An introduction to Mechajammer’s combat systems, showing the basics and looking a little deeper into the details. This guide introduces dice rolls, success rolls, combat mechanics, and squads, to give a range of explanations that prepare you to better understand the mechanics behind combat.
Introduction
Welcome to Mechajammer!
This guide will help you better understand some of the core mechanics in Mechajammer, including dice rolls, combat, stats! This guide is not nessecary for learning the game, but it can help you better understand the ins-and-outs of it.
Guide version: 1.0
Understanding Dice Rolls
Much like in a game of Dungeons and Dragons, every action you make will be determined by a roll of dice. Dice can also come in different shapes and sizes. A common way to describe dice rolls looks like this:
This means we have 2 dice, and each one has 6 sides. Each one can be from 1 to 6. If we wrote 1d8, this would mean we have only one die, but it has 8 sides in total, giving us anything from 1 to 8.
Predicting Dice Rolls
The mathematics between dice probabilities can be confusing at first, but can largely affect decisions made in Mechajammer.
Lowest Roll:
To determine the worst possible roll, you would assume all dice roll a 1, therefore a 3d4 will always give at least 3.
Highest Roll:
To determine the best possible roll, you would assume all dice roll their highest possible value. In the case of 3d4 this means each one gives 4, and we have 3 of those, so 3 × 4 = 12.
Average Roll:
The average value will always be from the middle value of every dice. For example if you have 2d7, the average will be from the middle value 4 on all 3 dice, so 2 × 4 = 8.
However if the dice has an even number of sides, the middle value is not a whole number. For example, with 2d6 the middle value of each die is 3.5, not 3 or 4. If we add them together we get 7, so the average value of 2d6 is 7.
What if the end value is not a whole number? With 3d6 we get 11.5. This means the most common outcomes are tied between 11 and 12, so both of these numbers are the most common.
Distribution of Rolls
For a more nuanced look, we can also examine how likely a dice roll is to happen based on the number of dice we have.
If you roll 1 die, all outcomes are equally likely, this means with a 1d10 you have a 1 in 10 chance to get the highest possible roll, and a 1 in 10 chance to get the lowest possible roll. That’s pretty chaotic! But if we add more dice, this changes.
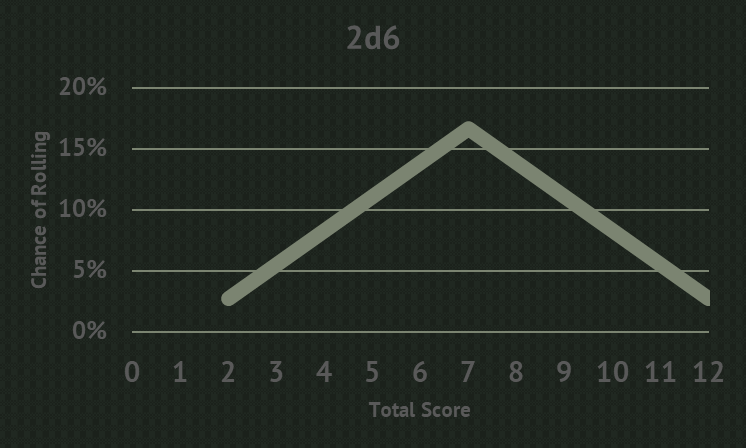
If you roll 2 dice, more likely you’ll roll an average value. With 2d6 your chances of rolling a 7 becomes a 1 in 6, but your chances of rolling 2 is only a 1 in 36. Why does this happen? Because the only way to get a higher or lower value is to have both dice roll in a similar way, but to get an average roll, you can include one die rolling high and another die rolling low.
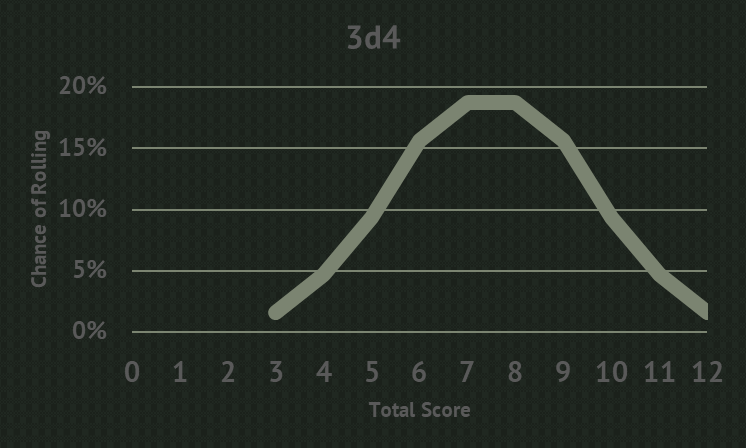
The more dice you add, the more likely the middle value will become, and the less likely the high and low outcomes become. If you want something chaotic with a chance to go beyond expectations, you would prefer it to have less dice overall, but if you want something consistent and reliable, you want more dice.
Despite having a higher minimum, the chance of getting a high number with more dice with fewer sides isn’t much better, while the chance of getting a middling roll is much higher
Combat Systems
Combat begins as soon as you are noticed by an enemy, this can happen for a variety of reasons:
- You or a squad member were heard by an enemy due to walking, breaking an object, or taking down another enemy.
- You or a squad member were spotted by an enemy.
- You or a squad member attacked an enemy.
Some enemies will not begin combat if they see you. Instead, they will tell you to leave. In these cases you have time to leave without starting combat, but stand around for too long or get spotted again and they will fight you.
Enemies can notice you and begin combat, even if they do not know where you are. In these situations you enter Turn Mode, but the enemy will patrol and try to locate you, and investigate the source of any sounds they hear.
Turn Mode
At the core of Mechajammer’s combat and stealth mechanics is its unique Turn Mode system. Any time you enter a combat situation, the game automatically begins Turn Mode. During this, the game will pause between every action you take. For example:
- Moving
- Attacking
- Throwing a weapon
- Using a Medical Kit
Each turn represents a fixed amount of time. Most actions come with a Preparation (Prep) and Recovery time. Preparation is how many turns will be spent before the action begins, while Recovery is how many turns will be spent afterwards before a new action can be chosen.
Enemies can move before the gun fires, and you will be unable to move out of the way for a while
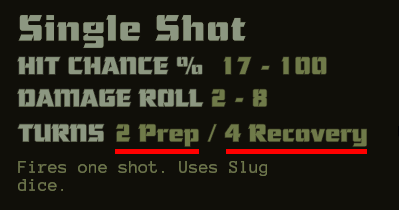
For example, when you shoot a Slug Gun, you may find it has 2 Prep / 4 Recovery. This means all enemies (and allies) can perform 2 turns worth of actions until you fire. In this time, they could move, attack, or get into cover. After firing, you enter 4 turns of recovery. After this is finished, you may begin a new action. In total, this took 7 turns before a new action could be chosen.
You can still perform certain actions without time proceeding:
- Stand up or crouch down
- Change equipped armour and weapon
- Read notes and journal
- Move inventory
- Pick up items very near to you
Cover
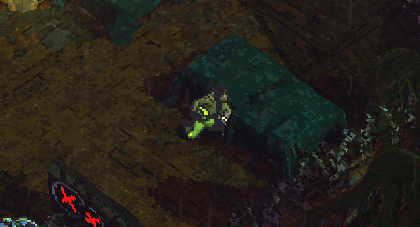
Some mid-height structures can be used as cover. You can use cover by crouching near to it. If you are covered from the line-of-sight of enemies, they will have less visibility and will be much less likely to land shots at you.
Sitting behind cover keeps you hidden and keeps you safe
When crouching behind cover, all Recovery turns will be spent in cover, making you much safer, especially in a gun fight. Even when standing, cover prevents line-of-sight to the lower body, preventing wounding damage to your legs. However, it will not protect you from being hit anywhere else.
Squads
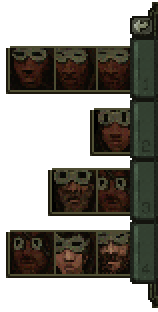
Squad members are assigned to 1 of 4 squads. All members of a squad can be given an order as a group by first selecting their squad by pressing the respective keyboard key 1, 2, 3 or 4. From there, you can click on a location to move the squad members, or select on an enemy to instruct the squad to attack.
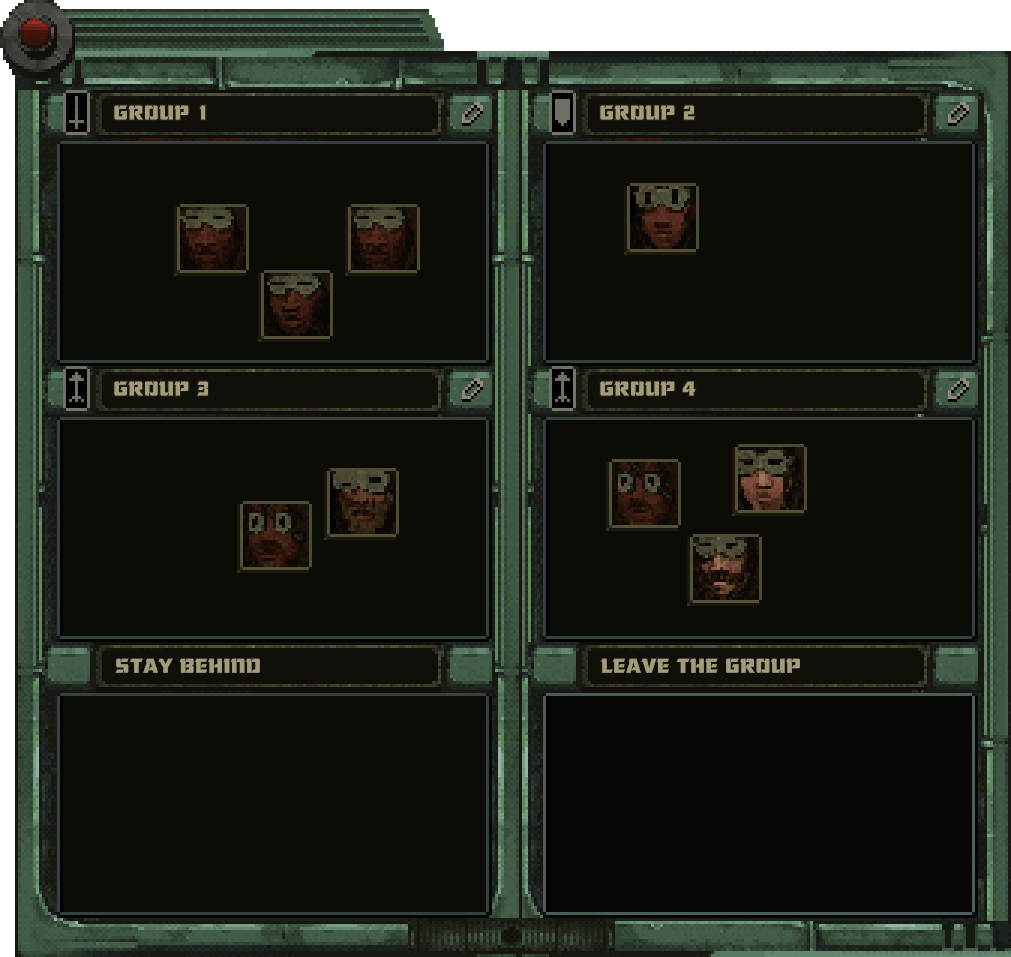
You can manage your squads and their combat behaviour from the Squads menu, which can be accessed by clicking on the icon above the squad list. From this menu, you can name squads, change their modes by clicking on the mode icon next to the squad name, and move allies between squads by dragging their icons.
Manage squad members and plan ahead your battle
Squad Combat
During combat, you can issue orders to squads to move or attack specific targets. They will then begin performing this as a group.
When issuing orders in Turn Mode, the turn will not proceed until your main character takes an action. This allows you to plan out the turns of squads at the same time as managing your character. While you can issue orders when the turns are not paused, it is much more difficult. You are given more control when your character is not performing turns.
Additionally, if a squad is ordered to Stay Close, by default or selecting on your character, the squad will mimic your stance. If you crouch, all squad members will begin crouching, and if you stand, squad members will stand. This allows you to move more quietly as a group, and decide how they will approach a target.
Squad Modes
From the Squad menu, each of the four squads can be assigned a mode. This will determine their behaviour during combat.
| Melee | This group will find cover unless directed to engage at close quarters. | |
| Range | This group will find cover and attack with range weapons. | |
| Shields | This group will stay near you to protect you. |
Squad Studies
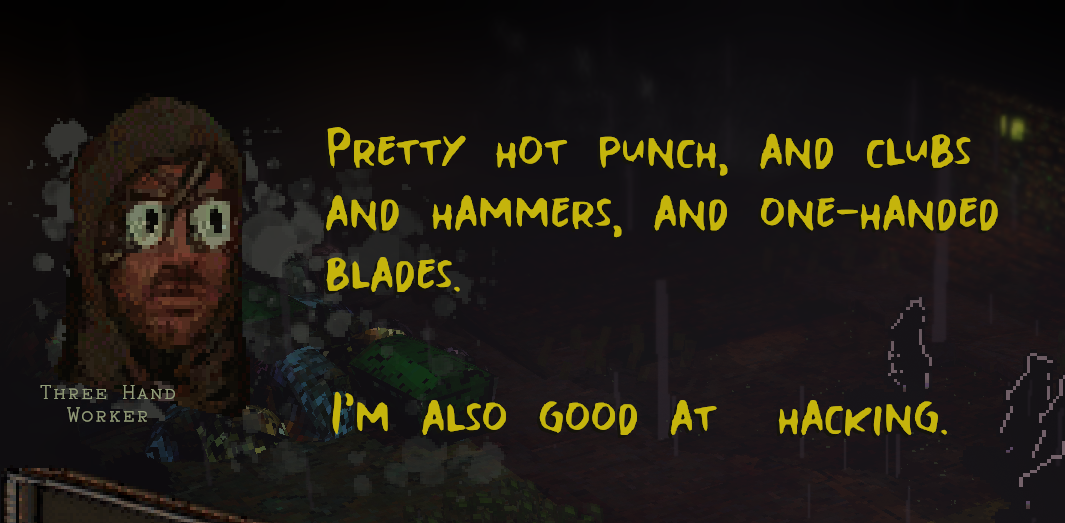
Every squad member will have their own personal skills, much like your character does. These can be found by talking with them and selecting Skills.
Talk with your squad members and find out what they’re best at
For any action using their best studies, they will have a higher success rate, similar to your own Success Rolls.
Healing
Your character will continually regain health. The Life Restore stat will determine how many turns it takes to heal back 1 health. Therefore, a smaller Life Restore means faster life regeneration. Squad allies also have life regeneration.
You can also heal yourself and allies by using a Medical Kit. Robots instead require a Repair Kit.
Allies when injured can also be healed without items by selecting them outside of combat and selecting Heal. This will perform an Organics roll for most allies, except robots, which require a Repair roll.
Wounds
Sometimes you may get injured beyond simply losing health, and be inflicted with a Wound. Wounds affect different parts of the body, and cause permanent status inflictions, such as lower health regeneration, lower total health, or worse aim.
These do not disappear when you heal. Instead you must cure the wound, with either a Medical Kit or by going to a Doctor. To use a Medical Kit open the character sheet and click on the wound you wish to cure. This will spend a Medical Kit.
Success Rolls
For every action you take, there is chance of success or failure. Depending on your character, the action being taken, and what tools you use, some actions may be more difficult than others to succeed.
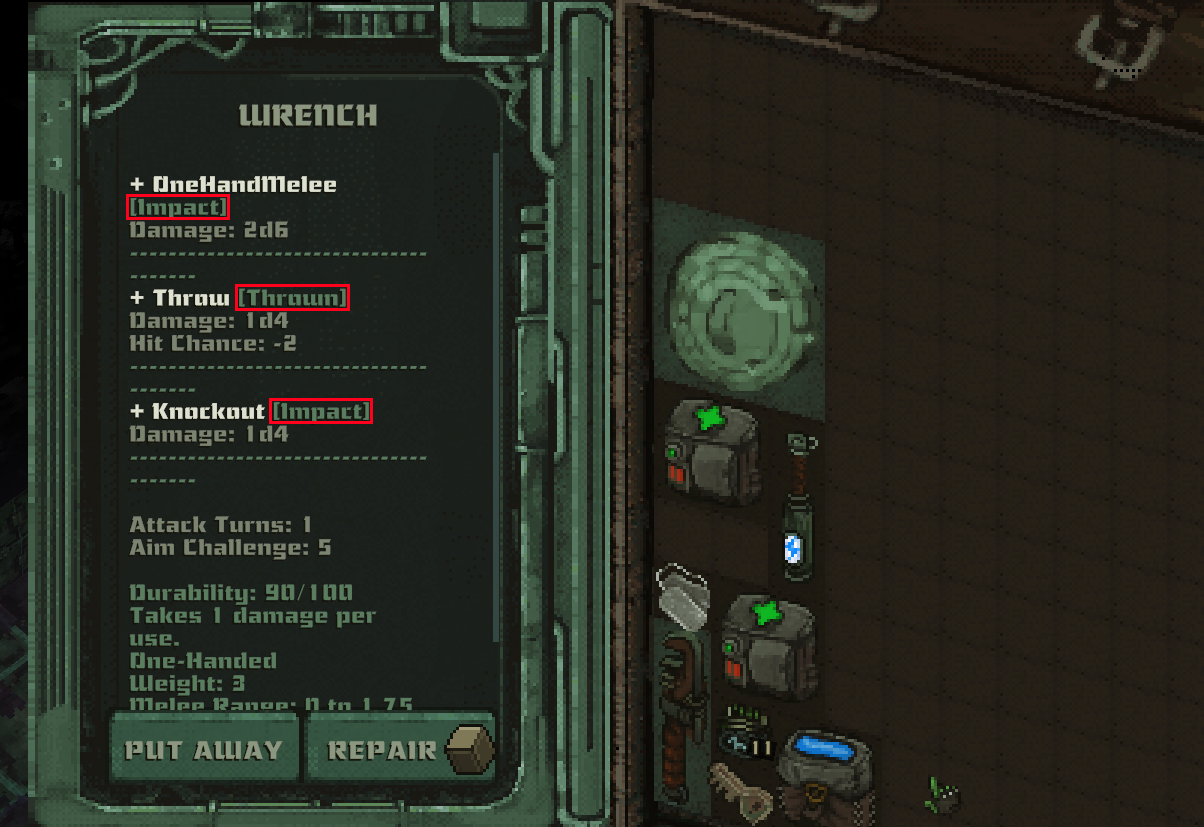
To determine your skills at a task, you will need to first look the type of task being performed. If you are blocking an attack, this will be Blocking, if you are melee attacking with a Wrench, this will be Impact. Checking a weapon’s details will tell you which type of skill is needed to perform an action.
Different actions may need different skills
Success Chance
When you perform an action, you roll a set of dice to get a chance to succeed or fail, this is your Success Roll.
The more pips and dice you have, the better your aptitude
Dice
On the character profile, under Studies is a list of every task type. For every dice you have in the specified task, you will roll a 6-sided dice, giving a random value 1 to 6 per dice.
Alongside the studies, your character also has Virtues. Many Virtues give additional dice for specific task types.
Some modifiers may remove dice, for example Wounds.
Pips and Modifiers
Alongside the dice you have Bonus Pips. These are a fixed number that is added directly to your success score.
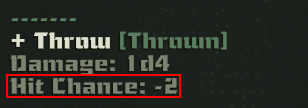
Some weapons and actions have a modifier to your success roll. They influence your success score by a fixed amount.
Throwing the Wrench reduces your aim roll by 2
Some other modifiers can also directly influence your score, including Wounds and Virtues.
Success Rate
Taking your final success score, this is how capable your character will be at performing the task. Note that every time you perform the task each dice gets rolled to potentially new values.
This value is then compared against the Challenge of the task, if you roll above the Challenge, you will succeed, if you roll below, you fail.
For example, if you have 3d6, with 2 bonus pips, and the Challenge is 10, you have 3d6 + 2 vs. 10. You roll 8 across the 3 dice, you then add the 2 points, and get a score of 10. 10 is enough to meet the challenge, therefore you succeed.
Luck Rolls
If your character has no dice for a task, by having no required Studies or Virtues, you will instead receive Luck Dice.
The Luck Dice is a single d6 dice. This can still be augmented by Pips and Virtues modifiers if you have those. If you roll at least a 6, the Luck Roll is succeeded. Otherwise, it fails.
Even if you succeed the Luck Roll, you may receive consequences for attempting a task you do not have dice in, such as by taking damage when using a weapon.
Hope you enjoy the Guide about Mechajammer – Combat Guide and Best Strategy – Playthrough, if you think we should add extra information or forget something, please let us know via comment below, and we will do our best to fix or update as soon as possible!
- All Mechajammer Posts List



Leave a Reply