Welcome to Fallout 4 – How to Create Settlement Border Meshes Guide.
This Guide explains how to build your Settlement border models.
Requirements
Basic understanding of Blender.
Creation Kit – Steampowered.com
Outfit Studio – [nexusmods.com]
How to Create a Rough Outline
First, you need to know that adding more buildings won’t expand the building area. Then you won’t have to create a new border. This is a tedious process that we don’t want to do again.
Step 1
As a backup, save Mod.esp.
We’ll be able to touch models in “precombines” most likely because we will need to. Accidentally nudging them can cause them to break their precombines, which may in turn affect FPS in certain areas.
!!! After this save, you must not save it anymore! !
You will ruin precombines and waste your money.
Some temporary work will be required that is not part of your mod.
Step 2
We will create a fake border wall using props. This will be then turned into a static collection.
This collection will be exported as NIF, imported into a blender, and used to create our border wall.
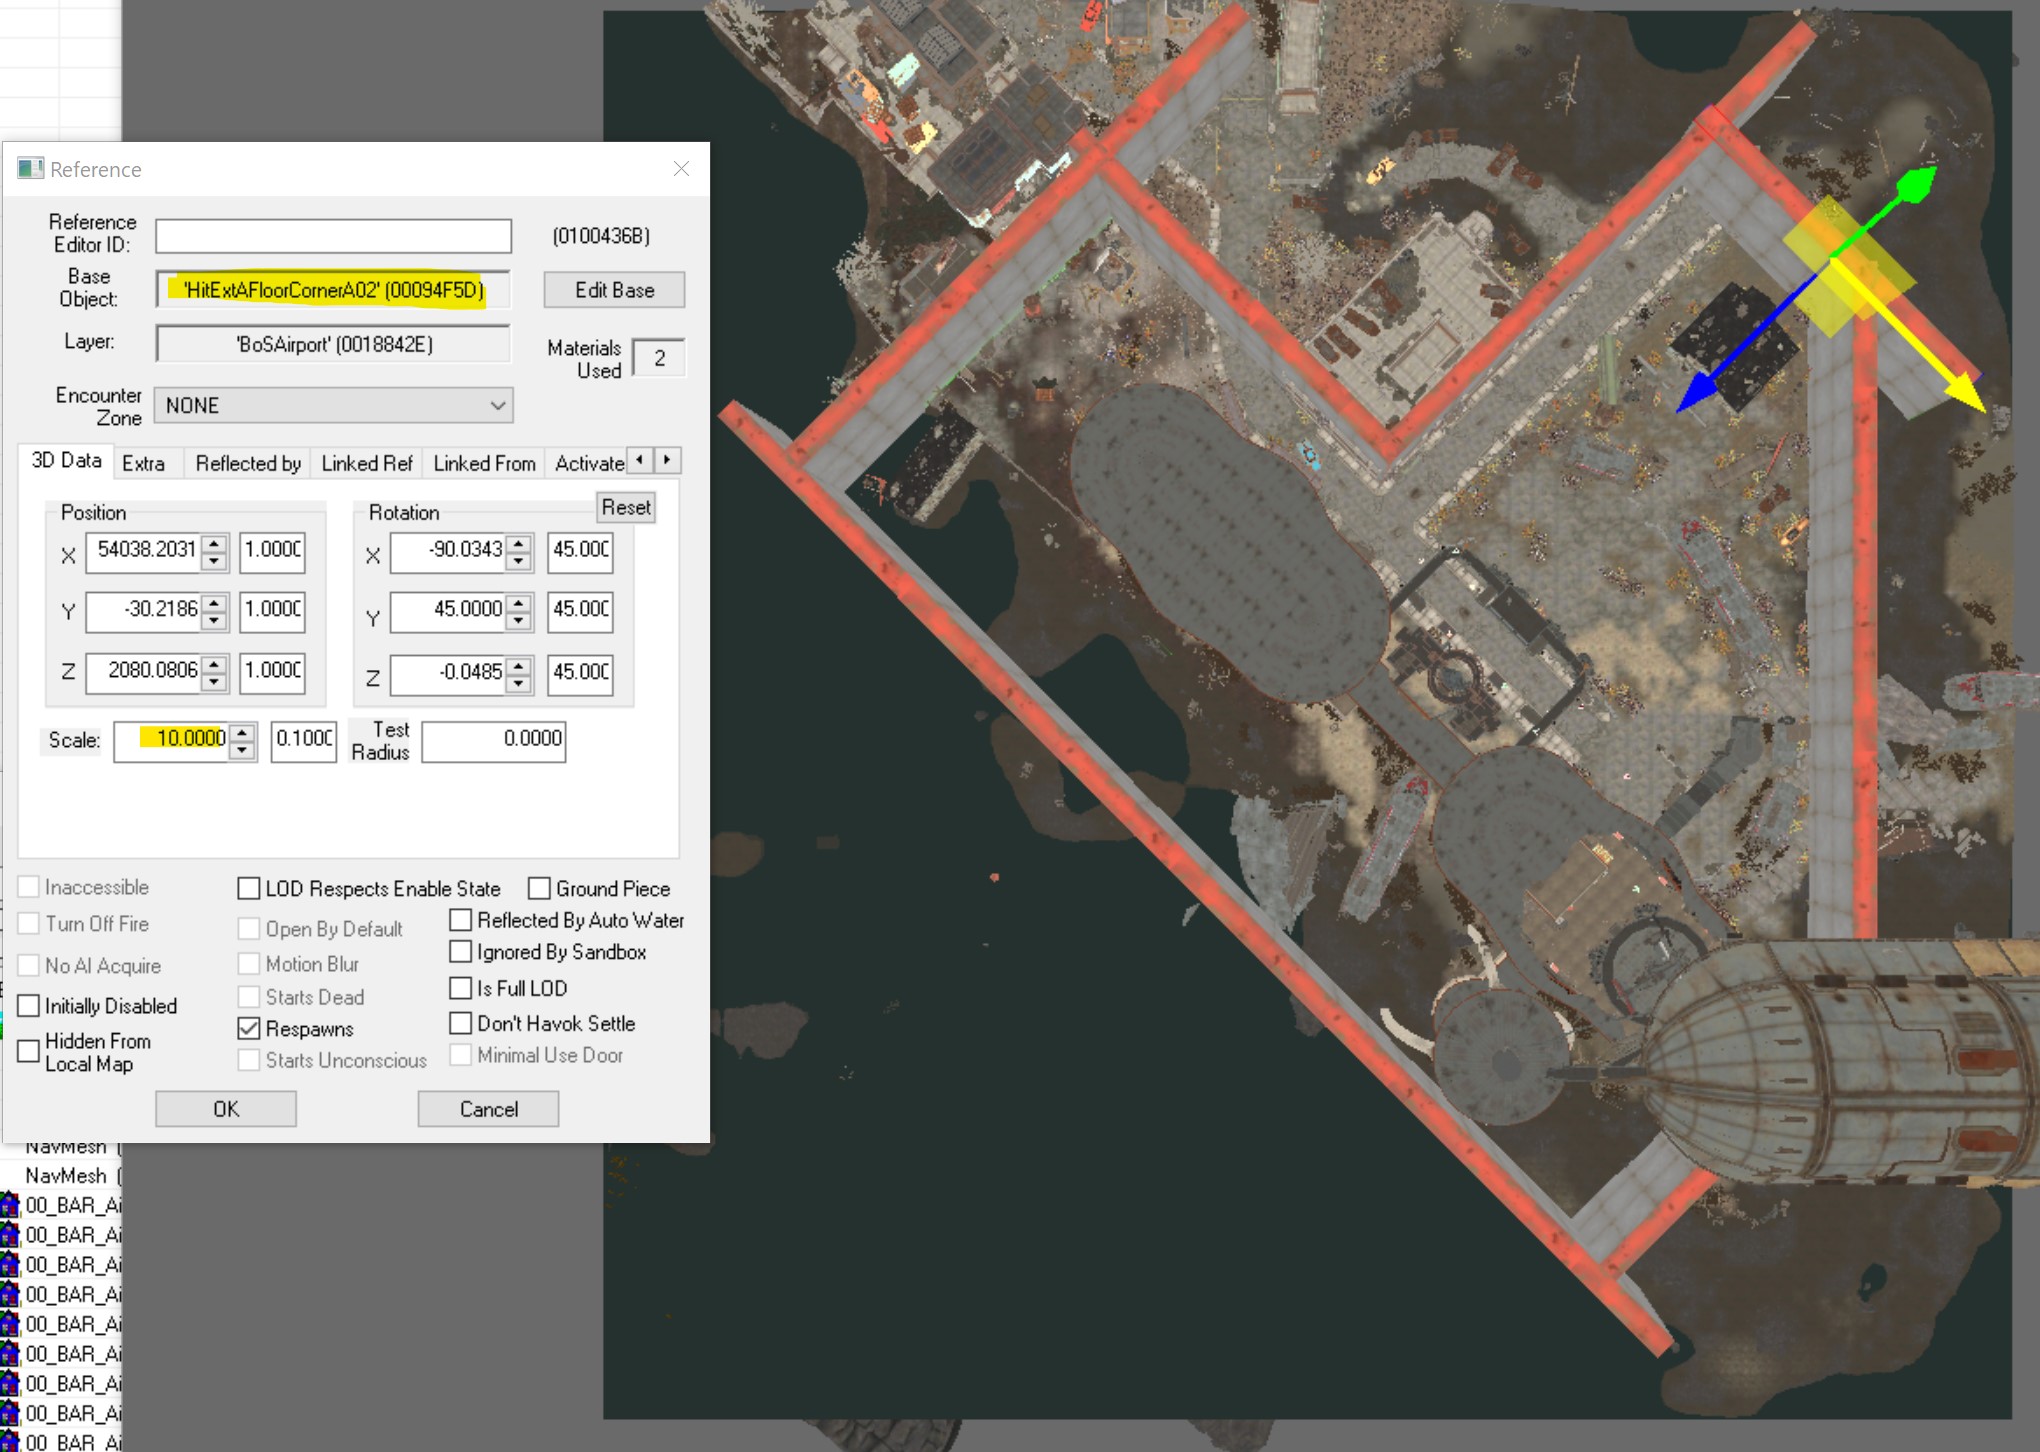
Search for the Static model “HitExtAFloorCornerA02”.
This is a very large rectangle. It can be placed in the world and its scale set to 10.
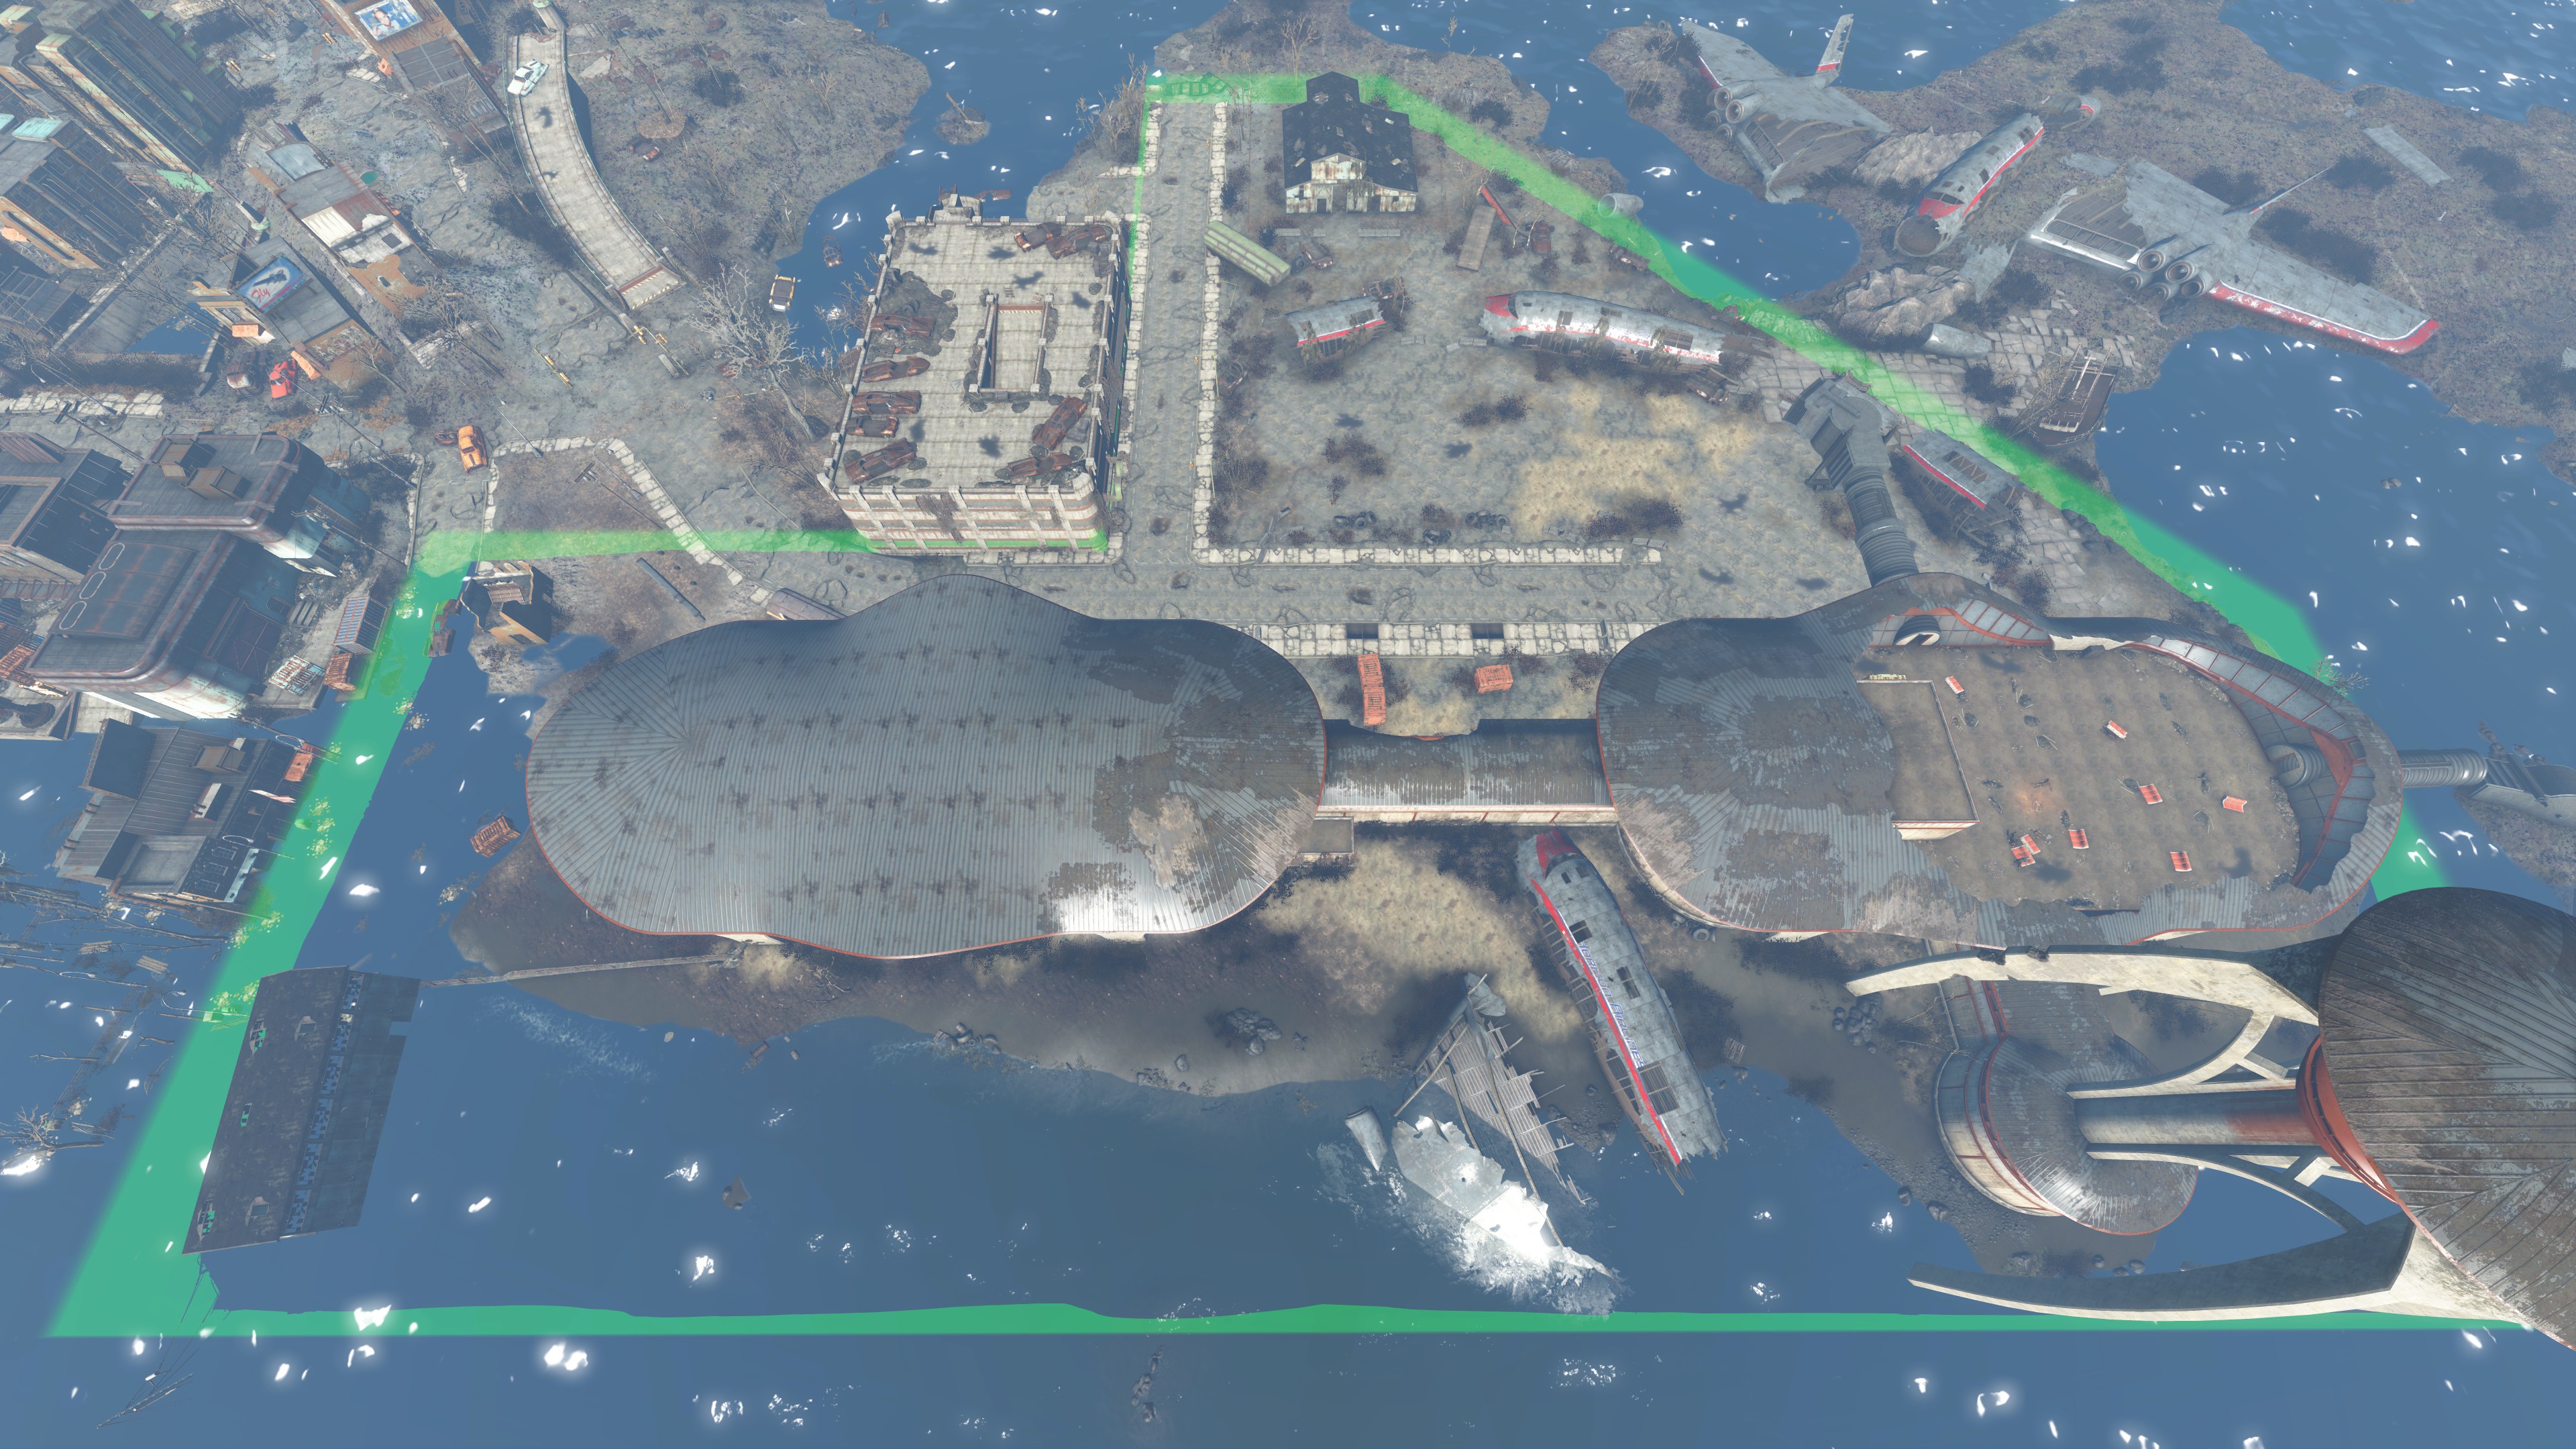
Turn it on its edge and outline your border.
Tip: To enter “Top Down Camera,” you can press T. This will give you a great view of your cell.
To be exact, follow along with your “Build Area Triggers”. You should, even though I didn’t do it.
Step 3
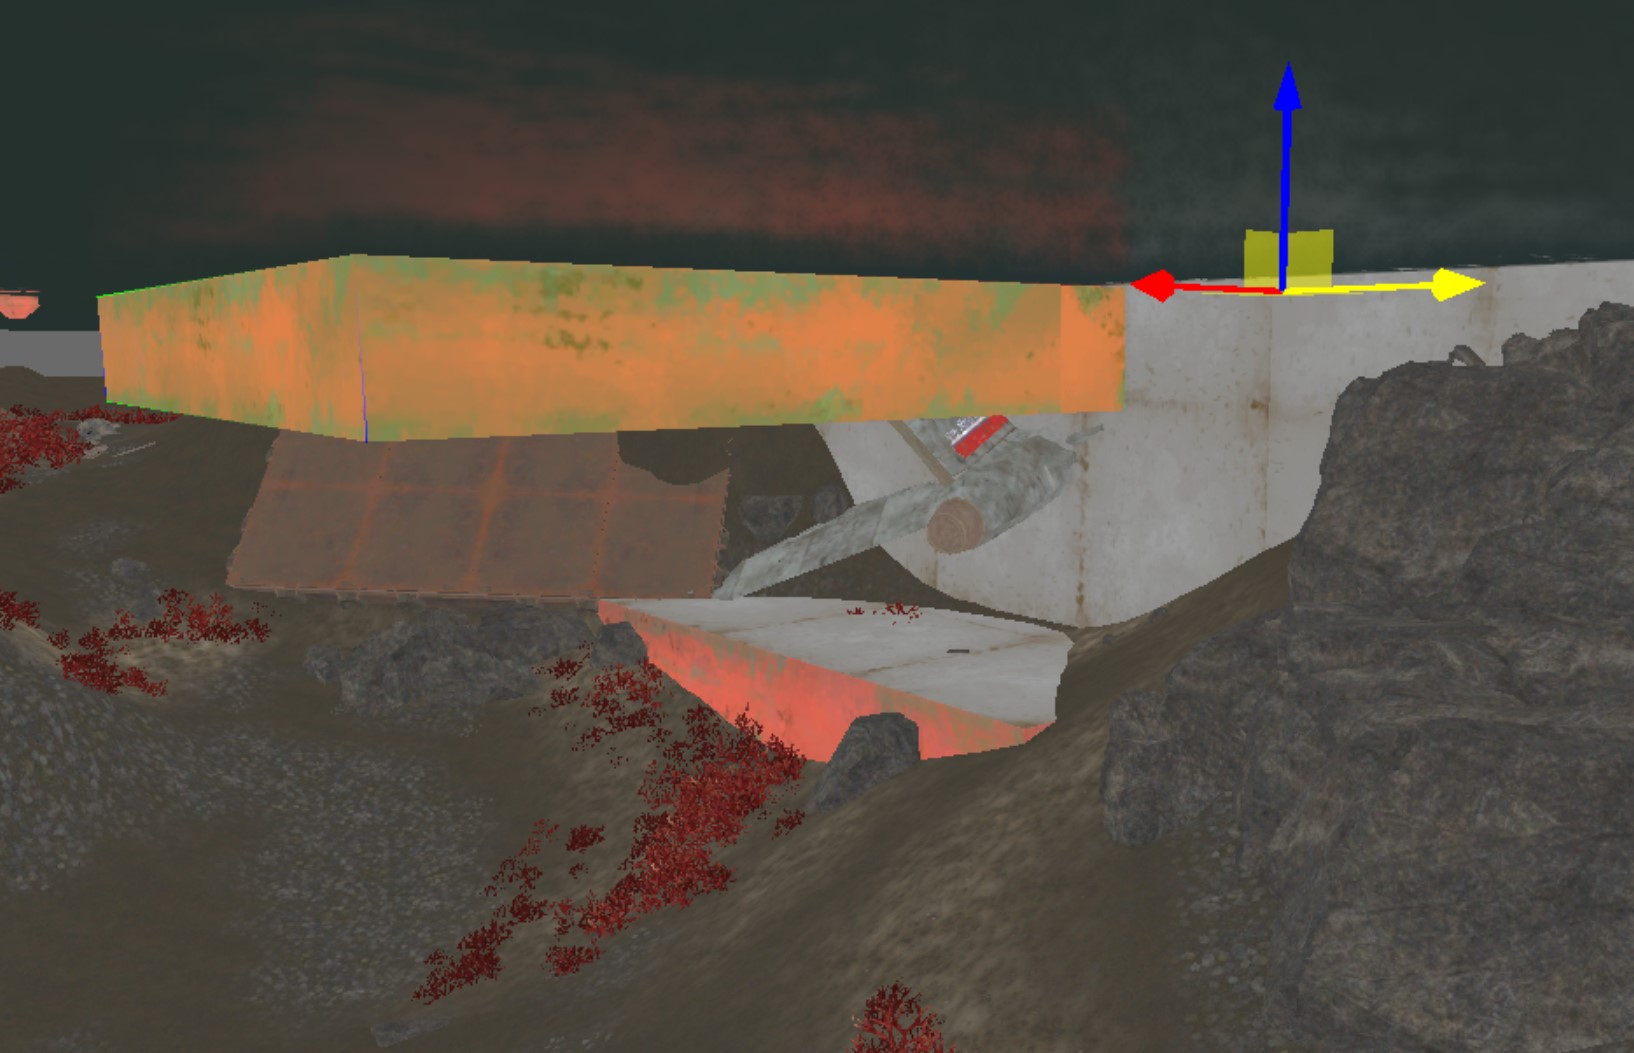
Place platforms on the floor plane to determine the border’s bottom.
We can’t export terrain. This is all we can do.
The Top platform is a guide to the water level so I know where the ground begins.
The bottom one is the lowest point underwater, so I know how far I must go.
Step 4
Look at all the wall pieces you have just placed and any other items you might want to use as a guide.
Next, choose the model you want to center your borders.
It must include any item that is part the settlement. A static model will suffice.
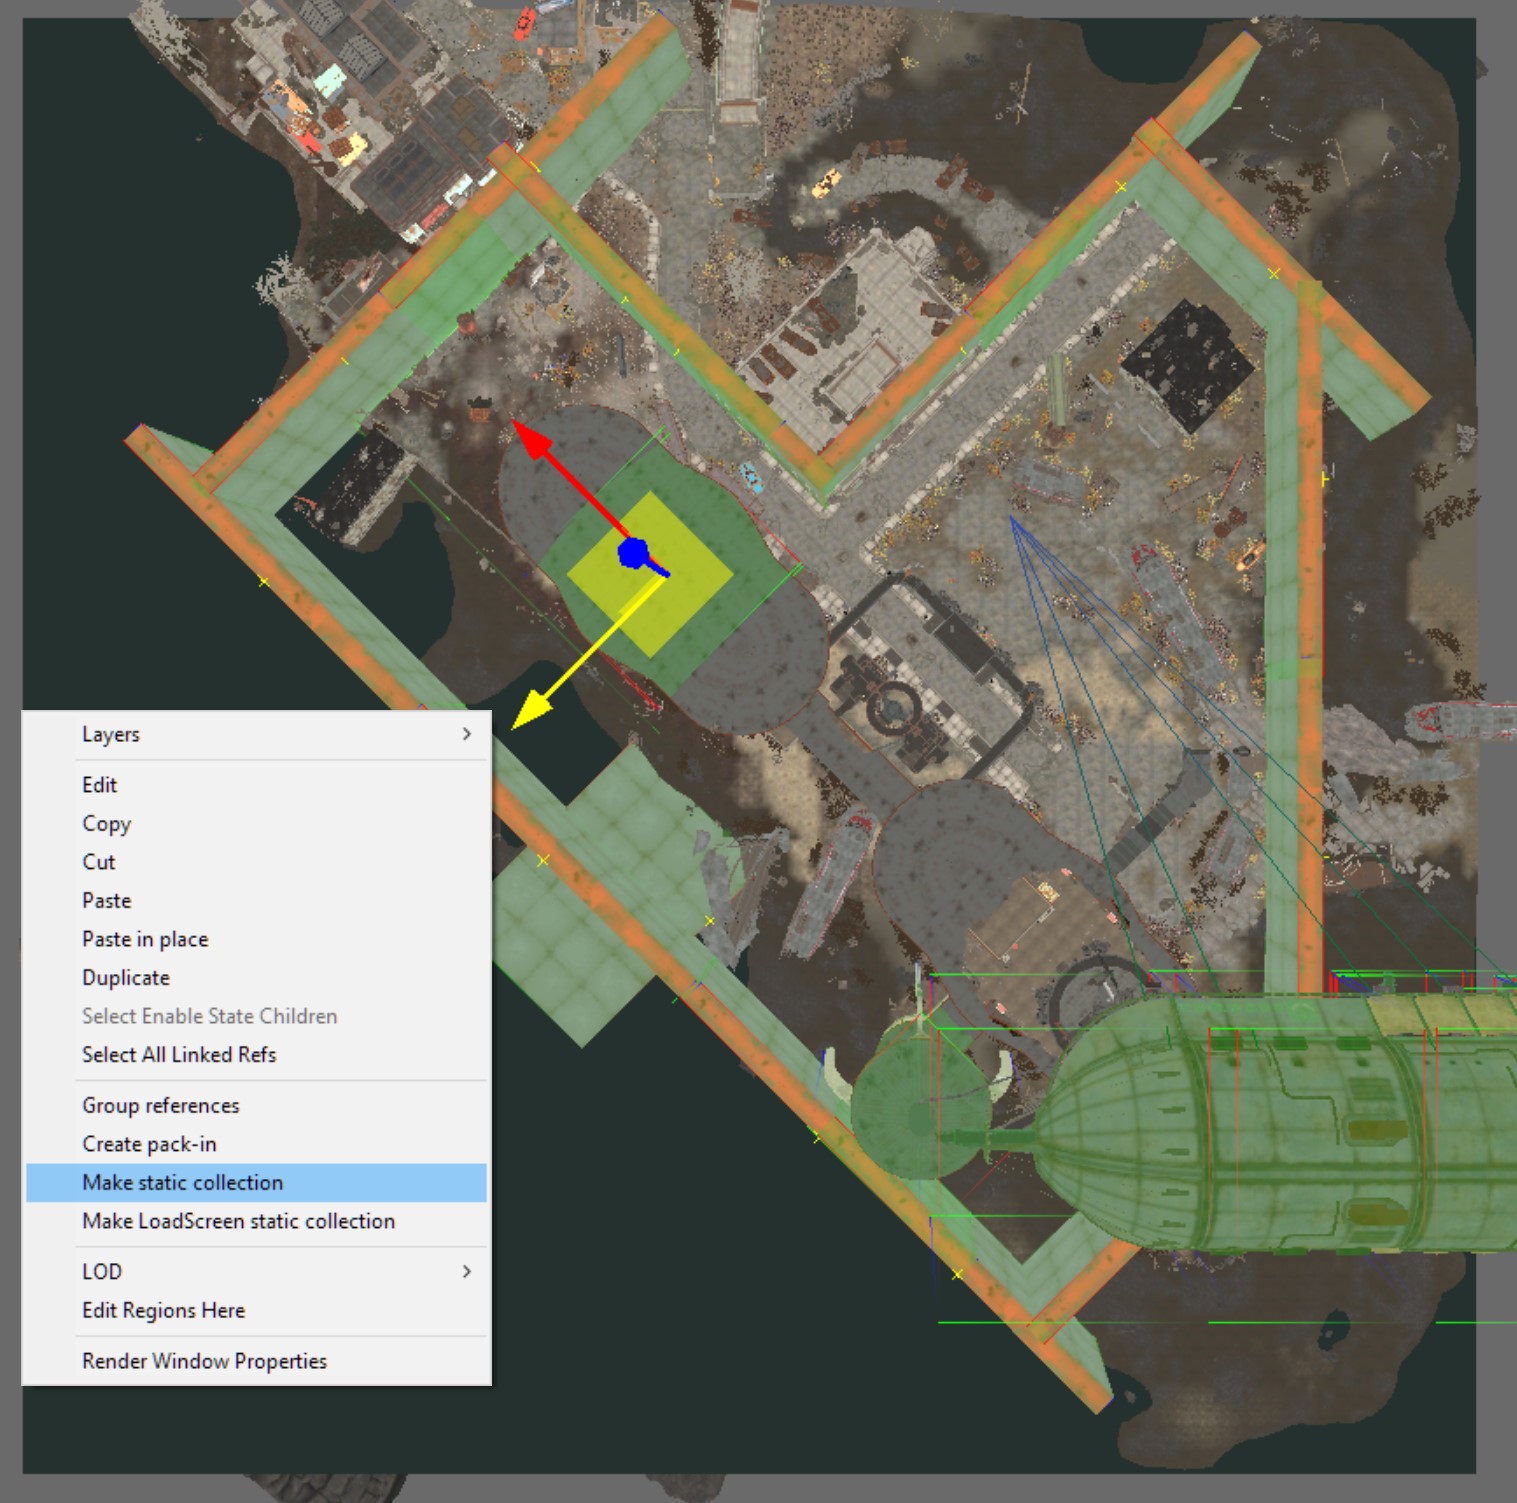
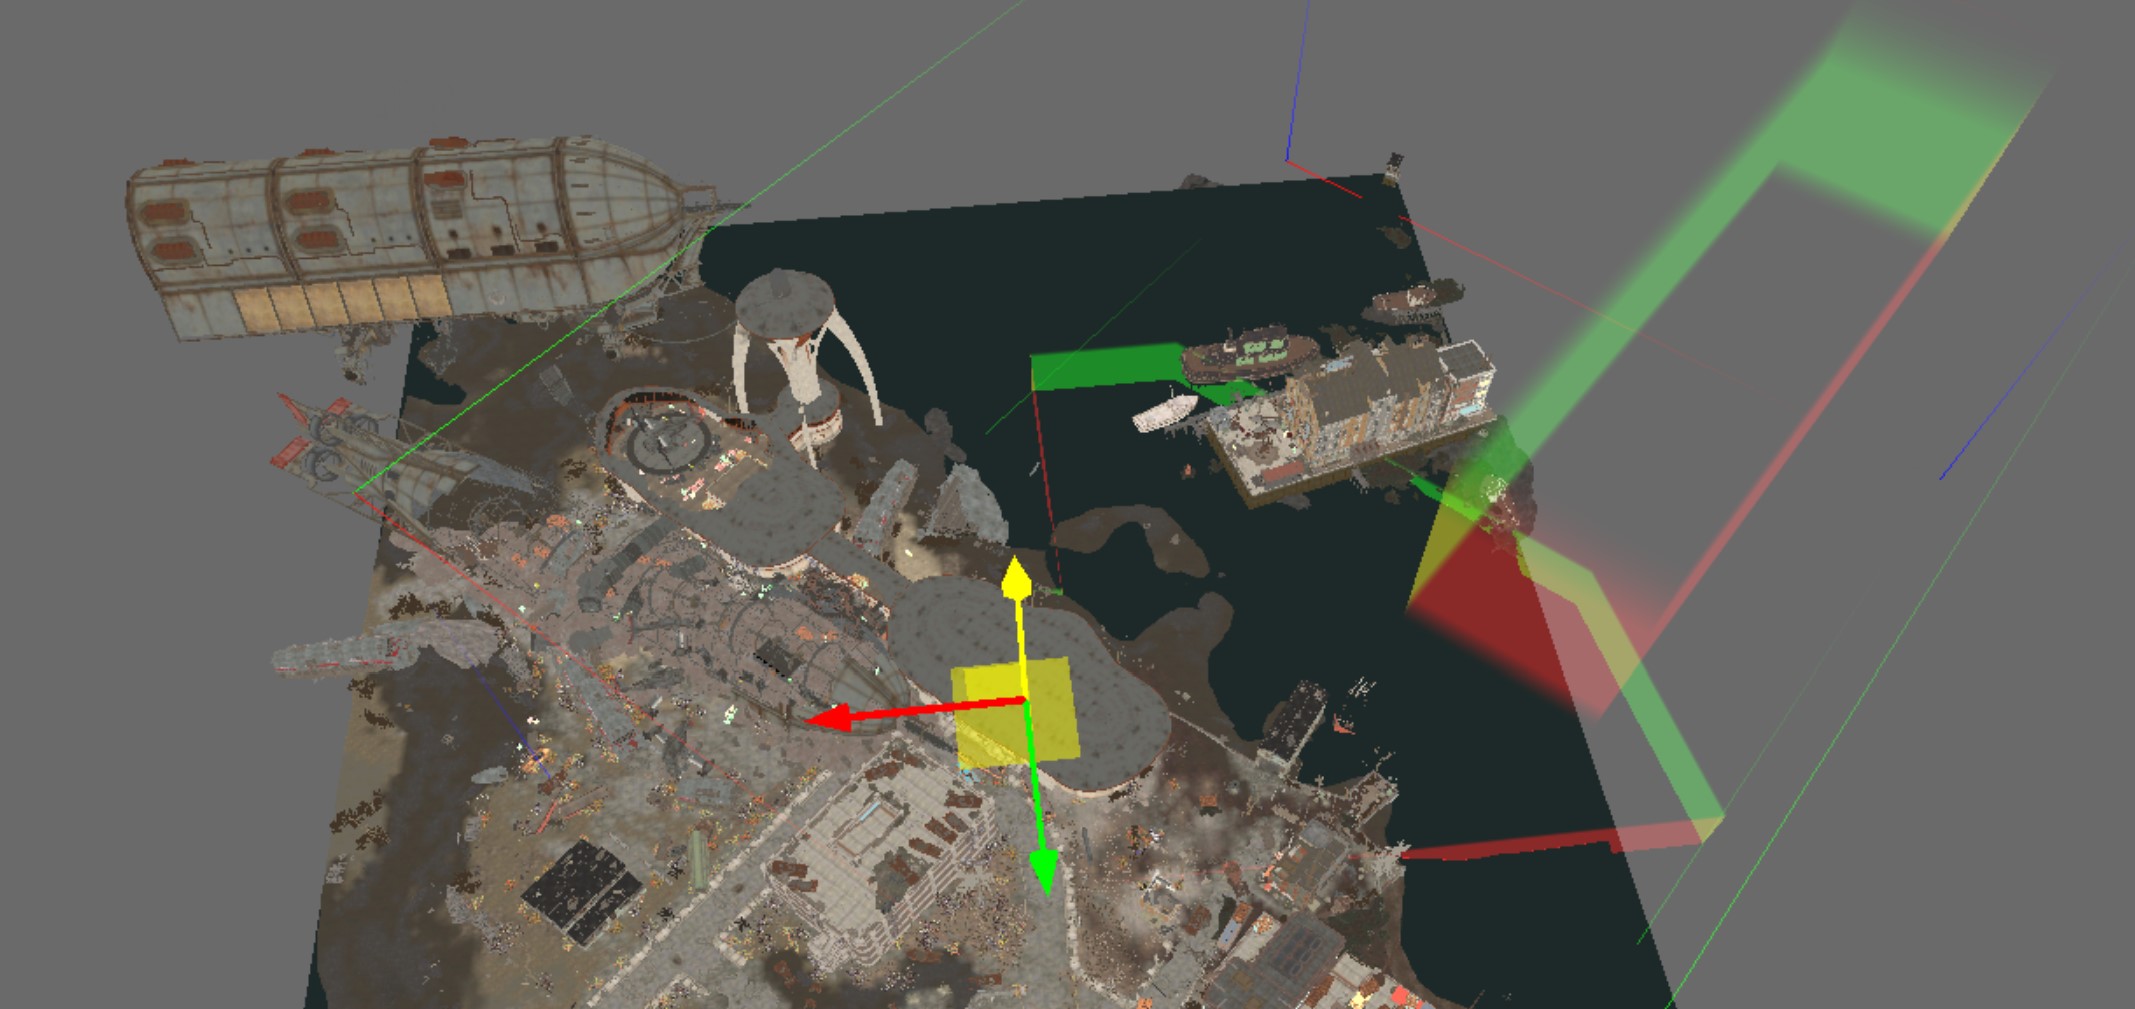
I chose to place the terminal’s roof. You can see the movement gizmo on the roof.
This is done because the last selected item will be the "Center" of your static collection, which will then be turned into a model. If we keep the center coordinates of a prop that will stay on the map we can duplicate it and swap that one for our border.
This will ensure that the border walls will be exactly where you want them to be
Select is active while you click the Render Window and then click “Make Static Selection”.
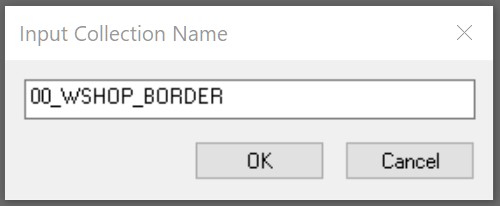
It will ask for your name. Choose something simple. I do 00_Wshop_Border.
It doesn’t matter if you do 000000000000. It’s temporary
It will ask you to enter the same text box again. You can leave it blank and click on “OK”.
Step 5
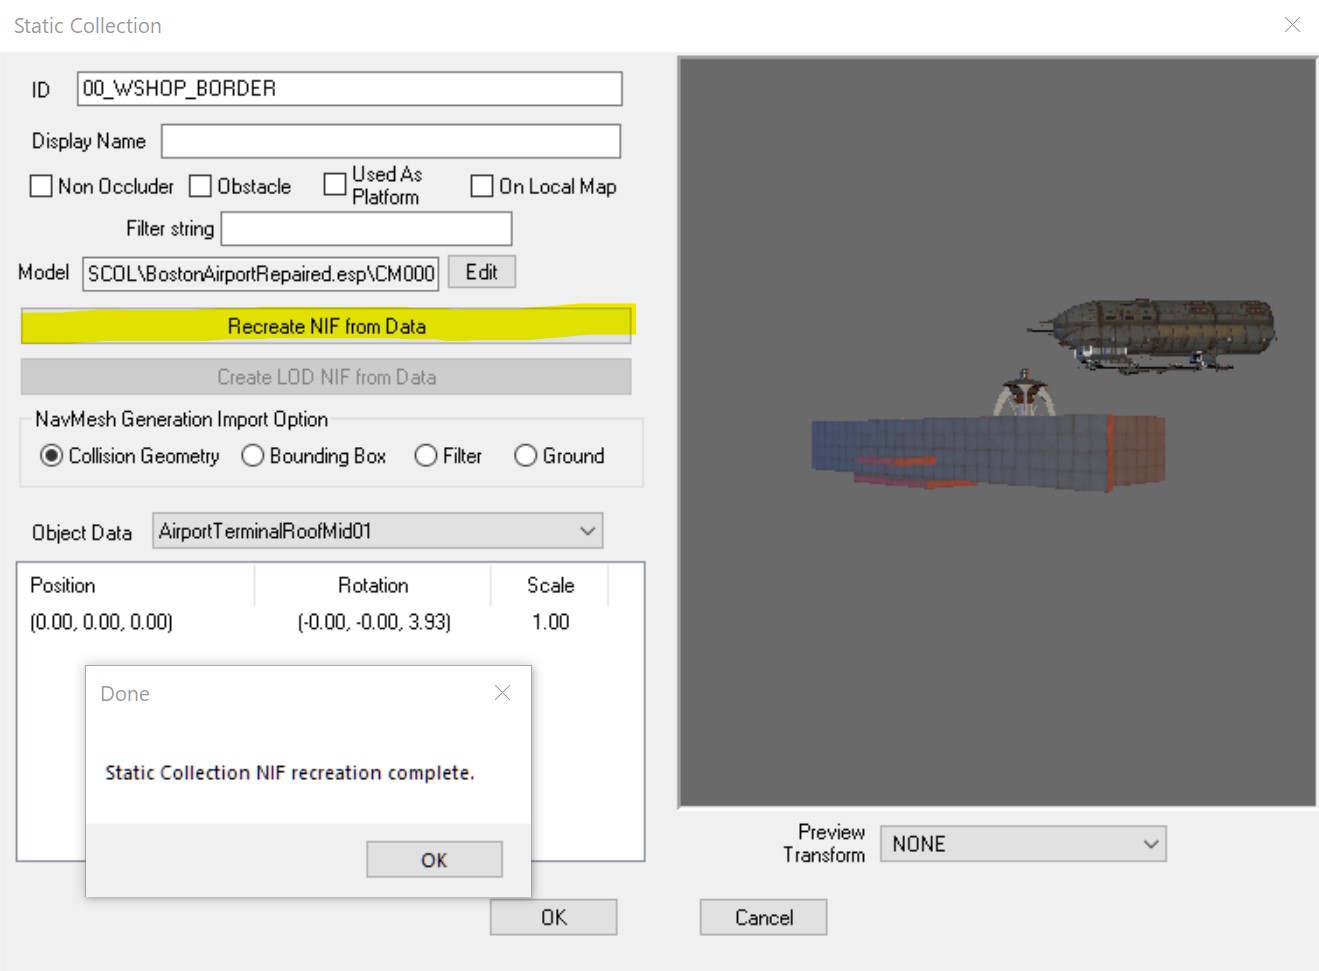
In the Object Window, look for the static collection that you just created.
Right-click it and click “edit”.
Click on “Recreate NIF From Data” in the new window.
Close the creation kit. It will ask you to save. Click “No”. DO NOT SAVE!
We’ll keep using NifSkope or your preferred modeling software.
Building Border Model
Step 6
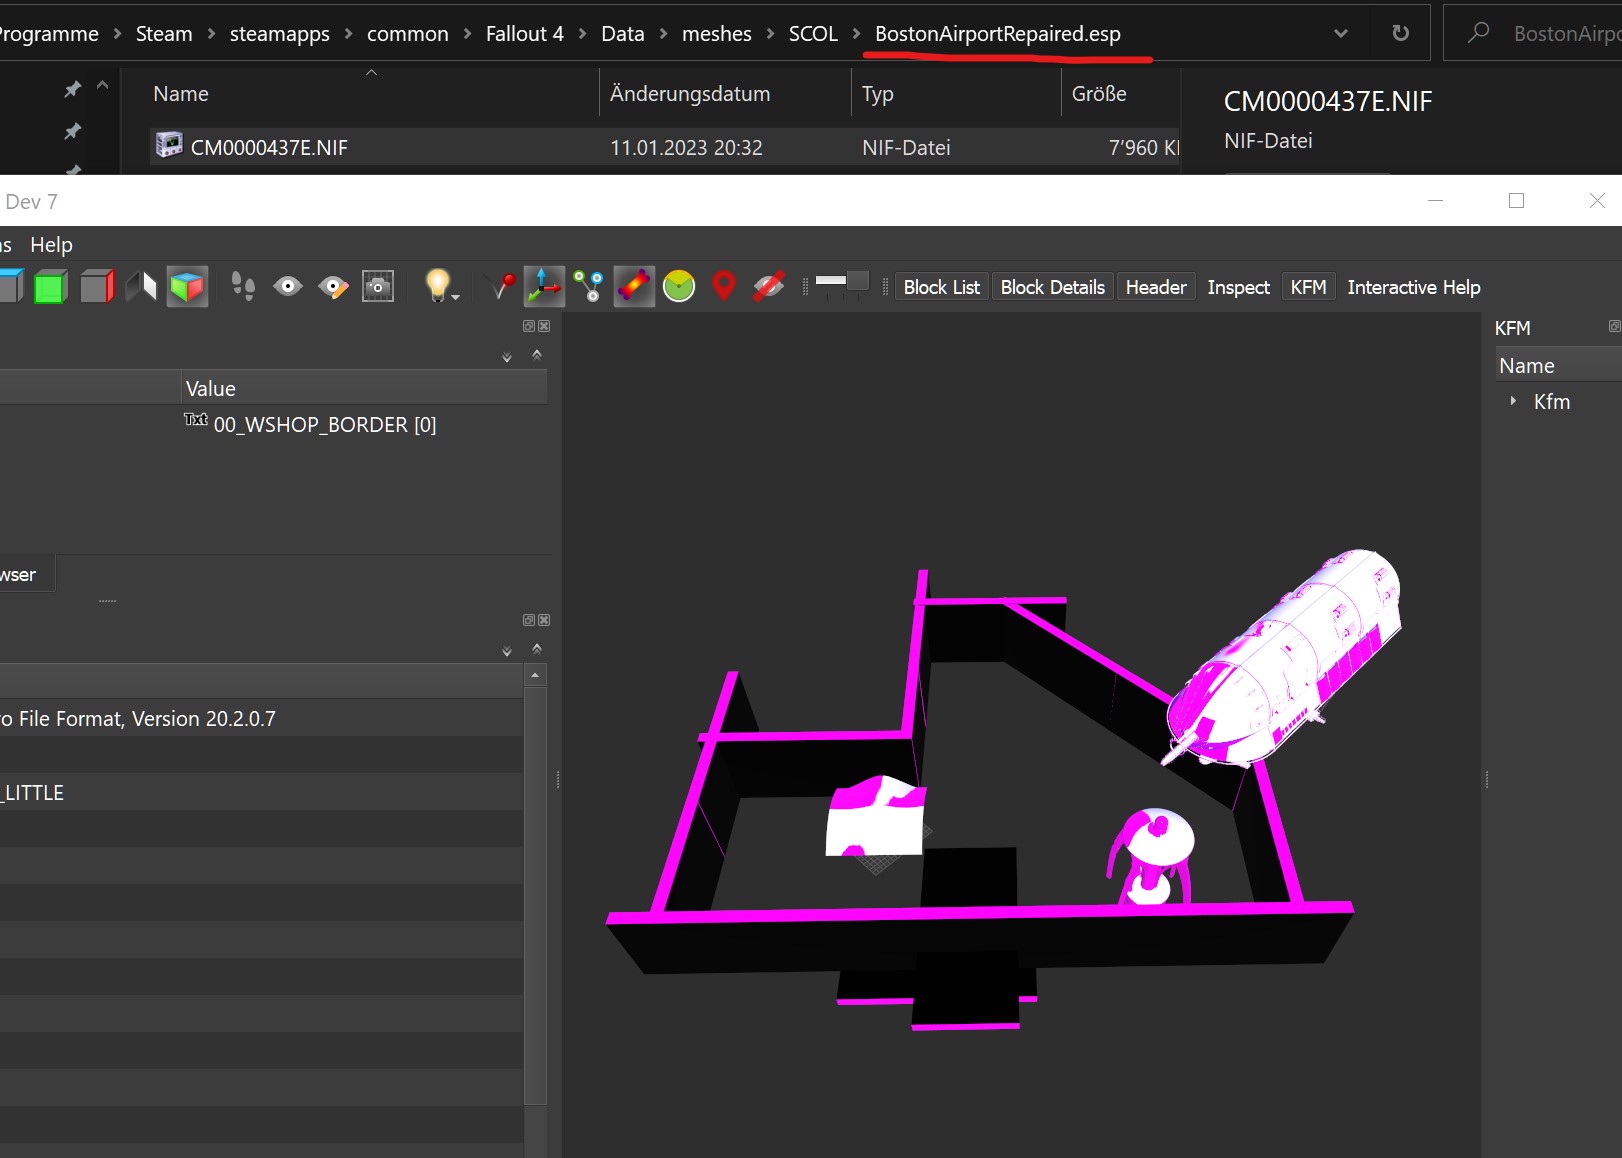
Go to “Fallout 4\Data\meshes\SCOL\.esp”.
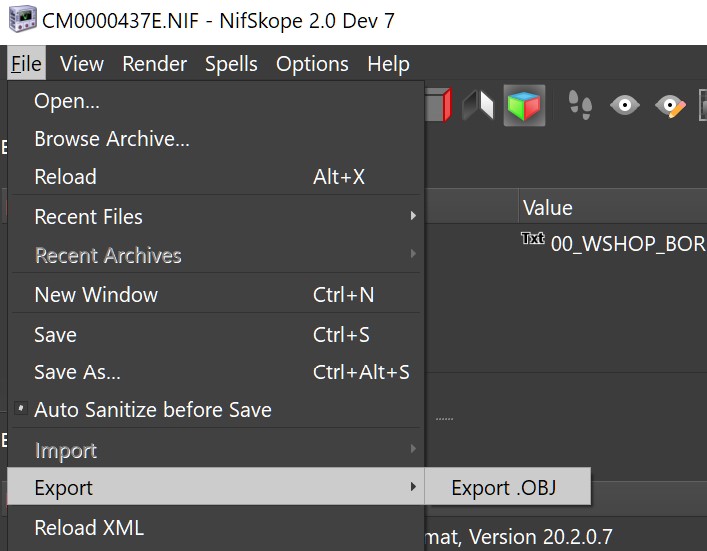
A NIF file is the static collection of your guide.
It can be opened in NIFskope, and exported as an OBJ
You can then delete the NIF file. It will be inoperable now.
Step 7
Use BSA Browser to export an existing workshop border from your game’s BSA.
It will be needed for the material setup later.
Step 8
Blend your guide OBJ.
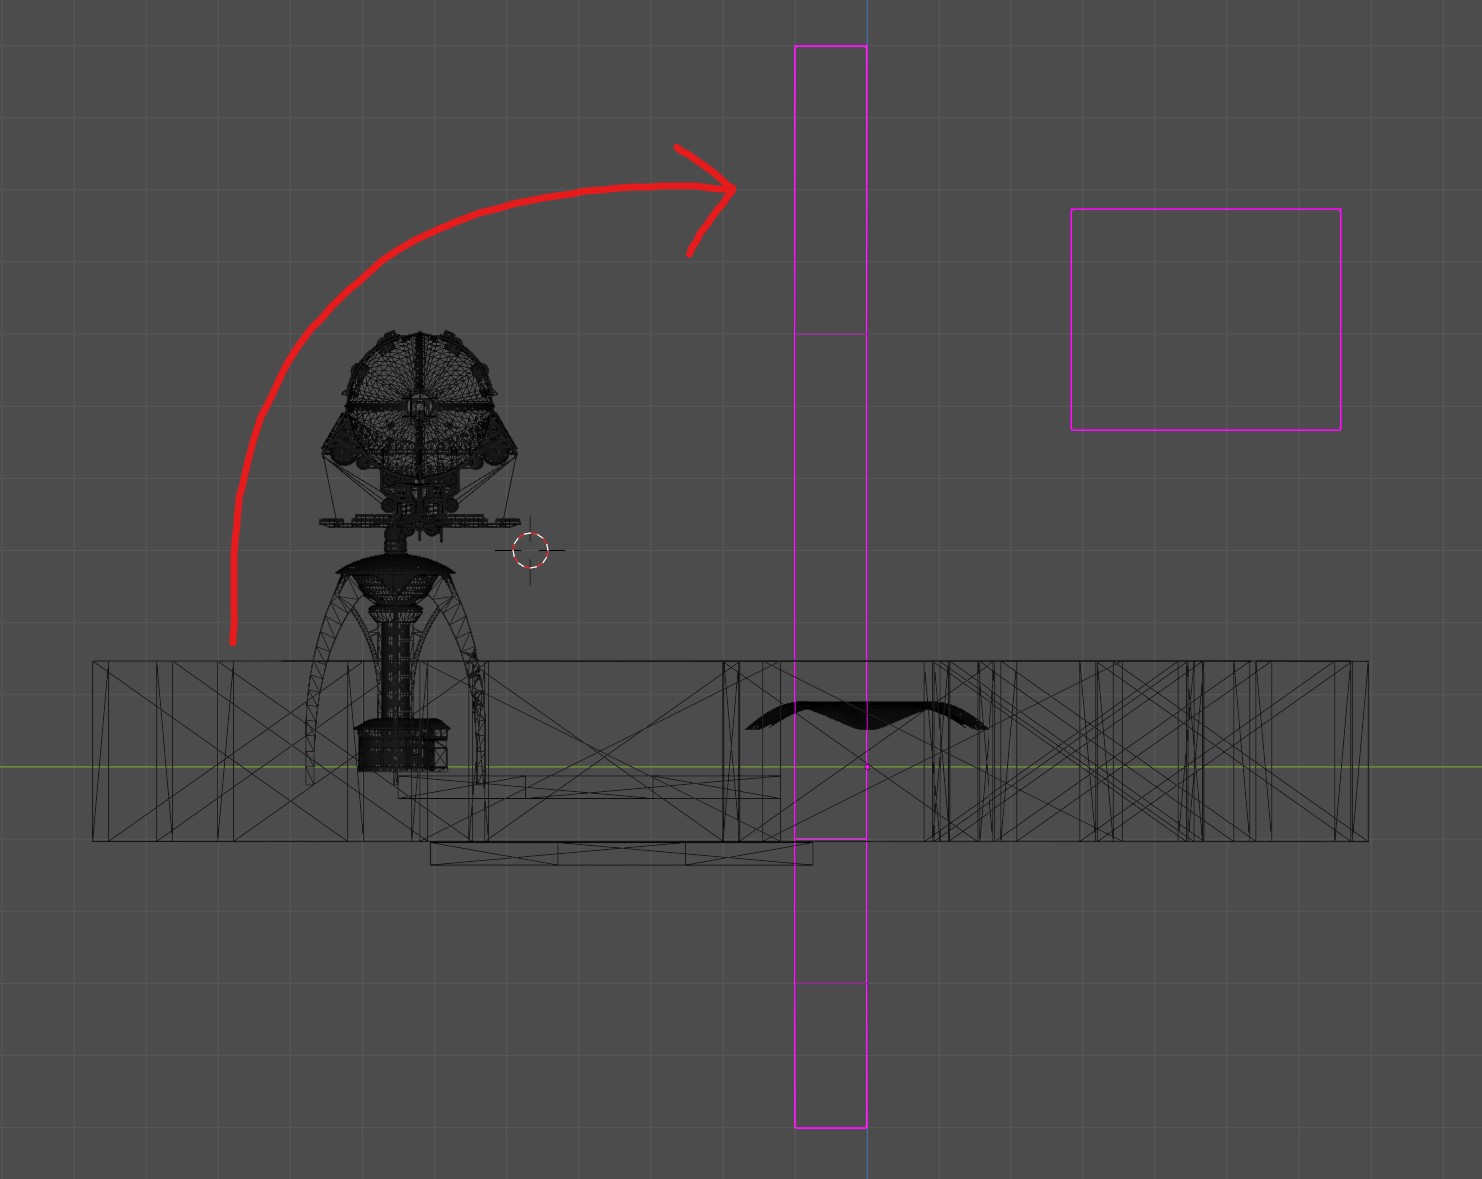
You may not see anything at all. Which is because the model is so large, it is clipped out of view.
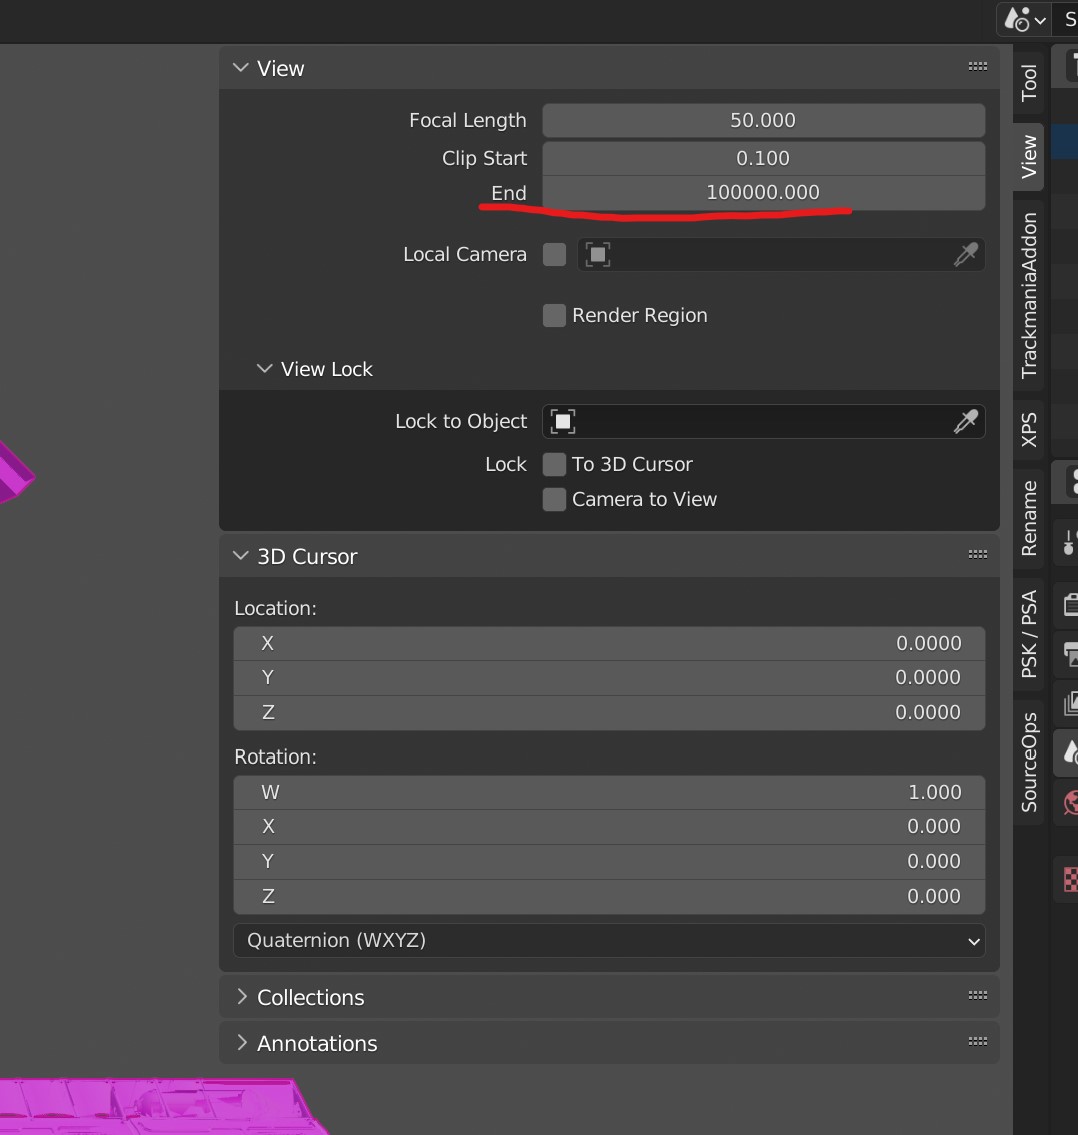
Hover your mouse over the 3D viewport, press N to bring up the right hand menu, head to "View" and increase clip end to 100000
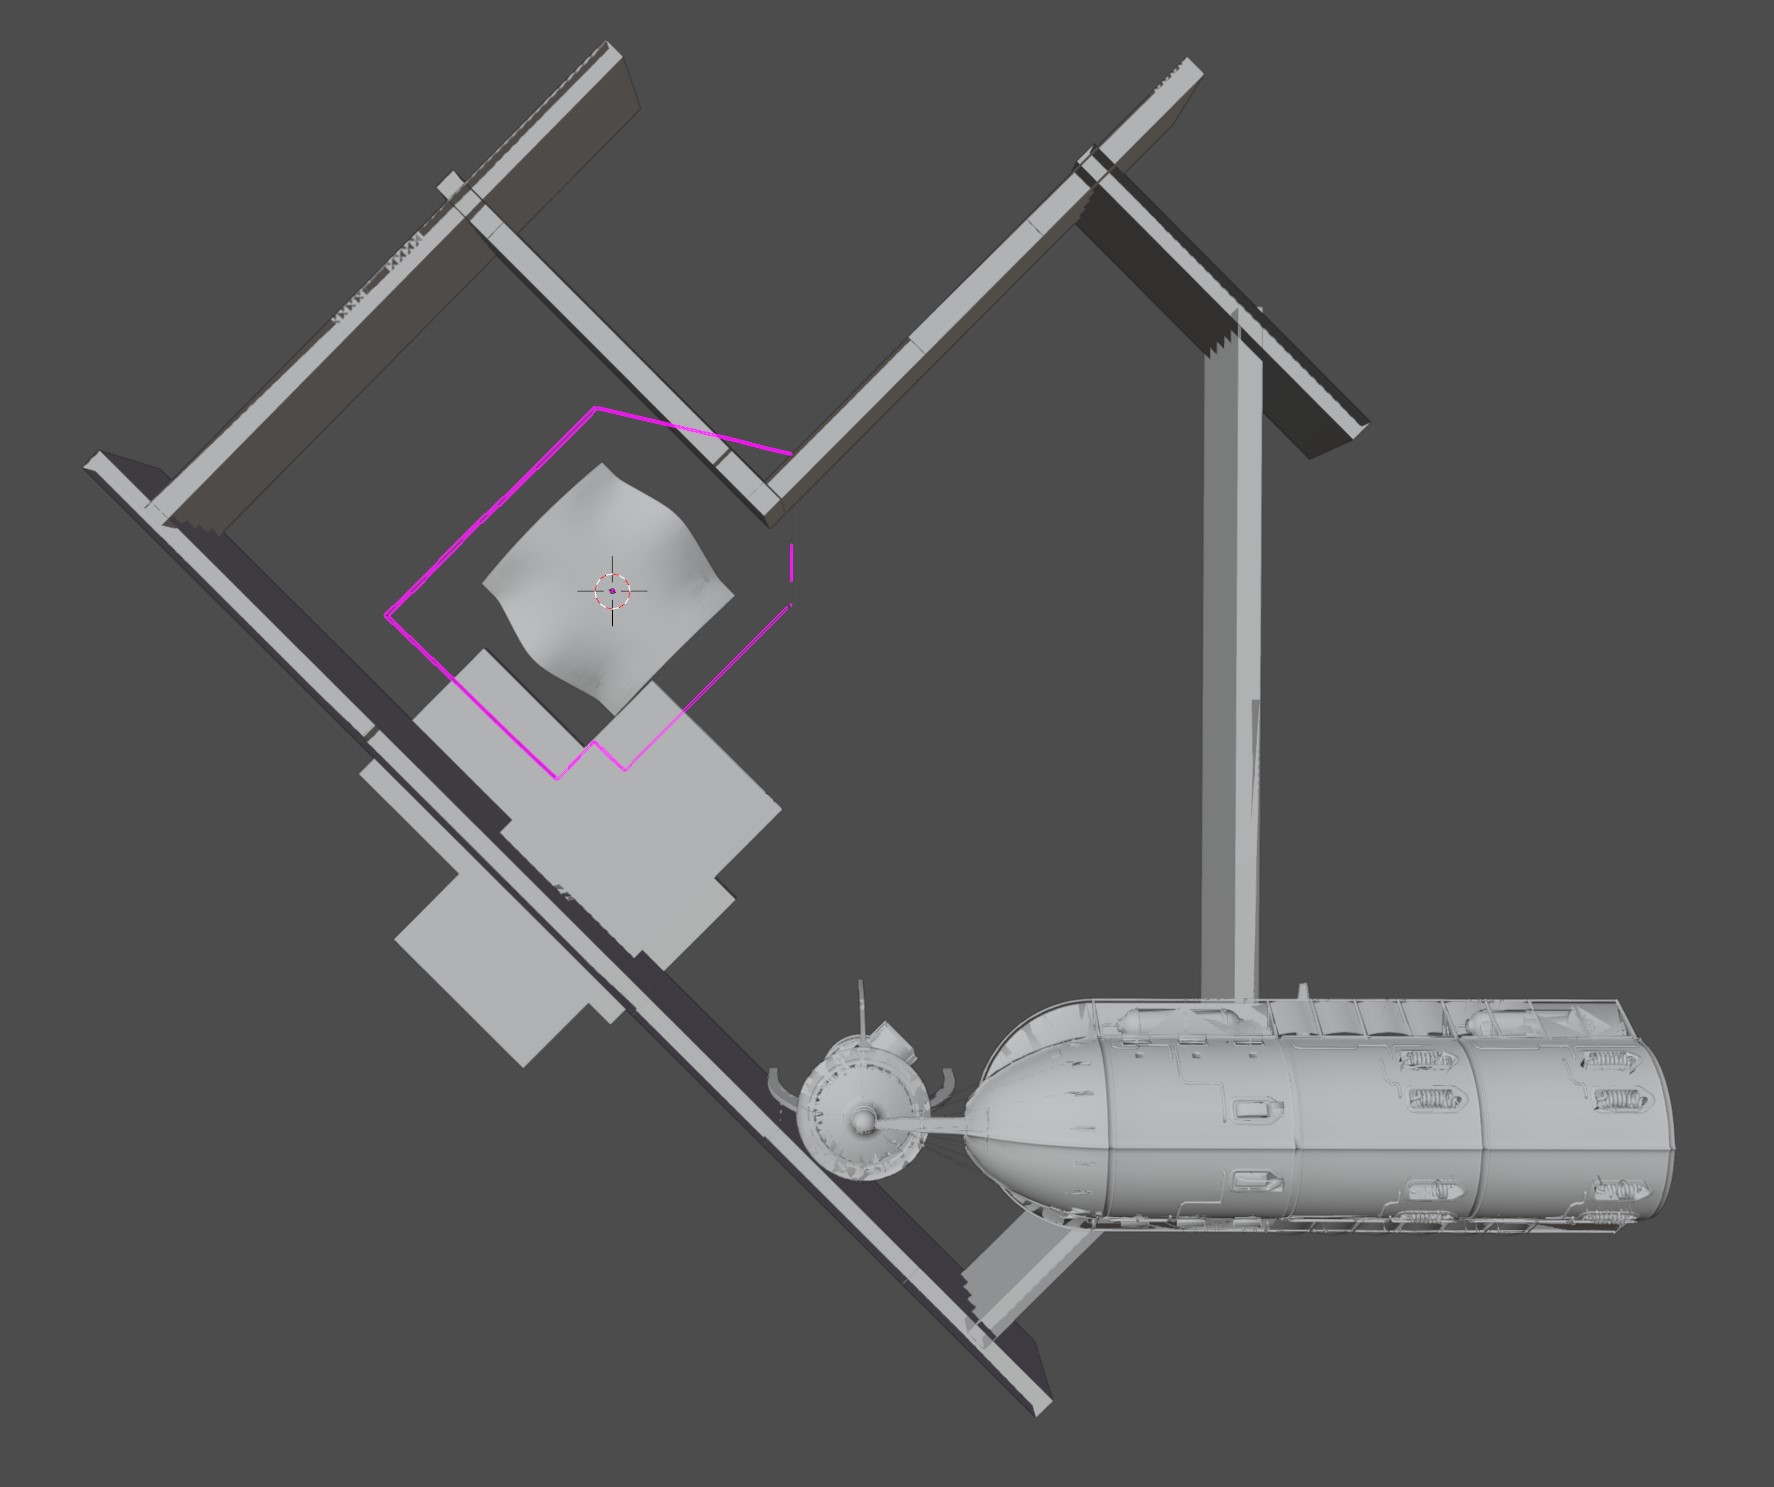
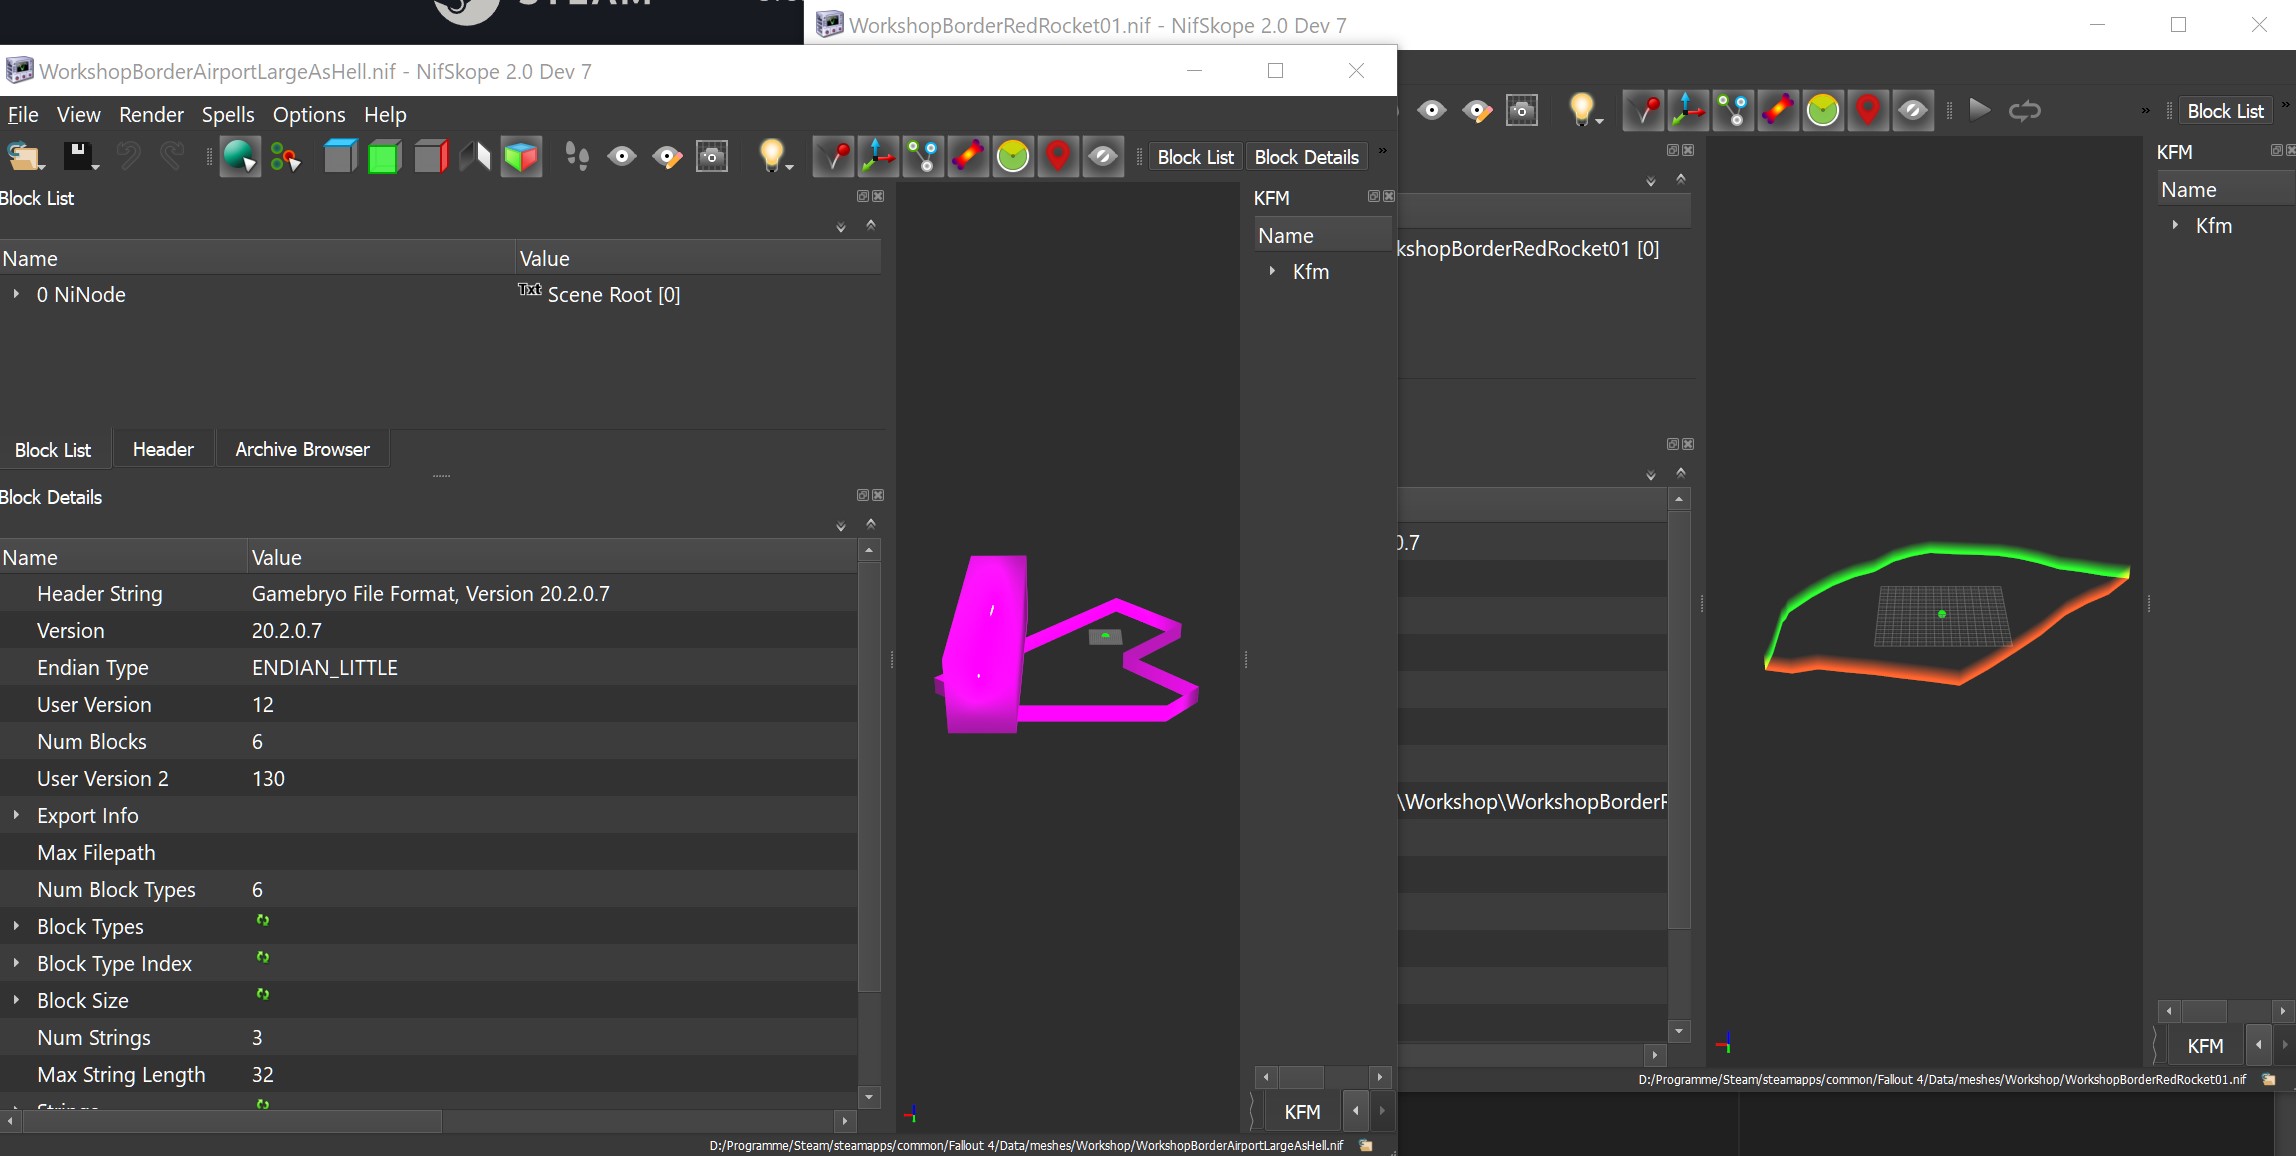
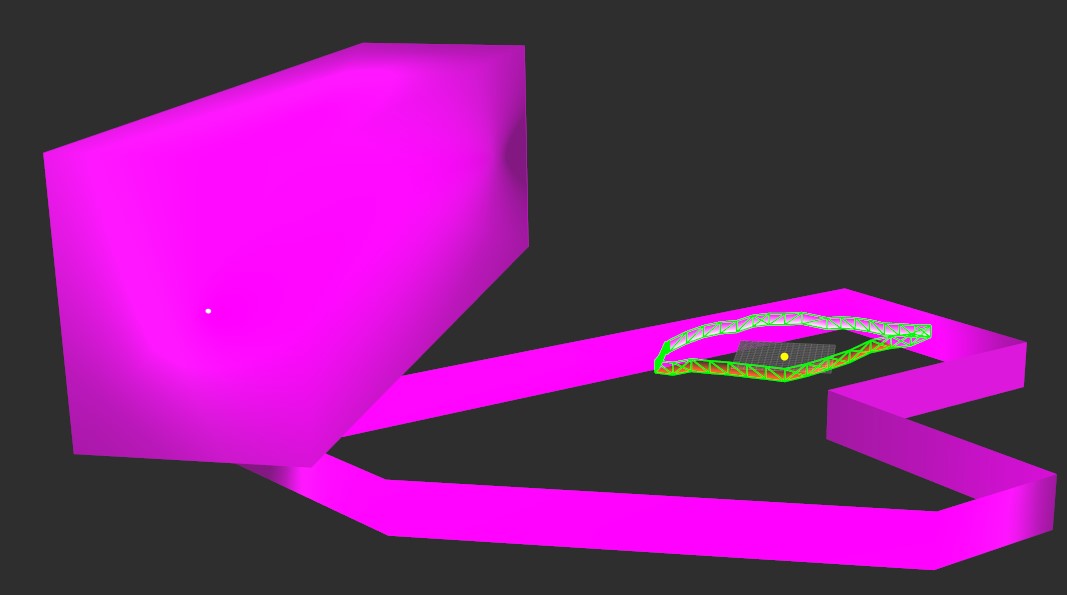
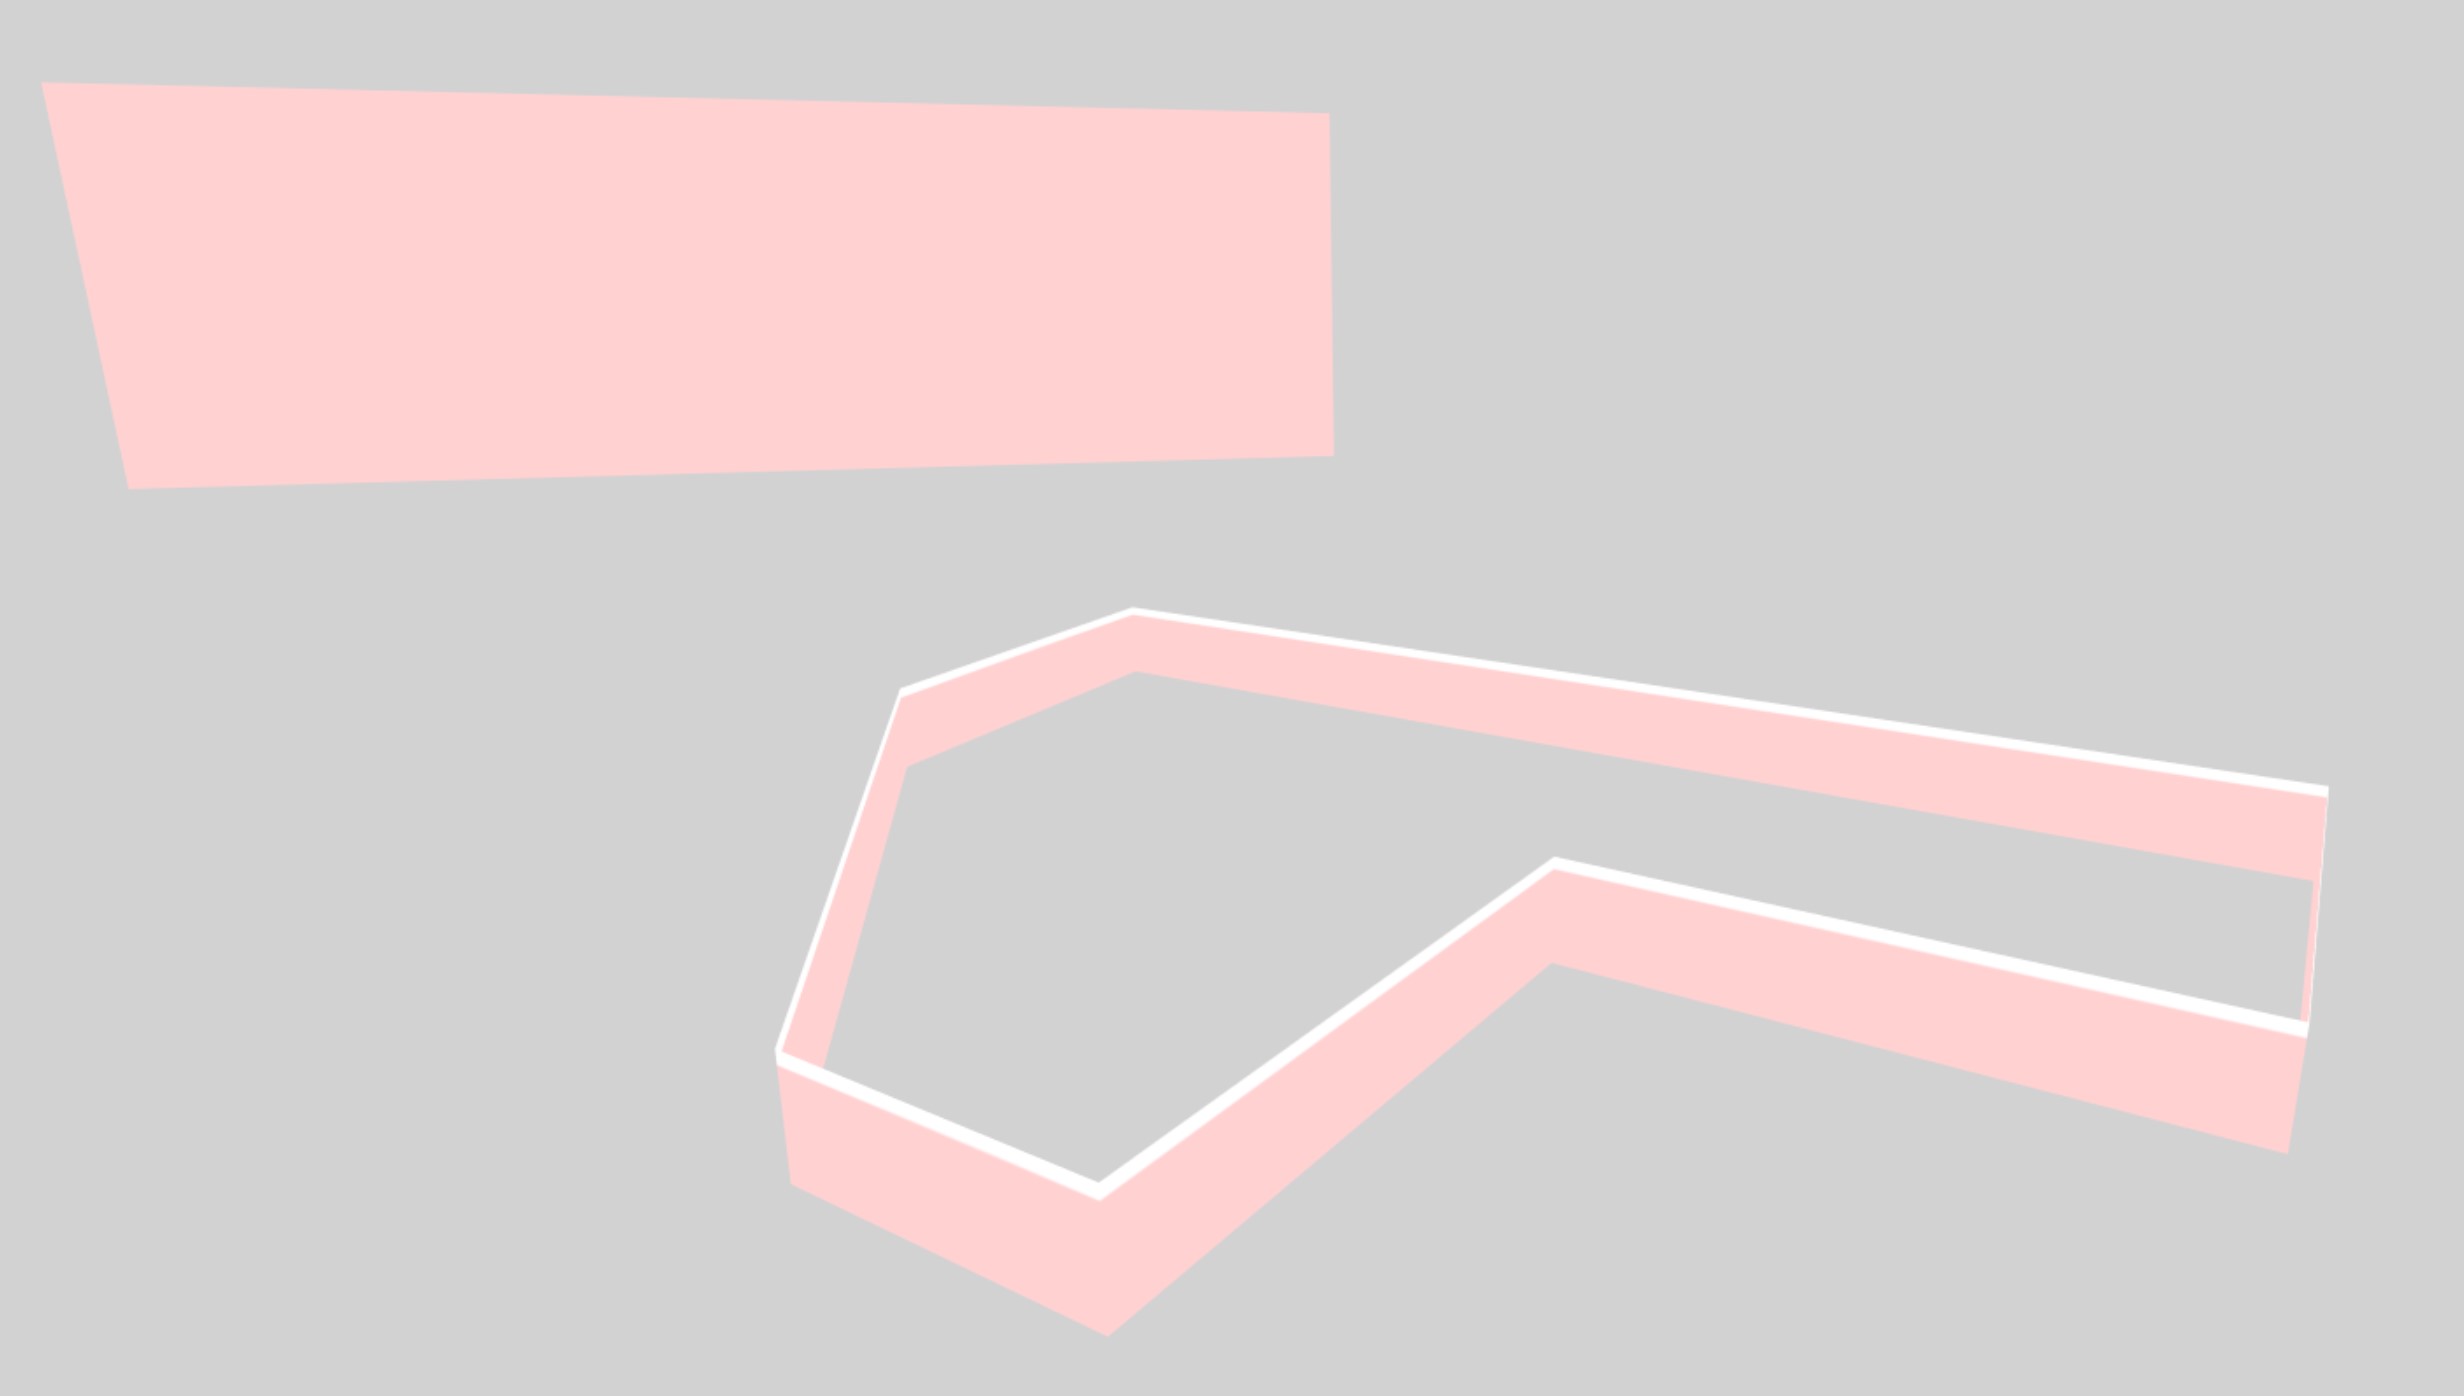
Red Rocket’s border is the small pink thing.
It was a reference for how high the wall should be above the ground that I imported.
The default walls are 255 units high.
As you can see, my helper model is located right under the roof i chose.
Step 9
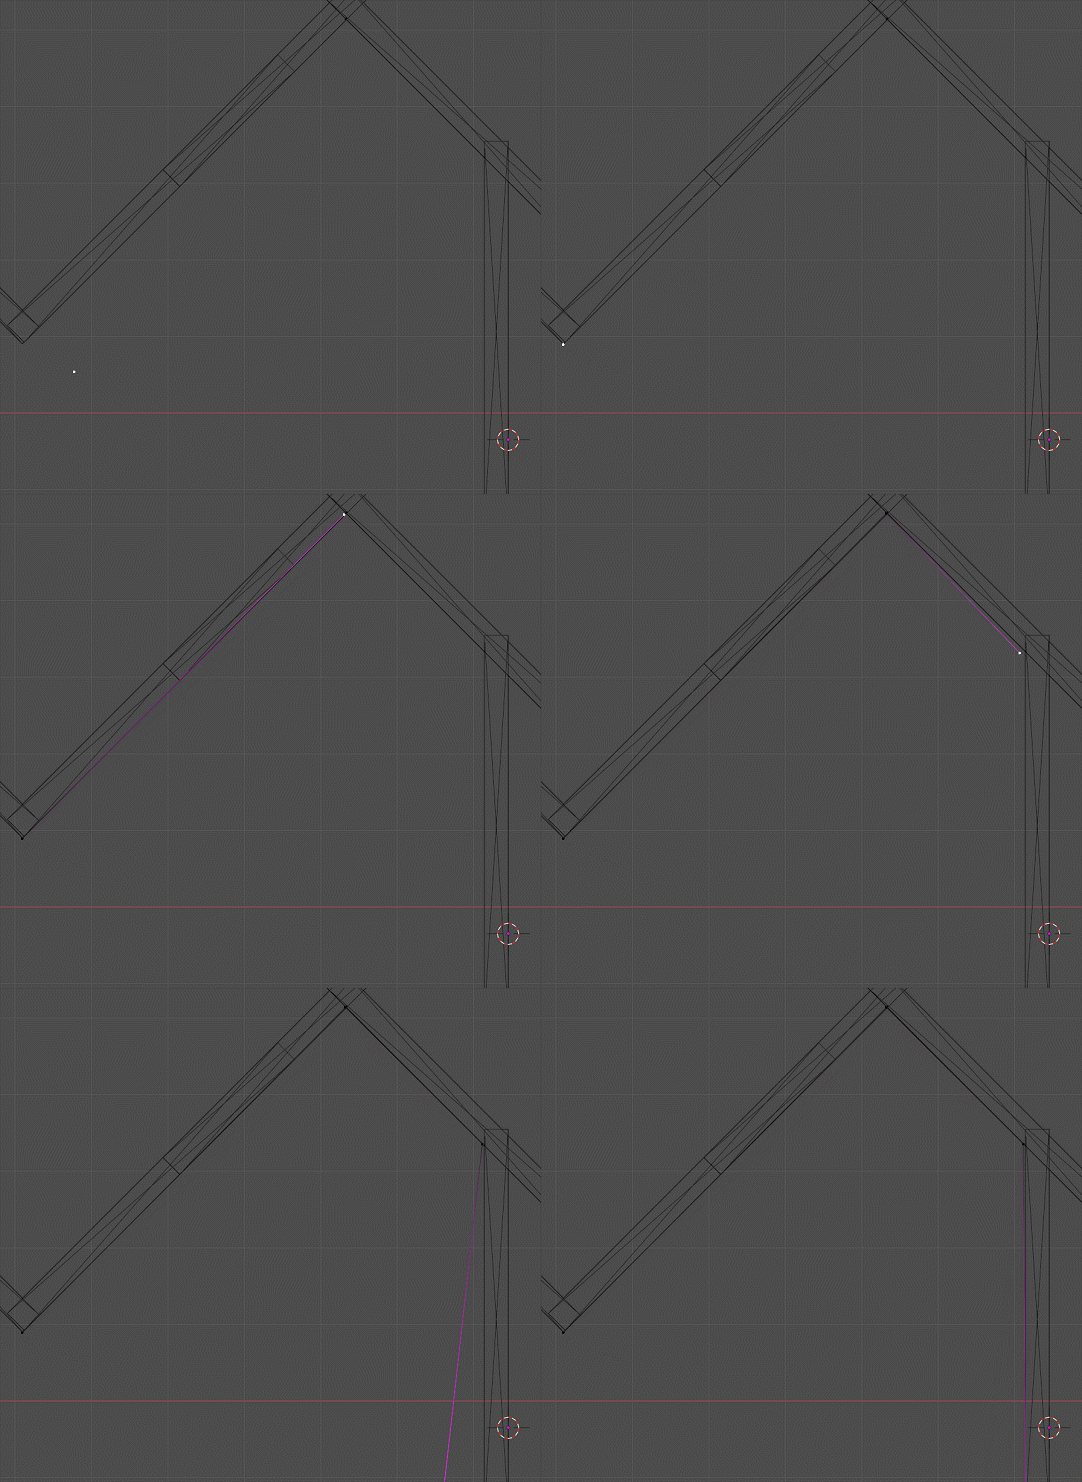
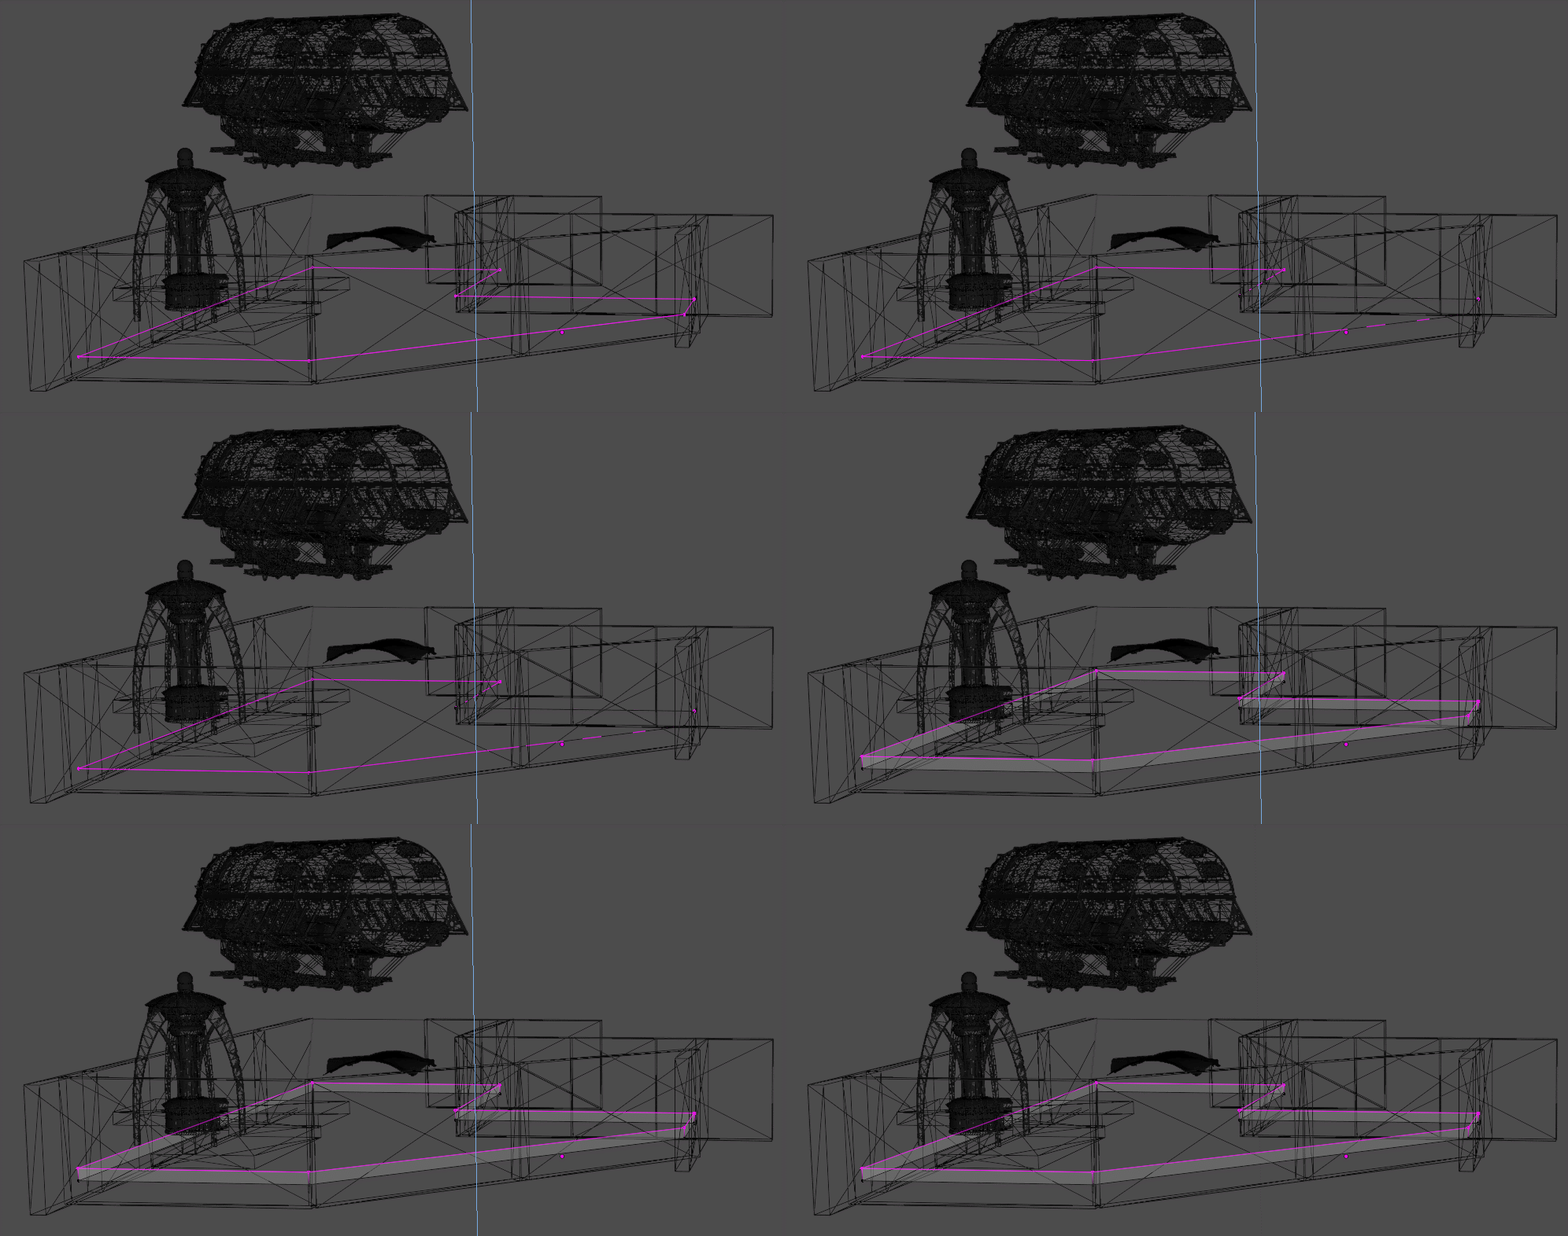
You can now use the guide to build a basic wall in the shape and size that you desire.
I did some “precise” combining of meshes and other things. You could also take one vertex and extrude it around the mesh edges. Then, make a loop and extrude the whole thing 255 units higher.
This thing may need to be rotated -90 degrees on the X axis.
It is possible to adjust it in NifSkope as well, but it is better to do it now.
This is exactly how the Bodyslide importer imports it. I don’t know why.
Step 10
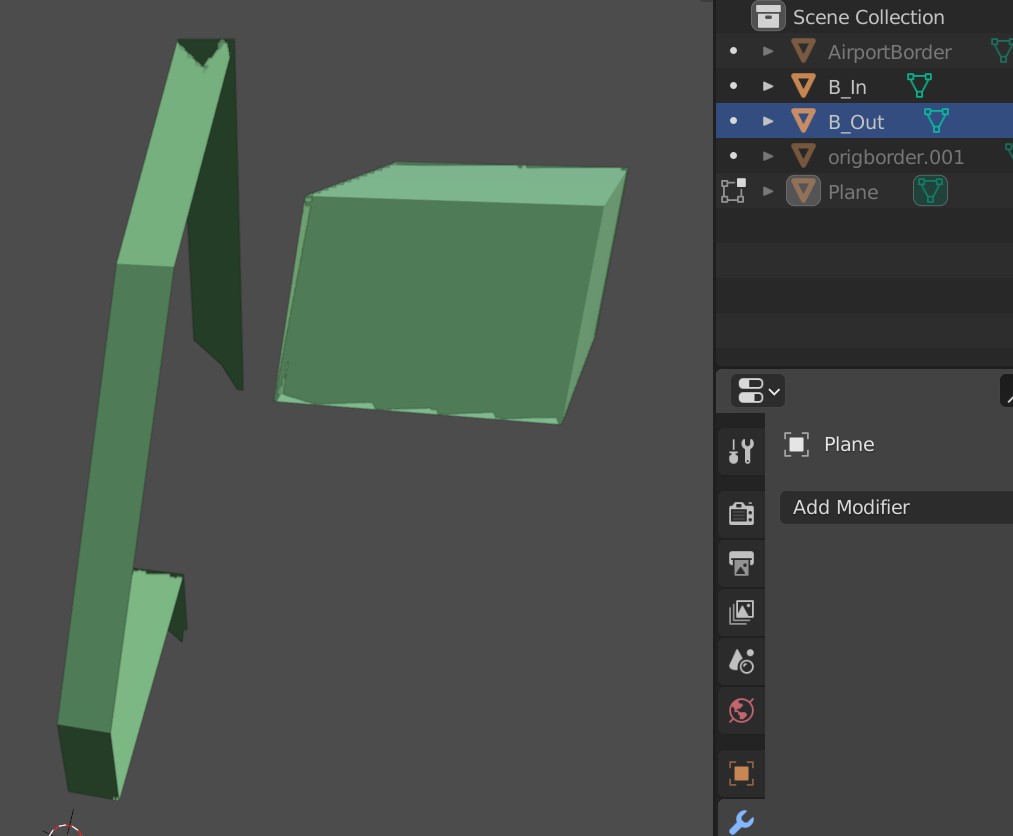
Make sure all normals at your border point outwards.
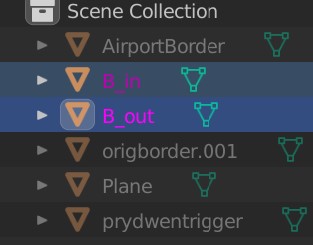
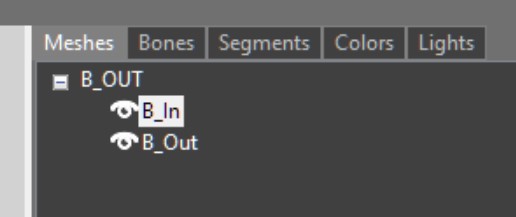
Name this object, which is just your border, to “B_out”.
Duplicate it, invert normals by pressing Alt+N, and rename the object “B_In”.
The border is a combination of red and green colors. Both sides must be separated meshes in order to color them correctly.
Step 11
Export your border models B_out and B_In as two meshes in one file FBX.
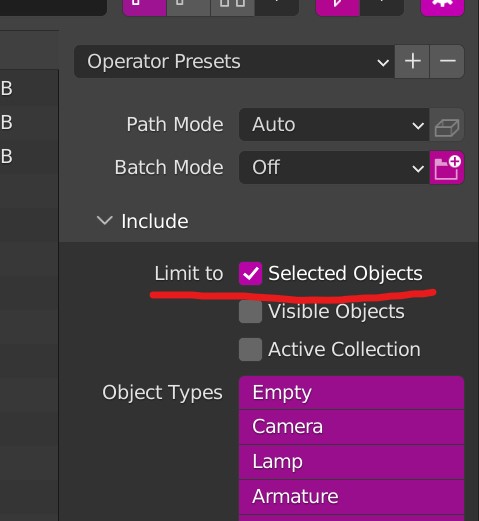
Select only the B_In/B_out in blender, export to FBX, and click “Selected objects”
This makes it easier to color them, as we don’t have to paint the color directly on them.
We can paint the outside mesh green and the inside red if he hides it.
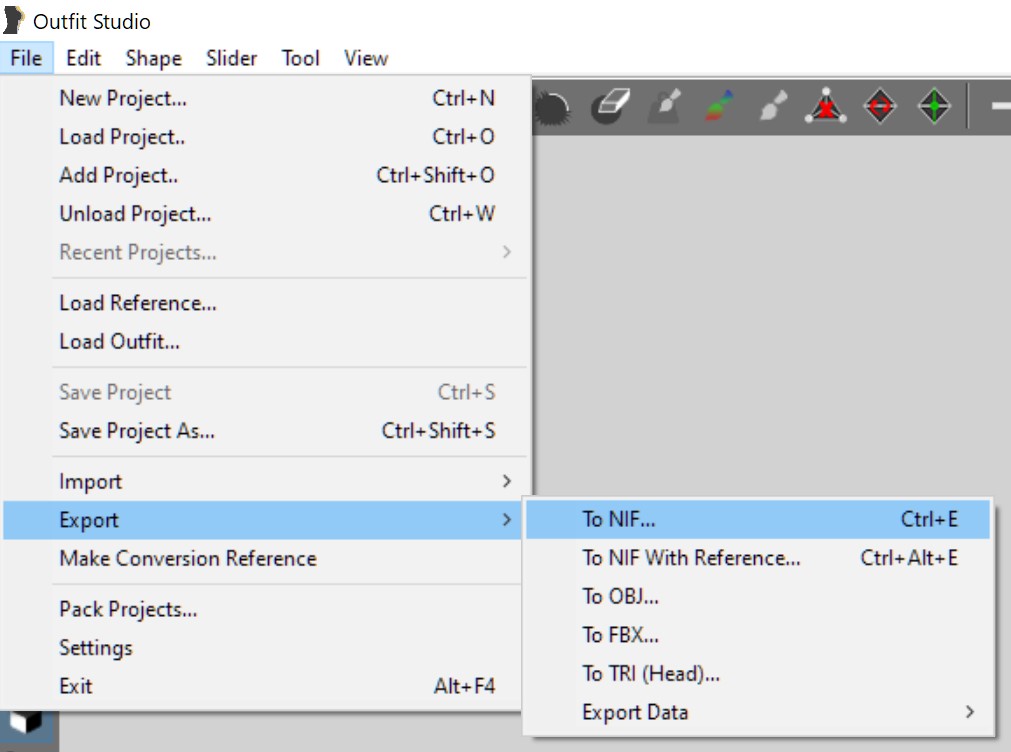
Open Outfit Studio and drag your FBX files onto it.
Outfit Studio will ask you to “import without reference”. We don’t care if you click OK
We only need the fbx-to-NIF conversion.
Now you’ll have two objects in this area.
Take a look at it once you have it imported. Then export as NIF.
It will be exported along with the FBX files I exported from blender.
We won’t put it in the game yet.
It will complain about unweighted vertices and something about a masque. We don’t care, click okay.
Step 12
After export, open both your NIF as well as the original exported border NIF in separate instances of NIFSkope.
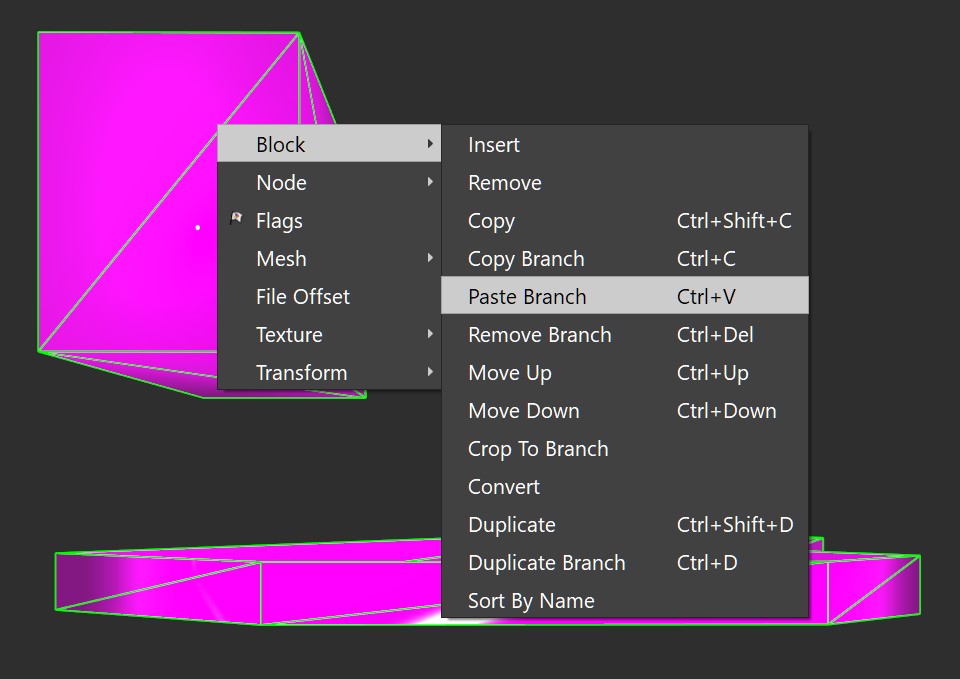
Right-click the original border and click “Block – Copy Branch”
Right-click your border and click “Block – Paste Branch”
Now, you will have the original border with its working material setup inside your NIF.
You can close the instance where the original border was. It and its NIF will no longer be needed.
Material Appropriation
Step 13
Your models will likely be pink, but the original border will still work perfectly. That has to be changed quickly.
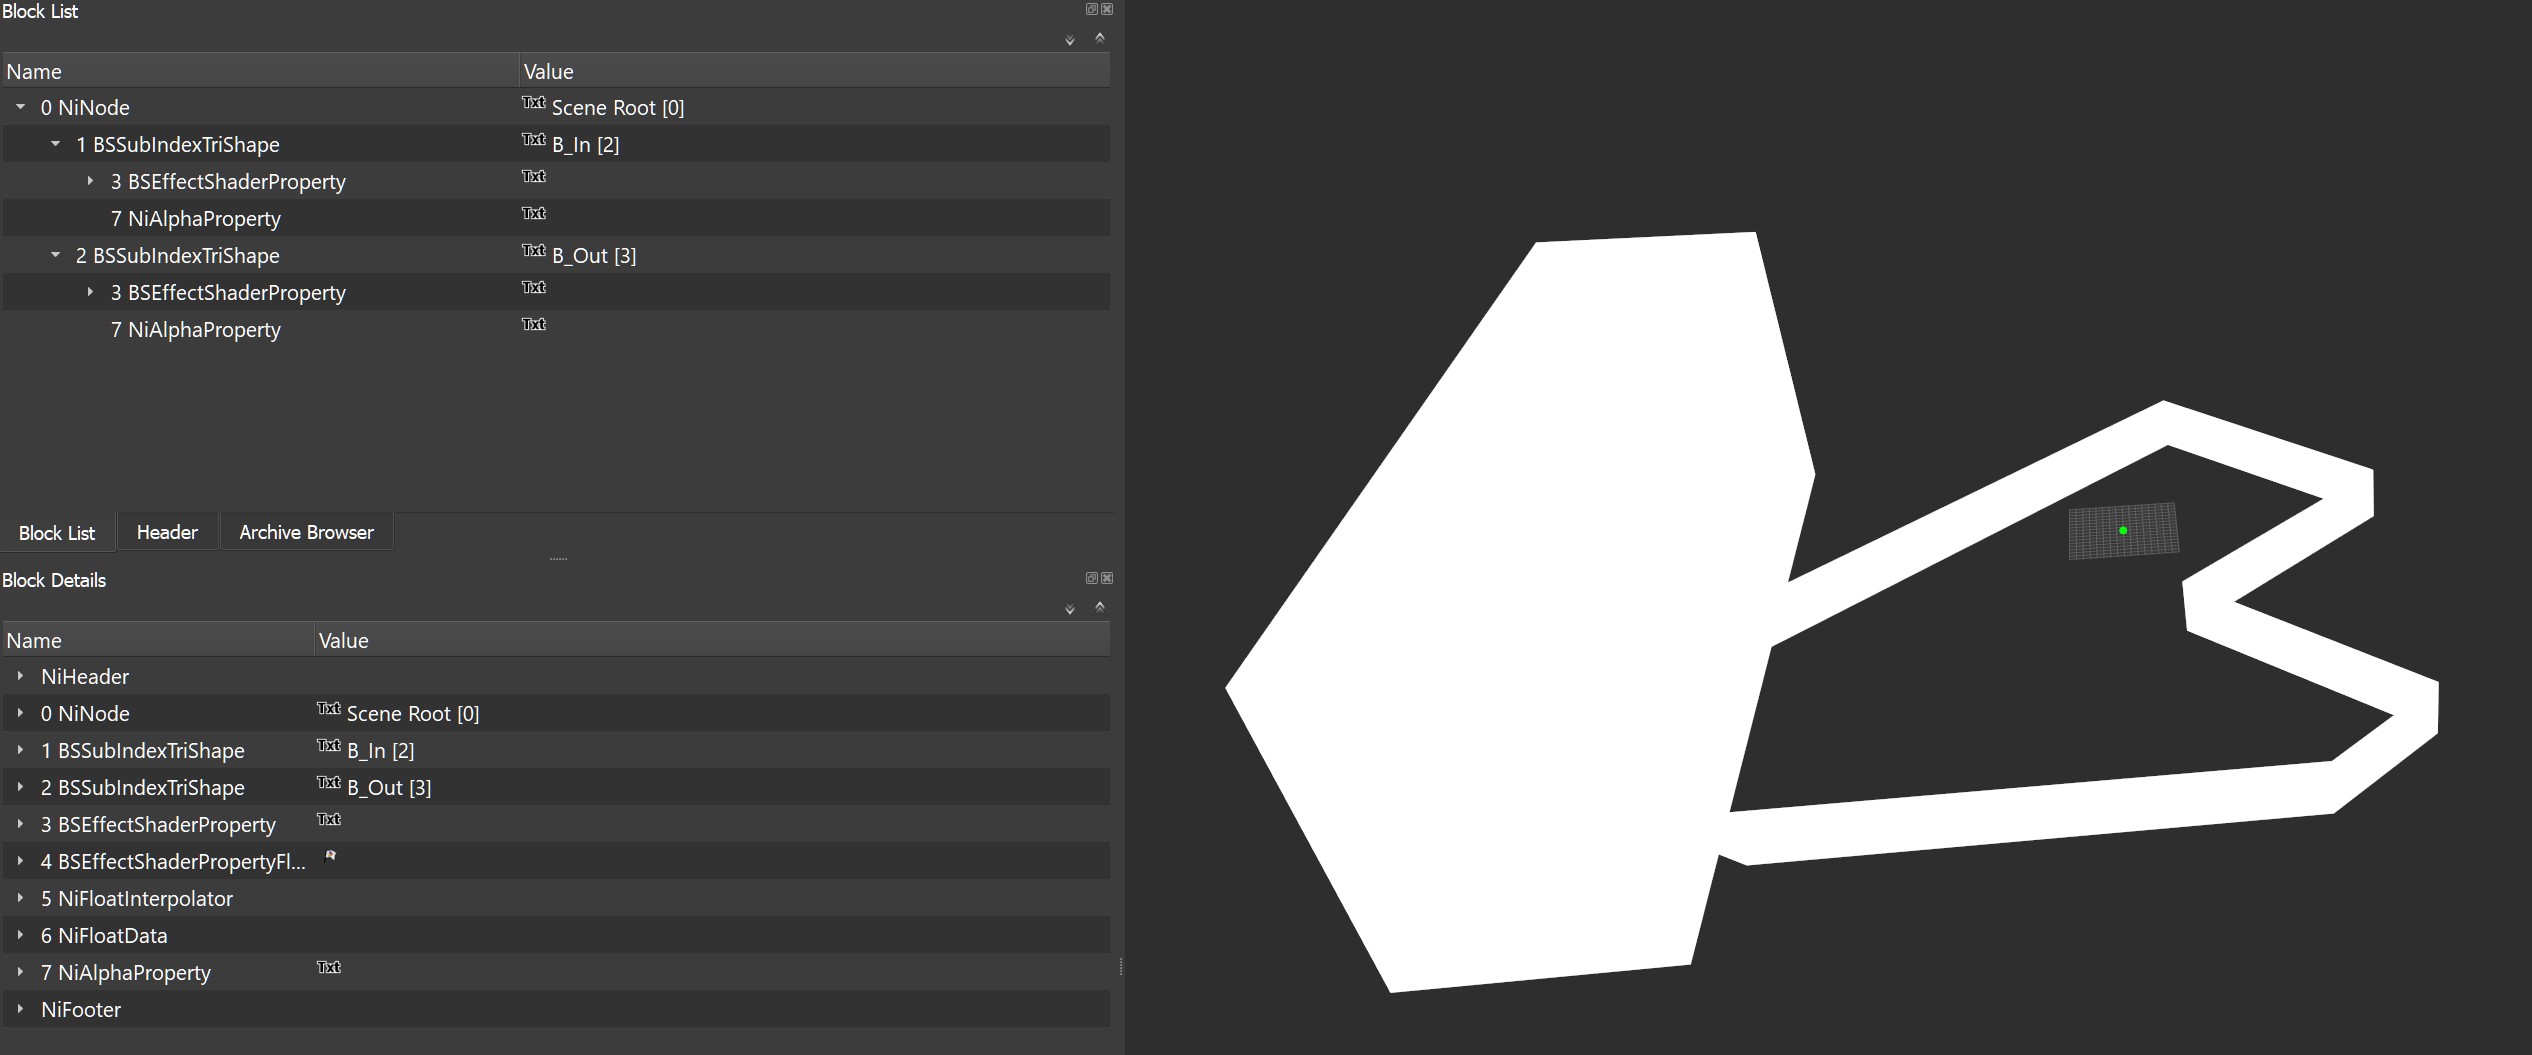
Expand the first “BSSubIndexTrishape” brench and delete BSSkinandBSLighting entirely.
Do the same with the second “BSSubIndexTrishape”.
If done correctly, your border meshes will be grey now.
However, the original should still be in its original colors.
Step 14
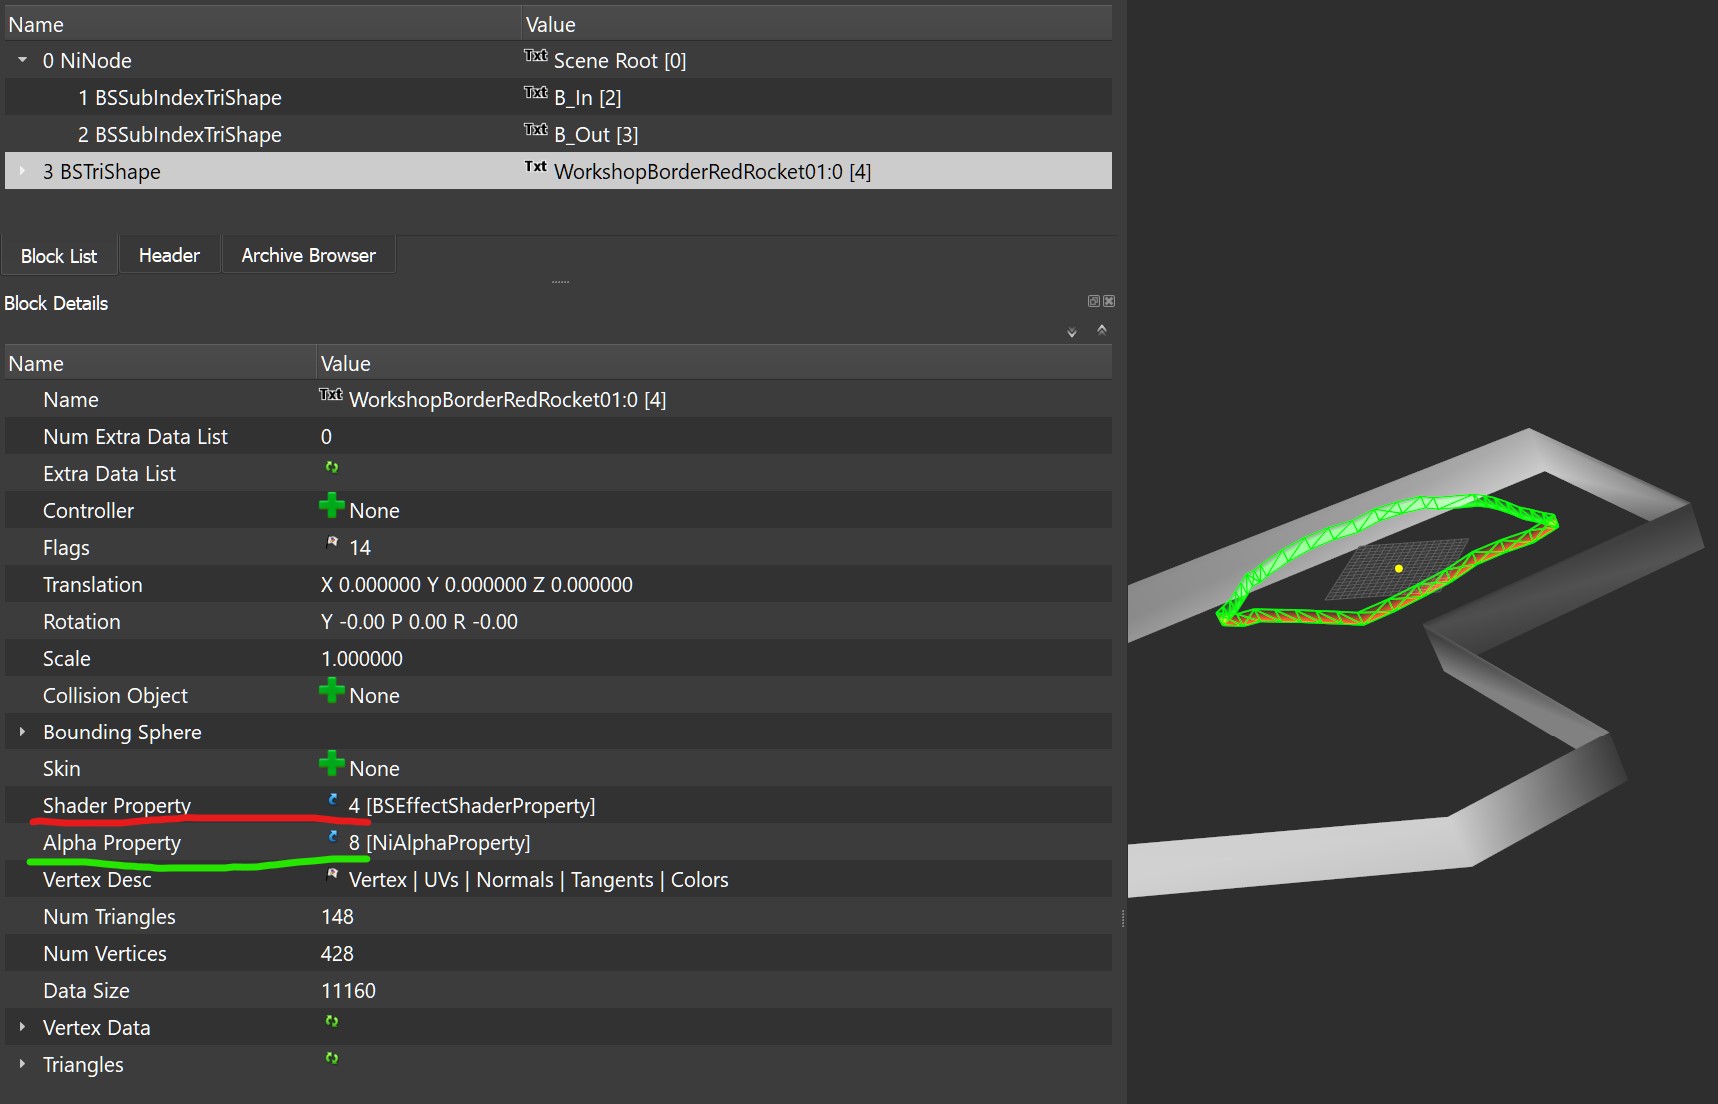
Click on the original border.
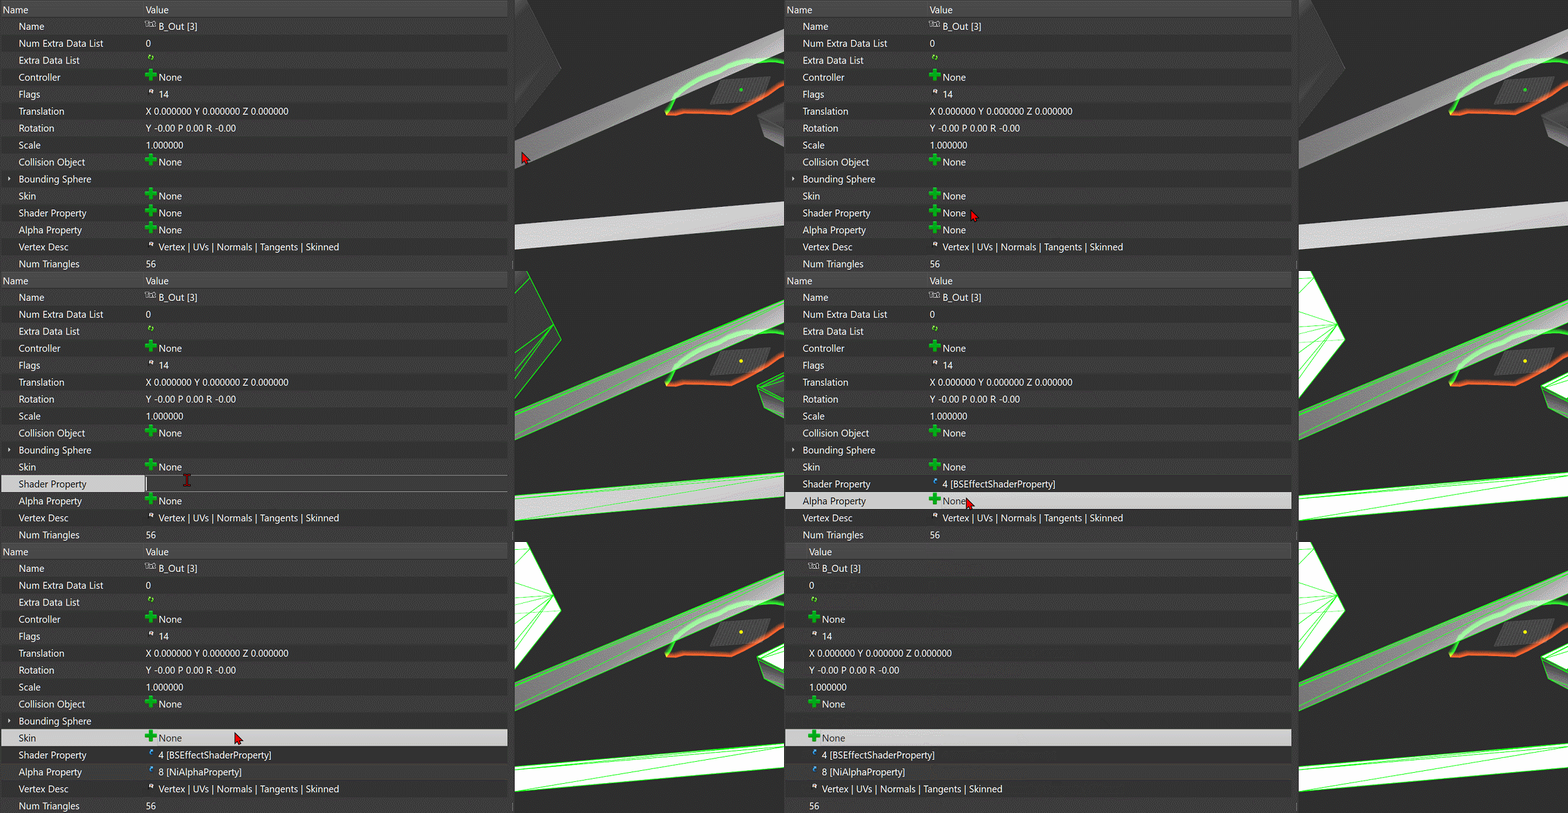
You will need to check the boxes for Alpha Property and Shader Property in the “Block Details”.
You can see the numbers written there.
Shader is 4, Alpha 8. It could be different numbers for you.
Click on your meshes, and then enter the same numbers into those boxes.
Do the same for both meshes.
They should change from grey to white.
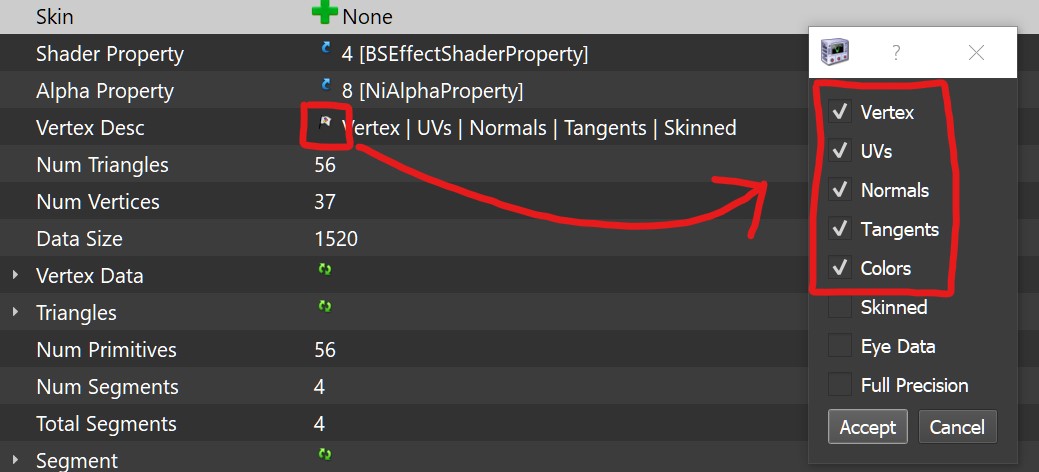
This little flag icon by Vertex Desc can be placed on both meshes.
A new window will open in which you can check the boxes.
Usually, it’s just switching from “Skinned to Colors”.
Step 15
You can now remove the original border you used to take the materials.
ONLY the BSTriShape!
Two white meshes will be left.
This NIF file can be saved. You can Name this anything you want, But i’d choose “WorkshopBorder_Modname.nif”
Coloring
Step 16
Outfit Studio needs to be painted. Outfit Studio’s camera movement can be slow.
To avoid scrolling for five minutes, make your mesh super tiny.
Select the shapes you want to use and set “Scale to 0.1” for any smaller mesh that will fit within the floor grid.
0.01 is even better
This tiny mesh can be saved.
If the scale value is still at 0.1, you can change it back to 1.
Step 17
Open Outfit Studio again and drag your NIF on it.
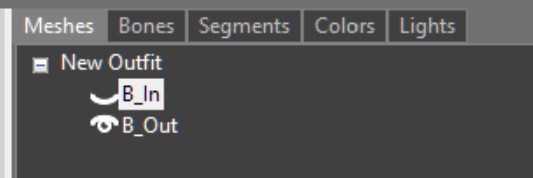
First, hide the B_IN Mesh by clicking this eye or clicking the name and pressing E.
Select the B_OUT mesh.
Go to color.
Change the brush color from green to red
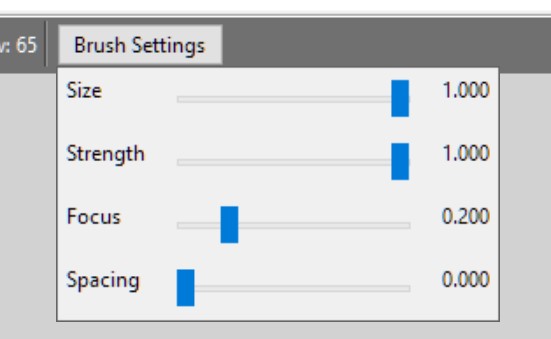
Change the Brush settings until they are as strong as steel.
When you hover your mouse over your mesh’s Vertices, a green dot should appear.
Paint the B_Out bottomvertices in red.
The top ones will be made black to paint the faded gradient onto it.
You can also go into Wireframe mode by clicking on the Eye icon (, or pressing twice on E).
It will also not paint if the camera is too far away. You will need to zoom in.
To be honest, painting is a bit Akward.
To paint, you must click and drag or sometimes wave your mouse around.
Here’s a faster gif showing you how it should look.
Zoom in close and it will be easy. This was something I discovered when I was painting the other half.
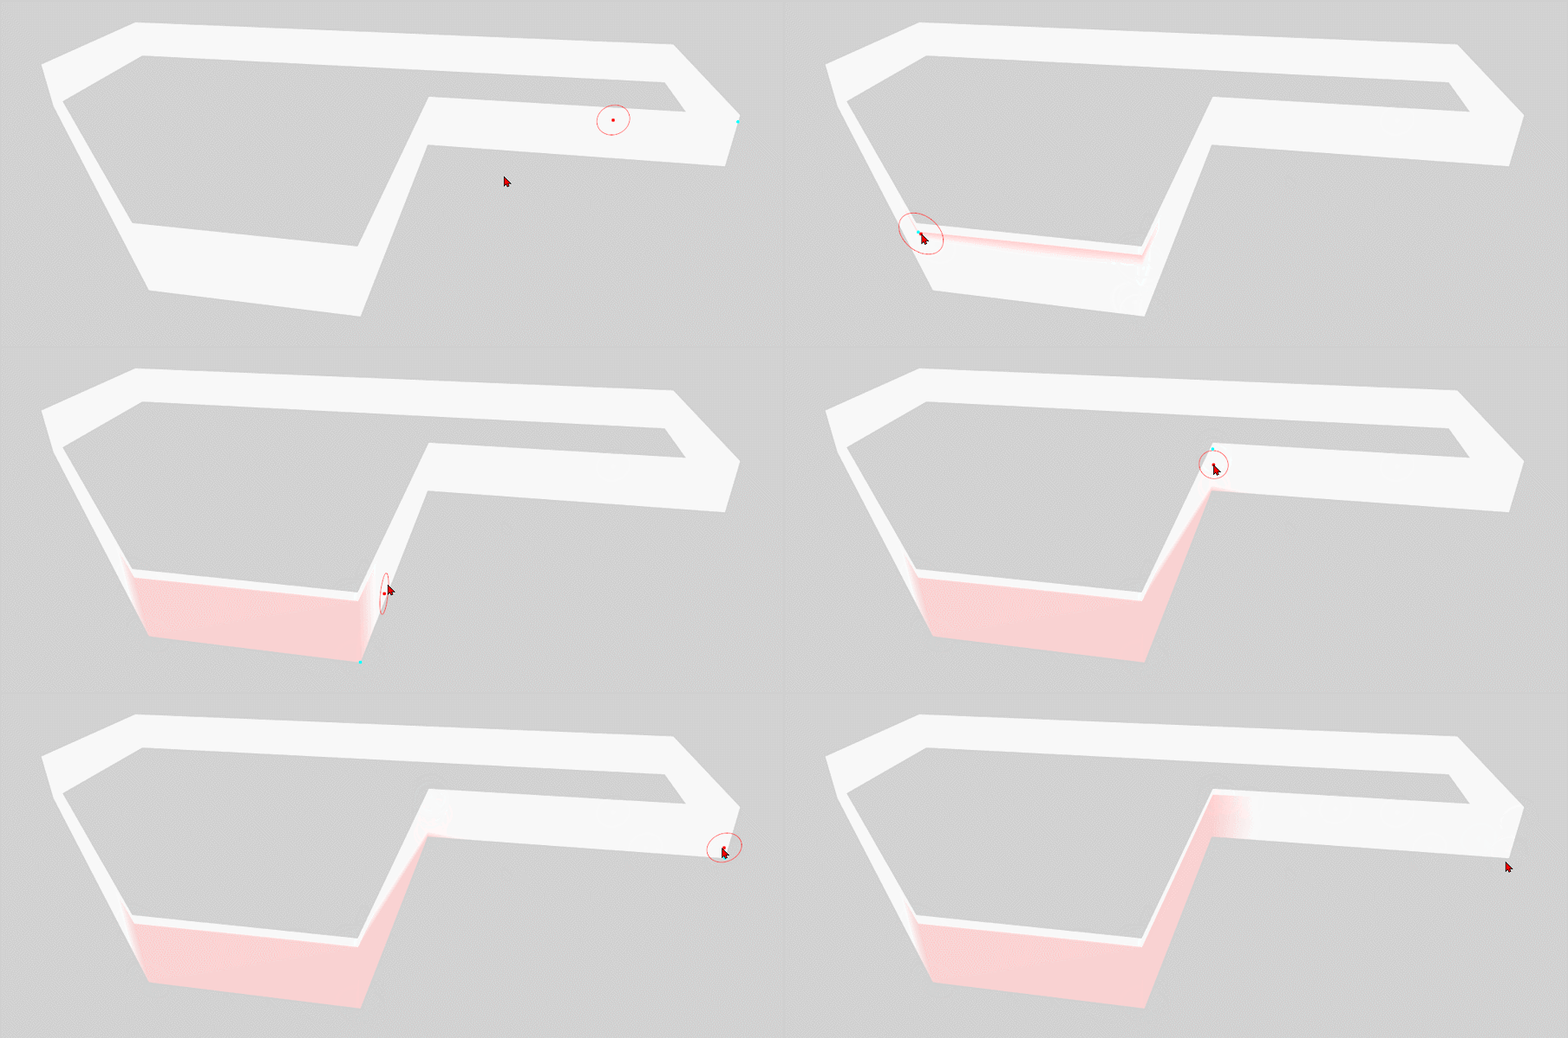
The top is white. This is because the large portion at the bottom is the entire red part of the underwater parts.
The white top will be painted black.
All that is red will eventually be red.
Once you are done, change the brush to black and paint the top half black.
It will likely pull the red higher up, but also create an intermediate gradient.
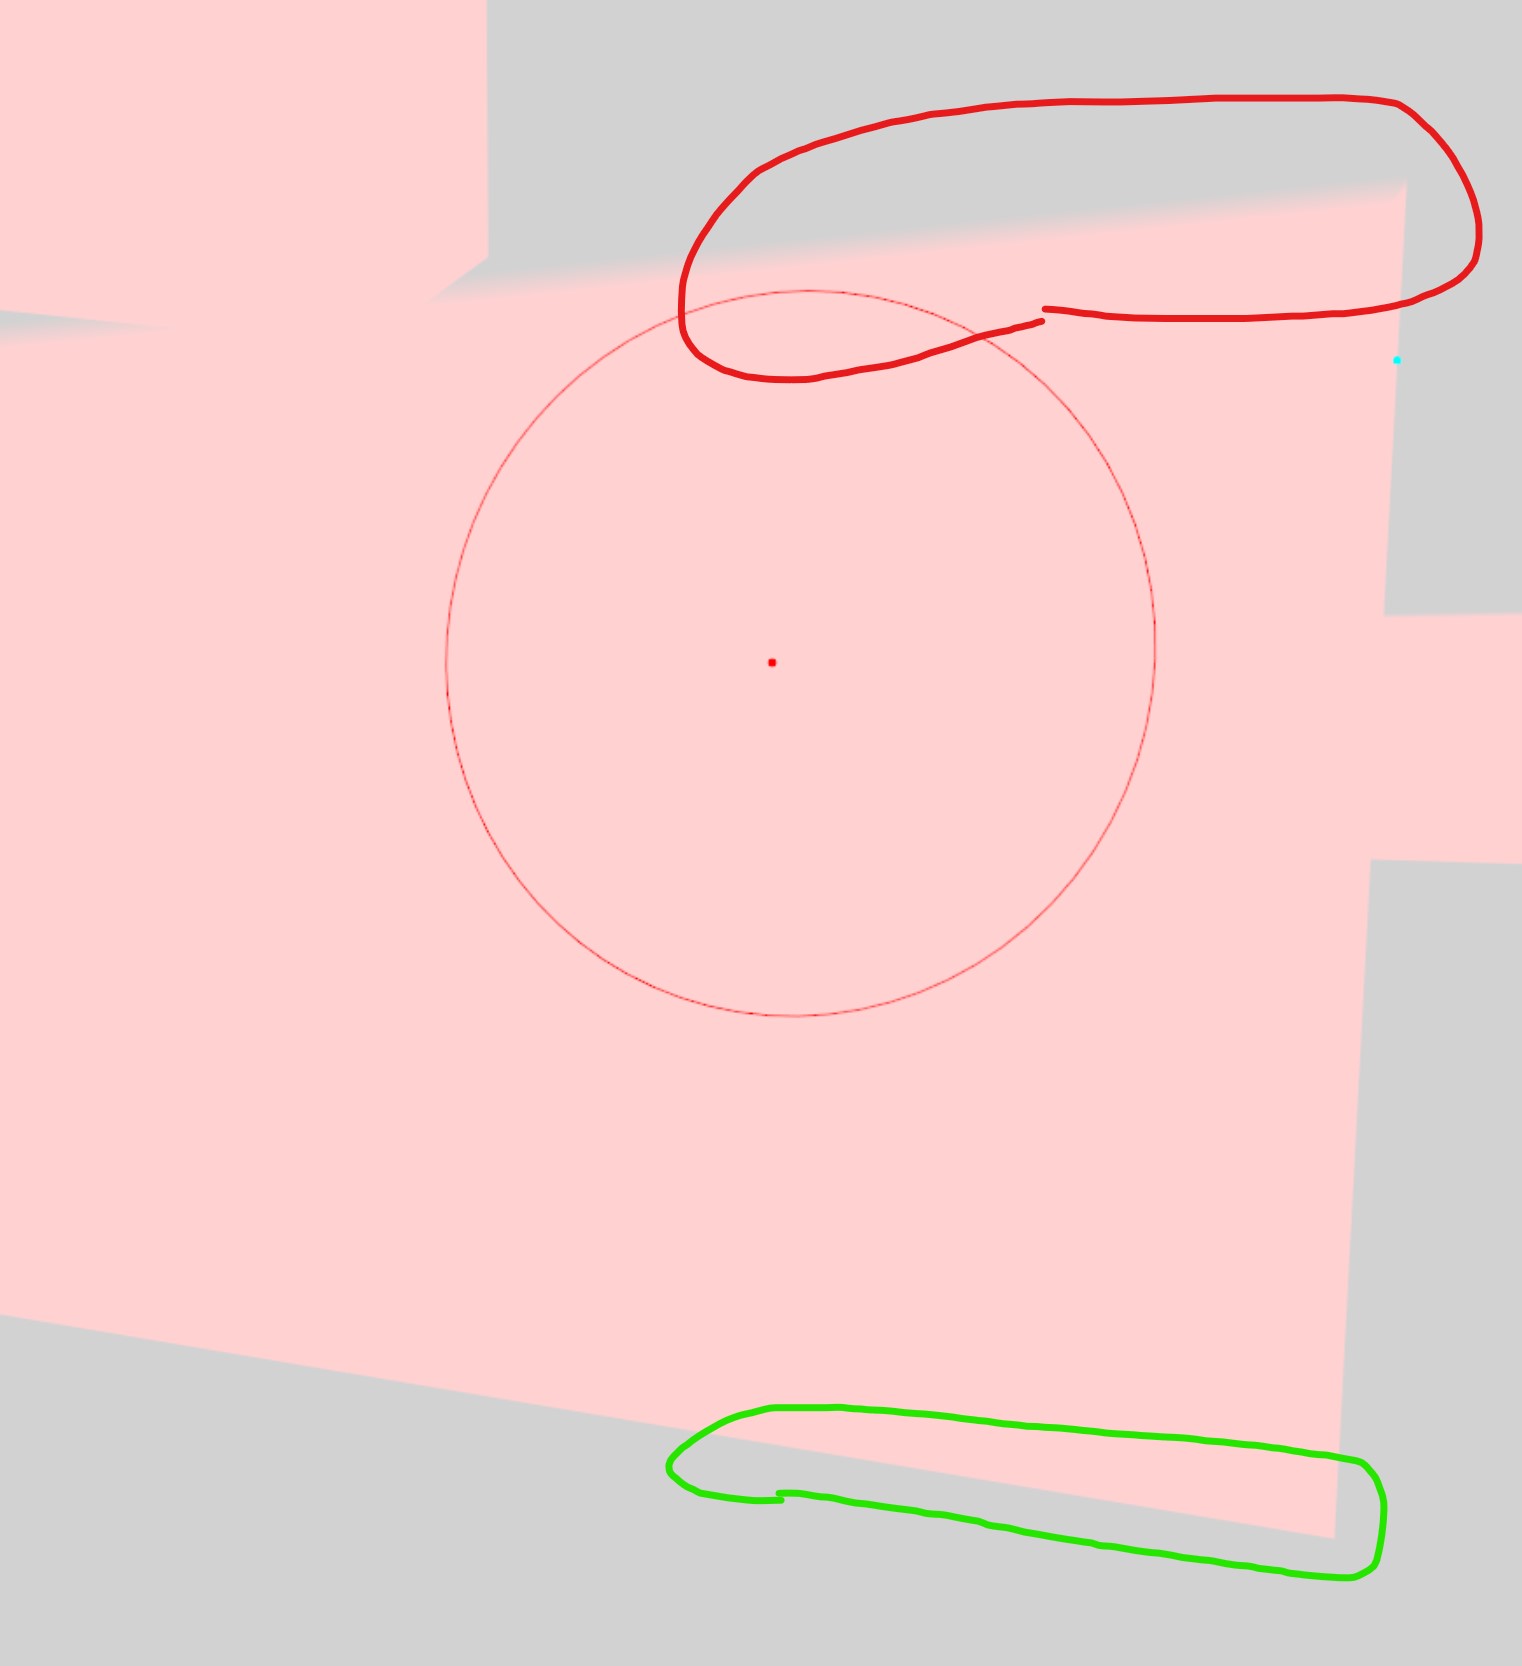
The image below shows that the red circles have a smooth gradient. However, the bottom of my mesh has a sharp edge that is fully red.
Ok, now the outside is painted red/black.
It’s time to do the same for the interior, but Green/Black.
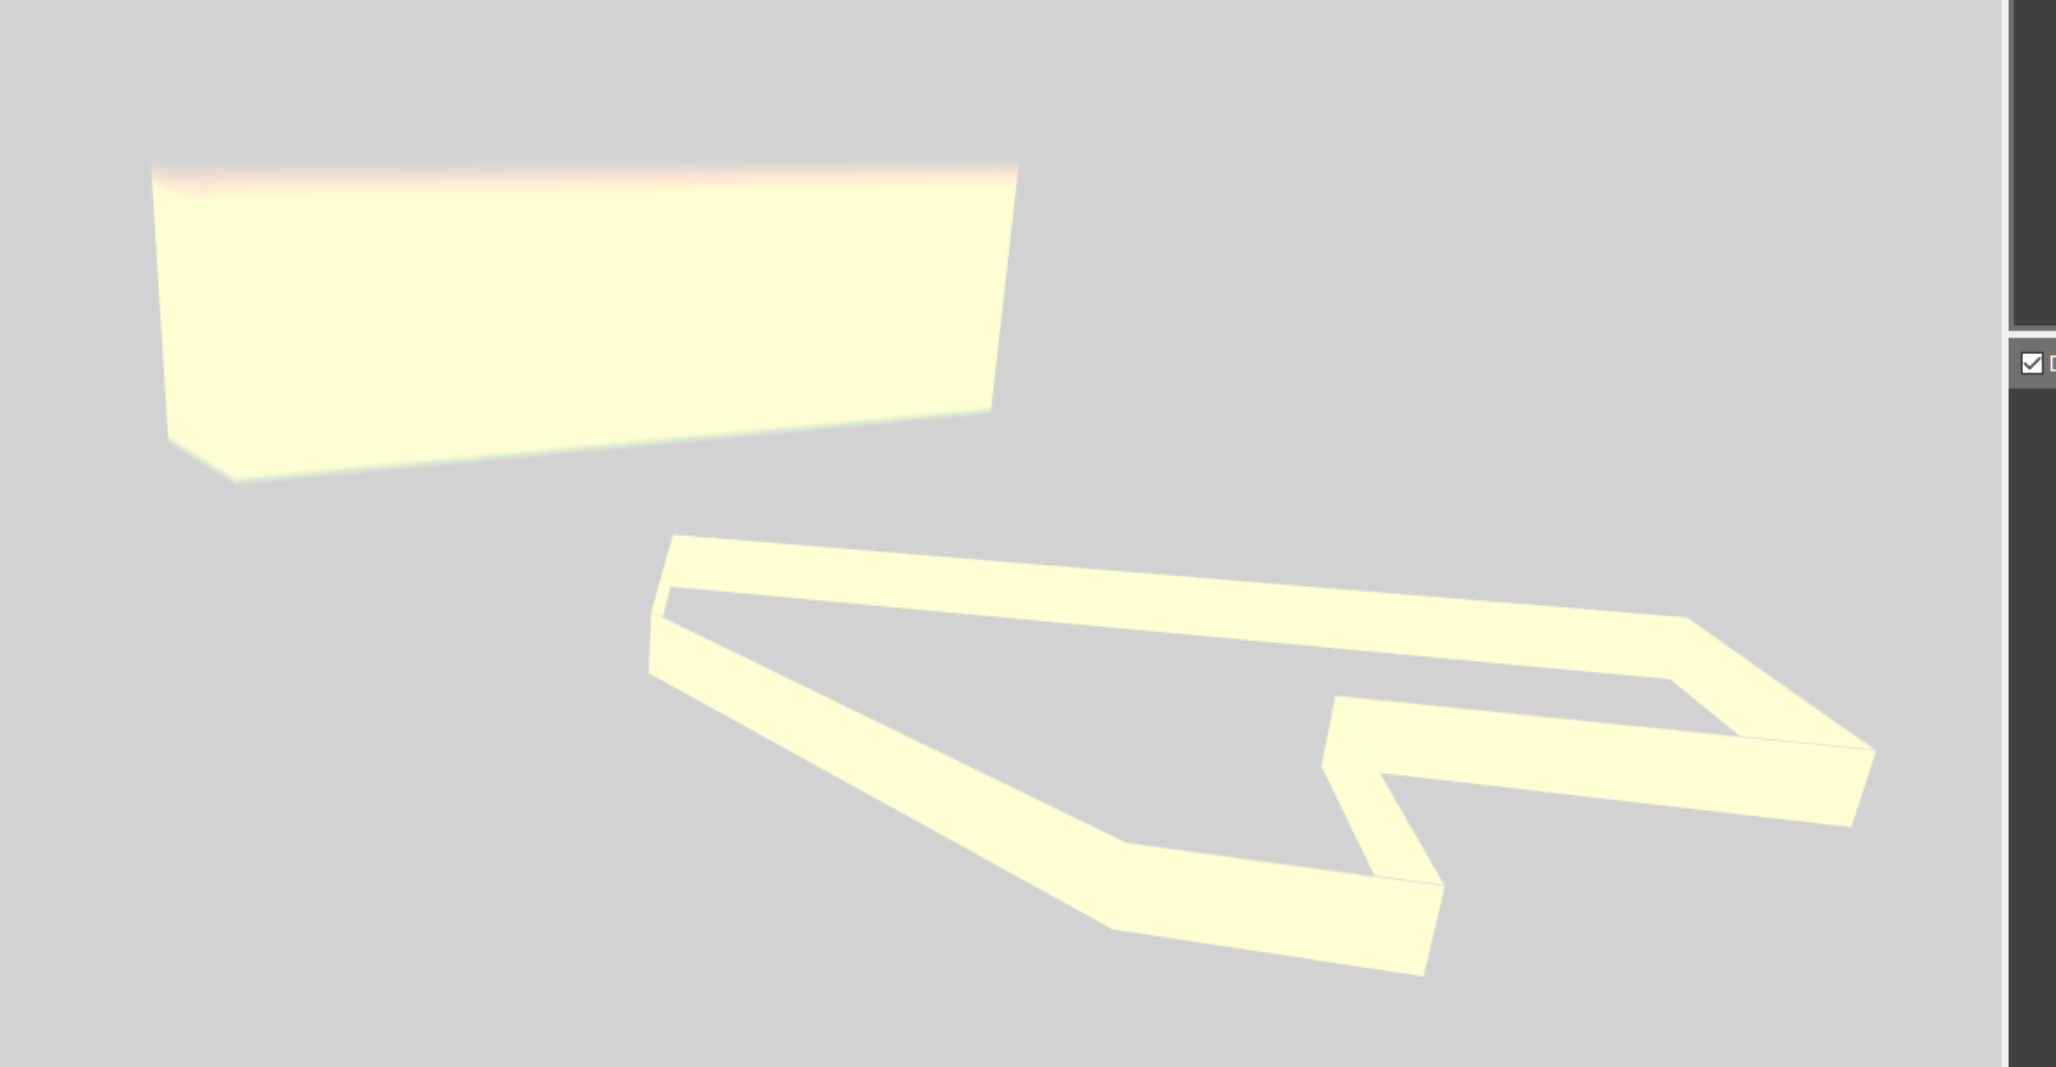
After you have colored the outside and inside, you can remove both layers. Because this shader is doing the job, your end result will look yellowish.
Oh BTW, It doesn't have to be green and red. but those are the default colors.
If you got some special thing on your settlement, like for example if the build zone is larger than the "Sandbox zone", you could make the sandbox zone a smaller shape with different colors.

The color mixing is Additive mixing. You could in theory go abolutely nuts with colors.
Step 18
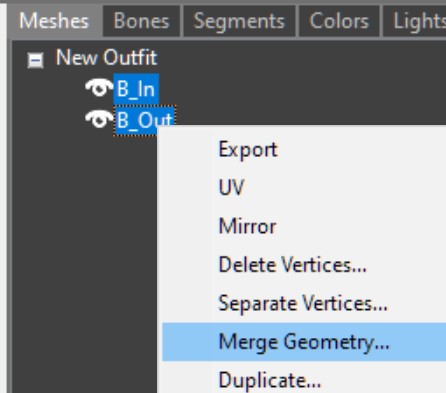
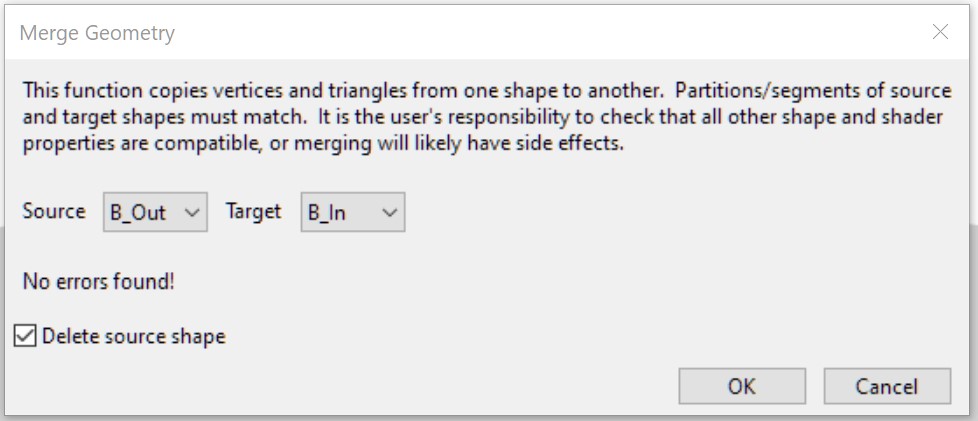
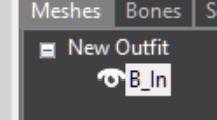
We now need to merge the meshes together. Otherwise, the shader won’t work in FO4.
Click on both and then click on the right-hand side to merge.
This NIF can be saved once more. Almost done!
Step 19
This NIF can be opened in NifSkope once more.
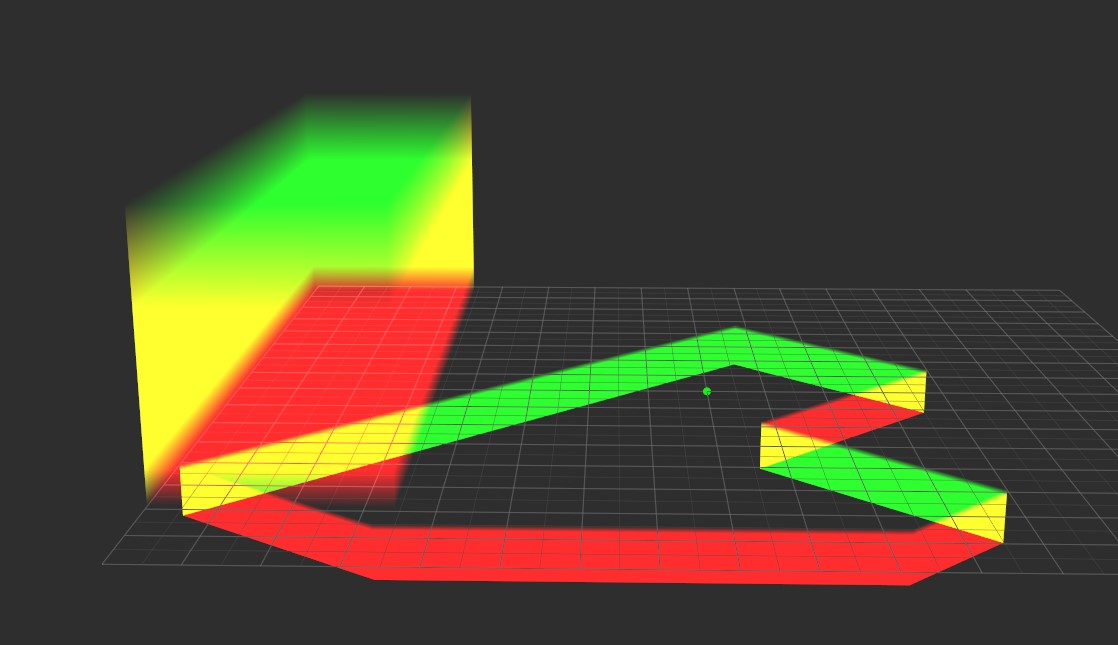
It should be obvious that the coloring worked.
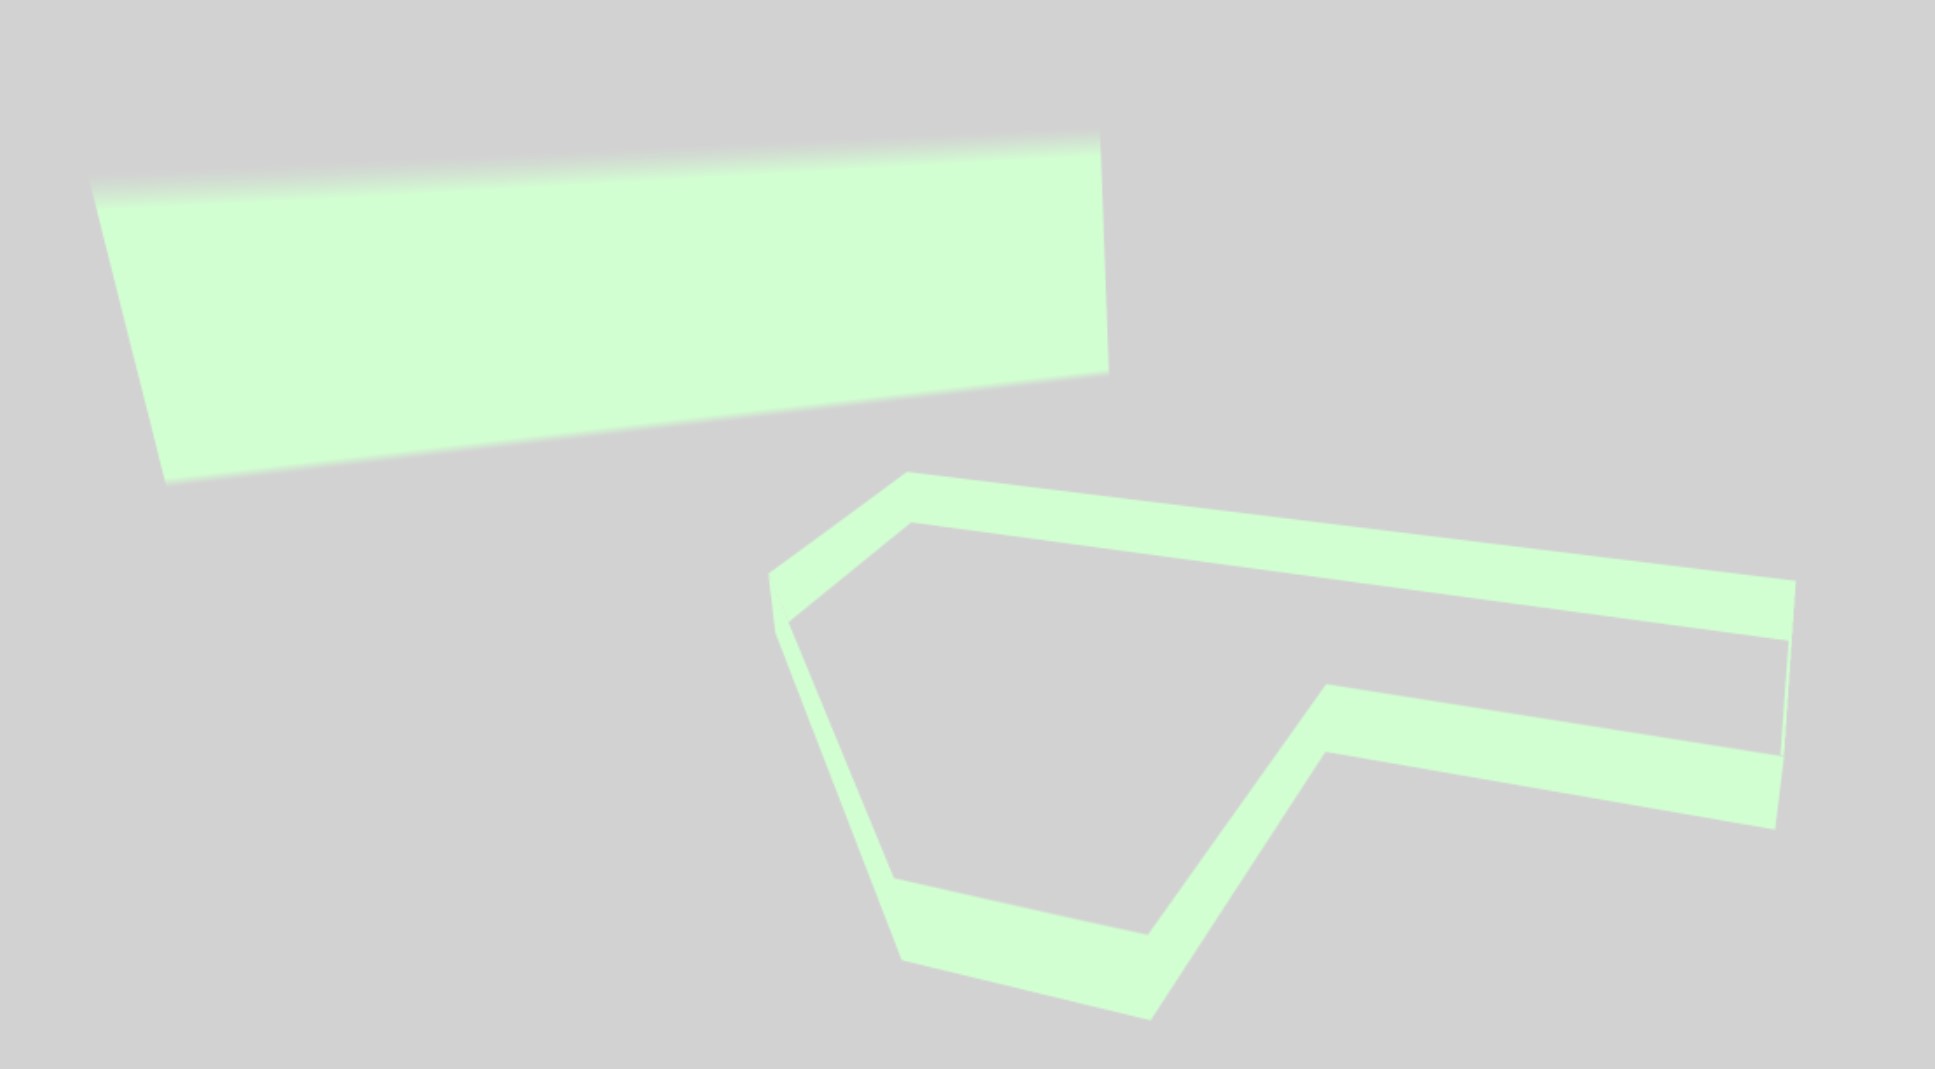
The inside is green, the outside is red, and the overlaps are yellow.
Different colors can be mixed differently.
In Step 16, we set the scale at 0.1 or whatever.
Reduce the scale to 1.
Save the NIF one last time.
If you have any NifSkope or Outfit Studio left, close them all.
Any NIF’s that are temporary or not used should be deleted. Now, we’re done with the NIF files.
We’re going back into Creation Kit now.
Place the Border
Step 20
Create your settlement in Creation Kit.
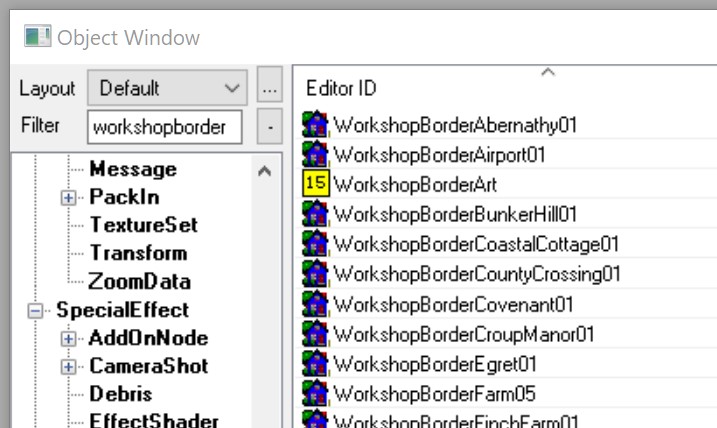
Search for “WorkshopBorder”.
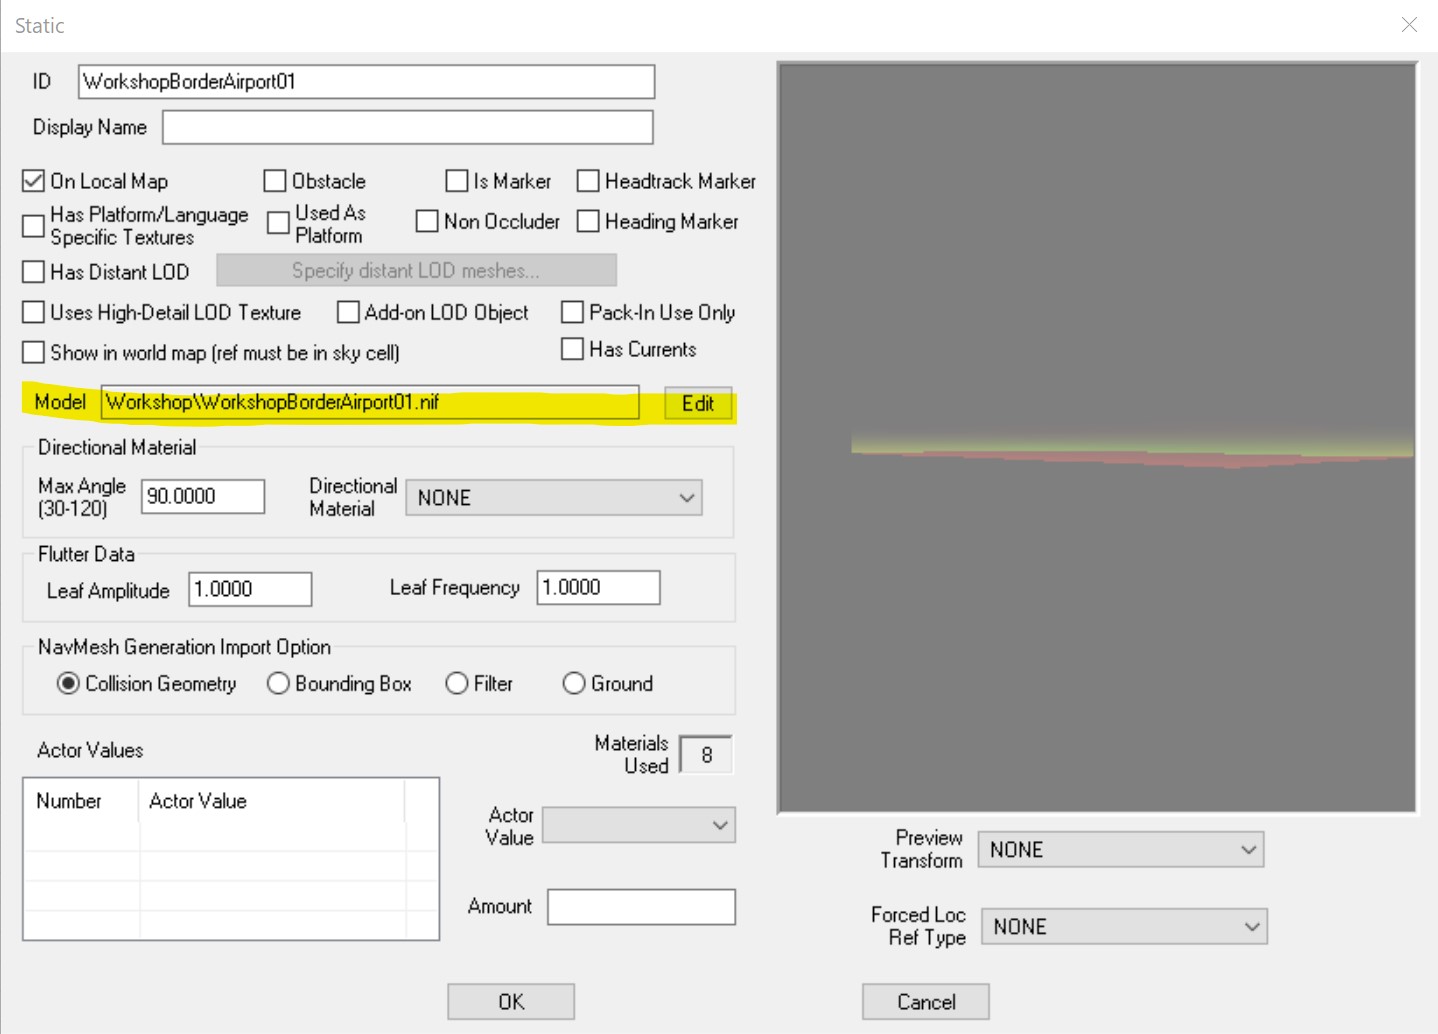
You can edit any border by selecting it.
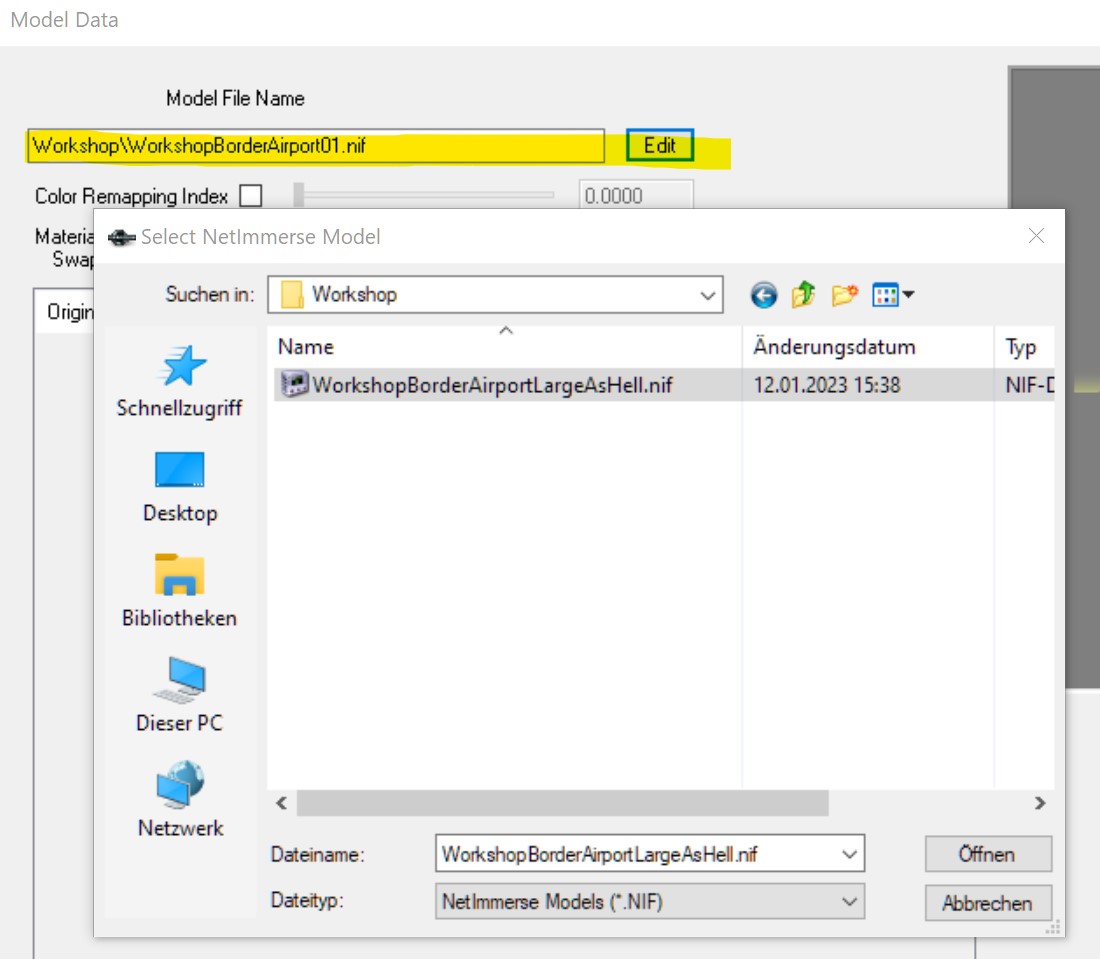
Change the model. You will be asked to change your FormID. Click yes.
This new object can be saved.
Step 21
Do you remember which prop you chose last time when creating the Static Collection.
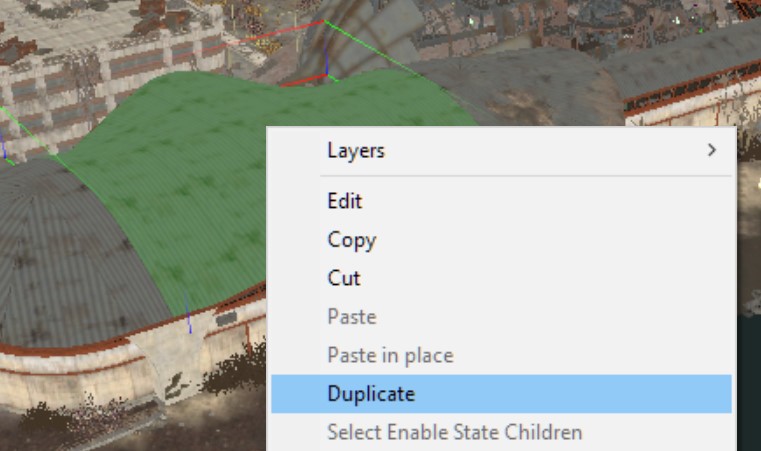
Right-click the prop and copy it.
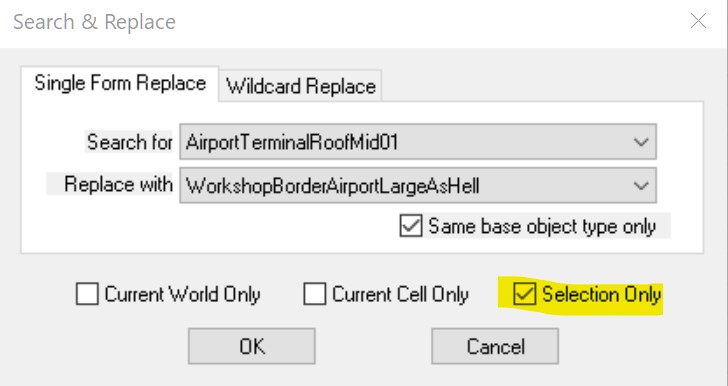
It will automatically select the Dupe that you just created. Press Ctrl+F to swap the Dupe for the new border object.
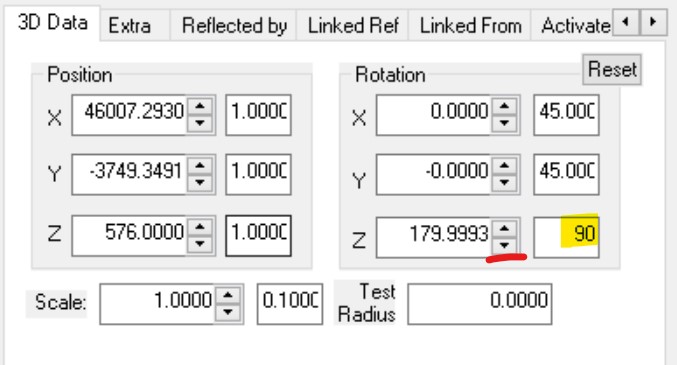
It can be rotated 90 degrees. Use the edit window to rotate it.
You can rotate the item and call it good.
Step 22
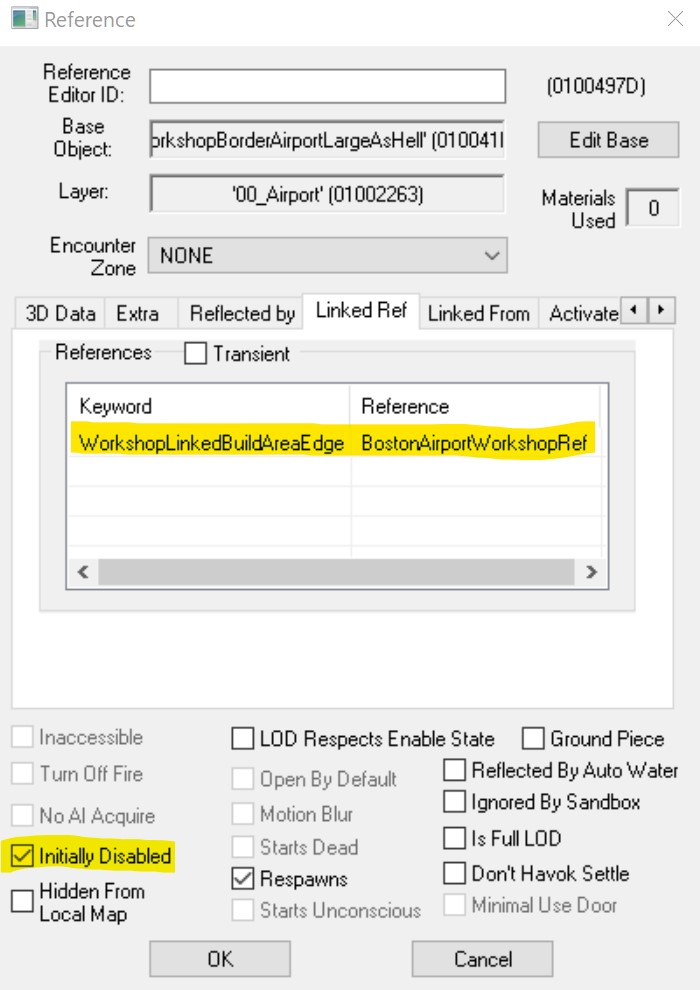
Use WorkshopLinkedBuildAreaEdge to link it to the workbench.
Make sure that “Initial Disabled” is selected.
Done.
Save the mod, launch your game, and look at your border.
That’s it. That was a great thing!
Join the modding community for help
Nexus Modding Discord. [discord.com]
server, I suppose.
They were unable to help me when I needed to figure this out.
It was a trial-and-error process so I wrote it down because there wasn’t a guide.
They used Outfit Studio to guess the model’s shape, although there was a guide.
Anyhow. This is a great idea.
Hope you enjoy the Guide about Fallout 4 – How to Create Settlement Border Meshes, if you think we should add extra information or forget something, please let us know via comment below, and we will do our best to fix or update as soon as possible!
- All Fallout 4 Posts List










Leave a Reply