Welcome
Mining is somewhat optional in Stardew due to being able to buy the stuff you need from Clint however why buy something when you can do it yourself, this guide will teach you how to mine and fight!
The Mines
Hello fellow dwarves and welcome to the mines, we’re going to be digging deep in search of ore artefacts and sick new weapons to use on the local population monsters, we are going to go through all the different themes in the Mines, the types of enemies you’ll encounter and what treasures you’ll find on the different floors, I will only be listing the enemies you can find on the level as I will discuss tactics for them later:
Brown Earth 1-30
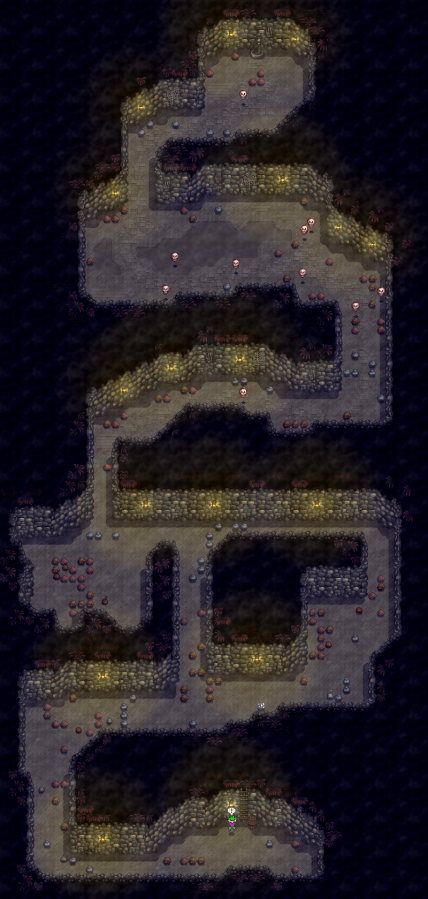
From the entrance to floor 30 we have brown earth, on floor 10 you get leather boots and floor 20 you get the Steel Smallsword, Floor 1-9 you can find Amethyst, Topaz Quartz and Earth Crystals, floor 19 is always a spiral pattern, the enemies you can find on these floors starts with Green Slime, Duggy, Bug and Rock Crab, at floor 11 and beyond you encounter Cave Flies and Grub until floor 31 where the theme and enemies change.
Shadow Earth 31-39
This theme is consistent all the way through, the only enemies you’ll have to deal with are Bat and Stone Golem, this theme is abundant in Copper Ore and Geodes are common here
Frozen Earth 40-69
At the start of this theme you unlock the slingshot, the main enemies you fight are Frost Jellies, Frost Bats and Dust Sprites at floor 51 you begin to fight Ghosts, floors 41-49 are abundant with Iron Ore, Frozen Geodes, Aquamarine, Frozen Tear and Jade, at floor 50 Diamonds being to appear 1 in 500 stones with each floor after 50 increasing the frequency by 0.00016, also at floor 50 you get the tundra boots, floor 51 to 59 Dust Sprites are abundant and floor 52 has a coal bag at the end, this will net you a lot of coal, at floor 60 you get the crystal dagger
Frozen Castle 70-79
Starting at floor 70 we get the master slingshot, the enemies here mimic frozen earth with one new addition; Frost Jelly, Frost Bat, Dust Sprite, Ghost, Skeleton, Frozen Geodes can be found here and Iron Ore is abundant
Lava Purple 80-109
Starting at level 80 we get the Firewalker Boots and a large amount of new enemies to deal with; Red Sludge, Lava Bat, Lava Crab, Shadow Brute, Shadow Shaman, Metal Head, Squid Kid, on this theme Gold Ore and Magma Geodes begin to appear and Emeralds, Fire Quartz and Rubies are common sights, at floor 90 we get Obsidian Edge, from floor 91 coal is less common from dust sprites and this continues going forward at floor 100 we get a Stardrop and floors 101- 109 are abundant in Gold Ore
Lava Crimson 110-119
At level 110 we get the space boots, the enemies remain the same as the previous floor and nothing is special about this theme
Floor 120
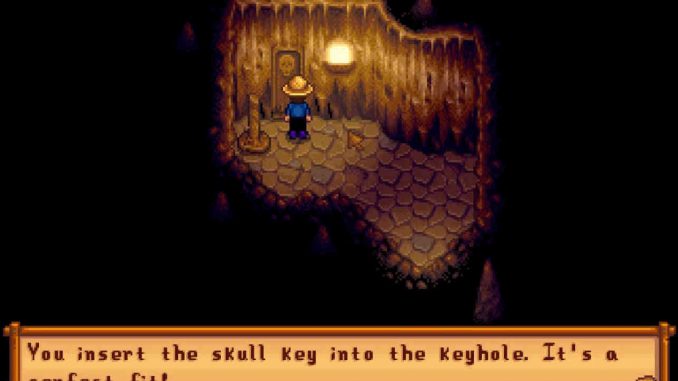
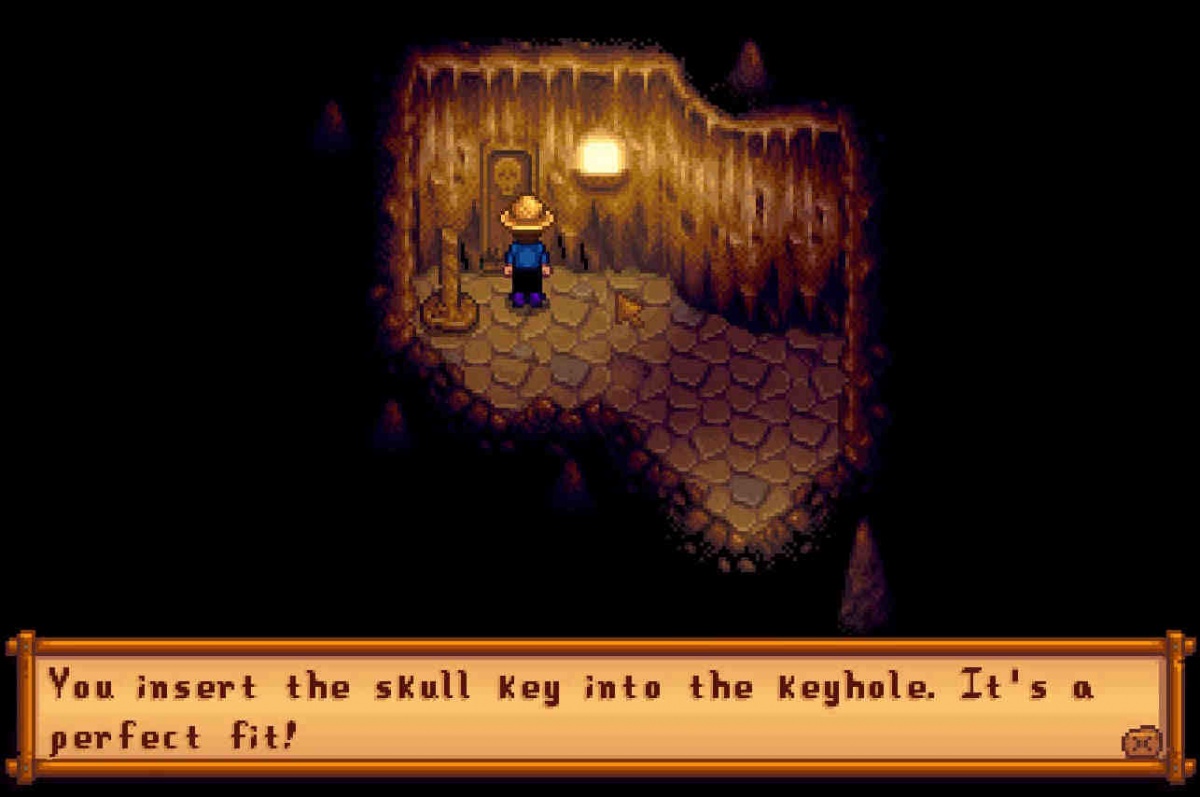
The final floor, we get the skull key and a few things change in the game code, with the skull key we can unlock the skull cavern in the desert and the Junimo Kart arcade machine in the Stardrop Saloon, and after reaching floor 120 prismatic shards and diamonds will now rarely drop from any monster, gems and purple mushrooms can now be found in trash bins, gems and purple mushrooms may now be requested in NPC quests and some monsters will be stronger.
Special Floors
You may also get special floors there are currently three, those being the Infested floor, the Mushroom floor and the Dungeon Levels there isn’t much to note for these other than them being a special occurrence, mushroom floors are great for Life Elixirs and infested floors are good for monster loot and Monster Eradication Goals Farming.
The Adventurer’s Guild
After you have slain 10 slimes and reached level 5 in the mines you should make your way to the adventures guild to begin collecting benefits from simply going through the mines as you will have to fight monsters anyway you may as well begin benefiting from it as completing the Monster Eradication Goals give you access to a few special items for free so why not?
Monsters
There are two sets of caves with 2 different types of monsters, so we’ll be going over both
Mines
- Green Slime; Green Slimes are the lesser slimes with only 24 HP and 5 Damage to their name they aren’t that formidable of a foe even in earlier levels, an effective combat strategy is to beat the slimes into a wall as hitting them will knock them back so keep hitting them until they are in a wall or corner and attack relentlessly, this is the same tactic with all slimes so I won’t be repeating this for each slime, also look out for special slimes you can identify them with the star antenna they have x3 more health and deal twice as much damage but can drop special items
- Duggy; with a base of 40 hp and base damage of 6 the Duggy is more formidable than the slime but not much more dangerous, the safest tactic against them is to stand on the edge of a dirt patch and bait them out to hit them until they are dead
- Bug; bugs have a base hp of 1 and damage of 8, they are basically of no threat to you, the best tactic is just to avoid them but if you can’t they only move in a single path so lie in wait and attack when they get close
- Rock Crab; with a base hp of 30 and damage of 5 these are one of the most annoying creatures to people first starting out in the mines, there are a few tactics for fighting them, first its key to identify them before they reveal themselves, rock crabs don’t produce shadows so if you see a rock without a shadow prepare for combat, you can also only damage them whilst they are mobile, if the rock crab “camps” a lot you can remove its shell by hitting it with a pickaxe a few times be weary that hitting it will cause it to become mobile again so be prepared, or you an use a bomb which is much more efficient
- Grub; the first ranged attacker, a base hp of 20 and attack of 4 the grub can be a nuisance in large packs of Grubs or monsters, when fighting them try to separate the group and corner them, this way they can’t flee, and try to avoid letting them cocoon when they reach critical damage as dealing with Cave Flies and Grubs can be a pain, other than that with their low hp once you have the cornered just lay into them until they die
- Cave Fly; unlucky, you let one of them hatch, no problems I find flying creatures easy to deal with as they charge and make their attack very obvious, just stand still and wait for it to come to you then hit it until its dead or flies away
- Bat; the second flying enemy bats have a base hp of 24 and attack of 6, the tactic is the same as all flying enemies, wait for them to come to you and hit them back
- Stone Golem; not a difficult enemy but the biggest tank yet with a base hp of 45 and attack of 5, they aren’t anything special though and are easy to defeat in combat
- Frost Jelly; base hp of 106 and a damage of 7 this slime might take you by surprise especially for the unprepared adventurer.
- Frost Bat; a base hp of 36 and damage of 7 the bat is now less frightening than a slime
- Dust Sprite; easy coal baby! Dust sprites are quite an easy enemy to handle with a base hp of 40 and 6 damage, similar to a slime the best tactic for them is to knock them back into a wall and just smash the left click (or whatever you rebound attack to)
- Ghost; Spooky! With a base hp of 96 and 10 damage this can be a scary enemy to encounter unprepared however they aren’t all that bad just a pain in the a*s to deal with due to their massive knockback susceptibility, best tactic is to charge at them or wait for them to float to you and keep knocking them back
- Skeleton; the skeleton army needs you, with a base hp of 140 and damage of 10 they seems quite strong but again they are simple enough to deal with, they have both a ranged and melee attack the bones are easy to dodge but if you struggle with dodging them bring some bombs to open up more room to dodge, other than that just smack them with your weapon of choice
- Red Sludge; a tough slime boy with 205 hp and 16 damage
- Lava Bat; Try Terraria! These guys have a base hp of 80 and damage of 15
- Lava Crab; a base hp of 120 and damage of 15 they are now even more pesky to deal with
- Shadow Brute; now we begin to get to the smarter and more difficult enemies, but that’s what I’m here for, shadow brutes have a base hp of 160 and damage of 18, they also resist knockback so most of our tactics are out the windows, the best tactic is to attack them as much as you can before they get close and then back up, use bombs if you have to and have escape options ready
- Shadow Shaman; where brutes are found shaman aren’t far, with a base hp of 80 and damage of 17 you’ll want to deal with these guys first as they heal monsters and apply debuffs to you that can be devastating, focus them out first and retreat if you are hit by the jinx spell, you can watch out for them casting the jinx fireball as they have a ring of leaves appear around them as they cast a spell, they do damage you if they touch you so be careful of that, when they reach critical health they will try to flee, do not let them, if it is safe to do so chase them and kill them
- Metal Head; with only 40 hp and 15 damage, they aren’t to scary, they resist knockback so just hit them 2 or 3 times and then back up
- Squid Kid; are you a kid or a squid? This weird enemy has a base hp of 1 and damage of 18, they shoot fireballs that can bounce off walls and can’t be blocked, the fireballs can be destroyed by attacking them, the tactic for the squid kid is to move in is quickly as possible to eliminate them
Skull Cave
- Armoured Bug; these guys can’t be killed and do 8 damage, just like before the tactic is to avoid them
- Big Slime; Try Minecraft! These slimes split into smaller slimes upon being killed, they can be any colour in the skull cavern although most commonly its Purple which has a base hp of 240 and damage of 15
- Purple Slime; speaking of purple slimes’ it’s smaller form has a base hp of 410 and damage of 16, a good tactic I recommend for these is to kill the big slime and use a bomb on the smaller slimes, to try and get some damage out quick then treat them like normal slimes
- Lava Bat; we’ve already talked about these guys, are you paying attention?
- Mummy; this monster will cost the un-prepared spelunker dearly, they have a base hp of 260 and damage of 30, after you kill them they will resurrect, to ensure they are dead finish them off with a bomb when they have been knocked down
- Serpent; the Skull Caves Flying enemy and one that will probably give you a fright, they move fast and are a common enemy, they have a base hp of 150 and damage of 23 so they can be a tough fight too, for these guys you are going to want to swing early as their hitbox is bigger that their sprite, other than that treat it like any other flying enemy but do so with caution
- Iridium Bat; with a base hp of 300 and damage of 30 the bat is suddenly a lot more scary, however the tactic with them doesn’t change at all
- Iridium Crab; same again but these guys hide as Iridium nodes rather than rocks now, it’s recommended to use a mega bomb for removing their shells
- Carbon Ghost; often found with Mummys these guys have a base hp of 190 and damage of 25, yet again use the same tactic for normal ghosts
- Pepper Rex; everybody do the dinosaur! With a base hp of 300 and damage of 15 this slow moving enemy can be killed with relative ease, when they pause their movement they will shoot fire in a single direction, side step them and attack, repeat until dead.
Monster Match
this guide is long and as much as I wanted to add the pictures in the last section I don’t have the character count for it so in this section I’ll match the Names to the Faces.
Slimes:
Crabs:
Bats:
Duggy:
Bug:
Grub:
Cave Fly:
Stone Golem:
Dust Sprite:
Ghost:
Skeleton:
Shadow Brute:
Shadow Shaman:
Metal Head:
Squid Kid:
Mummy:
Serpent:
Minerals and Ores
Foraged Minerals
These don’t affect your mining or combat but appear in the mine none the less, they can be foraged and sold, if you have a forager in your multiplayer or you have a high foraging skill yourself you should pick these up if you have the Gatherer profession perk as you get double harvest chance, other than that they don’t sell for a whole lot but it doesn’t cost energy to pick up so why not
- Quartz
- Earth Crystal
- Frozen Tear
- Fire Quartz
Gems
Now we’re cooking with Gas, you’ll find these in gem nodes and they are well worth picking up they sell for a good bit and some are used in crafting recipes so keep an eye out for them
- Emerald
- Aquamarine
- Ruby
- Amethyst
- Topaz
- Jade
- Diamond
- Prismatic Shard
Geode Minerals
These are extracted from Geodes, you can make a profit from almost all of them, cut even on one and make a loss on one, its worth taking these to the blacksmith and busting them open, first for the museum and second for the profit, listed by price lowest to highest;
- Limestone (Loss)
- Mudstone (Break Even)
- Baryte
- Sandstone
- Calcite
- Granite
- Nekoite
- Orpiment
- Slate
- Esperite
- Malachite
- Thunder Egg
- Marble
- Jagoite
- Petrified Slime
- Pyrite
- Soapstone
- Aerinite
- Celestine
- Opal
- Alamite
- Geminite
- Jamborite
- Jasper
- Hematite
- Basalt
- Fluorapatite
- Lunarite
- Lemon Stone
- Ghost Crystal
- Obsidian
- Ocean Stone
- Kyanite
- Fairy Stone
- Tigerseye
- Bixite
- Dolomite
- Fire Opal
- Neptunite
- Helvite
- Star Shards
Ores
The section that contains the most useful items to us all, the crafting reagents, ores, you’ll be using these for crafting rather than selling
- Coal Ore
- Copper Ore
- Iron Ore
- Gold Ore
- Iridium Ore
Are all the types of ore you can find that give you access to upgrading your tools and crafting wonderful machines
Weapons
There are 3 types of weapon in the game The Sword, The Dagger and The Club, Swords have quick attacks, low swing delay, and their secondary is a block, Daggers have a short range and they only attack he square in front of you, their secondary is a rapid spur of attacks, Clubs are slower than swords and daggers but have a wide swing, their secondary is a slam to the ground in front of them causing and AOE attack in a radius around the player that causes strong knockback.
The following list will be in order of highest damage to lowest however bare in mind you should also consider your own playstyle when choosing a weapon, one might prefer a hammer over a sword or both, don’t just pick for damage alone think of speed and the weapons other stats and properties
Sword
Rusty Sword
Wooden Blade
Steel Smallsword
Silver Saber
Pirates Sword
Forest Sword
Cutlass
Insect Head
Dark Sword
Iron Edge
Holy Blade
Neptune’s Glaive
Claymore
Bone Sword
Templar’s Blade
Steel Falchion
Tempered Broadsword
Obsidian Edge
Lava Katana
Galaxy Sword
Dagger
Carving Knife
Wind Spire
Iron Dirk
Crystal Dagger
Burglar’s Shank
Broken Trident
Wicked Kris
Galaxy Dagger
Club
Femur
Wood Club
Wood Mallet
Lead Rod
The Slammer
Galaxy Hammer
Slingshot
The ranged weapons, their damage largely depends on the ammunition you use with a base damage of 1-3 for the Slingshot and 2-6 for the Master Slingshot, these are the types of ammo you can use ranked lowest to highest damage;
Fruit, Veg and Eggs
Wood
Stone
Copper Ore
Coal
Explosive ammo
Iron Ore
Gold Ore
Iridium Ore
Preperation
When heading into the mines preparation is key, Food will allow you to hit above your level, bringing items for any situation and being adaptable whilst also leaving inventory space for new items from combat and mining is key, and knowing what you’ll be going up against and be prepared to face the monsters by knowing the strategy to beat them is integral, with this segment we will explore all of that
Food
The benefit of food really kicks in when we go mining and fighting, the food you will want to use depends on your purpose for heading into the mines, if it’s for mining you’ll want to prioritize Mining first and then Defence and then Luck, if you are heading down for monster loot you’ll want to chose either Attack or Defence as your first depending on your play style and then follow it up with luck, there are a lot of food items so I will go over the ones I find the most useful, be aware that you can only have one food buff at a time so eating a food will wipe your other buffs.
- Crab Cakes; a bit difficult to make but the Speed and Defence you get from it for its duration is pretty nice, this drops from the Crab enemies so it’s probably better to just let them drop it
- Cranberry Sauce; +2 Mining is nice for what is a relatively simple recipe, you’ll want to pop this when you find lots of stuff to mine, however you are mostly better off using something with a longer duration and includes luck
- Eggplant Parmesan; the Defence +3 on this is nice for such and easy recipe
- Fried Mushroom; +2 Attack for 7 minutes is very nice even if the recipe is a bit complicated
- Magic Rock Candy; The Food of Gods massive bonuses for 8 and a half minutes, pop this before going into the Mines and have a great expedition
- Miner’s Treat; +3 Mining is always great and +32 Magnetism, I’d probably use this in conjunction with bomb clearing a room
- Pumpkin Soup; Luck and Defence +2 not a bad passive buff and it has a good duration too
- Roots Platter; +3 Attack, great for infestation rooms with a 5 and a half minute duration it’s not too shabby
- Super Meal; +1 Speed and +40 Max Energy for a cheap crafting recipe, use this to get a bit of extra energy to plough through a couple of rooms before its low duration runs out
Items
There are a few key items that can help us in the mines, Bombs for clearing floors of Rocks when low on energy or monsters that are causing trouble, Rings which will have its own section and Potions
- Chery Bomb; the Baby Bomb, it’s explosion range is displayed below, better for use against monsters due to its explosion size but can be used to clear space or rocks or even mine if you don’t have any levels in mining yet
- Bomb; a Standard Bomb, it has and explosion radius of 5 or diameter of 11 so it’s great for clearing rooms enemies and mining granted by the time you start getting these you should have levels in mining and will want to save bombs for use on rocks to save your energy or on enemies like the Mummys in the Skull Cave
- Mega Bomb; the closest thing Stardew has to a Nuke, the Mega Bomb goes big, use this if you need to clear a big space or a large group of enemies is too much for you to handle but you know you can drop this and get out of the way of its massive 6-8 tile radius
- Life Elixir; Max Restore! If you’re dancing with the devil chug one of these and you’ll be back to full health in no time
- Oil of Garlic; if you are going on a mining expedition and don’t want to have to deal with combat waves or infested floors then use this to keep your attention focused on digging as bats and bugs will keep far away from you
- Staircase; if you need to get down a level to escape monsters and leave the mine, or this floor doesn’t have anything worth looting you can use a staircase to skip the level, they cost a fair bit but if you visit the mines a lot you’ll quickly earn it back, a great item for any miner to keep on their hotbar
Skills: Mining
Level 1
- Cherry Bomb
Baby bomb has joined the party we’ve already spoke about a lot of the items you get from levelling up in Mining and Combat so unless it’s new I won’t be talking about it, besides we’re all really here for levels 5 and 10 aren’t we?
Level 2
- Staircase
Level 3
- Miner’s Treat
Level 4
- Transmute (Fe)
Since human transmutation is strictly forbidden in Stardew we’ll stick with transmuting ores, this “crafting recipe” allows us to turn some of our copper into iron, this has its uses especially for those not well levelled or geared enough to head lower into the mines where they might find Iron
Level 5
Here we go, level 5 gives use the big choice between Miner and Geologist, lets go over our options
Miner
+1 Ore per vein is really kind of useful for the crafting side of things, I recommend Miner for someone more focused on crafting items for the farm and only really mines in Winter, it has its uses regardless though, but given this is better for crafting than money
Geologist
Speaking of Money, Chance for gems to appear in pairs, gems sell for a lot and having a 50% chance for you to get two is great, this also affect Geodes from breaking rocks which can be opened for Minerals that also sell for a lot, this is where the Miner makes his Bank
Level 6
- Bomb
Level 7
- Transmute (Au)
Level 8
- Mega Bomb
Level 9
- Crystalarium
A great way for a gem miner to make even more money, find yourself a diamond and just keep producing them to make major money, one of the best things about the Mining skill tree because it’s basically passive income
Level 10
Well here we are at the end of the tree, lets see our choices
Miner
Blacksmith
Metal Bars worth 50% more but you’re better off keeping them for crafting so this is kind of redundant, maybe worth getting if you find yourself a lot of ore
Prospector
Chance to find coal doubled, this means that when you do find coal you will find one extra piece, the text is a little misleading but if you picked miner I find this is the better option anyway as coals is always useful and getting more for less is great
Geologist
Excavator
You feeling lucky? Minerals are great and finding more is useful, you are more than likely to make a return than a loss or break even but…
Gemologist
Why do that when you can find yourself a Diamond and set up a Crystalarium farm earning 30% more from your gems for doing basically nothing, with a diamond selling for 975g this is by far one of the easiest ways to make money as a miner
Skills: Combat
Level 1
- Sturdy Ring
It’s dangerous to go alone take this! At Level 1 we get the Sturdy Ring, as with all the rings in the skill tree I won’t be talking about this one as I will be talking about it in the Rings Section
Level 2
- Life Elixir
Level 3
- Roots Platter
Level 4
- Warrior Ring
Level 5
Pick your Weapon, or Profession I guess, let go over our choices
Fighter
All attacks deal 10% more damage and you get +15 HP, not a bad choice to be honest some solid stat boosts and it’s a pretty safe bet
Scout
Critical Strike chance increased by 50%, I did a crit build once and it went pretty well, you do have to rely on RNGesus but with luck on your side this can actually work well for you, just note that crit chance is multiplicative not additive
Level 6
- Slime Egg-Press
- Oil of Garlic
I haven’t ever done Slime Farming but it looks fun so I’ll be doing it next play through.
Level 7
- Ring of Yoba
Level 8
- Slime Incubator
- Explosive Ammo
Level 9
- Iridium Band
Level 10
You’ve become quite the Veteran, time to decide what you’ll be known for
Fighter
Brute
Deal 15% more damage is nice this totals for 25% more damage in total which is a nice percentage and can be made higher with rings, not a bad choice
Defender
+25 HP is also nothing to scoff at, that can be the difference between life and death, I’m personally more partial to the damage but pick what suits your playstyle
Scout
Acrobat
Cooldowns on Special Moves cut in half, great for all the weapons, especially the hammer, keep everything away from you and separate groups easier
Desperado
Crits are deadly, again they don’t describe this well but Crits now do x3 to x21 more damage dealing roughly 42% more damage in the long run, this is the foundation of a crit build considering you maximum crit chance if you fully dedicate to the crit is only 10% which is still quite often
Rings
In this section I’m going to go through every Ring and talk about its affect and where its good to use it, if at all, given the multitude of ways some rings can be acquired I won’t be going through where to find them, with that out of the way lets being.
Small Glow Ring; emits 5 radius circle of light and stacks with other glow rings, not bad if you don’t have anything else to put there, torches are easy enough to place but in a pinch this ring can be useful
- Glow Ring; New Game + the glow ring now emits a 10 radius circle and still stacks, again its good but you can make torches and save yourself a ring slot
- Small Magnet Ring; Increases Magnetism by one tile and Stacks, same as the glow ring but this isn’t really worth it, there are better passive affects to have over tile item pick up reach
- Magnet Ring, Increases Magnetism by two tiles, once again just an upgrade of the other ring, still not worth wasting a slot on
- Slime Charmer Ring; I’m torn on this one, if you have a slime farm it’s a must and in the mines it’s great being able to ignore such a prevalent enemy but at the same time, slimes aren’t hard to deal with, its personal opinion really.
- Warrior Ring; Has a chance to give you +10 attack after slaying a monster, this seems pretty good but I can’t find the chance for this buff to apply, I imagine it’s based on luck a little so if you are going a Luck Crit build then this could be a decent choice, without knowing the chance for the buff to apply though I can’t really recommend it.
- Vampire Ring; Restore 2 health after slaying a monster, passive healing is nice but the number is very low, it’s lack of scaling really hurts it for later levels in the mines, not a great choice unless you can somehow get it really early on
- Savage Ring; 2 second +2 speed boost after killing a monster, yeah not worth it, if it was attack speed sure but it’s movement speed so nah.
- Ring of Yoba; Chance to receive Invincibility after taking damage for 5 seconds, not bad and it can be a life saver which is its intended affect seeming as it has a higher chance to trigger the lower your health is, also recommend having this on for good luck days or after a luck boosting meal.
- Sturdy Ring; Duration of negative effects cut in half, this is quite useful in lower levels like the Lava levels but in upper levels of the cave it’s not really worth it as the only debuff you’ll be facing is slimed, good choice for later in the mines.
- Burglar’s Ring; Monsters drop items more often, this is good if you are looking for specific loot like Essences or coal, the way it works is when you kill something the game rolls the monster drop table twice, not bad if you are looking for something but this is probably a swap ring.
- Iridium Band; Glow Ring + Magnet Ring + Ruby Ring, alone they aren’t all that great but when you get these affects in one ring, it’s not bad, the attack damage is really what we are after but if you are going to get the ruby ring anyway you may as well upgrade to this for the free extras.
- Amethyst Ring; 10% more knockback, not bad, good for hammer bros to keep enemies from swamping you, terrible for daggers but not bad for swords.
- Topaz Ring; Increase weapon precision by 10%, this means you are less likely to “miss” or cause no damage with an attack, not an amazing choice unless you have nothing better and are going in on a bad luck day I’d take something else.
- Aquamarine Ring; Increase critical strike chance by 10%, remembering that the math on this is multiplicative, unless you are going for a crit build you’d be better off leaving this.
- Jade Ring; Increases critical strike power by 10%, again if you aren’t doing a crit build steer clear, on crit builds though this is great until you reach level 10 since the benefit from level 10 is better anyway you are better off focusing for crit chance to be as high as possible.
- Emerald Ring; Increases weapon speed by 10%, not bad, great for all the weapons, speed and damage are king in the mines.
- Ruby Ring; speaking of damage, increase attack by 10%, other than the Iridium band this is one of the best rings along with the emerald ring, it’s a costly 10,000g to get both but the benefits are worth it
- Crabshell Ring; +5 defence, not bad defence affects how much damage you take and passively having a +5 in that is pretty good.
- Napalm Ring; when you kill and enemy they explode, its similar to a small bomb, this is most useful in the Skull Cavern as it will save you bombs fighting mummys, it’s also useful if you can train a bunch of enemies then kill one to set off a bomb, best part is it doesn’t damage you!
The Quarry
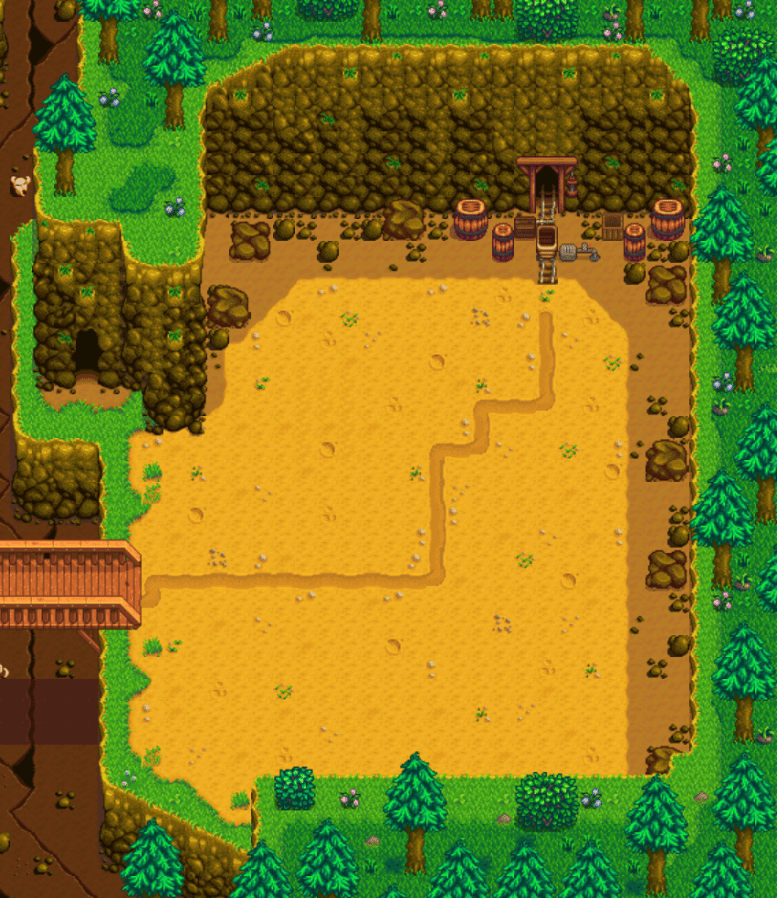
A nice easy way to get some ore and such, make sure to clear it daily so that new spawns don’t get interrupted and DO NOT use bombs here as it will destroy the ore, you can also enter the Quarry Mine from here where you can find 3 unique enemies, the Golden Scythe, the mine resets daily just like the quarry and is filled with common stone and ores with a chance for more valuable ores to appear
Skull Cavern
After reaching level 120 in the mines you get the Skull Key granting you access to the Skull Cavern which has 2147483647, but every visit you have to start from level 1 as there is no elevator, lots of rare materials can be gathered here but its dangerous and you should come fully prepared, maybe even bring the Galaxy Sword as it can’t be lost upon death, you can use shafts to go deeper which will cause damage but will never drop you lower than 1 HP which is still a risky gamble
Tips and Tricks
- The axe, scythe or pickaxe can be used to kill monsters in lieu of the sword.
- In year one for just under 250,000 you can skip all the floors by creating staircases due to robin selling stone for 20g however skipping the mines in this way skips the experience you would gain making monsters much more difficult to combat
- Ladders can be Dropped by Monsters, Rocks or spawned on load, monsters have a 15% chance to spawn a ladder assuming they die on an unobstructed tile, this doesn’t prevent ladders spawning from rocks, after the level loads there is a 95% chance that a ladder will try to spawn, a tile is chosen at random and if it is unobstructed it will be placed and prevent rocks from spawning ladders
- Some levels are preloaded with a ladder (12, 52, 92, treasure floors in skull caverns). These ladders do not prevent ladders spawning from rocks.
- Every rock hit has a base chance of 2% of spawning a ladder. This is adjusted by daily luck/5 (+/-10% / 5 = +/- 2%) and food buffs (every point of buff/100 i.e. each point of food buff adds 1%). The inverse of the number of rocks remaining after the rock is hit is added (e.g 5 rocks remaining – 1/5 = 0.2 = 20%, 100 rocks remaining = 1/100 = 0.01 = 1%). If no enemies remain then 4% is added. If this chance hits, then a ladder will spawn, and prevent further ladders spawning from rocks. If you are in the skull caverns there is a 20% chance that a shaft will spawn instead, and this does not prevent further ladders/shafts spawning from rocks
- If the player has reached at least level 2 in the Mining skill, floors can be skipped by using a Staircase (crafted from 99 Stone). A Staircase allows instant access to the next floor in the Mines. After every 5 floors, an elevator will be available, allowing access to that floor at any time.
- If the screen becomes “misty”, “glowy”, or “foggy”, several of the current level’s flying monsters will spawn and attack. Consuming Oil of Garlic will prevent these infestation fogs.
Thank You!
Thank You for reading my guide! I hope it helped you out, if you’ve read my other guides sorry if this one seemed a bit messier, there’s a lot of information involving the mines and combat and that results in a lot of text, I tried to keep the guide pretty and I hope I did a good enough job but even if it isn’t as pretty as the others I hope the information in it helps you to become a better miner/fighter, I’m pretty sure I did a better job than the Wiki on that front
Have a wonderful day and keep an eye out for my next guide which after looking at the guides section is probably going to be fishing since we have enough gift and social guides as it is.
I hope you enjoy the Guide we share about Stardew Valley – Mining and Combat Guide; if you think we forget to add or we should add more information, please let us know via commenting below! See you soon!
- All Stardew Valley Posts List




Leave a Reply