


Hello and welcome, We hope you find the following page, in which we detail the Spirit Hunters: Infinite Horde – All Characters walkthrough, informative.
A full guide on characters, skills and pets. Also tips on hitting the more difficult challenges and achievements.
Introduction
Greetings, and welcome to this guide on Spirit Hunters: Infinite Hordes. In this guide I will be laying out what I consider to be the optimal choices for ability levels, tips on using the various characters, and providing some advice on some of the harder challenges the game has to offer.
Importantly, what I will not be doing is giving you any kind of step-by-step walkthrough on how to clear the game, how to beat any particular boss, or what to upgrade on the Divinity Web. The game is far too random and requires far too much personal finesse for that to be possible, while the upgrade web is something you can easily work towards fully unlocking if you’re struggling.
Why should you listen to me?
Well, I have fully cleared the game, for what that’s worth. That’s including 100% achievements, beating every map, and beating every build challenge. But that’s not why you should listen to me. You should listen to me because of my dirty little secret:
I’m actually pretty bad at this game.
“But wait!” I hear you cry in a spray of Cheeto dust. “Doesn’t that mean I shouldn’t listen to you?”. Not at all, hypothetical nerd stereotype. You see, what I am good at is analysis, and it’s that analysis that has let me beat everything the game can throw at me with very little difficulty. It turns out that if you’re taking optimal picks this game is actually pretty easy (with the exception of a couple of the Sickle build challenges, which took me a few tries I’ll admit).
That doesn’t mean you can just do whatever I say without question and without personal ability and expect to coast through the game (as entertaining as that would be for me). You’ll still need to have some basic ability to figure out when to reroll vs when to accept what you’re offered, and you’ll still need to be able to weave your way through threats with some modicum of competence. But hopefully my advice should take the edge off the challenge for you at very least.
General Tips
Okay, let’s start with some generic tips on how to do well at the game.
- The most important one of all – use your invincibility frames. If you’re surrounded, don’t sit there trying vainly to avoid the damage that you know is inevitable – bumrush through the weakest point and break free. You’ll take some damage, but you were going to take that damage anyway, and at least this way you’ll get something from it.
- Equally, you can use the grace period to greed for chests and pets. This is something you’ll need to do a fair bit on Brutal difficulty – if you want to open a container, there’s a decent chance you’re going to get hit for it, so accept the hit, ensure you get your reward, then get away and make sure it was worth it.
- Try, where reasonably possible, to dump your level-ups into 1-2 abilities rather than spreading your points out. This isn’t always possible, depending on your gold for rerolls (or if you’re doing a building challenge), but if you can do it, it’s worthwhile because skills tend to have multiplicative damage. For instance, if you’ve invested five points into reducing Arrow cooldown already, adding base damage to it will have a substantially larger DPS impact than gaining some base damage on Cleave with zero points in it.
- To that end, there’s always going to be an ability that you don’t really expect to put any points into. You’ll still want to hit four powers so that the game stops offering you new ones, but you’ll want your fourth ability to function well with little to no point investment. I refer to these abilities as ‘Empty’ skills throughout this guide.
- You will almost always want to max Cooldown Reduction (CDR) on your abilities first. This is because CDR in this game is additive, not multiplicative, so each successive point has a greater impact on DPS. To give an example, the first point of CDR on Bone Shot takes it from a 1.2-second cooldown to a 1.0-second cooldown, meaning a 16% increase in DPS. The final point, meanwhile, takes it from 0.4s to 0.2s – a 100% increase in DPS. The only reason not to take CDR is if it’s your Empty ability, and even then you should consider it.
- If you’re struggling for gold in the mid-late stages of a run and don’t want to reroll too much, it’s often worth ensuring an ability is leveled to 25 even if the final few levels aren’t particularly impactful. Level 25 is the maximum for ability, so hitting it means you’ll stop getting offered those upgrades – making it more likely you hit the things you’re looking for.
- Try to avoid greeting too hard for a specific pet loadout. If you can get the optimal set of pets – great! If you can’t, it’s usually better to take what you can get. The reason for this is that shops tend to offer you a lot of pets if you don’t have all your pet slots filled – the ones you’re offered are frequently absolute garbage, and those are shop slots that could be full of upgrades for the pets you have. If all five pet slots are full, you’ll commonly see 2+ pet upgrades offered in shops, and that’s worth a lot more than a perfect set of pets in most instances.
- Paradoxically, do greed hard for specific ability builds? Rerolls for level-ups are fairly cheap and there are usually many good options available to you – there’s no need to settle here. I will never take a suboptimal level up unless I’m literally out of gold or unless I have to hit a specific level for a build challenge and I’m concerned about time running out.
- Pay attention to what your character does, and use their ability appropriately. None of them are ludicrously overpowered, but most can get you out of a tight spot.
- If you’re in a position where you have to get hit by something, try to make it a projectile. They hit for much less damage than most other damage sources.
- If you are (against my advice! For shame!) trying to force specific pets, try to avoid hard forcing until you hit an epic pet cage (i.e. the purple ones). They cost the same amount to reroll either way, so you may as well roll with 5 chances to hit rather than 3.
- The crit multiplier in this game is very high. Crit chance increases are usually pretty great. The sole exception is on Bone Shot, where it’s pretty inefficient overall.
Characters
This section gives some analysis and tips on characters. Just for fun, though, let’s start off with a tier list!
S tier – Belongs to Hugo only as the only stand-out broken character. All the others can honestly play more or less the same, it’s only really Hugo who’s able to laugh at them from far off in the comfort of his own immortality.
A tier – Vivian is a little unforgiving for newer players, but more XP is always good. McDiggins, meanwhile, makes A tier primarily off her starting synergy with Jinn, and would probably just about scrape B tier from her strong skill otherwise.
B tier – Conrad’s pretty tanky but obnoxiously slow, so he sits over here in the middle. On Brutal difficulty he probably deserves D tier because his tankiness stops being relevant and his speed becomes much more relevant.
C tier – Sickle sadly finds herself in C tier simply because she’s unable to heal (and also gets no health buffs from the Divinity Web, unlike other characters). Maxine, meanwhile, gets two free levels and a very restrictive ability, so she’s not great, either.
D-tier – Magnus is honestly just quite bad; his skill gets outscored fast, and his synergy does too. Shakpana has a similar issue in being outscaled, and while her skill can actually be decent at times, it has an obnoxiously long cooldown before it packs any kind of punch.
Wasn’t that fun? Now that’s out of the way, let’s talk about how this analysis will go.
Format
Name: As always, if you need this explaining, I will struggle to get across more complicated concepts to you.
Skill: The character’s active skill. This is what happens when you right-click, or hit whatever key you deviants hit.
Passive: The character’s passive effects.
Synergies: Almost all the characters share a common theme, so I’m not going through all fourteen of them individually. I’ll just give a general description and comment on it.
Playstyle: The meat of things. I’ll talk about what you should be doing with the character, any stand-out synergies, and generally talking rubbish about video games like I always do.
Magnus
“Check it out – I have a vampire-themed skill, healing synergies, healing passive, and an old-timey name… but I didn’t need to go all emo for it. Suck it, Twilight!” – Magnus
Name: Magnus
Skill: Vampire Night. Magnus becomes invulnerable for 7 seconds, dealing 30 damage on contact with enemies and gaining lifesteal. 7 uses per run with a 30 second cooldown.
Passive: Heals 10 health when levelling up. Meh.
Synergies: All Magnus’ synergies revolve around healing himself, which isn’t terrible I suppose. Early on in your playthroughs you should aim for synergies with flat healing on them (Bone Shot is a pretty good one), while later on you’ll want to choose synergies which drop Hearts since those scale with your health pool (Cleave is pretty good if you’re investing into it).
Playstyle: Magnus sits in D tier for a reason, and that reason is a horrible lack of scaling. He’s pretty good when you first start the game (and is the first character on the list for that reason), but you’ll quickly find that having a flat 30 damage on his Vampire Night form means he can’t actually kill anything on higher difficulties.
That said, his starting synergy can provide some solid healing, provided you pick a skill that drops Hearts and that you’ll pour points into early. Cleave, Jinn and Tangle Vines all have the potential for mass horde clear with the right builds, so if you’re dead set on using Magnus, pick one of those and dump your levels into it. You can then play very greedily, picking up chests you shouldn’t be allowed to collect and ignoring enemy contact in favour of healing up afterward.
The other benefit of Magnus is you can usually get away without using Hearty with him, which means you’ve got an additional free pet slot. While you’re probably still taking mostly the same pets, having the extra slot means you can pick up one of the more situational pets, like Flash or Cici, without being penalized.
If you’re playing Magnus on any difficulty above Normal, though, don’t expect much from Vampire Night. Don’t try to kill anything with it, and don’t get greedy with the lifestyle either – the healing isn’t all that much and you should be getting plenty from your starting synergy. Just get out of dodge to a position of safety so that you can heal up from Hearts.
Vivian
“Yeah, the claws look cool and all, but I honestly regret them. Just try wiping after using the bathroom and you’ll see what I mean.” – Vivian
Name: Vivian
Skill: Soul Vortex. For 12 seconds a circular AoE swirls around Vivian, dealing damage to enemies. Moving within magnet range of a soul will add it to the AoE, increasing its damage.
Passive: Increases Magnet range by 5% per level. This is damn good – remember Magnet Slime is 100% at max level, so Vivian’s getting there pretty damn fast. This frees up a pet slot for something else (like Flash to off-set her poor base movement speed).
Synergies: Whatever ability you start with will drop more souls. The synergies are all pretty interchangeable, but obviously whatever you pick needs to be what does your heavy lifting, at least for the early parts of the run. Arrow and Shock Bolt are the standouts as being decent AoE clear tools with 100% soul generation, so they’re probably the best options for pure XP gain; alternatively, for late game Brutal runs, Shuriken, Orbital Fire and Cleave are all very strong abilities for a build with great AoE potential.
Playstyle: Vivian is pretty squishy compared to other characters and doesn’t really have excellent movement speed either. Fortunately, her synergies carry her – more XP is always beneficial!
Don’t be mistaken, though – Vivian is not a late-game powerhouse. If your goal is maximizing XP gain, she will only end a run with ~10 more levels under her belt than other heroes, and those 10 levels will be the lower priority levels in the lower priority skills. What makes her powerful is how quickly she can get online compared to other characters – she can get ahead of the curve, and stay ahead of it, if you invest correctly into your starting skill.
Given her weak base stats, you’re really going to need to lean into AoE in runs with her. This is doubly so given Soul Vortex is one of the few skills in the game that doesn’t work well as a panic button – its base damage may as well not exist, so it won’t start clearing things for a few seconds, and even then only if you’re killing things. Once it’s ramped up, though, it will easily delete everything around you, giving you several seconds to simply walk around murdering everything.
On the whole, Vivian is a fairly high-risk high-reward character. You need a strong set of abilities to compensate for her poor stats and difficult-to-use skill, but provided you’re able to play the early game correctly, she should gain plenty of power to offset these issues.
Conrad
“I… am… quite…
…
…Slow.” – Conrad
Name: Conrad
Skill: Holy Shields. Conrad knocks away nearby enemies, healing 1 health per enemy hit. Recharges while standing still, and gains a small amount of charge when receiving damage.
Passive: Bonus damage mitigation. It’s hard to tell exactly how much, but it may as well not be there when you get to Brutal.
Synergies: Mostly around increased ability size, with a couple of low grade healing synergies (which should be avoided). Conrad’s synergies are all pretty low grade, in all honesty; if you’re taking him, you probably want a starting synergy skill which is both a) effective and b) doesn’t usually get size increases, giving you the best bang for your buck. That means start with Shuriken or Bone Shot.
Playstyle: Conrad is sloooooooow. Slow slow, slow. Glacial, even. Dude isn’t all that fast, really, when you get right down to it.
He is pretty damn tanky, admittedly, especially on lower difficulties. If you’re struggling with the game early on, Conrad is a good safety net – his passive damage mitigation combined with a pet boost can give you a wide margin for error. This is doubly so with his high max health – Heart healing is based on your max health, so more health means more healing.
All of this comes at a cost, however. He is, as already mentioned, not the most agile fellow. He also has the worst skill in the game – rather than giving you any real tool to escape, it simply gives a low grade knockback which really doesn’t help much when you’re surrounded. Even worse, to recharge it you have to stand still – giving the enemies time to surround you again. Ugh.
The other issue Conrad has is that his low speed leads indirectly to relatively weak late game builds. If you can’t move around easily, you can’t find shops, chests or pet cages easily either. What’s more, he relies more heavily on Magnet Slime than other heroes simply because moving to pick up stray souls takes longer. And to top it off, he also wants Flash to mitigate the issue – which still leaves him slower than a lot of heroes, and means he has very limited pet slots to use!
The key to using Conrad (aside from ‘don’t’) is to lean into his survivability on lower difficulties. Keep moving and searching, disregarding stray enemies in your way that other heroes would have to sidestep. Treat Holy Shields as a healing mechanism rather than a defensive one, recharging it when you finally stumble into a node. Prioritise Magnet Slime as your first pet wherever possible, and lean into higher damage abilities regardless of their difficulty in execution since you can get away with more mistakes.
On Brutal difficulty, meanwhile, Conrad is just plain bad. Here you have to play like any other character – his passive damage mitigation is too small to matter – but crippled. There aren’t really any great strategies for dealing with that, you’ll have to lean into your natural skill (or lack thereof).
Maxine
“This is definitely what cats look like.” – Maxine’s artist, apparently
Name: Maxine
Skill: Sable Beam. This fires either left or right, and is very similar to Final Slash in terms of aiming (i.e. pick a direction and watch everything in that direction die). It has three charges, all of which are spent on cast; each charge takes 25 seconds to rebuild, so 75 seconds for the full power.
Passive: Doesn’t really have one, to be honest. In theory she has a smaller model than other characters, but frankly this doesn’t matter much. She does also have the highest base speed and lowest base health of any character (Hugo notwithstanding), but that’s not really a passive.
Synergies: Mostly these start with a few ranks in cooldown reduction or ability numbers. Notably Ice Ring gives a unique bonus (movement speed), but Ice Ring isn’t particularly good as a skill. Mostly you ignore this and treat it as starting with 2-3 levels of CDR in your favoured clearing ability (which is pretty good, to be clear). Shuriken, Bone Shot and Tornado are all good options.
Playstyle: Maxine is pretty awkward. Her ability is pretty restrictive both in targeting and cooldown, her passive is irrelevant, and her starting synergy is functionally just a tiny level boost.
Her main saving grace is her very high base movement speed, which is useful for weaving through incoming enemies and avoiding problematic enemies. It also enables her to cover more ground quickly, which is good for hunting down pets and chests. If you’re playing Maxine, you must stay mobile at all costs – getting pinned down and surrounded is death.
To that end, you will almost certainly want a heavily upgraded Shock Bolt or Cleave in your build. No other skill is going to clear a path for you to run through reliably, nor do it quickly enough to keep up with your speed. What’s more, Sable Beam is far more effective at killing sub-bosses than saving your life, so you’re incentivized to index towards AoE due to not needing anti-boss damage as much.
For pets, resist the temptation to take Flash for more speed – you can have too much of a good thing! Instead, lean towards Magnet Slime for more reliable Soul collection without detours, and Mandrake to ensure your clearance ability actually clears.
Hugo
“My head! My precious head! What foolish dolt took this screenshot?!” – Hugo
Name: Hugo
Skill: Golden Lamp. Spawns a lamp which taunts enemies for 8 seconds and shoots them with lightning. Kills generate gold. This costs 100 gold to use, increasing by 100 each use to a maximum of 500.
Passive: When taking damage, spawns a clone to taunt enemies, becomes invulnerable, and gains movement speed. This is the single most powerful thing in the game bar none. Also has 8 damage instances instead of a max health, although you’ll barely notice this.
Synergies: Gains bonus gold, either from leveling or from kills. It isn’t completely terrible, but isn’t particularly interesting either. To maximise potential, you of course want to take an ability you’ll be relying on heavily – Bone Shot is a pretty good one – but really this isn’t why you’re taking Hugo, so don’t worry about it too much.
Playstyle: Hugo is a filthy, filthy character. He’s supposed to be all about gold, but that isn’t his identity here – his real identity is that, if played correctly, he doesn’t die. Ever.
The reason this is the case is his passive. It not only gives him a speed boost on taking damage (which would already be very strong), it also makes him immune to damage for the duration and ensures enemies are walking towards his spawned clone rather than him. It lasts an obnoxiously long time, and Hugo can keep throwing damage around while invisible.
What’s more, his health is replaced by damage instances; he’s got 8 points of ‘health’, and each time he takes damage, he loses one. A Heart restores one. This simply aggravates the problem – it means that if you’re trying to open a chest of any appreciable size (including boss chests), you don’t have to pay any attention while doing so. You can eat a point of damage and then sit there, entirely untouchable, while the chest opens – and there’s a strong probability that the chest will contain a heart to replace the damage you took.
To be clear, you can’t be entirely braindead here. While the passive is obnoxiously strong, it’s not entirely foolproof and it is technically possible to die if you decide to not bother dodging or go AFK to get a snack or something. Death is technically possible even with a fully upgraded Hearty (although, frankly even AFK it’d take a while). But if you have even a modicum of sense (and a few upgrades in things like chest open speed), you’re golden (ha).
Note that Hugo’s skill is actually pretty lackluster (ha again). Its damage is fairly low, doesn’t last long, and costs gold to boot. Furthermore, the taunt aspect of it is outclassed by his passive just like everything else in the game is. That said, you honestly don’t need ever to use Golden Lamp at all – any time you feel at all pressured, you can just take a point of damage, walk away from absolutely everything trying to kill you, and go slap a few crates for a heart or two.
Mark my words – Hugo is S tier for a reason.
Shakpana
“I am a fully rounded, realised character and not a painfully overdone racial stereotype at all.” – Shakpana, sarcastically
Name: Shakpana
Skill: Plague Bringer. Every enemy on the screen is inflicted with a poison DoT whose damage is determined by the level of charge used by the skill. Damage maxes out at 300/tick and resets to 1 when used.
Passive: According to the game, Shakpana’s passive is to ‘add or increase damage over time for all starting abilities”. In other words, her passive is ‘having a synergy bonus’. Congratulations, dear.
Synergies: It may shock you to learn that Shakpana’s synergies all add or increase damage over time for starting abilities. I know, I was surprised too. Regardless, the damage doesn’t scale at all and is so low as to be functionally redundant, so you can safely disregard this synergy in its entirety. Making her passive even more comical, now I think about it.
Playstyle: Unsurprisingly, Shakpana is not great. She’s a character whose passive is to have a starting synergy, and whose starting synergies are garbage. To cap it off, she’s also the second slowest character in the game (although amusingly, that still makes her about as fast as Conrad with two ranks of Flash).
Plague Bringer, meanwhile, isn’t completely awful as far as Skills go, but it doesn’t really do what you want it to do. Skills are at their best when they’re a panic button you can hit at the last second before taking damage, and which give you a good way to get clear. Plague Bringer, on the other hand, is pretty good at deleting a screenfull of enemies, but it takes a second or two to do it – giving a window for you to take damage – and it takes a loooooong time to recharge after use fully. On the bright side, though, it’s pretty great for killing bosses and sub-bosses… provided they’re not immune to poison, which they usually are.
I honestly have nothing nice to say about Shakpana. She’s got no redeeming features. If you must play her, play her like an entirely vanilla character and basically disregard her entire kit other than deleting a screen of enemies a couple of times per run with her skill.
Sickle
“Listen to Vivian complain about wiping her butt. How does she think I feel?” – Sickle
Name: Sickle
Skill: Death Mark. Deals 400 damage and knocks back nearby enemies, 35 second cooldown. For every 50 health Sickle is missing, damage increases by 200 and cooldown reduces by 5 seconds. Since Sickle doesn’t get Divinity Web health upgrades, this maxes out at 1400 damage on a 10 second cooldown.
Passive: ‘Increased damage’, which means that, like Shakpana, Sickle’s passive is to have a synergy. She also can’t heal by any means, so her passive is actively detrimental.
Synergies: Increased damage – either flat increases over time, or a percentage boost to damage. Obviously flat damage doesn’t scale (and the DoT abilities are pretty sucky anyway), so try to take one of the damage boosting synergies. Shuriken, Bone Shot, and to a lesser extent Cleave, are all pretty decent.
Playstyle: Make no mistake, Sickle is hard mode. Her overall kit is pretty solid – her ability, while not crazy powerful, still does what you want it to do, her synergies are uninteresting but effective, and her base stats are pretty good all things considered.
Problem is, Sickle can’t heal. At all. Ever. Any damage you take, any mistake you make, I’ll be watching you is stuck with you for the rest of the run, and you’ll just have to live with it. Or more likely, die with it.
In theory, Death Mark should compensate for this – it does power up as you take damage, after all. Unfortunately, while this is the case on Hard difficulty (and normal should be easy enough not to have to worry about it), on Brutal the damage simply doesn’t scale high enough. It functionally becomes a knockback and not a very reliable one, either.
All that being said, Sickle is supposed to be hard. She’s a skill test, and she works well for that. Play her vanilla, use her skill to get out of sticky situations, and use her unforgiving nature as a stimulus to get better at the game. You can do it! I believe in you!*
*This statement is not legally binding.
McDiggins
“Note to self – think up a gag here that isn’t just a predictable Minecraft reference” – Author
Name: McDiggins
Skill: Crystal Crasher. McDiggins becomes invulnerable for 4 seconds. During that time she gains movement speed, deals damage, knocks back, and has a 30% chance to drop a crystal. Solid, all around.
Passive: Transforms crystal nodes into ember core nodes on the map. As you might expect, this is entirely worthless once you’ve maxed the Divinity Web. Until that point, though, it’s actually surprisingly good – ember cores are useful, and they convert into the purple currency at a reasonable rate. Irrelevant for combat, though.
Synergies: Most of her synergies cause various abilities to drop runes, crystals or chests. These are all pretty much worthless other than for farming (and honestly, even for farming you’re better off just playing and progressing naturally rather than stressing about the grind). However, one synergy stands out above all others – Jinn. With this starting ability, kills with the Jinn have a 1% chance to drop a pet cage. This is amazing.
Playstyle: It’s unclear whether McDiggins was supposed to be one of the strongest characters in the game, or whether this was a happy accident on the developers’ part. Either way, she is, for two main reasons.
The first is her skill, Crystal Crasher. Disregard the damage, disregard the knockback, disregard the crystal generation – none of these are what counts here. What counts is that the skill is invulnerability and a speed boost for as long as you need it and no longer. Thanks to the short duration, it has a correspondingly short cooldown – which is why it’s one of the best in the game. Most characters have to wait a lot longer for their get-out-of-jail card to refresh, so use it liberally whenever you feel like you’ve run into trouble.
The other powerhouse of McDiggins kit is the Jinn starting synergy. As I mention in my Pets section, pets are transformatively powerful – they give far more power than a level up or two will ever give, and indeed, they can multiply your abilities’ power as well. Getting them early is great, getting them often is better. The one downside to all this is you’re going to have to start with, and lean into, Jinn – not an awful skill, but definitely not one of the best – but this is a small price to pay. If you’re feeling at all bad about it, grab an early Cici and use your free pet cages to hit 100% XP increase by 5 minutes in – that’ll really take the sting out of dropping points on a mediocre ability.
Obviously, aside from her power build, she is also the best farming character around. The starting synergy bonuses are all pretty meh for farming resources – not terrible, but not particularly impressive – but her passive is pretty fantastic for it. I have little to say about this since resource gain is something that should happen naturally anyway (and I don’t believe I had to grind, or otherwise run a level just to farm, even once in my 46 hours of play), but if you’re the sort of person who struggles, or who wants to power-game things, go for your life.
Abilities
The core of the game, abilities deserve a fair amount of analysis. I was tempted to put together a tier list here as well, but in all honesty most of the abilities are situational or cover a specific gap, so it would be a fruitless exercise since most of them would wind up in the ‘sometimes’ tier (with Poison Cloud and Grand Hex sitting on their own in the ‘lol, garbage’ tier).
One important point about this analysis though – any ability can work. None of them are completely useless, they all have their upsides. You can clear every map on Brutal running Poison Cloud, Ice Ring, Grand Hex and Jinn, with suboptimal builds for all four – it’s just much harder than picking the good stuff. So please, no comments saying things like ‘this is totally stupid, I beat the game using Grand Hex all the time and did fine so clearly the author is stupid and wrong’.
I say this knowing full well I’ll get those comments anyway. I want my rebuttal already written so I don’t have to keep typing it.
Anyway. As a general rule, you will need a few different things to make a good build. Firstly, you’ll need AoE clear – every map gets sufficiently swarmy at various points to make AoE essential, doubly so on Brutal. Secondly, you’ll need a way to kill high-health targets – I refer to these as boss-killers, but they apply equally to all kinds of high health enemies. And thirdly, you’ll want an ability which you don’t put points into until the very end of the run, if at all. I call these ’empty’ skills – and since you know you’ll be wanting one, you can pick a fourth ability which works well without skill point investment.
While these things are essential for a good build, there’s a couple of other things which aren’t essential but are very nice to have. The first is what I call a Corridor ability. This is a specific type of AoE which kills multiple enemies but does so in a defined area which gives you room to move. The second is a control ability – something to restrict enemies’ movement so that you can more easily avoid them.
Once you know what slot you want an ability to fill, you’ll know what kind of build to use – it’s entirely possible to build abilities to fit different roles depending on what you need them to do. For example, Shuriken with Star Shot is an AoE clear tool, while without it it’s a boss-killer/corridor ability. Spears without Spear Cage is an AoE, and Spears with Spear Cage is garbage. That kind of thing.
Now then. On with the key!
Name: The second largest city in Lebanon. Alternatively, the name of the ability.
Main purpose: This is where the ability slots into your build – AoE, corridor, etc. If there are multiple good options, I’ll mark this with /.
Commentary: This is where I give my general overview of the ability, its uses, and provide witty and insightful commentary which is why you all came here to read this. Don’t say it’s not. Leave me with my dreams.
Empty: Whether the ability is a good choice as an Empty ability or not.
Early: Commentary on the ability during the early stages of your gameplay, when you’re lacking a lot of the mods and upgrades in the Divinity Web.
Upgrades: The 3/4 upgrades available for the ability, with commentary. I mark number of upgrades with /X, with X being the max.
Mods: Unsurprisingly, the two mods available, again with commentary. Same marks for maximum.
Recommended builds A full level 25 build for the ability, with explanations. In some cases, more than one, if there are a few different ways to play it. Note that the upgrades listed are not listed in the order you should take them, because you really don’t have that much control over your upgrades unless you’re obnoxiously wealthy.
Orbital Fire
Name: Orbital Fire
Main purpose: AoE / Boss-killer
Commentary: Early on, one of the weakest abilities in the game – and I mean that both early game, and early into a run. With substantial points investment, though, becomes an all-purpose horde-destroyer. Essentially, this is what you’d get if Kayle – [fandom.com] was an ability.
Empty: Definitely not. One of the worst Empty abilities in the game.
Early: Early on, this is a really bad ability. It’s awkward, has low damage output, and doesn’t really have much of a payoff. Not only do the mods entirely make this ability into what it is, but a huge amount of its damage output is locked behind Brutal upgrades. Until you’re pushing into Brutal content, avoid this one.
Upgrades:
Orbital Radius (/10): If you’re insistent on using Orbital Fire early on into your game time, you’ll want a couple of points in this just so you’re not stuck trying to hug your enemies to death. Even then, though, you should limit yourself to just a couple of points – any more than that and the ability starts getting really awkward to use since enemies will constantly be getting inside your threat radius. Once you’ve got the mods for it – and therefore better options – avoid this upgrade entirely. Note that although not stated, this upgrade does also increase the size of the flame. The flame’s speed also increases to keep the time required for a full rotation consistent.
Rotation Speed (/10): Similarly, if you’re early into your playthrough, you’ll want this upgrade. It’s pretty much essential for actually killing things with the fire; more speed equals more coverage, and most of the damage is coming from a DoT anyway. Max it out if you’re taking it; once you’ve got access to the mods, though, skip this upgrade completely.
Damage Over Time (/20): Obviously, a damage boost. This upgrade gets a lot stronger with the Brutal upgrades, but even without those, you’ll want to focus on this if you’ve got access to the mods. The damage increase isn’t even all that significant – it’s just the only one that actually does anything with the mods equipped.
Mods:
Flame Dragon (/5): Available from level 10. This mod makes your Orbital Fire spit fireballs outwards periodically, with additional levels reducing the cooldown on the fireballs. Once you’ve maxed it out – and you should definitely max it out – it’ll spew a continuous wave of death. Note that the damage of the fireballs is affected by the Damage Over Time upgrades, since it does apply the DoT. Even with this upgrade, however, you’ll still need coverage, so you’ll still want to consider Rotation Speed upgrades until you have…
Multi Flame (/2): Available from level 22. As you’d guess from the name, this adds additional flames around you. These flames are affected by all your previous upgrades, although most of them become completely pointless once you’re able to work towards this – with two points, you’re sitting at three flames, which is more or less complete coverage. You definitely, definitely want this too. Remember that this upgrade exists (like you’d forget), because unlocking at level 22 makes it very easy to accidentally lock yourself out of it by putting too many points into other upgrades.
Recommended builds:
There’s really only one viable build for Orbital Fire when you’re reaching Brutal difficulty:
Orbital Fire
Damage Over Time +17
Flame Dragon +5
Multi Flame +2
This ability is something of a late-game scaler; it’s awful until level 10, still fairly weak until level 22, then suddenly it becomes crazy powerful. Not only does it give you AoE coverage up close at this point, but it continually blasts fireballs in every direction, and the damage over time combined with impact damage is sufficient for it to kill even boss-level enemies fairly quickly. Needless to say, however, only take this if you’re comfortable carrying a useless ability for a while.
Cleave
Name: Cleave
Main purpose: Boss-killer / Corridor / AoE
Commentary: Slightly awkward to use early on, but can quickly become the best Corridor ability in the game thanks to Final Slash being busted. Can be awkward to take as a first ability, though, since those first ~10 levels or so are kinda rough.
Empty: Not really suitable, as it doesn’t provide any utility at all. Still not the worst option since it does at least have decent base damage.
Early: Early on, Cleave is a pretty bad ability. It has pretty decent DPS, but you have to be very close and facing your enemy to make use of it, wheras abilities like Arrow are much more user-friendly at a point in the game where Arrow hasn’t been outscaled yet. If you really want to use Cleave at this stage, max crit, then split points between attacks and damage, with optional points in AoE size.
Upgrades:
Critical Strike Chance (/5): A solid amount of added crit, you should max this out regardless of your build intentions for this ability. With the full five points and Mandrake you’re sitting at a comfortably high crit rate, which in turn makes Final Slash a reliable Corridor ability. Even if you aim for a slash-centric build, you’ll want this upgrade as a damage multiplier.
Attack Size (/10): Substantially less useful, the added attack area does help, but given the restrictive targeting, it’s not really helping as much as you’d hope. That said, it’s still pretty much your only relevant option when setting up a Final Slash build, since the other two options are either irrelevant or actively detrimental. For a slash build, take as many points as you need to feel comfortable and no more than that.
Number Of Slashes (/15): This is what I mean when I say actively detrimental. For some reason, adding extra slashes doesn’t change the slash speed, so putting points into this upgrade generally makes the ability worse since it delays your Final Slash. This is really, really bad. For a slash build, meanwhile, this is typically a slightly better option than Attack Damage since it increases your uptime and the base damage is already pretty high with the crit upgrades.
Attack Damage (/15): As you might expect, increases the damage of your slashes. As you might have feared, it does not increase Final Slash damage, meaning this upgrade is basically pointless. Even in a slash build, you’re better off leaning towards the uptime provided by slash numbers instead of this. The only time you’ll ever put points here is if you haven’t unlocked mods yet.
Mods:
Final Slash (/5): Available from level 10. This is the most overpowered ability in the game. It’s not the most powerful one – that probably sits with Shuriken – but it is the one that definitely shouldn’t be this powerful. For five points, you’re getting an attack with an obnoxiously long range, generous width, and which almost always crits for 1500 damage. Remember – this is on an ability which is supposed to be melee.
Needless to say, this is what you should build around in most cases. You’ll probably still want secondary boss damage if you’re on Brutal – those guys get pretty spongey – but it’ll clear a corridor every time with no concerns.
Echo Strike (/3, then /3): Available from level 10. Also somewhat absurd. Once you’ve unlocked this, you’re followed by a ghostly version of yourself that mimics your movements with a few seconds of delay and copies your Cleave attacks, including Final Strike. Fully upgraded it deals 70% of the original damage and then (confusingly) unlocks again – allowing you a second copy. Echo Strike is a force multiplier, so the more points you put into Cleave, the better it is; given Cleave is pretty useless until Final Slash maxed, you’re probably going all-in on it. Once you’ve maxed out both, though, the good times roll.
Between the two of these mods, you’re taking an ability which is supposed to be high-risk and high-reward and changing it into an ability which not only full AoE clears a corridor, but which also routinely kills sub-bosses before they even make it onto the screen while you’re facing the wrong direction. The fact that that sounds like hyperbole – but isn’t – is what lets you know this ability is overtuned.
Recommended builds:
There’s really only one viable Brutal-difficulty Cleave build, which is to lean into Final Slash. Your early levels are getting the crit out of the way and then grabbing ability size simply as the least bad of the three remaining options. You then max out Final Slash and Echo Strike, and any remaining points can be thrown into ability size again if you really insist on maxing it out (although honestly one of your other abilities would be a better use of the levels at that point). That leaves you with something that looks like this:
Cleave
Critical Chance +5
Ability Size +8*
Final Slash +5
Echo Strike +3
Echo Strike +3
*As noted, four points here early to reach level 10 for Final Slash, then ignore until everything else is done.
If you really, really insist on playing without Final Slash, you’ll still want Echo Strike to mimic your slashes, and you’ll want to prioritise extra slashes over damage for the uptime and coverage via your clones. You don’t need any points in ability size, but you may grab a few points anyway just for ease of use. You’ll probably wind up looking something like this:
Cleave
Critical Chance +5
Ability Size +3
Combo +10
Echo Strike +3
Echo Strike +3
Holy Arrow
Name: Holy Arrow, but most people call it Arrow.
Main purpose: AoE / Corridor
Commentary: A really good early game ability, unfortunately Arrow falls off a cliff as you progress towards Brutal difficulty. It can still work there – anything can – but enemy health scales much faster than Arrow damage and you’ll definitely feel it. It’s still worth it for some people due to sheer ease of use.
Empty: A slightly better choice than Cleave thanks to the long-range knockback, but still isn’t great as an Empty ability.
Early: This is one of the best early game abilities around – it has high base damage, good range, AoE, and a knockback to keep you safe. You’ll probably wind up using it more for the consistent damage output on bosses than as a real Corridor ability, relying on other abilities for AoE, so lean into crit and damage – you can grab points in ability size if you want it to corridor for you properly.
Upgrades:
Ability Cooldown (/5): As with basically all abilities, regardless of your build you’re going to want to max this out. You might think that Poison Arrow builds wouldn’t care about it so much – re-applying the DoT doesn’t make it tick any faster, but in practice, you still want the CDR to allow you to infect as many enemies as possible.
Critical Strike Chance (/5): This, on the other hand, is an upgrade you may or may not want. If you’re relying on the direct damage of your Arrow – i.e. if you’re not trying to rely on Poison Arrow – you’ll want this as the most bang for your buck as far as damage boosts go. On the other hand, if you’re trying to poison everything, this is pretty pointless since it doesn’t affect your poison DoT.
Ability Damage (/20): Much like with crit chance, this is only of value to you if you’re not running Poison Arrow. That being said, Poison Arrow isn’t great, so in practice you’re probably going to be using this to dump the remainder of your levels once you’ve picked up CDR and crit.
Ability Size (/8): The Yin to damage/crit’s Yang. You’ll want to max out Ability Size for any kind of Poison Arrow build, to ensure you’ll poison as many enemies as possible. There is an argument for putting points here even without Poison – boosting Arrow’s ability to act as a Corridor ability – but in my view this is a waste of points. All you’ll really be doing is dumping 8 levels into an upgrade that does the same job that Final Strike does in five, but doing it much worse. If you really want a Corridor ability that badly, take Cleave.
Mods:
Multishot (/4): Available from level 10. This is a real mixed bag of a mod. On the one hand, splitting your Arrow into additional shots obviously gives you way more coverage and makes it much easier to hit enemies. On the other, though, for some reason damage is split between each projectile, meaning each individual arrow stream is much weaker than before. This is also true of the projectile size.
Chances are, though, you’ll always want to run this. You definitely want it for any Poison Arrow builds, since applying poison to more targets is ideal for you. For direct damage builds, you have to choose your path – Multishot makes Arrow much better as an AoE tool, but severely weakens it for single target damage and Corridor effectiveness. That being said, Arrow isn’t a particularly great single target ability at the best of times, nor is it a great Corridor ability – it’s more of a mixed bag, effective at doing lots of things at once, but none of them especially well. Odds are, therefore, you’ll find yourself wanting Multishot in just about every build simply because at least then it does one thing effectively.
Note that the first and third points in Multishot are pretty much direct downgrades because you lose the straight-forward shot direction. At these points you’re just disadvantaging yourself. Try to get the odd-numbered points ASAP so you don’t spend too much time like this.
Poison Arrow (/5): Available from level 12. Taken from a purely objective standpoint, Poison Arrow kinda sucks. You can apply it easily, at least, so there’s that – but the damage is extremely lacklustre for a five point upgrade, and it doesn’t scale at all (other than with Whoodoo I suppose). The bright side is that it’s at least not reduced by Multishot, but frankly, that doesn’t mean all that much when the damage is this low already.
If you’re going to run Poison Arrow, you need to be running it in a dedicated build – it’s definitely not an upgrade you splash into on a whim. Pick either direct damage or poison and tailor your Arrow towards it.
One other note on Poison Arrow – like Poison Cloud, it has a slow attachment. However, the slow is not tied to the poison but is applied separately – so the slow can wear off while the poison is still ticking.
Recommended builds:
Assuming you’re not looking to run Poison Arrow, you’re probably looking for your Arrow to function as a straightforward AoE tool. If that’s the case, you’ll want a build that looks more or less like this – but bear in mind its damage does tend to drop off on Brutal difficulty.
Holy Arrow
Ability Cooldown +5
Critical Strike Chance +5
Multishot +4
Ability Damage +10
If on the other hand you’re insistent about using Poison Arrow, you’ll want to spread it as effectively as possible. In that case, you’ll want something more like this. Note you’ll almost certainly want to pick up five points in Whoodoo if you’re trying to run this build.
Holy Arrow
Ability Cooldown +5
Ability Size +8
Multishot +4
Poison Arrow +5
Critical Strike Chance +2*
*These two points are just to reach 25 – they don’t really add much, and so are very low priority.
One more build for you, specifically for those of you who like to play around with weird builds. Since Poison Arrow does apply slow, it’s actually possible to use Arrow as a control tool, since you can apply it to lots of enemies at once; if you do this, you don’t need to invest as many points into it. It’s still VERY points-intensive for just an AoE slow, though, so don’t read this as a good build – it’s just interesting that it can be done.
Holy Arrow
Ability Cooldown +5
Ability Size +2
Multishot +4
Poison Arrow +1
Spears
Name: Spears
Main purpose: AoE
Commentary: Spears is a really nice, easy-to-use ability with good damage. This makes it a real shame that it doesn’t really do anything you need an ability to do. It doesn’t actually AoE properly, so it’s not really suitable for that role; it doesn’t control; and it’s terrible at killing bosses. Having said that, it does supplement other AoE abilities nicely by killing off the bulkier enemies that your AoE otherwise needs multiple hits to remove, so it works fairly well as a second or third ability.
Empty: This is actually a pretty good Empty ability. Sure, it won’t do all that much, but Empty abilities never do; however, it requires no input from you, and the base damage is high enough to kill stuff without investment. Good enough.
Early: Spears is really good early on because its mods aren’t worth using, so all you’re missing is Divinity Web upgrades. Its main problem is the same one you’ll have with it all game – it doesn’t really kill anything relevant, just kills indiscriminately. Still, that’s all you need early on, so this is a pretty solid ability to use.
Upgrades:
Ability Size (/5): Definitely not. Spears are too infrequent and too random for increased size to have any substantial impact, and honestly even fully upgraded the horde needs to be pretty tightly packed for a spear to hit multiple targets. Given there’s a readily available alternative, disregard this completely.
Ability Damage (/15): A little better, but not by much. Spear base damage is pretty good – it’ll generally kill most things it targets – and the enemies Spears won’t kill aren’t going to fall over from a few points into this upgrade. The only reason you’d pump points into damage is to try to kill bosses – but even with max CDR, the spears just won’t have the DPS to do that effectively, nor can you really force them to target the boss even if they did.
Ability Cooldown (/7): As always, a must-take. CDR is just too good to pass up. Always max.
Number of Spears (/25): This right here is where you want to sink your levels. Aside from CDR, there’s nothing else worth getting in the entire Spears tree; adding more spears, meanwhile, improves the one thing Spears is good at – guaranteed hits (usually kills) on some random enemies. This is doubly true when you finish the brutal upgrades, because then you’re getting two bonus spears with every level. Note that for some reason the max on this upgrade is 25 despite 24 being the most you could ever actually get.
Mods:
Spear Cage (/1): Available from level 13. This is terrible, a mod which actually downgrades your ability. It takes Spears from being randomly targeted but always hitting something, to being force-targeted in an area that isn’t actually all that useful, and usually missing. Do not ever take this unless a build challenge forces you to.
Frost Spear (/3): Available from level 19. Freeze Chance. A bit better than Spear Cage because it can at least do something useful. Still isn’t really worth the points though. Spears usually kill what they hit and punch enough holes in the horde (assuming plentiful spear number upgrades) for you to weave through – adding a tiny, short-lived slow zone doesn’t really change anything. What’s more, the main function of control is reliability – there’s a lot less benefit in having a control ability if you can’t plan for it. Avoid in favour of even more spears.
Recommended builds:
There’s really only one build here. It is both simple and obvious. Fill the screen with spears and you’ll find that even pseudo-AoE can become real AoE if you have enough of it.
Spears
Cooldown Reduction +7
Number of Spears +17
Ice Ring
Name: Ice Ring
Main purpose: Control / AoE
Commentary: Initially a really good AoE and control tool, Ice Ring suffers from the unfortunate fact that Shock Bolt does everything it does but better. It still works, it’s still AoE and CC, but outside of build challenges there’s not really any reason to use this when Shock Bolt is a thing.
Empty: Pretty decent as an Empty ability for controlling enemies. As with everything else, though, it’s outperformed by Shock Bolt.
Early: Probably your best unconditional AoE for the early game, Ice Ring can kill most of the trash enemies on normal difficulty with just a couple of points in freeze duration. With ability size also maxed, it can handle pretty much all your AoE on its own with fairly minimal points investment. As you start progressing to harder maps and difficulties, though, you’ll find it falls off a cliff – but fortunately by that time you should have Shock Bolt.
Upgrades:
Freeze Duration (/2): This is absolutely a must-take. For two points you double your freeze duration, which not only makes this a far more effective control tool, but also substantially increases the damage (such as it is) since Ice Ring is technically a DoT. Always take this if you’re running Ice Ring.
Damage Per Tick (/12): Much less exciting, Ice Ring’s damage starts off awful and doesn’t get much better no matter what you do to it. You’ll probably wind up throwing a few levels here towards the end of a run, if only to get the game to stop offering you Ice Ring upgrades, but you won’t feel good about it.
Ability Size (/10): You’ll also want to max this one. Ice Ring has a fixed and fairly slow, proc rate, and even with maxed freeze duration most enemies can get to you in between the casts. Maxed ability size will cover a substantial portion of the screen, giving you much more control over the enemy and drastically reducing the chances of an enemy getting to you without being frozen first.
Mods:
Frozen Death (/3): Available from level 15. This, on the other hand, is pretty terrible. It allows enemies killed while frozen to trigger an additional freeze AoE; the problems are manifold. Firstly, an enemy dying while frozen means, more or less by definition, that you don’t need to freeze it anymore; secondly, while it is technically an AoE, the AoE size is so pitiful that you could have fooled me into thinking it was somehow single target. To really rub salt into the gangrenous wound, it’s not even guaranteed – merely a low chance to proc maxing out at 30% with three points invested. Ignore this – even damage boosts are more useful.
Ice Storm (/4): Available from level 10. Ice Storm, meanwhile, is… hard to define. It doesn’t seem to offer any additional utility, instead providing randomly targeted low-grade damage on a very short cooldown – but franky, it’s really hard to tell what it is doing in amongst all the other things on the screen. For all I know, it has a slow built into it that I’m just not seeing. Either way, it’s fairly low investment at four points max, and if you’re putting those four points into Ice Ring it’ll wind up going into damage in one way or another, so you may as well pick it up. It’ll clear out a little bit of trash, if nothing else.
Recommended builds:
Again, only one recommended build – there really isn’t the scope for anything else with the limited upgrade selection and substandard mods. Bear in mind that while this is about the best you can do, to really get the best of things you should take Shock Bolt instead of Ice Ring.
Ice Ring
Freeze Duration +2
Ability Size +10
Ice Storm +4
Damage Per Tick +8*
*Low priority, it barely does anything and should only be taken if you’re dumping levels towards the end of a run.
Tangle Vines
Name: Tangle Vines
Main purpose: Corridor / Boss-Killer / AoE
Commentary: A deceptively strong ability that gives you a nice corridor to play with and can also contribute both AoE and Boss damage. Due to the long cooldown and awkward levelling pattern, however, it’s only really suitable as a second or third ability – it should never be your primary clear.
Empty: Not great as an Empty ability since at base it’s very small. Better than stuff like Cleave, but I’d still recommend going for something more controlly.
Early: Before getting mods for it, Tangle Vines serves a very different purpose to what you’ll use it for afterward. During this early stages it’s pretty much the definition of a Corridor ability – when it goes off, it lays down a pathway of death you can stand in or walk over freely without any fear of attack because basically, everything dies to it on contact. To that end, it’s a pretty great ability in the early game provided you’re willing to sink points into making the corridor big enough actually to do something with.
Upgrades:
Damage Per Tick (/20): You’d be forgiven for thinking that damage upgrades for Tangle Vines are pointless – after all, it already has surprisingly high base damage, and it’s supposed to be a Corridor ability, right? Turns out no – this upgrade also boosts Bomb Pod and Spitter damage, making it a must-take. This is doubly true given the other two upgrades arguably make the mods worse. Always dump your first 8 points here; after that, it’s up to your personal preference whether you put another handful of points into it or dump into Bomb Pods instead. Either way, it’s filler while you get to Spitter.
Number Of Vines (/3): Really great in the early game because it extends your corridor a long way for minimal points investment – for three points you get a double-length path which can easily stretch off the screen with a few size upgrades. Once you’re running with mods, though, you’ll want to skip this so as to focus your power.
Ability Size (/10): Much as with the vine number upgrade, great early in your playthrough, bad later on. It’s less useful than vine numbers, though, being less efficient per-point and being as much about widening the path as lengthening it. Also note that the more vines you have, the more effective this upgrade is, since you’re increasing the size of more vines.
Mods:
Bomb Pods (/10): Available from level 9. The first available mod, and a fairly strong one, Bomb Pods is how you turn Tangle Vines from a corridor ability into an honest-to-goodness AoE. Unfortunately, the pea-shrapnel it sprays doesn’t pass through enemies, making it a lot more limited than it could be for clearing big hordes; still, it’s pretty decent for what it is, despite needing heavy points investment.
Note that it’s entirely possible that the initial explosion of the bomb pods could deal damage to things – hell, you’d think it would with a name like ‘Bomb Pods’ – but I haven’t been able to confirm this yet. Unfortunately almost every enemy falls over the moment it touches the vines, and the few that don’t inevitably eat so many shrapnel hits at the same time as the explosion that it’s hard to discern. It’s kind of irrelevant, though, just a point of interest.
Spitter (/10): Available from level 13. The real power of Tangle Vines, Spitters are lethal. Their damage is deceptive, since the actual damage number doesn’t look all that big; what you have to realise, though, is that they fire a lot of projectiles very quickly, and those projectiles have a solid range and pass through enemies. Sure, they’re randomly targeted, but that’s why you can have ten of the buggers. As soon as you have this mod unlocked, it should dominate any Tangle Vines build you aim for.
Also of note is that this is a blatant, and not particularly interesting, reference to Plants vs. Zombies.
Recommended builds:
Once again, only really one suitable build for Brutal difficulty, although one with two variations. You can either put your spare points into Bomb Pods for some light AoE, or simply dump more points into damage to make your Spitters hit even harder. It mostly comes down to what you’re missing and whether you enjoy the unnecessarily loud explosion SFX.
Note that the reason for avoiding points in vine numbers and ability size is twofold. Firstly, if you’re running Spitter (or Bomb Pods for that matter), you really don’t need the Tangle Vines themselves to do anything, so they’re a waste of points that could go into more damage. Secondly, and more importantly, though – the bigger the area of the vines, the more spread out your spawned Pods and Spitters will be. They tend to function a lot better at clearing out relevant chunks of enemies when grouped up – spread out spawns tend to take out small groups of enemies, leaving a mess for you to navigate.
Tangle Vines
*Damage Per Tick +8
*Bomb Pods +6
Spitter +10
*Optionally, the six points in Bomb Pods can be moved to Damage Per Tick instead. The inverse is not true, since you need those eight points to unlock Bomb Pods in the first place.
Tornado
Name: Tornado
Main purpose: Corridor / AoE
Commentary: Fantastic corridor ability which can morph into a solid AoE tool if you prefer. The main downside, beyond needing a fair-sized points investment to get it working as an AoE, is that the projectiles clutter the screen heavily which can make things more difficult, particularly for newer players.
Empty: One of the best Empty abilities in the game, it has decent base damage and it functions fairly adequately as a corridor ability even without investment. It’s also really quite strong in the late stages of a run when you’re dumping points into it, too. Great choice.
Early: Tornado is a mixed bag in the early game. It’s definitely the best corridor ability you’ll have at that stage (and honestly remains one of the best for the entire game); however, it really doesn’t benefit too much from heavy investment. You’ll definitely want to max CDR, then alternate points between tornado number and size – both are functionally doing the same thing, which is increasing the size of your corridor.
Once you’re reliably getting a corridor to move through, though, further point investment is unnecessary – it’s just getting you more of something you’ve already got enough of. At this point, focus on other abilities.
Upgrades:
Number of Tornadoes (/20): Assuming you’ve got both mods, this is where most of your points are going to be going. Without Chaos Storm, this is basically interchangeable with Tornado Size; with it, however, this becomes the far superior option since random directions means you want more tornadoes to increase the likelihood that one will spin in the direction you want it to. What’s more, lots of tornadoes in a confined area can lead to some Bouncy Wind shenanigans and absurdly high damage. This is a great upgrade route.
Tornado Size (/10): The weaker alternative. You should always avoid this upgrade once you’ve got the mods – it’s not bad as such, but there are definitely better alternatives. If you really want to boost the size, go talk to Big Tex.
Cooldown Reduction (/5): Once again, max it. CDR is never a bad thing.
Knockback (/10): Utterly and entirely pointless. Everything that gets hit by a Tornado is either dead, or a boss; bosses you want to be moving predictably so you can kill them, not knocked around. What’s more, with the two mods, there can be a tendency for enemies to be knocked into you, which can make this upgrade borderline suicidal. Avoid.
Mods
Bouncy Wind (/1): Available from level 9. Not too impactful – all it’s doing is making your tornadoes bounce off terrain – but that’s still pretty useful, especially for only a single point invested. Tornadoes hitting terrain are otherwise either wandering off the map (which is useless) or passing through obstacles to kill enemies on the other side of them (where they’re not a problem yet). Neither scenario is optimal.
Chaos Storm (/1): Available from level 16. A very transformative mod, Chaos Storm removes all of Tornado’s corridor power and shoves it squarely into AoE instead. Tornado base damage is substantial enough that a single one is likely to kill most enemies, particularly as they tend to get multiple hits in thanks to their innate knockback. Chaos Storm sends them all off in random directions, making them fantastic for clearing out basically everything in sight (or at least, everything not tucked away behind a rock). Note that with this mod you’re effectively double-dipping on CDR and number of tornadoes, since they come out singly rather than all at once.
Recommended builds:
There are technically two viable build paths for Tornado, but one of them is the same corridor build you’ll have been using since the early game – max CDR, then alternate between size and number upgrades, avoiding mods – so I won’t post any kind of example of that build. Instead, I have posted below the most effective level 25 Tornado build.
That said, the most common Tornado build you’ll use will probably be either a level 1 Tornado, or one with just the five points in CDR. It works very well as an Empty ability, after all, and that’s not true of most others.
Tornado
Cooldown Reduction +5
Tornado Number +17
Bouncy Wind
Chaos Storm
Bone Shot
Name: Bone Shot
Main purpose: Boss-killer / AoE
Commentary: The most consistent Boss-killing ability in the game, this is simply a truckload of DPS in a predictable pattern. It’s less easy-to-use than Final Slash, it’s less damage than Shuriken, but it does exactly what you want it to do, and it does it all the time. I strongly recommend this ability to anyone who doesn’t want to have to micromanage their positioning.
Empty: A really bad Empty ability, Bone Shot is useless without the five points in CDR at very least. Even then, it’s not the best option since all you’ll get is fairly solid damage.
Early: Bone Shot early is basically the same as Bone Shot later on – generally you’ll want to avoid mods for this one since they only get in the way of what you take the ability to do. The only difference is you don’t have the option to splash in some Splinters, but honestly that’s rarely worth it anyway.
Upgrades:
Cooldown Reduction (/5): As always, yes. In this case, very yes – Bone Shot’s real power comes from its absurdly high rate of fire at maxed CDR. Technically it’s still lower DPS than a properly built Shuriken, but equally, at least Bone Shot always goes somewhere you expect it to. Either way, if you’re taking Bone Shot, you’re maxing this.
Ability Damage (/15): This is the dump upgrade – you’ll want points in it, but how many essentially comes down to how many points you have left over after you’ve grabbed everything else you want. Bear in mind that this ability fires very fast, though, so even a few points of damage can make a substantial difference.
Ability Range (/6): Unusually, the amount of points you put into range for Bone Shot is very variable. You’ll usually want at least a few – with zero points of added range the bones fly about as far as you can spit – but how many is the operative question. All six is usually overkill, so personally I usually opt for 2-4.
Note, however, that range does also interact with both mods. If you’re for some reason dead-set on an AoE Bone Shot build, you’ll want zero points in range simply so that the mods activate relatively close to you and there’s an outside shot of them doing something relevant.
Critical Strike Chance (/10): Unusually, crit chance is not an upgrade we want here. Don’t get me wrong, crit is still good; unfortunately you’re only seeing 3% improvement per level here, which really isn’t worth the points. What’s more, Bone Shot relies on a lot of very frequent hits rather than a smaller number of big ones, so crits don’t really do much beyond just being a raw DPS increase. Avoid this and take Mandrake.
Mods:
Splinters (/3): Available from level 10. This mod adds a multi-projectile AoE to your bones – 4/8/12 splinters based on level – which fly off at angles horizontally to the Bone Shot directions. There’s a few issues though – frequency of splinters is not affected by your CDR, their damage is mediocre without the high rate-of-fire behind them, and they don’t really cover much area either. That being said, you’ll probably grab this anyway towards the end of the run for the simple reason that there’s not all that much else to spend the points on.
Impale (/10): Available from level 13. Much less impressive than Splinters, it adds a periodic AoE spike at the end of the Bone Shot projectile range. Again, not affected by CDR, and this time it’s just a circular AoE with mediocre damage. What’s more, since the spikes appear at the end of the Bone Shot projectile range, they’re not really hitting anything Bone Shot wouldn’t have destroyed anyway unless you sink a lot of points into this. Really, really not worth it – just stack damage instead.
Recommended builds:
The main build you’ll be running is a simple one, because Bone Shot has a simple job – annihilate anything directly up or down from you. It won’t kill bosses as quickly as Shuriken will, nor will it do it from the range that Final Slash will – its niche is reliable, consistent DPS output. To this end, we take the things that make it consistent.
Bone Shot
Cooldown Reduction +5
*Ability Range +4
Ability Damage +15
*You can optionally move up to three points from range into Splinters, depending on personal taste.
The alternative is to lean heavily into AoE. As I’ve already discussed at length, I think this is a really bad idea – however, if there’s one thing the internet loves, it’s bad ideas. Here’s a sample build for those of you who like to play with weird stuff.
Bone Shot
Cooldown Reduction +5
Ability Damage +6
Splinters +3
Impale +10
Grand Hex
Name: Grand Hex
Main purpose: AoE / looking pretty
Commentary: I really hate this ability. It sucks. It’s slow, awkward, slow, random, slow, and its mods kinda suck. Also, the only way to mitigate the slowness is to invest an absurd 10 levels into CDR. Avoid this one.
Empty: This ability is atrociously bad even with point investment; as an Empty ability it may as well not exist. Don’t.
Early: Grand Hex early is about as good as it’ll ever be – which is to say, not very. I have very little nice to say about this ability in general, so I may as well start here – use something else. Trust me. Even Orbital Fire is going to work better early game.
Upgrades:
Cooldown Reduction (/10): If you really, really want to use Grand Hex (or more likely a build challenge is forcing you to), this is where you start. The cast time doesn’t stop being obnoxiously long, the random targeting doesn’t stop making the ability useless, but at least with all ten points in CDR it’ll cast very often. So often, in fact, that you’ll have two of them on screen at once. Yaaaaay.
AoE Size (/20): Here’s where the rest of your points go, usually at least. Again, you’ve got a really long cast time and random targeting on an ability whose only function is AoE – you may as well increase the AoE size. It’s about your best bet for making it actually hit something.
Ability Damage (/10): Definitely not. The ability already hits hard when it hits, and it already misses more than it hits. You really don’t need to add a small amount of additional damage to it when you could be boosting the range so it might tag something on occasion. Don’t.
Critical Strike Chance (/5): As much as it pains me to say, skip this too for the same reasons as Ability Damage above. It’s painful because it’s a crazy amount of crit – 10% per level, giving you 100% base crit chance with all Divinity Web upgrades and rank 3 Mandrake – but you don’t need it. You need to make it as reliable as you can – which still isn’t very.
Mods:
Fowl Hex (/3): Available from level 3. A really, really not great mod. Enemies hit by Grand Hex but not killed are turned into chickens. The effect itself is actually fairly decent – removing the abilities from some enemies can really solve some problems for you. The problem is, though, that Grand Hex usually kills what it hits. Damage isn’t the problem – actually hitting things is the problem, and this does nothing to solve it. What’s more, it’s not even guaranteed to happen – you’re looking at a 20/30/40% chance. Definitely not.
Gold Hex (/3): Available from level 10. Marginally better. This mod has the same 20/30/40% proc rate as Fowl Hex, but now it procs off kills rather than not-kills – which is far more useful. It doesn’t actually improve the ability at all, but instead just feeds you some extra gold. You don’t always have a use for that gold, but you do often enough that you may as well grab this if you’re going deep into Grand Hex. If nothing else, it’s gold you can use to reroll so you don’t have to put any more points into it.
Recommended builds:
The best build I can recommend for Grand Hex is to use literally anything else. Yes, even Poison Cloud – at least that’s reliable and has some nice utility. You can sink 25 points into this thing and at the end be left with mediocrity, and that is not what you want to feel after a 25 point investment.
Still here? Guess your mind’s made up. Here, then, I will once again perform my turd polishing routine for you:
Grand Hex
Cooldown Reduction +10
Gold Hex +3
Ability Size +11
Shuriken
Name: Shuriken
Main purpose: Boss-Killer / Corridor / AoE
Commentary: The highest raw DPS ability in the game, but rather awkward due to targeting the ‘closest’ enemy (which isn’t always the closest enemy, since it struggles to find enemies at longer ranges). With investment it becomes an endless deluge of shuriken which will shred hordes just as well as it does bosses. I strongly recommend you get used to this ability, because for all its awkwardness, it is tremendously lethal once you’re using it right.
Empty: Not a bad Empty ability as far as they go, since Shuriken has pretty good base DPS, and it’s fairly easy to drop the occasional point in as and when you don’t want to burn gold on a reroll. The main downside is it’s very much supplementary damage – it doesn’t really accomplish much on its own. You’re better off grabbing something utility-based, but it’ll do in a pinch.
Early: Early game Shuriken doesn’t have the versatility of its late-game counterpart, but it’s still very effective at shredding its way through bosses or hordes of enemies. You can think of it as a more awkward version of Bone Shot – it doesn’t often go where you want it to, but when it does, it disintegrates enemies. Build it in the same way as below, just without the points in the mods.
Upgrades:
Number Of Shuriken (/15): You should generally sink your points into this upgrade above all others. Technically you get more DPS out of splitting points between numbers and damage – but increasing shuriken numbers makes the ability much more forgiving because, unlike Cleave it has the same cast time no matter how many are being thrown. Once you’ve got some points sunk here, you can unleash a stream of shuriken, allowing you to compensate for the awkward targeting to some degree with movement. Note that fully unlocking the Brutal upgrades in the Divinity Web will give you two shuriken for every level, making this upgrade absolutely absurd.
Ability Damage (/15): Again, as above – you should split points between this and shuriken numbers if you’re aiming for pure DPS, but usually you’ll want to ignore this upgrade in favour of making the ability more reliable. That said, with the Brutal upgrade, it’s pretty interchangeable since you’ll have a ridiculous number of them anyway.
Critical Strike Chance (/5): Okay, we need to be careful here. It’s a lovely upgrade – 10% crit is juicy – but with full Divinity Web upgrades Shuriken already has a very good crit rate, and you’ll be running Mandrake in most builds for even more crit. This means you should sink three, at most four points into this upgrade – three points puts you at 95% crit, the fourth is just a 5% boost but does give you complete reliability. The fifth point would do nothing, so never add it.
Mods:
Star Shot (/1): Available from level 10. Another purely transformative mod, this shifts your Shuriken from being a corridor clear and a boss-killer into being an AoE. In isolation, this actually isn’t a very good trade – shuriken can only hit one target, so each throw isn’t going to clear out the entire horde around you. Once you have some points in Ricochet, though, Shuriken actually becomes a great AoE tool if you want it to be. All you need to decide is what you want out of life it.
Ricochet (/3): Available from level 15. Instead of being transformative, this mod is all upside – any shuriken hits will bounce off to potentially hit something else. Number of potential bounces is equal to the number of levels invested, and while three points is probably overkill in most situations, it’s still pretty funny – and honestly, what’s a few more points, eh? Always take at least one point in this mod to give your boss-killer some more utility, if nothing else.
Recommended builds:
You’ve got two options here, depending on whether you’re looking for an AoE tool or a boss-killer and corridor ability. Bear in mind that this can be quite an awkward ability to use for actually killing bosses though – it’ll only fire at the closest enemy, and then only if they’re inside a fairly tight radius from you (plenty of times I’ve had Shuriken get flung off-screen at nothing while there’s an end boss on the screen). That said, while awkward, it also has the highest DPS potential of any ability in the game, so it might just be worth it.
For standard use:
Shuriken
Critical Strike Chance +3
Number of Shuriken +15
Shuriken Damage +5
Ricochet +1
For AoE:
Shuriken
Critical Strike Chance +3
Number of Shuriken +15
Shuriken Damage +2
Star Shot
Ricochet +3
Magic Mine
Name: Magic Mine
Main purpose: Boss-Killer / AoE
Commentary: Surprisingly, this is actually a really strong ability. I fully expected it to be garbage when I first unlocked it and began testing, but it turns out that a fully invested Magic Mine ability can cover you nicely in sticky situations and provide decent AoE coverage while also packing a hefty punch on large targets. A happy surprise. It’s still not among the very best abilities in the game – it’s slightly too awkward for that – but it’s not a bad pick by any means. Note that you need to keep moving when using this ability, even if you’re running in circles, or the mines won’t drop.
Empty: Definitely not. Mines are pretty good when invested in, but without at least the CDR points they’re too slow to be useful. You also need the Zap Mines mod for them to really function as AoE.
Early: The ability is okay in the early game, but you have to lean into the boss-killing archetype unless you want to be stuck with the (very underwhelming) AoE mines build. Generally I’d suggest the former – it hits really hard right out of the gate, so a few points invested can make it a really good tool for wiping big threats off the map.
Upgrades:
Cooldown Reduction (/5): As always, this is your first stop. Maxing CDR here will take your mines from being an occasional surprise to being a solid burst damage tool provided you can make something relevant run into them.
Explosion Radius (/15): Mehhh. As far as upgrades go this feels quite lacklustre, since the explosion starts out small and doesn’t get much bigger. Besides which, Zap Mines are handling your AoE heavy lifting, so boosting the explosion radius never really feels impactful. That said, there’s not a whole lot of other places to spend your points if you’re not going all-in on boss damage.
Ability Damage (/10): Even more meh. More damage is a good thing in general, but mines hit hard enough that this is going to be overkill for most enemy types. If you’re relying on this ability for your boss destruction then by all means, go nuts – after picking up crit, that is – but otherwise, very low priority.
Critical Strike Chance (/6): The best of a mediocre bunch. Six points added to the mines’ 15% base crit chance sits you at 45%, or 75% if you have Mandrake (let’s be honest, you have Mandrake). This is enough to give you easy 600+ crit damage mines, which delete most enemies without any need to delve into damage boosts.
Mods:
Cold Mines (/4): Available from level 12. And the meh just keeps on coming. Actually, being fair, this mod isn’t so much ‘meh’ as it is ‘bad’. As I noted above, things that eat mines are usually in small pieces shortly thereafter, and for the few things that can survive a hit, the answer isn’t a low-grade, small-radius slow – it’s more mines. Avoid this entirely, in all situations, and pick up a different ability if you need control.
Zap Mines (/4): Available from level 12. Much better. Mines suffer against massed hordes, and despite being explosives they can’t really handle AoE very effectively even with a boost to explosion radius. Zap Mines solve the issue happily, delivering some nice AoE any time one is triggered. Note that the chain lightning effect is actually pretty low damage, so don’t expect it to kill anything bigger than trash – but realistically that’s all you need to kill to ensure the bigger stuff hits the rest of your minefield.
Recommended builds:
You’ve basically got two build paths with mines. You can lean into AoE, or you can set up a build that kills bosses and also splashes some AoE around. Let’s do the latter first because it’s much more effective.
Magic Mines
Cooldown Reduction +5
Critical Strike Chance +6
Zap Mines +3
Ability Damage +10
The AoE build, meanwhile, looks like this:
Magic Mines
Cooldown Reduction +5
Explosion Radius +15
Zap Mines +4
Poison Cloud
Name: Poison Cloud
Main purpose: AoE / Control
Commentary: This isn’t the worst ability in the game, and for one very important reason – Grand Hex exists. Seriously though, it isn’t great. The damage is both delayed and low, the shape of the cloud is awkward, and the delivery mechanism even more so. Like everything else, it can be made to work if you really try hard, but why do that when there’s a lot of far more effective abilities lying around?
Empty: Not the worst Empty ability, I suppose. It does at least have the slow, and I guess the close-up cloud can break crates quickly? Still not great.
Early: Poison Cloud is even worse in the early game than it is late, because you don’t even have Breaking Wind to spread things around. The bright side is enemies are weak enough to die to it on normal difficulty, but they’ll die to basically anything else, too. Avoid this early game, and then avoid it later on as well.
Upgrades:
Cooldown Reduction (/5): Poison Cloud is such a trash ability that it can’t even do CDR right – you’ll see much less benefit putting CDR in here than other abilities because all it does is reduce the downtime between clouds – it doesn’t touch the duration of the cloud building around you before it shoots out. It’s still worth maxing, more or less, just to ensure that anything that gets close enough to hit you is getting poisoned in return – but it’s still a little sad to see CDR so underwhelming.
Duration (/6): Not really worth it. To be clear, this affects the duration that poison lasts on enemies after they leave the cloud, not how long clouds stick about. All that’s doing is increasing the damage a little tiny bit (because they’ll be in the cloud for a long time if you’re building right). Disregard this entirely.
Damage Per Tick (/15): Not great, because the ability’s damage isn’t great in general; all the same, it’s about all there is to dump a half dozen points into before you get access to Breaking Wind, so you’ll wind up with a few in here regardless. Even if you’re trying to run with poison as your main damage source you’ll generally want to put points into that instead of this, simply because more coverage is more important than the damage being dealt.
Ability Size (/12): This would actually be worth using in a vacuum, since more coverage means both more AoE kills and also more control – Poison slows infected enemies down, after all. Unfortunately for this upgrade, both mods do a better job of getting poison everywhere than it does. Avoid.
Mods:
Poison Trail (/Infinite): Available from level 9. The only benefit to this over Breaking Wind is reliability – you’ll know exactly where the poison cloud is going. Unfortunately, that’s not a great selling point because the alternative is for poison to go everywhere. Compare and contrast – Magic Mines will drop 600+ damage explosives behind you twice a second; Poison Trail will drop a little cloud of gas to deal like 80 damage periodically. Which sounds better?
Breaking Wind (/Infinite): Available from level 12. If you’re looking for the place you dump your points for this ability, it’s here. Breaking Wind is random, admittedly, and is also relatively slow due to being a function of the Poison Cloud attack pattern. For each point, though, you get two smaller clouds in random spots breaking off from the main one. If you invest a lot of points into this – and you will – you’ll be able to more or less cover the entire screen at all times, heavily mitigating the random factor and allowing Poison Cloud to finally act as a control tool. Admittedly, it still does both AoE and control jobs worse than Shock Bolt, but at least it’s functional.
Recommended builds:
Only one, which I’ve alluded to above – cover the screen with gas for CC and damage. You can optionally shift some points into damage if you really want, but in my experience it’s just a waste of points that could be spent on more coverage – or on a better ability.
Poison Cloud
Cooldown Reduction +5
Ability Damage +6
Breaking Wind +13
Shock Bolt
Name: Shock Bolt
Main purpose: Control / AoE
Commentary: Here we go, the premium control tool of the game. Properly built, it’ll lock down basically everything around you ad infinitum without any issues, and it’ll do some decent damage as well. I definitely recommend it.
Empty: Along with Tornado, this is also one of the best Empty abilities too. As always, you can’t expect too much for a low investment, but its base range is short enough that it’ll give you an on-demand stun whenever things are looking a little sketchy. You may want to max CDR even running this as an Empty simply for how good it is at protecting you.
Early: Shock Bolt is even better early than it is late, simply because it kills things reliably. You’ll want to build it more or less the same as the regular version, but shift the points in the mod you don’t have yet (and optionally a couple more) into number of targets for the redundancy. Then have fun being invulnerable to everything that isn’t huge.
Upgrades:
Cooldown Reduction (/5): Immediate yes. Probably the best ability to get CDR in (and CDR is always great), because it brings the cooldown to an obnoxiously low level. You need this before you start boosting the AoE size, because otherwise you’re going to start running into issues with having more enemies in range than you can shock. You need it either way, really, because it’s great.
Ability Range (/10): The best place to dump your points once you’ve got the essentials (by which I mean CDR). Base range Shock Bolt is good as a self-defence tool, but you’re going to need to boost the range if you want to be using it as a true control ability. Bear in mind, though, that the bigger your AoE the more targets your Shock Bolt needs to be able to hit – you’ll need CDR early, and you’ll start getting some holes in your defences as the AoE size grows until you can pick up Chain Lightning to fill the hole.
Number Of Targets (/10): Generally this isn’t worth taking for the sole reason that Chain Lightning exists and does the same job in a more points-efficient way. You may still want to grab a point or two in here even with Chain Lightning if you’re on one of the more swarmy maps (Hinterlands, for example), but that’s down to personal taste.
Ability Damage (/20): Here’s where you put your otherwise unused points. It’s not actually a great use of them overall – Shock Bolt’s selling point is control and AoE, not damage – but the cooldown is so low that a little extra damage goes a long way.
Mods:
Spark Turret (/4): Available from level 10. Generally speaking, you should avoid this mod for the sole reason that it makes Shock Bolt worse at what you want it to do – that being to sit around you stunning anything that looks like it has even a remote chance of hurting you. Having said that, though, Spark Turret is actually really effective when maxed out as a damage tool – with the full four points you can have three turrets down at once, functionally tripling your Shock Bolt DPS for anything inside all three AoEs. It’s a little janky for moving around, but it’s worth trying out at least a couple of times to see if you enjoy that playstyle.
Chain Lightning (/3): Available from level 18. The real juice, Chain Lightning multiplies your control functionality by giving each bolt an additional target – and another, and another. The bolts aren’t identical – there’s some loss of damage on each jump – but the stun remains intact and that’s all that really matters. Depending on how many bolts you have as base (Divinity Web can add some) you may want to grab some points into target numbers too, but once you’re maxed on the Web you can mostly just rely on this.
Recommended builds:
Two for you here. The first is your standard build for using Shock Bolt as a control tool – you just want it big and hitting everything it can, the damage is very much secondary.
Shock Bolt
Cooldown Reduction +5
Ability Range +10
Number of Targets +1
Ability Damage +5
Chain Lightning +3
The alternative build is for Shock Turret. Here you don’t really need the full points in Chain Lightning, or any in additional targets, because you’re expecting to have three turrets firing rather than one. You get some surprisingly good DPS out where the fields overlap.
Shock Bolt
Cooldown Reduction +5
Ability Range +10
Spark Turret +4
Chain Lightning +1
Ability Damage +4
Jinn
Name: Jinn
Main purpose: AoE / Boss-Killer
Commentary: This is a weird ability. It functions effectively as both an AoE tool and a boss-killing tool at the same time, but it doesn’t do either of them in a very reliable way and there really isn’t any way to improve reliability to the point that you can be happy with it. It’s not a bad ability as such – but if you rely on it, you’ll find it’s very, very awkward. In all honesty, a properly built (and modded) Orbital Fire will do the exact same thing Jinn does, but much better. The only thing Jinn has on Orbital Fire at that point is being able to occasionally pick up drops for you, and that’s really not worth an entire ability slot.
Empty: Definitely not. Without upgrades the Jinn is pretty much useless, since it’ll barely fire at anything and when it does it won’t hit much. Avoid.
Early: Similarly to Spears and Grand Hex, Jinn is as good early as it’ll ever be because both of the mods suck. You’ll still be building it in the same way, and you’ll still be giving it the side-eye when you need it killing a boss and it’s on the other side of you smacking some crates about.
Upgrades:
Cooldown Reduction (/5): As always, yes. Once you’ve got CDR maxed the Jinn is capable of some pretty decent DPS overall – not on the same level as Shuriken or Bone Shot, of course, but decent – provided it happens to be where you want that DPS to happen. Half the time it isn’t, but that’s the price you pay for the Jinn I guess.
Ability Size (/10): Definitely not. This is only really touching the width of the projectile (length-wise, Ability Range does that job much better), and between the Jinn’s high damage output and rapid rate of fire, anything stood next to its target is probably getting blasted next anyway. Avoid.
Ability Range (/5): Definitely yes. Unlike Ability Size, you need this so that the Jinn’s projectiles go far enough to actually function as a moderately effect horde clear. Without it, you’ve basically just got a funny looking and much slower Orbital Fire without mods, and that’s just terrible.
Ability Damage (/20): It’s really not great, but this is probably where the rest of your levels are going – more damage is better than the alternative, and with Jinn’s very low cooldown (once upgraded, of course) a few extra points of damage give it a fairly good boost. You’re still at the mercy of wherever it happens to be in its orbit at the time, of course, but if you’ve got to spend points on Jinn you may as well ensure it can contribute to killing big enemies when it’s in the right spot for it.
Mods:
Vile Aura (/10): Available from level 8. Vile Aura… sucks. Completely sucks. It starts off with a terrible range on it, meaning you’d have to dump a lot of points into it for decent coverage. Even with full investment, it’s not really reaching any further than the Jinn’s attacks are. And the damage is so low that it’s barely going to be killing anything worth your time regardless. Note that technically boosting Ability Damage does also boost Vile Aura damage (by a tiny bit), but this is rather irrelevant since you’re burning 10 points here to make it hit stuff so you don’t really have much left over.
Stun Shot (/3): Available from level 16. Again, really not good. In theory the on-demand stun could have been nice, but in practice the Jinn’s issue really isn’t dealing with the things it’s shooting at. Most of the time, whatever it’s shooting at is dead, and so really doesn’t need to be stunned. The problem with Jinn is the enemies on the other side of you that have free reign to walk in and beat on you, and this mod does nothing for that. Ignore.
Recommended builds:
Only one, because really there’s only a couple of upgrades that are worth your time. Not much to say here that I haven’t already said – Jinn’s only realistic function is to be a slowly orbiting turret, and trying to make it do anything else is a mistake.
Jinn
Cooldown Reduction +5
Ability Range +5
Ability Damage +14
Pets (part 1)
Note – pets don’t really have pronouns listed anywhere, so I’m going to just refer to them as the gender I feel like they are. Feel free to ignore that if it bothers you for some reason.
Pets in this game can be very, very impactful. On the other hand, they can also be… not. A single point in a pet is generally a lot more important than a single point in an ability – but they’re also much harder to roll for, since you’ve only got three slots on your standard pet cage and reroll costs are doubled, plus a much bigger pool size.
To that end, let’s start with a tier list!
S tier – These are the pets you want to aim for. If you’re going to greed for anything, greed for these.
A tier – Solid pets, you should be fine with picking these up at any point. If you don’t want to roll, grab an A tier.
B tier – These pets are not very good. They’re not completely useless, but there’s enough A tier pets that you can do better. Don’t take these unless you really need to avoid rolling, or a build challenge forces you to.
Farming Tier – These pets are good for only one thing, and that’s giving you more resources. I got through the entire thing, unlocking everything, without ever grinding or using these pets outside of build challenges, so they’re absolutely not necessary. If you’re struggling for resources, though, you may as well grab them.
Final Tier – Lol.
The Pets
Pets are listed in alphabetical order, with commentary because I’m nice like that.
Ranks: 5
Effect: Lures enemies away. Additional ranks increase duration of the lure by 2.5/5/7.5/10 seconds.
Commentary: An unfortunately underwhelming pet. He can be pretty decent at times, admittedly; the issue is he’s pretty unreliable and can sometimes be a hindrance when he makes enemies shift pathing when you’re not expecting them to. There’s definitely better options out there.
Ranks: 5
Effect: 20/30/40/50/60% increased ability size.
Commentary: A much more solid choice. Big Tex isn’t going to work miracles, certainly, but up to 60% AoE boost can be very handy. Tex’s main problem is that he’s a lot of pet ranks to invest in something that’s only going to help for AoE most of the time. He’s also pretty useless if you don’t have all that much AoE (e.g. you’re relying on Ricochet Shurikens and Spears to clear).
Ranks: 5
Effect: Incoming projectile damage reduced by 5/10/15/25.
Commentary: Worthless. Obviously a much larger damage reduction than Chicon Rad provides, but only for projectiles – which relatively few enemies have, and which already have pretty low base damage. Projectiles are really not what you should be worrying about, so Blocker should stay at home. Two additional notes – firstly, Hugo can get Blocker for some reason even though he (correctly) can’t get Chicon Rad. Secondly, enemy auras do not count as projectiles, which is a shame because it would make Blocker actually usable on Brutal.
Ranks: 3
Effect: Incoming damage reduced by 1/2/3.
Commentary: Sadly, Chicon is also pretty useless. On normal she’s actually really freakin’ good – the problem is she doesn’t scale at all, and 3 damage per hit is barely noticeable even on Hard. On Brutal, Chicon may as well not exist.
Ranks: 10
Effect: Blue souls (and only blue souls) are worth 10/20/30/40/50/60/70/80/90/100% more XP.
Commentary: Cici’s pretty great. She’s not flashy, and she costs a lot of pet ranks, but more XP is more XP – she still means you’re hitting a higher level than you otherwise would. However, Cici is always a trade-off and you need to think about your situation before you invest in her. Are you likely to get enough pet ranks to make her worthwhile (and early enough for her to be impactful)? Do you have the right abilities to make her extra levels worth anything? Do you really need certain other pets to make your build function well? All questions you need to consider before you throw 1-10 ranks into Cici’s hands.
Ranks: 1
Effect: Doubles value of collected crystals.
Commentary: Obviously pretty useless outside of farming. For farming purposes, though, Crys is okay I guess – she’s at least doubling a relatively hard to come by currency. Personally I don’t think I’ve ever taken Crys outside of a build challenge, though.
Ranks: 3
Effect: Mining speed of crystal nodes (and ember core nodes for McDiggins) increased by 30/60/100%.
Commentary: Really useless, even on farming runs. The time you spend mining nodes is dwarfed by the time you spend looking for the buggers, and honestly really doesn’t make much difference in any world. Avoid like the plague.
Ranks: 3
Effect: Movement speed increased by 10/20/30%.
Commentary: A surprisingly good pet, but not as essential as some people seem to think. Certainly having Flash feels nice, but in practical terms he doesn’t necessarily add a huge amount to a run. It mostly depends what you’re finding yourself doing – if you’re hunting for resources constantly, or if you’re on Brutal and having to deal with endless spawns of those little purple buggers, Flash can be valuable. On the other hand, if you’re just wandering around farming hordes with AoE, he contributes nothing. Personal preference, really.
Pets (part 2)
Ranks: 3
Effect: A Heart pickup is generated every 20/15/10 seconds.
Commentary: Hearty, on the other hand, is amazing. This little dude gives you a safety net – when you’re low on health, you don’t have to worry about finding a chest and opening it, or hunting down boxes and hoping – just get away and wait a little and you’ll get healed. Apart from anything else, the psychological value is immense. He’s also the only realistic way to heal during a final boss fight (not that you should usually need to, but still). I will almost never pass up Hearty when offered him.
Ranks: 3
Effect: Chests are opened 30/60/100% faster.
Commentary: Not as useless as you might think – on Brutal, many chests are simply unattainable because there’s a huge horde of purple gits coming after you and you simply don’t have the time (or more to the point, the damage) to clear them out while you open a chest. Lockpick can resolve this situation nicely, giving you more comfort and more resources. That said, he’s still never going to be your first choice of pet – as useful as he can be, he’s still niche, and there are much better broader-appeal pets available. Still, in a pinch, he’ll definitely do.
Ranks: 3
Effect: Loot magnet radius increased by 25/50/100%.
Commentary: Another great pet, Mag Slime is absolutely fantastic. Loot magnet radius isn’t something you’d immediately think of as amazingly valuable, but Mag Slime is absolutely indispensable for ensuring you get full value out of your kills. I’m fairly confident that Mag Slime is, point-for-point, worth a lot more XP than Cici is in fact – the simple act of ensuring you pick up most of your soul drops is worth a huge amount. It also helps that she’s an absolute cutie.
Ranks: 3
Effect: Critical strike rate for all abilities increased by 10/20/30%.
Commentary: Much less of a cutie, but just as fantastic. Mandrake gives you up to 30% crit chance. That’s flat crit chance. He gives so much crit for just three ranks that you can actually overcap on some abilities. Even without any outside effects, the huge crit modifier in this game makes Mandrake a drastic boost in damage. You will want Mandrake on basically every run unless a build challenge is forcing you to use DoTs exclusively. Also, dude’s angy.
Ranks: 3
Effect: On level up, deal 100/200/300 damage in an AoE around yourself.
Commentary: From best to worst. Nomicon is a sad excuse for a pet whose existence baffles me. Not only does her effect only proc when you level – which is incredibly unreliable and which has a built-in knockback anyway – but the damage is pitiful. There would actually be a cute synergy with Vivian’s skill here, since once the vortex ends you suck in all the souls and usually level multiple times back to back – but the damage is so pathetic that you’ll never get as much damage from it as you’d get from a single Final Slash crit. I can only assume Nomicon exists to function as a ‘blank pet slot’ for build challenges, because if anyone thought she was actually good I have serious concerns about their mental health.
Ranks: 1
Effect: Doubles value of collected runes.
Commentary: Basically just a worse Crys. Runes fall out of the air whenever you do anything in this game. You get so many you’ll be tripping over the damned things. You really shouldn’t need a pet to get even more of them.
Ranks: 3
Effect: Collected coin pickups, including coin bags, are worth 30/60/100% more coins.
Commentary: Also terrible. While gold has of course got some uses, it’s not worth spending an entire pet slot on, let alone dropping three full ranks for doubled gold. If you need money, just walk in any random direction and you’ll find a chest sooner or later – you really don’t need to invest this much of a valuable resource to get more of it.
Ranks: 3
Effect: Drops loot every 8/6/4 seconds.
Commentary: Usable for farming runs, but that’s about it. Technically Scoop does have some utility – he can sometimes dig up coins, souls, even hearts – but the amount he produces is comically small even at max rank. Disregard.
Ranks: 5
Effect: Base damage of all abilities increased by 5/10/15/20/30.
Commentary: A little bit hit-or-miss, Slayther is fantastic in the right build. He boosts your damage substantially when paired with an ability with a very low cooldown and/or very high crit rate – Shuriken loves him. On the other hand, unlike Mandrake he doesn’t scale with your build or your difficulty. In a lot of cases he’s still worth it – absolutely essential if you’re trying to kill things with Shock Bolt – but his damage drop-off means he just misses out on S tier.
Ranks: 1
Effect: Adds an icon to the screen pointing towards a chest. This is supposed to be the nearest chest, though this isn’t always the case.
Commentary: Similar to Rupert, this guy is pretty worthless. If he pointed you towards pet cages he’d actually be a potentially valuable tool since you could use him to force a lot of early ranks in Cici; unfortunately he only points you towards chests. Sometimes he doesn’t even point you to the closest chest and you actually stumble into a different one while you’re en route. Chests are common as muck anyway. Ignore.
Ranks: 4
Effect: Periodically creates an AoE slow field for a few seconds. Increased ranks boost the AoE size.
Commentary: Disappointingly, Webster could have been great, but falls short and lands in the ‘meh’ pile. His AoE slow is actually really quite effective, and at max rank it covers a substantial amount of the screen. The trouble is, you can’t speed up his cast rate at all, nor does he deal any damage. Because of that, you’re going to have to be running AoE anyway, and that AoE (or one of your other abilities) is bound to have enough built-in control to render Webster redundant. Could have been cool, but as it is, a pet slot is too valuable to spend for some very unreliable control.
Ranks: 5
Effect: Base damage per tick of all DoT effects is increased by 3/7/12/16/20.
Commentary: If you’re running DoT abilities, Whoodoo is essential. The trouble is, you’re probably not running DoT abilities, because most of them aren’t very good. Orbital Fire is the only one with any bite to it, and that has more than enough damage to be sufficient; Tangle Vines stops being about the DoT as soon as you get mods. Don’t bother.
Challenges
There are only really two build challenges in the game difficult enough to be worth talking about, both of which are Sickle challenges (inevitably). I’ll give a few tips on each of them here so you’ve got a good idea of how to approach them. Note that it took me about a half dozen tries for each of them to manage to beat them, but that was with me figuring out the best approach for each of them on the fly, so hopefully you’ll have a better time of it.
Sickle 76
Map: Viper Village Brutal
Requirements:
Spears – Level 19
Bone Shot – Level 19
Poison Cloud – Level 19
Tangle Vines – Level 19
Cici – Rank 3
Tips:
This is a tricky one because Viper Village strongly incentivises you to explore inside the villages to find chests and pet cages – but doing so can easily lead to you being surrounded and trapped. What’s more, you’re not running particularly great abilities, and you’re required to take Cici (which isn’t a bad thing as such, but means one slot less for combat power).
The best approach in my opinion is to lean into Bone Shot early – particularly CDR, as you’d expect – to try to get it online ASAP. Once it’s functional at 0.2s cooldown, you can start spreading points into Spears as well for some crowd clearance. Tangle Vines can come a little later, once you’re feeling reasonably comfortable in your damage output – bear in mind it’s not going to be all that useful until you start picking up ranks in Spitter. Finally, Poison Cloud comes last; just make sure you don’t leave it too late, as one of my failed runs on this map was from simply running out of time to collect the requisite levels to get Poison Cloud to 19.
Strategy-wise, you should aim to explore in bursts. From the start of the run, you should be heading for villages and ransacking the chests and pet cages you find there. Once you’re floating at about 2000 gold you can start ignoring chests altogether and focussing on finding pet cages (and to a lesser extent, stores).
However, as soon as you start seeing purple portals appear, you’ll want to get out to the more open areas. The medium-sized purple guys aren’t actually that much of a problem – Bone Shot should handle those, and you can potentially keep playing greedy. The large or small purples, though, are you cue to GTFO – the big purple buggers take enough hits to require some space to maneuvre, as well as having an aura which will screw you if you’re pinned, while the small ones die easily enough but are fast moving and come in a big enough horde that you’re better off just running.
Finally, remember that your ability has a decent knockback on it which can bail you out in a pinch – and if worst comes to worst, run through the horde rather than sitting in an aura, because it’ll net you a lot less health loss.
Reaper Revenge
Map: Cemetery Brutal
Requirements:
Cleave – Level 25
Echo Slash – Level 3
Zap Mine – Level 3 [functionally requires Magic Mines level 14 total]
Ricochet – Level 3 [functionally requires Shuriken level 17 total]
Nomicon – Rank 3
Tips:
This challenge is considered by some to be the hardest in the game, and it’s easy to see why – a second flavour of aura-wielding big bugger, lots of obstacle-spawners, and a tendency for the map to generate in very restrictive patterns to make it difficult to move freely.
Even more so than Sickle 76 above, you’re going to want to time your greed. You’ll definitely need pets and gold to get through this challenge, but if you try to take them while you’re being attacked by purples you’re going to eat way more damage than you can be comfortable with. The best approach is to grab whatever you can while you’re relatively unmolested; when the purple dudes show up, start running. If you spot a pet cage or a particularly valuable chest, remember where it is and flee in a straight line; you can then backtrack once the purple guys leave.
Although Cleave level 25 is required for the challenge, I strongly recommend instead focussing on Shuriken early on. Get it strong enough to start clearing the hordes and killing off the bigger enemies by throwing points into numbers (possibly with a few points in crit). You can use it to carve a corridor fairly effectively with some simple strafing once it’s started firing.
Once Shuriken is appropriately strong, you can start working on Cleave. Do not get Star Shot until your Final Slash is online and has a few points in it – you’ll lose a huge amount of your boss-killing potential when you make that transition. Max out Cleave while still adding points to Shuriken so as to get Ricochet online – it’s required for the challenge, so you’ll need it sooner or later, and it’s also your best option for a full AoE. Once you’re running a heavily upgraded Final Slash and a Star Shot Ricochet Shuriken, you’re in a good spot.
Magic Mines can wait until later, although if you’re offered CDR for it you may as well take it for some supplementary boss damage. You’ll probably want to max out crit chance on it at some point as well (noting you’re going to need Zap Mines levelled for the challenge).
Importantly, this challenge leaves your fourth ability slot open, so you can take whatever you think is most useful. Personally, I found Shock Bolt to be the most effective choice, as it can save you a lot of health in the early game; I put points into its CDR to maximise its emergency save potential, but nothing else.
Using this approach I beat the challenge with 150 health remaining, which I was fairly happy with. I’ll put the screenshot below – you’ll note my ability build is more or less ideal, with the exception of the final point in Cleave which I grabbed simply because the end boss was about to appear and I needed to finish it off fast.
My pet choices were essentially a) greed for Mandrake, then b) grab any decent pets to fill the remaining slots so that stores would sell me upgrades. This meant I didn’t have to greed quite so hard for pet cages, and in particular, meant I wouldn’t have to waste any pet cages on getting Nomicon to 3 for the challenge.
Hopefully these tips will help you succeed as well.
Achievements
While the build challenges are the meat of the difficulty in this game, I’ve seen a couple of questions about how to complete a few of the achievements on the discussion boards, so I thought I’d post some solutions for them here. Note that these are, of course, not the only ways to get the achievements – they’re just the easiest approach I could determine with a few minutes’ consideration.
Max Level
Reach level 100
This achievement isn’t actually all that hard, but you have to know where to go for it. Personally, I feel the best way is to take McDiggins with the Jinn as your starting synergy, and go to the Hinterlands map on Brutal difficulty. Pile your points into Jinn, and take additional abilities with fairly small impacted areas or low damage – Ice Ring, Cleave and Orbital Fire are good choices.
The starting synergy will mean that your Jinn kills (which should be plentiful if you prioritize it) will occasionally drop pet cages. This is key – you use the pet cages to greed for a) Cici, and b) Mag Slime ASAP. The remaining three pet slots don’t matter – Flash is nice to have, but honestly isn’t a huge deal. The important thing is to fill up your other three pet slots ASAP to minimize your need to roll, and to ensure stores give you a full offering of pets you own (single-rank pets like Crys are also useful for this purpose).
Once you’ve got these pets online, you can roam the map looking for stores. Jinn will continue to drop pet cages – as time goes on, they’ll come more and more frequently as enemies start to swarm – so don’t be afraid to invest in other abilities after this point to make sure you’re not threatened too much. A few ranks in Cici and Mag Slime and all that’s left is to farm enemies – Mag Slime will help you collect the souls, and some decent AoE will ensure enemies die in sufficient numbers for you to collect as much XP as you want.
Using this method I reached level 100 at ~12:00 on the clock, so about 80% of the way through the run – plenty of leeway.
Golden Run
Earn 20k gold
This achievement is honestly a cakewalk, and I’m not sure how anyone struggles with it. Take Jinn and a decent starting synergy – anything that drops gold on kill, not the ones that earn gold per ranks – and prioritise that ability to pick up plenty of gold. Brutal Hinterlands is a good choice again – enemies tend to swarm in huge numbers on that map, and it’s generally very open, so you can farm to your heart’s content without getting crowded.
Try to pick up Rupert ASAP – honestly, the only time you’ll ever want him – to multiply your incoming gold. Avoid spending any gold on rerolls or on stores unless it’s to secure Rupert (who is worth a lot of money to you).
I was done with the 20k by about halfway through the run, so you really shouldn’t have any issues here.
Elite End Boss Hunter
Defeat all 27 end bosses.
All but one of these bosses appear in build challenges, so I’d like to focus on Lunar Caverns Brutal which does not appear. Although technically challenging at first glance, the map becomes immensely simple as soon as Hugo joins your side – making everything ridiculously straightforward!
Hugo makes this map especially easy by scattering chests everywhere; at times you may even be able to open multiple simultaneously. With so many chests around him, Hugo can take multiple hits while reaching them and opening them – he will likely collect enough hearts to heal himself up fully regardless of their locations!
Lunar Caverns features a shorter timer than other maps, so plan for this early conclusion when designing your build. I have included my screenshot for that level below as an indication of my process; Hugo should make this level an easy victory.
The Spirit Hunters: Infinite Horde – All Characters walkthrough section of this guide has concluded. Please let us know if you have any inquiries or suggestions about how we may enhance this topic. Thank you so much, and I hope you have a fantastic day! The author and creator Yippo the Clown inspired this post. Don’t forget to add us to your bookmarks if you like the post; we update regularly with fresh stuff.
- All Spirit Hunters: Infinite Horde Posts List

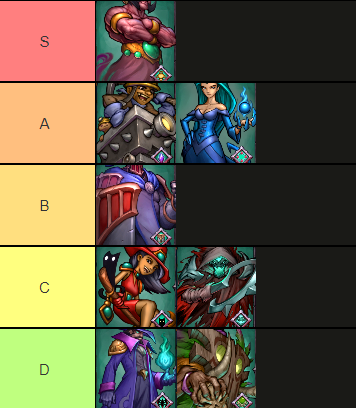
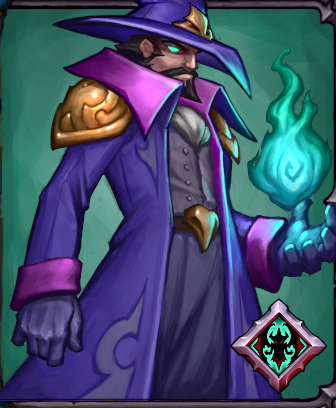

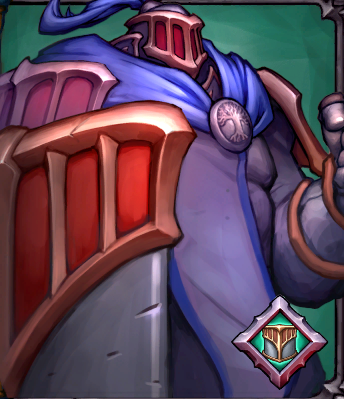
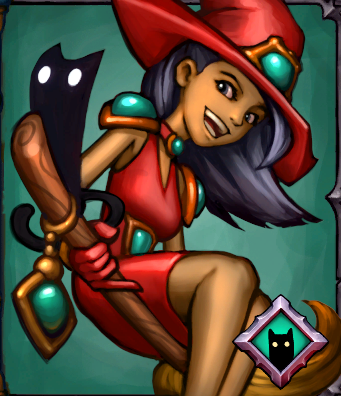
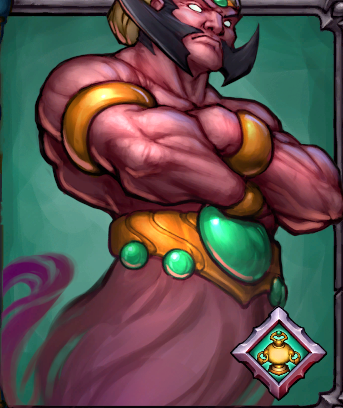
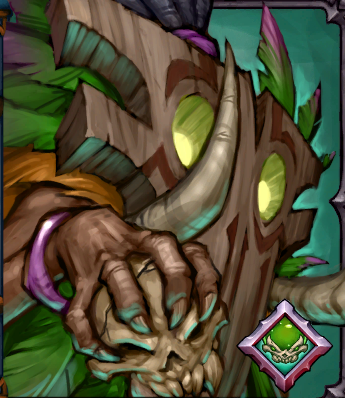
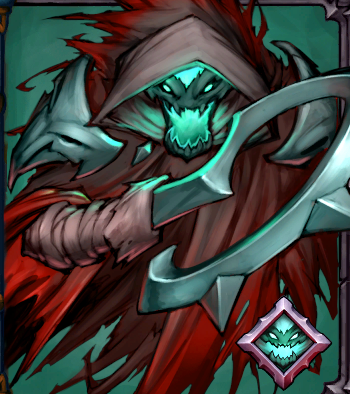

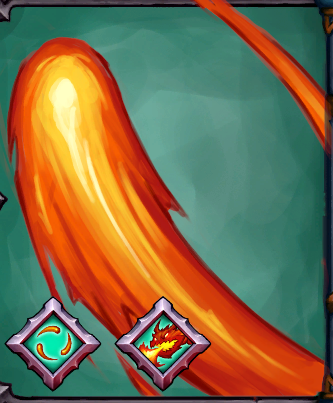
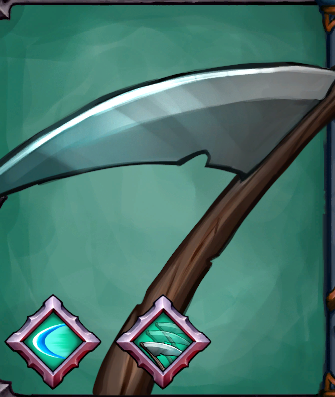

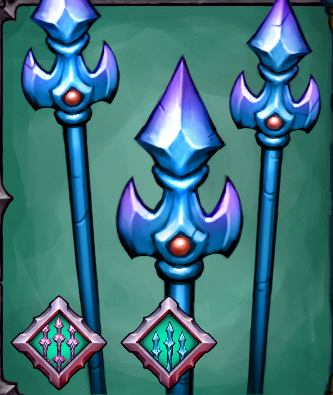
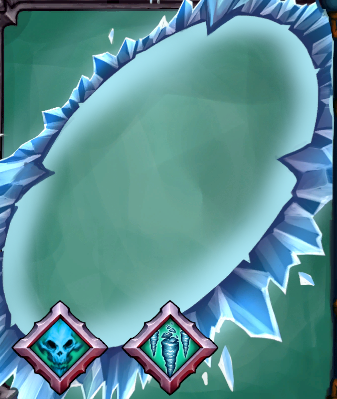
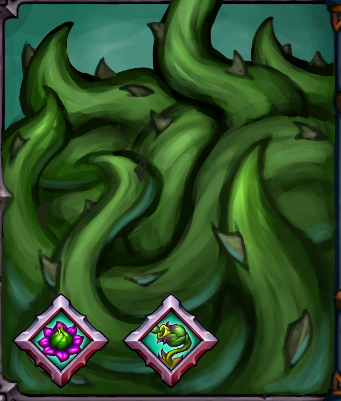

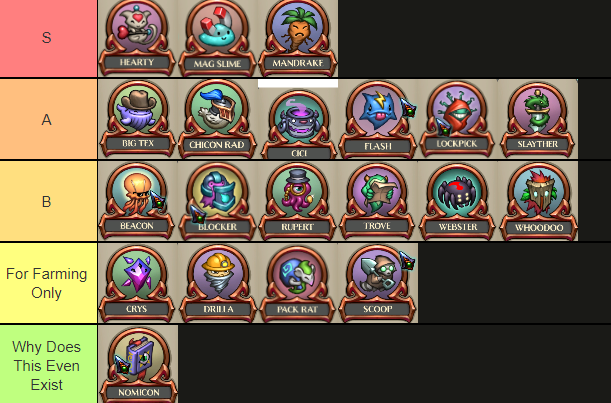








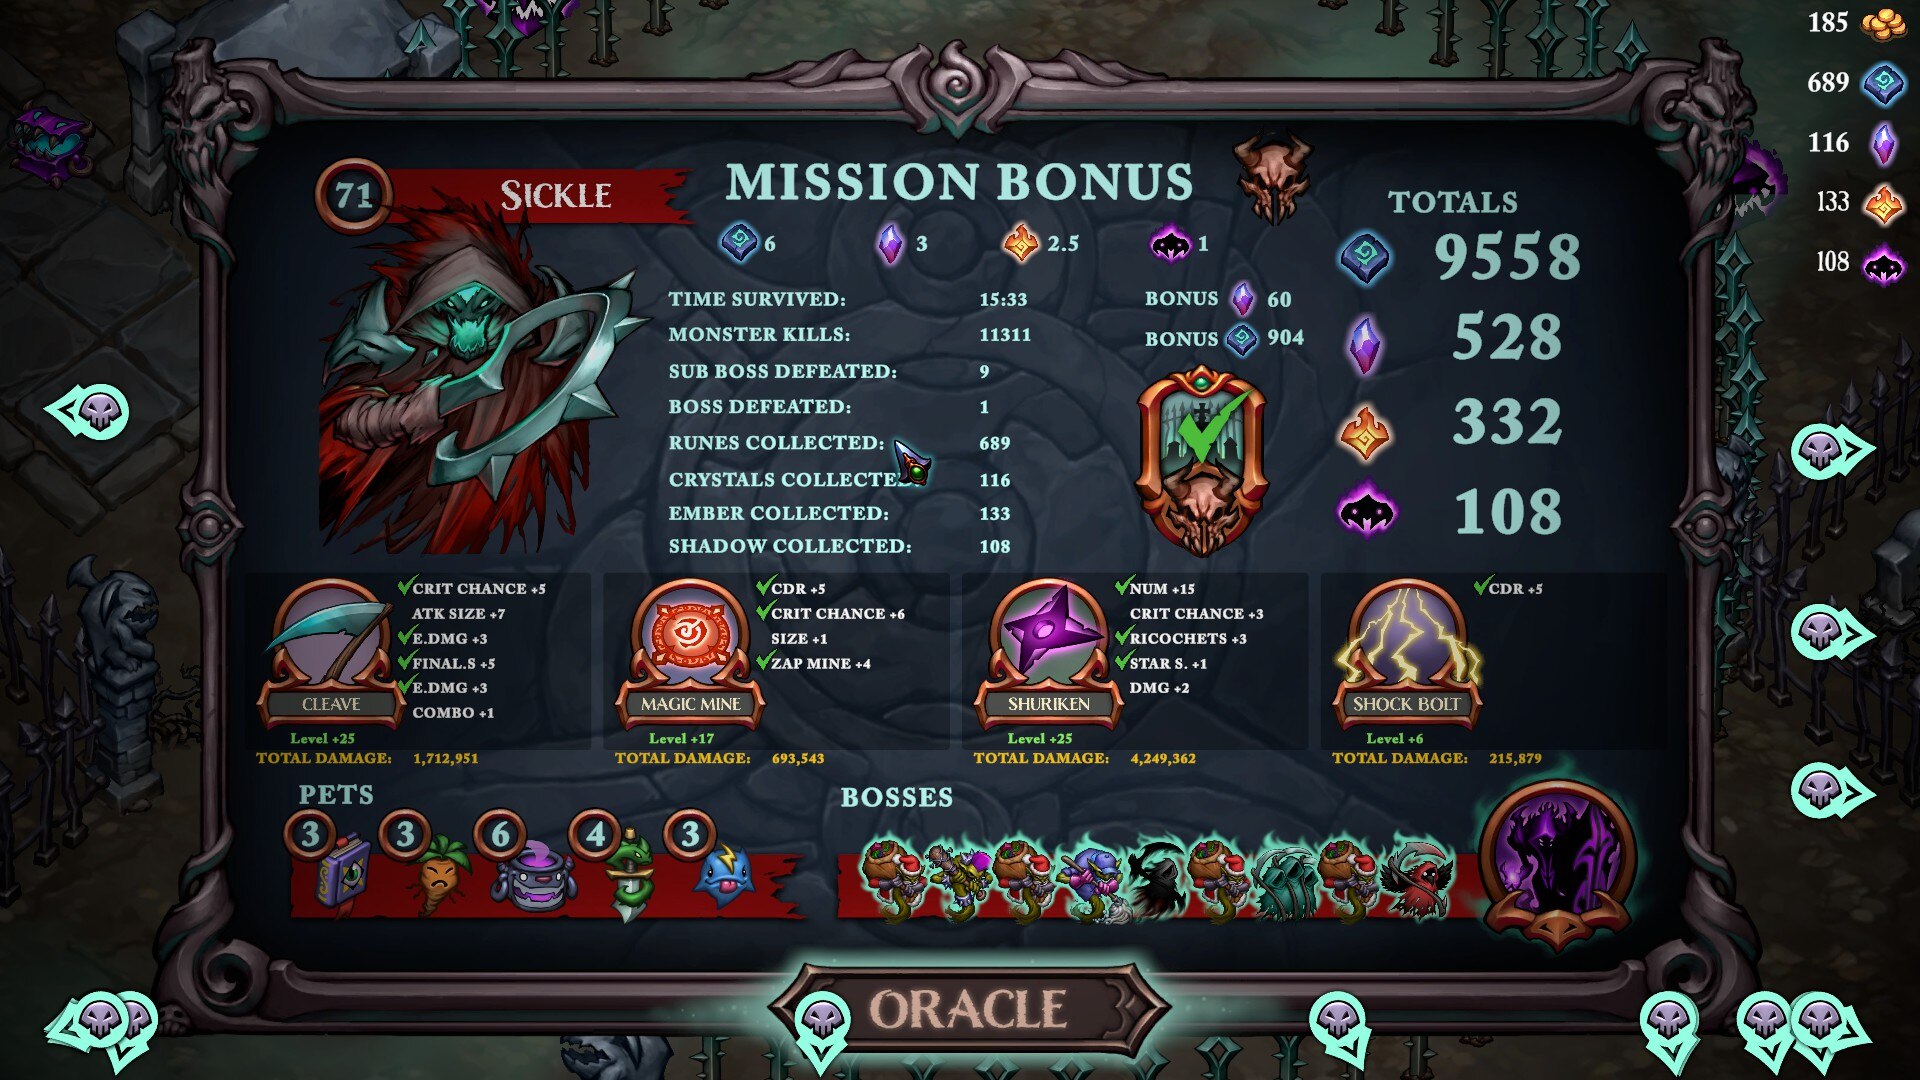
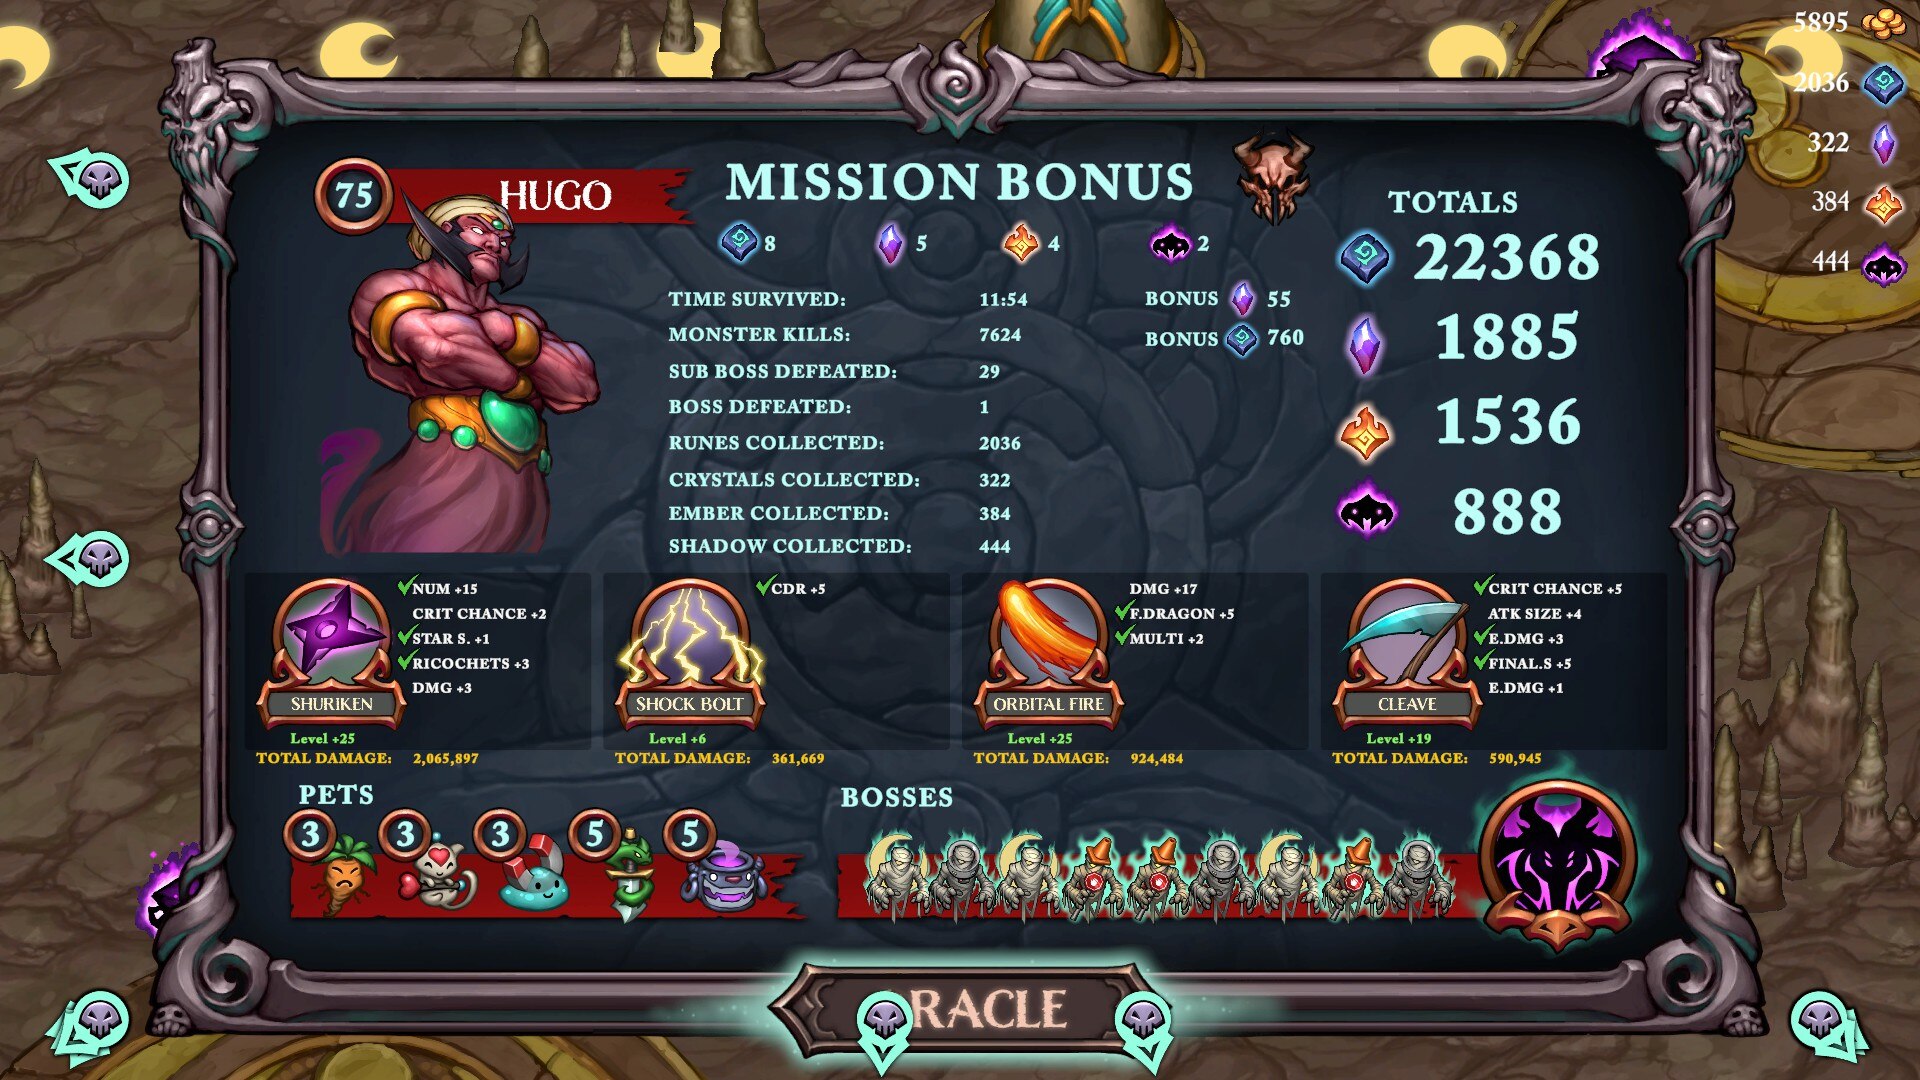
Leave a Reply