Stackers
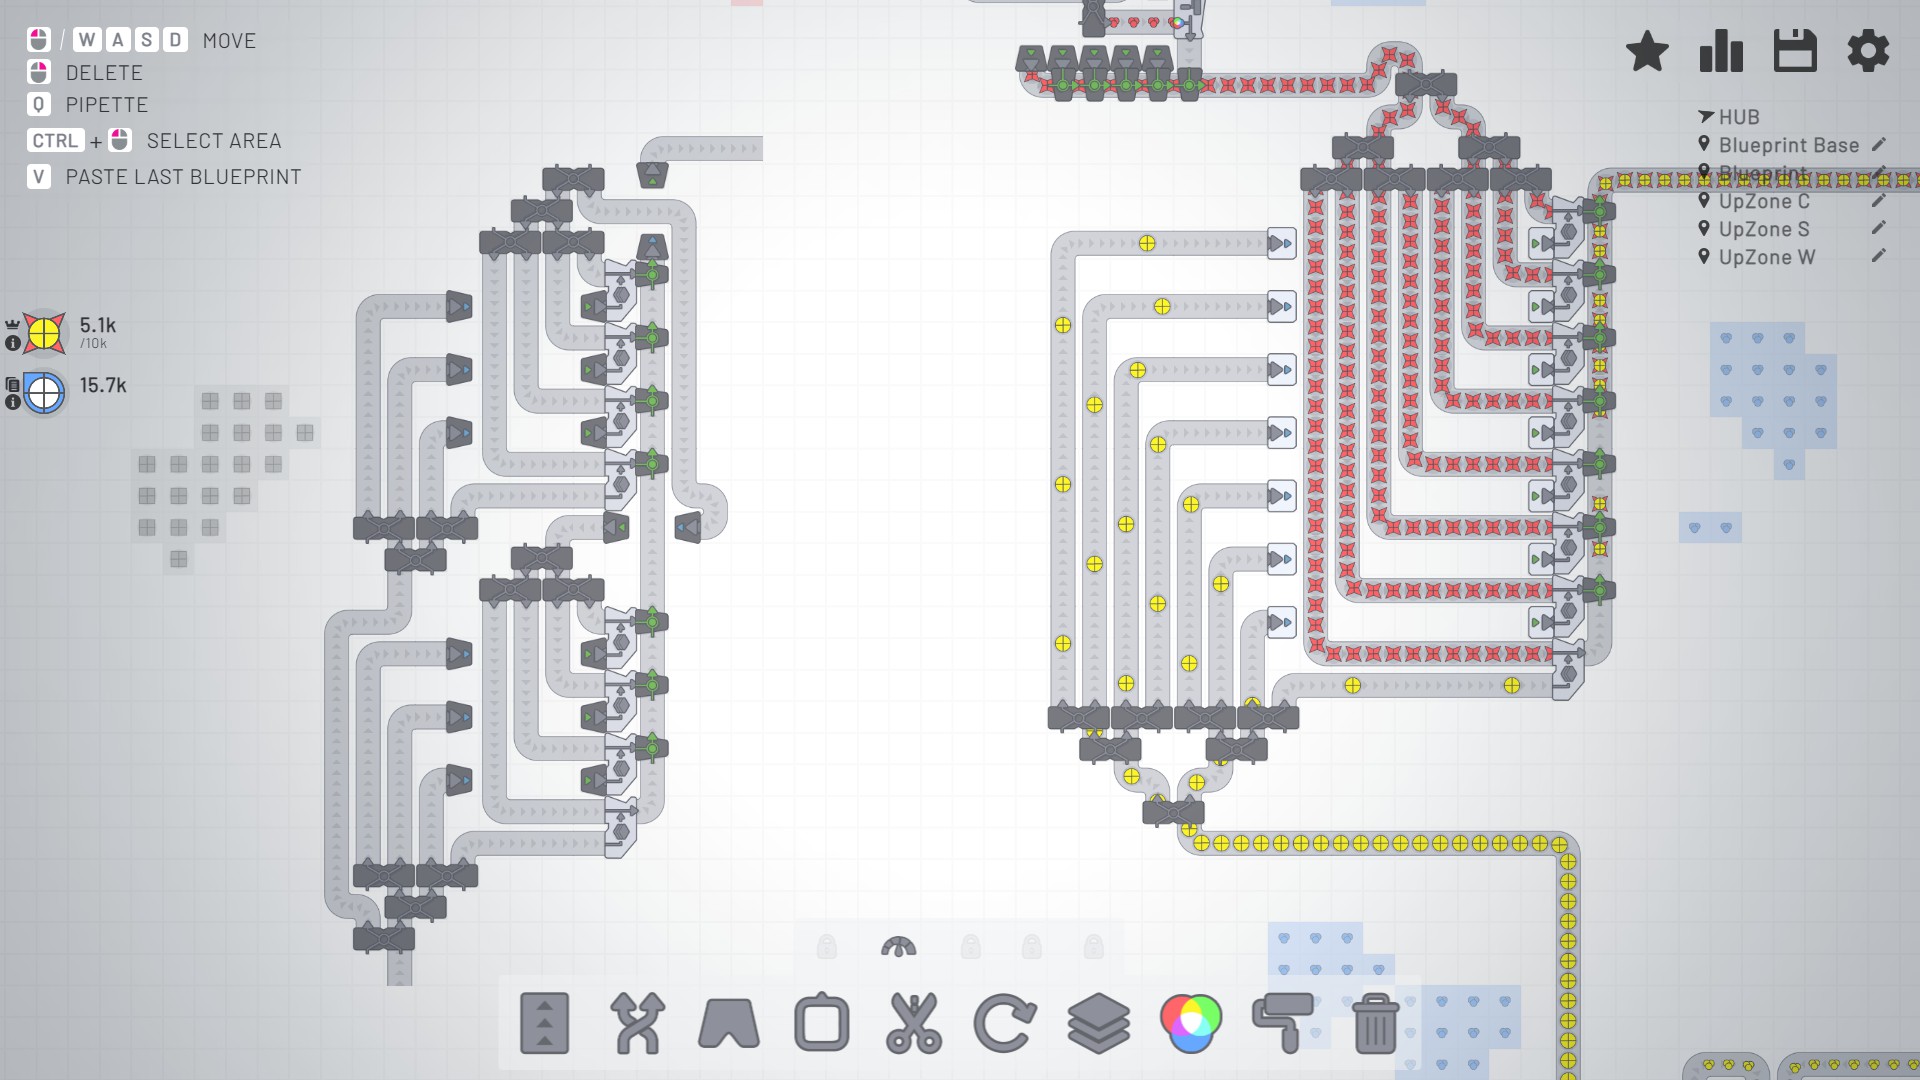
Stackers: to achieve max output, install 8 stackers per one output belt.
Either design is okay, but the right one is available only after Tier2 tunnel is unlocked (which means you can barely use this in the speedrun achievement), and more bulky (because of longer belts inside).
Watch out for polarity of the stacker. To match required polarity, you may swap the positions of the ‘controller’ (distributors) part.
Colors (Mixers & Painters)
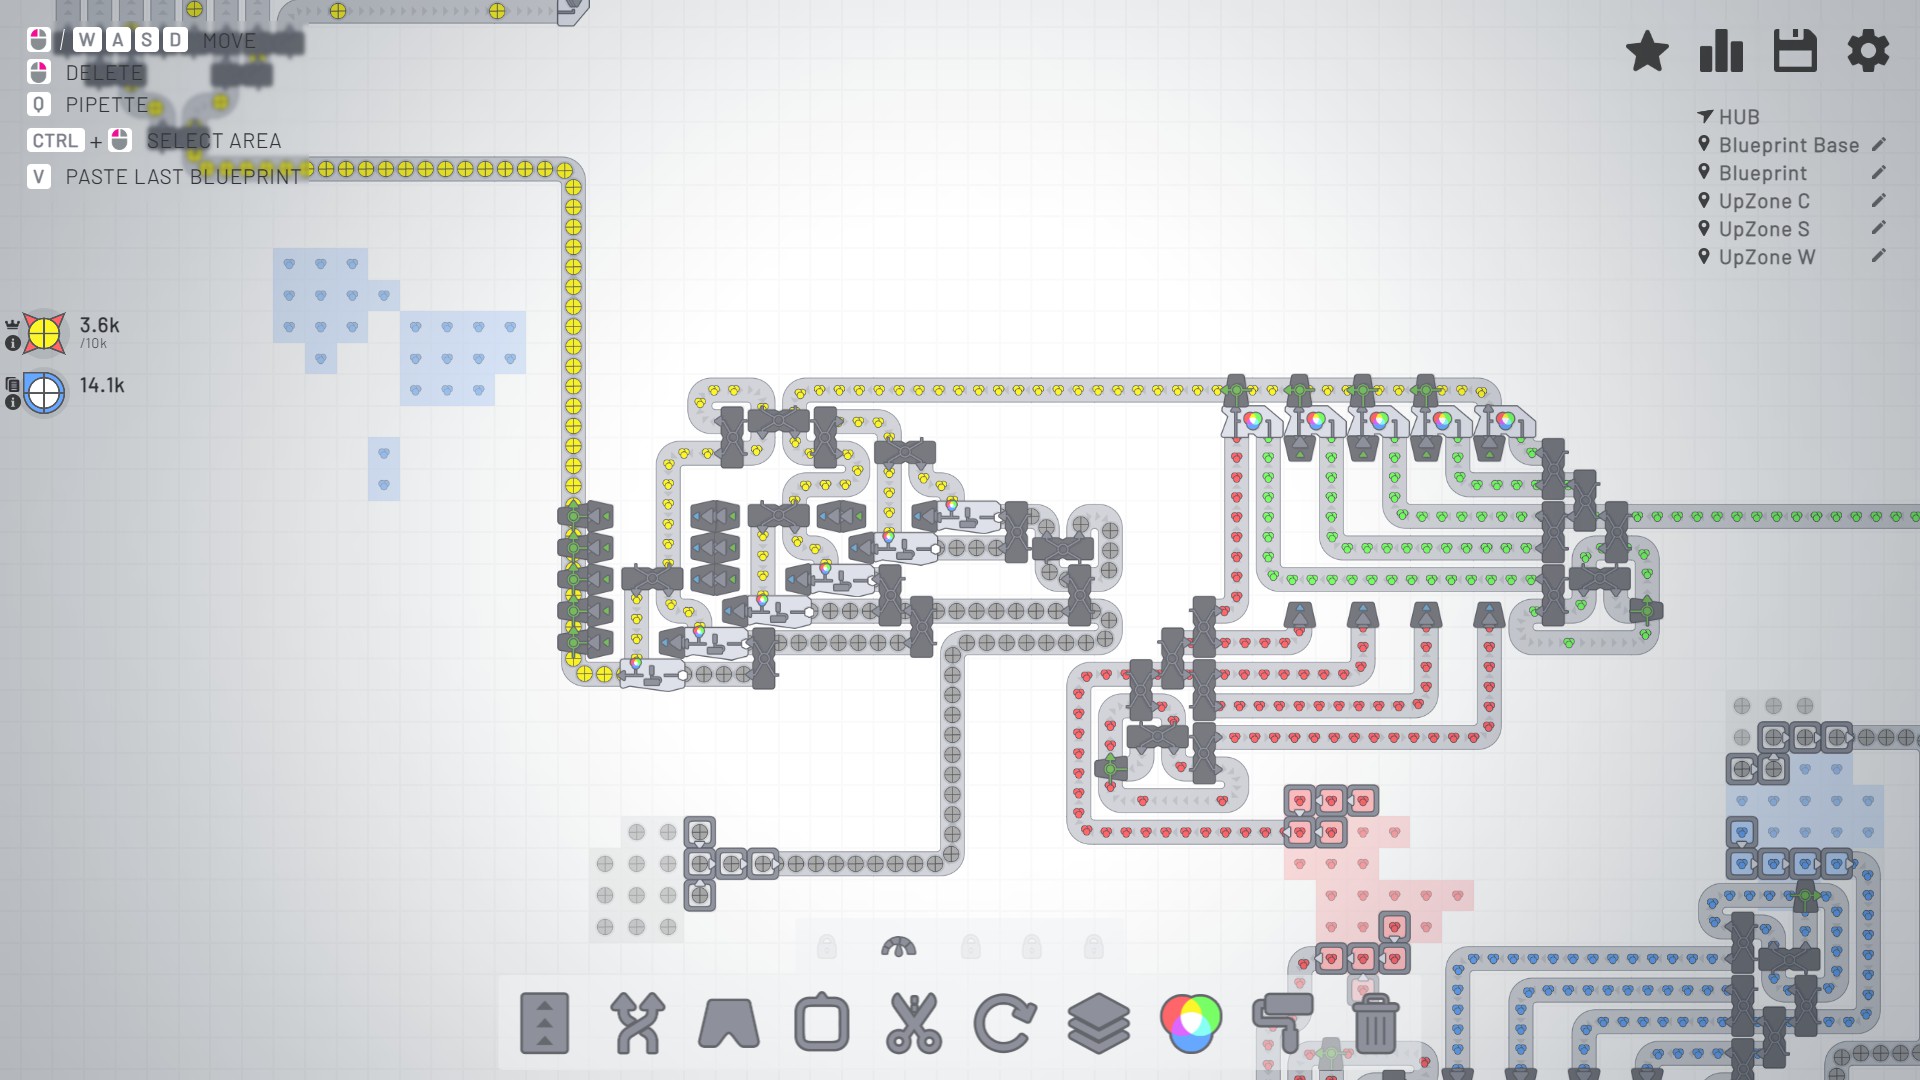
Mixers: 5 for maximum output
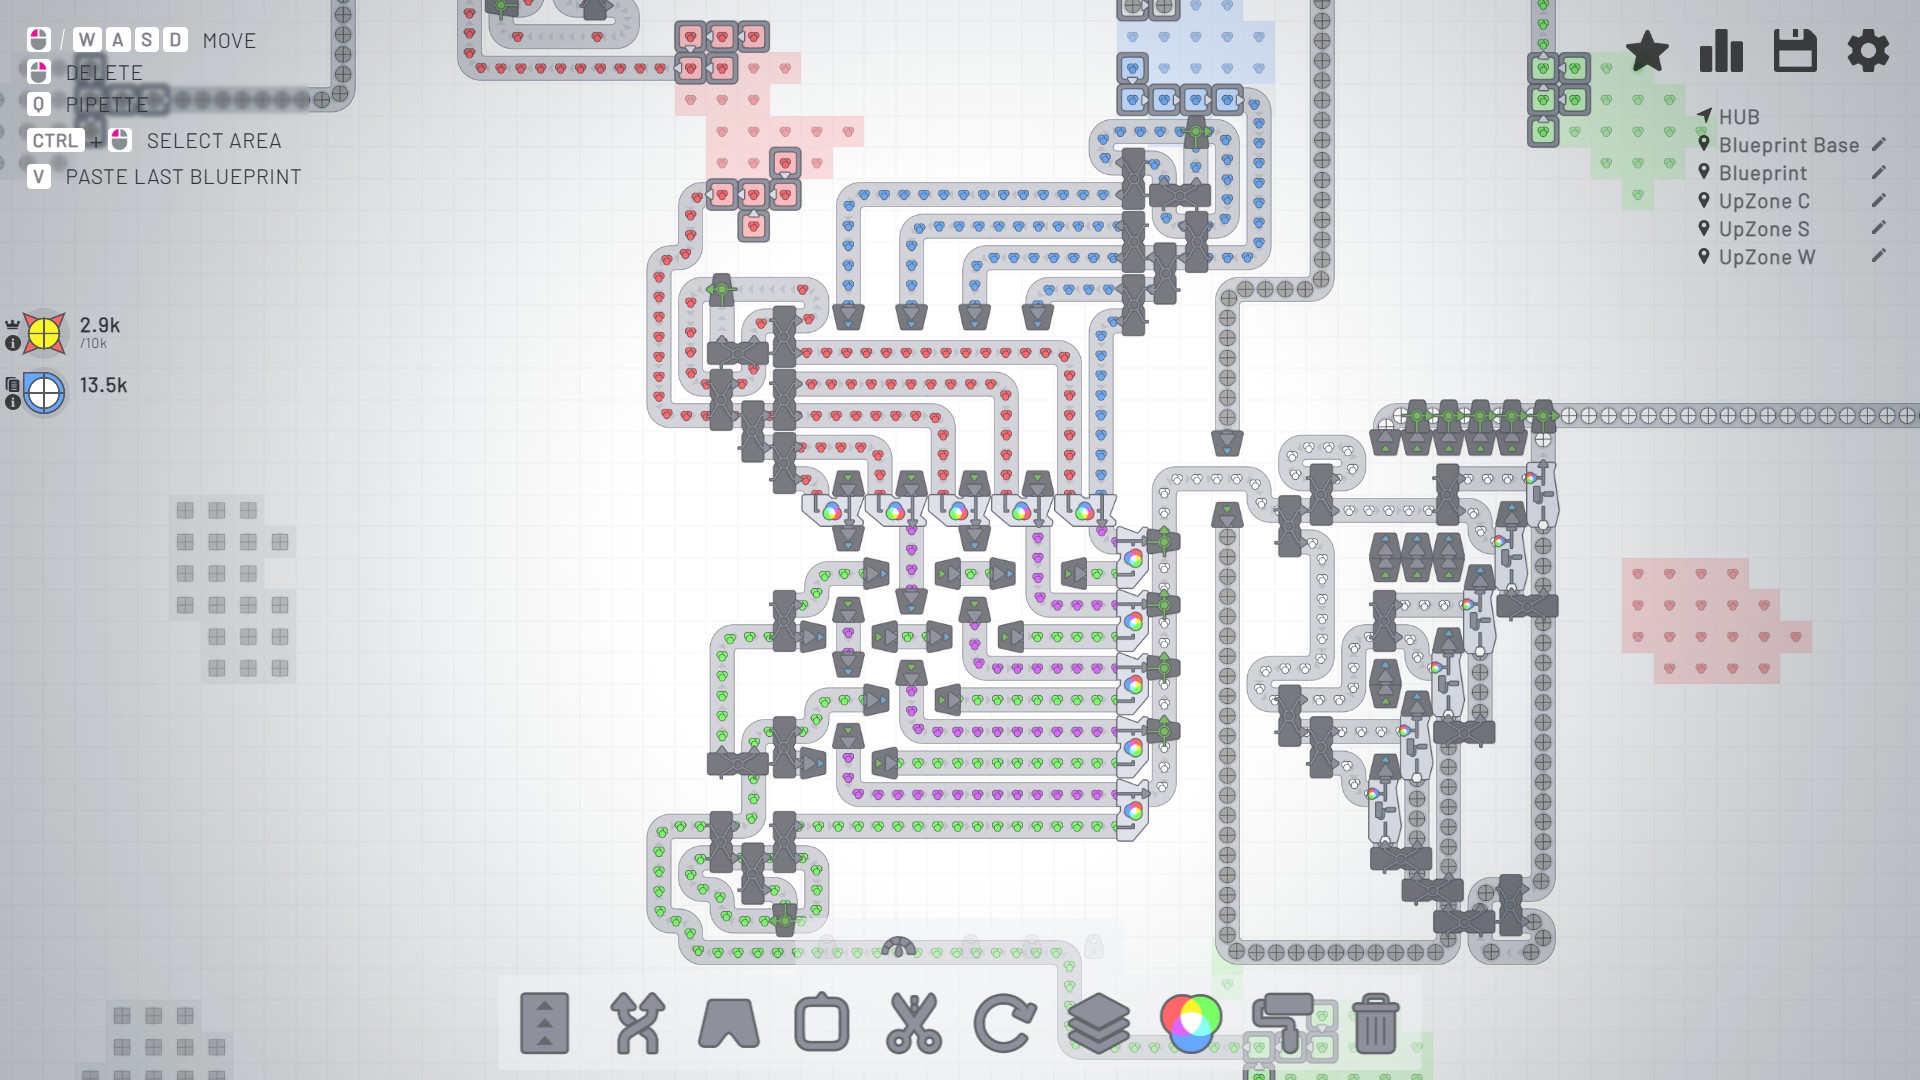
Painters: 6 for maximum output
Painters may look more complex than it should be, but take your time, observe part by part, and then you will be able to remember it and repeat it on the game without referring to any ‘cheat sheets’.
Again, watch out for the polarity. This time, the direction of the diagonal array of painters matters. You must arrange them so that the color pigment input does not block the Shapez input.
My preferred order of installation is:
- 1. Arrange the painters in diagonal array.
- 2. 3 balancers (splitters) for color pigment input (these 3 balancers have fixed position, you’d better remember those). And the belts for color input.
- 3. Painted Shapez output tunnels, to jump over the color pigment inputs.
- 4. The rest (Shapez inputs, input controllers (distributors), output collect).
(Reminder for the speedrun achievement: Before the advent of compact merger (Lv.10), making a conduit for evenly distributing 5 inputs are more cumbersome; this applies only to Lv.9)
Example: Blueprints (Spoiler Alert)
In this screenshot, at the stage of second mixing (to make white pigment), I was forced to use the popular ‘knitted tunnels’ solution because of the outputs of intermediate pigment are conveniently spaced by 1. The result is this, where you can compare the two solutions.
Hope you enjoy the Guide about shapez.io – Easy to Remember Structures, if you think we should add extra information or forget something, please let us know via comment below, and we will do our best to fix or update as soon as possible!
- All shapez.io Posts List


Leave a Reply