A walkthrough on how to change your Perfect Heist workshop project’s thumbnail from the default one set by the game.
Introduction
When you upload a map from inside the level editor, it automatically creates a new workshop project for Perfect Heist 2 and sets the thumbnail to the in game level thumbnail. You cannot change this through the steam workshop user interface. If you want to change your existing project’s thumbnail to any image, follow the steps below to set a custom thumbnail for your project.
First Steps
Before we start, this process only works for an already existing workshop project. If you have not published your map yet, you can set a custom thumbnail by changing the preview.png file within your level’s folder and setting it to read-only before uploading.
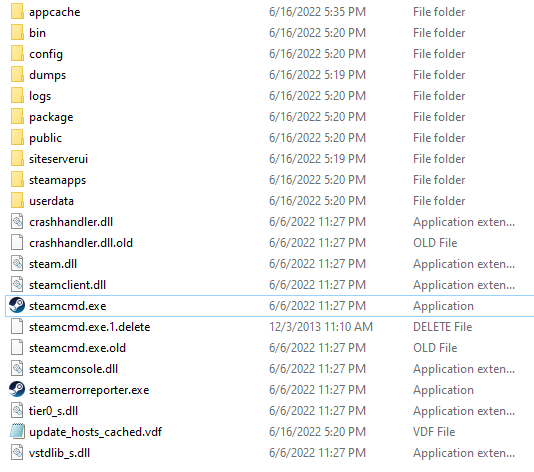
The first thing you must do is download SteamCMD – [valvesoftware.com] from the Valve developer website and extract the zip file somewhere on your computer.
You should see something like this once extracted.
Run the steamcmd.exe application file. It should open a command prompt window and start downloading a bunch of files for first time setup. Once completed, you should end up with a command line starting with
Steam>
Next step is to log into Steam through the console. Enter the following command, replacing Username, Password, and Steam Guard with your account credentials.
login USERNAME PASSWORD STEAMGUARD
Note: If you do not have Steam Guard enabled on your account, use the command without adding anything after password.
Note 2: In my experience, I was logged out of steam on the desktop application when using the developer console. So do not attempt this while actively using steam.
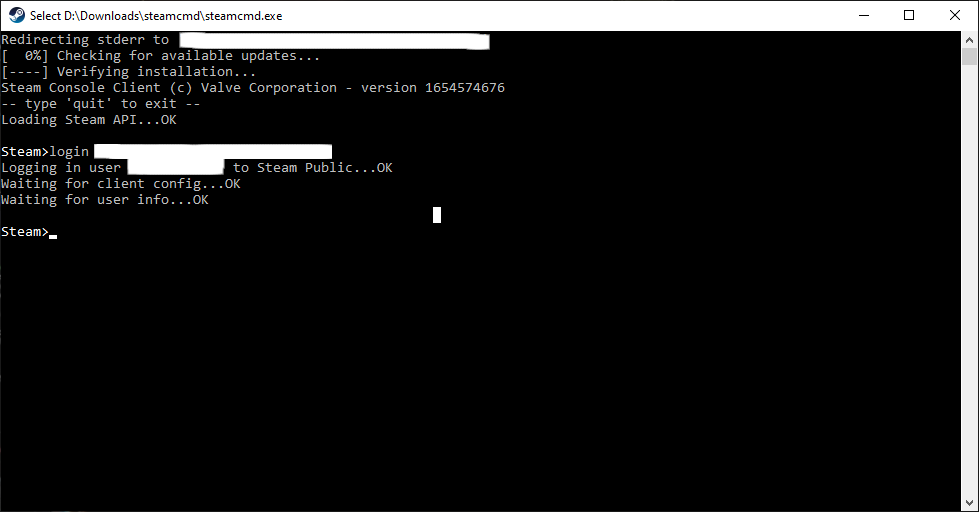
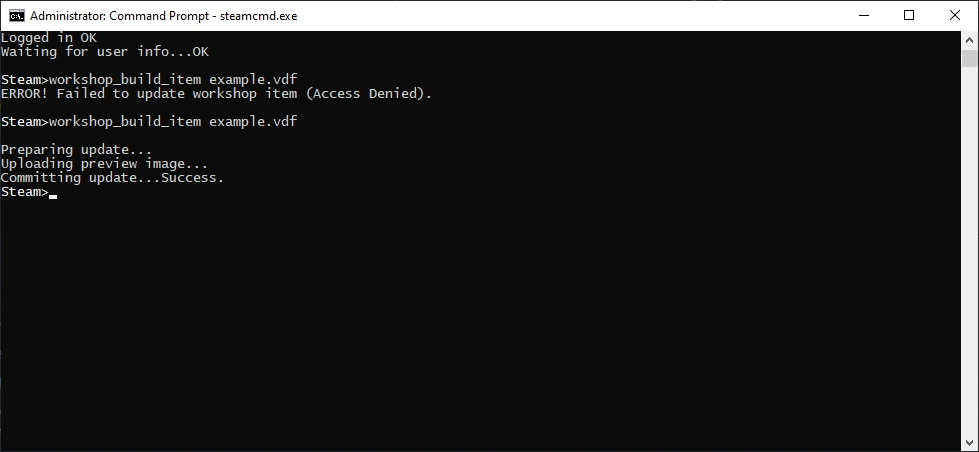
If everything was successful, you are now logged into the steam developer console! You should see something like this:
Changing Your Thumbnail
Now we must create a VDF file to upload to the steam servers. To do this, you will need some information to put inside the file.
Project ID
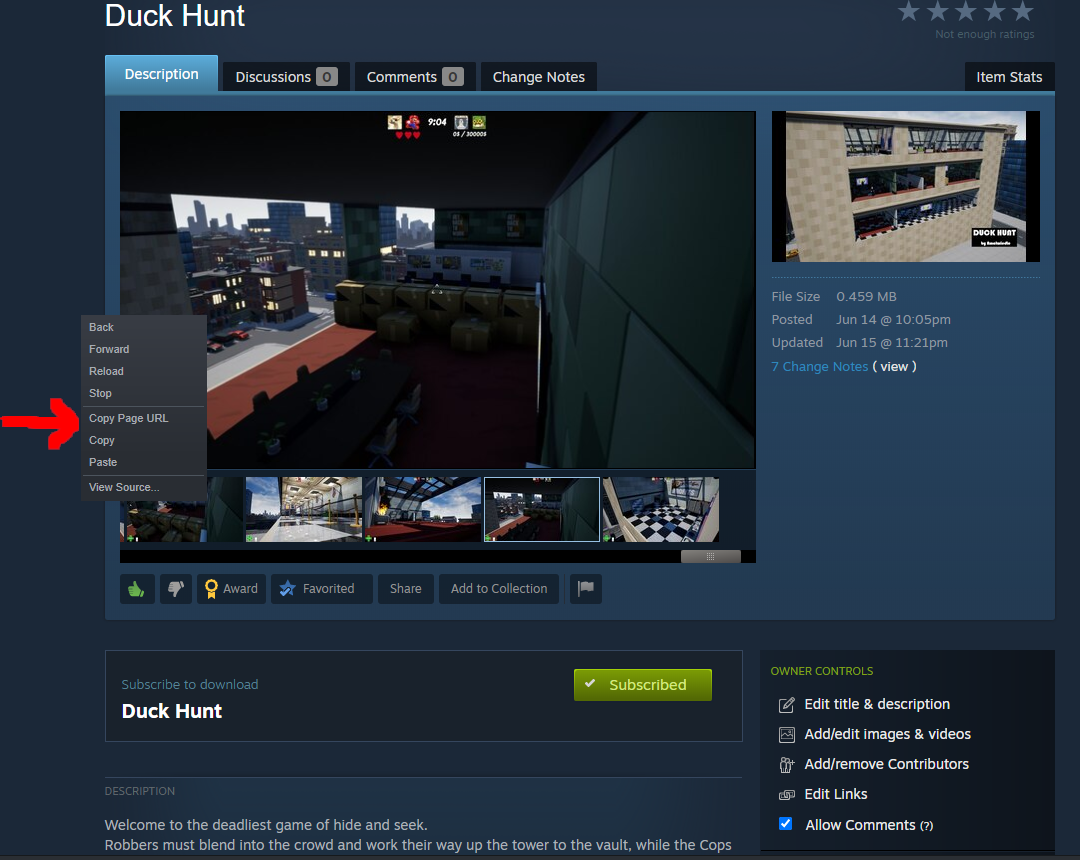
Find your project’s ID number by going to it’s workshop page and right clicking the page. Then copy the page URL. You will get a URL like this:
https://steamcommunity.com/sharedfiles/filedetails/?id=XXXXXXXXX - [steamcommunity.com]
Copy the numbers after the “id=” and save them for later use.
Thumbnail File path
Go to the image file you wish to use as a thumbnail and copy the file path of where it is stored on your hard drive. It should look like this:
C:\steamcmd\thumbnail.png
Save this path for later use.
Creating the VDF File
Create a blank text file inside the steamCMD folder on your computer and open it. Copy the following text into the file you just created. Change the value inside the quotes after “publishedfileid” and “previewfile” to the values you saved earlier.
"workshopitem"
{
 "appid" "1521580"
 "publishedfileid" "Your Workshop Project's ID Number"
 "previewfile" "Your Thumbnail Image File Path"
 "changenote" "Added thumbnail."
}
Note: Do not change the “appid” value, it is already preset to Perfect Heist 2.
Note 2: You may be able to remove the “changenote” line from the file. In my case however, I was unable to upload the VDF successfully without it.
Once you add your information to the file, save the file and change the file extension from .txt to .vdf.
The last step is to upload the VDF file you just created to the steam servers. Use the following command inside the SteamCMD console to do so.
workshop_build_item FILENAME.vdf
Note: If you get a rate limit exceeded error, it is because your thumbnail file is too large. I found files no larger than 500KB will be able to be uploaded. To solve this, shrink or compress your thumbnail down in resolution before uploading.
Finishing Up
After uploading the VDF file successfully, your workshop project should have an updated thumbnail! It might take a couple minutes for it to reflect on the page, so if it doesn’t show up immediately, give it a second.
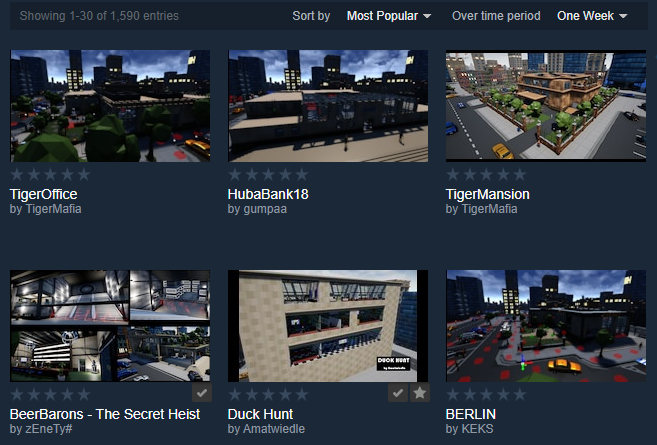
If you look at my custom map Duck Hunt, I uploaded a simple thumbnail to my project with a title and my username in a black box in the corner. Your project should appear to have whatever image you uploaded through this process.
You should safely close out of SteamCMD instead of closing the window using the following command:
quit
Enjoy your new custom thumbnail!
I hope you enjoy the Guide we share about Perfect Heist 2 – How to Set a Custom Workshop Project Thumbnail; if you think we forget to add or we should add more information, please let us know via commenting below! See you soon!
- All Perfect Heist 2 Posts List


Leave a Reply