This guide teaches you how to package your mod into a single .pak file, which then can be used on its own or served through a custom mod list server.
Getting a PAK editor
Before you continue, you need to get yourself a PAK editor. You can use google to find one 🙂 Just make sure it’s able to not only read but also write/add files.
For this tutorial, I’ll be using Quark – [sourceforge.net] , which has a UI so it’s easier to show what’s happening. But feel free to continue with any other PAK editor.
Preparing the mod
For this tutorial, I’ll be downloading an existing mod and package it. But if you’re developing your own mod, I’m sure you already have everything set up.
The mod I’ll be using is Deathmatch Classics Vol. 1 – [quaddicted.com] . It’s just a zip file with a bunch of bsp files.
Creating the pak file
Now it’s time to create the pak file.
The Pak file it’s almost like a zip file. It contains files and folders. And it mirrors exactly the same as a mod folder. If you were to extract all the files from a pak file into a mod folder, you’d be able to run it exactly the same without issues. That also applies the other way! If you package a mod folder into a .pak file, you can just use it as long as you place it inside the mod file with the name ‘pak0.pak’
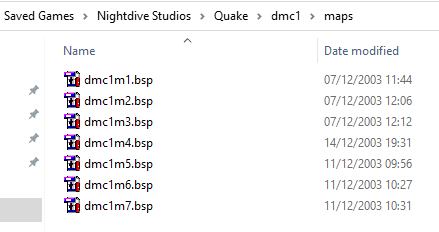
Here I extracted all the files into a mod folder called ‘dmc1’ and the sub folder ‘maps’.
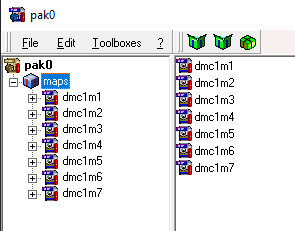
Next up, create a new pak file. If you’re using Quark, the easiest way is to open an existing pak file (eg: Quake64) and then going to File -> New Pak File.
Then create the ‘maps’ folder inside the .pak and import all the BSP maps into it. Then save the .pak as pak0.pak.
Testing compatibility
Now it’s time to test if the pak file works!
I deleted the maps folder and left only the .pak file in the mod folder.
Launch the game and change to the mod by typing in the console:
game dmc1
Afterwards, launch one of the maps by typing:
map dmc1m1
And it works 🙂
You should also test all the maps for compatibility with the new engine.
However, we’re not done yet! This is enough for a basic package, but we should use the new features from the new engine.
Map selection
In order to add map selection to the mod, you need to create a json file called ‘mapdb.json’.
In this link – [pastebin.com] is a copy of the file that comes with Quake64 mod. This is a json file. If you don’t know how to edit json, I recommend you look at some tutorial.
Using the Quake64 json as a base, I created this file:
{
 "episodes": [
 {
 "dir": "dmc1",
 "name": "Deathmatch Classics Vol. 1",
 "needsSkillSelect": false
 }
 ],
 "maps": [
 {
 "title": "Basewalk",
 "bsp": "dmc1m1",
 "episode": "dmc1",
 "game": "dmc1",
 "dm": true,
 "coop": true,
 "bots": false,
 "sp": true
 },
 {
 "title": "Acrophobia",
 "bsp": "dmc1m2",
 "episode": "dmc1",
 "game": "dmc1",
 "dm": true,
 "coop": true,
 "bots": false,
 "sp": true
 },
 {
 "title": "Bloodrun",
 "bsp": "dmc1m3",
 "episode": "dmc1",
 "game": "dmc1",
 "dm": true,
 "coop": true,
 "bots": false,
 "sp": true
 },
 {
 "title": "DeutschMaschine",
 "bsp": "dmc1m4",
 "episode": "dmc1",
 "game": "dmc1",
 "dm": true,
 "coop": true,
 "bots": false,
 "sp": true
 },
 {
 "title": "Domination",
 "bsp": "dmc1m5",
 "episode": "dmc1",
 "game": "dmc1",
 "dm": true,
 "coop": true,
 "bots": false,
 "sp": true
 },
 {
 "title": "#endif",
 "bsp": "dmc1m6",
 "episode": "dmc1",
 "game": "dmc1",
 "dm": true,
 "coop": true,
 "bots": false,
 "sp": true
 },
 {
 "title": "Lost Entrance to the Dismal Oubliette",
 "bsp": "dmc1m7",
 "episode": "dmc1",
 "game": "dmc1",
 "dm": true,
 "coop": true,
 "bots": false,
 "sp": true
 }
 ]
}
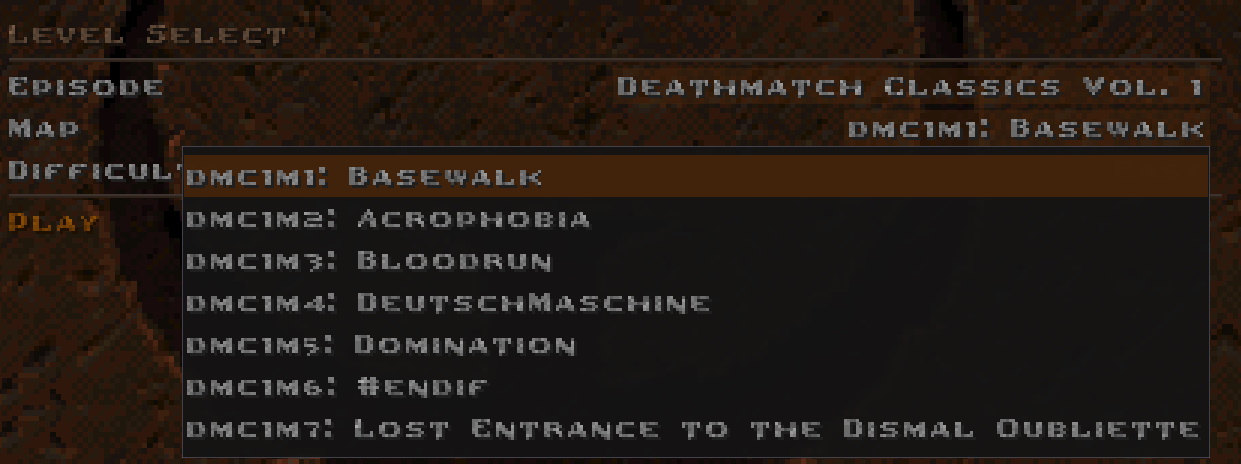
and after restarting Quake and testing in-game, you can see that it works.
Structure
There isn’t official specs on this, so this is all based on what I could infer from existing json files.
There are 2 sections: Episodes and Maps.
Episodes
dir: The mod folder name where the episode resides
name: What’s shown in the episodes dropdown
needsSkillSelect: Unsure what it does.
Maps
title: The map name shown in the dropdown
bsp: Name of the bsp file of this map.
episode: Which episode this is related to. The value is the same as the dir from the episode.
game: Which mod this map runs on.
dm: Does this map support Deathmatch?
coop: Does this map support Coop?
bots: Does this map support Bots?
sp: Does this map support Singleplayer?
Addons list
This tutorial will not cover on how to add the mod to the addons list, but in sum, it is not possible to do it from local folders. The .pak file is ready to be hosted by a community mod list server, so if you can get it hosted there, it should be ready for it.
I hope you enjoy the Guide we share about Quake – Packaging your custom mods; if you think we forget to add or we should add more information, please let us know via commenting below! See you soon!
- All Quake Posts List


Leave a Reply