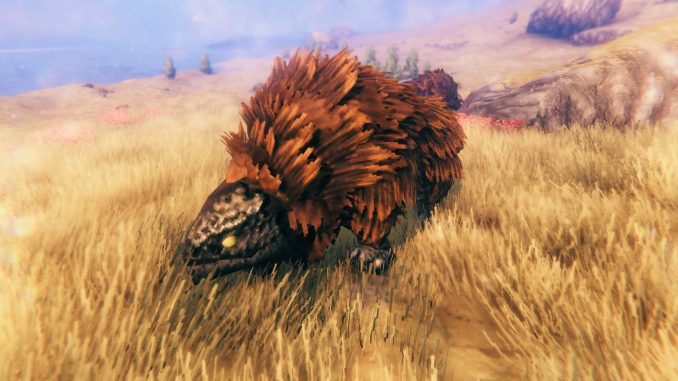
Valheim is a game set in the secret tenth realm of the Norse cosmos that’s filled with bountiful nature and deadly enemies. You’ve been tasked by Odin with defeating gigantic, terrifying monsters in this strange new world — and you’ll need the right tools and the right knowledge to do it.
1. Enter different worlds in Valheim to get resources you can’t find
Although you might prefer to stick to the first server you enter, it is very useful to know this from the beginning: you can take your character to whichever Valheim world you want, without losing stats or items.
You should definitely use this to your advantage while gathering resources later on. Can’t find any stones around your base? Or maybe there’s a shortage of deer? Then go back to the main menu, and enter another world that does have a lot of these resources.
2. Grab wood and stones to get started in Valheim
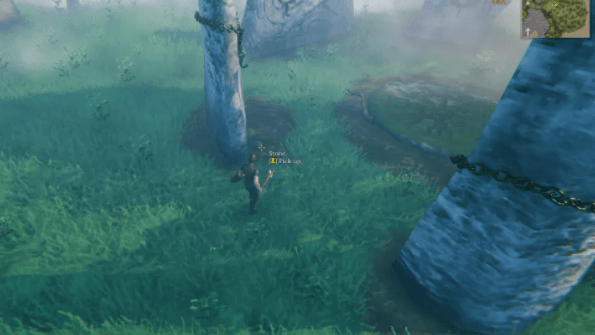
This may not come as a surprise to those familiar with the survival genre, but the first thing you need to do after spawning in the world of Valheim is gather wood and stones. See the smaller trees? Simply punch them with your bare hands until they break into wooden logs.
Stones, on the other hand, need to be picked up. You can only get the small ones, so keep an eye out for them while walking through the woods.
While gathering these resources, it won’t be long until you encounter your first enemies; the Greylings. Don’t worry too much about them though, the Greylings are pretty weak and a few punches will kill them.
3. Craft the axe and hammer to build your first base
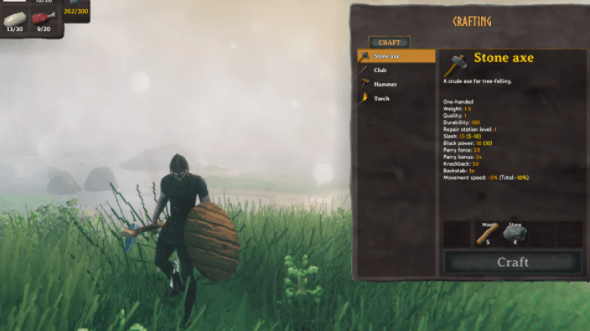
You can open your Inventory and the Crafting menu with Tab. The first tool you need is the stone axe: use 5 pieces of wood and 4 stones to make it. This will help you chop down trees much faster. That’s a good thing, because we’re going to need lots of wood to build our first Valheim base.
Next, use 3 wood and 2 stones to craft a hammer. Equip this tool to start building your base. Right-clicking opens up the menu with different building materials, left-clicking places a material, and the middle mouse button allows you to dismantle any piece at no cost.
4) How to craft a Valheim workbench and create a building area
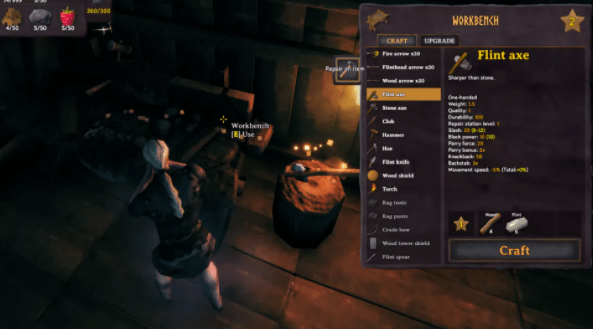
Once you have your basic tools, the next thing you need is a Valheim workbench. This will unlock many new crafting options, and creates an area for you to build on. Equip the hammer, and then go to the ‘crafting’ tab to find the recipe for the workbench. It requires 10 wood.
After you place the bench, you will see a large, white circle surrounding it. This is your building area. If you want to build somewhere else, either place a second workbench or simply dismantle it and place it again.
5. How to build a Valheim base
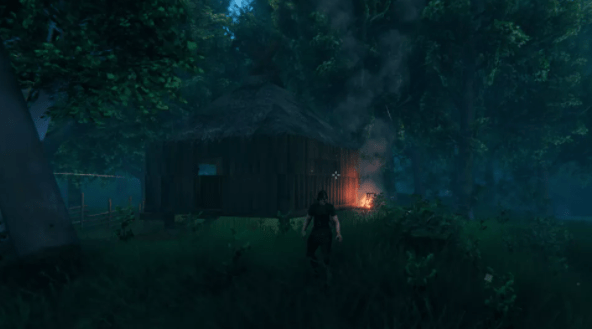
But don’t think you’re done just yet! Before you can actually use your workbench, it needs to be protected by a base. Placing a simple wall and a piece of roof will suffice, but you can just as well start on a proper Viking home.
As the forest ground is quite uneven, most buildings in Valheim require a foundation. Use the poles and beams to support your floors and walls. Keep in mind that this base will often be under attack after defeating the first boss, so do make sure it’s sturdy. You should place your valuable loot inside.
6. How to build a Valheim respawn point with a bed and campfire
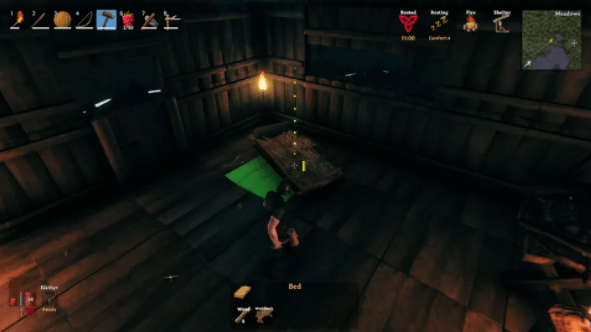
Now that the Valheim base is finished, it’s time to place a bed. This is not just useful for skipping the night; it’s also your custom Valheim respawn point. You can find the building recipe by equipping the hammer and then clicking the ‘furniture’ tab.
There’s just one problem though: you need a campfire close to your bed, but the bed is inside your wooden base and the campfire can’t be placed on wood. The solution? Place the campfire next to your bed, but outside your base. It doesn’t matter if there’s a wall between them!
7. How to find and eat food in Valheim
Your character is probably hungry by now. Luckily, the raspberry bushes, mushrooms, and animals in Valheim are not that hard to find. There is just one tricky thing that you should know about; you can’t eat the same food type twice in a row.
Apparently Vikings care about a varied diet, so you can eat 1 raspberry and 1 mushroom at the same time, but not 2 raspberries. You will have to wait until the food icon in the lower left corner of the screen starts flickering or has disappeared. This means you can eat the food again.
8) Find and defeat the first Valheim boss Eikthyr
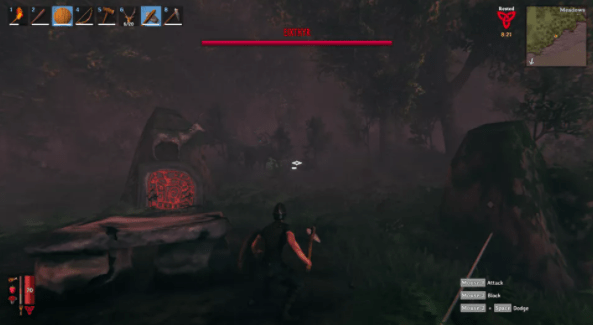
If you want to advance in Valheim, you need to defeat the bosses. The first boss, Eikthyr, is located near your default spawn point. After finding his location, you must offer a deer trophy to summon him.
It is not wise to battle Eikthyr right away. Make sure you have decent weapons first, such as an upgraded bow or flint knife. You should also equip leather armor. Killing boar and deer will get you the required materials. Finally, make sure you’re fully fed, healed, and rested. After you defeat Eikthyr, you can bring his trophy to the default spawn point to get better stats.
9. A few more essential tips before entering Valheim
Here are a few final things you should keep in mind when you start your Valheim adventure:
- Falling trees can kill you. As soon as you notice that a tree is going to fall, step away.
- A quick way to gather lots of wood in Valheim is by placing a workbench next to an abandoned building and dismantling the foundations. You will get a big stack by just a few clicks.
- Always repair your items before you leave your base. If you click on the workbench, you can repair your items for free (no additional resources required).
- Using roll-dodge will help you win many difficult battles. You need to go in ‘sneak’ mode first (using Ctrl), and then press shift. It’s a fast and easy way to avoid taking damage.
- Skills are upgraded by simply using the ability (running, swimming etc.), but can be diminished by dying.
- Boars don’t run away, but deer do. So start by hunting boar for leather scraps with a melee weapon; then use them to make a bow and start hunting deer for their leather.
- Those aren’t arrows flying at you, it’s just the wind.
And that’s all. You’re as ready for the Viking world of Valheim as you’ll ever be.
Points of interest:
- Viking Graveyard – Rock formation in the shape of a Viking ship
- Rune Stone – big rock with red runes written on one side of it, which contains Lore.
- Stonehenge- a place surrounded by five or so boulders.
- Abandoned house – ruined structure made of wood. Sometime containing a random chest with loot.
- Glade – little area with dirt covered ground and a stump in a middle surrounded by trees.
- Abandoned outpost – ruined tower made of stone. Often got some Draugrs outside and inside, and crows flying around. Usually contains a chest with loot.
- Little ruins – a ruins of stone house with a chest of loot inside protected by Draugrs.
- Tower – a structure of stone with two torches and a chest with loot on top.
- Tomb – a tomb-like structure with entrance to dungeon-instance. Often surrounded by Draugrs. Dungeon-instance also contains a lot of Draugrs and chests with loot.
- Camp ruins – small circular area surrounded by walls with some clutter and a chest with loot inside. It is also a place of Forest Troll spawn.
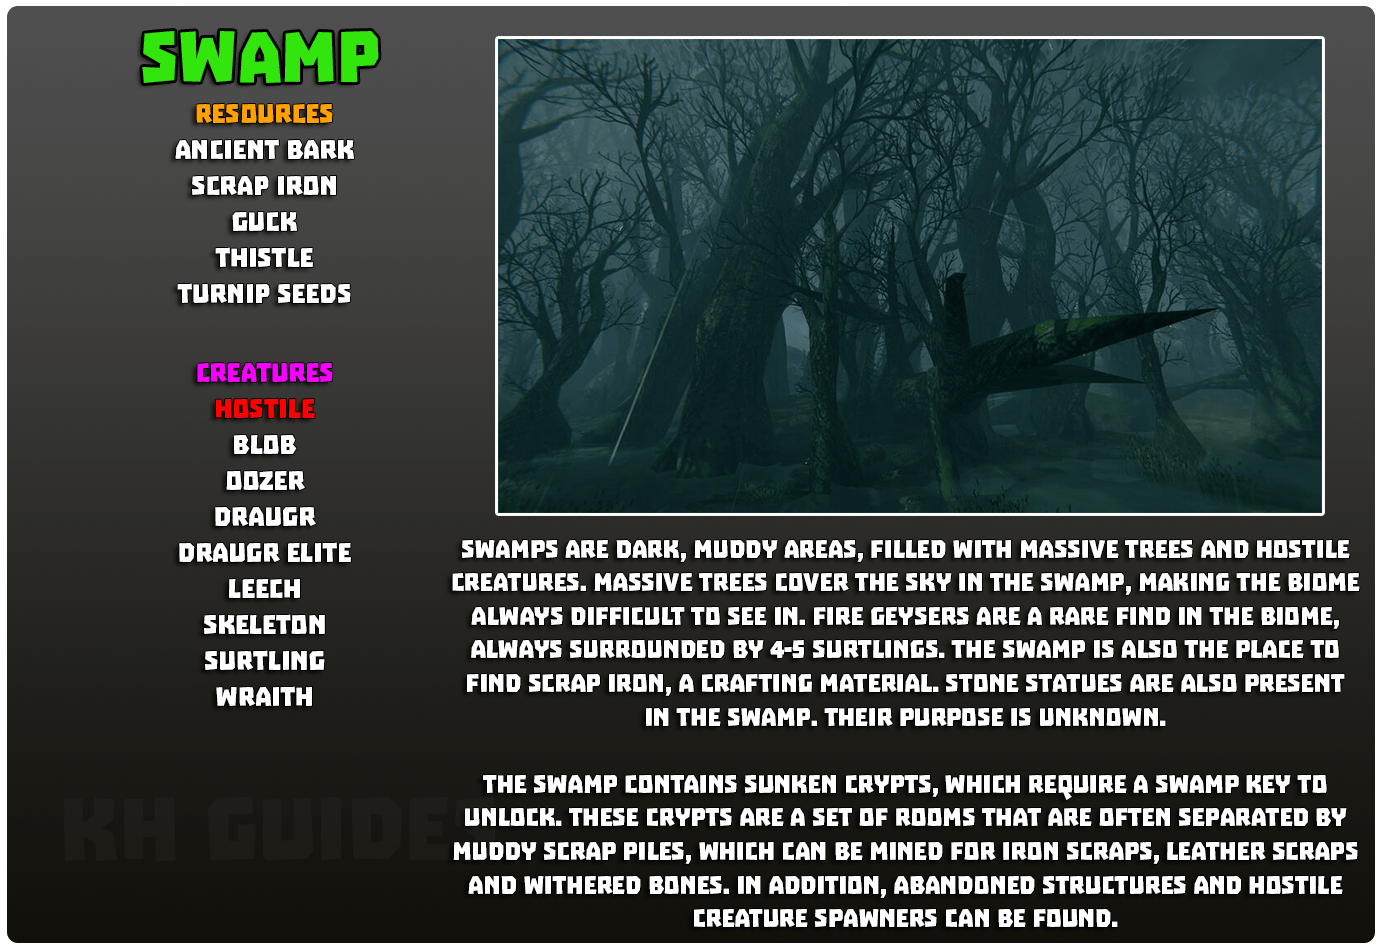
- Crypt – Brick structures found in the Swamp with green torches in the front. Require a Swamp Key to open.
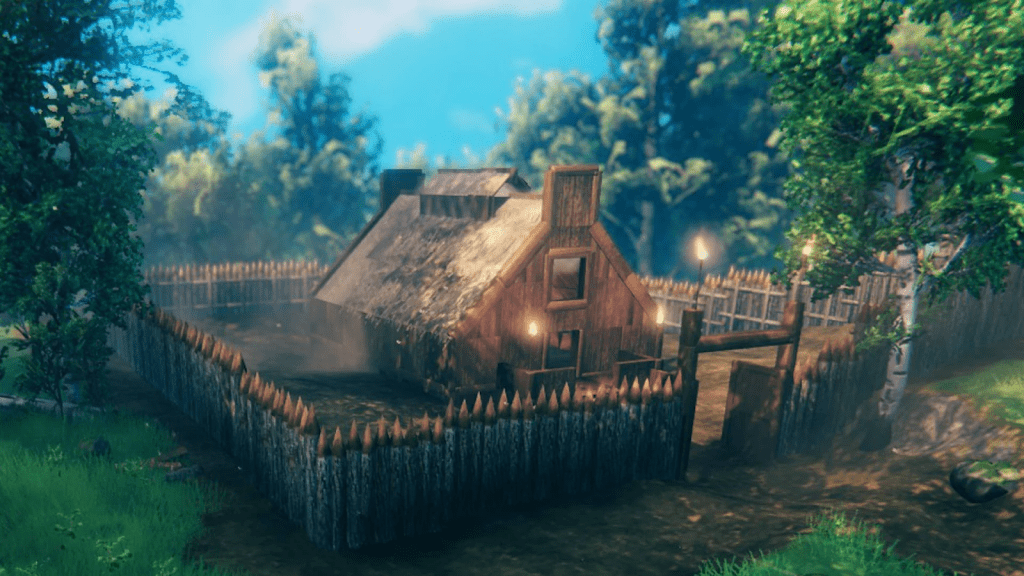
You can build using a Hammer within the working area of a workbench.Press [1-7] to use the hammer in the hotbar slot.
Press [F] to switch category
Press [Q/E] to switch item
Press [LMB] to place
Press [Middle Mouse Button] to remove
Scroll the mouse to rotate the item
There are various crafting stations required to be nearby to you to place certain items such as:The Workbench, required to place most building items you have unlocked from the beginning or early on, and some late items.
The Forge, required to place most building parts containing metals.
The Stone cutter, required to place building parts created out of stone, such as the stone walls some abandoned buildings are made out of.
The Artisan Table, required to build some crafting stations that as of Patch 0.142.6, are at the end of implemented progression.
Snap Building
The building parts such as wall, roof, floor, beam, and pole can snap to each other on the same height.
However, you can’t make a perfect alignment to natural spawn buildings. It may appear crooked.
Decay
If wooden building parts are not covered during rain or connected to a roof or are submerged in water they will decay down to a maximum of 50% durability, changing appearance to look rotted until repaired. The stake wall does not decay when exposed to rain but the wooden gate does.
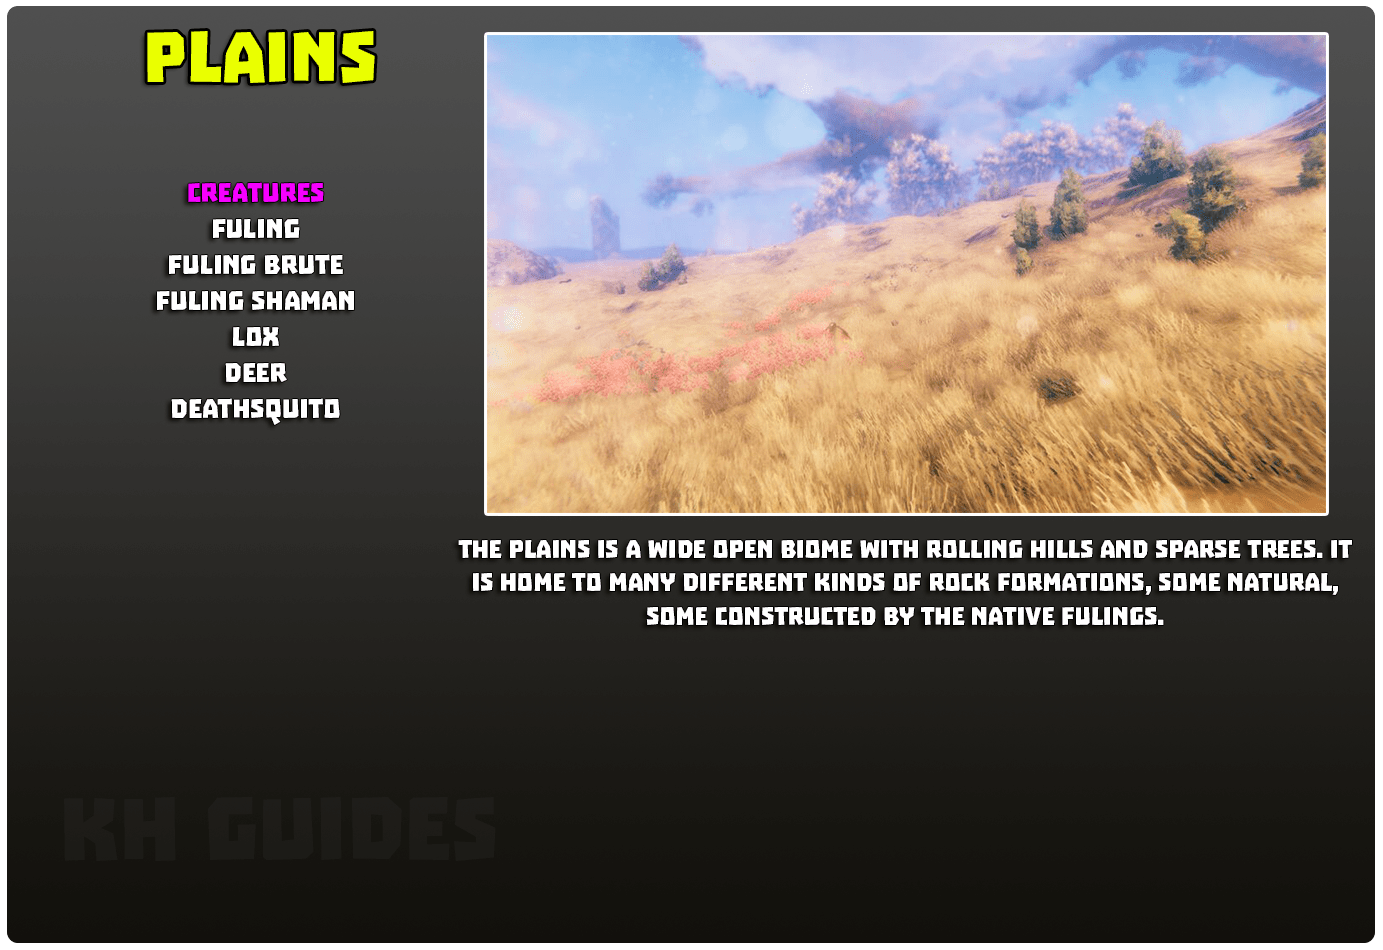
Uncovered wooden parts in The Plains will not decay as there is no raining in that biome. (it is possible this may be inaccurate)
Damage
Building parts can be damaged by player, monster, and creature attacks. Wooden spikes will also take small amounts of damage while dealing damage to entities that touch them.
Hostile monsters are attracted to and aggressive to all light sources and crafting stations and will attempt to break them if not attempting to attack a player.
Over time ANY wooden structure or craft station WILL degrade to 50% health if placed in water.
Repair
You can repair building parts that seem to be decaying or damaged with a Hammer. This does not cost any resources, but does consume stamina, and needs a Workbench to be placed within range of the building part.
Abandoned Buildings
These structures are a type of POI that can be found in the naturally occurring in the world. The size, layout, and materials these structures are made of can vary greatly as each is generated from random templates.
There are different types of abandoned structures such as Abandoned Cabins, Abandoned Towers, Abandoned Farms just to name a few.
These abandoned and generated structures can contain things such as chests with items specific to the biome, monsters (usually Skeletons), and monster spawners, and Vegvisirs to mark the nearest boss altar for that biome.
In the meadows biome they can also contain naturally spawning Beehives, which will drop a Queen Bee and sometimes Honey when destroyed.
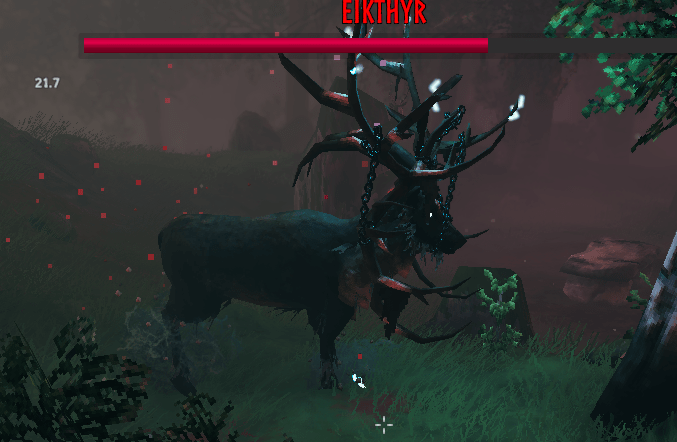
Eikthyr
Description
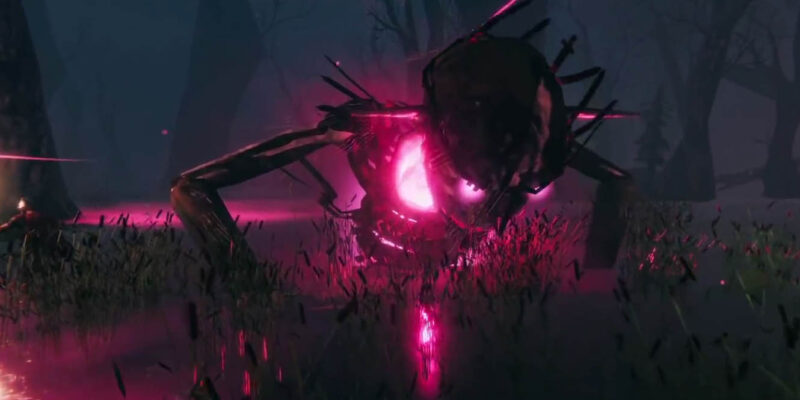
Eikthyr is the first boss of Valheim. He is a large stag, wrapped with chains and with electrified antlers.
Attacks
Eikthyr has three different attacks:
A forward striking, ranged Lightning Attack.
A large AoE lightning attack.
A melee lunging attack with his antlers.
Location
At spawn, left of Eikthyr’s Sacrificial Stone, is a small glowing rock. Interacting with this rock presents a new icon on the map indicating the location of the nearest one of Eikthyr’s summoning altars.
Multiple altars can be found in the Meadows biome.
Techniques
Eikthyr can be easily defeated with a starting Wood shield and Flint spear. His attacks are easily blocked, and poking him with the spear in between attacks allows the player to whittle him down in under three minutes. Alternatively, he can be kited relatively easily with a Crude bow and wooden or flint arrows.
Eating a good meal of three different foods (e.g. 1 cooked meat, 1 grilled neck tail, and 1 raspberry or mushroom) is recommended, for maximum health and stamina. It is also recommended to gain the Rested Effect by sleeping in a bed the night before summoning Eikthyr
Forsaken Power
Upon Killing Eikthyr, his trophy will be dropped. Bringing this trophy to spawn will allow you to mount it on the hook hanging from his respective stone. (You must activate the hook, not the stone it is hanging on.) This enables the player to activate Eikthyr’s forsaken power by pressing F. While the power is activated, the player will have 50% less stamina drain when running and jumping for 5 minutes. This ability has a 20 minute cool down period.
Drops
Eikthyr trophy,Hard antler ×3
The Elder
Description
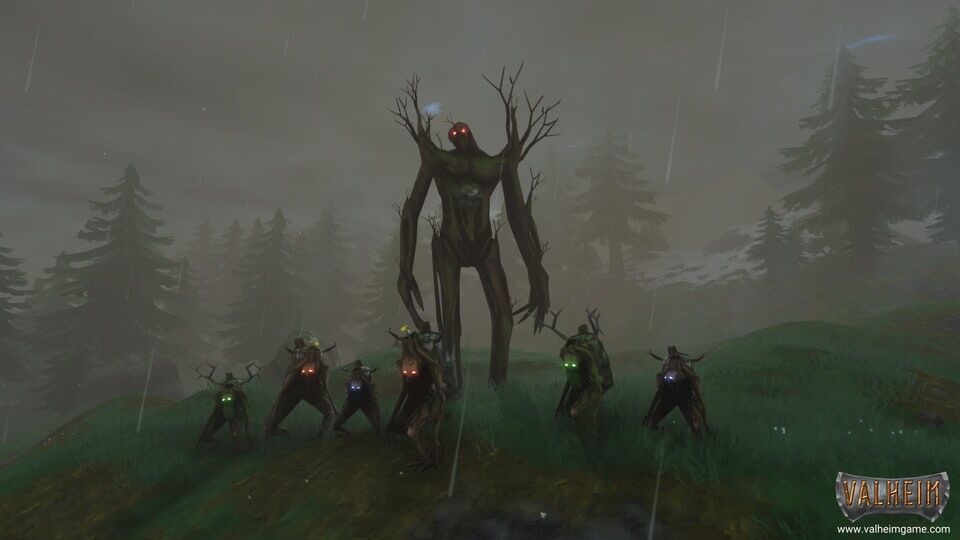
The Elder is the second boss of Valheim. It is a large bipedal creature that takes on the appearance of a large tree.
Summoning
The Elder can be summoned by obtaining three Ancient seed and burning them at sacrificial altar in the Black Forest. The altar is the quadratic stone monument with the fire bowl in the middle, it has a rune stone also, that reads: “Burn their young”.
Attacks
The Elder has three attacks:
- Close range stomp
- Ranged vine attack in a straight line directed at a target player if no player is in close range
- Occasionally, The Elder will raise an arm to the air to summon Roots in a large area. These Roots will persist for some time and deal damage if the player gets close. Roots can be attacked and destroyed.
Location
The Elder’s summoning spot is found in the Black Forest. His location can be found when visiting Burial Chambers, where a Rune Stone will reveal its exact summoning location on the map.
Drops
- Swamp Key
- Elder Trophy
Forsaken Power
Upon killing The Elder, you can return to the spawn. Mounting The Elder’s trophy upon his respective stone will allow you to claim his Forsaken Power. Activated with F, this ability will allow you to chop down trees faster.
Trivia
The Elder is the second boss of the game.
The altar provides a few hints on what items are used to summon him. First, the altar reads “Burn their young” referring to Ancient seed. In addition, the top of the columns are topped by statues that look similar to Ancient Seeds in shape.
It is recommended to bring a stack of health potion to the battle. It is recommended that you have at least 100 HP before you fight the Elder.
Because of the Elder’s location in the Black Forest, additional enemies such as Trolls or Greydwarves may join the battle and increase the difficulty significantly.
The Elder does not despawn if players run away or all die, and will continue to chase players across considerable distances.
Bonemass
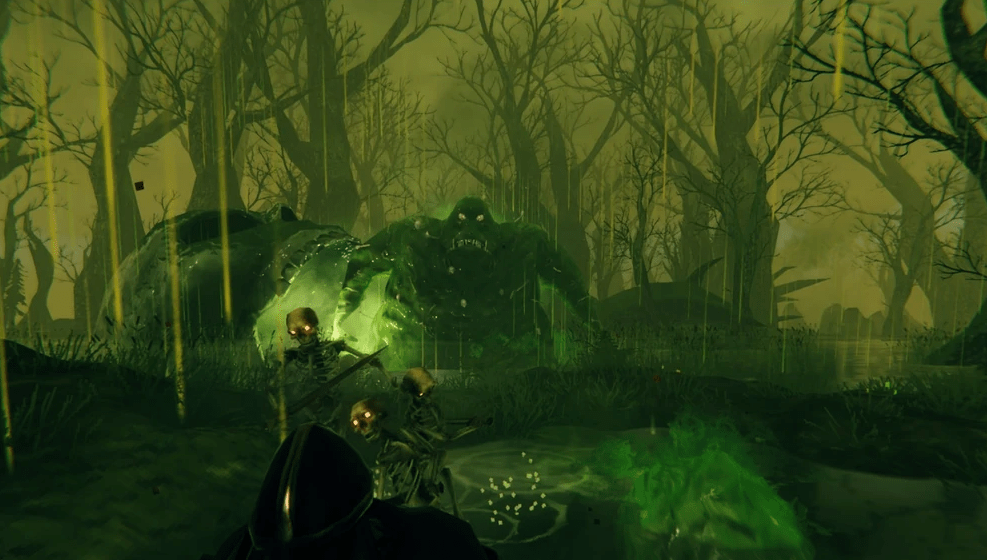
Bonemass is one of the bosses found in Valheim.
Summoned using 10 Withered Bones at the skull altar in the swamp.
Strategy
Bonemass is weak to Blunt damage.
It is HIGHLY recommended to use iron maces or other forms of melee blunt damage.
A list of effective weapons, from most to least:
- Iron Mace
- Iron Sledge
- Bronze Mace
- Wooden club (yes, seriously)
- Stagbreaker
Do not use bow and arrow besides to standstill its health regen- it is extremely ineffective. One fully upgraded wooden club would out-dps a Huntsman bow with ironhead arrows.
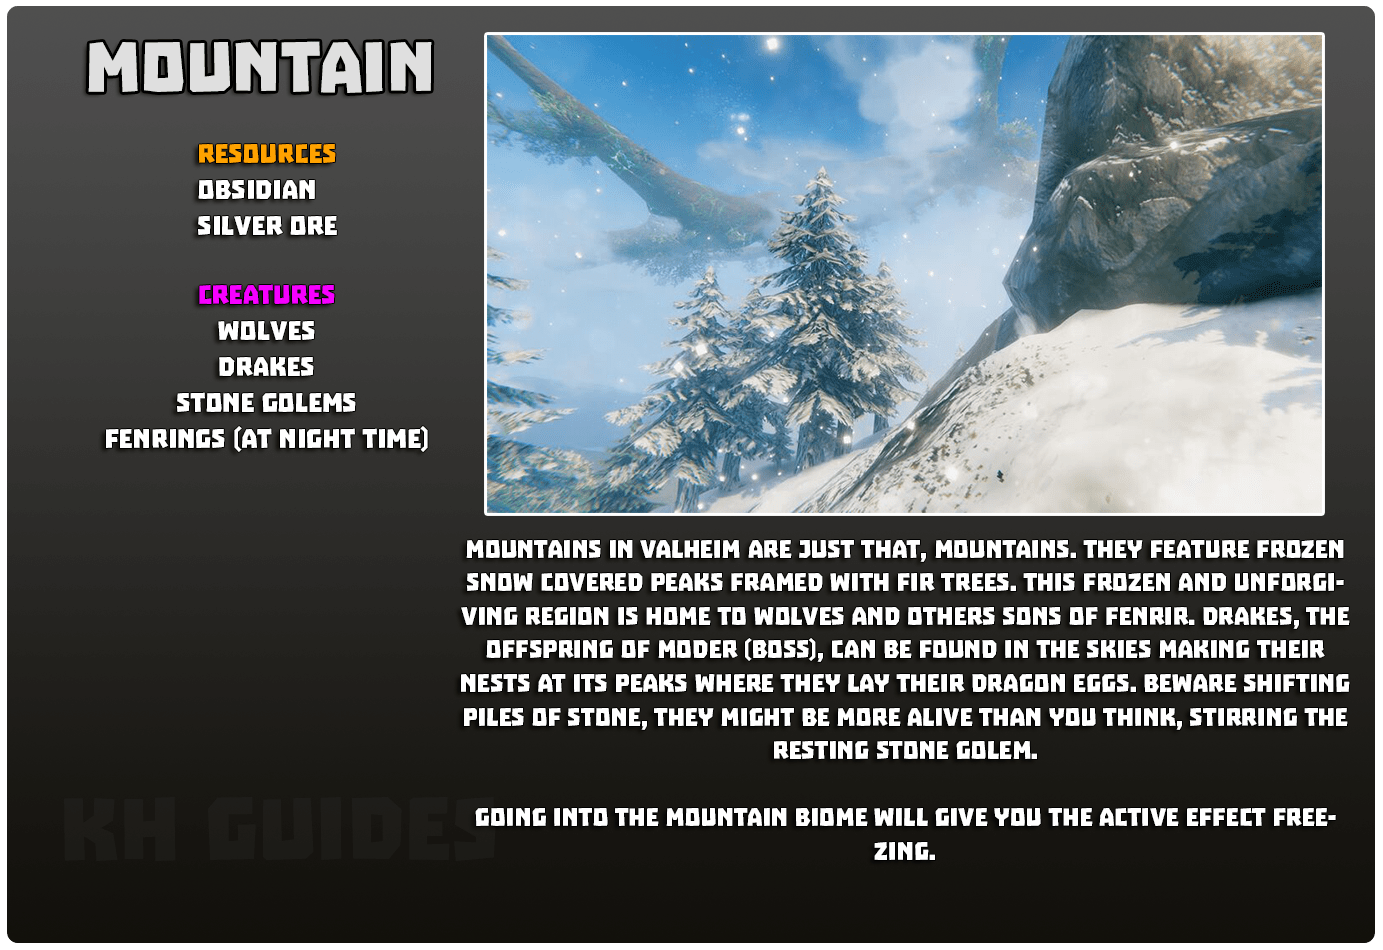
If you can make it to mountain biomes with an iron pick, mine obsidian to make frost arrows. Frost arrows make it very easy to take this boss down from a distance!
USE POISON RESISTENCE MEAD!!!
This boss is next to impossible without making poison resistance meads. It is recommended to bring MANY- without an iron mace, one will not be enough. Everyone should have 4-5 in case of deaths.
Stagbreaker is great for dealing with the ADS skeleton + slimes when they are bunched up. If you have multiple people, have the guy taking aggro focus on dodging swipes with rolls. Lay into him with blunt damage while he’s doing all attacks until he uses the poison AOE. You may walk through the poison, just don’t stay in it. If you are low health avoid being poisoned so you can regenerate health.
Building a structure, out of his reach, on top of a Sunken Crypt is useful to take the aggro away from the player.
Drops
Bonemass drops a Wishbone, which is used to find treasure and Silver ore.
Bonemass also drops his trophy, Bonemass Trophy.
Moder
Description
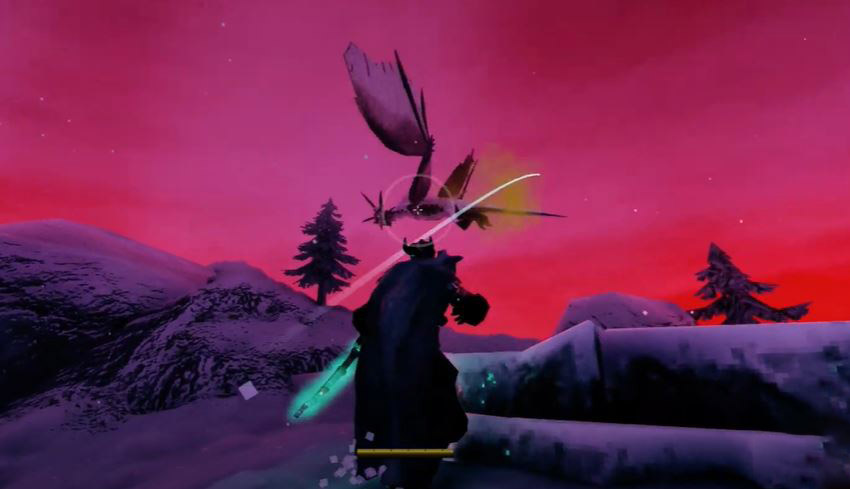
She is a large Wyvern with black scales, white hair and patagium.
Summoning
Moder is summoned by obtaining three Dragon eggs and placing them at the sacrificial altar in a seed-determined specific Mountain biome.
The altar is made of stone and is circular. Within the structure is an executioner’s block. Behind which are three offering bowls to place in the required Eggs.
The entire structure glows red and is adorned with black runes around the edge. It depicts two Wyverns flying atop a mountain, as well as four humanoid figures carrying three assumed sacrificial victims. (See Gallery)
Attacks & Abilities
Moder has the ability to fly but will also choose to land, alternating between the two.
When airborne she will fire projectiles that turn into crystalline formations upon impact that will later explode.
While grounded, she will perform a swipe attack with either claw or choose to let forth her blizzard like breath. She may sometimes roar, which opens her up to be attacked.
Either of her cold attacks will slow your animation speed significantly for 15 seconds, making you vulnerable to further attacks.
Trivia
- Moder’s granted forsaken ability is “Always tailwind while sailing”.
- Despite needing dragon eggs to summon her, Moder is, in fact, a Wyvern.
- Because the Eggs themselves weigh 200, it would take several people, or trips, in order to fulfil the requirement.
- “Moder” translates to “Mother” in Swedish.
Yagluth
Description
He is a large Skeleton with only the upper half as his body.
Summoning
Yagluth is summoned by obtaining five fuling totem’s and placing them at the sacrificial altar in a seed-determined specific Plains biome. There are stones which give the location of the altar.
The alter can be found within four giant stone pillars. Within the pillars is a small altar that has five small circle’s for wich you can place the totems in.
There is a red tablet in front of the alter that can be used once the totems are placed to complete the sacrifice, once done the boss will be summoned.
Valheim Taming Boars, Wolves, Lox
Taming wild animals, specifically boars, wolves, and lox in Valheim is one of the more interesting things that you can do in the game. Valheim lets you tame, and even breed wolves,lox and boars for your own interests. The piggies are a good source of food and leather, while the wolves can become pelts, but the way cooler option is to have them fight by your side. However, as everything else in the game, you have to put in some serious work to get your pets. To help you out, here’s our Valheim Taming Boars, Wolves, Lox guide.
How to Tame Boars in Valheim?
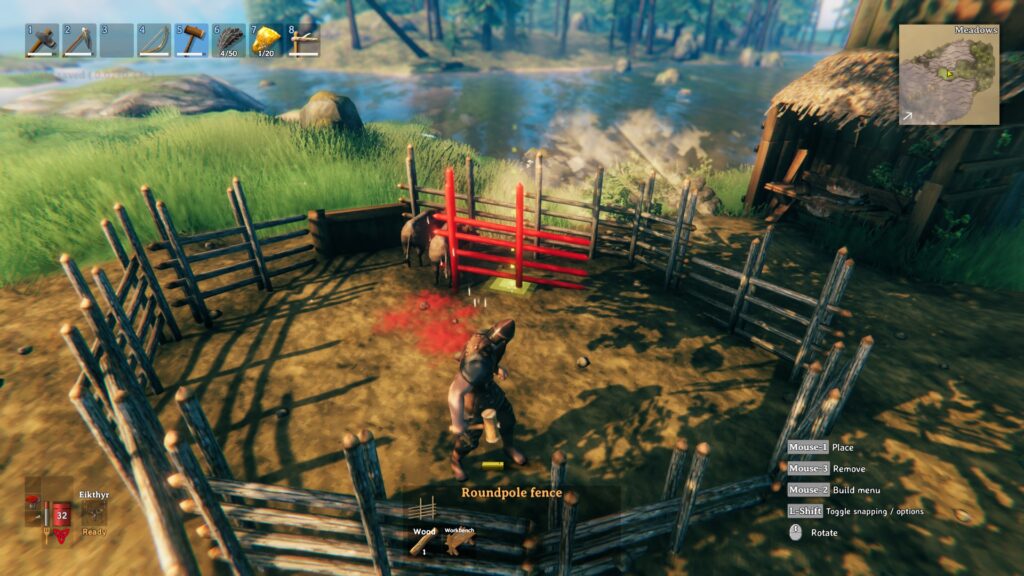
To tame boars in Valheim, you have to build a pen, attract them into it, close them in, and provide food from then on. There are several ways to do this. You can build a pen from Roundpole Fences, and then leave a hole or build a door. Then, you have to lure the boar in, either with food or by provoking them into attack and then let them chase you into the enclosure. If you’re feeling especially adventurous, you can literally build the fence around you and the boar while dodging its attacks.
Once you have them in the enclosure, that’s when the Valheim boar taming actually begins. You have to feed your piggies blueberries, raspberries, regular mushrooms and/or carrots regularly. You don’t have to do it daily, but don’t let them starve for too long, either. All you have to do is throw the food on the ground in the enclosure and step away for the boar to start eating. Different foods have different rates of taming, with carrots doing the most. Also, don’t go too far off, or the taming will go dormant.
After you’ve tamed a boar, you can then pet it, which is nice. More importantly, if you tame more than one boar and then put them in the same enclosure, they will breed after you feed them carrots. You do have to have a big enough pig pen, though; they stop breeding after there’s too many of them. I recommend keeping the boars in separate, small enclosures while taming them, however. You can later build a bigger space and just push them inside once they’re tame; just get into a block stance to do so.
Valheim Wolves – How to Tame?
To tame wolves in Valheim, you essentially need to follow the same blueprint as with the boars. However, there are some changes that you’ll have to implement in order to account for the fact that wolves can mess you up bad in seconds. First thing’s first, you have to go where they spawn, which is in the freezing Mountain biome. So, make sure to have an anti-frost potion handy, or build a path of campfires.
Next up, build a pen out of Stakewalls; regular fences are not gonna hold a wolf for long, if at all. Once that’s done, you can use raw meat to lure a wolf into the enclosure, or you can use yourself as bait. If you choose to do the latter, you madlad, make sure to have at least a bronze shield, like the buckler, to defend yourself. When the wolf comes into the pen, quickly slam the last bit of wall down.
With the wolf trapped, make sure to feed it raw meat regularly. Also, repair the walls of the enclosure, because the beast will start thrashing around as soon as you come near. And, yes, after you throw the meat inside, make sure to walk away so it isn’t scared. You might have to build a platform to throw the meat from.
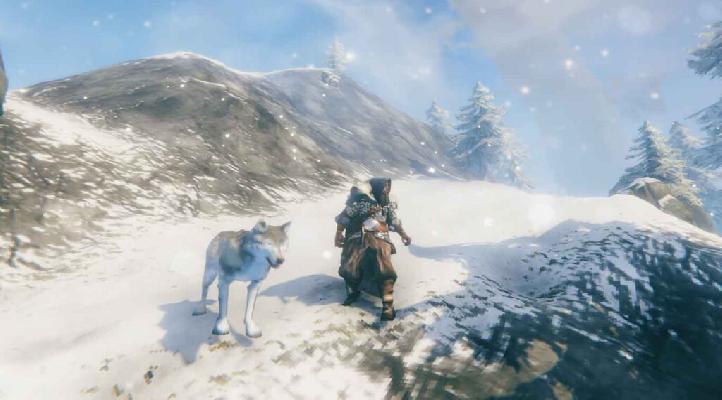
Once the wolf is tamed, you can breed it as you would boars, which is fun. More importantly, if you pet a tamed wolf, it will start following you around. If you two (or three, or more, however many you’ve tamed) run into an enemy, your pets will absolutely attack and fight by your side. It. Is. Awesome.
How to Tame Valheim Lox
Lox in Valheim are probably the most difficult animals to tame in the game. They are exceptionally strong, so fencing them in is largely useless. Instead, your best bet is to sneak up to them, throw down some food (barley and / or cloudberries), and then sneak away. Or, you know, run for your life if it gets mad. Rinse and repeat until the lox is tamed. Incidentally, you might die. Probably more than a few times, if we’re being perfectly honest. When you do eventually manage to tame one of these furry dinosaurs, then you can build a pen and throw some more food in. Wait for the lox to shuffle inside and close the gate.
Valheim is a game that’s largely about survival and crafting. You may have encountered Gold, Rubies, or Amber at some point in the game; these items do indeed have a purpose. Valuables can be sold for money, but you won’t be able to do much until you find the Merchant.
Where is the Valheim Merchant?
As with most things in this game, the Valheim Merchant is located at a specific location depending on your map seed when you generate the world. Unfortunately, there’s no easy way to find him — you’re going to have to look around.
It’s not that bad, thankfully. In the few maps I’ve seen, the Merchant is typically not that far away from the center of the map. The icon for the Merchant (seen above) will appear when you are relatively close to him. Although the Merchant has a cart, he doesn’t ever appear to move from his position.
One important note about the Merchant: a series of four Runes surround his camp. These aren’t like the Runestones that you can read in the world; rather, these Runes ward off any and all enemies. Enemies won’t attack you or follow you into the Merchant’s area, so you never have to worry about a Troll smashing your head in while you’re shopping.
How to Sell Items to the Merchant
Selling items to the Valheim Merchant is as easy as pushing a button. Pushing that button will sell all of the salable items that you have in your inventory. Don’t worry about accidentally selling any of your equipment or anything like that, either — the Merchant is only interested in vendor trash.
Where Do You Find Items to Sell to the Merchant?
You can’t sell anything without finding it first! The Valheim Merchant buys Amber, Amber Pearls, and Rubies. These can be found in a few different locations in the game world:
- Chests in abandoned buildings
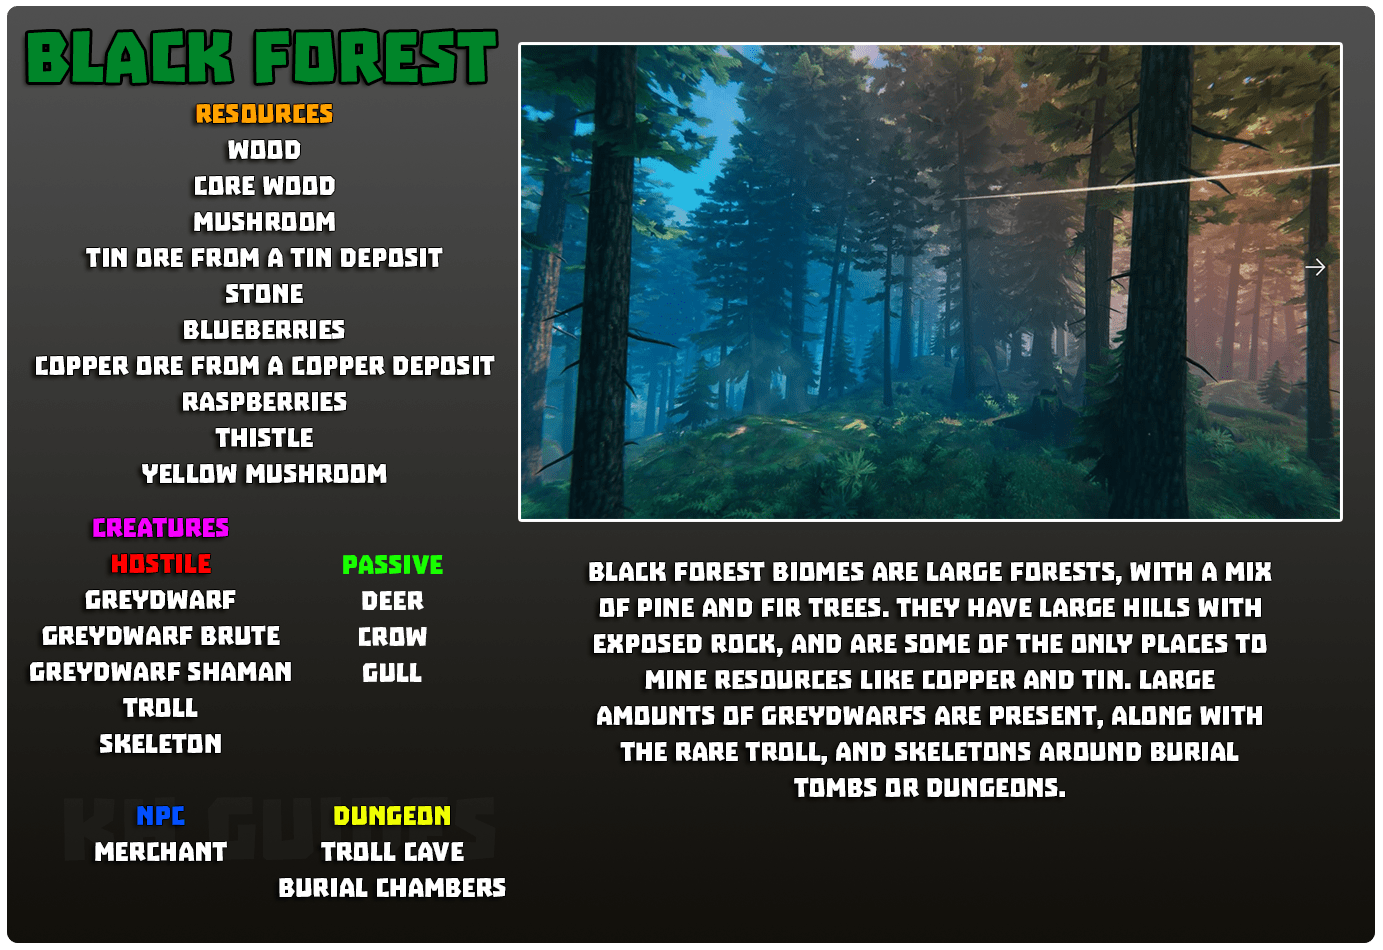
- Burial Chambers in the Black Forest
- Troll Caves in the Black Forest
- Crypts in the Swamp
Troll Caves are especially good sources of loot. You can also fight and kill a Troll in the open world — while you aren’t likely to get any treasure, you will get some Gold.
What Does the Valheim Merchant Buy and Sell?
The Valheim Merchant only buys a handful of treasures that you can find in the game world; this is the only purpose for these items, so there’s no reason not to sell them unless you want to use them to decorate.
The items the Merchant sells, however, are much more interesting. You can get a magical flashlight on your head, a fishing pole, or even a special item that increases your carry weight!
Items You Can Sell to the Merchant
Item Name Price Description
Amber 5 Valuable. Only purpose is for selling.
Amber Pearl 10 Valuable. Only purpose is for selling.
Ruby 20 Valuable. Only purpose is for selling.
Items the Merchant Sells
Item Name Price Description
Yule Hat 100 A festive cosmetic hat.
Dverger circlet 620 A circlet that projects a light in front of you that never runs out.
Megingjord 950 Increases your carry weight by 150.
Ymir Flesh 120 Crafting material. One of the pieces of the two-handed Iron Sledge.
Fishing Rod 350 Allows you to fish.
Fishing bait x50 10 Required for fishing.
What You Need to Get Started Making Mead and Potions
Making Valheim Potions and Mead is a pretty simple affair once you’ve met the basic requirements. To start, you’re going to need to be able to make metal — that means you’re going to have to get your hands on a Pickaxe by beating the game’s first boss Eikthyrnir.
Workbench
- 10 Wood
Forge
- Workbench
- 4 Stone
- 4 Coal
- 10 Wood
- 6 Copper
1 Bronze Axe (to chop down Birch Trees and get Fine Wood)
- Forge
- 4 Wood
- 8 Bronze
- 2 Leather Scraps
1 Beehive
- Workbench
- 10 Wood
- 1 Queen Bee
1 Campfire
- 5 Stone
- 2 Wood
1 Cauldron
- Forge
- 10 Tin
1 Fermenter
- Forge
- 20 Fine Wood
- 5 Bronze
- 10 Resin
You should also bear in mind that the workstations and tools alone are not enough — you also must have picked up every single ingredient in a Mead Base recipe before you can actually make it. (A list of all of the Valheim Potions and Mead recipes we’ve found so far are at the end of this guide.)
Why Beehives are Important for Making Potions and Mead in Valheim
You’re going to need some Beehives as noted in the above list. Look around the Meadows for abandoned buildings and listen for the characteristic buzzing sound of bees. If you find a nest, all you have to do is shoot the nest down or destroy the building around it so that it collapses. You’ll get a bit of Honey for your trouble, and more importantly, you’ll get a Queen Bee.
That Queen Bee can be used to make a Beehive, providing you with a renewable source of Honey — an important ingredient in most Potions and Meads. Beehives need to be placed outdoors and they also need a certain amount of open space around them; interacting with the Beehive will tell you one of the following messages:
- The bees are happy – Your bees have enough open space and are producing Honey.
- The bees need more open space – Self-explanatory; there isn’t enough open space around the bees. Place the Beehive in a more open area or put it on top of a wooden pole.
- The bees are sleeping – It’s nighttime and the bees are asleep.
A Beehive can store a maximum of 4 Honey before it won’t produce anymore. Make sure to collect it regularly! That’s the main reason you’re doing all this work — many common recipes require Honey.
How to Make Valheim Potions and Mead
Making Valheim Potions and Mead is easy once you’ve got the setup done! The only downside is that it takes time for the Potions and Mead to ferment in the Fermenter; it may be worthwhile to build multiple Fermenters
Step 1: Gather the Ingredients
Each Potion or Mead has its own specific crafting ingredients. You can’t get started without the items to make it, after all! Some ingredients such as Blueberries, Dandelions, and Honey are easy enough to get; other ingredients, however, can be more challenging to acquire.
One of the most important ingredients for Tier 2 Potions and Mead is a Bloodbag; you can get this item as a drop from Leeches, a waterborne creature that can be found in the Swamp Biome.
Step 2: Cook your Mead Base in the Cauldron.
The Cauldron is where you’ll make your Mead Base — this is the precursor to actually making Potions and Mead. Like most crafting stations, the Cauldron will make things pretty much instantly.
Step 3: Ferment the Potions/Mead
Your final step is to take your Mead Base and put it in the Fermenter. It takes roughly a couple of in-game days for the process to complete. Once it’s done, you can interact with the Fermenter to pick up your finished Mead! Again, it may be a good idea to have multiple Fermenters if you plan on using Mead regularly.
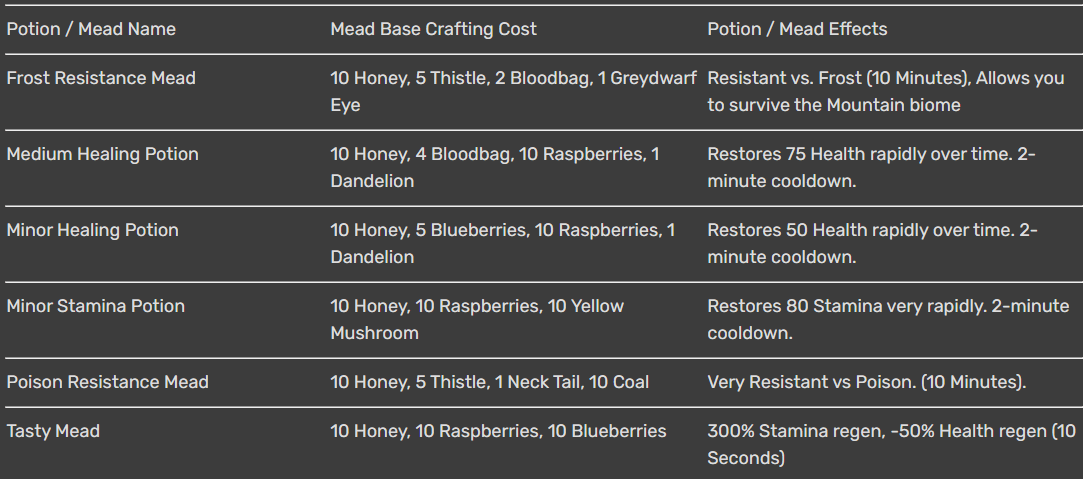
List of Valheim Potions and Mead
This is a list of all Valheim Potions and Mead that we’ve found. This list will be updated as new Potions and Mead are discovered.
Where to Find the Valheim Fishing Rod
The Valheim Fishing Rod is only sold by the Merchant. You’ll have to find the Merchant before you can buy it; you’ll also need 350 Gold to buy it.
Once you’ve found the Merchant, acquiring the Fishing Rod is simply a matter of purchasing it. Make sure to buy some Fishing Bait, too — you’re going to need it to catch your dinner!
How to Fish in Valheim
Fishing in Valheim is a fairly straightforward process. Naturally, you’ll need to have your Fishing Rod equipped and some Fishing Bait in your inventory. Once you’re all set up, it’s time to find some water and get to fishing!
Here’s how to Fish in Valheim:
- Stand near water and look for Fish.
- Hold down the left mouse button to charge up your cast.
- Release the left mouse button to cast your line.
- Tap the right mouse button to bring the line in.
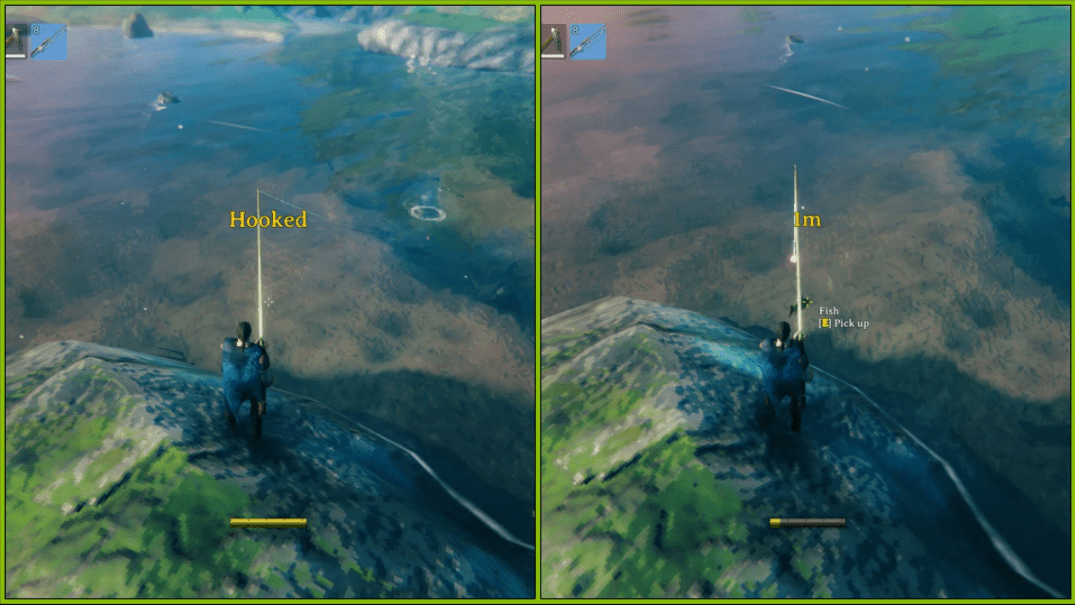
- Once you hook a fish, you have to mash the right mouse button to reel the fish in. Keep in mind that this uses up your Stamina!
- You can press E to pick up a Fish once it gets close enough.
If your luck is poor (or you’re not finding any Fish), you’re going to have to cast your line and try again. Catching a Fish will get you raw meat that needs to be cooked on a Campfire.
Unfortunately, the Valheim Fishing Rod is not quite a true “tool” like other things in the game. The upside is that it won’t break after being used too much. The downside, however, is that you cannot upgrade it in any way to improve its performance.
Hope you enjoy the Guide about Valheim – WIKI, if you think we should add extra information or forget something, please let us know via comment below, and we will do our best to fix or update as soon as possible!
- All Valheim Posts List











Leave a Reply