How to find, access, and solve the secret areas containing the four letters (H, J, E, M). Also explains the strange symbols and the secret mini-game.
Introduction to Secret Areas (Letters)
There are four secret areas hidden in the world. Each contains a letter unlock at the end (much like how in the main progression path you unlock numbers) that each give you an achievement. Find all four and you get another secret unlocked for yet another achievement.
It is worth mentioning that you are under no pressure to find the secrets. None are permanently missable. Even after the credits roll you have all the time in the world to go looking for them.
General hints
General pointers if you are trying to find the secret areas on your own:
1) The normal mechanic where you click on a repeater (lock) to change screens still applies for the secret areas. Try to look for out-of-place repeaters at the edge of uncharted territory.
2) If you have already unlocked at least one letter you could look at the central hub (with the battery display) for an indicator to infer a rough direction you might look in for any letters you are still missing. That is if you haven’t already been spoiled by the content list of this guide or a glance at the map below – sorry!
And a general hint if you happen to be stuck in a screen with a giant question mark and want just a push in the right direction instead of the full spoiler you might find in the guide below: Question mark screens require inputs from other screens. So if they seem impossible to solve you should look for holes in the wall and where they might lead at a distance (even behind gaps in the map). Depending on which solutions you’ve picked during the normal course of playing the main progression path you might already “accidentally” be sending the right distant inputs for some question mark screens.
How to find the right guide chapter
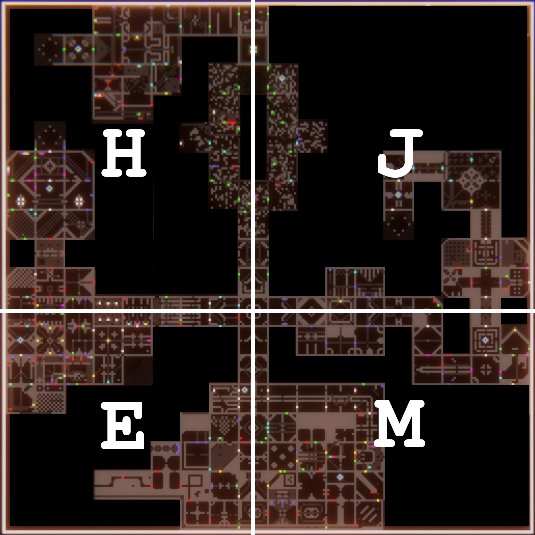
And finally how to find the right secret area in the guide below without accidentally spoiling yourself about the others: If a vertical and a horizontal line through the central hub (with the battery display) divide the map into four quadrants, then each quadrant has a secret area.
As you can see on the map, the bottom left secret area contains the letter E and will be the dealt with in the next chapter.
Bottom Left Secret Area (Letter E)
How to Find
This one, more than the others, is really hiding in plain sight. You can even see the edges of levels from the main path. Ironically it was the last one I found and I had to really look for it. The mildest hint I can give you is to look for out-of-place repeaters (locks) that make no sense from a gameplay standpoint. The location you want to canvas is still in the prologue area before you reach the central hub, but very close to the hub.
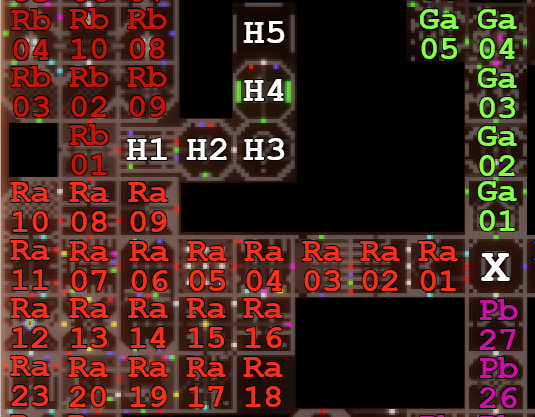
If all else fails, here is the map of the secret area and its surroundings:
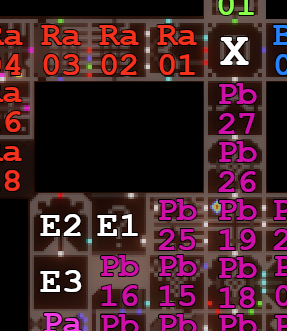
X marks the central hub. Access happens via Pb25 by clicking on the otherwise useless repeater in the upper left corner of the screen, one tile off the edge.
How to Beat
The Question Mark (E1)
Right off the bat if you stumbled onto the secret area during a normal course of play, don’t sweat it. Chances are you cannot beat it yet and should return a little later. The reason is that the very first screen here needs an outside input for which you will have to progress a little further and open up at least the second screen in the Red branch (marked Ra02 in the map above).
Once you meet that requirement you should consider what you need to beat the level and how you might get it. You start with a white emitter and the repeater requires cyan light. How can you transform white into cyan? You do it by removing the red component with a red filter beam, which you can redirect downwards in the aforementioned Ra02 screen. Then it should be a very simple level to solve: Bend the filtered beam to the right so it cuts in front of the white emitter, then bend to now filtered cyan beam to the left into the repeater.
The Rest (E2-E3)
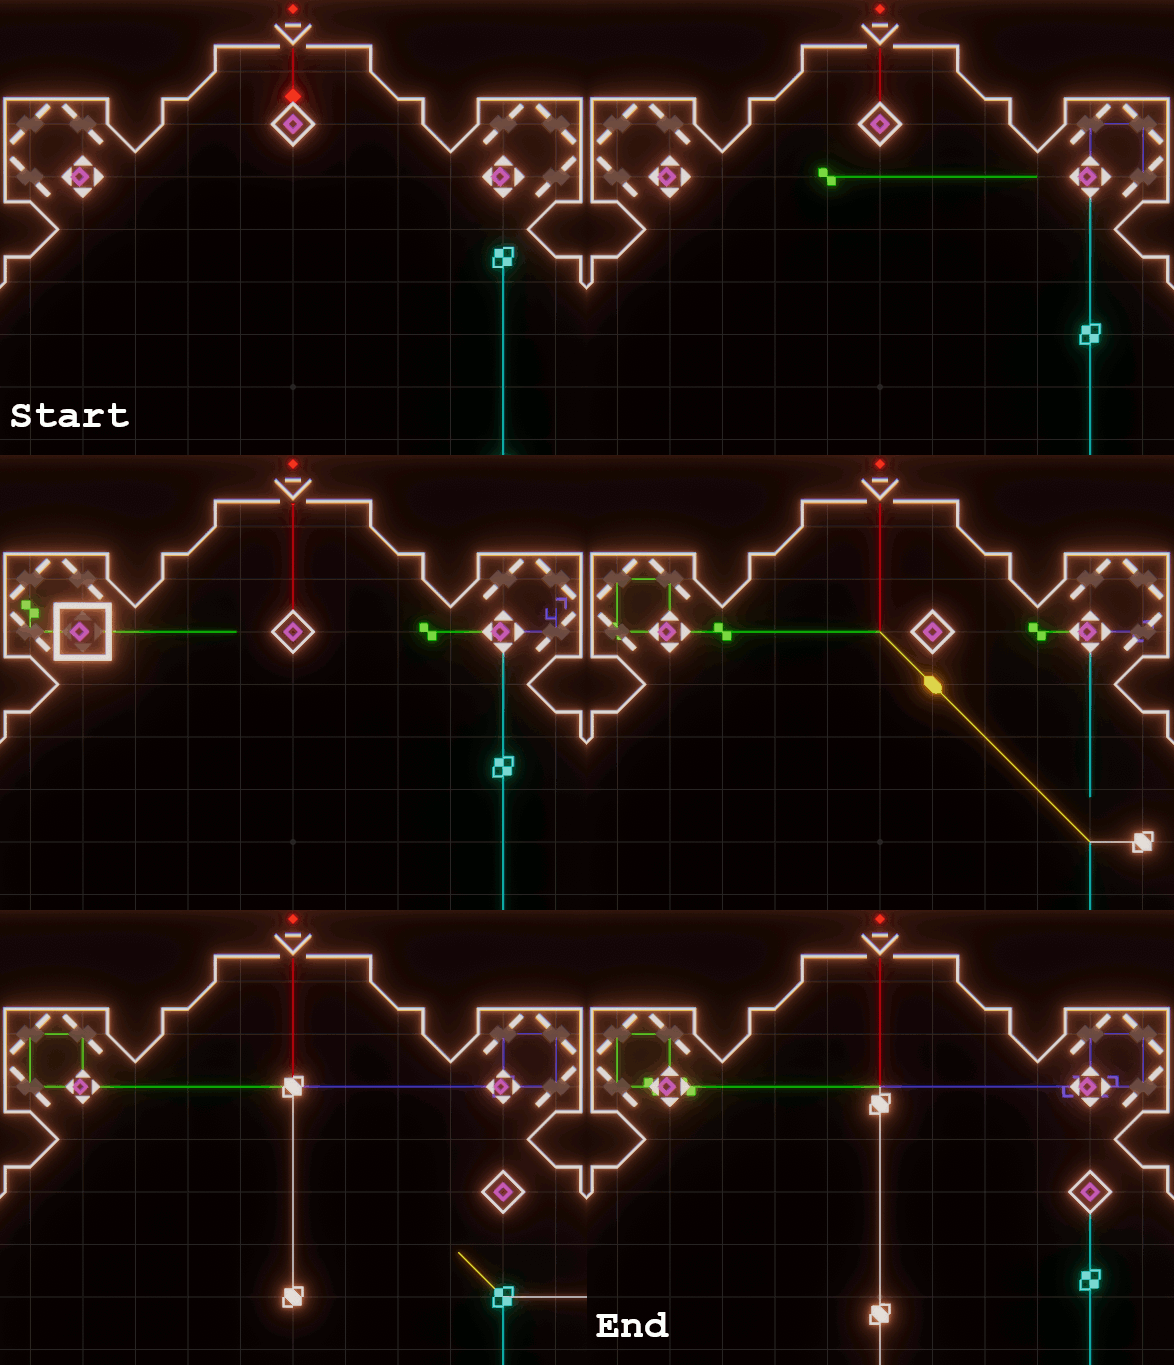
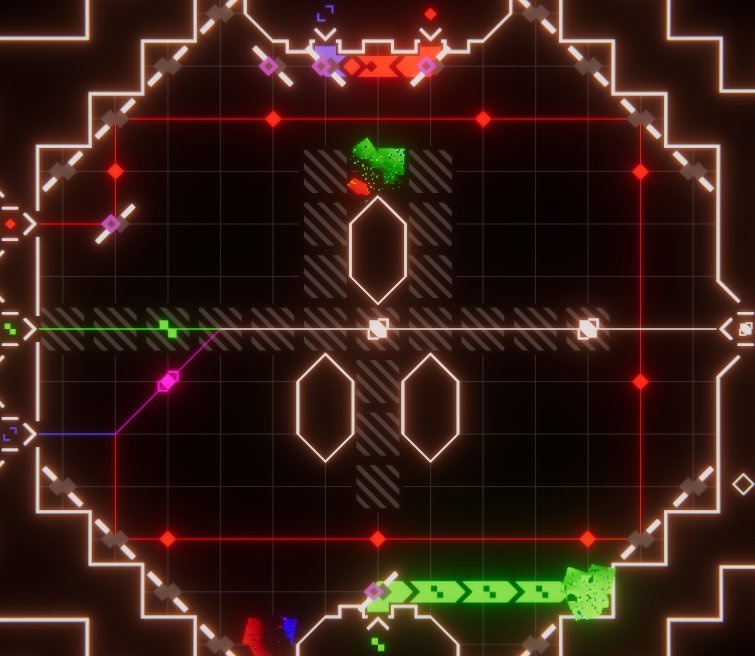
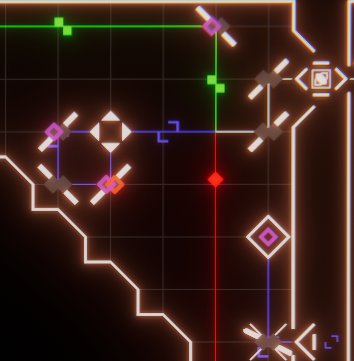
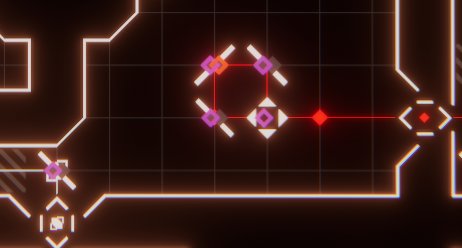
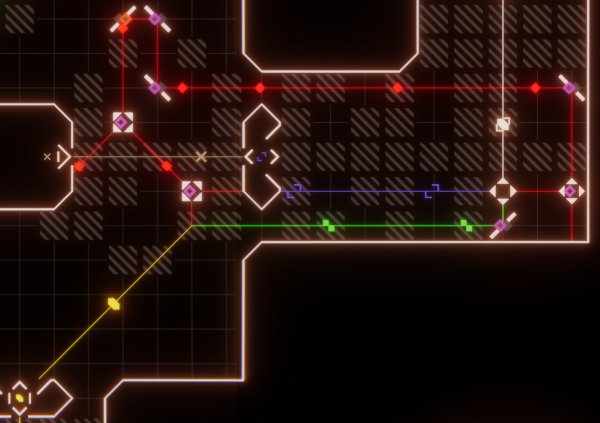
The next screen is more of an annoyance than a real challenge. If this is your first time encountering a formation like this you should really think about what you can do with 3 mirrors and a splitter all facing each other. I call that formation a “generator”: You have to initially direct a beam into it and then it generates an output beam on its own. The splitter duplicates the beam and sends one outwards while the other travels around the small square in an infinite loop which basically acts as a new light source. This reduces the challenge to finding ways how to avoid interference by pre-existing beams. First, we want to load the left side with green. Disable red with the blocker high above and wait for the cyan to split a green photon to the left. Once it passes the middle pull down the blocker to keep greens from interfering from behind. Then click and hold down LMB on the left splitter so the (now singled out) green photon can pass without splitting. Release your mouse button and the left generator is now set up. Pull the blocker to the right (to still keep the split green from interfering) and yellow will now start to intercept the cyan beam which naturally sets up the blue generator on the right. All that is left to do is to pull the blocker down to stop the cyan beam and the three colors will meet to form white. If that sounds complicated, maybe this animation will help clear up the process:

Bottom Right Secret Area (Letter M)
How to Find
This one’s access point is pretty traditional – just a repeater in a wall. If you want to limit your search area, look in the blue branch somewhere in the first half before you unlock the number 3. To spell it out look in the bottom right corner of the blue path.
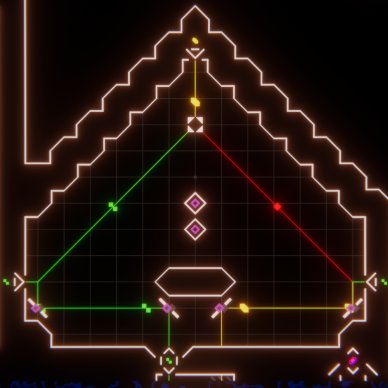
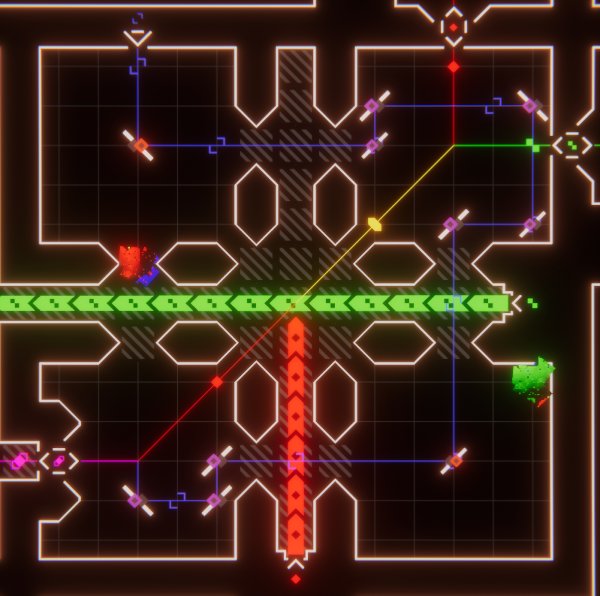
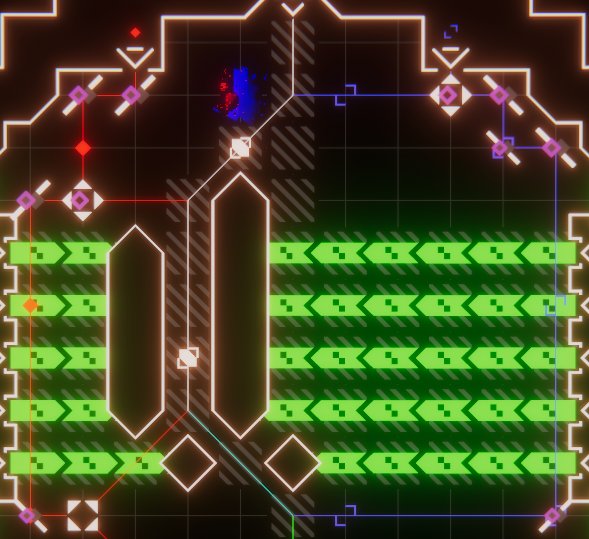
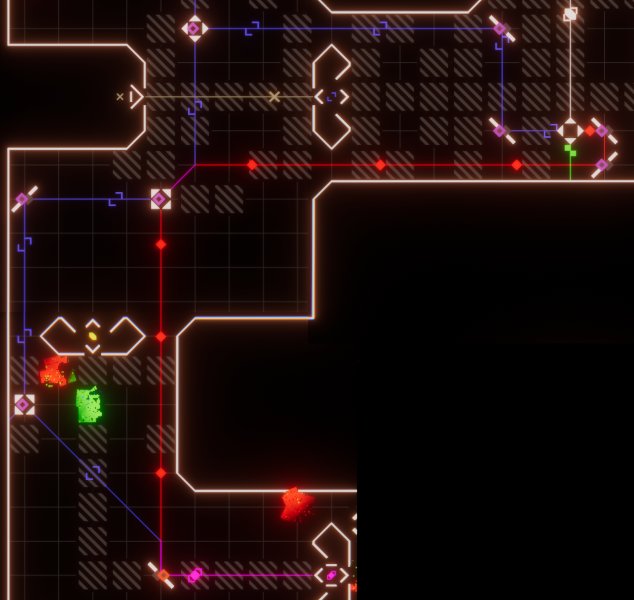
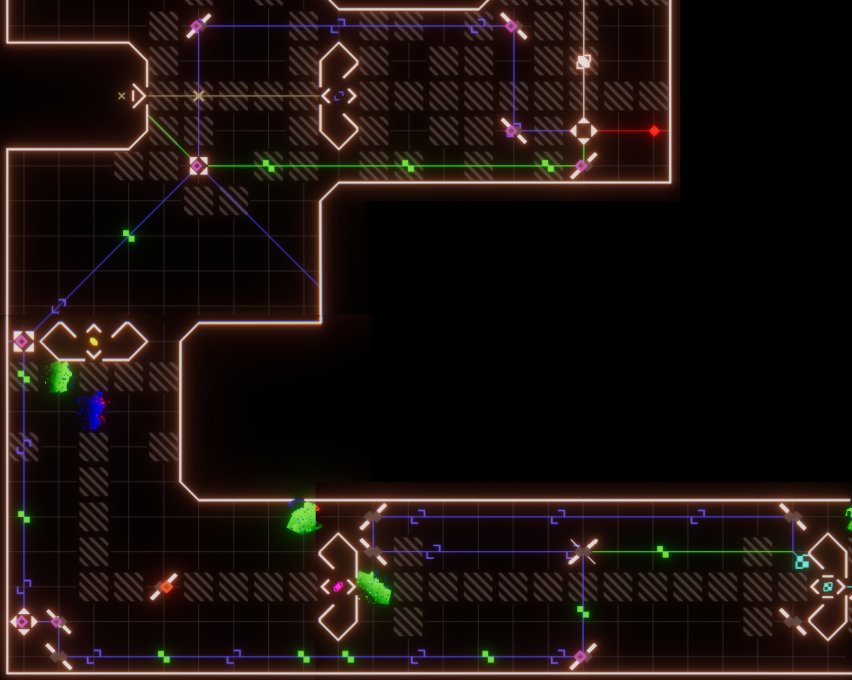
The only hurdle is that you seemingly cannot get the right colour in that room, which is because you need to create yellow one screen above and then phase it through a few walls which happen to be non-solid, lined up with the marked path, then put mirrors in the bottom holes to direct the beam into the repeater. If you struggle with creating the right colour here is a screenshot:
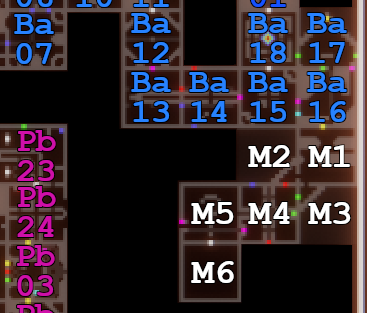
If all else fails, here is the map of the whole secret area and its surroundings:
Access happens in Ba16 via the yellow repeater in the bottom wall, for which you need to create a beam in Ba17 and send it through some walls.
How to Beat
The First Area (M1-M3)
This shouldn’t be much of a challenge. Unlock both repeaters and transfer all mirrors but 1 each to the main screen, then rework your solution to fit the repeaters in the side areas until you get both colors through.
Creating Purple (M4)
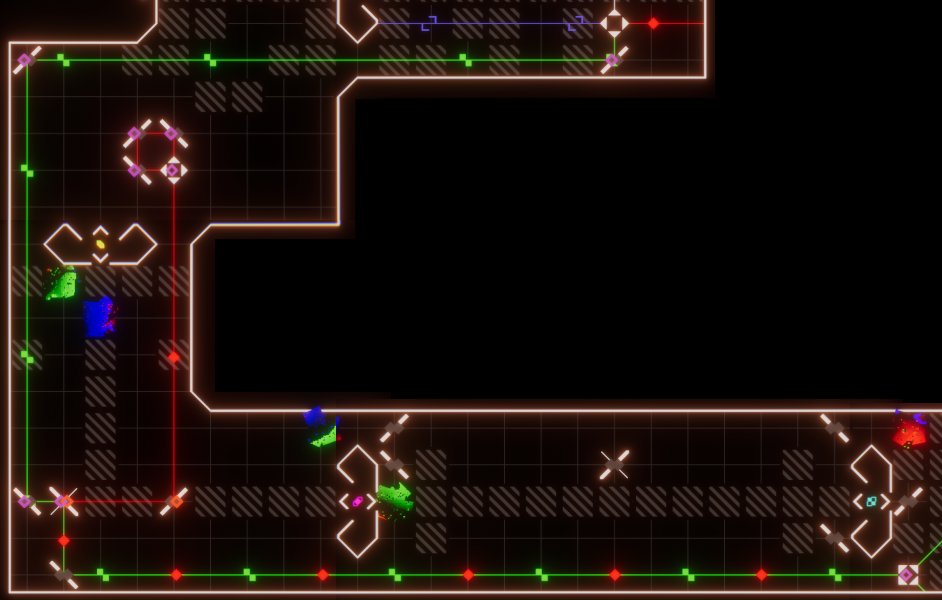
This is a tricky screen until you realize that all you have to care about is getting blue to the bottom left. You can leave red/green/yellow completely untouched. From that the main theme is simply avoiding interference which will have you do a lot of swerves. Full solution screenshot:
The Question Mark (M5)
Sticking with the usual theme of question mark levels think really hard about what you need and where you might be able to get it from. With just a magenta input we need to pull green in through the small gap in the left wall, coming from the prologue area to the left. For this we, unfortunately, need to break our solution over in the prologue because you will need to direct green from one screen above (Pb23 in the map above) until it is lined up with the gap (in Pb24) for which you can use the magenta filter beam coming from M5 as an indicator. Once all the ingredients are present you will bend the green filter beam upwards, then pull the green beam above the question mark so it hits the magenta beam where the resulting diagonal white beam will go directly into the repeater requiring it.
Top Left Secret Area (Letter H)
How to Find
Finding the access area is not really the problem this time. For the general area look around the red branch, specifically somewhere in the second half after unlocking the number 5. You will find the repeater sitting in plain view but behind a switch-block.
Unlocking the access point is getting ever more involved and is here (uniquely) completely disconnected – the switch to toggle the blocker is in the same branch but nowhere adjacent. Think back hard where you might have seen an unusual formation that might help you now as the switch is located in the middle of the first half of the red branch, specifically four screens down from the blocked path.
Here is the map of the secret area and its surroundings to provide some orientation:
X marks the central hub. Access happens via Rb01 by toggling the switch in Ra20.
To accomplish this we first need to reroute the current solution. Unlocking the number 5 in Ra12 has given you an upwards cyan beam on the right side that we can turn around in Ra10 to send it back down on the left side. Back in Ra12, it will be automatically routed to the right (Ra13), retracing the initial solution when you first arrived here. Notice the blue repeater in the bottom right of Ra13? With the new cyan beam, we can finally pass through thereafter removing the green component by passing through the yellow filter beams in this room. I would suggest carefully analyzing your situation as you only need to make a minor adjustment to your initial solution (if you didn’t come up with a solution that is wildly different from mine). Namely let the premade mirrors do their job and loop the cyan beam around at the bottom left so it hits the mirror above the repeater on the right. After passing down to the next screen you just need to cannibalize your original solution for a moment to toggle the switch (don’t worry, it automatically locks in place and can’t be turned on again).
How to Beat
Three for Three (H1)
Hints:
1) If you think this room is horribly complicated you are likely overthinking it (I did so at least).
2) The order of the target repeaters is very specific.
3) The solution is symmetrical.
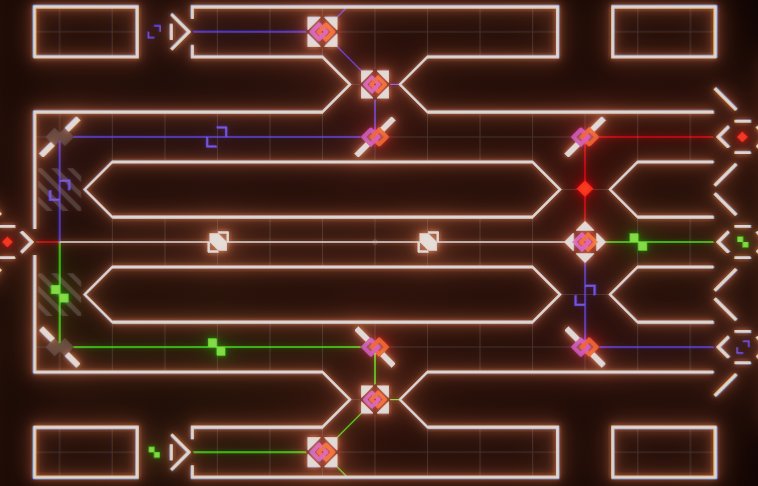
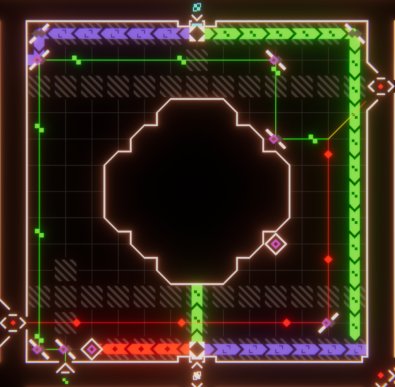
Solution: The target repeaters (from the top: RGB) are exactly in the order a splitter would output them from a white beam, so let’s do that. The challenge is now finding a timing so everything collides on the left, right in front of the red input. For that you need to start blue and green with a short diagonal beam between two diagonal splitters. Full solution:
Mirror Walls (H2)
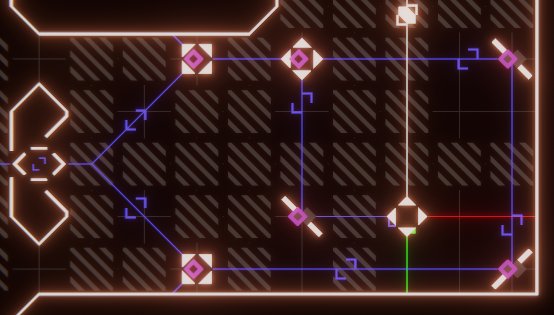
This room seems bad but due to all the mirrors there aren’t many viable paths left. Deal with the filter beams and find a way to merge everything up. I don’t have many hints here. My solution might be unorthodox as I have an unused part left, which happens very rarely in this game. Here’s a screenshot:
The Question Mark (H3),
Again, if you came here very early you will probably have to first continue the main progression of the game until you have beaten both the red and blue branches completely since you need access to Ga02, the second screen in the green branch. On the other hand, this is one of the more straightforward question mark rooms with a decent chance you might have set it up correctly by accident already. For filtering purposes in Ga02 you probably have the splitters on the inside white beams already so they project red and blue filter beams to the side. All you have to do then is make sure the gaps on the left edge of the room aren’t blocked and you will get the two beams into the question mark-room to filter out everything but green. Just use the fixed-location mirror to go down and route to the right to make use of the filter beams.
The Narrow Gap and Beyond (H4-H5)
The next room has a certain familiar theme as you can tell by just looking at the layout: The main beam will stay on striped tiles the whole way so you have to do all direction changes with collisions. As a hint, no beam has to cross the central/main beam. And the full solution as a picture:

Top Right Secret Area (Letter J)
How to Find
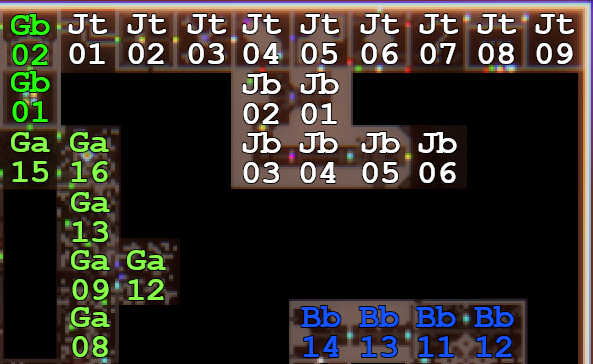
This “secret” area is basically unmissable as the credits sequence that plays after beating the green branch basically shows you the new path that has opened up in the top- and right-most screen. Since the layout of this branch is a bit more complicated, here’s a map of the surroundings again:
How to Beat the Top Row
A Gentle Start (Jt01-Jt03)
The first screen (Jt01 on the map) is either a troll level or a vision-check. Simply remove the blockers and put them on the single tiles on the outside of the wall.
The second screen (Jt02) shouldn’t put up much resistance either. The only mechanic that’s maybe a bit non-intuitive is that diagonal splitters work like horizontal splitters when it comes to filter beams. Use that right in front of the filter beam emitter to break it up, route the green beam up top and put the horizontal splitter one tile into the red beam so it collides with green right in front of the target.
The third screen (Jt03) still shouldn’t be that hard. As a hint the solution is once again symmetrical. Just set it up like this:
Breaking the Game (Jt04-Jt05)
This is where the branch opens up a bit. The imprintable target repeater means it’s very easy to beat the fourth screen and even the fifth (at least staying on the top row of the map). But here’s how you do it right so everything works out for future screens:
In the fourth screen (Jt04) we want to finish with white since we’ll need that on the next screen. We come in with white, but there is simply no way to get a blue component through the magenta and cyan filter beams, and the blue emitter on the right is set up to discard half its output. That’s a bit of a problem.
For the basic set up we bend the white input downwards so it hits the bottom left splitter from the top. Red already works, but green has to be routed to the top via the left edge of the screen. Now to deal with blue: I took the easy route – why mess with duplication when we can simply set up a generator that will create an unbroken beam for us? Here is the crucial part of the solution:
The fifth screen (Jt05) looks intimidating at first until you realize that you can use the exact same mechanic we just used on previous screen to trivialize the challenge. Simply set up a generator for red, then feed the white beam straight down. Problem solved with three parts to spare – definitely not an intended solution. Or in picture form:
Finishing off the Top (Jt06-Jt07)
The next screen (Jt06) is fairly uneventful. Use the green beam to guide the red to its goal. Screenshot of the full solution:
This once again puts us into a question mark level (Jt07). No further advancing here, but let’s pause for a moment to test your understanding of the game. You have exactly one movable part, a single mirror. Can you predict where it goes? It’s pretty obvious that more beams will have to come in from the bottom, but can you visualise how the solution will work?
We’ll get back to this later. For now, let’s backtrack to that white beam we sent downwards in Jt05.
How to Beat the Bottom
This is one of the hardest areas in the whole game. There is no conceptual challenge, it’s just all execution. You have a single input, a bunch of tools, ever changing requirements and lots and lots of options. With every screen you unlock you’ll have to completely rework everything before it to match the next step. Experiment. Liberally transport tools between screens. And I’m pretty sure some stages have multiple solutions. Here are my solutions (some pictures will look a bit odd due to stitching):
Making Blue (Jb01)
Making Yellow (Jb01-Jb02)
Making Purple (Jb01-Jb03)
This was by far the hardest challenge for me. Just the way it stretches across multiple rooms and uses diagonal splitters was super unintuitive to me.
Making Cyan (Jb01-Jb04)
Work your way backwards since the last screen needs a very specific input.
Making yellow (Jb01-Jb05)
Again start from the last screen. There’s really only one part that works here and that limits some of your options since it takes away one of your two diagonal splitters, so you can’t use them together anymore.
Once again I have opted to use a generator instead of trying to wrangle the beam around. It might actually be intended here since routing red around from the source will take more parts than that and the only spare part left is the lone diagonal splitter. Just take care to preserve the correct cycle.
How to Beat the Finale
The Question Mark (Jb06, Jt07)
We have finally unlocked the screen below the question mark room by completing the bottom branch up to Jb06. No more changes to the bottom branch required, yellow works for us since it will give us green with the red filter at the bottom of the question mark room. Still… there’s another thing we need – a blue component which we will have to get from Bb11, beyond the gap that’s below Jb06. Break your solution in Bb11 and send a blue beam up through the gap on the left. Now all that’s left in Jb06 is redirecting blue to the very left, with yellow going upwards one tile to the right. Time to check if you’ve placed that mirror correctly in Jt07! It goes one tile above the red entry point. Red comes out and collides with the green beam coming from below. Then the yellow diagonal beam immediately gets set straight by the blue coming in on the far left and getting bent by the mirror onto the target line.
Of Stars and Symbols (Jt08-Jt09)
The next screen is a complete oddball. You are blocked by glitchy tiles. Below are some strange stars and every colour of light in the game. Experiment and you’ll quickly find out that the stars take the shape of the last light hitting them – it’s a combination lock! Brute forcing a solution is a very bad idea since you don’t get any feedback on partial solutions. It’s not like getting the first star right will remove the first glitchy tile – either get them all right or it won’t work.
But where oh where might we get a solution from? Look around. It’s closer than you might think. Most readily apparent it’s when you look at the map. If you still don’t get it:


Secret Mini-Game (HJEM)
How to Find
The prerequisite is unlocking all four letters (see guide above). Upon doing so you will have a small “HJEM” button on the main menu that let’s you start the secret mini-game.
How to Beat
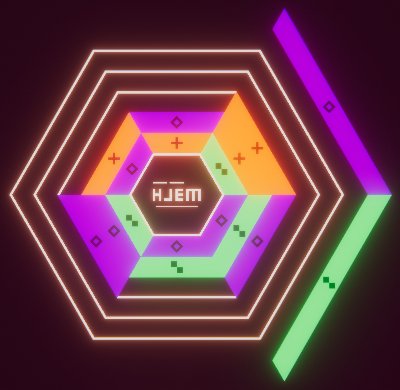
After the (woefully inadequate) tutorial stage you’ll be looking at a hexagonal grid, not unlike a spiderweb.
Randomly 1 single, 1 double or 3 single blocks of a random color combination will spawn and automatically descend towards the center of the grid. Your inputs (the buttons below or the arrow keys) allow you to rotate the blocks clockwise or counter-clockwise. Hold Esc or click-hold the X-button to eventually exit.
In the middle of the hexagon you’ll find the letters HJEM. Above them are up to 3 bars, indicating which level you are on (the first, the second or the third and final level). Below the letters is your health bar, which slowly regenerates over time. Every time a block explodes you take damage. Blocks either explode when you drop them outside the grid (so on top of a side that’s already full) or when 3 or more blocks of the same colour touch. Beware: Both vertical and horzontal adjacency counts as touching! The goal of each level is to fill all empty spaces of the grid. There are no further rules, no colour-matching aspect or any kind of priority requirement.
There is a strategic aspect for sure, trying to set up patterns that don’t easily detonate or rely on a specific colour (like the bottom spot in the screenshot above where only orange can safely go). But whether you can set up a good checkered pattern or not is largely dependent on the spawning randomness. Sometimes the game will give you loads of one colour making me believe it is not always guaranteed you can beat the game. Even a single detonation of only 3 blocks often spells doom as it either leads to a chain reaction or leaves you with too many of the other two colours making the next placements very hard (especially the 3 singles spawn can be devastating). And unfortunately there is no quick way to restart either.
Beyond trying to set up a good, solid pattern I’ve found two actual techniques: I think trying to build evenly on all sides is generally better, but should you end up with one higher tower you can place a block on it and continue to rotate the other blocks that are still falling, allowing you to break up bad patterns. In the same vein sometimes it’s pretty useful to have a maxed out side as you can at-will destroy single blocks. It will damage your health bar a little bit, but (especially with the automatic regeneration) it’s not nearly as bad as causing a chain reaction.
Once you’ve understood the basic controls and rules and honed your skills a bit it’s honestly just waiting for a good RNG pattern to give you a victory. I didn’t really enjoy this mini-game, so my best advice is just to beat your head against the RNG until it works out. If you’ve beaten stage 2 think twice about quitting as there are no checkpoints. If you exit the game you will have to start from stage 1 again.

Decoding the Symbols (Clock & Coordinates)
SOLAS 128 uses a very peculiar numbering system. You will find them on the main menu (numbering the save slots), the pause menu (telling you the coordinates of the current screen) and on the mysterious clock that counts up (located one screen above the central hub with the battery display).
The Number System
So how does it work? The basic components are the various symbols used for colours in the game. But for a full number two symbols are combined vertically. There are 16 unique numbers:
There is a fairly obvious logic to these combinations, but ultimately it is a base16 system with arbitrary glyphs. It’s not like the bottom symbols are ones and the top symbols are tens or something like that (else rolling over a blue in the bottom would have to lead back to X which only happens at the end of the complete sequence of 16).
For numbers 1-3 sometimes the bottom symbol stands alone. This explains why the save slots on the main menu are designated Red, Green and Blue – it’s just slot 1, 2 and 3. For numbers 0-16 we have the sequence above.
And how do we form bigger numbers? Basically like we do in our common base10 system, only with the quirk that the second (and any further) position is added to the right. So the number 15 (position 1: blue on bottom, white on top) rolls over into 16 (position 1: X on top and bottom; position 2: X on top, red on bottom). Now it becomes just a standard base16 system.
The Coordinate System
And now we have all the tools to decode the game’s coordinate system.
You have probably noticed these symbols on the pause menu. They tell you the coordinates of the current screen. As the lines indicate, the left number tells you the column starting with 0 from the left. And the right number tells you the row starting with 0 from the rop. Since the game only has an 18×18 grid we don’t need any bigger numbers and so the top symbol of the second position is cut off (and replaced with the orientation indicator), but the rest is only the number system we’ve just learned.
In the example in the image above the current screen is the central hub. Working out the numbers we can tell that it is in column 8 and row 10. Note that numbering starts with column/row 0 (aka “zero-indexed”), so this is actually the 9th column from the left and the 11th row from the top.
The Clock
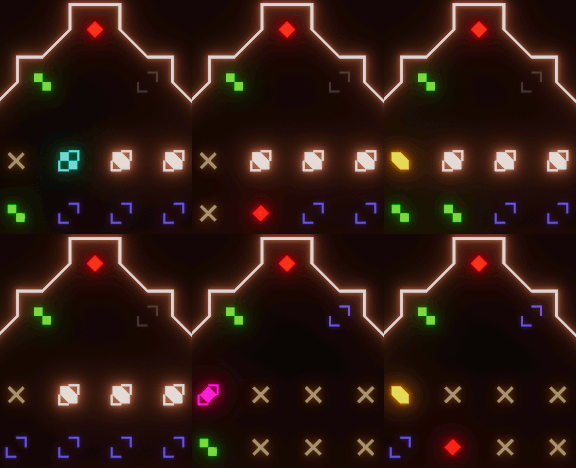
So how does the clock count exactly? Every clock update adds 7 to the displayed number. Clock updates happen every 4 beats (so always when the photons are in the same place). And the whole game seems to be based around 120 beats per minute, meaning 2 beats per second. Every second the clock adds 3.5 to its value which is updated every other second.
If you find any more secrets worth mentioning, let me know in the comments!
Hope you enjoy the Guide about SOLAS 128 – Secrets Guide including Symbols, Letters, etc, if you think we should add extra information or forget something, please let us know via comment below, and we will do our best to fix or update as soon as possible!
- All SOLAS 128 Posts List




Leave a Reply