Solution for the Sacred Lands Puzzle
Description
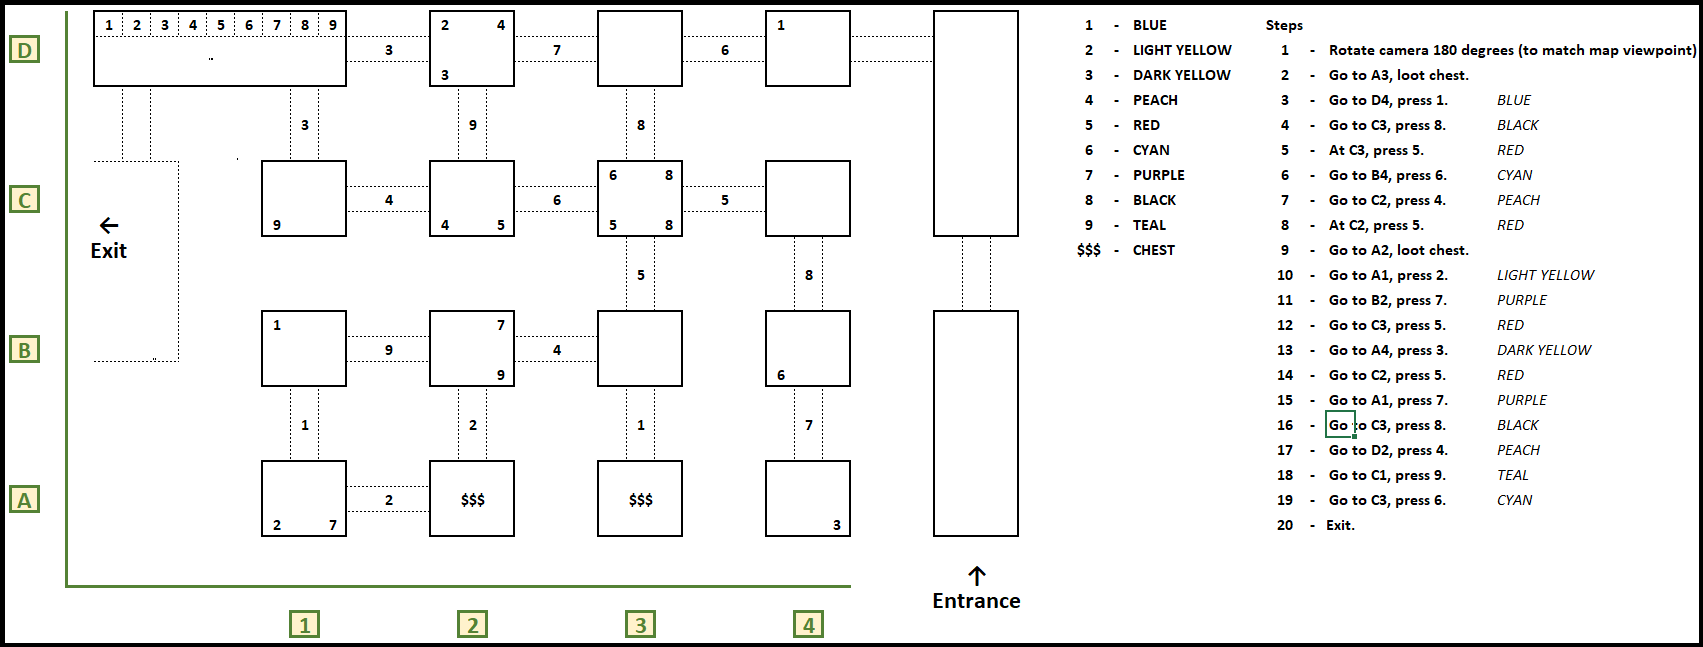
TL;DR – grab the map at the very bottom of this guide for the full solution. Refer to text parts in this guide if anything is unclear.
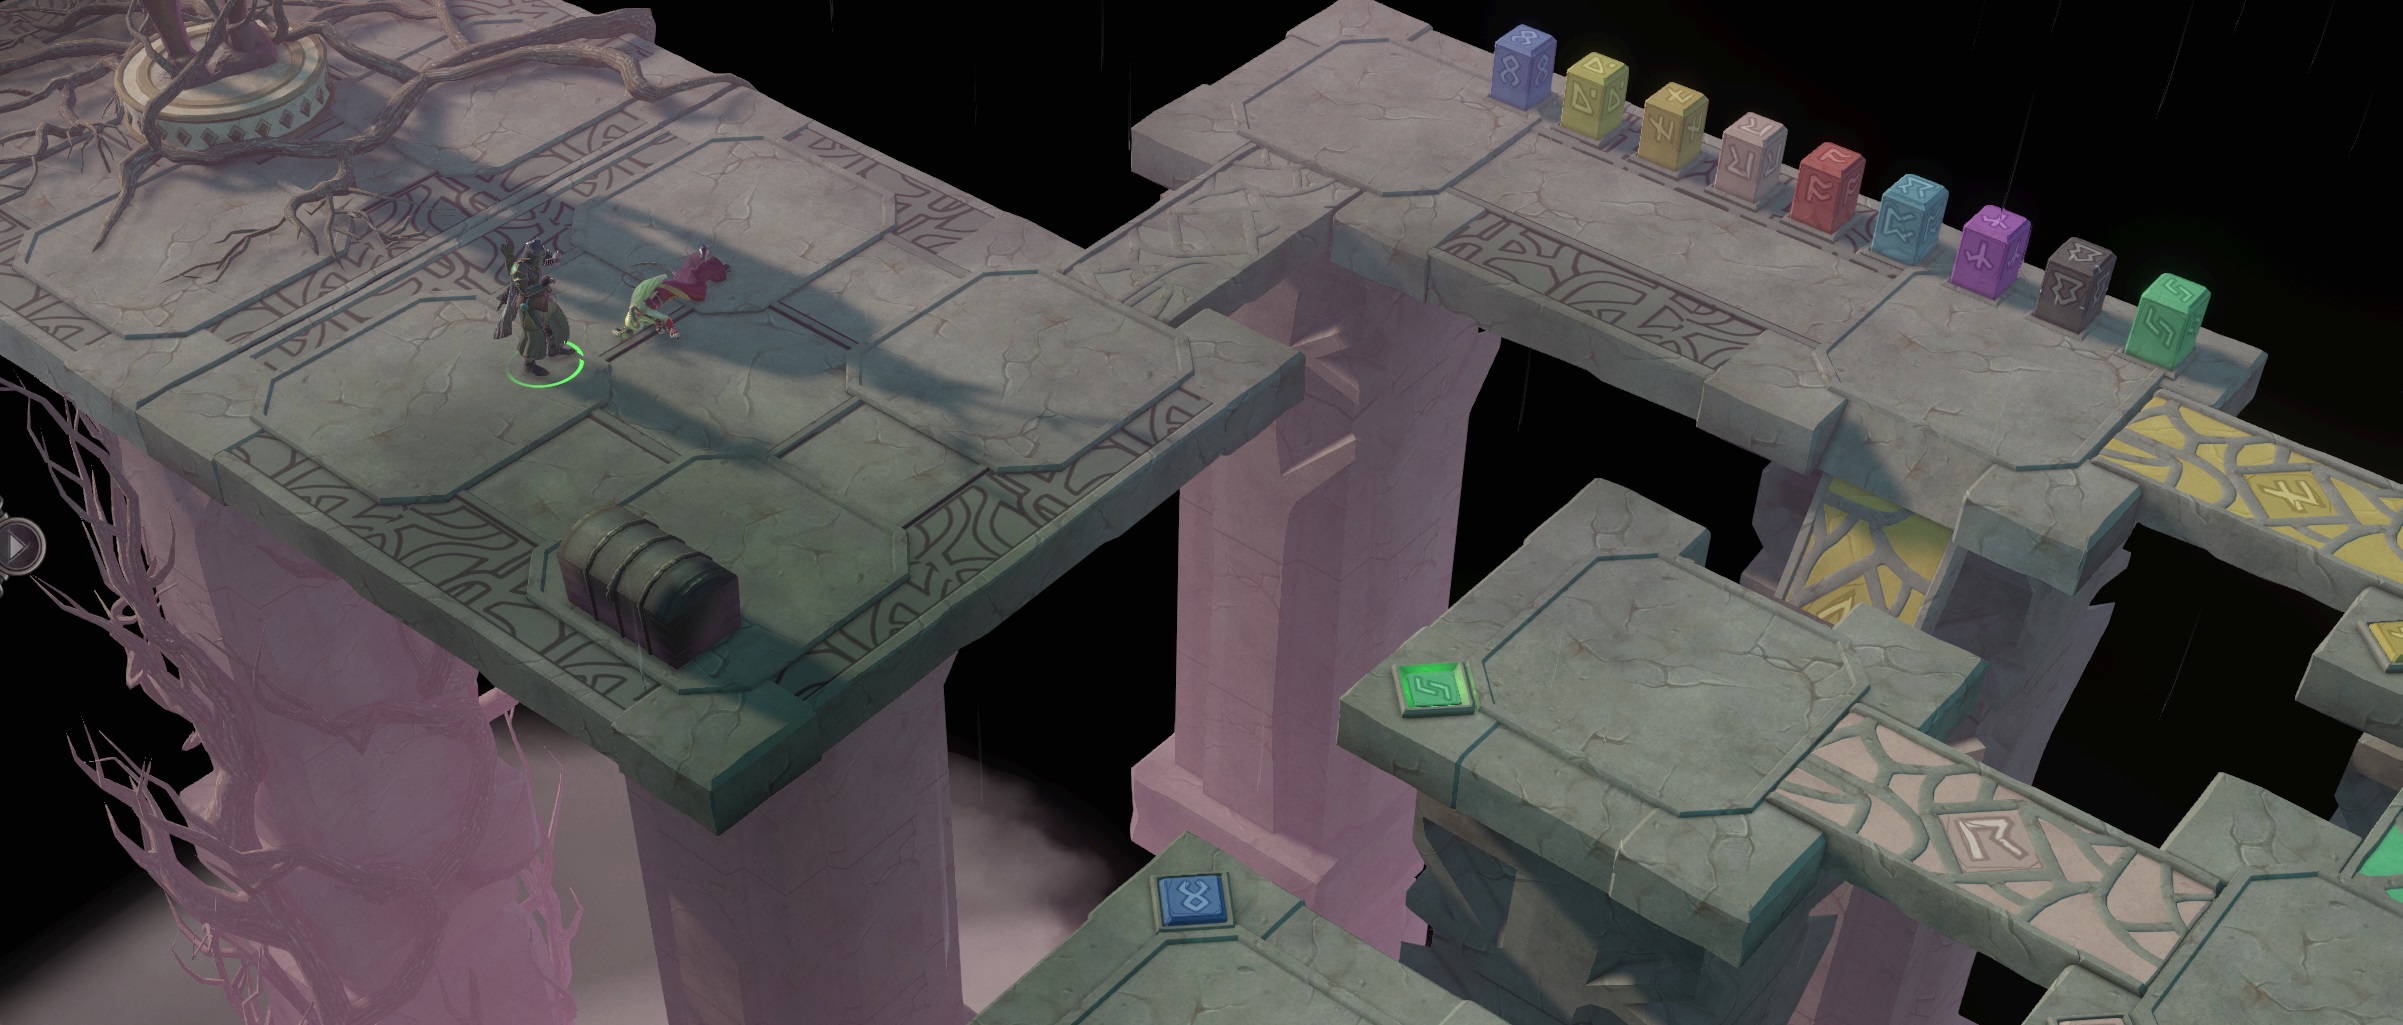
To solve the puzzle in the Sacred Lands temple you must raise and cross the bridge at the final platform.
This puzzle is all about pressing colored switches to raise & lower bridges. Pressing a switch will raise and lower the matching bridge(s), as well as raise and lower the colored pillars located at the final bridge. The final bridge requires all colored pillars to be raised.
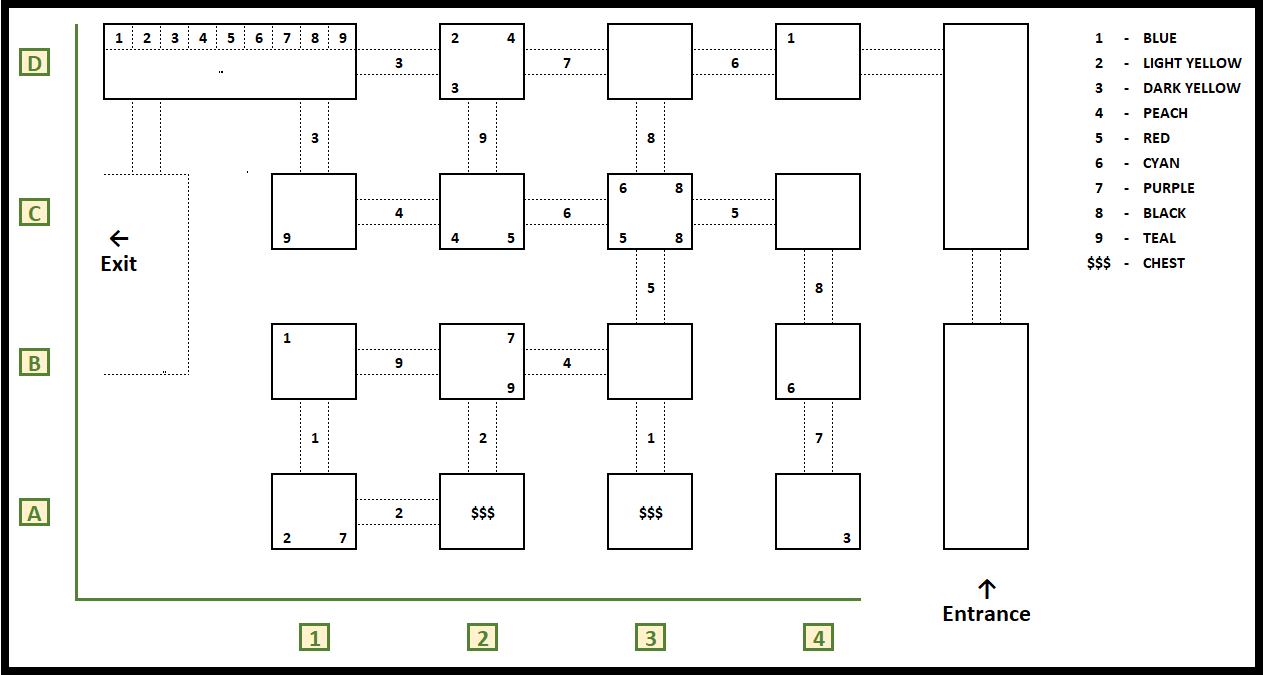
Below I have a mapped layout of the arena and a complete solution to reach the exit while grabbing both chests along the way.
Colored Switches
To keep the maps below clean each switch color is assigned a number, which is then used in the maps.
- 1 – BLUE
- 2 – LIGHT YELLOW
- 3 – DARK YELLOW
- 4 – PEACH
- 5 – RED
- 6 – CYAN
- 7 – PURPLE
- 8 – BLACK
- 9 – TEAL
- $ – CHEST
Maps
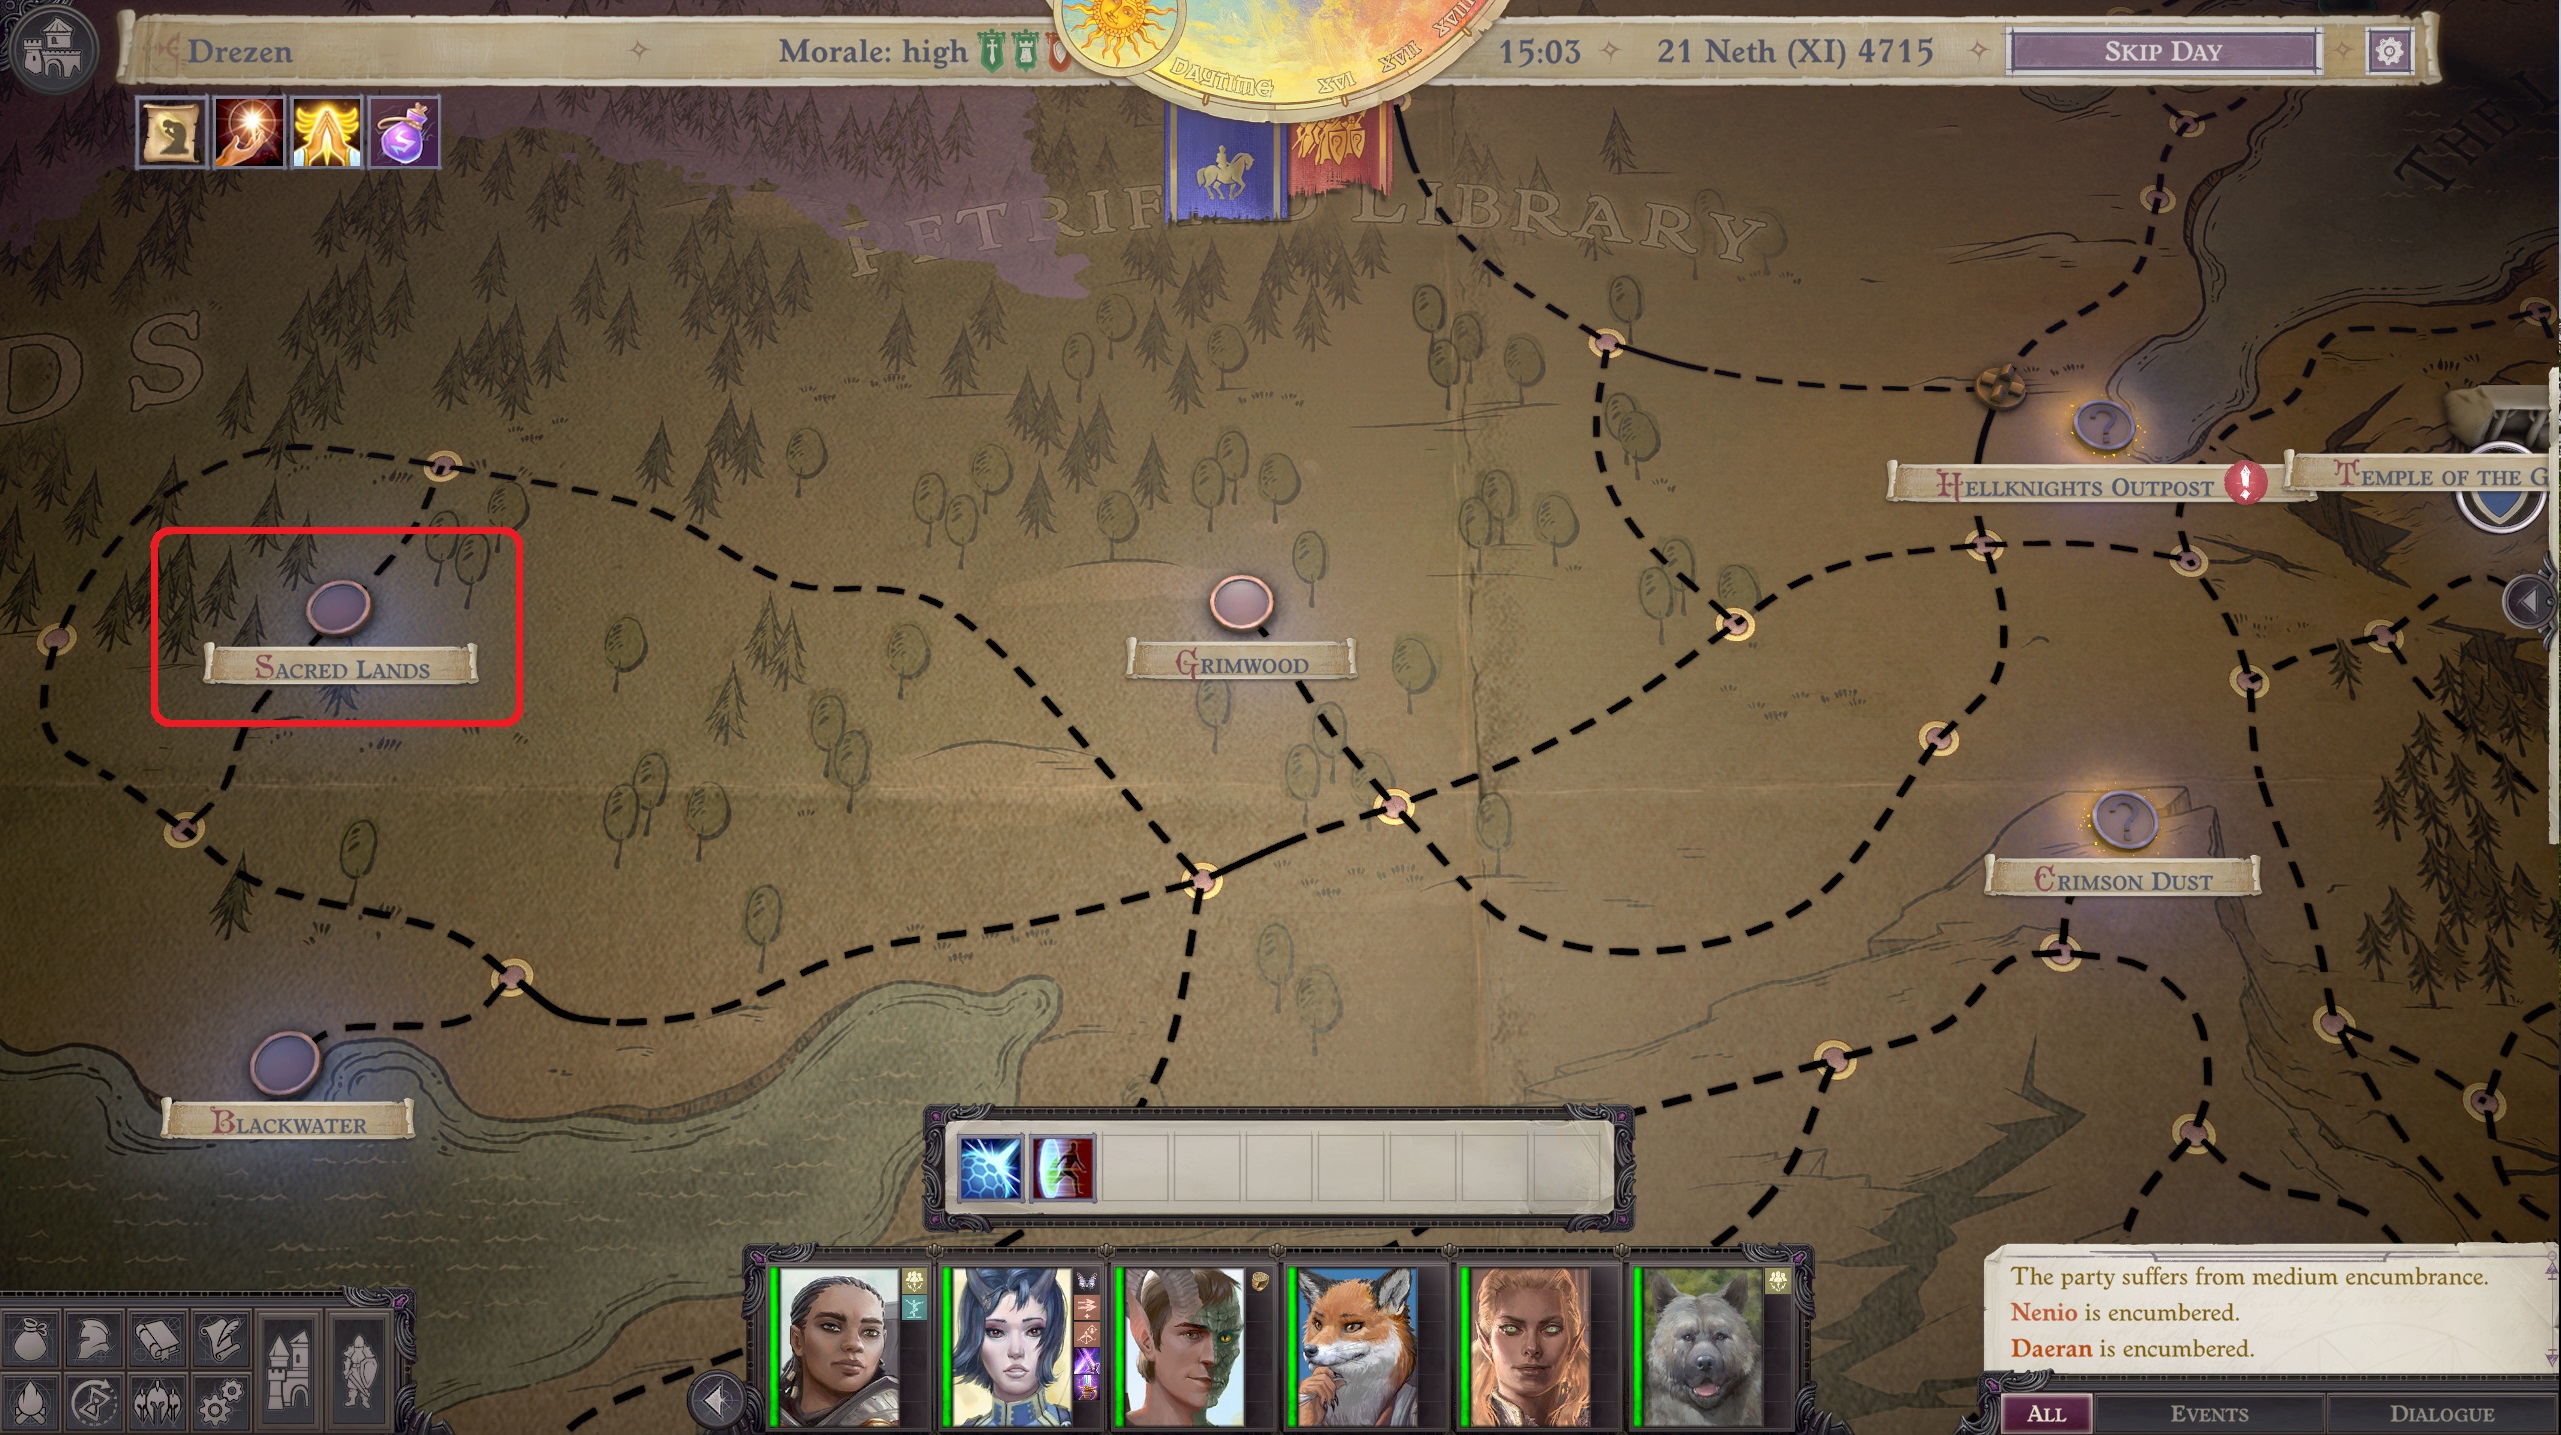
The Sacred Lands can be found west of Drezen during Act 3, as shown above.
Solution
side note: As you progress through these steps, you might run into issues with the tooltips covering up the tiles. I’ve found that moving your character and tapping the [TAB] key helps with this issue. YMMV.
- 1. (optional) Rotate the camera 180 degrees so your viewpoint matches the map.
- 2. Before pressing any switches, go to platform A3 and loot the chest.
- 3. Go to platform D4 and press the blue switch [#1 on the map].
- 4. Go to platform C3 and press one of the black switches [#8].
- 5. Still at platform C3, press the red switch [#5].
- 6. Go to platform B4 and press the cyan switch [#6].
- 7. Go to platform C2 and press the peach switch [#4].
- 8. Still at platform C2, press the red switch [#5].
- 9. Go to platform A2 and loot the chest.
- 10. Go to platform A1 and press the light yellow switch [#2].
- 11. Go to platform B2 and press the purple switch [#7].
- 12. Go to platform C3 and press the red switch [#5].
- 13. Go to platform A4 and press the dark yellow switch [#3].
- 14. Go to platform C2 and press the red switch [#5].
- 15. Go to platform A1 and press the purple switch [#7].
- 16. Go to platform C3 and press one of the black switches [#8].
- 17. Go to platform D2 and press the peach switch [#4].
- 18. Go to platform C1 and press the teal switch [#9].
- 19. Go to platform C3 and press the cyan switch [#6].
- 20. Exit.
This is all about Pathfinder: Wrath of the Righteous – Hints for Sacred Lands Puzzle Guide; I hope you enjoy reading the Guide! If you feel like we should add more information or we forget/mistake, please let us know via commenting below, and thanks! See you soon!
- All Pathfinder: Wrath of the Righteous Posts List


Faulty. Does not work.