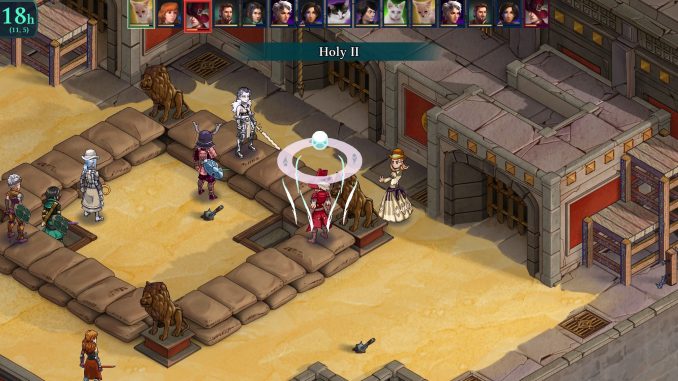
Achievements (1/9)
“Marked for Glory”
This is an achievement that will be earned automatically as you progress through the story. You’ll earn this achievement once you become a Marked one.
“Devil Doc & Demon Touched”
Recruit Yates & Unlock the Demon Knight Class
These achievements will be earned automatically as you progress through the story. You’ll earn them both at the same time when you save Anadine from the corruption with the help of Yates. After securing the amulet on Anadine at Yates’ cabin, you’ll unlock this both after a short cutscene.
“Pilgrimage – First Relic
Visit the first Relic
This is an achievement that will be earned automatically as you progress through the story. You’ll earn this after visiting the first temple in the Highlands.
“Pilgrimage – Second Relic”
Visit the second Relic
This is an achievement that will be earned automatically as you progress through the story. You’ll earn this after visiting the second temple in the Jungle.
“Pilgrimage – Third Relic”
Visit the third Relic
This is an achievement that will be earned automatically as you progress through the story. You’ll earn this after visiting the third temple in the desert.
“Pilgrimage – Fourth Relic”
Visit the fourth Relic
This is an achievement that will be earned automatically as you progress through the story. You’ll earn this after visiting the fourth temple.
“Pilgrimage – Fifth Relic”
Visit the fifth Relic
This is an achievement that will be earned automatically as you progress through the story. You’ll earn this after visiting the Immortal Council Chambers and defeating Primus for the first time.
“No More Smoke Bombs”
This is an achievement that will be earned automatically as you progress through the story. You’ll earn this after rescuing Katja in the Strangled Cove.
“Beetle Crusher”
This is an achievement that will be earned automatically as you progress through the story. You’ll earn this after visiting the Restful Stones and saving Bzaro a second time. He never does seem to stay out of trouble…
Achievements (2/9)
“Reassignment”
Change Class at least once
You’ll probably earn this one naturally and in the very beginning of the game. You can swap character classes at anytime, so simply do that with any character to unlock this achievement.
“Animal Control Officer”
Defeat a unit with its Elemental weakness
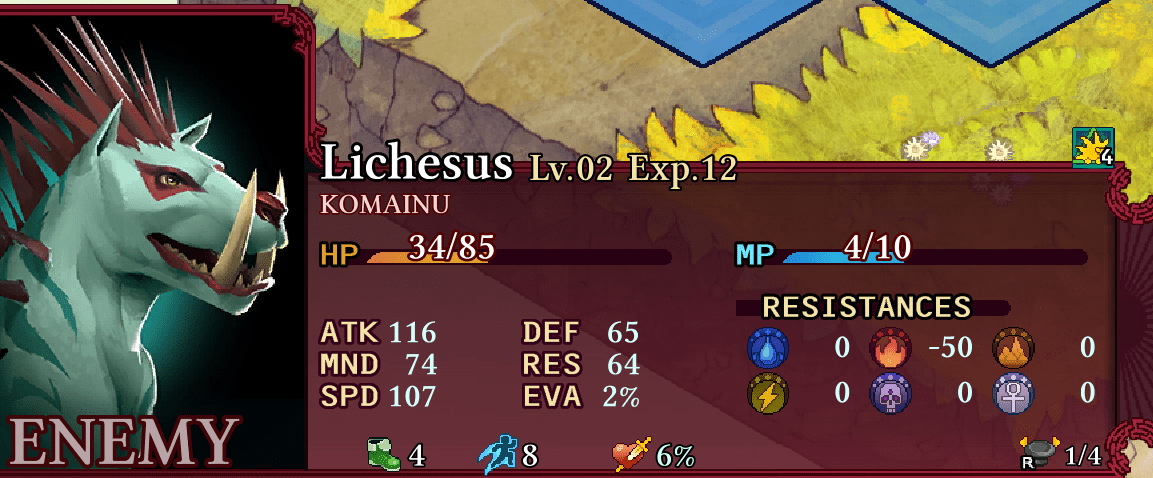
This one you’ll either earn early on, or without even knowing it. You need to defeat any one enemy with an attack that corresponds with their weakness. Check their profile when you hover over them to determine what they are weak against, such as this enemy’s weakness to fire.
“Build a Guild Upgrade.”
Build a Guild Upgrade.
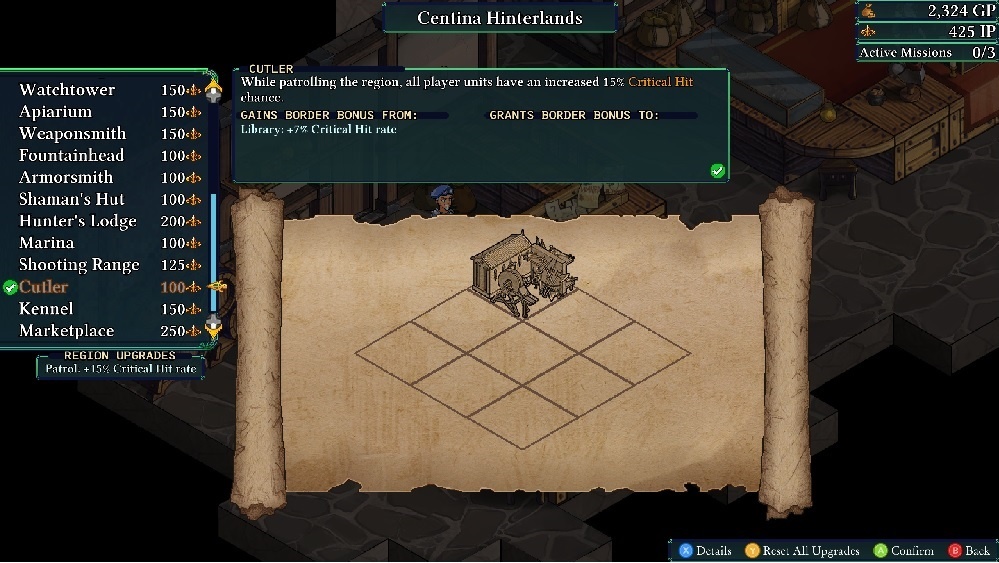
You’ll unlock the ability to access guilds and guild upgrades when you reach Centina. You can upgrade a region with guild upgrades using the influence points (IP) you earned in battle up until this point. Pick any one upgrade now or later to unlock this achievement.
“Sharp Retort”
Defeat an enemy by using a Counter Ability or Thorns
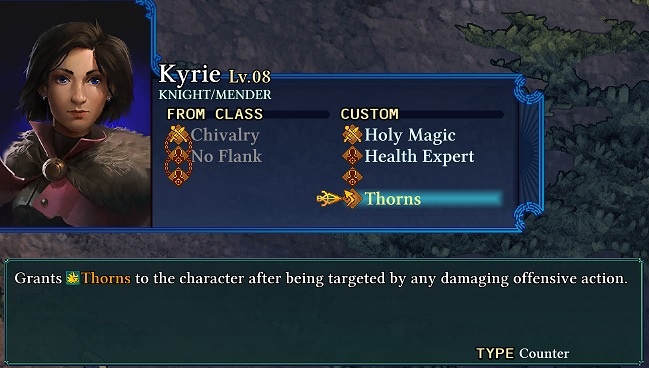
This can be completed without really needing to go specifically for it. As you level up, your Arbiters will learn various counterattacks. With the counterattack equipped, you’ll need to get an enemy to attack you, then die from the counterattack. Do this only once to unlock this achievement.
You can do this with any counterattack or thorns equipped as shown:
:
“Budding Crafter”
Craft your first item
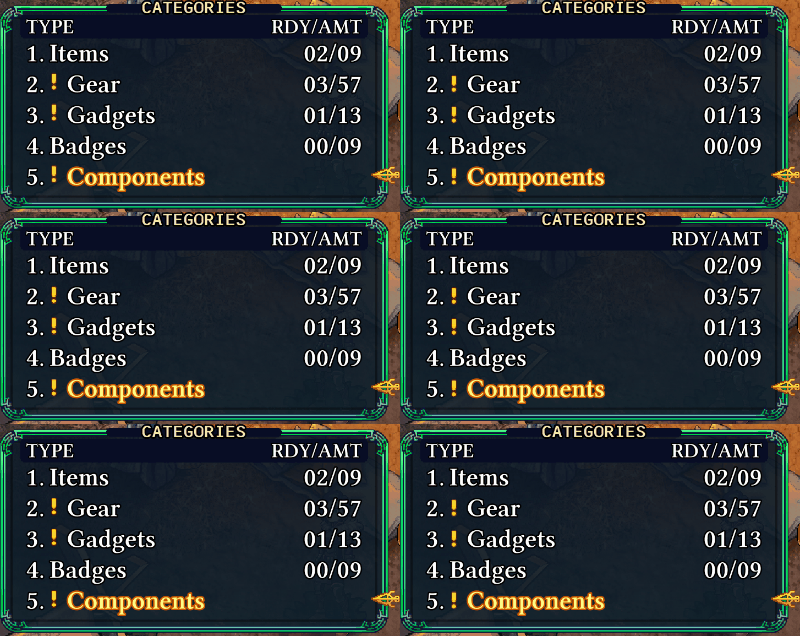
As you fight, you’ll most certainly amass a great deal of components to craft various items.
When in your camp, you need to craft any one “Item” to unlock this achievement.
Do note that crafting “Gear”, “Badges” or “Gadgets” will not unlock this achievement, but since you only need to make one singular item, you’ll earn this without any trouble.
“Sinking Feeling”
Drown an enemy
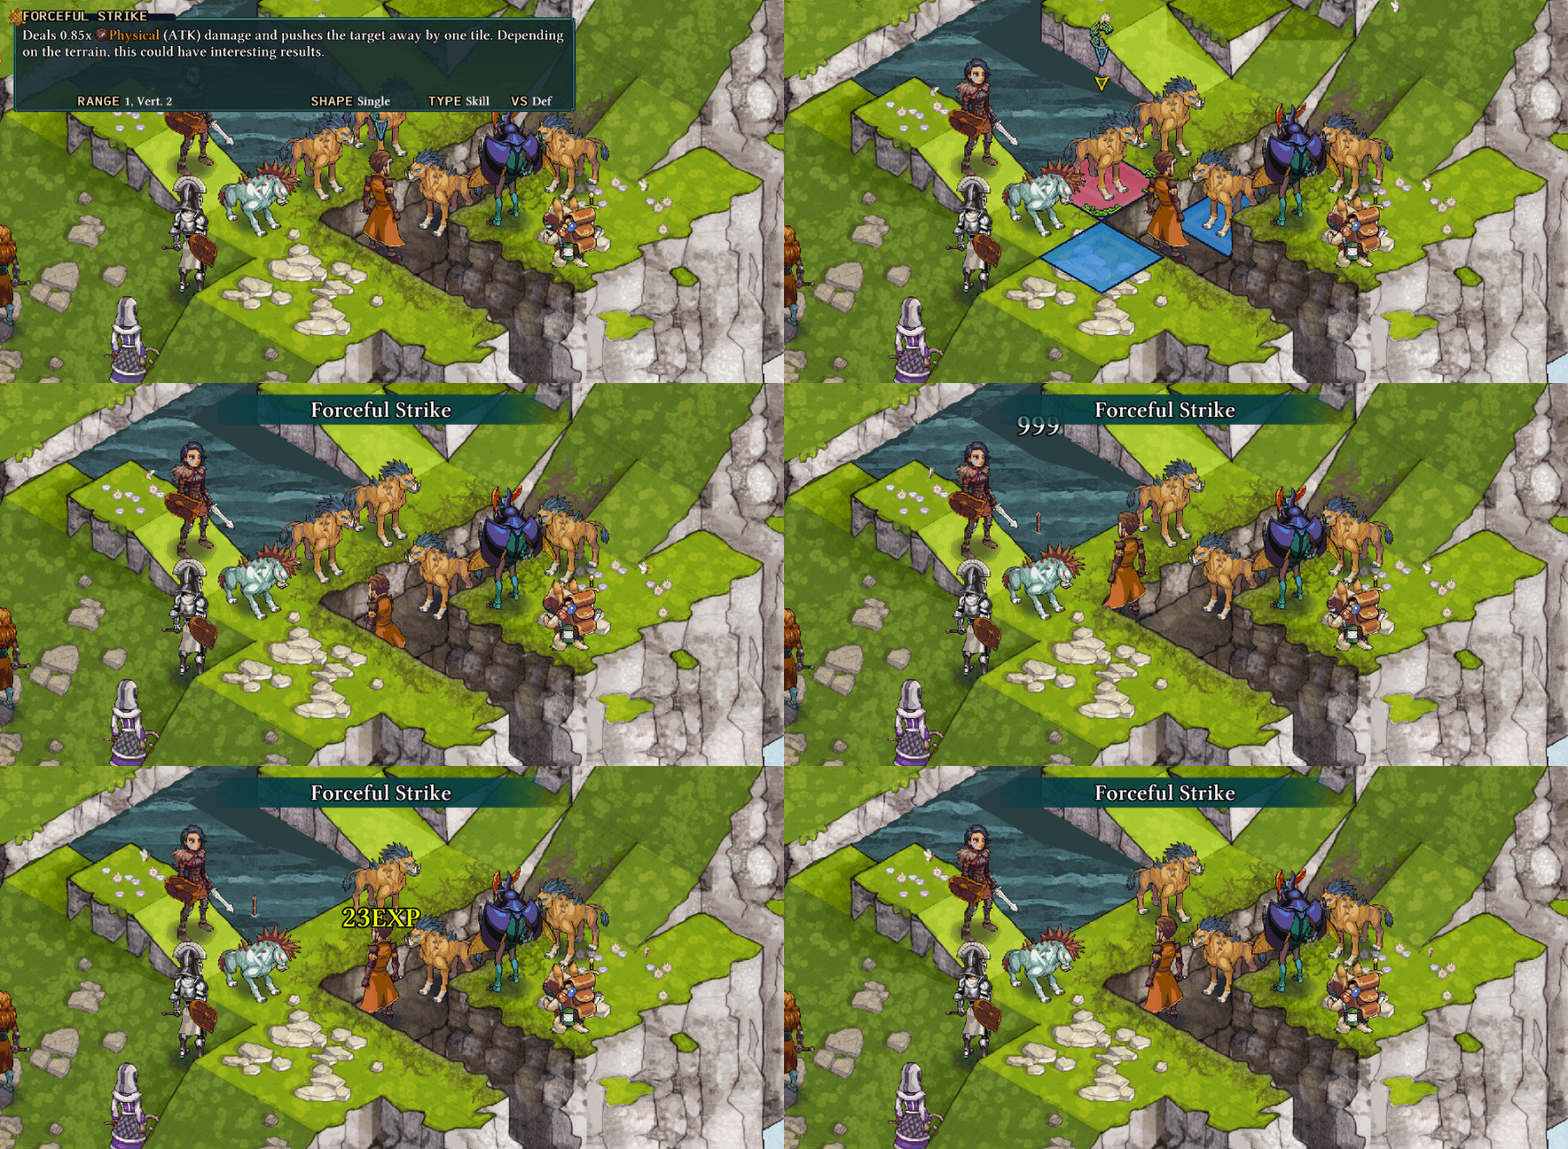
You’ll be able to drown an enemy as early as “The Highlands”, which will be the first area to be in and around water. There’s a few ways to drown enemies, but the one you’ll have access to early on is the attack “Forceful Strike”, which pushes an enemy one tile backward.
If you play your cards right and with a little bit of luck, you can get an enemy to stand next to a body of water. Use this attack to instantly kill them and unlock this achievement.
“Master in Your Field”
Master any Class
Not as hard as one would think, mastering any one class is fairly quick and easy. You’ll earn this naturally as you progress through the game, so no need to grind specifically for it. You’ll unlock the master in any class once you learn all the skills for any given class using your “ability points” (AP) that you earn from fighting.
“Stand Down!”
Defeat an enemy with falling damage
Much like the drowning achievement, this one can be done with similar attacks that push your foe back a tile.
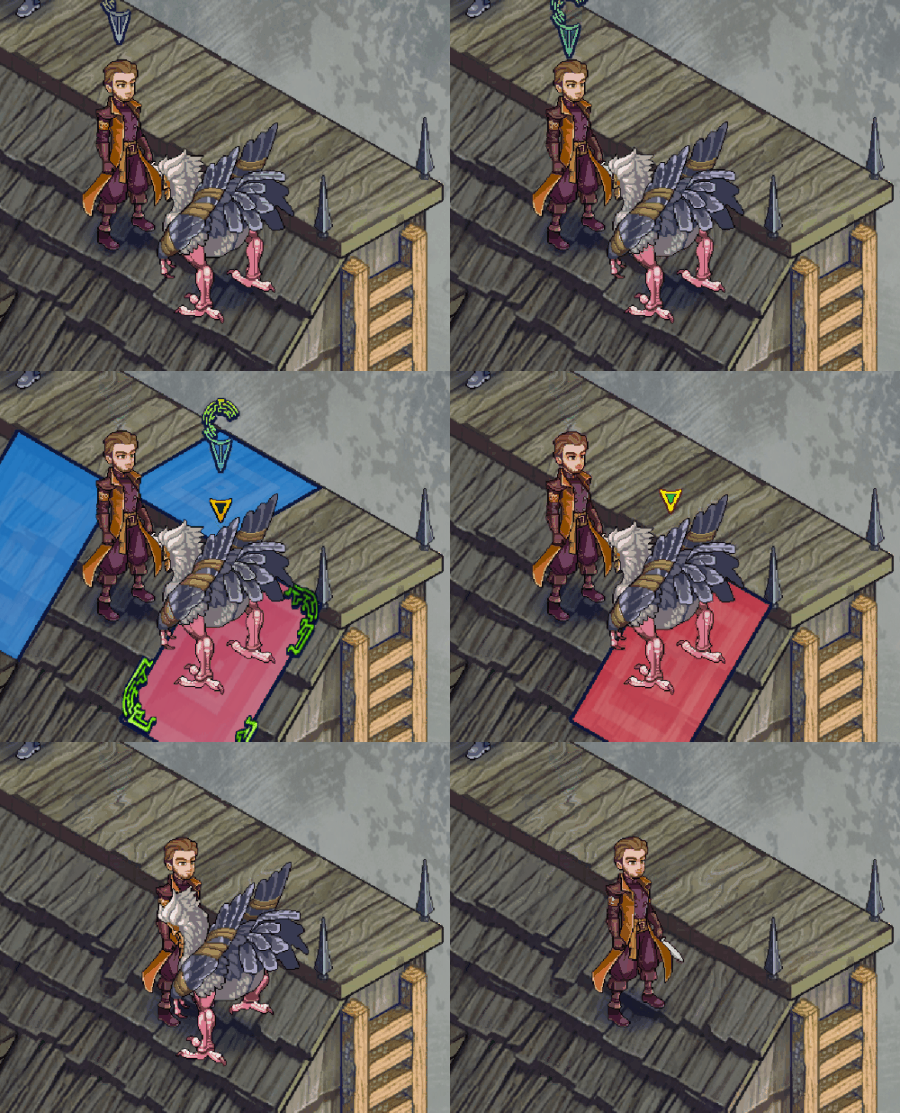
The first place I was able to accomplish this was at Yate’s Cabin. You’ll have a few members of your team start on the roof of his cabin and a few flying enemies that, if lucky, you can get to position themselves next to the edge.
One swift hit with your “Forceful Strike” and off the ledge they go!
“Regional Hero”
Complete 100% of Missions in one region.
This achievement sounds harder than it really is, mostly because it can be done while not even playing the game, or simultaneously while doing the main story mission. To start a mission, go to any town and select “Guild”, then “Missions”.
You’ll need to complete every mission at least once with a successful run. Once you complete every mission, the game will unlock this achievement and a gold star will be noted where the previous percentage was on your completion rate.
Do note that if you fail a mission or wish to do them more than once, you can.
“Monster Party”
Complete an encounter deploying only Monsters.
Once you unlock the “Wrangler” character class, you’ll be able to start taming various creatures out in the field. Think of it like pokemon: the lower the enemy’s [HP], the easier it is to tame said monster.
To earn this achievement, field only monsters and no human characters for any one battle. You do not need to deploy a full group, so even a partial will work if they’re strong enough.
“Double Agent”
Defeat an enemy with a Berserk, Charmed, or Mind-Controlled enemy
This one requires a little bit of planning and maybe even a little luck. I earned it by repeatedly charming monsters/human enemies, then focusing on one non-charmed one and whittling down their HP. Timing it right with your team’s turn order is key and then cross your fingers the charmed enemy cooperates and goes for the intended target.
“My Hero”
Save Somier a second time
As you progress through the main story, make sure you visit Somier in the “Unassuming Hovel”. I did this just after I completed the third temple, though you may be able to do it before or after. Once you visit, you’ll see he has left a note stating he is roaming the desert. Head over to the “Caravan Trail” and you’ll find him there.
Protect him from the enemies to earn this achievement.
“Champion”
Win the first Tournament
The first tournament can be found in Centina and can be done at any time. It consists of three rounds and you must win all three in a row to complete the tournament and unlock this achievement.
“Grand Champion”
Win the second Tournament.
The second tournament will become available after you complete the first tournament and the story mission “Immortal Council Chambers”. The second tournament consists of four rounds this time.
Achievements (3/9)
“Open Book”
View all optional dialogue events
These events will come as you progress the main story. While they are optional, if you want to earn the achievement, you’ll need to pay attention to when they pop up.
Keep in mind that you don’t need to enter each event right away, but some are timed and missable, so it is best you do them as they appear to avoid missing out.
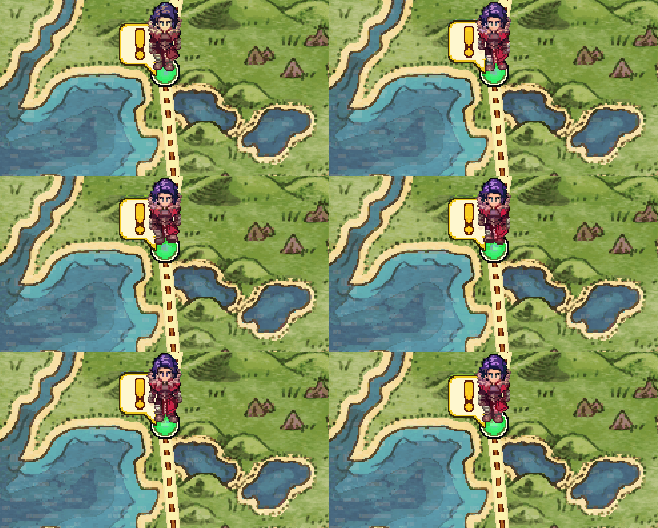
You can tell an event is available by the “!” box that appears over any given area so keep your eyes peeled! Events happen in this order:
- Event #1 – Early on in the game you’ll see the first one trigger prior to reaching Centina. This is more or less the introduction of the event(s) and will explain what they are for the rest of the game. Can’t miss it.
- Event #2 – Appears on “The Highlands” in the Centina Highlands.
You’ll encounter him there and will need to protect him from a pack of wild monsters.After you defeat them and save him, an event will trigger when you go back to the main map hub so it’ll be pretty hard to miss this one.
- Event #3 – Once you create the amulet for Anadine, head over to the Azure Fields. After completing this area for the first time, you’ll unlock the next event.
- Event #4 – When you reach Thespeiros, after meeting with the mayor you’ll go back to the main map and the event will trigger.
- Event #5 – After defending Thespeiros from the bandits and healing Anadine, event #5 will appear over Thespeiros.
- Event #6 – Just after event #5, event #6 will appear back in the city of Centina. The only thing I did between event #5 and #6 was run some missions offline, so unsure if this was triggered by additional missions, or appeared right away after event #5 and I didn’t notice it until I logged back in the following day.
- Event #7 – After defeating the bandits ransacking the Oldebzar, event seven will appear over it.
- Event #8 – After completing the third temple in the desert, event eight will appear over Baaz Island.
- Event #9 – You’ll unlock this after rescuing Katja in the Strangled Cove as part of the main story line. It will appear over the same area right after completing the mission.
- Event #10 – After completing the area “Drakesmouth Seaway for the first time, event #10 will appear over this area.
- Event #11 – After defeating Lady Anquine, in the Alpine Woods, you’ll unlock this event. See more about unlocking this event under the “Laid to Rest” achievement.
After initiating event #11, you’ll unlock this achievement.
Achievements (4/9)
“Big Game Hunter”
Complete all unique Hunts and large-scale battles.
- Large-Scale Battles #1 – The first one will be available as you progress the story naturally. It will appear south of Centina.
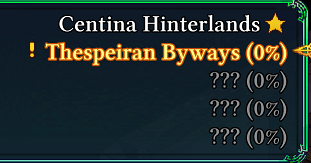
- Large-Scale Battles #2 – This one will become available after completing all the missions in the Thespieran Byways. It will appear in the Banyan Span.
- Large-Scale Battles #3 – This one will become available after completing all the missions in the Zzakandia. It will appear in the Dumadi Depths.
- Large-Scale Battles #4 – This one will become available after completing all the missions in the the Coast of Industry. It will appear in Port Grendel.
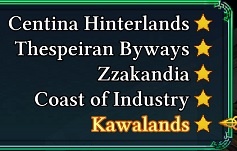
- Large-Scale Battles #5 – This one will become available after completing all the missions in the the Kawalands. It will appear in Grim Eye’s Study.
- Monster Hunts #1 – The first one will be available as you progress the story naturally. It will appear at Yate’s Cabin.
- Monster Hunts #2 – Unlocked by completing the mission “Baleful Guardian” in the Zzakandia Region.
- Monster Hunts #3 – Unlocked by completing the mission “Violet Blight” in the Zzakandia Region.
- Monster Hunts #4 – Unlocked by completing the mission “Three Sisters” in the Zzakandia Region.
- Monster Hunts #5 – Unlocked by completing the mission “The Beast Below” in the Coast of Industry Region.
- Monster Hunts #6 – Unlocked by completing the mission “The Beachmaster” in the Coast of Industry Region.
- Monster Hunts #7 – Unlocked by completing the mission “A Legendary Dessert” in the Coast of Industry Region.
- Monster Hunts #8 – Unlocked by completing the mission “Impostor!” in the Kawalands.
- Monster Hunts #9 – Unlocked by completing the mission “Children of the Volcano” in the Kawalands
- Monster Hunts #10 – Unlocked by completing the mission “Kidnapped Children” in the Kawalands
- Monster Hunts #11 – Unlocked by completing the mission “Raife’s Journal” in the Kawalands
- Monster Hunts #12 – Unlocked by completing the mission “Demon Versus Demon?” in the Kawalands
- Monster Hunts #13 – Unlocked by completing the mission “Infestation!” in the Kawalands
“Master Arbiter”
Master all Human story character Classes.
This is different from the “Wearer of Many Hats achievement. These story classes are the unique ones to each individual character. They are as follows:
| Class Name | Requirements | HP | MP | ATK | DEF | MND | RES | SPD |
| Marked | Kyrie. Unlocked through the story. | 7.0 | 4.0 | 5.0 | 3.25 | 4.5 | 3.25 | 1.0 |
| Spymaster | Reiner. Unlocked through an optional battle. See “Jack of All Trades” achievement. | 6.5 | 3.0 | 4.25 | 3.5 | 4.25 | 3.5 | 1.25 |
| Demon Knight | Anadine. Unlocked through the story. | 8.0 | 1.0 | 6.0 | 3.25 | 3.5 | 2.5 | 0.67 |
| Anatomist | Yates. Unlocked automatically. | 5.5 | 4.5 | 3.75 | 3.5 | 5.0 | 4.0 | 1.0 |
| Bounty Hunter | Katja. Unlocked automatically. | 6.0 | 2.0 | 4.25 | 3.5 | 3.75 | 3.2 | 1.37 |
| The Exiled | Kairu. Unlocked automatically. | 6.5 | 6.0 | 4.75 | 3.25 | 4.5 | 3.25 | 1.13 |
Achievements (5/9)
“Crowd Control”
Defeat at least 4 enemies with a single hit.
Not as hard as it seems, but one I kept on the backburner until I was much stronger and had a character able to one-hit several low level enemies at once.
While there are several ways to do this, I went back to the first area and patrolled it, bringing just two characters, which included a Sorcerer.
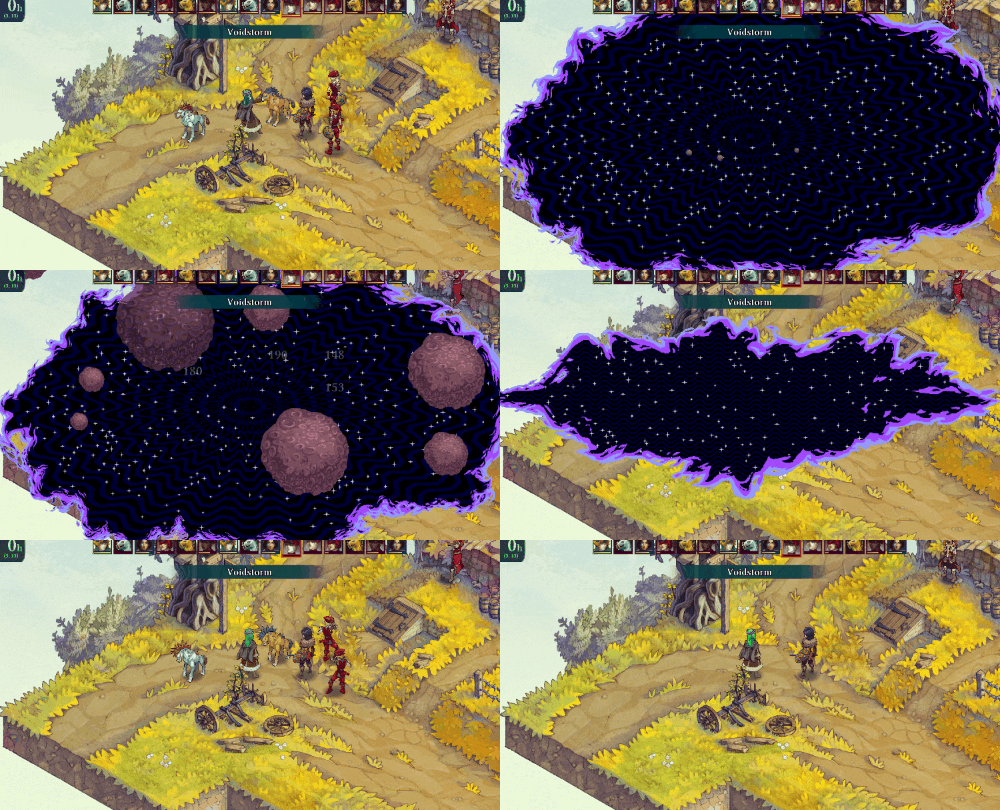
My Sorcerer was level 28 at the time. I grouped up everyone onto one screen with my primary character and then cast Voidstorm, killing four enemies at once.
“Caretaker of the Realm”
Fully upgrade all 5 regions.
When you visit the Guild of any given town, you can choose to upgrade your guild with various bonuses using accumulated Influence Points (IP). You should have plenty of IP by the time you near the end of the game, so just upgrade each guild in each area to your liking to unlock this achievement.
“Mysterious and Spooky”
Complete the Halloween encounter.
You’ll find this optional achievement at the “Restful Stones” location. It is unlocked simply by progressing through the game. Complete the fight against your Halloween-themed adversaries to unlock this achievement.
“Wearer of Many Hats”
Unlock all 20 base Human Classes.
Unlocking all the basic human classes will probably be something you’ll do on your own, especially if you have one of every class recruited as you unlock them. When going to your character list, select “Change Class” to see a list of all available classes.
Each class will have specific requirements, as well as an indication if they are “non-story”, meaning they do not fall into the required 20. Those will be for a different achievement all together. The basic human classes you need to unlock are as follows:
| Growth | ||||||||
| Class Name | Requirements | HP | MP | ATK | DEF | MND | RES | SPD |
| Mercenary | None | 8.0 | 1.5 | 4.5 | 4.0 | 3.0 | 3.5 | 0.83 |
| Scoundrel | Mercenary 2 | 6.5 | 2.5 | 3.5 | 3.5 | 3.5 | 3.5 | 1.38 |
| Knight | Mercenary 3 | 7.5 | 1.5 | 4.0 | 5.0 | 3.0 | 4.0 | 0.75 |
| Ranger | Scoundrel 4 | 6.5 | 2.0 | 4.0 | 3.25 | 3.5 | 3.75 | 1.25 |
| Templar | Knight 4 | 7.0 | 2.0 | 4.5 | 3.5 | 3.5 | 4.5 | 0.88 |
| Peddler | Ranger 5 | 7.0 | 3.0 | 3.75 | 4.0 | 3.5 | 4.0 | 1.13 |
| Reaver | Templar 5, Scoundrel 4 | 8.0 | 1.0 | 5.5 | 2.75 | 2.5 | 2.75 | 0.83 |
| Gunner | Mercenary 4, Knight 4, Ranger 4 | 6.5 | 1.0 | 4.5 | 4.25 | 3.0 | 3.5 | 0.93 |
| Assassin | Gunner 4 | 6.0 | 2.0 | 4.25 | 3.0 | 3.5 | 3.25 | 1.47 |
| Duelist | Reaver 3, Peddler 3 | 7.0 | 1.0 | 5.0 | 3.5 | 3.0 | 3.0 | 1.05 |
| Mender | None | 6.0 | 4.0 | 3.25 | 3.5 | 4.5 | 4.0 | 1.0 |
| Wizard | Mender 2 | 5.5 | 4.5 | 3.0 | 3.0 | 5.0 | 5.0 | 0.78 |
| Plague Doctor | Mender 4 | 7.5 | 3.0 | 3.75 | 4.0 | 4.25 | 4.0 | 0.9 |
| Alchemystic | Wizard 4 | 6.0 | 3.5 | 3.5 | 3.25 | 4.25 | 4.5 | 1.33 |
| Druid | Mender 3, Wizard 5, Alchemystic 3 | 6.0 | 3.0 | 4.0 | 3.5 | 4.5 | 4.0 | 1.08 |
| Sorcerer | Druid 5 | 5.0 | 5.5 | 3.25 | 3.5 | 5.5 | 4.25 | 0.75 |
| Fellblade | Knight 3, Wizard 3 | 7.0 | 2.5 | 4.75 | 3.5 | 4.5 | 3.5 | 0.92 |
| Warmage | Plague Doctor 3, Fellblade 4 | 6.0 | 3.0 | 4.5 | 3.5 | 4.75 | 3.2 | 1.13 |
| Gambler | Scoundrel 3, Mender 3 | 6.5 | 1.8 | 4.5 | 3.5 | 3.5 | 3.0 | 1.2 |
| Gadgeteer | Scoundrel 3, Wizard 3 | 7.5 | 2.5 | 4.0 | 4.0 | 4.0 | 4.0 | 1.0 |
Note: The following are DLC characters and do not count towards this achievement. Instead, they count towards one made specifically for them:
“Warriors and Wild Ones”
Master the 3 new Human Classes.
| Class Name | Mission | Class Requirements |
| Wrangler | The Monster Mine | Knight 3, Mender 3 |
| Beastmaster | Wiped Out | Mercenary 5, Ranger 5, Mender 4 |
| Samurai | Assassin! | Knight 5, Ranger 4 |
“Master of All”
Master all 20 base Human Classes.
You’ll need to complete all 20 classes listed above (not including the DLC classes) to unlock this achievement. Simply complete the skill tree in their primary class and the achievement will unlock.
“Laid to Rest”
Defeat Lady Anquine.
To encounter Lady Anquine, you’ll first need to do a few side missions in the following order:
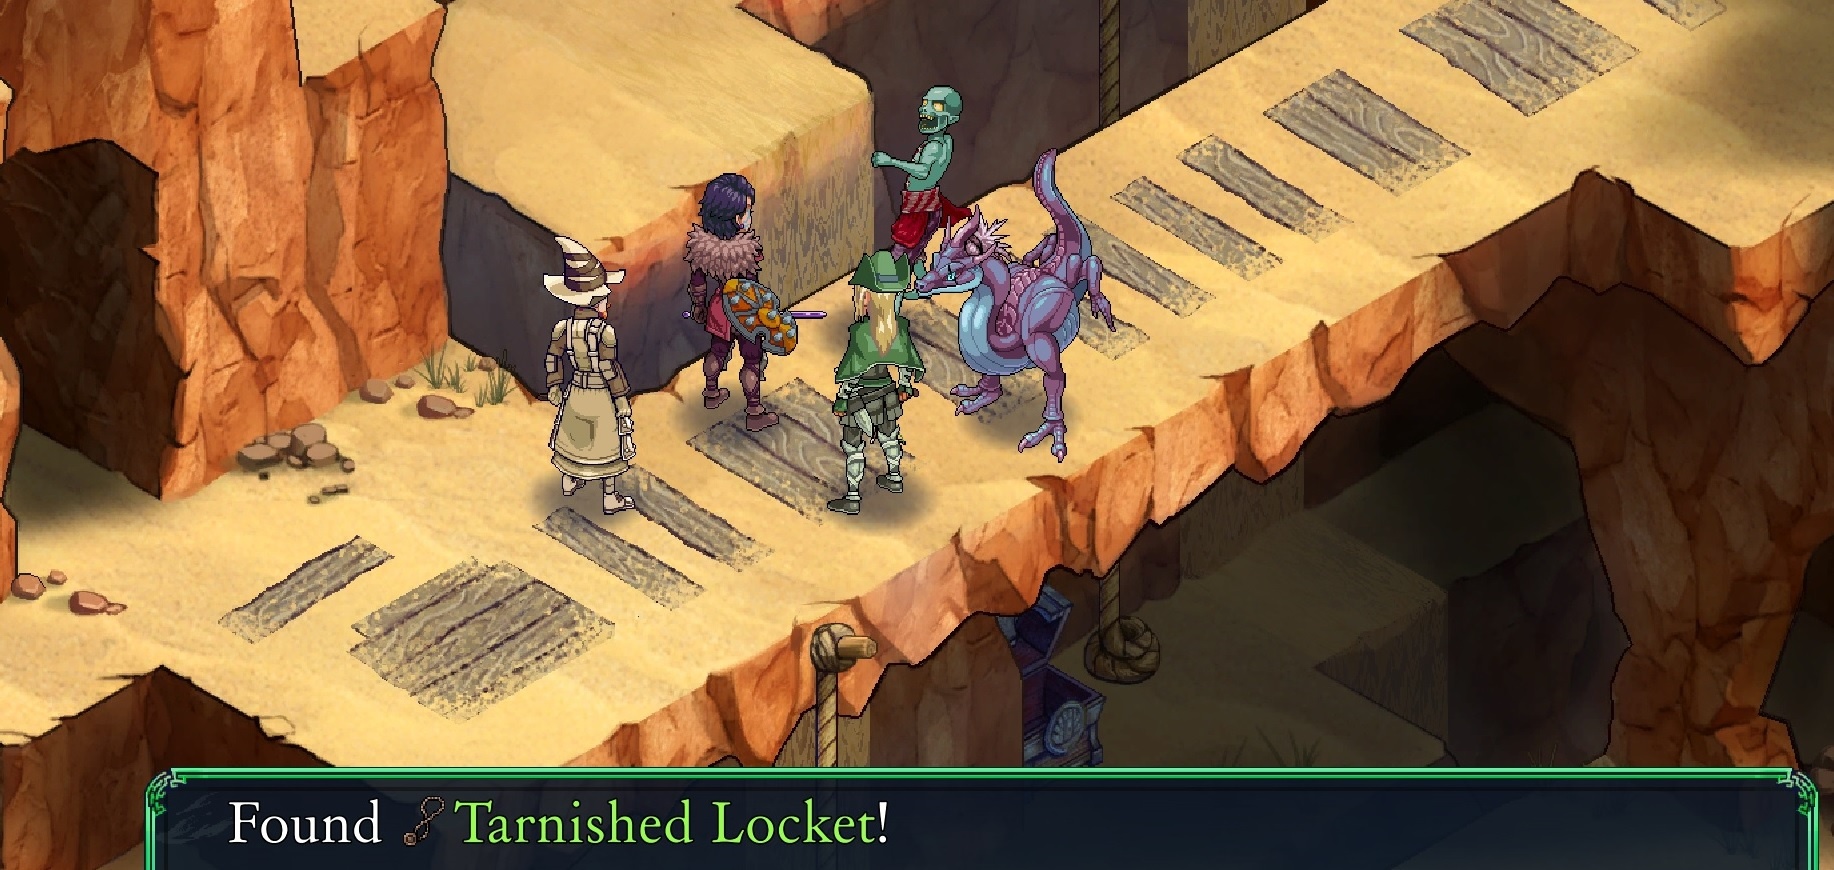
- Go to Iirzk’tara Gorge in the northern area of the map and patrol the location. Here you’ll encounter and need to kill the Cadaver with “Collect Pelt” attack to get the Tarnished Locket Component.
- Use Tarnished Locket to craft Ancient Locket.
- Go to Centina and view the cutscene about recent gossip.
- Go to Alpine Woods (with the Locket equipped on any character) to encounter Lady Anquine. She has about a half dozen minions and hovers around level 25 or so.
“Jack of All Trades”
Unlock the Spymaster Class.
After you complete the achievement “Laid to Rest” by defeating Lady Anquine, view the optional event in the Alpine Woods (see event #11). At the end of the conversation between Reiner and Yates, you’ll unlock the Spymaster class.
“Inventor”
Obtain all gadgets.
Not terribly difficult, but rather time consuming, as obtaining all the gadgets will require some rather rare materials. If you’re doing all the optional side missions and working towards obtaining all the achievements, you’ll come across all the necessary materials without much trouble from simply fighting enemies and locating the treasure chests on the various maps.
This is one achievement I wouldn’t focus on directly.
Achievements (6/9)
“Mission Accomplished”
Complete all Missions.
Complete every mission in all five areas of the map to unlock this achievement. You can do this prior to completing the game, but won’t have access to all the missions until the near-end anyway, so do them at your leisure.
Make sure you read each mission description, as they give you instructions to increase your success rate. Don’t worry though, if you fail you can always try them again. Once an area is completed, you’ll have a star next to each area.
“Veteran Investigator/Relentless Investigator”
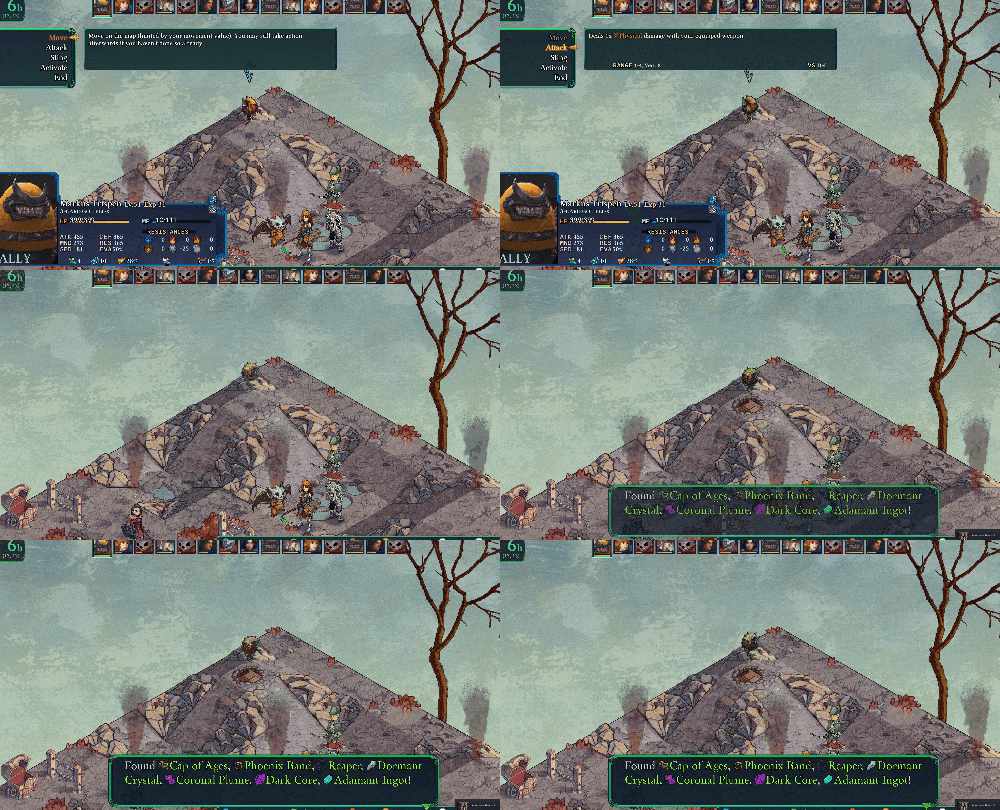
Open 50% of treasure chests/Open all treasure chests
The chests, their loot and their requirements are as follows:
| Level Name | Coordinates | Contents | Requirements |
| The Gauntlet | (3, 1) | Adamant Ingot | None |
| Azure Fields | (11, 3) (7, 1) (5, 14) |
Monk Robe Sage Hat Healbot-3000 |
None None None |
| Caravan Trail | (8, 12) (3, 0) (5, 0) |
Surpriser-Plus Aegisite Ingot Jet Boots |
Requires 12+ “Jump” |
| Ekhinda Falls | (4, 13) | Badge: Lunar Crest | Requires 8+ “Jump” |
| Scarred Summit | (13, 8) | Dispelotron | None |
| Phougamouth Bogs | (8, 4) | Badge: Phylactery | Requires “Hover” |
| Zzakander Spires | (7, 12) | Speed Generator | None |
| Restful Stones | (0,1) | Badge: Blood Crest | Push the button on the western statue prior to opening. Location: (0,4) |
| Iirzk’tara Gorge | (1, 0) (10, 7) |
Badge:Bone Crest Battle Claw |
Requires “Fly” None |
| Alpine Woods | (17, 5) | Silver Spear | None |
| Oldebzar | (0,0) | Soul Armor | Requires “Fly” and any one of the following: “Swim” or “Hover” or +7 “move” |
| Drakesmouth Seaway | (6, 3) | Pestilence (maul) | Chest is obscured, but no requirements needed. |
| Timber Road | (11, 9) (0, 10) |
Plate Glove Sinewdle Fruit |
Requires +8 “Jump” None |
| The Resting Giants | (9, 9) | Malcubus Helm | Requires “Hover” and either 8+ “Jump” or “Fly” |
| Gelligh | (0, 0) (12, 16) |
Cursed Shield Distilled Water |
Requires “Fly” and “Hover” if done before Mission #3, or “Fly” and 12+ “Jump” if done after Mission #3.
The chest on the room at (12,16) requires 9+ “Jump” |
| Mount Nervanzer | (3, 13) | Adamant Ingot | None. However it is visually obscured. |
| Kapawka Jungle | (14, 11) | Phoenix Band | Requires “Hover”. |
| Bardvig Aqueduct | (7, 5) | Hover Boots | Activate the valves at (12,7) and (12,2). |
| Gelligh Foothills | (10, 3) | Behemoth Guard | None. However it is visually obscured. Stand at (11,2) to open. |
| Godstear Wastes | (6, 14) | Chitin Suit | None |
| Devilsblood Ascent | (11, 0) | 2x Dormant Crystals | Requires “Hover” |
| Claret Woods | (0, 11) | Noctis Garb | Requires 8+ “Jump”, but first you need to activate the state at (2,12) from (1,12). |
| Screwworm Swamp | (0, 0) (0, 15) |
Dark Core God’s Messenger |
Requires “Hover” Requires “Hover” & “Fly” |
| Fetid Depths | (12, 4) | Gold Thread | None |
| Infernal Depths | (8, 13) (1, 0) |
Infinity Godwood |
Requires “Hover” None |
“Riddle Me This”
Complete the Obelisk riddle.
The riddle is something you’ll have to work on over time and won’t be able to complete until you’re towards the end of the game. To unlock this achievement you’ll first need to locate all eight obelisk clues. They are located in the following maps and at the following coordinates:
| Clue No. | Location | Coordinates | Requirements |
| 1 | Scarred Summit | (2, 10) | None |
| 2 | Azure Fields | (7, 16) | None |
| 3 | Ekhinda Falls | (4, 15) | Requires a character with “Hover” or 25+ “Jump” |
| 4 | Baaz Island | (2, 13) | None |
| 5 | Kapawka Jungle | (16, 8) | None |
| 6 | Gogombob City | (12, 15) | None |
| 7 | Devilsblood Ascent | (6, 4) | Requires a character with “Hover”. |
| 8 | Gelligh Foothills | (1, 8) | None |
Once completed, you’ll be given the clue:
“To those seeking access to the treasures of our old clan, make your way to the site of our most glorious and fated battle. 13 days it lasted and a mighty struggle it was, leaving the fields barren and sulfurous. Once the trip made, take your feet to the twin coordinates therein. Use our treasure wisely, that no 13 others have to suffer our fate.”
Go to Godstear Wastes and have a character stand on coordinates (13,13) at the top of the hill and they will have a special prompt to get the treasure. Keep in mind you must gather all 8 Obelisk Clues first – the prompt will not be available otherwise.
Achievements (7/9)
“Master of Secrets”
Master all 6 special badge Classes.
For this one, you’ll need to collect crests for each class. They can be found, earned, or crafted. The following class requires the badge listed below, as well as other requirements shown in the class change screen:
| Lunar Crest | Werewolf | Ekhinda Falls | 1x Energized Crystal, 1x Mycoleather |
| Blood Crest | Vampire | Restful Stones | 1x Dormant Crystal, 2x Dragonsblood Sap |
| Phylactery | Lich | Phougamouth Bogs | 1x Dark Core, 1x Cold Iron |
| Lord Crest | Lord | None | 1x Coronal Plume, 1x Energized Crystal |
| Princess Crest | Princess | None | 1x Coronal Plume, 1x Angel Tears |
| Bone Crest | Vessel | Iirzk’tara Gorge | 1x Meteorite, 1x Dark Core |
“Breaking the Curse”
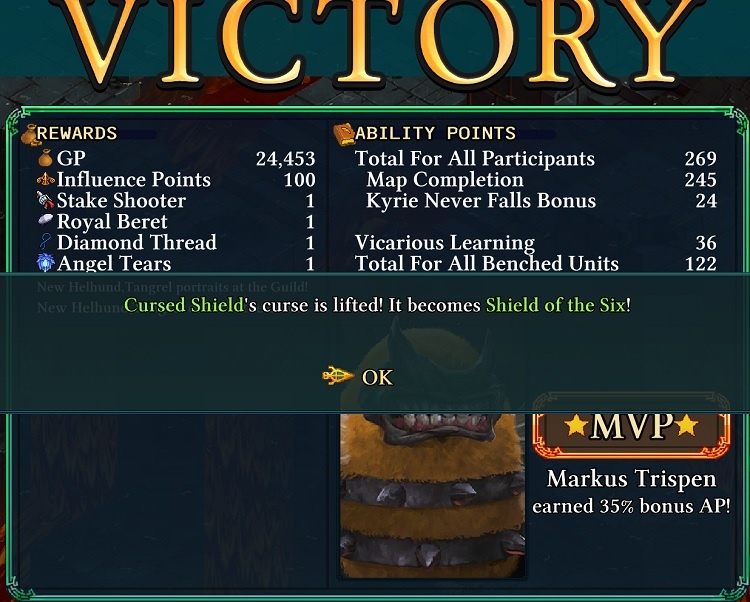
Cleanse the Cursed Shield.
The Cursed Shield can be located in Gelligh inside a treasure chest at (0,0). Once obtained, you will need to equip it on a character and bring that character into battle 15 times. In doing so, the shield will be cleansed of the curse and its stats will increase drastically.
Please not, that having it equipped on a benched character will not count. Once you complete your fifteenth battle, you’ll be notified that the curse has been lifted:
“The Exiled”
Recruit Kairu.
Kairu is found at Lodestarhenge, which will only show up on the map once you have found your first Henge Fragment. There are four in total and they can be found in the following locations:
- The first one will drop randomly as you progress. The farther along you go in the story, the higher the percentage the drop rate increases until you obtain it.
- The second one is unlocked with the “Spymaster Class”. See that achievement for instructions on how to accomplish it.
- Complete the jungle temple, then the desert temple, then return to the jungle temple to release the trapped henchmen inside. One of them will give you the third fragment.
- The fourth one is found by completing the desert temple and recruiting Bzaro, head to the “Cavaran Trail” and save Somier (he must survive), then go to Gogombob City. After watching the cutscene, return to the City and Somier will reward you with the fourth fragment.
“Forbidden Lore”
Use your first Class badge.
Class badges are found in treasure chests and off felled enemies, while some must be crafted from rare materials.. You’ll more than likely have no issue finding them or the materials needed. To use one, go to your character selection screen when in the overworld map and select “Change Class”. As long as you meet the requirements at the top of the class selection screen, you can change any character to any class.
The classes that utilize the badges are the following:
- Vessel
- Vampire
- Lich
- Werewolf
- Princess (only available on female characters)
- Lord (only available on male characters)
If you’re having trouble locating the badges. They can be found/crafted here:
| Badge | Class | Guaranteed location | Components |
| Lunar Crest | Werewolf | Ekhinda Falls | 1x Energized Crystal, 1x Mycoleather |
| Blood Crest | Vampire | Restful Stones | 1x Dormant Crystal, 2x Dragonsblood Sap |
| Phylactery | Lich | Phougamouth Bogs | 1x Dark Core, 1x Cold Iron |
| Lord Crest | Lord | None | 1x Coronal Plume, 1x Energized Crystal |
| Princess Crest | Princess | None | 1x Coronal Plume, 1x Angel Tears |
| Bone Crest | Vessel | Iirzk’tara Gorge | 1x Meteorite, 1x Dark Core |
“Sealed Fate”
Get the first ending.
The first ending, or as I regard it as, the bad ending, requires you to fight The Maw before collecting the energy fragment. Head to Tertoma to locate The Maw. I did this with characters around level 45-55. Once defeated, enjoy the cutscene and collect your achievement.
Now, at the end it will ask you to save the game. You can do so freely and not worry about having to play the game all over again. Once saved, it will put a “cleared flag” (a gold star) on that save file. Re-load the cleared save file and it will put you back right before fighting The Maw. Now you can go about doing the second ending on the same save file. Time to collect the energy fragment!
“Breaking the Seal”
Get the second ending.
To get the second ending, you’ll first need to collect the four Henge Fragments. They are detailed within this guide. Please see that portion under the achievement “The Exiled” for further.
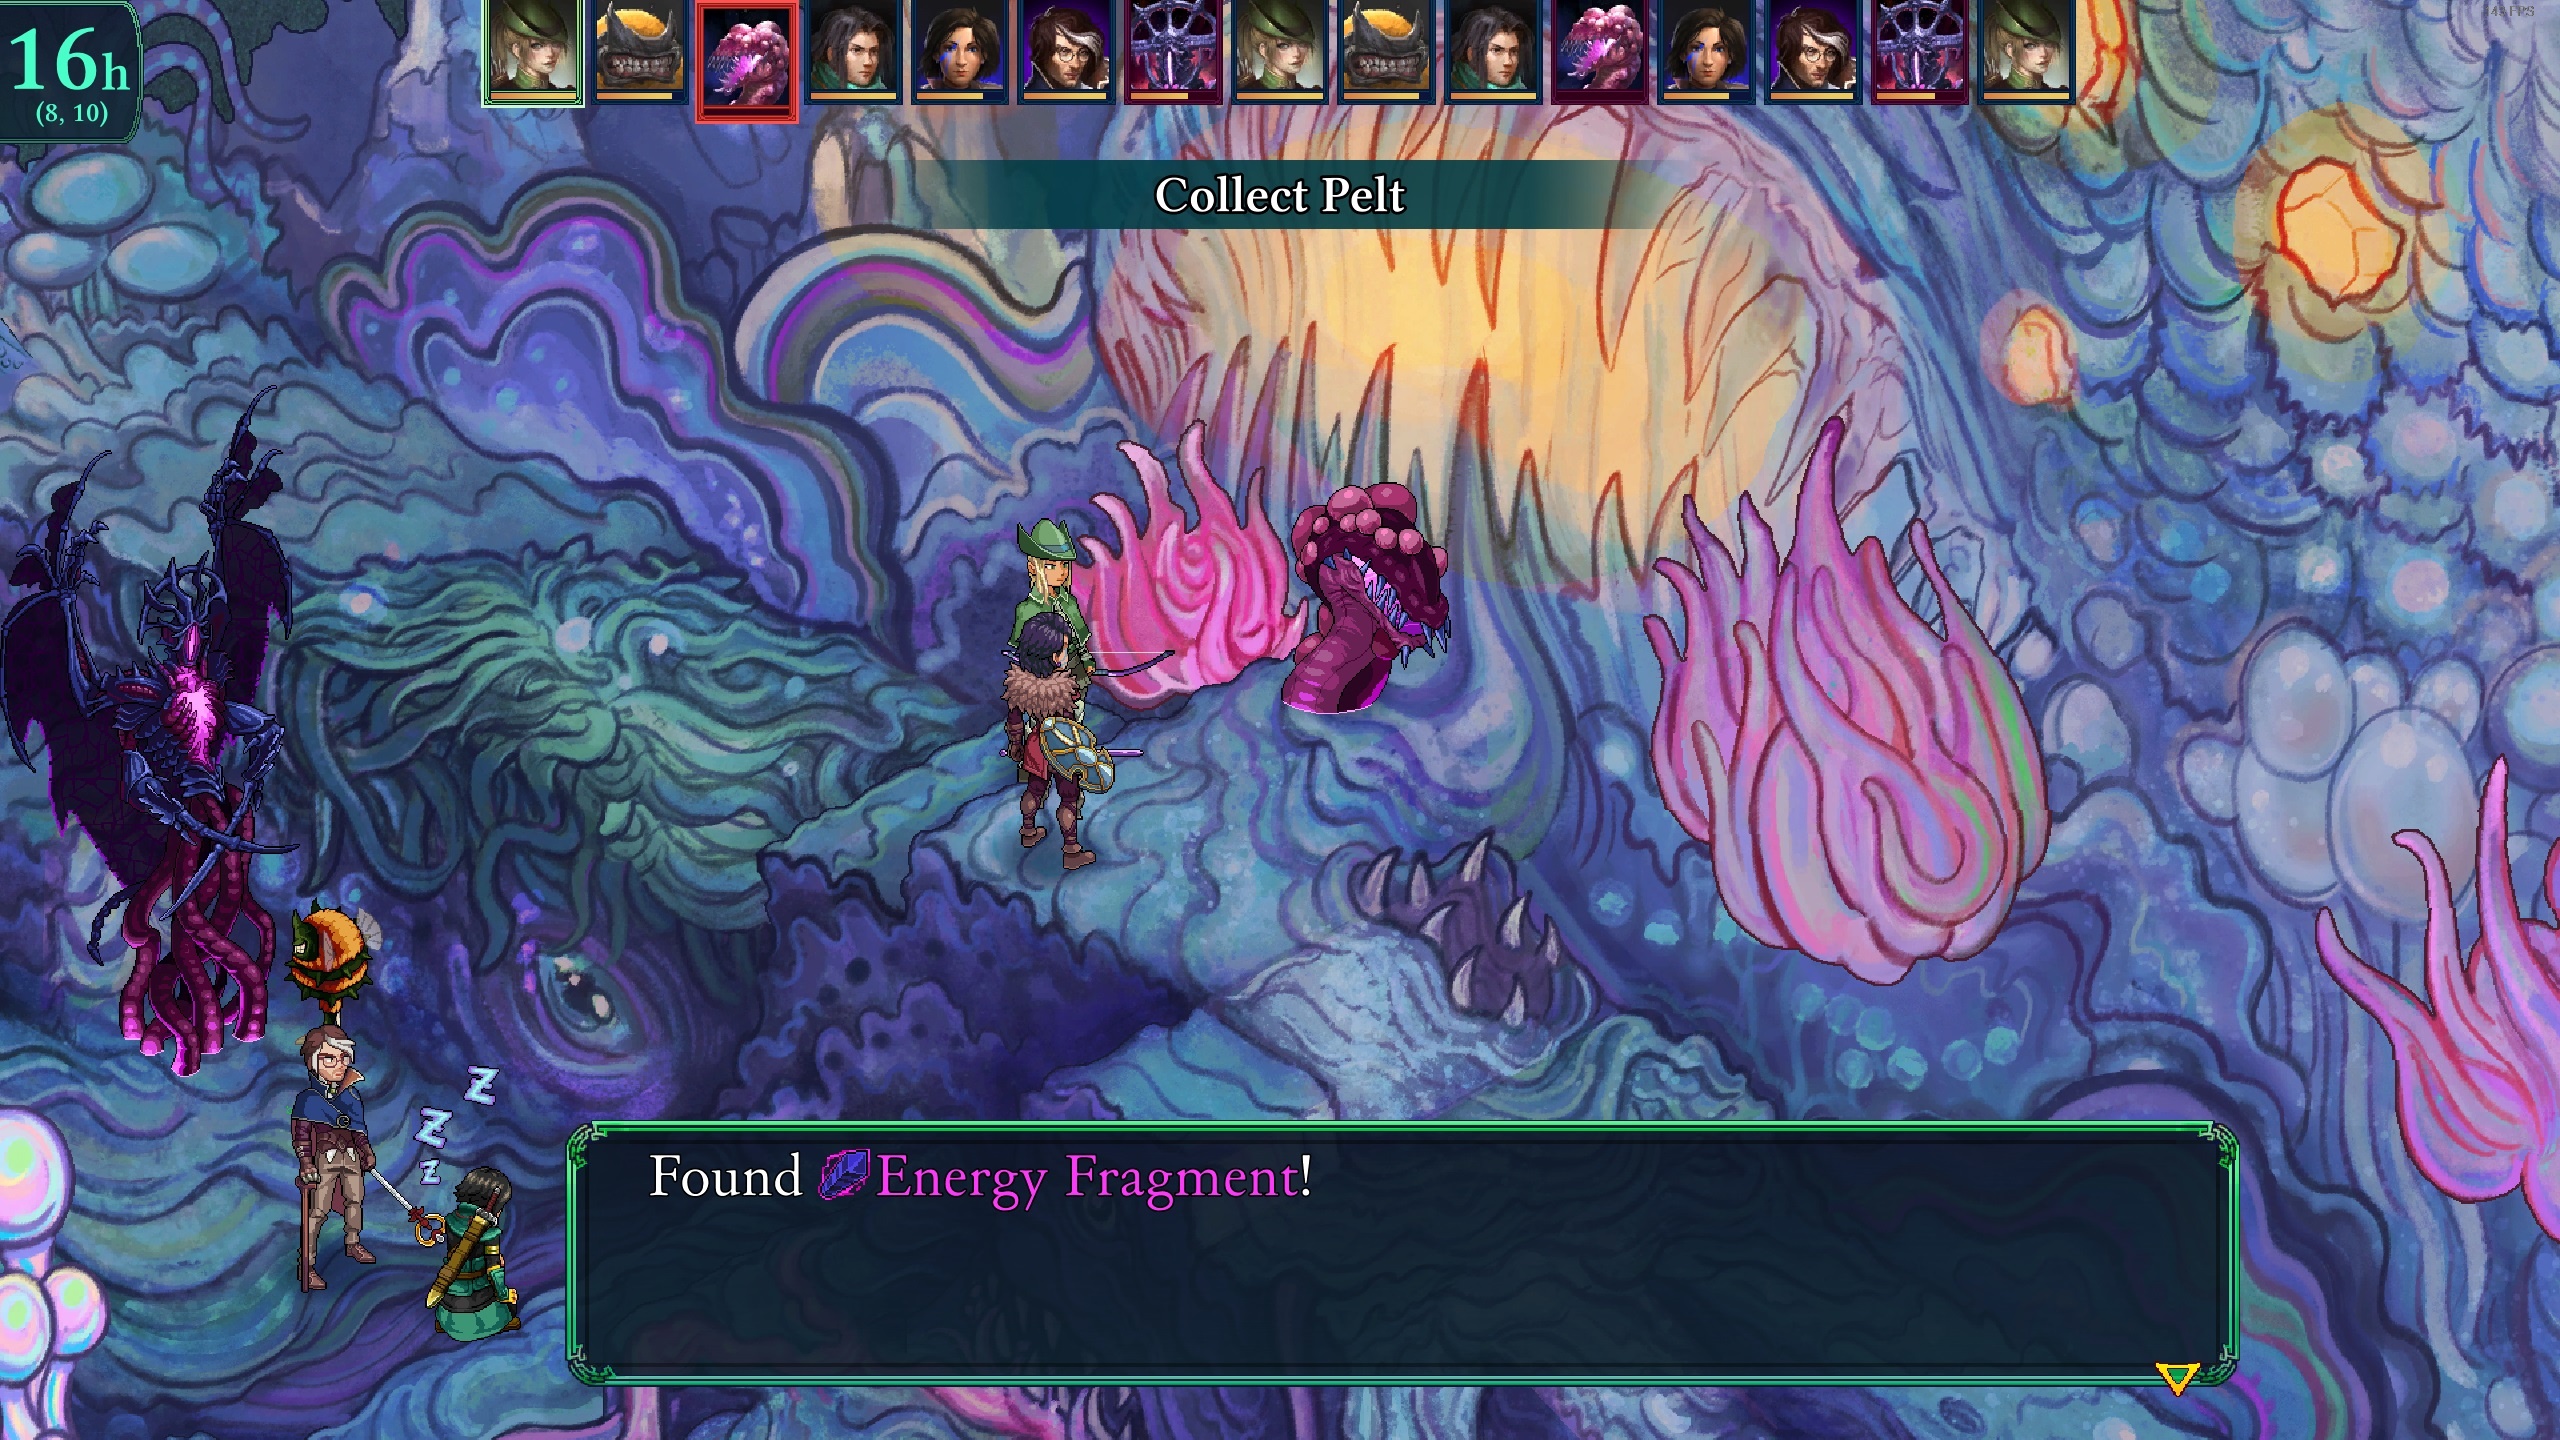
Once you do that, head over to Gobombob City and watch the cutscene on how to obtain an Energy Fragment. Essentially, during the fight with The Maw, you need to collect it mid-fight. To do so, bring either a character that can “Steal Component”, or someone with “Collect Pelt” or the ability “Collect Trophy”. You can also use the Vampire/Bounty skill “Shakedown”.
You’ll need to attack and kill one of the two Viscerawyrms on the map. “Collect Pelt” and “Collect Trophy’ HAVE to be killing blows. There is also a random chance they drop one upon death, but I wouldn’t rely on that. If you kill them, they do eventually respawn. Once you obtain the Energy Fragment, kill The Maw and you’ll automatically be transported to a cutscene and the second fight right away.
While, you can’t stop to re-equip, your characters will heal between battles automatically. Kill The Maw a second time to unlock the second ending.
“Master Smith”
Craft a final-tier weapon.
The following weapons count towards the achievement and are classified as “final-tier”:
| Weapon Name | Weapon Type | Crafting Materials |
| Eternias | Sword | Adamant Ingot x1, Meteorite x1 |
| Cry Havoc | Light Axe | Adamant Ingot x1, Cold Iron x2 |
| Del Chliss | Rapier | Adamant Ingot x1, Angel Tears x1 |
| Dominance | Bow | Godwood x1, Snakebite Oil x3 |
| Prism Rod | Rod | Godwood x1, Energized Crystal x2 |
| Godsleg | Staff | Godwood x1, Angel Tears x2 |
Achievements (8/9)
“Catch ’em All”
Enlist each of the base 18 recruitable Monster types.
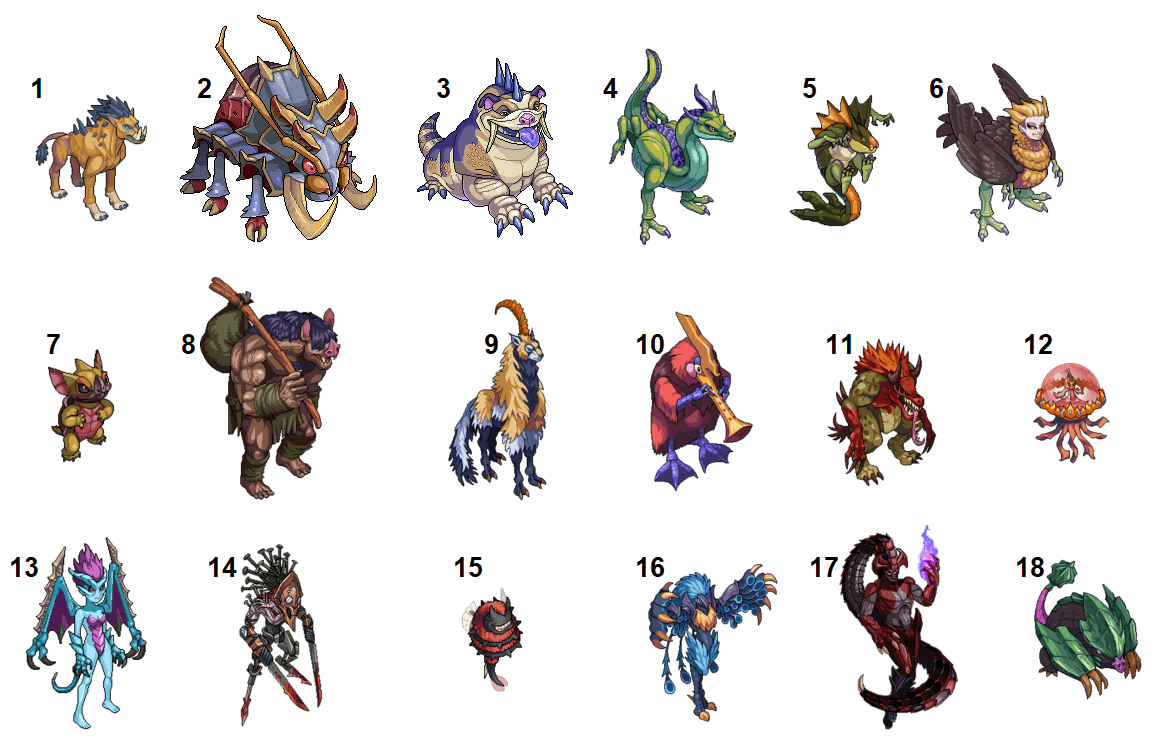
To do this, you will need a wrangler-classed character, which has a unique ability “Tame” that can give you a chance of taming a creature to use in battle. The lower the enemies health, the higher your chance of taming said creature. Here’s a rundown of all the monsters you can tame and a spot in which you can find them:
- #1 – Vangal – Timber Roads
- #2 – Bzzerk – Location: Iirzk’tara Gorge
- #3 – Bulldrake – Location: Strangled Cove
- #4 – Therva – Location: Restful Giants
- #5 – Rakkerjak – Location: Ekhidna Falls
- #6 – Arpia – Timber Roads
- #7 – Kawa – Location: Highlands
- #8 – Blardger – Location: Iirzk’tara Gorge
- #9 – Daodrenner – Timber Roads
- #10 – Niwot – Location: Restful Giants
- #11 – Helhund – Location: Gogombob City
- #12 – Pektite – Location: Alpine Woods
- #13 – Malcubus – Misson/Hunt Reward (The Malcubus is a reward from a mission in the Coast of Industry region.)
- #14 – Harvester – Misson/Hunt Reward (The Harvester is a reward from completing a Hunt in the Kawalands region. You have to complete a mission to unlock the hunt, then complete the hunt for the monster reward.)
- #15 – ZitZot – Multiple Locations (These have a random chance of spawning during a patrol have Apiarium in guild upgrades active to increase frequency (near hunters lodge)).
- #16 – Ercinee – Location: Scarred Summit
- #17 – Archafflictor – Misson/Hunt Reward – (The Archafflictor is a reward from completing a Hunt in the Kawalands region. You have to complete a mission to unlock the hunt, then complete the hunt for the monster reward.)
- #18 – Tangrel – Location: Baaz Island
“Master of Monsters”
Master all 22 Monster Variants.
This achievement will require a bit of grinding and will likely be earned towards the end of your achievement run. To unlock it, you’ll need to master all 22 different variants of monsters. They are as follows:
- Pack Leader (Base class 4)
- Guard (Base class 5)
- Sylvan (Base class 5)
- Deft
- Mystic (Guard 4, Sylvan 3)
- Scout (Deft 4)
- Skeletal (Base class 4, Dermestid Serum)
- Thorned (Sylvan 3, Guard 3, Thorn Serum)
- Tyrant (Pack Leader mastered, Scout 4, Tyrant Serum)
- Venomous (Base class 4, Venom Serum)
- Aerial (Base class 6, Wing Serum)
- Celestial (Aerial 3)
- Clockwork (Pack Leader 4, Thorned 2, Gadgeteer unlocked)
- Feral (Base class 6, Claw Serum)
- Horned (Feral 4)
- Myconid (Skeletal 4, Venomous 3)
- Shadow (Scout 3, Skeletal 3, Special***)
- Warden (Myconid 4, Mystic 4, Radiant Serum)
- Corrupted (Horned 3)
- Speedy (Deft 4, Feral 3, Aerial 2)
- Fell (Tyrant 4, Shadow 4, Corrupted 4, Fell Serum)
- Drake (Mystic 4, Venomous mastered, Draconic Serum, No other Drake class on unit)
-You only need to master one of the four Drake variants.
***The monster must die in combat with the Ancient Locket equipped.
Achievements (9/9)
“Final Metamorphosis”
Master all 19 base Monster Classes.
These classes can only be used by Bzaro and enemy Bzil. Other than Therva, Daodrenner, and Vangal, which are unlocked automatically, each monster class requires gathering 5 essences to unlock. Essences are gathered by defeating monsters with Bzaro in the party. You gain 1 essence per tier of each enemy you defeat. I highly recommend using Bzaro when you get him to unlock this as you progress, otherwise you’ll have to do a lot of end-game grinding and it becomes rather annoying.
- Bzzerk
- Blardger
- Bulldrake
- Daodrenner
- Kawa
- Rakkerjak
- Therva
- Vangal
- Zotzit
- Cadaver
- Arpia
- Pektite
- Archafflictor
- Malcubus
- Helhund
- Niwot
- Ercinee
- Harvester
- Tangrel
- Mummified – This one does not need to be mastered for the achievement.
“Small but Fierce!”
Defeat an enemy with a Pet Effect.
This achievement is actually easier than it sounds. Albeit a very situational and sometimes even luck-based achievement, there is a simple way to force it to occur. The easiest way I found was to take your “Beatmaster” class, which is required and any three other classes that don’t have offensive counter-attacks.
Go to the first level and eliminate all but one non-healing enemy. Box them in on all sides and have your beastmaster have at least one pet out with an offensive effect. Keep skipping turns and let the pet effect slowly damage the enemy. Bring a healer if necessary. Once the enemy dies, you’ll be awarded this achievement.
“In the Footsteps of the Ancients”
Complete the Ancient Path.
To unlock the Ancient Path, complete the story encounter in Mount Nervanzer near the end of the game and then head over to the Oldebzar and watch the cutscene. This will unlock the Ancient Path. Complete all seven levels of it to unlock this achievement.
“Smoke and Mirrors”
This achievement isn’t missable (none of them are), but it is easy to overlook. After finishing Mount Nervanzer and viewing the cutscene in the Immortal Council Chambers, head over to Thespeiros where you’ll start an encounter with only Kyrie, Anadine and Reiner.
Here you’ll have to fight three identical copies of themselves. Your rewards for completing this battle is a dark core, ” Excalibur” and, of course, this achievement.
This is all about Fell Seal: Arbiter’s Mark – 100% Achievements: A Comprehensive Guide; I hope you enjoy reading the Guide! If you feel like we should add more information or we forget/mistake, please let us know via commenting below, and thanks! See you soon!
- All Fell Seal: Arbiter's Mark Posts List



























Leave a Reply