Hi, welcome to this post, FATAL FRAME / PROJECT ZERO: Mask of the Lunar Eclipse – How to Extract Audio Files Digital Deluxe DLC Soundtrack guide.
Utilize this method to get the Digital Deluxe DLC Soundtrack’s audio files out in the highest possible quality.
Requirements
- Fatal Frame / Project Zero: Mask of the Lunar Eclipse Digital Deluxe Upgrade Pack DLC – [steampowered.com]
- 7-Zip – [7-zip.org] to unzip the tools.
- kvsTools – [github.com] for extracting the kvs files.
- kvs2ogg – [deiyu-studio.net] to convert the kvs headers to playable audio files.
- MP3Tag – [mp3tag.de] for tagging the audio files with titles and album data.
- https://drive.google.com/file/d/1ldBiq4ArqGoaDNys6u8_vpTWfYMwYwtP/view – [google.com] – (filename: tagData.zip) – tag data and album covers, per region.
Workspace Setup
- On your PC, create a new directory called “Soundtrack Workspace”
- Install 7-Zip.
- Unzip kvs_tools.zip within “Soundtrack Workspace\kvsTools”
- Unzip kvs2ogg within “Soundtrack Workspace\kvs2ogg”
- Install MP3Tag, choosing “Portable Installation” – choose the following directory “Soundtrack Workspace\mp3Tag”
- Unzip the tagData.zip package within “Soundtrack Workspace\tagData”
- Create three new directories in the workspace, and label them “gameFiles”, “kvsOutput”, “oggOutput”
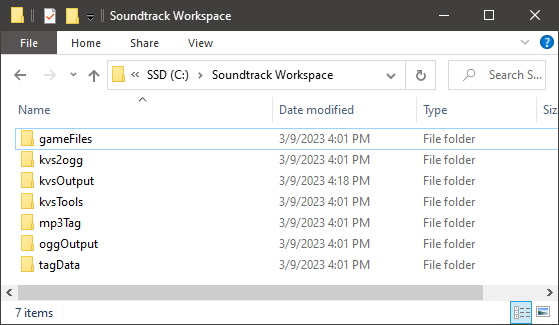
- Verify that “Soundtrack Workspace” now contains 7 folders (see screenshot):
“gameFiles”
“kvs2ogg”
“kvsOutput”
“kvsTools”
“mp3Tag”
“oggOutput”
“tagData”
Copying Files from Installation
-
- Open Steam
- Verify that you have downloaded the Fatal Frame / Project Zero: Mask of the Lunar Eclipse Digital Deluxe Upgrade Pack DLC to your Steam installation.
- Right-Click the Fatal Frame / Project Zero: Mask of the Lunar Eclipse menu item, and select Manage -> Browse local files
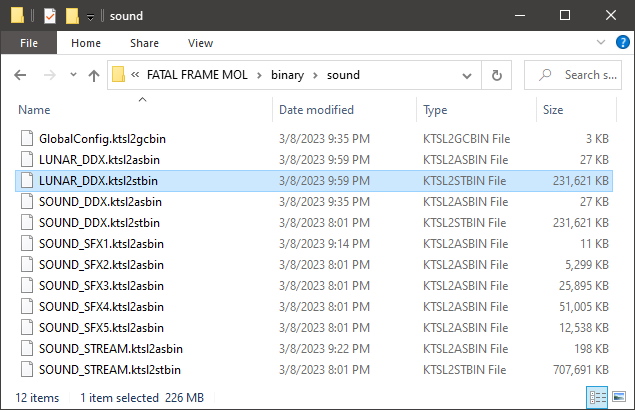
- Traverse down the following directories: [FATAL FRAME MOL]\binary\sound\
(see screenshot)
- Once in the u]”sound”
[/u] directory, locate “LUNAR_DDX.ktsl2stbin”. It should be approximately 231 MB.
- Right-Click -> Copy
- Navigate to the “Soundtrack Workspace\gameFiles” directory
- Right-Click -> Paste. The directory should now contain “LUNAR_DDX.ktsl2stbin”.
Converting the Audio Files
- Navigate to the “Soundtrack Workspace\kvsTools” directory.
- Right-Click on “kvs_extract.exe” -> Copy.
- Navigate to the “Soundtrack Workspace\gameFiles” directory.
- Right-Click -> Paste.
- Select “LUNAR_DDX.ktsl2stbin” and Drag this file onto “kvs_extract.exe”
- Select “kvs_extract.exe”
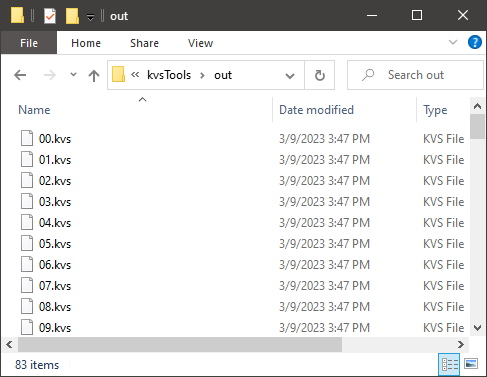
- Wait until extraction completes. If successful a folder named “out” should appear.
- Navigate to “out”. There should be 83 files in this directory (see screenshot)
- Select all 83 files in this directory by selecting Ctrl + A.
- Right-Click -> Copy.
- Navigate to the “Soundtrack Workspace\kvsOutput” directory.
- Right-Click -> Paste. The directory should fill with 83 files.
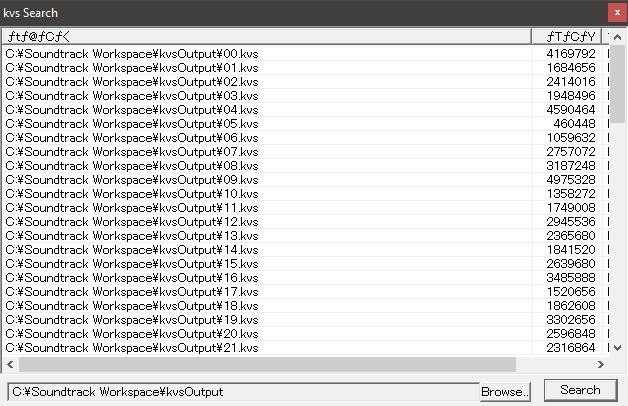
- Open the kvs2ogg application (e.g. kvs2oggd.exe) located in “Soundtrack Workspace\kvs2ogg”.
- From the top menu bar, select Tool -> kvs Search
- In the form that opens, select Browse, and navigate to and select your “kvsOutput” directory.
- Press the Search button. The form should fill with numerous rows. (see screenshot)
- Right-Click where the rows are displayed, and select All Convert -> Convert.
- In the form that opens, traverse to and select your “oggOutput” directory.
- Press Save.
- Wait for the files to process. You should have 83 .ogg files in the “oggOutput” directory once finished.
Tagging and Renaming the Audio Files
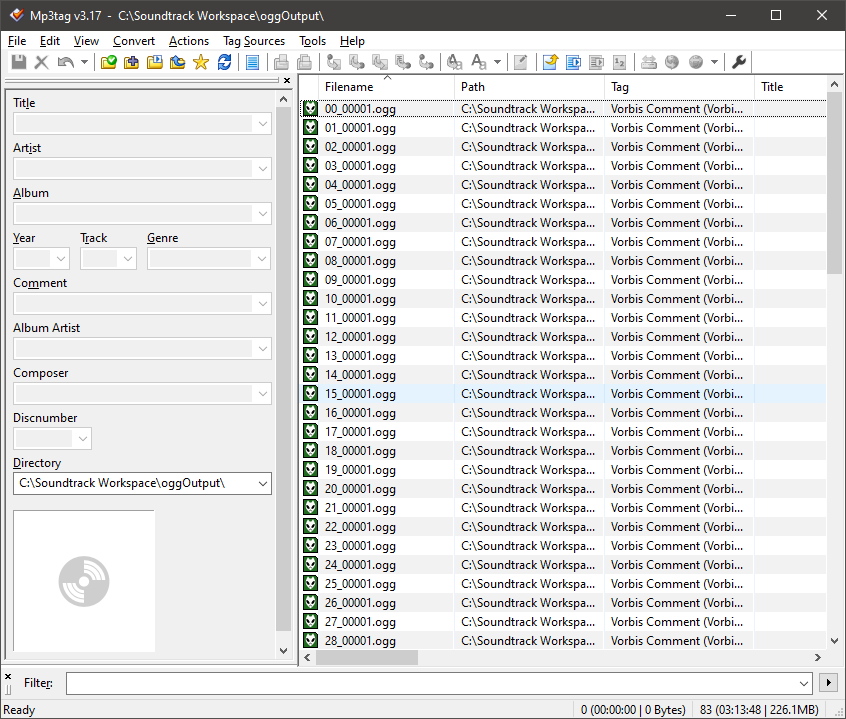
- Open the MP3Tag application (e.g. Mp3tag.exe)
- From the top menu bar, select “File” -> “Change directory.” Navigate to and select your “oggOutput” directory
- The .ogg files should populate the pane on the right side. (see screenshot)
- Ensure the filenames are sorted by ascending order by clicking on the table header entitled “Filename” until a upward caret appears (e.g. ^).
- From the top menu bar, select “Edit” -> “Select all files”
- From the top menu bar, select “Convert” -> “Text file – Tag”
- On the open form, under the “Filename:” field, select the browse button (e.g. three dots …)
- Traverse to your “tagData” directory, and select either “Fatal Frame MOTLE.csv” or “Project Zero MOTLE.csv” (depending on region of choice)
- Under the “Format string:” field, copy and paste the following line:
%Title%,%Album%,%Track%,%Year%,%Filename%,%Artist%
- Press OK.
- Wait for the files to process. Once finished, the right pane’s entries should be populated with various tag information.
- From the top menu bar, select “Edit” -> “Select all files”
- From the top menu bar, select “File” -> “Save tag”
- From the top menu bar, select “Edit” -> “Select all files”
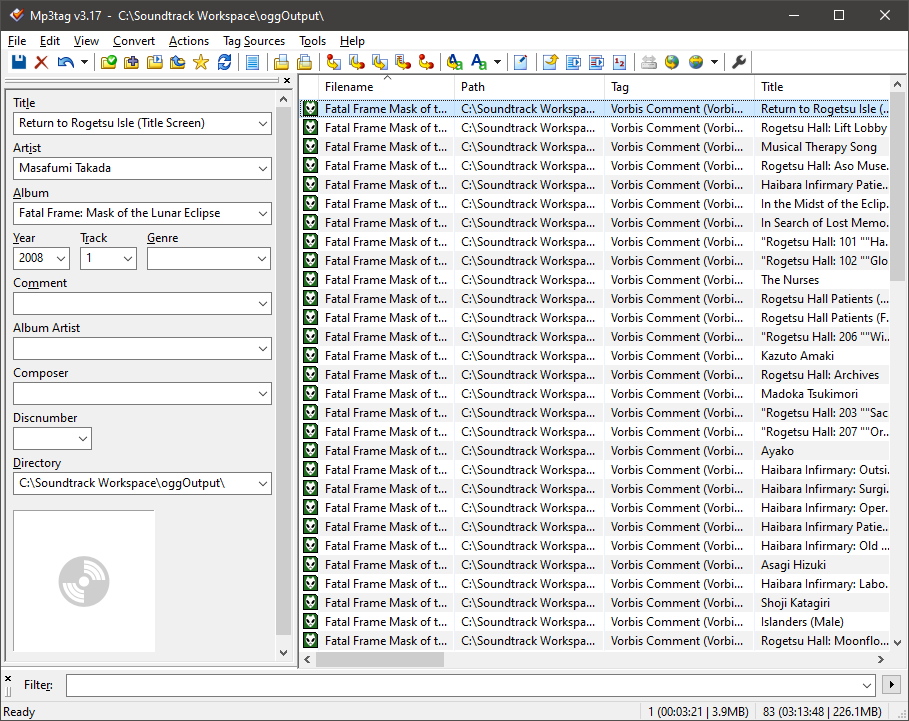
- From the top menu bar, select “Convert” -> “Tag – Filename”
- In the form that appears copy and paste the following line into the textbox:
%album% - $num(%track%,2) - %title%
- Press OK.
- The filenames should be changed accordingly. (see screenshot)
Embedding Album Covers
- Within the Mp3Tag application, From the top menu bar, select “Edit” -> “Select all files”
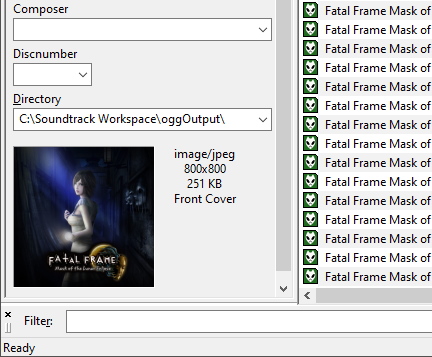
- Right-Click the large white box in the bottom left corner of the application, and select “Add cover.”
- Navigate to the “tagData\AlbumCovers” directory and select an appropriate .jpg file.
- Album covers are sorted by Region, and are branded accordingly.
- Once an album cover has been selected, it should appear in place of the large white box.
(see screenshot)
- With the Album set still selected in Mp3Tag, select “File” -> “Save tag”
- Enjoy the Fatal Frame / Project Zero: Mask of the Lunar Eclipse Digital Deluxe Soundtrack at maximum quality.
Nearly all modern music players can play these files with no plugins, and most smartphones support the format natively as well.
- foobar2000 – [foobar2000.org]
- VLC – [videolan.org]
- MusicBee – [getmusicbee.com]
- Winamp – [winamp.com]
Notes
Please leave a comment if you run into any bugs. Otherwise, enjoy the unfiltered soundtrack!
Version History:
- 1.0 – Initial Release
We’ve enjoyed assisting you with the FATAL FRAME / PROJECT ZERO: Mask of the Lunar Eclipse – How to Extract Audio Files Digital Deluxe DLC Soundtrack and hope you found it useful. If you see any mistakes or have suggestions for how we can improve this post, do let us know in the comments. Best wishes for a lovely day, and thanks for your time and effort! The inspiration for this piece came from the author/creator Daedalus. Also, if you like the post, don’t forget to add this website to your bookmarks; we publish new posts every day with additional material, so be sure to check back with this website on a regular basis for more posts.
- All FATAL FRAME / PROJECT ZERO: Mask of the Lunar Eclipse Posts List


Leave a Reply