

Tips and Tricks for Sproggiwood’s Savage difficulty
Basic Game Mechanics
Sproggiwood is a roguelike. There are 10 dungeons and 6 character types. Each dungeon has a boss you need to kill in order to complete the dungeon. You must complete a dungeon to unlock the next dungeon. Completing the dungeon the first time may unlock a reward such as a new class. In addition, you will receive 1000 gold for the first team you beat a dungeon with each class.
On the main map, you will select a dungeon you want to run. Then you will be given a choice of unlocked classes to play as. Once you select a character you will be able to select Equipment to start as. You will purchase Equipment to use from the shop. Equipment is added for purchase in the shop after you the first time you find it during a run (in a red/blue vase for consumable potions/scrolls or a Treasure Chest for other slots)
For early shop purchases, I’d recommend the first freeze weapon for each character. Fire weapons are better for damage but freeze weapons apply CC for one turn to an enemy on hit. I find the extra CC is good for avoiding damage from the tanker enemies that can take ~2-3 hits. The first tier of weapons is also pretty cheap overall. For consumables, a Health Potion is a good starting consumable for purchase from the shop. Scrolls of Pottery and Blizzard are excellent at times but the ability to heal to full is great for keeping a run going.
Click Begin Adventure to start the dungeon. You will start off in a randomly generated overworld. Areas you have not explored are hidden from you. Squares in your line of sight are revealed. Your goal is to find the stairs to each level. The first stair will take you into the dungeon proper. Each dungeon has multiple levels with the final level being the boss room (the number of floors depends on the dungeon)
The game map is a grid system. You (and your enemies) can move vertically and horizontally but not diagonally. At the start of the dungeon, each character starts at level 1 with no acting skills. All classes basically share the same default attack. The default attack can be used against any enemy in an adjacent square. Simply use the move command in their direction.
Enemies will attack you if you are on a square adjacent to them on their turn. During the game, you will want to make heavy use of the ‘Wait’ command. The Wait command basically passes your turn. This is used to make the enemy move into the square next to you so you can attack them first rather than walk next to them and let them get the first blow.
When you kill enemies you will gain a random amount of gold and exp (note: regenerating enemies like spiders will not reward exp when they die, you will only get exp from killing the spawner). Each kill will also reward one Stamina star. Stamina stars are used to use class kills. When you get enough Exp to reach a new level, you can level up.
Leveling up will allow you to select/upgrade a power. Each class has 3 normal skills and one ultimate skill which is only available at level 5. Normal skills can be upgraded to higher-tier but require a particular level to unlock (4 for tier 2, 6 for tier 3). Each skill requires a certain amount of Stamina stars to use. If you do not have enough stars then you cannot use that skill and will need to kill more enemies to get more stars.
Civic Boosts
Civic Boosts are permanent buffs that you can buy from the shop. They apply to every class. Each has 5 ranks and all cost the same to purchase:
| Rank | Cost |
|---|---|
| 1 | 750 |
| 2 | 1500 |
| 3 | 2250 |
| 4 | 3000 |
| 5 | 3750 |
As you can see, the cost for each higher rank jumps $750 up from the last rank. Unlocking the higher ranks will become a serious cash investment. They are good investments through as they apply to everyone and isn’t locked to individual characters.
Academy Expansion
Gain XP 20 / 40 / 60 / 80 / 100% faster
One of the best buffs imo. Worth getting a few ranks early on. Each run you start off at level 1. Faster exp helps you level up faster during the run letting you unlock more skills and higher skill ranks to improve.
Apothecary Fund
+5 / 10 / 15 / 20 / 25 hit points
Boosts your starting health. More health gives you more leeway in your runs. The first two levels aren’t too costly so you can grab them quickly. Higher ranks will cost you a lot for +5 health per rank, In the long term you’ll want it but you can make do with cheap armor from the shop until you can afford to upgrade.
Merchant Quarter
Items cost 10 / 20 / 30 / 40 / 50% less
Cuts the cost of buying items from the shop. Not a huge priority in the early games but in the mid-late game, you will want to max this out. With 5 ranks in Merchant Quarter, end game Weapons and Armour will cost 2k each, and Accessories cost ~2-2.5k each.
Clergy’s Coffers
Find 20 / 40 / 60 / 80 / 100% more cryptic shrines
Increases the number of shrines you find. Shrines gives a random boon when prayed upon. They can be used only once unless you have the ‘Key to the Heart of the Gods’ Accessory equipped, in which case you may pray at shrines twice. Shrines can give a large number of boons:
- Widespread flame damage to every other square
- Widespread frost damage to every other square
- Heals you to full health
- Converts nearby enemies to vases
- Summons a horde of hostile enemies (spiders, goats, frogs, etc.)
- Randomly teleports you
- Spawn Bizarro door and spawn Bizarro monsters from Scroll of Wonder effect
Shrines can be a great bonuses to you at times but can also be harmful or provide negligible benefits. Due to the random nature of the buff I’d rank this as low priority to upgrade.
There’s another kind of shrine, I’m not sure if it’s affected by this. A Health Shrine restores a bit of your health. This shrine has a Heart symbol over it to differentiate it from the other random shrines.
Pottery School
Find 20 / 40 / 60 / 80 / 100% more special vases
Increases the chance to find ‘special’ vases. Red vases contain a random Potion type consumable, Blue vases contain a random Scroll type consumable, Yellow vases contain a large sum of gold. I’d rank this as much better investment than Clergy’s Coffers. Why there is still RNG involved, you don’t need to worry about negative drawbacks and you gives you a better chance of finding good consumables to bank for the boss fight.
Enemies (Jelly)
Jellies
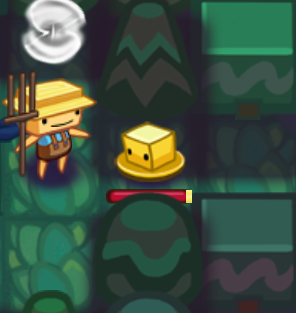
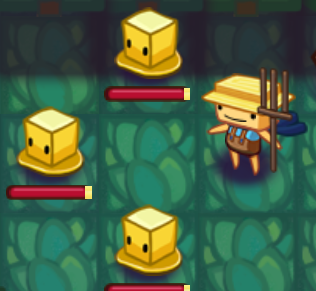
Jellies are a common enemy type. You will face a number of reskinned versions of the jellies throughout the game with their own unique abilities. Jellies come in two types; small and big. Big jellies have large amount of health (~2-3 hits) and turn into 1-3 jellies upon death. Small jellies have little health and activate their unique ability on death.
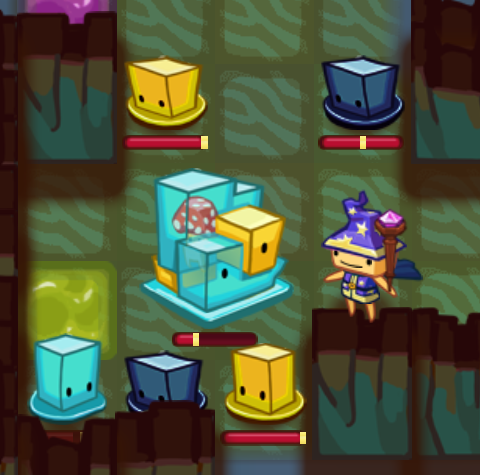
(Big jelly died, three small yellow jellies spawn in squares surrounding it)
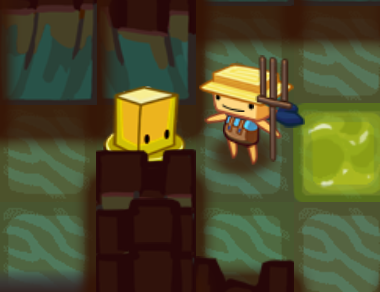
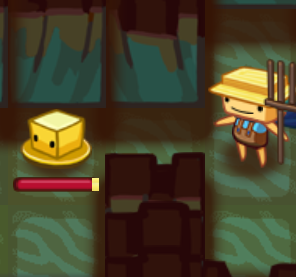
Big jellies will spawn fewer spawn jellies if the spawn location is obstructed. The best place to kill big jellies is therefore tight narrow spaces as then they’re won’t be anywhere for them to spawn their little mes.
(Big Jelly died in corridor, one little jelly spawned)
| Name | Screenshot | Health | Damage | Abilities | Location |
|---|---|---|---|---|---|
| Small Yellow Jelly |  |
5 | 2-3 | Leaves behind a harmless yellow stain. If you step on it you slide forward two steps instead of one. Jellies are not affected by this but other enemies are. | Ickycolo+ |
| Big Yellow Jelly |  |
8 | 4-5 | Spawn 1-3 small jellies after they are killed. They leave no stains behind. | Ickycolo+ |
| Small Blue Jelly |  |
5 | 3-4 | Leaves behind a blue stain. If you step on it you slide forward and take 2-3 damage for each stain hit. Jellies are not affected by this but other enemies are. | Goaturku+ |
| Big Blue Jelly |  |
10 | 7-8 | Spawn 1-3 small jellies after they are killed. They leave no stains behind. | Goaturku+ |
| Small Black Jelly |  |
5 | 4-5 | One of the most frustrating enemies. Leaves behind dark stains. The stain must be walked over to remove it, otherwise, after 6 turns the stain will be removed and a Big Dark Jelly spawned in it’s locations. The stain will slide you forward and other jellies will block you from clearing these stains. Take careful care to kill in narrow locations and away from other enemies. | Ickycolo boss fight |
| Big Black Jelly |  |
10 | 8-9 | Spawn 1-3 small jellies after they are killed. They leave no stains behind. I absolutely recommend only killing them in narrow spaces if possible as this will make it easier to clean up the stains to prevent new spawns. If you’re note careful you can easily get swarmed by an army that spawns faster than you can actually clear. | Ickycolo boss fight |
| Small Red Jelly |  |
5 | 4-6 | Goes into stasis after death (blocking the square it is on). Explodes next turn, horizontally, vertically and diagonally for 6 squares. Hurts allies and enemies. | Goaturku+ |
| Big Red Jelly |  |
10 | 8-9 | Spawn 1-3 small jellies after they are killed. | Goaturku+ |
| Small Purple Jelly |  |
5 | 5-6 | Leaves behind a purple stain. Stain causes sliding, does heavy damage and harms all non-jellies in adjadent squares. Walking onto a collection of stain causes you to take damage for each linked stain. It’s a good idea to avoid taking damage using skills or kite enemies over them instead stay two+ squares away from the stain through) | Goaturku+ |
| Big Purple Jelly |  |
10 | 8-10 | Spawn 1-3 small jellies after they are killed. They leave no stains behind. | Goaturku+ |
| Small Ice Jelly |  |
5 | 5-6 | Goes into stasis after death (blocking the square it is on). Explodes next turn, horizontally, vertically and diagonally for 6 squares. Freezes. Hurts allies and enemies. | |
| Big Ice Jelly |  |
10 | 9-10 | Spawn 1-3 small jellies after they are killed. Also summons a small jelly every now and then while alive. They leave no stains behind. |
Enemies (Mushroom + Spider)
Mushroom
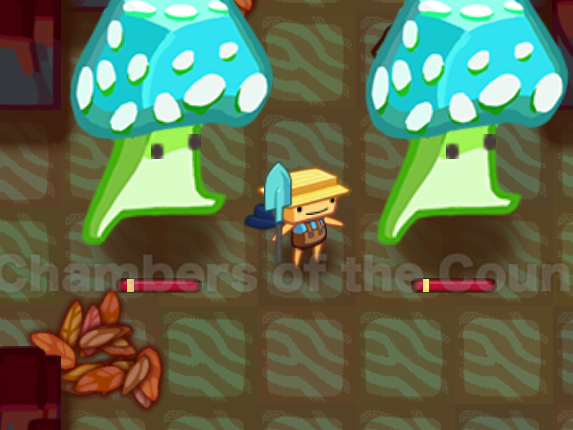
Mushrooms are a common enemy type. You will face a number of reskinned versions of the mushrooms throughout the game with their own unique abilities. Mushrooms basic ability is the ability to ambush your character, spawning around your character. Orange Mushrooms are nightmare inducing foes and can open a gate to another dimension that summons insanely BS Bizarro monsters.
| Name | Screenshot | Health | Damage | Abilities | Location |
|---|---|---|---|---|---|
| Spotted Mushroom |  |
5 | 2-3 | Spawns out of nowhere right next to your character. | Ickycolo+ |
| Purple Mushroom |  |
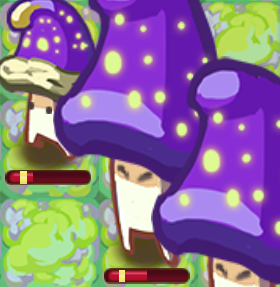
5 | 3-4 | Spawns out of nowhere right next to your character. Hides again if you kill any mushrooms. Will Ambush you again later. | The Bloated Grotto+ |
| Vampire Mushroom |  |
8 | 3-4 | Spawns out of nowhere right next to your character. Hides again if you kill any mushrooms. Will Ambush you again later Lifesteals on every attack. | |
| Orange Mushroom |  |
10 | 5 | Nightmare enducing run enders. It runs away from you while spawning Bizarro Door’s. Each door can generate 4-5 bizarro monsters before despawning. And the Orange Mushroom can create multiple doors at once. You can close the door early but this will cost you a turn’s action. | The Floating Isles+ |
| Bizarro Goatman |  |
10 | 5-6 | Has similar abilities to normal goatmen but Charge teleports you to a random square. This can lead to a cycle of getting randomly teleported around while the Orange Mushroom summons more doors and floods the level with Bizarro monsters. This is the point you’d make a desperate dash for the exit! | Spawned by Bizarro Door |
| Bizarro Cloghead |  |
10 | 3-4 | Has Pitch Fork ability similar to Farmer class but the Pitch Fork teleports you to a random square. Same issue as mentioned for Bizarro Goatman with hopeless teleport spam. Pitch Fork only used if you’re in adjacent square. | Spawned by Bizarro Door |
| Bizarro Sheep |  |
5 | 10-11 | Melee hits teleports you to a random square. Much easier to avoid hits through than the previous two spawns as it only has a melee attack and is easier to kill. | Spawned by Bizarro Door |
Spiders
Spiders are a common enemy type. You will face a number of reskinned versions of the spiders. They are generated by a concoon. Higher dungeons concoon’s will spawn more stronger spider types.
| Name | Screenshot | Health | Damage | Abilities | Location |
|---|---|---|---|---|---|
| Spider Concoon | 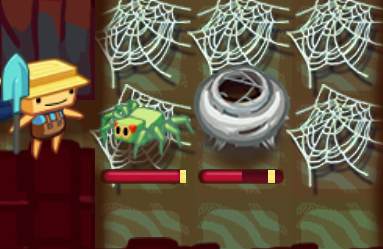 |
8 | 0 (cannot attack) | Spawns 1-2 spiders every ~7-8 turns until killed. Spawned spiders are not worth any expierence. Needs to be killed to stop spawn. | |
| Giant Spider |  |
5 | 3-4 | Spawns a web object on any square it touches. Web will cause any non-spider that touches it to lose a turn and the web is destroyed. Web is also destroyed by fire and ice. | Ickycolo+ |
| Poison Spider |  |
5 | 3-4 | Goes into stasis after death (blocking the square it is on). Explodes next turn in a 3×3 radius for 4-6. Spawns a web object on any square it touches. | Ickycolo+ |
| Ice Spider |  |
5 | 4-5 | Applies freeze on hit. Spawns a web object on any square it touches. | Ukku Ice Maze |
Enemies (Other)
| Name | Screenshot | Health | Damage | Abilities | Location |
|---|---|---|---|---|---|
| Goatman | 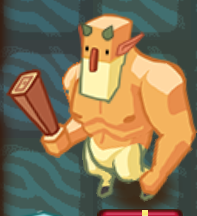 |
10 | 6-8 | Will charge you after a turn if you’re in a straight line from him. Don’t try to run away from a Goatman if you’re still in the same row / col as him as he will keep charging and getting free hits. Goatman will use normal attacks if next to you. | Goaturku+ |
| Bloated Frog | 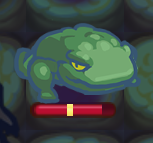 |
~10-15 (~2-3 hits) | 4-6 | Does not chase you and doesn’t move around much. Has a ‘tongue whip’ that does 1 damage and drags you towards him. Also uses this on random other monsters. This can potentially throw you into the middle of an enemy group and can mess up your positioning. On the other hand, it does a pittance for damage and given their lack of movement, it’s a good way to get into melee range with them as they do a lot more damage with their normal attack if you walk up to them to hit them. | Goaturku+ |
| Forked Tongue Frog |  |
15 | Same mechanics as Bloated Frog | Late game dungeons | |
| Wisp |  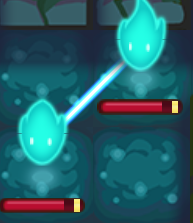 |
5 | 2-3 damage every turn, all adjadent squares | One of the game’s most annoying enemies, the Wisp can be a pain to deal with if you don’t have the right setup. It doesn’t do much damage but has a special ‘linked’ ability which it will use if it is not killed the turn it is encountered. Linked creates a new Wisp and a visual ‘link’ is displayed on the screen between the wisp and its clone. If one Wisp is killed on a turn and the linked Wisp is not also killed the same turn, then the surviving Wisp will immediately spawn a new Wisp. So you need to be able to kill both Wisps in the same turn using some sort of AOE attack, otherwise the wisps will forever keep respawning and slowly kill you. If the Wisp is killed before it can use the ‘linked’ ability, then it dies and no clone is ever created so if possible it’s best to kill them like this. Skills like Shoot Arrow are great for this. A wisp is also summoned if you or an enemy steps on a green leaf trap. | The Bloated Grotto+ |
| Flying Goldfish |   |
10 | 8-10 | Flying (not blocked by obstacles). Also has a similar ‘linked’ mechanic as the Wisp and is the most annoying enemy. However, the Goldfish summons a pair of clones instead of one like the Wisp. If a single Goldfish is left alive at the end of the turn it will resummon the two dead Goldfish. So you can kill one Goldfish one turn, then kill the other two in one turn to remove them. Otherwise, fleeing down the stairs works as well lol. | Hakkipunki+ |
| Yeti | 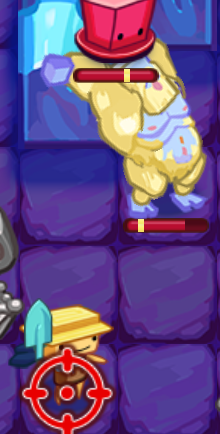 |
Very High – absolute tank, I’m guessing ~20-30 | 9-10 | Pick’s up nearby enemies and then throws them at your location for damage. The throw has a one turn wind-up and you can avoid the throw by stepping out of the targetted square. | Ukku Ice Maze |
Consumables
Consumables are one time use items that you can acquire from special vases on the game world. Attacking the vase will generate a random consumable. You can only have one consumable available at any given time. If you have a consumable already, picking up the new one will give you a choice:
- Use – Use the new consumable now and keep your old one
- Keep – Cashes your existing consumable into gold and replaces it with the new consumable
- Cash – Convert the new consumable into gold and keep your old one
There doesn’t appear to be a way to use the existing consumable and then replace with the new one. After seeing a consumable in the game, it is added to the Store for purchase. Purchasing a Consumable makes it available at the start for every character.
Scroll of Teleportation
| Teleports you to a chosen space | 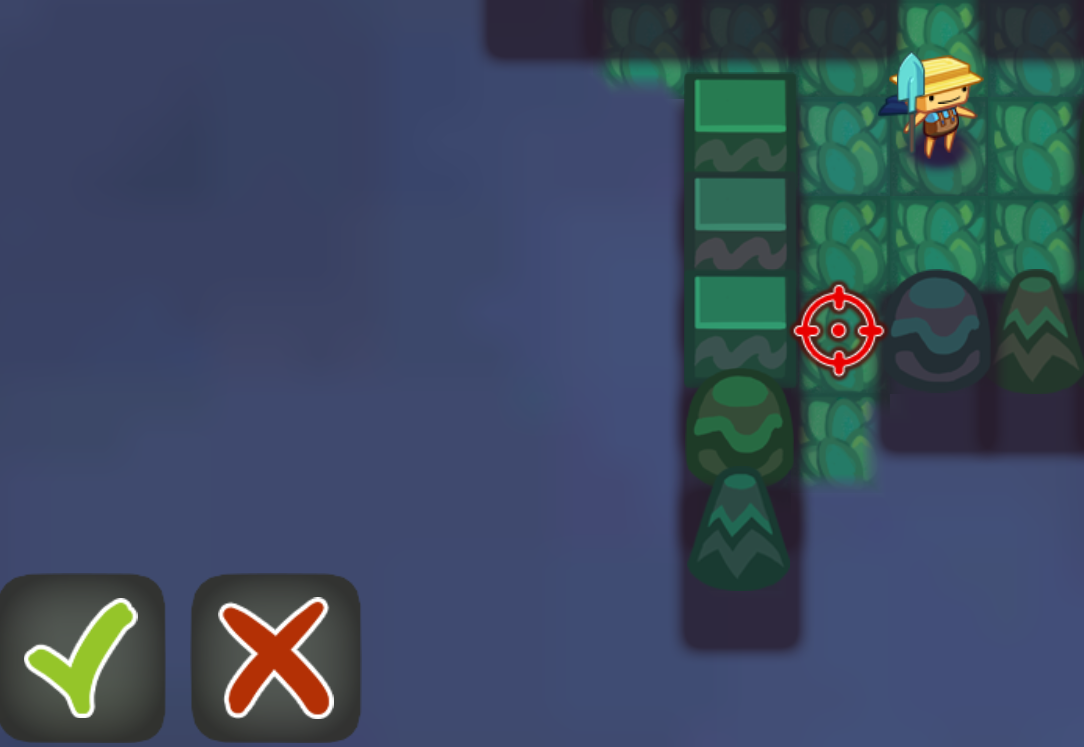 |
Useful for a quick escape from a dangerous situation. I’d rank it as one of the least useful consumable through. If you don’t have a consumable already you might as well pick it up but otherwise I’d always cash it.
Scroll of Summoning
 |
Summons monsters to fight for you | 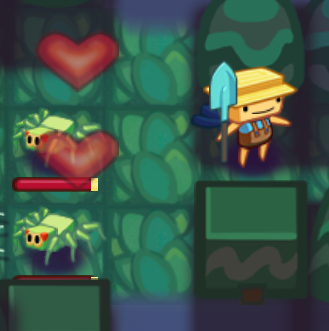 |
Gives you a bit of a meat shield I guess. You will receive they the stamina for any monsters they kill. They tend to be a bit fragile, it’s okay but not a great consumable imo.
Scroll of Blizzard
 |
Freezes everything | 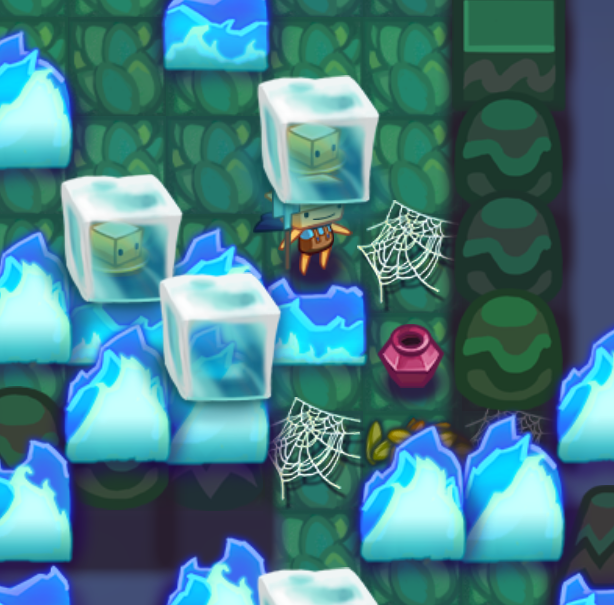 |
Inflicts ‘Freeze’ on all enemies in the vicinity. Unlike the Freeze effect that some Weapons have, Blizzard’s freeze lasts quite a long time. It’s great for CC and applies to bosses as well allowing you to freeze the boss and kill them while they are frozen. One of the better consumables to have.
Scroll of Wonder
 |
Changes your surroundings in strange ways | 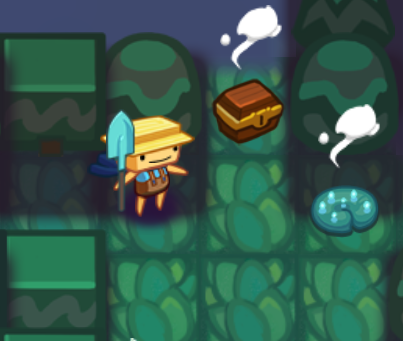 |
Scroll of Wonder is a interesting consumable. Using it randomly changes the map, adding new objects into it. Chests, spiderwebs, shrines, leaves, etc. It’s not worth holding on to, instead, just Use it when you find it.
Scroll of Pottery
 |
Transforms all enemies into vases | 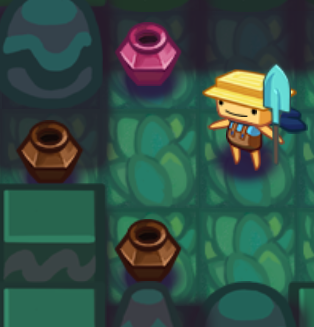 |
One of the best consumables, using it converts all enemies in the vicinity into vases. Killer move for dealing with out of control Black Jellies, Wisps and Goldfish. As a bonus, you’ll likely find a special vase from the converted enemies to restock with a new consumable. For boss fights, it can be useful for dealing with adds but has no impact on the boss itself. Can be an excellent starting consumable in case you have terrible starting spawns.
Scroll of Fireball
 |
Shoots a big fireball in a chosen direction | 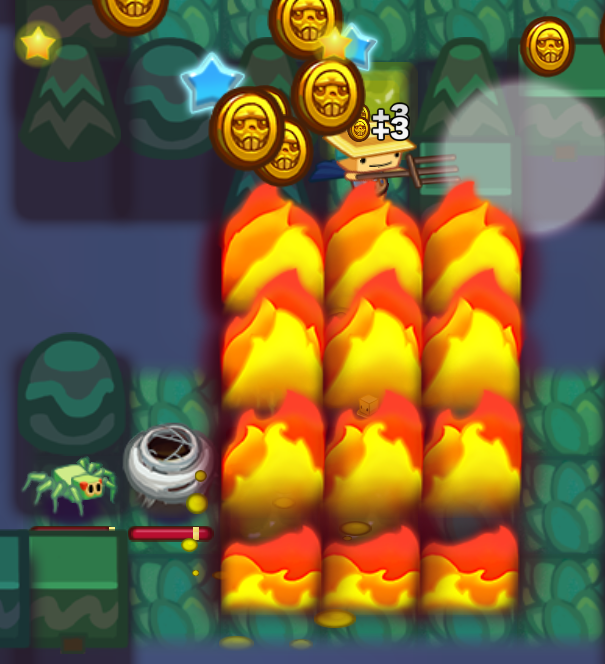 |
Shoots a wave of fire in a direction you choose. Does good damage and is an excellent way to dispatch Wisps and Goldfish. I’d rank it as a medium quality Consumable.
Stamina Potion
 |
Restores your stamina to full |   |
Completely restores your Stamina. Generally good but not great. Normally don’t carry these as there are far more options to carry. If you’re playing a farmer through a Stamina Potion basically equals a full heal + 2 Stamina remaining once you get to level 5 so in this case would be more valuable than a Health Potion. Also can be useful if you’re planning on spamming long range skills on a boss (ie: Archer’s Shoot or Wizard’s Magic Missile)
Health Potion
 |
Restores your health to full |   |
Completely restores you Health. As 0 health equals run over this should become one of your favourite consumables. If lowish on health when you found and a good consumable already on hand, you can Use it outright for the heal. Otherwise, Keep it until you need it. Good consumable for boss fights as it allows you to restore yourself easily and eat more damage. An excellent starting consumable as well as it allows you to recover from early damage taken while you level up and build up your character.
Invisibility Potion
 |
Turns you invisible for 50 turns |  |
Using the potion will turn you invisible for 50 turns. While you are invisible, enemies cannot attack you. Attacking an enemy, opening a chest, using shrine, getting suck in spider web, etc. will immediately cancel invisiblity. I consider this a somewhat low value consumable. When you find one you can Use it and scout out the exit.
Identity Crisis Potion
 |
Scrambles all your powers | 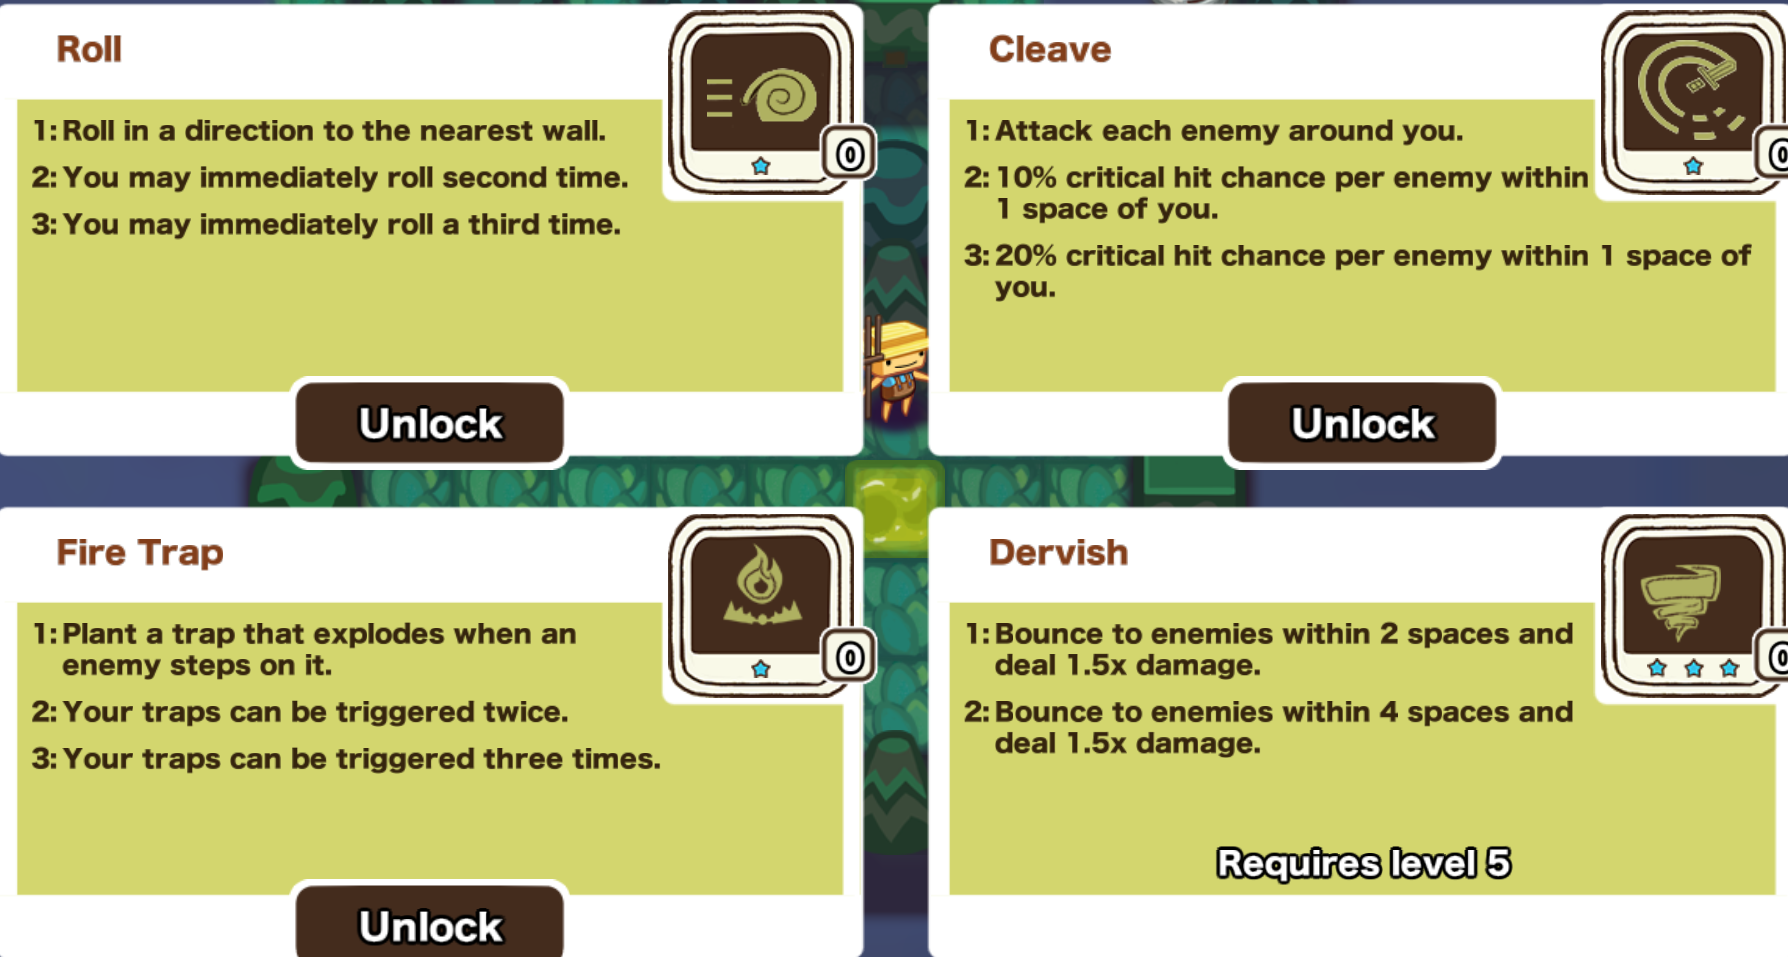 |
One of the most interesting consumables, it completely scrambles your powers. You will be assigned four random powers (3 normal skills, one ultimate level 5 skill) from all class skill pool. This is great for giving a more random feel to the game, generating unique runs with new skill combinatons. Also, it’s good for completing Savage with classes you don’t like as you can change their skill selection into more favourable skills. I recommend not using this during your run; instead bring as your starting consumable and use at the start. Then when you get your first level up, review the powers you have and see what synergizes best.
Haste Potion
 |
For 30 turns, enemies don’t act when you take a step | 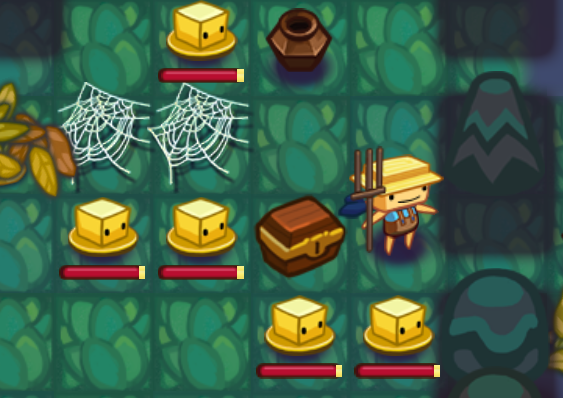 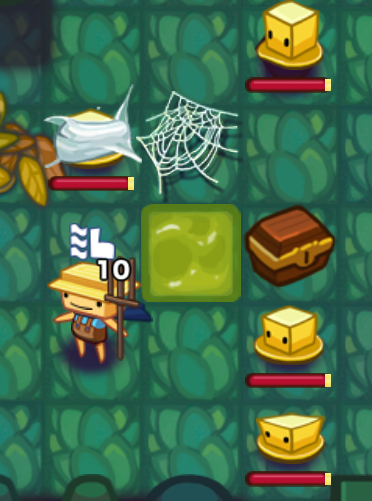 |
Haste potion is generally a better version of the Invisibility Potion imo but lasts 20 turns shorter. Enemes do not take a turn when you move your character. Attacking causes enemies to take their turn. Not worth saving, Use whenever you pick one up.
Class Guide (Farmer / Warrior / Archer)
Farmer
The default starting class and my second favourite class. Has a very good mix of class skills with a ranged ability, an AOE, crowd control and one of the best Ultimate skills. If you can survive to level 5 to pick up Cornucopia then you will likely be able to complete your run.
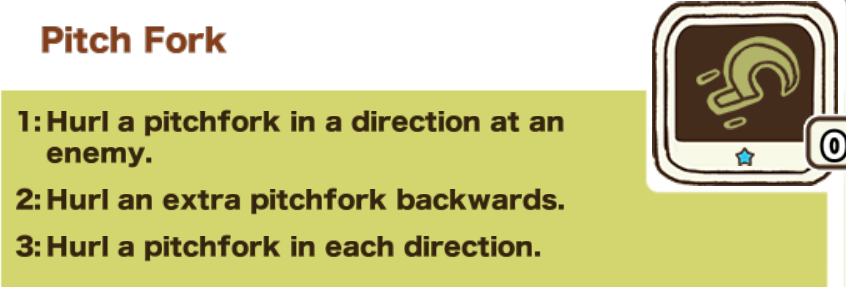
Pitchfork is a ranged ability. It is fired in a straight line towards the enemy. The second tier throws a second pitchfork in the opposite direction while the third tier throws them in all four directions. Useful for killing enemies at range and only requires on star but you need to line it up. Should be more useful at max tier but I never really used it much because I prefer Pumpkin Bomb instead.
Pumpkin Bomb allows you to place a bomb in an adjacent square. When an enemy steps on it it will explode in a 3×3 blast pattern. Enemies can be lured into it but you can also drop it on enemies and have it explode immediately. It will also explode if hit with any short of fire damage. Higher tiers spawn additional pumpkin bombs nearby semi-randomly. Easy to use and effective, great for killing packs of spawned mushrooms or multiple jellies. Requires 2 stars.
Scarecrow is an extremely useful skill for CC. Enemies are inflicted with fear and will run away from you. Good for giving yourself some space if you’re getting surrounded. Excellent when used against black jellies as you can drop it and clean up the slime tiles to prevent respawn while enemies are feared. Second tier increases affect from 3 to 5 seconds making it last much longer while the third tier makes enemies fight themselves instead. You will get stamina for any enemies that die while they are fighting. Requires 2 stars.
Cornucopia is maybe the best Ultimate skill in the game. It completely heals you, allowing you to tank damage from enemies and just turn their stars into full health. You don’t even need good pre-gear on the Farmer for Savage if you get Cornucopia; it’s practically a free win once you do so. It requires level 5 to get first tier. Second tier requires lvl 10 which is practically impossible to get so I’m not even going to discuss it. Requires 3 stars.
Generally I’d suggest Pumpkin Bomb (2 – for early AOE), Scarecrow (3 – for the CC), your choice of Pumpkin Bomb / Scarecrow tier 2 (4), Cornucopia (5). Then level up Pumpkin / Scarecrow until you max those out.
Warrior
Can either be the second or the third class available, depending on your choice. The Warrior is a melee / tank focused class with a very solid selection of class skills.
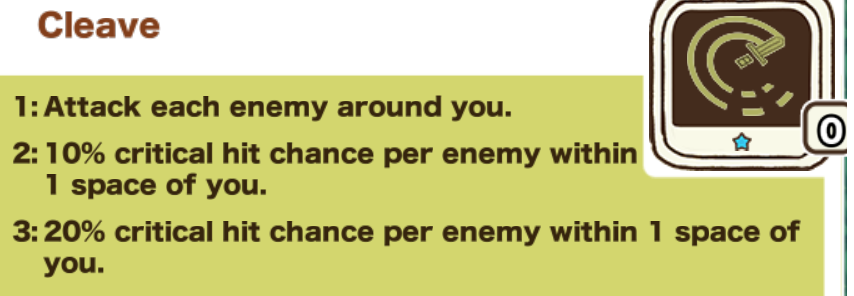
Cleave is an AOE that hits all squares around you (3×3). It’s a good way to kill multiple targets and you can get a free hit on tough enemies that you can’t one shot by hitting them in a diagonal square. Tier 2 and 3 increase the chance of critical strikes for each enemy within range. Requires 1 star.
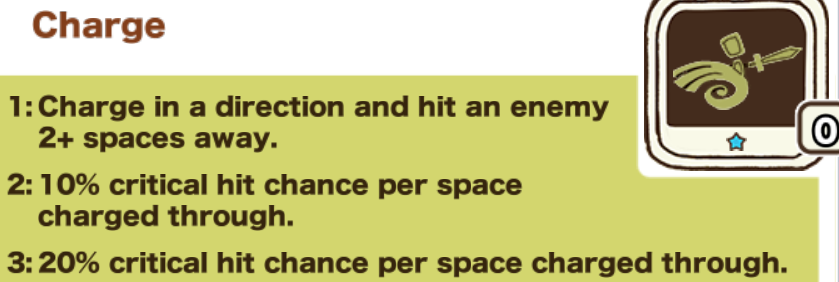
Charge is a movement based skill. It allows you to move in a straight line and hit an enemy mutiple squares away. Tier 2 and 3 increase the chance of critical strikes for each square you charge through before hitting the enemy. Charge is a free action, that is, after using it you can still complete your normal attack or use a skill as normal after using it. Excellent skill for chasing down annoying enemies you need to kill fast (ie: mushroom spawners). Downside is that you it’s only usable if there’s an enemy to hit so it can’t be used an easily as some other movement skills to escape issues. Requires 1 star.
Shield Wall is a defensive skill. It ignores all damage you take for a few turns. Tier 2 reflects 50% of damage back to attackers, tier 3 reflects 100% of damage back to attackers. Useful for tanking damage or avoiding damage from slime tiles. Requires 3 stars.
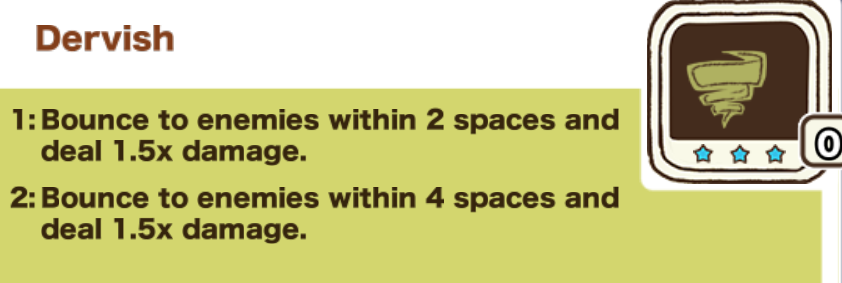
Dervish bounces you to nearby enemies and deals a heavy damage hit. Can be useful for getting out of situations where you’re overwhelmed but I never really used in too much in my builds. I usually ended up burning a lot of Stamina using Shield Wall and that also burns up a lot of Stamina stars. Requires 3 stars.
Generally I’d suggest Cleave (2 – for early AOE), Shield Wall (for tanking), Charge (for movement skill) and then level up your choice of Cleave / Shield Wall.
Archer
Can either be the second or the third class available, depending on your choice. The Archer is a ranged focused class.
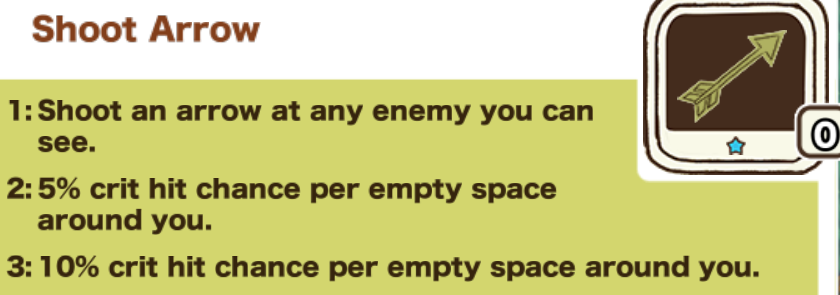
Activating Shoot Arrow lets you select a target to attack from range. Shoot Arrow has a really long possible targetting range and you can fire diagonally. I prefer it to Piercing Shot due to this as it lets you easily take out high priority targets quickly (spawners, wisps, goldfish, etc.). Tier 2 and 3 increase critical hit chance for each empty square around you. Very effective bread and butter ability when you are away from enemies. Requires 1 star.
Roll is a must have skill. Using it moves you to the nearest wall. Excellent for repositioning yourself, avoiding slime tiles and escaping sticky situations in general. This lets you avoid enemies and kill enemies from afar. The downside is that you can’t control where to stop, you’re forced to go straight to the wall. Tier 2 adds a second roll, tier 3 adds a third roll. Extra rolls can further help reposition because sometimes you can’t see where you’re going to stop and might be somewhere bad but limited by the room structure. Requires 1 star.
Piercing Shot lets you shot an arrow in a direction hit each enemy within its path. Tier 2 lets the arrow shoot through walls while Tier 3 makes it wrap around and hits enemies behind you. It has the advantage of potentially hitting multiple targets compared to Shoot Arrow but you need to line up enemies in a row / column. Shoot Arrow is also better for single target DPS because of higher crit %. Requires 1 star.
Lightning Arrow fires a heavy damage arrow along a random path. Can potentially hit multiple targets. I tend not to use this ultimate skill, prefer using less random skills and kill enemies from a far with the low stamina skills (either Shoot Arrow or Piercing Shot). Require 3 stars.
Generally I go Shoot Arrow (2 – for picking off enemies far away), Roll (3 – for repositioning), Shoot Arrow (4 – buff prime skill), Roll (5 – extra movement), Shoot Arrow (6 – maximize prime skill). You can grab Roll tier 3, Lightning Arrow for ultimate or Piercing Shot at this point.
Class Guide (Thief / Vampire / Wizard)
Thief
Can either be the third or fourth class available, depending on your choice. The Thief is largely a melee class specializing in secrecy. He’s by far my least favourite class in the Sproggiwood. His overall mechanics/skillset feels lacking to me and I often used the Identity Crisis potion on him in later Savage dungeons to roll up more skills I’d prefer more.
Juke is an interesting skill. Using it on a target swaps places with them and deals does damage. At tier 2 you have a 50% chance of going invisible, at tier 3 you have a 100% chance of going invisible. Can be used to jump around, repositioning yourself and dishing out damage and going invisible at high tiers can let you move secretly and attack an exposed enemy. Requires on star.
Hide In Shadows lets you go invisible for 5 turns. While invisible enemies cannot see you. Invisibility will break up completing an action such as attacking, opening a chest, getting webbed, using shrine, etc. Tier 2 increase length to 10 turns, Tier 3 makes your first attack a Free Action while invisible. You’ll probably want to drop at least one point into skill and use it for positioning yourself when you’re getting overwhelmed. The Tier 3 buff is great if you can actually get to it. Requires 1 star.
Fire Trap plants a trap that explodes in a large cross pattern (horizontally and vertically but not diagonally) when an enemy steps on it. Tier 2 lets it be able to triggered twice, Tier 3 lets it be triggered three times. Fire Trap is imo inferior to Farmer’s Pumpkin Bomb. Firstly, it’s dropped under you, you cannot decide to put it on an adjacent square so you can’t use it offensively against enemies that spawn around you. You need to drop the trap, then guide them over the trap to trigger. You need enemies to be in the trap row / column to be hit. Requires 1 star.
Backstab does extra damage to a random adjacent enemy. Pretty lacklustre for an ultimate skill but only requires 2 stars compared to three that other ultimate skills do.
Vampire
The 5th character you will unlock. The Vampire has an interesting skillset, with skills that require health to use as well as Stamina but also skills that let let you heal. Starts off very slow with somewhat weak attacks but by level 5 can become almost unkillable in normal dungeons. Lacks good anti-boss skills through.
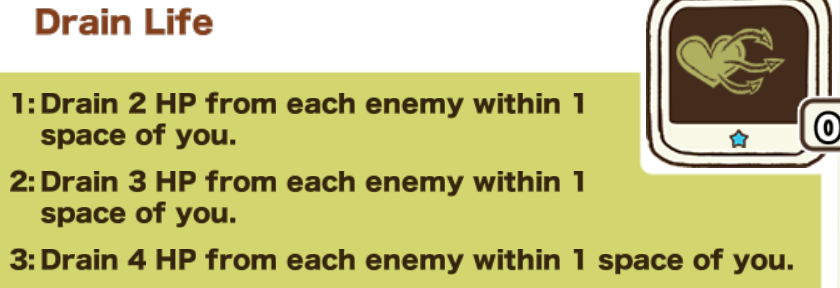
Drain Life does damage to nearby enemies within 1 space of you and heals you for the damage done. It only drains 2 HP on first tier which is very low. At tier 2 it drains 3 HP, at tier 3 it drains 4 HP. It’s a good skill once maxxed out but is kind of slow early going. You can use it to hit enemies diagonally to drain HP then kill them normally to get Stamina back. Not worth using against bosses. Requires 1 star.
Vanish into Bats teleports you in a semi-random fashion to nearby enemies and applies Dazzle for a couple of turns. It is a free action and costs 15% of your health to use. Can be useful for positioning and Dazzle but the random nature and health loss is a downside. Requires 1 star.
Enthrall is cast on an adjacent enemy to fight for you. Costs 20% of max HP. At tier 2 the thrall’s attack heal you for 1-2 HP, at tier 3 the thralls attacks heal you for 2-3 HP. Never really fit this into my builds. Early on it take a lot of HP for a temporary tank. I can see it potentially be okay once you’ve gotten Feed! to restock health and/or high tier to have thralls cover some of the health. Requires 3 stars.
Feed! kills a random, adjacent, non-boss enemy and heals 40% of your max HP. This is one of the better ultimate skills. Like Farmer’s ultimate skill it heals you but only for 40%, however, it lets you instant kill any non-boss enemy. This is a great against high health enemies like Yeti’s. Also, combining Drain Life + Feed! you can become almost unkillable. On boss fights, try to find some spawns that you can use as a blood pack during the fight if you can. Requires 3 stars.
Generally I’d suggest Drain Life (2 – get your AOE heal going), Vanish Into Bats (3 – for emergencies but can be a little random), Drain Life (4 – improve your AOE heal), Feed! (5 – become almost unkillable), Drain Life (6 – maximize your AOE heal).
Wizard
The final unlocked character and my favourite. The Wizard has four excellent and diverse skills and excels with powerful ranged attacks. Has a lower HP than some others.
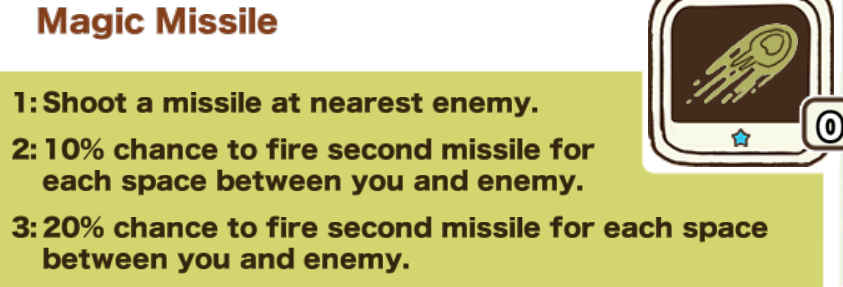
Magic Missile fires a projectile at the nearest enemy. Tier 2 and 3 adds a chance to fire a second missile for each space between you and the enemy. Efficient and effective long range attack, main downside is that you can’t target the missile. Requires 1 star.
Teleport is a movement skill. Activating allows you to select a square for you to teleport to. You can teleport to any squares you have seen and can also teleport to any hidden squares. If a hidden square is not a valid location or object already on then you will receive a warning that you cannot teleport there. Teleport is a free action. Tier 2 leaves behind a replica that dies in one hi, tier 3 leaves behind a replica that dies in three hits. One point is absolutely required, as a Wizard you want to kill things from a distance and Teleport helps you position yourself to do so. Never felt a need for the replicas and the Wizard’s other skills are worth investing in. Requires one star.
Summon Yeti is the only summoning skill in the game. It summons a Yeti to fight for you. Yeti’s are very tank NPCs and anything they kill returns Stamina to you. Tier 2 spawns an extra Yeti, Tier 3 spawns three Yetis. Summon AI is only okay but at worst it acts as a tank and maxxed out you’ll have three very tank minions fighting for you. It requires 3 stars.
Fireball does the same as the consumable scroll of the same name. Fires a long range 3 tile wide fire wave in a direction of your choice. It’s a great choice for clearing packs and perfect for killing one-shotting linked goldfish. Requires 3 stars.
Personally like to run Wizard mostly as a Missile spammer. Generally I’d go Magic Missile (2 – for long range attack), Teleport (3 – for repositioning), Magic Missile (4 – for the chance of extra missiles), Fireball (5 – for AOE and anti-goldfish), Magic Missile (6 – to get max tier). Any other points after this rammed into Summon Yeti for support.
Bosses
Ickykolo – Big Icky
Big Icky is the boss of the first dungeon. He is a misshapen jelly and is in a large, mostly open cavern. The floor has many slime tiles. Avoid these except for the dark slime tiles as these will spawn dark jellies. Ickykolo will attack you in melee and will summon additional jellies as he takes damage.
As the first boss, Big Icky has relatively litlte health. You can potentially get swarmed down by adds through, especially dark jellies if you’re not careful with them. Given his low health you can try rushing him down but you can get screwed if enemies keep standing onto the exit to escape.
For this fight, I’d recommend the following consumables:
Scroll of Pottery – Dark Jellies? Adds from Big Icky? Just turn them into pottery!
Scroll of Blizzard – Freeze Big Icky and nearby enemies and burn him down fast while they are frozen.
Healing Potion – Restocks your health, should give you more breathing space to kill Big Icky and escape.
Goaturku – The Goatess
The Goatess is the boss the second dungeon, Goaturku. She is a old Goatfolk and her level consists of small, narrow passageways. Slowly crawl your way through the tunnels, killing enemies you find until you find The Goatess.
The Goatess can charge you like normal Goatmen and has a skill to summon several Goatmen to assist her. Like Ickykolo she doesn’t have too much health. For melee builds, get up front and punch to death. Ranged builds might need to kite and kill Goatmen adds while whittling her down. Not too many strategy overall.
For this fight, I’d recommend the following consumables:
Scroll of Blizzard – Freeze her and she won’t be able to summon any Goatmen to assist her and with her low health you will drop her before the freeze wears off
Healing Potion – Restocks your health, should give you more breathing space
Big Tree – Mushroom Council
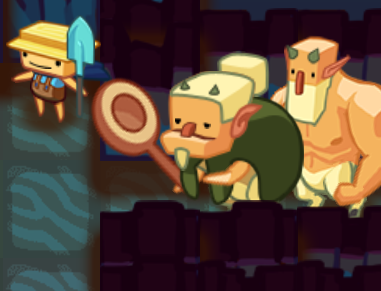
The Mushroom Council is a dual boss. You start the fight basically right on top of them. If you haven’t completed the dungeon once before, then you will need to watch a cutscene each time you fight the boss. Once you have completed the dungeon, the fight begins as soon as you enter the room.
This is a much more challenging boss than the first two. Firstly, there is simply the fact that there is two of them. Secondly, you star the fight in a terrible position. Both are very tank to boot and knock you back when they hit you potentially making the fight a bit of a slog.
To the South is an open cavern fill with hidden mushroom spawns. They will reveal themselves and surround you when in this section. They can be a good way to restock lost Stamina stars for skills you need to fight the bosses. If you’re playing Farmer, you can use the Stamina to heal via Cornucopia and use Pitch Fork and Pumpkin Bomb to damage the boss without getting into melee range. Warrior can use Charge to get back into range of them. Vampires can use Feed! on these to restock health throughout the boss fight. Archer / Wizard can use them to restore Stamina to spam Shoot Arrow / Magic Missile from range at boss. Thief can drop traps and lure the bosses over them.
For this fight, I’d recommend the following consumables:
Scroll of Blizzard – Freeze both of them and try to burn one down so you don’t have to tank two at once
Healing Potion – Restocks your health, should give you more breathing space
The Bloated Grotto – Rumakko
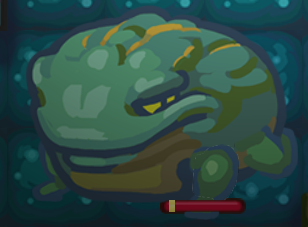
Rumakko is the boss of the fourth dungeon. He is a giant frog and is in a large open cavern with a lot of Bloated Frogs. He’s pretty tank but doesn’t really move much or have any abilities. He basically just sits where he is.
The Bloated Frogs can be a little annoying; with so many frogs in one area there’s lots of tongue whipping going on. On the flip side they can be used as Stamina rechargers. For Archer / Wizard, shoot him from range then recharge Stamina from the frogs. Farmer / Vampire should use Stamina for Cornucopia / Feed! to restock health when needed and use default attack on boss. Warrior can Charge to get in range, pop Shield Wall to become invulnerable and back off to restock Stamina and repeat. Thief skillset kind of weak for boss. I guess use Backstab and hopefully have a good consumable or you can use Identity Crisis Potion to get some better moves.
For consumables, use the usual ones. Pottery can be used to remove the Bloated Frogs. This will also mean removing your Stamina replenishers but can summon jars with new consumables as well to use. Blizzard good for CCing everything. Health potion always good for restoring health. Stamina potion can also be good for Farmer (turn Stamina into health) or let you spam long range attacks with Archer or Wizard.
Hakkipunki – Mr. Creepy
Mr. Creepy is the boss of the fifth dungen. He is a giant spider and is in a large cavern full of spider webs and a few spider spawners. He doesn’t have any real abilities, just attacking with basic melee and is a pretty straightforward fight assuming you don’t have Arachnophobia.
The spawners can be used to replenish Stamina if required. Webs can be cleared via flame / frost weapons or skills. Otherwise just concentrate on hitting Mr Creepy. Farmer can default attack + Cornucopia, Archer / Wizard can burn him down from distance, Warrior can default attack + Shield Wall, Vampire can default attack + Feed! spawned spiders, Thief can kite over fire traps and punch to death.
Ignis Caverna – Ignis
Ignis is the boss of the sixth dungeon and imo may be one of the hardest bosses. Doesn’t help that his dungeon is full of Wisp and Black Jellies, two of the most annoying and frustrating enemies in the game.
He’s in a large cavern with multiple green leaf trap that will spawn normal Wisps. He’s stupidly tanky (probably most except for maybe final boss) while also putting out good damage against you. There’s also an unavoidable 2 HP drain every turn just from being on the final floor.
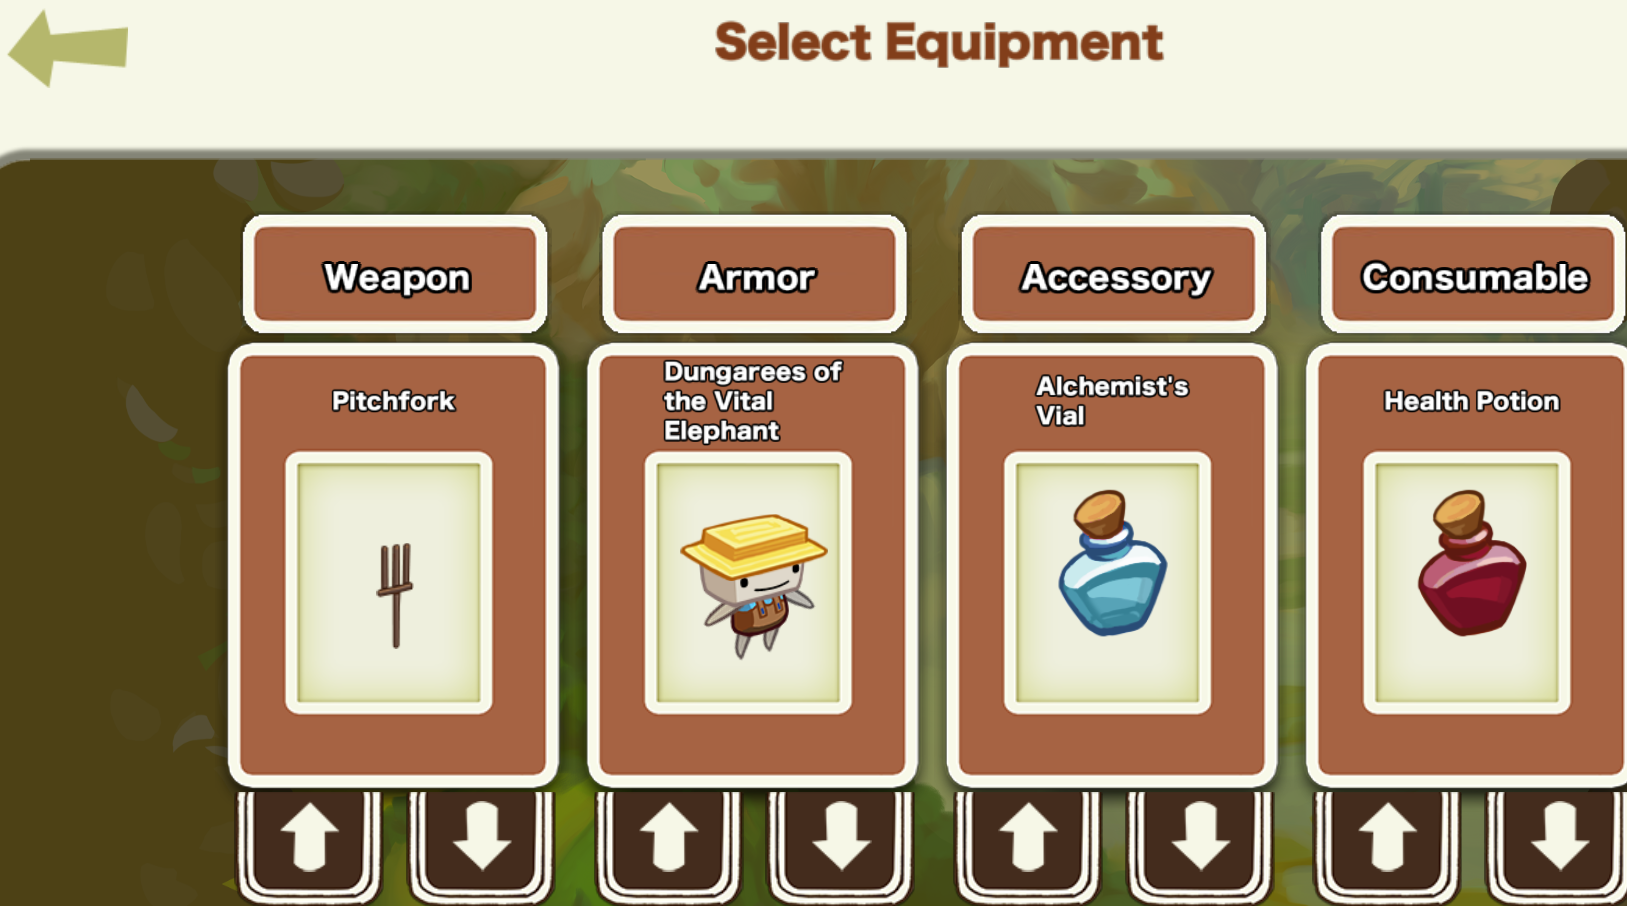
I generally like using Frost weapons because I like the CC effect for normal floors. For this boss, through, I’d suggest using fire weapons instead as frost weapons do terrible damage against him. A general optimal setup would be [Fire Weapon] + Alchemist’s Vial (rare accessory that you will need to purchase from store that lets you use potions twice) + Health Potion. With a good fire weapon and double full heal you should be able to go 1v1 with Ignis.
Some more class specific advice:
Farmer – Trigger traps to spawn normal wisps and use them as Stamina Replenishers so you can spam Cornucopia to stay alive
Vampire – Trigger traps to spawn normal wisps and ue them as Stamina Replenishers and Feed! bloodbanks to stay alive
Archer / Wizard – Stay as far away from Ignis as possible and spam Shoot Arrow / Magic Missile. Stamina potion can potentially be used to restock Stamina allowing you to kill him from safety.
Thief – I’d suggest using Identiy Crisis potion for a better moveset
If you’re having trouble with the boss, you can get it done easily with Warrior and skip it until later for other classes. Warrior can cheese the boss. Trigger several wisp traps and pop Tier 2 Shield Wall. The wisps will suicide themselves on your shied wall giving you more stamina. Which you use to recast Shield Wall. With Shield Wall up 100% you are unkillable. Just take your time slowly killing Ignis.
Bosses (Part 2)
Ensi – Sapius the Wise
Sapius the Wise is the boss of the seventh dungeon. When you first attack him, he splits up into a LOT of weak clones. When a clone blows up and starts steaming, they will launch a one row fire attack the next turn. The attack can be vertical, horizontal or diagonal. A number of normal enemies (most likely purple jellies) will likely be found on the level as well.
The attack isn’t too powerful but the sure number of clones can be an issue for some melee builds as they can wind up inside a ton of fire attacks. Ranged classes can clear the boss quite easily as each clone can be 1-shotted allowing them near limitless stamina to clear the clones from afar while avoiding most of the clones attacks. Some class suggestions:
Farmer – Kill three clones for 3 stamina, use Cornucopia for full heal, repeat until Saprius is completed.
Archer – Use Shoot Arrow to snipe clones from afar. Once all clones outside of range, creep forward, picking off clones that come into range.
Wizard – Same thing but use Magic Missile and Fireball if multiple clones can be hit together.
Warrior – Use Charge to get into range of clones instantly. Cleave if it can hit multi-targets or diagonal ones. Shield Wall is a little slow for fight, maybe Dervish could be useful. If having issues with Warrior you can try using Identity Crisis Potion to get a ranged option or Cornucopia which makes the fight easy.
Vampire – If there’s still normal enemies available, you can use Feed! to help heal. Vanish Into Bats should be avoided, too many clones and the HP loss per use would be painful. Identiy Crisis Potion good option for getting better skillset for fight.
Thief – Hide in Shadows to go invisible to get up to clones to attack. Most of the other skills probably not really helpful. Again, Identiy Crisis Potion option for better skills.
The Floating Isles – Sapius the Wiser
Sapius the Wiser is the boss of the eighth dugeon. It’s largely a rehash of the fight against him in Ensi but now has the additional ability of Teleport which makes it even more annoying for melee builds as the clones will now teleport to safety as you try to chase them down while the others spam you with attacks.
See advice for Ensi fight. The same advice basically applies here as well. Just the teleport makes it harder if you’re trying to melee things without a way to get into reach.
Uppmas Point – Sapius the Wisest
Sapius has evolved to his highest form… the Wisest! Yes, this is a rehash of the same boss you’ve fought the last two dungeons. The only real difference from last fight is that the clones now have a freeze attack that they will use in addition to their previous fire attack. The freeze attack will cause you to miss a turn. Once again, same advice as before.
Ukku Ice Maze – Surma
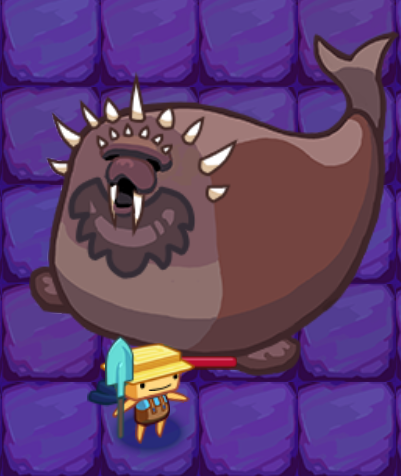
Surma is the boss of the final dugeon. He is a mighty demon… Walrus… He’s in the north of a large open cavern, is absolutely huge and has a huge health pool. Surma doesn’t move too much. He has a melee attack with a large knockback.
At the start and throughout the fight Surma will summon monsters to aid him, cryptic shrines and health shrines. The boss fight can turn into a battle of attritution as you fight against the waves of monsters, patch yourself up when possible and deal damage to Surma when you can.
Cornucopia and Feed! are both excellent skills for sustain in these fights (through Farmer has an ability that carries it even more than Cornucopia actually). Other classes will need to more careful to avoid losing health.
Farmer – The easiest class for this by far. Get Tier 3 Scarecrow and just resummon it whenever it goes down. You will get all the Stamina you need from the monsters killing each other and you can punch Surma to death.
Vampire – Use Feed! to restock your health whenever you can (preferably on Yeti’s as they have huge health pools and Feed! is a 1-shot kill). Slowly kill Surma with default attack when you can, keeping an eye on your health and making sure it never drops too low.
Wizard – Fireball is good as there will be lots of enemies in close quarters for you to hit. Use teleportation to get to shrines and reposition. Spam Magic Missile as effective low stamina nuke and summon Yeti’s as meat shields.
Archer – Use Shoot Arrow on Surma when you can. Roll to reposition yourself. Not as easy to use as Wizard’s Teleport but you should be able to stay away from danger. Hit up shrines when needed and kill summoned enemies for more Stamina.
Warrior – Shield Wall can help mitigate damage from the huge number of enemies that can get spawned. If you’re having issues, try using an Identity Crisis Potion, Cornucopia, Feed!, Scarecrow will all make fight much easier if you get it.
Thief – Use a Identity Crisis Potion to get a better skillset. Cornucopia, Feed!, Scarecrow will all make fight much easier if you get it. Other skills like Wizard / Archer ranged skills not as dominant but still good.
Q&A
Have any questions about the guide? Suggestions? Having issues anywhere?
This is all about Sproggiwood – Savage Difficulty for Players Tips and Tricks Guide; I hope you enjoy reading the Guide! If you feel like we should add more information or we forget/mistake, please let us know via commenting below, and thanks! See you soon!
- All Sproggiwood Posts List






















Leave a Reply