Intro
Welcome to my guide about Sea Salt, in this guide I’ll be showing you how to get that glorious 100% completion in Sea Salt, and information about each boss and enemy encountered in the game.
If you like this guide, please rate, favorite or award this guide. I would really appreciate it 🙂
Spoiler warning
If you are a brand new Dagon please do not read this guide until you’ve done a blind run or if you get stuck on a boss. I want to help players get achievements but not spoil the game for them. This guide contains spoiler material for the bosses, enemies and really cool surprise achievements that are best unlocked blindly.
You have been warned!
Dealing with townsfolk pt.1
Here are some info about the townsfolk in Sea Salt. Some arefightersand some are just cowards, the weak ones that don’t attack grant gold upon defeat, and the ones that fight back don’t grant gold.
Townsman (red)
Type: Coward
Attack Method: n/a
Note: Be sure to kill them before they go inside a house and become unreachable.
Townsman (farmer hat)
Type: Coward
Attack Method: n/a
Note: Be sure to kill them before they go inside a house and become unreachable.
Townsman (Nice hair cut)
Type: Coward
Attack Method: n/a
Note: Be sure to kill them before they go inside a house and become unreachable.
Townsman (Wings?)
Type: Coward
Attack Method: n/a
Note: Be sure to kill them before they go inside a house and become unreachable.
Gunner (Ship)
Type: Fighter
Attack Method: Bullets
Note: Keeping close to them will scare them and they will only attack when they are at a distance
Mother
Type: Coward
Attack Method: n/a
Note: Be sure to kill them before they go inside a house and become unreachable. Will drop her baby before running away.
Baby
Type: Doesn’t know wtf is going on
Attack: n/a
Note: Gets crushed when your minions walk on them.
Priest
Type: Coward
Attack: n/a
Note: Be sure to kill them before they go inside a house and become unreachable.
Coward in a hood
Type: Coward
Attack: n/a
Note: Will literally run towards you for forgiveness. Screw forgiveness because they denied your sacrifice and you’re probably needing the gold.
Bell guy
Type: Bell operator
Attack: n/a
Note: Will go towards the nearest bell and ring it.
Gunner (Leather hat)
Type: Fighter
Attack: Bullets
Note: Keeping close to them will scare them and they will only attack when they are at a distance
Molotov Thrower
Type: Fighter
Attack: Throws molotov that spreads temporary fire
Note: A circle will appear where the Molotov will hit, it will enlarge as it gets closer to hitting the ground. Move your minions away from the area to avoid it
Note 2: The fire can be doused instantly with the drowned, making the molotov futile, but your minions will however get damage by the actual molotov landing
Note 3: Molotovs can be deadly when already fighting other enemies.
Note 4: Steering a thrower to a wall then surrounding them can prove an effective way of dealing with molotovs.
Woodsman
Type: Tanky Fighter
Attack: Smashes their axe to the ground causing a 3 part shock wave, with each larger every part, deals high damage to minions that are in the vicinity
Note: When they smash their axe they have to get it out of the ground, making them briefly vulnerable.
Note 2: It is absolutely important that you dodge the attack, failing to do so will result in large minion loss
Archer
Type: Fighter
Attack: Shoots arrows, where they will hit will be marked by a circle, enlarging the closer the arrow is to the ground
Note: These little guys can be dangerous when you are in a fight with other enemies or when in large numbers
Dog
Type: Aggressive fauna
Attack: Charges at your minions in a linear pattern, biting and killing up to 3 minions in their path
Note: It is best to dodge the attack then kill them right after they have finished their attack.
Dealing with townsfolk pt.2
Armored Gunner
Type: Fighter
Attack method: Shoots bullets like the gunner but much more rapidly
Note: They can be deadly to small hordes and when they are behind barricades, they can easily pick at your minions while you try to reach them. Try to surround them with minions to stop them from shooting
Pikeman:
Type: Fighter
Attack method: Slashes minions using a pike dealing high damage
Note: They can be deadly to slow moving minions, small minions and when trying to tackle an axe wielding enemy
Guard
Type: Fighter
Attack method: Attacks exactly like the woodsman
Note: Nothing different to note, the same tips from woodsman apply to this guy.
Watchtower
Type: Stationary fighter
Attack method: A red circle moves around the watch tower, if a minion touches this circle, 5 circles will appear next to each other along with 5 deadly shots.
Note: Watch carefully until you see a moment to take out the tower before the circle turns back to your minion’s location.
Alchemist
Type: Fighter
Attack method: Functions exactly like the molotov thrower except a potion is thrown and lingers where it hits for a short while, slowing down minions that walk over it
Note: They can be deadly when combined with fast moving enemies
Thief
Type: Fighter
Attack method: They use their knife to slash at minions
Note: n/a
Ballista operator
Type: Operator
Attack method: They run towards a ballista to shoot huge bolts at minions
Note: Kill them as soon as you can, you don’t want to be struck by a surprise bolt, or perhaps they could be useful?
Automated machine ballista
Type: Machine
Attack method: Automatically fires bolts at minions
Note: When moving caution should be taken to avoid a surprise bolt attack
Dealing with hunters
Hunters are mini boss like enemies that can pose a serious danger to unprepared players.
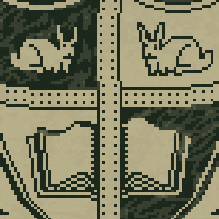
Vanderberg Hunter
Attack method: Shotgun
Tip 1: Surround in swarming minions or having a large horde. Can easily take out a small horde of range minions
Tip 2: Protect range minions under the shield of the hermit. The shield is bullet proof so unless the hunter goes inside their attack is futile.

MacGrigor Hunter
Attack method: Flame thrower, flame jetpack
Tip 1: Use range such as cultists and attack from the end of the flame throwers range, dodge the jetpack flames and relocate to the hunter. Rinse and repeat.
Tip 2: Surround the hunter with minions such as the swarm and repeatedly attack, dodge the jetpack when they take enough damage.
Tip 3: Use the hermit and put a shield around range minions, flames cannot go through the shield rendering the hunters attack futile.

Blavatsky Hunter
Attack method: Sword dashes through minions, dealing high damage
Tip 1: Use range minions and attack from a distance, dodge when you hear a sword sound and move from the direction that the hunter is facing
Defeating bosses pt.1
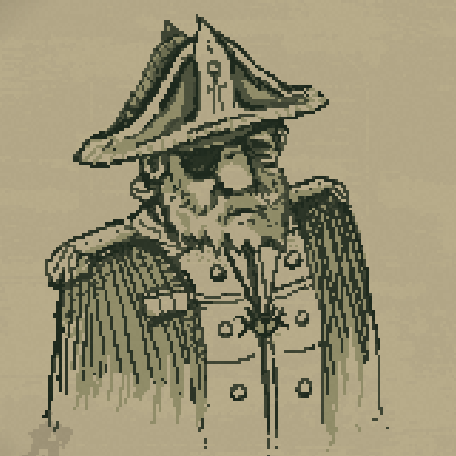
Admiral Pierce
Attacks:
1. Cannons, admiral will fire cannonballs at your minions, marked by a circle that enlarges as it gets closer to the ground. He will fly up to the top of the ship through the rope he climbs up. He will also sometimes jump up to the steering wheel floor.
Tip: Dodge the cannonballs and attack when he is on the ground.
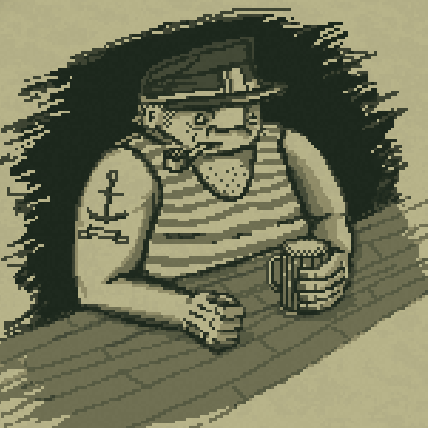
Wharfmaster Glenn
Attacks:
1. Swings a huge anchor around him, instantly killing any minion that gets in the way
2. Gets ready to launch his anchor, where it will go is marked by a thick grey line. After a short period he will throw his anchor at the mark, destroying any minions in its path. Will begin reeling in the anchor, leaving him vulnerable
Tip: During his swinging phase, it is essential you run away from him, some obstacles can be destroyed by his anchor so use that to make the area clearer to move around in. Dodge the thrown anchor and attack with all you’ve got but be ready to start running away when he retrieves his anchor.
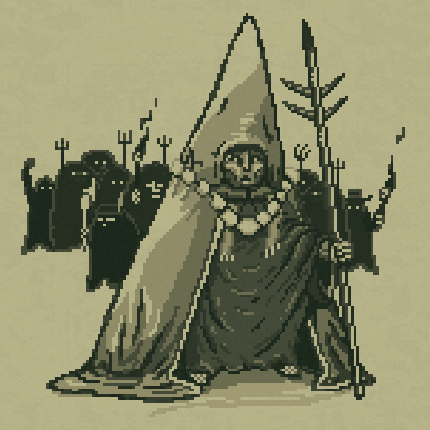
Deacon Raphael
Attacks:
1. A horde of townsfolk will chase after the minions. Some melee and some are ranged. There are also molotov throwers in the group.
2. Once the horde is killed. Deacon will be thrown out of the building he is hiding in, and can be killed. Once killed the fight ends.
Tip: Invest in a group of range minions such as cultists and pick off the horde one by one, or invest in a huge tanky horde such as a horde of creatures to take them on head first.
Defeating bosses pt.2
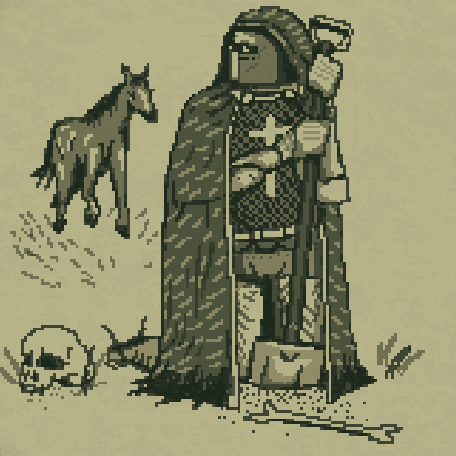
The Lone Warden
Attacks:
1. With his horse, he will charge at your minions, dealing damage to any minion in the way.
2. He will pause, then raise his sword high in the air causing lightning to strike. Then green ritual circles will appear, becoming brighter and brighter before zombie arms begin slashing minions that are in the circle.
3. There are 3 ballistas up on the hills on each side, they are unreachable and cannot be destroyed, and will shoot bolts at minions.
Tip 1: When passing an area that is in the ballistas range, it would be unwise to remain in the path which will result in precious minion death. You can tell where the path is as it is marked with a shallow dug up trail leading to the other side of the area.
Tip 2: Timing attacks on the boss between its attack patterns is important, bad timing can result to minion loss.
Tip 3: Using range minions such as cultists and attacking the boss from a distance can provide you with more attack chances given you are dodging his attacks.
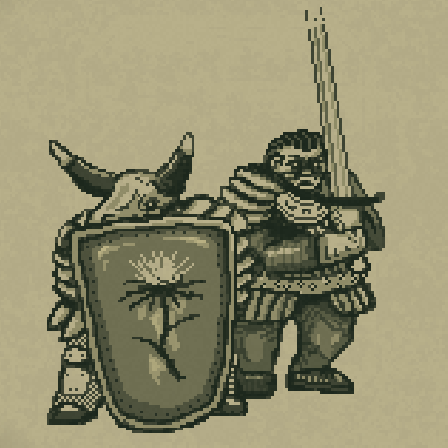
The Thistle Guards
Budakh:
Attacks:
1. They will move towards your minions, when they get close they will perform either two attacks.
a. Bash the minions with their shield
b. Slam their shield to the ground, creating a 3 part shock wave, similar to a woodsman except incredibly larger. While they are recovering, they will be vulnerable to attacks, this is the only time they are vulnerable.
2. If Rumata is killed first, Budakh will become enraged. They will run faster, the shield bash becomes a smaller ground slam attack, and the ground slam attack shock wave becomes larger.
3. While Rumata is on the gate, they will shoot cannonballs at your minions.
Upon reaching half health, Rumata will jump down with a fiery ring forming around them that spreads.
Rumata:
Attacks:
1. They will swing their sword at your minions, doing so a few times will make them cool down, making them vulnerable as they do so, this is the only time they are vulnerable.
2. If Budakh is killed first, Rumata becomes enraged. They will move faster, swing their sword more often and will form a fiery ring around them after their cool down.
Tip: Going towards them and attacking a short bit and retreating quickly then repeating can avoid losing minions, be prepared for Budakh’s shockwave though, you’ll want to retreat quite far as it is huge.
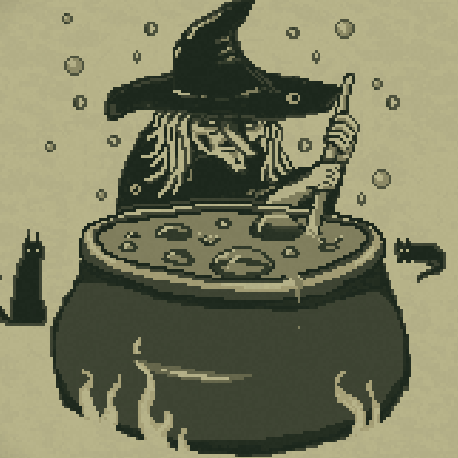
Witch of the Forest
This following section assumes you are not sparing her.
Attacks:
1. She will cast a fiery ball towards your minion. Upon being touched it will explode, killing any minions in close proximity
2. She will surround herself in a ring of fire, she will spread the fire horizontally. During this spell she will make 3 duplicates of herself.
3. She places down cauldrons that shoot gooey contents at your minions, where it will hit will be marked by a circle that enlarges as it gets closer to the ground.
Tip 1: Using range minions like cultists and attacking from a distance while avoiding getting too close to the witch and her duplicates can be a good tactic.
Tip 2: Destroying cauldrons won’t hurt and can decline the amount of things to avoid during this fight.
Tip 3: When you notice the witch or her duplicates begin shooting a fireball be ready to retreat and avoid the ball as it can put a large dent on your horde.
Defeating bosses pt.3
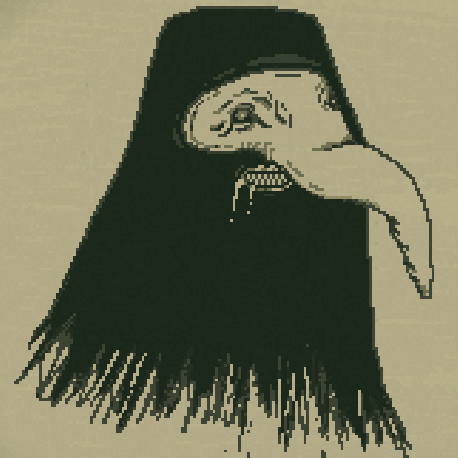
Count Volgrave
Phase 1:
Attacks:
1. Will choose between two weapons, he will raise the chosen weapon to the air before attacking
a. Shoots a fast firing gun at your minions, rolling away from the direction of your minions every now and then
b. Dashes towards your minions with a sword, dealing high damage to minions in his path.
He will continue to switch between the two weapons throughout his first phase.
Phase 2:
Attacks:
1. Spins around towards your minions in fast speeds, doing so for a short while.
2. Raises one of his tentacles and begins summoning falling rocks from the sky in random locations close to your minions.
Tip 1: During his first phase, moving around and through the tubes can be helpful in dodging his attacks.
Tip 2: There a few tubes with fishman inside, breaking it can free the minion. There is one tube with a swordsmen inside. It is advised to deal with this before his second phase
Tip 3: Using range minions can be useful during this fight, as for the most part you’ll be running away from him.

The Archbishop
Attacks:
1. Floats in the air and fires three large spheres towards your minions, killing them instantly upon touch.
2. Loads a mini gun before rapidly firing at your minions, dealing rapid damage.
3. Shouts loudly that causes chandeliers to fall from the roof, killing any minions that are below it. They can be seen coming from their shadow that darkens as it gets closer to the ground. Upon hitting the ground fire will spread.
4. The archbishop pulls out his staff, and fires a huge death ray and spins around once, instantly killing any minions that gets caught in the ray.
Once you have taken out his shield, he will be vulnerable to attacks. Once a fair amount of health has been taken out, he will reform his shield. You’ll have to repeat this a few more times.
Tip 1: As intimidating this boss is, most of his attacks can be made futile by positioning your minions behind a pillar. If you are in the right position, the attack will be completely blocked by the pillar.
Tip 2: Because for the most part you’ll be behind a pillar dodging his attacks, melee minions are as good as range minions.
Tip 3: You will most likely die a few times, likely from screwing up your position. It is important that you keep your head in the game and keep learning where to position your minions behind the pillars.
Tip 4: These are the best times to attack him.
a. After you have dodged a part of his death ray attack, attack from the area where the death ray has already been.
b. While he is summoning falling chandeliers, while keeping a close eye on their whereabouts.
c. Briefly while he is switching between attacks.
Unlocking apostles
Apostles are beings that have proved themselves worthy of being Dagon’s apostle. They are chosen at the start of a level and each grant special abilities and starter minions. You will start off with Aghra De Pesca, but as you play you’ll unlock more and more by completing their requirements.
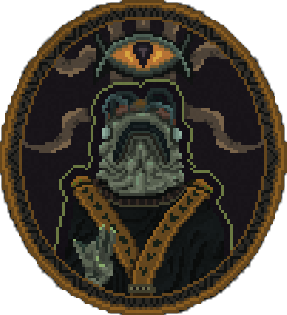
Aghra De Pesca
Minions: 25x swarm
Abilities: Stronger swarm, worms explode
Unlock requirements: Unlocked at the start of the game
Notes: A great starter, having a huge pack of swarms can be quite deadly at the start of the game.

Ivan Dorovich Xlll
Minions: 3x spitters, 4x worms
Abilities: Choose only from 3 cards, has access to cheat cards
Unlock requirements: Collect 50,000 gold
Requirement notes: This takes time to unlock, to minimize the time, destroy all the barrels you see and kill all the townsfolk and hunters that drop gold (let none escape!).
Notes: Best for players who want a challenge and those who don’t mind a bit of RNG gameplay.
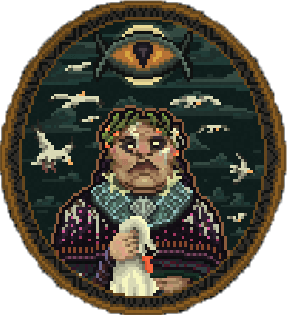
Don Moros Momos
Minions: 1x Madman, 1x Flesh, 1x Toad
Abilities: Randomize minions on every 10th kill (pay gold to randomize minions)
Unlock requirements: Beat 30 rounds in arenas
Requirement notes: Its probably best to attempt this when you have gotten further in the game, after unlocking the hermit and the creature cards.
Notes: Again for players who want a challenge and don’t mind a bit of RNG gameplay.

Saint Traeton
Minions: 6x Cultists
Abilities: Can sacrifice cultists at alters
Unlock requirements: Kill 50 humans/dogs with cultists
Requirement notes: You unlock cultists quite early in the game and they are really handy to have so this shouldn’t be too much of a task to unlock.
Notes: Taking account that cultists can be handy even in the endgame this is a great apostle for starters, sacrificing cultists will award you with very powerful minions.

Silaris
(Best girl)
Minions: 3x Fishman
Abilities: Fewer minions => more strength
Unlock requirements: Complete 10 rooms with 5 or less minions
Requirement notes: I recommend doing this at the very start, as the game is at its most easy, preferably when you have cultists.
Notes: This apostle is great for players who use tanky and smaller hordes. Using the creature along with spitters, the hermit and the shaman can be an absolute beast of a horde and very effective against arenas(more on that later).
Personal note: If you don’t think shes beautiful… we can not be friends.
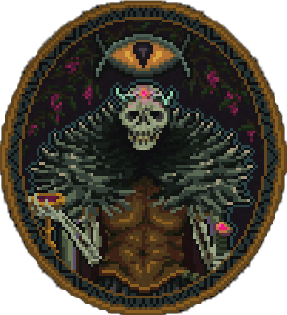
Saint Kristina Blavatshy
Minions: 1x Lich, 3x Spectres
Abilites: Can’t summon minions, spectres never expire
Unlock requirements: You need the Lich to kill 150 humans/dogs and turn them into spectres
Requirement notes: The Lich has ranged attack like cultists, but it would be wise to combine them with other minions as only 1 Lich summons at every summon.
Notes: For players who want to play a bit differently, do note you only get 1 Lich, and since a spectre can only be summoned with a Lich it would be advisable to take extra precaution to protect the only Lich because you cannot summon minions with this apostle.
Area maps
Here are the maps of all the areas in Sea Salt. Refer to here if you need help getting to a certain area.
Xthu-Tho R’yal
1. Xthu-Tho R'yal-Sacrificial Site | ⌄ 2. Xthu-Tho R'yal-Road | ⌄ 3. Xthu-Tho R'yal-Garden | ⌄ 4. The Fale Lady-Lower Decks | ⌄ 5. The Fale Lady-Ammunition Deck | ⌄ 6. The Fale Lady-Weather Deck(boss battle)
Karlshaven East
1. Main docks | ⌄ 2. West Construction Block | ⌄ 3. East Construction Block | ⌄ 4. Dock 46 | ⌄ 5. Fish Market | ⌄ 6. Eastern Docking Bay | ⌄ 7. Docking HQ | ⌄ 8. Construction & Trading(boss battle)
Karlshaven North
1. Main Docks | ⌄ 2. Central Street | ⌄ 3. Central Market | ⌄ 4. Old Town | ⌄ 5. Fish Market | ⌄ 6. Aghra Street | ⌄ 7. Back Alley | ⌄ 8. Iron Bay | ⌄ 9. Iron Square(boss battle)
Rotwood Road (Karlshaven Market)
1. Eastern Exit | ⌄ 2. Karlshaven Outpost | ⌄ 3. Turnpike | ⌄ 4. Road | ⌄ 5. Macgrigor's Outlook | ⌄ 6. Campsite | ⌄ 7. Crossroads | ⌄ 8. Village-Entrance | ⌄ 9. Village | ⌄ 10. Old Mining Road | ⌄ 11. Traeton Bridge-Stairs | ⌄ 12. Traeton Bridge | ⌄ 13. Traeton Ruins | ⌄ 14. Hogstead Frontier(boss battle)
Rotwood Swamps (Innsburgh-Harbour)
1. Outskirts | ⌄ 2. Logger's Cabin | ⌄ 3. Lumber Camp-South | ⌄ 4. War Machine Factory | ⌄ 5. Lumber Camp-Meadow | ⌄ 6. Lumber Camp-North | ⌄ 7. Crossroads | ⌄ 8. Lodge | ⌄ 9. Trading Post | ⌄ 10. Macgrigor Estate | ⌄ 11. Warfront | ⌄ 12. Training Camp | ⌄ 13. Traeton Ruins | ⌄ 14. Hogstead Frontier(boss battle)
Hogstead (North)
1. Approach | ⌄ 2. Basker Farmstead | ⌄ 3. Basker's Barn | ⌄ 4. Docks | ⌄ 5. Marlon's Farm | ⌄ 6. Wheat Road | ⌄ 7. Blavatsky's Farm | ⌄ 8. Orchard | ⌄ 9. Argo's Mill | ⌄ 10. Argo Fields | ⌄ 11. Ugarit Outskirts | ⌄ 12. City Entrance(boss battle)
Hogstead (East)
1. Approach | ⌄ 2. Basker Farmstead | ⌄ 3. Basker's Barn | ⌄ 4. Docks | ⌄ 5. Ritual Fields | ⌄ 6. Sally's Farm | ⌄ 7. Basker Field | ⌄ 8. Blavatsky's Farm | ⌄ 9. Hank's Pumpkin Patch | ⌄ 10. Plateau Fields | ⌄ 11. Sacrificial Lake | ⌄ 12. Ugarit Fields | ⌄ 13. Witch's Hut | ⌄ 14. Outer Wall(boss battle)
Nova Ugarit Center (Hogstead road)
1. Main Road | ⌄ 2. Crimson Tree Chapel | ⌄ 3. St.Sanguine Square | ⌄ 4. Old Ugarit Memorial | ⌄ 5. Station | ⌄ 6. University Park | ⌄ 7. Moros Avenue | ⌄ 8. Trade District | ⌄ 9. Thistle Memorial | ⌄ 10. Alley | ⌄ 11. Charging Facility(boss battle)
Nova Ugarit Sewers (Hogstead Farms)
1. Hole in the Wall | ⌄ 2. Smuggler's Docks | ⌄ 3. Smuggler's Den | ⌄ 4. Holding Cells | ⌄ 5. Hall of Suffering | ⌄ 6. Old Church Storage Room | ⌄ 7. Volgrave Lab & Torture Chamber | ⌄ 8. Charging Facility(boss battle)
Nova Ugarit Gardens (South)
1. Garden Entrance | ⌄ 2. Garden Avenue | ⌄ 3. Canal District | ⌄ 4. National Museum | ⌄ 5. Traeton Park | ⌄ 6. Dagon Street | ⌄ 7. Cathedral District | ⌄ 8. Cathedral Approach | ⌄ 9. Grand Cathedral(No boss battle)
Nova Ugarit Graveyards (North)
1. Entrance | ⌄ 2. Temple Site | ⌄ 3. Macgrigor Family Mausoleum | v 4. Northern Graveyard | ⌄ 5. Walk of the bishop | ⌄ 6. West | ⌄ 7. West Entrance | ⌄ 8. Cathedral Approach | ⌄ 9. Grand Cathedral(No boss battle)
Collecting the cards
I could tell you how to unlock all the cards in this guide. But there is already a guide that goes into great depth about each card and where to find them. Please support the first ever guide created by Mortecrane.
https://steamcommunity.com/sharedfiles/filedetails/?id=1892353650
If you get stuck on which area is where, refer to ‘Area Maps’ section in this guide.
666 Kills
For this achievement you’ll have to kill 666 people. Just play through the game and you’ll get it sooner or later.
Bad Devs
For this achievement, you are required to kill the devs (no not in real life, put that knife down).
They are found in Nova Ugarit – Trade District in Nova Ugarit Center, you’ll have to go through Hogstead North in order to get to it.
At the top of the area you will encounter a balista, destroy the balista but do not kill the operator, spare them for a short while so they can get to the other balista, dodge the attack to destroy the hidden barrier next to the balista you just destroyed. Go through the secret passage to get to the devs, then kill them. A fancy achievement will pop up congratulating you for taking out the fourth wall breakers.
Super Secret Achievement
At the end of the credits, with the noble words ‘Thank you for playing’ do not leave the screen, wait a while.
Then you’ll notice a ship is moving, then it will stop and a hunter will come out.
You get to control the hunter!
You must make it across a few areas back to the Grand Cathedral. In each area you must shoot and kill all the minions you find, be careful to avoid getting too much damage dealt to yourself as you don’t heal. Once you’ve made it to the Cathedral inside, next to the well where the great archbishop had fallen you’ll be faced with swarms and swarms of never ending minions. To this you need to die, then you will unlock a very special apostle… the evil version of El Huervo, the hunter you just played.
Congratulations you just unlocked the super secret achievement that only very few people know about (not anymore tbh).
Hard Salt
Firstly have you beaten the game yet? Now, have you unlocked the ‘super secret achievement’ yet? No? Then please do that before proceeding to this section.
You must complete the game in hard mode which is unlocked after you’ve beaten the game on normal at least once. As scary as it sounds there is one little trick you can do to make this game mode decently simple to beat.
For this we are going to beat the whole game with one apostle, the legendary El Huervo. He can be very powerful in later parts of a level. Here are a few tips to have while doing this.
1. El Huervo is weak at every start of a level, improve this by leveling up his attack (you can upgrade him the exact same way you summon minions with other apostles). Level up his attack until you start noticing enemies are dying to many less shots, if his health falls down less than half then upgrade ‘the health’ this will heal him all the way back to 100%.
2. It can prove effective to hold onto gold bonus upgrades as a ‘med kit’ in a sense, if you’ve just killed every enemy in an area and have the gold bar filled up it wouldn’t hurt to hold onto it to heal if you need to do so on the next areas to come.
3. During a boss fight, you only have 1 minion to watch, this is quite beneficial as you’ll be able to dodge attacks quite effectively without having to worry about wondering minions. If you feel the need to, upgrade ‘speed’ to move faster.
Once you’ve slain the archbishop (again) the achievement will pop up congratulating you for being one hell of a hunter.
Beating the arenas
This will probably be the last achievement you’ll earn. There are 4 arenas to conquer. I recommend getting every card before attempting this and unlocking silaris.
For this guide we will be using silaris as the apostle.
An effective horde goes as followed, the creature, spitters, the hermit, the drowned and shaman. This is an absolute beast of a horde and will highly likely grant a win. Even if you don’t get the bonus from silaris if you are to lose your horde and a creature remains, that creature will have the best chance of surviving and allowing another summon from a gold bonus with the full power of silaris’s bonus.
But you have to play your cards right!
1.Swordsmen and dogs are a challenge to deal with, especially when grouped up. Learn to dodge them better if needing to do so.
2. Leave the gold on the ground for emergencies if your horde becomes small. You can pick these up and get a bonus summon without killing anything.
3. For the arenas with church, its best to just go in for the kill, I found this tactic very effective with the horde idea listed above, with a few creatures and spitters, the church can go down in seconds, and with the hermit and drowned, this can protect you while you shred down the church.
4. In the graveyard arena, observe closely when gravestones and buildings spawn around the place, you may get yourself stuck or cornered by enemies.
End
Thank you for reading this guide, I hope it has helped you get that awesome 100% in Sea Salt. If you liked this guide, please do rate, like, or award it.
Thanks especially to the following people:
YCJY games – For making Sea Salt
mrmanet – Creator of VCR Mono, the free to use font on some of the pictures
All the special people in my life who make up my life
And YOU. Yes you, for reading this guide and hopefully getting something out of it

Hope you enjoy the Guide about Sea Salt – Ultimate Guide, if you think we should add extra information or forget something, please let us know via comment below, and we will do our best to fix or update as soon as possible!
- All Sea Salt Posts List
Intro

Welcome to my guide about Sea Salt, in this guide I’ll be showing you how to get that glorious 100% completion in Sea Salt, and information about each boss and enemy encountered in the game.
If you like this guide, please rate, favorite or award this guide. I would really appreciate it 🙂
Spoiler warning

If you are a brand new Dagon please do not read this guide until you’ve done a blind run or if you get stuck on a boss. I want to help players get achievements but not spoil the game for them. This guide contains spoiler material for the bosses, enemies and really cool surprise achievements that are best unlocked blindly.
You have been warned!
Dealing with townsfolk pt.1

Here are some info about the townsfolk in Sea Salt. Some arefightersand some are just cowards, the weak ones that don’t attack grant gold upon defeat, and the ones that fight back don’t grant gold.
Townsman (red)
Type: Coward
Attack Method: n/a
Note: Be sure to kill them before they go inside a house and become unreachable.
Townsman (farmer hat)
Type: Coward
Attack Method: n/a
Note: Be sure to kill them before they go inside a house and become unreachable.
Townsman (Nice hair cut)
Type: Coward
Attack Method: n/a
Note: Be sure to kill them before they go inside a house and become unreachable.
Townsman (Wings?)
Type: Coward
Attack Method: n/a
Note: Be sure to kill them before they go inside a house and become unreachable.
Gunner (Ship)
Type: Fighter
Attack Method: Bullets
Note: Keeping close to them will scare them and they will only attack when they are at a distance
Mother
Type: Coward
Attack Method: n/a
Note: Be sure to kill them before they go inside a house and become unreachable. Will drop her baby before running away.
Baby
Type: Doesn’t know wtf is going on
Attack: n/a
Note: Gets crushed when your minions walk on them.
Priest
Type: Coward
Attack: n/a
Note: Be sure to kill them before they go inside a house and become unreachable.
Coward in a hood
Type: Coward
Attack: n/a
Note: Will literally run towards you for forgiveness. Screw forgiveness because they denied your sacrifice and you’re probably needing the gold.
Bell guy
Type: Bell operator
Attack: n/a
Note: Will go towards the nearest bell and ring it.
Gunner (Leather hat)
Type: Fighter
Attack: Bullets
Note: Keeping close to them will scare them and they will only attack when they are at a distance
Molotov Thrower
Type: Fighter
Attack: Throws molotov that spreads temporary fire
Note: A circle will appear where the Molotov will hit, it will enlarge as it gets closer to hitting the ground. Move your minions away from the area to avoid it
Note 2: The fire can be doused instantly with the drowned, making the molotov futile, but your minions will however get damage by the actual molotov landing
Note 3: Molotovs can be deadly when already fighting other enemies.
Note 4: Steering a thrower to a wall then surrounding them can prove an effective way of dealing with molotovs.
Woodsman
Type: Tanky Fighter
Attack: Smashes their axe to the ground causing a 3 part shock wave, with each larger every part, deals high damage to minions that are in the vicinity
Note: When they smash their axe they have to get it out of the ground, making them briefly vulnerable.
Note 2: It is absolutely important that you dodge the attack, failing to do so will result in large minion loss
Archer
Type: Fighter
Attack: Shoots arrows, where they will hit will be marked by a circle, enlarging the closer the arrow is to the ground
Note: These little guys can be dangerous when you are in a fight with other enemies or when in large numbers
Dog
Type: Aggressive fauna
Attack: Charges at your minions in a linear pattern, biting and killing up to 3 minions in their path
Note: It is best to dodge the attack then kill them right after they have finished their attack.
Dealing with townsfolk pt.2
Armored Gunner
Type: Fighter
Attack method: Shoots bullets like the gunner but much more rapidly
Note: They can be deadly to small hordes and when they are behind barricades, they can easily pick at your minions while you try to reach them. Try to surround them with minions to stop them from shooting
Pikeman:
Type: Fighter
Attack method: Slashes minions using a pike dealing high damage
Note: They can be deadly to slow moving minions, small minions and when trying to tackle an axe wielding enemy
Guard
Type: Fighter
Attack method: Attacks exactly like the woodsman
Note: Nothing different to note, the same tips from woodsman apply to this guy.
Watchtower
Type: Stationary fighter
Attack method: A red circle moves around the watch tower, if a minion touches this circle, 5 circles will appear next to each other along with 5 deadly shots.
Note: Watch carefully until you see a moment to take out the tower before the circle turns back to your minion’s location.
Alchemist
Type: Fighter
Attack method: Functions exactly like the molotov thrower except a potion is thrown and lingers where it hits for a short while, slowing down minions that walk over it
Note: They can be deadly when combined with fast moving enemies
Thief
Type: Fighter
Attack method: They use their knife to slash at minions
Note: n/a
Ballista operator
Type: Operator
Attack method: They run towards a ballista to shoot huge bolts at minions
Note: Kill them as soon as you can, you don’t want to be struck by a surprise bolt, or perhaps they could be useful?
Automated machine ballista
Type: Machine
Attack method: Automatically fires bolts at minions
Note: When moving caution should be taken to avoid a surprise bolt attack
Dealing with hunters

Hunters are mini boss like enemies that can pose a serious danger to unprepared players.

Vanderberg Hunter
Attack method: Shotgun
Tip 1: Surround in swarming minions or having a large horde. Can easily take out a small horde of range minions
Tip 2: Protect range minions under the shield of the hermit. The shield is bullet proof so unless the hunter goes inside their attack is futile.

MacGrigor Hunter
Attack method: Flame thrower, flame jetpack
Tip 1: Use range such as cultists and attack from the end of the flame throwers range, dodge the jetpack flames and relocate to the hunter. Rinse and repeat.
Tip 2: Surround the hunter with minions such as the swarm and repeatedly attack, dodge the jetpack when they take enough damage.
Tip 3: Use the hermit and put a shield around range minions, flames cannot go through the shield rendering the hunters attack futile.

Blavatsky Hunter
Attack method: Sword dashes through minions, dealing high damage
Tip 1: Use range minions and attack from a distance, dodge when you hear a sword sound and move from the direction that the hunter is facing
Defeating bosses pt.1


Admiral Pierce
Attacks:
1. Cannons, admiral will fire cannonballs at your minions, marked by a circle that enlarges as it gets closer to the ground. He will fly up to the top of the ship through the rope he climbs up. He will also sometimes jump up to the steering wheel floor.
Tip: Dodge the cannonballs and attack when he is on the ground.

Wharfmaster Glenn
Attacks:
1. Swings a huge anchor around him, instantly killing any minion that gets in the way
2. Gets ready to launch his anchor, where it will go is marked by a thick grey line. After a short period he will throw his anchor at the mark, destroying any minions in its path. Will begin reeling in the anchor, leaving him vulnerable
Tip: During his swinging phase, it is essential you run away from him, some obstacles can be destroyed by his anchor so use that to make the area clearer to move around in. Dodge the thrown anchor and attack with all you’ve got but be ready to start running away when he retrieves his anchor.

Deacon Raphael
Attacks:
1. A horde of townsfolk will chase after the minions. Some melee and some are ranged. There are also molotov throwers in the group.
2. Once the horde is killed. Deacon will be thrown out of the building he is hiding in, and can be killed. Once killed the fight ends.
Tip: Invest in a group of range minions such as cultists and pick off the horde one by one, or invest in a huge tanky horde such as a horde of creatures to take them on head first.
Defeating bosses pt.2

The Lone Warden
Attacks:
1. With his horse, he will charge at your minions, dealing damage to any minion in the way.
2. He will pause, then raise his sword high in the air causing lightning to strike. Then green ritual circles will appear, becoming brighter and brighter before zombie arms begin slashing minions that are in the circle.
3. There are 3 ballistas up on the hills on each side, they are unreachable and cannot be destroyed, and will shoot bolts at minions.
Tip 1: When passing an area that is in the ballistas range, it would be unwise to remain in the path which will result in precious minion death. You can tell where the path is as it is marked with a shallow dug up trail leading to the other side of the area.
Tip 2: Timing attacks on the boss between its attack patterns is important, bad timing can result to minion loss.
Tip 3: Using range minions such as cultists and attacking the boss from a distance can provide you with more attack chances given you are dodging his attacks.

The Thistle Guards
Budakh:
Attacks:
1. They will move towards your minions, when they get close they will perform either two attacks.
a. Bash the minions with their shield
b. Slam their shield to the ground, creating a 3 part shock wave, similar to a woodsman except incredibly larger. While they are recovering, they will be vulnerable to attacks, this is the only time they are vulnerable.
2. If Rumata is killed first, Budakh will become enraged. They will run faster, the shield bash becomes a smaller ground slam attack, and the ground slam attack shock wave becomes larger.
3. While Rumata is on the gate, they will shoot cannonballs at your minions.
Upon reaching half health, Rumata will jump down with a fiery ring forming around them that spreads.
Rumata:
Attacks:
1. They will swing their sword at your minions, doing so a few times will make them cool down, making them vulnerable as they do so, this is the only time they are vulnerable.
2. If Budakh is killed first, Rumata becomes enraged. They will move faster, swing their sword more often and will form a fiery ring around them after their cool down.
Tip: Going towards them and attacking a short bit and retreating quickly then repeating can avoid losing minions, be prepared for Budakh’s shockwave though, you’ll want to retreat quite far as it is huge.

Witch of the Forest
This following section assumes you are not sparing her.
Attacks:
1. She will cast a fiery ball towards your minion. Upon being touched it will explode, killing any minions in close proximity
2. She will surround herself in a ring of fire, she will spread the fire horizontally. During this spell she will make 3 duplicates of herself.
3. She places down cauldrons that shoot gooey contents at your minions, where it will hit will be marked by a circle that enlarges as it gets closer to the ground.
Tip 1: Using range minions like cultists and attacking from a distance while avoiding getting too close to the witch and her duplicates can be a good tactic.
Tip 2: Destroying cauldrons won’t hurt and can decline the amount of things to avoid during this fight.
Tip 3: When you notice the witch or her duplicates begin shooting a fireball be ready to retreat and avoid the ball as it can put a large dent on your horde.
Defeating bosses pt.3

Count Volgrave
Phase 1:
Attacks:
1. Will choose between two weapons, he will raise the chosen weapon to the air before attacking
a. Shoots a fast firing gun at your minions, rolling away from the direction of your minions every now and then
b. Dashes towards your minions with a sword, dealing high damage to minions in his path.
He will continue to switch between the two weapons throughout his first phase.
Phase 2:
Attacks:
1. Spins around towards your minions in fast speeds, doing so for a short while.
2. Raises one of his tentacles and begins summoning falling rocks from the sky in random locations close to your minions.
Tip 1: During his first phase, moving around and through the tubes can be helpful in dodging his attacks.
Tip 2: There a few tubes with fishman inside, breaking it can free the minion. There is one tube with a swordsmen inside. It is advised to deal with this before his second phase
Tip 3: Using range minions can be useful during this fight, as for the most part you’ll be running away from him.

The Archbishop
Attacks:
1. Floats in the air and fires three large spheres towards your minions, killing them instantly upon touch.
2. Loads a mini gun before rapidly firing at your minions, dealing rapid damage.
3. Shouts loudly that causes chandeliers to fall from the roof, killing any minions that are below it. They can be seen coming from their shadow that darkens as it gets closer to the ground. Upon hitting the ground fire will spread.
4. The archbishop pulls out his staff, and fires a huge death ray and spins around once, instantly killing any minions that gets caught in the ray.
Once you have taken out his shield, he will be vulnerable to attacks. Once a fair amount of health has been taken out, he will reform his shield. You’ll have to repeat this a few more times.
Tip 1: As intimidating this boss is, most of his attacks can be made futile by positioning your minions behind a pillar. If you are in the right position, the attack will be completely blocked by the pillar.
Tip 2: Because for the most part you’ll be behind a pillar dodging his attacks, melee minions are as good as range minions.
Tip 3: You will most likely die a few times, likely from screwing up your position. It is important that you keep your head in the game and keep learning where to position your minions behind the pillars.
Tip 4: These are the best times to attack him.
a. After you have dodged a part of his death ray attack, attack from the area where the death ray has already been.
b. While he is summoning falling chandeliers, while keeping a close eye on their whereabouts.
c. Briefly while he is switching between attacks.
Unlocking apostles

Apostles are beings that have proved themselves worthy of being Dagon’s apostle. They are chosen at the start of a level and each grant special abilities and starter minions. You will start off with Aghra De Pesca, but as you play you’ll unlock more and more by completing their requirements.

Aghra De Pesca
Minions: 25x swarm
Abilities: Stronger swarm, worms explode
Unlock requirements: Unlocked at the start of the game
Notes: A great starter, having a huge pack of swarms can be quite deadly at the start of the game.

Ivan Dorovich Xlll
Minions: 3x spitters, 4x worms
Abilities: Choose only from 3 cards, has access to cheat cards
Unlock requirements: Collect 50,000 gold
Requirement notes: This takes time to unlock, to minimize the time, destroy all the barrels you see and kill all the townsfolk and hunters that drop gold (let none escape!).
Notes: Best for players who want a challenge and those who don’t mind a bit of RNG gameplay.

Don Moros Momos
Minions: 1x Madman, 1x Flesh, 1x Toad
Abilities: Randomize minions on every 10th kill (pay gold to randomize minions)
Unlock requirements: Beat 30 rounds in arenas
Requirement notes: Its probably best to attempt this when you have gotten further in the game, after unlocking the hermit and the creature cards.
Notes: Again for players who want a challenge and don’t mind a bit of RNG gameplay.

Saint Traeton
Minions: 6x Cultists
Abilities: Can sacrifice cultists at alters
Unlock requirements: Kill 50 humans/dogs with cultists
Requirement notes: You unlock cultists quite early in the game and they are really handy to have so this shouldn’t be too much of a task to unlock.
Notes: Taking account that cultists can be handy even in the endgame this is a great apostle for starters, sacrificing cultists will award you with very powerful minions.

Silaris
(Best girl)
Minions: 3x Fishman
Abilities: Fewer minions => more strength
Unlock requirements: Complete 10 rooms with 5 or less minions
Requirement notes: I recommend doing this at the very start, as the game is at its most easy, preferably when you have cultists.
Notes: This apostle is great for players who use tanky and smaller hordes. Using the creature along with spitters, the hermit and the shaman can be an absolute beast of a horde and very effective against arenas(more on that later).
Personal note: If you don’t think shes beautiful… we can not be friends.

Saint Kristina Blavatshy
Minions: 1x Lich, 3x Spectres
Abilites: Can’t summon minions, spectres never expire
Unlock requirements: You need the Lich to kill 150 humans/dogs and turn them into spectres
Requirement notes: The Lich has ranged attack like cultists, but it would be wise to combine them with other minions as only 1 Lich summons at every summon.
Notes: For players who want to play a bit differently, do note you only get 1 Lich, and since a spectre can only be summoned with a Lich it would be advisable to take extra precaution to protect the only Lich because you cannot summon minions with this apostle.
Area maps

Here are the maps of all the areas in Sea Salt. Refer to here if you need help getting to a certain area.
Xthu-Tho R’yal
1. Xthu-Tho R'yal-Sacrificial Site | ⌄ 2. Xthu-Tho R'yal-Road | ⌄ 3. Xthu-Tho R'yal-Garden | ⌄ 4. The Fale Lady-Lower Decks | ⌄ 5. The Fale Lady-Ammunition Deck | ⌄ 6. The Fale Lady-Weather Deck(boss battle)
Karlshaven East
1. Main docks | ⌄ 2. West Construction Block | ⌄ 3. East Construction Block | ⌄ 4. Dock 46 | ⌄ 5. Fish Market | ⌄ 6. Eastern Docking Bay | ⌄ 7. Docking HQ | ⌄ 8. Construction & Trading(boss battle)
Karlshaven North
1. Main Docks | ⌄ 2. Central Street | ⌄ 3. Central Market | ⌄ 4. Old Town | ⌄ 5. Fish Market | ⌄ 6. Aghra Street | ⌄ 7. Back Alley | ⌄ 8. Iron Bay | ⌄ 9. Iron Square(boss battle)
Rotwood Road (Karlshaven Market)
1. Eastern Exit | ⌄ 2. Karlshaven Outpost | ⌄ 3. Turnpike | ⌄ 4. Road | ⌄ 5. Macgrigor's Outlook | ⌄ 6. Campsite | ⌄ 7. Crossroads | ⌄ 8. Village-Entrance | ⌄ 9. Village | ⌄ 10. Old Mining Road | ⌄ 11. Traeton Bridge-Stairs | ⌄ 12. Traeton Bridge | ⌄ 13. Traeton Ruins | ⌄ 14. Hogstead Frontier(boss battle)
Rotwood Swamps (Innsburgh-Harbour)
1. Outskirts | ⌄ 2. Logger's Cabin | ⌄ 3. Lumber Camp-South | ⌄ 4. War Machine Factory | ⌄ 5. Lumber Camp-Meadow | ⌄ 6. Lumber Camp-North | ⌄ 7. Crossroads | ⌄ 8. Lodge | ⌄ 9. Trading Post | ⌄ 10. Macgrigor Estate | ⌄ 11. Warfront | ⌄ 12. Training Camp | ⌄ 13. Traeton Ruins | ⌄ 14. Hogstead Frontier(boss battle)
Hogstead (North)
1. Approach | ⌄ 2. Basker Farmstead | ⌄ 3. Basker's Barn | ⌄ 4. Docks | ⌄ 5. Marlon's Farm | ⌄ 6. Wheat Road | ⌄ 7. Blavatsky's Farm | ⌄ 8. Orchard | ⌄ 9. Argo's Mill | ⌄ 10. Argo Fields | ⌄ 11. Ugarit Outskirts | ⌄ 12. City Entrance(boss battle)
Hogstead (East)
1. Approach | ⌄ 2. Basker Farmstead | ⌄ 3. Basker's Barn | ⌄ 4. Docks | ⌄ 5. Ritual Fields | ⌄ 6. Sally's Farm | ⌄ 7. Basker Field | ⌄ 8. Blavatsky's Farm | ⌄ 9. Hank's Pumpkin Patch | ⌄ 10. Plateau Fields | ⌄ 11. Sacrificial Lake | ⌄ 12. Ugarit Fields | ⌄ 13. Witch's Hut | ⌄ 14. Outer Wall(boss battle)
Nova Ugarit Center (Hogstead road)
1. Main Road | ⌄ 2. Crimson Tree Chapel | ⌄ 3. St.Sanguine Square | ⌄ 4. Old Ugarit Memorial | ⌄ 5. Station | ⌄ 6. University Park | ⌄ 7. Moros Avenue | ⌄ 8. Trade District | ⌄ 9. Thistle Memorial | ⌄ 10. Alley | ⌄ 11. Charging Facility(boss battle)
Nova Ugarit Sewers (Hogstead Farms)
1. Hole in the Wall | ⌄ 2. Smuggler's Docks | ⌄ 3. Smuggler's Den | ⌄ 4. Holding Cells | ⌄ 5. Hall of Suffering | ⌄ 6. Old Church Storage Room | ⌄ 7. Volgrave Lab & Torture Chamber | ⌄ 8. Charging Facility(boss battle)
Nova Ugarit Gardens (South)
1. Garden Entrance | ⌄ 2. Garden Avenue | ⌄ 3. Canal District | ⌄ 4. National Museum | ⌄ 5. Traeton Park | ⌄ 6. Dagon Street | ⌄ 7. Cathedral District | ⌄ 8. Cathedral Approach | ⌄ 9. Grand Cathedral(No boss battle)
Nova Ugarit Graveyards (North)
1. Entrance | ⌄ 2. Temple Site | ⌄ 3. Macgrigor Family Mausoleum | v 4. Northern Graveyard | ⌄ 5. Walk of the bishop | ⌄ 6. West | ⌄ 7. West Entrance | ⌄ 8. Cathedral Approach | ⌄ 9. Grand Cathedral(No boss battle)
Collecting the cards

I could tell you how to unlock all the cards in this guide. But there is already a guide that goes into great depth about each card and where to find them. Please support the first ever guide created by Mortecrane.
https://steamcommunity.com/sharedfiles/filedetails/?id=1892353650
If you get stuck on which area is where, refer to ‘Area Maps’ section in this guide.
666 Kills

For this achievement you’ll have to kill 666 people. Just play through the game and you’ll get it sooner or later.
Bad Devs

For this achievement, you are required to kill the devs (no not in real life, put that knife down).
They are found in Nova Ugarit – Trade District in Nova Ugarit Center, you’ll have to go through Hogstead North in order to get to it.
At the top of the area you will encounter a balista, destroy the balista but do not kill the operator, spare them for a short while so they can get to the other balista, dodge the attack to destroy the hidden barrier next to the balista you just destroyed. Go through the secret passage to get to the devs, then kill them. A fancy achievement will pop up congratulating you for taking out the fourth wall breakers.
Super Secret Achievement

At the end of the credits, with the noble words ‘Thank you for playing’ do not leave the screen, wait a while.
Then you’ll notice a ship is moving, then it will stop and a hunter will come out.
You get to control the hunter!
You must make it across a few areas back to the Grand Cathedral. In each area you must shoot and kill all the minions you find, be careful to avoid getting too much damage dealt to yourself as you don’t heal. Once you’ve made it to the Cathedral inside, next to the well where the great archbishop had fallen you’ll be faced with swarms and swarms of never ending minions. To this you need to die, then you will unlock a very special apostle… the evil version of El Huervo, the hunter you just played.
Congratulations you just unlocked the super secret achievement that only very few people know about (not anymore tbh).
Hard Salt

Firstly have you beaten the game yet? Now, have you unlocked the ‘super secret achievement’ yet? No? Then please do that before proceeding to this section.
You must complete the game in hard mode which is unlocked after you’ve beaten the game on normal at least once. As scary as it sounds there is one little trick you can do to make this game mode decently simple to beat.
For this we are going to beat the whole game with one apostle, the legendary El Huervo. He can be very powerful in later parts of a level. Here are a few tips to have while doing this.
1. El Huervo is weak at every start of a level, improve this by leveling up his attack (you can upgrade him the exact same way you summon minions with other apostles). Level up his attack until you start noticing enemies are dying to many less shots, if his health falls down less than half then upgrade ‘the health’ this will heal him all the way back to 100%.
2. It can prove effective to hold onto gold bonus upgrades as a ‘med kit’ in a sense, if you’ve just killed every enemy in an area and have the gold bar filled up it wouldn’t hurt to hold onto it to heal if you need to do so on the next areas to come.
3. During a boss fight, you only have 1 minion to watch, this is quite beneficial as you’ll be able to dodge attacks quite effectively without having to worry about wondering minions. If you feel the need to, upgrade ‘speed’ to move faster.
Once you’ve slain the archbishop (again) the achievement will pop up congratulating you for being one hell of a hunter.
Beating the arenas

This will probably be the last achievement you’ll earn. There are 4 arenas to conquer. I recommend getting every card before attempting this and unlocking silaris.
For this guide we will be using silaris as the apostle.
An effective horde goes as followed, the creature, spitters, the hermit, the drowned and shaman. This is an absolute beast of a horde and will highly likely grant a win. Even if you don’t get the bonus from silaris if you are to lose your horde and a creature remains, that creature will have the best chance of surviving and allowing another summon from a gold bonus with the full power of silaris’s bonus.
But you have to play your cards right!
1.Swordsmen and dogs are a challenge to deal with, especially when grouped up. Learn to dodge them better if needing to do so.
2. Leave the gold on the ground for emergencies if your horde becomes small. You can pick these up and get a bonus summon without killing anything.
3. For the arenas with church, its best to just go in for the kill, I found this tactic very effective with the horde idea listed above, with a few creatures and spitters, the church can go down in seconds, and with the hermit and drowned, this can protect you while you shred down the church.
4. In the graveyard arena, observe closely when gravestones and buildings spawn around the place, you may get yourself stuck or cornered by enemies.
End

Thank you for reading this guide, I hope it has helped you get that awesome 100% in Sea Salt. If you liked this guide, please do rate, like, or award it.
Thanks especially to the following people:
YCJY games – For making Sea Salt
mrmanet – Creator of VCR Mono, the free to use font on some of the pictures
All the special people in my life who make up my life
And YOU. Yes you, for reading this guide and hopefully getting something out of it

Hope you enjoy the Guide about Sea Salt – Ultimate Guide, if you think we should add extra information or forget something, please let us know via comment below, and we will do our best to fix or update as soon as possible!
- All Sea Salt Posts List


Leave a Reply