This guide will help you trough the painfully steep learning curve of Neos when starting out in desktop mode. It’s best used as a complementary guide to more specific guides that you can find on the internet that might skip over some desktop mode specifics.
Getting started
Head over to https://wiki.neos.com/Basic_Controls – [neos.com] and read the Desktop/Screen mode controls. If you have multiple monitors, that’s worth being kept on the side as a reference. Also it’s probably a good idea to checkout some of the tutorial worlds in Neos.
Even better would be though if you’ve got friends who play Neos or if you are brave enough to talk to strangers. Ask them for help if you’re having trouble! Most Neos users seem more then happy to try to help if they’re not busy.
Cheatsheet for VRChat migrators:
Here’s a quick rundown of similar but different things between VRC and Neos:
| VRChat | Neos |
|---|---|
| R: Action Menu | T/MouseWheelDown: Context Menu |
| Esc: Quick Menu | Esc: Dash |
| Left click: Moves things & Interacts | Left click: Use things |
| Right click: Show intractable things | Right click: Move things |
| F1-F8: Gestures | F1-F8: Various neos keybinds |
| Number row: – | Number row: Various tool keybinds |
| M: – | M: Toggle mute |
| V: Push to talk or toggle | V: Push to talk when muted |
Avatar import
You’ll want to already have an avatar saved up on your computer.
Press escape to open your dash menu, and using the bottom buttons navigate to the file browser:
From there you’ll want to navigate the folders to where your model is. Double click the model file, and after closing your dash menu you should see the model importer.
In the model importer you’ll want to select “3D Model”, “Regular / Avatar”, then the scaling you’ll want, “Auto Humanoid Height” for example should work well for human shaped avatars.
From there you can just run the import, or optionally tweak some of the advanced settings. For example I had to tick the box under advanced settings to force the character into a T-pose to get my model to import correctly. Note though that this will only import the model itself and if you’re lucky, the textures & materials. If you’re coming from VRChat you might be a bit disappointed to learn that all your cool animations aren’t going to work in Neos. Later on though we’ll take a look at how you can setup some basic gestures with Neos with just the blendshapes.
Avatar creator
You’ll then want to open your dash menu again, and head back to the home screen.
From there you should find and click a button that says “Avatar Creator”. It’ll spawn a headset and the Left and Right (Red) hand, as well as the menu for creating the avatar. You can try pressing trough the buttons to for example try to autoalign the hands. You’ll most likely need to move and rotate the placements manually though.
If you followed this guide closely, you’ll already know that you can drag things by holding right click whilst looking at them. You can also then rotate the items while holding onto them by also holding e on your keyboard. Try to match the positions and rotations with your avatar as closely as you can, but if you’re only going to be on desktop, it won’t matter too too much to get them exactly right. After you’re done you can press the create button, or alternatively go trough the next section before finalizing your avatar.
Once you have finalized your avatar though, hold right click on it and open the context menu (with scrollwheel down or t), and save to inventory. Note that you should go to your inventory and select the folder in there you’ll want to save the avatar into before you try saving it, as currently there is no way to move things. After you have saved your avatar, you can press the heart button in your inventory to favourite it (aka automatically use it as your avatar when you join instances) or change into it by pressing the lightningbolt icon.
Fixing up avatar textures & materials
If you are happy with how your avatar looks after the import, you can skip this section.
If you’re missing textures though or the materials look off, keep reading.
To start off, you’ll want to open your inspector. To do so, open the inspection tool with pressing 2, and then looking at your avatar, use your secondary action (mouse4 or t) to select it (purple lines should appear around the selected thing). You can use your context menu to also unselect everything and try again if you accidentally selected the wrong thing.
After having a part of the avatar selected, open the context menu and open the inspector.
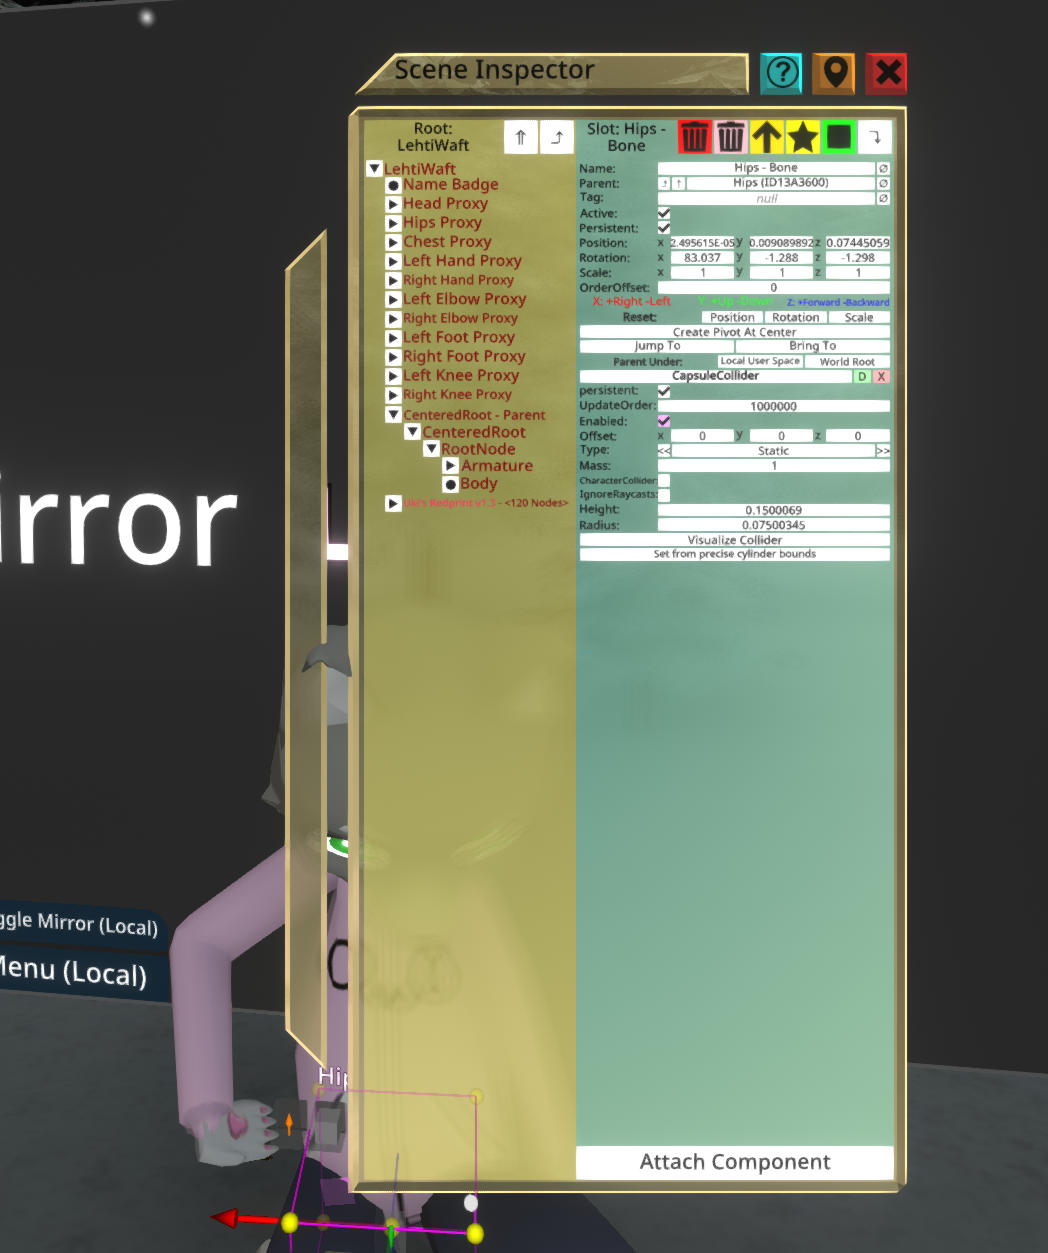
In the inspector, you’ll want to hit the up arrows on the left side until you find the RootNode which should contain your model’s Armature and body. Select the Body by double clicking on it.
On the right side, with a bit of scrolling (with scrollwheel or grabbing it with the left mouse button and moving your mouse up/down), you should find a section called SkinnedMeshRenderer.
From there you can press the small arrow on the left side of the material to view what’s wrong with it. If for example the MainTexture is white and says null, it means it’s missing a texture file (an image).
The same way as you got your model into the game (so main menu ->File browser), find the texture file and import it. The main texture file is often called Albeido, Color, or just Texture. You’ll want to import the file as “Image / Texture”.
How to actually drag the image onto the texture slot:
You might just think “oh click on the image and then click on the empty slot”. But no. As Neos is designed primarily for VR, the controls kind of expect you to have two hands. It is possible to do on desktop though. You’ll want to first start holding of the image with right click, then go to the inspector, look at the empty slot, and then press left click, all whilst still holding the image with right click. If the image is in the way of the inspector, remember that you can rotate it while holding it by just holding e and moving your mouse,
Upon doing it successfully the slot on the inspector should update with the image and details of it. If you have textures for the normal map, emissions, metallic maps or so on, you’ll want to repeat this process for all of them.
You also might want to tweak some of the numeric values, but what you want to tweak them to completely depends on your avatar and texture files, so experiment if you’re unsure!
As quick tip of similar janky controls, you’d do a similar thing with holding an image and opening the dash in order to update your profile picture.
Gestures / blendshapes with LogiX
Now that you hopefully have a working avatar, it’s time to learn a bit about LogiX, the part of Neos that you’ll need to use if you want to setup gestures. For this, I’d really recommend having someone who already knows a bit about it with you to ask questions from when something doesn’t make sense, as LogiX is quite a complex system.
The very basics
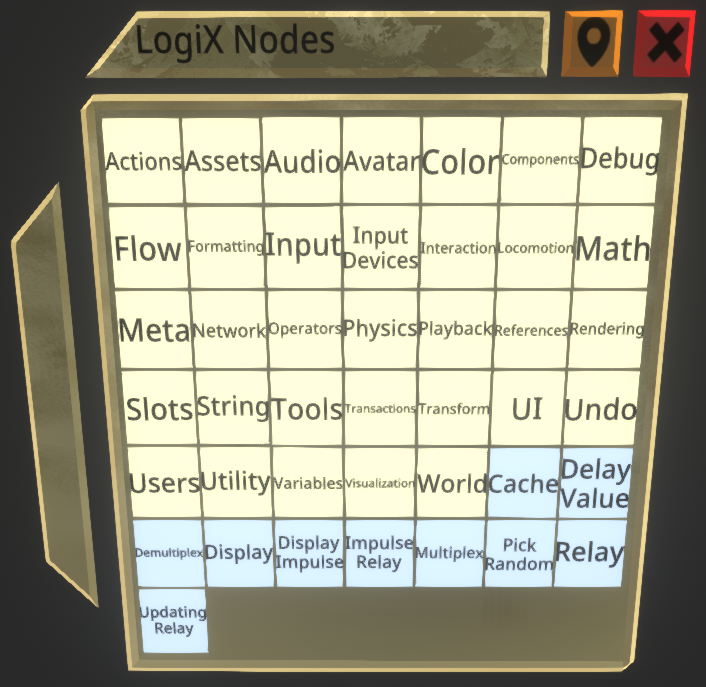
Equip the LogiX tool by pressing 3 on your keyboard. Then with the context menu, open the node browser. From there you can explore what all kinds of LogiX nodes are available to you. You can also explore the Neos wiki a bit if you want to read more about them.
In order to spawn a node, first make sure you have the LogiX tool equipped, then double click on a node from the browser, and then double click an empty space in the world.
If it has inputs/outputs, you can drag them from compatible nodes to each other via holding left mouse button.
Desktop gestures
Hopefully by now you’ll know how to navigate the inspector. A tip that you might not know is that by pressing F6, you can go into a freeform camera mode where you can also select yourself with it by pressing the context button whilst hovering over yourself. You can get back to standard mode with the F5 third person camera mode toggle. That way you can easily find your RootNode and the Body under it which contains the SkinnedMeshRenderer, which will hopefully have all of your bledshape weights in it.
If you want to modify the value of the weight, you’ll need to extract the driver for it. To do so, equip your LogiX tool, in the context menu set it to “Extract: Drive Node” mode. Then in the inspector, grab the text name of one of the blendshape weights with right click, and press the Secondary Action button (R/Mouse4).
You should now have a input/float node (white box) as well as the actual drive node (the arrow).
You’ll want to replace the float input node with your own input to the drive node in order to change the value via other means than typing the value you want into an input box.
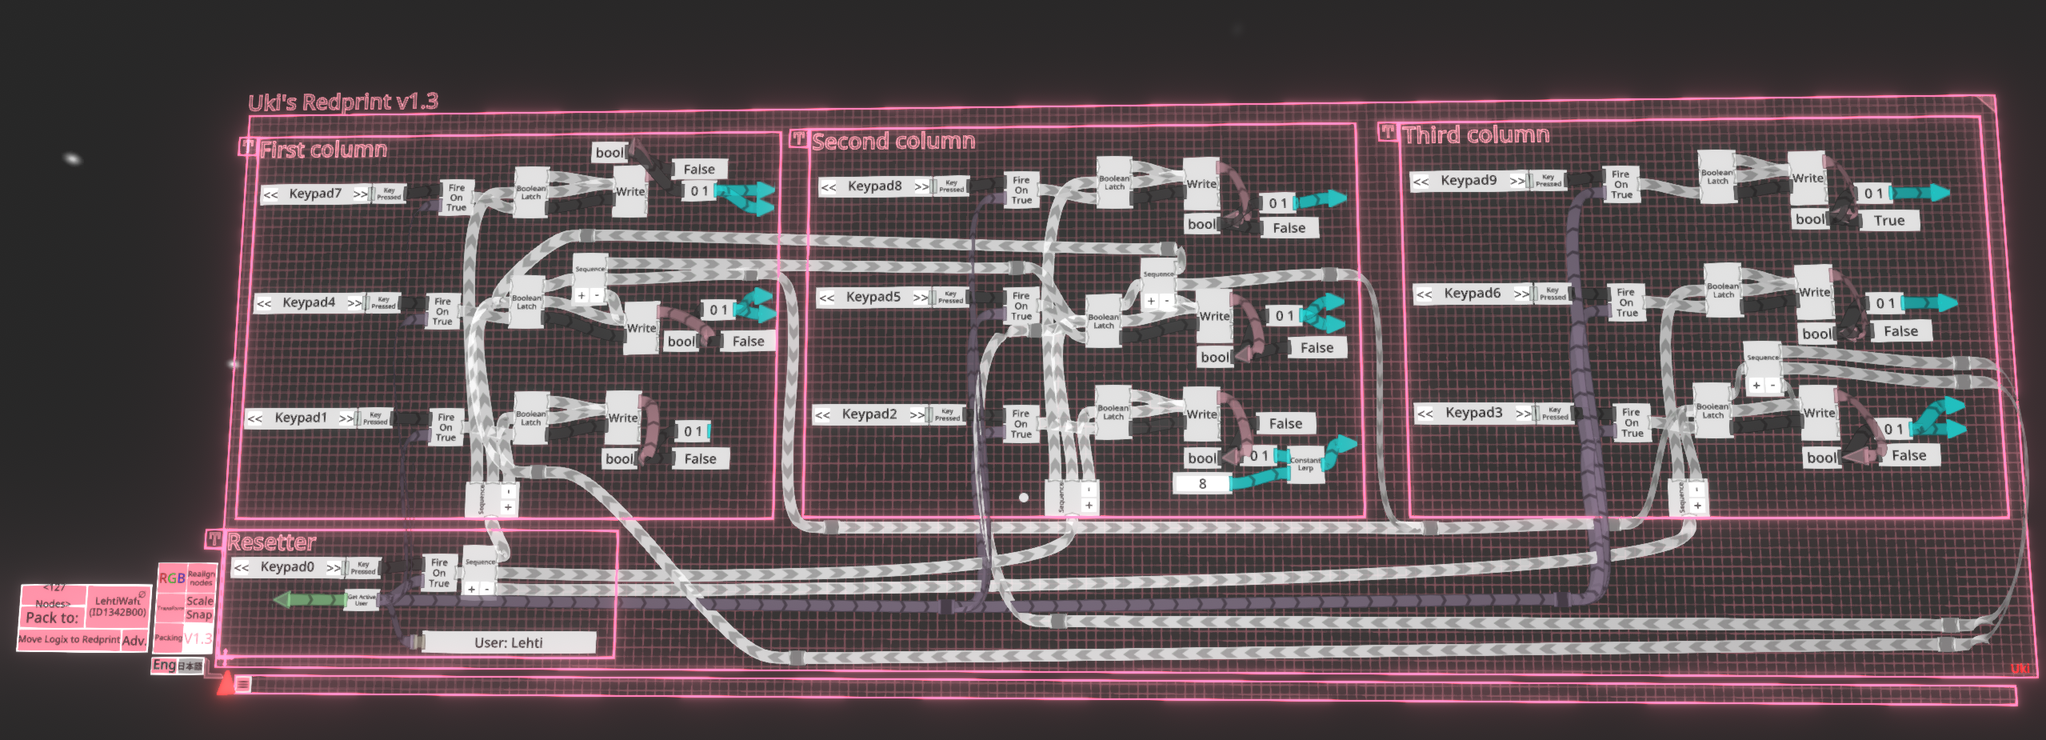
For a basic gesture system you’ll need to:
- Detect when a certain key was pressed
- Ensure that the key press came from the person wearing the avatar
- Have the impulse turn into a toggleable value
- Write the value to a variable so it synchronizes to other users and late joiners
- Finally turn the value from a bool to a numeric value (0/1)
- Direct the value to the drive node of the blendshape weight.
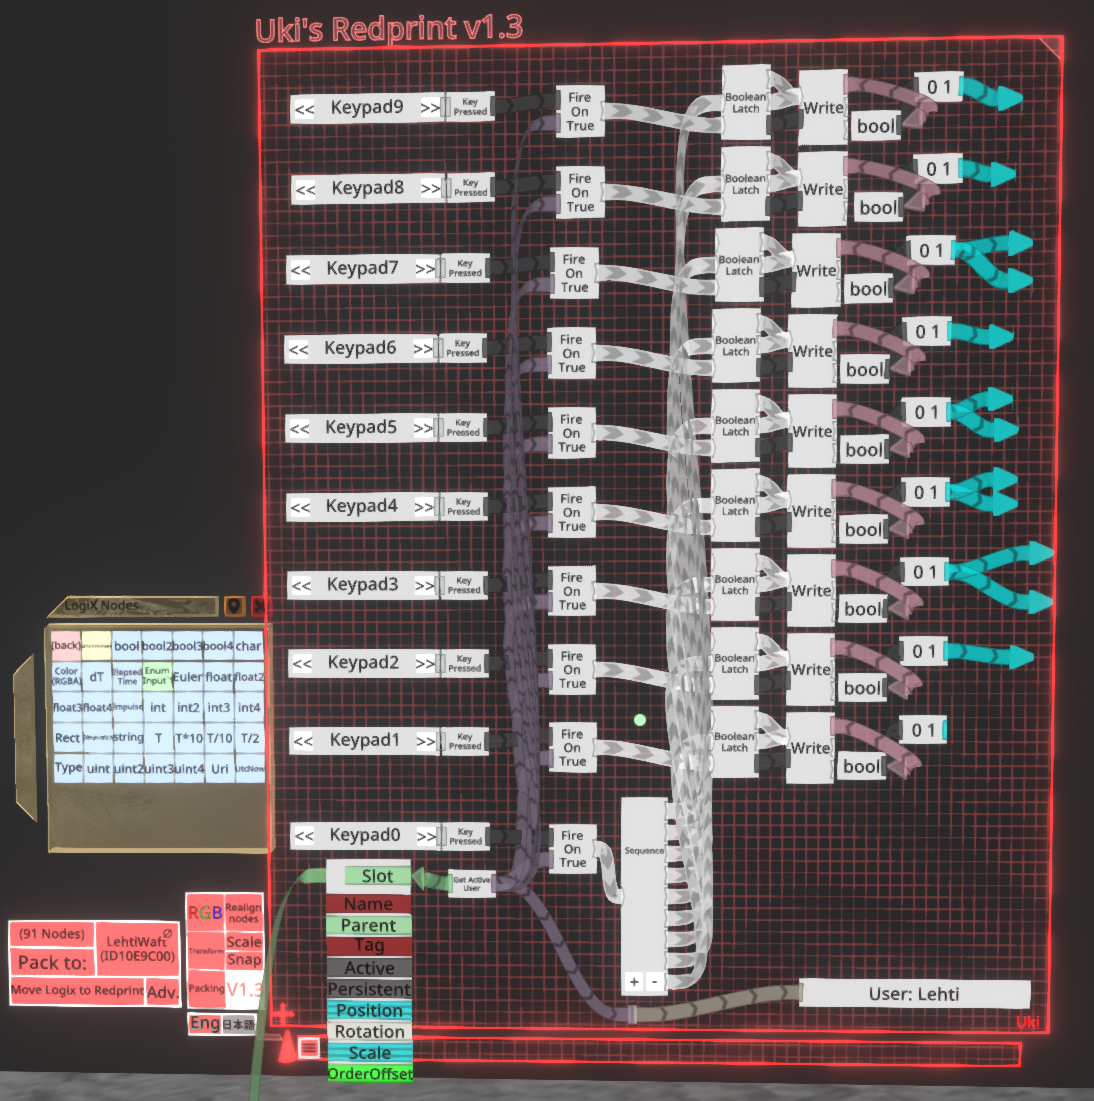
You can look at the very simple example I provided, where each Keypad number excluding zero toggles a value, and zero resets them all to false.
The “slot” that the “Get Active User” is pointing to can be gotten with your LogiX tool in “Extract: Interface” mode by dragging your whole avatar’s actual root (the thing which Name Badge and different Proxies are under) from the inspector for example and then using the secondary action.
After that it’s all really just up to personal preference as to if you want to wire things up a bit differently. As another example, here I’ve made some of the gestures ensure that some other ones are off, and also made to the Keypad2 gesture animate instead of instantly switching:
Packing & Unpacking
After you are done, you should pack your changes into your avatar. With the Redprint you just drag your avatar’s root into the packing menu, and press pack. If you want to unpack a Redprint easily, just spawn a Redprint, drag the object from the inspector to the Redprint’s packing slot and press unpack.
If you’re not using the Redprint, packing is a bit more complex. Firstly, make sure you have the LogiX tool equipped. Then you’ll need to select an object from the inspector’s left side, hold right click on it, open the context menu and then set it as the packing root.
After that, whilst not looking at any logix components, start holding the secondary action, then look at some of the LogiX components, and then let go of the secondary action button. To unpack, you’ll want to grab the object in the inspector with right click and while holding it open your context menu, and select unpack.
Remember to save your avatar by going into your inventory and pressing the blue arrow button, and the favorite it if you want it to be your new default!
Extra tips & tricks
The most important tip of all; When you’re in the middle of making something, make sure that you have auto saving on. If you crash and you didn’t save, you’ll lose all of your progress. You can go enable it under the Session/Settings if you’re the session host.
Aligning UI elements
Whilst holding an UI object like the inspector for example, if you left click it aligns it to the closest straight angle.
Community folders
There are loads of very cool things you can find from other people’s public folders, so be sure to dig trough them a bit if you’ve got time to spare. You can find some of them by visiting a world called “The Directory”.
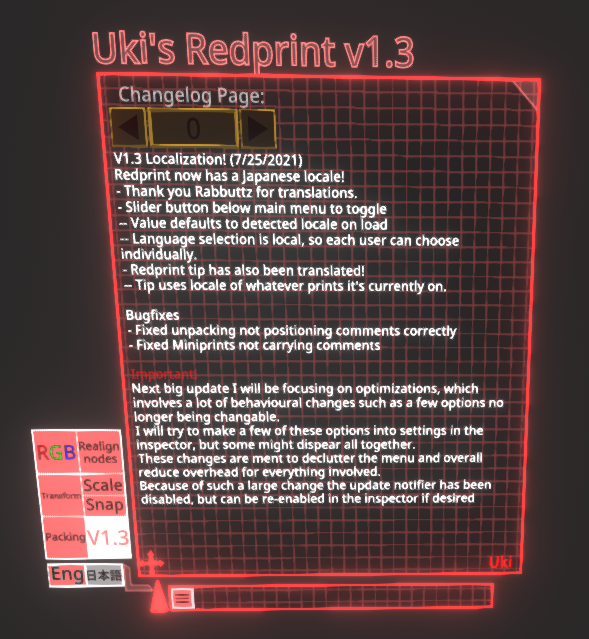
I myself found Ukilop’s Redprint very helpful, as it helps with organizing things and duplicating multiple different nodes. You can search for Uki in “the directory” world for example to find their public folder. With the Redprint you can grab and delete the changelog after spawning it, and the just drop nodes onto the plane and it’ll automatically align them. But the Redprint and the tool that came with it allow you to select regions by holding left click whilst looking at the Redprint and do a bunch of cool things with them, like moving or duplicating or adding comments to whole regions at once.
LogiX on a plane
If you want to stick to the standard LogiX tool, you can still tile your nodes neatly by holding ctrl and left clicking on a LogiX node. From there you can grab another node with right click, and left click once whilst holding it to tile it to the same plane. You can then hop to it by holding ctrl and left clicking on it. Or you can also start holding ctrl and hold right click and move the camera around, and use the mouse wheel to zoom.
Feedback / Comments
If this tutorial helped you be sure to leave a like or award or whatever is the popular attention begging sentence on steam ;P
Also if you think that there’s something wrong or that could be improved with it, do leave a comment down below! I’m by no means an expert, but I have very recent memories of the most painful things I had to learn which I tried to address in this tutorial.
I hope you enjoy the Guide we share about Neos VR – Cheat sheet for VR Chat Migrators; if you think we forget to add or we should add more information, please let us know via commenting below! See you soon!
- All Neos VR Posts List



Leave a Reply