
All details on hunting, strategies for each prey item, and other details to help with a successful hunt across multiple game-modes.
Disclaimer
As time passes and the game improves, many details of hunting will change along with it. This has been written for the Patch v1.0.8e game version, with recent patches for 16th of January, 2022, and upwards with patches up to Patch v1.0.8g from 31st of January, 2022. This will cause the document to need alterations, new details added, and possibly new strategies to be reworked and/or added.
(Last update version: Patch v1.0.8g (Released on 31 January 2022)
These are all also based on personal experience, research, and techniques used by myself and others I’ve worked with. This will update as new tactics are found, researched, and tested with various wolves of different stats, as well as different game modes. The only content not tested personally were the health/food value ratio, which has been referenced off of the Wiki. These are not the exclusive ways to hunt each prey item, and it is entirely always the choice of the player. These are just the easiest strategies for myself that I have used for the game.
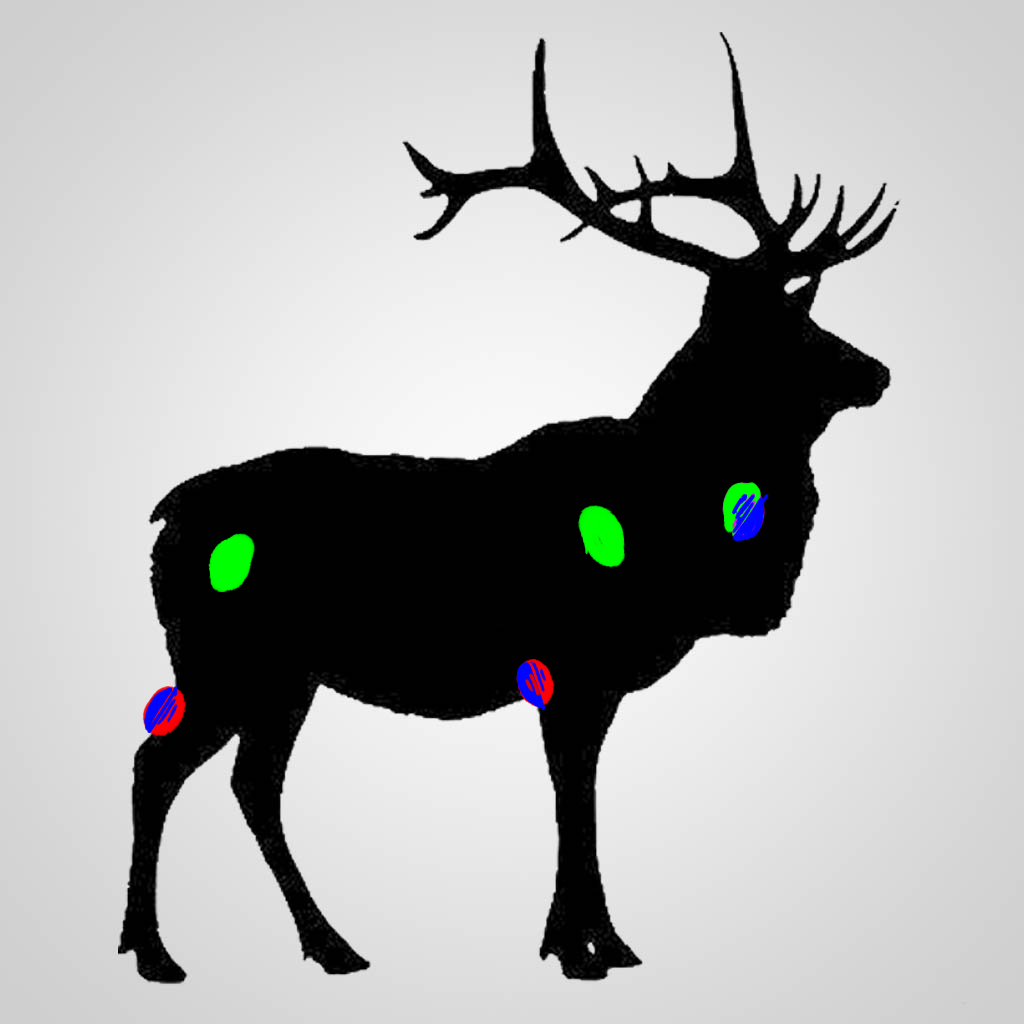
All artwork from examples of each prey-type is from free clipart resources. They will be changed in the future to personal artwork, and are currently placeholders to visually show the available attack points of each prey item.
Prey, sorted by Food Value %
Prey, sorted by Food Value %
Animal … Type | Food Value … (HP)
✤Bison…………..Bull………..| 1000% … (5500)
★Elk………………Bull………..| 600% … (1800)
✦Moose…………Bull………..| 500% … (2500)
★Elk……………..Cow………..| 400% … (1100)
★Elk……………..Spike………| 400% … (1200)
✦Moose………..Cow………..| 350% … (1800)
✦Moose………..Calf…………| 222% … (1100)
★Elk…………….Calf…………| 200% … (560)
✶Mule Deer…..Buck……….| 180% … (900)
✶Mule Deer…..Doe………..| 110% … (650)
✶Mule Deer…..Fawn………| 60% … (300)
★Elk…………….LS Calf…….| 50% … (175)
✦Moose………..LS Calf…….| 50% … (200)
✶Mule Deer……LS Fawn…| 30% … (125)
❅Beaver………………………| 40% … (500)
❅Snowshoe Hare………….| 5%
⋆Water..(Every 4 Hours)…| 5%
Prey, sorted by Break Even Ratio
Prey, sorted by Food Value %
Animal … Type | Food Value … (HP) | Breakeven Ratio
The breakeven ratio is the balance between the risk/reward system. The lower the percentage, the less risk there is with hunting the animal with its food value/health balance. This is not to say one animal will be easier to hunt than the other; this is exclusively looking at their food value/health ratio, rather than other factors.
❅Snowshoe Hare………….| 5%……………………..0%
⋆Water..(Every 4 Hours)…| 5%………………………0%
★Elk……………..Cow………..| 400% … (1100)……73.33%
★Elk…………….Calf…………| 200% … (560)……..73.68%
★Elk………………Bull………..| 600% … (1800)…….75%
★Elk……………..Spike………| 400% … (1200)…….75%
★Elk…………….LS Calf…….| 50% … (175)………..77.78%
✦Moose………..LS Calf…….| 50% … (200)……….80%
✶Mule Deer……LS Fawn…| 30% … (125)………..80.65%
✦Moose………..Calf…………| 222% … (1100)…….83.21%
✦Moose…………Bull………..| 500% … (2500)……83.33%
✶Mule Deer…..Buck……….| 180% … (900)……..83.33%
✶Mule Deer…..Fawn………| 60% … (300)……….83.33%
✦Moose………..Cow………..| 350% … (1800)……83.72%
✤Bison…………..Bull………..| 1000% … (5500)….84.62%
✶Mule Deer…..Doe………..| 110% … (650)………85.53%
❅Beaver………………………| 40% … (500)………..92.59%
✦ i. Starting Details ✦
Hunting is one of the most important things within WolfQuest. Due to the complexities of mechanics, as well as newer updates and newer tweaks to hunting mechanics, this will be a collection of hunting tips and tricks for each animal, as well as general information about how & when to hunt, where to hunt, and health/food value of each animal.
Before anything else, hunting will require 2 things across the board:
- Stamina above 50%
- Taking as little damage as possible during the hunt (usually staying over 70% health)
When you, as a wolf, have less than 50% stamina as you bite, you will suffer a penalty that dampens your damage trade-off with the prey. It’s best to wait until your stamina is near-full before biting back down onto your prey; keep sprinting reserved for closing in on your prey and biting, and simply trot or even wait when the chance is given (often when prey is in showdown or occupied with something else.) Resting by sitting/laying down also can also quickly speed up your stamina.
I. Stamina, Hunger, and Health
Due to the importance of stamina A few ways you can boost stamina is:
- Keeping your hunger level at around 50-55%. This is an optimal time to get the most out of your stamina, as anything above 55% will cause a dip in stamina (and decreases more and more with a filling hunger bar), and anything below 50% will cause a dip as well.
- Stamina will be nearly entirely nullified when you have 0% wakefulness or 10% hunger and below. It’s best to eat hares and drink water whenever possible to keep your hunger balanced.
There are other factors to consider as well, such as health recover levels and your stamina
- Your hunger will deplete around 12% per full sleep in Accurate mode, 10% in Challenging, and 6% in Easy mode.
- Your health will recover at 20% in Accurate mode, 50% in Challenging, and 75% in Easy mode when you have enough food (at least 50% hunger)
I. Hunting With Multiple Wolves
Whether you have a mate, or are hunting with 5-8 wolves in multiplayer, it’s extremely important to be aware of when someone else is biting a prey animal. A prey animal such as an elk will kick you off after 3-4 bites. Doing so causes a bit of damage to your wolf – this affects all the wolves on the animal at the time. It’s best to wait until the animal has kicked everyone off before going in for a bite. Even then, you should only hold down for 2-3 hits of damage towards the animal, or only 2 rounds for things such as bulls/bucks of any species (elk, bison, mule deer, ect)If someone else is biting, make sure you have enough time to bite as well to avoid taking damage as soon as you latch on.
I. Searching for Prey [Elk Herd + Beaver Trail Locations]
Prey is easily found across all parts of the map. Depending on what you’re hunting, some prey may be stationary to a specific area (such as beavers) or travel across the entire map, no matter the season (mule deer, moose). Elk have specific ‘hunting grounds’ they can be found within, which change depending on the season. While this isn’t exactly specifically known, they are generally found within the areas below.
Please note these maps are unfinished and may be lacking a few herds. While herds stay in the general area (unless migrating during season change) they may drift around within an unknown ‘radius’, the markers are not exact.
Amethyst Mountain
Elk Herds
Autumn
Winter
Beaver Trails
Slough Creek
Elk Herds
Winter
Spring. Extremely unfinished and missing a majority of herds. This will be updated as more are found and securely located based on season.
Due to not yet knowing if herds fully and truly move drastically during the summer, there is no true summer map. Further testing will be done and herds will be accurately located based on if the migration is consistent.
Beaver Trails
I. Best Seasons for Your Prey
Each season has varying health levels of all the animals within it. While some seasons lack prey of a certain type at all (beavers will be gone during the winter months) a majority of prey will have weakened states at some seasons. The best season over-all for hunting is Slough Creek’s Deep Winter, specifically. This is where a majority of ungulates will be weakened and have very low health. It’s even possible to find bison that are low enough in health to take down solo.
During Summer, all ungulates will be at their healthiest. This is due to preparing for rut in the fall, and having ample amount of grass to eat. Your best bet during this time is to hunt the calves when they start walking. While this doesn’t give much food, it helps you avoid taking damage from attempting to hunt full-health ungulates.
Beavers will only be available during the autumn, spring, and summer months. This makes them easy prey for all seasons except for winter, in which all ungulates are at their weakest.
Hares and water are options for food at all times of the year, readily available in some parts of the map in one way or another. This is a small amount, but it can help buffer you into a ready range and keep you from starvation when prey is scarce for one reason or another.
✦Ungulates ✦
Running An Ungulate
One of the first things to learn when it comes to hunting down any ungulate within the game (elk, mule deer, or moose) is how to run an ungulate. The one group of ungulates that do not fall under this is bison, however that will be explained later in their own category.
Running a herd/individual increases your success during a hunt, as this expels energy and causes the prey to be tired out. This can lead to weaker prey to be ready to enter a showdown much quicker, as well as decrease the amount of damage they can do to you. On average, it takes about 1-2 minutes of consistently chasing an ungulate for it to become tired out enough for you to attack it efficiently without it fighting back or doing more damage to you. (Getting -50 damage or so to your wolf down to -8 to -20, depending on how low on health, tired, and what kind of ungulate it is.)
You will know when an ungulate is efficiently tired by seeing their damage ratio and their behaviours. Are they stumbling a bit more and no longer stotting (jumping/bouncing as it runs; mule deer), or are falling behind the herd more and more (elk)? Is it giving distressed sounds, or increasingly slowing down/entering a showdown (moose)? Check the damage ratio when possible – only hold down for one set of damage to be done to both the ungulate and you. See if the damage you do to the prey is higher than what it does to you. If it isn’t, try to keep chasing it for a bit longer, and check again. It takes a lot of patience, but it helps give you more successful hunts, and quicker recovery time due to saving your health.
Further tactics will be shown for each individual animal as they show in this list.
✧ ii. Elk ✧
Attack Points
Red – Only available during chase (2 in total on each side of the body)
Blue – Available during showdown (2 in total on each side of the body, 1 on the neck)
Green – Available during a takedown, when elk is on the ground (2 in total on each side of the body, 1 on the neck)
Elk are one of the most common animals within WolfQuest, as well as making up a majority of a wolf’s diet in-game and in real life. They are the easiest and simplest animals to hunt, but even they have tips and tricks for hunting down these animals.
Overall, one of the most effective hunting tactics is to run the herd, find any slow/weakened elk, and then avoid being kicked or jabbed. This is the most extensive part of the document, but they are one of the most complex prey within the game, having multiple behaviours depending on seasons, as well as having multiple types of herds.
Ii. Running A Herd
Mentioned before in Running An Ungulate, causing a herd to run off is one of the most effective parts of hunting and the foundation of finding a successful hunt.
One of the best ways to get a herd to start running is to do various emotes and possibly even snap at and bite a few elk. Saving health is one of the most important things, so exercise caution when trying to find an elk to bite. Is it far from the other elk? Are other elk nearby to hit you if you bite the elk? Do you have enough health to risk a few hits? If you’re unable to bite an elk, or want to save health, go the easier route: growl, snarl, and charge at the herd to spook them.
A strong, healthy herd will usually be very difficult to get to run; if it takes too long to get them to start running, it’s best to move onto a different herd that contains weaker elk. It may take much longer to track down another herd, but it’s extremely worth the time if you want to lessen the recovery time after a hunt, as well as avoid abandoning hunts for the day empty-handed.
Ii. Finding A Weak Elk
Weak elk will be extremely easy to find when you have the herd on the run. Behaviours of a weak elk are mostly consistent with a few traits.
A weak elk will usually:
- Be the very first to split off and run when a herd is starting to escape.
- Around 1-2 elk will start to run away, and multiple others will then follow. It’s best to check on the very first few elk that run, and see if they match any of the behaviours below to see if they’re worth a chase.
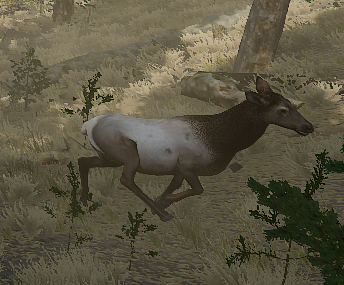
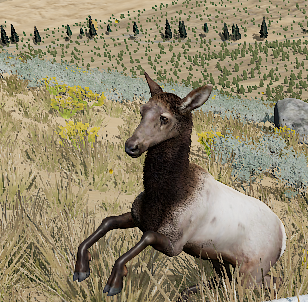
Head pulled back
Head normally
Have their head pulled back while they run (often below 50% health) - At the start of a chase, most herds may have many elk pulling their heads back. They will then correct themselves and run normally. These are still healthy elk; a weak elk will have their head consistently held back at all times.
Fall further and further behind the herd as time goes on. - Some healthy elk may fall back due to running into, or getting caught on, various things within the map such as trees, unsteady terrain, rocks, etc. Keep watch of any elk that fall behind, and see if they are able to quickly recover and reach the herd again.
Cow elk swinging around to hit the wolf.
Possibly enter a showdown with your wolf(having around 30% or less health left) - A showdown triggered by being close to a weak elk will have it suddenly stop without having to bite it. It will swing around and attempt to hit you with its front hooves, before standing still or trying to run back towards the herd. Chase it if it happens to try to run, and see if it attempts to swing again. If it does, it’s a weakened/tired elk!
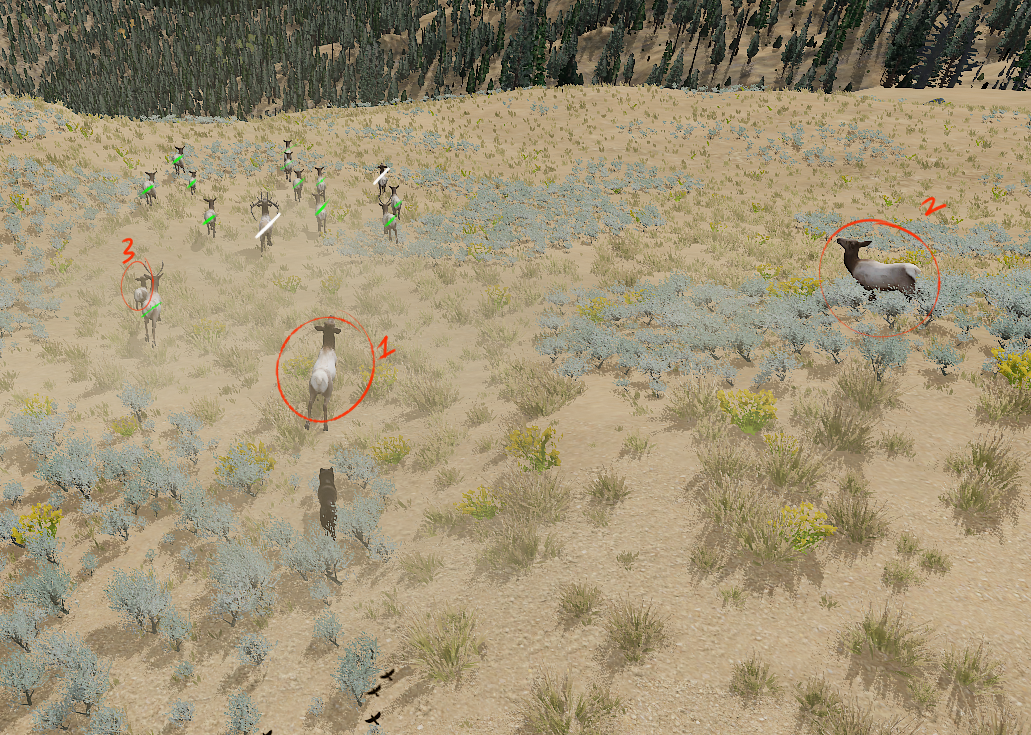
As a test view of a herd containing weak elk.
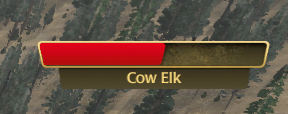
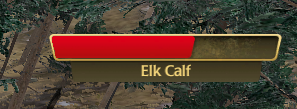
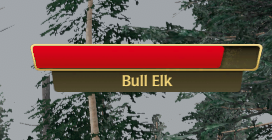
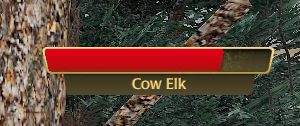
Green marks on healthy elk, weak elk have been circled in red. White marks for elk who temporarily showed signs of weakness, but corrected themselves when approached.

Ii. Bull Elk ✧
Hunting bull elk is a very risky ordeal for all wolves. Depending on difficulty, a full-health and full-energy elk can do up to 200+ of damage in a kick/jab.
Strategy
One of the best suggestions when hunting a bull elk (or any animal, for that matter) is only hold down your bites for a few rounds of damage. For bull elk, only bite down for 2-3 hits of damage before releasing. This will make sure you aren’t kicked off (causing further extreme damage to your wolf) as well as give you time to easily recover without risking a ‘stumble’ animation on your wolf, and falling behind your prey.
Rut Season & Recovery
Late Fall to Early Spring are one of the easiest times to hunt all male elk, including spikes. Some groups of elk will have little-to-no health. This is due to rut in the fall season; males will often cause damage to each other during brawls. In real life, males will eat little-to-no food while in rut due to consistent brawling with other males, and this still holds true within the game. When you locate a Bull Elk group during the fall season, sit back and watch for a bit. See if the males are brawling. A brawl has a specific collection of steps:
A single male from the Bull Herd will step up, bugle, and then wait. It may bugle a few more times towards the main herd. The bull from the herd will then step up towards the challenging bachelor group. They will circle each other a few times. After that, they may step away and go back to their own herds without injuring either side. However, there is a chance they will get into a brawl. They will lock antlers and attack each other, causing damage on both sides. This is a wonderful opportunity to step in and hunt either of the elk, picking the weakest and taking advantage of the damage they have obtained during the brawl.
The rewards of damage during the rut also affects them up to Late Spring. While elk will no longer have a bull elk in the main herds, bulls will return to their bachelor groups once again. They will still have the damage done from rut, as well as lack of food during the winter time. It is easy to get a herd (or individual) elk to start running. One of the infamous elk with little-to-no health is the Lupine Bull Herd, usually located near Crystal pond.
Ii. Elk Herds ✧
Herds consist of:
- Cows
- Calves
- Spike Elk
But during Fall, they will have a single bull elk that is within the herd. He will only be available during the autumn season due to rut, and then will return to a male group during the winter, spring, and summer seasons.
Herds including these types of elk will be the most common groups. While individuals in a herd are not as dangerous as a herd or individual bull, they still have high risks regarding themselves as a collective. Herding mechanics have since updated, causing herds to run away from you. However, there is a high chance that if you are not in a good spot, you could become trampled by a herd. This can end up taking a large chunk of a health, as tramples can cause up to -500 damage to your wolf or even worse, though only 1-2 hits of damage is more likely.
Strategy
One of the best options is to make yourself aware of the herd as a collective, as they will often move as one. Use previous tips above in Running An Ungulate to get a herd to run, as well as drain their energy. Once you are able to get a herd to run, see if there’s any lagging further and further behind, showing traits of being a weakened elk. Your best chance of a hunt is to enter Showdown. One of the easiest spots to hunt a cow elk is the sides. With no antlers on a cow elk, you will only have to worry about hoof damage; the neck is a more available spot for biting and dragging an elk down. They are the simplest to hunt regarding strategies.
Ii. Calves ✧
Calves are smaller in fall, though they are nearly full-grown during the wintertime in Slough Creek. While they are still weak, they always have a mother following them. Oftentimes, a calf will split from the herd with mother in tow, making it easy to judge if the calf is weakened or not.
Strategy
Once you have located and selected a calf to hunt down, this is a very tedious process of attack-and-pull-back. This will be very similar to hunting mule deer (tips given later) and will help you save your health in the long run. Rather than entering a showdown, you want to allow the pair to keep running. Stay away from the pair you are hunting, and allow them to follow the herd. If the calf is weak enough, it should lag further and further from its mother. It’s possible the mother is weak, while the calf is strong, causing the calf to run far ahead of the mother. In either case, you want to make sure they are staying as far from each other before leading into an attack. Approach a calf (be very wary of the chance the calf will turn and swing at you!) Grab the calf and hold on for 3-4 hits of damage. You should be very careful of the approaching mother, who will attempt to hit you off the calf. After you have bitten and the calf + mother are near each other again, walk away and allow them to run off again. This is a process that you can repeat until successful. If you’re taking too long to hunt the calf, or they are staying too close to each other to continue the hunt, try to find another calf to hunt down.
Ii. Mother & Baby Herd (Late Spring) ✧
Mother & Baby Herds will show up during the later end of the spring months during midnight. They will be accompanied by a message titled ‘Newborn Ungulates!’ Any nearby mother elk will have a lighter pink scent spore, and once within range, an audio called ‘Hide & Snack’ will play.
Strategy
One of the easiest strategies to make the most out of both food sources of mother & calf is to first find the calf. You can do this multiple ways, and it’s best to find a strategy that best suits your style, whether it’s splitting up the grass patches and searching from one side to the next, or running a spiral through all patches. You will want to first locate the calf, however. Once located, the mother will start running towards you. Rather than killing the calf, keep it alive and allow the mother to start a showdown with you.
The mother will not run away as long as the calf is still alive; while she may run for a moment, she will turn around and return to the patch of grass once she is not being chased. The mother will still be a danger to you if you drop the deceased calf near the mother, however. This won’t guarantee her staying and attempting to chase you off. However, a cow elk will still very likely kick/attack for a short duration in an attempt to chase you off the calf. She can be quick to escape, though. So it is still best to leave her alive.
Stay right beside the calf and wait for her to return. This is where you can either hunt the mother cow solo, or bring multiple wolves to bring her down. Cows during late spring and early summer will usually have higher-maintained health, so it will be difficult to find a weakened cow. However, this removes having to search for a cow to feed both yourself (with the cow) and your pups (with the calf). You will be able to kill the calf after the mother has died and if you stay nearby the entire time. Leaving the radius after the mother is dead will cause the calf to despawn, so always find the calf first before killing the mother.
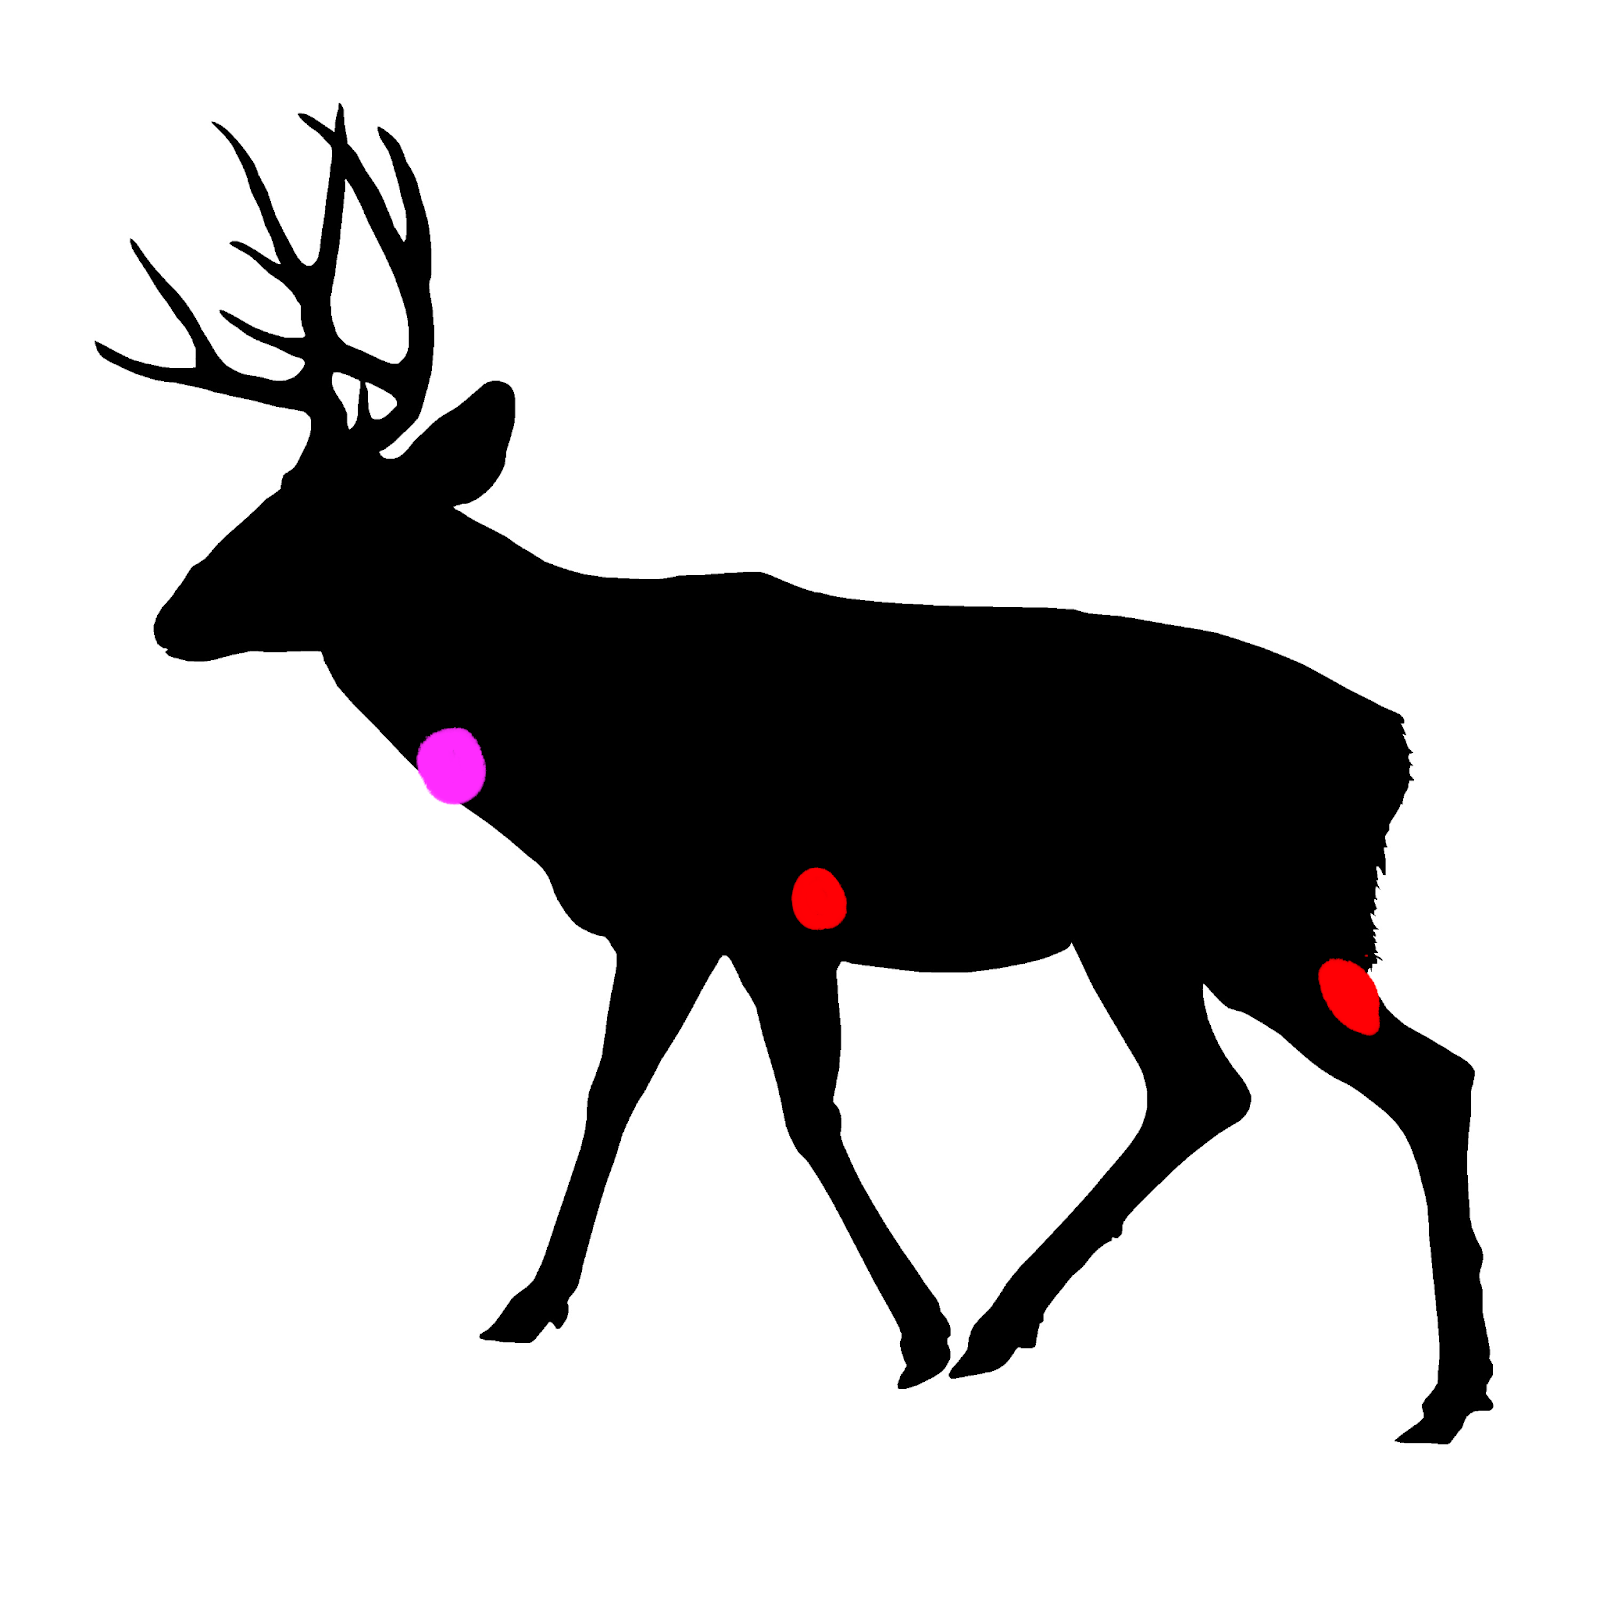
✦ iii. Mule Deer ✦
Attack Points
Red – Available during chase, or when slowed (2 in total on each side of the body)
Pink – Only available when deer is slowed to a walk (2 in total on each side of the body, 1 on the neck)
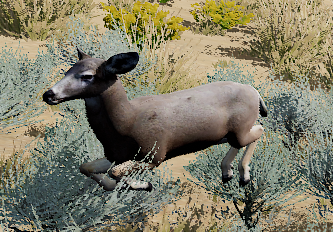
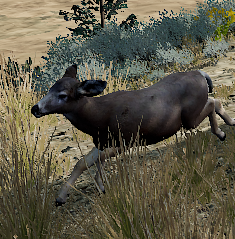
A majority of mule deer hunts will be of the same strategy, whether a buck, doe, or fawn. Fawns will usually be easier to catch, however you will have to focus on both the mother and the fawn together, rather than just one or the other. They are very quick-moving ungulates, and have a higher risk with moderate reward. They are interesting for challenging, or for wolves who can maintain the hunt.
While all deer are extremely similar, there are some key differences that can change how the hunt is available and how much damage you can obtain during the hunt.
Buck deer are similar to bulls as they do have antlers; however, it’s often very unlikely they will enter a showdown and be able to use their antlers to retaliate. It is possible, however. One noticeable difference between a doe and a buck is their speed – bucks are faster, and are able to outrun your wolf a majority of the time.
Doe deer are much slower than their male counterparts, being easier to catch up with and easier to take down due to their lack of antlers. Doe deer will also have a higher chance of being within a group of either other does, their fawns, and possibly 1-2 buck deer. Majority of the time during the seasons, however, doe deer will be together with other does, up to 1-5. During this time, it’s best to try to split the group up and follow through with the strategies above.
Strategy (Running)
Mule deer are extremely quick animals compared to elk. One of the things that can be maintained is chasing them down and draining their energy. On average, it takes about 2 minutes to get a mule deer drained of energy to the point where they will cease stotting (their usual ‘bouncing’ strategy.)
Mule Deer Fawn stotting.
Doe Deer running.
The easiest way to maintain a deer’s escape is to consistently switch on and off with sprinting. Even with a -2 stamina and/or -2 speed wolf, you will be able to keep up with a fully healthy deer as long as you remain patient and vigilant with keeping them running. Sprint until your stamina meter is about 1/3rd empty, as you want to keep the recovery time short and not risk slowing down to a trot. While recovering stamina, return to a gallop. Do not stop to sit/rest to recover stamina, as this can cause the deer to stop their run. Instead, keep galloping and remain near the deer until your stamina is fully returned. Continue sprinting. Repeat this process; while it may seem tedious, over time, this drains the deers energy and closes the distance between you and the deer over time. Once a deer has slowed from strotting to a run, you can attempt to bite them; see if their damage ratio is in your favor. If not, continue to chase after the deer. It should be much easier to stay behind the deer at this point, being able to remain beside or directly behind it at all times.
Strategy (Attack / Pull Back)
This strategy is best working for any wolves with a higher speed stat. While it is possible to get this accomplished with -2 speed if you keep the deer running for long enough, there are ways to do this without draining their energy first (though, you would require much more health, as the deer can retaliate if they still have high energy. It is highly suggested to chase the deer for a while due to new hunting mechanics.) It’s easiest to get this accomplished with a single deer, usually bucks or a stray doe with no fawn. You will have to chase the deer for a moment, letting it run out of range until it slows and turns around to face you. This puts the deer at a disadvantage, allowing you to sprint forward and close the distance between you and the deer as it attempts to turn 180’ and run away. Often times, you will be able to catch up and land a few rolls of damage before letting the deer go again. Allow the deer to run away for a short moment before it turns back around to look at you. You’ll be able to continue this process over time, slowly whittling away at the health of the deer as you catch up to it each time.
Rut Season & Recovery
Bucks will also be affected by the rut season in late fall; oftentimes, you will see a group of doe being trailed by a buck or two. During this, watch for any other bucks that will start a challenge. While mule deer are not as vocal regarding their challenges, you will be able to spot them charging at each other and locking antlers. During this time, they will be taking damage during the fight, and lowering each other’s health. If you remain downwind, you may be able to sneak closer and charge at them. This will catch them off guard due to their battling animations, in which they need time to stop the fight, turn, and run. You’ll have an easier time taking down a buck that was in the midst of battle than one openly grazing and alert.
Herding
While this isn’t a full strategy in-and-of itself, this is a mechanism that has been in place for mule deer for a long time. Mule deer would prefer to go into flight rather than flight, especially when the deer is often solo or in small herds of 1-5, depending on the season. Due to this, they will often run the direct opposite of where you’re located. While this may seem inconvenient for you, this is a positive detail that will allow you to complete hunts within your own territory, as long as you are able to circle the deer and lead it to the direction you desire. It’s best to take advantage of this hunting mechanism whenever you are in a small territory surrounded by pack hexes, as it means your final kill will remain in your own hex and avoid the risk of being driven out by a patrol of wolves.
Iii. Doe and Fawns ✧
Mule deer are much more willing to split up during escapes compared to elk. This holds especially true for does and their fawns. Oftentimes, a doe will have around 1-2 fawns following her during the later growing stages.
Strategy
With mothers often having more than one fawn, this allows you to quickly step in and chase one of the fawns away from the group. While there are 2 (or more), she will instead focus on the fawn closest to her, leading you to have much time to step in and take down the stray fawn for a meal. Usually, you will not have to follow through with the above strategies used on adult deer. Instead, you are more likely to simply chase down the fawn and kill it, even with struggling stamina. Deer fawns struggle to defend themselves, and will not give as much trouble due to their attempts at retaliation being of little harm to you. Always be aware of the deer around you, however. There is a chance the mother will turn around and attempt to chase you off, though will abandon the other fawn in the process.
Iii. Doe and Fawns (Late Spring) ✧
Doe and fawn pairs will show up during the later end of the spring months during midnight. They will be accompanied by a message titled ‘Newborn Ungulates!’ During this time, you will be able to find a mother deer by looking for any ‘Doe Mule Deer’ spores; it does not indicate if she has a baby or not within the spores, so you must follow it and see if the doe will run away if you’re near her. If she instead turns to you and refuses to run, and the ‘Hide & Snack’ audio is playing, there is a baby fawn somewhere nearby.
Strategy
One of the easiest strategies to make the most out of both food sources of s doe and her fawn is to first find the fawn. You can do this multiple ways, and it’s best to find a strategy that best suits your style, whether it’s splitting up the grass patches and searching from one side to the next, or running a spiral through all patches. You will want to first locate the fawn, however. Once located, the mother will start running towards you. Rather than killing the fawn, keep it alive and allow the mother to start a showdown with you. The mother has a higher chance of running away from the fawn than an elk mother and her calf; however, she will always return. When biting the doe, you will be able to rest for a moment as her animations play through from the struggle. This gives you time to drop her health as much as possible before she attempts to leave. She will return, however. This gives you time to recharge stamina. Once your stamina returns, stay beside the fawn, or possibly walk a few feet away and return to alert the mother to attempt to chase you off again. You can slowly widdle down her health until you make a kill. This should feed 2 adult wolves, and then you can bring the fawn to your pups. Leaving the radius after the mother is dead will cause the fawn to despawn, so always find the fawn first before killing the mother.
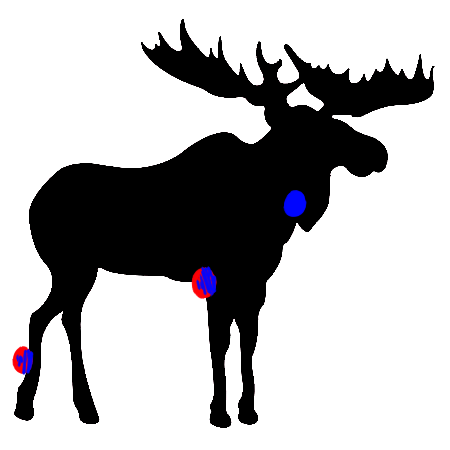
✦ iv. Moose ✦
Attack Points[/b]
Red – Available during chase (2 on each side)
Blue – Only available when moose is in showdown (2 on each side, 1 on neck)
Moose are one of the strongest prey items within the game, only coming second to bison. They are a very inconvenient type of prey to hunt due to the fact that they can land extreme damage to your wolf, and will often immediately enter a showdown when approached. Bull moose are even more dangerous, as their antlers can nearly immediately put your wolf too low in health to hunt. Even cow moose are dangerous, as they have strong kicks and can stomp on your wolf. In the end, this is an animal with very high risk and very little reward, as they have even less food than their elk counterparts, despite having more health and doing more damage.
Strategy
Strategy
A moose will often immediately enter a showdown when approached; this is often due to the fact that they are stronger, and will hold their ground even when solo. Your best chance is to locate a moose with less than 1/4th health left, or even less. Once located, attempt to chase them out of their stand-off. This can be done by biting or snarling at the moose (though, be extremely careful of being kicked) When the moose is on the run, chase them down. If you pull back, it will be difficult to get them out of a showdown again, and will end up costing you more health. Instead, simply keep chasing them – their energy will deplete more and more as they runtheir energy will deplete more and more as they run. Once they have started to slow, test their damage ratio. On average, if a moose is thoroughly tired out, they should only do 9-20 damage max towards your wolf as you hold on. If the ratio is out of your favor, continue chasing them.
This will be a tedious process that requires patience, but it is possible. Your best chance is to bite at their front leg, as this gives you time to release after 2 hits of damage and flee before the moose turns around and attempts to stomp on you. A moose will not be dragged down once their health is low enough. Instead, they will end up collapsing once dead. Be careful as to not kill them near/beside sources of water, as there is a chance they will fall into the water itself and the carcass will be impossible to eat from.
Iv. Bull Moose ✧
With a massive set of antlers, and doing more damage to your wolf than a cow, bulls are often an item of prey to chase during absolute peak performance, as any damage to your wolf pre-hunt can cost you severely. They are able to rattle their antlers as well, quickly hitting you as soon as you let go (if you’re biting onto their neck)
Strategy
While elk and buck deer go into rut and often are lacking massive amounts of damage, moose. Avoid biting at the neck whenever possible, as this can easily lead to your wolf being injured by their antlers. Instead, keep them out of showdown and attack at their sides/back legs. This will keep you from taking intense damage from their antlers. The best locations are right under the front leg.
Iv. Calves ✧
Moose calves, now that they’re within the autumn time, will stick much closer to their mothers and will be nearly full-grown. Due to this, it will often be a bit harder to properly hunt them without having to deal with the mother first. It is possible to hunt them with little-to-no contact with the mother.
Strategy
Often, calves are now much stronger than their Late Spring counterparts the seasons prior. During this time, they will be near fully grown and have the ability to fight back. Not only that, but they will be much quicker to turn back towards their mother for assistance. However, this can be a downside for the calf as well, due to them being so large. You can often charge at a calf that had wandered slightly too far, possibly spooking it into running. During this time, or even when it is still near the mother, try to bite on the opposite side of where the mother is standing. You will need to keep a close eye on her, but due to the large calf, she will often have to walk around her calf to attack you. Staying on the opposite side allows you time to bite and hold on to the calf long enough to give damage. Once the mother is near, though still far away enough, release and try to escape. This is a wash-and-repeat situation, though it’s the safest option to hunt down the calf without sustaining too much damage. As with all moose, be mindful to not kill the calf near any water, as the body can be lost due to it.
Iv. Cow and Calf (Late Spring) ✧
Cow moose and their calves are one of the most difficult offspring-mother pairs to hunt during the spring and summer months. Attacking a calf itself is a very daunting task, as a moose calf can register nearly as much damage as a cow elk, and thus is difficult to hunt without damaging your wolf even with the mother nowhere to be seen. Your challenge isn’t over, even once the calf dies. During this time, while elk may hover near their deceased child, a mother moose will remain entirely hostile and will be an obstacle of its own to go through, even after taking down the calf.
Strategy
While you can often get away with hunting a mother of any other species, you’re best left to exclusively hunt down the calf and avoid the mother at all times when it comes to a moose. This is due to the fact that calves give you as much damage as a cow elk, while giving much less food and an angry mother to watch over. While searching, attempt to be extremely aware of your own distance. Your best choices are to attempt to separate the two and create space between them, or attack when they create space themselves.
If the calf returns to the mother and refuses to continue running, you can attempt to charge and bite at either of them. Both have pros/cons to attacking; while biting the mother allows you to only have to watch over her for any incoming hits. However, this poses the threat of taking extreme damage that can half your health. For the calf, this allows you to quickly bite and hold and drain the energy and health of your target. However, this will cause you to have to watch over the cow that will be approaching and attacking. Plan accordingly to release quick enough to allow your animation to play ouf, and have time to make a getaway before the mother approaches.
Often, a moose calf will wander further from its mother while exploring. During this time, you can quickly run in and attempt to land hits on the calf in an attempt to get it to start running. While you can tire out the mother or calf by running them for a while, you can often take down the calf very quickly solo and with both still at full energy. Your biggest opponent will be the mother that trails behind, so always be extremely aware of her location and distance from you. Once the calf is below half health or less, it will usually no longer run and instead struggle, or even kick you. If the mother is too close, attempt to pull away just enough to allow the calf to run again.
After the calf has been killed, you will have to drive off the mother just enough to pick up the carcass. You can often do this by trying to lead her away. Standing within her radius until she charges can be an easy way to move her far enough off the calf to circle around and pick it up. Otherwise, you can attempt to charge at her and bite down for a moment or two. This will cause her to flee once she has been damaged enough, and will abandon the carcass.
✦ v. Bison ✦
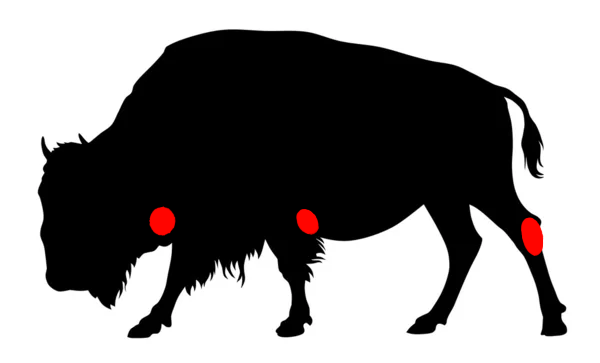
Attack Points
Red – Available at all times (3 on each side; 2 on neck, 2 on front legs, 2 on back legs)
Bison are the strongest animal of the game. With a whopping 5,500 health points and the ability to cause a loss of -300 health on Easy mode, they are extremely dangerous to be around. Oftentimes, herds are made up of 1-5 bison, each of which will often immediately turn aggressive if you approach them. They are one of the few animals that won’t attempt to run, and will often stick to showdown with a wolf immediately. This can lead to difficulties in trying to tire it out in the traditional methods for all other ungulates.
Strategy
It is possible to track down and fight a bison solo. However, your best chance of doing so is on a Multiplayer game in Slough Creek’s wintertime. This is when bison will have their weakest points, as well as having the ability to quick-heal. Your best option is to find a bison that is well below half; a majority of bison will be at half health or slightly above. However, there will be times where bison are much closer to near-death.
Locate a group of bison and bite a few. It’s much easier if a bison is alone, though this is rare. Once checking a few bison, see if any are much lower than half health. If there are none, try to find another group. It’s tedious to find a weak bison, but it is possible and will save you time in the end.
Once a proper bison is located, your safest best is to make sure to avoid being rammed at all possible times. This includes from the other nearby bison. To lead the weaker bison of the group away, you can circle around and attempt to lead it into charging at you. You must be extremely careful however, as a landed hit during a charge can destroy the whole hunt, and leave you unable to finish the hunt in most Singleplayer scenarios. Sprint or gallop away from the bison, and repeat this until it is far enough away that the other bison in the group are no longer sending aggression signals (raised tail, shaking head, snorting, etc)
Once the bison is singled out and led away, you can begin to slowly chip away at its health. Patience and consistency will be the biggest factors of the hunt, as this can take much longer than most hunts in the game. While no spot to attack is truly ‘safe’, neck and front legs are the most likely spots where you’ll take massive damage from being rammed. Often times, biting at the neck can lead to a high chance of being rammed. Your safest option of the bites will be at the back legs – this is made even more true if you have multiple wolves attacking the bison at once, whether it’s your mate or other players. Doing so can hold the bison in place and prevent it from sharply turning and ramming you. When possible, try to back away and restart the bites. This can give the bison time to turn around when you have the chance to escape, and gives you a moment to try to bite at its leg once more.
The entire game of bison hunts is patience and consistency. Bite, back away, and continue to find safe spots to attack before continuing. Over time, the bison will slowly decay more and more in health. They are similar to moose in that they will not have a final dragging-down stage when they are dying, and will simply topple over to their side. Just like moose, it is best to avoid killing a bison beside any deep water, as it could pose the threat of losing the entire carcass.
Beavers
Attack Points
Still need to be determined and properly confirmed.
Beavers are the only other rodents within the game, apart from hares. They have, debatably, the most complex hunting, as you’ll have to not only track them down in very specific trails, but have to crouch and be mindful of the wind to not alert them by your scent. They are also entirely unavailable during wintertime, only leaving the dams once all the snow has melted. However, once you have everything within your favour, it’s quite easy to take down a beaver and take minimal damage as well. Crouching offers a ‘boost’ that can multiply your damage as you startle the beaver.
There are multiple trails across all available maps; each trail will allow a beaver to spawn and walk up it. It’s not guaranteed that a beaver will be on the trail, however. Your best choice is to visit multiple trails, rather than simply waiting for one to spawn in. This can help you collect multiple beavers, and check on any new trails you pass by.
Strategy
Beavers are exclusively found on set trails during the seasons of autumn, spring, and summer. During this time, they will be seen wandering up and down their trails. During this, check the wind direction. Is it blowing your scent towards the trail, or bringing the beaver’s scent towards you? Make sure you are always downwind, as to not alert them/startle them into escaping into the water. Once downwind, crouch beside the trail. You can have a fair bit of distance and still have the crouch be ‘registered’ to give you a bonus of damage. However, being closer can help you save stamina, which is the main deciding factor in a successful hunt.
Once a beaver is within range, hold down shift to prepare to attack. Once close enough, rush forward and bite onto the beaver. Beavers will often dislodge themselves and attempt to attack you after 3-4 bites, so release beforehand. If you are quick enough, you can attempt to re-crouch. This gives you the ability to continue the massive damage hits towards the beaver.
If unable to successfully complete the crouch, whether due to the beaver attacking or the beaver attempting to run away, you can try to change which direction the beaver runs by getting between them and the water. It may take practice, but over time, it’s a tactic that can become easier with time.
Hope you enjoy the Guide about WolfQuest: Anniversary Edition – Hunting Details Guidebook, if you think we should add extra information or forget something, please let us know via comment below, and we will do our best to fix or update as soon as possible!
- All WolfQuest: Anniversary Edition Posts List


![WolfQuest: Anniversary Edition - Hunting Details Guidebook - i. Searching for Prey [Elk Herd + Beaver Trail Locations] - 2032104 WolfQuest: Anniversary Edition - Hunting Details Guidebook - i. Searching for Prey [Elk Herd + Beaver Trail Locations] - 2032104](https://steamlists.com/wp-content/uploads/2022/03/WolfQuest-Anniversary-Edition-Hunting-Details-Guidebook-i.-Searching-for-Prey-Elk-Herd-Beaver-Trail-Locations-2032104-steamlists-com.png)
![WolfQuest: Anniversary Edition - Hunting Details Guidebook - i. Searching for Prey [Elk Herd + Beaver Trail Locations] - 1984BE9 WolfQuest: Anniversary Edition - Hunting Details Guidebook - i. Searching for Prey [Elk Herd + Beaver Trail Locations] - 1984BE9](https://steamlists.com/wp-content/uploads/2022/03/WolfQuest-Anniversary-Edition-Hunting-Details-Guidebook-i.-Searching-for-Prey-Elk-Herd-Beaver-Trail-Locations-1984BE9-steamlists-com.png)
![WolfQuest: Anniversary Edition - Hunting Details Guidebook - i. Searching for Prey [Elk Herd + Beaver Trail Locations] - 4C9B040 WolfQuest: Anniversary Edition - Hunting Details Guidebook - i. Searching for Prey [Elk Herd + Beaver Trail Locations] - 4C9B040](https://steamlists.com/wp-content/uploads/2022/03/WolfQuest-Anniversary-Edition-Hunting-Details-Guidebook-i.-Searching-for-Prey-Elk-Herd-Beaver-Trail-Locations-4C9B040-steamlists-com.png)
![WolfQuest: Anniversary Edition - Hunting Details Guidebook - i. Searching for Prey [Elk Herd + Beaver Trail Locations] - 667D1B5 WolfQuest: Anniversary Edition - Hunting Details Guidebook - i. Searching for Prey [Elk Herd + Beaver Trail Locations] - 667D1B5](https://steamlists.com/wp-content/uploads/2022/03/WolfQuest-Anniversary-Edition-Hunting-Details-Guidebook-i.-Searching-for-Prey-Elk-Herd-Beaver-Trail-Locations-667D1B5-steamlists-com.png)
![WolfQuest: Anniversary Edition - Hunting Details Guidebook - i. Searching for Prey [Elk Herd + Beaver Trail Locations] - 4FF486D WolfQuest: Anniversary Edition - Hunting Details Guidebook - i. Searching for Prey [Elk Herd + Beaver Trail Locations] - 4FF486D](https://steamlists.com/wp-content/uploads/2022/03/WolfQuest-Anniversary-Edition-Hunting-Details-Guidebook-i.-Searching-for-Prey-Elk-Herd-Beaver-Trail-Locations-4FF486D-steamlists-com.png)
![WolfQuest: Anniversary Edition - Hunting Details Guidebook - i. Searching for Prey [Elk Herd + Beaver Trail Locations] - D856C5D WolfQuest: Anniversary Edition - Hunting Details Guidebook - i. Searching for Prey [Elk Herd + Beaver Trail Locations] - D856C5D](https://steamlists.com/wp-content/uploads/2022/03/WolfQuest-Anniversary-Edition-Hunting-Details-Guidebook-i.-Searching-for-Prey-Elk-Herd-Beaver-Trail-Locations-D856C5D-steamlists-com.png)
 Head normally

Leave a Reply