This lists errata and functionality of different components you can use in Trailmakers to create your vehicles and contraptions. For individual components, this guide aims to:
- Point out practical uses of the component
- Go in-depth with how it interacts with physics
- Provide pointers for how to position the component for intended effects
It also will go over basics of how to build different vehicle types using these parts.
NOTE: This guide does not go over components that are exclusive to the High Seas DLC – though it does detail free parts that were introduced with this update.
Editor Controls Documentation
Since Trailmakers’ editor help section doesn’t list anything like this, here’s hotkeys you can use in the editor that I know of:
- WASD/Arrow Keys with parts selected – Nudge the selected parts 1 unit in the direction pressed. This is relative to your camera, so if you’re looking at your vehicle straight-on from the front and press W, the parts will move up 1 unit.
This moves the part or parts to the next valid space they can occupy, and can be useful for sliding pieces in and out of tight parts, or gaps within the middle of a vehicle. - Ctrl+LMB – Select multiple pieces.
- Ctrl+LMB Double Click – Select all pieces on your vehicle of the exact same type (if you do this on an Offroad Wheel, for example, this will select all Offroad Wheels in the editor space.)
- Insert – Copy. Of special note is that this will place the object 1 unit closer to you depending on how the camera is angled, and this works on similar principles as to how the nudge mechanics work. If you’re do this from the opposite side of your vehicle from a seat, this will usually mirror the component’s rotation over it (the primary way to do this before the Beta Mirror feature was introduced).
- Hold Alt – Quick-Display rotation handles
- Hold Alt + Shift – Use the rotation handles to rotate in the opposite direction.
Seats
Seats are required on anything you make that you want to have rideable or directly controlled. They aren’t required for any creations you make that you want to have automated (by using logic blocks) or that serve as stationary constructions or emplacements (things like traps, walls, barriers, or turrets). That said, 90% of things you’ll be building will have at least one seat.
Special notes about using seats:
- If the seat has been subjected to a strong enough impact. In Campaign Mode, being ejected in this way kills your character and forces you to respawn.
- If the seat is put underwater. This will not kill you, but does prevent you from piloting most vehicles when submerged.
- For seats that do not have a top to them, landing upside down will also eject you, and in campaign or rally modes, will also kill you. This will occur even if you land slowly enough to otherwise avoid crashing.
Seat – This roll-cage equipped, normal seat is the one you start the Campaign mode out with. Overall, its traits include:
- 2w x 4h x 4l
- Decent durability with slightly higher-than-average weight
- Mediocre drag
- High number of connection points on all sides – this is a very easy seat to construct with
- Will eject you if you crash too hard or fall into water
- Will not eject you if the seat touches ground upside-down.
It’s a useful starting seat, but other seats you’ll find will often have more specialized uses they can apply to, without much extra costs.
Armored Seat – The armored seat is a fully-enclosed seat that protects the rider from crashes. Its traits include:
- 2w x 3h x 4l
- Heavy and indestructible
- Fair drag
- Connection points on all sides
- Terrible first-person visibility
- Will only eject you if you fall into water.
Finding this seat is a top priority for Campaign mode, as it will allow you to recover and repair yourself in more places than would otherwise be possible, allowing you to save more progress as you travel. For the purposes of lightweight vehicles, however, this seat can prove more of a challenge than a benefit, especially for any game modes that don’t ‘kill’ your player character. That aside, almost entirely a full improvement over the standard Seat.
Diving Bell – This spherical glass diving bell is made specifically to allow for submarine navigation. Its traits include:
- 4w x 4h x 4l
- Average Weight
- Fair Drag
- A few connection points on each side towards the center, but not at the edges.
- Only ejects you if you crash – not when you go underwater or if you land upside down.
This is an easy seat to use in Campaign mode to allow you to hunt for things underwater, being the first one you can possibly find for this purpose. Of the two seats that are underwater-capable, it is much easier to build with.
Ship Wheel – Operated with your character standing at the wheel, it evokes the imagery of an old-timey captain piloting their boat through a stormy sea. Its traits include:
- 4w x 5h x 2l
- Average weight
- Connection points are only on the bottom
- Bad Drag
- Ejects under all circumstances
This thing’s just for show really. It basically has nothing going for it other than being a way for your pilot to stand out.
Motorcycle Seat – A lightweight seat. Traits of this one include:
- 3w x 3h x 4l
- Lightest seat, tied with Go-Kart seat
- Few connection points: on front, back, and bottom.
- Fair Drag
- Ejects under all circumstances
The odd block width of this seat makes it very awkward to build with, as many mechanics, motors, and other components come only in even-numbered dimensions. This means that, if you wanted to balance out a load of engines, you’d need to have at least one on each side to cancel it out. Overall, it’s this aspect that makes the motorcycle seat rather undesirable, even with its other traits.
Cockpit – An enclosed, highly-streamlined seat:
- 2w x 3h x 5l
- Lighter than average
- Lots of connection points on all sides except the top.
- Very good drag
- Noticeable first-person perspective obstructions
- Doesn’t eject if flipped upside down.
For many circumstances, this is a good seat that’s easy to build with as well – certainly the seat of choice I use for larger-scale speed vehicles such as racecars or jets.
Go-Kart Seat – An open-topped, lightweight seat. It’s the first seat type you use when doing the Rally game mode but is found pretty late in the Campaign mode otherwise – and for good reason. Its traits include:
- 2w x 3h x 4l
- Lightest seat
- Connection points on all sides except for the top.
- Bad Drag
- Ejects under all circumstances
In essence, this is the Motorcycle Seat, except possible to use, owing to its identical weight, and basically the only practical difference being its block width. Its drag can be cancelled out by placing down a nice windshield, and its fair number of connection points means that the number of extra blocks required to balance the vehicle are much lower. In short, it’s the ultimate lightweight piloting seat, in spite of its poor durability otherwise.
Operator Seat – A standing open-front seat.
- 2w x 4h x 2l
- Average Weight, Fair durability
- Connection points on all sides except the front.
- Bad Drag
- Does not eject if landing upside down
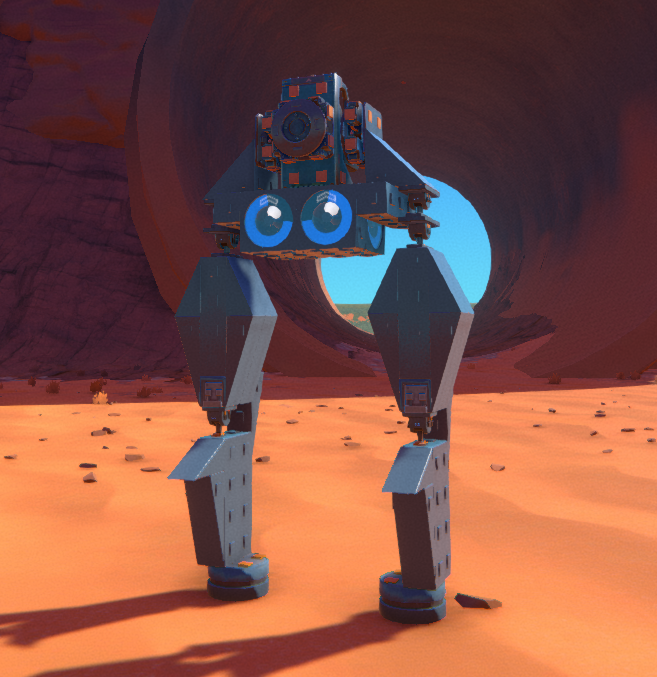
The operator seat is more intended for aerial use or for tall builds rather than streamlined ones (helicopters or walker mechs). It’s fairly average otherwise.
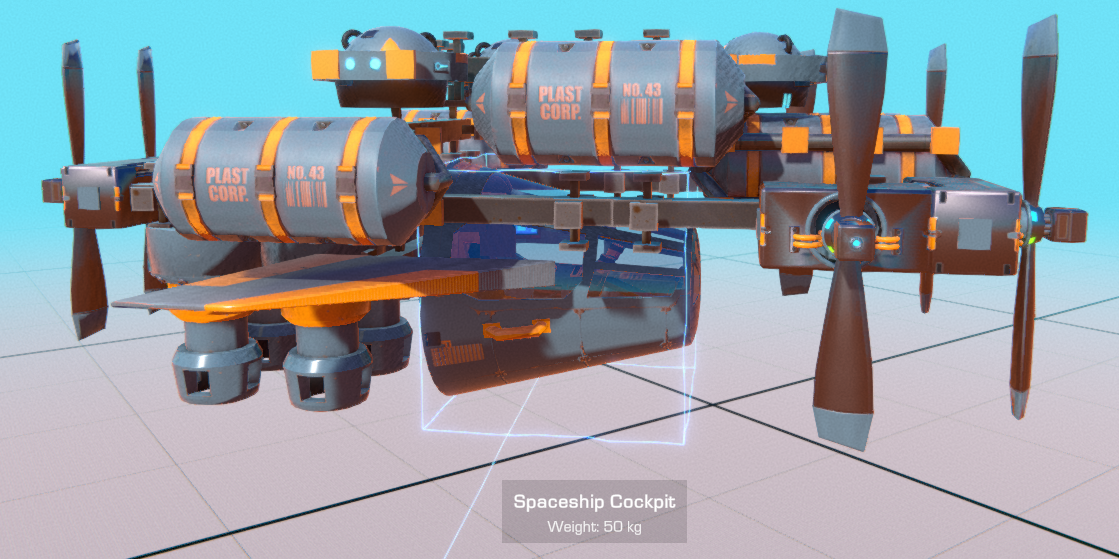
Spaceship Cockpit – A large, heavy, streamlined pod. The Spaceship Cockpit is basically the end goal of the Campaign mode, while also being a fair reward on its own in some ways:
- 4w x 4h x 4l
- Heaviest seat (tied with armored)
- Many connection points, but they’re all on the back.
- Some first-person obstructions
- Fair drag
- Never ejects under any circumstances (fully indestructible and sealed).
Despite being extremely difficult to fit into lighter-weight builds, the Spaceship Cockpit is otherwise the ultimate when it comes to making a vehicle that can withstand any conditions. It makes this seat usable for heavy-duty aircraft (i.e. if you wanted to survive a crash), large submarines, and other durable vehicles.
Frame
Frame components are the building blocks you put your constructions together with. Only under very edge cases will you ever have any builds that do not use these components. Functionally, these have no real applications, and only differ in how they are sized. That said, this category does include five different general “types” of components it encompasses:
Basic Blocks – The most rudimentary components.
- These always have connectors on every possible side and space they take up on their surface.
- They are moderately durable, and come in a wide variety of dimensions, ranging from the diminutive 1×2 block, to the 4×8 block. The larger a block is, the more durable it is overall, so it’s generally more desirable to use larger, fewer blocks rather than tons of smaller blocks.
- Bad drag
They have high connectivity to everything around them – which can be both good and bad. It’s good for making uniterrupted, sturdy structure that can hold itself together even when taking a beating, but can be a hindrance if you’re trying to define a movable part distinct from the rest of your chassis (i.e. something connected through a mechanics piece, if it’s jointed through normal blocks or some other connection, won’t move as intended.)
Shields – Protective outer covering.
- Have connectors on only one side.
- Durable, but low connectivity means you need to be smart with how you use it, or else it won’t be that effective as armor.
- Noticeable weight
- Comes in 1×2, 2×2, and 4×2 sizes.
- Bad drag when placed vertically, but very good drag if horizontal.
Shields can be used as a finishing layer to hide the ‘bumps’ on blocks (also owing to its unique painting options), and if placed carefully, can bind together alternating block pairs for some added durability. It won’t make you invincible (crashing into a wall fast enough, for example, won’t really allow shields to do anything) but it does make you look nicer. For their size, they are fairly hefty, so they could also be used to slightly re-balance your vehicles.
Grid Blocks – Lightweight skeletal components.
- Have connectors on most sides on the farthest ends – high connectivity
- Comes in 1×2 and 1×4 sizes.
- Extremely lightweight for their volume.
- Average drag
- Cannot be colored.
Grid Blocks are instrumental in making lightweight builds, as they are perhaps the lightest and easiest of the components to use for these purposes. Globally they allow more connections and are lighter than tubes of equivalent size, which makes them much better for coordinating internal connections between components rather than an external branch (where usage of tubes, especially long ones, would make more sense.)
Connectors – They have a very specific purpose.
- Come in 1×2, 1×3, and 1×4 variants
- Have two connection points on the far ends, both on the same side.
- Extremely Lightweight
- Do not generate any drag
They serve to very specifically connect two distant blocks together in a way that tubes cannot. They can also help bind together adjacent blocks to make them slightly more difficult to break apart, but that’s basically all they can do.
Porthholes – They’re basically just for show.
- Come in a small 1x2x2 size and a large 4x4x3 variant.
- Identical weight to blocks, size for size.
- Bad drag
- Missing connectors on their front and back (i.e. where the windows are).
Just standard block variants.
Propulsion
These components are the main workhorses you use to make your vehicles vehicles. Propulsion parts have common traits:
- All have a Power Core draw, limiting how many you can place to improve your performance and speed.
- Most are configurable and can accept controls that influence what parts they interact with.
- A majority of the propulsion options do not work underwater!
There’s a few different categories that these propulsion devices fall into:
Engines
Engines supply torque to wheels you put on your vehicle. By default, they provide it to each wheel, but can be configured to only apply their power to certain wheels – if you have an excess of engines in comparison to wheels, distributing engine power between wheels can be beneficial to your maximum speed and acceleration, since the number of engines applied to a wheel has diminishing returns as you add more.
Splitting engine workload like this also enables you to set up advanced driving maneuvers using logic gates (i.e. handbrake systems for powersliding) that apply torque to only specific wheels.
Bulldawg Engine – This is the engine and only propulsion that you start the Campaign mode with. It’s defined by its small size, high acceleration, and low maximum speed. Engine distribution only begins to show through after stacking around 2 engines per wheel, and its low torque means its usefulness is limited for any heavier vehicles.
RAW Engine – The Raw engine is a large, heavyweight engine with a big profile, high maximum speed, and low acceleration. With higher torque, the benefits of splitting engine workload between tires occurs with even just 1 engine/tire assigned. Its higher power makes it more viable for heavyweight vehicles, especially construction equipment, and it apparently can work with the following engine type to increase your maximum speed.
Of special note: The RAW engine has a very specific angle at which it minimizes drag – despite how it looks, putting the large protruding bit towards the front minimizes drag. It makes some sense on closer inspection, since this appears to be some type of air intake. This is still quite noteworthy, since it’s the only engine that has this directional drag difference (and for that fact, the only engine that doesn’t have bad drag).
Dragon Engine – Fitting into a pretty square package, this is a high performance engine with both acceleration and pure power. Putting out 10x the power of the Bulldawg engine and being half the weight of the RAW, it squarely outclasses the other two engine types in just about every way, and similarly to RAWs, can benefit from distributing engine power to individual wheels at as few as 1 engine/wheel. While extremely powerful and both lighter and smaller than the RAW, its sheer power can make it quite dangerous to use on very lightweight cars, and it has the highest Power Core draw of the engines (3).
Thrusters
Thrusters put out pure thrust in the direction their exhaust is pointed, allowing vehicles to move through the air. They have a wide variety of applications for all sorts of vehicles, including ground-based cars or bikes (either as methods for sticking to the ground, balance, or temporary boosts), as well as all types of air-based movement as well (hovercrafts, planes, and any other flying machines that aren’t copters.)
- Globally, thrusters have some of the highest maximum speeds of all propulsion options. For example, a car equipped with Dragon Thrusters will go faster than a car equipped with an identical number of Dragon Engines.
- As a bit of a cost, thrusters can only apply their force in a single direction – if you have thrusters pointing forwards, for example, you’ll be able to use them to propel yourself forward, but not backwards.
- Their positioning also determines how they move your vehicle as well: if offset from your vehicle’s center of mass, they will cause your vehicle to rotate, instead of being purely pushed forwards.
Mini-Thruster – Small and low powered, these jets are often too weak to be usable as a main means of propulsion, but are great as support thrust for any ancillary movement or support – they can be faced downwards to help vehicles stick to the ground, put at far ends to allow hovercrafts or flying vehicles to turn in midair, and otherwise make small adjustments – these are great thrusters to use when off-center from your center of mass, precisely for this reason.
RAW Jet – The RAW Jet is all about all-out thrust and acceleration – at the cost of consistency. As with its Engine equivalent, it’s the largest and heaviest variant of thruster, and the mid-cost when it comes to power core usage. The RAW jet can only be active for a maximum of ~1.5 seconds, and requires ~3 seconds to cool off once being active for that long. It can also cool down over time without hitting this limit.
It’s best used as a temporary speed boost, sometimes seen on cars as a way to gain a turbo boost (often in the Rally game mode.)
Dragon Jet – Dragon Jets are the main workhorses for jet airplanes and other high-speed jet vehicles. Unlike RAW jets, they can be active constantly, though unlike the RAW/Dragon Engine relationship, the Dragon Jet is not more powerful than the RAW jet (only having half the power/acceleration). However, they are lighter and smaller, and generally are more useful. Compared to the RAW Jet, Dragon Jets appear to have the same maximum speed, but will take a bit longer to reach this limit.
Gimbal Jet
Despite being called jets, these aren’t really comparable to standard thrusters. Instead, they always apply their thrust upwards, making them some of the most useful propulsion components for stability and aerial balance.
No matter what angle a Gimbal jet is placed at, it will always point its thrust upwards, and because they always apply force in the same direction, this does mean that even one gimbal jet, theoretically (with a chassis light enough to be lifted with it) will always go up – it won’t always stay upright, but it always will apply that force upwards instead of rotationally.
Placing these at the corners of a flying machine you want to make can help create a highly-stable aerial vehicle without using any aerodynamic wing components (i.e. a blimp), and with configurable thrust, they can be used to create a neutrally-buoyant vehicle that can levitate.
Propulsion (continued)
Hover Block
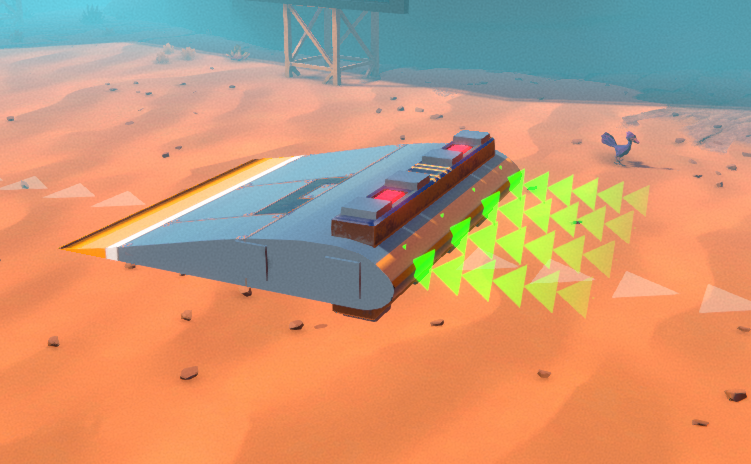
Flat plates that put out air resistance against any surface below. These are used to create hovercrafts, and work best when placed similarly to Gimbal Jets (with one caveat that they usually shouldn’t be rotated.) Hovercrafts have a couple of advantages and disadvantages as vehicles:
- + can hover over hot lava without taking any damage
- + can avoid triggering explosives placed on the ground
- + can cross water when going at speed
- + can reach extreme maximum speeds with very little additional propulsion
- – have no friction, making them extremely difficult to control in tight corridors
- – will fall through water if they come to a stop
- – always require other propulsion pieces to actually move (jets or propellers are the most common)
- – very awkward to adjust using configuration menu
Hover Blocks used in unorthodox ways can also be leveraged to provide ground-based stabilization: because they always want to hover over the surface they are pointed at, you can apply them against your own frame (a surface) to provide an odd source of propulsion if placed vertically, or to keep a car rooted to the ground or a wall (making a spidercar) if placed upside-down.
Propeller
Propellers work very similarly to thrusters/jets; they provide force through the air, allowing vehicles to fly, and similarly work in relationship to your center of mass. There are some key differences, however:
- Unlike jets, Propellers can provide thrust both forwards and backwards. The propeller ‘s ‘forward’ is the direction the propeller itself is facing (keep this in mind if you’re placing rear-mounted props). Clever placement can make use of a single propeller to turn both ways, or to go forwards and reverse.
- Propellers have no visible power rating, and overall have very poor acceleration. Even though they can go in reverse, doesn’t mean they can change directions quickly.
- Most uniquely, Propellers are one of the few propulsion types that work underwater. However, they work even slower than normal under these circumstances.
Helicopter Engine
Helicopter Engines come in a basic and v2 variety, with the only difference being that the v2 has additional connection points on its top (which are stationary). The addition of the v2s top connection points allows you to stack helicopter engines (preferably rotating in the opposite direction to counterbalance the other one).
An insidious thing about the helicopter engine is that the rotation of it provides gyroscopic force, meaning even a base Helicopter engine, with nothing attached, gives your vehicle rotational momentum. Several template vehicles make use of this principle to give themselves rotational control and tilt, and with Logic components, can allow you to build auto-stabilizing vehicles. However, if you’re trying to make an actual helicopter and don’t know about this – prepare for your copters to spin wildly out of control. There’s a reason real-life helicopters have these in pairs, after all.
Helicopter engines, like propellers, can go forwards and backwards – in this case forwards is clockwise rotation (relative to its square base) and backwards is counter-clockwise. Vertically placed, either direction, when fitted with lift-generating wings or blades, will allow you to go up, so usually this is more essential when dealing with cancelling out gyroscopic force.
Helicopter Engines work underwater, and their modular attachment points mean you could technically fit them with flippers to make a swimming watercopter.
Underwater Propeller
As the name implies, this is a propeller that works only underwater, and is the simplest option that works under these circumstances. Compared to using a propeller or helicopter engine in the same circumstances, they provide about 3x as much overall speed and acceleration. The drawback is that they are entirely useless out of water.
Wheels
Wheels are the primary component you’ll be using to make any ground-based mobility. Compared to just about every other block, wheels are designed to interact with and make contact with the ground, and have special friction properties that interact with different terrain.
As discussed in the Propulsion section, wheels are designed to get direct power from Engines. They otherwise are simply attached to your vehicle via a freely-rotating axle (implicitly), and relative to the engines used, will rotate in the direction the arrows show. These can be disregarded if the vehicle being used doesn’t use engines, but for quick reference, the arrows on the top of the wheel should point forwards.
Offroad Wheel
The wheel type you start out Campaign mode with, they serve well during its progression, since none of the areas explored in it have any roads. It otherwise handles sand, grass, and dirt well, and despite the description, does fine on tarmac as well. However, it faces a bit of challenge when going through mud (note: almost no tires like mud at all). With dimensions of 2w x 4h x 4l, offroad wheels are moderate-size, and have an okish amount of drag.
It is one of the few wheel types that can float in water.
Racing Wheel
This wheel type is something of a mainstay for most racing modes, serving as a mid-profile wheel optimized for onroad driving. Racing Wheels flawlessly handle tarmac and pavement, with great acceleration on these surfaces. They’re passable at handling solid rock as well, but become unusably slippery and slow when on grass, sand, dirt, or mud. Like offroad wheels, they are 2x4x4, but benefit also from having very low drag.
Monster Truck Wheel
The heaviest and largest wheel type, Monster Truck Wheels suffer from these facts, as their mass makes them inherently difficult to accelerate with and means they suffer from an inability to really climb slopes that well. Other than that, they have good to average handling on most surfaces, and are one of the few wheel types that handles mud exceptionally well. At 4x7x7 and with mediocre drag, they aren’t speedy in any sense of the word, but their large size does make them quite good for creating a vehicle that can wade through water. Doubly so, as the Monster Truck Wheel floats in water, with their significant mass contributing to them serving as strong ballast.
Go-Kart Wheel
At a size of 1x4x4, Go-Kart wheels are nearly the smallest of all wheels, and nearly the lightest. They have similar handling to Racing Wheels, but suffer from their extremely small size – they can only take so much torque before they just inherently begin spinning out, meaning they are only feasible to use on ultra-light cars. Their aerodynamics are not as good as their larger brothers, either, being similar to Offroad wheels.
Slim Wheel
Despite looking larger, Slim Wheels are still the same dimensions in the editor (1x4x4) and are the lightest of all wheels. They don’t have that good of grip on most surfaces, but overall have a very similar profile to most other racing wheels – that is to say, passable traction on tarmac, and awful traction anywhere else. This all said, these are the go-to wheels to use on any vehicles that won’t be primarily using them, such as aircraft landing gear – doubly so, because they have excellent aerodynamics.
Drag Racing Wheel
These chunky, 3x5x5 wheels can be thought of as the on-road equivalents to monster truck wheels. Being the second heaviest wheels, and generating a fair amount of drag, they require a lot of engine power (much like monster truck wheels) to be used effectively. Their big size and chunkiness does mean that any roadster that uses them will be highly stable and have great traction under those circumstances, however.
Truck Wheel
These rugged wheels are the smaller variant of the Monster Truck Wheels, standing only at 2x5x5, with moderate drag and being the third-heaviest wheel type, truck wheels are well-suited to heavyweight vehicles that don’t need to traverse really rough terrain like mud. The Truck Wheel handles most ground about equally, with slowish acceleration. Unfortunately, it misses out on the big benefit that Monster Trucks get, in that it doesn’t handle nearly as well on mud as those do, and it also does not float in water.
Spiked Wheel
These wheels have almost identical dimensions and appearance to Offroad wheels, but have the added benefit of improved handling on mud – it’s not great handling, still being noticeably worse traction, but it is by far the best option for wheels if you want to quickly go over muddy land. Otherwise, it similarly handles most terrain quite admirably, and similarly to the offroad wheel, floats in water.
Motorcycle Wheel
These small, lightweight wheels are 1x3x3 in size, the smallest of them all. Despite this, they handle everything just about equally well. They can be seen as a counterpart to the Spiked Wheel, proving to be valuable as yet another tire type that can accelerate pretty well on mud (though again, not good turning regardless). If you’re planning to do races on Race Island, Motorcycle Wheels serve quite well, owing to their overall adaptability and light weight, and the average amount of traction on them lending themselves well to performing drifting.
Skis
Only really wheels in the most technical of the sense (I mean yeah they’re made to make contact with ground, right?) they provide a slippery, lightweight, and effective contact point with it. These are the ideal choice for takeoff gear for aircraft, but cannot provide propulsion by themselves – you’ll need to pair them with jets or propellers instead of engines. They also can float, but their mass is so small that it’s unlikely its buoyancy would really be able to practically hold up any vehicle of size.
Mechanic
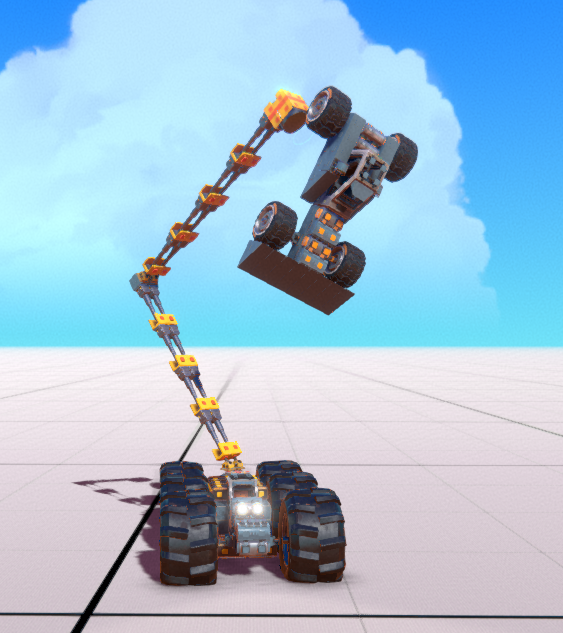
Mechanic pieces are advanced parts that allow you to coordinate vehicle sections to move in relation to one another, letting you make parts of them bend, rotate, extend, retract, and otherwise move. Globally (compared to full-on propulsion parts), mechanic parts lack strength and speed to serve as full-on mobility. What they lack in those aspects, however, they more than make up in in terms of precision. Mechanic pieces demandattention be used with them through the configuration menu settings to get the effects you want from them.
For your convenience, this guide will go into depth on how to manipulate these settings to get the desired effects. For posterity, here’s some information about how some common settings work:
Speed – Determines how quickly the mechanical part will move into place when given input. Faster input can be used to some degree to apply force (though only so much can be generated by one piece alone), and can be useful if you wish to shift your vehicle’s weight. However, if you want to keep a part steady (such as a lifting crane), using lower speeds can be much more beneficial.
The speed on a component can be set to a negative value in some cases. When this is the case, the inputs will essentially be inverted, and apply the speed in that opposite direction.
Angle – Determines the maximal angle that a mechanical component can bend or rotate from its resting position. When considering how these work, note that this is an angle relative to its base position as displayed in the editor, often in both directions. Restricting angle can help prevent a vehicles own parts from colliding with itself, while extending it can allow a part a greater degree of motion, as well as more potential space to build up speed.
Strength – Determines how strongly the component will attempt to keep its position without input. This ranges from 100 (always attempt to keep the position, rigid) to 0 (free-swinging joint). Use it to give a mechanical piece a bit of ‘give’ under pressure.
Hold Position – A toggle that tells the mechanism to hold its last position when given no input. This defaults to off, causing mechanics to go back to their base state. Leaving it off is useful for things such as steering systems where you expect mechanics to go back to neutral to help driving in a straight line. Meanwhile, turning it on is more useful for anything that might require more fine positioning over time, such as a spinning crane.
Some connection tips for using mechanics also include:
- Ensure that the connection points of the frame are only connected through mechanics parts. If a mechanics part is connected to the same block of vehicle chassis on both sides, it won’t be able to do anything.
- Self collisions: collision boxes of your vehicle’s moving parts are calculated off of all components, except for tubes, aerodynamic blocks, any frame blocks that are smaller than your standard ‘block’ parts, and other objects that are 1x1x2 or smaller – this isn’t fully consistent however (for example, steering hinges don’t seem to like clipping through objects despite them only being 1x1x1, and the longer grid block doesn’t clip nicely either).
Steering Hinge
This is the one mechanical part you start out Campaign mode with – a basic hinge that can bend itself up to 90 degrees in both directions, and mainly serves as a means by which to allow your cars to steer, by attaching wheels to these hinges. Positive input will make them bend in the green arrow direction, while negative input bends them in the red arrow direction.
Steering Help – This determines the amount of input reduction that should be given in relation to your current speed. Defaults to 100 (full slowing down with speed), but can be turned off entirely – turning this off can be useful for any hinges that you make that aren’t used for actual steering systems.
Large Hinge
A larger variation of the Steering Hinge – wider along its rotating axis, the large hinge cannot bend quite as far (maximum 60 degrees) but is more stable, and better suited for moving non-wheel components – doubly so, because most wheels always are mounted on a 1 by 1 connection point.
Trailer Hinge
A rarity amongst mechanics components, the Trailer Hinge has no configurable controls, and instead serves as a loose-swinging, fully articulated joint between the parts on each end. This can be useful for defining loose ‘towing’ extensions that can withstand and adapt to bending terrain. That said, be careful to having powered propulsion at both ends – because the angle between the two parts can be literally anything, this can make controlling a car that’s adjoined in this manner very unpredictable!
Suspension Spring
This 1x2x3 component absorbs shock diagonally, connecting a component on each side. This serves well for directly connecting a wheel to it.
Suspension components have two configurable settings, but otherwise don’t take any input:
Stiffness – The amount of weight required to compress the spring. Higher settings should be used for heavier vehicles (otherwise the suspension’s just always compressed and has no effect for what you’d use suspension for – rough landings and bumps). Otherwise, excess stiffness can make your vehicle sit higher on the suspension and raise its center of gravity.
Damping – Determines how much the suspension stops motion. Higher settings are more stable, and are better suited to flatter terrain, whereas lower lets your suspension be more ‘bouncy’ and reactive to motion, very well suited to rough terrains, but much more difficult to potentially control on a flat surface.
To finely observe how changes in these two settings affect your vehicle, take note of both how much the vehicle bounces when landing on exiting the editor, as well as how high or low it sits at rest. Adjust to taste.
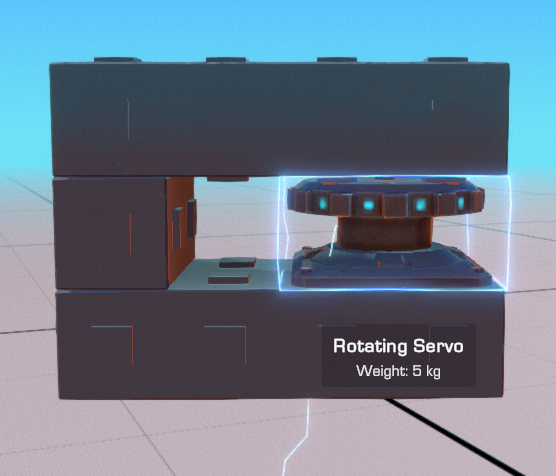
Rotating Servo
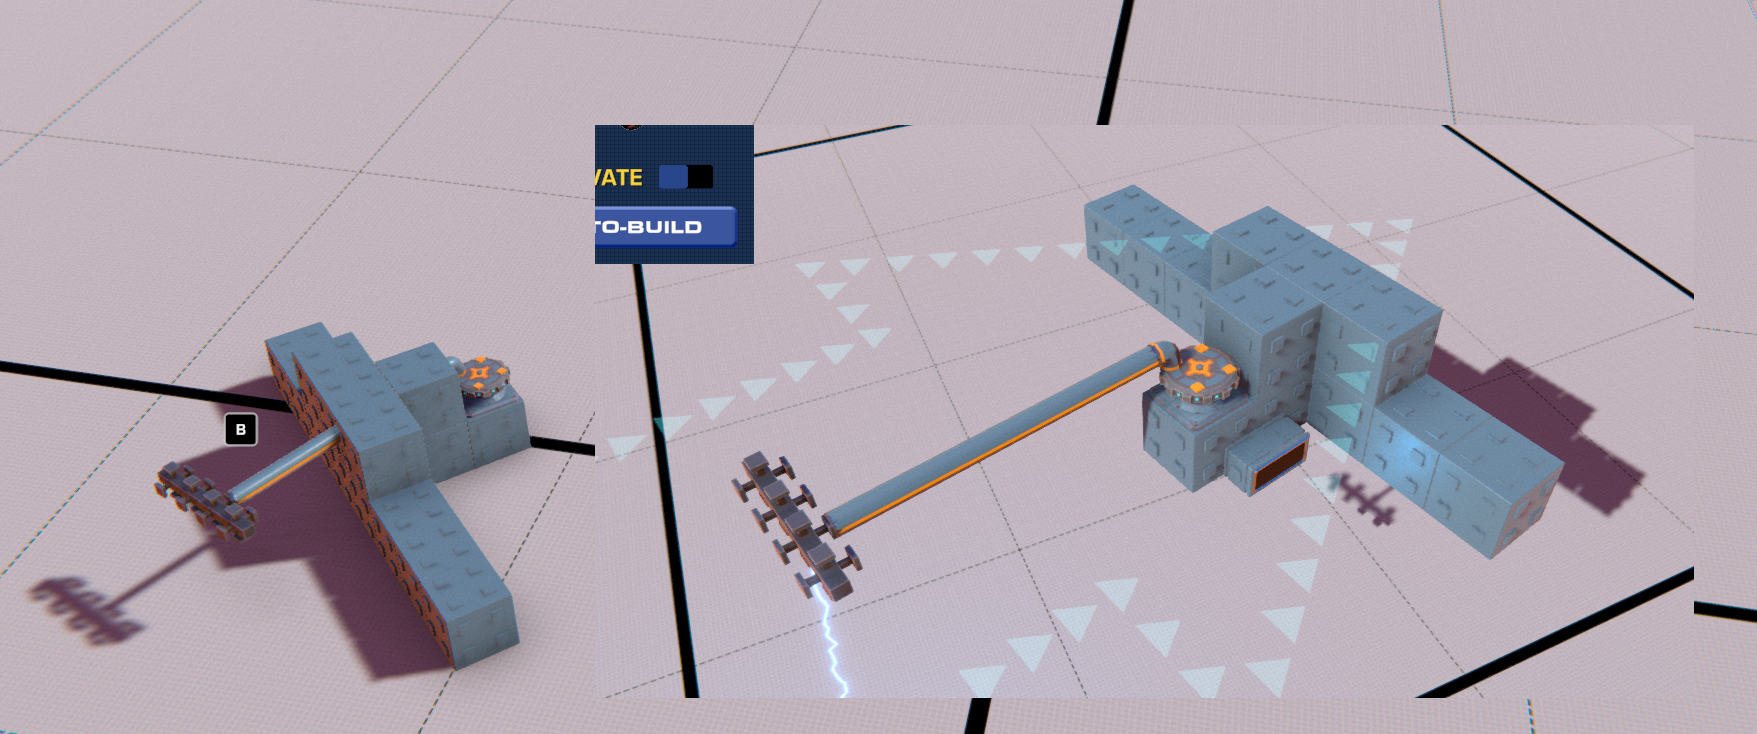
This flat (2x1x2) disc-shaped mechanic turns slowly and precisely within a defined angle. Positive input will rotate it clockwise (relative to its square base) while negative input rotates it counter-clockwise.
Rotating Servos are slow, steady, and precise, making them best used for precision rotation components such as cranes, turrets, or rudder-adjustments on planes. Of special note on their configurations is their angle range which can go all the way up to 360 – this allows the Rotating Servo to cover a full, cyclical range of rotating motion.
Mechanic (continued)
Spinning Servo
This taller (2x2x2) component is used for quicker, less-controlled spinning versus the precision of the Rotating Servo – the two shouldn’t be mistaken for one another! The Spinning Servo always rotates in a full 360 degree range of motion at a quick, uncontrolled rate. It cannot be told to hold its position, only stops spinning if given reverse input, and otherwise operates quite similarly to a (low-powered) helicopter engine. Overall, it has much fewer practical applications than the Rotating Servo – anywhere where you’d want to use one of these, you’d likely be better off just using an actual motor of some sort.
Piston
Narrow pistons for linear motion, fitting in a 1x4x1 space. At low speeds, they can be used as a means to stow long components for travel, whereas high-speed can be used to potentially create systems that allow you to jump! When contracted, they fit into a 1x1x1 space.
Pistons are notable for having perhaps the highest maximum speed of any Mechanic piece, making them quite good for providing a burst of force – however, since it’s only linear and because pistons got a maximum length, that’s really all you’ll get from it: one burst. Positive input extends the piston, while negative input retracts it.
Start Pos – Simple setting that just tells whether to have the piston start in extended (1.00) or contracted (0.00) position.
Auto-Reset – The piston version of the “Hold Position” setting, but reversed. Unchecked, the piston will hold its position, while checking it will reset the position to the value defined by the Start Pos slider.
Strange small bit of errata: pistons travel faster backwards than forwards, meaning if you set the speed of a piston to a negative value, then bind its negative input to what you want to use to extend the piston, you get more of a punch than with maximum positive speed.
Detachable Block
This niche mechanical piece serves as a way to separate a part of your creation from yourself. This can be used to create things such as: branching vehicles, weapon systems that deploy one-time-use mines or missiles, and multi-stage rockets as a few examples.
As would be expected, the detachable block can only be triggered once, after which it just destroys itself harmlessly and thus severs the connection between the blocks at either end. As always, the principle of connection loops applies in spades here – if the blocks on both ends are connected somewhere else on your chassis by a non-detachable block, this component then just deletes itself and does nothing.
Of technical note is that each split component off of the base structure then counts as its own vehicle – so if you respawn it, you can end up exponentially multiplying the number of vehicle parts in the game world, which might be a slight damper on performance. Use it sparingly; it’s quite clear that its intended use is for split-off components that will self-destruct after a given period.
Straight Suspension
Similar to the suspension spring, but this time, applied in a fully linear direction, and fitting into a 1x2x1 space. These tend to be useful for any wheel systems that might take dedicated head-on collision with the ground, versus more passive contact, as well as being useful for creating crumple zones for vehicles you might crash. Block-for-block, this straight suspension piece is much better for absorbing shock in its designated direction, but worse for preserving center of mass. Generally this is best used on heavier vehicles, and for separating different pieces of your frame, rather than as a direct mount for your components.
Aerodynamic
Aerodynamic blocks are just variants of Frame blocks that are sloped or curved specifically to minimize wind resistance. They are quite useful for the following purposes:
- Increasing your vehicles speed by reducing aerodynamic drag (the most obvious use)
- Reducing vehicle weight – unit-for-unit, areodynamic blocks always weigh less than the equivalent space in full Frame blocks would weigh.
- Restricting connections for tight mechanical configurations – the surface with the curve or slope on it restricts connection upon its surface.
Each aerodynamic block is generally shown in the facing that will produce the least drag. Facing the slope or curve of the block towards the front, even generally, will produce less drag than any other facings, in which case the block has as much drag as a standard frame block anyways.
Most aerodynamic blocks are self-explanatory and don’t have any control caveats.
Lights
they illuminate dark spaces.
There’s only one real thing to explain for these components, and that’s with configuring their controls:
Press For Light – Despite the name, all this toggle does when enabled is default your light on spawn to off instead of on (this also gets reflected in the editor). If you plan on interacting with the light in any meaningful way through controls (i.e. a button to switch your lights on or off, or having your rear lights only light up when driving in reverse), you’ll want to check this. Otherwise your lights will always be on, regardless of what extra mapping you do.
Tail lights are just for show/visibility, and the basic headlamps cast a LOT more light than the v2 ones, at the cost of weighing more and having a less aerodynamic profile. Moving on.
Lift & Drag
Lift and Drag pieces manipulate airflow, used to create vehicles that fly, hover, or stick to the ground. Every piece in this category affects how your vehicle will move through air or water, reacting to movement to produce flight or propulsion.
Spoiler
This extremely lightweight piece produces reverse lift, relative to its top. Obviously intended as use for sticking your cars to the ground better, you can turn these upside-down to use them as makeshift wings. They’re not as easy to use as other components for this, however, owing to their connection points all being on the sides and bottom, meaning you can’t balance out thrust without placing your thrust somewhere else than just on the wings.
Modular Wing
These wings are used specifically to create fully-flying machines, and feature connections on the tops, bottom, and sides. They’re significantly heavier than spoilers, note (the small variant being 10x heavier – still light at only 1kg), but they more than cancel that out at speed, and thrust can be balanced out on the tops and bottoms of them as well.
Modular Wings come in a small size (4x1x2) and normal size (4x1x4). The proper positioning for generating lift is to put the thicker end facing forwards, and the flat surface of the wing on the bottom side. Placing them upside-down (flat surface on top) will produce downwards force instead of lift, while placing them backwards will restrict your vehicle’s ability to tilt and bank in air (which might be useful if you need stabilization?)
Tailfins
These are basically intended as ends to the modular wings, matching the sizes of them fairly closely. With the exception of the “Tailfin” piece, all of them only connect on a single end.
The lightest variant is the Small Tailfin (1x2x2) followed by the Simple Tailfin (1x3x5), and ending with the heaviest Tailfin (2x4x2). Small and Simple tailfins are better for generating lift versus their weight, while the basic Tailfin includes connection points on the top and an even-width to be able to be placed centered on most vehicles (that aren’t using an odd-width seat like the Motorcycle Seat).
Tailfins are designed to be placed vertically in principle – unlike wings, they are symmetrical on both sides, and aren’t quite as good at generating lift. Instead, they provide rotational stability and control. If your flying machine is having difficulty flying in a straight line, despite its thrust, try adding one of these to aim it more easily.
Helicopter Blade
The Helicopter Blade is meant to be paired with the Helicopter Engines to produce lift through rotation. They’re symmetrical from front-to-back, meaning if you stick them onto a helicopter motor, they’ll produce lift regardless of which way they spin. similar to modular wings, however, they have a curve to them that’s designed to produce lift in relation to their motion. If placed upside down – well, they’ll produce lift in that direction, meaning you’ll go down instead of up. If you want lift, make sure the dip in their blade is pointed downwards instead of up, like in the picture to the right.
Helicopter Blades occupy a 2x1x8 area, the width making them perfect candidates to slap onto Helicopter Engines that just happen to have a 2-tile width with 2 connection points.
Paddles
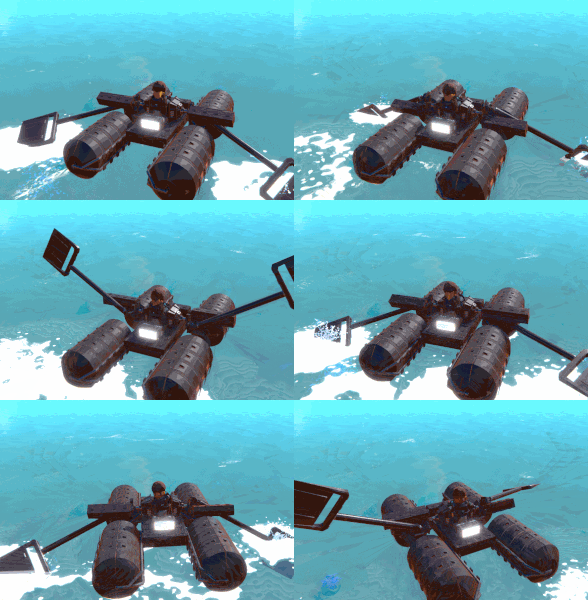
Paddles come in a regular size (2x1x3) and large size (4x1x4).
Powered Tailfins
The Powered variants of tailfins come in the same basic dimensions that normal Tailfins come in (simple, small, and regular), but differ in two major ways:
- They each use up one core power
- They generate additional drag – in other words, they generate additional resistance to any motion that isn’t parallel to their facing – in other other words, they really do not like travelling sideways.
In short, just use these things if you’re having an extremely hard time stabilizing your airplane or helicopter and want it to travel very straight. Otherwise the “artificially enhanced drag” usually will restrict your mobility in certain directions while drawing from your power core supply, which you could use for any number of extra propulsion, or utility gadgets.
Tubes
Tubes are, primarily, 1-block-thick components that excel at three primary tasks:
- Reducing weight in comparison to an equivalent number of Frame blocks (save for grid blocks)
- Restricting connectivity for interactions using mechanics or propulsion blocks that might define moving parts
- Allowing moving parts of your creation to clip through one another – when concerning self-collision, most Tube parts that are actually tubes don’t count for such collisions.
Aside from this, tubes tend to lack a degree of utility – if you have grid blocks, those generate the same amount of drag, are easier to rotate and configure, and even weigh lighter all at once. Tube Elbow pieces, meanwhile, are disproportionately heavy for the single space they take up, and ancillarily, the cone blocks in this category also make 0% sense (I have no idea why they’re here instead of just in the Aerodynamic Block section.)
Given the rule that larger blocks tend to be more durable, however, longer tube variants can be of some use for lightweight-distant connections (1×8 being a shoutout for this purpose) and can enable some specific, precise connections (the diagonal pieces, for example, being great for attaching components such as spoilers). Otherwise, there’s quicker and lighter ways you can build with that were discussed earlier in this guide.
Balance
Balance blocks are used to redistribute your weight and buoyancy on your vehicle. These are generally more useful for utility vehicles (cranes, bulldozers, turrets) and boats, whereas most racing vehicles and aircraft would be bogged down by these components instead – further enforced by just about every piece in this section having poor drag.
Weight Block
Weight blocks are small (2x1x2) blocks that weigh disproportionately large amounts. They come in two sizes: a cylindrical basic weight that weighs 30 kg, and a heavy weight block that is rectangular, has connection points on all sides, and is 50 kg instead. While heavy weight blocks are more connectable, they do suffer from having worse drag than the cylindrical basic weights.
Weight blocks are essential if you’re trying to make a utility car with a component such as a crane, and are especially key in this purpose during Campaign as they will allow you to apply leverage against the force of a carried object or thin, protruding parts. This can help prevent your vehicle from tipping over in these cases, or just allowing them to even move when carrying a heavier load.
Pontoons
Pontoons are floatation devices used to create boats (specifically), and come in small (2x1x1), medium (4x2x2), and large (8x4x4) sizes. Larger sizes obviously get heavier, but in exchange provide more floatation for your vehicle. Obviously, you’ll want enough on a boat to keep yourself afloat, but any excess floatation otherwise will be a waste. Pontoons only have attachment points on a single side, so they’re usually going to end up on the outer perimeters of your vehicle.
The positioning of pontoons should be fairly high up for stability, but can be put lower to try and float your boat higher, and generally follow semi-similar placement guidelines as placing wings or gimbal jets. Keep in mind that this works in tandem with your Center of Mass – if your center of mass is over your center of floatation, then the boat will usually capsize if it’s tilted too far while sailing.
Pontoons have less drag when placed longitudinally, which is an edge-up they have on the other two flotation devices, and makes them well-suited for being added to sea-planes.
Buoyancy Control Device
The BCD is a cubical, medium-sized (4x2x2) pontoon with adjustable buoyancy. In most respects, its just a flat upgrade to the basic pontoon with the exception of it having a few less connection points.
Positive input to BCDs will increase buoyancy, while negative input will decrease it to sink or dive.
BCDs are primarily used to construct submarines, and adjusting the floatation can be used to adjust your depth and facing underwater, following the same general rules of centered buoyancy (or uncentered if you wanted to tilt your sub). What’s also nice (even for non-submarines) is that the Starting Buoyancy of the block can be adjusted, ranging from anywhere between not at all to as floaty as a standard Medium pontoon. While they lack a way to just set their buoyancy to a specific level, this does allow it to be used without controls as a means by which to finely balance a sea vehicle.
Hull Blocks
Hull blocks are perfectly cubic (4x4x4) pieces with lots of connections on all sides, coming in corner, edge, and center pieces that are suitable for creating structures for boats. These pieces are ideal if you’re planning to build a boat without much respect to optimized floating height (or in other words just want to make some kind of raft or boat that just keeps itself over water). They can be very easily chained together and connected with other structures to make a big, floaty vehicle.
They otherwise are just about equal to a large pontoon, including their weight.
Gadgets
Gadgets are specialty tools that use up your Power Cores to give your creations additional options of what they can do. Globally, most are small, but can pack a big punch. Just about every piece of gadgetry is configurable in some way.
Cannons
Bring out the big guns, Cannons are used to inflict damage to objects and vehicles with projectiles. They come in a subclass of Large Cannons (The Tank Cannon and Large Cannon), which cost 3 power cores and fire an explosive shot once every second, and the Small Cannons (Small Cannon and Tiny Cannon) which cost only one power core, and fire a high speed ballistic bullet every 0.5 seconds. The only difference between the two choices in the subclasses is how they’re positioned, with the Large Cannon and Small Cannon being mounted on an angled turret, and the Tank Cannon and Tiny Cannon being mounted directly facing off of the surface they’re attached to. Otherwise, there are minor differences in how they all compare in weight and size but they otherwise operate exactly the same.
Cannons generate recoil, so keep that in mind when slapping them on a very lightweight vehicle. Alternatively this does make them a possible source of propulsion if used wrong enough.
Cannon projectiles drop off over time (with greater gravity applied to Heavy Cannon shots than the light ones), and have a limited range, turning from yellow to green as they go further. The shot speed also scales with the speed of the cannon, meaning that attaching a cannon to a piston or other moving component that thrusts it forward while firing will make the shot travel faster as well.
Dispensers
Dispensers are gadgets equipped to generate physics objects in the world. They have both positive and negative input, with the positive input spawning (really more flinging) the object out from their spawner, and their negative input despawning generated objects immediately.
When you use positive input for any dispenser that has a nozzle (ones that take up 2x4x2 instead of 2x2x2) you can charge the dispenser up to fire out the object at a higher speed, getting it more range (and potentially more damage on collision.) It takes roughly 0.3 seconds to reach a maximum charge for this firing.
Beach Ball Dispenser – Dispenses whimsical bouncy beach balls. These fire out at a lower maximum speed than most other dispensable objects, and do not cause any damage to vehicles, making these good for sports or play.
Snowball Dispenser – Dispenses orbs of snow. Unlike most other dispensed objects, snowballs destroy themselves on contact with any surface, no matter how fast or slow they fly or fall. Their maximum launch speed is quite high, and they do cause damage to vehicles.
Concrete Wall Dispenser – This is the only dispenser that doesn’t charge up and fire its item, but rather just plops it out unceremoniously nearby. Concrete Walls are wide, sturdy, and heavy, meaning they make for rude traps and blockades to stop people from moving.
Metal Crate Dispenser – These dispense large metal crates that are heavy and cause damage on contact, while also not falling apart on contact with the ground.
Dispensable objects globally follow these rules:
- They cannot be interacted with using the Tractor Beam
- They persist until they either reach a spawn limit for the number of objects for the given player, or until they manually despawn using negative input.
- They do not float in water.
Tractor Beam
This used to be called the Electromagnet (which made its lack of interaction with metal crates all the more confounding). Nonetheless, the tractor beam’s utility in Campaign Mode cannot be understated, and its ability to otherwise attract non-player-generated objects such as orbs or salvage makes it highly useful for manipulation and moving objects. The Tractor Beam can also influence other player vehicles.
Positive Input to the tractor beam will attract objects into its area, while negative input repels objects instead.
Each Tractor Beam on your vehicle can latch on to one object. When not hanging on to something, it emits a wide cone of energy, which will shrink as soon as something is within its grasp. Having multiple Tractor Beams (properly spaced) can thus allow you to carry along multiple objects at once.
Anchor Pin
This gadget is the most unusual – it has no Power Core cost, doesn’t have controls, and basically is the inverse of the Detachable Block (a mechanic piece, where it honestly might make a little more sense?) What it does is: as soon as it makes contact with the ground, an object, or another vehicle, it forms a permanent sticky bond. This even extends to dispensable objects (i.e. the things that Tractor Beams cannot affect). Anchor pins stay bonded to the object they are stuck into, until you repair your vehicle.
The most valuable uses for the Anchor Pin are in fact, not for vehicles, but for basically any stationed emplacement or structure, like a turret, tower, standing ride, or house. For this it’s especially valuable when getting stuck in terrain, as it forms essentially the ultimate counterbalance.
Dynamite
These small blocks of explosive (2x1x1) can be fitted onto a vehicle to make it explosive, allowing you to either just destroy yourself in a horrible blaze of glory, or to set deadly traps or create custom missiles. Dynamite explodes when either detonated manually (using the positive input) or when subjected to a strong enough force, similar to volatile pieces of salvage in Campaign mode.
If you want to use them to make deadly traps, it’s valuable to combine their nasty explosion with logic blocks to define a trigger, since there’s currently no way to give a remote, separated part of your vehicle signals after they detach.
Logic
The most complex blocks, Logic Blocks encompass a variety of logical gates, sensors, and tools that can be used to both automatically control your vehicle’s parts, or to organize your vehicle’s controls into separate keybinds for specific purposes.
Logic Blocks utilize an Output Scale to control the level of ‘control’ they send out to other components or logic gates. For most standard purposes, the values of +1.0 and -1.0 produce the most desirable effects, but more fine-tuned numbers can perform tasks such as holding slight angles on aerial or buoyant components and fine adjustments.
Some valuable things to realize about Logic Blocks include:
- they always weigh identical to an equivalent number of full blocks (as shown in the “frame” category) of the same size, if such a piece exists.
- Most Sensor blocks are alignment-sensitive, meaning they check for their conditions in the direction(s) the block is facing. Usually this corresponds with indicators or surfaces of the block that have displays on them.
- Logic operation blocks accept input, both manual and from sensor blocks. Sensor Blocks only generate output.
- Output from a Sensor Block is always binary. It puts out “0” if the condition it’s set up for isn’t true, and will put out the value it’s set to when the condition is met.
- Logic Blocks treat any non-zero input as valid input. When this is done, they scale the number (which can be positive or negative) to the output value that is listed on them
for example, a logic block that has its output set to -0.5 might receive an input of -0.9. When it sees this -0.9, it rounds the number to -1.0, then multiplies that value by -0.5, resulting in +0.5 instead. Hopefully that made any sense. - The Input of any Logic Block is the sum of all output signals it receives. This means if a Logic Gate gets a signal of +1.0 and -1.0, they both cancel out and nothing happens with the gate.
- Manual input is always +1 and -1.
- It should be noted that feeding another component (such as mechanics or engines) output from these blocks tends to remove some degree of “smoothing” that these parts have when controlled normally. Sometimes just doing the controls manually from the component itself just works better.
Logic Blocks – AND, OR, and XOR
These 2x1x1 blocks are logic gates. They generate their output when certain rules about their input are met. Their displays show a venn diagram that visually represents what it’s meant to do, as well as two arrows – one pointing in (the input arrow) and one pointing outwards (the output arrow), which turn red or green to reflect what kind of input or output they’re receiving or generating. A white outline of an arrow means it is receiving or generating no signal.
From the least restrictive to the most:
OR – An OR gate will generate output if any input hooked up to it – be it a sensor, another logic gate, or manual controls, becomes non-zero. OR gates are the simplest way to potentially hook up a logic chain of input that can control multiple components at once.
XOR – XOR gates generate input when only one of their inputs are non-zero: if it gets a signal from a single component or sensor, it will generate its own signal scaled off of that input. If it gets it from an additional sensor, logic gate, or control input on top of that, then it stops. Signals that cancel one-another out also count against this limitation, so even if two sensors/gates sending a +1 and a -1 that results in a 0 will still block the XOR gate from generating any output.
XOR gates can be helpful for generating inverted (i.e. NOT) operations, by hooking them up to one sensor that is always on, followed by taking input from some other source that stops its signal.
AND – The AND gate will only trigger if and ONLY if every single source of input the gate is receiving is non-zero. This accounts for every other gate or sensor that is attached to it and any direct input that might be configured on itself as well. While this can make it helpful for defining precision controls that might only occur under very specific circumstances, it does make it very restrictive to use under simple circumstances. Inverse of XOR, additional signals that cancel out one-another count towards its activation rather than against it.
Logic – Sensors
Sensors generate output based off of information they collect from the space around them. These are the main way you can use logic components to construct cool automated systems such as proximity mines, auto-balancing gyroscopes, self-righting mechanisms, or neutrally-buoyant floating.
Sensors have the following common configurations:
- Invert Trigger – This acts like a NOT operator for the sensor itself, sending its output signal whenever the sensor is satisfying the opposite of their standard condition. This can be particularly useful for creating ‘always-on’ input signals, especially for any non-piloted mechanisms.
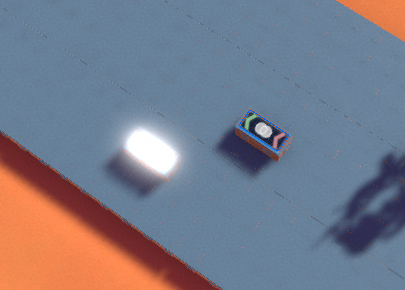
Distance Sensor – The distance sensor gauges the distance from the screen on its 2-tile long side, to any solid object in front of it. If an object is within that distance, the screen lights up white, and sends its output signal.
Distance Sensors are the easiest of the sensors to adjust to always generate signal, owing to their small size (2x1x1) and the ease of configuration: just invert its signal, and set its activation distance to 0, as every possible surface it could detect would be further from itself than that.
Speed Sensor – Speed Sensors have an arrow that points towards an opening on their small 1×1 side that gauges how fast the vehicle or machine it’s attached to is travelling in that direction. Once they cross this speed threshold they generate their signal.
They work much better at detecting linear velocity (i.e. speeding forwards in a straight line along with the sensor) rather than rotational velocity (i.e. spinning rapidly in place), but it is apparently possible to use them in this manner.
Speed sensors can be used to create braking systems for cars and hovercrafts, by sensing forward/backwards speed, then feeding these into an OR gate that hooks into an input-enabled AND gate to provide reverse-speed to your tires or jets. Much like distance sensors, they can also be adjusted to be ‘always on’ signals.
Altitude Sensor – The Altitude sensor is arguably the least useful of the sensor types for signal generation – it is the only sensor type that is entirely direction-agnostic, though it is still sensitive to its location on the vehicle. They generate signal when they are above a provided altitude from sea level.
It’s also unique for being the only sensor that accurately shows a number (representing the block’s height over sea level). Its primary uses thus are for measurement, and for coordinating advanced boat or submarine mechanics.
Angle Sensor – These larger sensors (being 2x2x1) detect the angle at which they are held. These sensors work by attempting to always point their arrow up, regardless of how they’re held. When the arrow (or if you look closer, the ball inside the sensor itself) is within the blue zone (which is always relative to your own vehicle), it sends a signal. These are the most configurable of the sensors, with two settings:
- Direction: Rotational alignment of the activation zone relative to its top. Realistically you only really need to use any number ranging from 0-90, since all other angles can be achieved just by rotating the entire sensor itself.
- Angle: The size of the range in which the sensor can be activated.
Angle Sensors are simultaneously essential to reacting self-righting or self-balancing systems, but for those purposes you’ll usually need at least two to give the sensors enough context to tell which way a vehicle might be listing, and thus what balance components to activate and in which directions. It gets even more complex if you want to do it both from left-to-right and front-to-back, as that’ll require you to put down two extra angular sensors placed perpendicularly to the first ones.
Angle Sensors usually do best when placed vertically rather than horizontally for these purposes – again, owing to their sensor point wanting to point up. I guess these could be used to detect micro-tilting?
Compass
Looking mostly identical to the Angle Sensor, but in red, the Compass will always attempt to point its needle to the north, which can be used for additional navigation context on larger areas (without having to flash between your game and your map). As with the Altitude Sensor, this seems more useful as an informational tool rather than a signal generator – I mean, unless you wanted to make a rocket that goes NORTH very quickly for some reason.
This said, Compasses work inverse to that of Angle Sensors, in that they are the most valuable when laid flat. There’s probably creative ways these could be used to coordinate fine lateral movements, but in these cases it’d probably take at least 4 compasses to get any kind of meaningful result.
Physics Fundamentals
To help with engineering functional, well-handling vehicles, some concepts are useful to discuss here:
Center of Mass
The center of mass of your vehicle can be thought of where the overall balance of the vehicle lies. Usually it’s static on most vehicles, but can shift if your machine includes extending or bending parts, which can both be utilized and taken advantage of, or make your vehicle handle in unintended ways.
To find it, it’s usually best to hover over parts on your vehicle and try to find where the heaviest parts of it are. Sadly there’s no shortcut to this, it’s just a thing you have to get a sense for by knowing how and where the pieces are.
Trailmakers’ built-in help files discuss this concept slightly, but it cannot be overstated how important knowing how and where to estimate this center of mass is for making any type of vehicle, because just about every source of propulsion or movement interacts with how it’s centered in relation to it.
The most general rules I can give for designing things in relationship to this center of mass would be:
- Cars/Ground Vehicles: Should form a pretty stable pyramid between wheels to avoid tipping over. More out of necessity than performance, cars need to have their wheels below center of gravity.
- Air vehicles: Center of mass should be balanced against the center of lift – primary sources of lift (the big wings of a plane, or the main propeller of a copter) should be around or on top of this point to avoid tilt upwards or downwards, and work best, inversely to wheels, when placed towards the top of the vehicle.
- Sea vehicles: Center of mass works with centered buoyancy, and you’ll need more buoyancy to counteract heavier parts of your machine. In these cases, excess buoyancy can help for making boats capable of lifting heavy loads without sinking, and you will always want to put your center of buoyancy above your mass to avoid capsizing.
- Hovercrafts and jet-directed mobility: Thrust that’s centered and balanced around the center of mass will produce linear movement (accelerating), whereas thrust imbalanced around it can produce intentional or unintentional rotation. Use this to turn hovercrafts, or to re-angle submarines or jets.
- The heavier your vehicle gets, the harder it becomes for minor weight shifts (either from the vehicle’s motion itself or from anything it might be lifting or moving) to offset that. This means that heavy vehicles, while they might be slower, benefit from being able to haul larger objects without unexpectedly capsizing.
Turning Techniques
To rotate vehicles, you generally can take one of three approaches:
- Force Direction – Re-angling a component that applies force. Examples of real-life vehicles that use this include cars, motorboats, and helicopters.
- Airflow Direction – Re-angling the vehicle using changes in air-resistance or buoyancy. Examples of real-life vehicles that use this include airplanes, sailboats, and submarines.
- Specialized Direction – Usage of specific components that are individually created to control turning. Examples of real-life devices that use this method include self-guided missiles, Roombas and other robots, and EVA modules.
Force direction usually involves usage of Mechanics parts to bend parts of your vehicle that generate your forward motion. The most classic and upfront way that Trailmakers demonstrates this is through use of wheels directly attached to turning hinges – but you can take this principle even further: nothing’s stopping you from attaching underwater propellers, helicopter engines, or entire halves of your vehicle to these kinds of hinges either.
Redirecting the way you apply force tends to be one of the simplest ways you can make a turning system, and in some ways, there is considerable overlap with how this manifests with how directing airflow also occurs. The key element here is that there’s a fundamental change in the direction in which force is being directed: you turn a car’s wheels right, and the movement to turn right is both due to how the wheels themselves change angle and are rotated forwards, but also because there’s now movement forward being generated in that direction. Meanwhile, the Helicopter is an even better example of this, because the direction the top rotor is angled determines how it moves laterally.
Pros: Very easy to implement with Trailmakers’ tools, works well with redistributing mass of the vehicle.
Cons: Difficult to turn or maneuver in tight corridors
Airflow direction emphasizes use of actual aerodynamics to produce desired direction and turning. Rather than relying on a source of thrust or propulsion to produce a change in direction, a change in pitch, direction, or yaw is generated because of how the vehicle is travelling through the air. Consider a propeller airplane: the engine on its nose doesn’t change angle relative to the rest of the plane’s chassis. Instead, it can roll, bank, and turn by using specialized mechanical parts that re-angle parts of its wings and rudders to generate that motion. Granted, it’s obviously being combined with Force direction to achieve maintained flight with the propeller, but it’s on a scale outside of the vehicle itself.
Pros: Essentially zero power core draw, lends itself well to higher speed navigation
Cons: Requires strong understanding of aerodynamics, coordination of mechanical parts, and close attention paid to your vehicles mass and physics.
Specialized direction is perhaps the most flexible and novel of turning methods, and just about all the examples I can think of this in real-life are machines or robots rather than true vehicles. This principle makes sense, since it relies on the employment of several individual sources of force that can be utilized to control facing or movement.
Consider the Roomba: This is a robot that moves using two individual wheels aligned on a single “axle” (they don’t actually share an axle however, and for a very good reason we’ll get into). In contrast, cars have two axles, and they turn by re-angling at least one of them to produce a curving motion. In contrast to that, Roombas rotate in place by turning one wheel forward, and either turning the opposing wheel backwards (to rotate in place) or keeping it still (to rotate in an arc). This kind of motion wouldn’t be possible if the wheels actually shared the same axle – and thankfully, that also isn’t a consideration that cars or wheels in Trailmakers have to worry about anyways!
This approach oftentimes is seen in practice with lots of mini-thrusters (i.e. the Gimbal Car, which uses sideways thrusters on the front and back to rotate), but also combines well with Logic blocks to coordinate these controls and send positive/negative impulses to different parts to produce the desired movement.
Pros: Unrivaled maneuverability and stability, full customizability, great interaction with Logic sensors
Cons: Requires effective use of components positioned at correct parts of your vehicle to operate. Can have a high Power Core draw. Often sensitive to external forces or unexpected obstacles.
Hope you enjoy the Guide about Trailmakers – Basic Gameplay + Editor Controls Documentation + Parts & Construction Catalog, if you think we should add extra information or forget something, please let us know via comment below, and we will do our best to fix or update as soon as possible!
- All Trailmakers Posts List










Leave a Reply