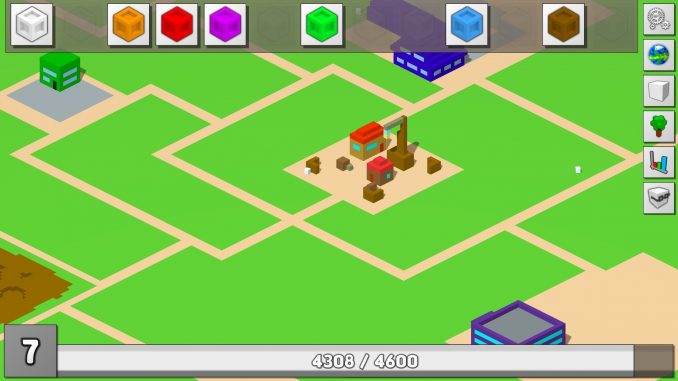
Preface
Before getting started with how to defeat each boss and their tiering system, I will explain how the UI (user interface) works for the Statue of Cubos. Upon clicking on the statue (or the black/universal colored block in the menu at the top of your screen), you will be greeted by a menu like this one.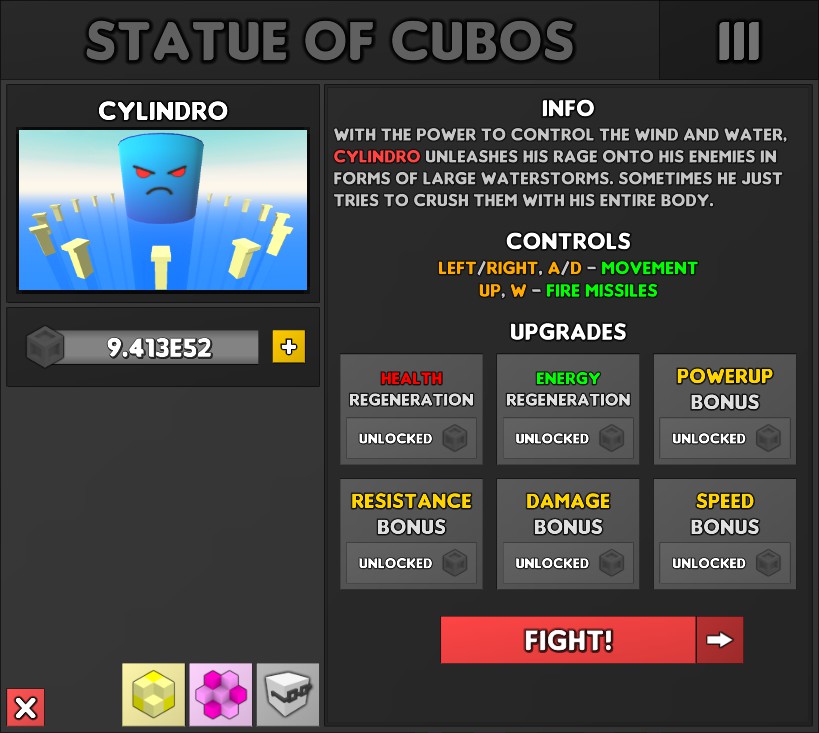
In this screen, you c
an do multiple things. First, there is the boss’ portrait, which you can click to access a boss selection menu, similar to the one in tower testing to change regions. You will unlock an extra boss at the following military tiers :
Boss 2 at military tier 4
Boss 3 at military tier 6
Boss 4 at military tier 10
Boss 5 at military tier 15 (not implemented yet as of the writing of this guide)
The second thing you will notice in the Statue of Cubos are different upgrades, which can be bought with black resources. These upgrades give you multiple strong advantages in defeating the bosses in question, BUT they are specific to each unique boss tier. That means an upgrade you bought for tier 1 Cylindro will not affect tier 2 Cylindro, for who you’ll need to buy another set of upgrades, which will all be way more expensive. Every boss has unique upgrades, and more upgrades can be unlocked by increasing the level of the Statue of Cubos using the Construction Firm. (For the sake of this guide, it is assumed you always have bought every upgrade before attempting the boss.)
The final thing you will notice at the bottom is the FIGHT! button, which may or may not have a little arrow to the right. Pressing FIGHT! will launch you into the battle, which will be discussed in separate sections for each boss, and the arrows allow you to change the tier of the boss you wish to fight. To unlock the next tier of a boss, you must defeat the tier before it, an each boss tier drops linearly more exotic gems than the first tier. However, each tier of each boss only drops exotic gems on the first defeat.
Cylindro, the God of RNG
First boss on our list is Cylindro, a boss which starts at a very low threat at tier 1, but ramps up to impossible levels really quick.
First thing to know about the Cylindro fight is that there is no reason why you shouldn’t just hold w/up at all times during the fight. Firing missiles doesn’t prevent you from moving, only the other way around.
Second thing you need to know is that Cylindro has two faces, which behave differently. Face 1 always does fast slams, and the other face does slow slams, single wave attacks and double wave attacks. Knowing which is which at all times is key to defeating tier 5 and 6 of Cylindro.
Third thing you need to know is that Cylindro slightly changes when reaching certain percentages of HP left (you can calculate precisely how far you are from one of these changes by pressing f2, since Cylindro is the only boss whose hp and state are shown to the right of the debug menu.)
Upon reaching 75% hp, Cylindro receives a slight boost in attack speed and rotation speed. At 50% hp, Cylindro not only receives another small speed boost, but his AI’s RNG (random number generation) changes too, which will be explained later. At 25% and 10% hp, Cylindro receives once again small speed boosts. Higher tiers of Cylindro also receive a higher starting speed.
Regarding Cylindro’s AI, there are two different known AIs, which will be referred to as >50% and <50%. Big thanks to TigTig#0621 (current holder of the Cylindro role on the Discord as of the writing of this guide) for figuring out the approximate odds for each attack in the >50% hp phase of the fight, which rounds to :
50. chance for a fast slam
20. for a slow slam
20. for a single wave attack
10. for a double wave attack
RNG for <50% hasn’t yet been exactly calculated, but there is a very noticeable decrease in fast slams and single waves after Cylindro goes below 50% hp, and a massive increase in double wave attack probability.
Now, for each attack, and how to survive them :
Fast slams : These are the bane of your existence. The only tell for them is that Cylindro’s current face is Face 1, which only can do fast slams. For tiers 1-3, your best bet to avoid them is to be always on the move while Cylindro is facing you with his fast slamming face. However, when you reach tier 4, something strange happens… Cylindro starts to become fast enough to do do what can be called inevitable slams. You may still be able to dodge them very rarely, but that is not reliable enough to count on it. Starting tier 4, your best move is to completely ignore Cylindro while Face 1 is pointed towards you and just gun him down. Each fast slam deals 20% of your maximum health (considering max upgrades), no matter the tier.
Slow slams : These slams are way easier to dodge, and they are the only move Cylindro has that can be telegraphed. When Cylindro prepares to do a slow slam, he will do a slow rotation around himself before slamming at the same speed as a fast slam. This is especially noticeable when the tower is moving. What makes this slam easier to dodge is the fact that, as soon as Cylindro starts the tell-tale rotation, his target is locked at the location at which the player was at the beginning of the rotation. Each slow slam deals 20% of your maximum health (considering max upgrades), no matter the tier.
Single wave attacks :
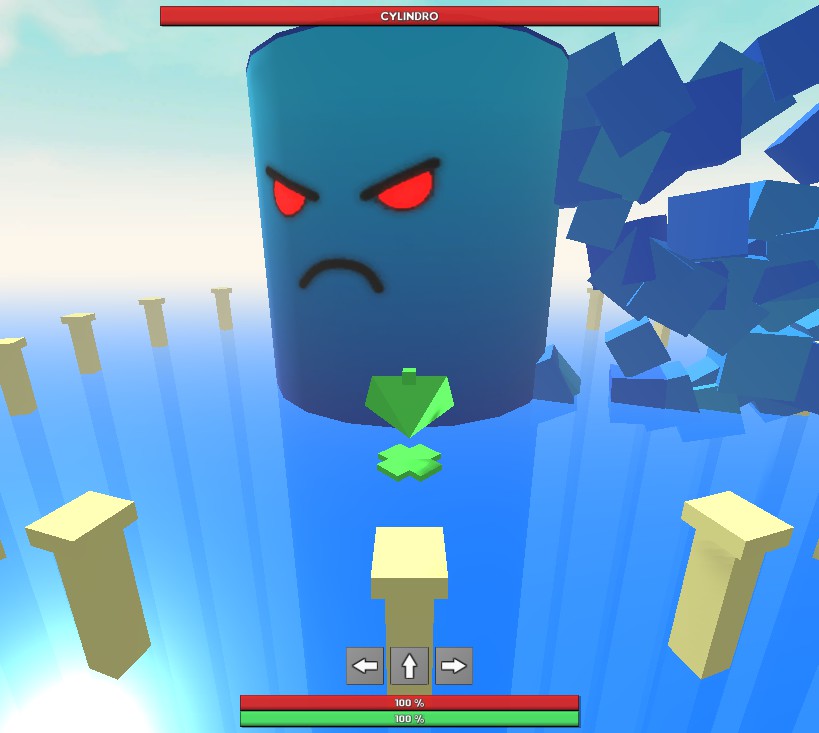
This is the moment you can shred down Cylindro’s health bar. When doing a single wave attack, Cylindro will face you and a jet of water cubes will appear to the left or right, perpendicular to his face. This attack scales up in speed as Cylindro’s health goes down, but it has what every other move of his lacks, which is a blind spot. To punish this attack, simply run away from the water jet until you notice it changing direction. There is a small section of the arena where Cylindro will never be able to touch you with the single wave, but this area becomes smaller as Cylindro’s speed increases, but it doesn’t become non-existent before tiers that haven’t been attained legitimately as of the writing of this guide. Each single wave deals 40% of your health pool with all upgrades, BUT IT CAN HIT YOU MULTIPLE TIMES IF YOU MOVE IN THE SAME DIRECTION AS IT, so jumping through the wave is a good idea if you are sure you won’t be able to outrun it.
Double wave attacks :
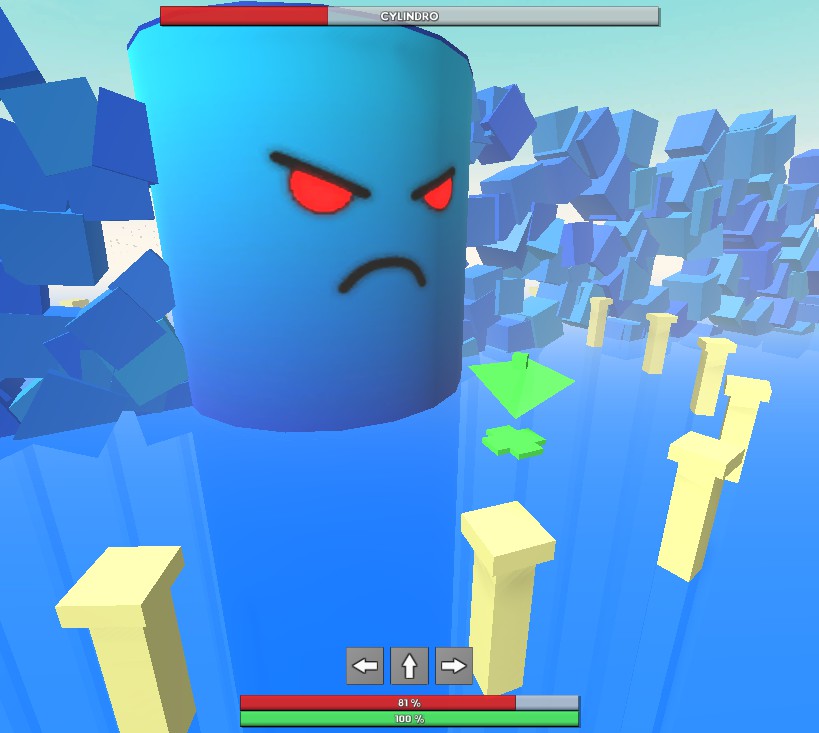
Pretty similar to single waves, but now there is another wave at the opposite side of the first one. This removes the single wave’s blind spot and makes double waves extremely deadly at higher tiers. Your greatest enemy while facing this attack is overconfidence. Yes, at lower tiers, you can outrun the wave. Yes, you have some time to shoot Cylindro when the waves change direction. However, you must learn your limits and not overshoot them, as this could lead to you taking damage equal to 40% of your max health with upgrades, or worse, since double waves have the same multi-hitting capacities as single waves. Once again, jumping through the wave is a viable option to avoid getting hit twice instead of once.
Tiering Cylindro and the upper limit of RNG :
Cylindro is the boss which scales the most with higher tiers as of the writing of this. Cylindro’s HP starts at a pretty low 100 (each missile you shoot dealing 0.125 damage, so you only need 800 missiles to kill t1 Cylindro), which scales exponentially with tiers, the exact formula being 100×1.5^(tier-1). This means Cylindro 2 has 150 hp, Cylindro 3 has 225, etc…
When talking about Cylindro tiers, there are two main breaking points. At tier 4, fast slams become nearly impossible to avoid, so Cylindro fights become reliant on the RNG you get, as to avoid getting killed by attrition through 20% hp hits. At tier 7, double wave attacks become faster than the tower, making tier 6 the highest known tier defeated, and the highest possible without absolutely insane luck in the <50% hp phase.
As of the writing of this guide, only two players have defeated tier 6 Cylindro. Those are TigTig#0621 and TECHTERROR731#5688, so if you have further questions, go ask them! (we won’t mind… I hope.)
Pyramidas, or the battle of a hundred years
Pyramidas is the second boss you will encounter, unlocked by achieving Military Tier 4. Pyramidas is also the most annoying boss to defeat of the bunch, and the author of this guide currently holds the record on it (which may or may not be a coincidence). Pyramidas is a “shoot them up” type minigame where you must shoot down the different parts of Pyramidas to defeat it. The Pyramidas fight is divided into three distinct parts, or phases, and every single piece of Pyramidas must be destroyed in order to achieve victory.
Pyramidas’ sides : Your tower will constantly rotate between the four sides of Pyramidas and have to fend off against the various pieces of Pyramidas on that side.
Plants :
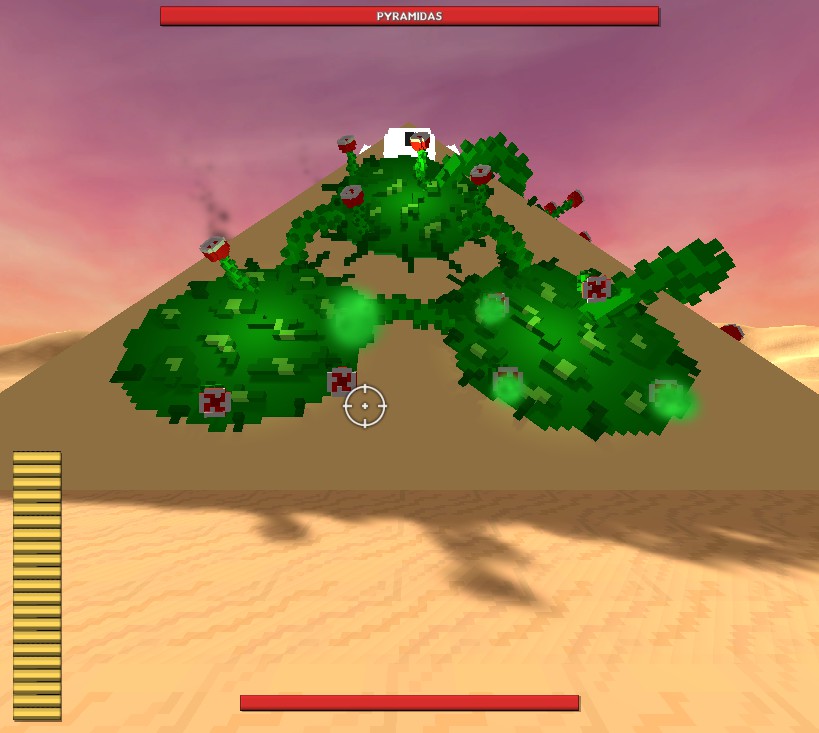
The first two sides of Pyramidas you will face are the nature ones, covered in red/white plants. Each plant has a certain range, and defeating the bottom-most plant makes the screen move slightly higher the next time you encounter its side. While your tower is in the range of a specific plant, that plant will rotate to face your POV (point of view), and shoot one green projectile at your screen, which can happen at any time between when you first enter the range of the plant and the screen starting to move to bring you to the next side. You can shoot these projectiles to destroy them, and projectiles always take one hit to destroy, no matter the tier of Pyramidas. Do take note that the leftmost plant on the first side (the one right under the fumes in the picture above) can shoot a projectile at you for the brief moment you are in its range while rotating, even if you are no longer in its range after that. Also take note of the fact that green projectiles will slowly ramp up in speed as Pyramidas’ health depletes, but don’t scale up with tiers (thank god)
Tesla coils :
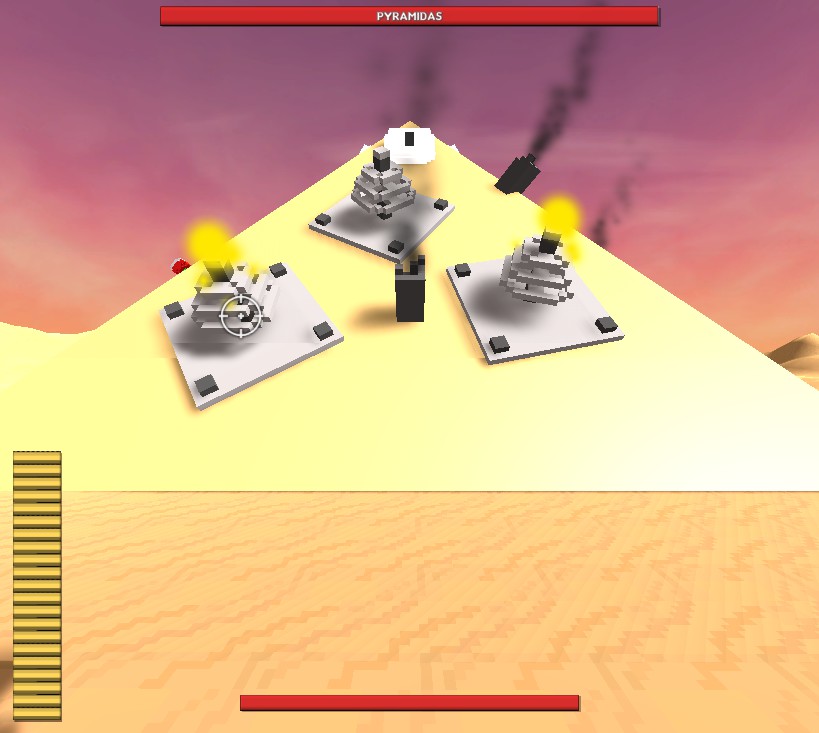
Tesla coils are way more resistant than the plants mentionned above. They also pack serious damage, especially in higher tiers (the tower dies in a single hit of a tier 9 coil). Unlike plants, the coils do not lob projectiles at the tower. Instead, the bottom two coils charge up for a few seconds and discharge directly into the tower. However, coils can be neutralized by shooting then four times while they are charging, which will cancel their attack for that rotation.
Note the presence of a third coil. This coil will activate if any of the two following conditions is true : Either one of the two bottom coils has been destroyed, or Pyramidas’ total health dropped below 50% of its maximum. The third coil can start charging mid-phase if one of these condition is fulfilled while facing the coils. Note that you can’t damage the eye at all on the second coil side until the bottom-most coil has been destroyed, because your POV is too low for it to be in range of your attacks.
The eye phase, aka “pure death” :
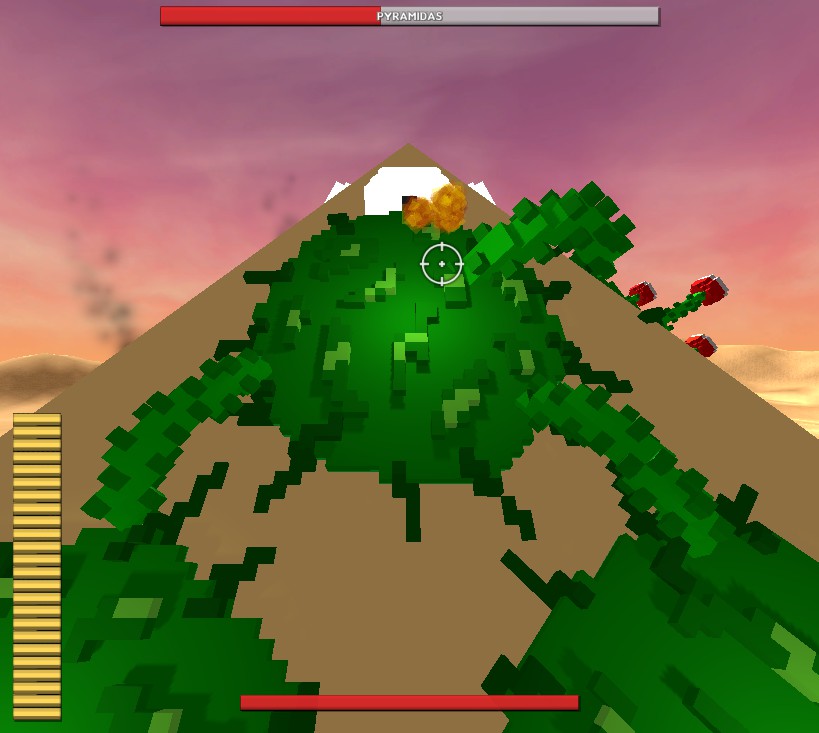
So you did it! You destroyed enough low pieces to ascend up to the eye of that side, which is, by itself, a large chunk of Pyramidas’ health bar. Now begins the true challenge, because these eyes hold back no punches. Similarly to plants, they will shoot projectiles at you, except that the eye projectiles curve instead of heading straight towards you, and there are more of them the closer Pyramidas is to 0% hp. Obviously, like plant projectiles, they scale up massively in speed as health drops too! That means your best way of dealing with them is to damage the eye while the screen is rotating, and aim dead in the eye to destroy the first projectiles, and act on reflexes to catch the rest before your charger runs out. Rinse and repeat until you see the victory screen. Do take note of the fact that you can damage other eyes while ascended at the top of your current side, so focusing down a single eye to have a moment of respite between two other eyes is a viable strategy.
Tiering Pyramidas, aka the death of fun :
Pyramidas scales slower than Cylindro… but Pyramidas also has a way higher base health pool, standing at a ridiculous 10,000 hp at tier 1. Considering your own bullets each deal 6 damage, that’s 1667 shots to defeat the first tier. The formula for health tiering with Pyramidas is 1000×1.25^(tier-1). However, where Pyramidas gets very, very annoying is with the damage scaling, which also scales by a factor of 1.25 each tier. This means that every tesla coil hit starting from tier 9 is an instant death, and every single enemy projectile becomes a game over at tier 15+. No wonder the current record for Pyramidas is an un-tied Tier 12 held by TECHTERROR731#5688.
Cubos Jr, Hippity hoppity, your rhythm is now my property
Cubos Jr is quite unique compared to the others. Instead of dealing with massive health pools and flurries of missiles, this boss fight is a rhythm battle akin to Crypt of the Necrodancer. In it, you must follow the beat and avoid being slaughtered by Cubos Jr’s many attacks while laying bombs to kill him.
Beat? How do I keep the beat??????? :
In all honesty, no matter the tier of Cubos Jr, this is the hardest to do. The game hints at multiple ways of keeping the beat, there is music, there are red bars going toward the center at the bottom of your screen… Ignore all of that. The best way to stay in beat is to always be moving, and if you have to skip a beat, the dance floor’s flip-flopping pattern is a more reliable way to keep in touch with the current beat, since the music will slowly desync with reality as the fight drags on, and the bars at the bottom are… less than accurate. Beware, because your tower can decide to just pre-move if you press a movement key while already moving, which can totally end your run.
Cubos’ special moves : Cubos has two primary attacks, each telegraphed by a 5 ticks timer of the corresponding color, for either red fire waves or brown earth shockwaves
Fire waves :
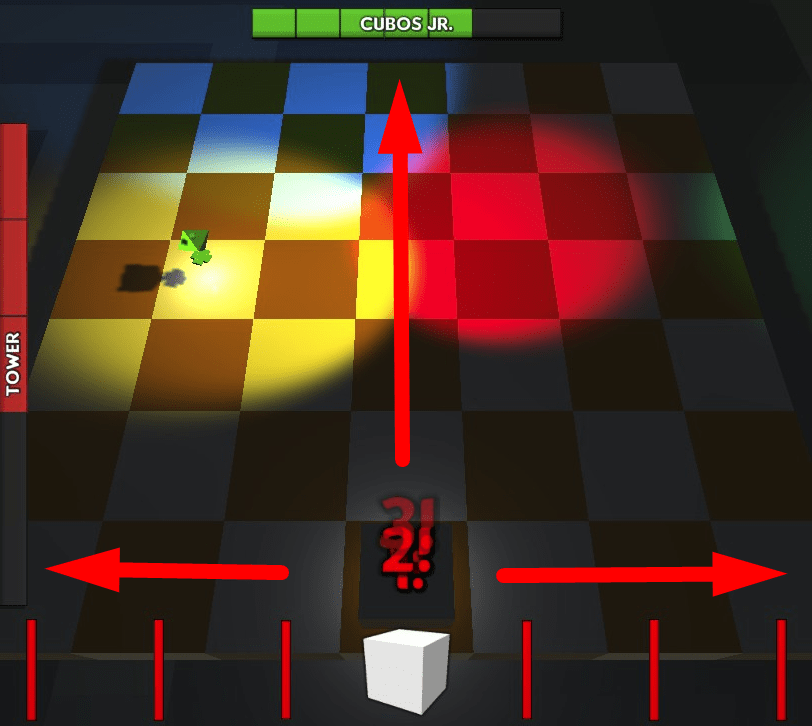
As seen on the picture above, Cubos Jr will spread lines of fire in all 4 cardinal directions once a red timer reaches 0. These flames last for three beats, no matter the tier of Cubos Jr, and touching the flames during any of them will damage the tower for one point of health. Cubos Jr is especially vulnerable to diagonal bombs during this attack, and one or more can be planted right next to him, as Cubos Jr will not move until the flames are no longer damaging.
Earth shockwaves :
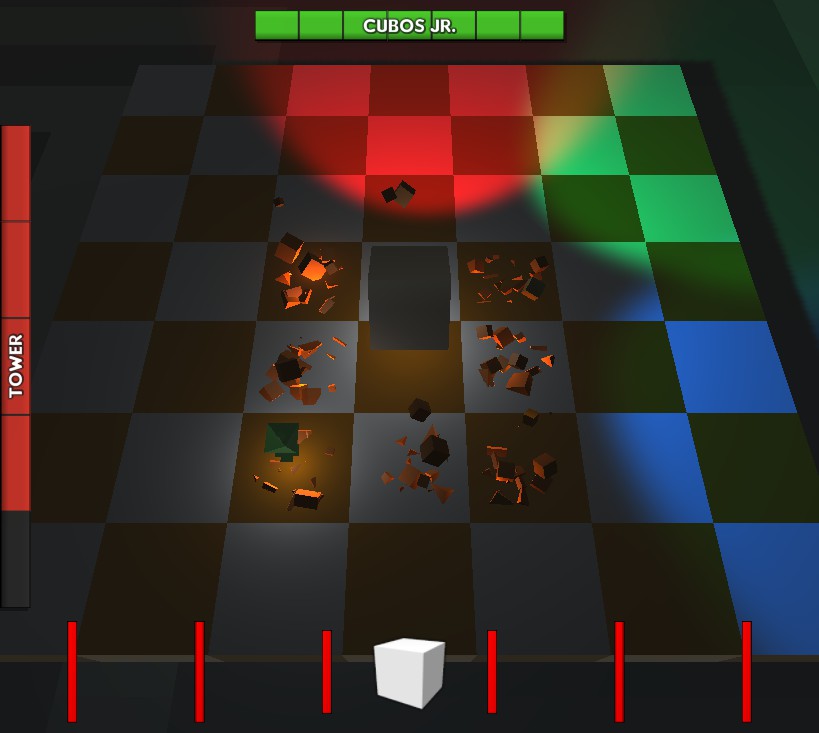
If the timer above Cubos Jr is brown, it will launch a radial attack covering a 3×3 square with Cubos Jr being the center of that square. The earth particles are also a damage source for three beats, and Cubos will again not move until the particles stop being damaging. This attack can be punished by placing a bomb right in front of Cubos during the first or second damage tick of the earth attack.
Fire trail :
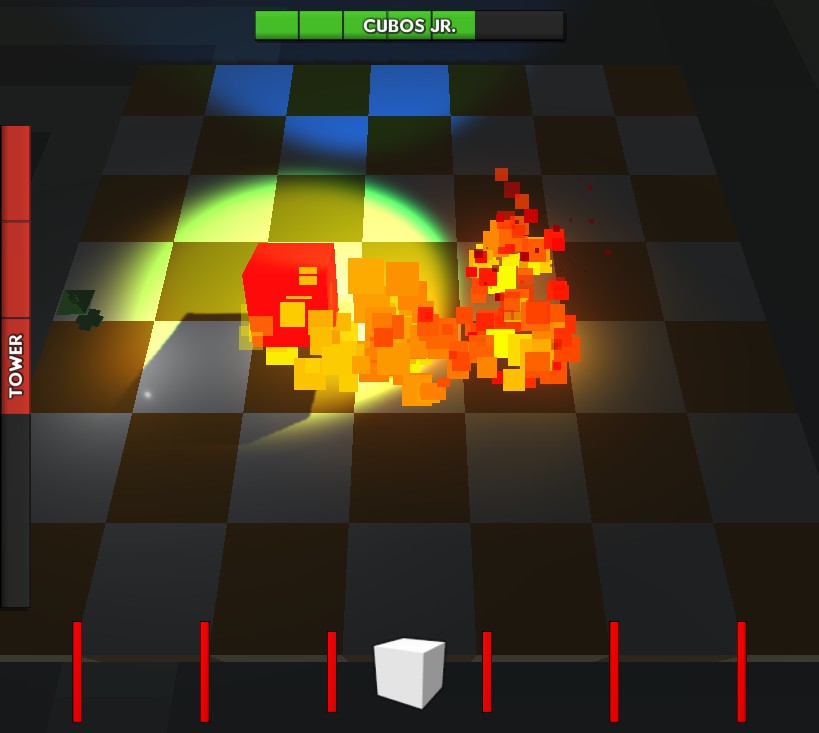
Cubos Jr will randomly set himself on fire, leaving a fiery trail of up to 4 spaces behind him. This attack is especially dangerous because Cubos can still decide to switch to using a special attack while on fire. There is not much to say for this one except… avoid getting hit?
Juking Cubos :
Cubos Jr can be manipulated while not using a special attack. By staying a certain amount of squares away from him, you can stall Cubos for a few beats by moving from left to right (or up to down if Cubos Jr is to your left/right). This will prompt Cubos to try and align with you again for a fire wave, but since you and Cubos move at the same speed, he will never catch up. This can be used to force a miss on a fire wave and punish by planting a bomb next to Cubos.
Tiering Cubos Jr, and the beginning of RNGFest :
Cubos Jr starts with 7 hp at tier 1. This health total is increased by 3 linearly each fight, making Cubos the only boss with non-exponential scaling as of the writing of this guide! However, there is a little something special that happens with higher tiers of Cubos Jr. Remember the 5 beats countdown before waves/shockwaves? Yeah, it is reduced with higher tiers, becoming absolutely non-existent at tier 5+. This makes high tier Cubos Jr fights very reliant on manipulating Cubos Jr’s AI, or just being lucky enough that Cubos Jr doesn’t just do fire waves to corner you and chip you down to death. The current Cubos Jr record holder as of today is Xenos6666#2117, with an un-tied t13 defeated.
Dodecai, jack of no trades, master of confusion
Dodecai is pretty simple as of this guide’s release, because this boss doesn’t have tiering yet. This makes the Military Tier 10-bound boss quite easy to master. However, there are still things to be said about it. Dodecai is regarded by the game as a “master of strategy”, so the fight is played with cards that summon minions instead of the tower directly attacking Dodecai.
The interface :
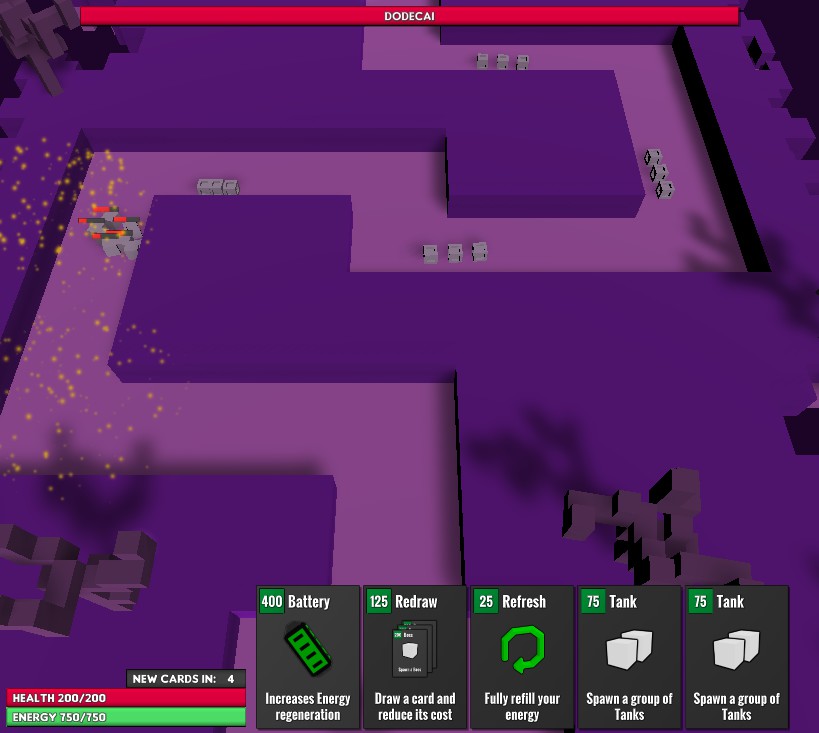
To fight Dodecai, you have access to cards. Each 10 seconds of real time, you get a new set of 5 cards, which you can spend energy on to play, or right click them to discard. Non discarded cards are kept at the end of a 10 seconds timer, but you don’t get more than 5 cards at any point in your hand. Your tower has maximums of 200 health and 750 energy with upgrades, which cannot be increased during the fight. You regenerate by base 5 energy twice a second .
Your cards :
Energy (400 cost)
A total of 4 energy cards can be used each fight. Each of them increases your energy regeneration by 1, up to 9 per interval. These should be used ASAP in the early game to prevent them from clogging up the place for better cards.
Heal (250 cost)
Self-explanatory, heals your tower. Not that useful, considering you will be pushing offensively for most of the fight.
refresh (25 cost)
Gives you back your 750 energy upon use, plain and simple.
redraw (125 cost)
Adds a random card to your hand, reducing its cost to 0 until that card is played.
fighters (50 cost)
Summons a group of 4 fighter cubes. They are very squishy, but pack a punch when aided by Speed Up.
tank (75 cost)
Summons a duo of larger tank enemies, which are a bit slower, but… tankier (who would have guessed.)
boss (125 cost)
Summons a single boss minion with a massive health pool and hit box, but a crawling speed.
speed up (80 cost)
Massively increases the speed and damage of friendly units in a large area after a small delay.
firestorm (180 cost)
Lobs a fireball, dealing enough damage to destroy all t1 enemy minions in a large area after a long delay.
frost nova (175 cost)
Lobs an ice ball, freezing enemy minions for a few seconds in a large area after a long delay.
lightning (200 cost)
Instantly deal massive damage to all enemy minions in a small radius.
Dodecai and minions :
Dodecai summons periodically sets of 3 minions. These sets are increased to 4 minions when the health of Dodecai drops to about 40-50%. Each minion is about as strong as yours, and deals 3 damage to your tower if they reach it.
Dodecai’s time cycle : Dodecai will shoot beams at the field, their frequency and number increasing as the boss’ health gets lower. The time cycle is dependant on real time, and not boss hp.
Day : During the day, Dodecai shoots light rays that buff enemy minions standing within their area of effect, similar to the player’s Speed up card.
Night : During the night, Dodecai will lob dark rays that deal massive damage to any player troops in their area of effect, similar to the player’s firestorms.
The cheesiest cheese :
Dodecai… is a very easy boss. So easy in fact, that one of the fastest strategies is just to spam left click on the left-most card and right click once every few seconds to get rid of cards you can’t immediately use and active abilities.
tiering… not :
Dodecai currently lacks tiers. As such, the @Dodecai role on the Discord server is held by whoever can get the most manual Dodecai kills. The current holder of the record is Someone12543™
#7733 with over 100 Dodecai kills.
Achievements, artifacts and “””Achievements””” (massive spoilers)
Boss roles on the Fire Sword Discord server :
Each boss section ended with the current score for each boss role and their current holder. Depending on the boss, more or less proof will be required of your achievement before Speedy or Matt gives you the role.
Boss achievements : Each boss has a secret achievement, obtainable by beating the boss under a specific restriction.
Cylindro : You spin me right round
Deal the last damage instance to Cylindro while Cylindro is at the lowest of a slam attack. This can be done by not dodging the slam and gunning him down while inside of his hitbox.
Pyramidas : Botanophobia
Destroy each plant on both sides before destroying a single tesla coil, then kill Pyramidas. To do this, you only have to remember that you only need to attack each coil 4 times to prevent them from attacking, as to avoid destroying them before all the plants are gone.
Cubos Jr : Not a scratch
Defeat Cubos Jr without taking damage. Yup.
Dodecai : Born under a lucky star
Beat Dodecai without discarding a single card. (This achievement is bugged, and you must not press right click at all during the fight to receive it)
Artifacts :

Pyramidas drops the metal plating with a 15% chance
Cubos Jr drops the incendiary device with a 15% chance and the Cubos cube with a 15% chance.
Dodecai drops the Dice of Fate with a 10% chance and the Necronomicon with a 5% chance.
“I hate Cylindro” : Roomer has it that defeating the God of RNG a thousand times may attract the favors of a very select group of people, known as the Cylindro haters.
This is all about The Perfect Tower II – Tech’s guide to bossing bosses; I hope you enjoy reading the Guide! If you feel like we should add more information or we forget/mistake, please let us know via commenting below, and thanks! See you soon!
- All The Perfect Tower II Posts List


Leave a Reply