Guide for creating models, meshes, & destructables for The Hand of Merlin, written by its animator and environment & level designer ‘AleLuja’.
- Introduction – Import Export
- Editor Files – Creating mdl and bmf files
- Textures
- Lightmap
- Saving
- Covers & Destructions
- Props – Attaching them to covers
Introduction
Hello! I’m AleLuja, an animator, environment & level designer for The Hand of Merlin. I will show you how to import models into Serious Engine, and how to create simple and static (destructible) models.
We are using Blender (any 2.8 version will do) for exporting .amf files, which we use for importing into Serious editor. For this tutorial, as an example, I’ll be using a model which I had previously made for Zone03.
Creating models, meshes, destructions
This particular model was sculpted in 3dCoat, I’ve also made a retopology and textures there.
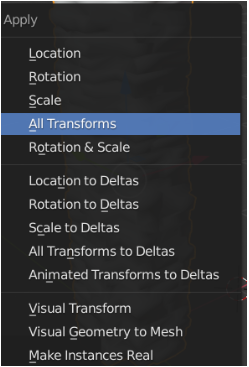
So, let’s begin! After you import your model into Blender make sure that your model is in the center, just to make sure you can always (right click) select your model, press on your keyboard Ctrl+A and choose All Transforms.
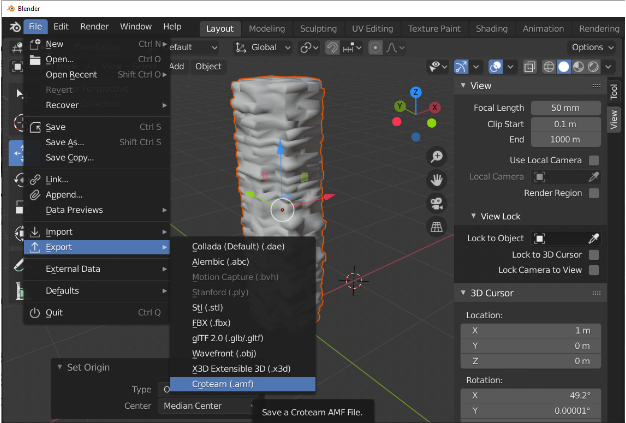
After that you can export your model. Make sure that a model is selected and then go to:
File -> Export -> Croteam (.amf)
(You can get the export script here – [google.com] .)
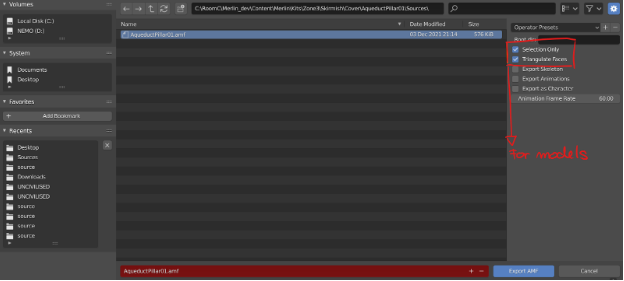
C:\RoomC\Merlin_dev\Content\Merlin\Kits\Zone3\Skirmish\Cover\AqueductPillar01\Sources\
-This is the path for this particular model, but you can always create your own folder named as you like
And now, when you’re done with exporting we can go into the Serious editor.
Serious Editor Files
Creating mdl and bmf files in Editor
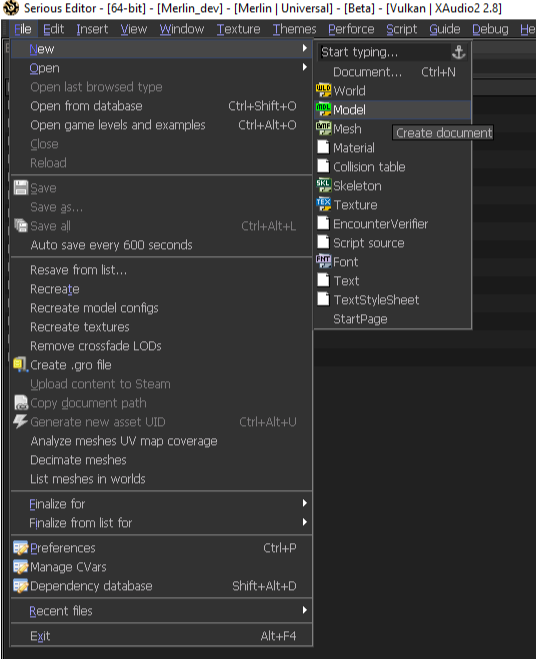
Now you can go to:
File-> New -> Model
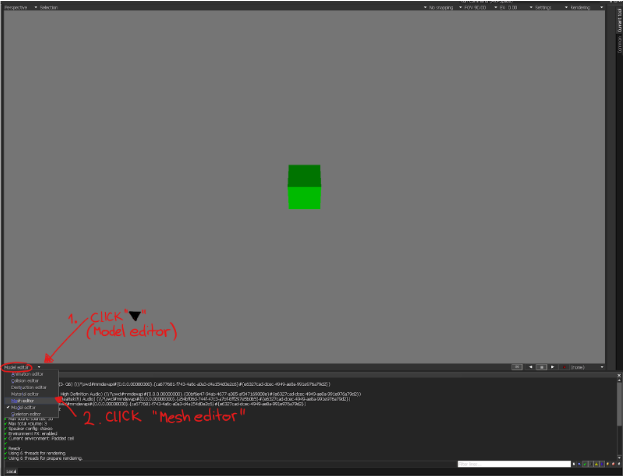
You are now in the Model editor and a green cube will appear.
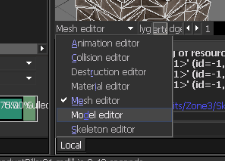
Press E+E on your keyboard to enter Mesh editor or press on “Model editor” like on this image:
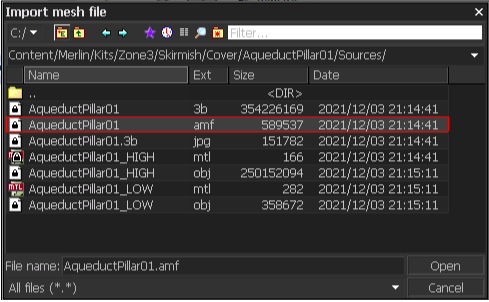
The green cube will disappear, and then press Ctrl + I and find the path of your .amf file.
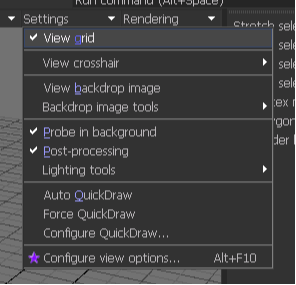
Sometimes models are too big or too small, so if you want to make sure that your scaling is right, simply turn on the grid. It is under settings on the upper right corner of your screen.
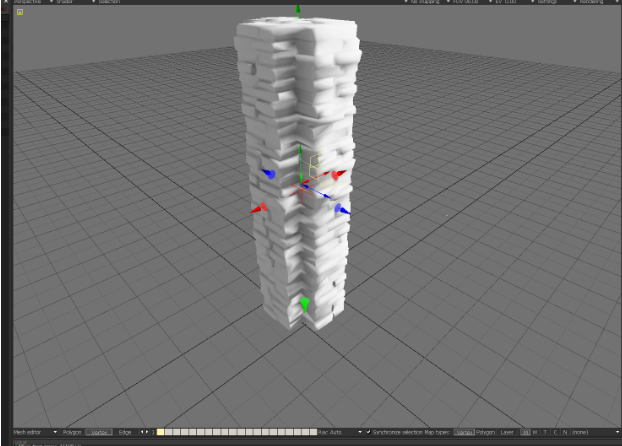
This particular model is too big so it has to be scaled down a bit. You can scale a model by holding Ctrl + Shift + RMB (by moving the mouse left/right a model will become bigger or smaller).
Blue, red and green arrows will appear.
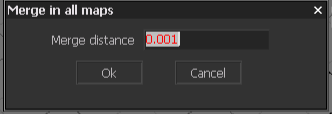
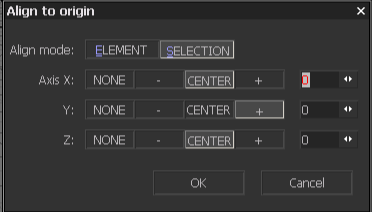
When you’re done with scaling press Ctrl + A
and then OK.
You can always scale your model later if you notice that it is too big/small, but
It is very important that you do not rotate a model while you are in Mesh editor, otherwise the colour and normal maps can appear broken.
Textures
Usually we are saving our colour/normal maps in .tga files but for the editor you will have to create .tex files from your original colour/normal maps.
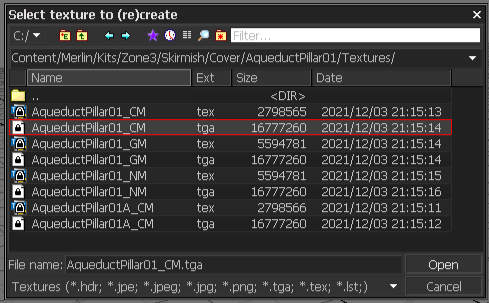
Press Ctrl + Shift + T
Find your textures and press open.
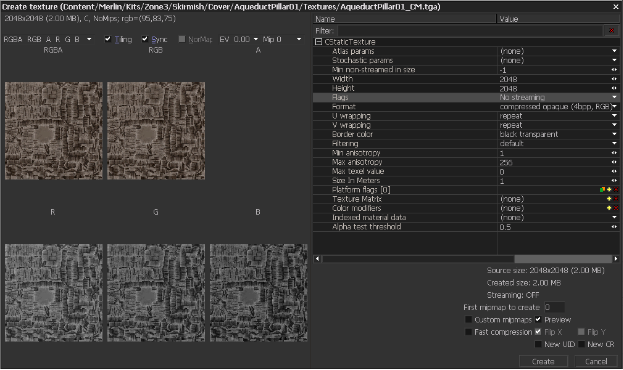
For the colour maps settings should look like this (texture size might vary)
If everything is okay – press Create.
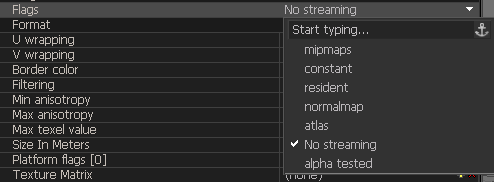
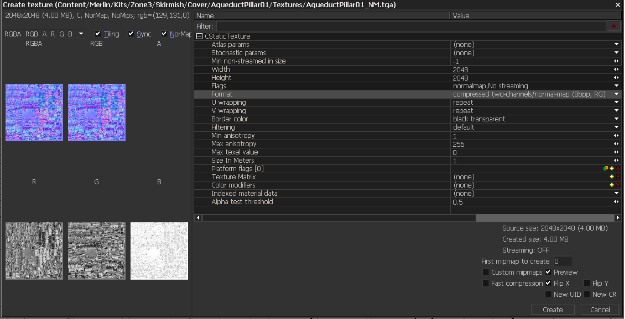
Settings for the normal maps are similar, just make sure to select “no streaming” and “normalmaps” under Flags
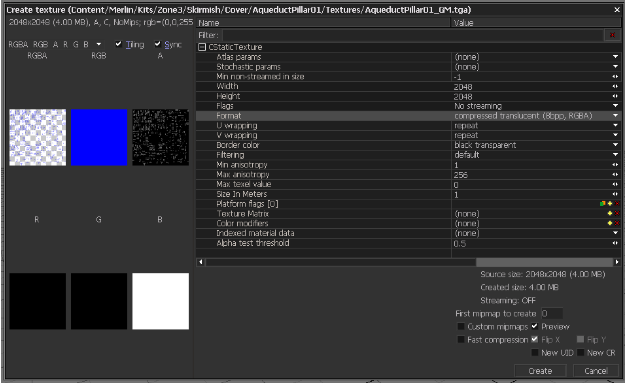
And this is the setup for creating gloss maps(mask). It is the same as for colour maps, except for the “Format” options. Make sure it is set as a “compressed translucent (8bpp, RGBA)”.
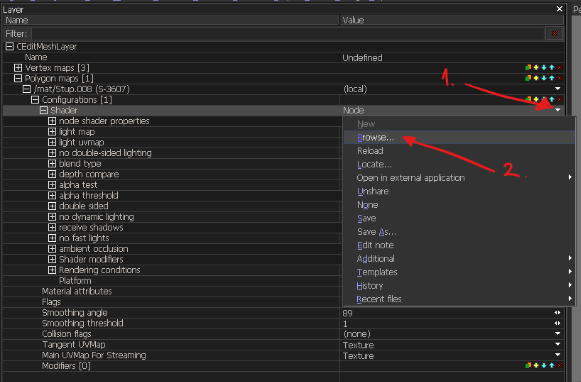
On the left side of the screen is the “Layer” bar. Find the Shader settings under Configurations.
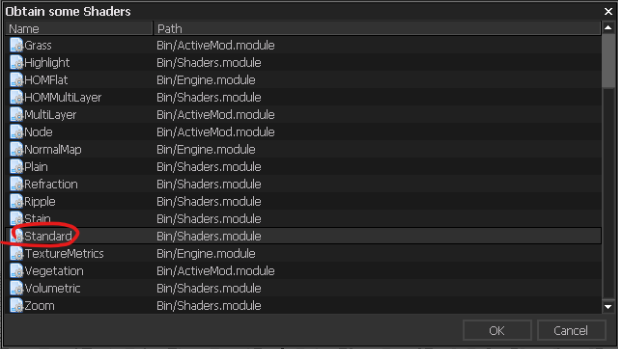
You will have to change the Shader type from “Node” into “Standard”.
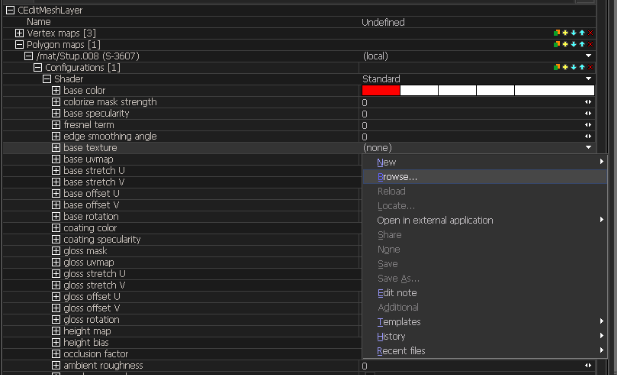
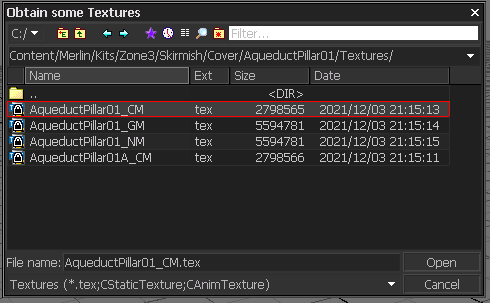
After you’ve changed the shader, browse your colour map’s .tex file under “base texture”.
Type “Texture” under “base uvmap”.
Do the same thing for the normal map.
And for the gloss mask.
By playing with the “base specularity” parameters the model will appear more or less shiny.
You can also add a height map if you like, but since a lot of in-game models are very small, we opted for not using them.
Lightmap
While we are still in the Mesh editor, we will have to create a light map.
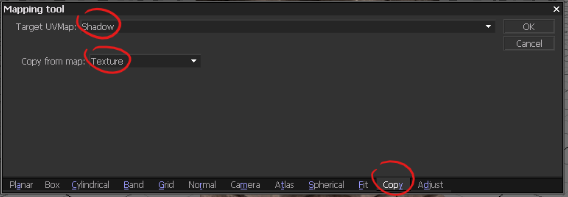
Press Shift + S and type Shadow under Target UVMap option. If all options are set correctly, press OK.
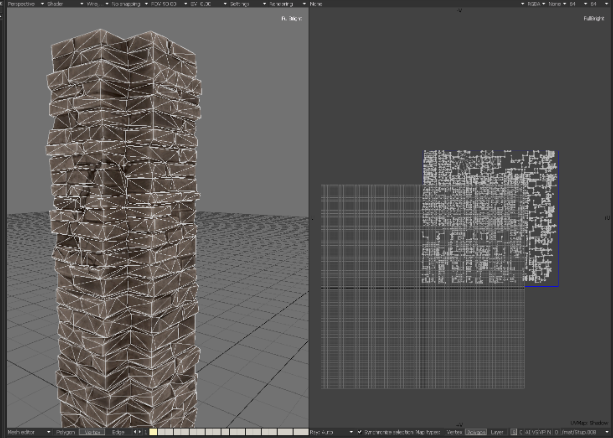
Press 8 (on your numpad) and A; your lightmap should appear on the right side of your screen.
As I mentioned earlier, this model is very big – so it has to have a bigger lightmap.
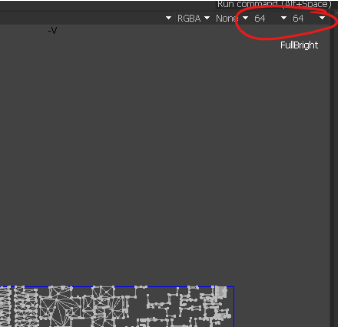
Usually for terrains we are setting the lightmaps to 512×512, but for small models 16×16 or 32×32 should be just fine. Tiny props work well with 8×8.
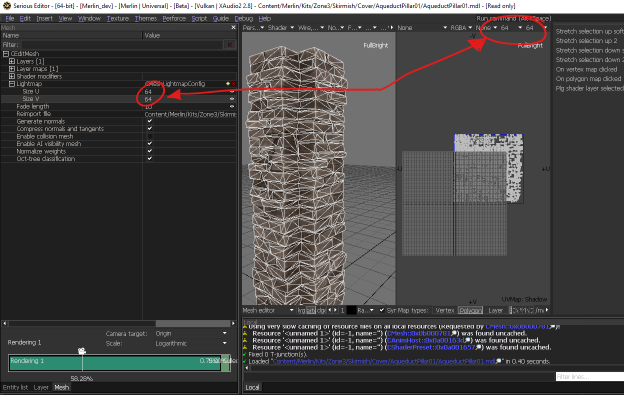
You are setting your lightmap size in the upper right corner:
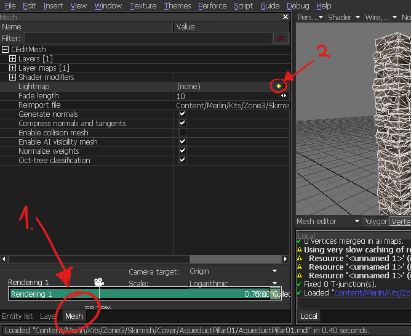
When you’re done, click on the “Mesh” rider in the lower left corner. And then, on the upper left side, you will find the “Lightmap” settings. Press on the yellow + icon:
Under the size options type in the same value you chose for the lightmap before:
And now our model is ready for saving. 🙂
Saving
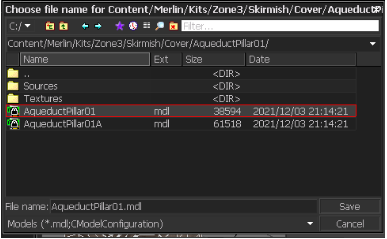
Go to File -> Save As and save a .mdl file
Then go back into the Model editor:
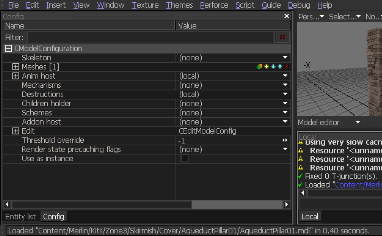
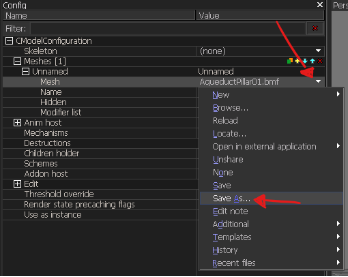
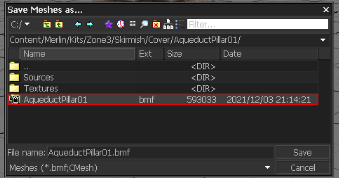
Under “Config” in the lower left corner (press Alt + 1 or find it in View options if it’s not visible right away) you will find the “Meshes” list. Expand it and, under Mesh, press an the arrow to save a .bmf file:
Covers and Destructions
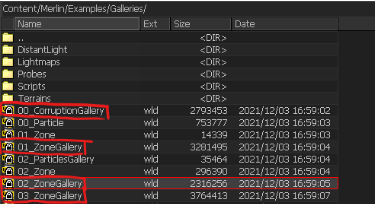
All of our models are placed in 4 galleries.
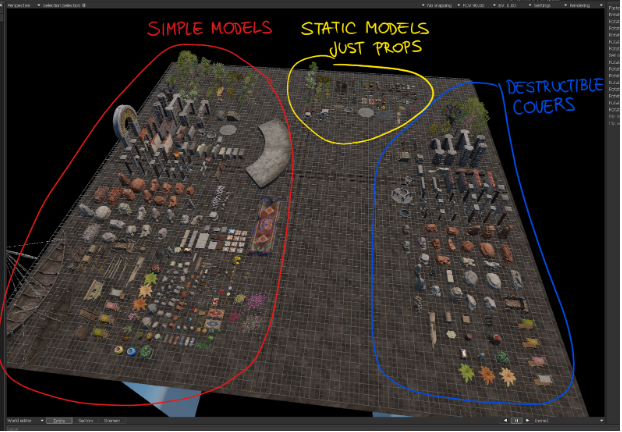
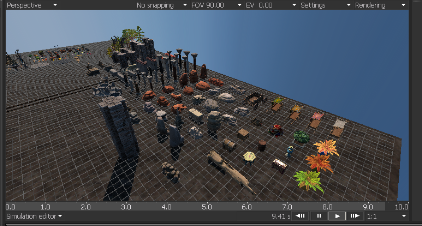
Each gallery contains models which will appear in skirmish maps, for example lets open 03_ZoneGallery.
Models on the left side (circled with red) are simple models. These models are placed around the playable areas. They are never placed in the playable arena itself simply because they are not destructible.
On the right side (circled with blue) are covers (destructible models) which are always on the playable areas.
And lastly, the models (circled with yellow) are the static models (props). We’ll get back to those later.
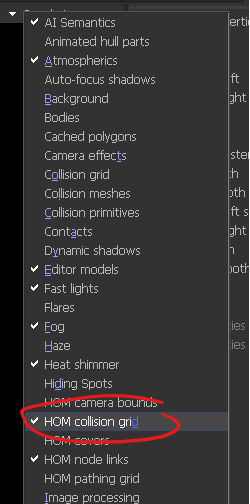
Now, in the upper right corner under Rendering, find HOMCollisionGrid.
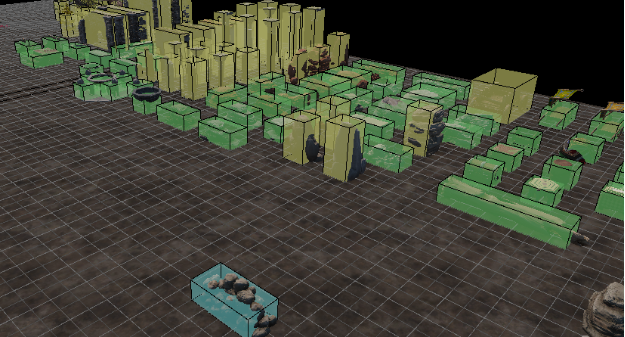
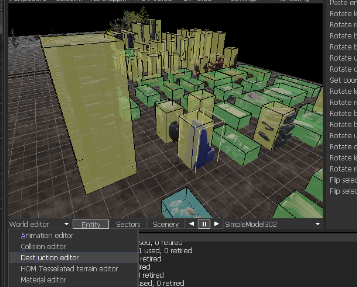
When you enable this, you will see that the models on the right side will turn yellow, green or blue.
Yellow models are the high covers. Green ones are low covers and the blue ones are simply to create obstruction.
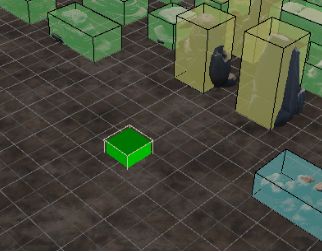
Now let’s go back to our model. Press the Insert key on your keyboard and the green cube will appear just like it did before when we were creating new .bmf and .mdl files.
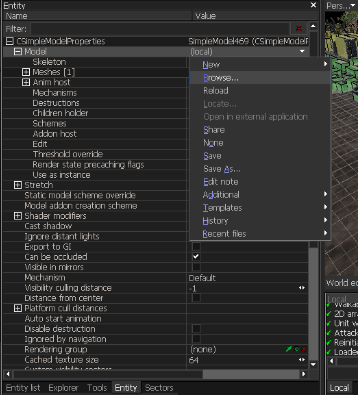
On the left side under “Entity” browse out your model. You’ll want to search for a .mdl file that you’d previously saved.
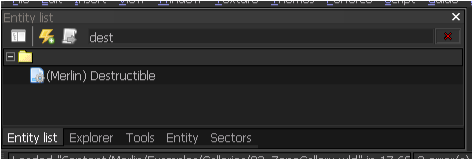
Under Entity list->Geometry find (Merlin) Destructible
Select your model, then click on (Merlin) Destructible and press the icon with a green arrow on it to convert the selected entities.
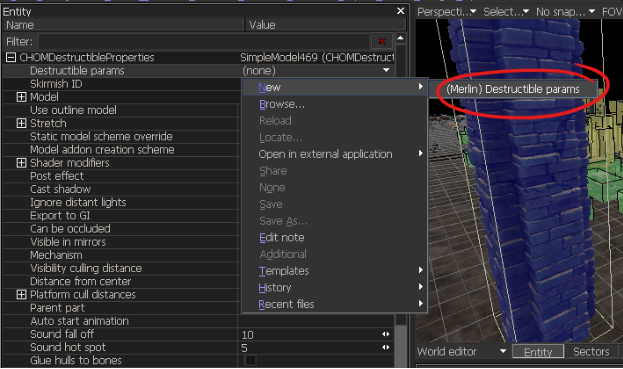
After you converted the model into a destructible, select the model again. Under Entity, go to Destructible params -> press an arrow-> New -> (Merlin) Destructible params.
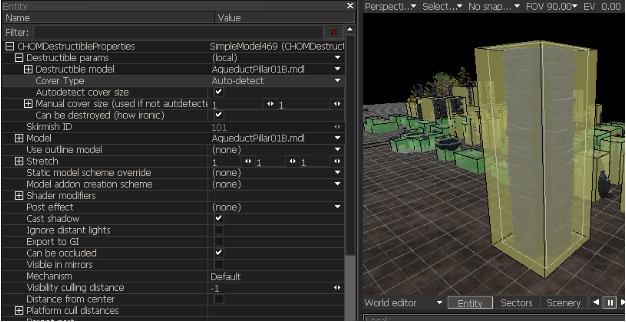
As we mentioned earlier, this model is quite large. As such, it is detected as a high cover.
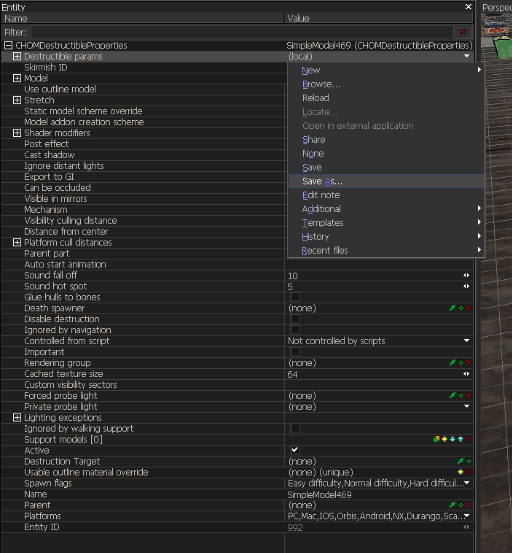
Now we have to save a .rsc file.
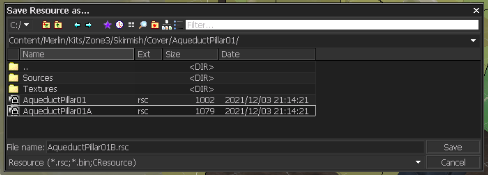
Under Destruction params-> press an arrow -> save as
While you’re still in the World editor you can press Ctrl + T to enter the Simulation editor.
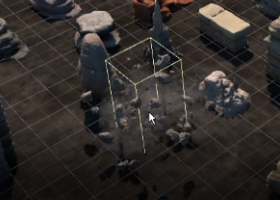
Press the M key and when you start clicking (LMB) on models – they will explode.
Let’s say that you like the way this particular model explodes and you would like if your model exploded in the same way. Quit the Simulation editor by clicking Alt + Q.
Select the model (the one with an explosion you liked) and open the Destruction editor.
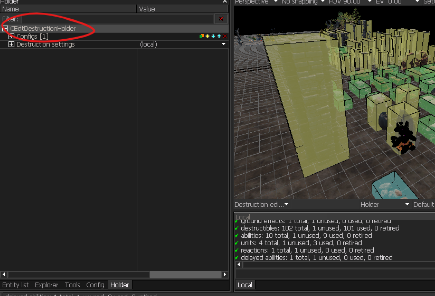
Under Holder, select the CEdtDestructionHolderline. Press Ctrl + C (to copy configs and the destruction settings under it).
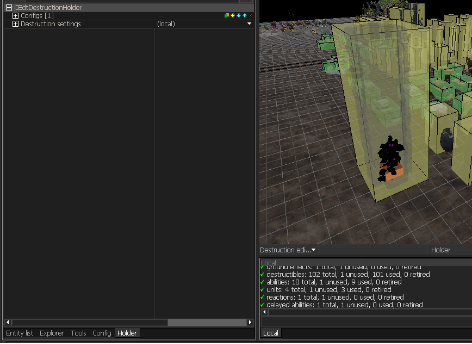
Go back to the World editor to select your own model. Open Destruction editor once more and under Holder– select its CEdtDestructionHolderline. Press Ctrl + V (paste).
Save your model. 😀
The only thing left to explain are the static models, those that are circled yellow in the screenshot presented earlier.
Since those models are tiny, they are usually attached to the covers and do not require special particles. They just disappear. A few of the stones, wood pieces and shrubs are an exception.
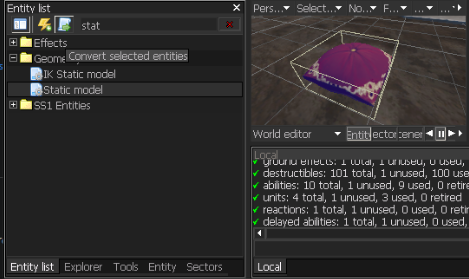
So, if you decide to make your own props just to beautify a scene, you can always copy CEdtDestructionHolder parameters from the existing props and paste them onto your new prop. But first, when you insert a new model into a gallery or a skirmish map (any .wld file), your model will be a Simple model by default. It has to be converted into a Static model.
You can do that by selecting your model and finding a “Static model” option under the Entity list:
And Confirm entity conversion.
Props
Attaching props to covers
One more thing and we are done. Let’s say that you’ve made a table model and you would like to add a few props on it, in order to make a scene look more beautiful and realistic.
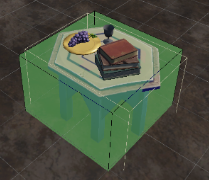
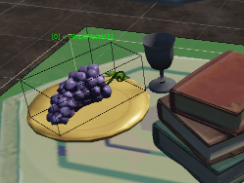
E.g. this is your scene.
The table is a destructible cover and the props on the table are static models. Since props are not attached to the table, they will levitate and stay in the scene if the cover is destroyed. You can avoid that by following this steps:
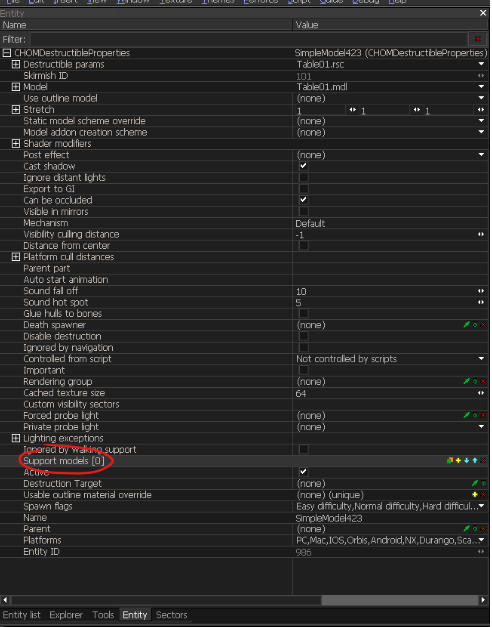
Select the table and under Entity list find Support models.
Press the yellow “plus” symbol on the right side.
Press the picker icon.
And then select a model on the table.
Since there are 4 props on the table we have to repeat this action.
Add 3 more supported models by clicking a yellow plus icon and then select each prop with a picker.
When you’re done you will see that the table cover supports 4 props.
Now you can test it and see if you did everything correctly.
Press Ctrl + T (to enter the Simulation editor), press Mand then select (LMB) the table.
If everything disappears then you’re done.
Don’t forget to save the models. 🙂
I hope you enjoy the Guide we share about The Hand of Merlin – Creating models + meshes + destructions Guide; if you think we forget to add or we should add more information, please let us know via commenting below! See you soon!
- All The Hand of Merlin Posts List











Leave a Reply