Survival Firsts: Tools, Fire, Food, Shelter, Water
In this section we will cover the first day do’s and don’ts.
Initially you will be placed in a rubber raft supplied with an anchor, a paddle and some basic survival items, compass, bandage and emergency rations (use the rations sparingly).
Get yourself to the nearest Island, stow the paddle and pull it ashore to prevent losing it as you may need it later and you will absolutely need the survival gear provided.
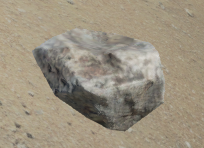
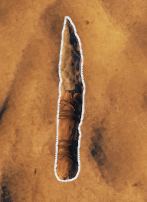
Next, find a stone,
/] focus, on this task as it it critical to your needs. Once you find the stone go to your crafting menu, keyboard “c”, and turn the stone into a stone tool.
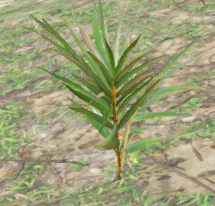
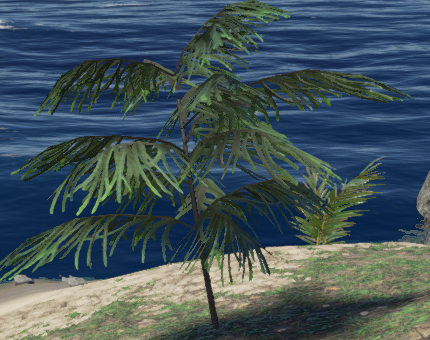
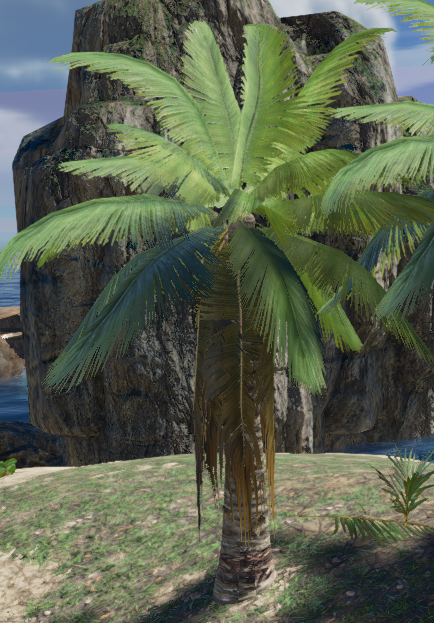
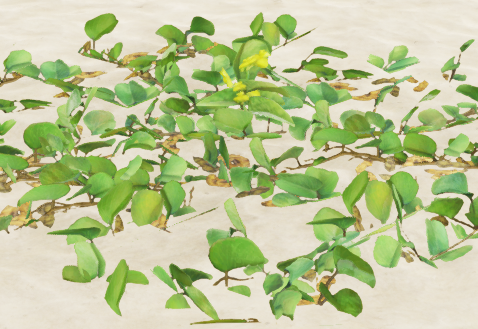
You can now use the stone tool to harvest fiber from palm saplings
or yucca plants
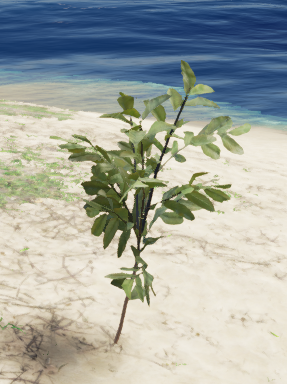
Or you can harvest sticks on the ground or from pine saplings
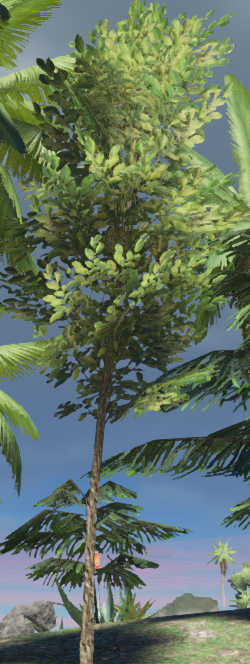
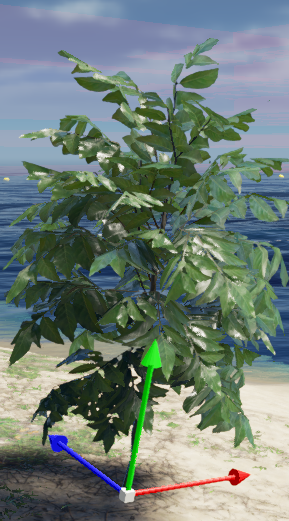
or Ficus Trees
. Be aware, the majority of the tools you make will eventually wear out. Check tool durability by holding the Tab button down and highlighting the required piece of equipment. The lower the percentage the more damage the tool has obtained and the sooner it will be destroyed. Many of the lower grade tools may be turned into higher grade tools that will be at 100% even if the lower grade tool is almost unusable so when your lower grade tools become almost unusable try to upgrade them. In the case of the Stone Tool, at this point, you will want to upgrade to a Refined Knife.
You can upgrade to a Refined Knife at anytime, it will be more useful in harvesting. You will need one stick, one binding (four fiber make a rope) and the stone tool. Craft it in the crafting menu “c”.
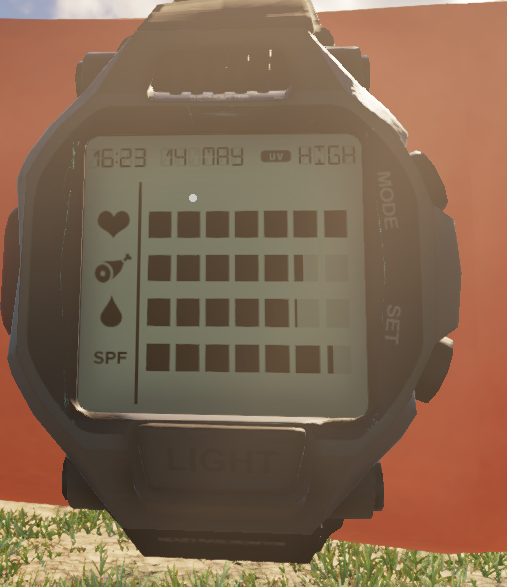
Once you have the tool of your choice you will want to build a fire. Before you do so you need to select a camp site on the Island, I recommend a place that provides at least a bit of shade as it gets hot and you don’t have a lot of protection from the sun. You can check this with your watch by pressing “F” and using the mouse buttons to switch through the watch modes, One: heath, hunger, thirst, Sun exposure (spf)
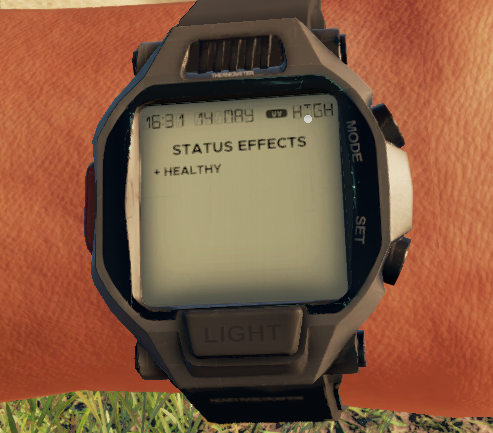
, Two: Health Status (injuries, or poisoning)
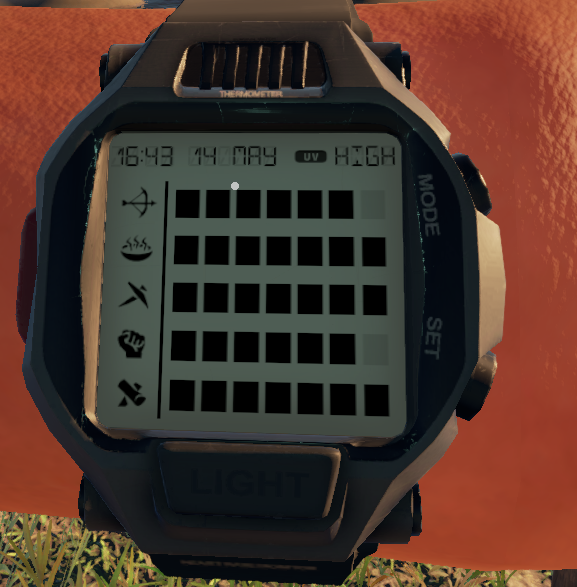
Three: skill sets: Hunting, Harvesting, Cooking, Crafting, Construction
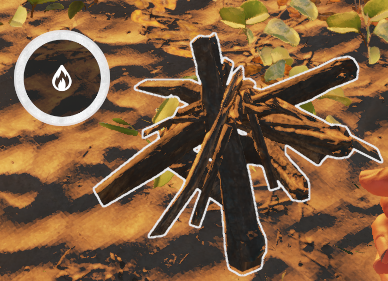
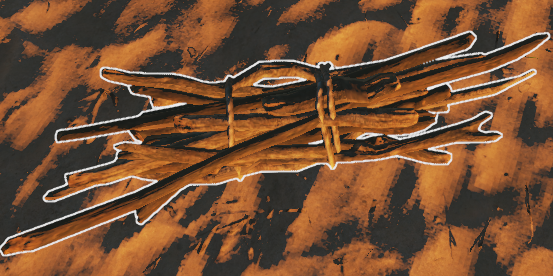
. You will need 6 sticks for your fire, 4 for the pit
2 to craft kindling,
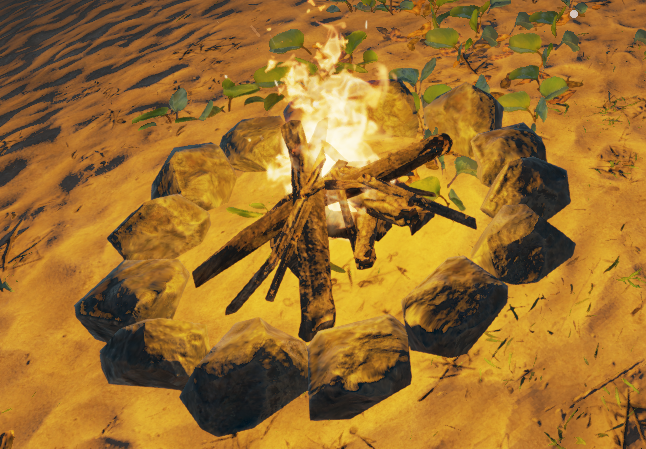
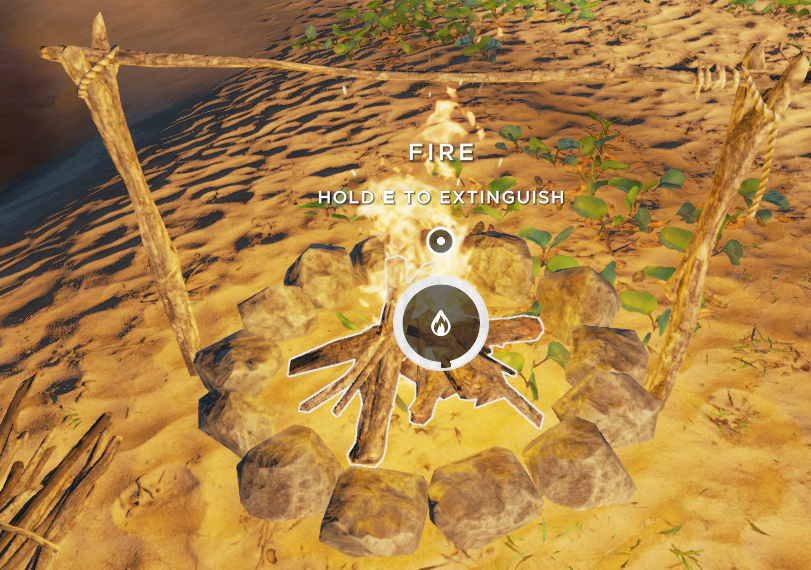
you cannot start the fire without kindling. The fire will allow one piece of meat to be cooked at time. One piece of small meat, small crab, sardine, will fill up one square on the hunger line of your watch. I recommend you take the time to find three stones and four more sticks and one binding to expand your fire pit to hold two pieces of meat. The crafting menu will show you the stone rim
that these items will produce, they go around and over the fire respectively.
Collect one more stick, either by finding a lose one or harvesting more, you will need them later anyway. Craft it into a fishing spear, again in the crafting menu and go fishing further out from the island for bigger fish, try to find fish that provide medium meat, watch out for the Sharks. Or just stick to the smaller stuff until you’re more comfortable will fishing with those guys.
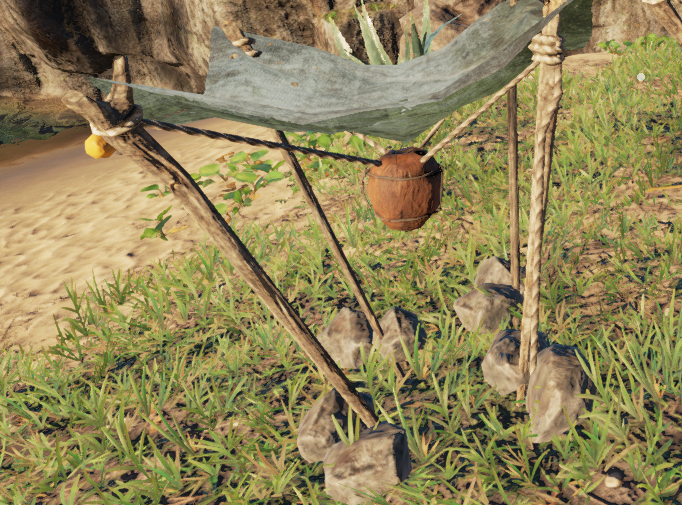
Next you will want to start collecting water. You will need to build a water still;
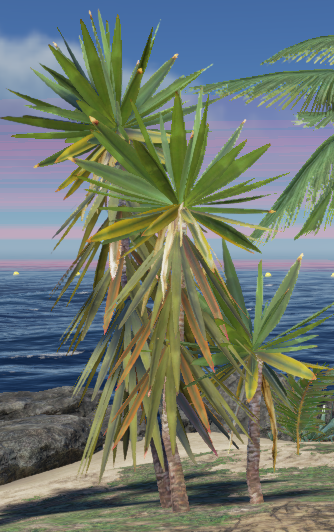
water stills, like many of the other main items you need, take multiple resources, one way to keep track of the items you have toward the construction of these is to access the main crafting menu, double click the crafting key “c” to access this menu, scroll down until you find the item you want to construct or craft. Highlight it and click the right mouse button. It will place this item in the upper left corner of your screen along with all the parts that are required for that item. If you have any of those parts or are near any of those parts the part will be brightened. You do not have to have the parts in your pack to construct the item, they only have to be in the same vicinity to be accessed. Water stills need to be supplied by fibrous materials to produce water, you can supply you water still with either fiber from palm sprouts or palm leaves from palm trees .
or from Yucca plants. Water stills will produce up to 4 portions of water (one square per portion in thirst line on watch). To keep producing water you must keep replenishing the fibrous materials.. You will want to build the water still close to your fire for easy access.
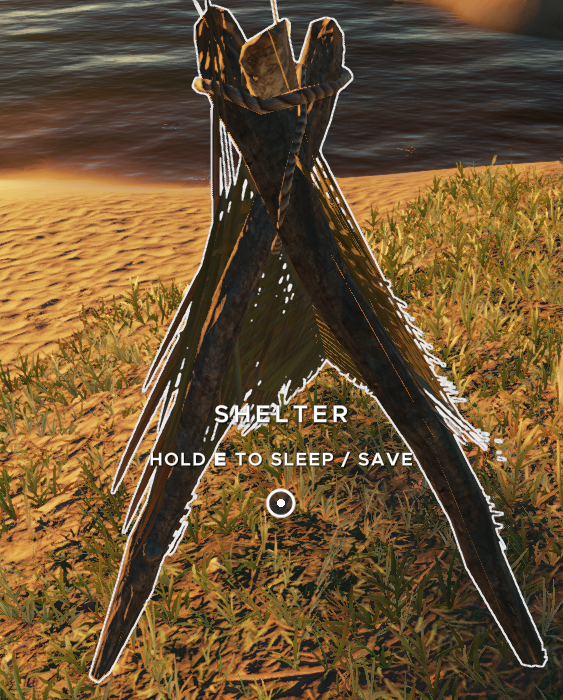
If you’ve accomplish all of the above you are off to a good start. Unfortunately you are not yet able to save your game. That’s where the shelter comes in.
Go to the main crafting menu, find the shelter, near the top of the menu, and right click then go look for the resources to build it. Build it near you fire pit and water still. Once this is built you can now save the game. You want to try to have all this done before night fall or close there after. Sleep, low hunger, high hydration will keep your health up,
A better way to cook, preserving your food, and more tools
I hope everyone enjoyed the first part of this guide and found it useful. In this section I will show you how to improve your food supply, expand on more of the tools available and how I store and use them. In addition I will explain how I store my food so it NEVER spoils. Don’t you hate when that happens? So let’s get started.
So your camp site is all setup, fire, water, shelter, sounds like you’re doing OK. Is OK enough? How often has your food spoiled? Can you really afford to have your food go bad, especially seeing how little you have? And it’s no fun having to forage all the time with no time for anything else, even when you get those medium sized fish. And what about the food that spoils even before you cook it? Yuck, what a waste. But fear not, I have a solution for all of that.
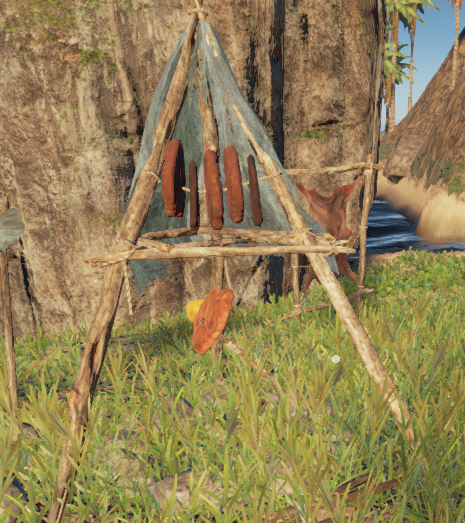
First let’s expand your food cooking capabilities so you have more food on hand. Go to your main crafting menu, you know , the one where you double click the “c”. Scroll down the menu and find the Smoker
and get it so you know when you have all the parts. Your smoker is going to upgrade your fire pit so there is no need to build a new fire set up. All you need to do once you have accessed all the parts you will need is to remove the spit before attaching the smoker. DO NOT destroy the entire fire pit only the spit. Once the smoker has been added to the fire setup you will be able to cook 6, oh yeah, 6 pieces of meat at one time, small, medium or large or any combination thereof. Keep in mind, each size cooks at a different rate and uses a different amount of fuel (sticks). I try to concentrate on cooking medium meat mostly as it is more convenient than the large and fuels the body 3 times more than the small.
Here is the breakdown of hunger replenishment for each size: Small = 1, Medium = 3, Large = 5.
As you progress in the game you will find building one or two more smokers will eliminate the need for more foraging and give you more time for exploring and treasure hunting, but for now stick to one, as you won’t be on your first Island that long.
O’boy, more food! “Yea, except I can’t eat it fast enough before it spoils. What’s the sense of that?”
Good question. And here’s the answer. Food only spoils when: 1: You butcher what you’ve killed or caught and don’t cook it right away. 2: You remove it from the cooking source and don’t eat it right away. You get the picture? I’ve gone from Island to Island, leaving behind food on the grill or left unprocessed fish, birds, hogs and pigs only to come back to find them ready for me to eat or butcher and cook. It didn’t matter how many game days I was away, it was all still there ready for my hungry tummy. I even packed up a crate full of raw Cod in the event I needed to cook something fast because I don’t have time to hunt or fish when I changed locations. So, if you catch or kill anything to eat, don’t butcher it until you’re ready to cook it and if you cook it, don’t remove it until you’re ready to eat it. You won’t starve between jaunts, and besides, if you’ve been smart, you still have your emergency rations.
Word of warning, don’t get fancy and try to put food on or in the smoker by dropping it on the ground then using the right mouse button to lift and place it on the grill someplace trying to get an extra piece cooked. It will cook, but if you leave it, it WILL spoil. The food MUST be attached to the fire, spit or smoker, physically, for it not to spoil.
Ok, next we have tools. I have already covered the Stone Tool and the refined knife in the first episode of this guide so let’s move on to some more important tools, the majority of which require the implementation of the Stone Tool. You are going to discover that rock is a very very important commodity in this game. Ninety percent of your construction and crafting tools depend on having Stone tools available, which means you gotta have rock.
The first tool you will want is an ax. The best ax is the refined ax. Unfortunately, the refined ax requires that you possess leather. At this point you have none, unless your searching through the shark infested shipwrecks has netted you some. In any event you will still need to craft a crude ax as this is a component to making the refined ax anyway. Crude axes require two stone tools, a stick and a lashing. I use the crude ax exclusively over the refined knife just because it lasts longer, is stronger and, when almost used up, I can save it and turn it into a refined ax at a later date. I just craft a new crude ax. You will want to craft one of these before you set sail for a new location.
Once you get to a new location, if it has wild boar and Giant Hogs, you will want to harvest the rawhide and craft a leather station. When this is done you can begin to produce, in this order, refined pick (for harvesting rock}. If you do happen to find some leather at you first island, I recommend you make one of these right away harvest as much rock as you can and then make several crude axes and a couple more refined knifes. Make 4 to 8 crude spears to hunt the boar and hogs, at least one fishing spear if you haven’t already. You will eventually want a crude hoe, does not come in a refined model but does require leather. And you will want to upgrade your crude spears to refined for better killing ability. Most of the refined tools require leather, so get it as soon as you are able. You can also get rawhide from sharks, but killing sharks is very time consuming and resource depleting, until you get a speargun,but even so, it takes 8 to 9 shots to kill a shark.
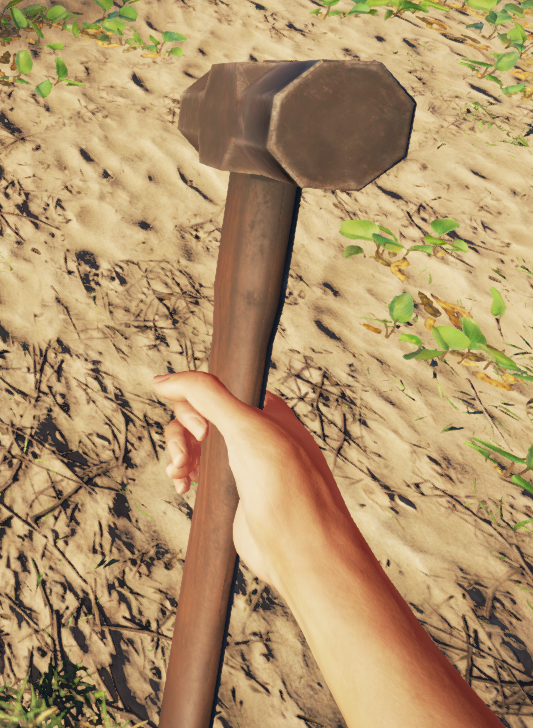
There is at least one tool that you cannot craft. This tool is important in construction rafts, buildings and other large structures. It is the Refined Hammer. You can craft a crude hammer for this purpose but these will eventually wear out whereas the Refined Hammer has a very long shelf life. Also the crude hammer is a component of the plank station and if this is constructed you no longer have a hammer. Choices , choices.
Let’s talk tool belts. The main crafting menu gives the option of crafting a tool belt. It comes in three sizes : Small = one tool, medium = three tools, large = 10 tools , each must be crafted in order. In actuality this is just a quick access format wherein you select a tool and assign it a number from the keyboard which allows you to quickly access that tool instead of having to access your equipment through TAB. The draw back is that you have to make these assignments each and every time you load the game. I personally only use the medium belt because it is time consuming to make all those assignments at the being of each session and all of your storage slots are taken up leaving no room for additional items like treasure. I basically only use three main items anyway. Be careful not to drop any of the assigned items as it will negate the assignment and will need to be reassigned if you do.
Exploring, storage, and navigation
Camp is setup, you have the needed tools to survive. Perhaps you did a little exploring in between doing all the above. How’d you do with the sharks?
Using the raft to get to the shipwrecks will help minimize the shark problem but not completely. And don’t forget to drop the anchor or you will lose the raft. As stated before, it is impossible to build a replacement raft without a hammer, be it a crude one or a refined one.
As you explore and search for treasure in the wreckage you will find some crates. You have the option to empty them of their contents or to pick up the whole thing. Remember, you only have a set amount of space in your pack so it is wiser to just pick up the whole crate, even if it only contains one or two items. Pick up everything, at this point of the game everything you find is important, later on that may not be the case. As mom always said, “Waste not, want not.” Crates can also be used later on to store more items and in multiples. Point is, Pick up and keep the crates you find.
You will initially find only a few crates, which you will be able to carry. You can carry up to 9 crates, in your pack. Strange that that is possible but it is. You cannot, however, store crates within crates. You should not carry around crates while you are exploring, except as you find them. Deliver them back to your campsite, or drop them near the raft, for quick and easy access. If you find crates with like items or items you already have consolidate these in one crate. The crates have three storage slots that hold up to a certain amount of like items. The normal max per storage slot is 4 with a few exceptions ie. 24 fibrous materials may be stored per slot in the crates and in you pack, same for arrows. Whatever your pack limitations are the same apply to the crates. You may transport one and only one crate in you rubber raft. Over loading the raft will cause it to become unstable and you will capsize and lose whatever is loose in the raft and you may lose the raft as well as you will be thrown into the sea also.
A word on storing fruits and potatoes. These items will eventually spoil just as any food will, DO NOT discard them, they are still useful for making potions, salves and fuel. See the section on Gardening, Potions and Fuel making.
Navigation knowledge is critical to move around the islands. Knowing where you are going and where you’ve been can keep you from unintentionally going around in circles, or ending up on an island you’ve already been to. I recommend keeping a log. My log consists of a notebook, one page per Island notating the coordinates of islands I have visited from each island and the return coordinates in the event I wish to return. There is a very good guide on compass usage, navigation, and mapping already posted that I highly recommend everyone find and read. I see no sense repeating something someone else has adequately covered elsewhere.
In addition to coordinates I keep detailed information as to what I have constructed on the islands I have visited and what items I have left ie, cooked and raw food, specialty crafted items like looms or leather stations ect. This information comes in handy if you find yourself unintentionally back at an Island you’ve already been to.
Gardening, Potions and Fuel Making
So, you finally took the leap of faith and left the original island you started on. Hopefully you ended up on an Island with a lot of resources and wild animals to hunt and garner rawhide. In this section we will discuss the importance of making and maintaining a garden. How to use the produce from your gardens to create potions, salves and fuel.
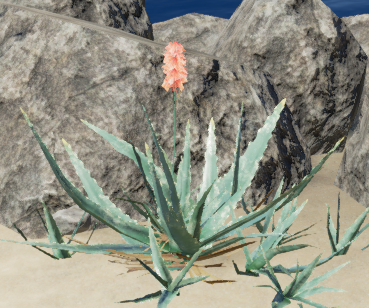
You may ask what importance does gardening have to surviving in the game? As you progress through the game you discover that some resources are scarce. Most of those have to do with vegetation such as fibrous materials and edible fruits. As you walk around on an island you come across plants like aloe
, and pipi
, fruits like Kura
and Quwawa
. Each of these, and others play an important part in your survival. They provide needed medicinal components for salves and potions for fighting poisons and healing wounds. The more you have the better your chances of surviving.
The Pipi plant is used to create an antidote for poison and when combined with a lion fish, becomes a repellent against sharks. But these resources ,again, are scarce, not all of the islands have them, and those that do may only have one or two plants and once used DO NOT regenerate, as far as I’ve been able to determine. If they do it takes a long time to do so. But, when a garden is planted with these scarce items they will reproduce more quickly and more abundantly.
Crafting a garden requires a crude hoe. Once you have the hoe you will need 4 sticks and one lashing for each garden, plus you will need the fruit or seed of the plant you wish to replicate. Remember earlier on I said not to throw away any rotted fruits or potatoes , this is why. You can still use them to seed your gardens. Once your gardens are set and planted you will need to maintain them. This is where the work comes in and why I recommend you plant as many Yucca gardens you can to start. You will need to make water skins, leather required, and additional water stills, depending on how many gardens you have. Your gardens must be watered to produce the desired results. No water to produce. Each garden holds 4 units of water, they initially start with one so you will need to supply the remaining 3. The unit will deplete by one after each harvest. To obtain the best results try to keep the water levels maxed by using the water skins. Each water skin holds 3 units of water. These need to be refilled at the water stills. Remember, you still need to maintain enough water for yourself, but there is a fix for that I will discuss shortly.
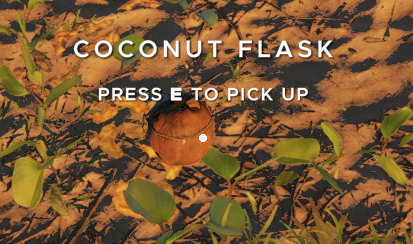
Now that the gardens are in and producing what do you need to prepare for producing the potions and salves? You will need containers to put them in and these are easily made, if you have the resources and one of the reasons I recommend planting Yucca first. Each salve or potion requires the use of a coconut flask
which requires one raw fresh coconut and one lashing, lashings, as we already know, require 4 fibrous materials, thus the reason for the yucca gardens. You have probably been using the coconuts to supplement your fluid intake and food consumption, however, you should now be able to provide yourself enough food not to need the supplemental coconuts and therefore put those resources to use in potion and salve production. You may fear that turning the coconuts into flask will cause you to lose the valued liquids needed for hydration but this is not the case. There is a very good advantage to converting coconuts into flasks and that is you can drink as much of the fluids from the coconut flasks as you wish without adverse affects, whereas if you drink more than two raw coconuts in one sitting you will be plagued with Montezuma’s Revenge, or diarrhea. When needed drink from the flasks instead of the water still or the water skins. The flasks, now empty, can still be used to craft the potions and salves desired or you can refill them like the water skins. If you craft the potions or salves before you drink you only waste what you could have used. “Waste not ,want not.”
So what do you do with raw or rotten potatoes? When the time comes you will eventually find all the components to build a motorboat motor. These require fuel and fuel is made from potatoes and you will need as many potatoes as you can grow to feed the fuel station that must be crafted for this purpose. It takes one can of gas to fill the motor tank, it takes 3/4 of a full fuel still to fill a gas can, and it takes approximately 6 to 8 potatoes to fill the fuel still. In my current game I have 6 gas cans, 5 of which are full, the remaining one is reserved to build another fuel station when it is needed.
Alternative to shelter building and crafting a raft/freighter
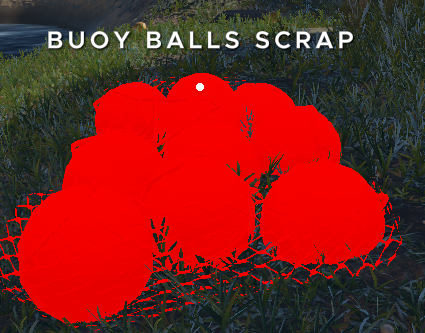
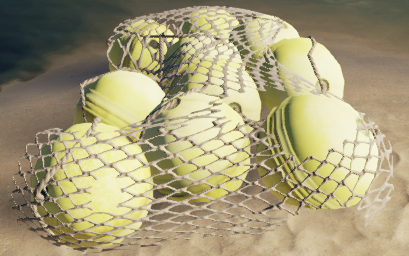
Boo Ya, you’re moving from island to island like a pro but your rubber raft isn’t adequate for the job you need to get done, not enough room for all your stuff. Your probably wondering what to do with all those buoys, and tires and barrels you keep finding. Well this episode, chapter, iteration, whatever you want to call this continuation will explain all that.
But first I have a question, “Aren’t you tired yet of having to craft a shelter each and every time you change locations?” Yup, so was I. Here’s the simple solution. Make yourself a sleeping bag or cot. Oh yeah, by now you should have the resources to craft one, and once you do you can save the resources used on the shelter for other constructions you need. A sleeping bag/cot is portable and it does exactly the same thing a shelter does, just don’t forget to pack it up whenever you change location.
Ok, no more shelters to build. Wonderful!
Now we can concentrate on getting our supplies from one location to the next and that is going to require crafting a raft. The most important tool you will need, as discussed earlier in the tools section, is a hammer, be it a crude hammer or a refined hammer if you don’t have either you need to make one, and seeing as you do not have the ability to make a refined hammer you must settle for a crude one. Go into your main crafting menu and figure out what you need for the hammer. Once it is crafted you can start collecting the components for the raft.
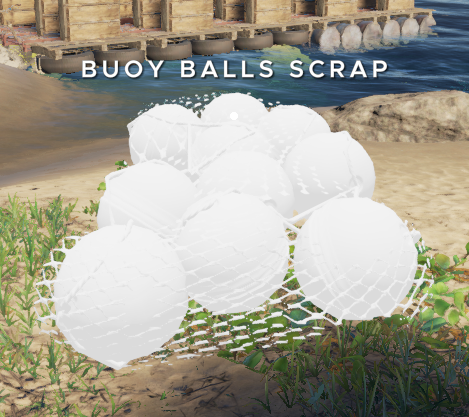
Basic rafts consist of one set of the following from most buoyant to least buoyant:
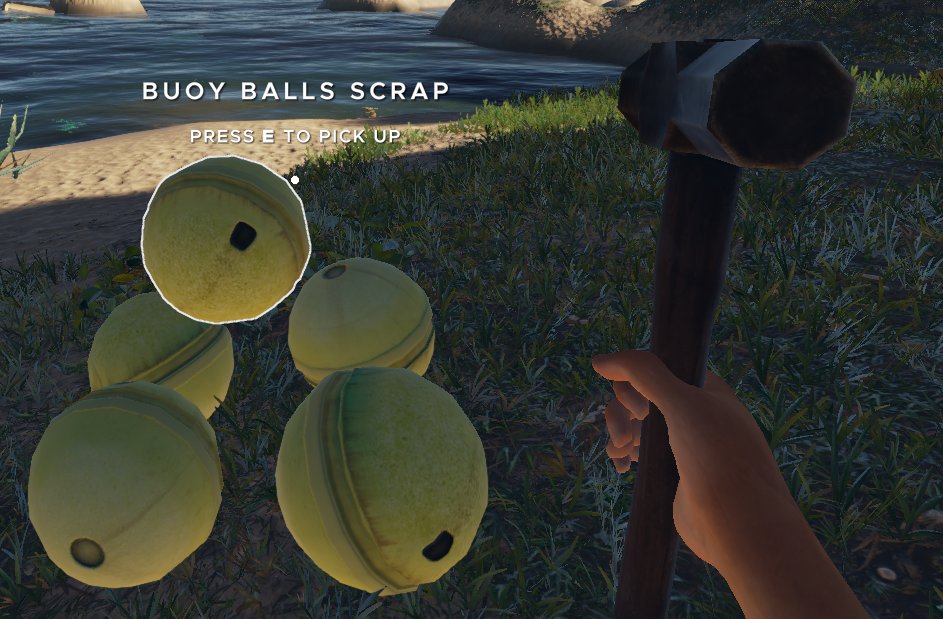
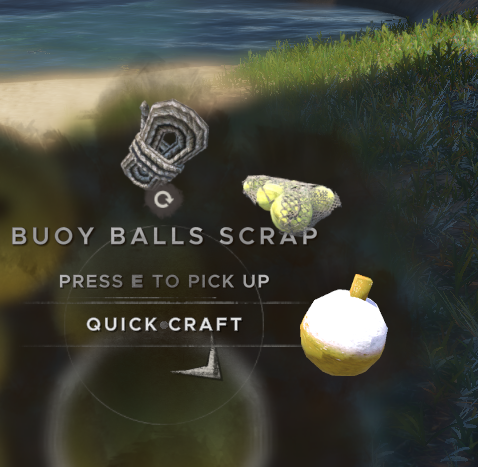
5 Buoy balls
2 Tires
3 Barrels
14 Sticks (I do not use sticks as there are plenty of the others to use.)
Each set requires one lashing to bind them together.
To construct possess the hammer,
proximate yourself to the set of components you desire to convert into the raft
and access the minor craft menu. Locate the image and highlight the image representing the raft base desired
and exit the menu. If you do not find the referred to image go to the main crafting menu, find the vehicle crafting section and go to the raft bases. From there you can select the type of raft base you are crafting. The raft base will appear as white,
if it is red
you need to move it to an area, hopefully near water, until it turns white. Click left mouse button and presto, raft base.
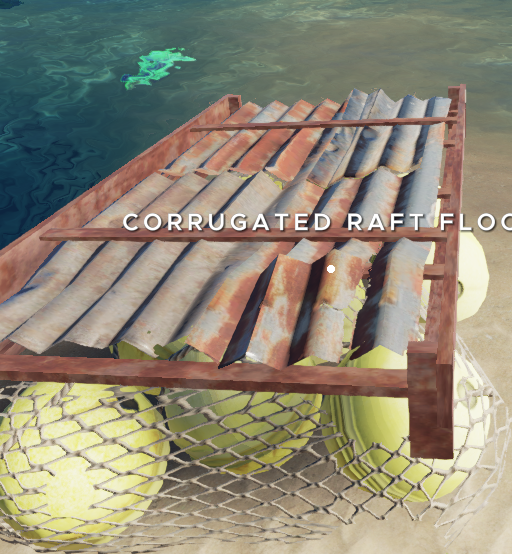
This is just the beginning. You will need to add a raft floor (I prefer using corrugated steel scraps, but will use wood planks in a pinch)
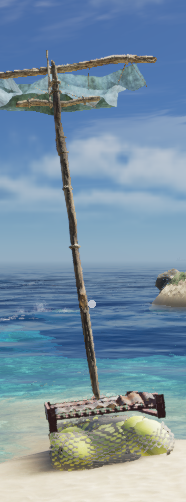
, a sail
and a tiller
in the same fashion. Before placing the raft in the water you will need to attach an anchor.
You may want to attach another base next to the tiller before you attach the anchor.
Attaching additional bases may require either elevating the raft onto rocks or putting it into water. You absolutely need an anchor to place the raft in the water or it may float away, especially if a storm comes. I recommend placing the anchor as close to the tiller as possible and the sail immediately in front of the tiller. This facilitates easy and quick access when raising and lower either the sail or the anchor. When sailing I recommend the following sequence of events.
1. Grab the tiller
2. Raise the sail
3. Raise the anchor
Reverse the sequence when you want to stop. Try avoiding stopping in the ocean on small rafts. I have lost several rafts because I failed to lower the sail and anchor before releasing the tiller and ending up falling off the raft. It is no fun having to swim in shark infested waters to an island half way across the sea. The only other option is to exit the game, reload and start from where the last save was performed, which reminds me, save as often as you sleep or as often as you make major changes, and especially just before you change locations.
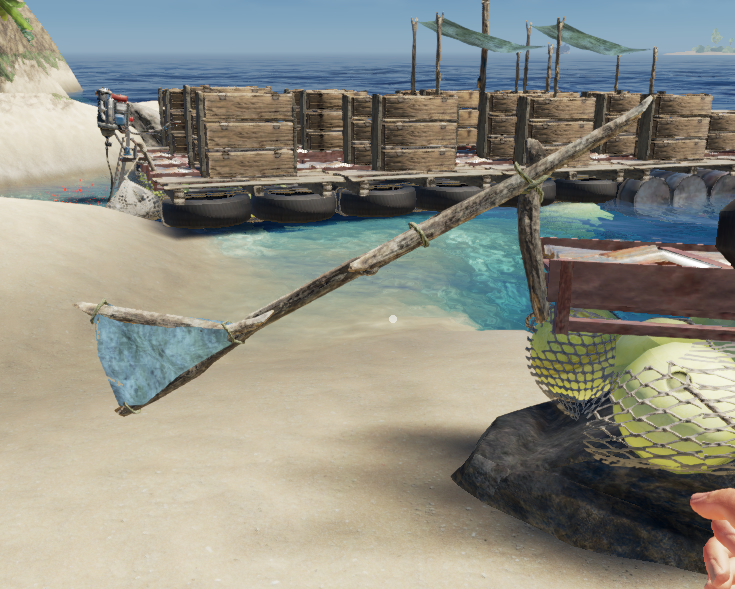
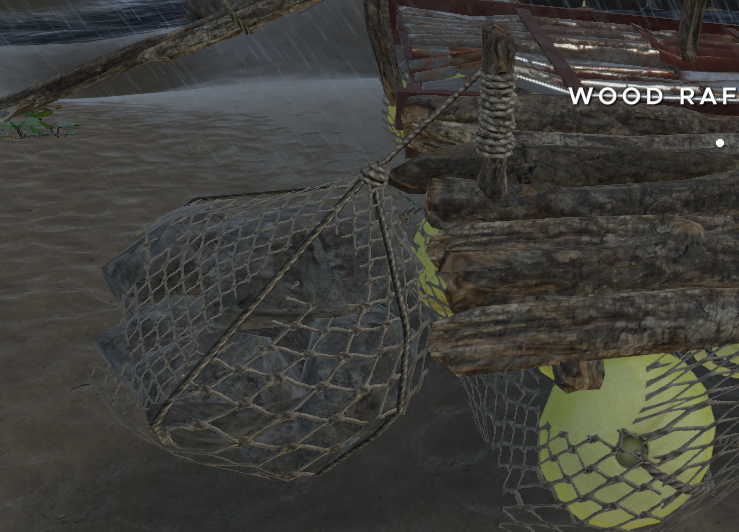
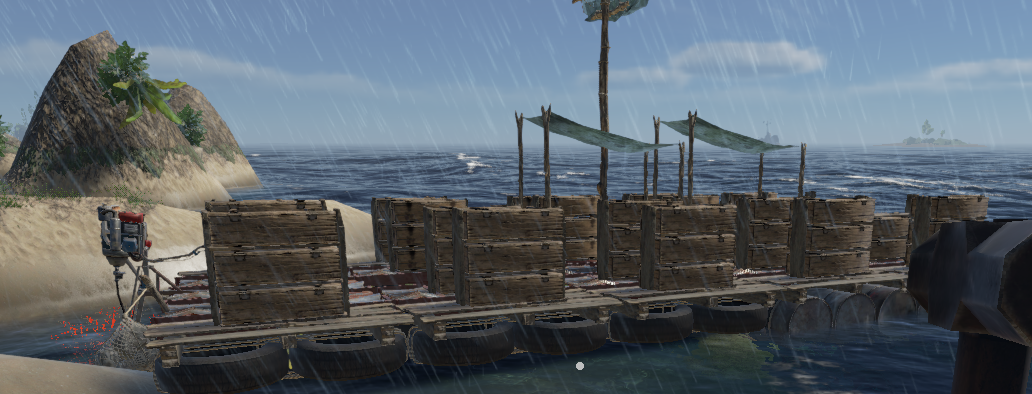
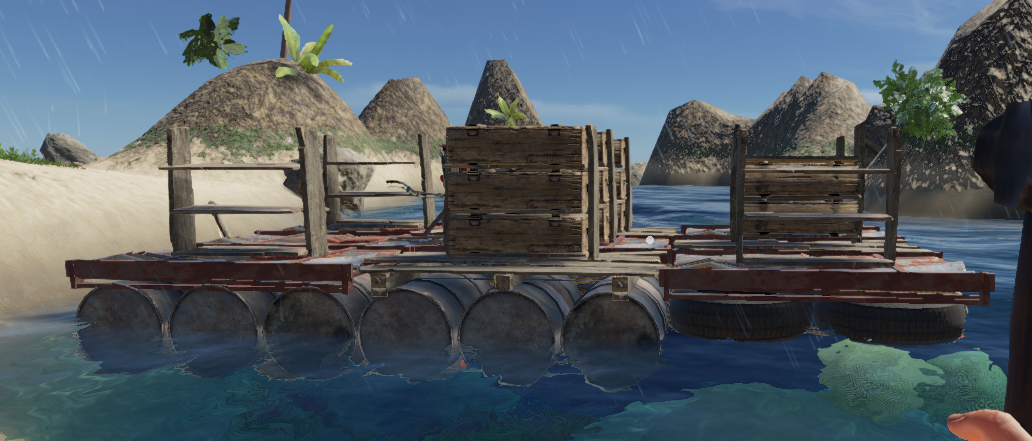
Alright, now you have a crafted raft, small to start, but you can continually expand. Here’s a couple of pictures of the rafts I use, one is my main raft I use for hauling
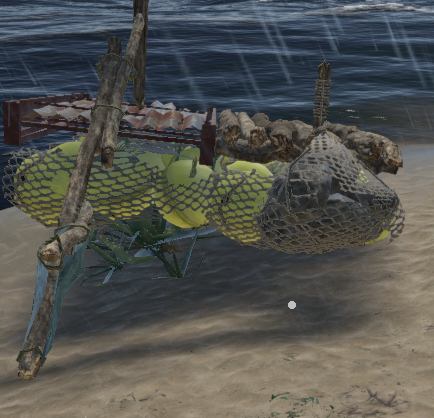
and the other to explore out lying islands from a centralized area.
As you can see both have the capability of hauling crates. Unfortunately this is the only way you can safely haul anything without sinking or disrupting you rafts sailing capabilities. I do not recommend making your raft or rafts any larger than my largest. The larger you make a raft the harder it is to maneuver, even with a motor.
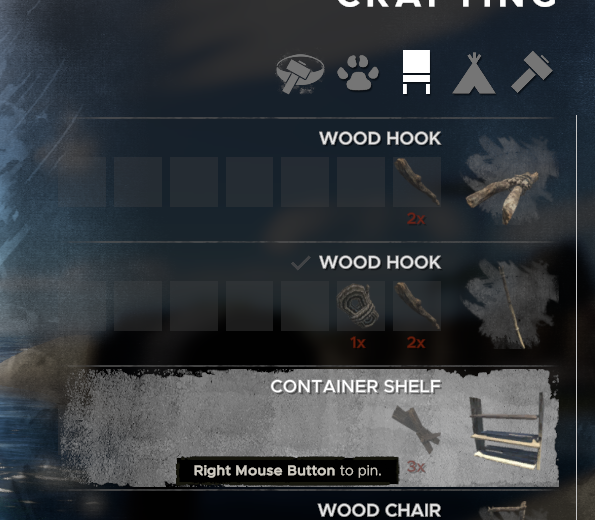
You can find the crate holders in the main crafting menu under the crafting heading in the section that looks like a cabinet.
When you place them make sure the open box in white is facing the direction you want the crates to open, this is also the side where the labels are read once you have labeled them with a label gun. When you place container shelves on your raft you want to make sure you do not block your navigation view so keep the center aisle of your raft(s) clear. You may be tempted to put loose items on your raft, even if you have a very large raft loose items, such as extra tires or barrels, will destabilize your raft, fortunately you will not lose any of your freight that is secured in the crate shelves, but anything else could be lost. Destabilization will also affect your navigation capabilities and you may not be able to maneuver
More Rafting and organizing your freight
In the previous section I showed how to craft rafts and made recommendations on crafting and storage. In this section I will expand on those recommendations and answer some unasked questions that I know will pop up eventually.
This is my freighter or main raft. It is a five by five raft meaning there are 25 sections of base raft comprised in the construction of it. I only use 20 of the allotted sections for storage consisting of the crate shelves. Each crate shelf holds three crates which totals a capacity of 60 crates. Each crate has three storage slots which can be assigned any configuration of items that is needed. In some of my crates I have multiples of the same items, for example I have dedicated one crate entirely to new crude axes and another entirely to used crude axes. A third crate is set aside for refined axes that are crafted from the used crude axes when needed. In this way I can continue to have a constant supply of axes for use. I only use the refined axes when that box is full and when the crude axes are depleted. Other items are assigned specific storage boxes as well to maintain a constant supply of scarce items. Some raw materials produce more when stored than the end product they eventually produce. For example, fibrous materials produce one rope or one cloth for four of this item. Whether in the pack or in a crate you can store only four per slot of each of the cloth or rope. However, each slot in the pack or the crate will hold 24 pieces of the fibrous materials which equates to 6 of either the cloth or rope.
There will be times when you will have an overflow of materials of a certain type. You need to decide whether or not you want to keep them or discard them, the decision is yours to make but keep in mind, you may find you need something later that you discarded a few saves back. It is for this reason that I keep a log of the items I have left behind on each island. If I find myself in need of these items and I am close enough to take the time for the trip to recover them then I will do so.
I organize my freight according to type, so the tools go in one section, engine parts and related items go in others. I try to section out the freighter so it is easier to find what I need. One thing for sure I do is to centralize navigation gear, compasses, binoculars near the tiller or the motor. Any extra empty crates are located in their own area and moved as used. This is done on both rafts. I only maintain a minimal amount of supplies on the exploration raft, the smaller one, to facilitate the recover of more resources on other islands.
I know the question will be asked, “How do you transport both rafts to the same location?” This is a good question and the answer follows.
When I decide to relocate I will load up the main raft, take a bearing and transfer to the next location. At that location I will craft a one section temporary raft with sail and tiller, no anchor and take a bearing back to the island I just vacated. When I get there I will either leave the raft or dismantle it and recover any assets that survive the dismantling. Load up the exploration raft and head out to the new island where my freighter is located.
Both rafts contain lanterns and a sleeping bag/cot and the standard tools for survival in the event I go off course and end up on an Island other then intended. The cot and lanterns on the exploration raft remain on the raft while docked with the freighter.
Some last words
I have covered quite a lot in this guide, though not everything. Keep in mind, most everything that involves crafting takes special crafting tools ie, looms, leather station, fuel still ect. If you want to stock pile supplies you will need to craft these and many others. Experiment and test what you can and can’t do. Let it be a learning experience and don’t let the monotony get to you. Survival is a monotonous process and should not be poo pooed. I like this game because it does, in most way, reflect a real life scenario.
Tip: If you need to find out where you are, save the game, exit to the game menu and go to cartography. The developers have a map of your region laid out with the names of the islands. When I first started out I was trying to identify and name the islands myself. The cartographic map is an enormous help in finding your way around the islands.
Tip: Try the island creation feature in cartography. I’ve already created three of my own islands and have inserted them into my current game. I am currently on one of those islands. I would like to share them with others, but I have not figured out how and the process looks complicated.
Ok all, I think that does it for this guide. Anyone wanting to add their incites are welcome to do so. I hope you all enjoyed reading this. I have had a wonderful time writing it.
This is all about Stranded Deep – Gameplay Guide and Tips for New Players in 2021; I hope you enjoy reading the Guide! If you feel like we should add more information or we forget/mistake, please let us know via commenting below, and thanks! See you soon!
- All Stranded Deep Posts List


Leave a Reply