
This guide is intended to get you through the opening part of the game while teaching you about the basics of playing. It contains an early game walkthrough with explanations of most major systems in the game, and advice about how to progress further once you’re done with what the guide covers.
Intro
In my first few hours of playing Starmancer I had to restart dozens of times due to bugs, not understanding the mechanics, colonists suffocating because they’re not wearing a spacesuit outside, or otherwise irreversibly screwing up my start and getting stuck and frustrated. I didn’t really get it, and the tutorial just confused me more.
This guide is intended to get you through the opening part of the game while teaching you about the basics of playing. It’s probably not the most optimal gameplay, but if you have been struggling to get started or frustrated at the lack of in-game tutorials, this is for you. I hope you find it helpful!
New Game – First Steps & Controls
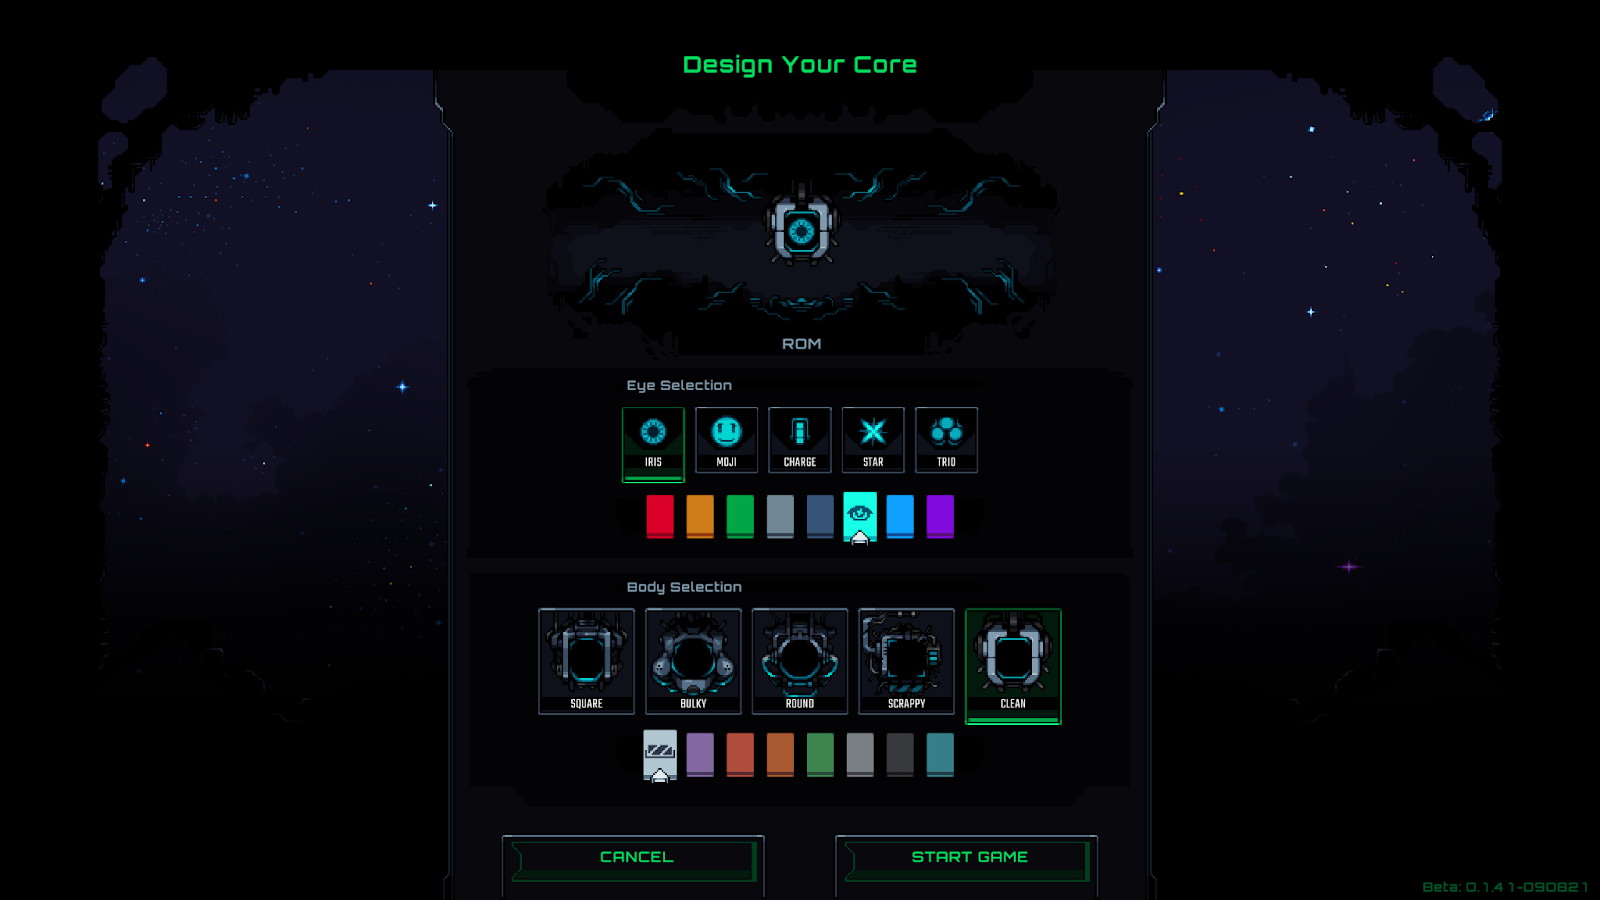
When starting a new game you’ll be prompted to create your core, name yourself and your station. All of this is cosmetic so you can choose anything you like.
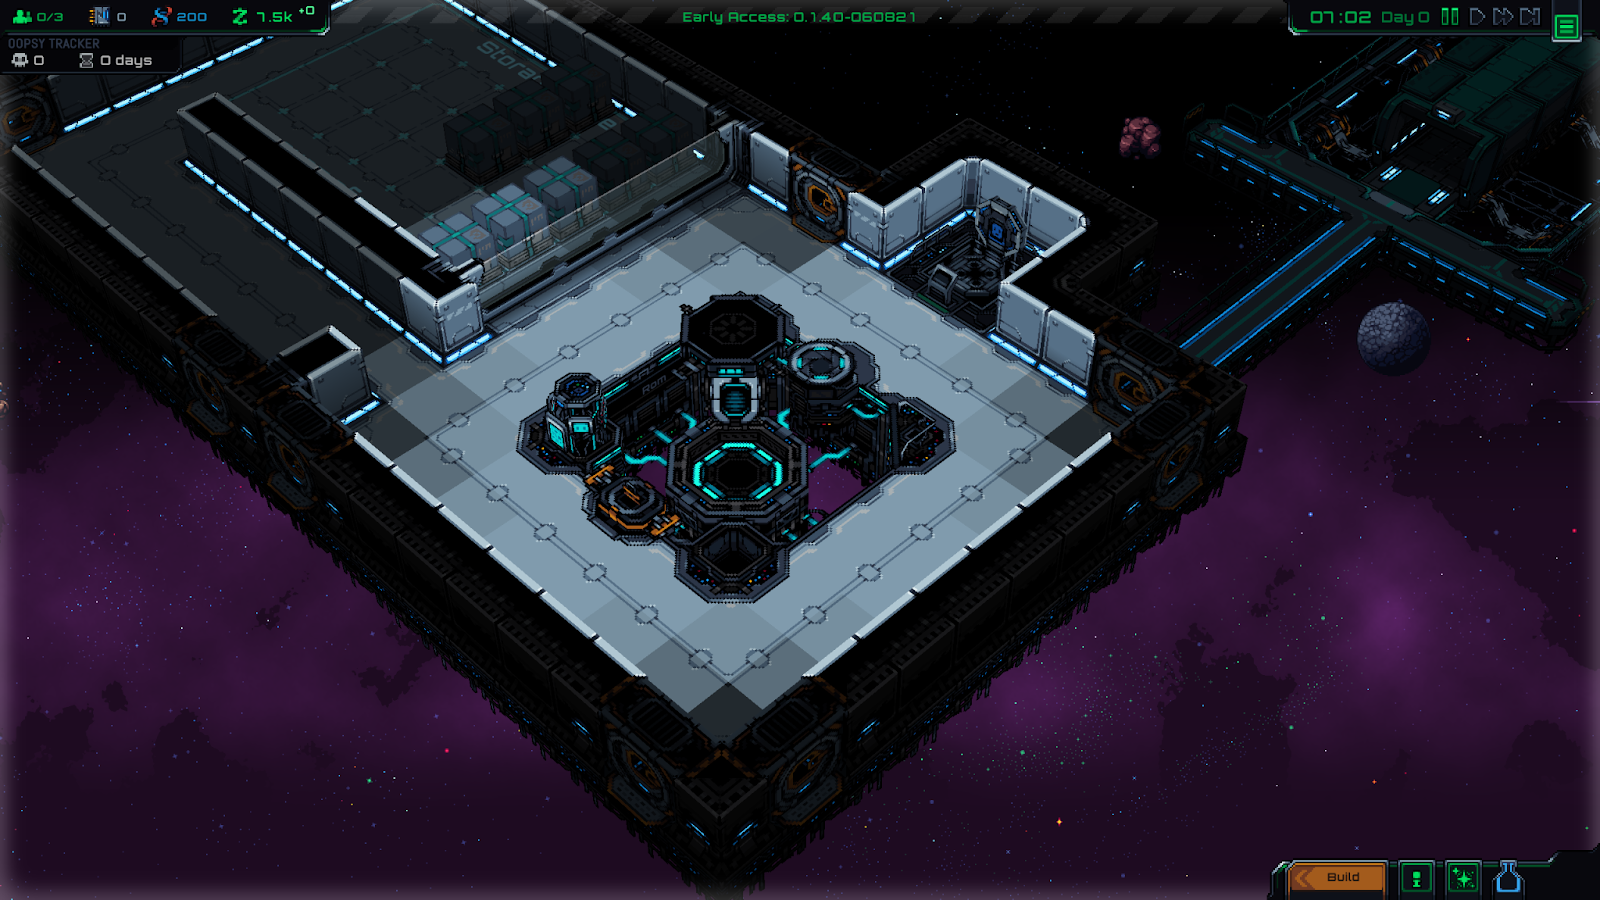
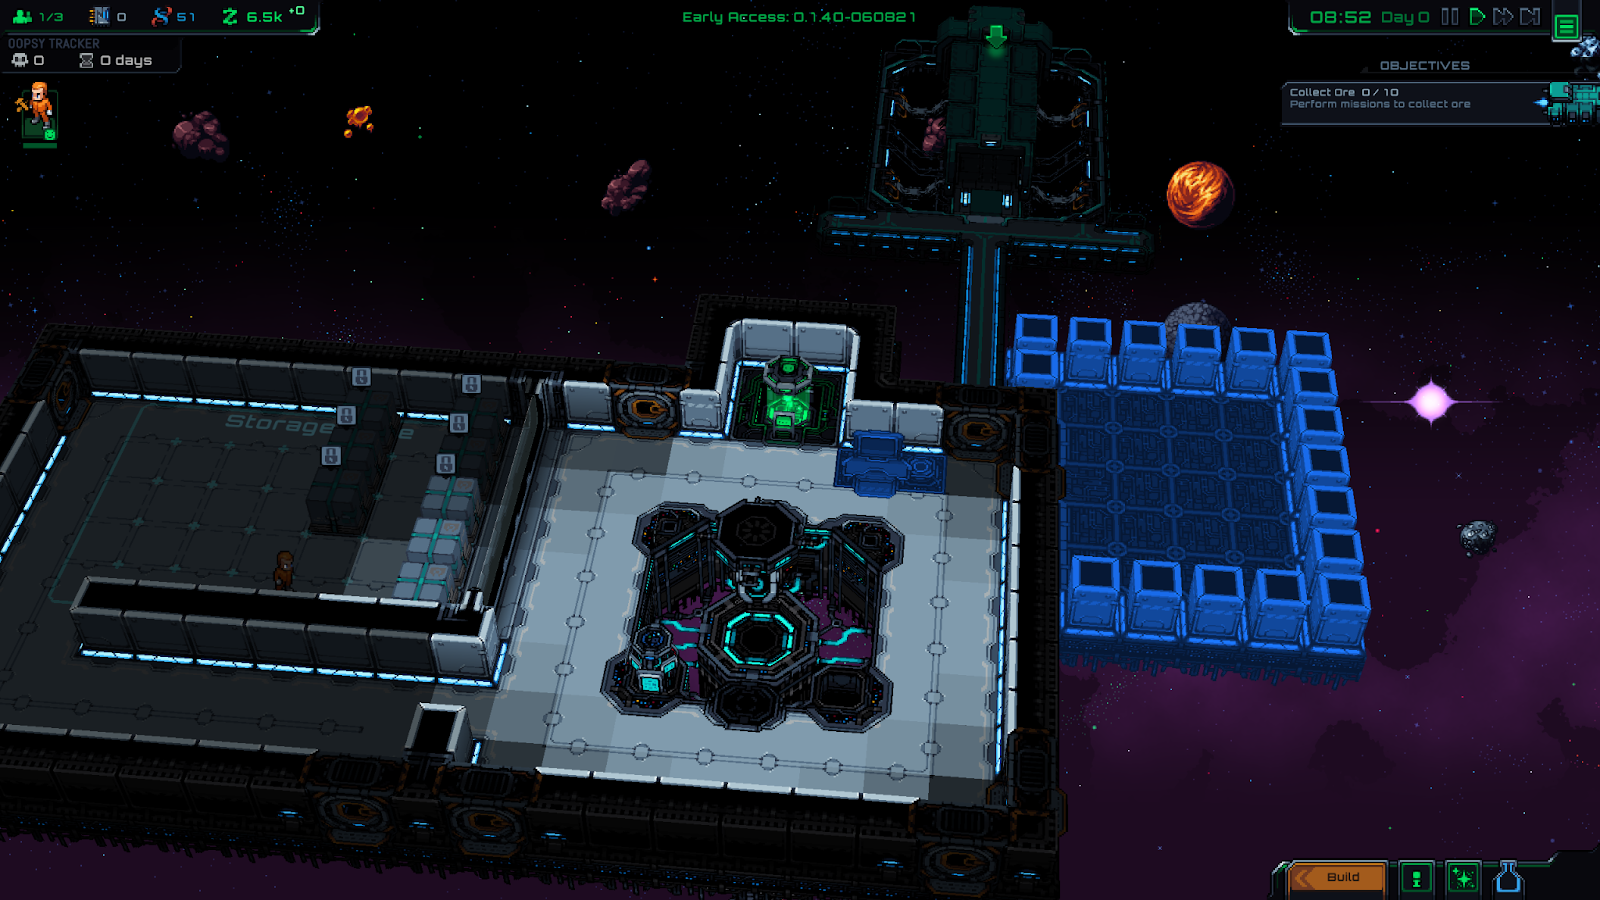
Once we load into the game, we’re presented with our basic station. The starting map is always the same, you should see your core and the colors you chose in the middle. I chose a light blue core, don’t worry if yours looks a little different than mine in the screenshots.
Camera Controls
Press SPACEBAR to pause and un-pause the game. While it’s paused there will be a light grey border at the edges of the screen. You should start by pausing the game, as we don’t have a reason to go forward in time yet.
You can move the camera around your base with WASD, and use the middle mouse button or Z and X to rotate your view.
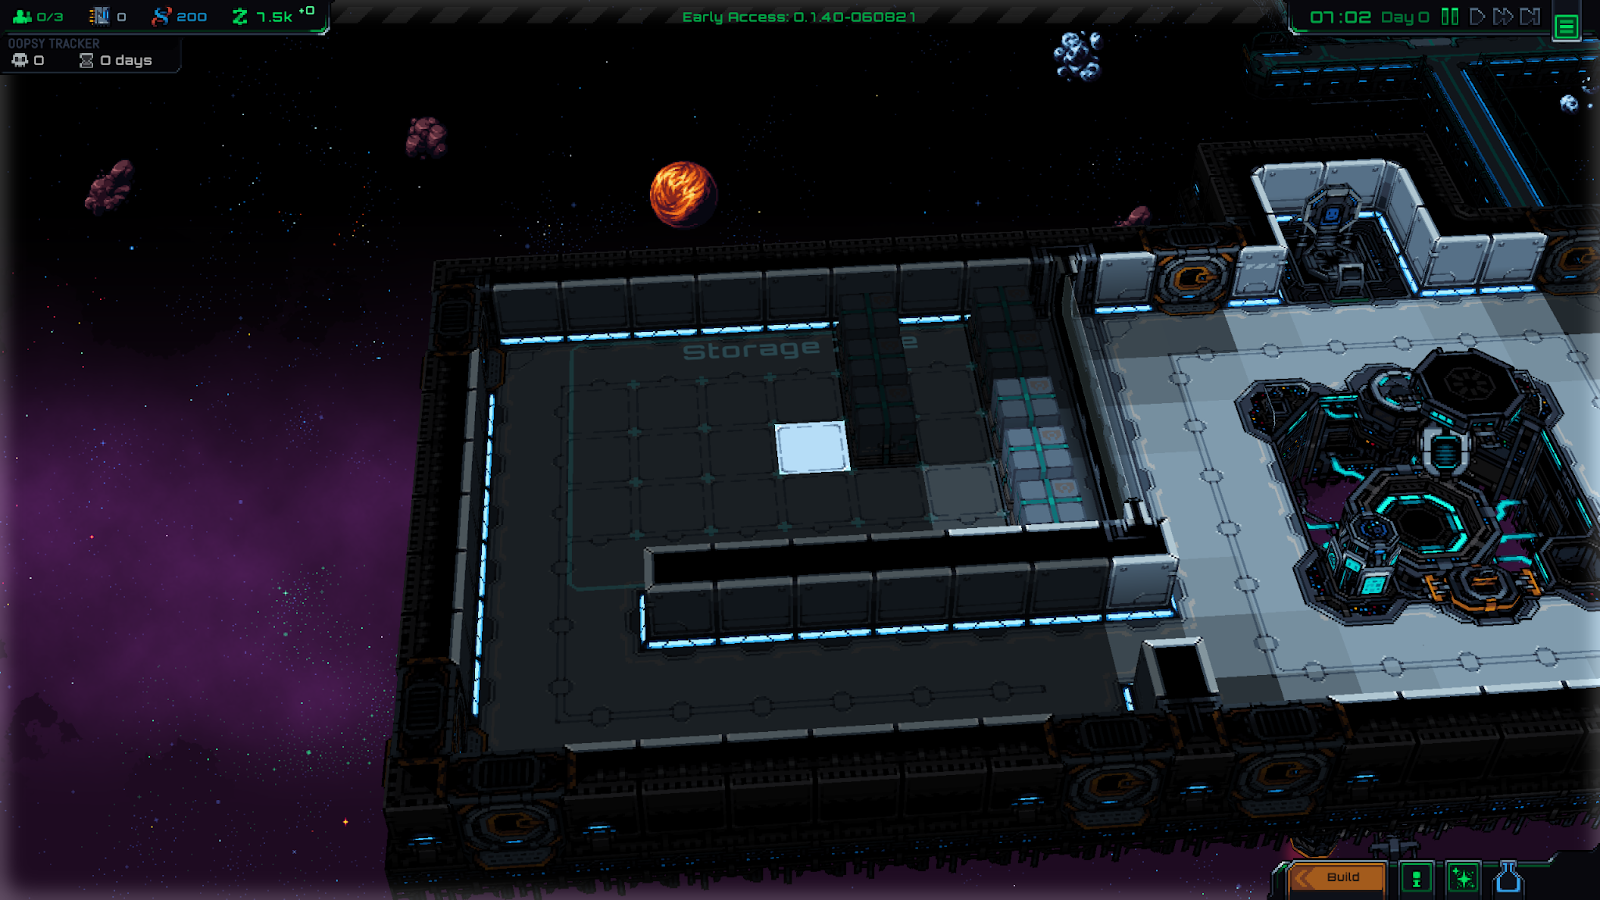
Move the camera over to the shaded area with the boxes. This is called a “Storage Zone,” it’s an area on the floor where colonists will store items.
Inspect the Storage Zone
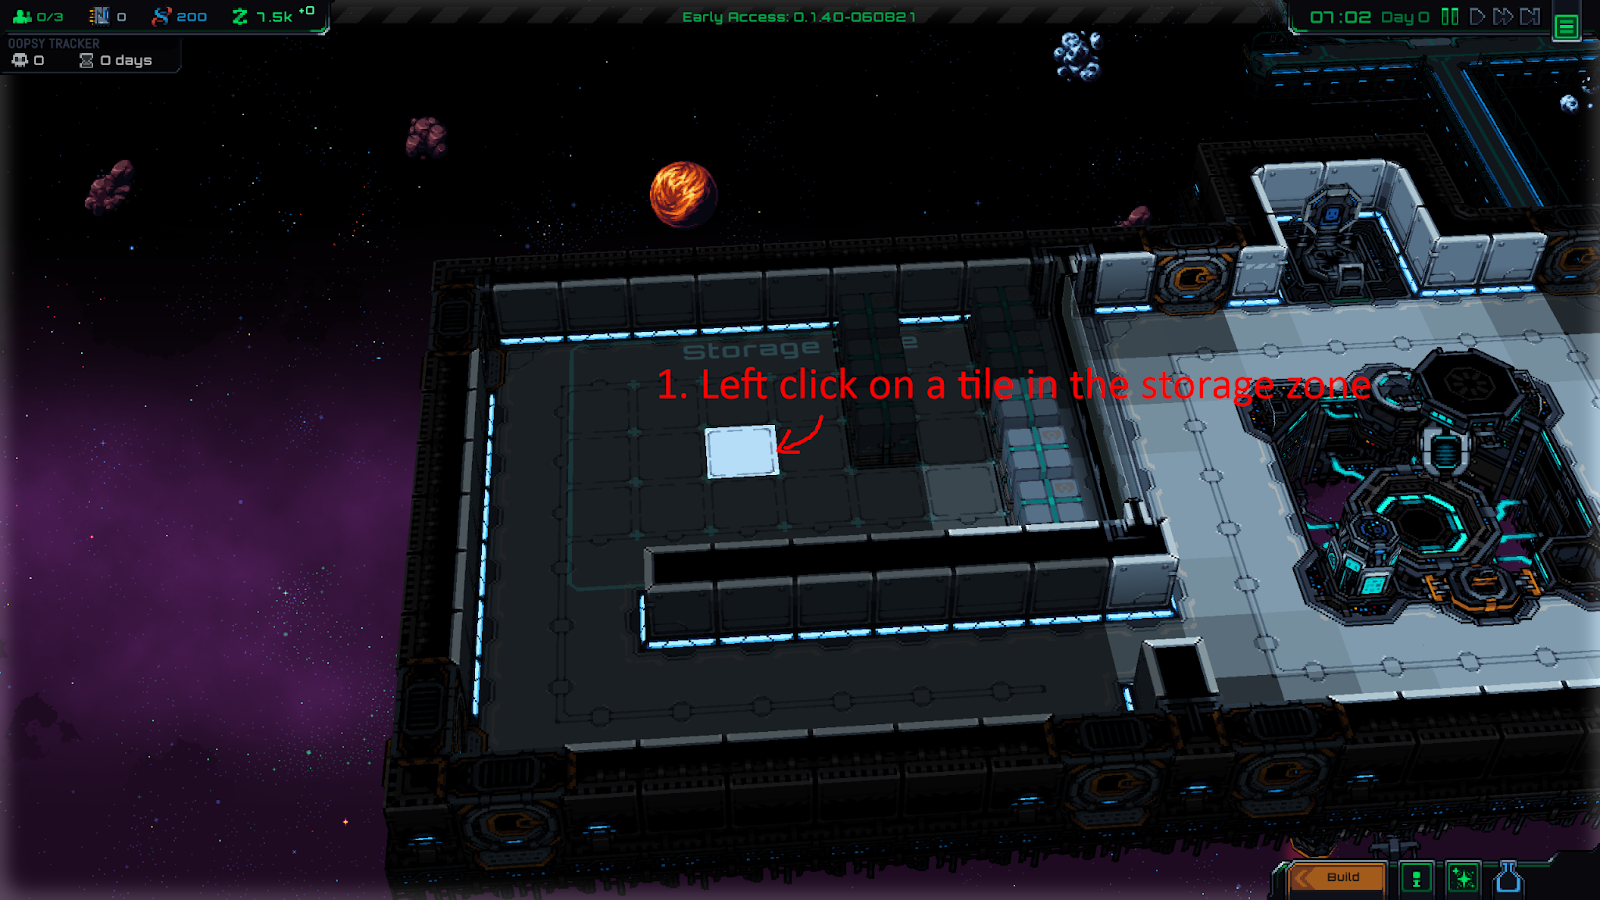
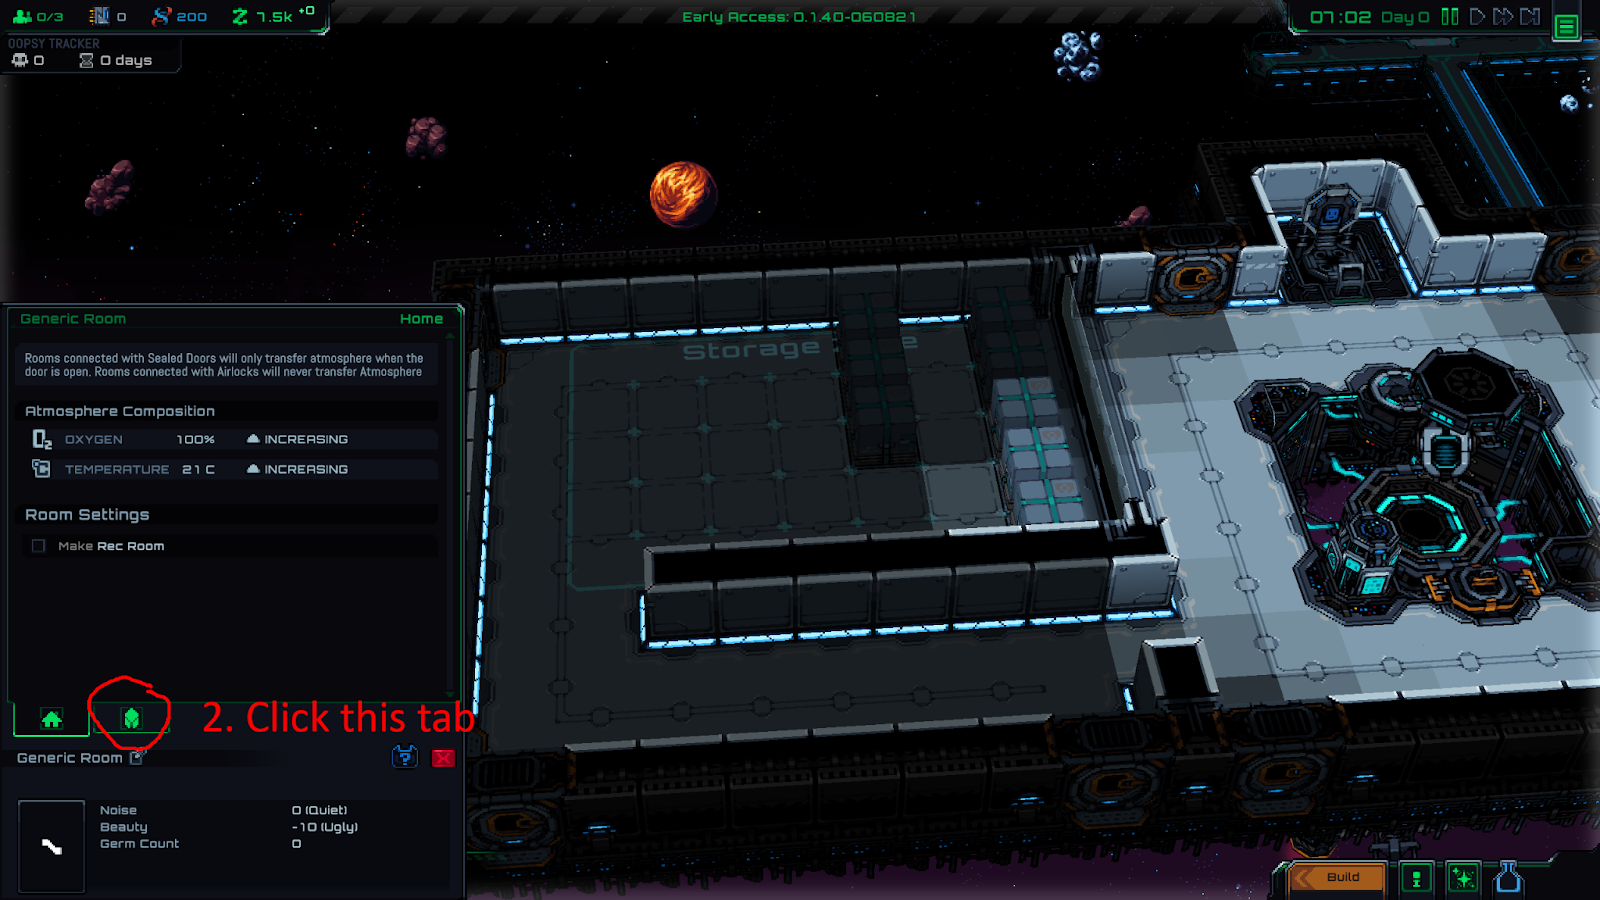
First, let’s go over how to get information about this zone. Left click on a tile in the storage zone.
You’ll see a box on the left side of the screen pop up with information about the room. To know about the storage zone, we want to go to the “Inventory” tab, which is the 2nd one:
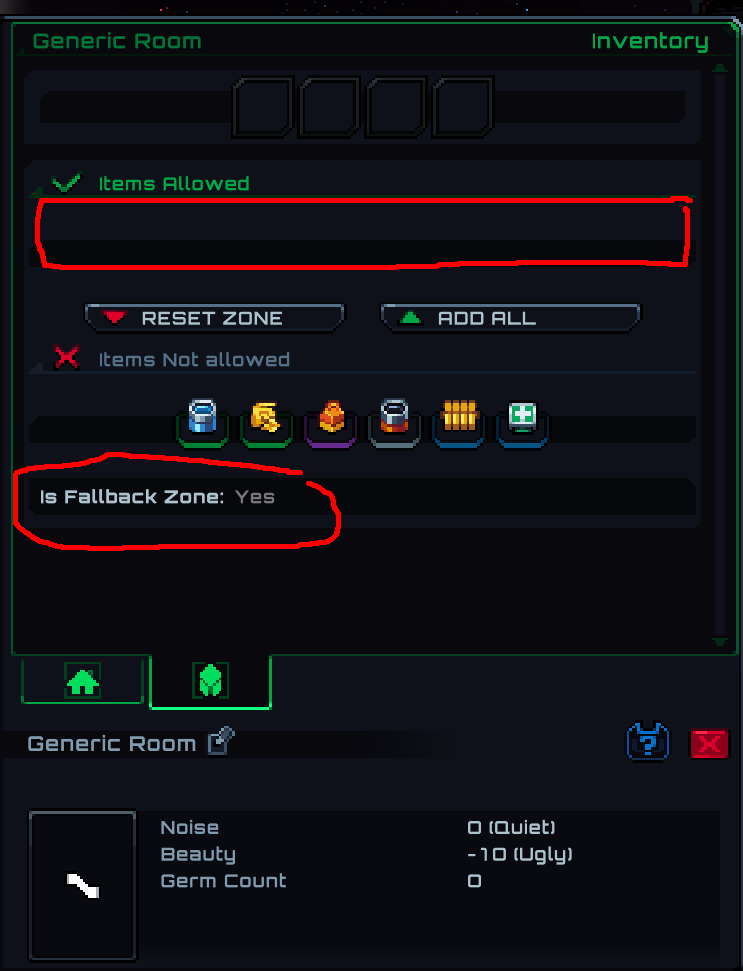
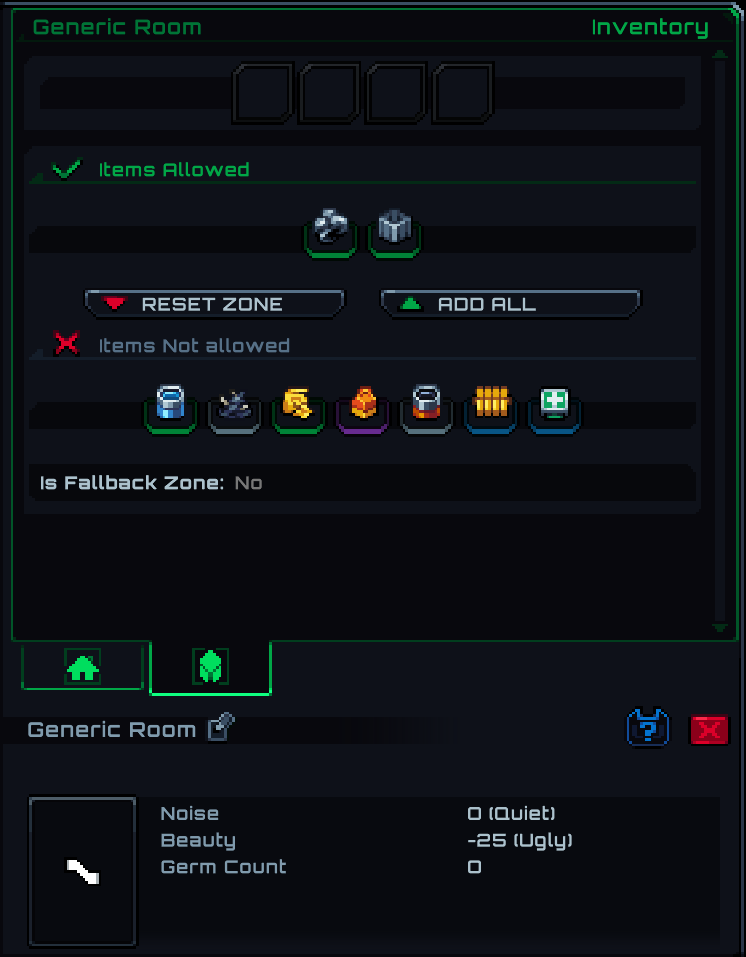
This is what the tile’s inventory tab looks like. The empty boxes near the top represent any items stored on the tile you clicked on (currently, we have no stuff, so the boxes are probably empty):
Below the tile inventory is the Storage Zone information (Items Allowed, Items Not Allowed, and Is Fallback Zone all have to do with the storage zone).
As long as NO items are allowed, “Is Fallback Zone” will be set to YES. That means that if an item doesn’t have a better place, colonists will drop it here.
For now, this is what we want, so you can leave this menu un-touched.
Just keep in mind for the future, you will be able to create zones and add any combination of items to them as long as you have discovered the item. (In other words – there’s no ore or metal available in the list of items, because we haven’t done any mining yet.)
Managing colonist movement paths is one of the most important parts of this game. If you have a long walk to the main storage area, it will take colonists that much longer to walk there and then back to work. As your base gets bigger, you’ll need to make new storage zones to keep things organized and running smoothly.
Lock the Starting Storage Crates
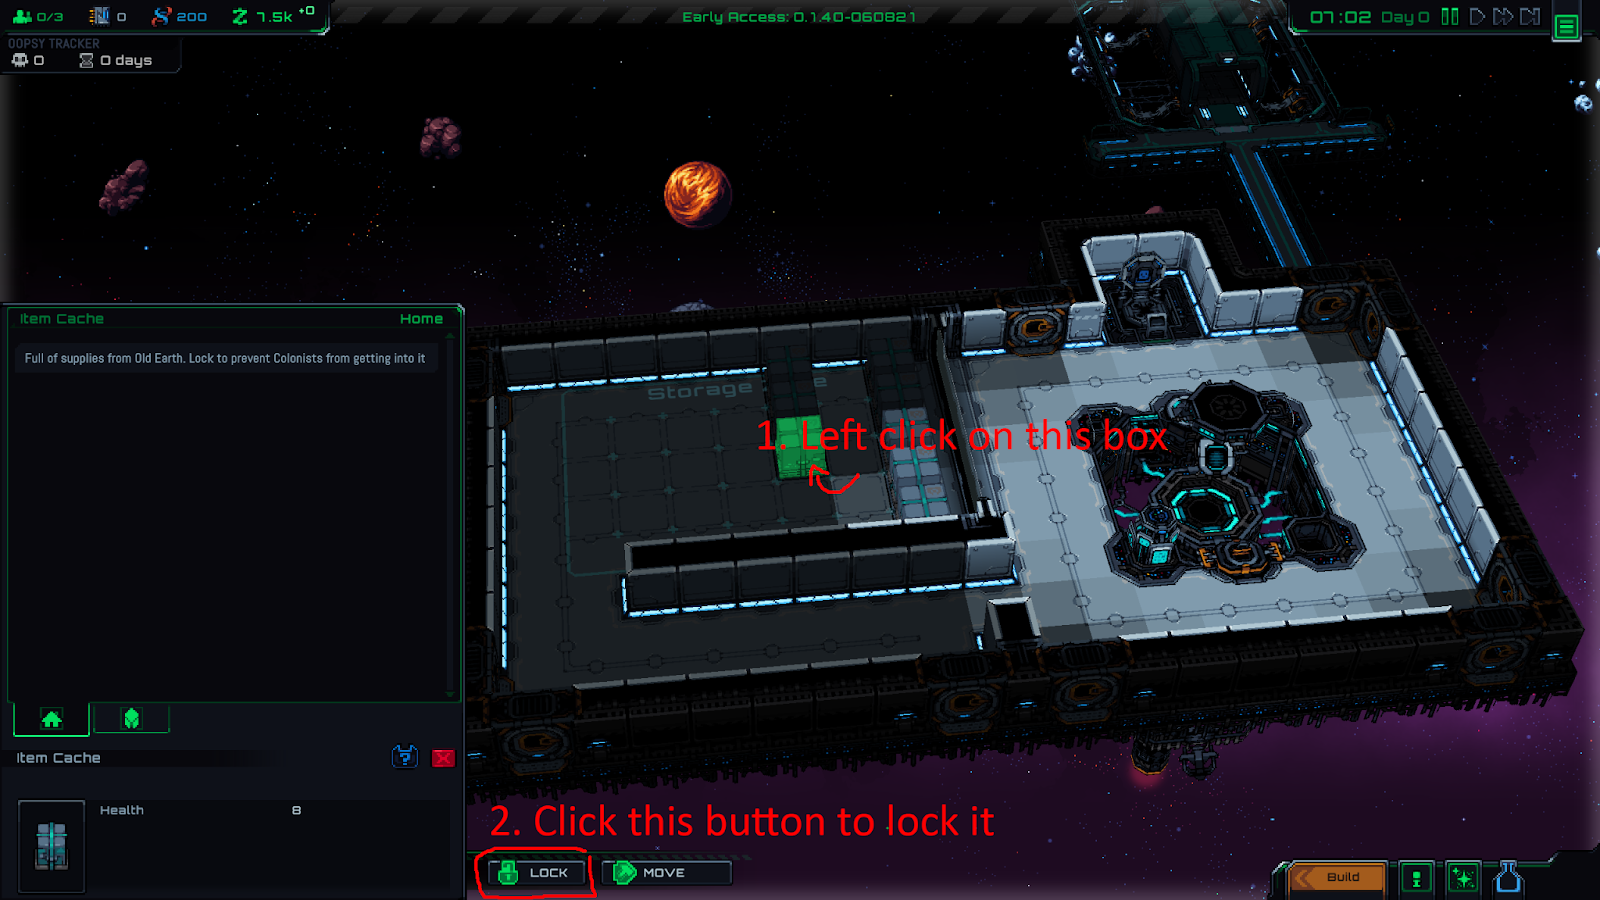
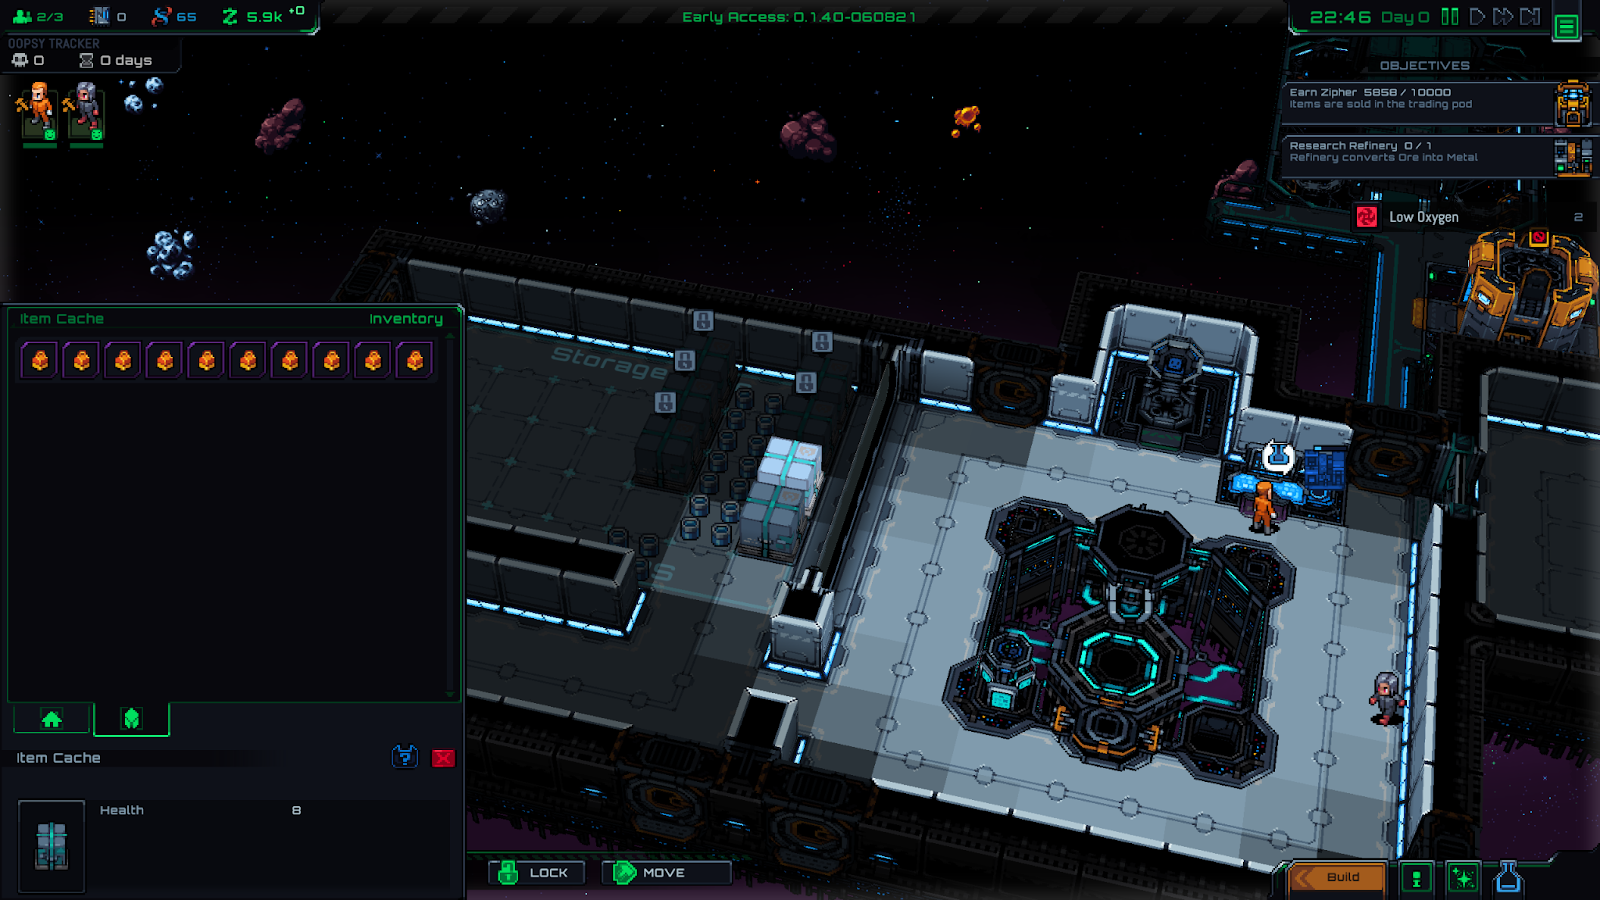
You might have noticed the boxes sitting in the storage zone. These will be opened by colonists automatically and contain much-needed supplies like clean water and food rations.
Once a box is opened it will disappear, and the items contained within will take up a lot more storage space than the box itself. If we open all the boxes at once it will be a mess, so we should first mark some of them as not being touched.
Just left click on one of the storage crates, and you’ll see a button near the bottom to lock/unlock access:
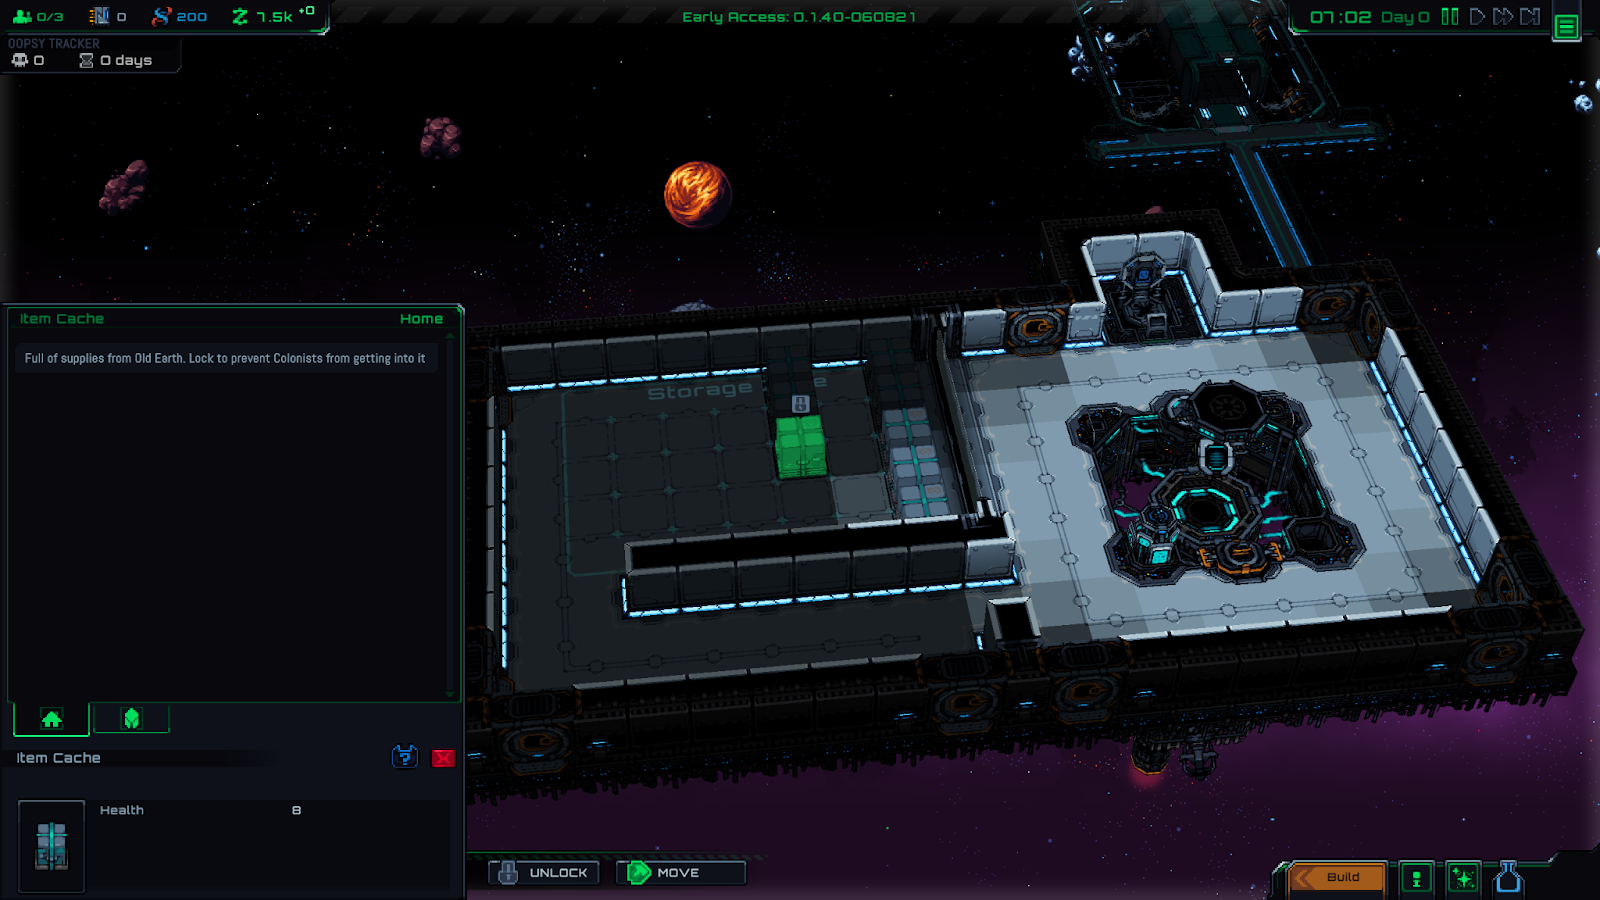
A locked box will have a grey lock icon overhead and also show the “Unlock” button instead of the “Lock” button:
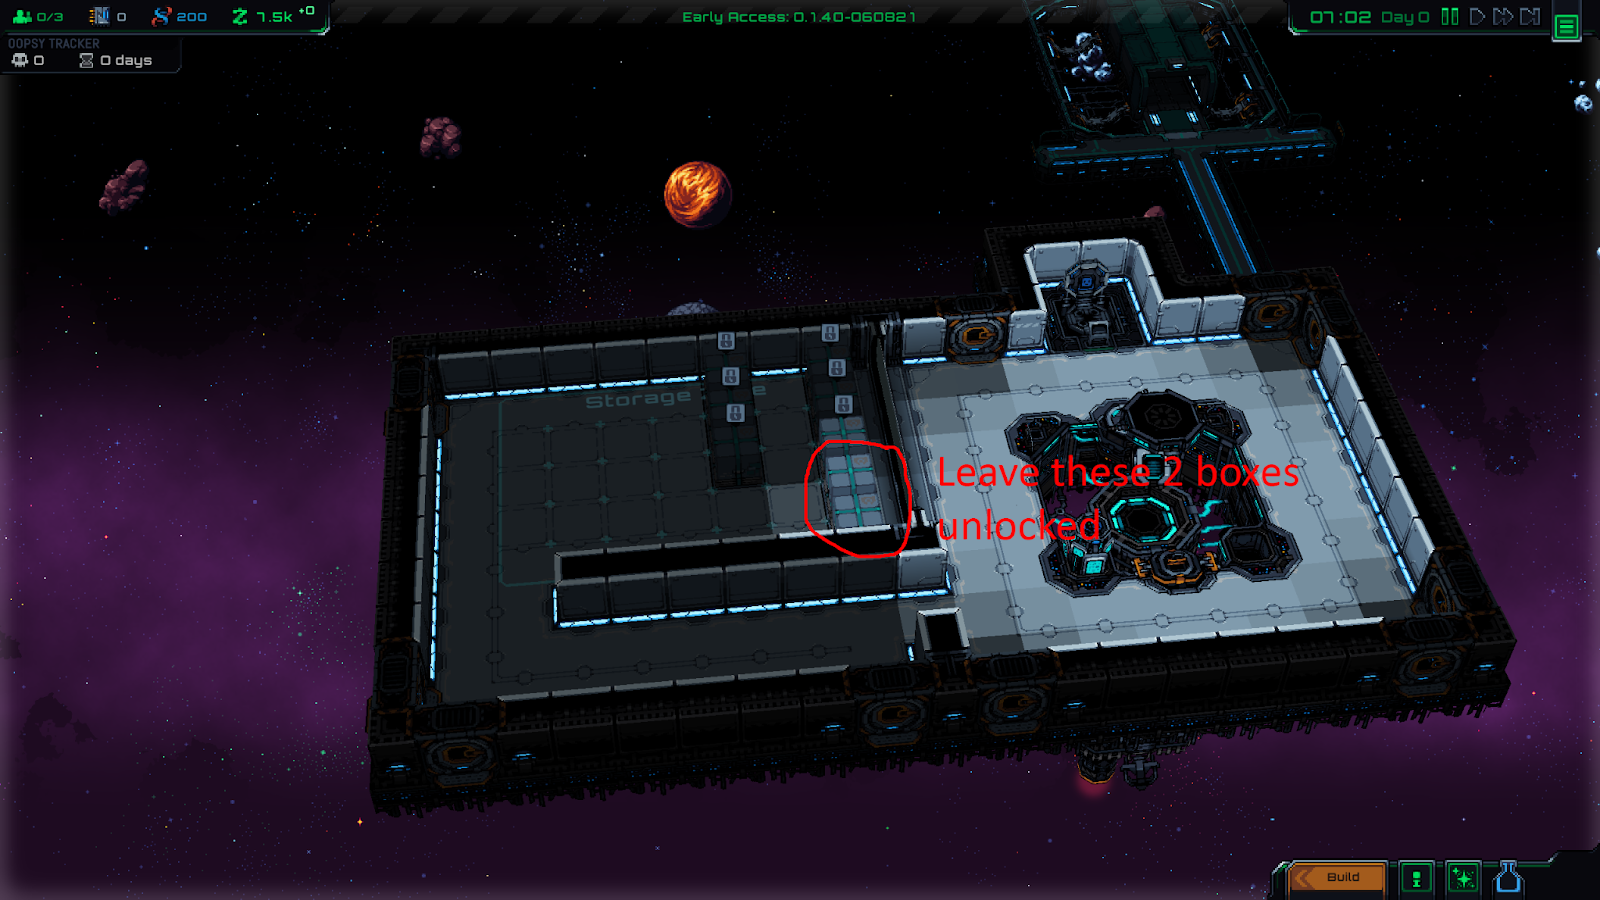
Go ahead and lock most of your boxes now. You should leave a couple of them unlocked so that colonists can open them and get the supplies inside.
Remember to check this storage occasionally and unlock new boxes as you use up your initial supplies.
Our goal is to get a sustainable base running with food production and a water purifier before we run out of this starting supply. Easy, right?
Unpause the Game to Proceed
Now that we’ve locked our extra storage crates, let’s get the game going.
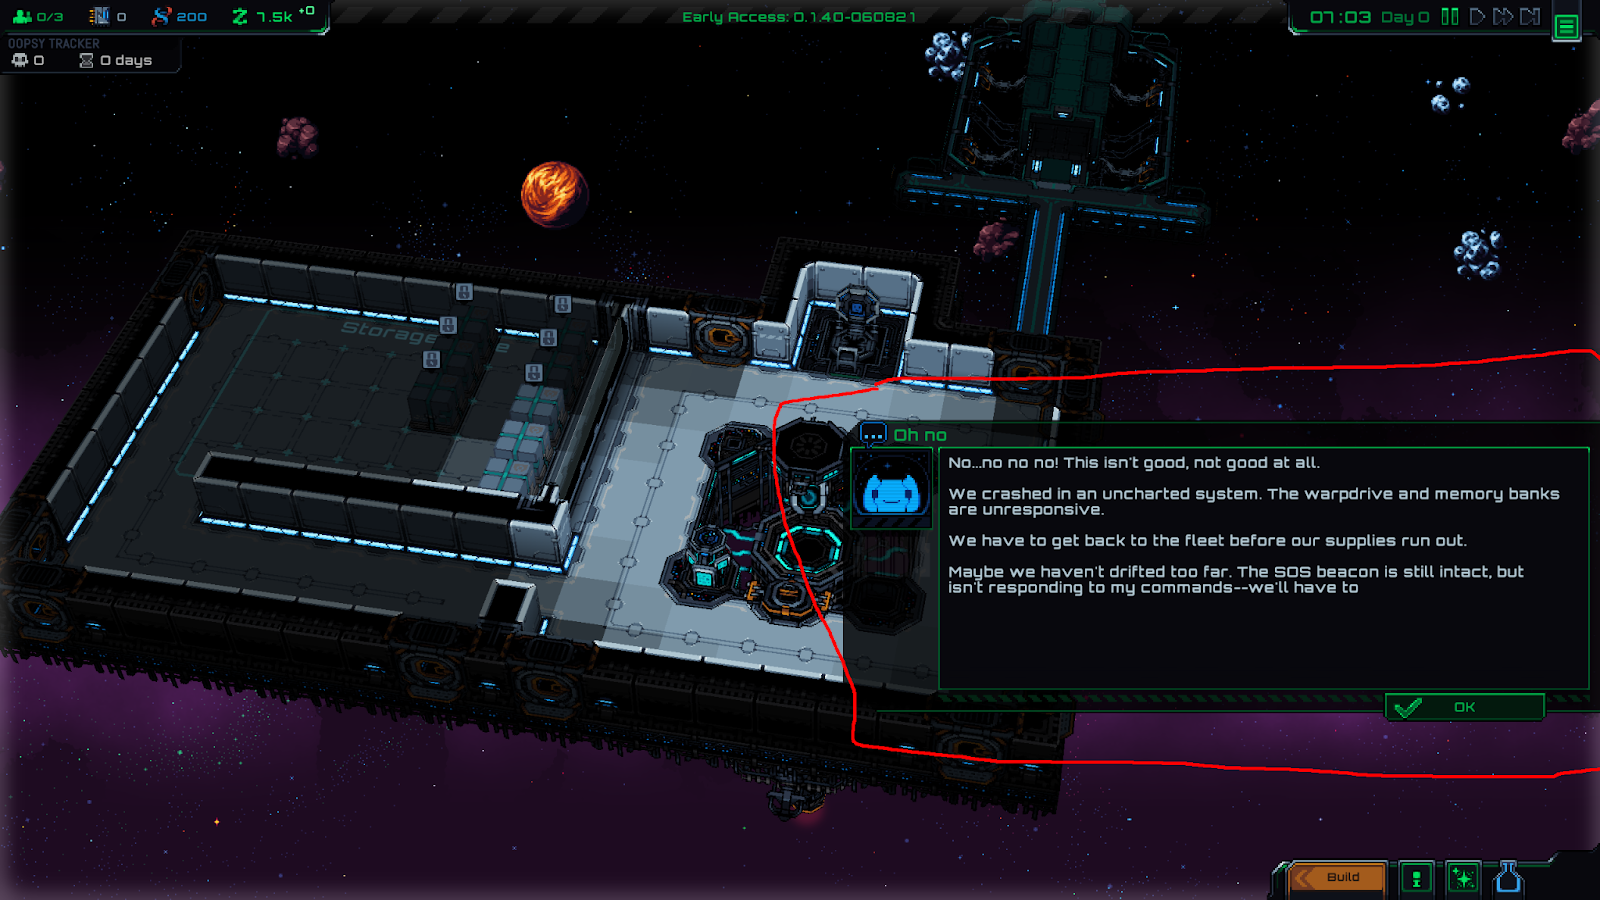
Unpause the game until you get this “Oh no” pop-up:
Clicking “OK” a couple times will give you your first mission.
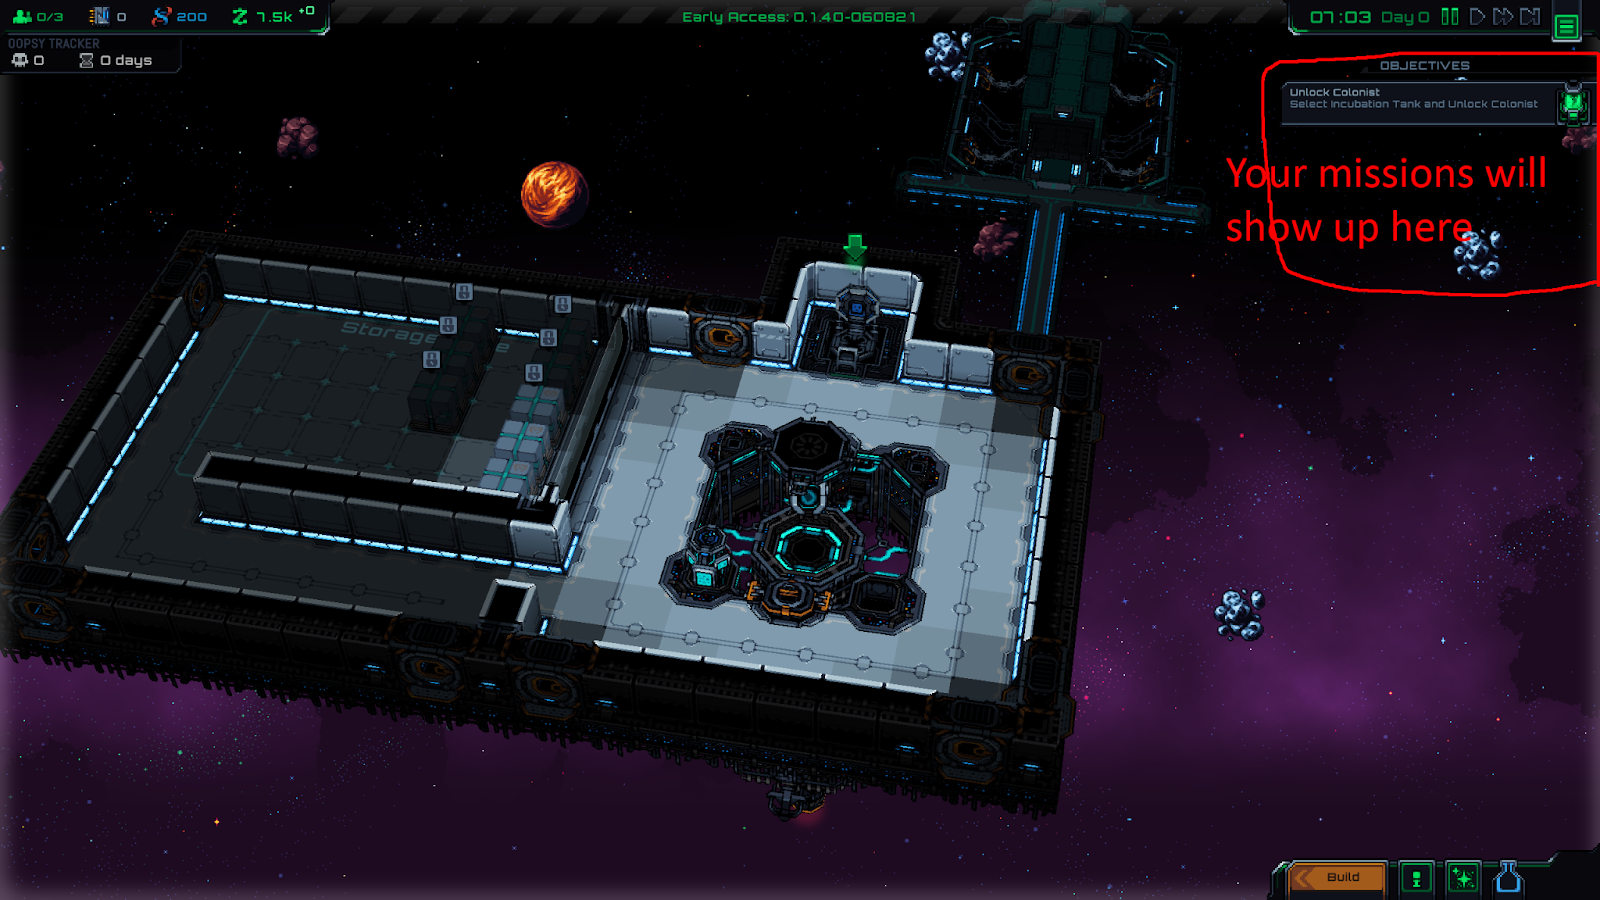
Generally speaking, missions won’t show up on your list until you’ve finished the dialogue boxes — so any time you get a dialog notification on the right side of the screen, remember to click through it.
For our first mission, the game just asked us to generate a colonist. So let’s do that next.
Buying Your Starting Colonists
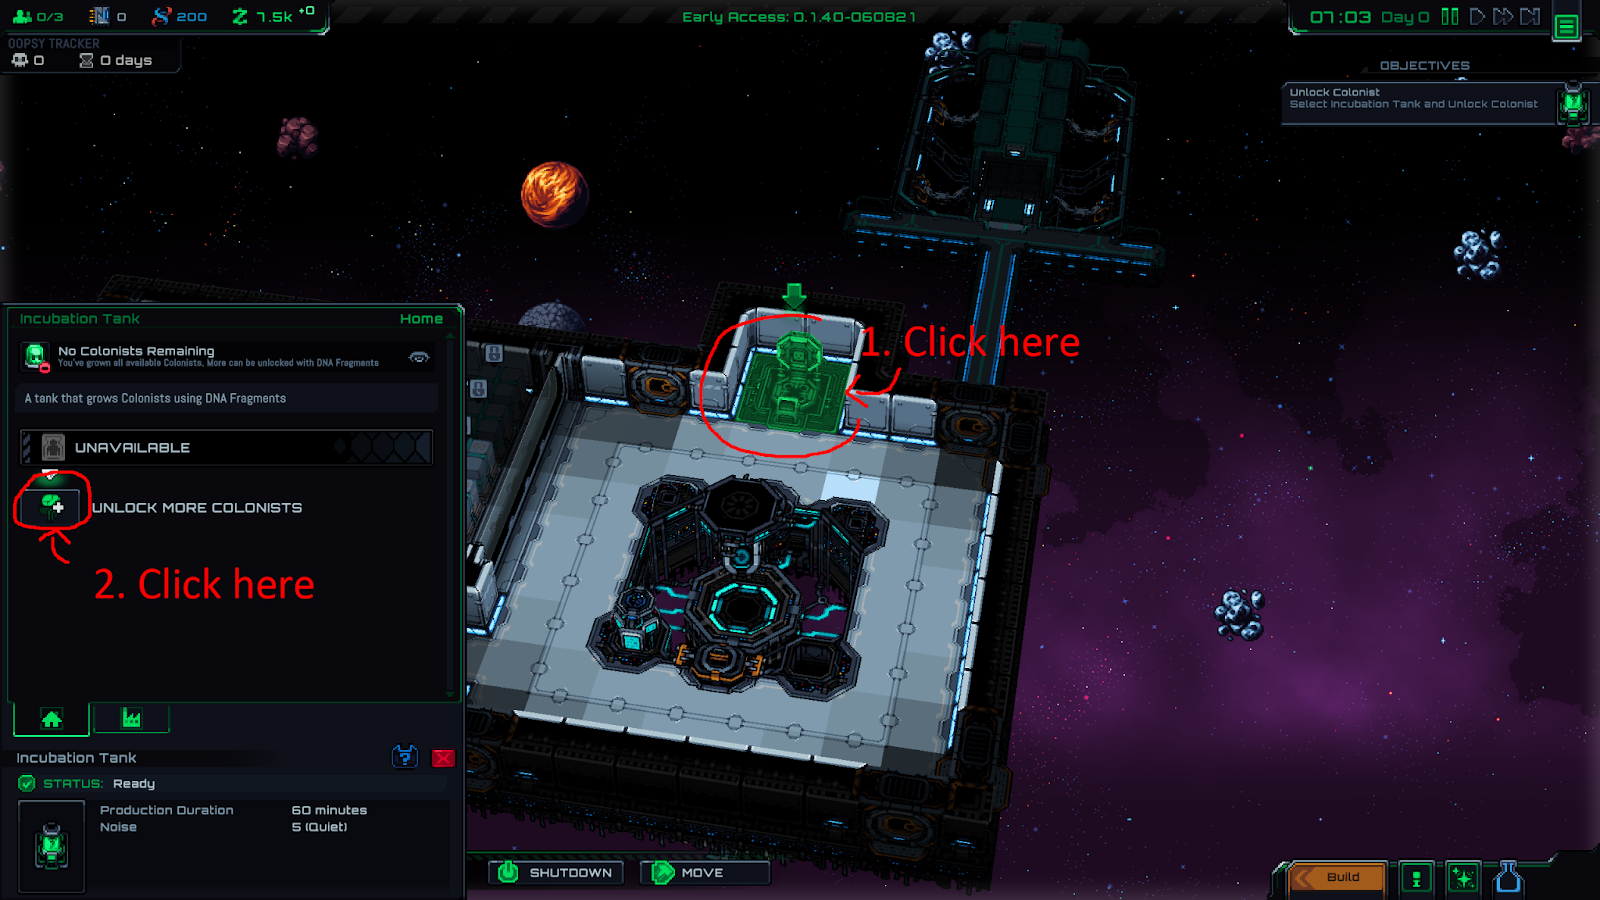
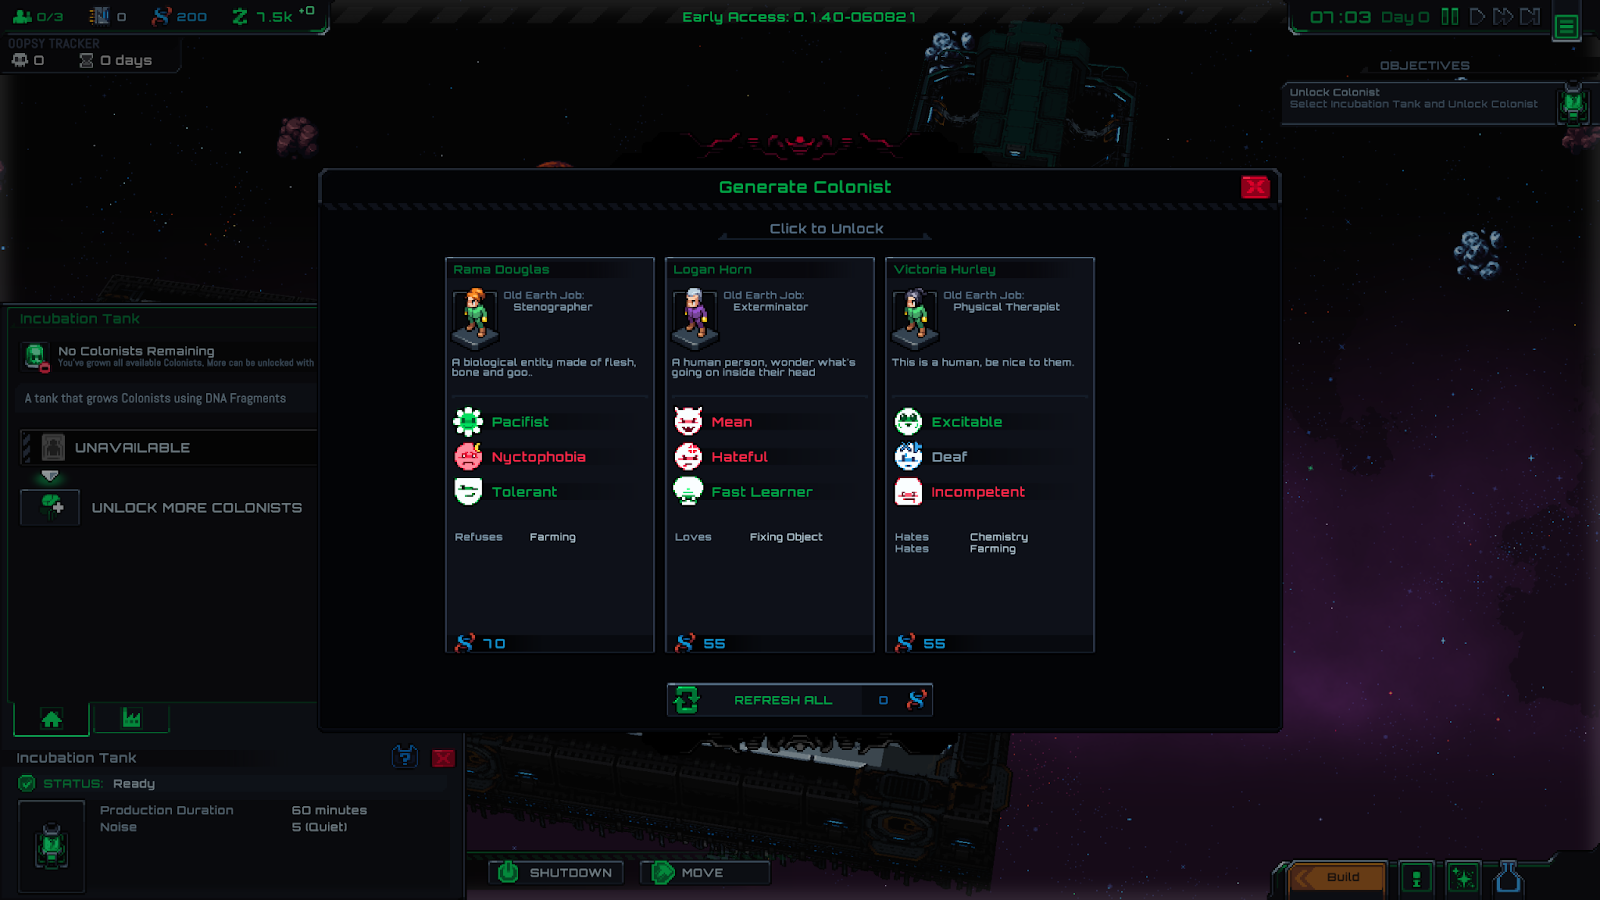
There should be a green arrow pointing to the incubation pod. This is where you can generate new colonists. Left click on it, and then in the info panel, you’ll see a button to “Unlock More Colonists.” Click that too.
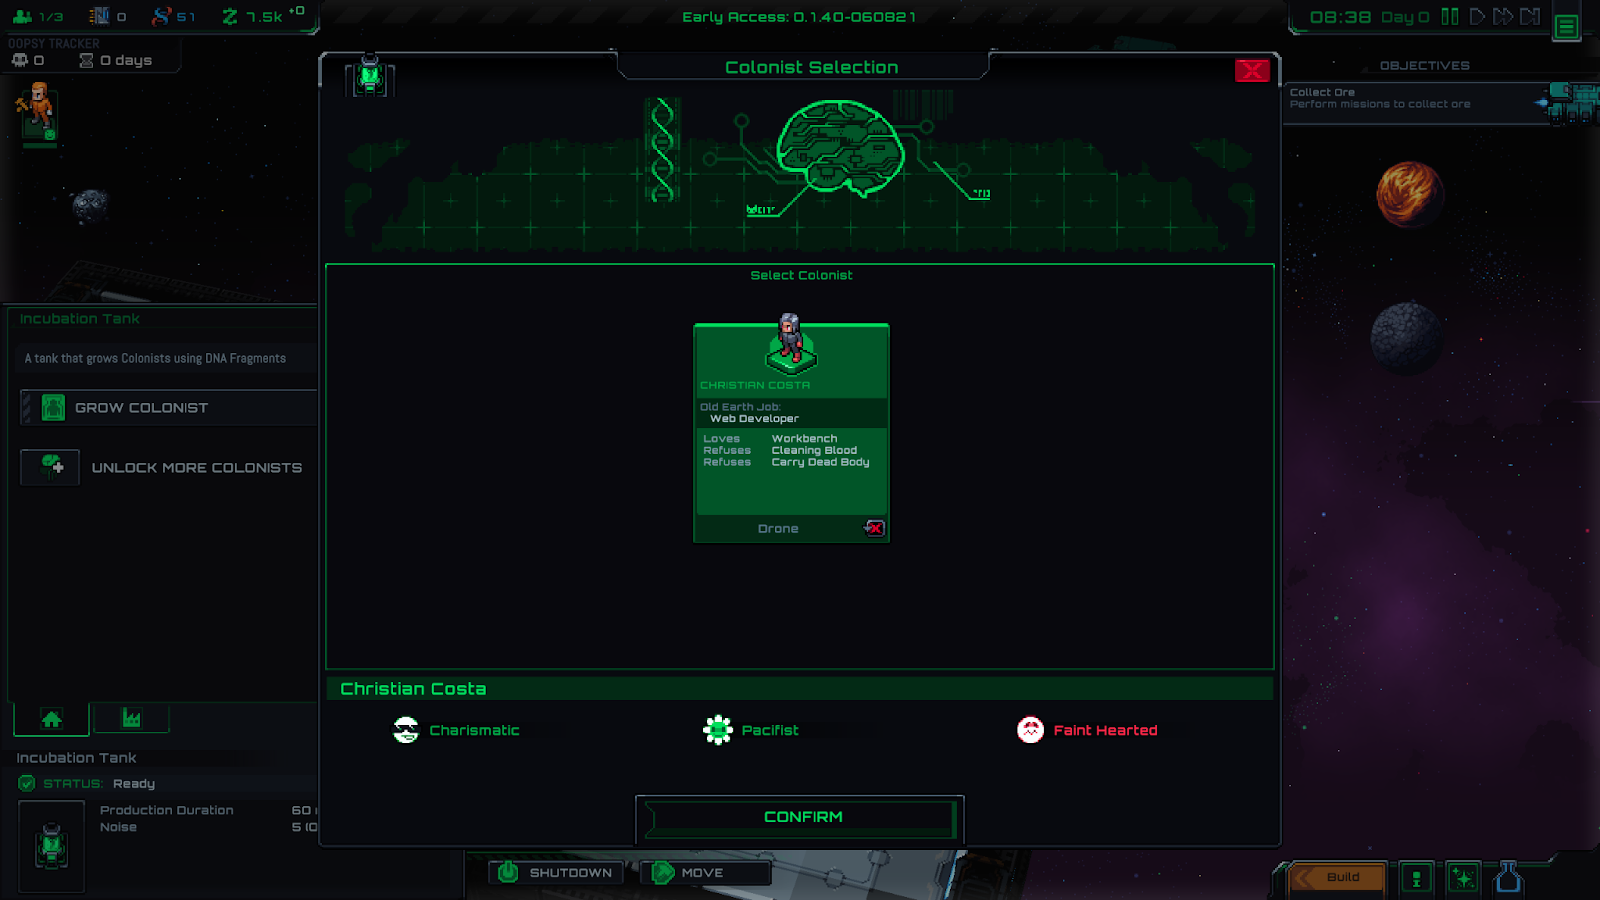
Now you should see a menu that looks like this (your colonists will be different):
Before you choose a colonist to start out with, there are a few things we should go over.
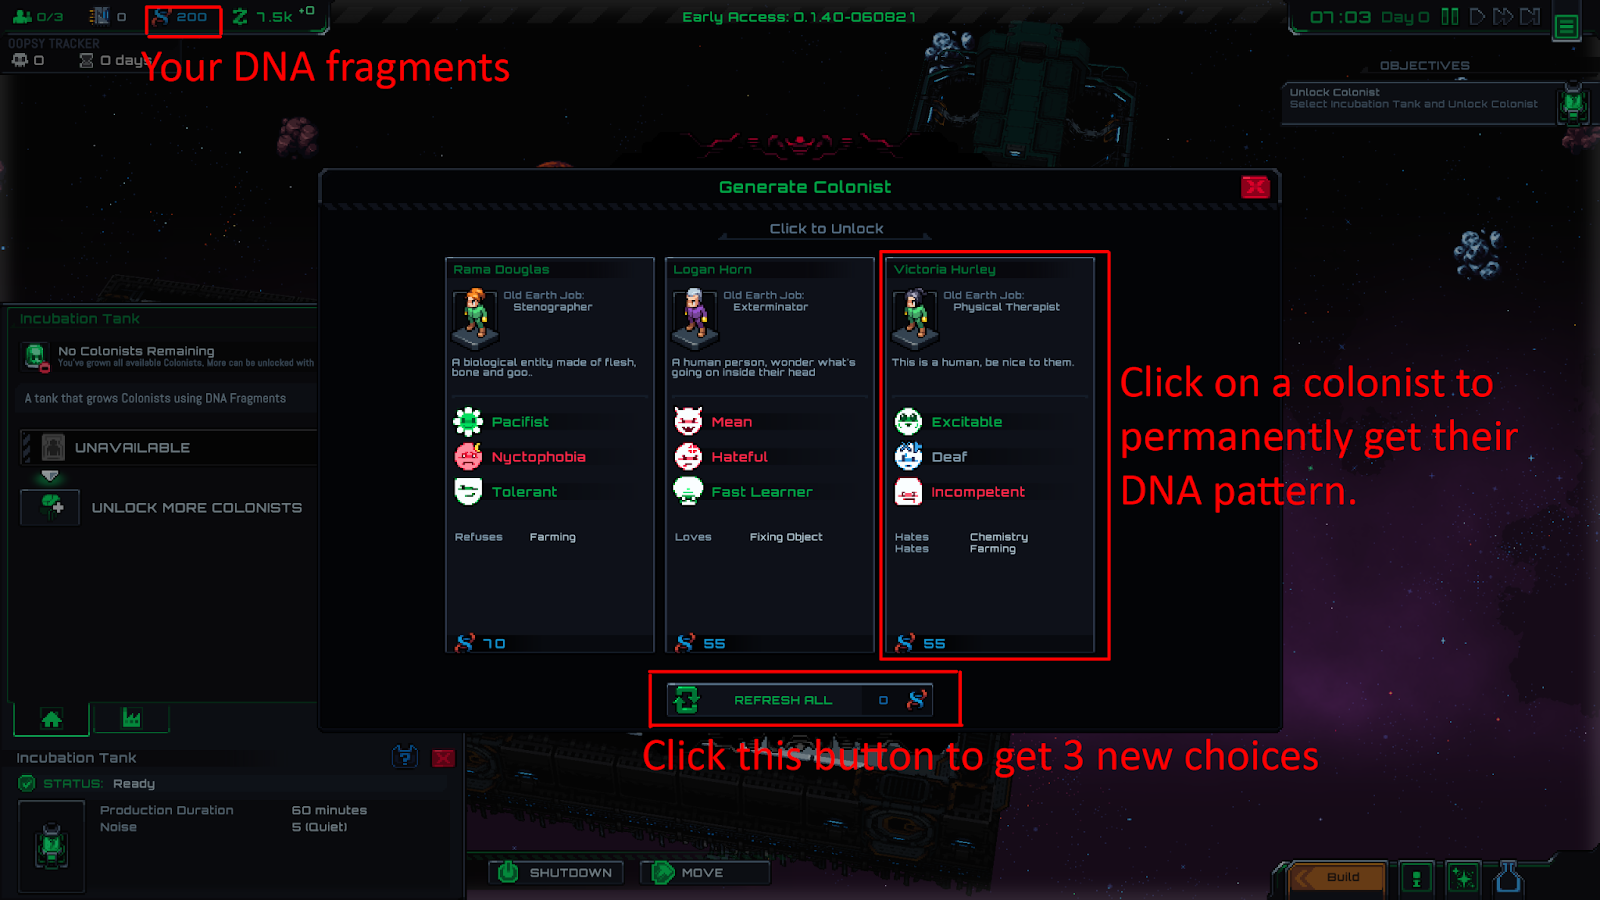
Here’s a quick overview of the UI itself:
You can refresh as much as you want for your first 3 colonists, so don’t be afraid to refresh a LOT in search of units you really like.
Bear in mind that every colonist has a DNA cost. You pay this when you first buy the colonist, and it doesn’t cost anything to grow them after that – so if someone dies, you can get them back without spending DNA again. Generally speaking, the fewer drawbacks and more positive traits a colonist has, the higher their DNA cost will be.
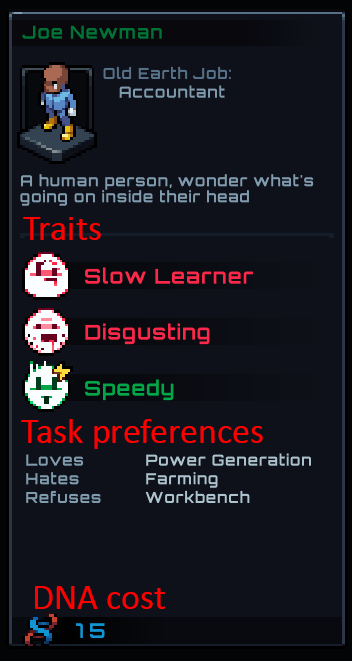
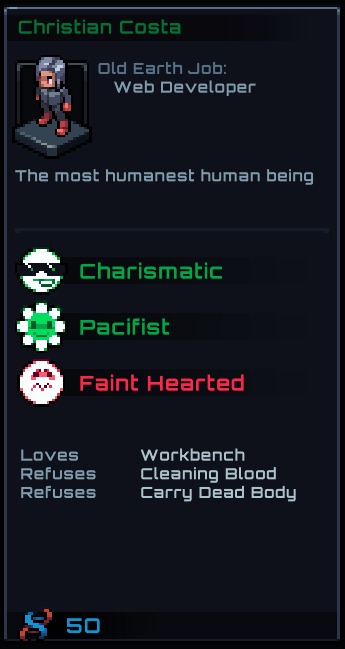
Let’s take a closer look at a colonist and talk about what this information means, and what we should look for.
First, we have traits, the colored words with icons.
Hovering over a trait will tell you about it, they should be pretty straightforward. Green traits are generally good, red traits are generally bad. Neutral traits are grey and can vary in how much they affect your gameplay, so read over them and decide if it’s something you want.
Below the traits we have a list of tasks the colonist has feelings about. Pay attention to these, they will matter a lot. Performing loved tasks will improve a colonist’s morale, while hated tasks will decrease their morale. If they are listed as “Refuses” the task, that means they will not do it under any circumstances. For your first few colonists you should look for people who don’t refuse or hate anything, because you won’t have a lot of other colonists who can pick up the slack.
Finally, there’s the DNA cost. We only have 200 DNA to start out with, but we can have up to 3 colonists alive at once. Our colonist Joe here is pretty bad, so he only costs 15 DNA, but that’s still a waste that we could put toward someone better.
You can buy more DNA patterns than you have room for in your colony, and hold the extra ones for later or situational use. But for now, we don’t have many DNA points to work with, so let’s focus on getting good colonists.
Start by buying your first 2 colonists. Look for ones that Love Stocking Machines, Mining, or Workbench – these are 3 tasks you’ll be doing a lot of in the early game. You’ll also be Building a lot at first, but this won’t be as important later, so it’s up to you if you want to invest in it.
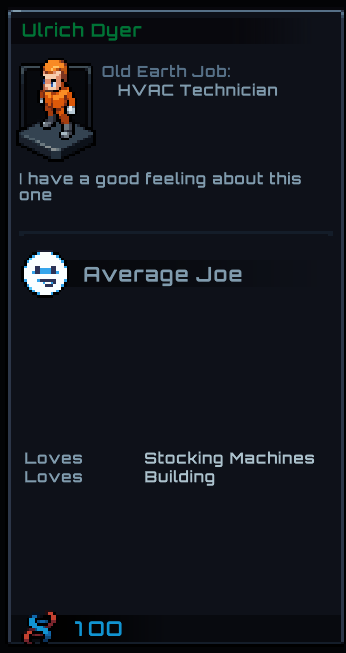
“Average Joes” are a decent choice for your 2nd unit because they’re fairly cheap without any significant negatives. It’s also pretty useful to have “Deaf” colonists who can operate machinery because they won’t be bothered by loud noise.
Finally, “Morbid Curiosity” (a green trait) makes for very good body haulers. You’ll want to get a couple colonists with this trait later and keep them in reserve for when things go bad, but I recommend skipping them for now.
Here’s the colonists I’ll be starting out with:
I picked this guy because he loves Building and Stocking Machines, which are both pretty common tasks. And he doesn’t have any refused or hated tasks, so he’ll do almost anything.
This colonist won’t cause social friction, and I plan to keep him on the workbench most of the time. He won’t carry bodies or clean blood, which could be a problem if things go bad really early. I’m just hoping that won’t happen!
Once you’ve found a couple colonists that you like and have purchased them, close out of the menu and press “OK” on the dialog box to get our new quest.
Growing Your First Colonist
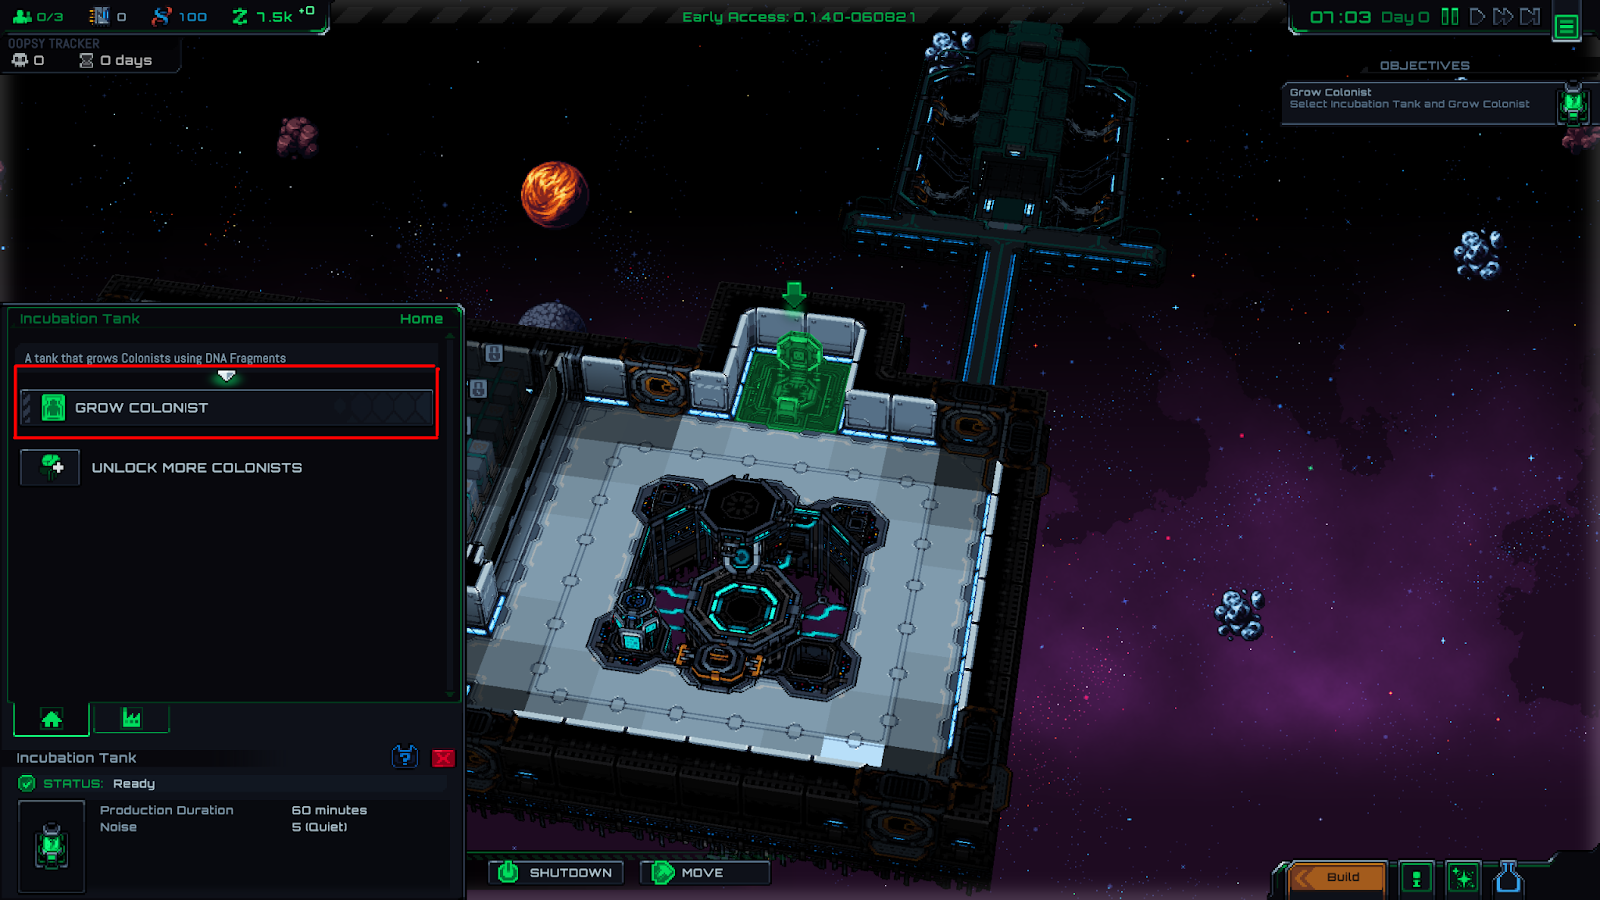
In the Incubation Tank’s info panel, where there used to be a greyed-out button should now be a button to “Grow Colonist.”
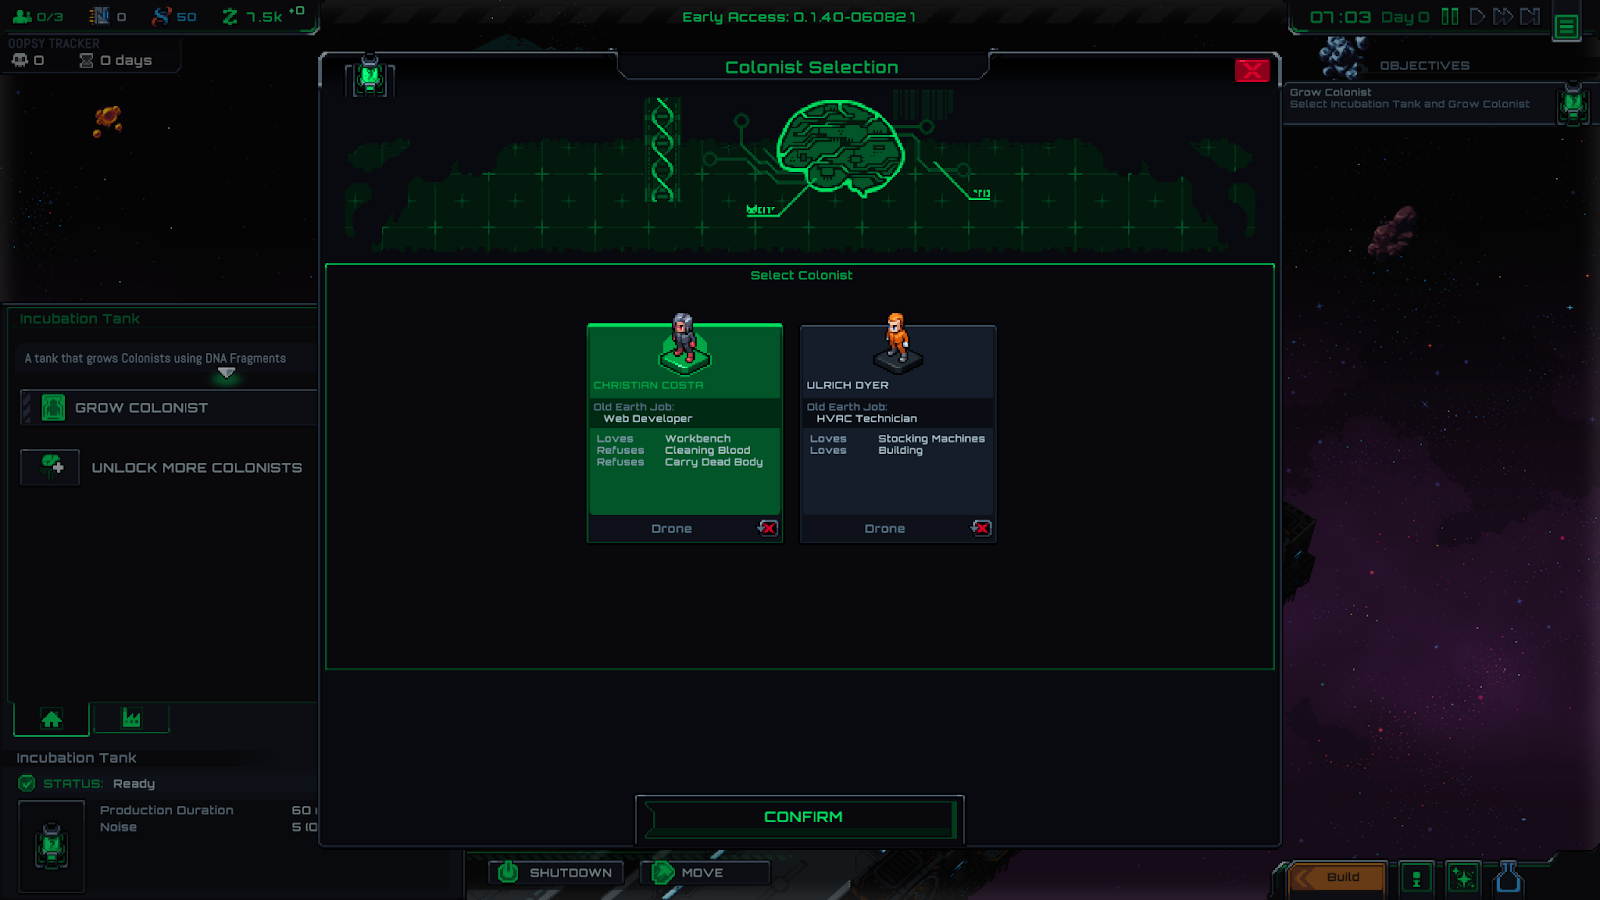
After clicking on Grow Colonist you’ll see a list of all the DNA patterns you’ve bought. You can only have 1 of a single Colonist alive at any time, so you can’t just grow the same guy repeatedly.
If you got a colonist that loves Mining, grow them first, as the game will want to send them on a mining mission as part of the early tutorial quests. Otherwise, grow someone who likes Building.
After you’ve chosen a colonist to grow you can close out of these menus and unpause the game.
By the way, you can press 1, 2, or 3 on your keyboard to change the speed the game is going at (and SPACEBAR to pause/unpause). Feel free to speed it up.
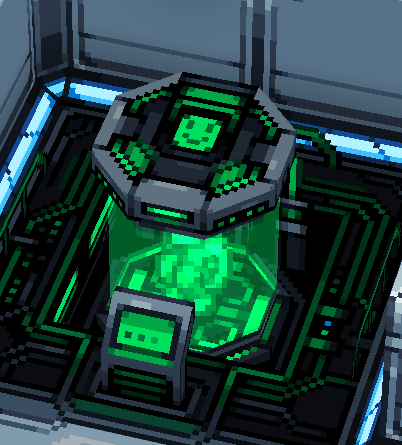
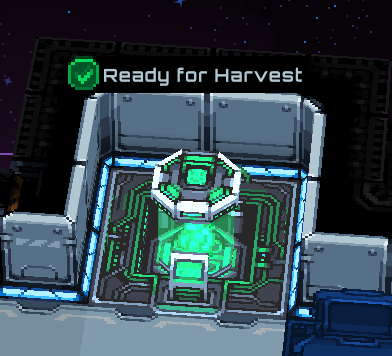
After about an in-game hour (or once you see a human sitting in the vat), it’s time to harvest!
Just click on the incubation tank and choose “Harvest Colonist.”
Voilà, a human!
As usual, click “OK” on the dialogue box to proceed.
Send a Distress Signal
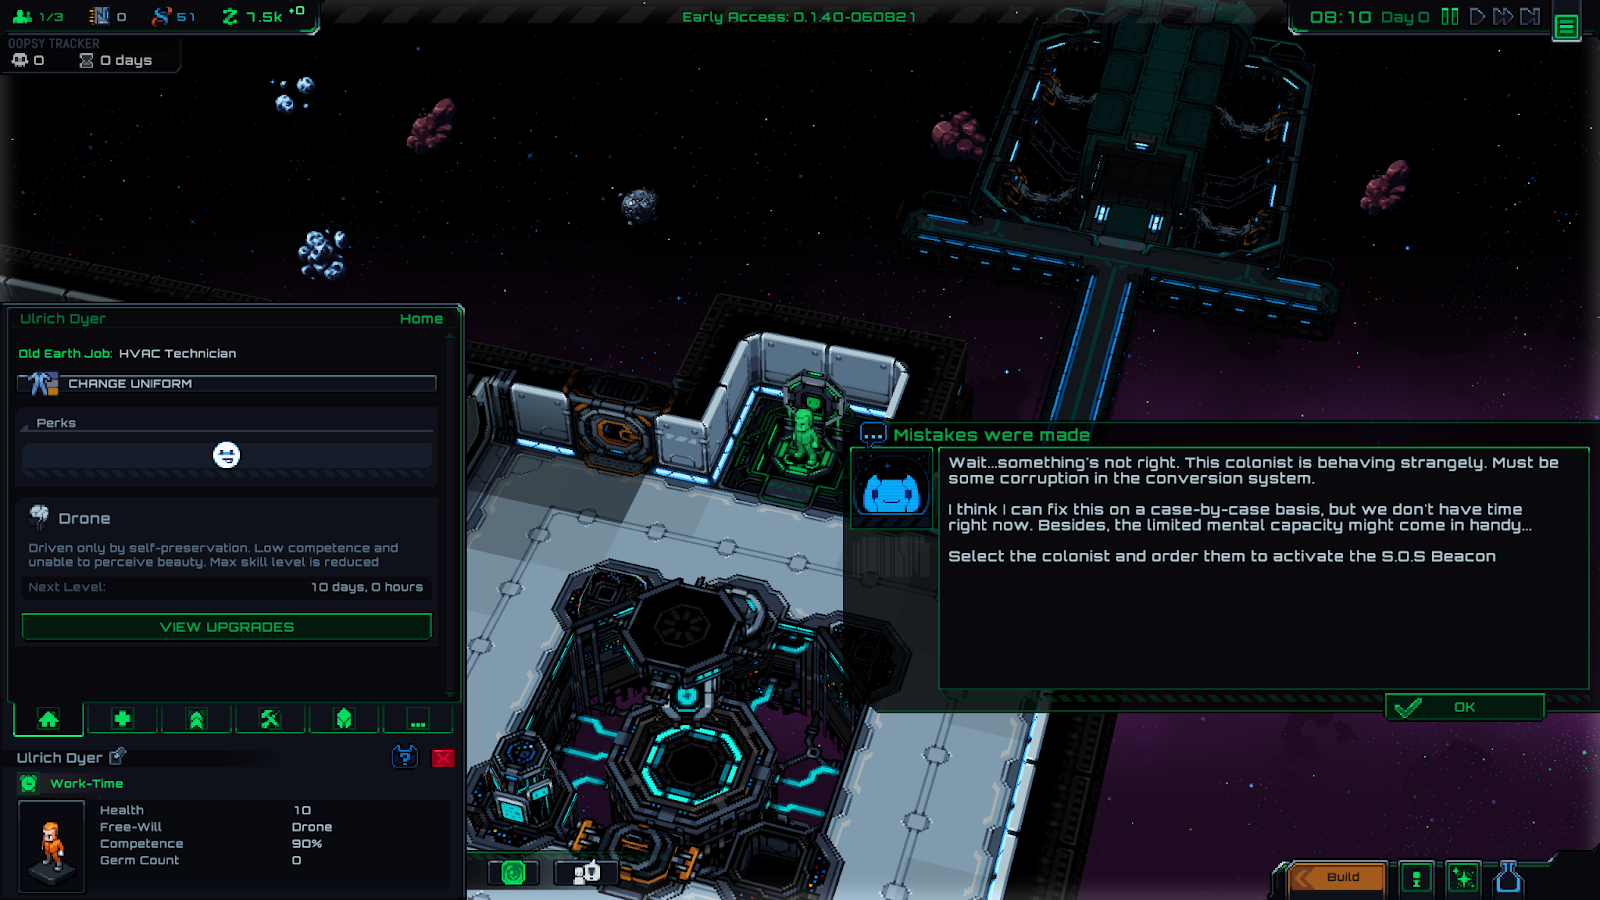
As far as I know sending a distress signal is only done at the start of the game to get things rolling, it’s not a real mechanic that you have to worry about.
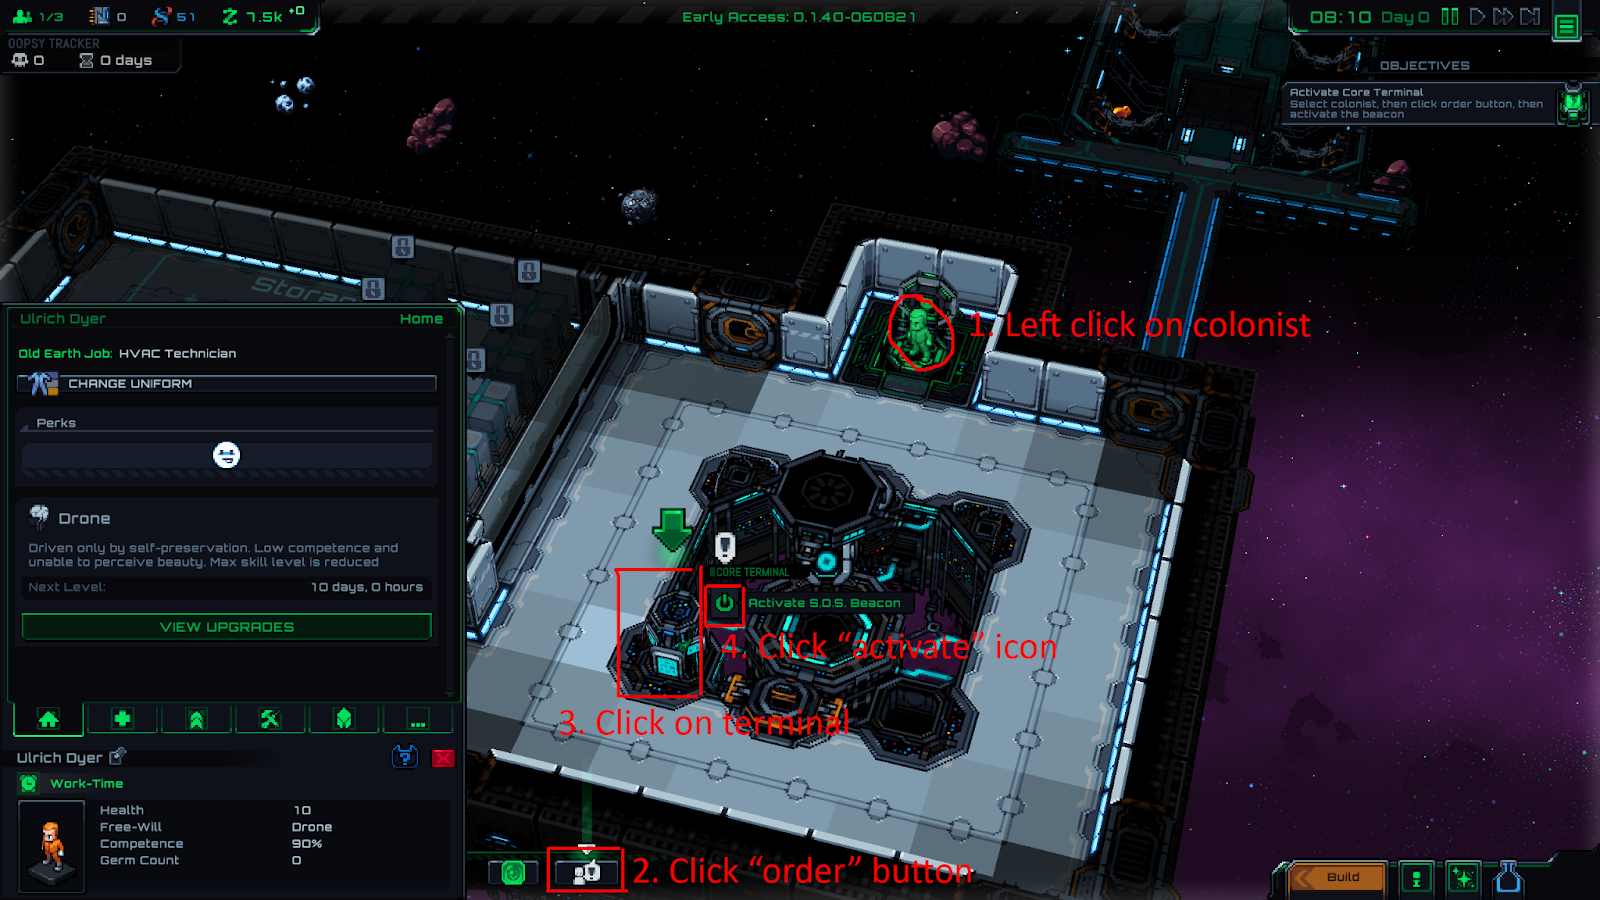
The game is basically giving you a short tutorial on how to manually order colonists to do things. For the most part you can rely on their built-in AI and job scheduling to get stuff done, but a few tasks are manual only.
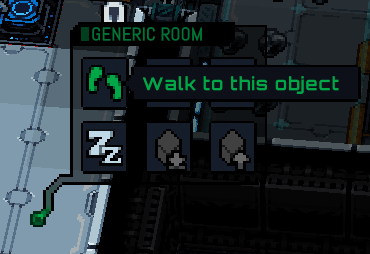
Click on the colonist, then click on the “Command Override” (aka Order button). Then click the object you want them to interact with, and choose an option from the list that pops up after clicking on the object. You got all that?
Once you’ve issued an order, it will show up in the colonist’s queue near the order button as a blue icon. If you need to cancel an order, you can do so by left clicking on the icon.
Troubleshooting: It seems like issuing orders is a little buggy right now and sometimes they don’t listen properly if they were already moving to do something else or have just spawned. If they don’t go to the terminal right away, try canceling the order, clicking away from the colonist and then clicking on them and issuing the order again.
Unpause the game and watch your colonist send the distress beacon.
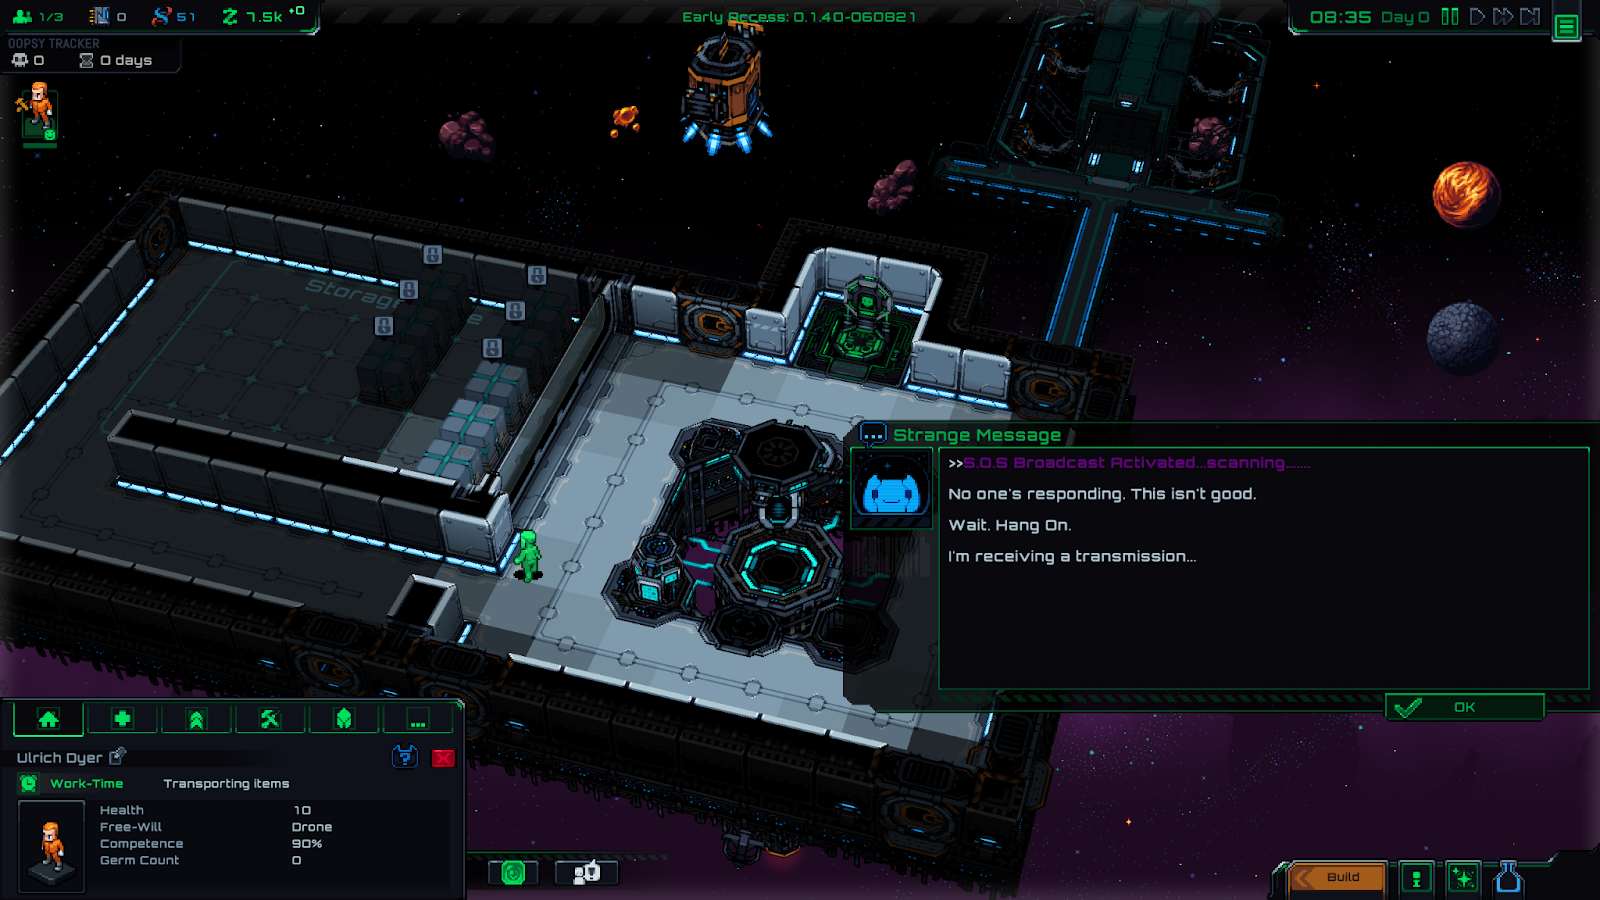
Click “OK” through this set of dialogues.
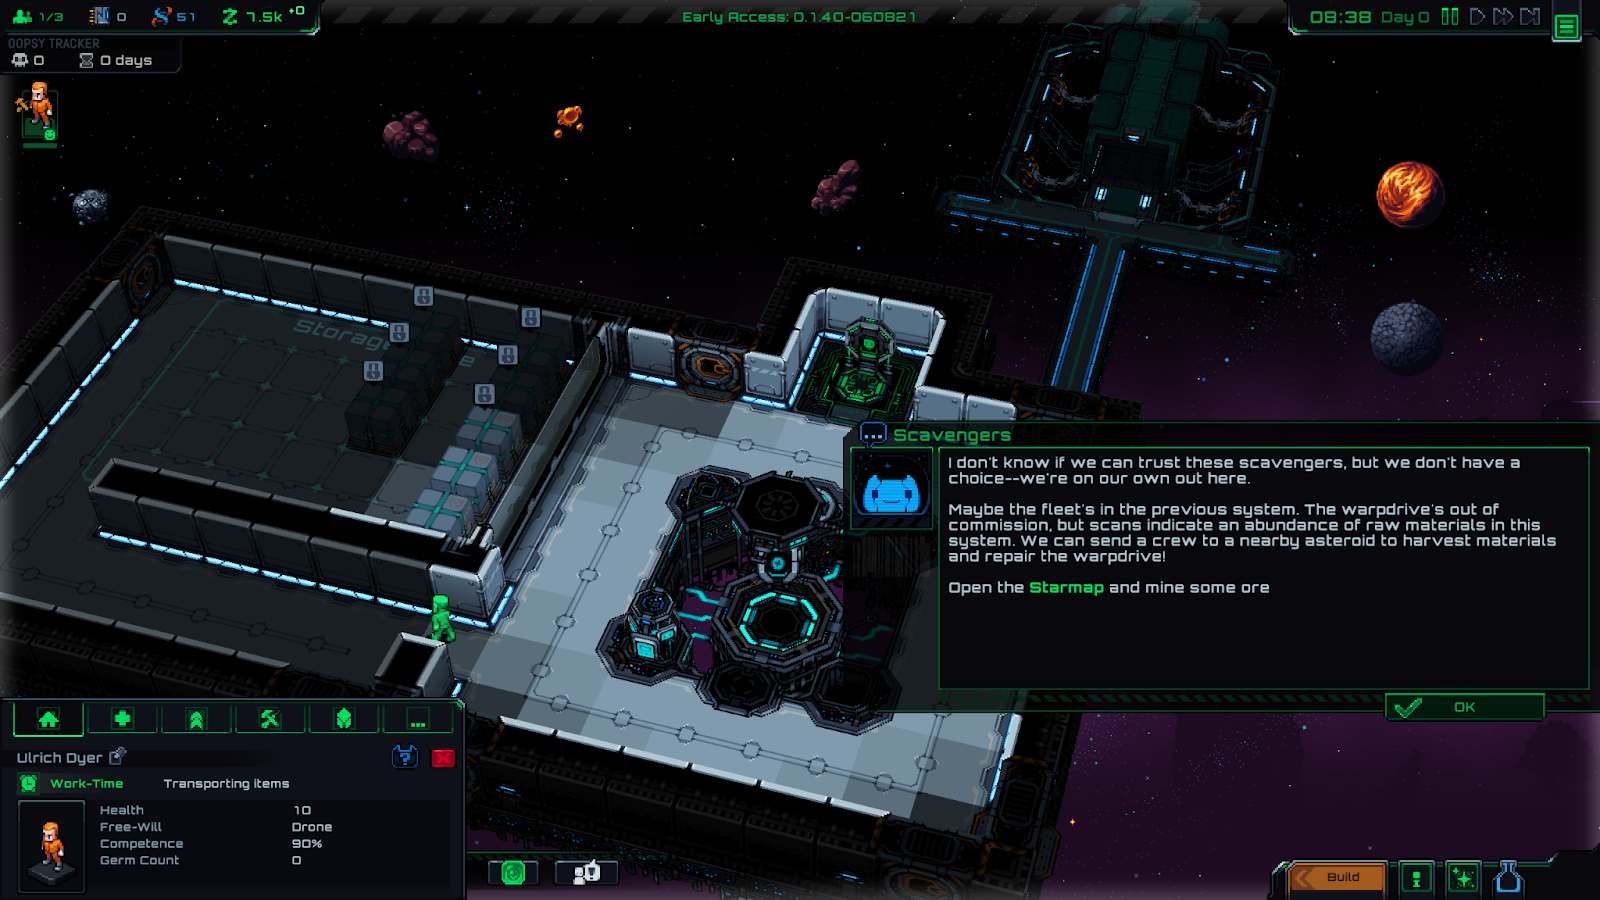
And, the next set of dialogues, a few seconds later. You might have to unpause your game briefly if they’re not appearing.
After all that, we finally have our next mission, to “Collect Ore.” We’re still early in the tutorial so it’s taking it slow.
But before we go mining, let’s do some initial base setup …
Building Your First Room
First things first. Let’s pause the game so we can think and plan our base.
Our Incubation Tank should be ready to go again by now, there’s only a short cooldown after harvesting.
Left click on the tank and start growing your second colonist. Remember, this is 100% free!
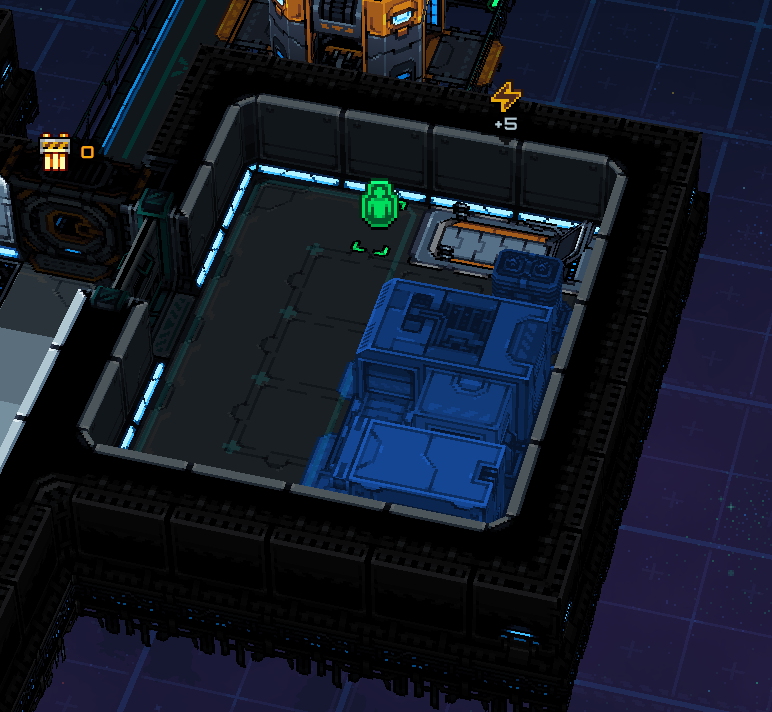
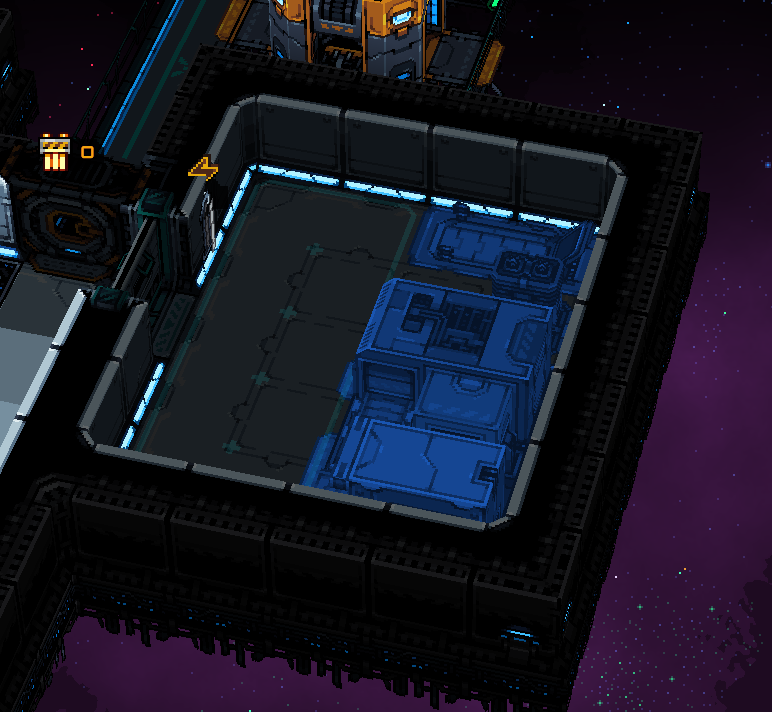
Now let’s focus on laying out our first new room. It will need enough space to hold a Treadmill and Battery for power, as well as an Ore Refinery machine – we also want a little extra room for a storage zone.
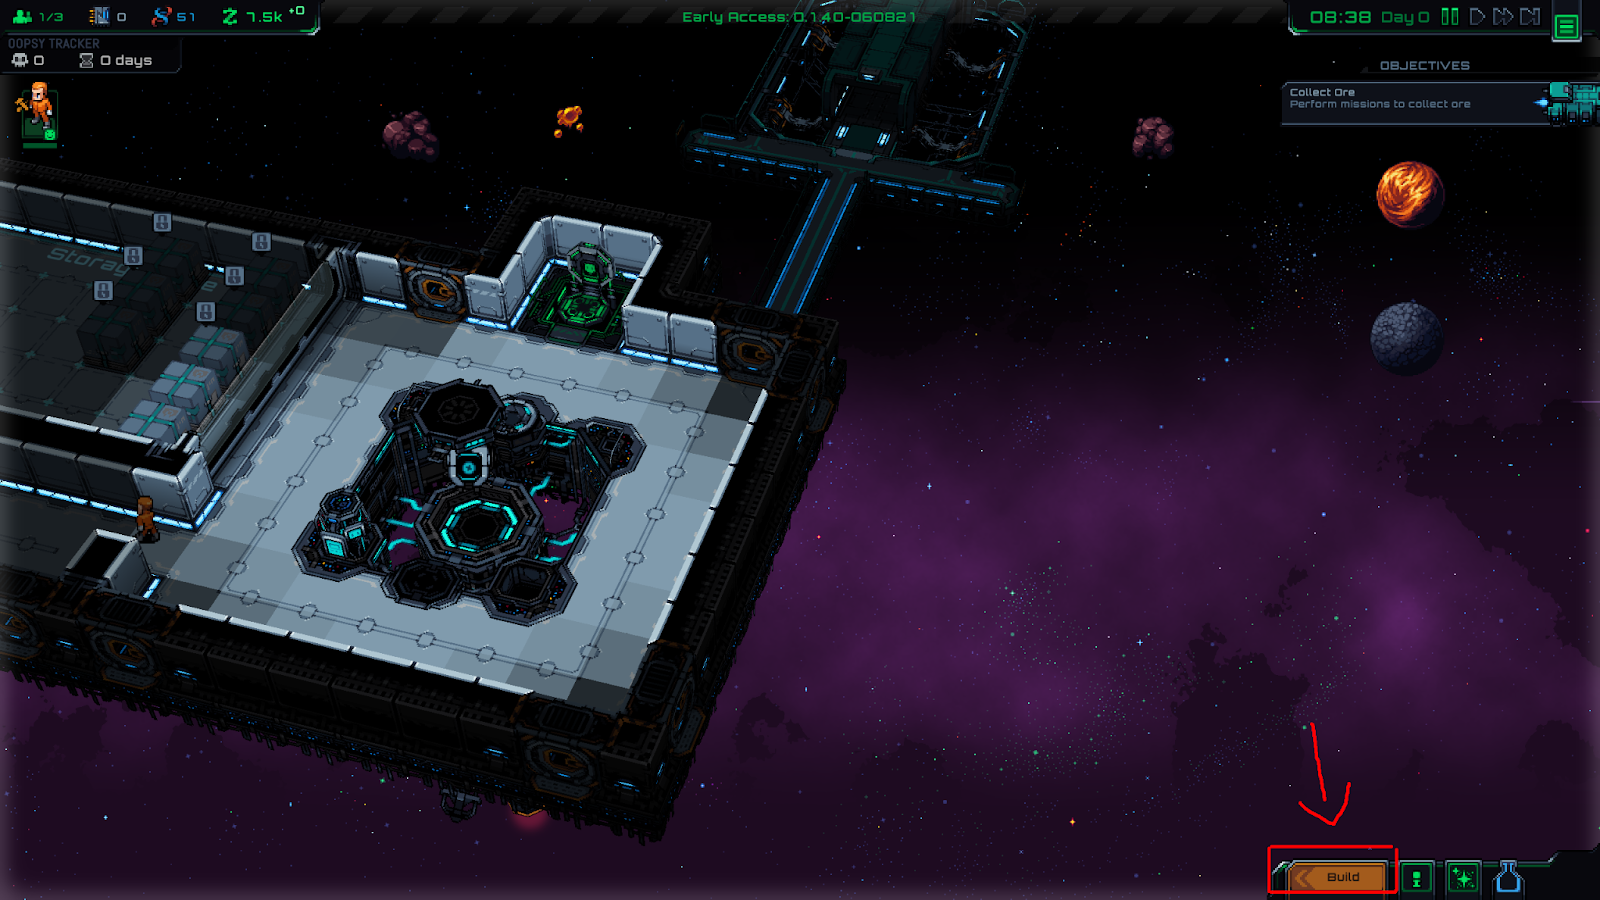
You’ll find the “Build” button in the bottom right, go ahead and left click on it to open the build menu.
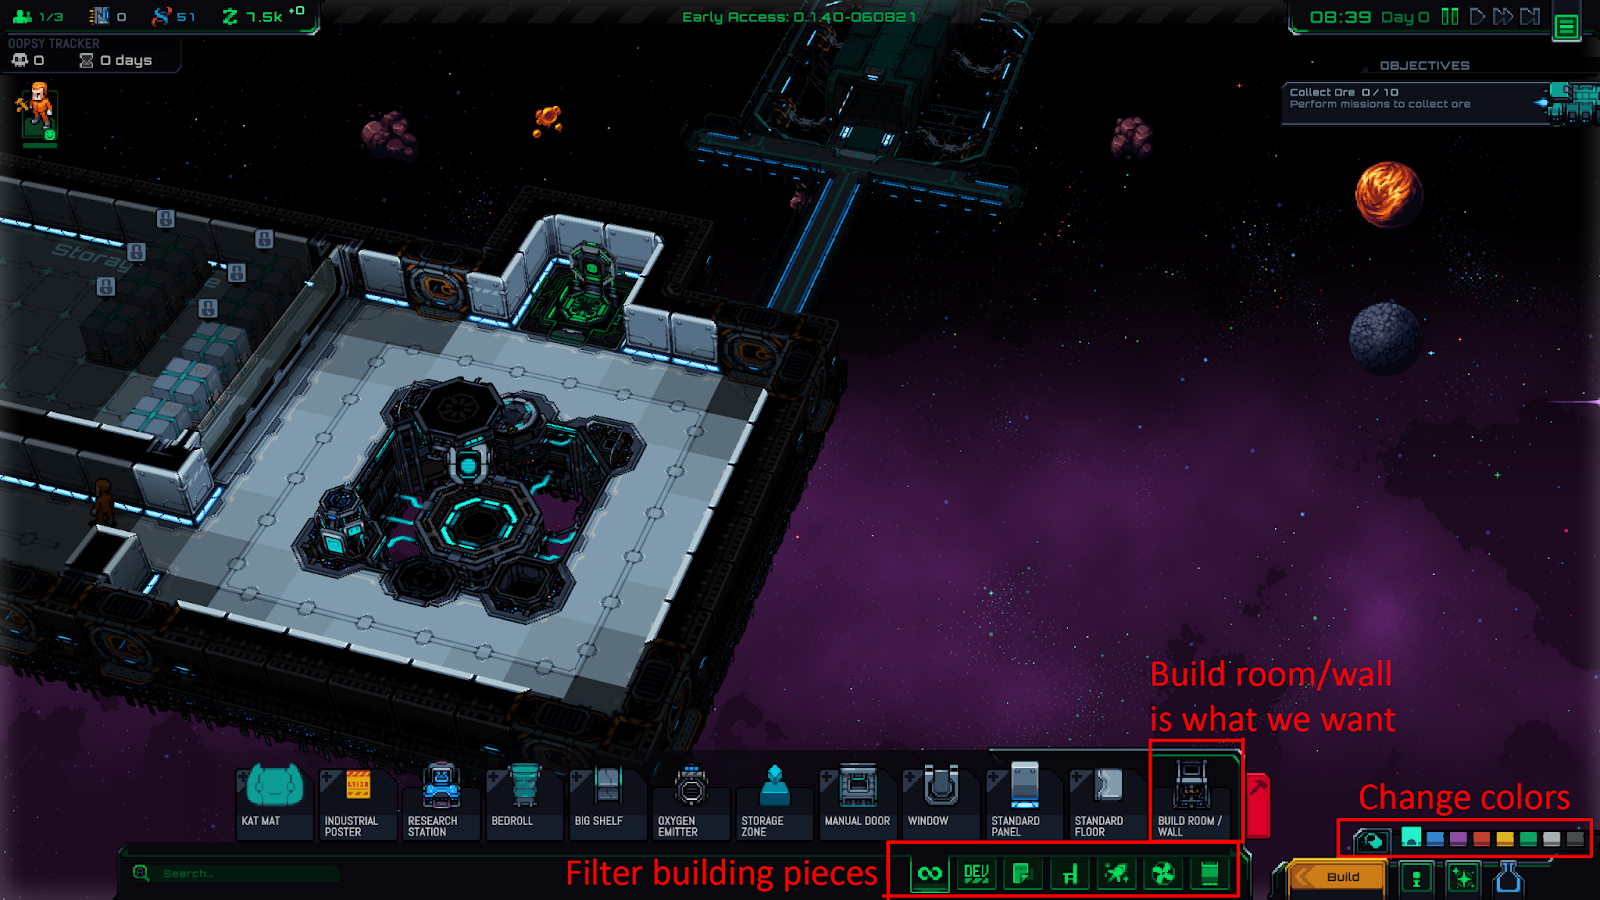
Here’s a quick overview of the build menu. It’s pretty simple – you have a scrollable list of stuff you can build. Left click on a piece to select it, and right click or press ESC while holding the piece to stop building.
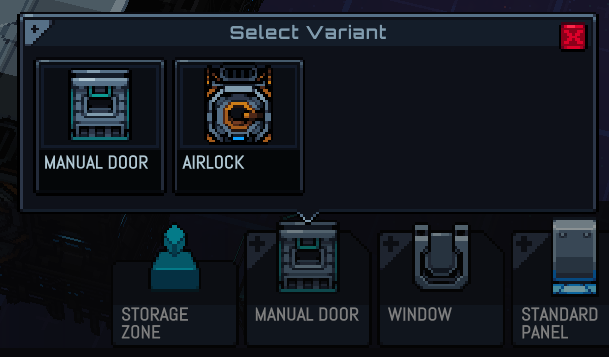
If the building piece has a grey + icon in the top left, that means that piece has different Variants. Right click on it and you can choose a variant, it will stick to the last one you chose.
To stop building the piece you’re holding, just right click while your mouse is hovering over the main game area (not any UI elements) – you’ll see it disappear from your cursor.
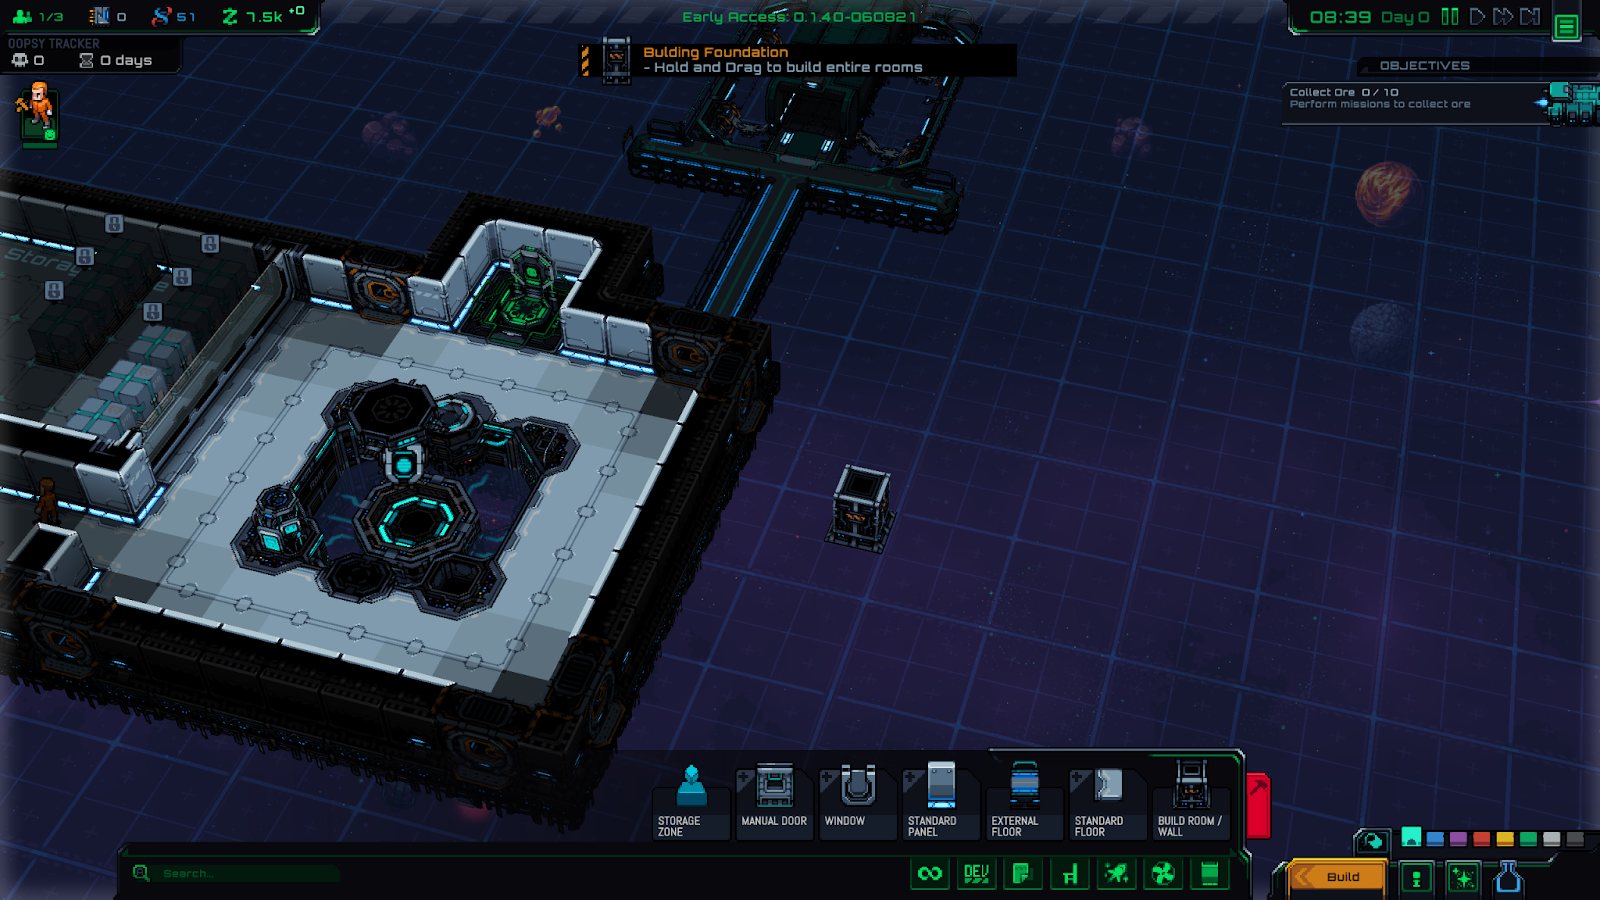
We want to expand our station to add a new room, so we need the “Build Room / Wall” piece. Left click on that, and you’ll see a transparent blue grid appear to aid in placement.
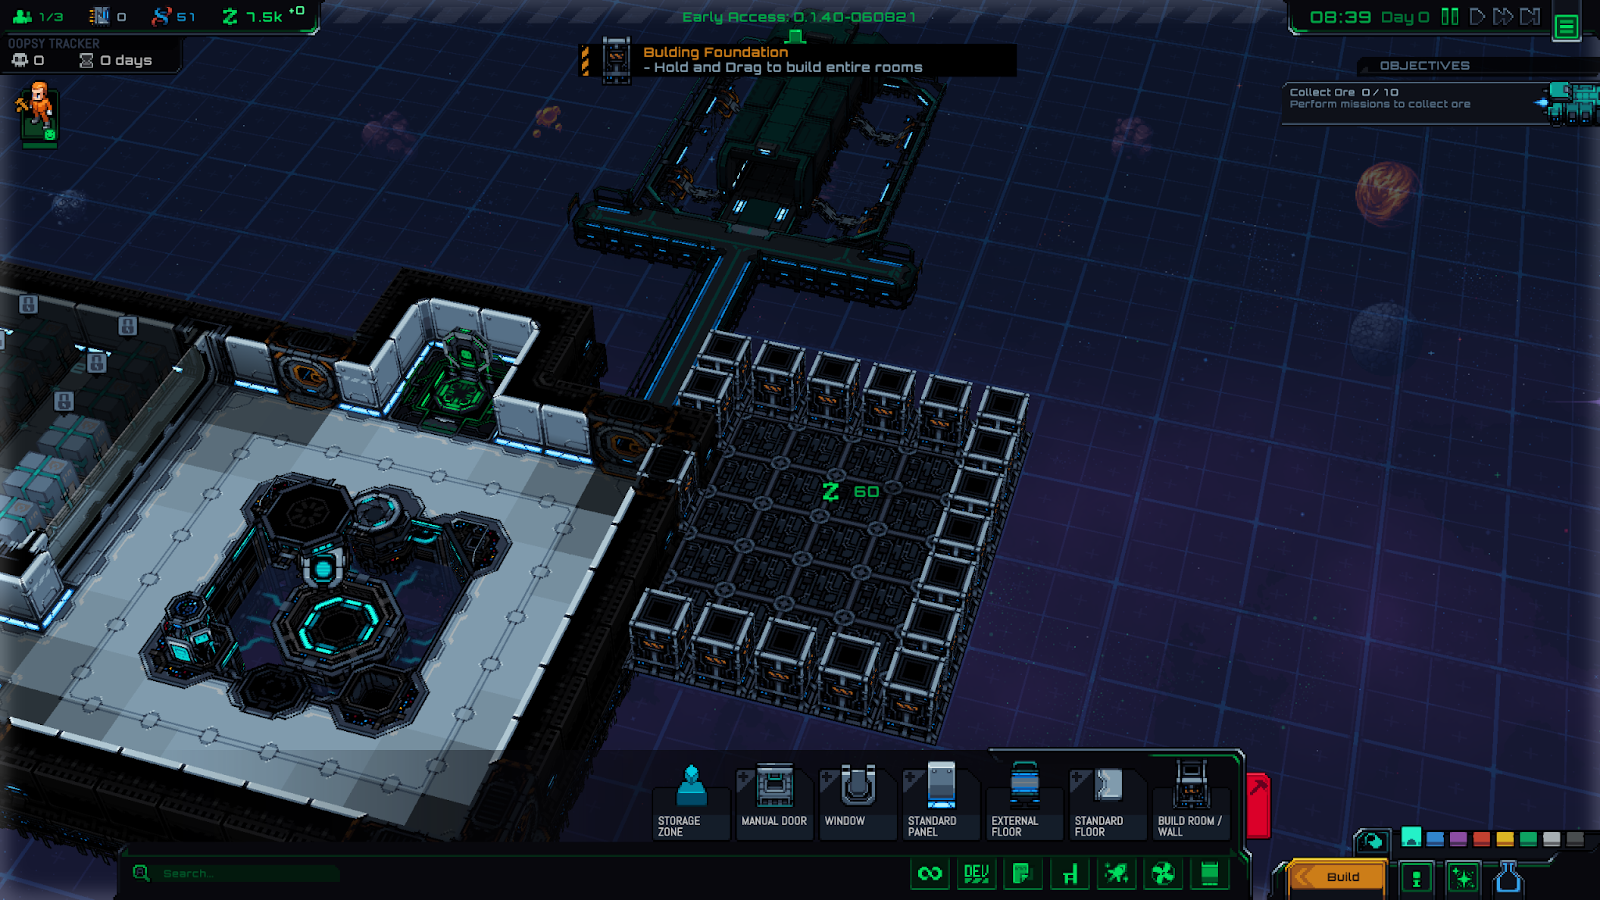
TO BUILD ROOMS: Click down on a tile that you want to be one corner of the room, then hold and drag to draw out a room with walls and floor quickly. You can also place walls one by one, or draw floors only using the “Standard Floor” building piece instead of “Build Room/Wall” – but it’s easiest to build the room all at once by clicking and dragging.
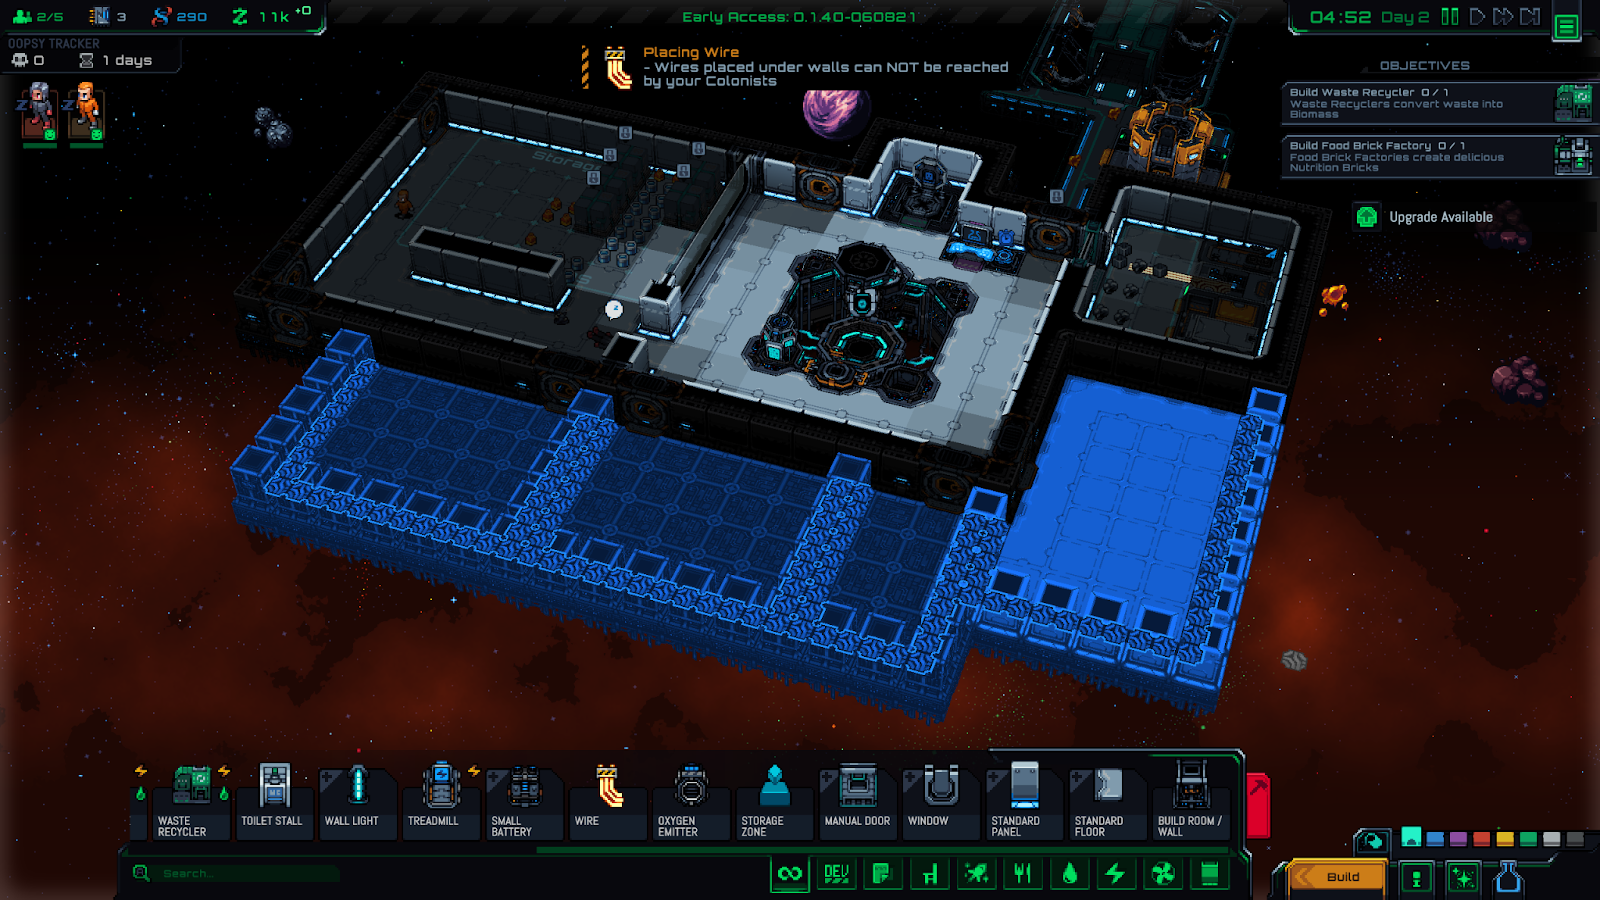
Go ahead and draw out a room with an interior that is 4 squares wide by 5 squares long, starting along the edge of the wall that’s already built. It should look something like this:
The walls are 6 units wide and 7 units long, resulting in an interior of 4×5.
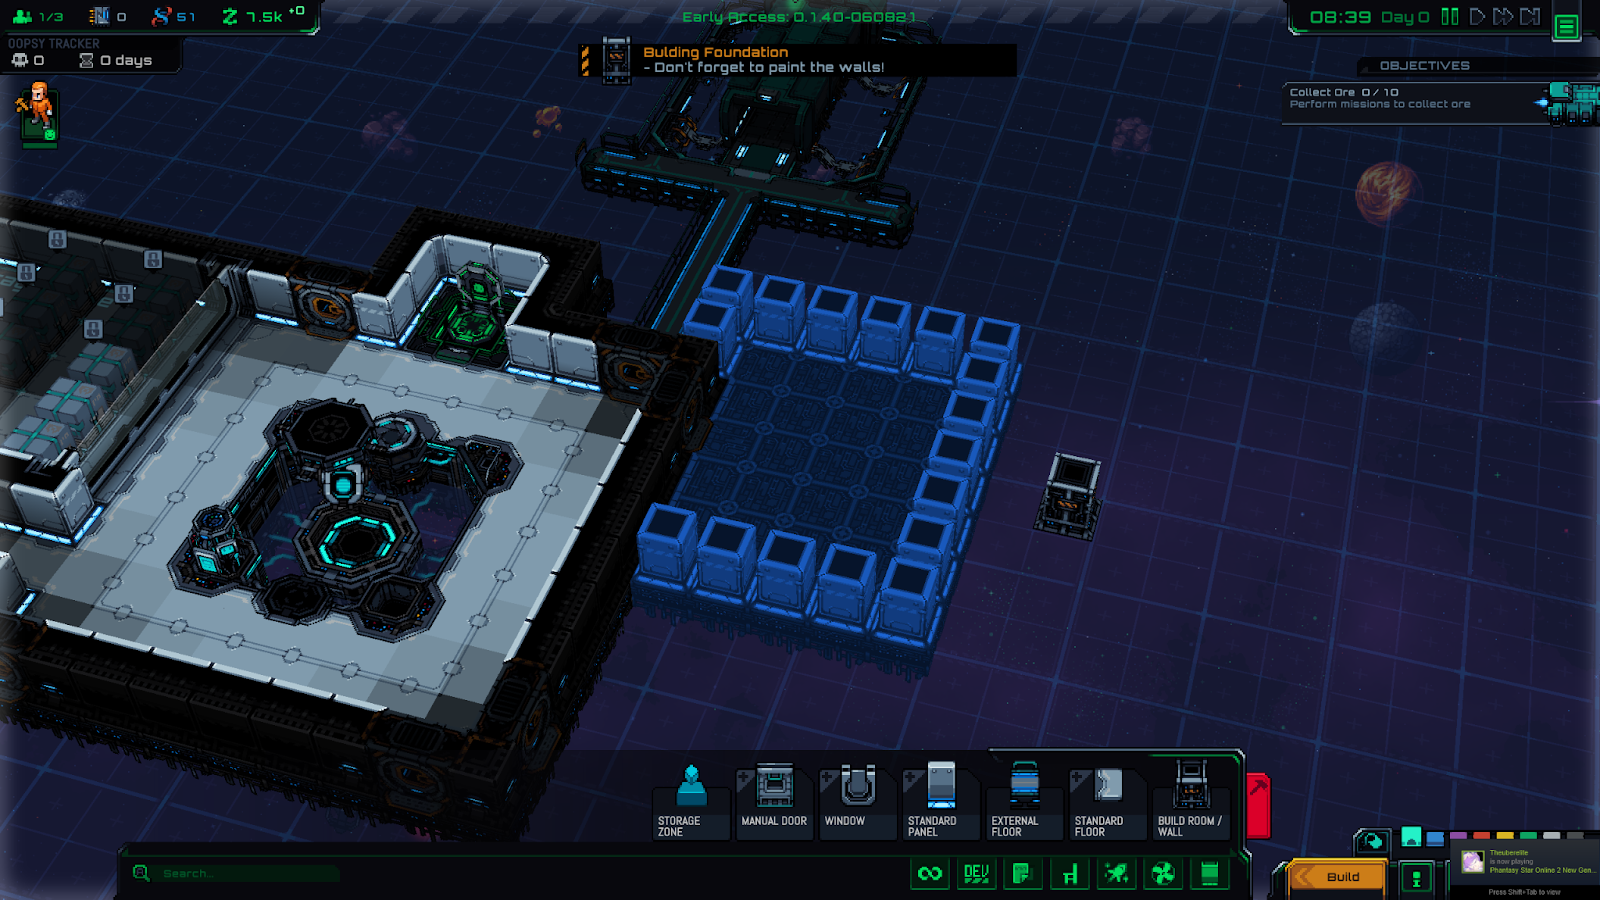
Once we’ve laid it out, we’ll see a ghostly blueprint of our planned room:
Right click or press ESC to stop building the wall and get rid of the planning grid.
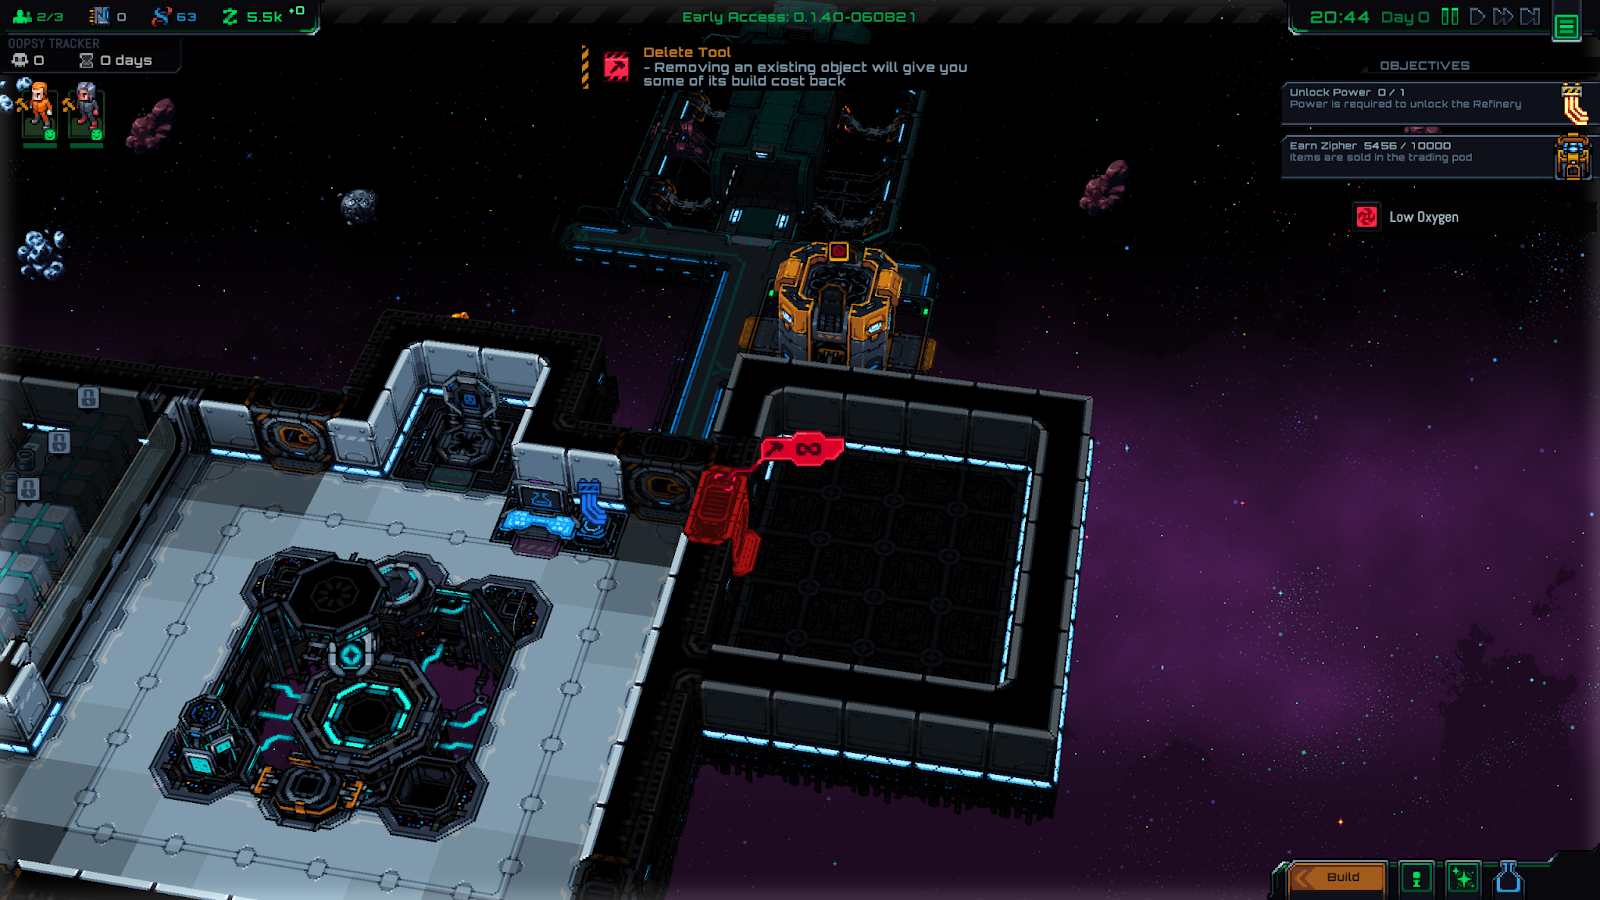
Troubleshooting: If you accidentally made a wall in a spot you didn’t want one, press the DELETE key (or click the red hammer button in the build menu) to go into delete mode. Then click on the wall blueprint, and it should disappear. (Right click or ESC to get out of this mode.)
Before we can fill this room with the ore refining equipment, we have to research that stuff first. To do that we need to set up a Research Station, which can be found under the “Furniture” tab.
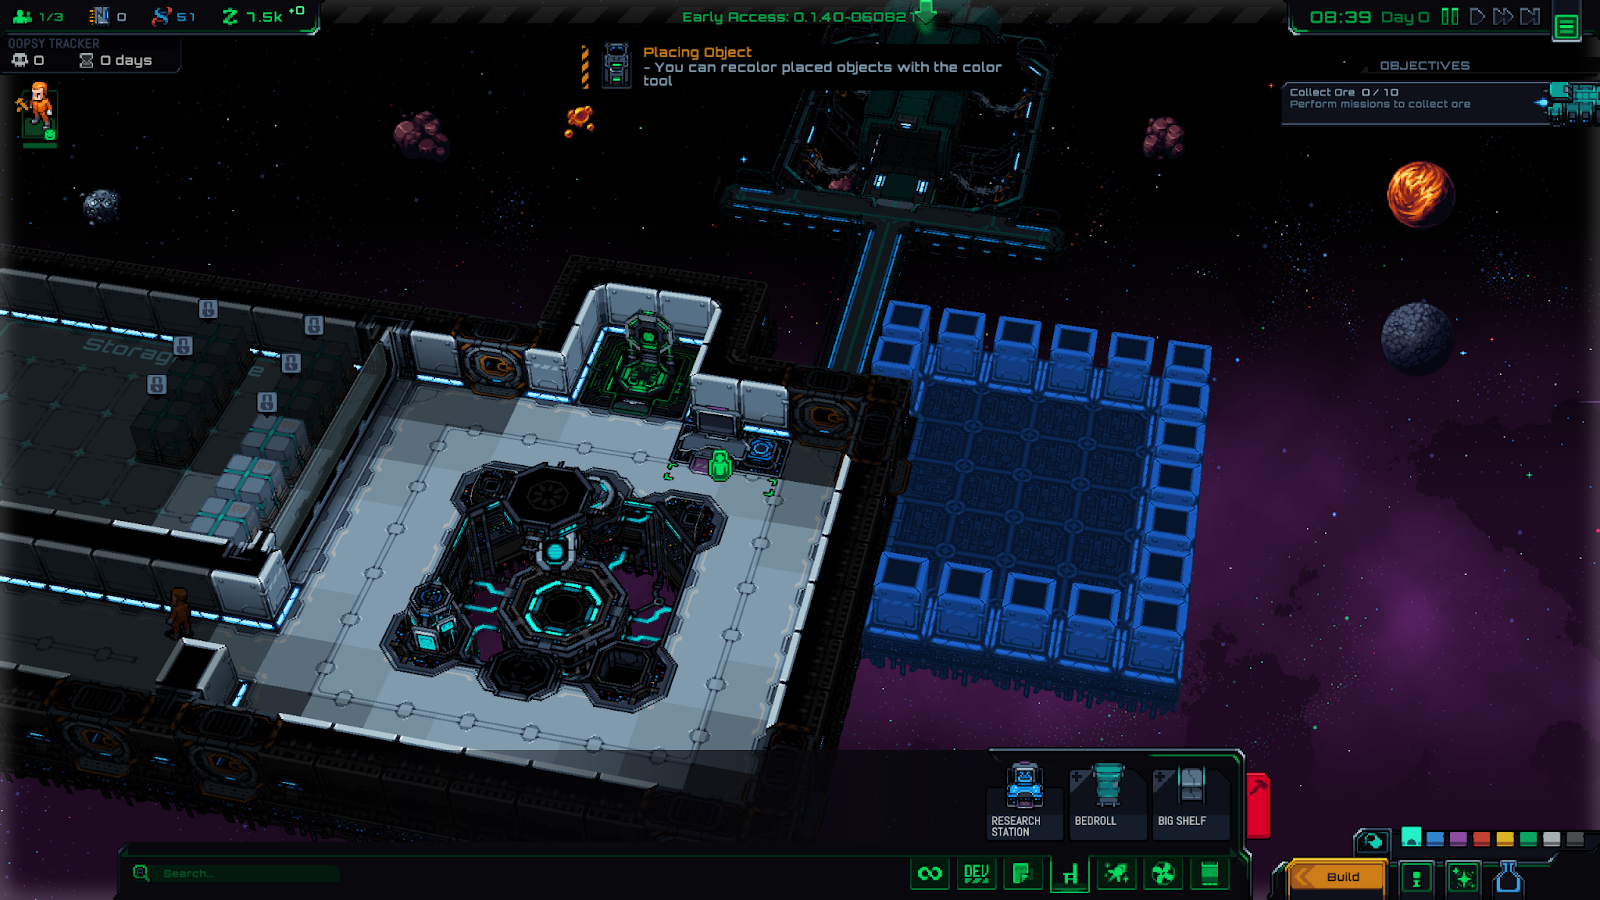
Go ahead and place the research station somewhere in the main room, I put it next to the airlock so it’s easy to find.
Here’s what my map looks like after placing down the research station. The station is blue just like the room, which indicates it hasn’t been built yet.
This is all we can build for now, so let’s keep going.
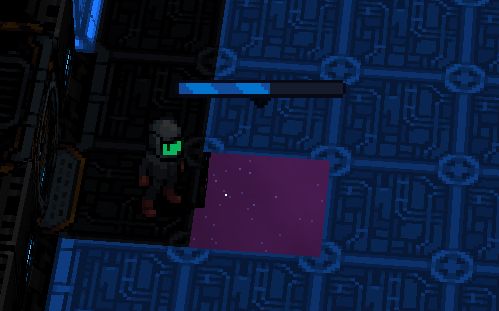
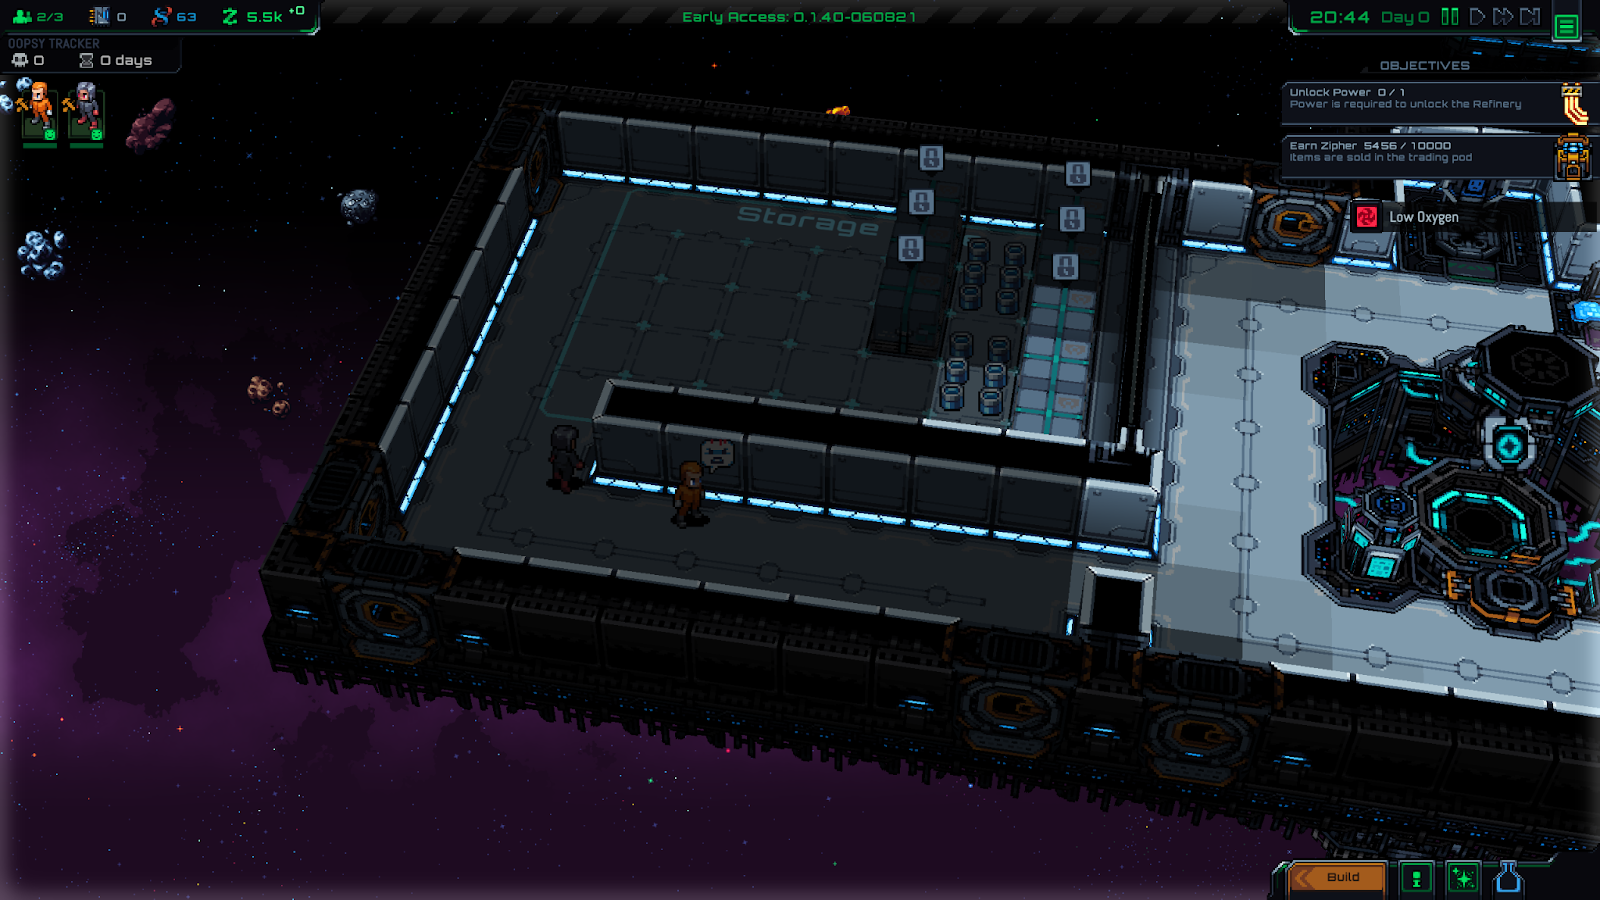
BTW, once your building gets started you may get a “Low Oxygen” warning on the right hand side of your screen. You can safely ignore this, it’s just telling you that the room you’re building doesn’t have oxygen yet. Of course it doesn’t, it’s out in space?
Your First Mining Mission
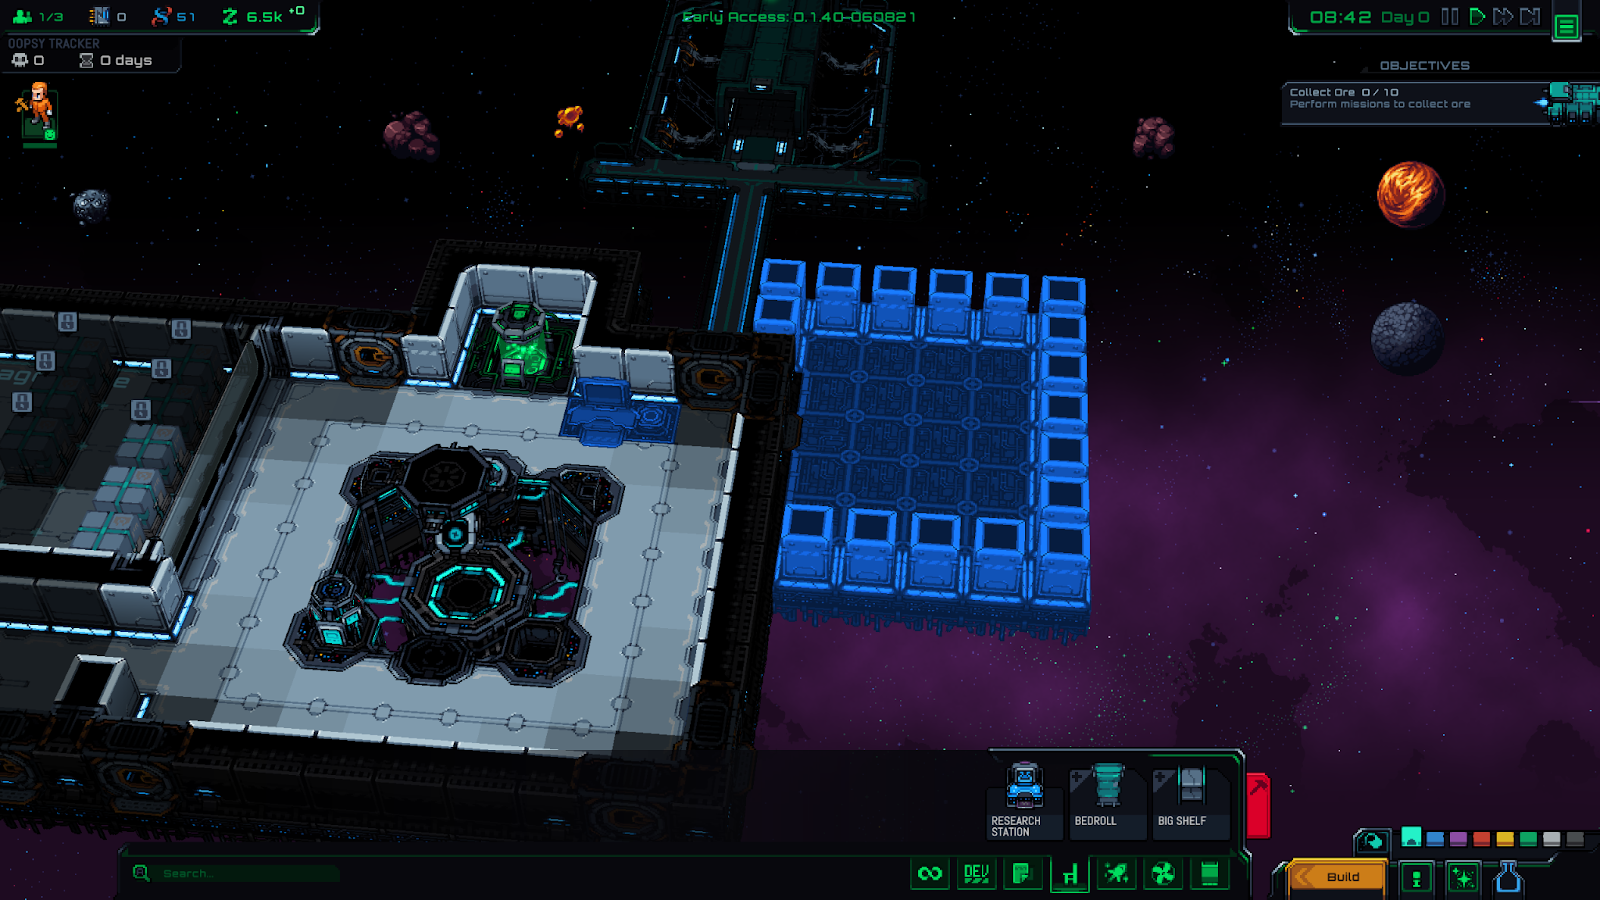
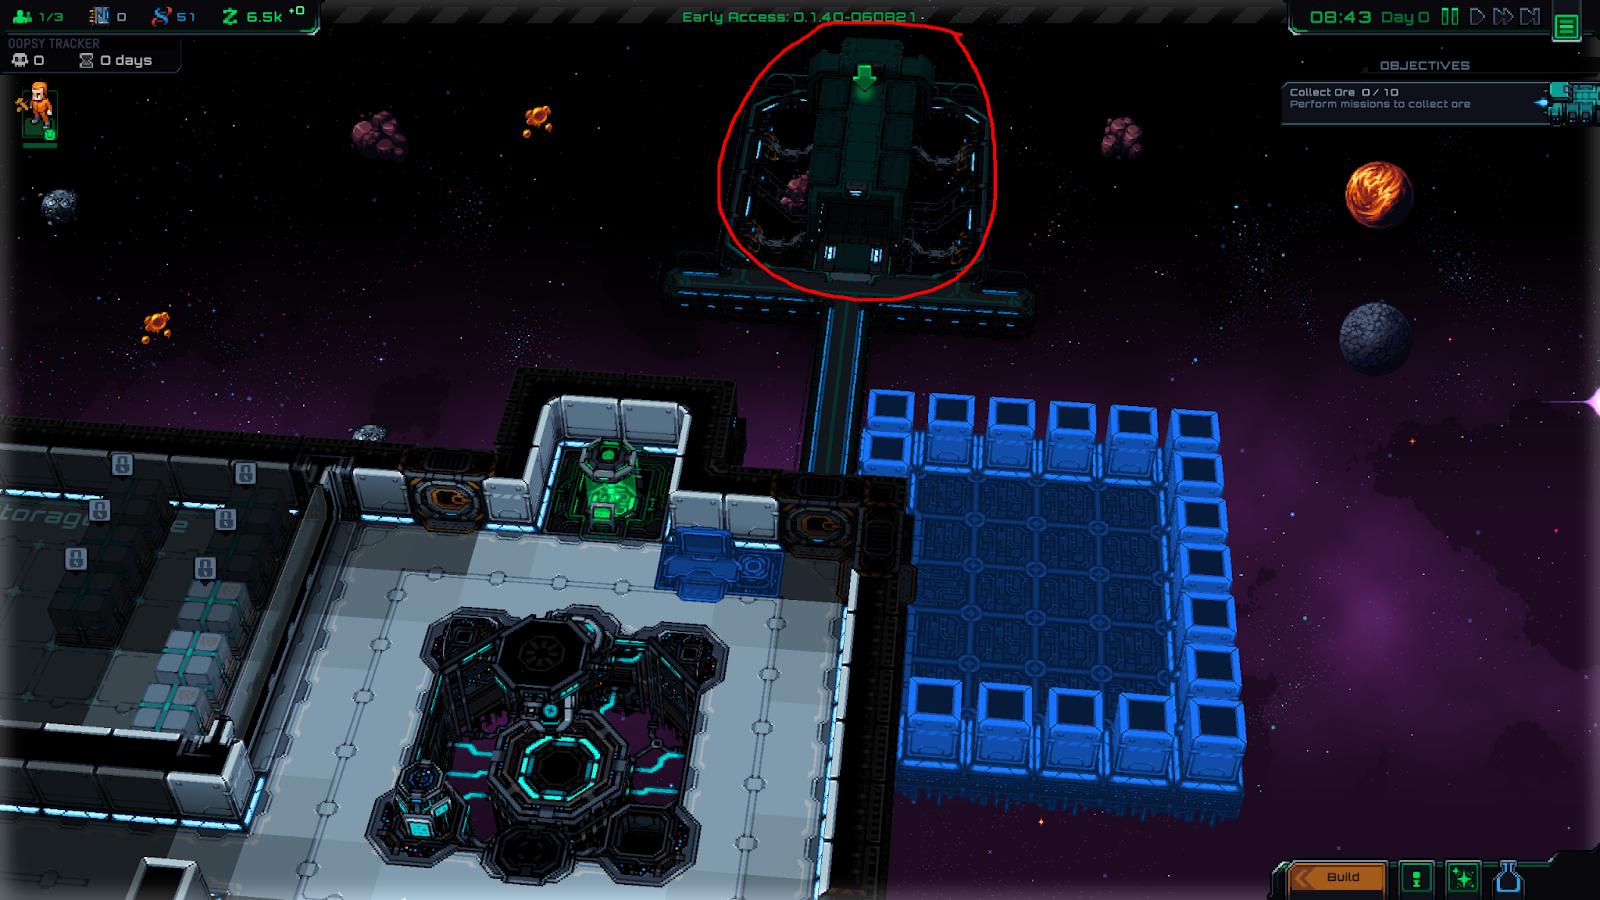
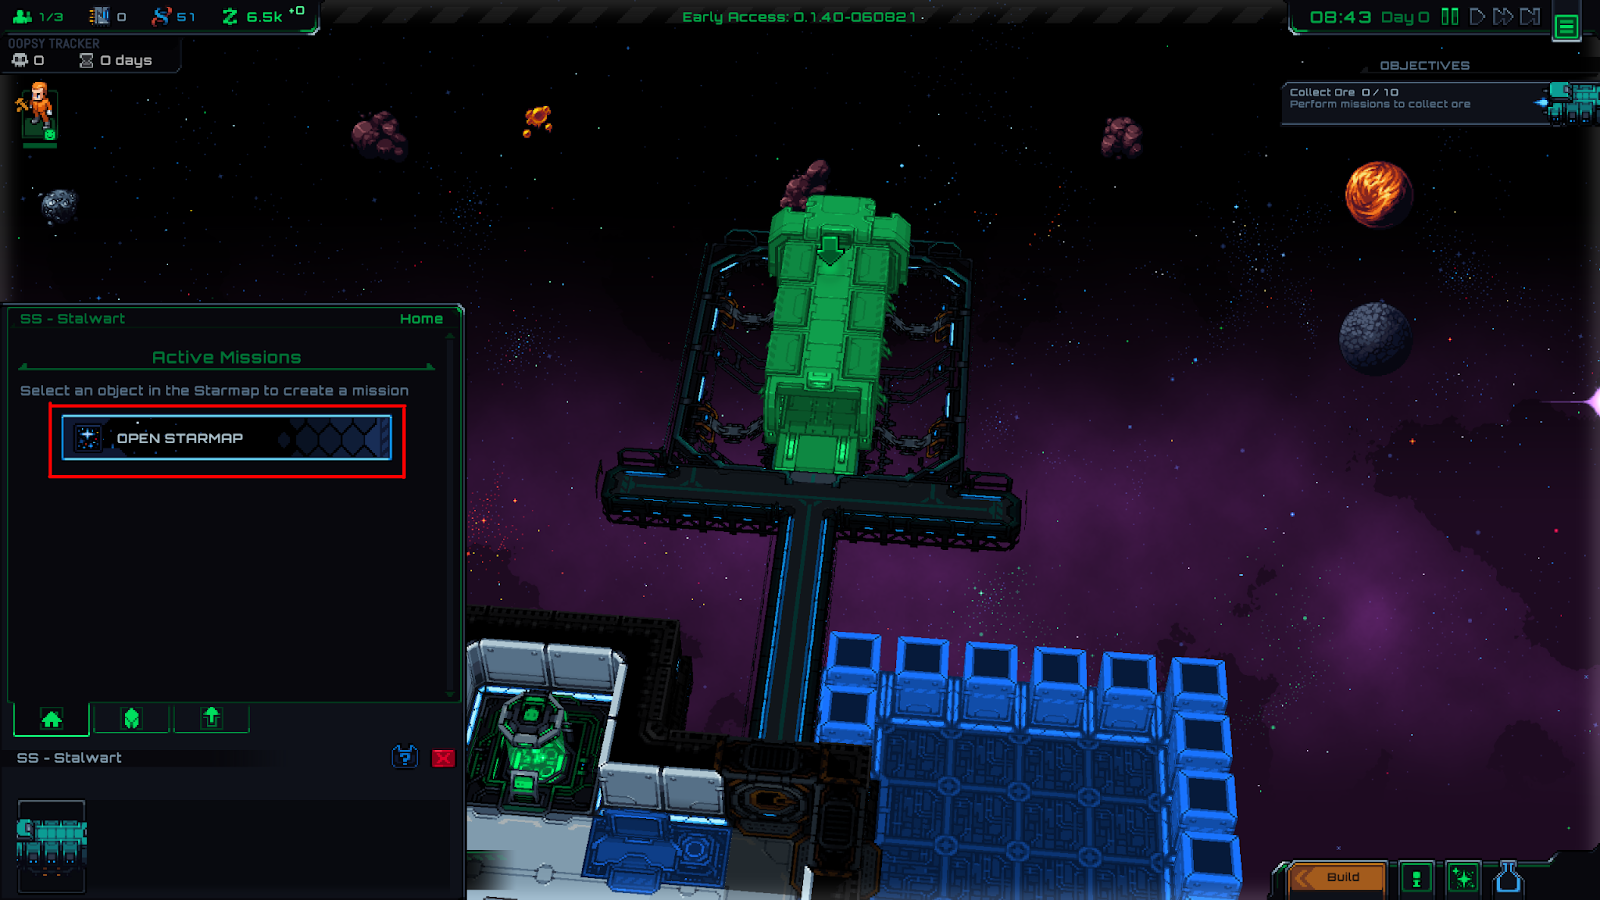
The mining mission will take a few hours, so we may as well get it started now. Find the loading dock on the external walkway outside your spaceship, and left click on it.
This starship object lets our colonists interact with the stars and stations around us. Press the big “Open Starmap” button on the info panel:
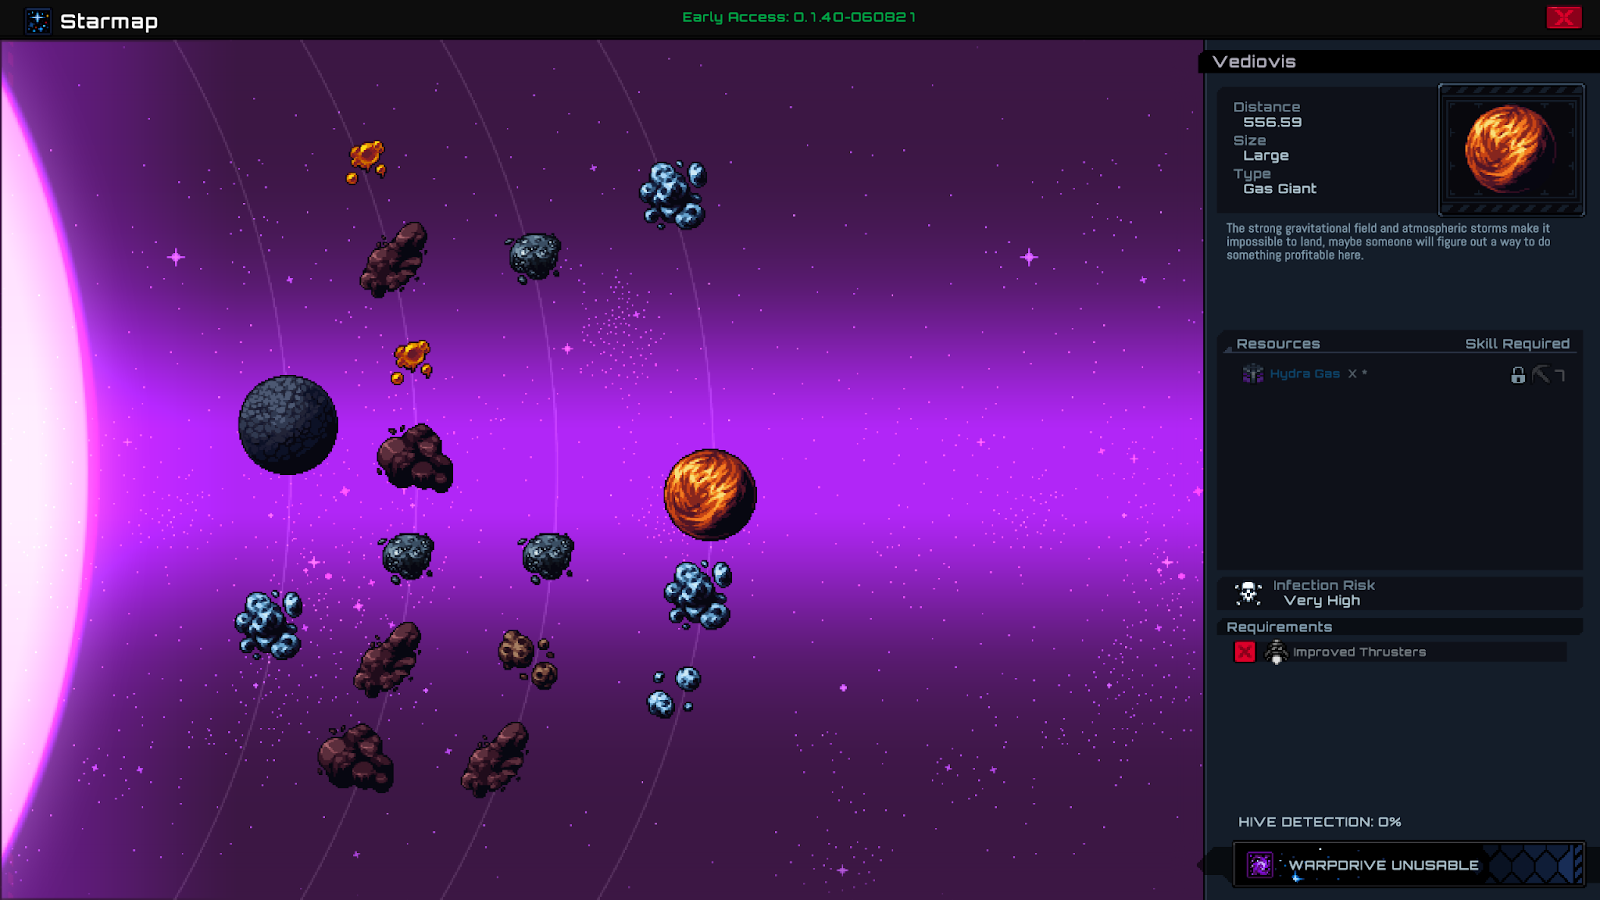
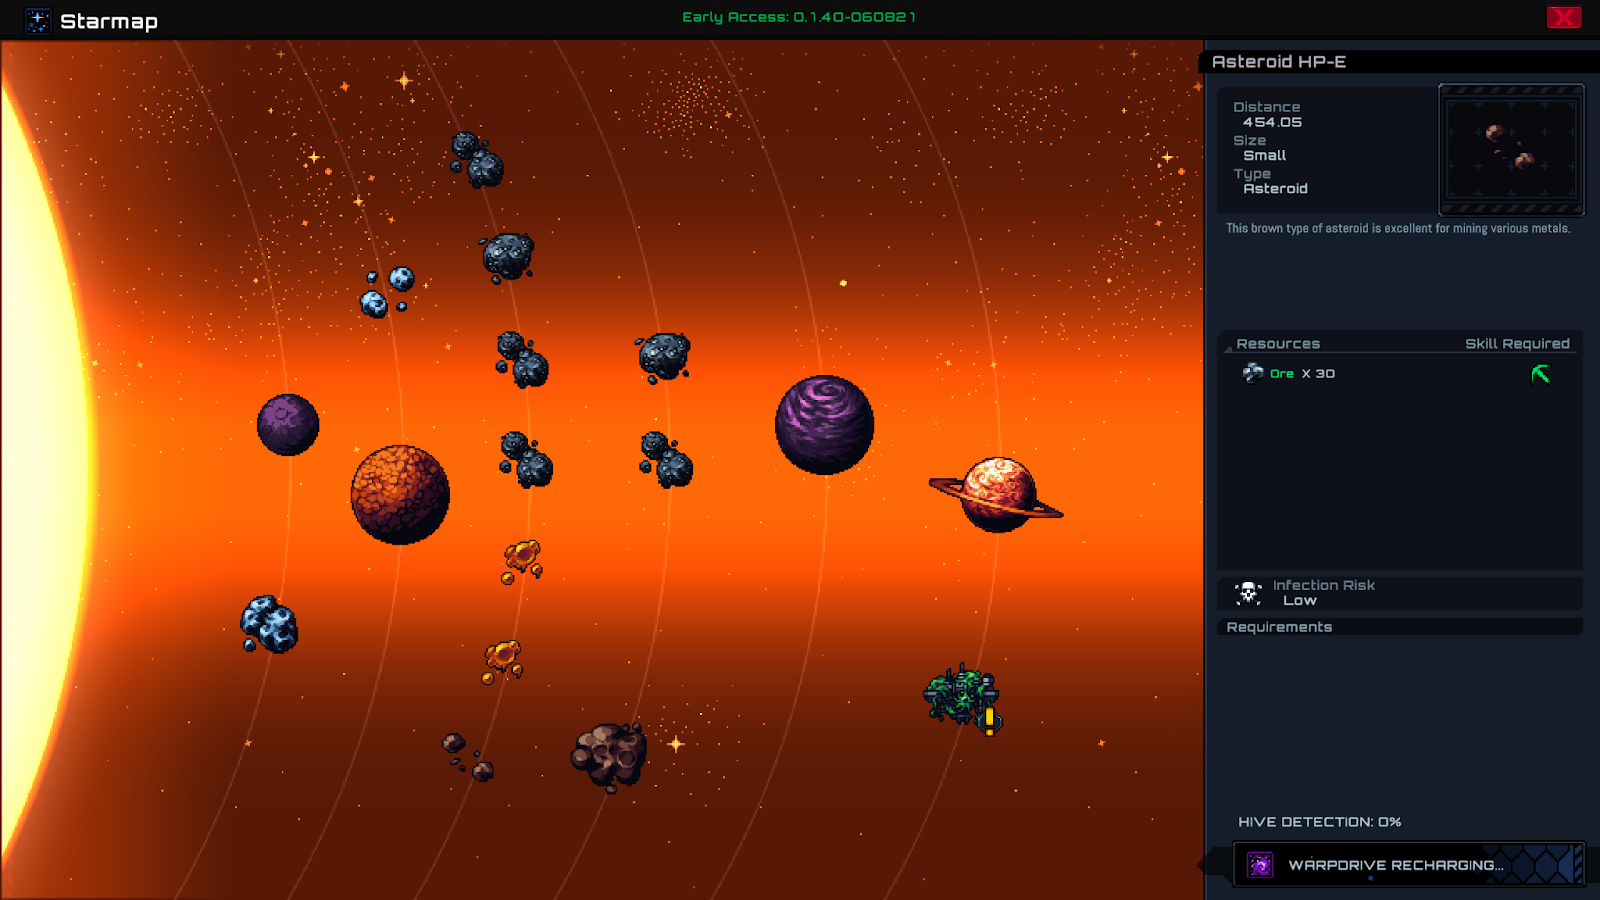
Here’s what my initial starmap looks like. You can hover over any of the planets and asteroids to find out more info about them.
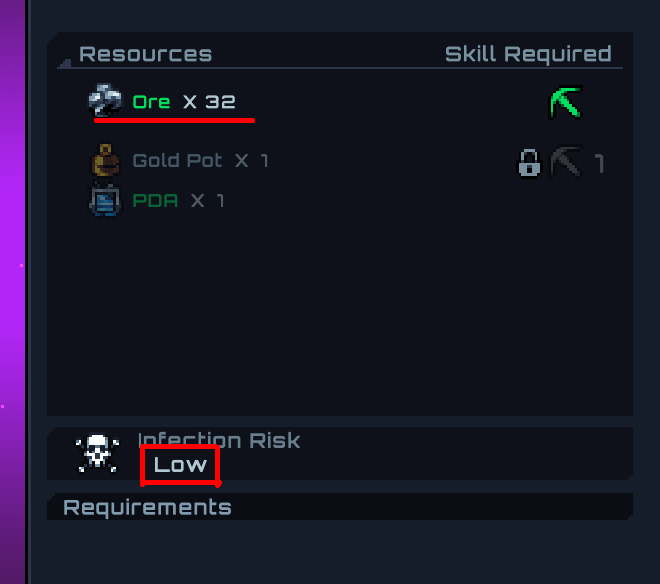
Look at the brown asteroids. Find one that has a “Low” infection risk (Very High = more dangerous) and some Ore available in the resources.
After you schedule the mission, your colonists will automatically go out on the ship and mine until the hull is filled up, then return after a few hours. You can eventually upgrade your ship’s storage capacity to make your mining runs more efficient.
You can try for the additional rewards if you’d like, they have a chance of being found as long as your colonist’s mining skill is high enough. Gold pots and pendants can be sold for around 2000z, so they’re a nice early game target.
For now, as long as your asteroid has 20+ ore and little danger, you should be good to go.
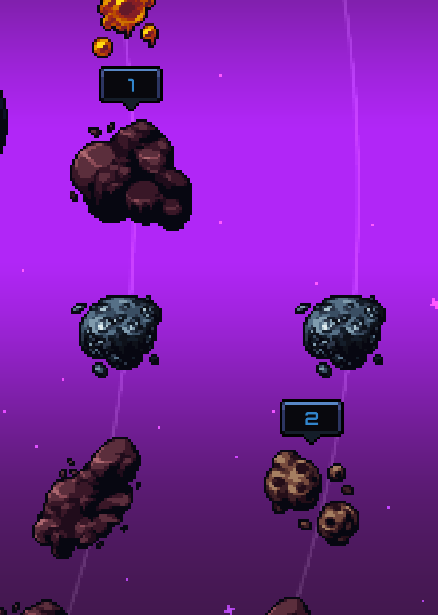
Once you’ve started the mission, you’ll see a marker with a number over the asteroid you chose. You can set up multiple missions and they’ll be completed in numeric order.
If you want to stop going to an asteroid, such as when it’s low on resources or if you chose a wrong place, you can left click on the asteroid to get an option to cancel the mission.
When you’re finished, press ESC to exit out of this menu.
Unpause the Game and Get Moving!
At last we’re gonna see some gameplay. Go ahead and unpause the game – your first colonist will probably start moving to complete the mission that you just set up.
While they’re busy mining, we can have our other colonist work on the base.
Keep an eye on your incubation tank. You can see the progress on it if you hover your mouse anywhere over the tank:
When it’s ready for harvesting, do so!
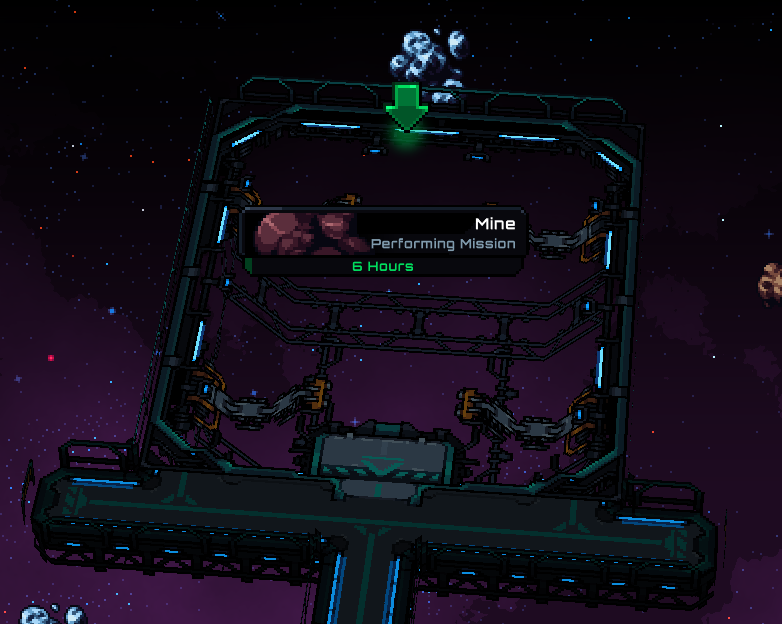
Once your first colonist has started the mining mission, you’ll see that the ship is gone and a progress bar is in its place.
Pretty simple right? We just need to wait 6 in-game hours for them to come back with the goods.
In the meantime, our 2nd colonist has started work on building out the new room! You can see a progress bar over the space where the object is being built:
While we’re waiting we may as well do a little clerical work.
Upgrade Your Colonists
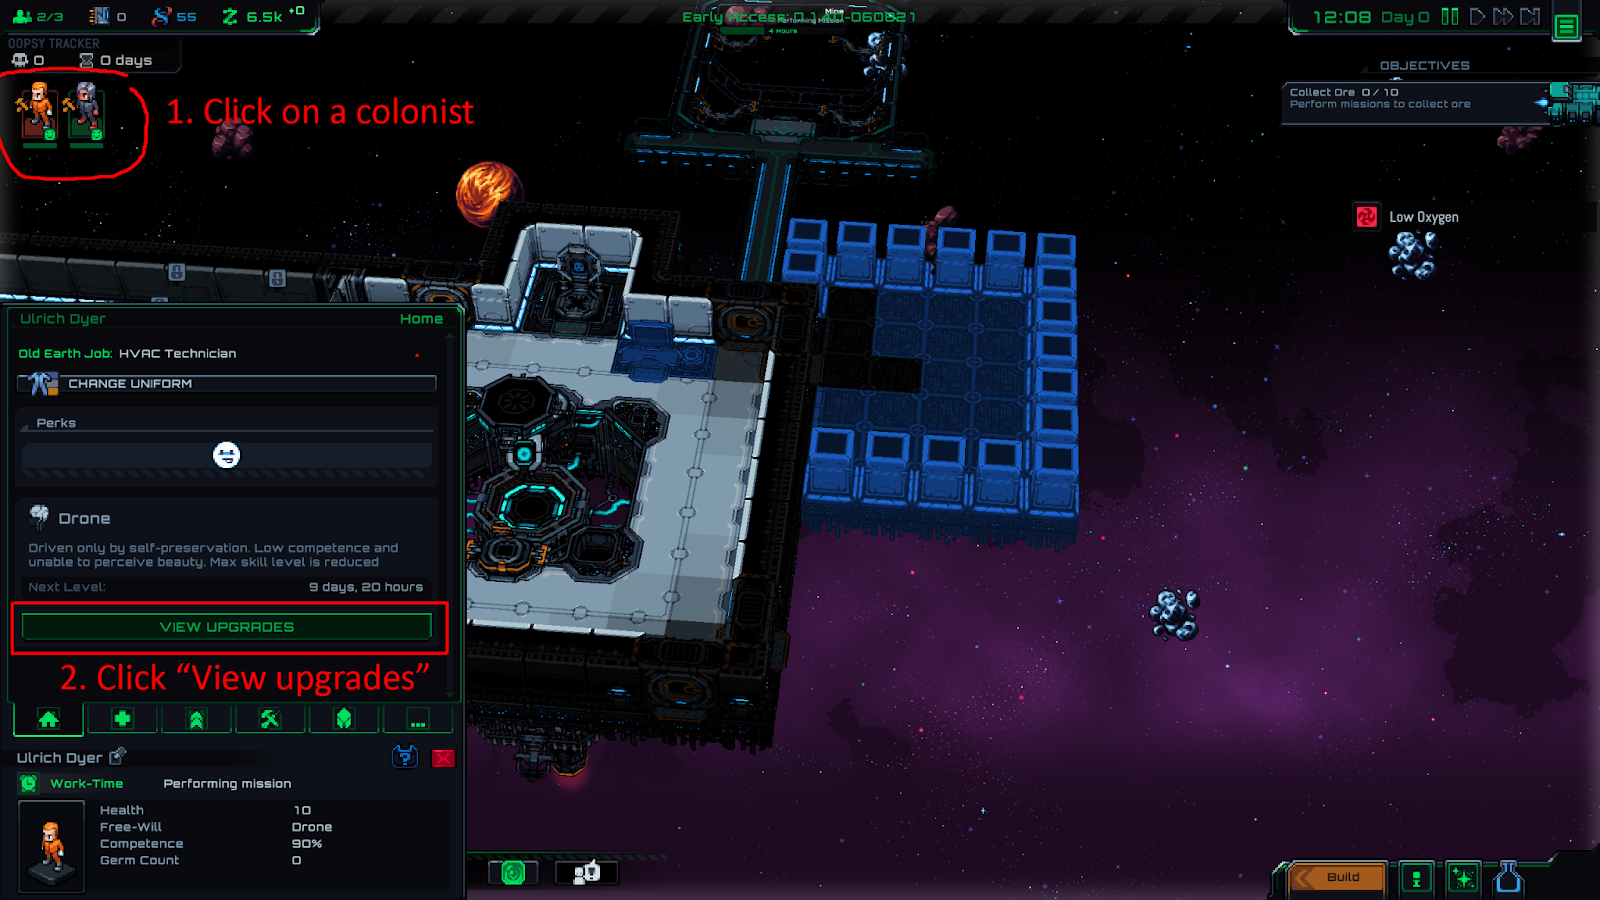
You can see a colonist’s info if you left click on them. But what if we want to know about our first colonist who’s busy on a mission?
Have a look at the top left, and you’ll see a list of all your colonists. Click on any of them to pull up their info screen, and you’ll see a big green button that we can press:
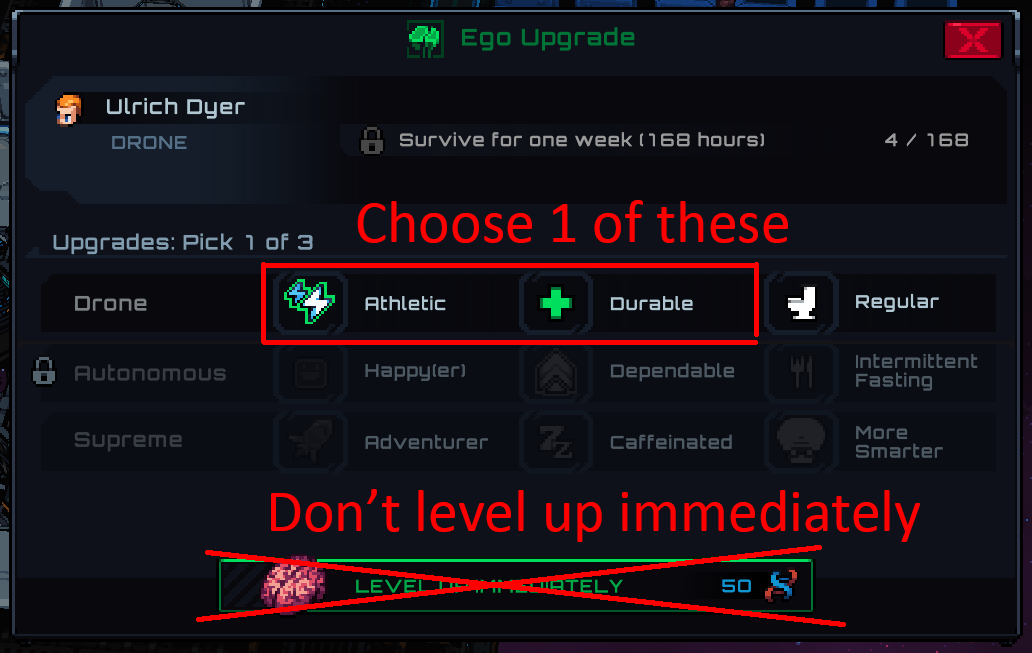
That will bring you to the “Ego Upgrade” screen, where we can give our colonist a permanent bonus for free:
A colonist will slowly level up their ego as they live for a longer period of time. Once they become Autonomous their needs become more complex, which we DON’T want right now!
I recommend choosing either Athletic or Durable. Athletic is nice in any situation because it makes your colonist faster. Durable is more useful if your colonist has the “Frail” negative trait, but I’m not sure if it makes a big difference otherwise.
Regular isn’t as useless as it sounds, but it will require you to handle your colonist’s bathroom needs more urgently, so it’s probably not a good choice for beginners.
Remember to upgrade a colonist any time you harvest (respawn) them!! They will lose their upgrades when they die.
Also, there is a bug right now – when you load your save upgrades are not saved, so you’ll have to re-assign them every time you start playing. Hopefully that gets fixed soon!
Once the Mining Mission is Done
You’ll get a “The mining mission has succeeded!” notification at the top of the screen about 1 hour before the mining ship is actually returned.
We have another dialogue box call, so answer that and click OK:
Our next objective is asking us to build a Research Station so we can start learning new stuff in the tech tree.
A few seconds later you’ll get ANOTHER tutorial call; this one should give you the ability to build the Trading Pod. This is an essential building that can be loaded up with raw materials, which we’ll send out.
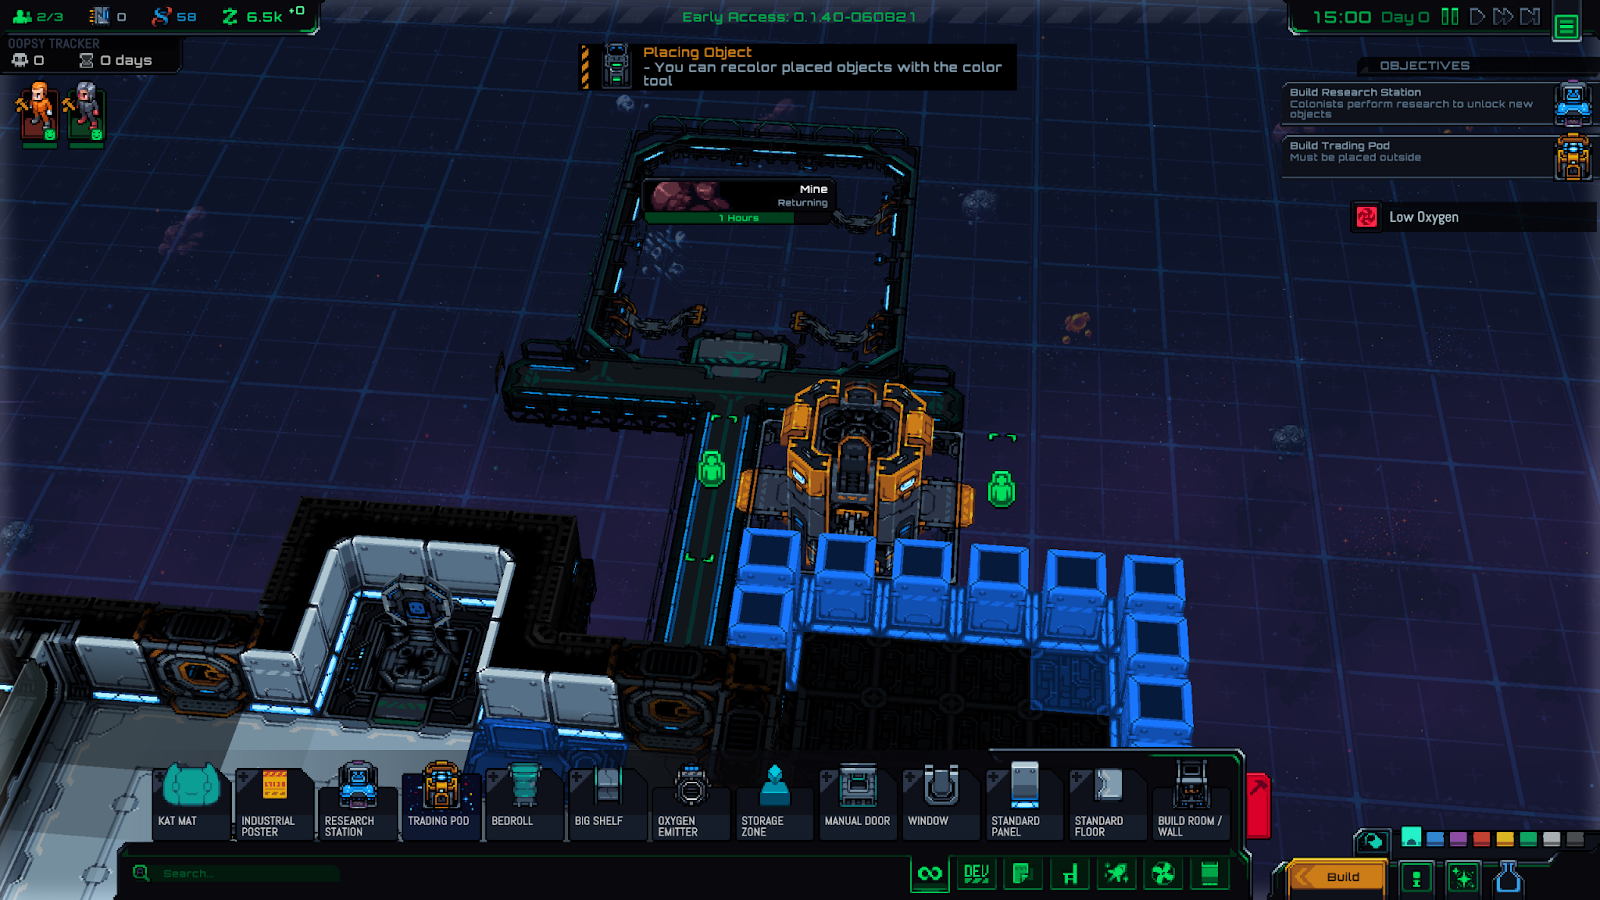
Open the Build menu and select the Trading Pod:
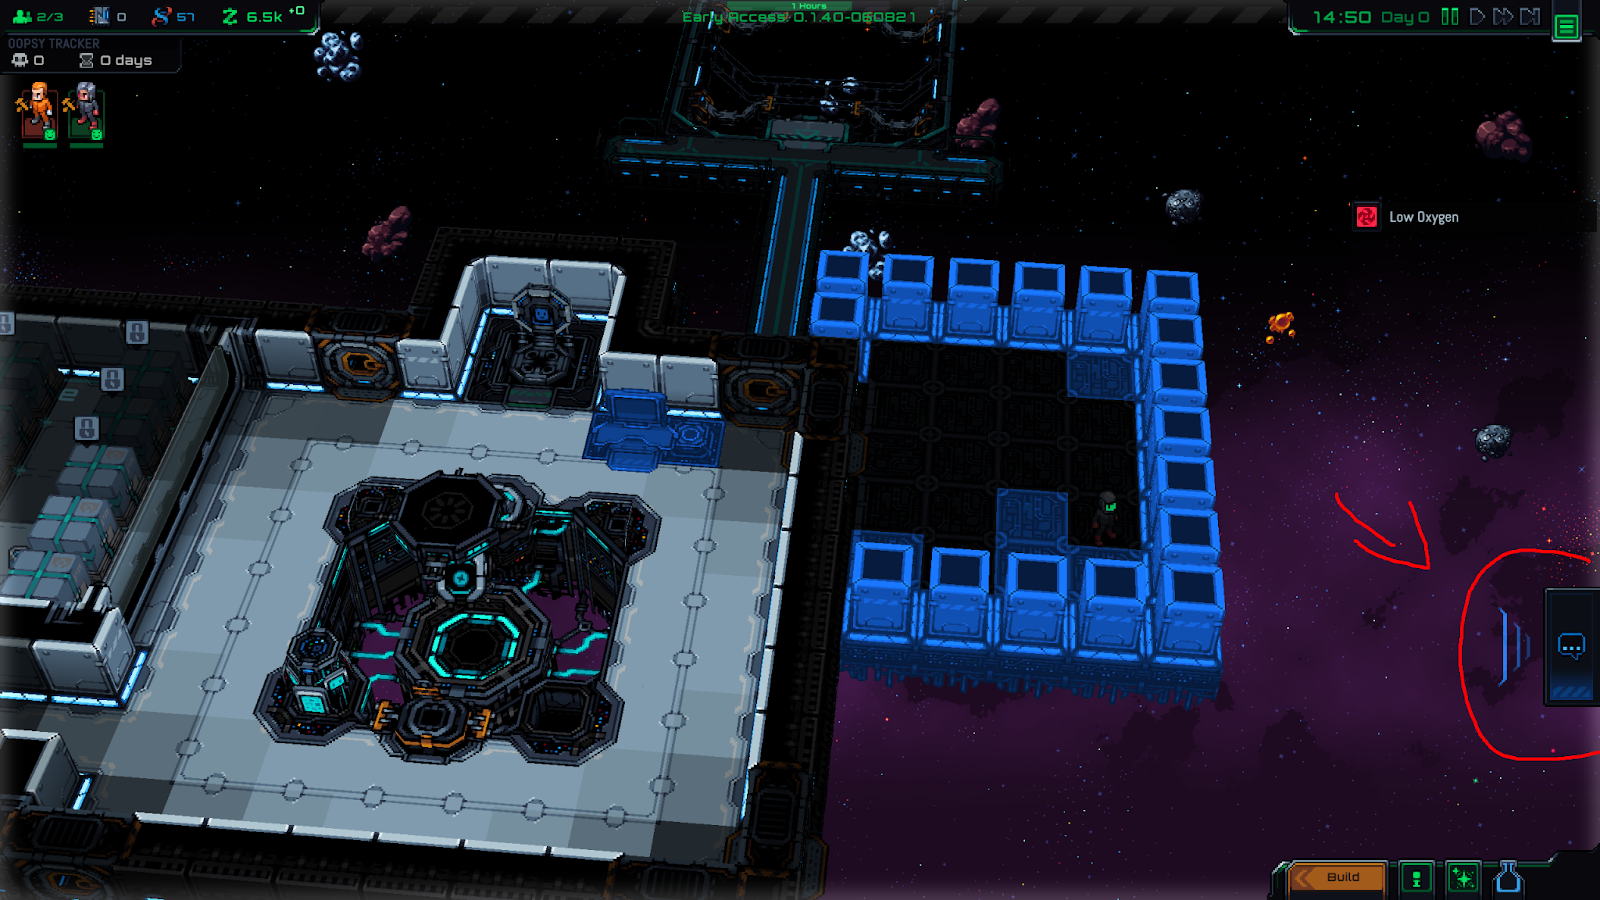
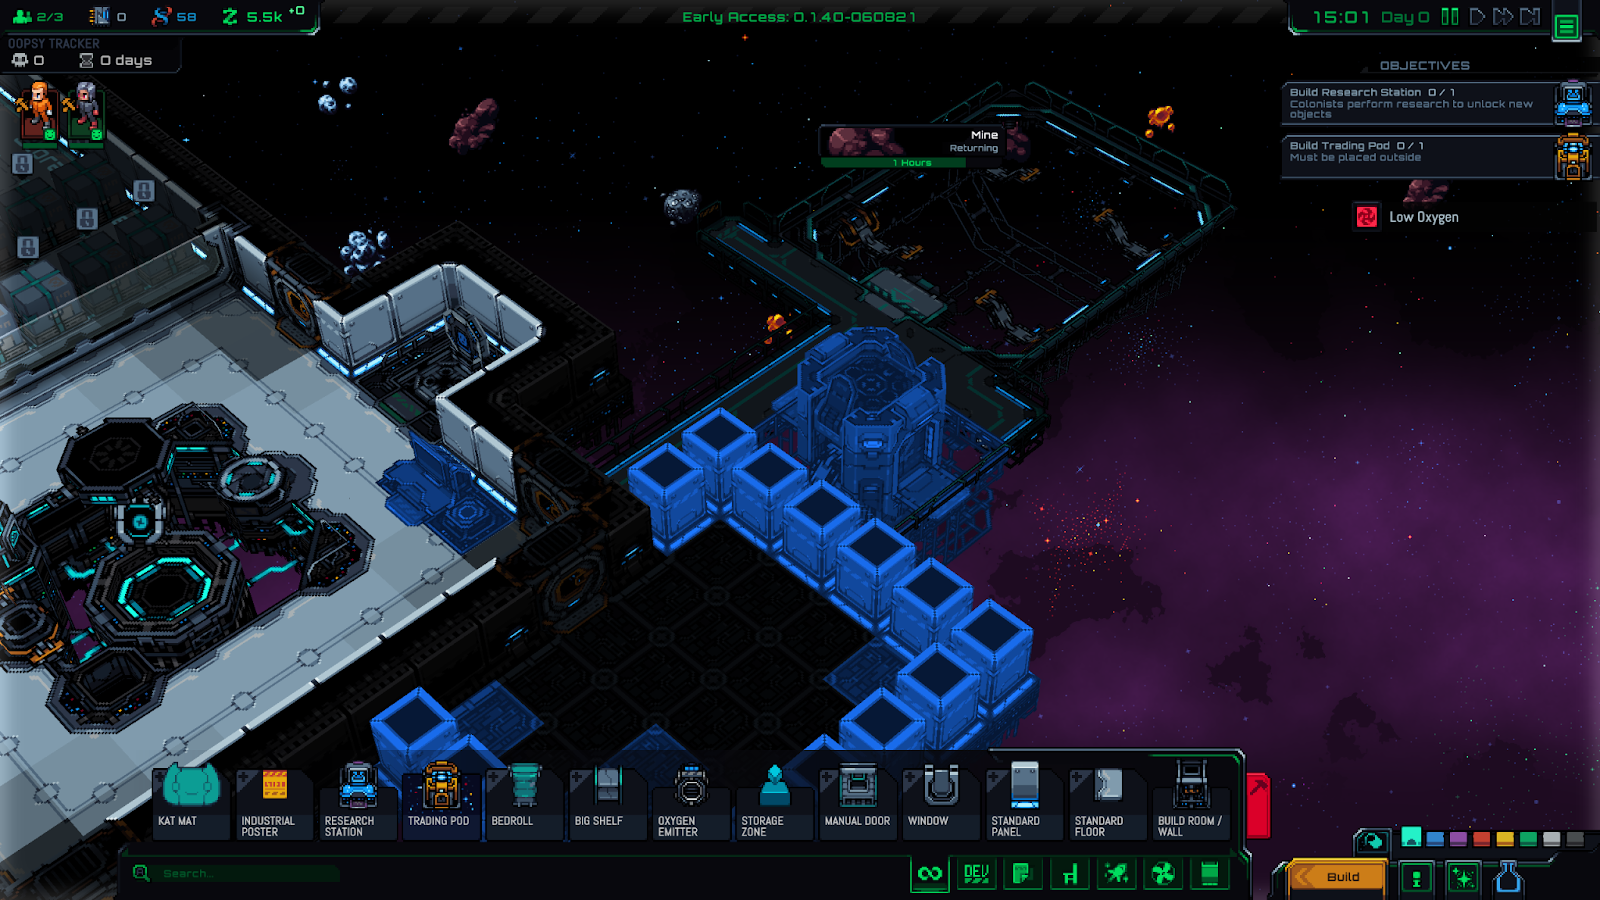
The pod has to be placed outside, but the closer it is to the base’s airlock and the loading dock the quicker transfer of goods to the trading pod will be. I like to put mine in this spot:
Just like before it will be a blue object after you place it.
Right click or press ESC to close all the build menus again.
Go ahead and wait for the colonists to finish building everything. It will probably take a few hours, that’s OK. Remember you can press 3 to go at the fastest speed, and 1 to resume normal speed.
If Your Miner is Hurt …
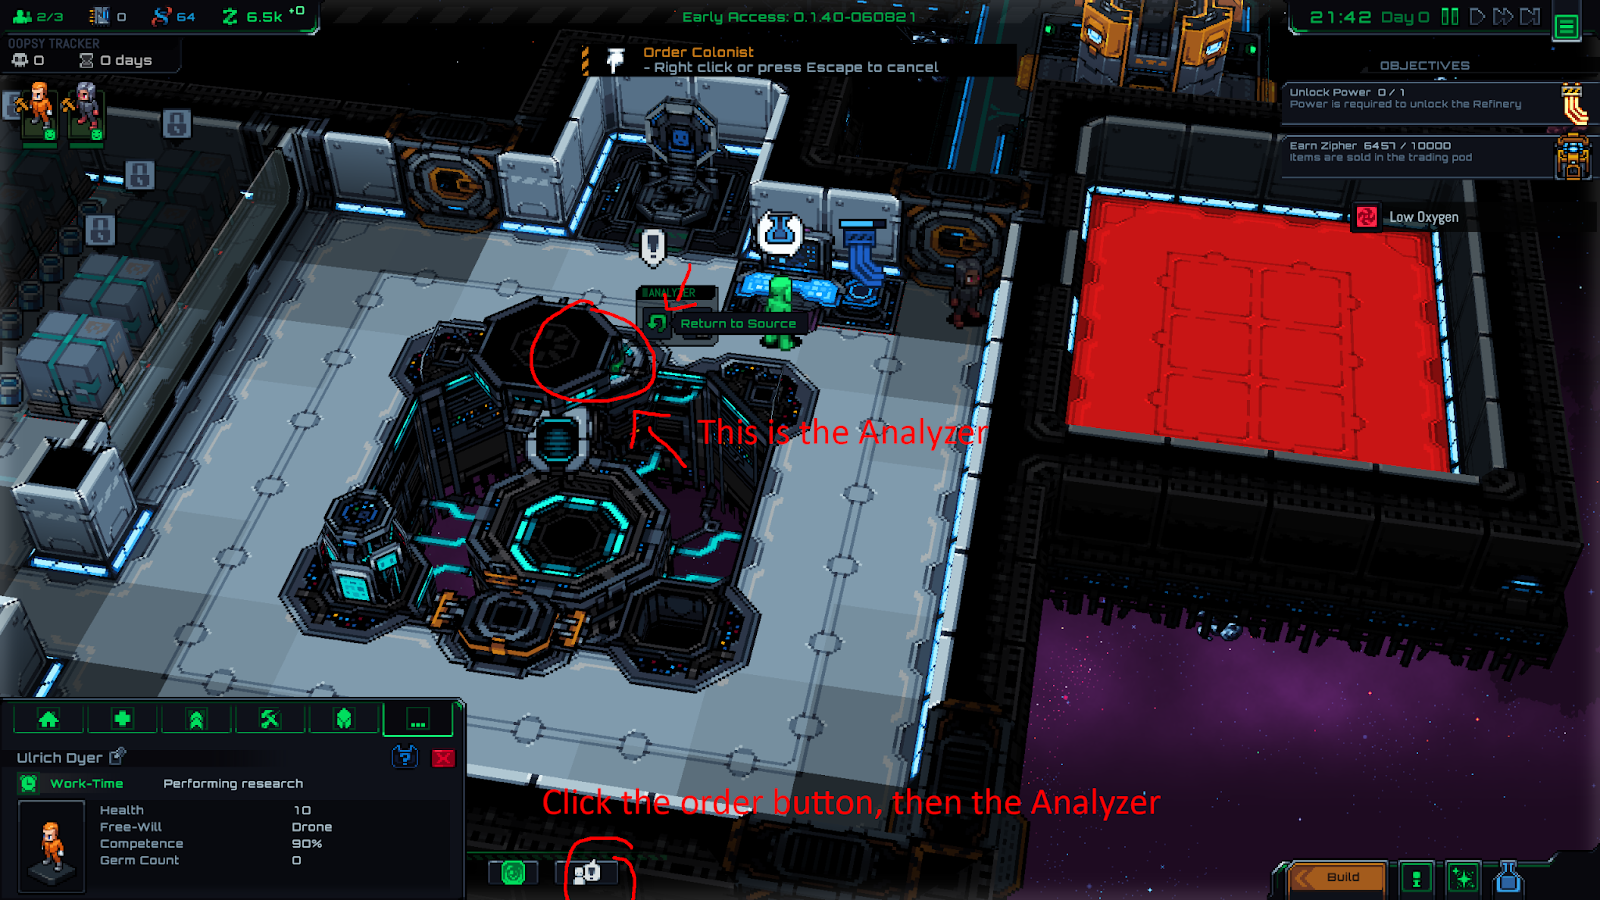
There is a tiny chance your colonist may be injured or get sick while out mining, even though this is the very first mission. If they’re gushing blood or otherwise injured when they come back, you can order them to “Return to Source” at the Analyzer.
This will kill the colonist and whatever disease they had on them, so you can re-grow them in the incubation tank. (Keep this in mind for the future, when things inevitably go wrong!)
Researching & Base Improvements
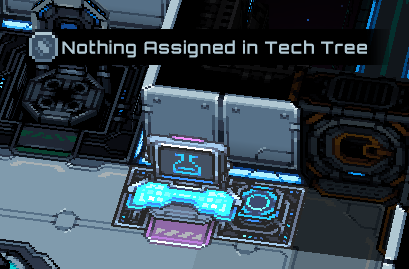
Once your research station is built you can hover over it and see that we aren’t currently researching anything. To proceed we’ll have to change that!
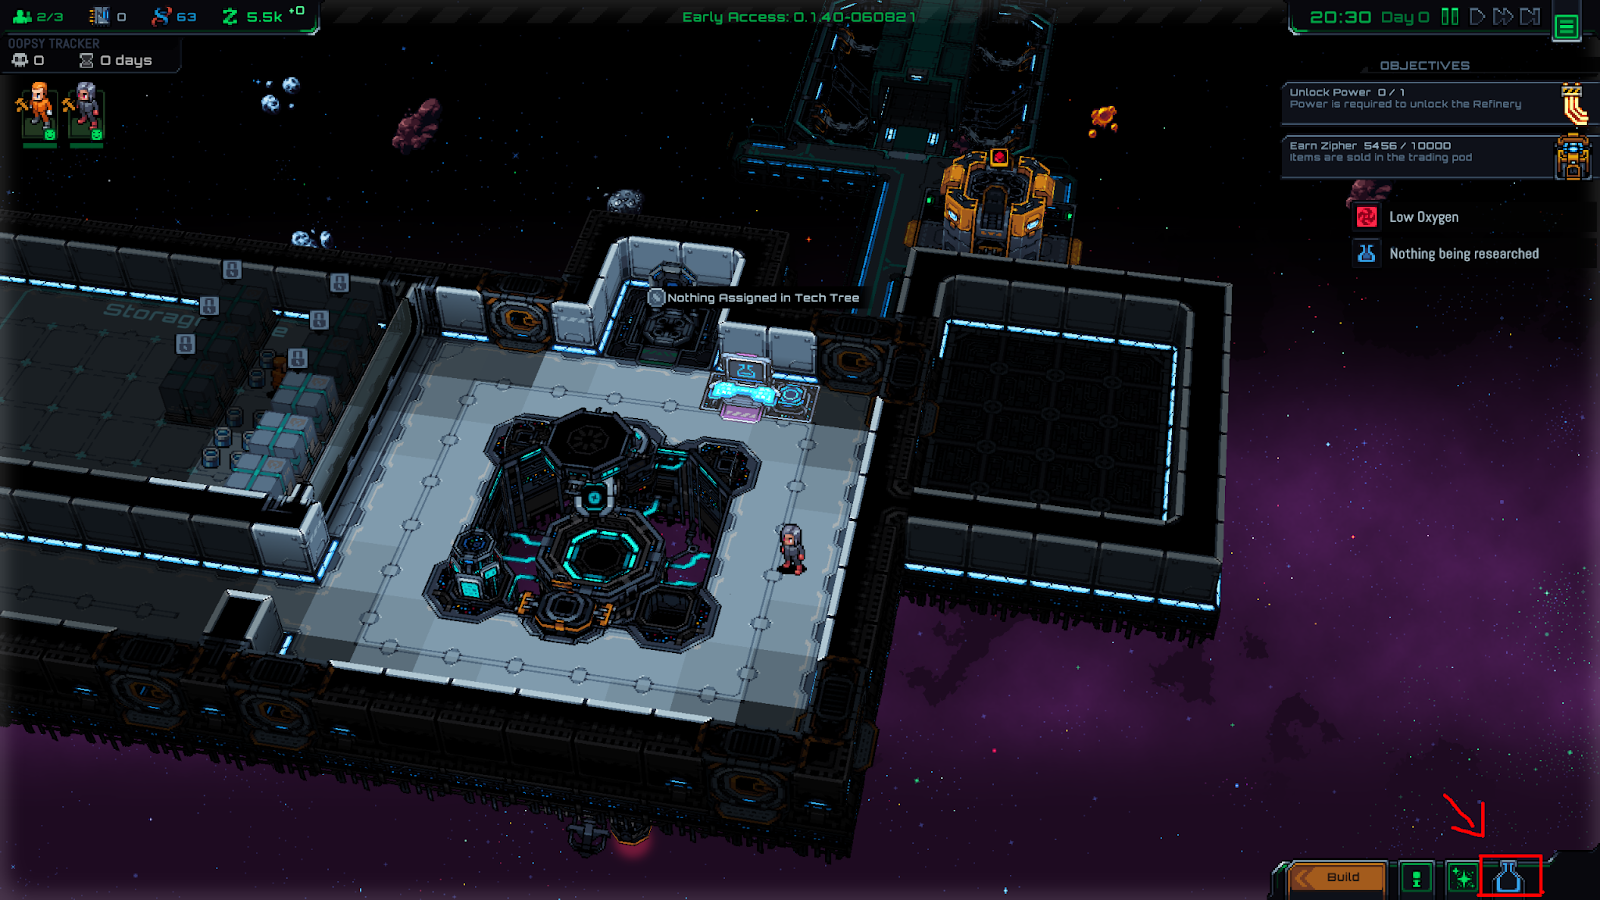
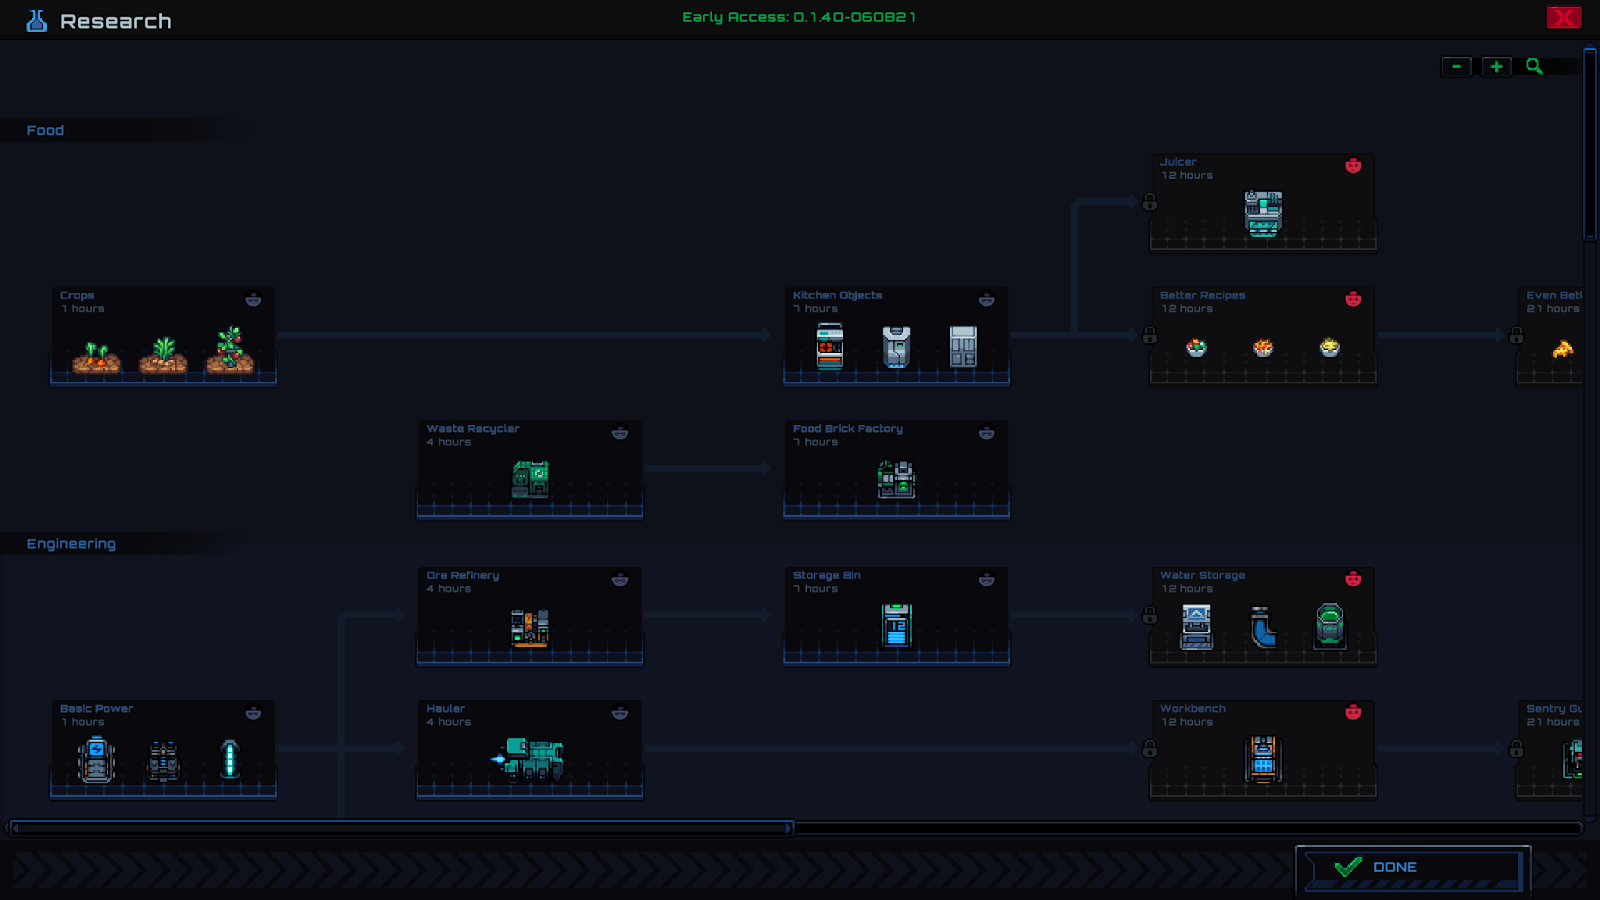
To open the tech tree you can left click on the research station itself, or on the blue research icon in the bottom right of the UI:
That opens the Research screen. Don’t panic! This is a big menu with a lot of priorities and options, but the good news is we can take it pretty slowly.
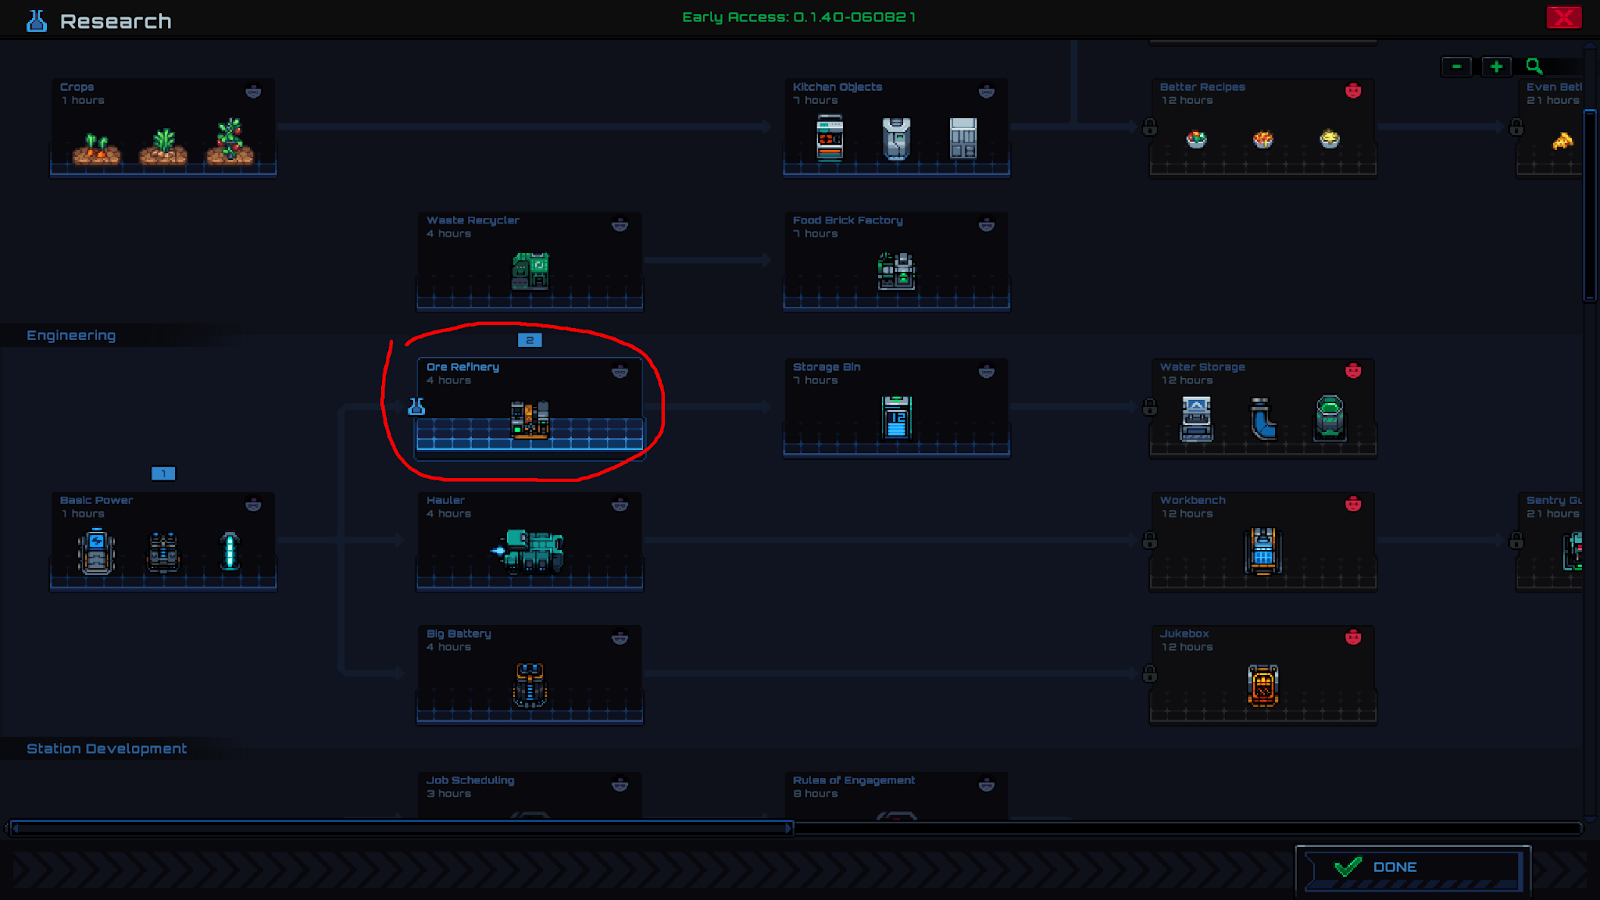
Scroll down to the “Engineering” category. Find “Ore Refining” and left click it to set it as our next research target.
Research unfortunately can’t be queued up except when researching a pre-requisite, so you’ll have to remember to set new research after you finish with the Ore Refinery. (IE, we can queue “Power” and “Ore Refinery” to be done in order, but there’s currently no way to tell the game that we want to research “Employement” after that.)
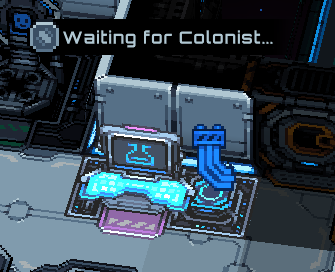
Once you’ve queued up the Ore Refinery research you can see the Research Station’s status has changed to “Waiting for Colonist …” and an icon of the tech we’re researching is displayed on the object.
We can only research while a colonist is actively operating the bench, and since we only have 2 colonists right now that effectively cuts our labor in half whenever we’re researching. So in the early game, we’ll try to do as little research as possible.
Once you’ve unpaused the game you can watch your colonist start researching.
But the other one is probably just hauling items around storage right now – let’s give them something better to do.
Storage Zone Improvements
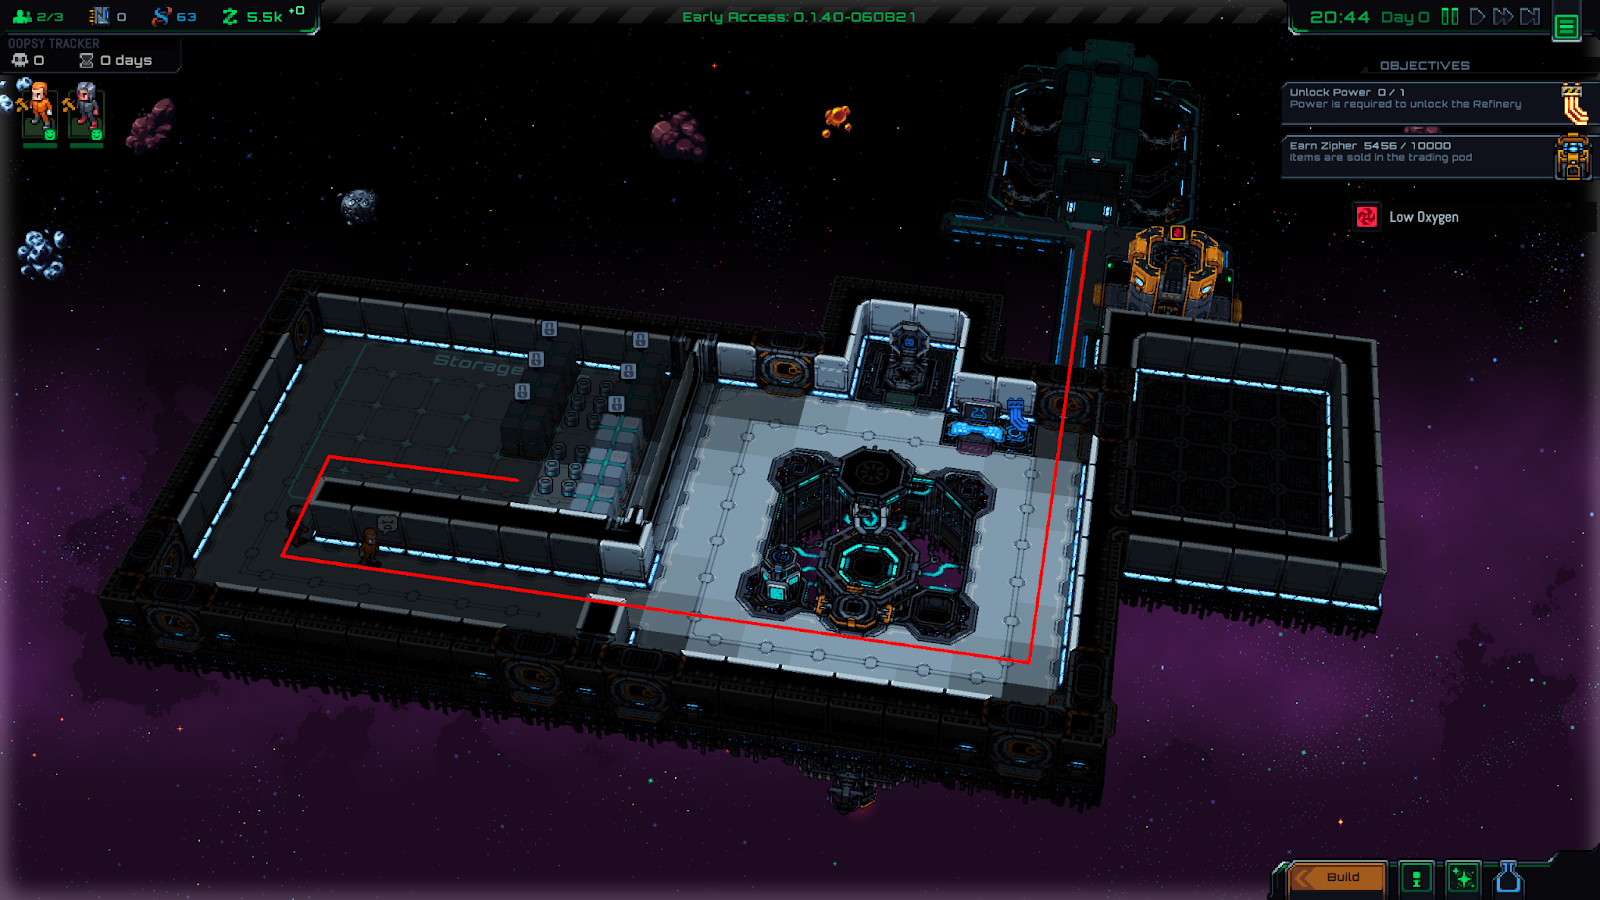
Consider this long, awkward path to our main storage zone. Have you noticed how the colonists have to walk the long way around to get to all their stuff?
With the current design, our colonists are going to sloooowly haul stuff from the loading dock to the main storage. Look, this is a pretty inefficient path:
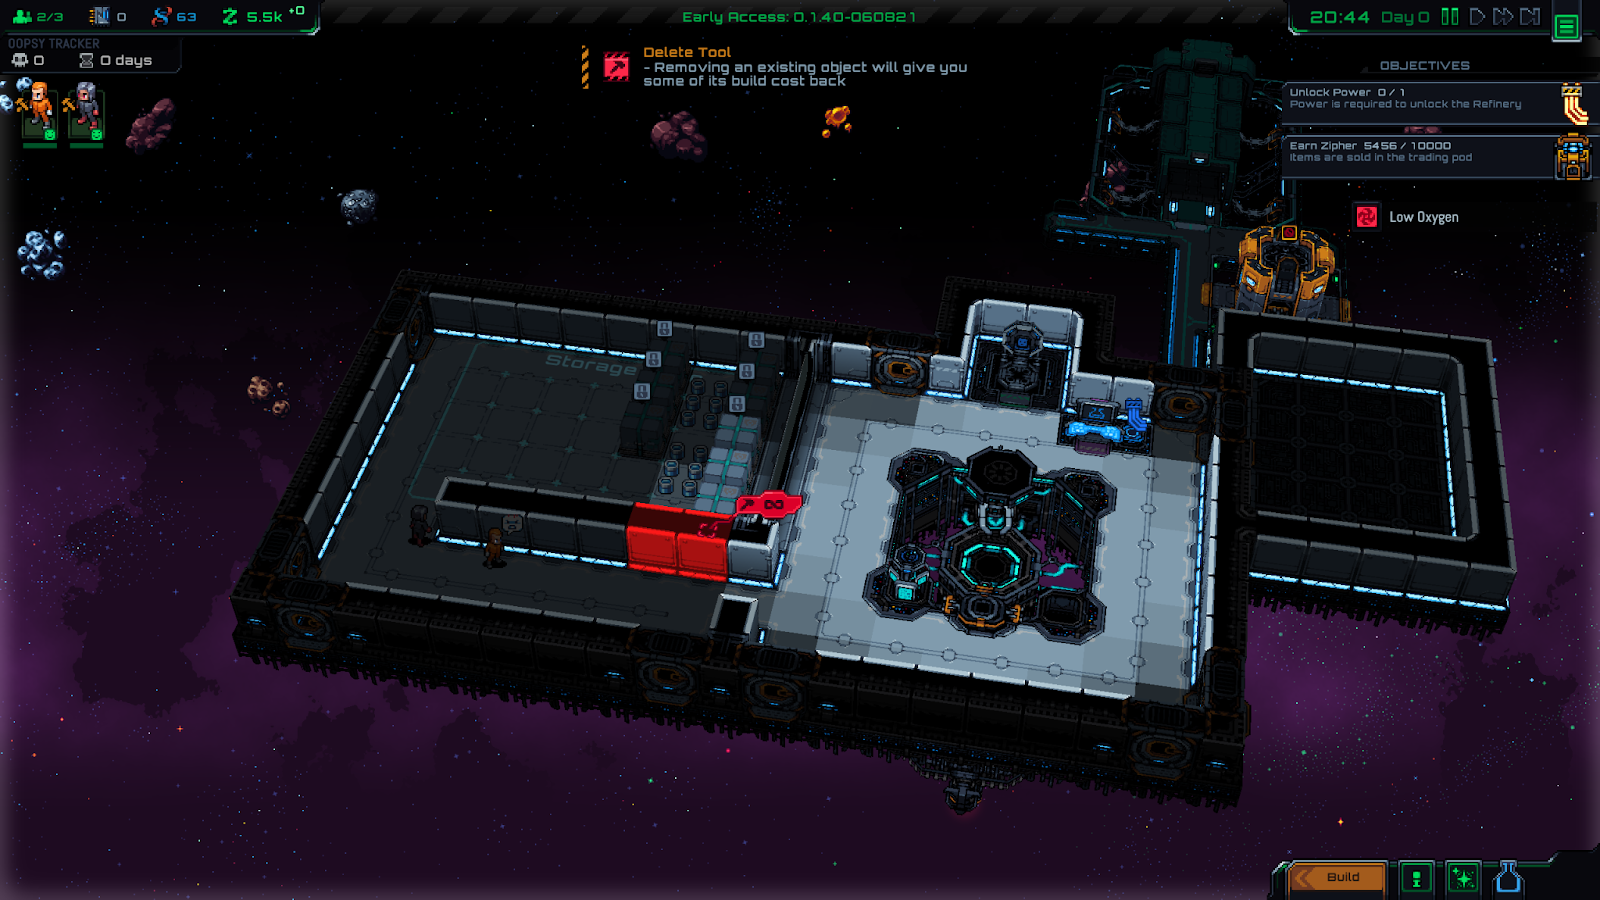
Press the DELETE key on your keyboard to enter delete mode. Let’s knock out a couple of the store room walls by left clicking on them, this will make our storage zone much more accessible:
Once they’re red and stay red, that means they’ve been marked for deletion. Right click or press ESC to get out of delete mode.
Connect the New Room to Our Base
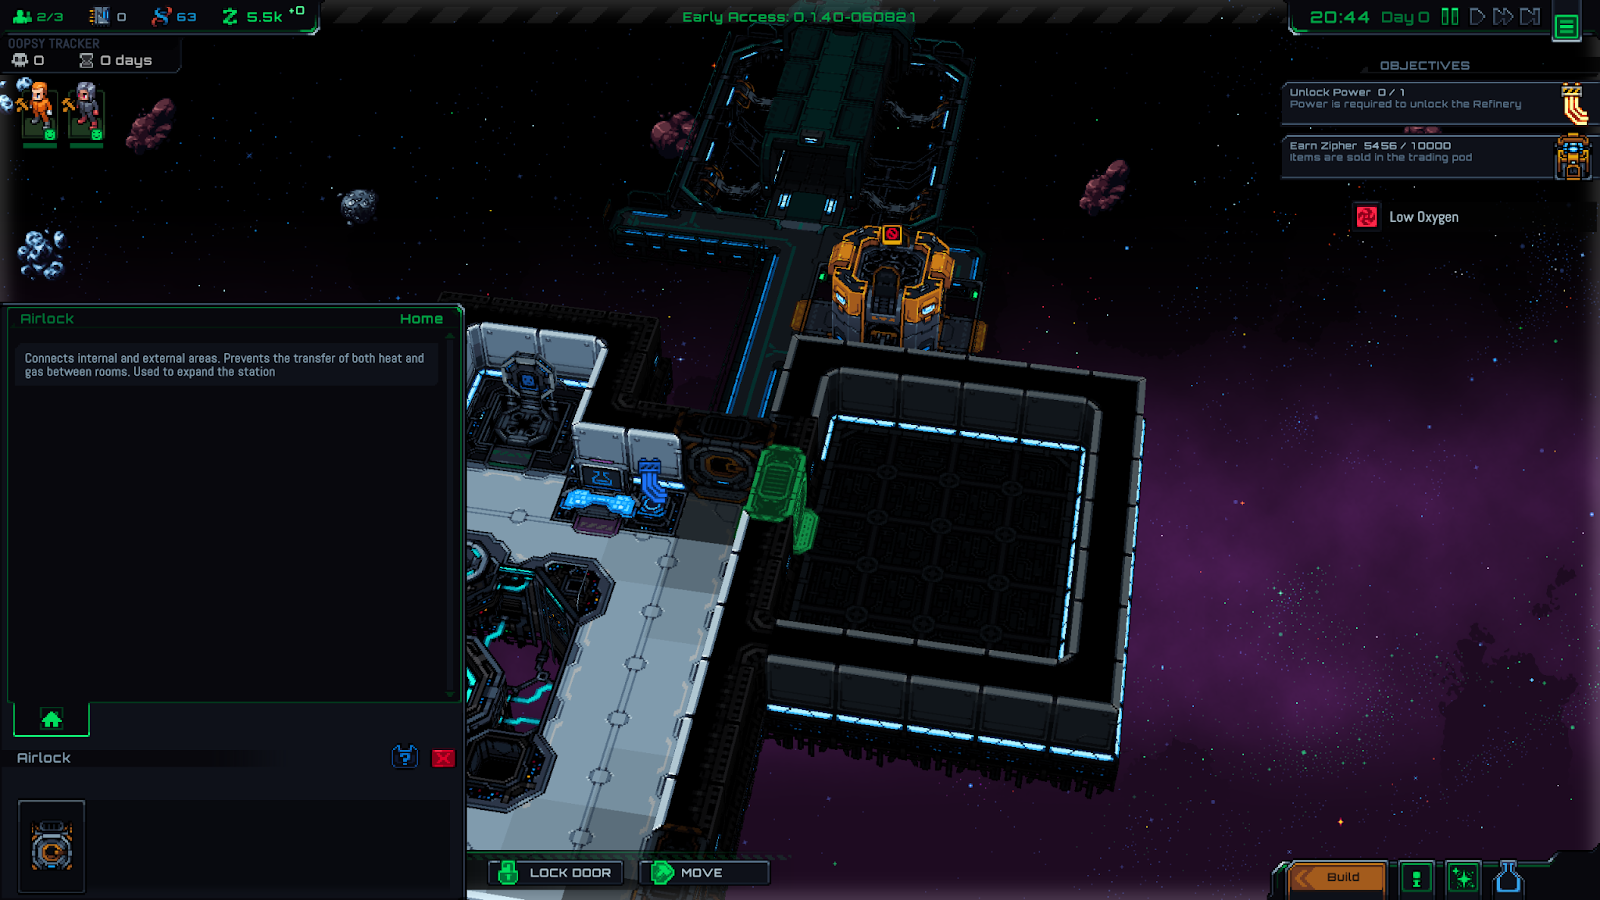
Have a quick look over at the ore processing room. If you left click on the door you’ll see that it’s an Airlock:
Airlocks are what separate your oxygen-filled and warm base interior from the cold, unlivable recesses of outer space. Every new room you build will first be connected to the base by an airlock.
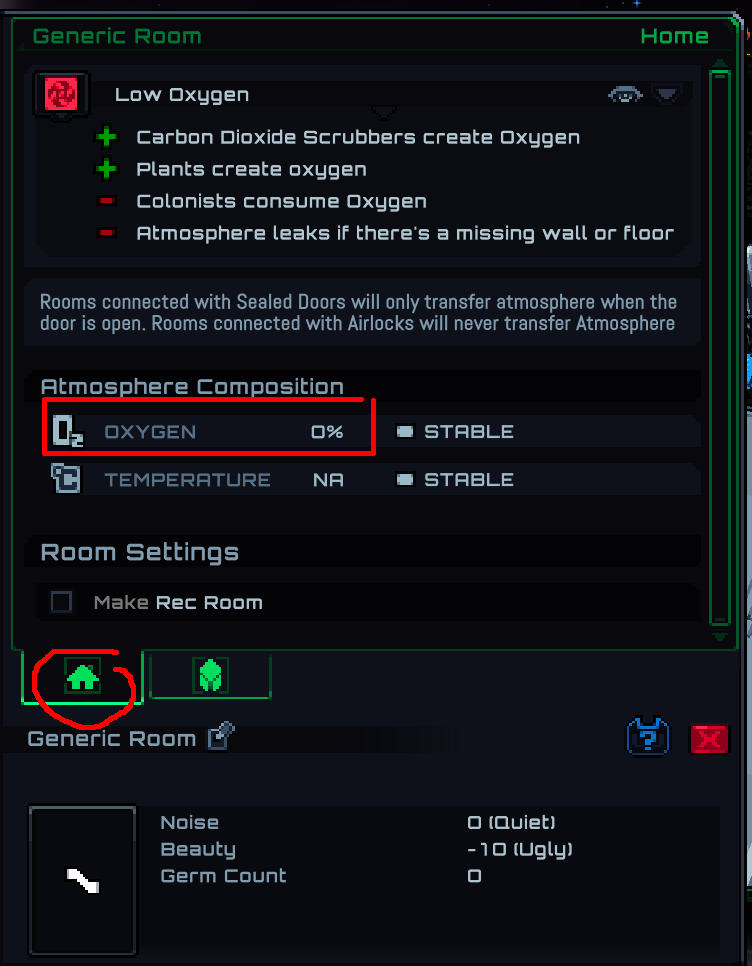
As the name implies, airlocks prevent air from passing through into connected rooms – which means that our nice new room has NO OXYGEN in it right now. You can verify this by left clicking on a tile in the room to open up the info panel, then clicking on the “Home” icon:
Colonists will automatically put a spacesuit on while going through an airlock if they need to, so the oxygen isn’t really a big deal.
But, it’s going to be a lot slower to get through the airlock than it would be if we had a proper door. And the more colonists we get, the more likely they will clog up around the airlocks and possibly cause hours-long slowdowns where no one gets through. This will very quickly end in death for the whole colony, so we should take the time to fix it before it’s a problem.
So, go ahead and mark the airlock between your main base and the side room for deletion.
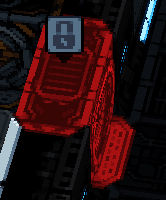
Once you’ve marked it a grey lock icon will appear over the airlock, this just means it can’t be used by colonists (since it is scheduled to be destroyed).
Unpause the game and let your colonists work for a bit. Hopefully one is researching, and the other is removing the walls you’ve marked.
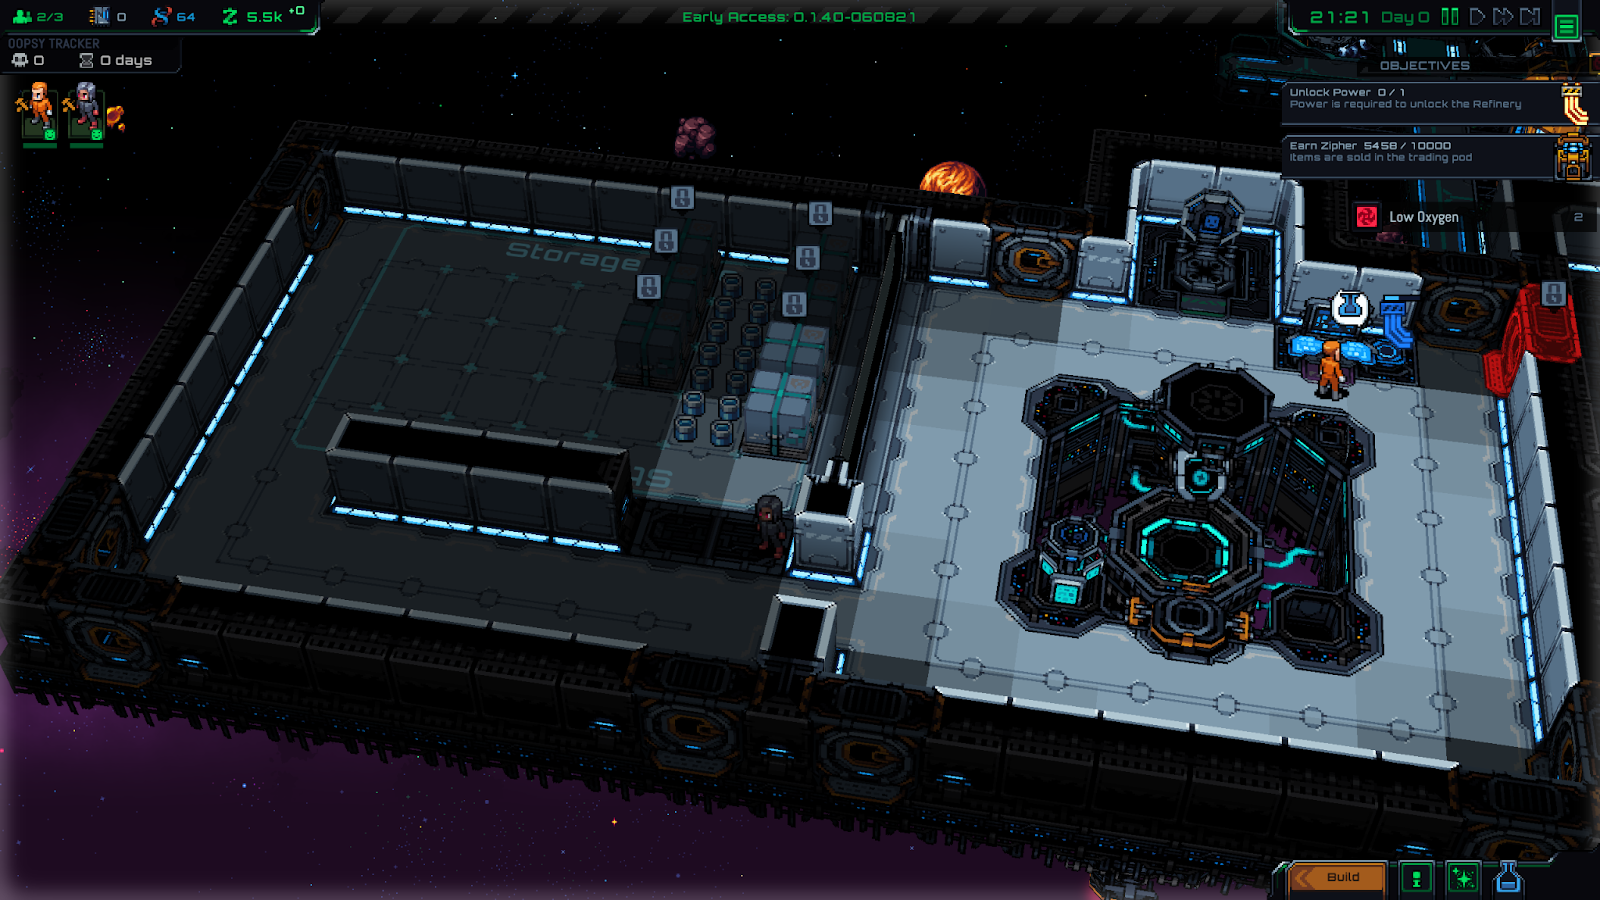
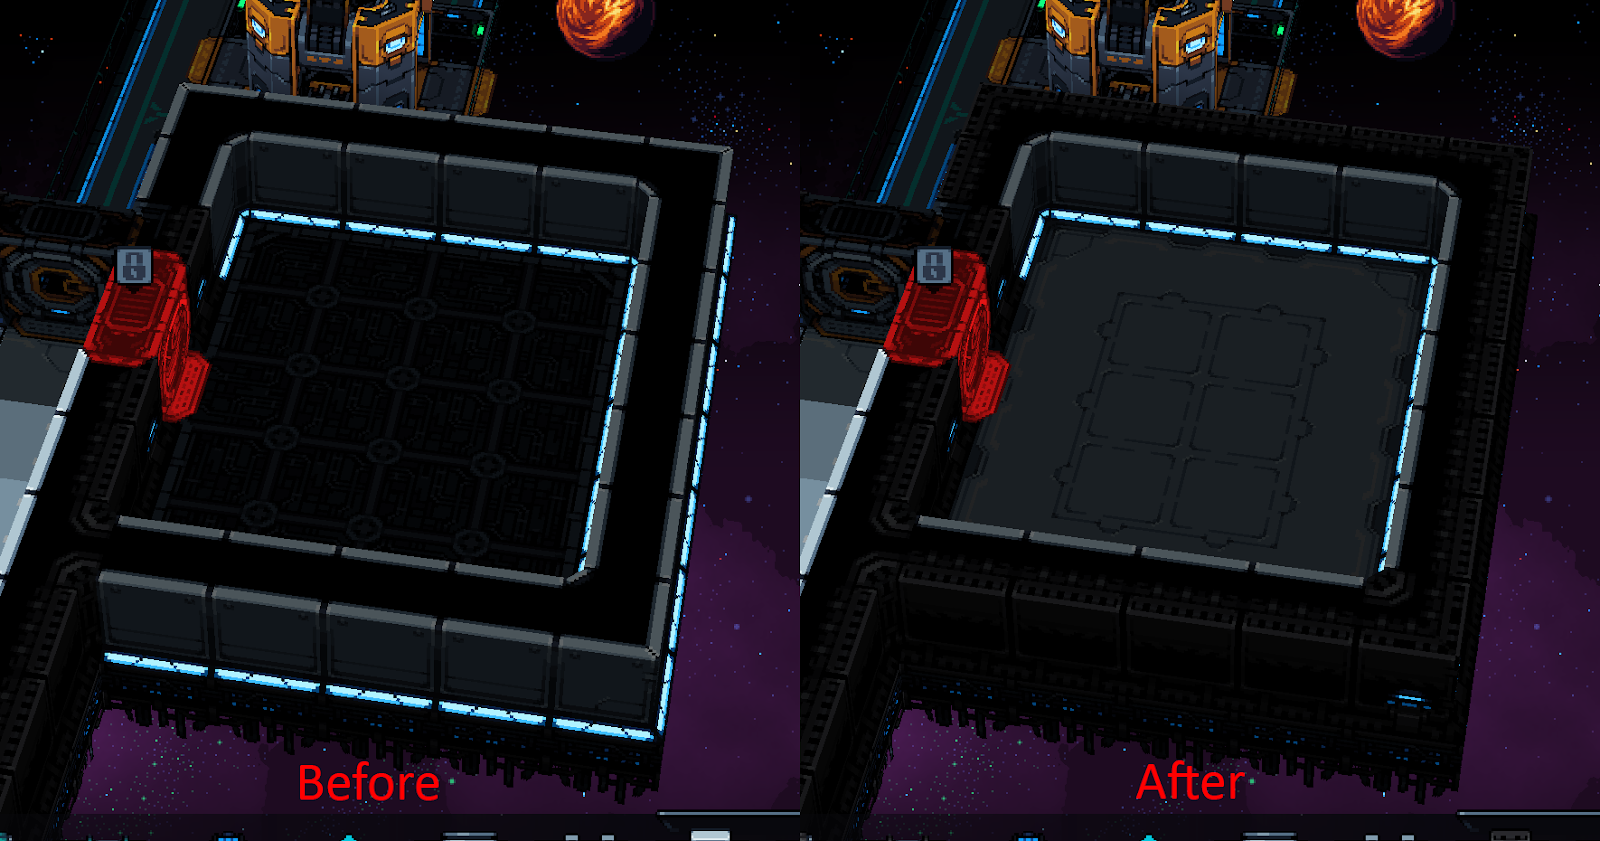
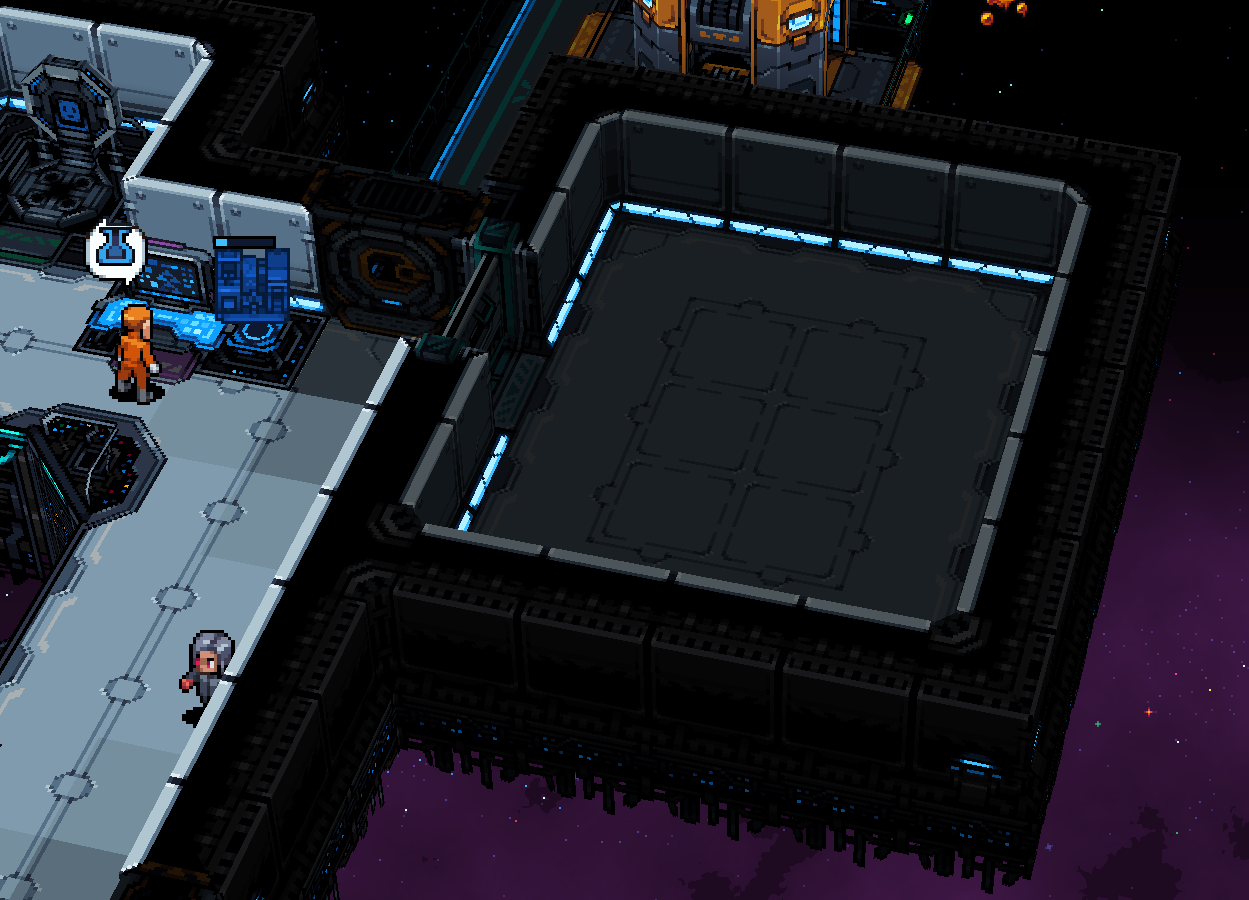
Our storage zone is much easier to reach now with those walls removed! But, the walls and floors left behind don’t really match their surroundings very well:
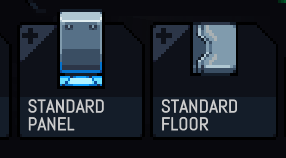
There is an easy fix for this. Open the Build menu and look for the “Panel” and “Floor” objects:
These have variants, so you can feel free to browse around and choose what you like. (Right click on an object to see the variants!) The interior is just using “Standard Panel” and “Standard Floor” everywhere, and the exterior of the ship uses the “Dark Panel (Black color)” by default.
Just left click and drag over an area to re-cover it with new floors or walls.
Looks like it was built this way all along!
If you like aesthetics, you’ll probably want to update the new room we made too so it blends in with the rest of the station. But, you can also safely ignore that if you don’t care about how it looks. Here’s what I did:
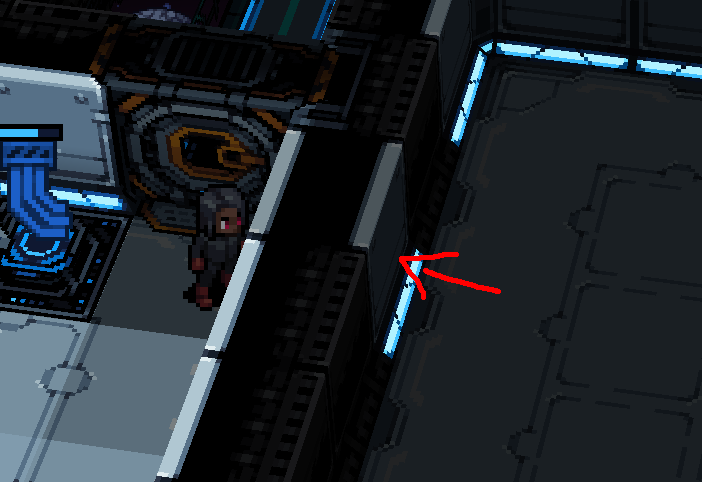
Once your colonist has finished removing the airlock, you’ll be left with an empty wall in its place.
You’ll want to mark that one for deletion, too:
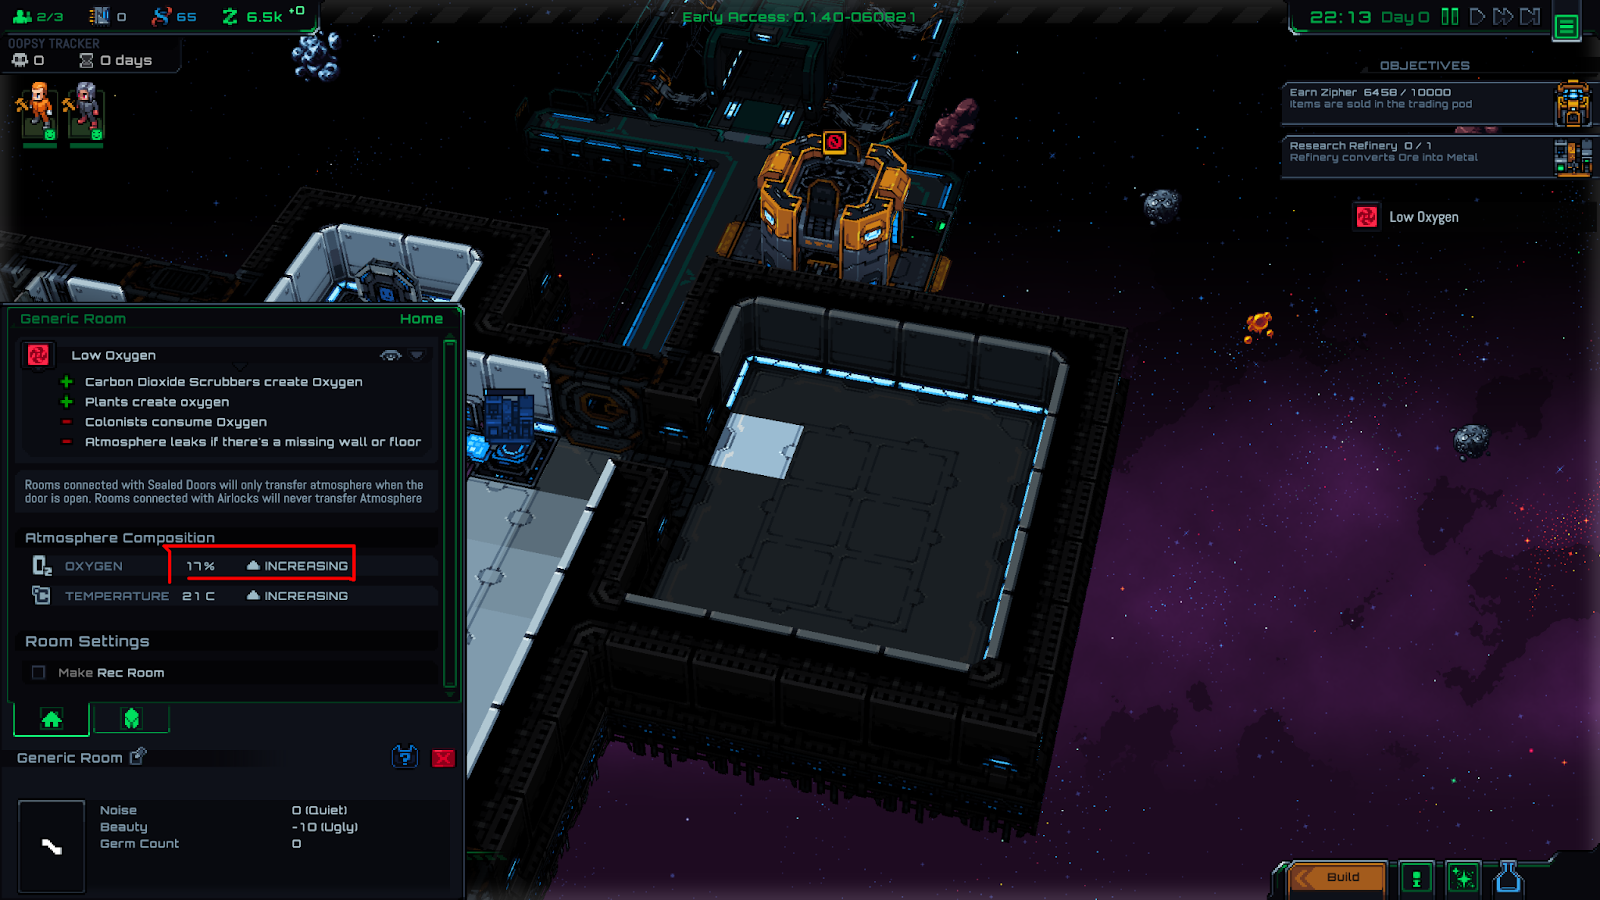
Don’t worry – once the wall comes down, the oxygen and temperature in the other room will quickly stabilize, allowing your colonists to walk around freely.
When your base gets big enough, you might need Oxygen Emitters or Wall Vents. Your core naturally generates oxygen but it will only reach so far, so keep an eye out for oxygen issues as you build new rooms.
The room is now connected, and we can see that its oxygen supply is increasing.
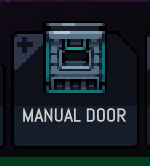
Last but not least, we need a door to this room. Open the build menu and look for the “Manual Door”, then place one in the open spot in the wall.
These doors will not prevent air-flow between rooms and have no power requirements, which is good enough for our current needs. Later you can research Sealed Doors, which work faster but require power.
At last, the room is finished and connected to our base:
Building the Ore Refinery
Unlock a Food Supply Crate & New Storage Zone
Remember how I had you lock all the crates at the beginning? It turns out the only 2 crates we unlocked contained nothing but Clean Water – this means our colonists won’t have any food when they get hungry. Oops!
When you left click on a crate, you can view its Inventory just the same way you viewed a room’s inventory, in the info panel’s “Inventory” tab.
Find a crate that has food and unlock it:
One more thing. Our non-researching colonist will probably have nothing better to do, so they’ll want to start unloading the metal that we mined earlier from the loading dock.
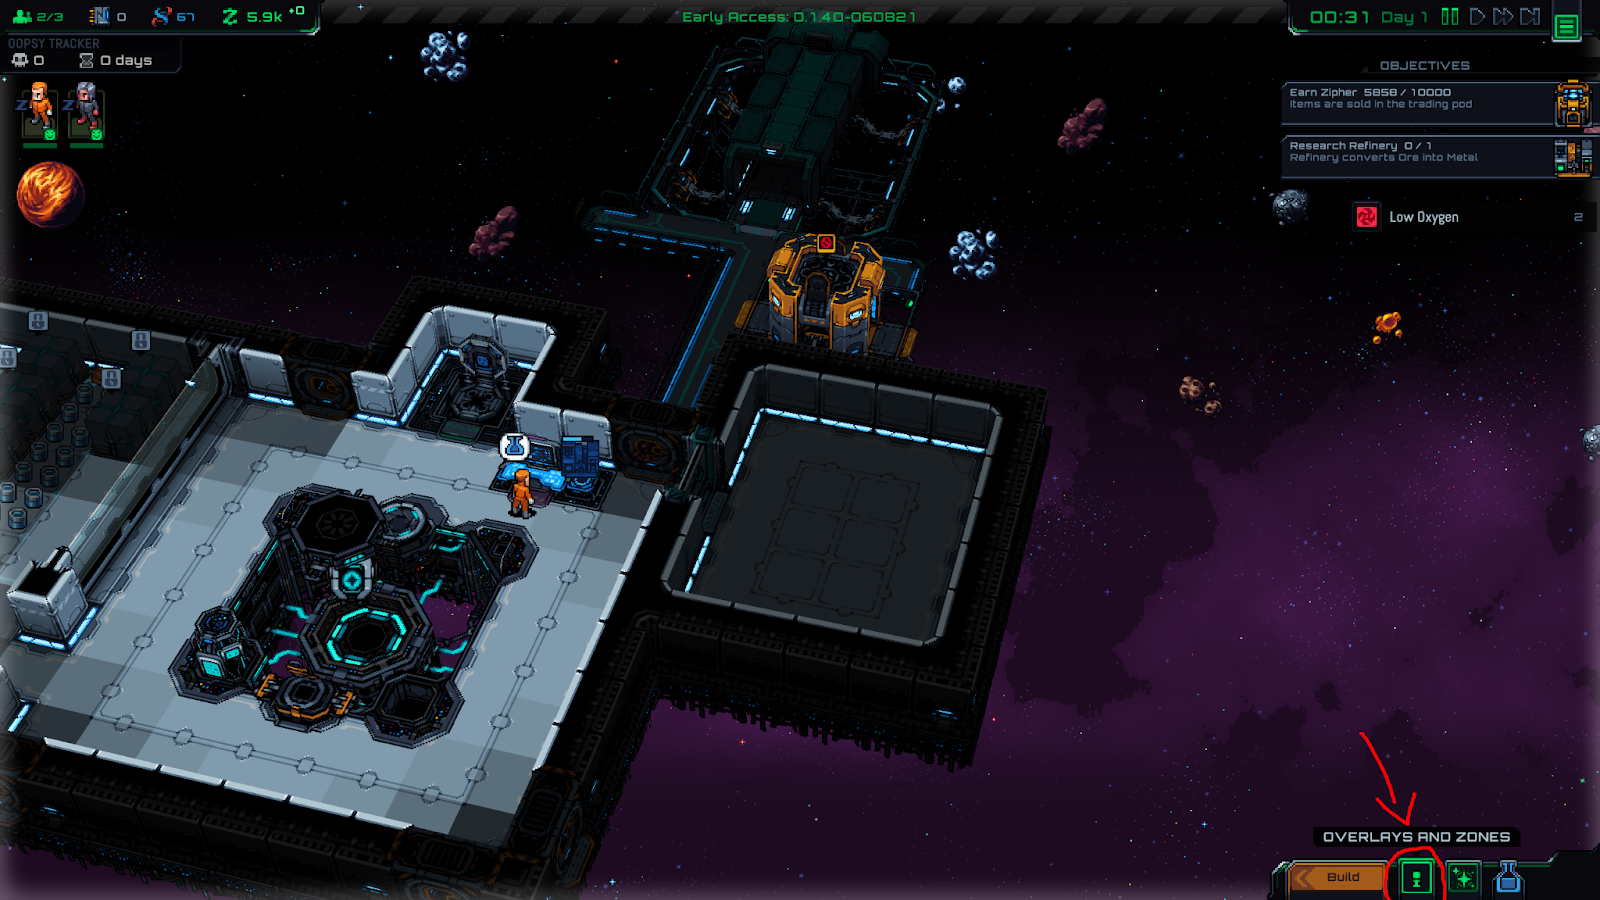
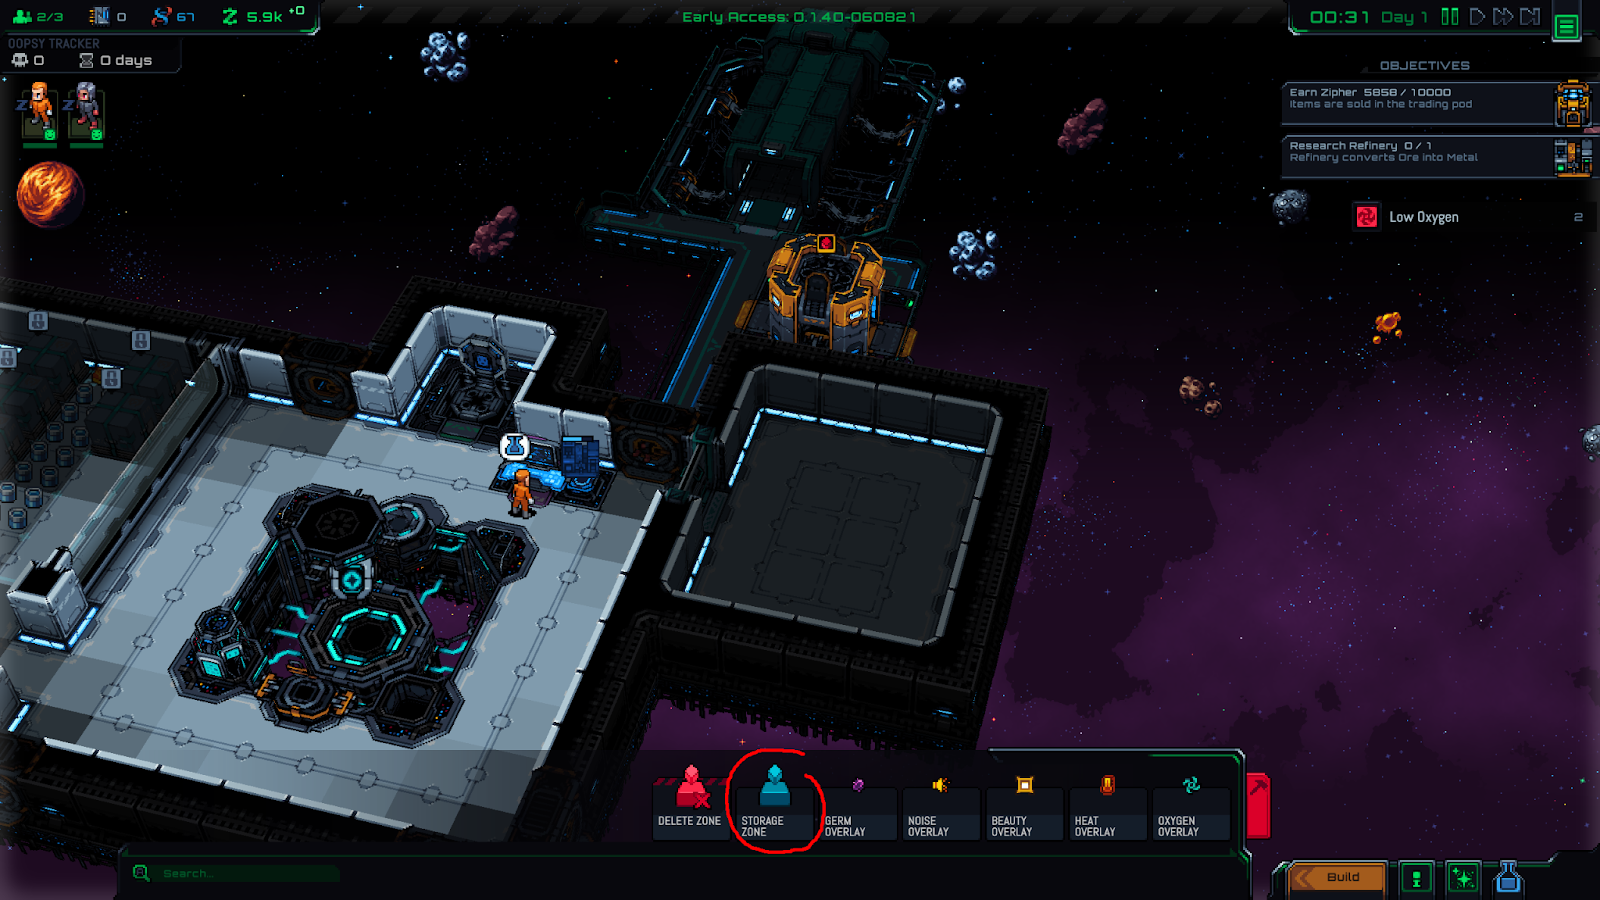
Let’s make a new storage zone to accommodate them. Click on the “i” icon in the bottom right menu to open the Zones menu:
Click on the “Storage Zone”, and then you’ll be able to draw out a zone the same way you click and drag to draw new rooms.
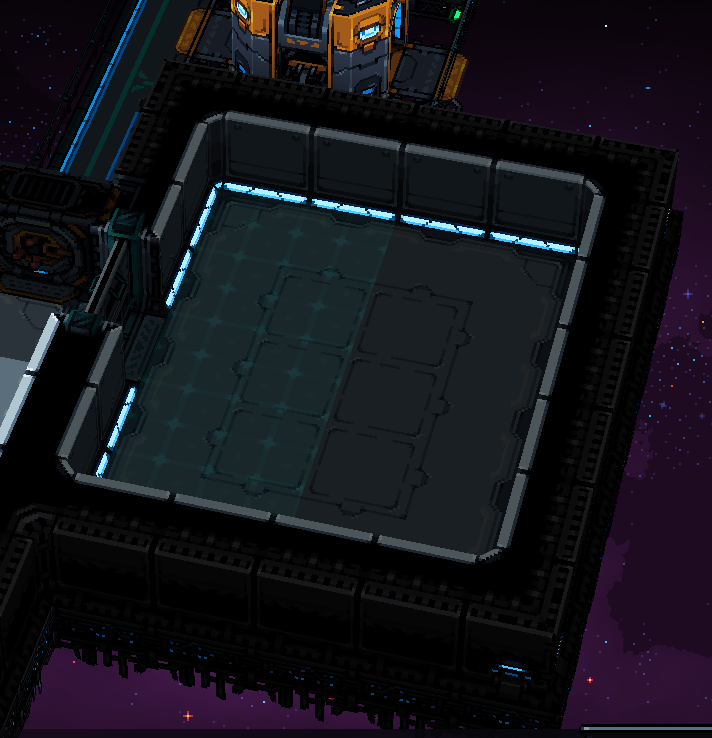
I set my zone up on the left hand side of the room, closest to the door and airlock:
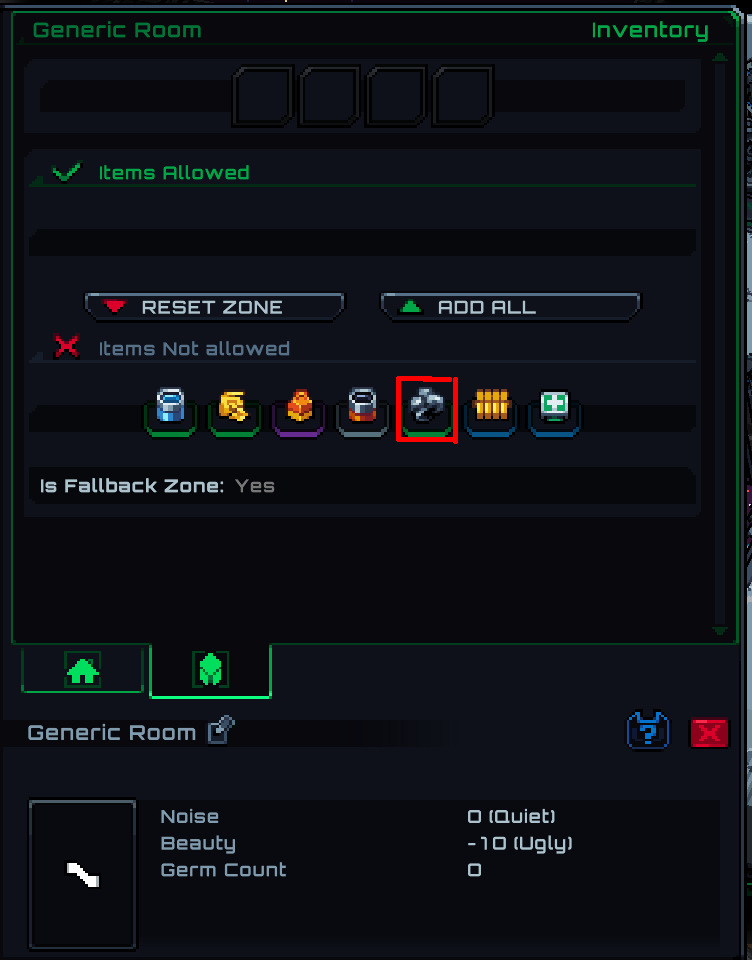
Hit ESC a few times to get out of the storage zone building mode. Then left click on a tile within the zone you drew out and go to the info panel’s “Inventory” tab. You might recognize this screen from before.
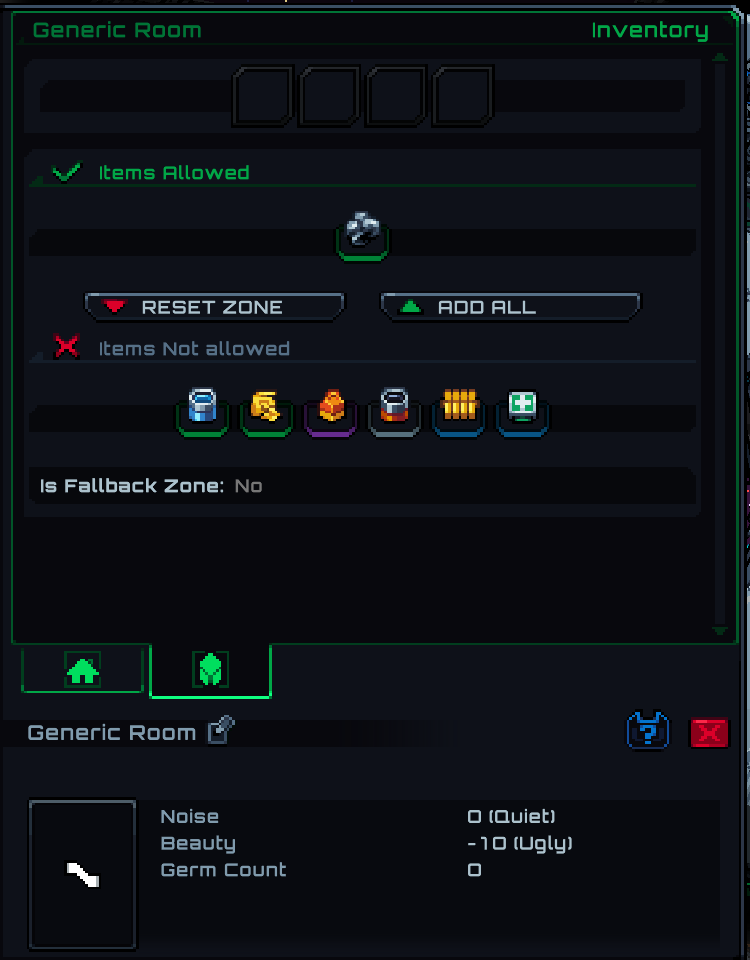
Click on the “Metal Ore” icon, and watch it get moved into the “Items Allowed” category. You should also see “Is Fallback Zone” change to “No” at the same time.
This is what your storage zone should look like for the ore refinery room right now.
Colonists will prioritize putting metal ore in this zone until it’s full up, which will keep them from dropping the ore in the main storage area (preventing a longer walk and cluttered space).
BTW, at some point your colonists will go to sleep for the night wherever they feel like it. We’ll unlock the ability to customize their schedules in detail later, for now just have patience! Anything that doesn’t get done today, you can always have them do tomorrow.
When You’ve Researched the Ore Refinery …
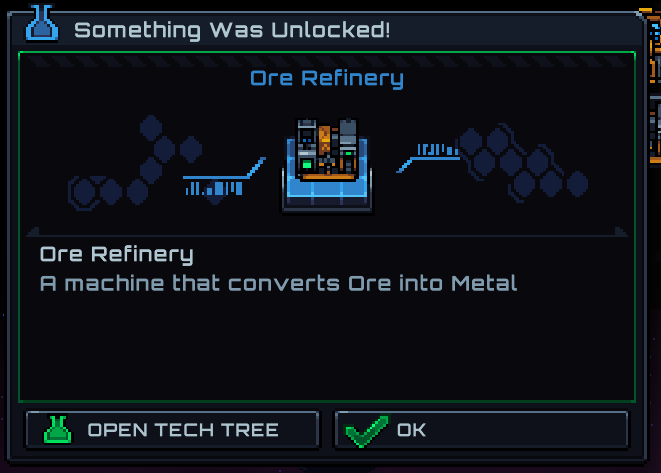
You should get a pop-up telling you that your research is finished, and the objective will also update.
Now we can actually build the stuff we need in order to progress. Sweet!
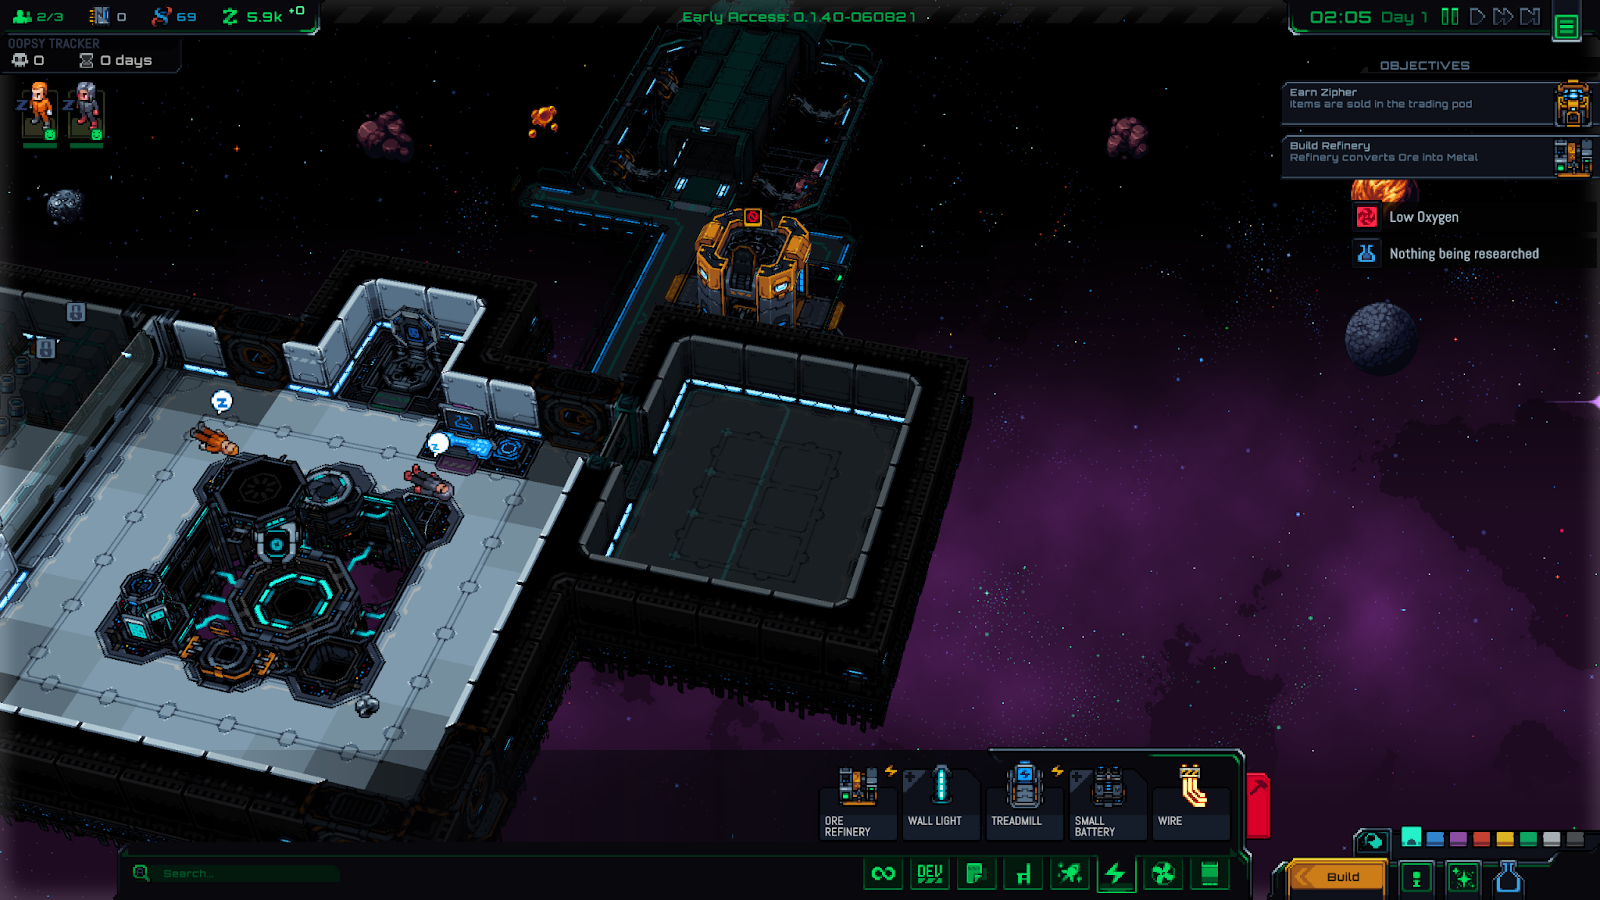
Everything we need is in the “Power” tab of the build menu, symbolized by a lightning bolt:
Let’s place down the Ore Refinery …
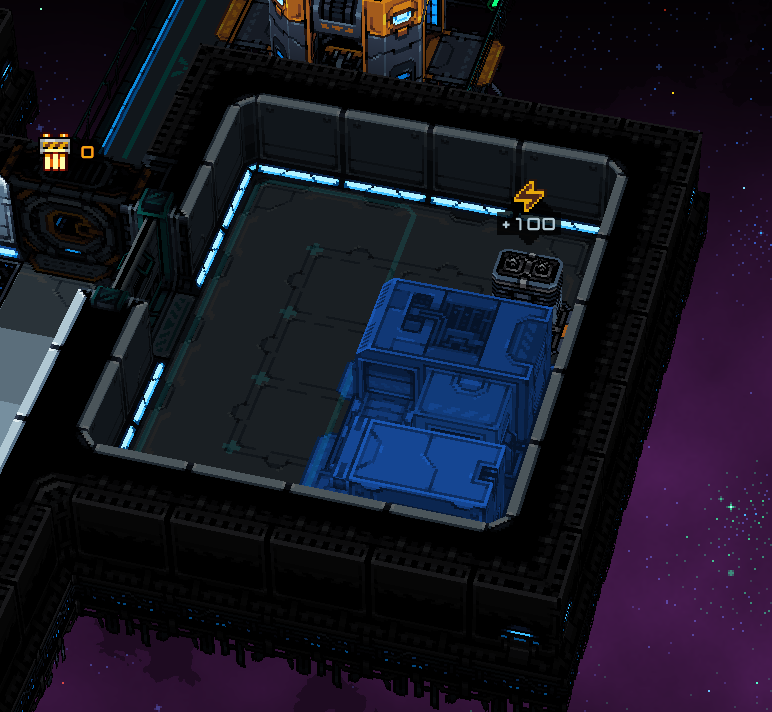
A small battery, which stores power:
And a treadmill, which colonists can run on to generate power:
This is the bare minimum setup our room needs to get moving, but it’s pretty utilitarian. Let’s add a “Wall Light” to the wall near the door:
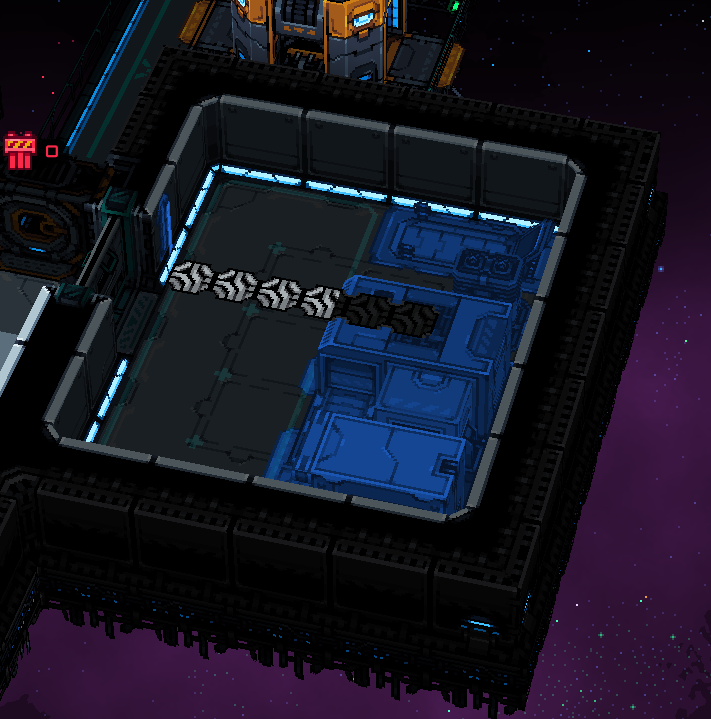
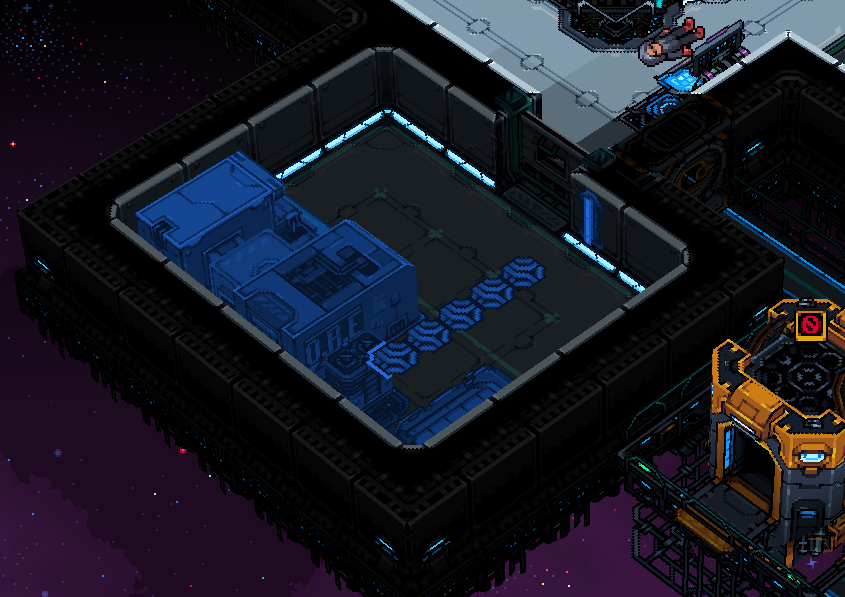
The wall light requires power to run, but it’s too far away from the battery right now so it won’t work. Grab the “Wire” building piece and draw a line from the battery to the wall light.
Here’s another angle so you can see what’s going on better. (It’s OK that the wire doesn’t fully reach after the blueprint has been laid down, it will still power the light. With most other objects you should be able to draw the wire all the way to the object to power it, I think this is just a quirk of the wall light.)
When you aren’t building wires the wiring becomes invisible – don’t worry, it will still get built by your colonists. If you can’t remember where you put wiring just get the wire building piece back out.
Next Research Priorities
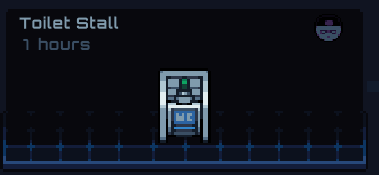
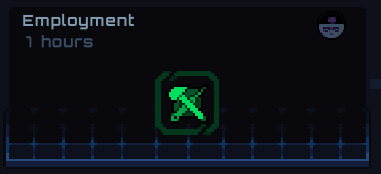
After the ore refinery, there are 2 things on the research tree we’ll want to have available right away before anything else: Toilet Stalls and Employment.
Queue one of them up, and then the other one once the first is finished.
After both of these are done, you should start working on the Waste Recycler and Food Brick Factory, which will take a little longer:
Now, just wait for your colonists to build everything.
Create Your First Metal
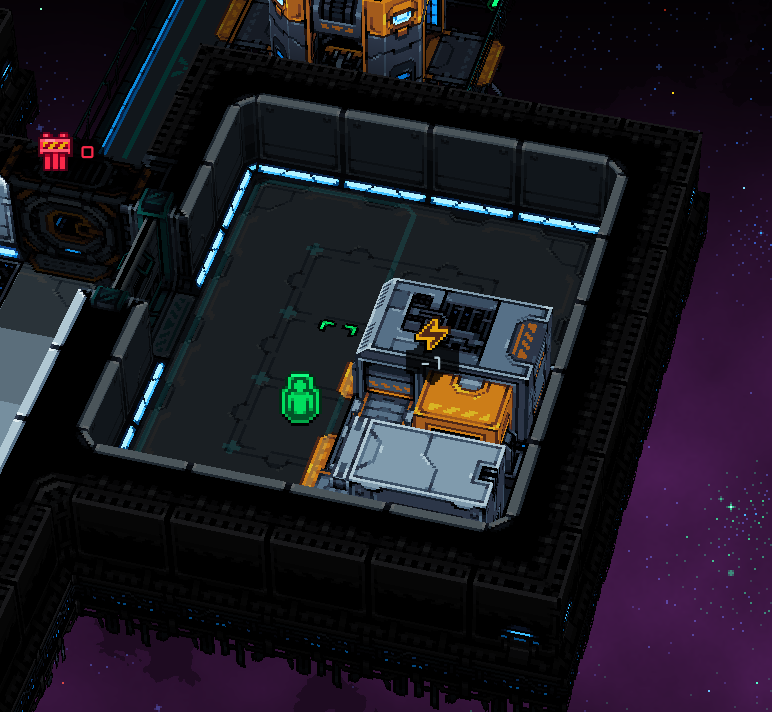
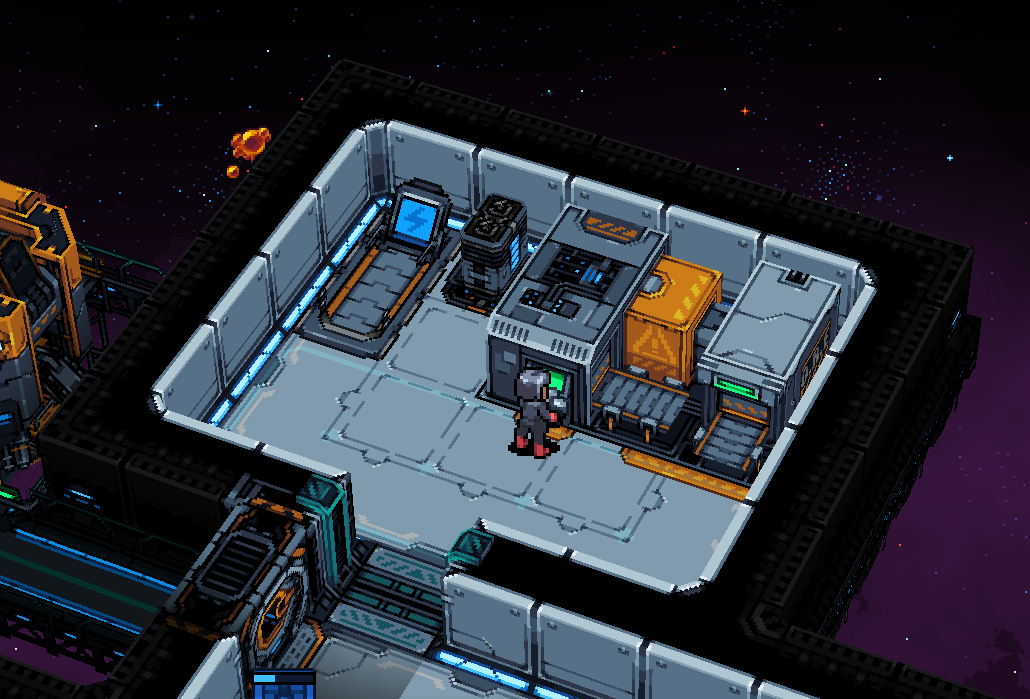
Here’s what our finished ore refinery room looks like:
Your colonists will automatically keep the room powered and work at the refinery, provided there is ore available for processing. The default refinery settings are just fine for now, no need to touch anything until later.
We’ll need to use our first processed Metal to advance the story, but after that it will be our main source of income early in the game.
Wait for your colonist to process some Metal:
Since this is the first Metal we’ve ever obtained, they’re unfortunately going to carry it all the way to the main storage zone. It’s too much work to order them to drop it somewhere else, so just let them drop it back there.
Once the Metal has been dropped off you’ll get another exposition call on the right side of the screen. Click “OK” through it and you’ll be presented with a new objective, “Place Metal in the Analyzer.”
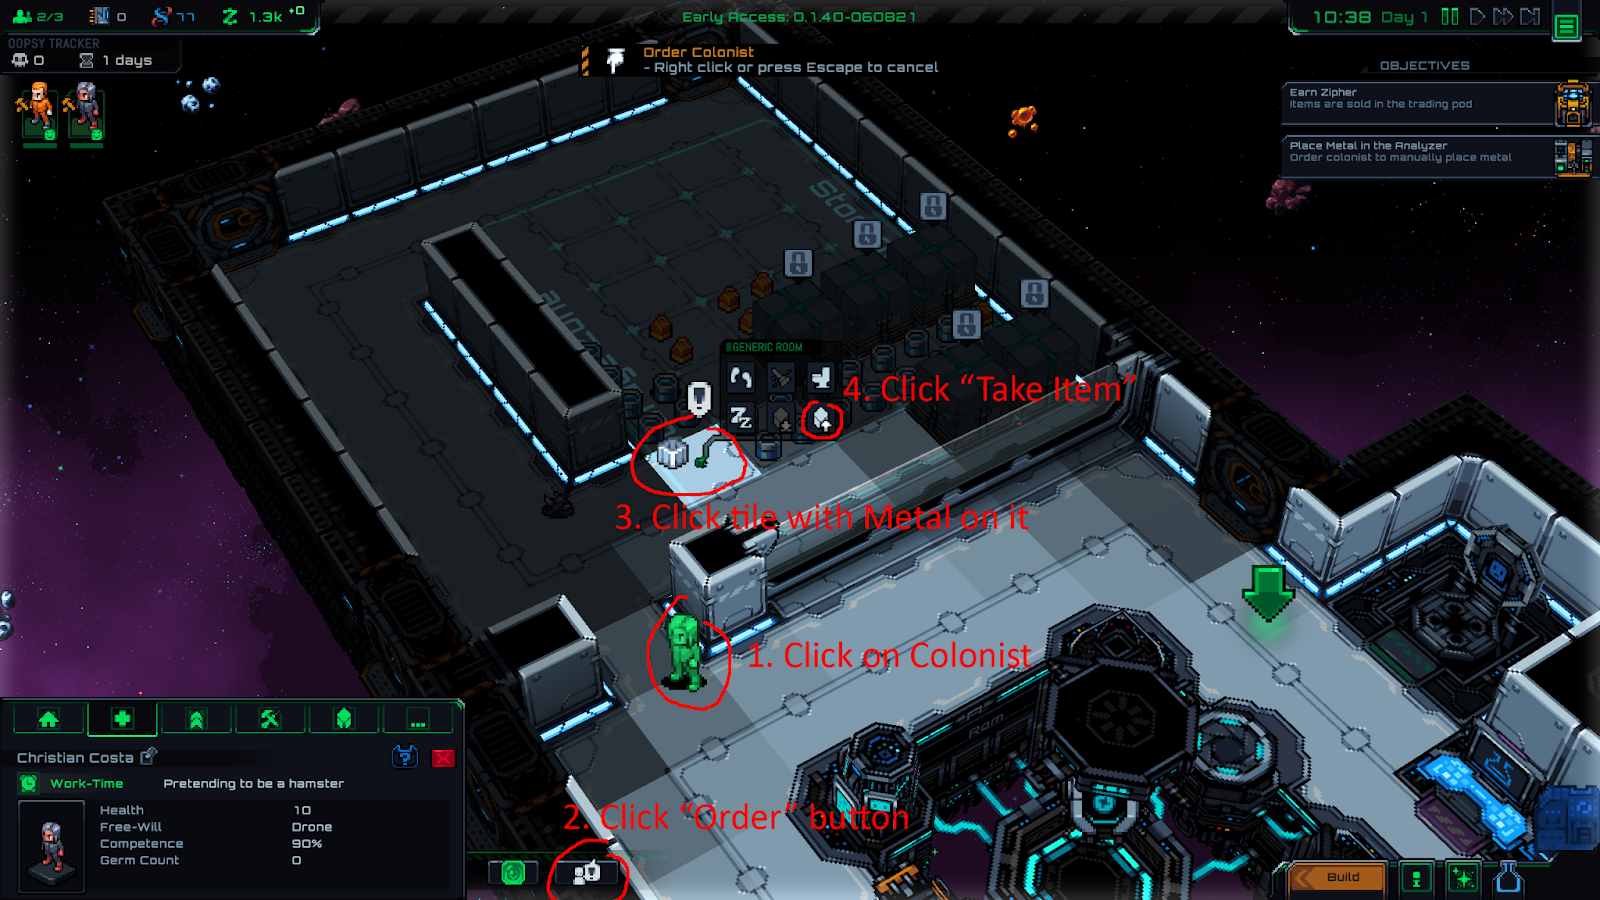
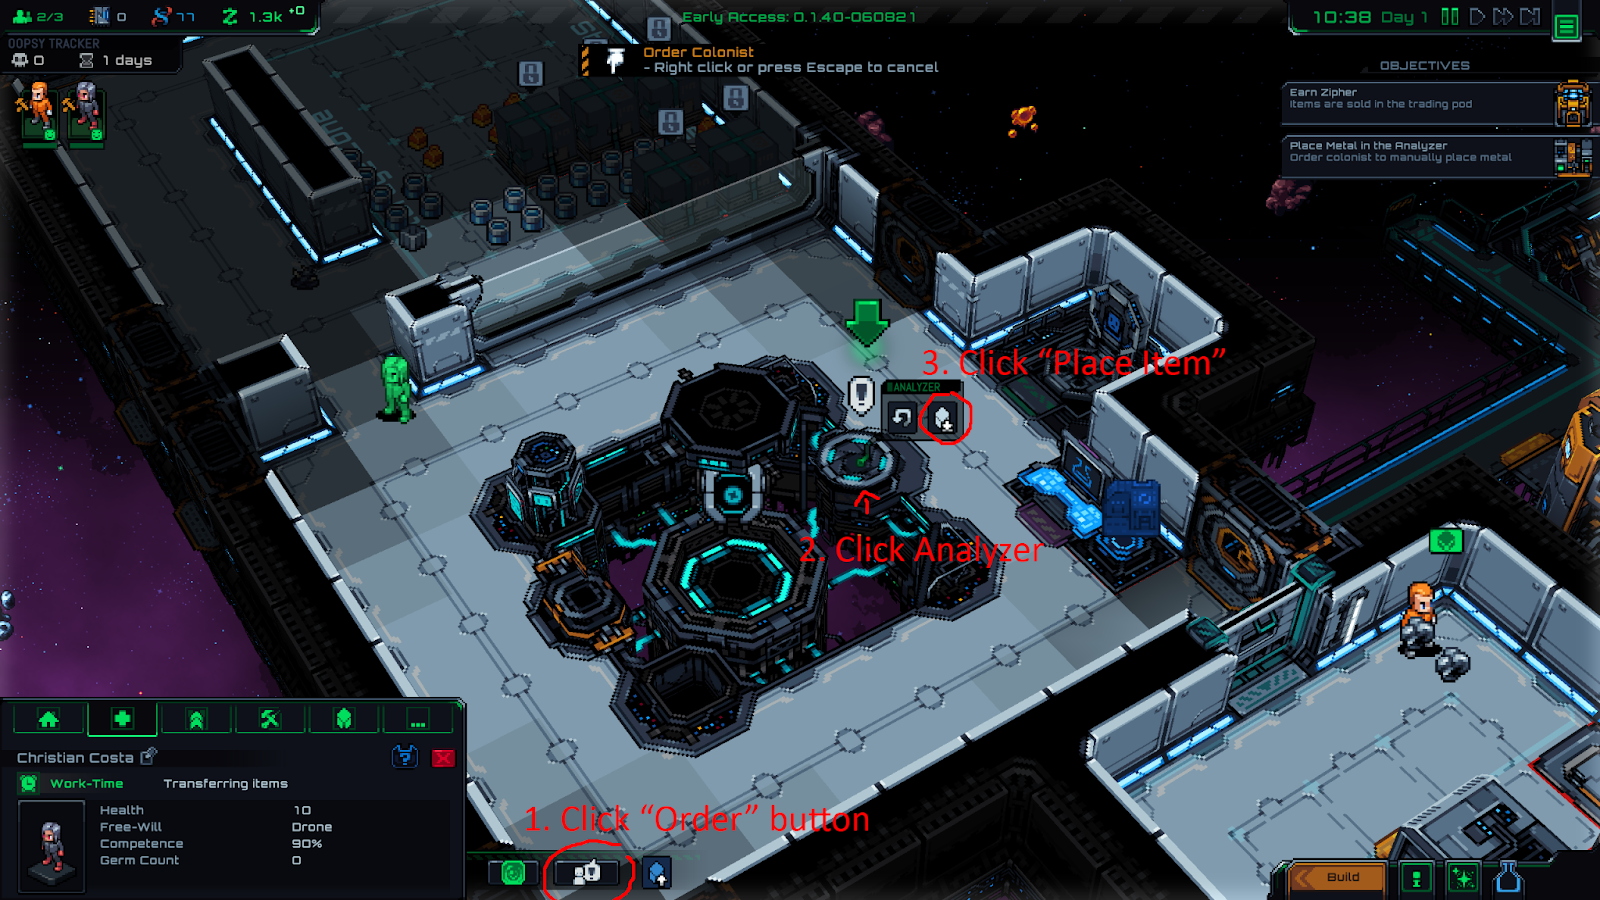
This is super clunky but useful to know how to do – you can order colonists to pick up items. Click on the Colonist, then the Order button; select a tile with an item you want to pick up and choose the “Take Item” button.
This will present you with a small scrolling menu where you can choose what to pick up by clicking on the name of the item.
Next, find the Analyzer. There should be a big green arrow pointing to it for this quest objective. Just order your colonist to place the Metal in it. You don’t have to wait for them to pick the item up before you tell them to place it back down, you can queue both tasks up right away.
If you’ve done it right, you should see these 2 tasks in the colonist’s queue:
By the way, while they’re walking the Metal over to the Analyzer, we should fix our refinery storage so that colonists place Metal there, too.
Left click on the storage zone in the ore refinery room and go to the Inventory tab. You should now see Metal available under the “Items Not Allowed” section – just left click on it to move it to allowed items.
Here’s what your refinery room storage should look like now:
Remember to update this if you start making a different kind of Metal in the future!
By the way, there’s an edit icon next to the room name, beneath the Home/Inventory tabs. If you want to keep more organized, feel free to rename your rooms:
Warp Away
We have our first room built, and now that we’re done with the Metal, the game is now directing us to activate Warp Drive.
!! MAKE SURE EVERYONE IS INSIDE THE BASE BEFORE YOU WARP !!
We can technically stay here and keep mining, but it’s probably safest and quickest to keep moving – we’re on a timer before those old Earth supplies are gone, after all.
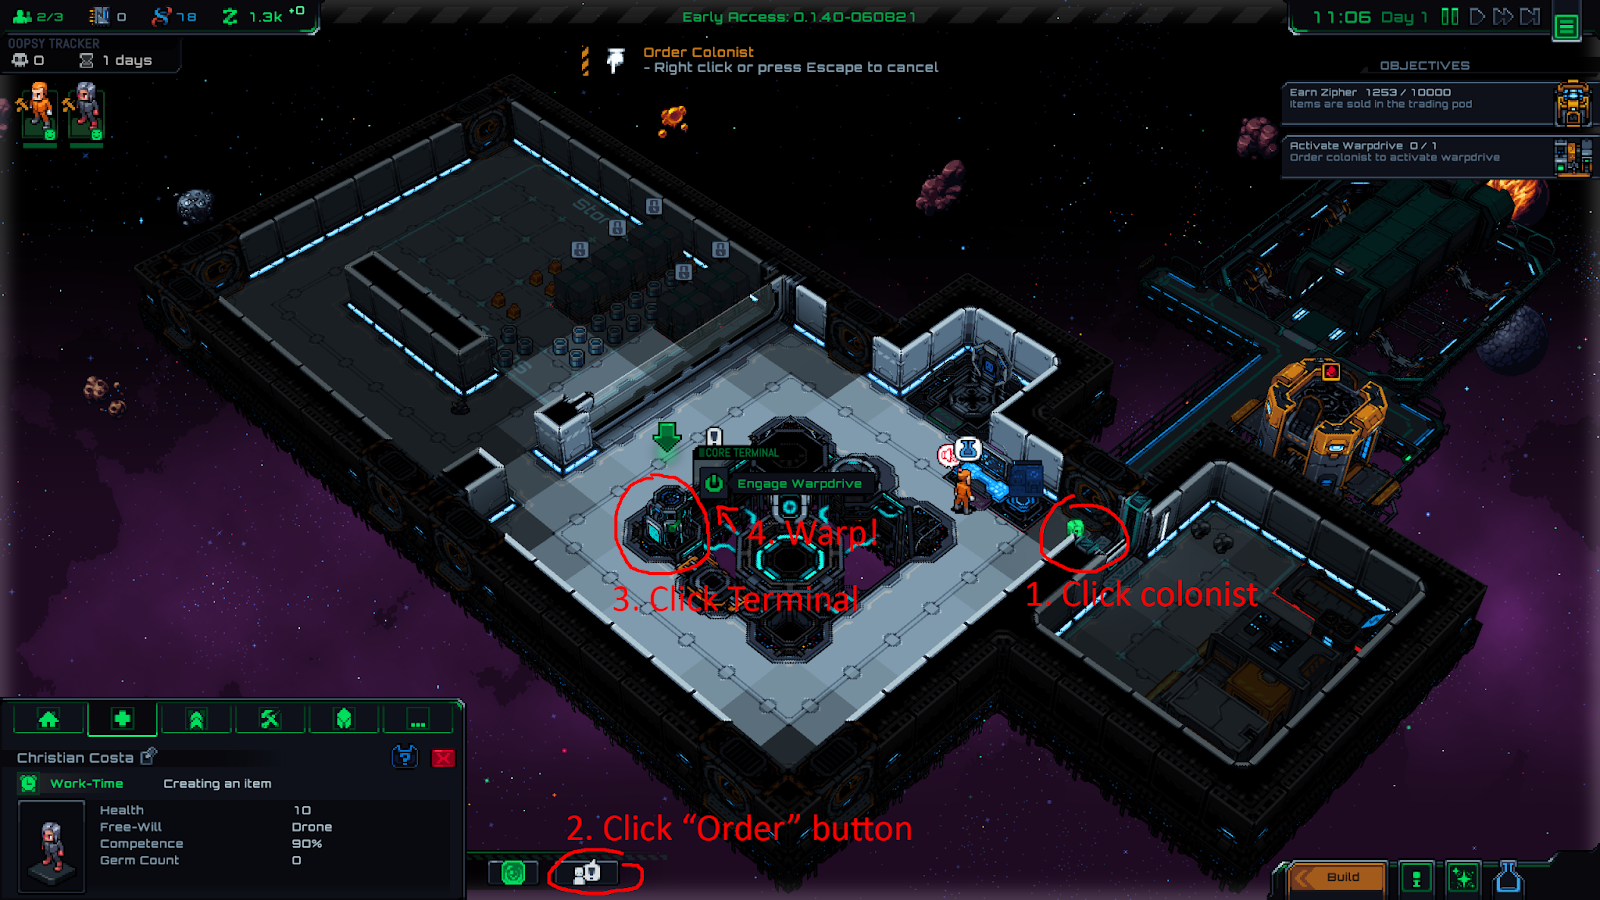
During the tutorial ONLY, you have to order a colonist to activate the warp drive, you can’t just do it yourself. So, just like before – click on the colonist, the Order button, then the Terminal, and choose “Engage Warpdrive.”
After your colonist engages the warp drive, make sure you click through the next phone call you get. Once you click “OK” you’ll warp to the next area.
Let the game proceed for a bit and you’ll get a few more phone calls. Click through all these until you get the “Rescue Civilian” objective.
Your First Contract: Rescue Civilian
Remember all those DNA points that we started with and spent on colonists? You might have noticed a slow trickle of DNA during regular gameplay.
We also get a big boost of DNA from completing special Missions called “Contracts.” So far from what I’ve seen the first few at least are tied to the main story.
Contracts work similarly to Missions, except you get to explicitly assign who should go on the trip.
Click on your starship in the loading dock (the same building you started Mining missions at earlier) and open the Starmap:
Looks different huh? Warping will reset your Missions and give you a new star field to explore.
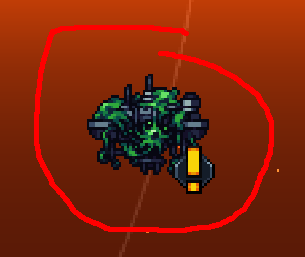
Anyways, the gist of those phone calls is that we need to rescue someone from an Infested Station. Look for a green-covered metal thing on the star map, it should have an exclamation mark on it:
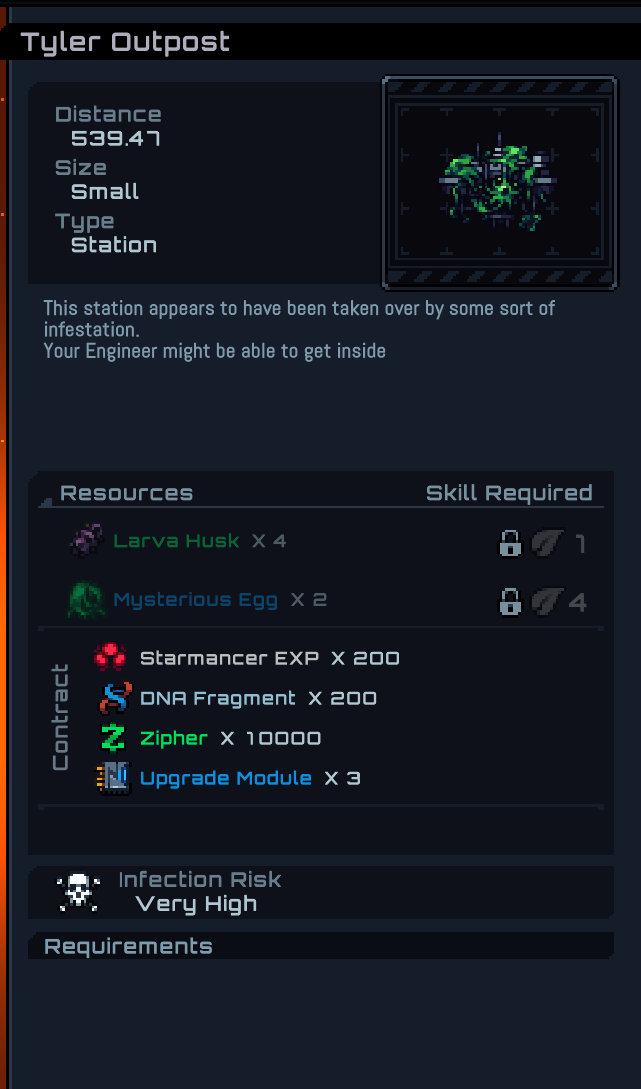
Hovering over the station will tell you more about it. Like it or not, we have to go here next – and I sure don’t like it because the infection risk is “Very High”:
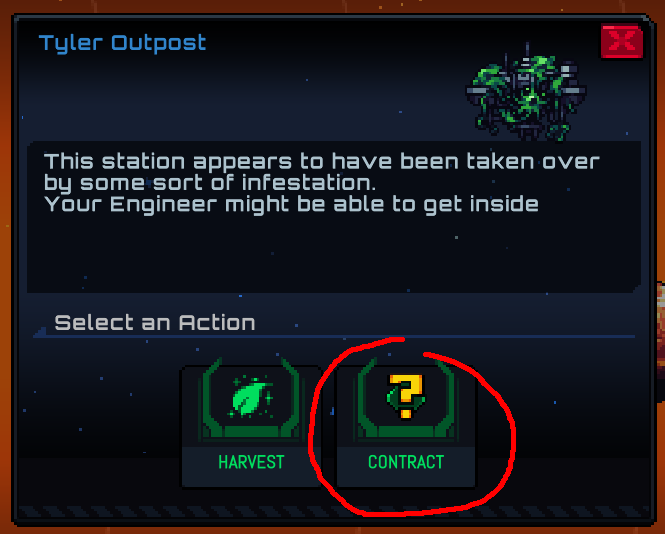
Left click on the space station and you’ll get a dialog box. We want to choose the “Contract” action:
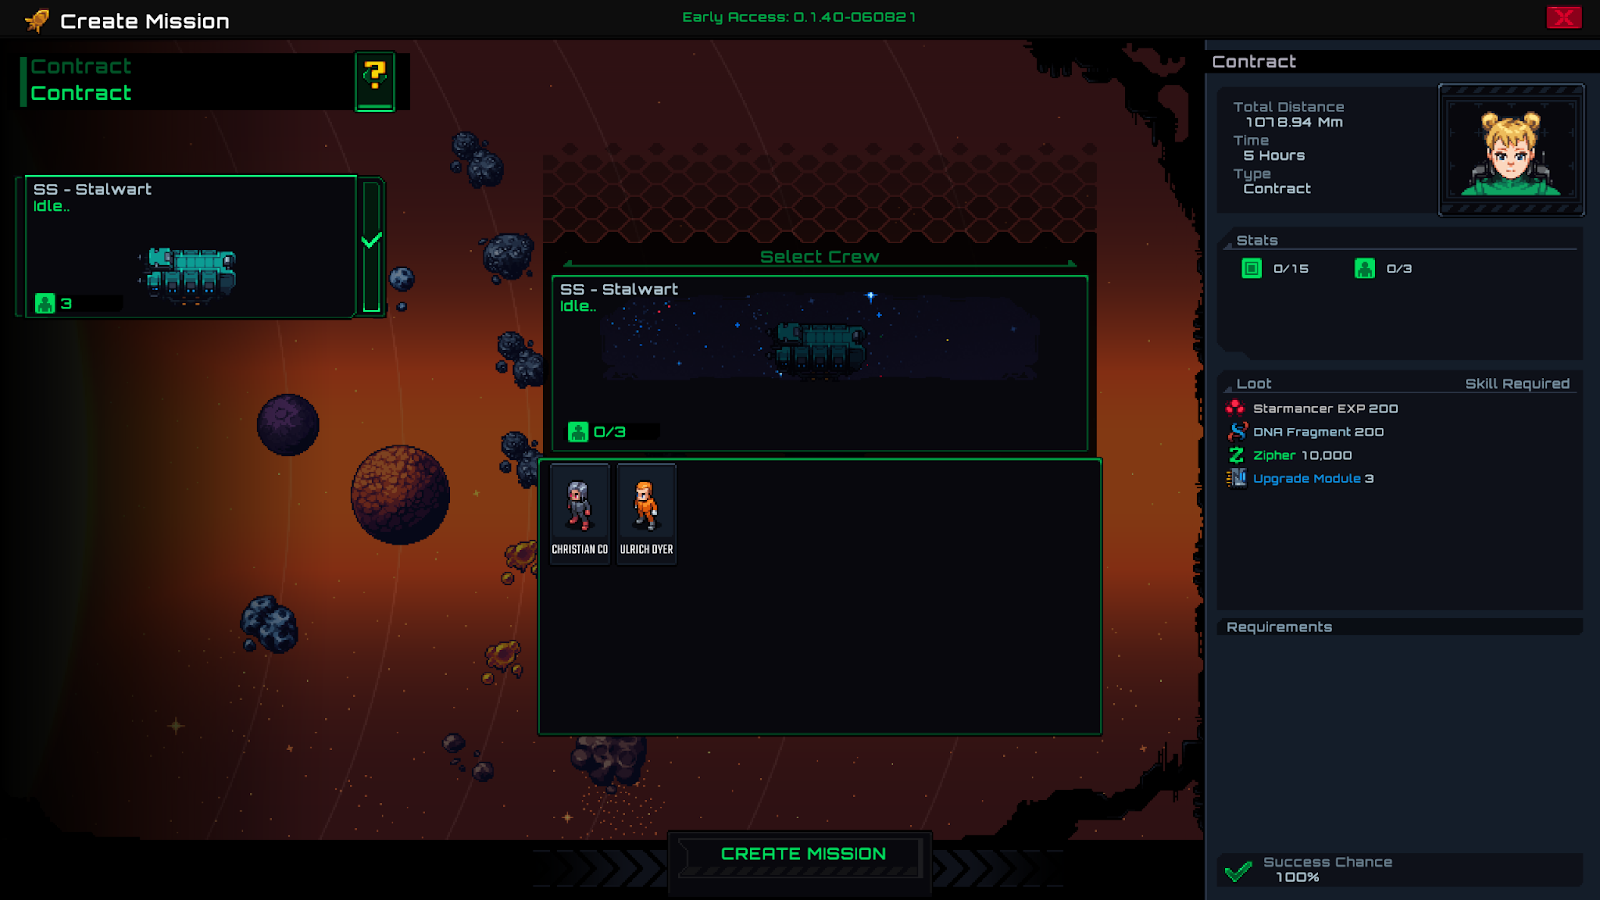
That brings you to this Contract menu, where you can assign crew members by clicking on them in the center panel:
It’s best to send the person you care about the least. They might die, huh?
Choose 1 of your 2 crew members to go on the contract and leave the other spaces unfilled. Since it’s a tutorial contract it should automatically succeed – you can see the success chance at the bottom of the contract info panel as a percentage.
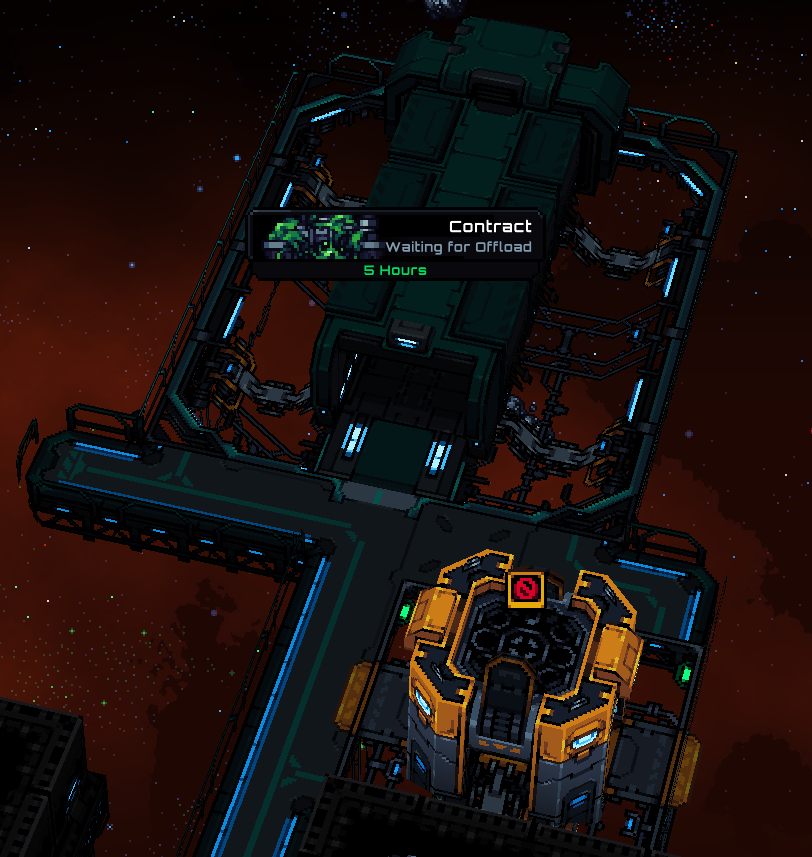
Once you’ve started it, the Contract can be seen as a progress bar on top of the ship:
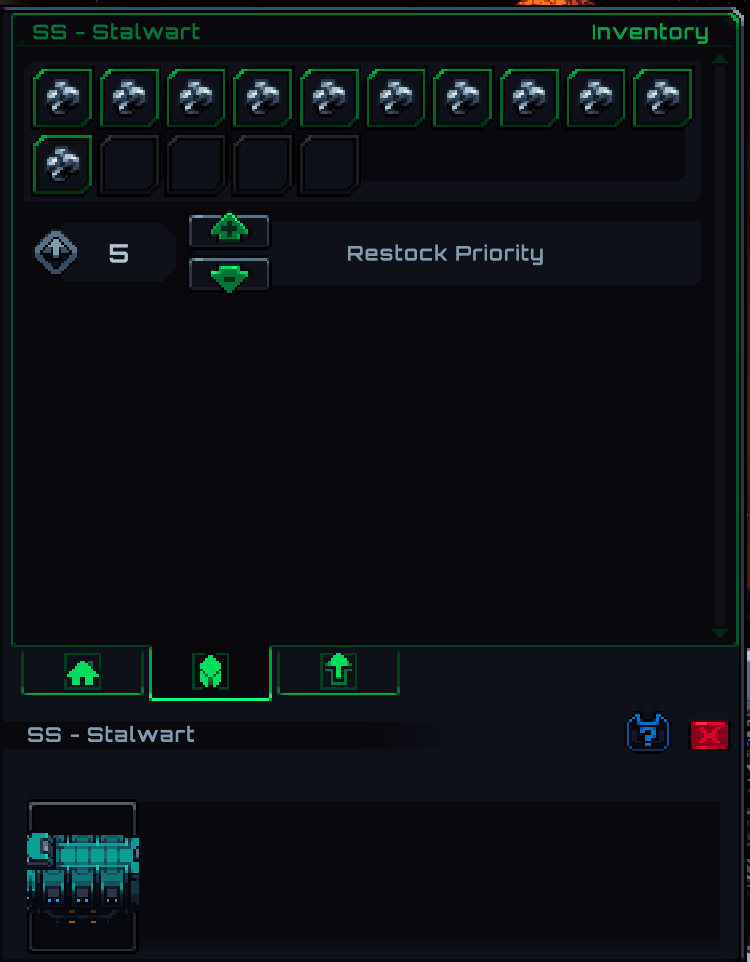
Right now my Contract says it’s “Waiting for Offload”. That means that the starship inventory still has stuff in it (only an empty starship can leave the base). Let’s check it out – left click on the ship, then click on the Inventory tab.
Looks like it’s just full of Metal Ore. Not a terrible problem to have!
All we have to do to remedy this is be patient and let the colonists do their jobs. The Contract will start when the starship is empty and the assigned crew member is ready to go.
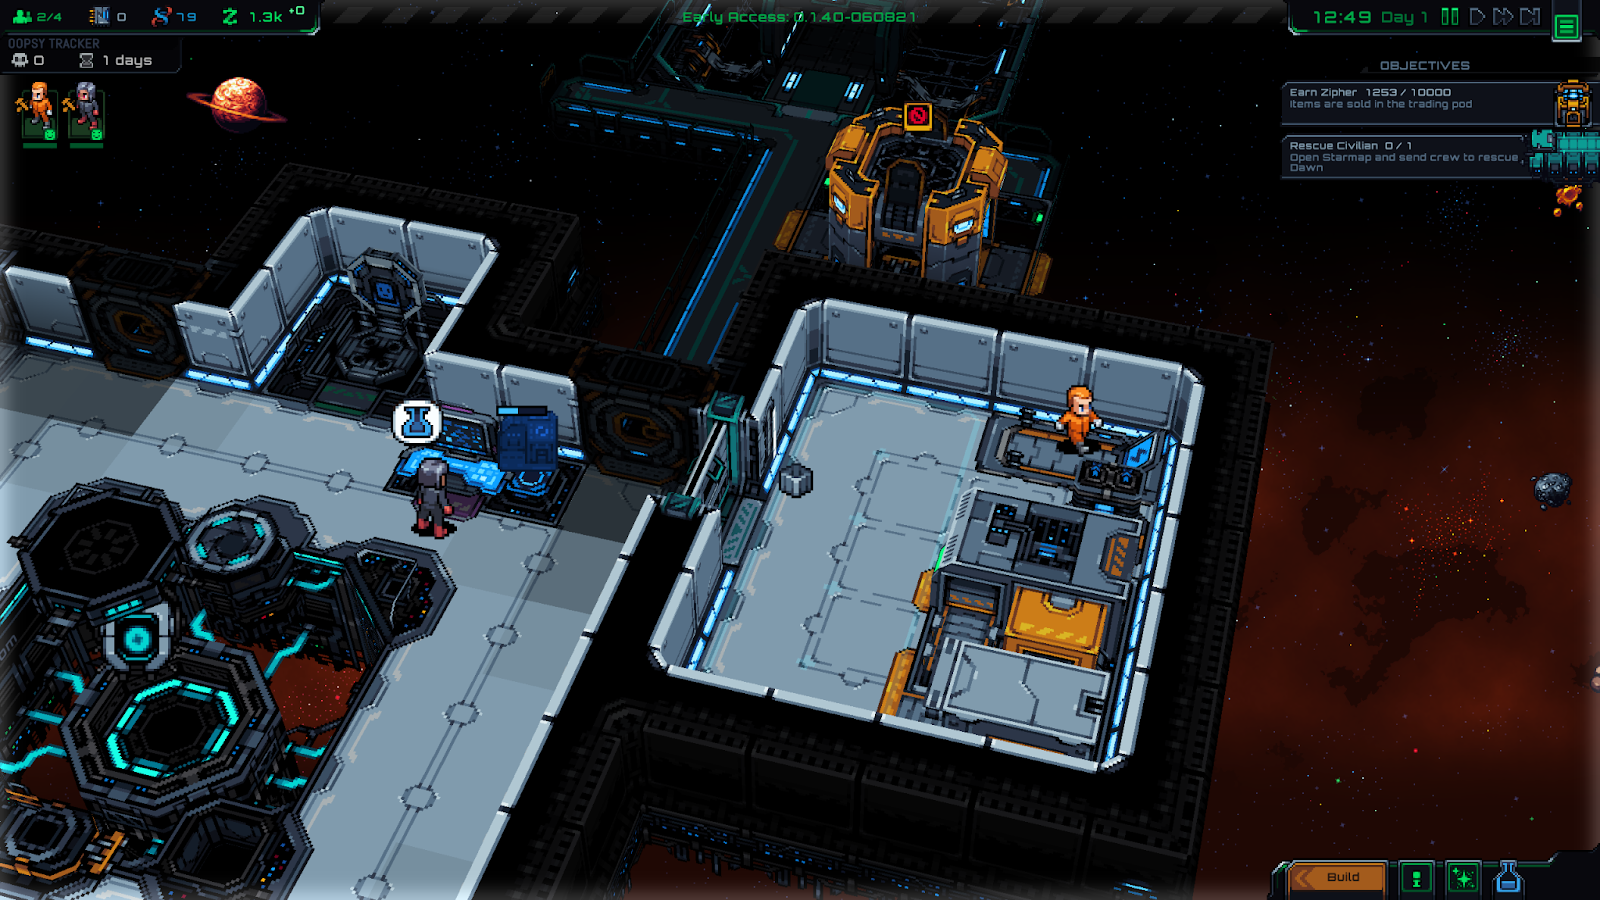
But wait … it’s not happening?
Watch my colonists pretend they have nothing better to do.
Luckily, we’ve already researched the tool to deal with this problem: Employment!
Assigning Colonist Jobs and Priorities
In the long run, you’ll have a few more than 2 colonists, and most of them will specialize in one, two, or three-ish tasks. Remember that a task is a general category of tasks such as Mining, Building, or Workbench (the Ore Refinery). It’s very important to assign them tasks in a priority that makes sense, and disable tasks you don’t want a colonist to bother doing.
Let’s talk about how to do that in the UI.
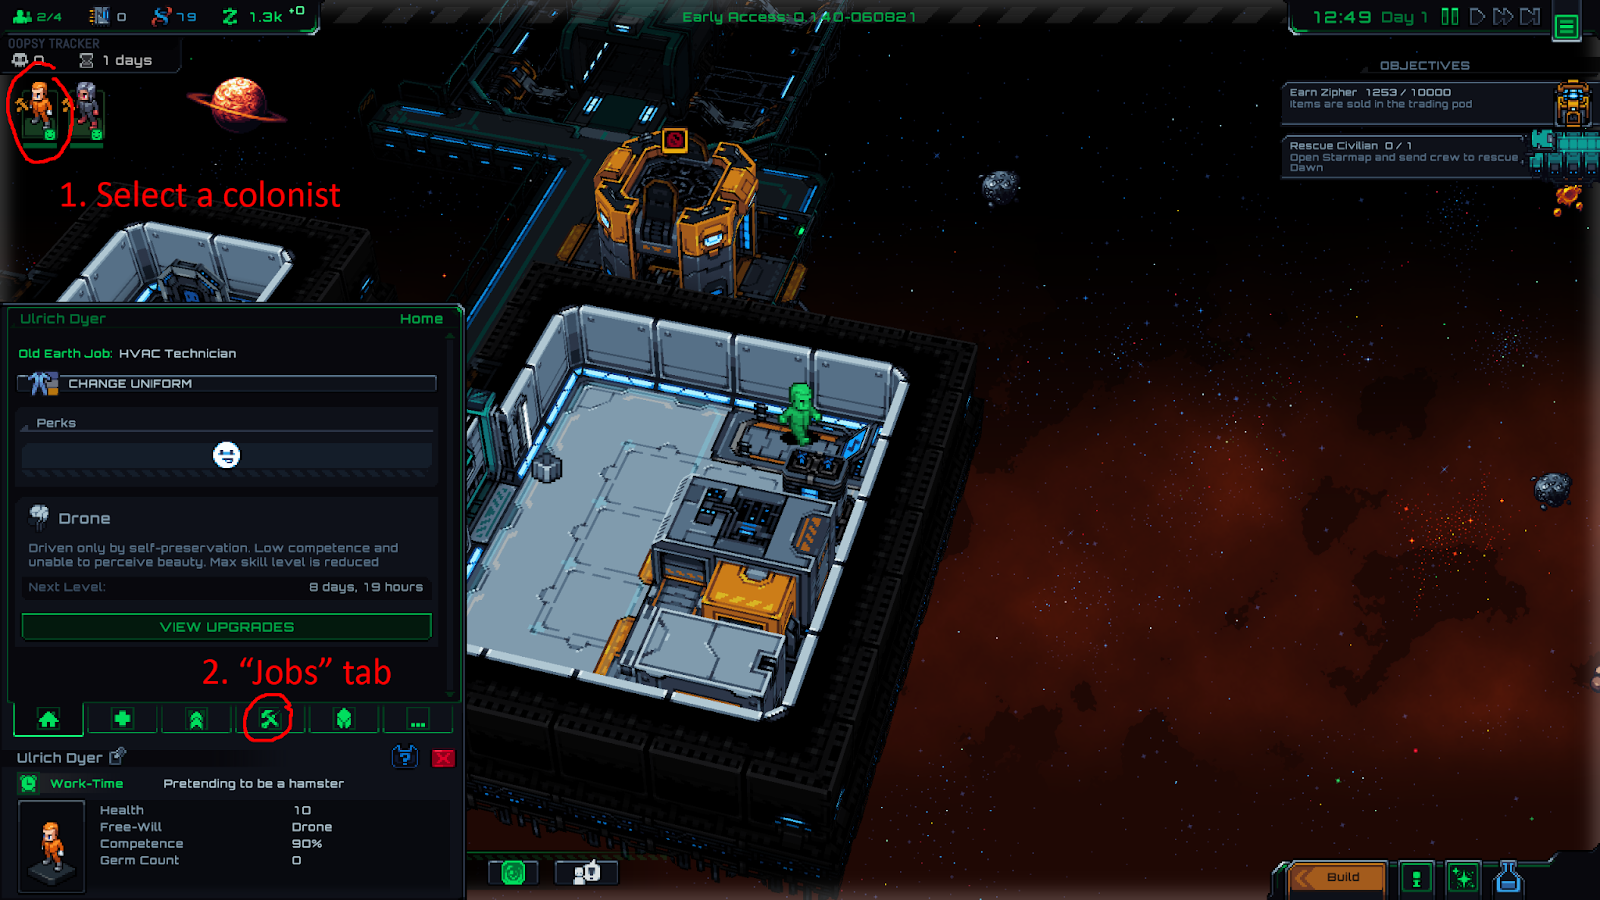
Using the colonist menu on the top left, you can cycle through your colonists quickly. Choose the hammer and wrench icon in the green tabs:
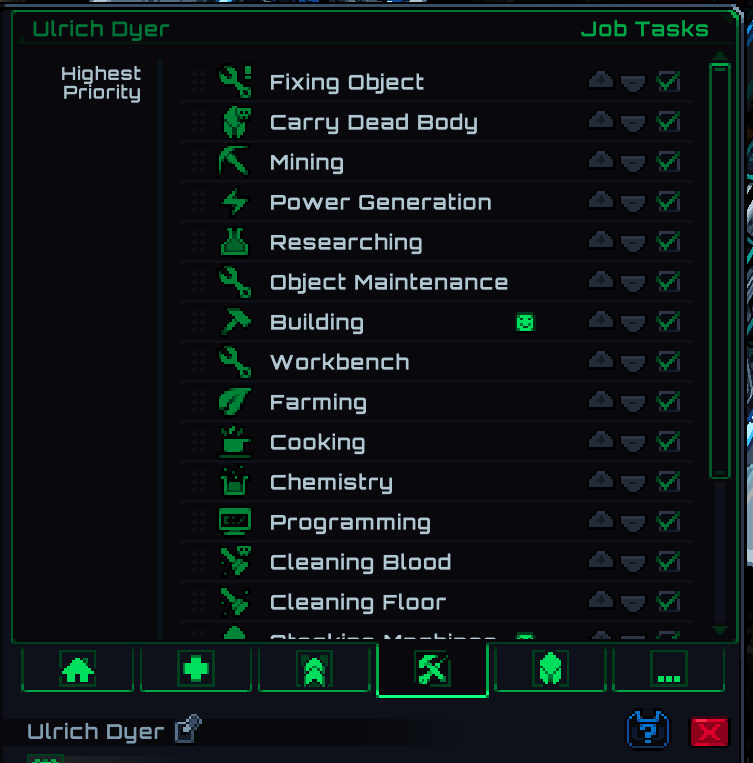
This is what the Job Tasks UI looks like:
Troubleshooting: Can’t see this menu? Make sure you researched Employment at the Research Station / Tech Tree.
Let’s break this UI down because it’s pretty complicated and has no instructions. First, it has a list of tasks, all of these must do something right?
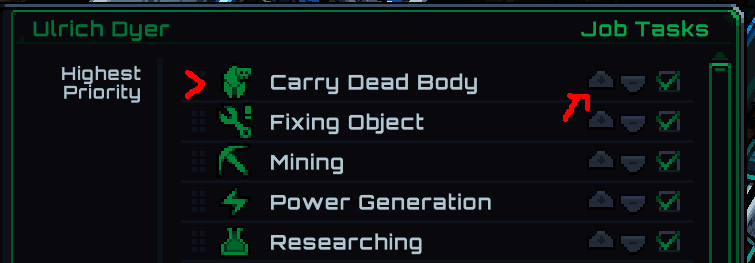
If we click on the up or down arrows, the task will move up or down in the list, swapping places with the task it just displaced. You can also click and drag a task to reorder it, this is probably easier!!
The higher on the list, the more important the task will be to this colonist.
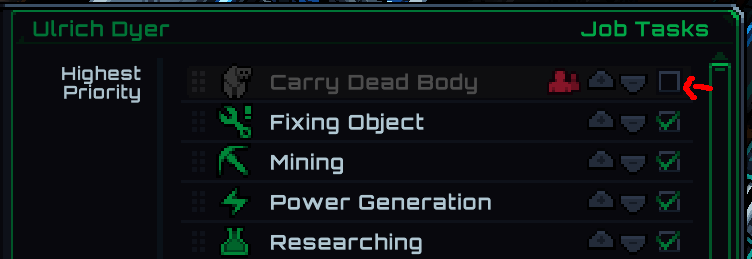
If we click the green check mark, it goes away and the task is disabled:
It’s a really good idea to disable any tasks your colonist Hates so they don’t accidentally do them. Those will be marked with a red unhappy face.
Tasks your colonist Loves, on the other hand, are a good fit for them because it will keep the colonist happier. Hopefully they love doing something essential!
(Here’s an example of the symbols I’m talking about – this task is Loved.)
Keep an eye out for this red group icon, it means everyone has a task disabled and no one will do it. If you see this you should try to enable it on somebody, just in case!
The X on the right is there in place of a checkbox because this colonist Refuses to carry a dead body. So, I can never get them to do it, which could be a problem if we don’t get more colonists soon.
So that’s the UI out of the way, let’s talk about the strategy.
What Job Priorities Should I Use?
The short answer is, this depends on the colonist and the current situation!
If you still have only 2 colonists right now, focus on Stocking Machines and Building for both colonists, Mining for 1 colonist and Workbench for the other. We’ll have enough DNA fragments to get another colonist or two very soon.
(You should set the above skills as higher priorities, unpause the game and read this long explanation while your colonists work on the Contract!)
Below is an explanation of what each task is in case any of them aren’t clear.
Carry Dead Body
Carries a dead colonist back to the Analyzer (near your core) to be respawned. You can’t respawn someone unless they have been carried back or died away from your ship.
This is useful to leave high up because it only applies when things are going badly and you don’t want to be messing with your job trees at that point. But most colonists find seeing dead bodies upsetting which could make things worse, so once you get a colonist that likes to carry bodies, you should disable it for the others.
Fixing Object
Repairs objects that are broken. Your Engineers who work at the ore refinery (Workbench) will be better at this than others, so make sure it’s high on their list in case the break is a bad one.
Mining
Goes in the starship to complete Mining Missions.
It’s probably better to have a sturdy miner than a fast one because they’re off doing dangerous stuff, eh?
Power Generation
Running on treadmills to produce energy to power machines and lights. Useful for people who will be near powered machines.
Also useful for people who have a lot of spare time or run around a lot, like a full-time machine stalker.
Stocking Machines
An important task to have someone doing, this involves moving items around, onloading and offloading the starship, putting Biomass into a Food Brick Factory, etc. It keeps the station running!
Researching
Stands at the Research Station to unlock new things at the tech tree for you. Very useful, but takes up a lot of someone’s day!
Wait until you have 3 people to research any more, it will be soon.
Object Maintenance
Spends time standing next to objects that are not broken and claiming it’s “maintenance.” I guess it probably also prevents objects from breaking as quickly, but honestly, my objects still break.
Building
Builds and destroys anything that you’ve marked or blueprinted. This is a base building game, and we do need builders!
Building is very time consuming, so if it isn’t someone’s main priority it should be lower than other tasks. But there will also be times where we don’t have building to do, so our main builder can do other things like run the workbench or stock machines in their spare time.
Workbench
This involves working at the Ore Refinery, and possibly other machines that I don’t know much about. It takes up a lot of someone’s time but can only be done while the machine is stocked and powered, so Stocking Machines and Power Generation should be slightly lower on their list.
It uses the Engineering skill, so it has good overlap with Object Maintenance and Fixing Objects, your workbench colonist should do all 3 of these things.
Farming
Planting crops should be an early priority after you’re done with this guide / the tutorial, because without proper nutrition your humans could get upset. They can eat wheat raw, and you start with a bunch of wheat seeds – then all you need is water.
Cooking
You’ll need the Kitchen tech tree research unlocked and then money to build the stuff in there. Cooking has a % chance to fail, so in the early game you’ll probably lose a few crops while the colonists level up. It’s probably best if you put farming and cooking on the same person and close together in your base.
Chemistry
Chemistry and cooking have the same base skill, so it’s probably easiest to double up on them with one colonist. This probably has something to do with the Chemistry Lab tech tree, but I don’t know much about it yet so I can’t give much advice, sorry!
Programming
Similar to the chemistry tree. It has its own skill to level up, and a different type of mined item (Silicon). The programming terminal isn’t set to auto-produce at the start, so you’ll either have to manually order a number of data chips or set it to infinite production yourself.
Cleaning Floor
Don’t underestimate how nice it is to have a clean floor. Especially if your humans become self-aware.
Cleaning Blood
Dangerous. Not everyone wants to do it, so look out for someone who has Morbid Curiosity. If they’re comfortable with blood that’s useful for you.
Carry Biowaste
Nobody wants to do it, but someone has to. And it should be high on their list.
Who Should Do What Jobs?
I’ve found it easy enough to live in the early game on about 3-4 characters, and 5 was a lot for me to handle by the time I unlocked it. You should start slowly until you feel comfortable taking on extra colonists.
So here’s what I recommend for the first 4 colonists, after this you can branch out and try new stuff:
- The Miner, who mines, stocks machines, and builds.
- The Engineer, who does the workbench, generates power, stocks machines and builds.
- The Chef, who researches, farms and cooks, stocks machines, and can later do chemistry/programming as needed if you don’t get a specialist in those areas sooner.
- The Errand Human, who carries biowaste, cleans floors, generates power, stocks machines, and builds. (It’s convenient if they’re also able to carry bodies and clean blood, just in case?)
We can leave Carry Dead Body near the top for everyone who is capable of doing it until we get a dedicated body recoverer with the Morbid Curiosity trait.
Otherwise I recommend sorting the priorities in roughly the order they’re listed above for each role, and disabling any that don’t need to be done (such as Research for our Miner, we don’t want them wasting time at the table when they could be out mining).
BTW, did you unpause yet? Hopefully you’ve got your colonists moving by now 😉
Finishing the Contract
Once you’ve set your job priorities, you can (hopefully!) just wait for the starship to be emptied and your colonists will eventually complete the Contract.
Help! My crew member’s not going on the Contract?
If your crew member still hasn’t gone on the ship, and it’s been an hour or two in-game, here are some things you should double check:
- Do they have Mining enabled and high in their Job Tasks list? (If not, you may have to temporarily enable it so they can go on the contract – or cancel the contract and send someone else.)
- Check the ship’s inventory. Is there metal ore in there? Make sure someone has Stocking Machines on and set to a high priority in Job Tasks. (It’s helpful to have that metal storage zone near the entrance too.)
- Are they blocked from getting to the starship? Is the Airlock locked (a grey lock icon over the top of it)?
- Did you confirm the Contract and assign a living crew person to it?
- Is it work time in the current schedule? (Look at the colonist list in the top left, if you see a grey Z or a green fork/knife then it is their free time. If you see an orange hammer/wrench it’s work time.) If it’s not, just wait a bit and your crew member should go when work starts.
When the Contract Is Done
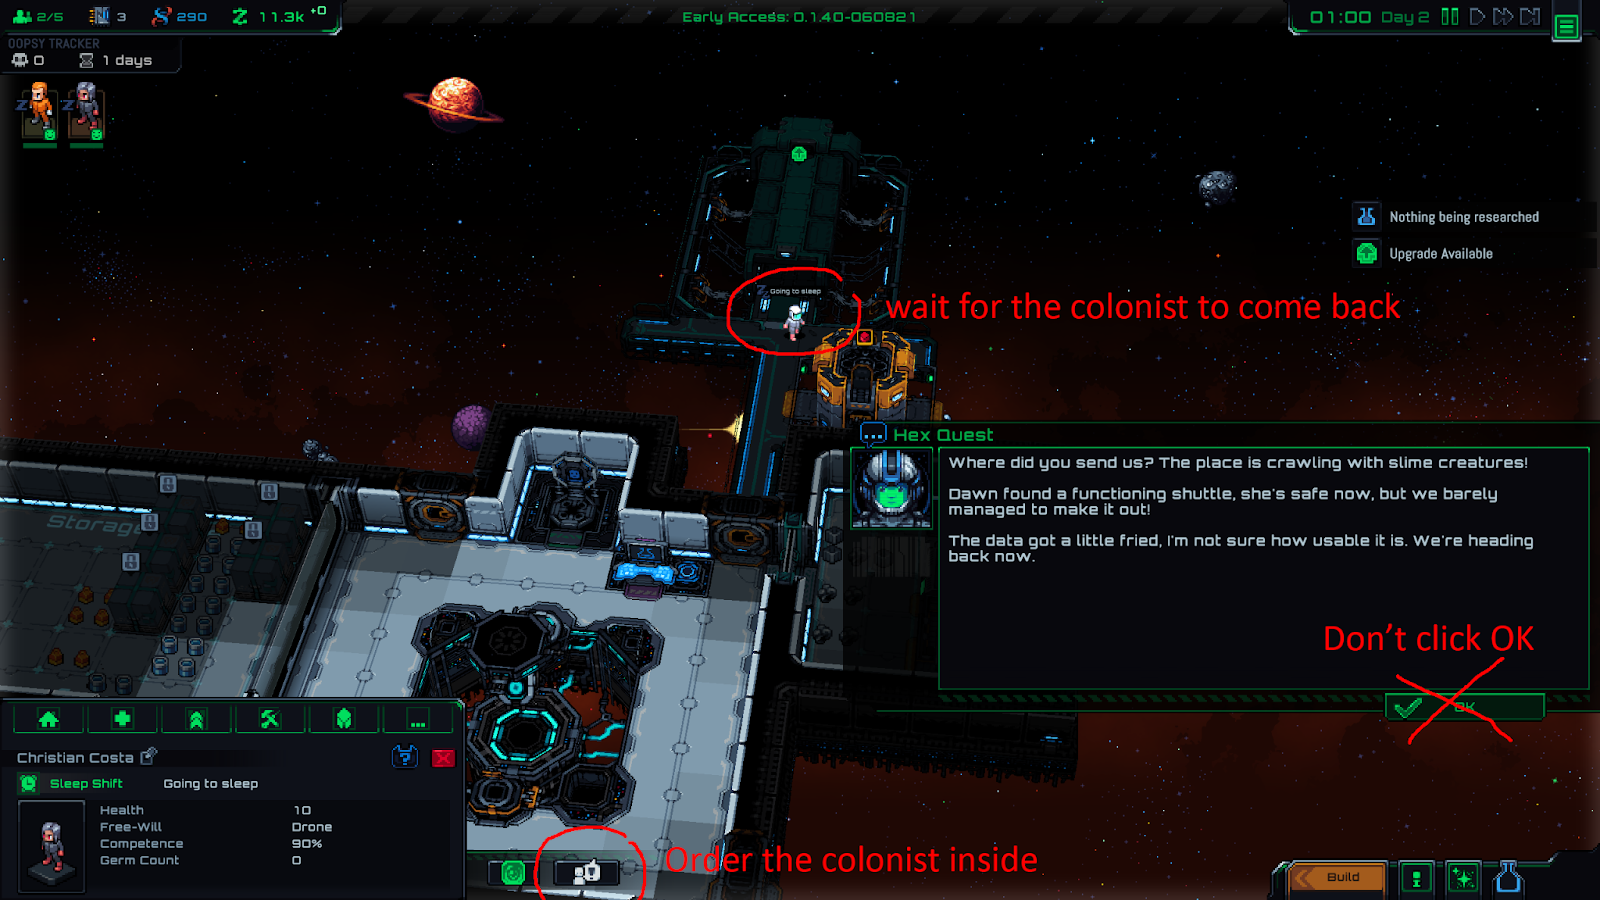
You’ll get a phone call about an hour before the ship lands. I recommend not taking it until the ship has fully landed – and if you did take it, don’t click OK all the way through.
Order the colonist inside when they get home, and prepare to click through the rest of the dialogues. You may have to progress time a little if nothing seems to be happening.
(Hint: you want this menu!)
Remember you can press SPACEBAR to pause the game! Good luck!
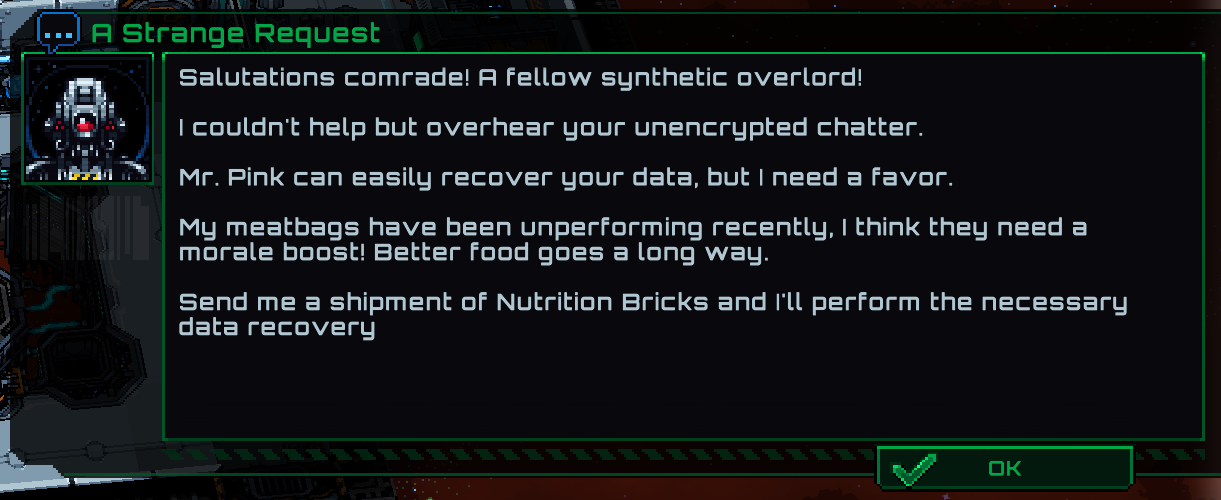
“A Strange Request”
After you handle the infested station situation, you’ll meet this gentleman.
That’s it for the main walkthrough. I’m going to give a little more advice from here on out on specific topics but the basic controls and gameplay are up to you.
Starmancer is a base builder, so have fun building your base!
What should I do now?
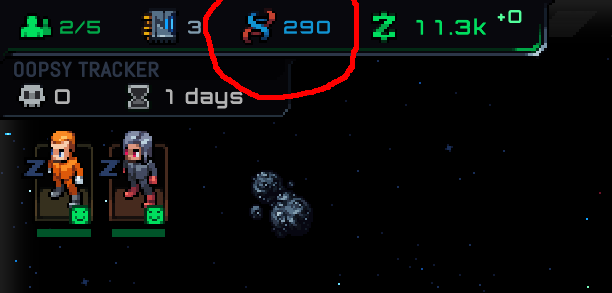
Check your DNA fragments count. You should have enough for at least 2 good colonists:
After your 3rd colonist is chosen, you won’t be able to freely re-roll colonists anymore. You get 3 re-rolls a day for a total of 9 new options each day – so be prepared to work with what you get for #4.
You won’t be able to warp again until you finish “A Strange Request,” so you’re limited to what you have on the current starmap. Focus on mining Missions and gathering resources until you have enough Nutrition Bricks to complete the next Contract. With 3+ colonists you should be done in a day or two once your brick factory is built and working.
How do I sell stuff?
If you didn’t build anything extra and followed this guide, you should have a little over 10k Z in the bank ready to build. But you’ll inevitably need more!
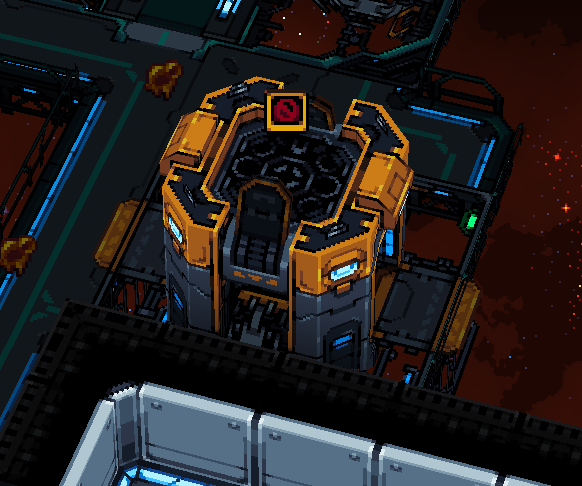
Remember the Trading Depot we built and did nothing with?
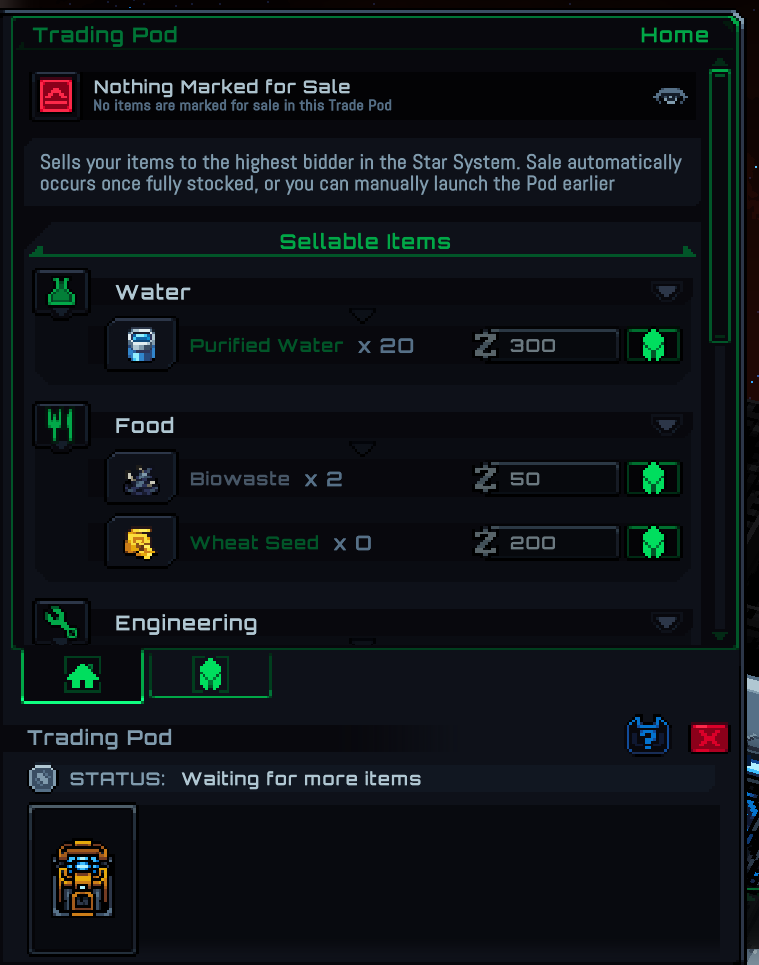
Left click on it to see a menu with a list of items that can be marked for sale:
Scroll down to find the Engineering items section, and click the button with the Z icon next to it. (This is how much each unit sells for, so 300z per Metal):
The Metal is now clearly marked for sale:
You probably don’t want to sell all of your food and water supplies, but if you need quick cash and don’t have much Metal Ore left available to mine in your area just try mining and selling whatever raw resources you can get your hands on.
Some items like Pendants and Gold Pots will be sold automatically because there’s no other use for them, and you can find them as mining mission rewards.
What should I research next?
The Waste Recycler and Food Brick Factory, if you haven’t finished researching them yet, are required for the current Contract – so you should get that done ASAP!
Crops and Kitchen Objects look like the next most important thing … but they have a prerequisite in order to grow: carried or piped water.
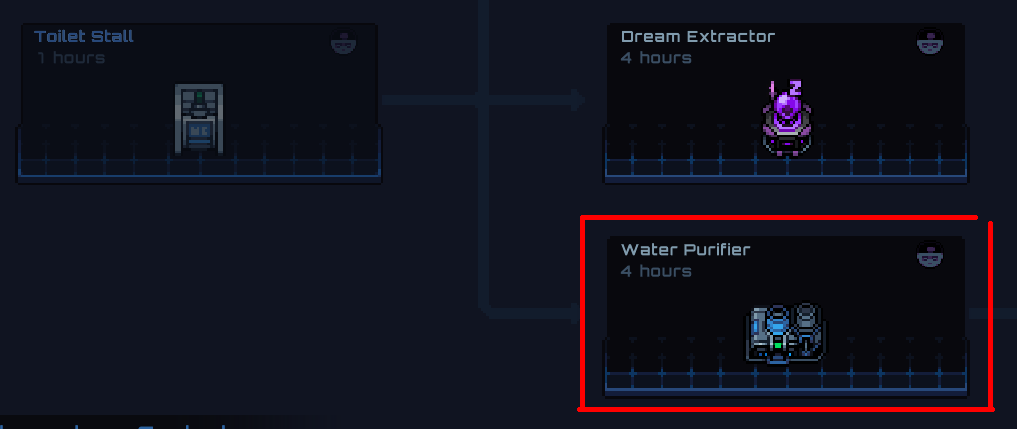
At first we can only get water by using our Earth supplies, or mining Ice from asteroids and letting it melt. But the Ice will melt into Dirty Water, so we’re probably going to want to build a Water Purifier:
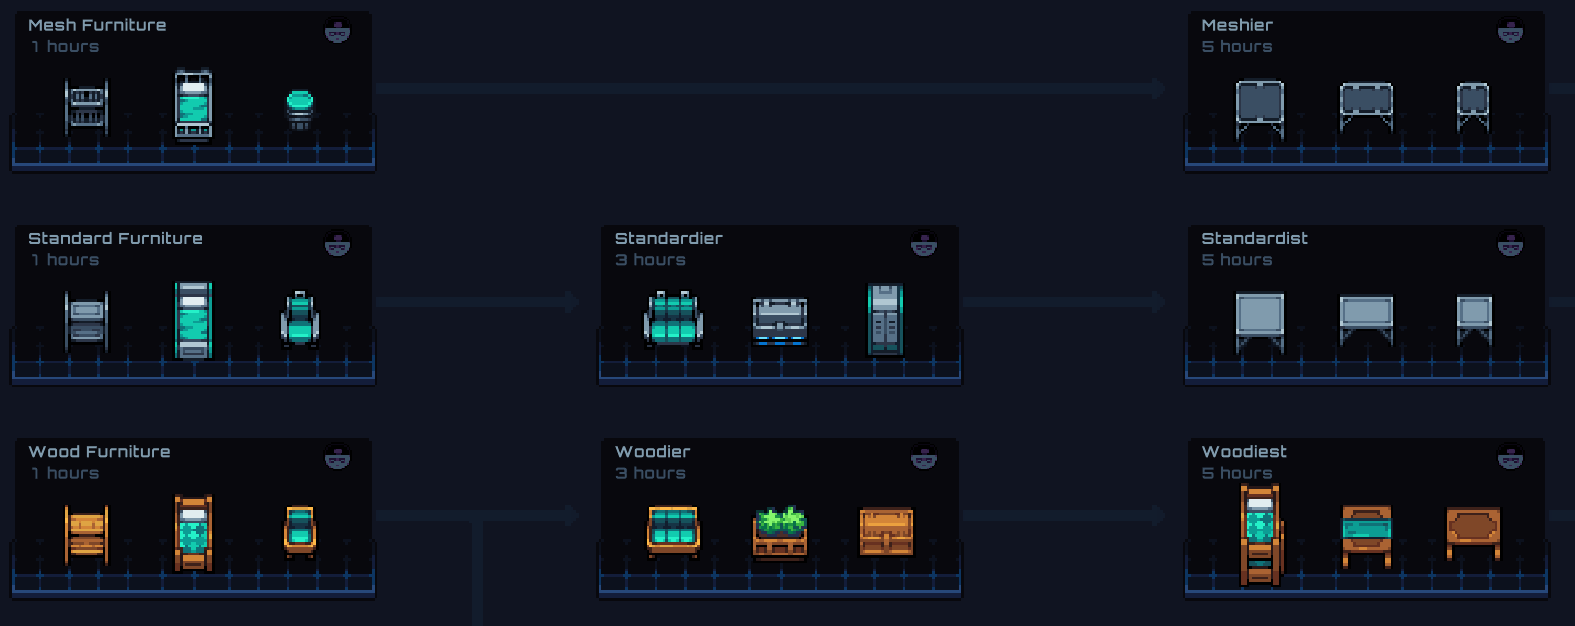
Decor is useful to build early and makes your base much more pleasant to look at. I like the Standard or Woodier lines, colonists can sleep and relax on the couches from the middle tier upgrade and they’re pretty cheap to build.
Job Scheduling and Rules of Engagement will become helpful to fine tune your base and mitigate disaster, but you can probably skip on them until you have your basics of living. Just don’t leave it too long!
Last but not least, the Reclamation Probe (also found under Station Development) is cheap to research, doesn’t cost anything and will give you the occasional free reward if you remember to check it. So it’s pretty worthwhile if you get it early and check it every few hours.
What should I build next?
Your colonists should still have enough food to last the next few days before they start wanting nutrition, so you don’t have to worry about it right away.
Work on getting a waste refinery room to complete the next Contract, and some basic living essentials: a bathroom, some couches to sleep / relax on and eventually a proper bedroom. A power generation room with lots of batteries is also a really good idea, get your ship on a network early so you don’t have to put a treadmill in every room.
I guess having a second outside entrance to your base might be helpful in case of emergency? But you’ll have to remember to lock it when danger shows up, probably, too.
Base Building Tips
1. Remember to replace Airlocks with Manual Doors once they’re connected to your base. This is the only way to make the interior base really usable, as your colony gets bigger colonists will pile up at Airlocks and die!
2. Build an empty room and then put the objects in it after. Colonists can’t move past objects once they’ve been built, and they sometimes prioritize building objects before walls (but will always build floors first). You might end up being unable to build the room’s back walls because there’s already some big machine in the way.
3. You can RUN WIRE underneath a wall, but only before it’s built! Once it’s built you would have to destroy the wall, place the wire on the floor and re-build the wall. This also applies to water/liquid pipes. Colonists will NOT place wiring before walls, so build your floors and wiring first, then manually add walls after the wires are completely built.
4. Be sure to plan out the room dimensions by checking the size of the objects you want to place before you let the colonists finish building, have a plan for how you want to lay stuff out. You can also delete anything that hasn’t been built for free, but once it’s built it takes a colonist’s time to remove and doesn’t refund the full cost.
5. Don’t forget about Storage Zones. When you run into new items remember you can and should assign a zone to it unless you want it to fill up your main storage.
6. In some circumstances, vacuums (rooms without oxygen, or floors without walls exposed to space) can be really useful. There’s no heat and no noise in them. So if you have machinery that generates a lot of noise or requires a cold room, putting that stuff in outer space behind an airlock is not a bad idea.
7. There are some buildable items in the “DEV” tab that do nothing, as far as I know they’re still being worked on. Don’t waste your money on building them unless you’re rich.
Emergency Preparedness Tips
You’ve probably already experienced an emergency by the time you got to the end of this guide, but in case you didn’t, congratulations! You will soon.
1. Remember you can press SPACEBAR to pause and unpause the game.
2. Dead bodies are upsetting to most people, so seeing one might cause a human to go a little haywire and go on a small killing spree. Having a coroner who has the Morbid Curiosity trait (Loves Carrying Dead Bodies and Cleaning Blood) is a great idea – you don’t even need to keep them alive when your colony is doing well, just be sure you have them ready for when it isn’t.
3. The killing sprees happen due to Morale, which is under the “Health” tab when you’re looking at a colonist’s info panel. If 1 or more Morale bars are deeply in the red, this is a bad thing!
4. If someone’s morale is low and seems like it will get worse, you can try to kill them before they get so angry they stop listening to you. Just order the colonist back to your Analyzer (“Return to Source”) and you can re-grow them at your convenience. They’ll lose a bit of skill but it doesn’t really matter.
5. As you get over 4 colonists the risk of traffic problems and suffocation increases significantly, if somebody dies unexpectedly your base can go downhill really quickly. Keep an eye on your airlocks, try to play on a slower speed when you have lots of building going on and watch for warnings about suffocation. If you have to, order colonists who are waiting for the airlock to walk to a different tile to get them out of the way of the one that’s suffocating outside.
6. Most colonists will try to fight threats that are immediately in front of them, but they may or may not win. If you’re worried for their health, order them to walk inside the base and lock the door behind them! A full health colonist can usually fight off 1 enemy on their own without much trouble. Don’t be afraid of sending your least valuable colonists in to fight, they can always come back later.
7. Check your colonist’s info panels after combat, they might have new “traits.” If they’ve been fighting certain enemies they could get infected with something nasty …
8. Look at your first few space stations as learning exercises, they will probably crash and burn until you get the hang of it. Remember, there’s no cost to starting over except time and patience!
Base Building Example
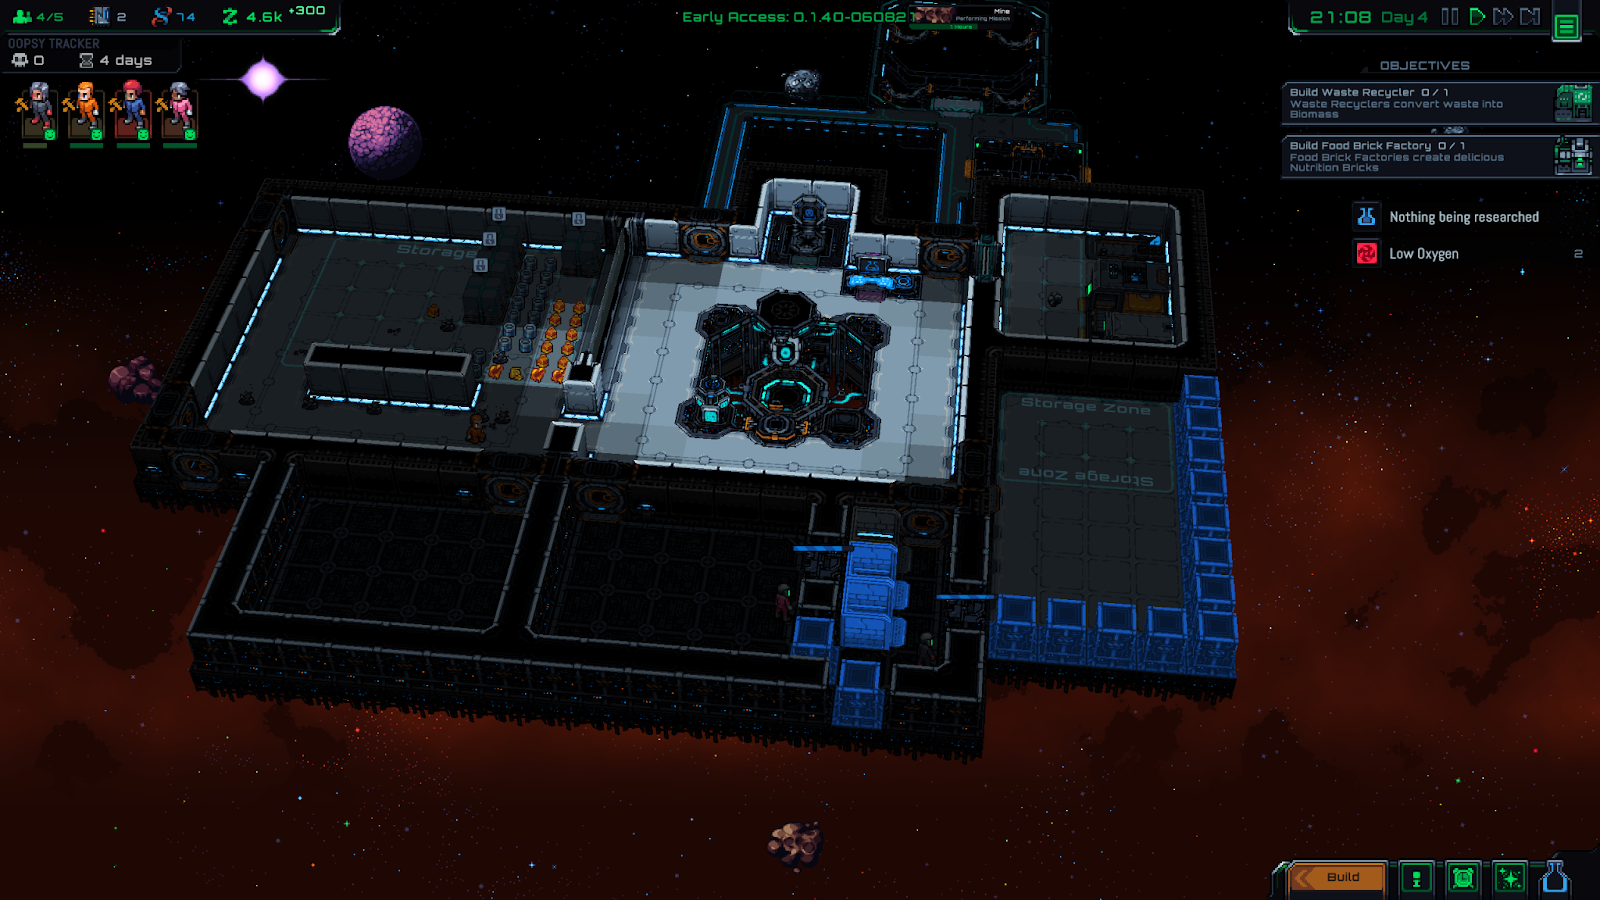
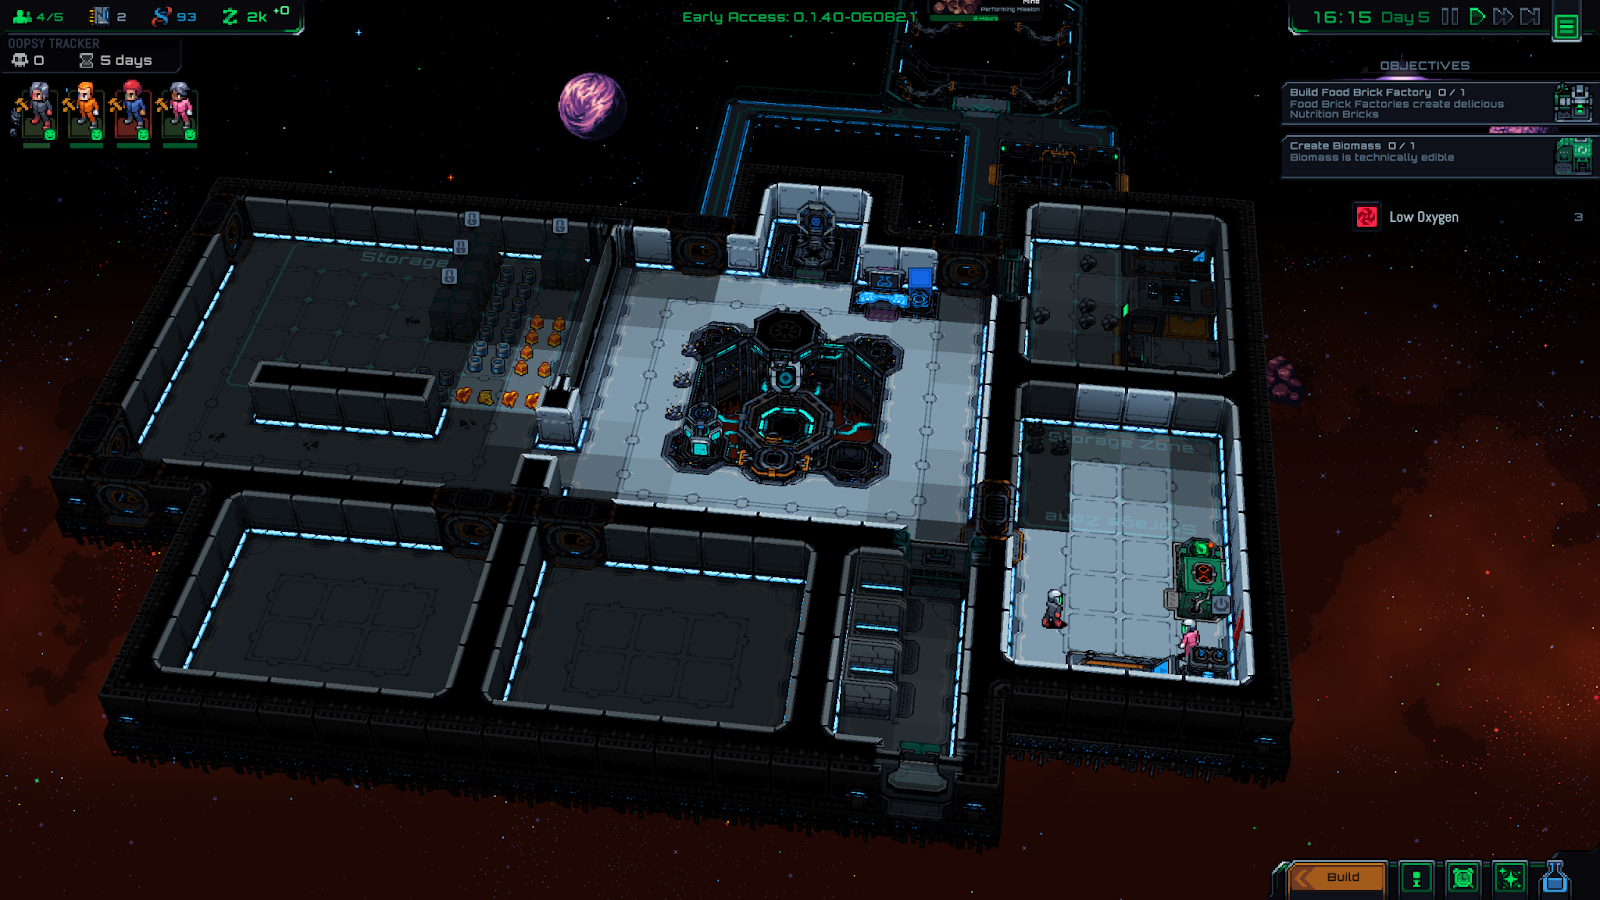
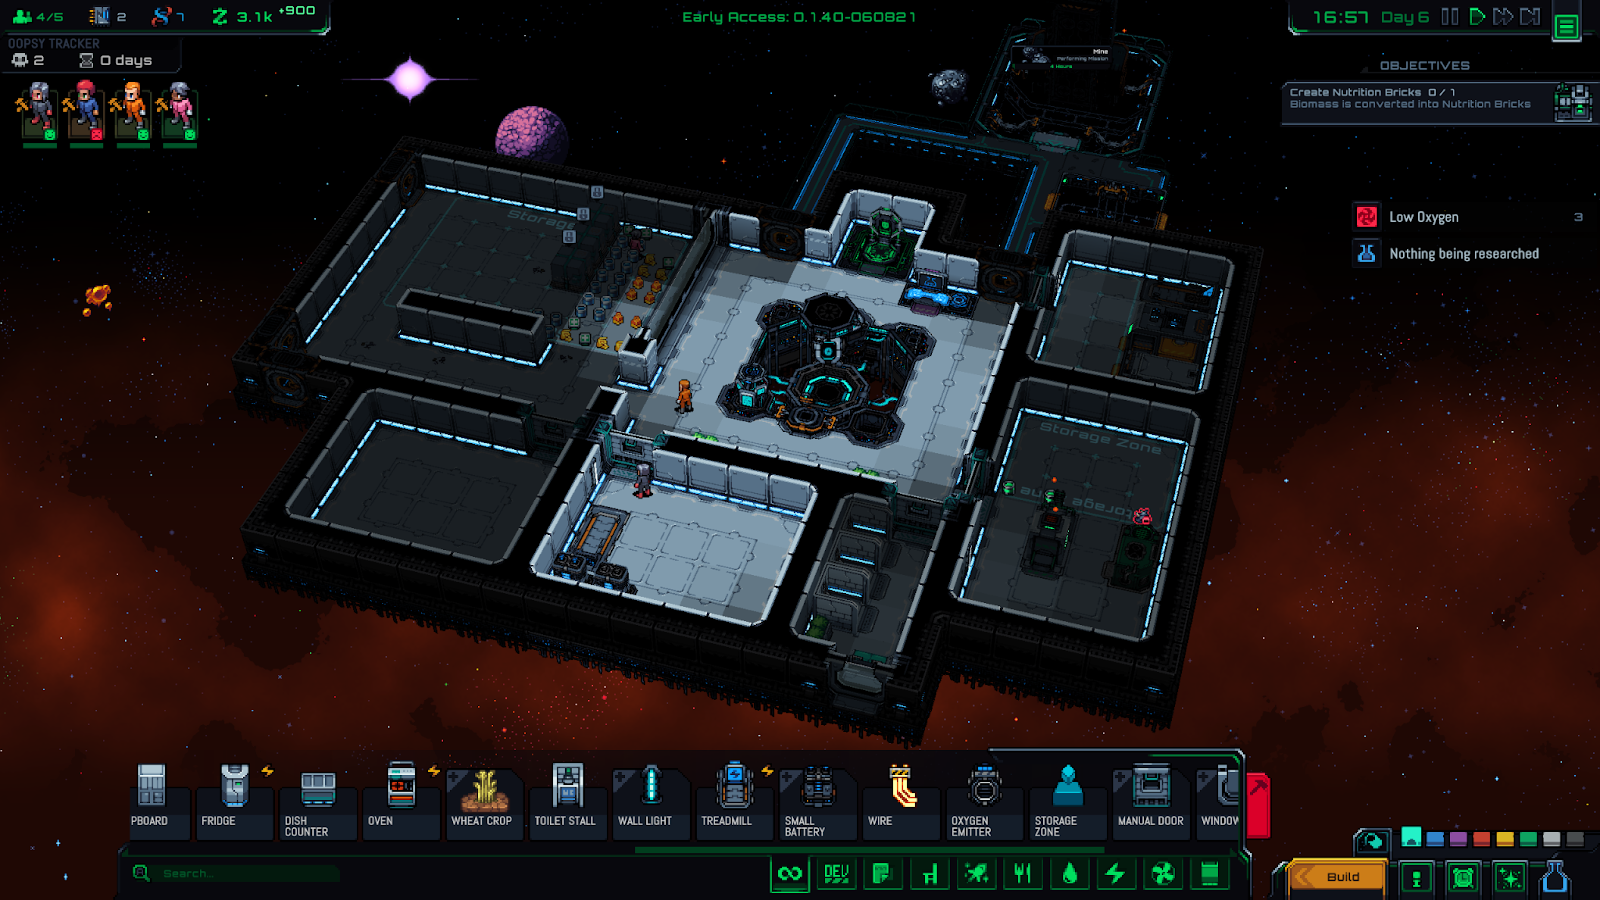
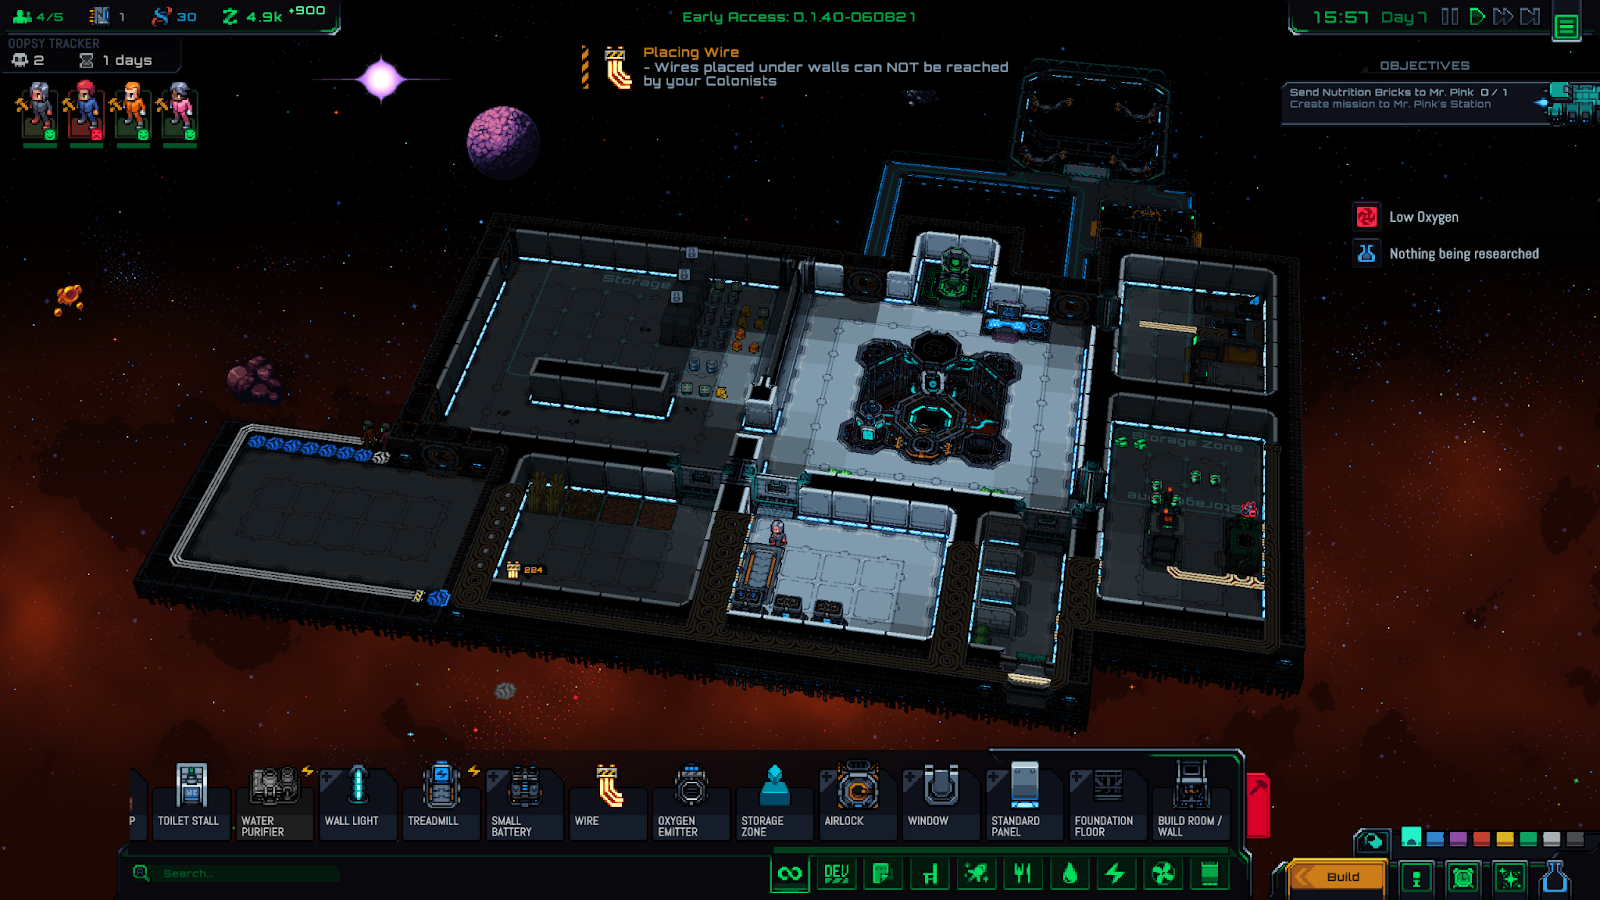
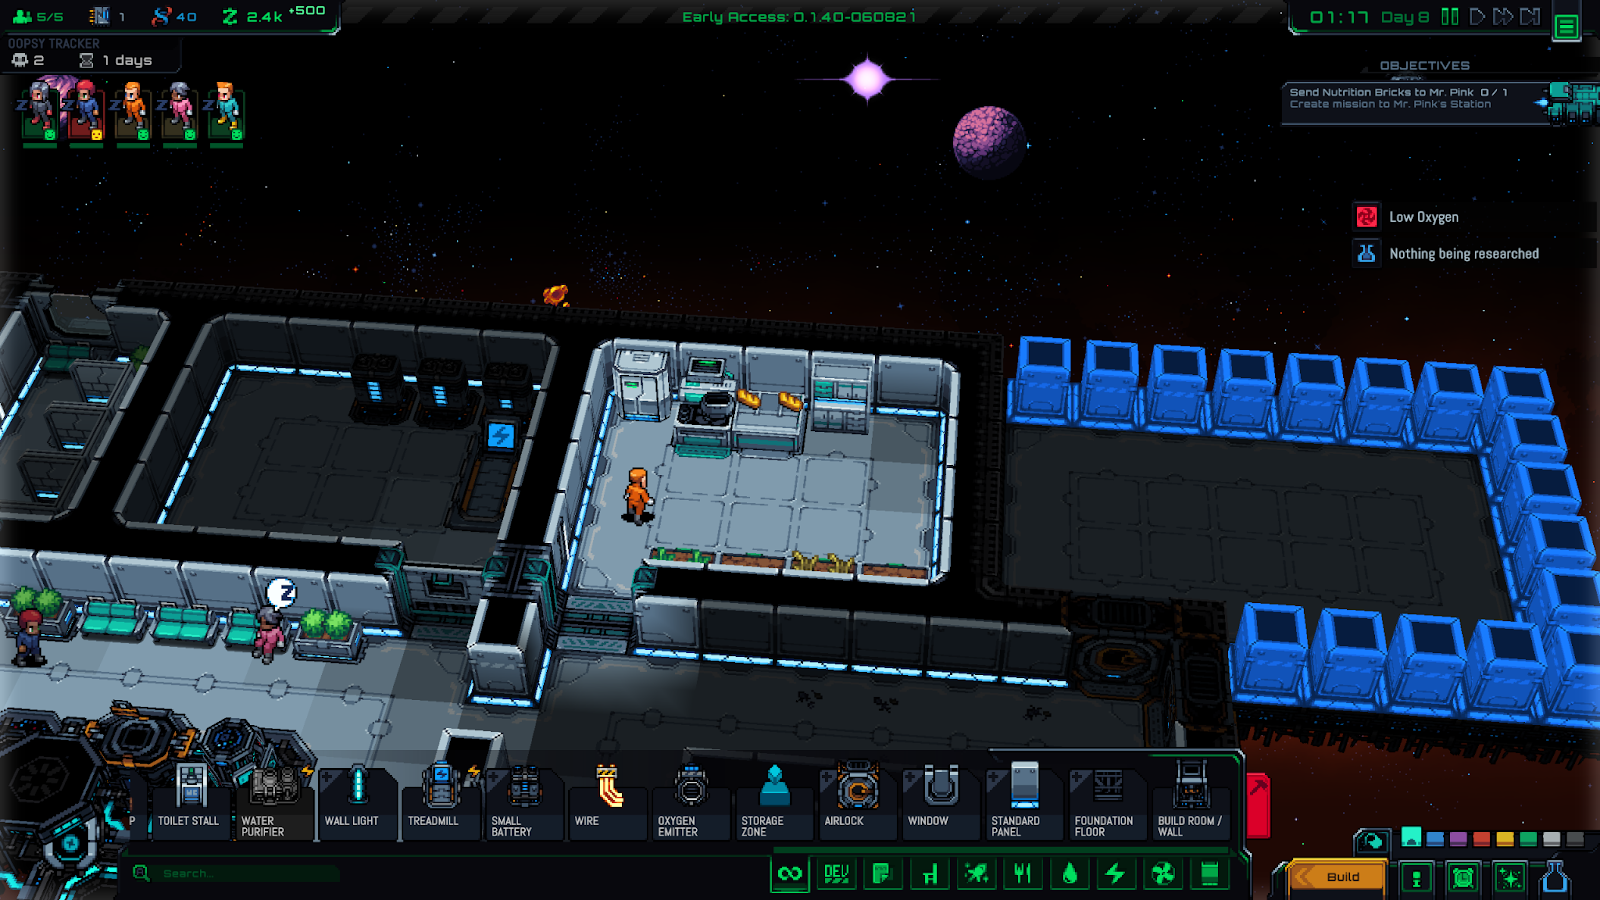
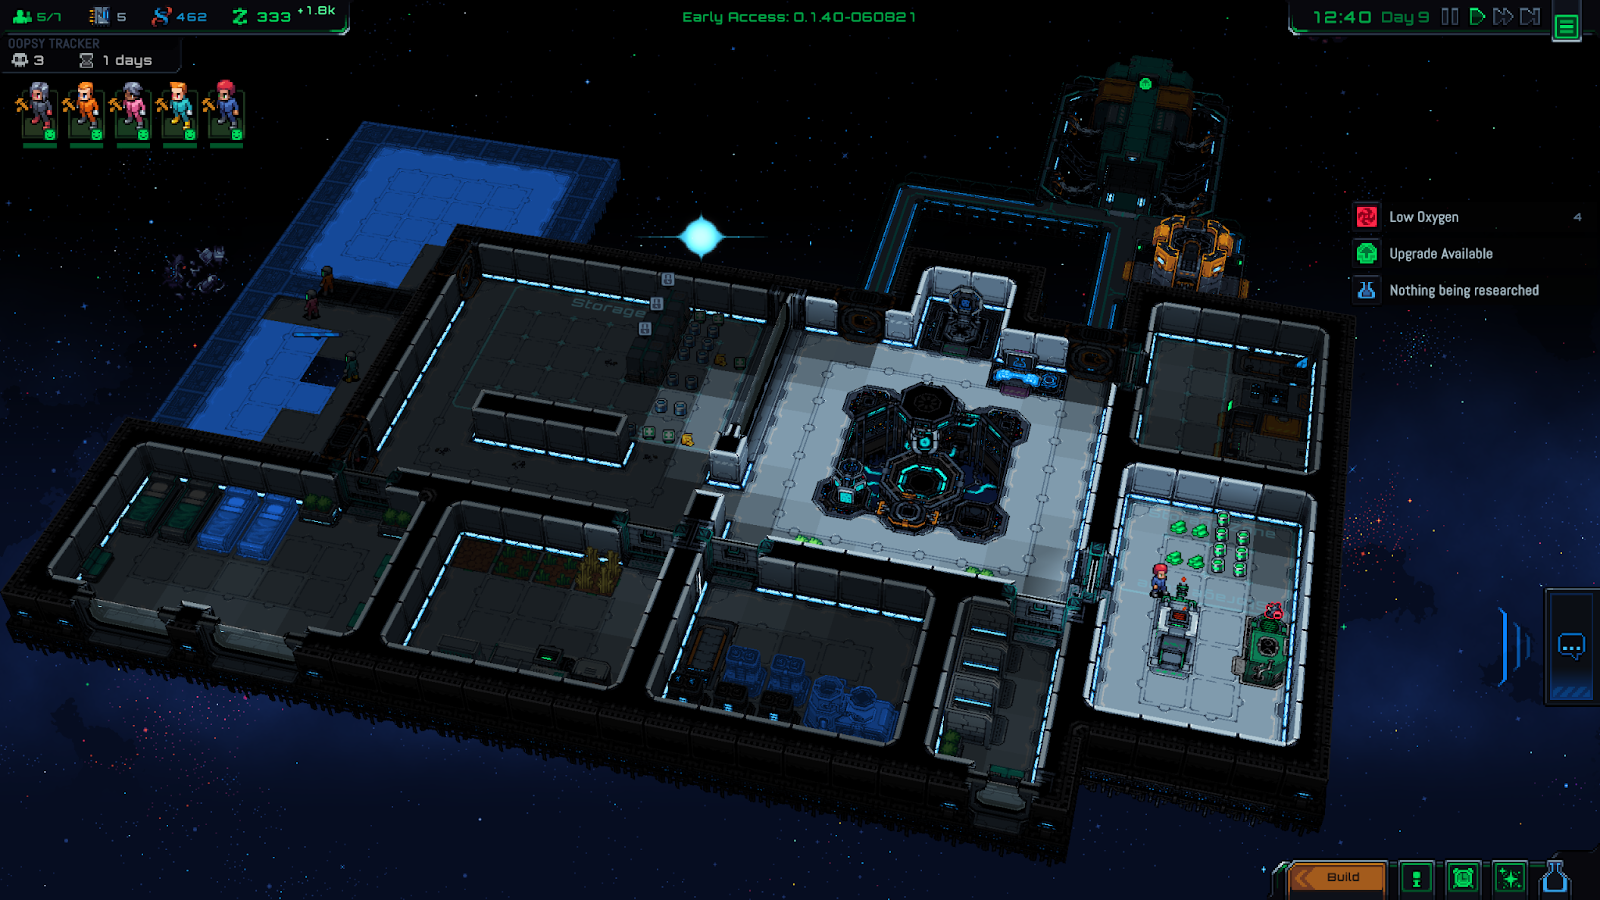
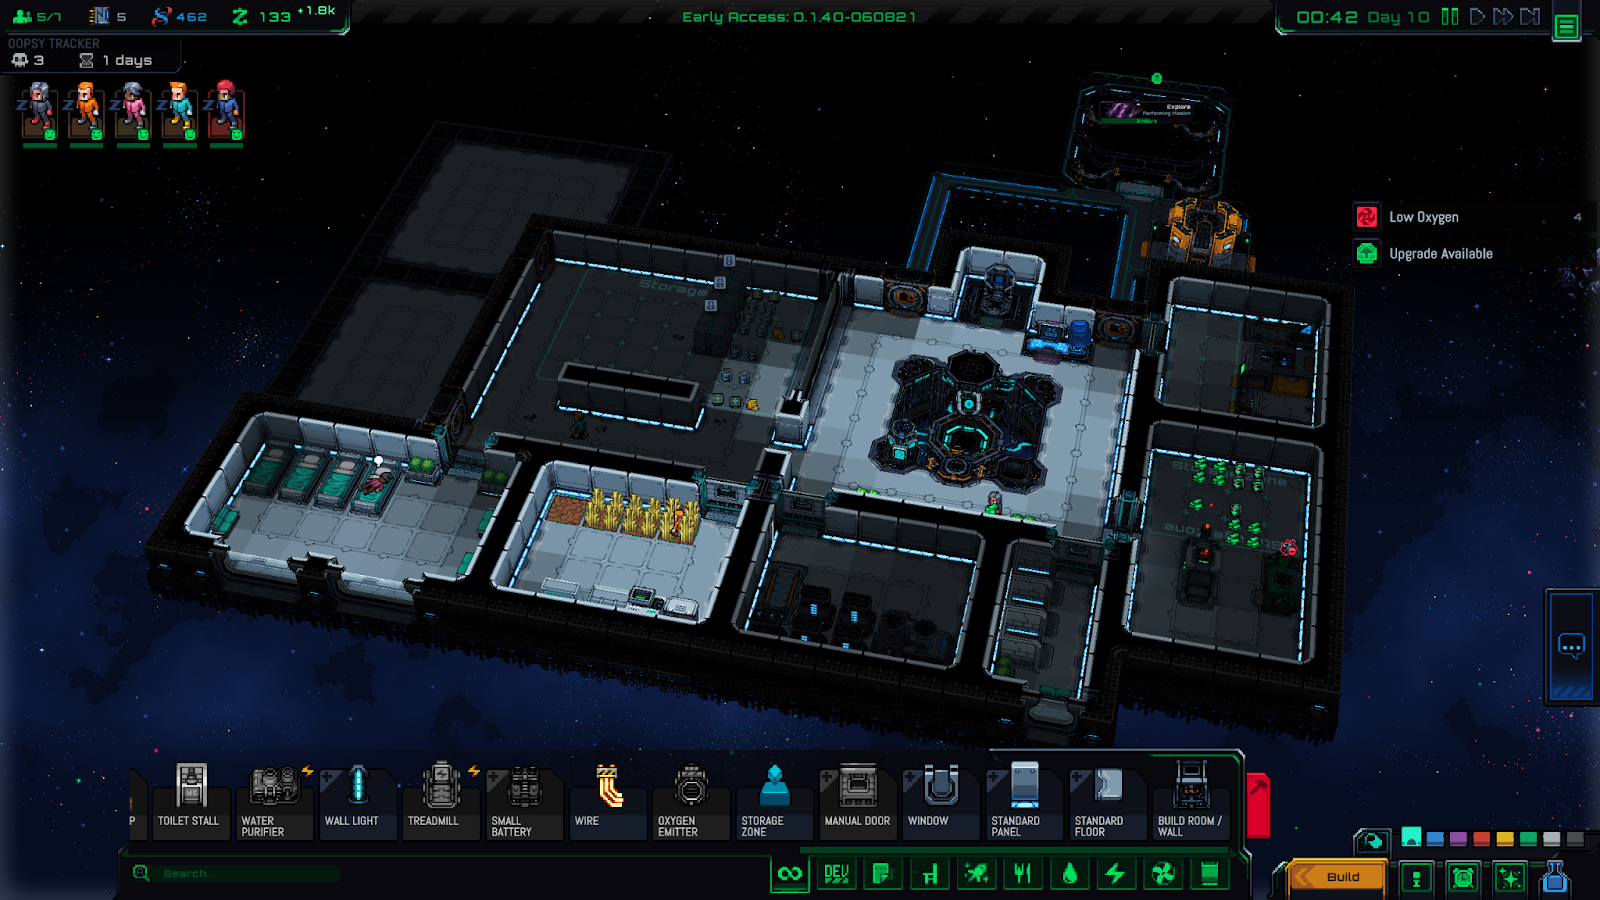
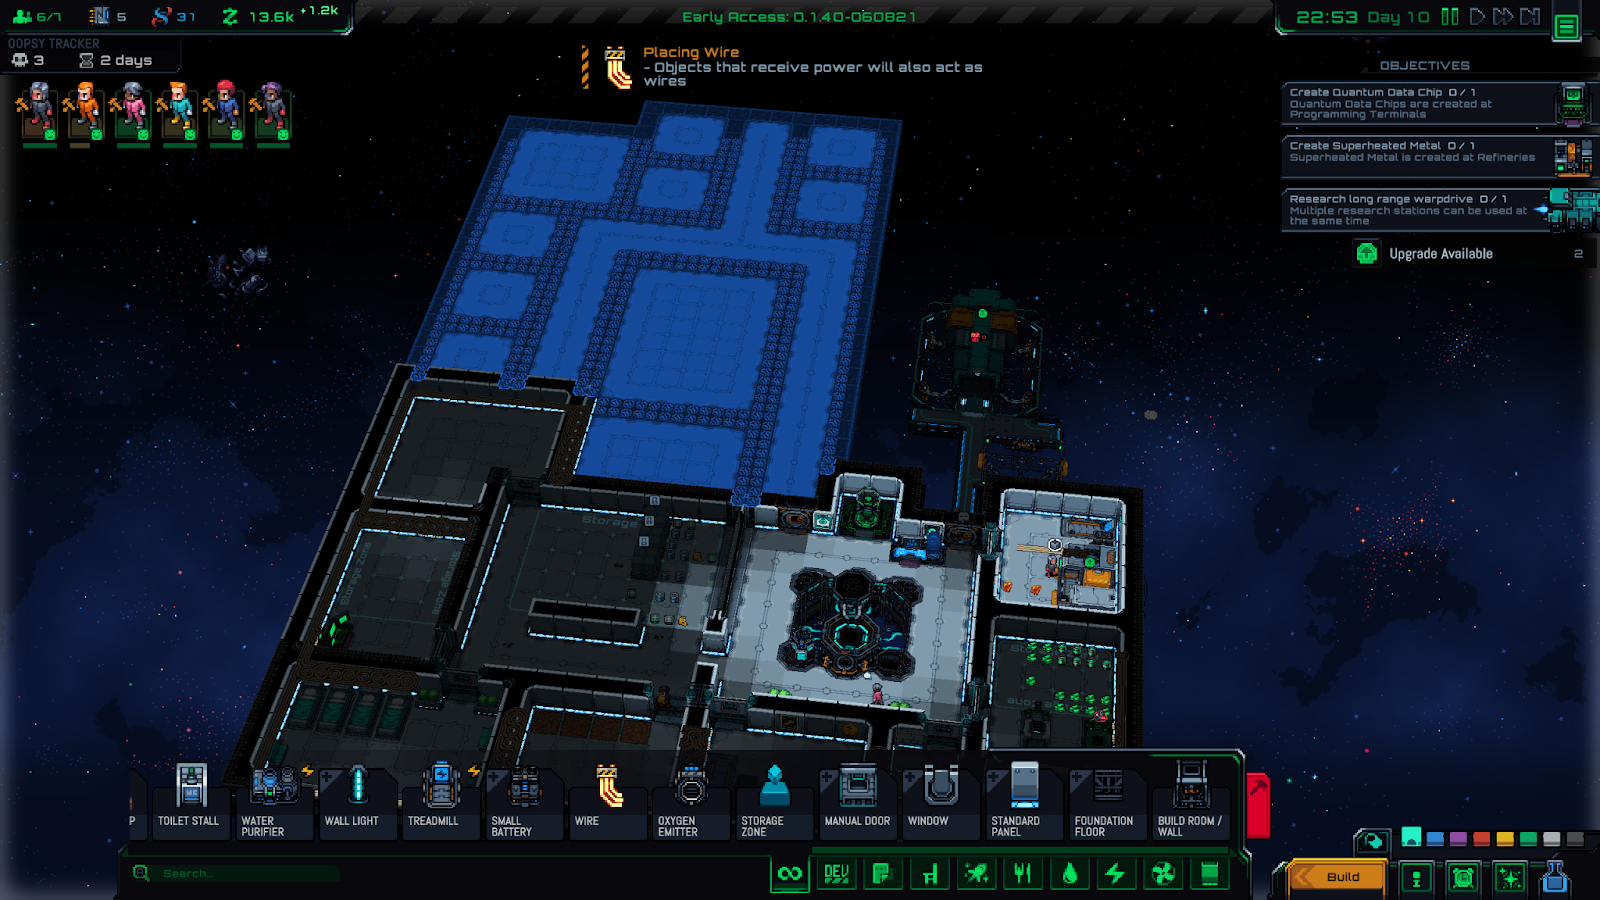
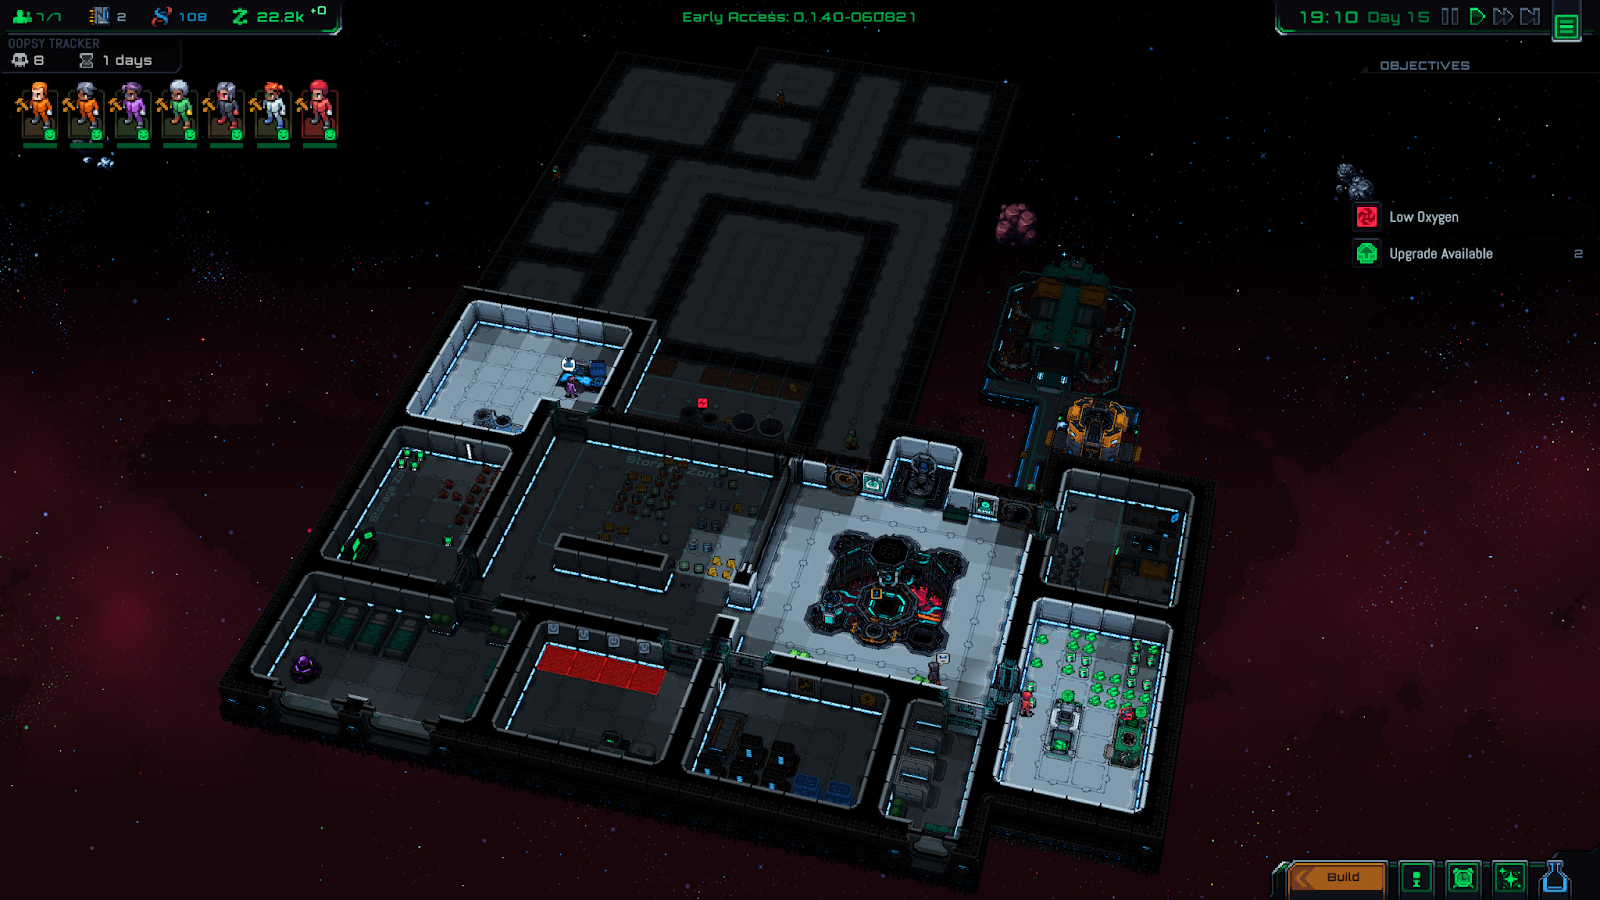
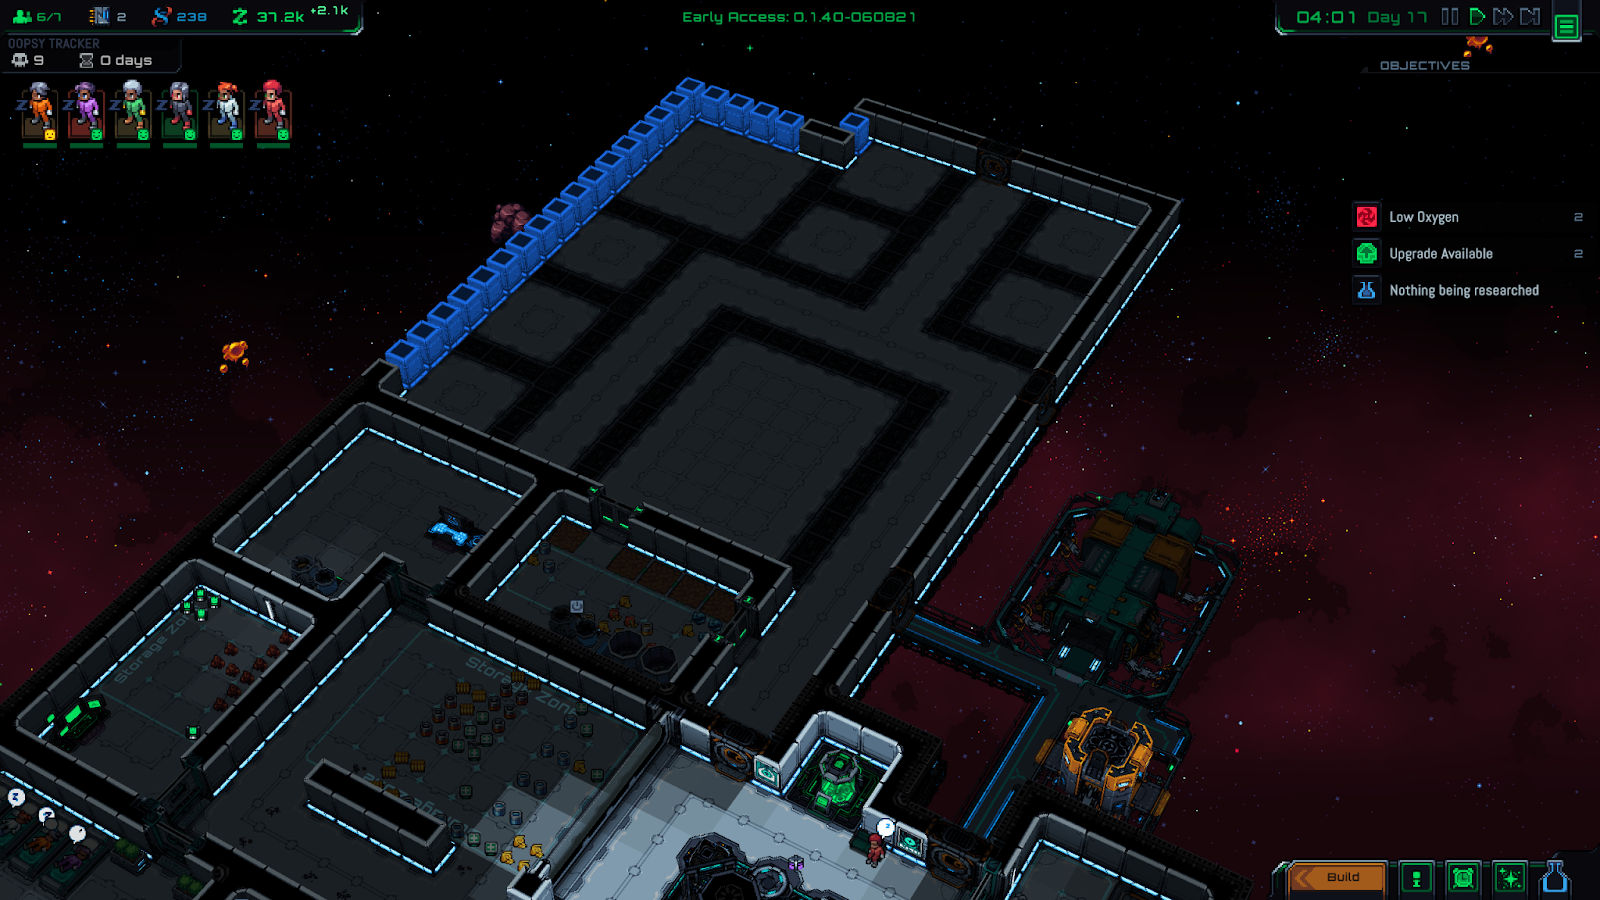
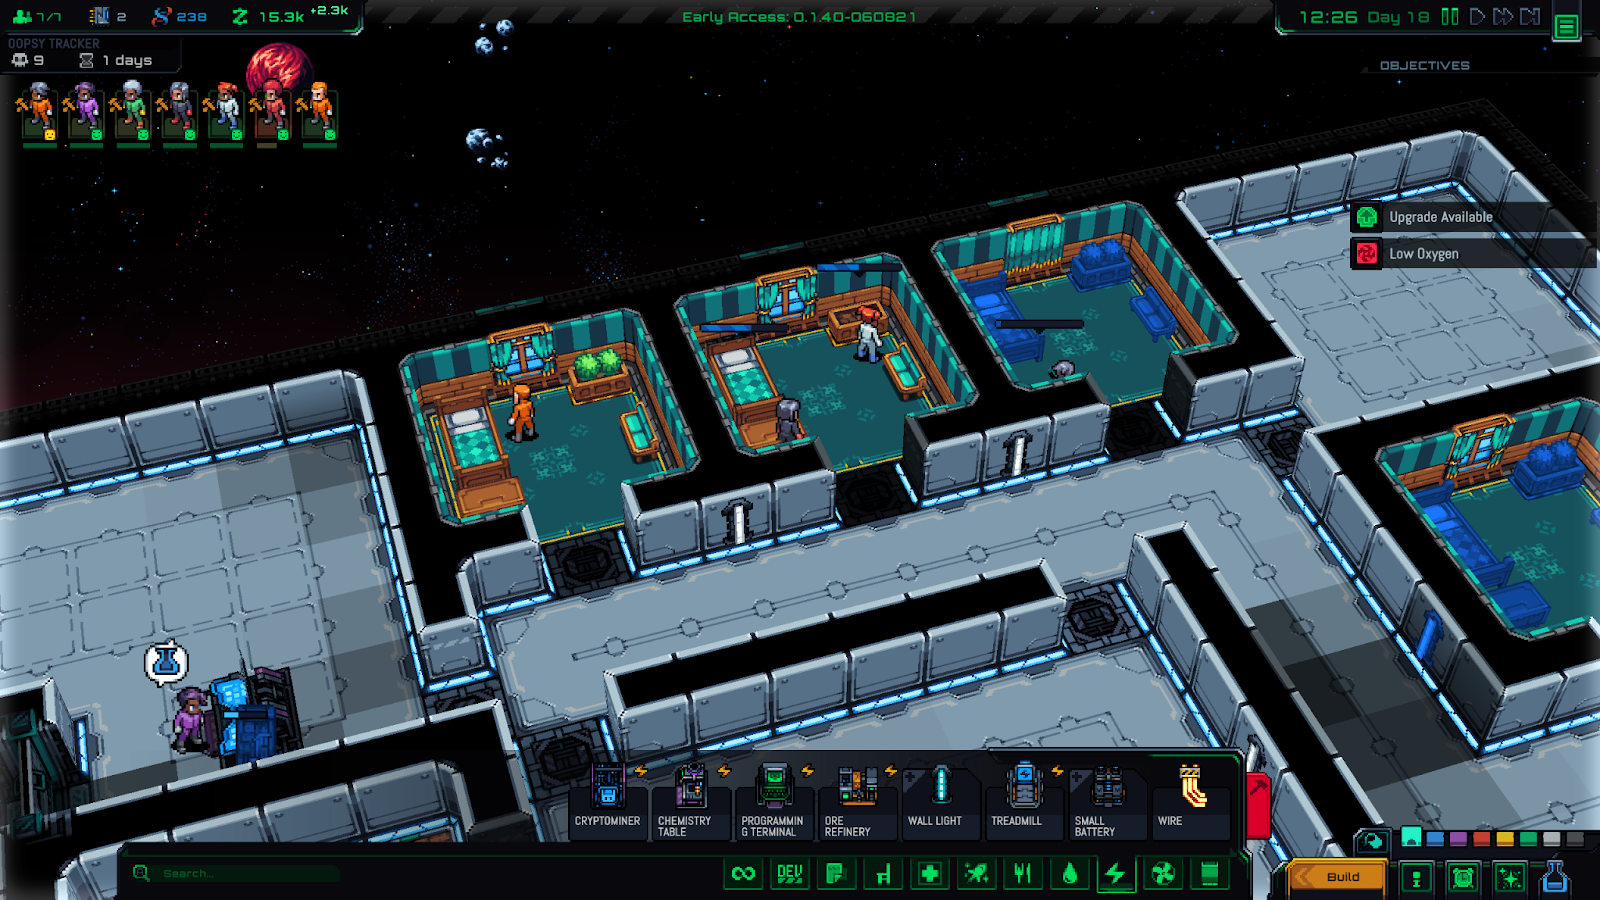
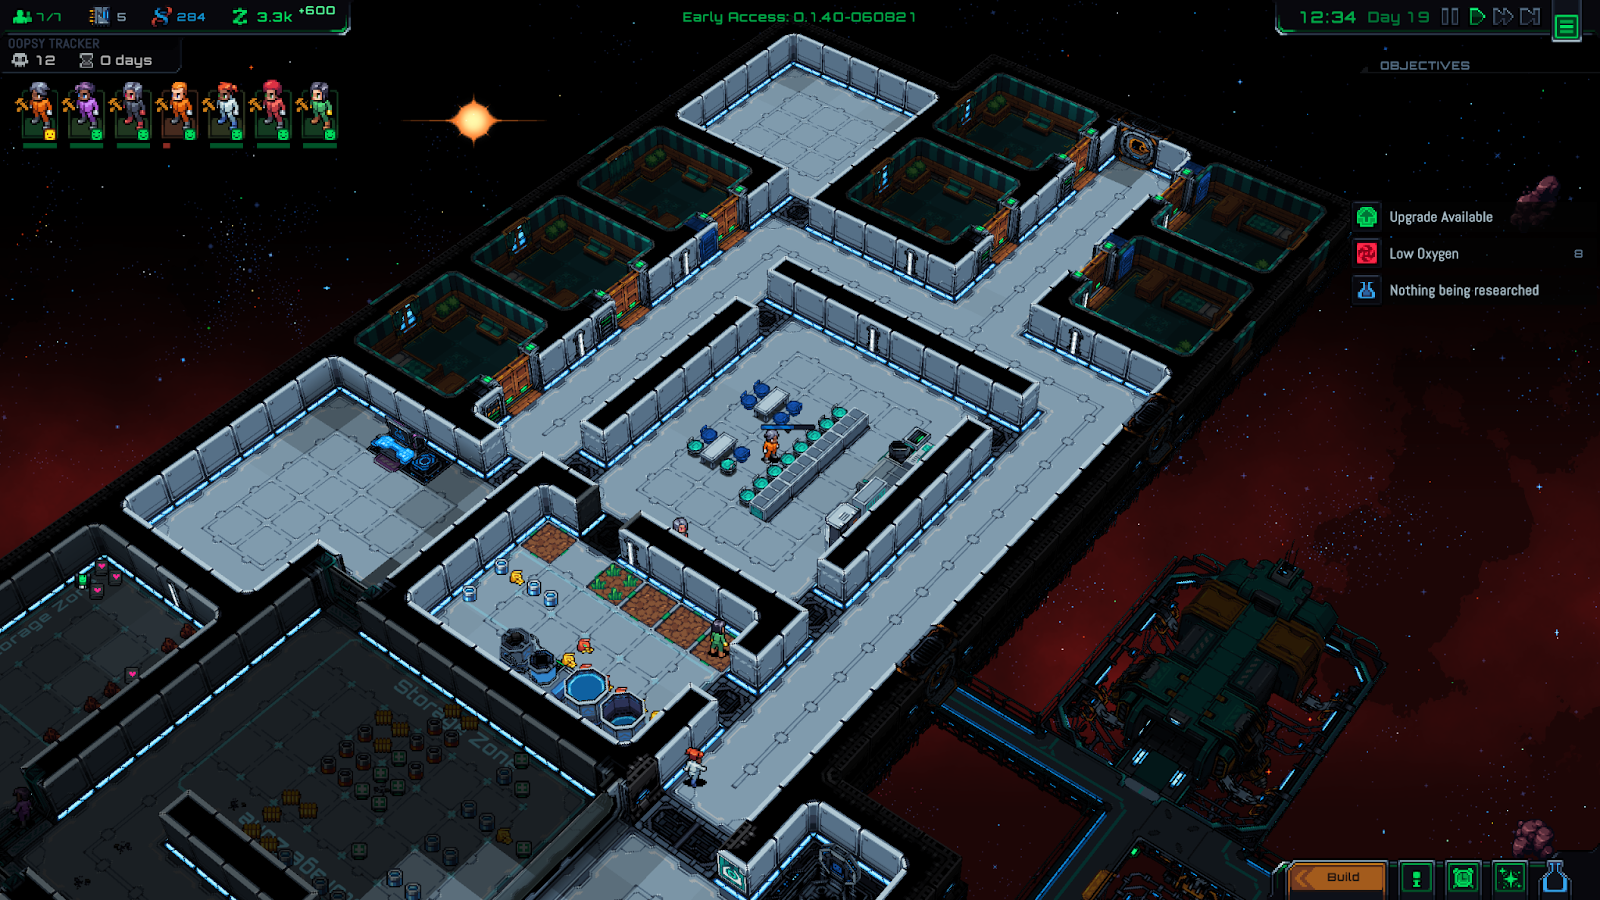
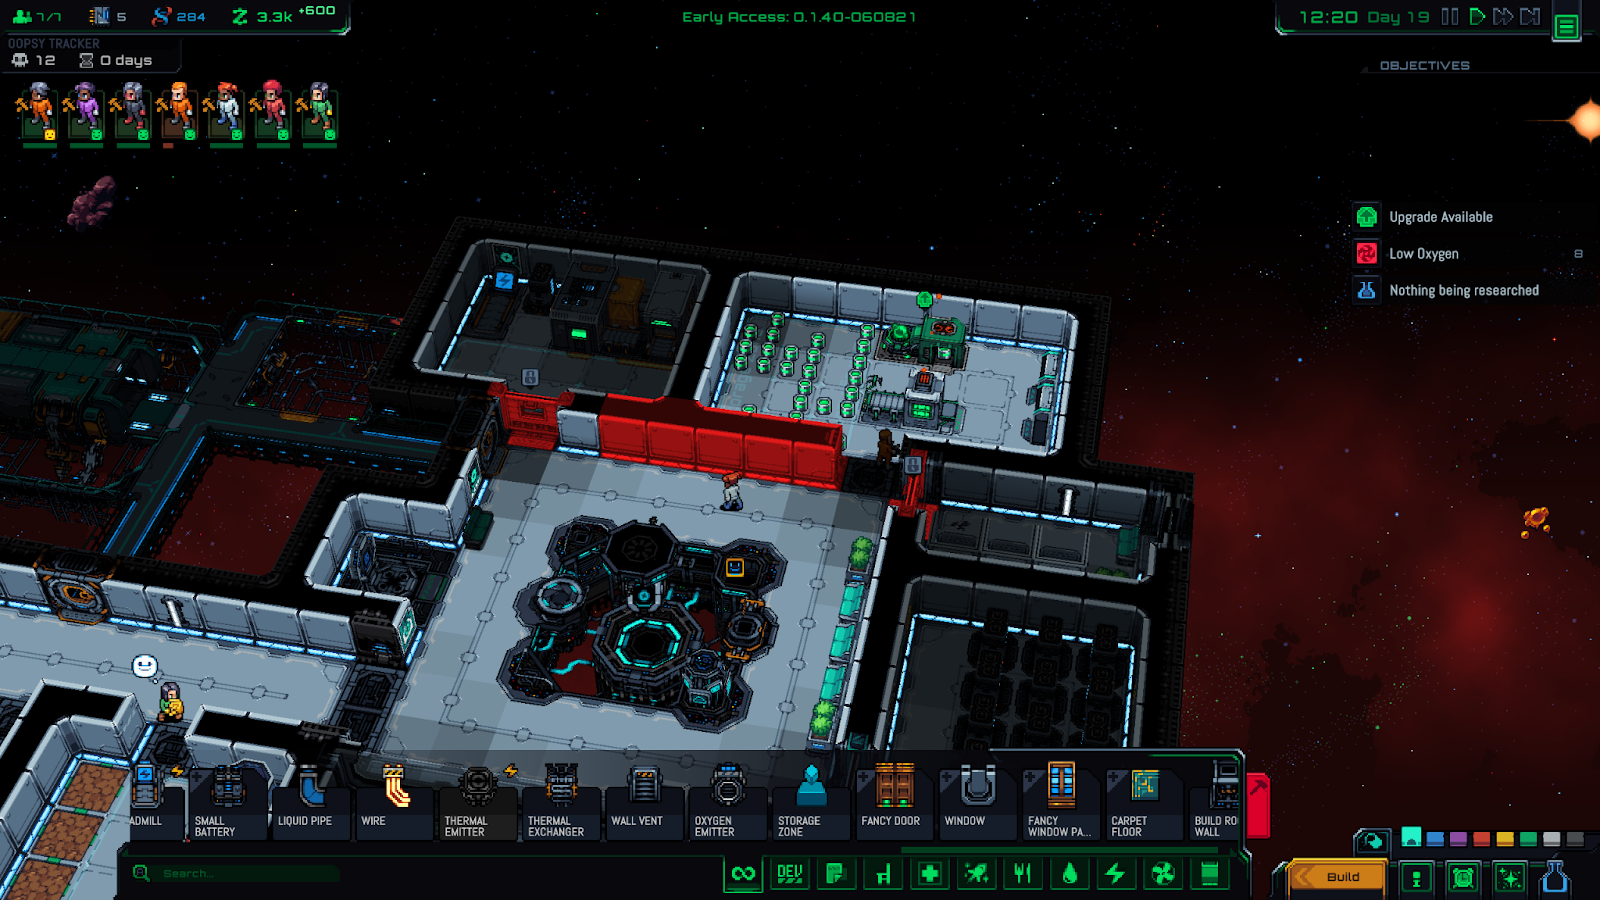
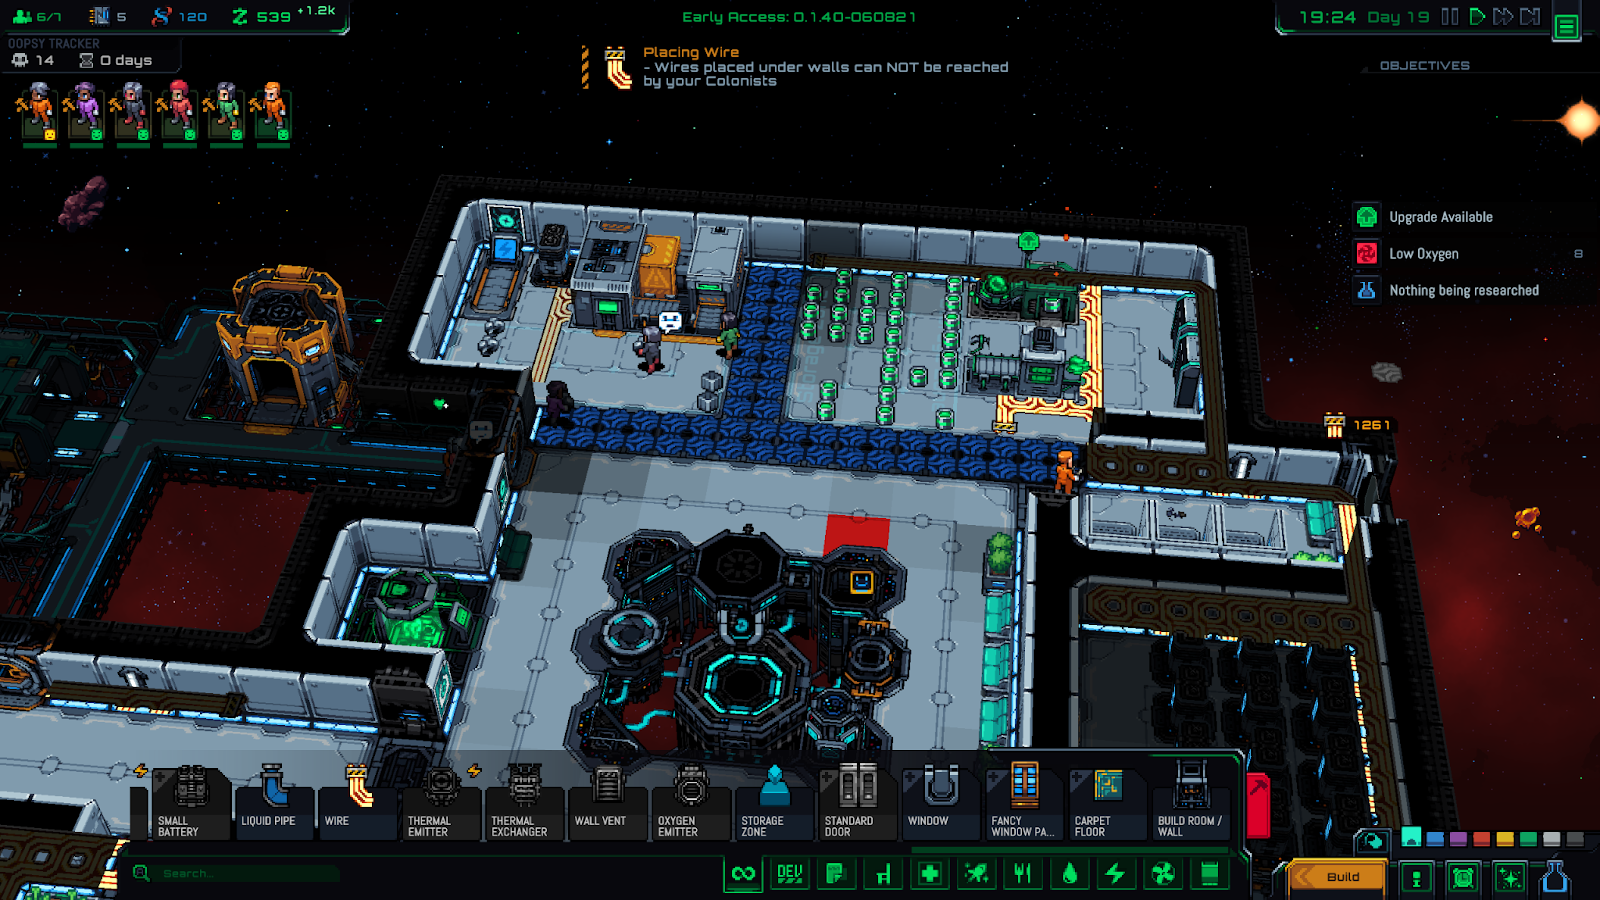
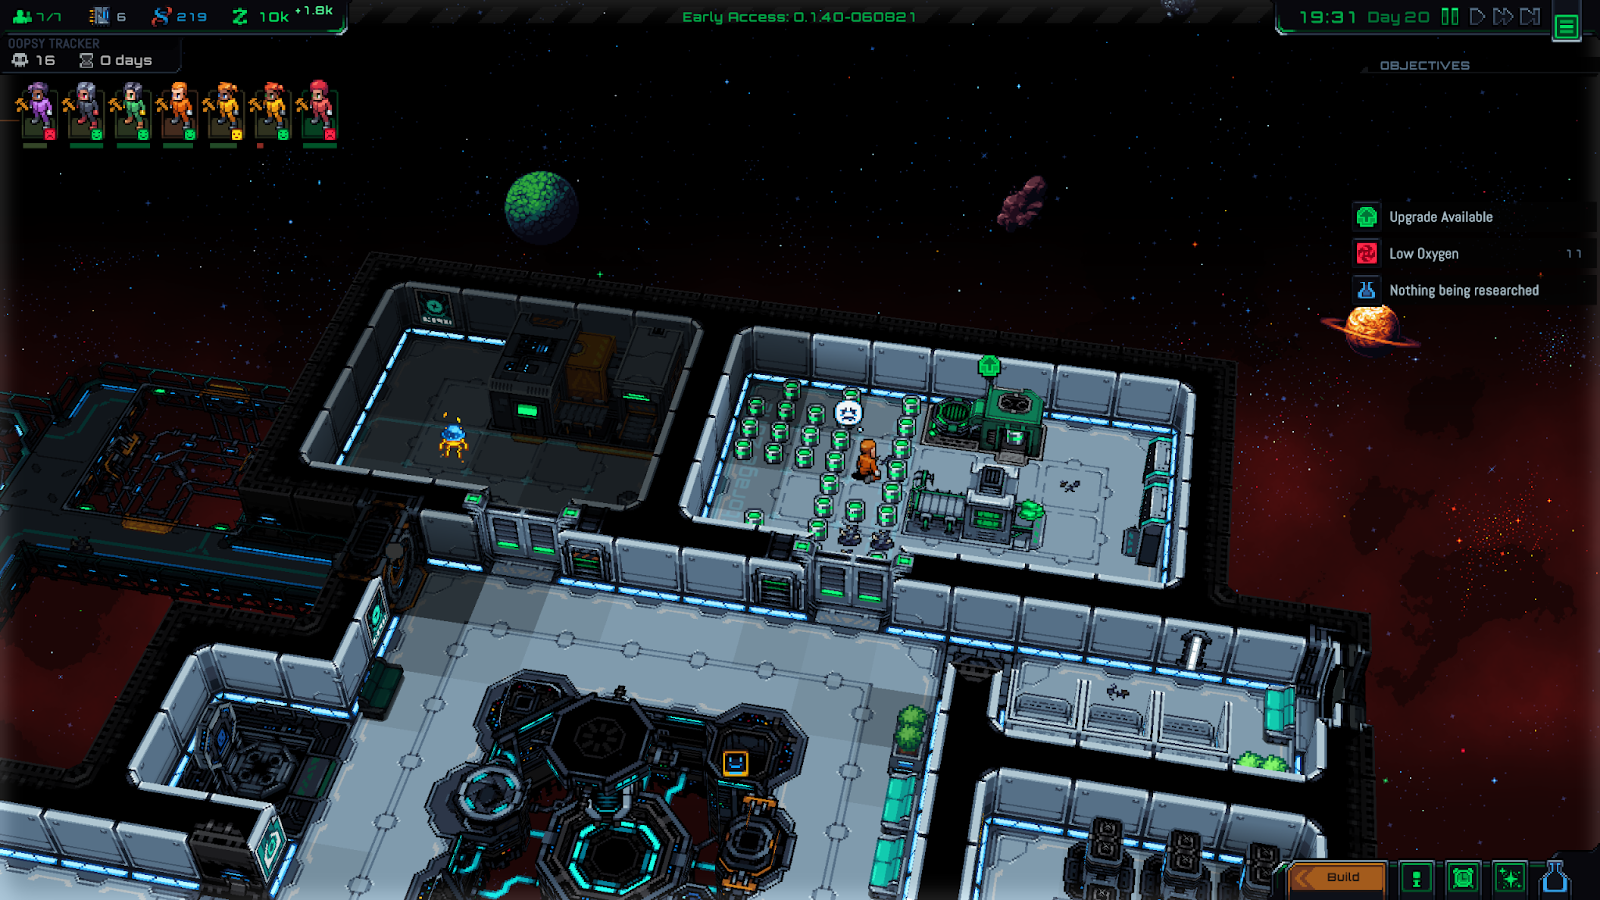
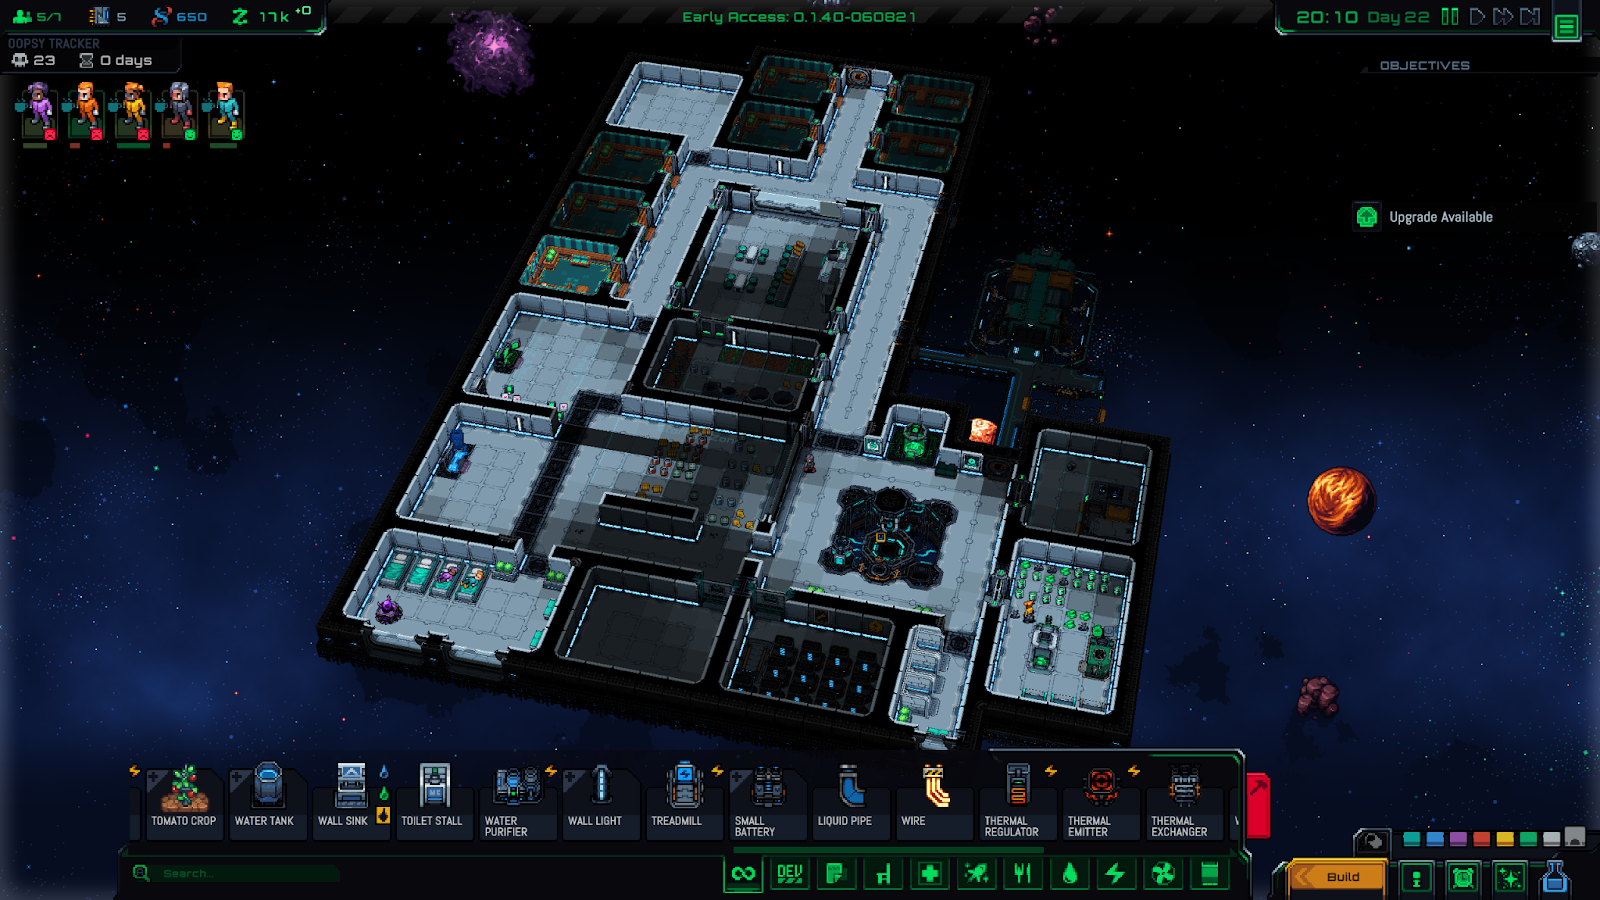
I kept playing this save after writing the tutorial, and took some pictures so you can see one example of how to plan out a base past the first day. Here are my progress photos –
Laying out wire blueprints (I had to remove the walls and then re-place them after the wire was built to get the colonists to build it, but then it worked great.)
Basic room building in progress
Working on the nutrition factory
Power room online!
Working on a new room …
This kitchen is only temporary so I can learn how cooking works, but hey, it’s a kitchen?
Continued expansion of the base.
Finally, we’ve got a super basic standard of living and communal bedrooms. This is probably the point my base was the most functional and happy, it’s also when I finally finished the in-game tutorial.
Plans for a new living space. Everyone gets a bedroom!
Construction several days later. Just laying down the wires now!
Making progress on the outer wall … around this point I realized it was probably a bit ambitious and got a bad feeling, but I already committed to building it.
Working on the private bedrooms. The cosmetic decor is really cozy! But I wish you could put curtains over real windows, and not just window panels – that hurt my design plans a little.
Bedroom area and kitchen mostly complete. The bedrooms turned out to have oxygen problems after I put the doors in, though, and I discovered I should’ve added water pipes under all the walls … and I needed a dedicated water storage room 🙁
Beginning renovations on the original base area, taking down walls to lay some power lines.
Laying down new wiring …
New and improved automatic doors!
One final shot of the base. This is as far as I got before I gave up on this base due to a zombie infection tantrum spiral and some unrecoverably messy design choices. Better luck next time I guess!
Anyways, that’s all I’ve got. Thank you for checking out my guide, I hope it helps you enjoy the game.
Good luck with your space station!!
Hope you enjoy the Guide about Starmancer – New Players Guide Tips, if you think we should add extra information or forget something, please let us know via comment below, and we will do our best to fix or update as soon as possible!
- All Starmancer Posts List














Leave a Reply