This guide has been moved to this place because of the death of the forums…
This guide focuses on Destroyer mechanics, spawns and locations, as well as other… stuff.
Introduction
As with previous iterations, some information may not be confirmed or complete. If you believe a point is incorrect, please quote it with the correction. Let’s begin.
This guide will provide a detailed breakdown of:
- Scaling mechanics
- Spawnable modifiers
- Enemy groups
- All CURRENTLY KNOWN mechanics the Experimental Destroyer
- Methods to Kill Destroyers
There are three types of Pirate Destroyers, each with a different reward restriction.
Low Difficulty
- Pirate Destroyer – “Adventure”
- Pirate Destroyer ‘Fortune’
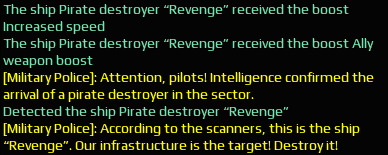
- Pirate Destroyer – ‘Revenge”
High Difficulty
- Cartel Destroyer ‘Happy’
- Corsair Destroyer ‘Pearl’
- Enclave Destroyer ‘Golden Hind’
Special
- ‘Experimental Destroyer’
Let’s look at the different Destroyer options and how they can cause problems.
Spawn locations, Basic Mechanics, and Modifiers
Where can you find them?
Pirate Destroyers can only spawn in specific sectors and cannot be found outside of bugged instances.
The following sectors are currently capable of spawning Pirate Destroyers:
- Felony Border
- Dreamland
- Anchorage of Captain Kidd
- Northern berth
- Spyglass
- Foul ground
- Stockade
- Skeleton Island
- Derelict Stronghold
- Northern Mining Station
- Pilgrim-11
- The Source
- Sanctuary
- Ancient Ruins
- Abandoned Complex
The Experimental Destroyer is ONLY and can be found within Dreamland.
Modifiers and Common Mechanics
All Pirate Destroyers share a number of mechanics, as well as a passive “particle flux disruptor” effect. This means that your damage will decrease depending on how far away you are from the ship.
1. Scaling health pool
The Destroyer will stop moving when a player attacks it for the first time.
If a second player attacks you while you are still attacking, your hull and shield will be doubled.
This continues until the Destroyer is hit by seven players at (I think)
If a player causes the Destroyer’s to scale, but leaves, the Destroyer will scale down.
2. Shield regeneration
If a player is killed while fighting a Pirate Destroyer, and there are no other attackers, the shield of the Destroyer will begin regenerating aggressively. This will stop if the Destroyer is attacked again.
3. Modifiers
A Destroyer will receive 2 buffs if it spawns. These buffs can be used to affect the Destroyer and its allies at different shield or hull percentages.
Check the ingame chat to see what buffs the Destroyer received upon spawning.
These modifiers include:
- Recovery from the ashes
Any deaths that significantly heal the Destroyer (includes drones, holograms, and objects)
- Speed increases
How can we increase the speed of our ships by 50%?
- Thermal Nebula
The ship will create a thermal cloud that deals 5000 damage every 0.5 seconds, for 3 seconds.
- Shield Gatherer
For 3 seconds, the ship will drain 3,500 shield point per second.
- Thermal Charges
Upon taking (?) damage will cause the ship to drain 3,500 shield points per second for 3 seconds.
- Increased EM shield resistance
Ship EM shield resistance has been significantly increased.
- Increased Kinetic shield resistance
Ship Kinetic shield resistance has been significantly increased.
- Thermal shield resistance increased
Ship thermal shield resistance has been significantly improved.
- Ally boost
A higher number of hull and shield percentages results in significantly more allies.
- Reloading modules
The speed of ship module reloading has been significantly increased
- Reloading Ally module
The speed of Allied ship’s modules reloading speed has increased by 42.9%
- Ally weapon booster
Increased damage from the Allied ships
4. Raider Portals
All allied ships that have been spawned will be spawned a “Raider Portal” and will depart within a few seconds after the Destroyer’s death and any attackers or loss aggro. You can stop them leaving by hitting them before you leave.
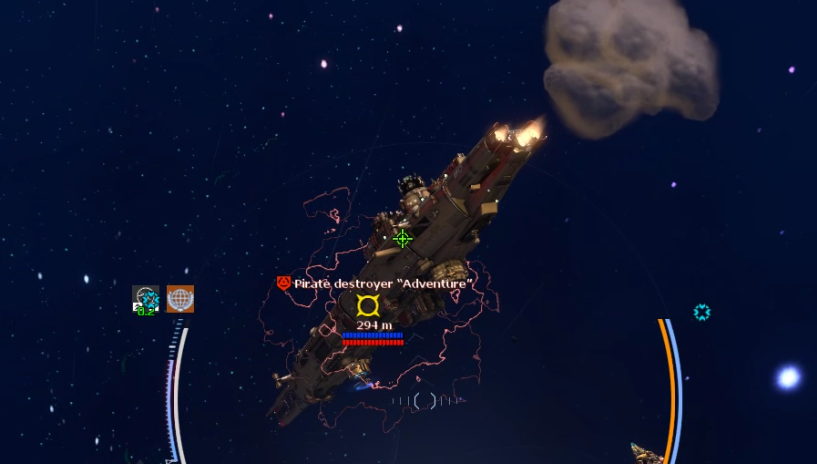
Pirate Destroyer – “Adventure”
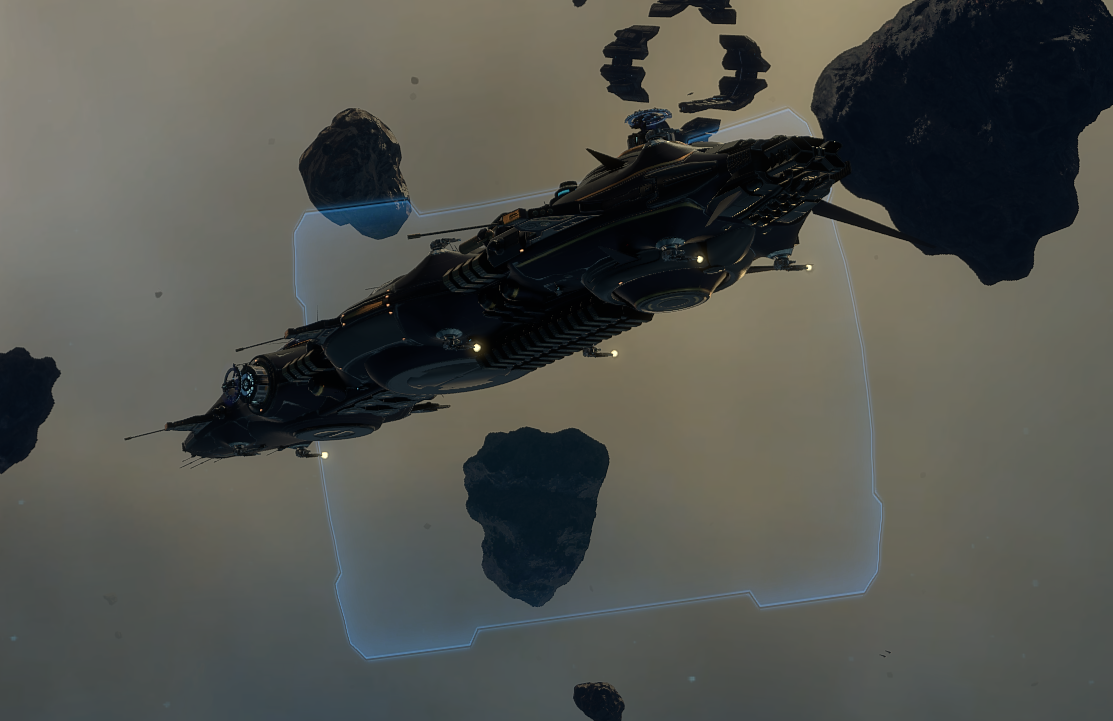
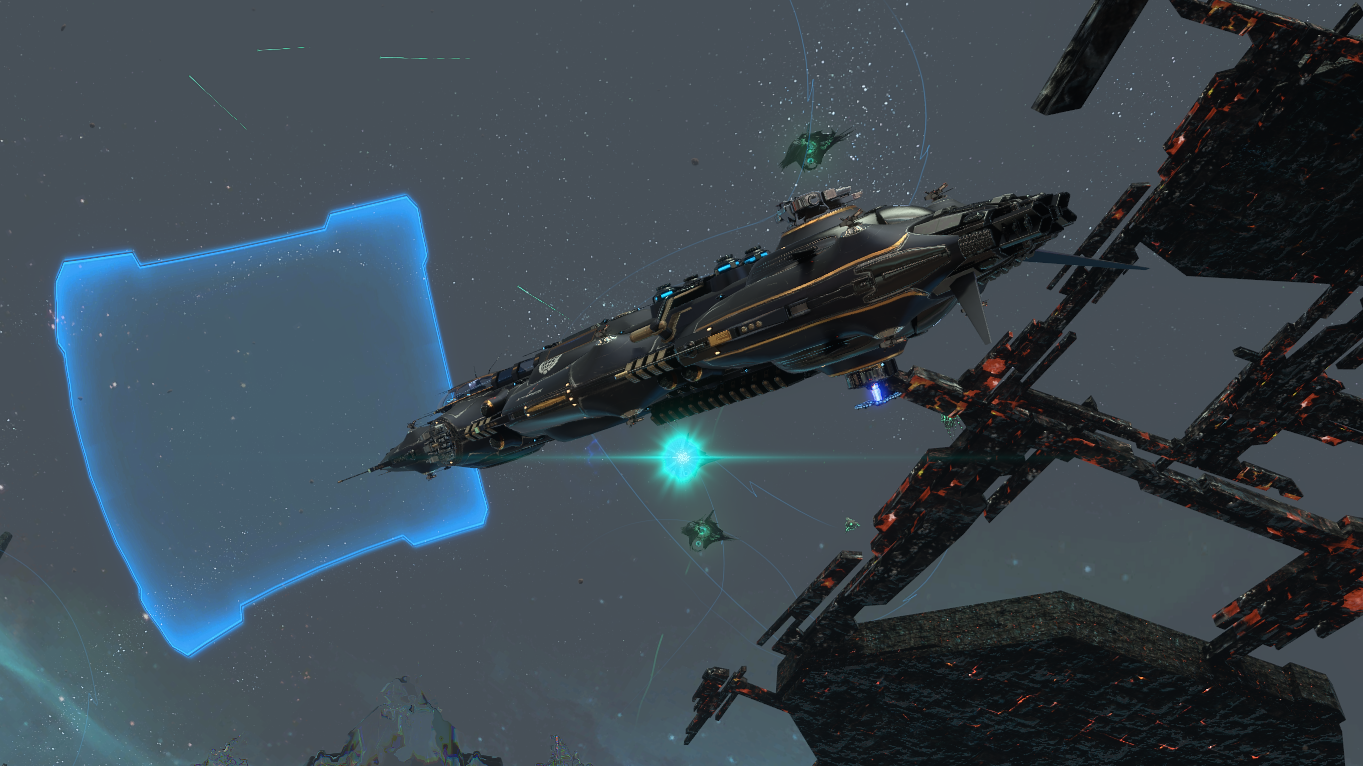
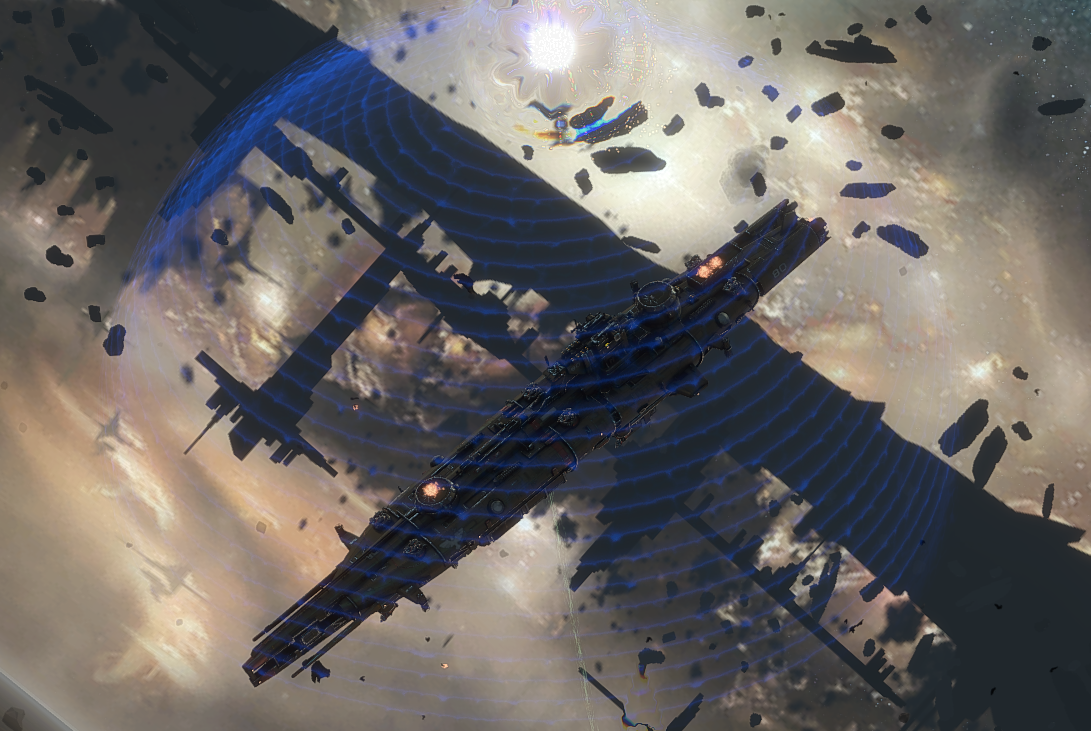
Adventure uses the model of an “Brave Empire Destroyer.”
It uses Coil Mortars, Pyro Emitters with no module model, Repelling beam, and “Unidentified Modul” with Heavy Repair Drones.
The Destroyer will start spawning “pulsars”, which deal less damage over time, on enemies that cross its line of sight. The Destroyer will stop spawning Pulsars if the player approaches it again or destroys an Unidentified Module.
Adventure cannot currently spawn because it is not programmed to spawn in sectors that aren’t owned by:
- The Enclave
- Jericho
- Empire
- Federation
It is not possible to see the ‘Adventure” if a Sector is temporarily owned by another owner.
Adventure is only available to Low Difficulty destroyer:
- 1 seed chip container
- 2 empty containers
- Low chance for a ‘Tornado system overcharge 17’
- 600,000. Credit
Low difficulty destroyers cannot drop exceptional seed chips above the rank 11 or higher, and only special seed chips below the rank 13.
Seed chip containers are protected drops so that anyone involved in the kill can pick them.
Adventure will continue firing coil mortars until the player is too hot to handle – these Coil Mortars can be blocked by ‘Missile Shield, barriers such as Static Barrier or Hammerhead’s mobile barrier.
Coil Mortar is a sequential weapon. The fire rate of Coil Mortar increases the more turrets can fire. Therefore, staying behind or below the Destroyer will reduce the damage taken.
If the player is within sight of the Repelling Beam modules, the Destroyer will use them as soon as it is off cooldown.
Adventure’s pyro emitter can not be killed because it does not have a model You can check for an empty module mount to see which side the ship is on.
This demonstration, which does not currently spawn Adventure, is quite old and does NOT show how to deal the Destroyer without a WAZ’dum.
Demonstration:
Pirate Destroyer ‘Fortune’
Fortune uses the model for a “Sibyl” Jericho Destroyer.
It uses a Fuse Blaster with low projectile speed, a Gravitational lens without module model, Hybrid Missile, and Plasma Turret With Static Shields.
The Destroyer will spawn “pulsars”, which are a 0.5 second long, on any enemy within its line of sight. They deal reduced damage over the course of time. Pulsars will cease spawning after the Destroyer is re-engaged or killed.
Fortune Currently, spawning is allowed in all eligible sectors Only a few are able to spawn the Destroyer.
It cannot currently spawn in:
- Sanctuary
- Abandoned Complex
- The Source
- Ancient Ruins
Fortune will only drop if you are a Low Difficulty Desstroyer
- 1 seed chip container
- 2 empty containers
- Low chance for a ‘Tornado system overcharge 17’
- 600,000. Credit
Low difficulty destroyers cannot drop exceptional seed chips above the rank 11 or higher, and only special seed chips below the rank 13.
Seed chip containers are protected drops so anyone can pick them up.
Fortune is one the most difficult of the two low difficulty destroyers that can be spawned. It uses its gravitational lens, hybrid missile continuously and often spawns with very difficult to deal with allies.
I recommend that you kill the plasma turbine as soon as possible when fighting this ship. It uses the same module and the ‘Experimental Destroyer. This means that it takes significant hull damage upon module loss due to its significantly lower total hull pool. It is possible to circle strafe the ship to avoid the slow projectiles from the Fuse Blaster and eliminate any troublesome allies.
Demonstration:
Pirate Destroyer – ‘Revenge”
Revenge uses a Federation destroyer model “Antares“.
It has a Blaster Turret and a Coilgun.
The Destroyer will start spawning “pulsars”, which deal less damage over time, on enemies that cross its line of sight. The Destroyer will stop spawning Pulsars if the player approaches it again or destroys an Unidentified Module.
Revenge You can spawn in any sector eligible There are no restrictions.
Because of its low health pool, Revenge is the easiest Pirate Destroyer. It also has a low damage output. The ship always spawns with “Recovery From the Ash” built in. This means it will regenerate aggressively from any attacked attackers but it has such a low pool of health that it can realistically die without seed chips.
Revenge is a Low Difficulty destroyer.
- 1 seed chip container
- 2 empty containers
- Low chance for a ‘Tornado system overcharge 17’
- 600,000. Credit
Low difficulty destroyers cannot drop exceptional seed chips above the rank 11 or higher, and only special seed chips below the rank 13.
Seed chip containers are protected drops so anyone can pick them up.
Demonstration:
Cartel Destroyer ‘Happy’
Happy uses a Jericho Destroyer model “Sibyl“.
It includes a G’thar’du Cannon and Tempest Launcher. Destabilising Field, modified Remote Mine Layer, Destabilising Field, Destabilising Field, Destabilising Field, Destabilising Field, Destabilising Field, Destabilising Field, Destabilising Force, Destabilising Field, and Unidentified Module With Static Shields.
The Destroyer will start spawning “pulsars”, which deal less damage over time, on enemies that cross its line of sight. The Destroyer will stop spawning Pulsars if the player approaches it again or destroys an Unidentified Module.
Happy You can spawn in all eligible sectors Sanctuary will not allow them to spawn.
Although it is the easiest of the higher difficulty destructioners, happy is a test for target priority, module management, and positioning. Happy will use its Tempest launcher or Destabilising Field when at moderate to high ranges. This is if the aggressor is off cooldown. You can’t avoid the Tempest rocket, but you can move out of the way of unguided rockets. Destabilising Field’s debuff can also be prevented by reducing your total speed to below 35%. This will eliminate the debuff completely.
Happy will spawn large green areas that deal little damage over time. If you don’t move within a few minutes of these fields spawning, it will stop you from moving for a long time or until you use a multipurpose modular to break the slowdown effect.
Happy is one of the most effective ways to kill someone.
- High total hull/shields
- High regeneration
- High mobility
- Explosive weapons
Happy can be killed as soon as it is possible to engage. However, this makes it a relatively easy fight from range.
Happy will drop as a High Difficulty destroyer
- 2 seed chip containers
- 2 empty containers
- Low chance for a ‘Tornado system overcharge 17’
- 1,200,000 Credits
High difficulty destroyers may drop exceptional seed chips up the rank 17 or 13.
Seed chip containers are protected drops so anyone can pick them up.
Demonstration:
Corsair Destroyer ‘Pearl’
Pearl uses a ship model “Antares“.
It uses Coil Mortars and Photon Emitter.
The Destroyer will start spawning “pulsars”, which deal less damage over time, on enemies that cross its line of sight. The Destroyer will stop spawning Pulsars if the player approaches it again or destroys an Unidentified Module.
Pearl You can spawn in any eligible industry without restrictions .
Pearl is the most difficult of the high difficulty Destroyers. It has an absurdly high range and high damage output, making it difficult to even approach. You will need to be prepared and chipped if you plan to fight Pearl alone. High damage missiles and explosive weapons are required as Pearl’s repelling beam is very slow and can often throw you far from the Destroyer. It will also bombard you with Coil Mortars while bombarding your face with Coil Mortars. The best approach to the Destroyer is from the underside, behind, or while invisible. You will then have to destroy its modules within seconds or have the tables turned.
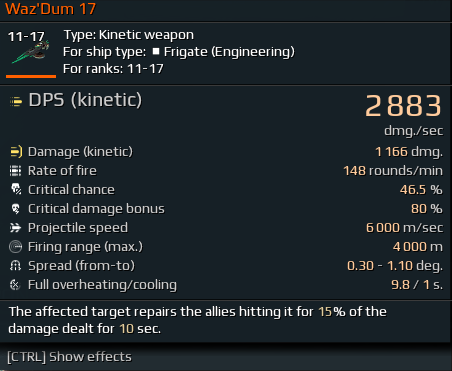
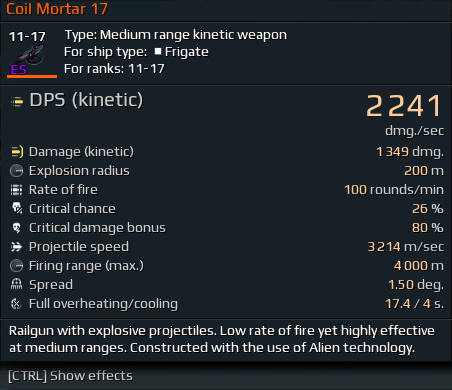
Waz’dum and Coil Mortars, Thermolauncher and Singularity Cannon are the best options for your base. They all allow you to quickly remove modules or, in the case Waz’dum’s case, out regenerate any damage the Pearl can deal out. However, any rapid-fire explosive weapon will suffice.
Be careful when trying to re-engage after a loss. Pearl has a range approximately 6,000m, which can make it difficult to approach the ship again.
As a High Difficulty destroyer, Pearl will drop
- 2 seed chip containers
- 2 empty containers
- Low chance for a ‘Tornado system overcharge 17’
- 1,200,000 Credits
High difficulty destroyers can drop Special seed chips up to the rank 17 And Amazing seed chips up to the rank 13 .
Seed chip containers are protected drops so anyone can pick them up.
Demonstration:
Enclave Destroyer ‘Golden Hind’
Golden Hind uses an Empire Destroyer model “Brave“.
It has Torch Launcher II and Tractor Beam.
Golden Hind will teleport the target to its right when it crosses line of sight with the Destroyer.
Golden Hind Currently, only a few sectors have spawned a child. The following are confirmed spawns.
It can currently spawn in:
- Sanctuary
- Abandoned Complex
- The Source
- Ancient Ruins
- Northern Mining Station
- Pilgrim-11
- Derelict Stronghold
Golden Hind is the second most powerful Destroyer, just behind the “Wood Louse“, which is known for its one-shotting player Destroyers. Golden Hind will pull in players from any range using tractor beam. It will also use it frequently on players already in melee. There are no other options than temporarily breaking line of sight or invisibility to stop the tractor beam. The ship may also try to use Isotope harvester, but this is not possible due to the ship’s inflated hull or shield capacity of Pirate Destroyers.
It is difficult to fight Golden Hind with a Frigate or Destroyer. Due to the Torch Launcher’s absurd damage, Golden Hind can 2 shot most Frigates. In close proximity, 1 shot Destroyers can be 1 shot Destroyers. It is recommended that you avoid using a Destroyer while hunting to avoid being killed instantly. To minimize damage, it is best to treat Golden Hind as any other player Destroyer. Approach from behind or below. This is a pure damage race, as even the regeneration from Waz’dum won’t stop Golden Hind killing you if it spawns using Elite Scorchers and Increased damage.
As a High Difficulty destroyer, Golden Hind will drop
- 2 seed chip containers
- 2 empty containers
- Low chance for a ‘Tornado system overcharge 17’
- 1,200,000 Credits
High difficulty destroyers may drop exceptional seed chips up the rank 17 or 13.
Seed chip containers are protected drops so anyone can pick them up.
Demonstration:
‘Experimental Destroyer’ – Wood Louse
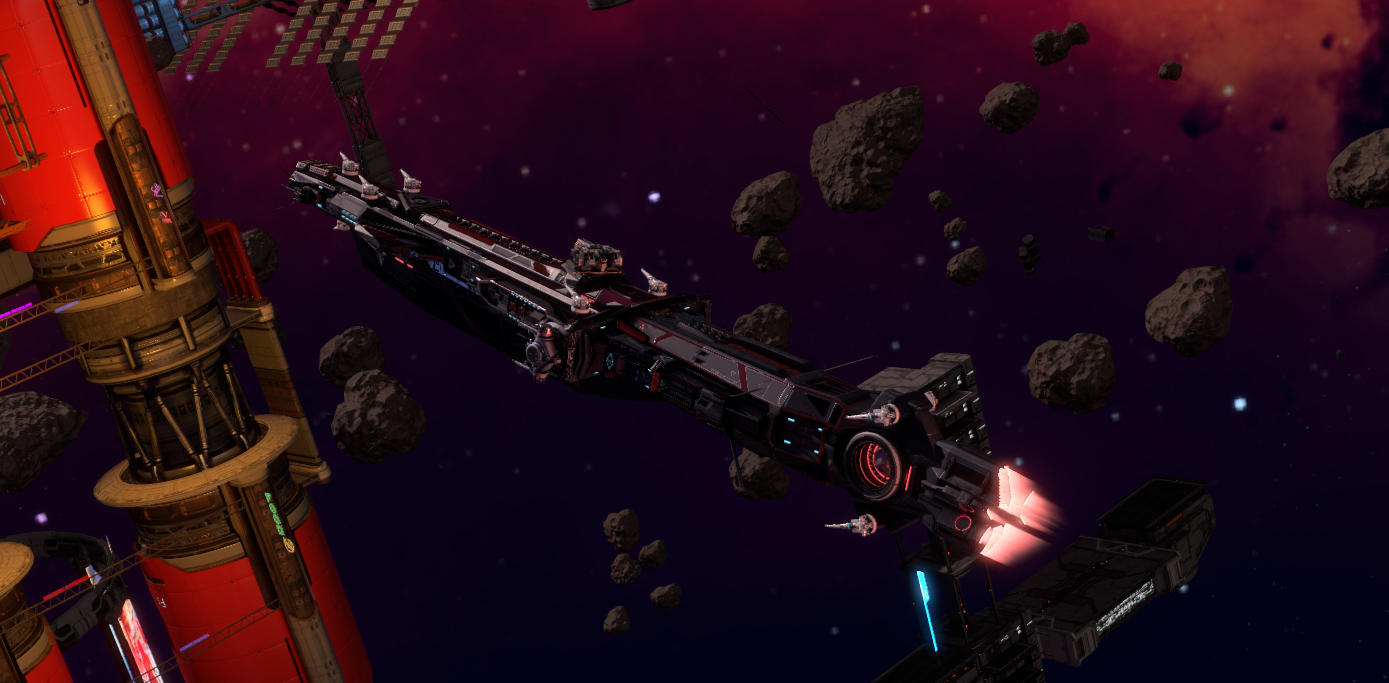
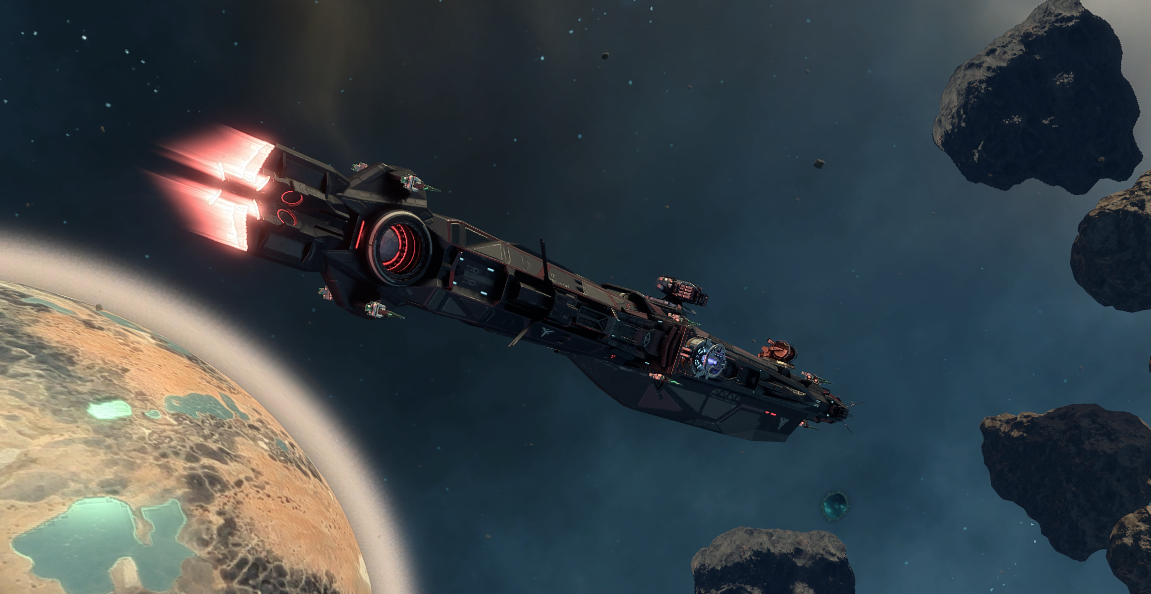
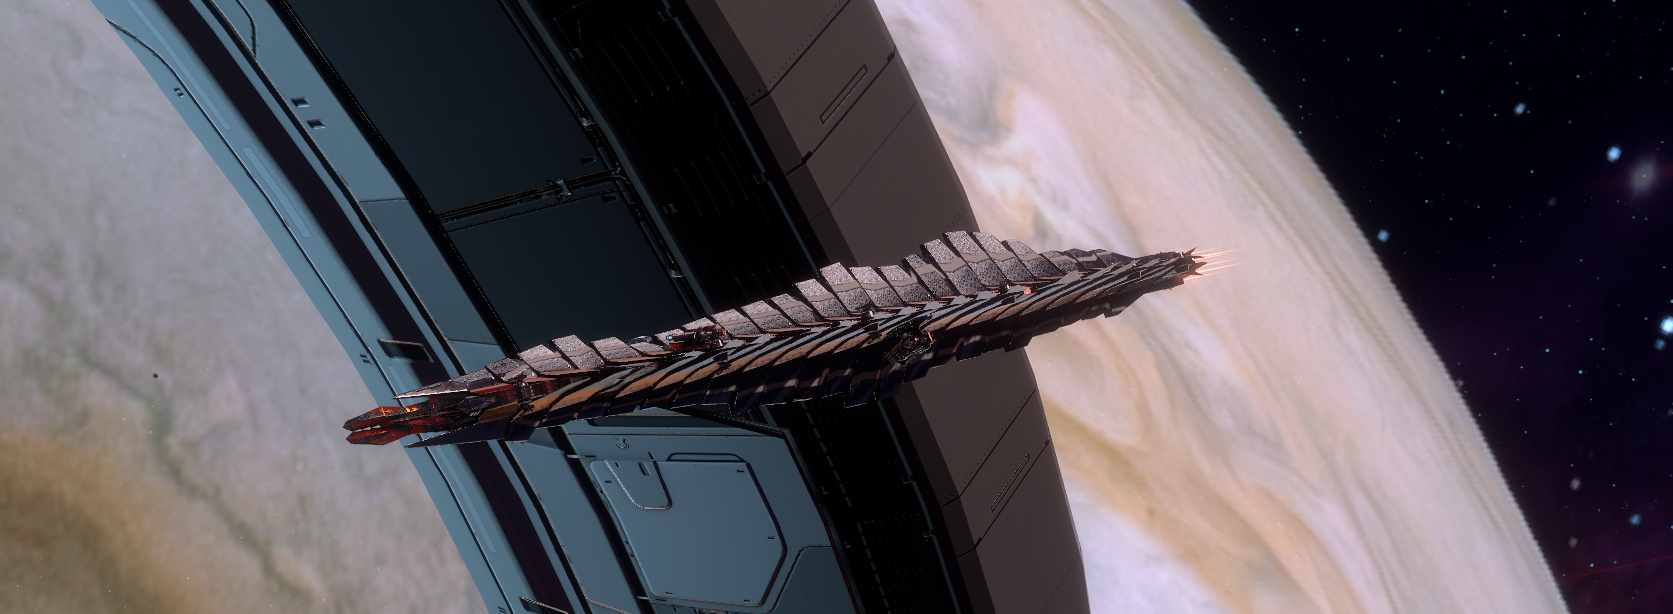
The Experimental Destroyer uses an original model of a modified ‘Custodian’ Jericho Frigate.
It uses Boson Cannon and Enclave Emitter, Tempest Launcher and Tempest Launcher, Jump Drive, Plasma Turret with Heavy Repair Drones.
Only the ‘Dreamland Sector can you find the Experimental Destroyer. Be prepared.
The Experimental Destroyer is currently the most powerful PvE enemy in the game. It has a base hull of 20,000,000 and shield at 4,000,000, with 400 resistance to all damage types. It is highly recommended to kill enemies as soon as they spawn.
The Experimental Destroyer is a Special Enemy.
- 1 seed chip container
- 2 empty containers
- Low chance for a ‘Tornado system overcharge 17’
- 2,500,000 Credits
- 1 ‘Valuable Sample Container’
The Experimental Destroyer can drop exceptional seed chips up the rank of 17 or up to the rank 13.
Seed chip containers are protected drops so anyone can pick them up.
The Valuable Sample Container has a 5% chance of dropping Cortical Columns necessary to produce Ze’ta parts.
Mechanics and Equipment – ‘Experimental Destroyer.’
Due to its unique weapons and modules, this Destroyer has many unique mechanics.
Boson Cannon
This cannon is not actually a Boson one. It fires an explosive projectile that has a range of 6,500m, and a radius of 750m. A debuff is given to you upon being hit by the Boson gun. This debuff can be used to apply damage over time, varying depending on the distance.
The Boson Cannon also has a hidden debuff. If the same debuff applies to a Destroyer while it is in close proximity to another Destroyer, it will start rapidly draining energy from both targets until they are far apart.
Missile shield can be used to destroy the projectiles of this weapon.
Enclave Emitter
Upon activation, the module will create a drone approximately 100m in front the Destroyer. This drone will project a 10km beam dealing 600 thermal damages per second for 3 seconds. It will project a 10km beam of approximately 1km in width, dealing high thermal damage and regenerating the hull for any targets that are destroyed after it has been activated.
This beam can cause you to die.
This module uses the Photon Emitter modeling and is located on top of the ship near the Jump Drive.
Tempest Launcher
The module will activate and fire 16 guided torpedoes at enemies within 10km. There are no more than 2 torpedoes per target.) deals roughly 50,000 kinetic damages to regular ships and 220,000 kinetic damage for Destroyer targets. These torpedoes are susceptible to damage over time, explosive damage, and missile shield.
The module’s damage does not affect the Destroyer’s hull.
This module uses Tempest Launcher models and is located on the ship’s botton next to the Plasma Turret.
Jump Drive
The Experimental Destroyer will accelerate backwards quickly if the module is off cooldown.
This module uses the multiphase shield and is located on top of the ship near the Enclave Emitter. It has a 36 second cooldown.
Plasma Turret
This is the same Plasma Turret as the Fortune Destroyer. It is surprisingly a standard plasma turbine with a hugely increased durability and damage upon module death.
Debuff Purge
The Destroyer will temporarily purge all debuffs that are received with a push-pull debuff.
This mechanic is displayed by a ‘Green Mist’ effect around the Destroyer during the debuff purge.
Waz’dum can also be reapplied using the debuff purge
The following modules, weapons, and effects can trigger the debuff purge:
- Trap Mine
- Anchor Mine
- G’thar’du Launcher
- Gravitational Lens
- Tractor Beam
- Gravi Lasso
- Boarding Coil Mortar
- Effect of ‘Gravitational Anomaly’ seed chip
- Effect of the ‘Static charge’ seed chip
This is a server-side buff that cannot be stopped by destroying components on the Destroyer.
The Experimental Destroyer, which has 400 resistance to all types of damage, is the best way to check for seed chips in PvE. It will take much less damage than if you were fighting a Golden Hind and Pearl.
A hull resistance debuff will be required if you are going to do significant damage. It will partially reduce the damage reduction. However, if you use a Hull resistance buff, it will be purged if the Destroyer is subject to a push/pull effect. This can reduce damage output significantly.
To avoid being bitten by a Tempest Launcher, it is best to immediately align yourself with the Enclave Emitter or Jump Drive when engaging the Destroyer. It is important to stay on the same side as the Enclave Emitter and Jump Drive when fighting the ship. The Tempest Launcher will immediately fire upon a valid target. This will cause your emergency barrier to go off without warning, and you will likely die as a result.
Be aware that Star Conflict’s Ai can be a bit erratic and the Experimental Destroyer could fire the Tempest Launcher at you. If this happens, be ready to move quickly.
Once you have dealt damage, the Destroyer will use its Jump Drive. This cannot be prevented by a debuff wiping as soon as the module starts to operate. Move towards the Destroyer But move out of the way for the Enclave emitter It will trigger immediately after a Jump Drive, if you are:
- In front of the ship
- The module is on cooldown
If the Tempest launcher is not activated yet, it will fire simultaneously with the Enclave Emitter. Make sure you have your flares ready when you see the second Torpedo hit you.
There are fixed spawn groups for different amounts of hull.
The first group is composed of:
- 2 Enclave Destroyers
- 1 Wicked Chameleon
Enclave Destroyers use Custodians with the Protective Barrier 2.0 special module, Pulsar Algorithm, Plasmatrons, and Pursuit Algorithm. It is strongly advised that you kill them as soon as possible, but not to move away from the Experimental Destroyer’s safe side. The Plasmatrons can cause severe thermal damage. They will approach you again once they reach 80% of the hull.
The Wicked Chameleon it spawns is a high-health variant. It only has Stasis and Protocol Regulation, and a Cloak. You should kill it as soon as possible, as the stasis could cause you to be killed.
This group composition will only spawn one time per kill.
Elite Scorchers, low-health varant Wicked Chamelons, and Elite Scorchers are also enemies of high priority. These units disrupt regeneration modules and leave you vulnerable to damage.
Elite Scorchers should be killed immediately, even if it makes you vulnerable to a Tempest. Their Hazardous Veils will completely block all forms of regeneration, including Waz’dum, due to the Experimental Destroyers high-damage resistances.
Due to the high damage output of the enemy Destroyer, the total hull, shield, damage resistances, and damage levels, this fight is not recommended to be undertaken alone.
If you’re taking on the boss of a group, make sure you have at least one Waz’dum and bring flares. The Tempest Launcher is so powerful that even if it hits you, it will return for another attempt.
Explosive weapons should be avoided as they cause more damage to Destroyers. However, you can use whatever weapon you have that does the most damage, and don’t bring an Interceptor. If you do, you will die often.
Demonstration for a solo fight
Equipment and effects that are commonly used
Pirate Destroyers can be difficult to find – most players won’t engage with them due to their high damage output, health (except Revenge and) health. These are some of the most commonly used pieces equipment and why are frequently used.
Waz’dum
This weapon is used widely for one reason and only one reason.
Regeneration.
Waz’dum can be used to ignore any other enemies or mechanics, depending on your seed chips. The weapon regenerates 15% of damage dealt, and both the hull and shield. You can fly up to most pirate destroyers and shoot their hulls directly without any consequences.
This won’t work against an ‘Experimental Destroyer’ because of its high damage resistances. However, it should work with any other Destroyer.
Coil Mortar and proximity Mortar
Coil Mortars are a common weapon due to their explosive damage. If your ship has access a fully automatic explosive weapon with higher damage, you might want to use it instead.
Coil Mortars can be accessed easily and are a standard weapon. They can be used on any Frigate and deal increased damage to Pirate Destroyers. Destroyers also take 75% bonus explosive damage and scales further within the melee coefficient.
Mortars don’t have a high base damage. Therefore, even if you seed chip your mortars properly, you might want to ensure that you have a bonus fire rate of at least 50%.
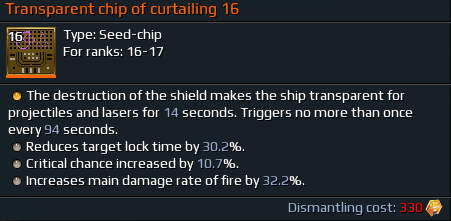
Transparency in the workplace
The bane of PvP and the easy way to engage in PvE – transparency makes you transparent. This means that all projectiles, lasers, and missiles will pass through the ship during the effect.
However, this will not stop you from being killed by AoEs or direct damage debuffs.
Modifiers like Thermal Nebula, pulsars from standard pirate destroyers, and the destabilising field called ‘Happy’ can still cause damage and possibly death if you are caught. If you are unsure if you can survive the effect, you should disengage.
Hull and Shield debuff
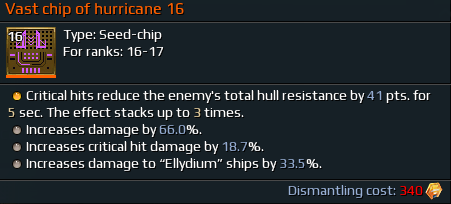
High damage builds have a staple: resistance debuff chip can greatly magnify your damage without requiring excessive damage chips. They can lower enemy resistances to all damage types up to 150 points, depending on the seed effect variant.
Shield debuffs don’t have the same importance as hull debuffs. With most pirate destroyers, you can fly under their shields to deal damage immediately – but they may still prove useful if your attacker is forced to attack from a distance.
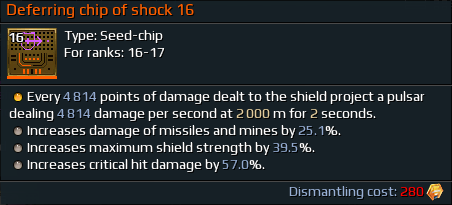
Pulsar Chips
This is the most common effect that seed chips can have on other players. This effect can be very helpful in’mobbing’, as it will likely be triggered during every engagement.
I wouldn’t recommend it unless the bonus stats complement the rest of your build.
Gun Adapter
Even if you don’t actually see it in play, you have probably seen Guards maul pirate wreckers at least once.
Gun adapter, although weak in PvP or PvE, is completely unhinged in Open Space. The ceiling for the damage bonuses is absurd. Nearly every enemy that spawns in a Destroyer fight is within the damage bonus range. This gives you an increasing damage bonus as each fight progresses.
A seed chipped Guard is a good choice if you are hunting.
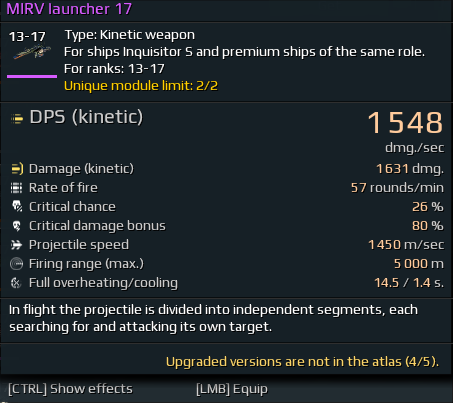
Launcher for ‘MIRV.
The underground presence of the ‘MIRV launcher’ has been a feature of high-health targets. It is almost impossible to use in PvP, and awkward in PvE. However, you might be able to see it in Special Operations or in Open Space.
Whatever the reason, MIRV launcher’s damage is greater at close ranges and against larger targets. This makes it a viable weapon for dealing pirate destroyers and even the Defiler, if you have seed chips.
Take note that MIRV has a low rate of fire weapons, so you might want to bring some fire rate to increase your DPS.
Conclusion
This should be enough for now. The mechanics of Pirate Destroyers are often updated silently, with new features being added or tweaked under the radar.
This guide will not be updated to reflect the changes (, unless it’s something significant like a new Destroyer).
Please let me know if you see an absurd number of typos.
I hope you enjoy the Guide we share about Star Conflict – Guide to Pirate Destroyers + Spawns + Locations Walkthrough; if you think we forget to add or we should add more information, please let us know via commenting below! See you soon!
- All Star Conflict Posts List



Leave a Reply