
Everything there is to know about Uberlights
What are Uberlights?
In SFM, there are 2 kinds of lights. Uberlights are more or less just your standard lights, but they offer much more control over the light and thus can increase the possibilities of what you can do with lights.
Functionally, Uberlights are almost identical to standard lights. The only difference being that the Uberlights actually make use of the nearEdge, farEdge, cutOn, cutOff, width, height, edgeWidth, and edgeHeight sliders on lights. All other sliders will function identically.
Uberlights fill a very niche role in SFM, and most of the time they are not necessary. It’s only when you need to have lights with a non-circular shape, or when you want smoother lighting in your scene, that you will use uberlights.
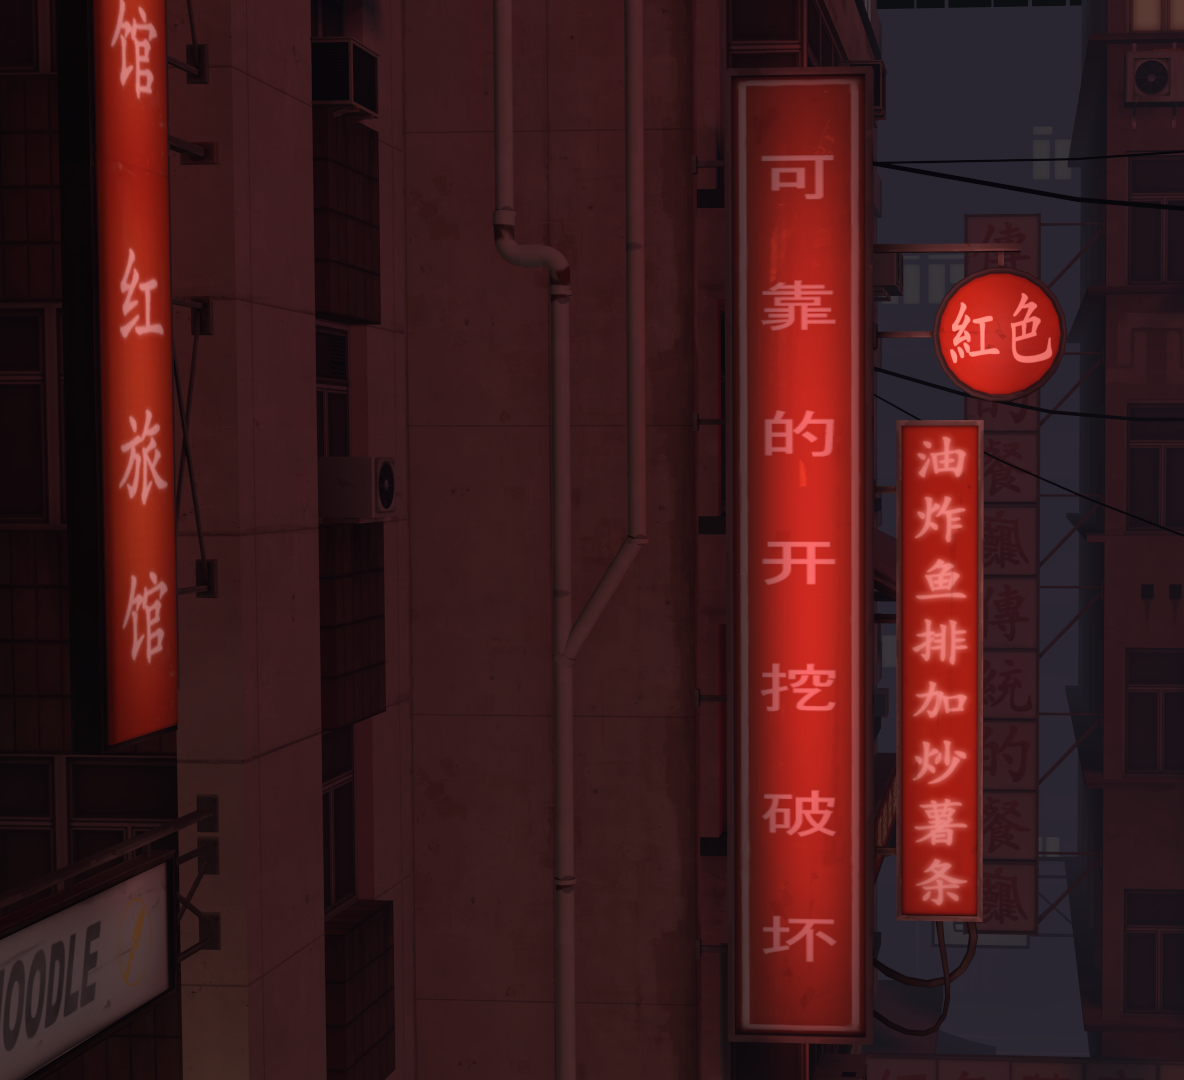
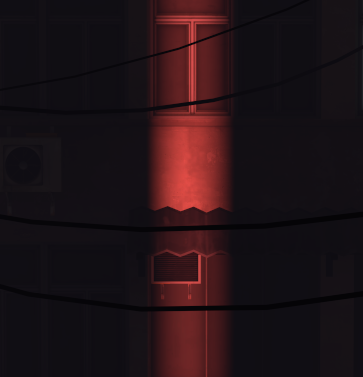
For example, if you wanted to light up these signs on kong_king, you would use an uberlight since they can create square lights:
How to create Uberlights
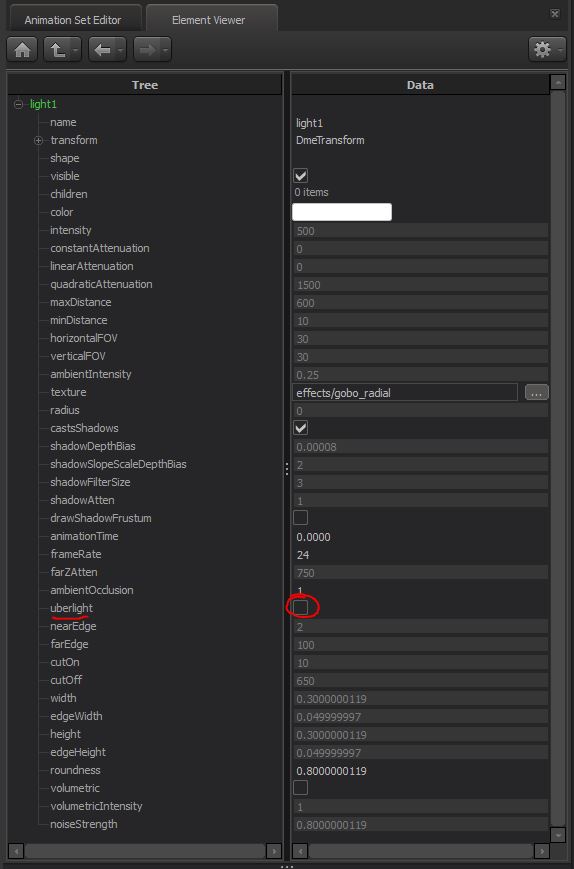
To create an uberlight, right click a light > Show in Element Viewer > Light. Once you are in the menu, scroll down until you see a little checkbox with the words “uberlight” on the left side. Click the box so that it has a check in it and bam! You have an uberlight.
Word of warning:
If you have remapped certain sliders in the light already, such as minDistance or maxDistance, converting that light into an uberlight will break the uberlight entirely. Because of this, I recommend that if you want to create an uberlight, you create a brand new light first, instead of using an existing one.
Understanding Uberlight components
I already covered the functions of many of these sliders in my other guide:
https://steamcommunity.com/sharedfiles/filedetails/?id=2486515012 – [steamcommunity.com]
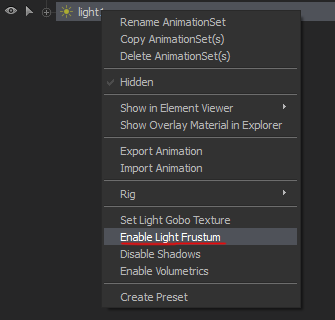
However, I will go much more in-depth with demonstrations of each slider. It is important to note that when working with uberlights, it is very helpful to enable the light frustrum to see what you are doing with the uberlight, since it is much more complex than a standard light.
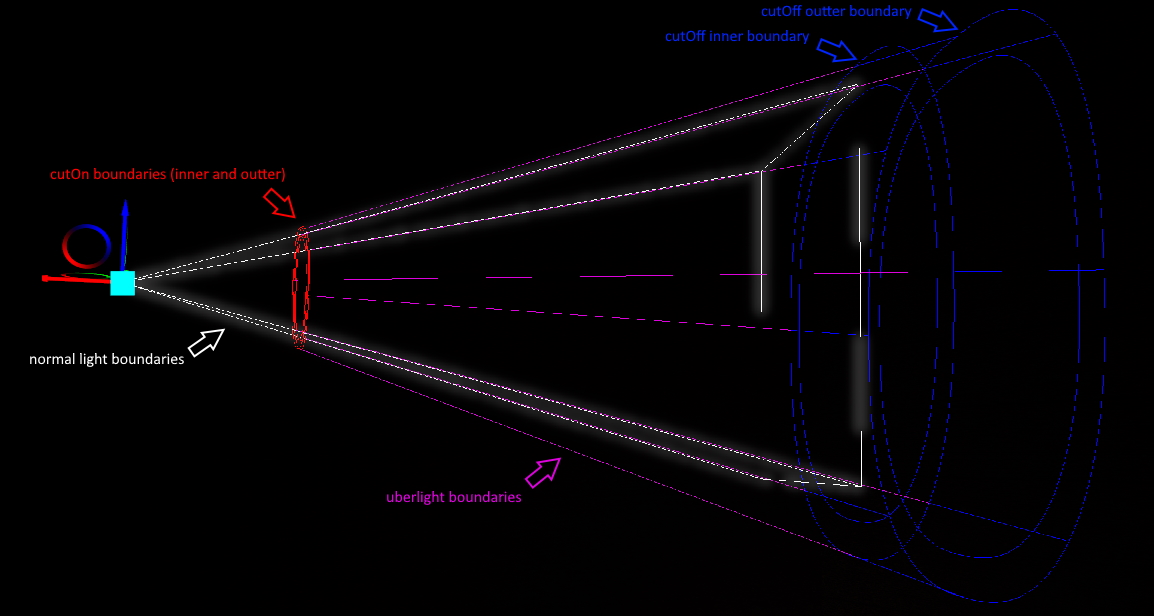
You will notice that when you enable the light frustrum, the light has many more moving parts than normal.
The white boundaries that are square are still important to keep track of since they are a hard capped limit to all sliders in the light. For example, you can expand things like the width or cutOff range past the white boundaries, but there will be no visible effect until the white boundaries include the uberlight boundaries. I will elaborate more in the sections below on how to manipulate all of these components of uberlights.
Width and height
One of the most key parts about an uberlight, and what you’ll find yourself using the most out of them, is the fact that you can create non-circular lights. This is especially useful for lighting non-circular objects specifically, such as the neon signs on koth_king I showed earlier.
The width and height sliders will control this. It’s pretty obvious what each will do, width controls the width, and height controls the height. Keep in mind, however, that there is no feature to round out the corners, so you are effectively stretching a circle into a really long oval, so to create a rectangular light, you want to max out either the width or the height so that the edges become straight.
CutOn and cutOff
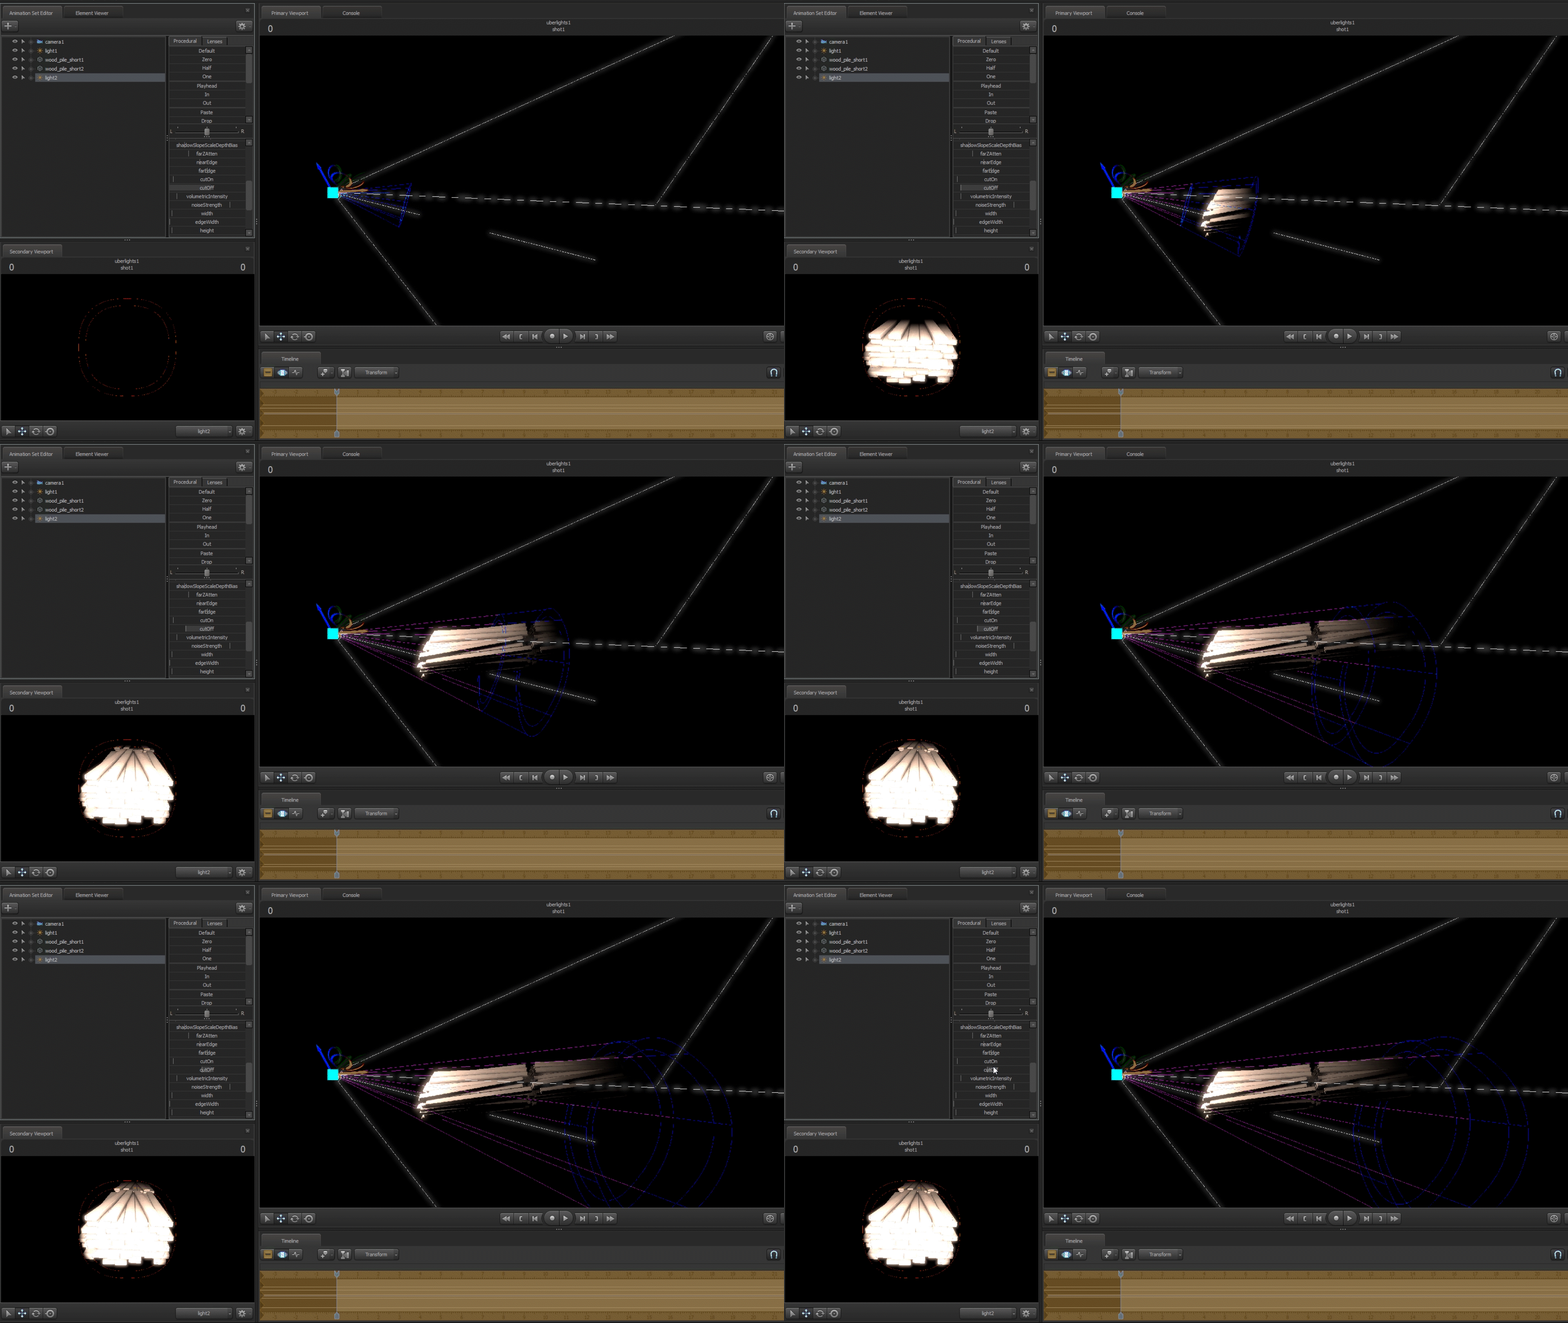
cutOn and cutOff function almost identically to minDistance and maxDistance with a few differences.
Note 1:
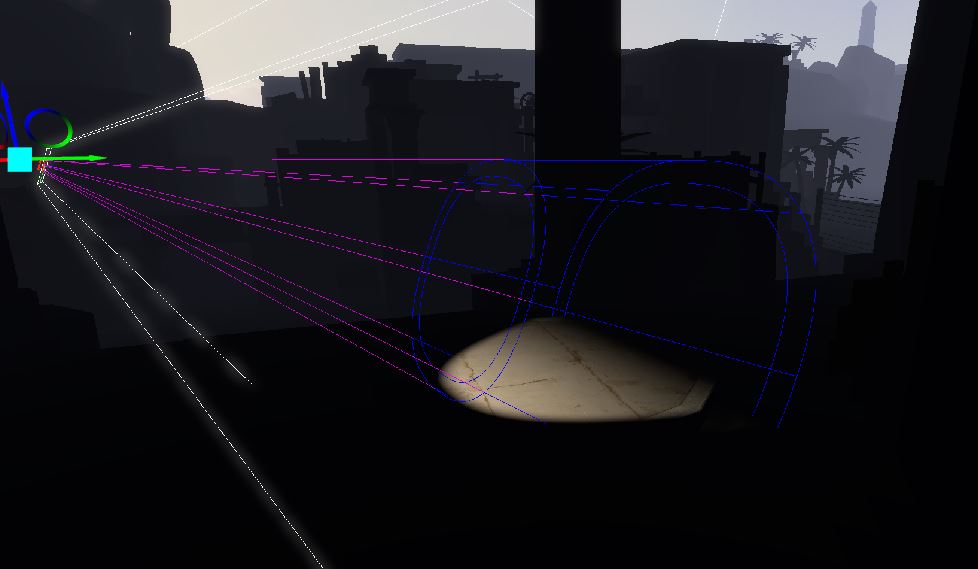
The two blue rings are the inner and outer edge of the cutOff. Starting from the inner edge (the smaller blue ring), the brightness of the light will begin to fade, until it reaches the outer edge (the bigger blue ring), where the light will stop completely. You can see this fading effect in the video above. More about this later.
Note 2:
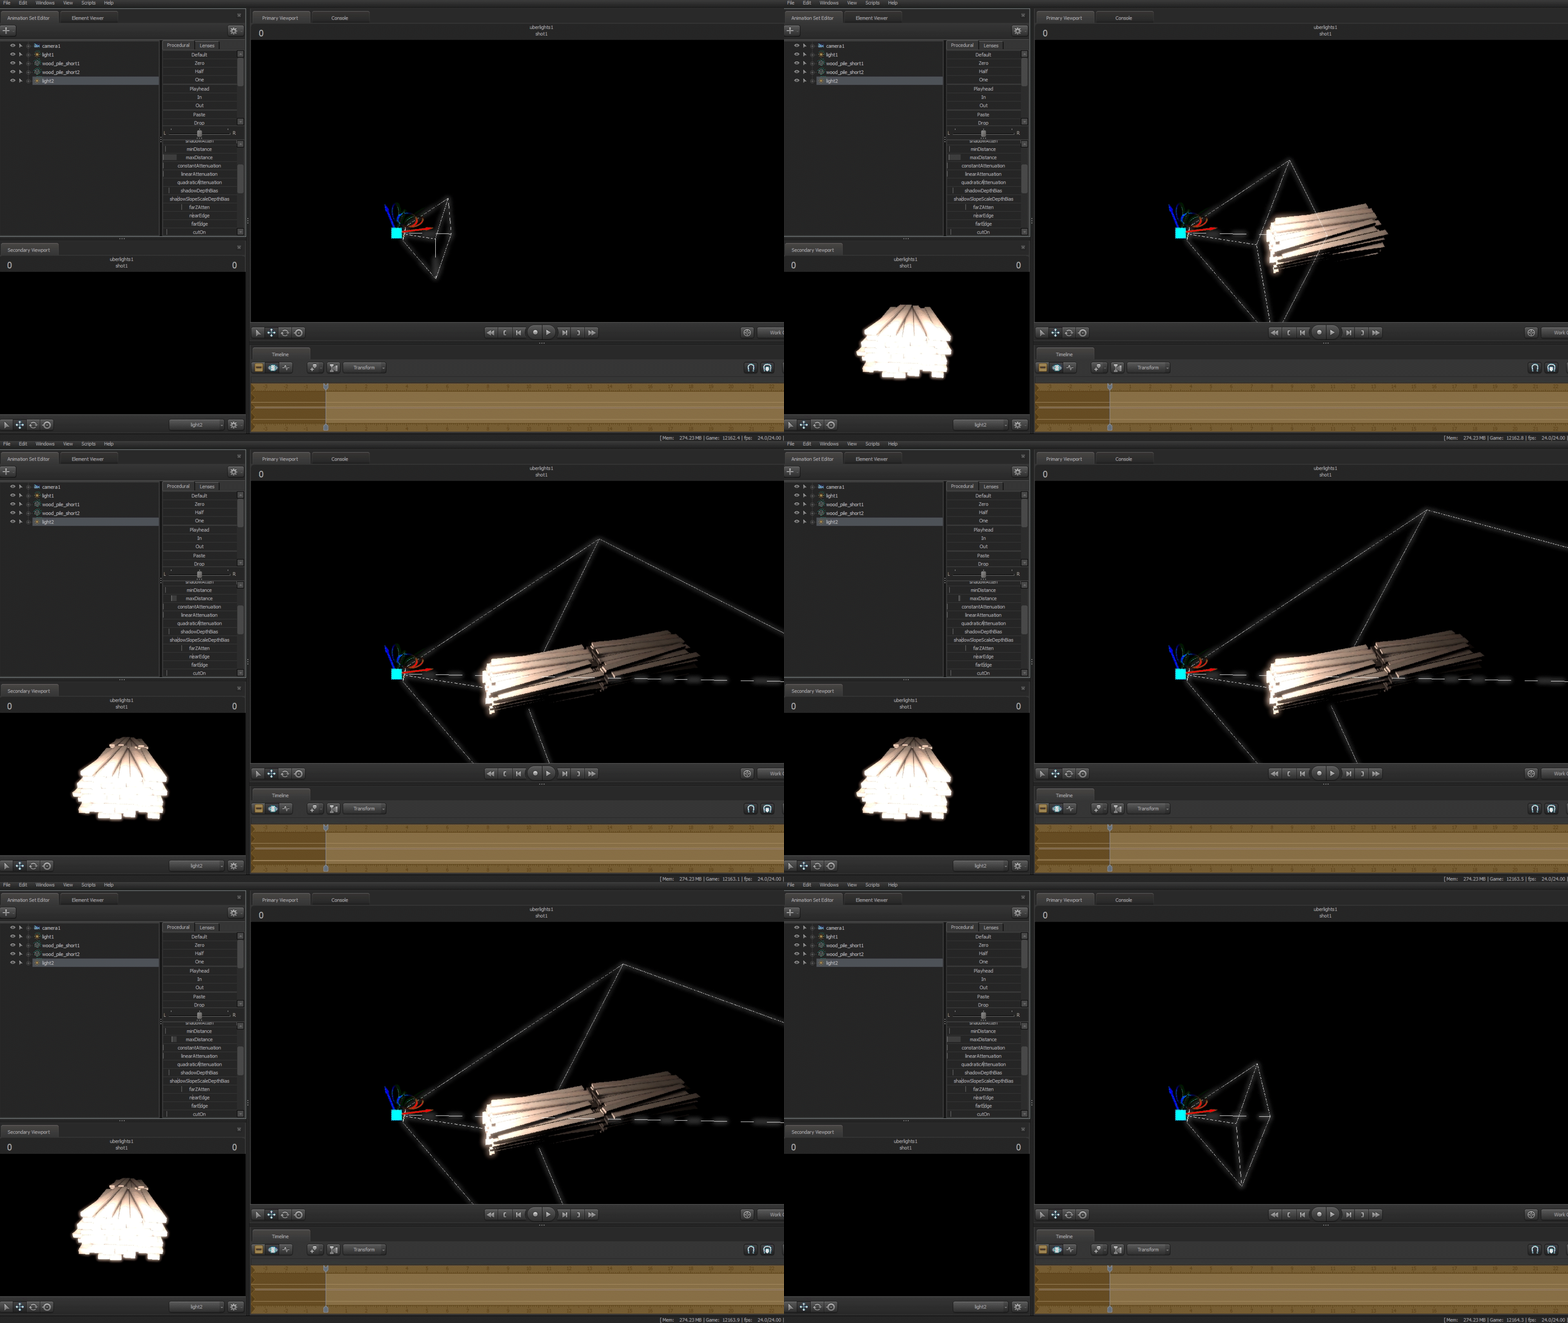
Before I talk about this point, there is something important to understand. Normal lights in SFM don’t really work like how you would imagine them to in real life.
When the max range of the light is changing, the only thing that is affected by the changing bounds is the shadows. The light itself is rendered exactly as normal until the max bound passes the object, and the planks are no longer within the bounds of the light at any point. In layman’s terms, SFM will continue to render light on objects normally, even past the bounds, as long as any part of the object is within the bounds of the light. This is an extremely annoying “quirk and feature” of SFM that can ruin a lot of scenes. This is where uberlights come in, and it is because of this feature alone that uberlights are useful beyond light shaping.
As you can see, with uberlights, the light will smoothly and naturally travel along the planks, following the bounds until the edges of either boundary.
NearEdge and farEdge
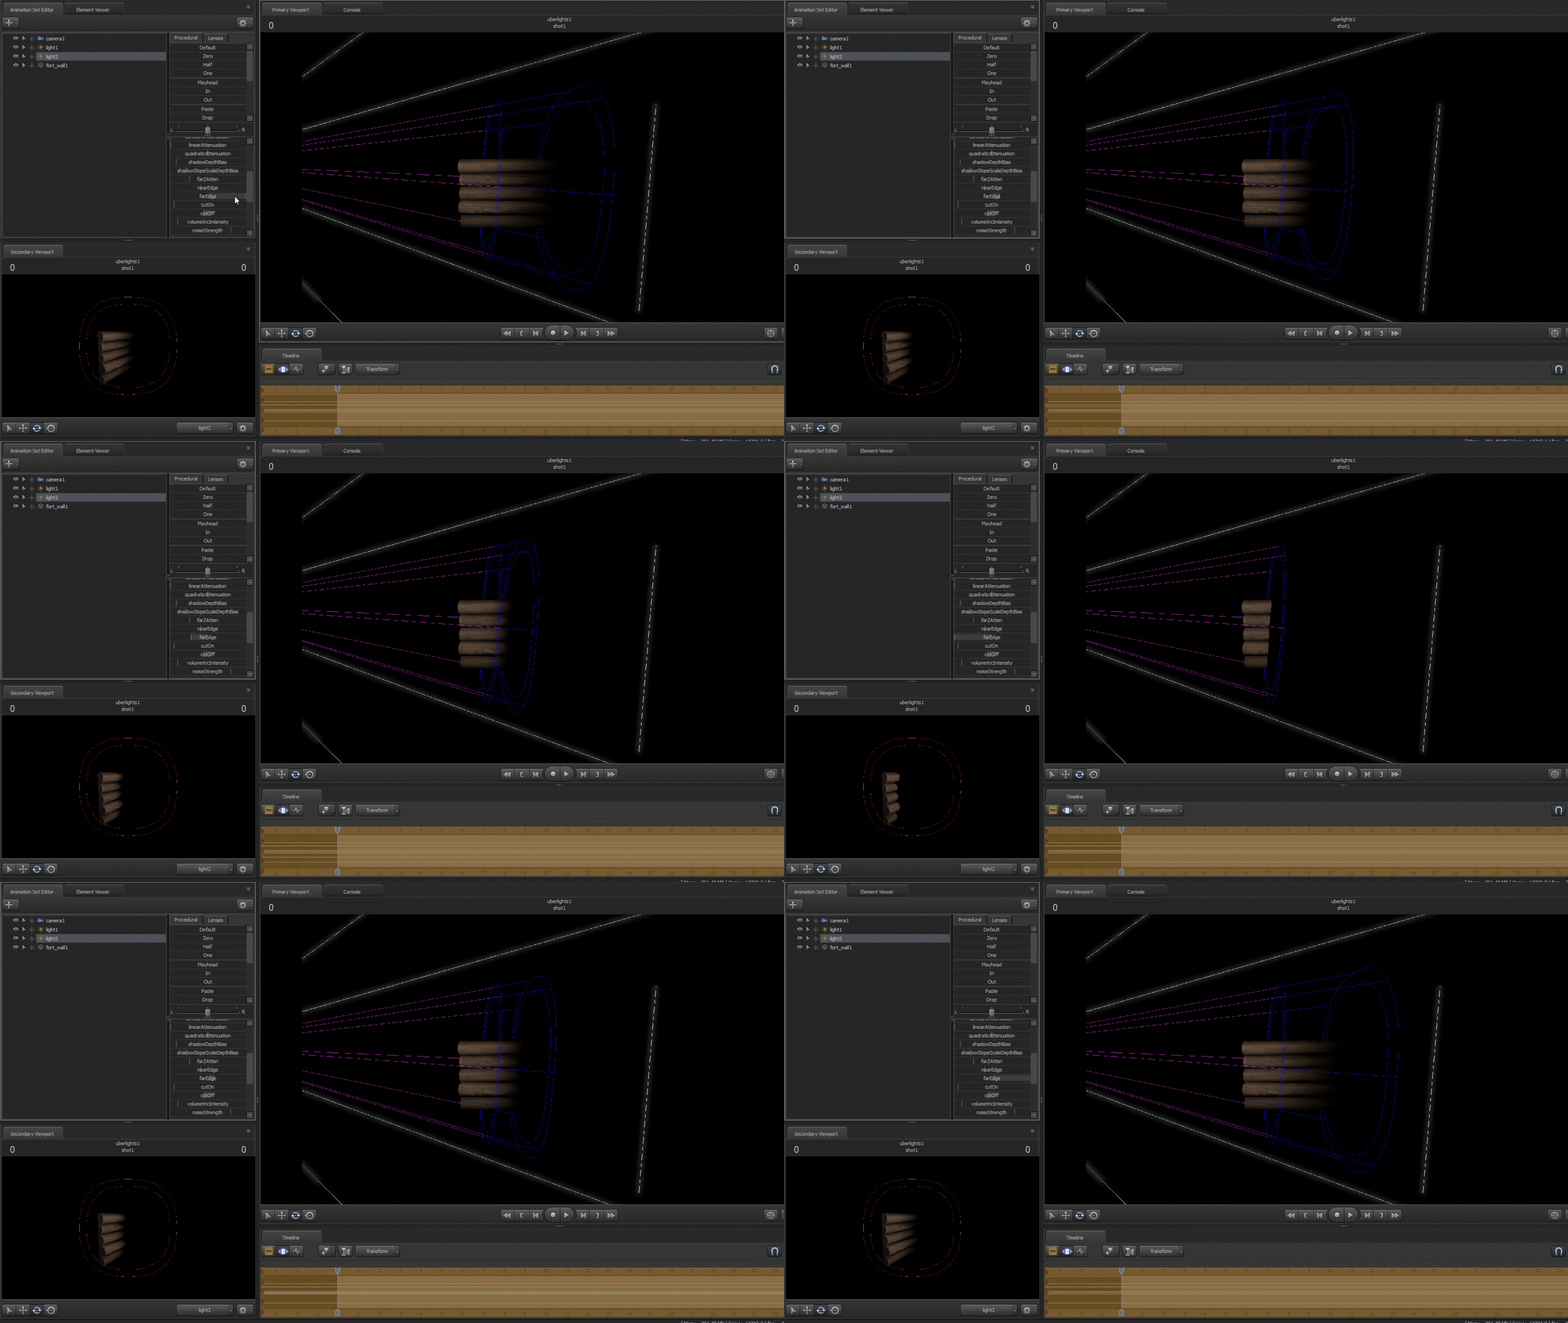
nearEdge and farEdge do the same things, just on the min and max range rings. For example, lets use farEdge.
By adjusting the farEdge slider, we are changing the distance between the two far rings, thus changing the distance the light has to fade off into the black. This is mostly just used to give lights a nice smooth transition into darkness instead of a very harsh and instant transition to black.
nearEdge does the same thing, but for the edge nearest to the light source. You might have to remap the sliders for this one a bit since the default values seem to barely provide any distance for you to work with. However, there are not a lot of situations that you will need to change how quickly a light fades in. farEdge is used far more often.
EdgeWidth and edgeHeight
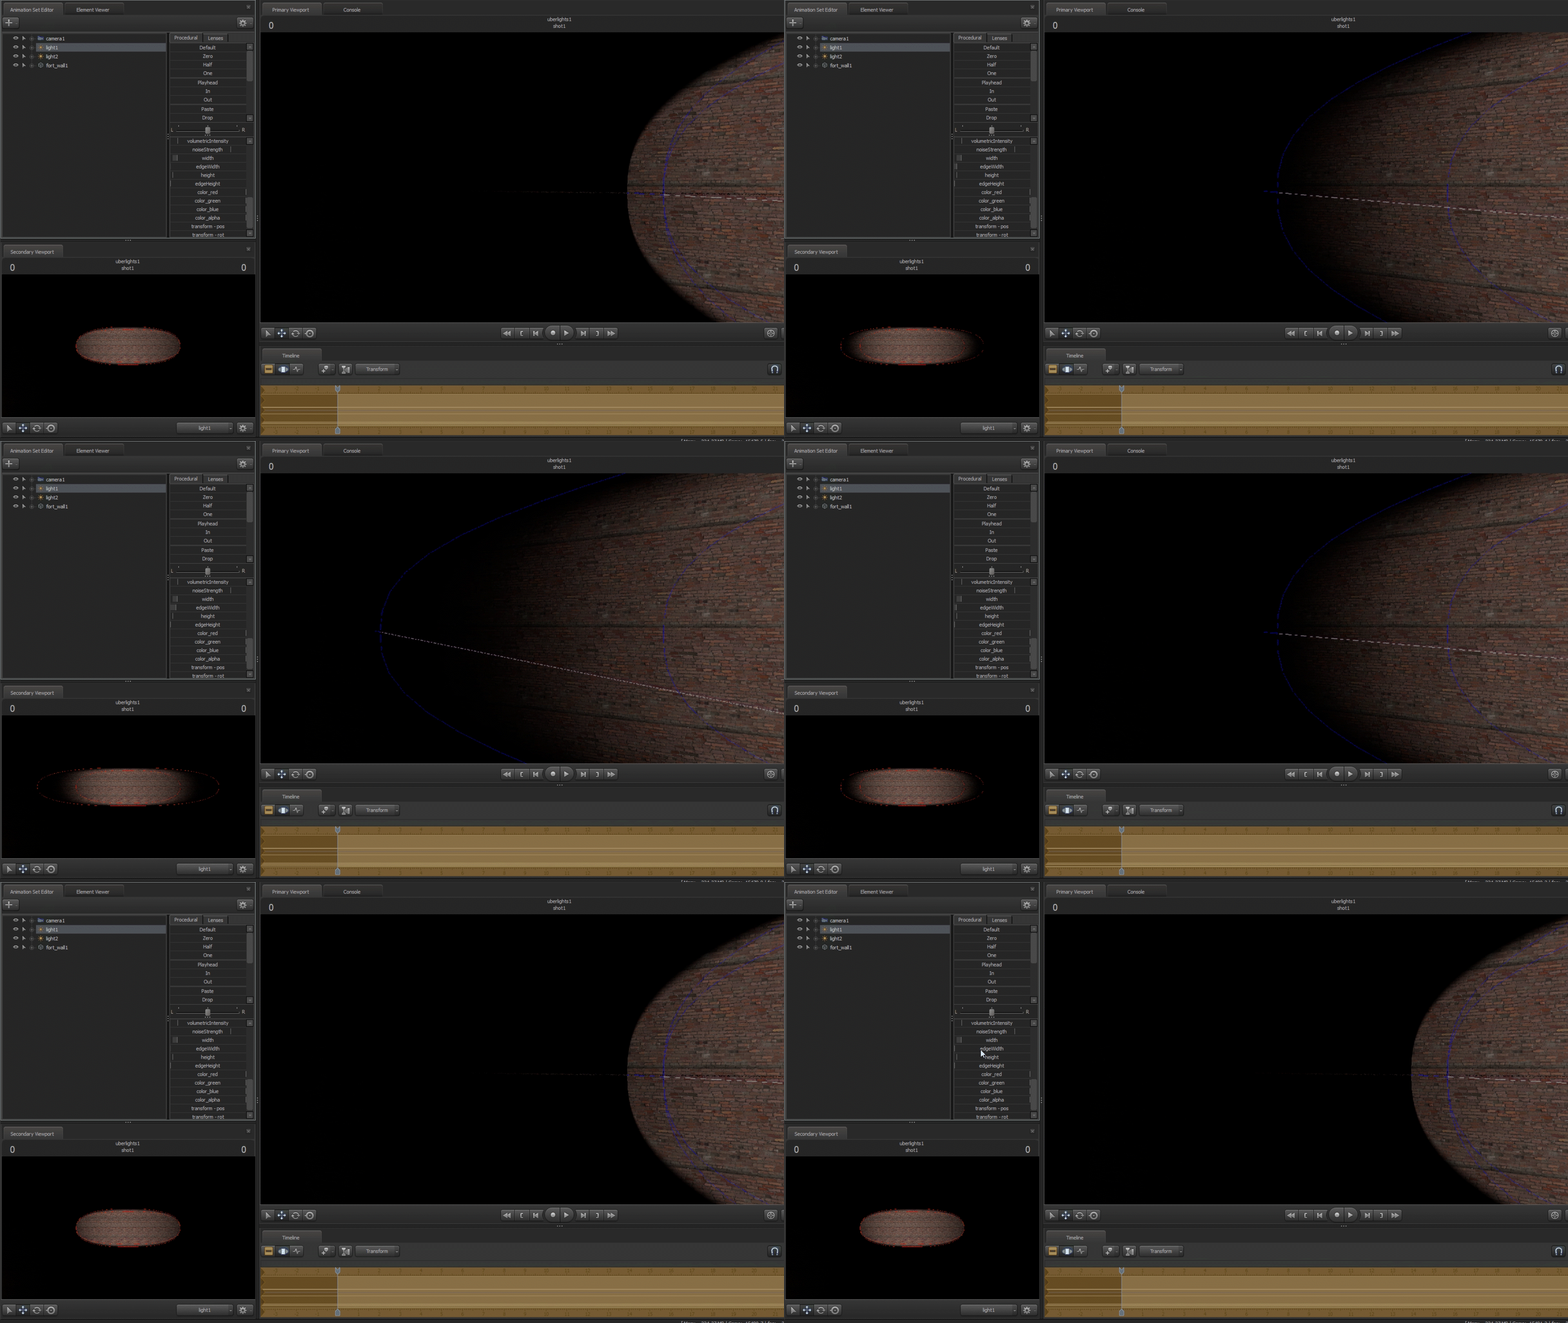
edgeWidth and edgeHeight do the same thing, just one is for width and the other is for height.
These two just control the outer circle for the max range circles. The wider these are, the more gradually the edges of the light will diffuse, and the narrower they are, the more quickly and harshly the light will diffuse.
Theres not much to this one really, often times I just set the edges to be as wide as possible since uberlights really excel when it comes to creating softer lights.
When should I use an uberlight?
Great question. Uberlights tend to me more complicated and difficult to work with, so keep your usage of them to a minimum. The only times you really need to use them are times when objects in your scene are not lighting correctly, or you need a rectangular light. There’s really no reason to use an uberlight otherwise.
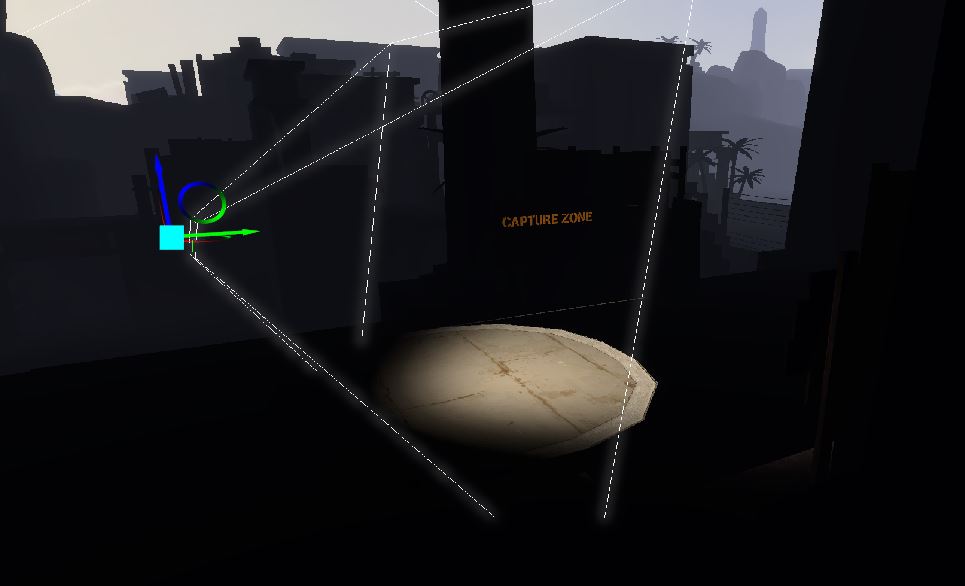
Take this scene for example:
Its not hard to tell that the lighting here is completely wrong. The control point area is fully lit even though half of it is out of the bounds of the light, creating an extremely harsh transition to darkness. Uberlights are ideal to use here since they will offer a normal and gradual change to darkness.
Obviously this is a pretty extreme example, but the concept is still there. Experiment around in your scenes with uberlights, and try to get creative. Like I said, uberlights fill a very niche area of SFM lighting and are rarely that useful, but they can add just that extra bit of smoothness to your scene to make it look much cleaner.
I hope you enjoy the Guide we share about Source Filmmaker – A Complete Guide to Uberlights; if you think we forget to add or we should add more information, please let us know via commenting below! See you soon!
- All Source Filmmaker Posts List


Leave a Reply