Introduction
Following this guide requires the Gathering Storm expansion.
It also assumes you have all other Civ 6 content, listed below, though it is not necessary to have these to utilise the key strategies of each civ.
- Pre-Rise and Fall content packs
- Vikings, Poland, Australia, Persia/Macedon, Nubia, Khmer/Indonesia
- Rise and Fall Expansion
- New Frontier content packs
- Maya/Grand Colombia, Ethiopia, Byzantium/Gauls, Babylon, Vietnam/Kublai Khan, Portugal
These content packs include exclusive civs, city-states, districts, buildings, wonders, natural wonders, resources, and a disaster, but not core game mechanics – all you need is the base game and the Gathering Storm expansion for those.
Persona Packs will not be covered until enough Civ players have access to them, as they would complicate the guides to America and France.
Power depends on two things: the force of arms and the observance of laws. Even the powerful must pay the price of disobedience. I shall cut down the over-proud; the wasteful and the rebellious; enemies within and without the Empire. That is all you need to know of me. Now go – serve the Romans.
How to use this guide
This guide is divided into multiple sections explaining how best to use and play against this specific civ.
- The Outline details the mechanics of how the civilization’s unique features work and what their start bias is if they have one.
- The Victory Skew section describes to what extent the civ (and its individual leaders where applicable) is inclined towards particular victory routes. This is not a rating of its power, but an indicator of the most appropriate route to victory.
- Multiple sections for Uniques explain in detail how to use each special bonus of the civilization.
- Administration describes some of the most synergistic governments, government buildings, policy cards, age bonuses, pantheons, religious beliefs, wonders, city-states and Great People for the civ. Only the ones with the most synergy with the civ’s uniques are mentioned – these are not necessarily the “best” choices when playing as the civ for a given victory route.
- Finally, the Counter-Strategies discusses how best to play against the civ, including a consideration of leader agendas if the civ is controlled by a computer.
Note that all costs (production, science, etc.) mentioned within the guide assume a game played on the normal speed settings. To modify these values for other game speeds:
- Online: Divide by 2
- Quick: Divide by 1.5
- Epic: Multiply by 1.5
- Marathon: Multiply by 3
Glossary
Terminology used in this guide and not in-game is explained here.
AoE (Area of Effect) – Bonuses or penalties that affect multiple tiles in a set radius. Positive examples include Factories (which offer production to cities within a 6 tile radius unless they’re within range of another building of the same type) and a negative example is nuclear weapons, which cause devastation over a wide radius.
Beelining – Obtaining a technology or civic quickly by only researching it and its prerequisites. Some deviation is allowed in the event that taking a technology or civic off the main track provides some kind of advantage that makes up for that (either a source of extra science/culture or access to something necessary for a eureka or inspiration boost)
CA (Civ Ability) – The unique ability of a civilization, shared by all its leaders.
Compact empires – Civs with cities close together (typically 3-4 tile gaps between city centres). This is useful if you want to make use of districts that gain adjacency bonuses from other districts, or to maximise the potential of area-of-effect bonuses later in the game.
Dispersed empires – Civs with cities that are spread out (typically 5-6 tile gaps between city centres). Civs with unique tile improvements generally favour a more dispersed empire in order to make use of them, as do civs focused on wonder construction.
GWAM – Collective name for Great Writers, Artists and Musicians. All of them can produce Great Works that offer tourism and culture, making them important to anyone seeking a cultural victory.
LA (Leader Ability) – The unique ability of a specific leader. Usually but not always, they tend to be more specific in scope than civ abilities. Some leader abilities come with an associated unique unit or infrastucture.
Prebuilding – Training a unit with the intention of upgrading it to a desired unit later. An example is building Slingers and upgrading them once Archery is unlocked.
Sniping – Targeting a specific city for capture directly, ignoring other enemy cities along the way. Typically used in the context of “capital sniping” – taking a civ’s original capital as quickly as possible to contribute towards domination victory without leading to a drawn-out war.
Start bias – The kind of terrain, terrain feature or resource a civilization is more likely to start near. This is typically used for civilizations that have early bonuses dependent on a particular terrain type. There are five tiers of start bias; civs with a tier 1 start bias are placed before civs of tier 2 and so on, increasing their odds of receiving a favourable starting location.
Complete information on start biases within the game can be found in the Civilizations.xml file (find the Civ 6 folder in Steam’s program files, then go through the Base, Assets, Gameplay and Data folders to find the file). DLC and Expansion civs have a similarly-named file in their corresponding folders.
Super-uniques – Unique units that do not replace any others. Examples include India’s Varu and Mongolia’s Keshigs.
Tall empires – Empires that emphasise city development over expansion, usually resulting in fewer, but bigger, cities.
Uniques – Collective name for civ abilities, leader abilities, unique units, unique buildings, unique districts and unique improvements.
UA (Unique Ability) – A collective name for leader abilities and civ abilities.
UB (Unique Building) – A special building which may only be constructed in the cities of a single civilization, which replaces a normal building and offers a special advantage on top.
UD (Unique District) – A special district which may only be constructed in the cities of a single civilization, which replaces a normal district, costs half as much to build and offers some unique advantages on top.
UI (Unique Improvement) – A special improvement that can only be built by the Builders of a single civilization. “UI” always refers to unique improvements in my guides and not to “user interface” or “unique infrastructure”.
UU (Unique Unit) – A special unit that may only be trained by a single civilization, and in some cases only when that civilization is led by a specific leader.
Wide empires – Empires that emphasise expansion over city development, usually resulting in more, but smaller, cities.
Outline (Part 1/2)
Start Bias
Byzantium has no start bias.
Civilization Ability:Taxis
- All military and religious units gain +3 strength per Holy City following Byzantium’s founded religion.
- Killing full civ or city-state units (including support units) causes Byzantium’s founded religion to increase in pressure by 250 points in cities within 10 tiles.
- This does not stack with the Disciples promotion for Warrior Monks.
- Holy Sites produce +2 Great Prophet Points per turn, up from +1.
Basil II’s Leader Ability:Porphyrogénnētos
- Light and heavy cavalry units do not have the usual 85% damage penalty against city defences so long as those cities follow Byzantium’s religion.
Basil II’s Unique Unit:Tagma
A medieval-era heavy cavalry unit which replaces the Knight
| Research | Obsoletion | Upgrades from | Upgrades to | Cost | Resource | Maintenance |

Divine Right |

Ballistics** |

Heavy Chariot |

Cuirassier |
220 or or |
10 Iron | 4 |
*Purchasing units with faith requires the Grand Master’s Chapel government building, which requires either the medieval-era Divine Right or renaissance-era Exploration civics.
**If you have insufficient iron, you may continue to train Tagmata even after researching Ballistics.
| Strength | Ranged Strength | Moves | Range | Sight | Negative Attributes | Positive Attributes |
| 48 |
N/A | 4 |
N/A | 2 |
|
|
Positive changes
- Costs 10 iron, down from 20 (-50%)
- Adjacent military and religious units receive +4 strength
- Units may only receive a strength bonus from one adjacent Tagma.
Outline (Part 2/2)
Unique Unit:Dromon
A classical-era naval ranged unit which replaces the Quadrireme
| Research | Obsoletion | Upgrades from | Upgrades to | Cost | Resource | Maintenance |

Shipbuilding |

Square Rigging* |
None | 
Frigate |
430 or |
None | 2 |
*If you have no access to nitre, you may continue to build Dromons even after researching Square Rigging.
| Strength | Ranged Strength | Moves | Range | Sight | Negative Attributes | Positive Attributes |
| 20 |
25 |
3 |
2 |
2 |
|
|
Positive changes
- 2 range, up from 1
- +10 ranged strength vs. land and naval units
Unique District:Hippodrome
A classical-era speciality district which replaces the Entertainment Complex
| Research | Terrain required | Required to build | Base production cost | Maintenance | Pillage yield |

Games and Recreation |
Any passable land tile within your territory. The city cannot already have a Water Park district. |

Arena Zoo Stadium |
27 * or 10. ** or 5. ** |
1 |
Pillager restores 25 health. |
*All districts increase in cost based on your technological and civic progress. If you have more or the same number of speciality districts as speciality district types you have unlocked and the former number divided by the latter is bigger than the number of copies of this district you have, you will receive a 40% discount.
**Purchasing districts with gold requires the governor Reyna (the Financier) with the Contractor promotion to be present in the city. Purchasing districts with faith requires Governor Moksha (the Cardinal) with the Divine Architect promotion to be present in the city.
| Adjacency bonuses | Other yields | Great Person points | Other effects |
| None | 3 |
None |
|
Positive changes
- -50% production cost
- Provides 3 amenities, up from 1
- Upon the district and its buildings’ completion, receive a free heavy cavalry unit. The free cavalry unit has no gold maintenance nor resource cost, even when upgraded.
- The free heavy cavalry unit is whichever one you can train that has the most strength.
Victory Skew
In this section, the civ is subjectively graded based on how much it leans towards a specific victory type – not how powerful it is. Scores of 3 or more mean the civ has at least a minor advantage towards the victory route.
| Leader | 
Culture |

Diplomacy |

Domination |

Religion |

Science |
| Basil II | 5/10 (Decent) |
3/10 (Acceptable) |
10/10 (Ideal) |
9/10 (Ideal) |
4/10 (Acceptable) |
Cultural victories make a fair backup path for Byzantium. Hippodrome district buildings can be a useful supplementary source of culture and tourism, while advantages to religious spread can aid with securing the 25% tourism modifier for a common religion.
Diplomacy is Byzantium’s weakest path. While extra amenities can indirectly help with gold and culture outputs useful for aid emergencies and key civics respectively, Byzantium on the whole is better-off going for other routes.
Domination and Religion are Byzantium’s strongest victory routes, and the strengths at both are closely intertwined. Strong warfare spreads Byzantium’s religion, while spreading the religion to more Holy Cities makes military and religious units alike stronger. The bonus to Great Prophet Points is very welcome when it comes to securing a religion and the all-important Crusade belief, though overall between domination and religion, domination victories have the edge for the civ. Being able to ignore city defences with fast, units is an extremely effective bonus for rapidly sweeping across the map, and the significant amenity boost makes conquests easy to hold.
Byzantium isn’t particularly equipped for a scientific game, though the amenity boost from Hippodromes can translate into a boost to key yields like science and production.
Civilization Ability:Taxis
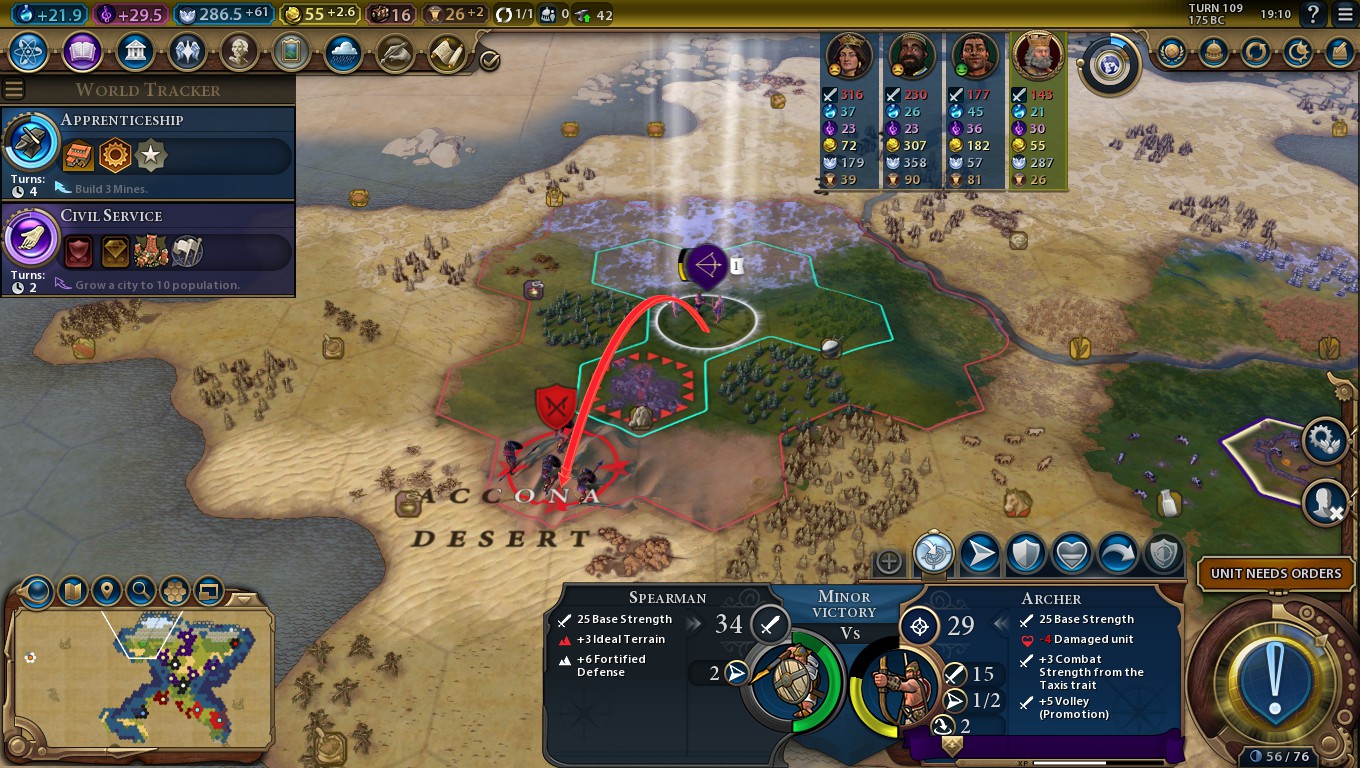
The strength bonus is great in war and theological combat alike, but it’s also helpful in clearing out Barbarians!
Byzantium mixes military and religious strengths closely together to create a civ that can spread their religion through war, and spread their religion to aid in war.
Holy Sites produce 2 Great Prophet Points
When starting out as Byzantium, it is a good idea to build a couple of Holy Sites very early in the game, or even just one with a Shrine. For this modest investment, you can secure yourself a religion and with it hopefully the Crusade enhancer belief.
Unlike most religiously-inclined civs, Byzantium doesn’t need that much of a religious infrastructure to get by, so it may be a good idea to focus on Settlers, culture, production and gold instead. As Tagmata are unlocked on the civics tree, it doesn’t matter so much if you fall a bit behind on science early on. Be sure to allow some district capacity so you can build Hippodromes later.
+3 Strength per converted Holy City
A city a religion is founded in is the holy city for that religion. It will produce twice as much religious pressure as another city of that religion with a Holy Site, or four times as much as one without.
Once you’ve founded a religion, therefore, so long as you keep that city following your religion, you’ll have a reliable +3 strength bonus for military and religious units alike. While not a huge advantage in individual battles, the net effect can be quite considerable considering the range of units covered.
Where this bonus really shines is if you are able to convert the holy cities of other religions. In peace-time, you can do this by sending Apostles with promotions such as Proselytiser and Translator. Buying Apostles in a city with Governor Moksha (the Cardinal) present with the Patron Saint promotion will maximise the chances each individual Apostle can secure these promotions.
Converting a rival holy city will most likely initiate a religious emergency against you. The most reliable way to stop a holy city from flipping away from your religion is to conquer it, but if this isn’t possible, surround the city with Apostles so religious rivals can’t get their own religious units close enough.
The maximum strength bonus possible from this ability is based on the number of religions in the game, which in turn is determined by the map size:
| Map Size | Number of Religions | Maximum Bonus |
| Duel | 2 | 6 |
| Tiny | 3 | 9 |
| Small | 4 | 12 |
| Standard | 5 | 15 |
| Large | 6 | 18 |
| Huge | 7 | 21 |
Four holy cities following your religion will allow adjacent Tagmata to fight at Cuirassier levels of strength even without the Crusade belief.
Overall, this bonus helps Byzantium to snowball. Once a few holy cities are taken, few will be able to resist Byzantium’s might.
Religious Spread Through Combat
Killing enemy military units – so long as they are not Barbarians – will cause your religion to spread to cities within 10 tiles. The effect works in the same way as killing a religious unit in theological combat, only without the loss of pressure for the target unit’s religion.
The exact amount of pressure is 250. For comparison, Missionaries at full health using a spread-religion charge add 200 pressure, and Apostles 220. The amount of followers of any given religion in a city is based on the proportion of overall pressure the city has. As such, 250 pressure will have a more significant effect in a city with minimal religious presence relative to a city with constant conversion by Missionaries.
A good way to use this bonus is to take the Crusade enhancer belief, which adds +10 strength to all your units in range of an enemy city following your religion. Killing a few of their units will help you flip the city’s religion, and then you can use the +10 strength boost to help take down the city defences.
Killing units may not be enough to flip cities’ religions – particularly larger cities with a long history of religious power struggles. As such, it helps to bring some Missionaries or Apostles along with your military. Apostles with the Proselytiser promotion will be particularly effective as they wipe out 75% of religious pressure for religions other than your own, allowing the +250 for killing enemy units to go much further.
Outside of Basil II’s leader ability and the Crusade belief, flipping cities to your religion when you’re at war with the city’s owner will provide you with an impressive 3 era score! This can quite easily secure you a chain of Golden Ages, and the associated loyalty bonuses will make it significantly easier to hold on to the cities you capture.
Summary
- Build a Holy Site or two early on to secure a religion, but don’t worry too much about investing in additional ones.
- Try to take the Crusade enhancer belief to maximise your potential unit strength.
- Bring some Apostles with the Proselytiser or Translator promotions along with your army to help with converting trickier cities.
Unique Unit:Dromon
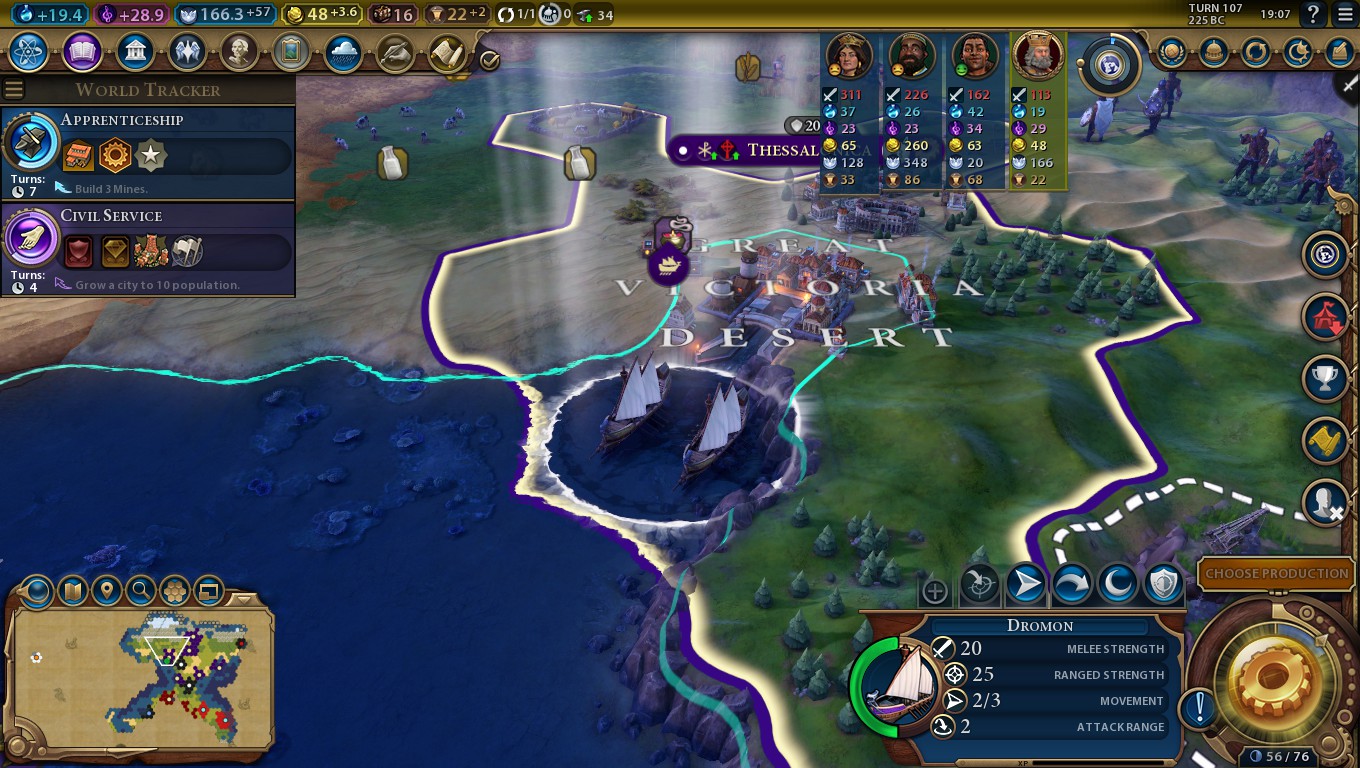
Byzantium’s other uniques have a tight synergy that makes them complement each other well, leaving Dromons as something of an outlier. This isn’t to say they’re bad units by any means, however, and make great explorers, coastal defenders, Barbarian killers and complements to Tagma warfare.
Getting to Dromons
To be able to build Dromons, you’ll need at least one coastal city as well as the classical-era Shipbuilding technology. It’s a good idea to settle on the coast as your second or third city (if your capital didn’t start there already). This will give you time to develop the city’s production base and build a couple of Galleys for Shipbuilding’s eureka.
Aside from water-heavy maps like Island Plates, it’s best not to beeline the Shipbuilding technology. You’ll need Astrology for Holy Sites and Builder technologies for general development to aid with early expansion and maximising your culture output. While Dromons and Galleys together can capture enemy cities, the facts they have to stick by the coast limits their attack angles, there are often few coastal targets this early in the game, and holding a captured city is difficult due to loyalty pressures undermines this strategy.
You’ll also want to pick up the Foreign Trade civic for the Maritime Industries military policy card so you can build Dromons in half as much time.
Using Dromons
The biggest advantage Dromons have over regular Quadriremes is their range. A range of 2 allows multiple Dromons to hit the same enemy target in a single turn where far fewer Quadriremes could manage. It can allow Dromons to attack enemy naval units from a safe distance, but even more significantly allows them to attack further inland.
The +10 strength bonus Dromons have against enemy units, combined with their range, makes them significantly stronger than regular Archers in this role – and more mobile – at the cost of being restricted to coastal tiles. A few Dromons can easily wipe out early enemy units, helping you to spread your religion via Byzantium’s civ ability. This is particularly useful with enemy cities that have a long coastline and are as such hard to attack with many Tagmata. You can also use Dromons as a second garrison unit in coastal cities – the combination of city walls, an Archer and a Dromon will make that city able to quickly kill would-be attackers.
The main vulnerability of Dromons is their low defence, which is no higher than regular Quadriremes. Just two or three Galleys can be enough to destroy a Dromon from full health, or two Catapults, so be sure to either use a front line of Galleys for safety, attack first before your enemies can counterattack, or be ready to retreat.
Obsoletion
Dromons dominate the seas until Caravels appear. Caravels have 55 strength, which is enough to destroy a Dromon in a single hit. As such, once Caravels appear but before the Square Rigging technology, keep your promoted Dromons safe in coastal cities. At Square Rigging, if you have spare nitre, go ahead and upgrade Dromons into Frigates.
Conclusion
Dromons are versatile and effective early naval units which are best-used as a naval complement to your more important land-based forces. They can clear the coasts of enemy units ready for your cavalry to sweep in and take the land.
Unique District:Hippodrome
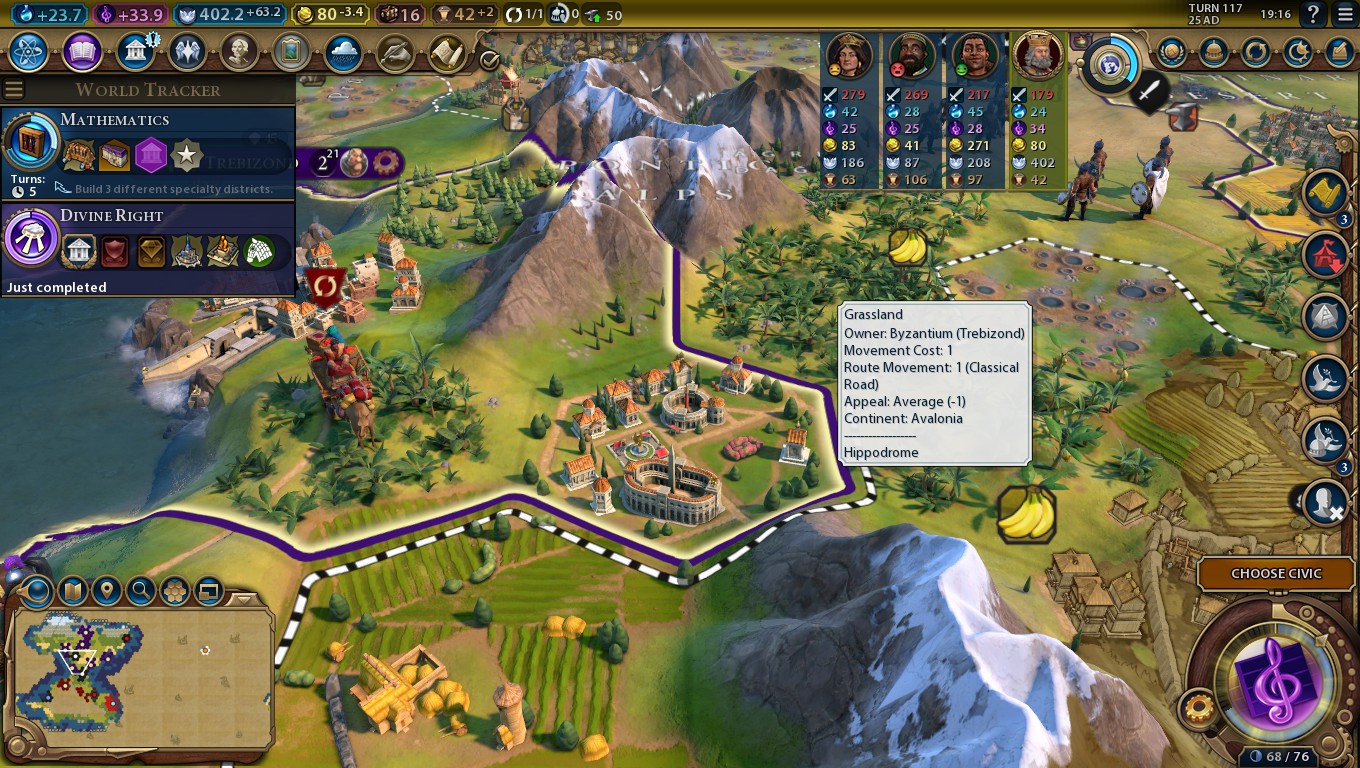
Hippodromes are a powerful district which can save you a significant amount of production and strategic resources in raising an army, while also providing enough amenities to cover war weariness. However, it’s important not to rush right into to completing them – with a little careful planning, you can raise an entire Tagmata force the moment you research Divine Right!
You can unlock Hippodromes at the classical-era Games and Recreation civic, but there’s no need to rush. Political Philosophy is the best classical-era civic to aim for first, while Drama and Poetry will help you increase your culture output and Theocracy will help you develop your religion.
The Tagma Rush
Once you research Games and Recreation, start building Hippodrome districts in as many cities as possible, but do not complete them – switch production to something else once there is just one turn of production left. On, or on the turn before, you research the Divine Right civic, switch back to building Hippodromes in all your cities that have them nearly completed. This will provide you with a significant Tagmata force for a minimum production cost and no need for iron, though watch out for gold maintenance.
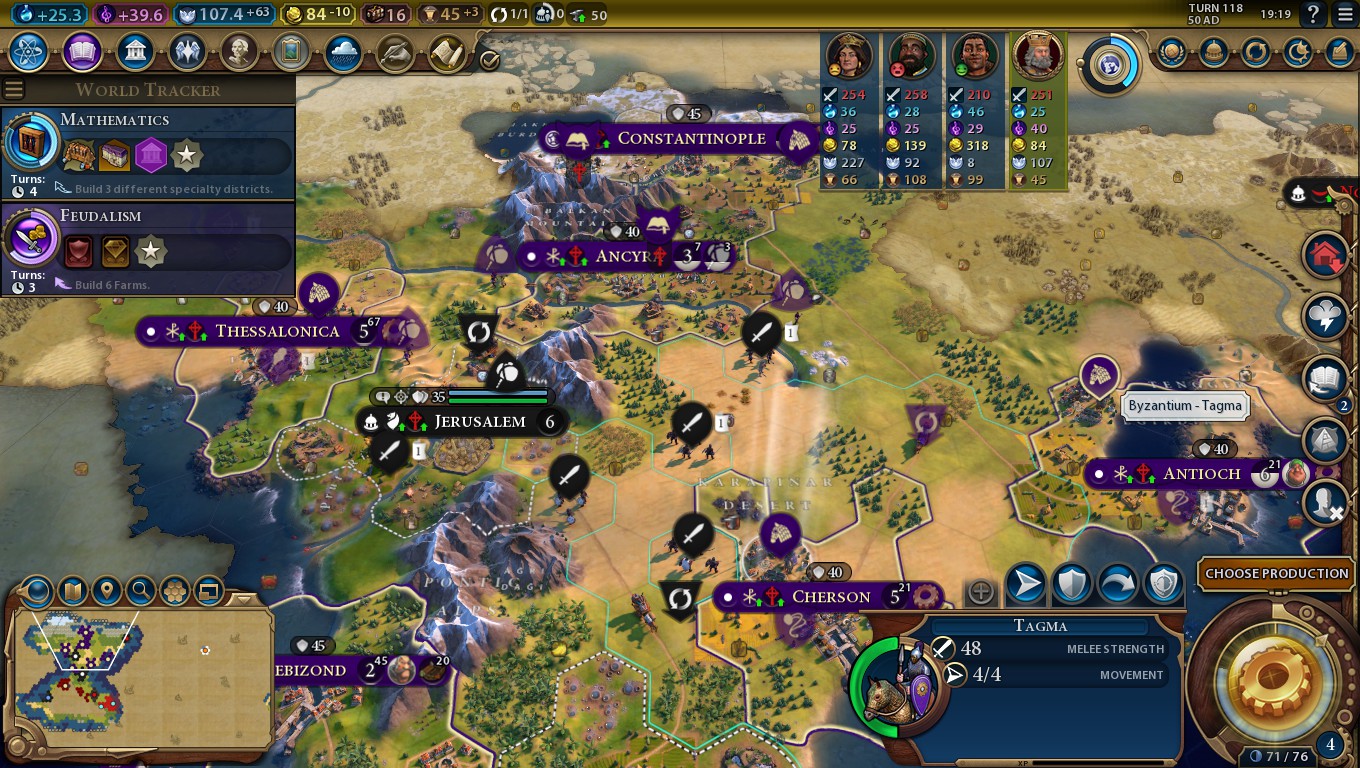
The cities of Constantinople, Thessalonica, Cherson and Antioch all completed Hippodromes simultaneously, granting me four Tagmata and twelve amenities!
Thanks to Basil II’s leader ability, a Tagma force can single-handedly take out an enemy empire, though it helps to bring along some religious units to make city conversions easier, and Dromons to clear the coasts.
After finishing the Hippodromes, you can then build Arenas for a second wave of Tagmata, and then focus on Harbours and Commerical Hubs to support the high maintenance cost. You might want to start expanding your science infrastructure as well so you can get to the industrial-era Ballistics technology at a reasonable rate, seeing as you’ll be able to upgrade Tagmata to the significantly stronger Cuirassiers then.
Heavy Cavalry
As Hippodromes specifically offer free Heavy Cavalry units, it’s a good idea to look at this unit category more closely. Heavy cavalry units all have in common a vulnerability to anti-cavalry units, immunity to Zone of Control and a distinct promotion tree. Those promotions are as follows:
| Promotion | Prerequisite | Effect | Notes |
| Charge | None | +10 vs. fortified units |
This promotion single-handedly makes heavy cavalry amazing at breaking through enemy unit lines, even against anti-cavalry units. That being said, you should still be aware of the defensive bonuses of rough terrain, or the combat penalties for attacking over a river, both of which can substantially lessen your unit’s potential damage. |
| Barding | None | +7 when defending against ranged attacks |
If you can sweep the lands free of enemy units, you’ll be taking damage largely from two main sources: damage dealt by defenders when you attack them, and ranged attacks. This promotion helps address the latter. Against a foe with a smaller army, you may find this promotion more useful than Charge. |
| Marauding | Charge or Rout | +7 vs. units in districts. |
This promotion may help you defend against garrisoned ranged units in city centres or Encampments, though is most useful against civs with a high number of districts such as Germany. |
| Rout | Barding or Marauding | +5 vs. damaged units |
While one of the weaker strength bonuses on offer here, it is among the most versatile. This promotion works most effectively with the help of a ranged attack – hit the enemy once from afar, and then move in for extra damage. Flanking the enemy also works well. |
| Armour Piercing | Marauding or Rout | +7 vs. other heavy cavalry units. |
The only land-based units fast enough to keep up with heavy cavalry are other cavalry. Light cavalry are slightly faster, but slightly weaker, so they shouldn’t be too troublesome unless in large numbers. With this promotion, you’re much less likely to be caught out by heavy cavalry, so you can get an edge over all the fast units of land. |
| Reactive Armour | Rout | +7 when defending vs. heavy cavalry and anti-cavalry. |
The biggest advantage here is the resistance to anti-cavalry, which mostly covers their inherent bonus against cavalry. Still, this does nothing to help you attack them, so beware of enemy anti-cavalry which use terrain to their advantage for massive defensive advantages. |
| Breakthrough | Armour Piercing or Reactive Armour | +1 attack per turn if movement points allow. | This promotion can almost double your damage output – almost, because heavy cavalry take some damage every time they attack, and units become weaker the more damage they take. It’s most effectively used where you have a significant strength advantage and hence will be taking minimal amounts of damage as you attack. |
Later Usage
While Hippodromes are most effective during the age of Tagmata, they remain powerful districts throughout the game. The second Entertainment Complex building – Zoos – arrive at just the right time to grant you free Cuirassiers, while the final building – Stadiums – arrive at the right time for oil-free Tanks or Modern Armour.
Furthermore, the significant amenity bonus means not only will war weariness be of minor concern for Byzantium. While Water Parks cannot be built in the same cities as Hippodromes, thus making it awkward for Byzantium to stack the amenity bonuses of Zoos, Stadiums, Aquariums and Aquatics Centres, extra amenities from Hippodromes covers that problem.
Summary
- Start construction of Hippodromes in as many cities as possible, but don’t finish building them until you get the Divine Right civic.
- Byzantium can reliably build a cavalry force even without strategic resources.
Basil II’s Unique Unit:Tagma
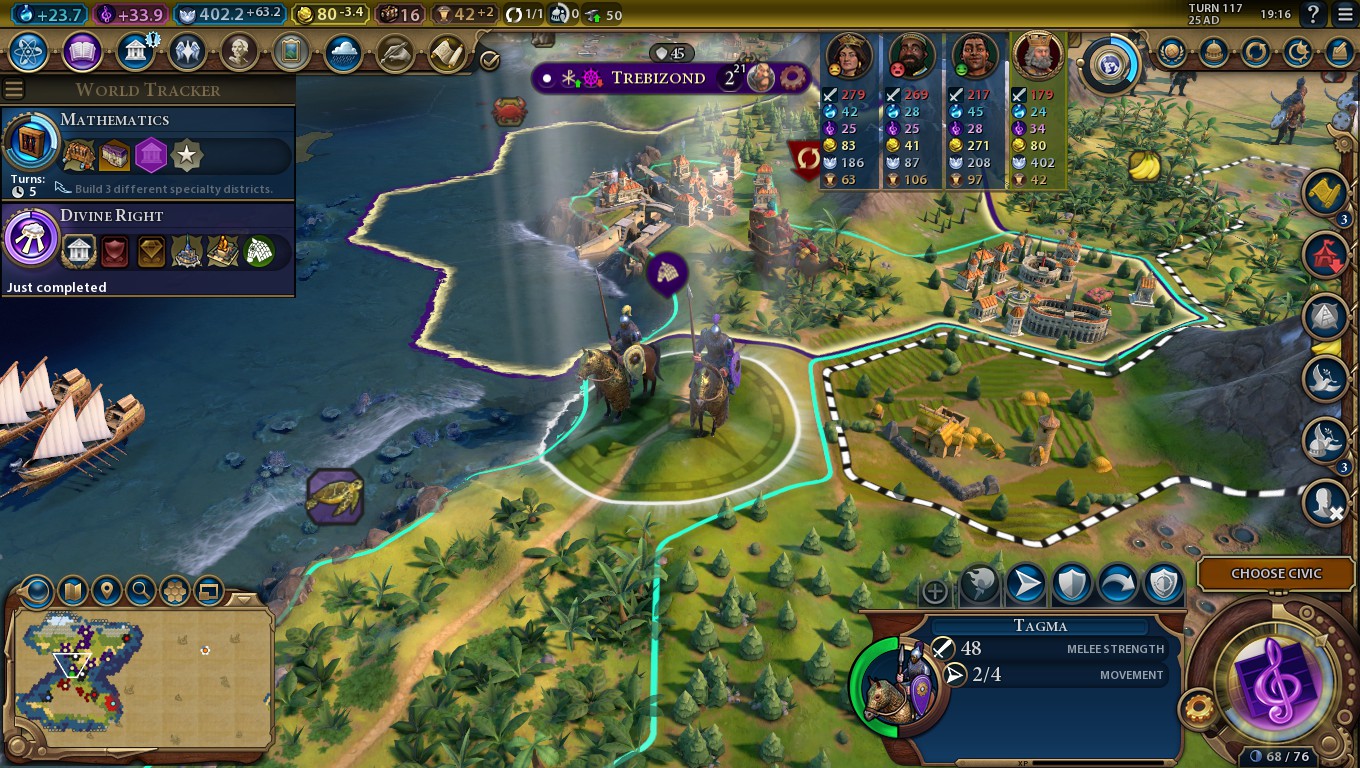
The power of Tagma units is deceptive – on their own, away from other units, they may seem no stronger than regular Knights, but paired together and taking Byzantium’s other abilities into account, they can create a devastatingly effective force capable of ripping apart enemy empires shockingly fast.
Unlocking Tagmata
Unlike regular Knights, which are unlocked at the medieval-era Stirrups technology, Tagmata are unlocked at the medieval-era Divine Right civic. While for many civs this change could cause a problem as many supporting units are found in the technology tree, Byzantium can downplay science generation altogether to emphasise training more Settlers and building more Monuments. That’s because Basil II’s leader ability removes the need for siege support, while the strength of Tagmata combined with Byzantium’s leader ability provides enough strength to cover most threats.
As with any key research path for any civ, it helps to earn as many inspiration boosts along the way to Divine Right as possible, though don’t be afraid to ignore inspiration boosts where they are particularly hard to earn. The most likely inspiration boosts to be skipped are:
- Drama and Poetry – Building a wonder isn’t generally worthwhile for Byzantium this early in the game seeing as you’ll need to make preparations for Tagmata wars.
- Defensive Tactics – Completely dependent on the actions of other civs.
- Recorded History – You can get by as Byzantium with a low early science output, and you need spare district capacity for districts other than Campuses (most notably Hippodromes, but also Encampments for a Great General and Commercial Hubs for gold will really help).
- Civil Service – Getting a city to size 10 can be tricky at this stage in the game, especially given how much culture you can generate from training new Settlers and founding new cities for extra Monuments.
The Games and Recreation inspiration (research the Construction technology) is difficult to achieve quickly, but if you focus on getting Recorded History and Theology first, you can buy plenty of time to get it. Building two Temples for Divine Right similarly isn’t too difficult as you’ll most likely already have two Holy Sites by the point you research Theology.
There is no need to create Heavy Chariot units ready for upgrading into Tagmata later. Instead, if you have spare gold, invest it in purchasing Monuments, Settlers or Builders so you can develop your cities and maximise your culture output, thus granting you access to Tagmata sooner. Hippodromes will provide you with plenty of Tagmata.
Tagmata in Combat
If you have founded a religion, and your Holy City follows it, then Tagmata start at 51 strength – enough to evenly match a Pikeman. Two Tagmata together will add 4 strength on top making 55 – on a par with a Musketman.
In theory, you can accompany Tagmata with Crossbowmen to extend their +4 strength advantage, but the lower mobility of Crossbowmen makes that difficult to use outside of cities in very rough terrain or if you’re playing defensively. Instead, a force made up of Tagmata with a few religious units to help with in-battle conversions can be enough to best your foes, though of course Dromons can help with anything near the coasts.
Tagmata also extend their strength bonus to religious units, though this bonus can be tricky to use. In active warfare, theological combat is unlikely to occur as you can simply use the “condemn heretic” function on military units to instantly destroy enemy religious units. It does have some niche functionality if you can secure open borders with another civ to allow a Tagma to accompany your religious units in, or if you’re playing defensively against Apostles and want to maximise the strength of your Inquisitors.
Obsoletion?
With the industrial-era Ballistics technology, you may only train Tagmata if you have between 10 and 19 iron, as any more and you’ll only be able to create Cuirassiers. Cuirassiers are significantly stronger in direct combat, but lack the +4 strength bonus to adjacent units. As such, it may be a good idea to upgrade most of your Tagmata to Cuirassiers while keeping a few around to boost their strength – a bit like a second, more limited, Great General. Form corps and armies with these remaining Tagmata so they can resist enemy attacks more easily.
Conclusion
Tagmata have a modest advantage over generic Knights in themselves, but their real power comes with Byzantium’s ability to raise lots quickly with Hippodromes, and the combat bonuses of Byzantium’s civ ability and Basil II’s leader ability. The next section will specifically cover how Basil II’s leader ability makes Tagmata – and other cavalry units – significantly more effective in warfare.
Basil II’s Leader Ability:Porphyrogénnētos
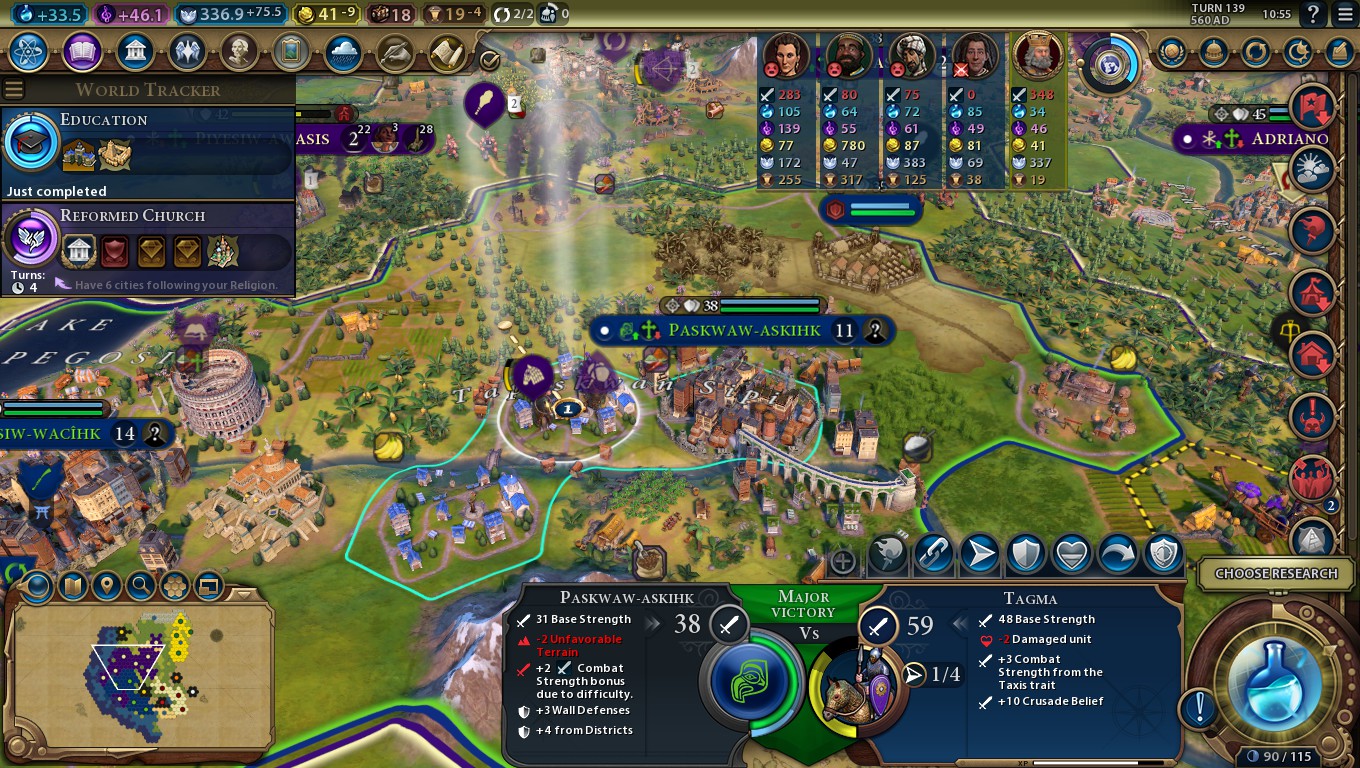
Even without support, this unit alone could rip down those outer defences in just two turns.
Any city that follows your religion can be taken down without siege support.
That’s Basil II’s leader ability in a nutshell – and a significantly more powerful bonus than it may at first appear. Siege units are very slow, while siege support units like Battering Rams and Siege Towers are both slow and must be paired with slow units like Swordsmen. By allowing cavalry units to deal full damage against city defences, you can quickly rip down city walls and then move on to the next city. This allows Byzantium to conquer a civ particularly quickly.
The two big limitations are the need to convert the city to your religion, and the need to use cavalry units.
Byzantium’s civ ability allows you to convert enemy cities by killing nearby enemy units, but be prepared to bring along some religious units to help finish placing pressure on them. Seeing as you have to convert enemy cities anyway to use this bonus, you might as well use the Crusade enhancer belief for an extra +10 strength, making ripping down enemy walls even faster.
The restriction to cavalry units can be trickier to work around, as smart opponents will start investing in anti-cavalry to stop your forces. One possible countermeasure is to send religious units of your own into a third civ you are not at war with, in order to convert their Holy City and secure yourself an extra +3 strength bonus. However, this can require a heavy faith investment you might not have. You can also try bringing along some melee infantry units along with Siege Towers (earlier on) or Artillery (later on) to deal with enemy anti-cavalry and stubborn cities that won’t convert, but this will slow down your attacks. Another strategy is to team up against your target with a civ strong at using melee infantry units, like Rome or Spain.
Conclusion
Basil II’s leader ability allows you to replace siege support with religious units, and reduces the need to emphasise science early in the game. It allows you to switch rapidly from conquest to conquest, but can be prone to making your assaults predictable.
Administration – Government and Policy Cards
Note that the Administration sections strictly cover the options that have particularly good synergy with the civ’s uniques. These are not necessarily the best choices, but rather options you should consider more than usual if playing this civ relative to others.
Governments
Tier One
Despite doing little for warfare, Classical Republic can be a good choice for early development. More economic policy card slots allows you to boost Settler, Builder and general production all at once with the Colonisation, Ilkum and Urban Planning policy cards respectively. The more cities you have developed, the more culture you can generate and the more Hippodromes you can build.
Add the Warlord’s Throne for a production bonus every time you take a city.
Tier Two
Theocracy extends your advantages in theological combat, provides extra faith, cuts the cost of faith purchases and has an excellent balance of military and economic policy cards.
The Grand Master’s Chapel allows you to funnel your faith into military units.
Tier Three
Fascism‘s war bonuses work well for Byzantium’s combat-based strategy, even if you’re aiming for a religious victory.
The War Department ensures you can kill units (and spread your religion) more often as it heals your units by 20 points on every kill.
Tier Four
Corporate Libertarianism‘s production bonuses and military policy cards work well for a domination victory, while Synthetic Technocracy enhances the production of Holy Site Prayers projects and offers more economic policy card slots, making it ideal for the religious game.
Policy Cards
Ancient Era
Colonisation (Economic, requires Early Empire) – The more cities you have, the more Monuments and Hippodromes you can build for culture and Tagma units respectively.
Conscription (Military, requires State Workforce) – Tagmata cost a massive 4 gold per turn to maintain, so any saving you can get will be very welcome.
Maritime Industries (Military, requires Foreign Trade) – Allows you to build Dromons effectively twice as fast.
Urban Planning (Economic, requires Code of Laws) – Makes it significantly easier to build Monuments in new cities, allowing you to maximise your overall culture output and get to Divine Right sooner.
Medieval Era
Chivalry (Military, requires Divine Right) – Need to train additional Tagmata or Cuirassiers and have ran out of potential Hippodromes and their buildings? Chivalry allows you to train these units faster.
Professional Army (Military, requires Mercenaries) – Upgrading a Tagmata force to Cuirassiers can cost a lot of gold, so this policy card will help lessen that burden.
Renaissance Era
Religious Orders (Economic, requires Reformed Church) – Extends on the theological combat advantages offered by both Byzantium’s civ ability and the Tagma UU.
Wars of Religion (Military, requires Reformed Church) – A good fallback if you’re struggling to convert the cities of another civ, as it’ll let you fight their units more effectively.
Industrial Era
Force Modernisation (Military, requires Urbanisation) – Heavy cavalry units obtained from the Hippodrome unique district have no resource maintenance cost, so upgrading your Tagmata and Cuirassiers to Tanks and Modern Armour can save you quite a bit of oil. However, you’ll need plenty of gold to do so, so as such this policy card will help.
Modern Era
Levee en Masse (Military, requires Mobilisation) – Helps cover the high maintenance costs of a large heavy cavalry force.
Lightning Warfare (Military, requires Ideology) – Helps you train extra cavalry units to make use of Basil II’s leader ability if your Hippodromes aren’t providing enough.
Administration – Age Bonuses and World Congress
Age Bonuses
Only bonuses with notable synergy with the civ’s uniques are covered here.
Exodus of the Evangelists (Dedication, Classical to Renaissance eras) – You can get quite a lot of bonus era score as you fight with this dedication and Byzantium’s civ ability together. Converting a city of a civ you’re at war with will provide +3 era score on top!
Exodus of the Evangelists (Golden Age, Classical to Renaissance eras) – While a great choice for any religious civ, Byzantium’s ability to spread their faith via warfare does somewhat limit the effectiveness of this dedication. That being said, while you’re attacking one civ, you can convert the Holy City of another for a strength boost, and faster religious units with more charges will really help with that.
Monumentality (Golden Age, Classical to Renaissance eras) – Rather useful for early development if you have some spare faith around, especially seeing as Byzantium’s religious game is less faith-dependent than most religious civs.
Pen, Brush and Voice (Golden Age, Classical to Medieval eras) – Ideal for a classical-era Golden Age, this dedication will save precious turns on the way to Divine Right. The sooner you get Divine Right, the more effective your Tagma conquests will be.
Twilight Valour (Dark Age, Classical to Renaissance eras) – Tagmata will be able to deal even more damage. Their high mobility means retreating to friendly territory to heal is a good move for them anyway, so the downside isn’t too much of a problem.
World Congress
How you should vote in the World Congress will often be specific to your game – if you have a strong rival, for example, it might be better to vote to hurt them than to help yourself. Furthermore, there may be general bonuses to your chosen victory route or gameplay which are more relevant than ones that have stronger synergy with civ-specific bonuses. Otherwise, here’s a list of key votes that have high relevance for this civ relative to other civs.
Mercenary Companies – Effect B (Producing, or purchasing military units using the chosen currency type costs 100% more until the next World Congress) on whichever currency type your opponents are most likely to use.
Seeing as Byzantium can gain key heavy cavalry units indirectly, you can put up the cost of units to other civs without a penalty to yourself.
Military Advisory – Effect A (Units of the chosen land promotion class gain +5 strength) on heavy cavalry units.
Byzantium will tend to have more heavy cavalry units than other civs due to the way the Hippodrome UD works.
Urban Development Treaty – Effect A (+100% production towards buildings in this district) on Entertainment Complexes
Allows you to build Arenas, Zoos and Stadiums faster, therefore helping you secure Tagmata faster.
World Religion – Effect A ( +10 strength for all religious units of this faith) on your founded religion.
With Byzantium’s civ ability, this will make your religious units extremely potent in theological combat.
Administration – Pantheons, Religion and City-States
Pantheons
God of Healing – Due to the mechanics of Byzantium’s civ ability, rival religious civs make ideal conquest targets. These will tend to have plenty of Holy Sites in their cities, and with this pantheon, you’ll be able to rapidly heal up your units there after each city capture.
God of War – Can help provide a little extra faith as you fight rival religious civs, as you’ll be capturing their Holy Sites along the way.
God of the Open Sky – The more culture you can secure, the faster you can launch Tagmata wars, making this pantheon extremely useful.
Goddess of Festivals – An alternative source of culture.
Religious Beliefs
You can have one founder, one follower, one enhancer and one worship belief.
Choral Music (Follower) – Developing Holy Sites can now be an additional source of early culture, helping you get to Divine Right faster.
Crusade (Enhancer) – The most important belief for Byzantium to get (though you can still be successful at war without it), Crusade offers a massive +10 strength bonus near rival cities you convert. Byzantium’s civ ability makes converting enemy cities in war much easier than it would otherwise be.
Defender of the Faith (Enhancer) – A reasonable backup to Crusade, this helps to hold on to cities you convert and capture.
Lay Ministry (Founder) – Can be a minor source of culture if you can’t secure stronger sources like Choral Music or World Church.
Mosque (Worship) – Extra spread-religion charges for Missionaries and Apostles is particularly helpful when they’re supporting your military units on the front lines, far from any Holy Sites to purchase more.
Tithe (Founder) – A reasonable source of gold to cover heavy cavalry maintenance.
World Church (Founder) – A decent source of culture to help you get to Divine Right faster.
City-States
Ayutthaya (Cultural) – Bonus culture for your journey to the Divine Right civic.
Fez (Scientific) – Converting cities to your religion for the first time – which happens a lot via Byzantium’s civ ability – will now grant you science on top!
Kumasi (Cultural) – The trade route bonus can be a reasonable source of culture early in the game.
Nan Madol (Cultural) – Your Dromon-producing coastal cities can now provide a little bit of bonus culture.
Yerevan (Religious) – Allows you to consistently take the Proselytiser promotion for Apostles, which makes it much, much easier to convert the religion of rival cities which have a lot of accumulated pressure from other religions.
Administration – Wonders and Great People
Wonders
Great Lighthouse (Classical era, Celestial Navigation technology) – The mobility advantage allows Dromons to easily chase down enemy units on the coast.
Terracotta Army (Classical era, Construction technology) – Finishing this wonder just after you complete a round of Hippodromes can give you access to the powerful first tier of promotions for all your Tagmata.
Hagia Sophia (Medieval era, Buttress technology) – An extra spread-religion charge is rather helpful for Missionaries and Apostles on your front lines, especially when they’re far from any Holy Sites making it hard to move new ones in.
Taj Mahal (Renaissance era, Humanism civic) – Byzantium, via their civ ability, can easily convert the cities of civs they are at war with, which provides +3 era score every time. With the Taj Mahal wonder, that rises to +4 every time, making it even easier to chain together Golden Ages.
Great People
Remember that these are only the ones that have particular synergy with Byzantine uniques, not necessarily the most effective options. Obviously, all Great Generals can be useful in warfare, but it would be redundant to list them all.
Classical Era
Gaius Duilius (Great Admiral) – The +1 movement and +5 strength bonus of a Great Admiral to multiple Dromons is better than a +10 strength bonus to just one, but if you have another classical-era Great Admiral, retiring Gaius Duilius can produce an extremely strong Dromon capable of killing Spearmen in a single hit.
Themistocles (Great Admiral) – A permanent bonus to Dromon construction, and gives you a free one – though be sure to have a classical-era Great Admiral spare before retiring them.
Medieval Era
Abu Al-Qasim Al-Zahrawi (Great Scientist) – Fast healing reduces the amount of downtime Tagmata have, allowing to move onto the next city with ease.
El Cid (Great General) – Got a spare classical or medieval-era Great General? Great! You can retire El Cid and get a powerful Tagma corps.
Leif Erikson (Great Admiral) – Allows your naval units to cross oceans. Importantly, Dromons and Galleys together can pick off cities in foreign continents (city-states are good targets if full civs are likely to put up too much of a resistance). This allows you to expand to a whole new landmass early!
Rajendra Chola (Great Admiral) – Gives Dromons an extra edge by buffing all your naval units by 3 points of strength.
Atomic Era
Georgy Zhukov (Great General) – Cavalry units are excellent at flanking, and retiring this Great Person makes the flanking strength bonus even larger.
Counter-Strategies
Byzantium’s strength in religious and domination are closely interrelated, but if either are disrupted, the entire civ’s strategy can suffer.
Civilization Ability:Taxis
Byzantium gets a reliable +3 strength bonus once they have a religion, and their extra Great Prophet Points from Holy Sites makes it extremely likely they’ll secure one. To get any further strength bonuses, however, they’ll have to convert other holy cities. If you have a religion of your own, just a few Inquisitors or Apostles stationed near your holy city should keep Byzantine Missionaries and Apostles at bay. If you don’t, consider building a Holy Site in a city that isn’t following Byzantium’s religion so you can buy religious units to help protect that religion.
Every unit Byzantium kills spreads their religion to nearby cities. As such, you’ll want quality, rather than quantity of units when facing their armies. Anti-cavalry corps and armies are particularly effective, especially when kept together for support bonuses.
If Byzantium is allowed to kill a lot of units and hence flip a lot of cities’ religions, they will likely gain a lot of era score in the process. That’s because converting the city of a civ you are at war with grants 3 era score every time. This can make a runaway Byzantium easily chain together multiple Golden Ages, making it difficult to place loyalty pressure upon them. However, a chain of Golden Ages can easily crash into a Dark Age if Byzantium struggles at any step in that process – such as use of anti-cavalry units ahead of Byzantium’s present era.
Basil II’s Leader Ability:Porphyrogénnētos
Any city following Byzantium’s religion is highly vulnerable to the attacks of their cavalry units. Keeping Inquisitors on your border cities ensures you can stop their religion dominating there, but if that’s not possible, treat Byzantium’s cavalry units as you would siege units for the purposes of which units to prioritise attacking.
Cavalry units are, of course, vulnerable to the attacks of anti-cavalry units. Anti-cavalry units lack resource requirements unlike most cavalry units, and tend to be cheaper, though their lack of mobility and low base strength can be a limitation.
Basil II’s Unique Unit:Tagma
The Tagma UU has relatively few direct bonuses, but the real strength of the unit comes in supplementary boosts like the Hippodrome district, the civ ability and Basil II’s leader ability.
As Tagmata are unlocked on the civics tree, rather than the technology tree, that can complicate Byzantium’s research. It’s hard to have both strong science and strong culture, so Byzantium might lack other medieval-era units like Crossbowmen to complement their Tagmata (at least, at first).
The bonus strength Tagmata offer to religious units is relatively situational as religious units are hard to use on the front lines anyway. If the military unit they share a tile with is killed by a ranged attack, then another military unit can move in and pillage them. In defence during peace-time, avoiding the religious unit strength bonus can be as easy as denying Byzantium open borders.
A bigger challenge is facing Tagmata combined with Crossbowmen, as the latter can deal heavy damage without taking any. On the defensive, try to position Crossbowmen of your own in cities and on Encampment districts so your units can’t be so easily picked off. Alternatively, try to divert the Tagmata away from the Crossbowmen, as the low movement speed of the latter will make them struggle to keep up with the former.
Basil II’s Agenda:Divine Guardian
An AI-controlled Basil II focuses on spreading his religion to other civilizations, and likes those who follow it. He hates those that do not follow his religion. He cannot have the Zealot hidden agenda as it overlaps with this main agenda.
This agenda can be tricky to play around as either you’ll meet the requirements but leave your cities vulnerable to Byzantium’s units, or you’ll run the risk of facing a war where Byzantium will try to kill your units to convert your cities. Overall, it might be better just to defy the agenda and keep Byzantium’s religion out of your lands unless you have a lot to gain from their religious beliefs.
Unique Unit:Dromon
The biggest downside of Dromons is that they are used in considerably different terrain to Tagmata. It is difficult for Byzantium to get full usage of both UUs, so you can focus your defensive efforts toward whichever one Byzantium is likely to push for more (most likely Tagmata).
Dromons have a devastating ranged attack compared to regular Quadriremes, but no extra defence. By stacking Galleys, Quadriremes or Catapults of your own, you can hit Dromons with multiple attacks before they have a chance to react.
If Byzantium chooses to keep multiple Dromons together, then you won’t be able to challenge them in the sea until the renaissance era. In this case, position land units with ranged attacks on city centres and Encampments to keep them safe from bombardment. Consider spreading out your damage output among multiple Dromons (so long as it doesn’t provide Byzantium with enough experience to buy a promotion and heal the damage taken). This forces the Dromons to return to friendly seas to heal.
Unique District:Hippodrome
Hippodromes offer one of the strongest amenity boosts of any unique infrastructure, allowing Byzantium to ignore a huge portion of war weariness. More importantly, completed Hippodromes and their buildings gives Byzantium free heavy cavalry units, circumventing the need for strategic resources and saving production.
The catch is that Hippodromes use up precious district capacity, meaning Byzantium can’t invest in other useful districts as much. Considering Byzantium needs culture for Tagmata, gold for unit maintenance, faith for religion, Encampments for Great Generals and so forth, it can be pretty difficult for Byzantium to balance all of their varying favoured yields. The key advantage of Hippodromes – the free units – is mostly useful in the short-term so if you can resist Byzantium’s Tagmata wars, they maybe set back in other ways.
Another weakness of the Hippodrome is that they’re mutually exclusive with the Water Park district. Normally, civs can mix Zoos/Stadiums and Aquariums/Aquatics Centres for extra amenities. Byzantium can either do this and miss out on some free cavalry units, or else they will lose their amenity advantage in the latter eras of the game.
Hope you enjoy the Guide about Sid Meier’s Civilization VI – Zigzagzigal’s Guides – Byzantium (GS), if you think we should add extra information or forget something, please let us know via comment below, and we will do our best to fix or update as soon as possible!
- All Sid Meier's Civilization VI Posts List





Leave a Reply