Introduction
This tutorial assumes you know the basics of creating a mod. This is not a tutorial to teach you how to make a leader or civilization. Instead, its focus is on making and implementing icons and leader art.
- This tutorial uses “->” to represent choices in a context menu, such as in a right-click or drop-down list.
- Regularly hit Ctrl+Shift+s to save all when working in your project.
- For steps that are similar or identical to preceding steps, images are largely omitted.
- The method by which leader icons are added in this guide can be used to add icons for most other elements of the game, such as civilization or unit icons.
Preparation: Rename Art.xml, Create Folders
A solid preparation phase means fewer—hopefully zero—broken icons or Cleopatra leader images in the future.
First thing’s first, right-click your Art.xml file in your Solution Explorer -> Rename, and change any underscores to spaces (unless you actually have underscores in your project name). Otherwise, when we go to use Asset Editor later, it’ll throw a hissy fit. Don’t launch Asset Editor quite yet.

⠀
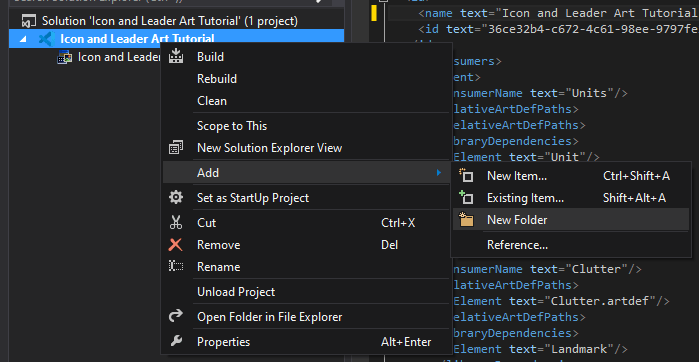
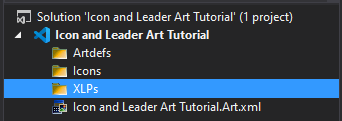
Let’s yeet some folders into this project. Right-click the project name -> Add -> New Folder. We want the following folders at root level: Artdefs, Icons, XLPs.
Preparation: Project Files
Icons
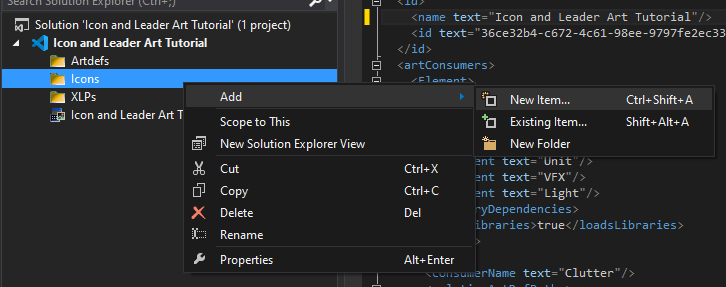
Right-click the Icons folder -> Add -> New Item. Create an Icons.xml file.
⠀
Artdefs
Now, it’s time to launch the infamous Asset Editor. From the top toolbar, Tools -> Launch Asset Editor…
With Asset Editor open, File -> New -> Artdef. Now, you should have something like this:
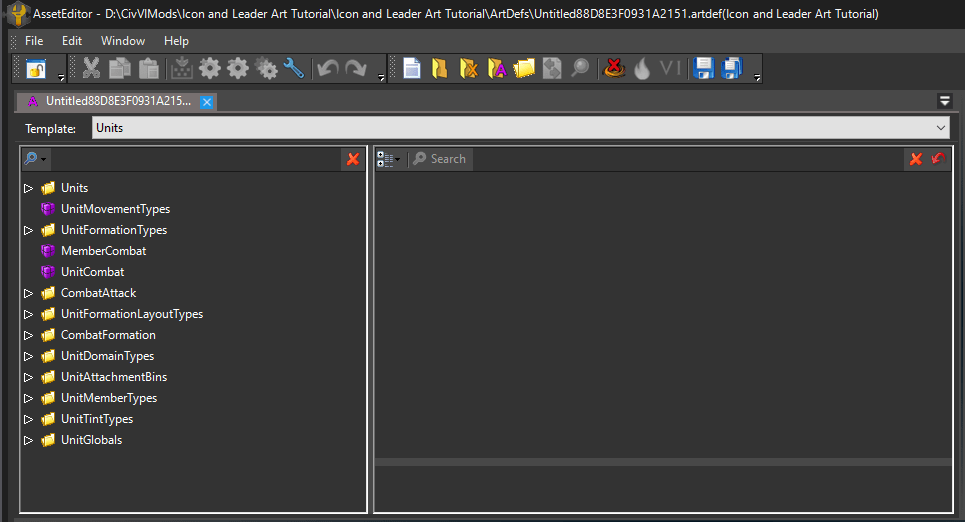
From the Template drop-down -> Leaders. Ctrl+s and save as Leaders in your project’s Artdefs folder, but don’t close it just yet.
Now right-click the Leaders entry in your artdef -> Add Element, and an element with a green dot should appear.

Click that element to bring up its details in the right panel.
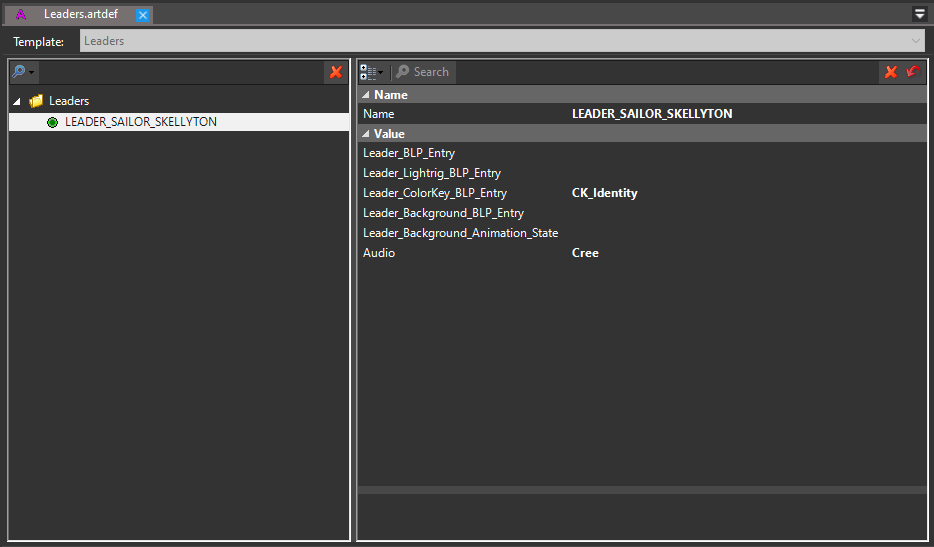
Change the Name field to your leader’s LeaderType as defined in the database. In my case LEADER_SAILOR_SKELLYTON. Change the Audio field to the civilization whose music you’d like your leader to use. I chose Cree because I hate myself. Ctrl+s to save. Ctrl+w to close.
Similar to the above. File -> New -> Artdef. From the Template drop-down -> LeaderFallback. Ctrl+s and save as LeaderFallbacks in your project’s Artdefs folder, but don’t close it just yet.
Now right-click the Leaders entry in your artdef -> Add Element, and an element with a green dot should appear. Click that element to bring up its details in the right panel. Change the Name field to your leader’s LeaderType as defined in the database. In my case LEADER_SAILOR_SKELLYTON. Now right-click Animations -> Add Element, and a new line should appear in the right pane. Ctrl+s to save. Ctrl+w to close. We’ll come back to this later.
XLPs
Still in Asset Editor, File -> New -> XLP gives you this:
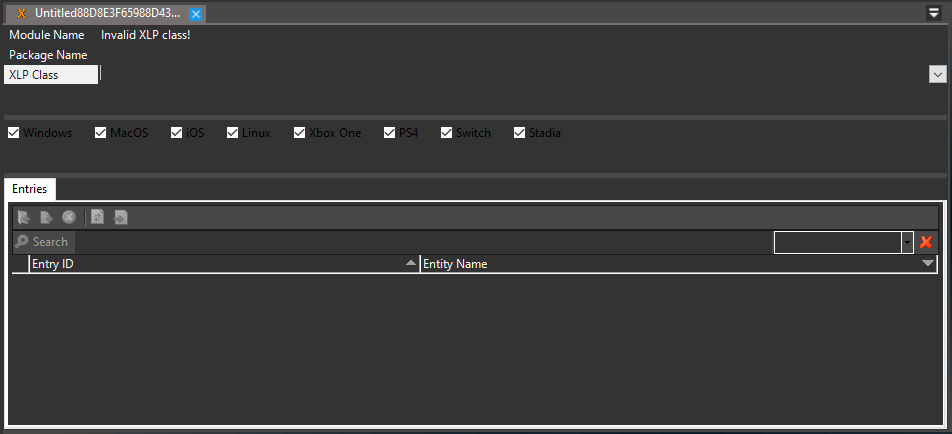
From the XLP Class drop-down -> UITexture. Enter UI/Icons in the Package Name field.

Ctrl+s and save as Atlas in your XLPs folder. Ctrl+w to close.
File -> New -> XLP. From the XLP Class drop-down -> UITexture. Enter UILeaders in the Package Name field.
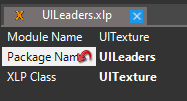
Ctrl+s and save as UILeaders in your XLPs folder. Ctrl+w to close.
File -> New -> XLP. From the XLP Class drop-down -> LeaderFallback. Enter LeaderFallbacks in the Package Name field.
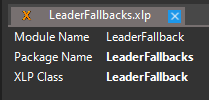
Ctrl+s and save as LeaderFallbacks in your XLPs folder. Ctrl+w to close.
Art.xml
What you add here will depend largely on what your mod is trying to do—leader, civ, unit, district, etc. I’m going to tell you what to add specifically for leader icons and art. If yours differs, or you want an automated method, I suggest skipping this section and using forums.civfanatics.com – https://forums.civfanatics.com/resources/thecrazyscots-mod-art-generator.27740/ at the very end of this tutorial, just before building your solution.
Still in Asset Editor: File -> Open Art.xml -> choose your project’s Art.xml file. Your screen should look something like this:
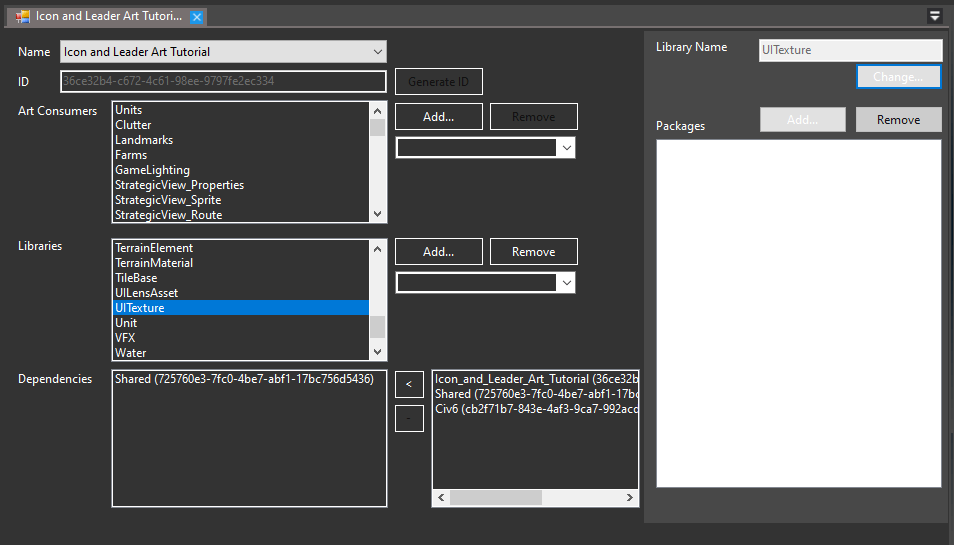
Scroll the list of items in the Art Consumers box until you find Leaders, and choose that. Now, on the right side, beside Packages, click the Add… button. From there, choose your Leaders artdef file.*
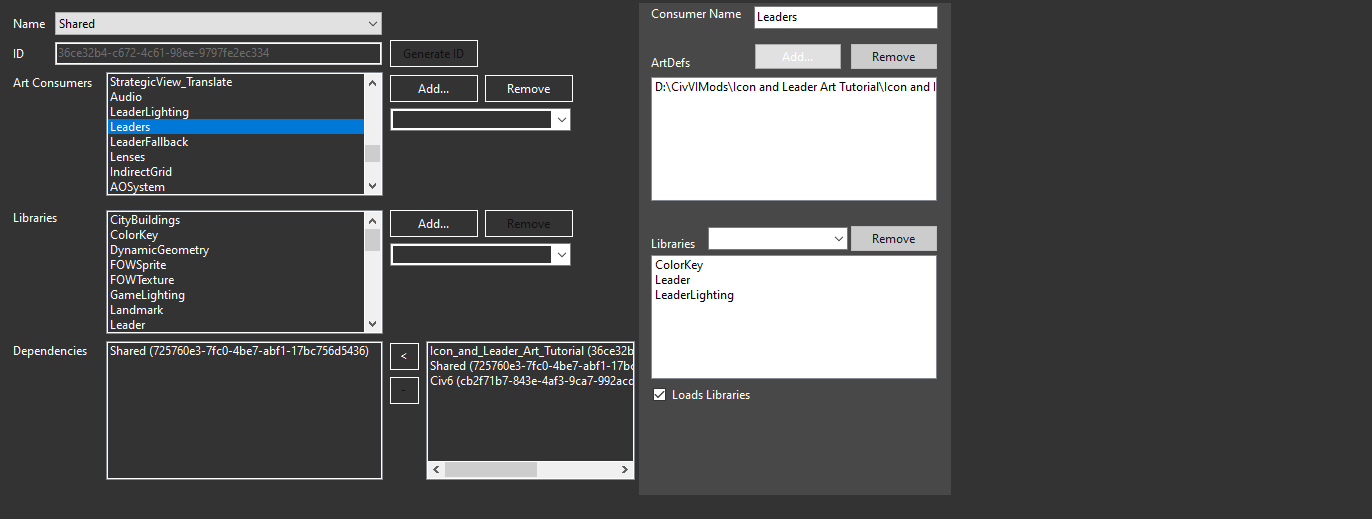
Scroll the list of items in the Libraries box until you find LeaderFallback, and choose that. Now, on the right side, beside Packages, click the Add… button. From there, choose your LeaderFallbacks XLP file.*
* See the end of this section.
Scroll the list of items in the Libraries box until you find UITexture, and choose that. Now, on the right side, beside ArtDefs, click the Add… button. From there, choose your Atlas and UIleaders XLP files. Should then look like this:
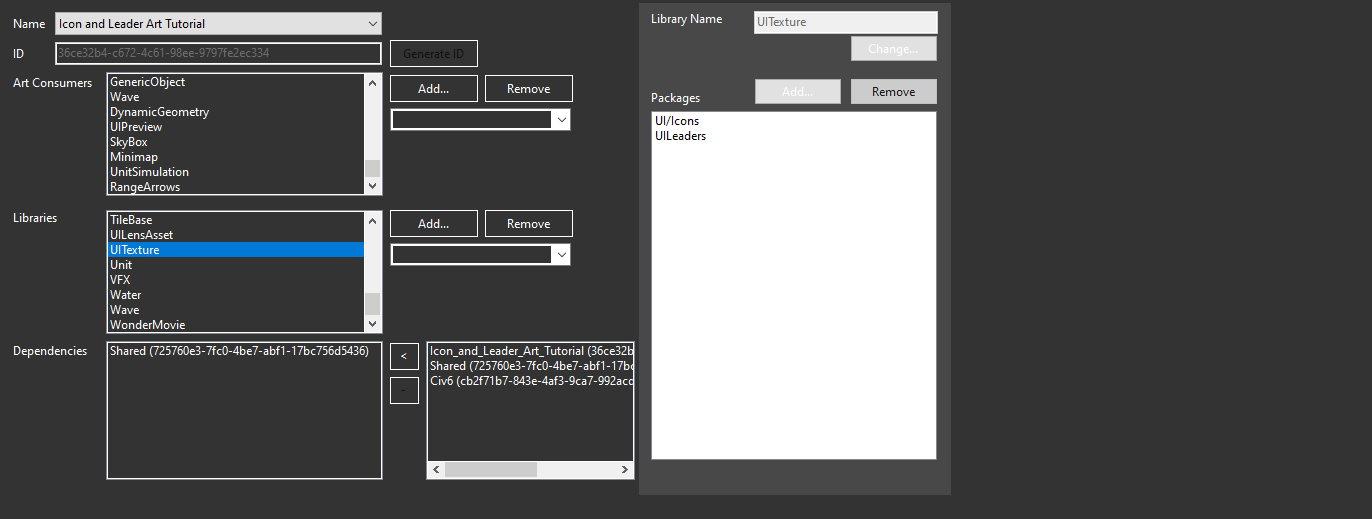
Scroll the list of items in the Libraries box until you find LeaderFallback, and choose that. Now, on the right side, beside Packages, click the Add… button. From there, choose your LeaderFallbacks XLP file.
Ctrl+s to save. Ctrl+w to close.
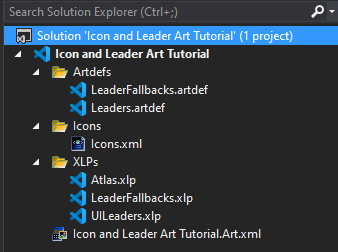
Now, switch from Asset Editor back to your Modbuddy project. In solution explorer, right-click the Artdefs folder -> Add -> Existing Item… and choose the two artdef files you created. Next, right-click the XLPs folder -> Add -> Existing Item… and choose the three xlp files you created. Your solution explorer probably won’t have only these folders and files, but it should have at least these folders and files:
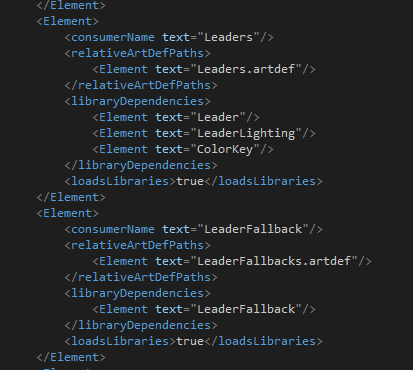
* Open your Art.xml in Modbuddy. Ctrl+f to search for Leaders.artdef in Current Document. Change it to <Element text=”Leaders.artdef”/> removing the folder path. Do the same thing with LeaderFallbacks.artdef, changing it to <Element text=”LeaderFallbacks.artdef”/>. Ctrl+s to save.
Preparation: Actions
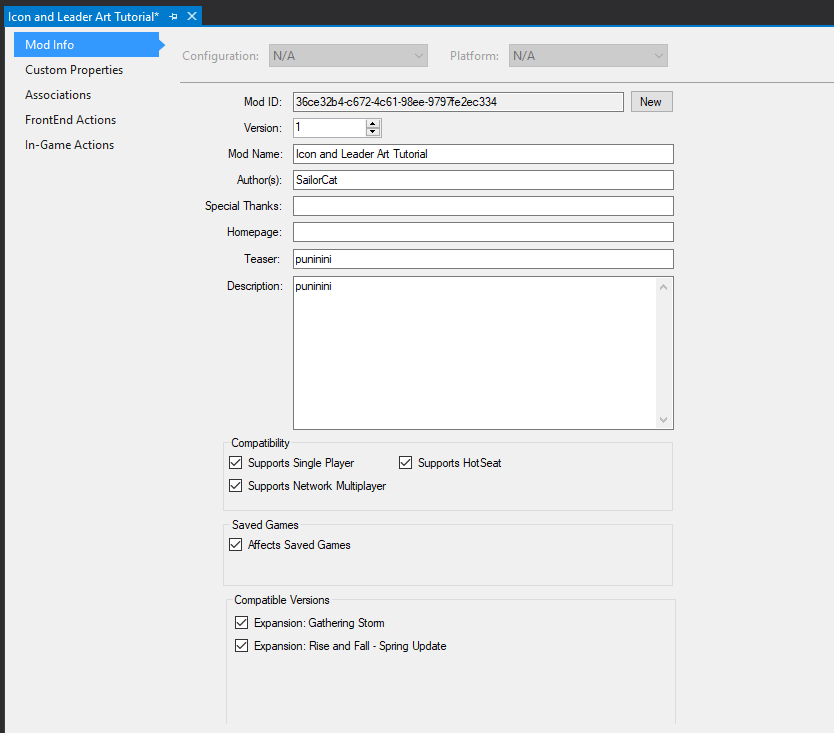
From the top bar, click Project -> YourProjectHere Properties… You should see something like this:
⠀
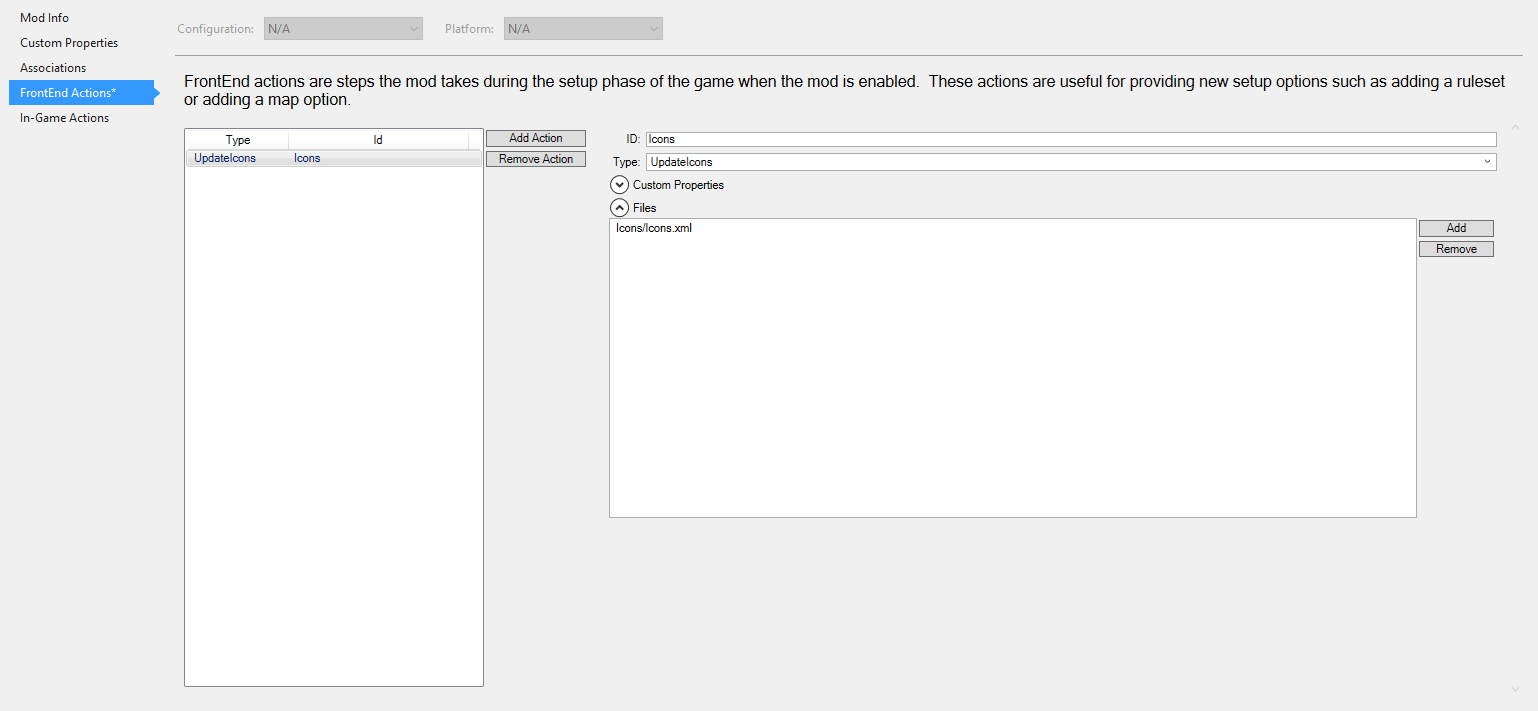
- Switch to the FrontEnd Actions tab.
- Now click the Add Actions button. This will add an UpdateDatabase action by default.
- Click that, and it’ll expand to the right with ID, Type, Custom Properties, and Files.
- Change the ID field from NewAction to Icons.
- Click the Type drop-down where it says UpdateDatabase, and choose UpdateIcons.
- To the right of the Files box, click Add. A prompt will appear with the File and Priority options.
- From the drop-down, choose Icons/Icons.xml. Leave Priority empty. Click OK.
Click the In-Game Actions tab and repeat the previous instructions.
- Switch to the FrontEnd Actions tab.
- Now click the Add Actions button. This will add an UpdateDatabase action by default.
- Click that, and it’ll expand to the right with ID, Type, Custom Properties, and Files.
- Change the ID field from NewAction to Art.
- Click the Type drop-down where it says UpdateDatabase, and choose UpdateArt.
- To the right of the Files box, click Add. A prompt will appear with the File and Priority options.
- From the drop-down, choose (Mod Art Dependency File). Leave Priority empty. Click OK.
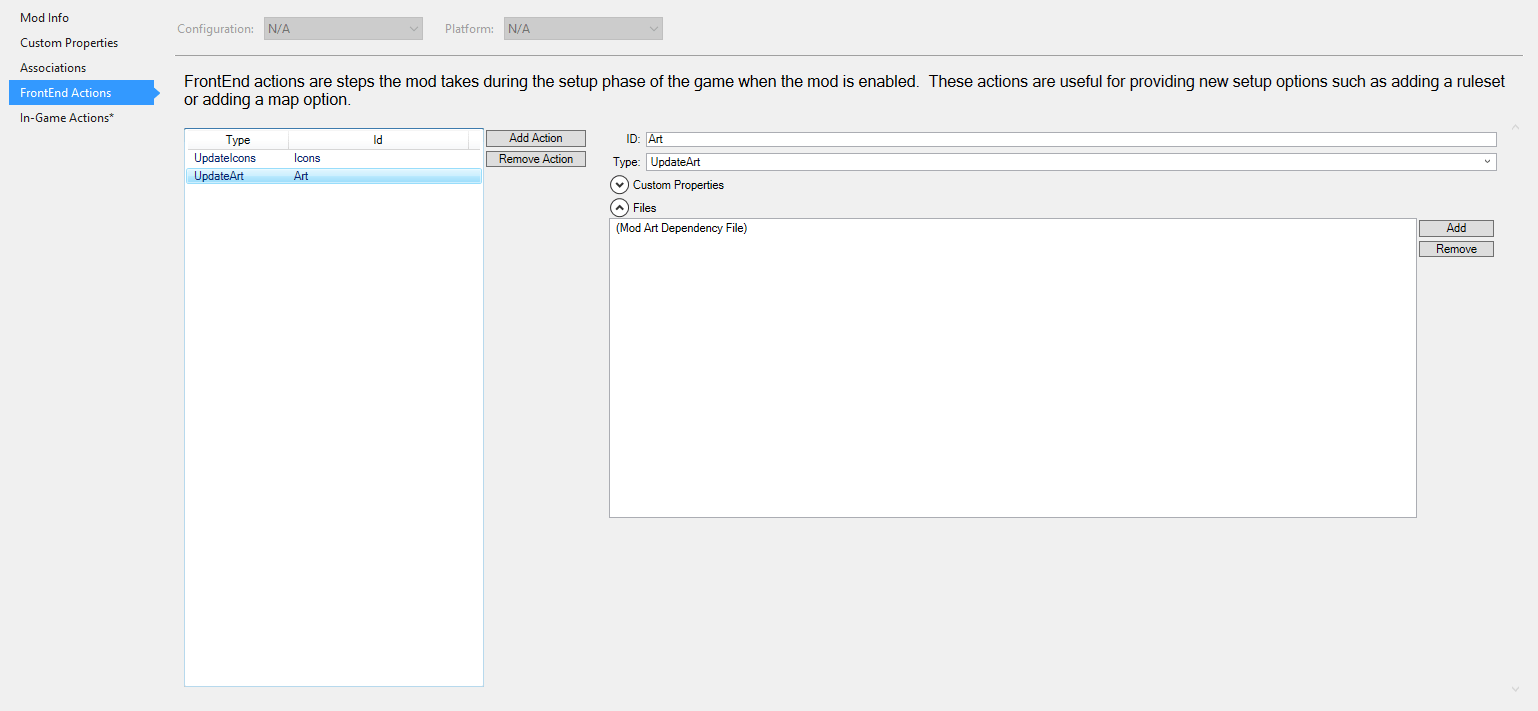
Click the In-Game Actions tab and repeat the previous instructions.
Image Creation
Proper preparation is what makes all this go as it should. For image creation, just grab GIMP, Photoshop, or some alternative. Learning how to use any image manipulation software is beyond the scope of this tutorial.
Don’t worry about saving as .dds. You don’t need to anymore, so it isn’t worth the effort. .png only. .png is seiso. ChimpanG has some super useful templates on his discord.com – https://discord.com/invite/FPwndr4—templates that I recommend—but I ain’t gonna assume you’re using them.
All image layers should be merged before saving (only one layer!). Otherwise, don’t start bawling when your art’s bonkers.
Leader Portrait Icons
- Sizes (square): 256, 80, 64, 55, 50, 45, 32
- Naming convention:
- ICON_LeaderType_Size.png
- Ex: ICON_LEADER_SAILOR_SKELLYTON_256.png
- ICON_LeaderType_Size.png
Examples:

⠀
Leader Fallbacks
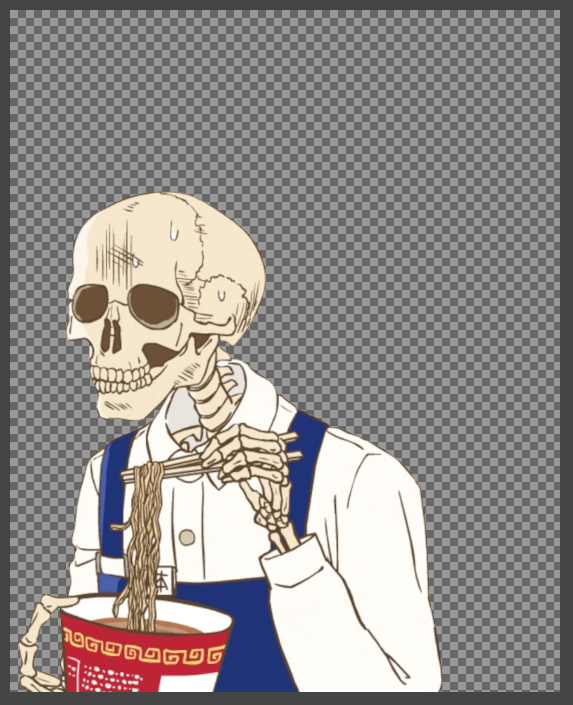
- Size: 825×1024
- Your leader should be aligned to the left side of the image, completely within the frame, with about 40% of the image empty. This gives your leader some padding in relevant screens. You can fiddle with the width if you’d like more padding.
- Naming convention (save two copies):
- FALLBACK_NEUTRAL_LeaderType.png
- Ex: FALLBACK_NEUTRAL_LEADER_SAILOR_SKELLYTON.png
- LeaderType_NEUTRAL.png
- Ex: LEADER_SAILOR_SKELLYTON_NEUTRAL.png
- FALLBACK_NEUTRAL_LeaderType.png
Example:
⠀
Leader Backgrounds
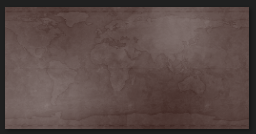
- Size: 1920×960
- Naming convention:
- LeaderType_BACKGROUND.png
- Ex: LEADER_SAILOR_SKELLYTON_BACKGROUND.png
- LeaderType_BACKGROUND.png
This consists of two separate images, one layered over the other. The first (1) is the background art for your leader’s diplomacy scene. The second (4) is the stylized frame that covers most of the background.

- Size: 1920×1010
- Naming convention:
- Background art: Remove LEADER from LeaderType_1.png
- Ex: LeaderType LEADER_SAILOR_SKELLYTON becomes SAILOR_SKELLYTON_1.png
- Frame: Remove LEADER from LeaderType_4.png
- Ex: LeaderType LEADER_SAILOR_SKELLYTON becomes SAILOR_SKELLYTON_4.png
- Background art: Remove LEADER from LeaderType_1.png
Tip: If you have a wide chongus leader who doesn’t fit leader select all that well, you can create a tailored LEADER_SAILOR_SKELLYTON_SELECT.png in addition to _NEUTRAL.png and add it to your Config file by inserting LEADER_SAILOR_SKELLYTON_SELECT into the Portrait column of the Players table.
Importing Images
Time to import these bad boys in Asset Editor. Tools -> Launch Asset Editor…
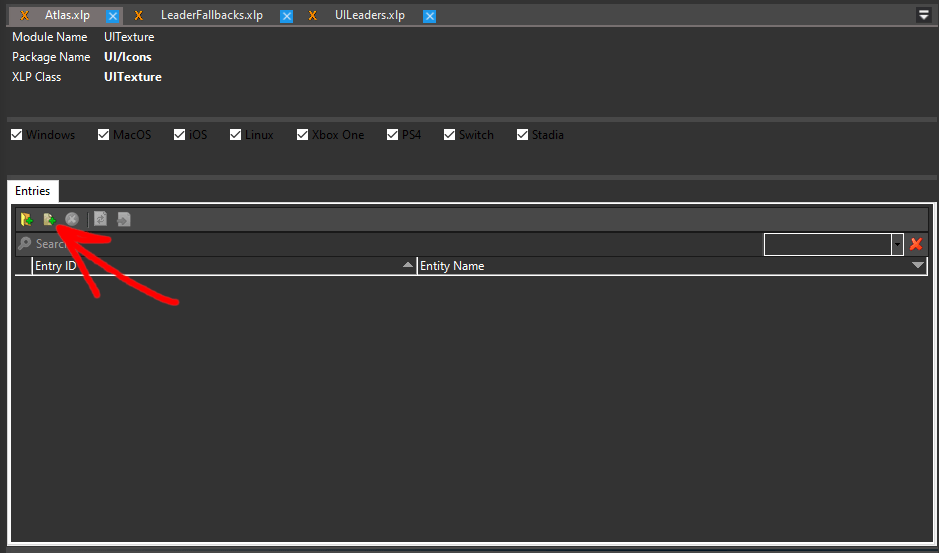
With Asset Editor open, File -> Open XLP. Open Atlas, LeaderFallbacks, and UILeaders.
⠀
Atlas.xlp
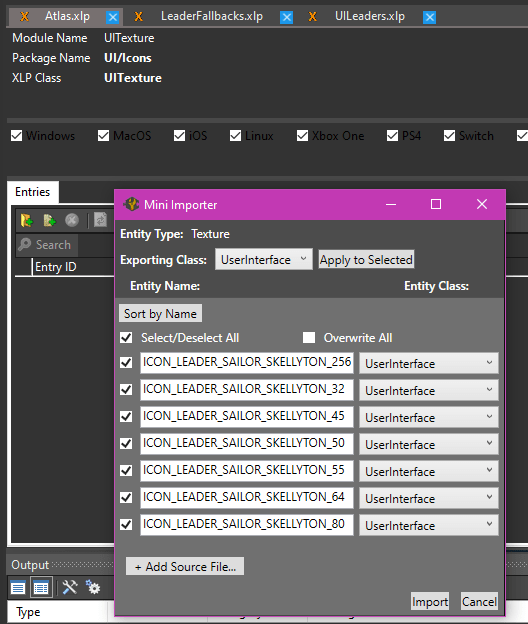
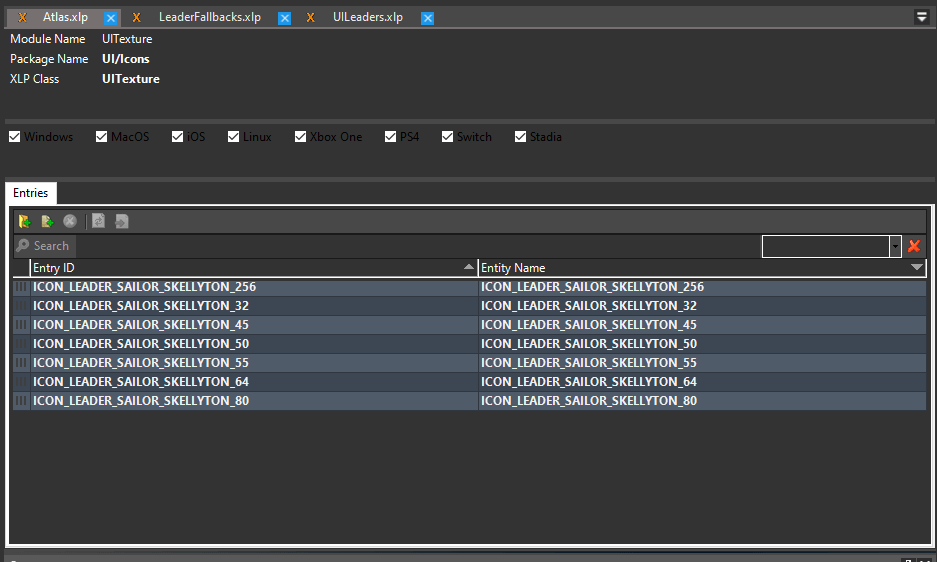
Click the second folder icon in the Entries panel (follow the red arrow above), and a prompt will pop up. Click Add Source File… -> Choose all your ICON_ images. Now, in that same prompt, change Exporting Class to UserInterface, then click Apply to Selected. Click Import at the bottom right. Ctrl+s to save, Ctrl+w to close.
⠀
LeaderFallbacks.xlp
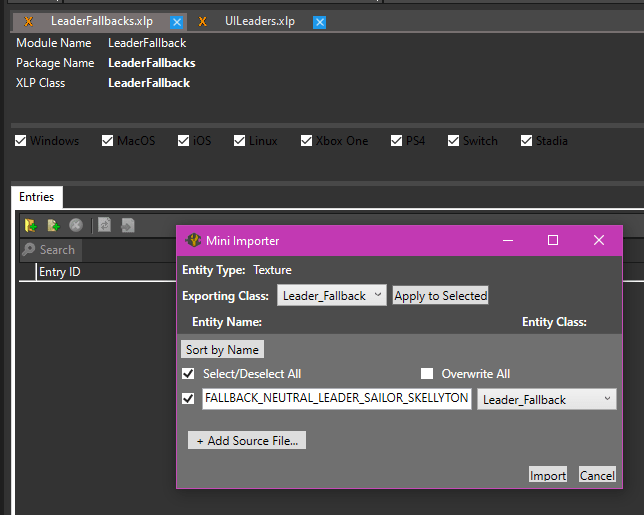
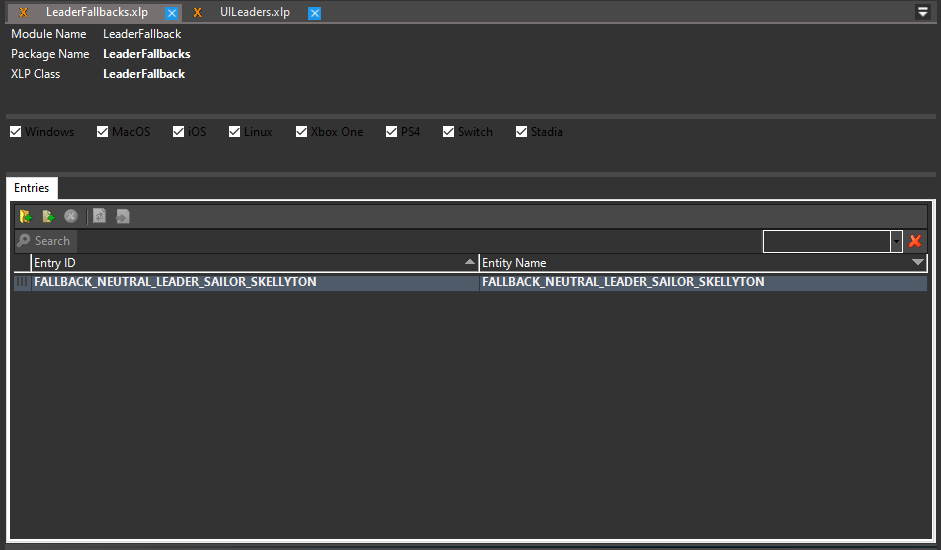
Click the second folder icon in the Entries panel, and a prompt will pop up. Click Add Source File… -> Choose all your FALLBACK_NEUTRAL_LEADER image. Now, in that same prompt, then click Apply to Selected. Click Import at the bottom right. Ctrl+s to save, Ctrl+w to close.
⠀
UILeaders.xlp
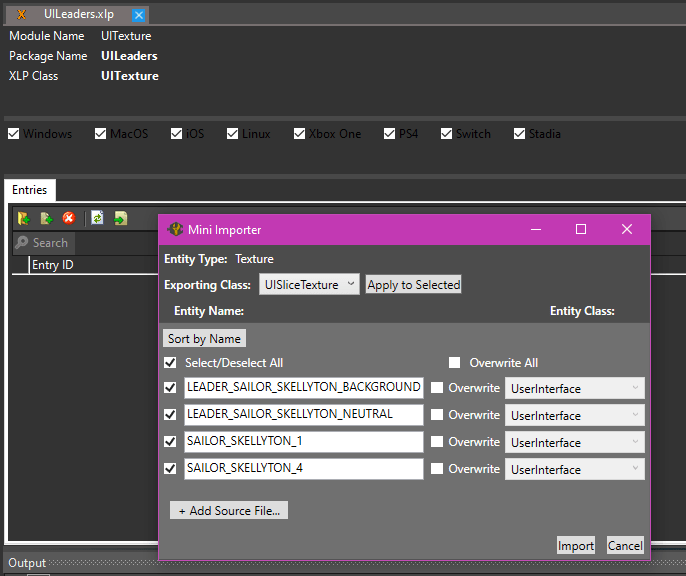
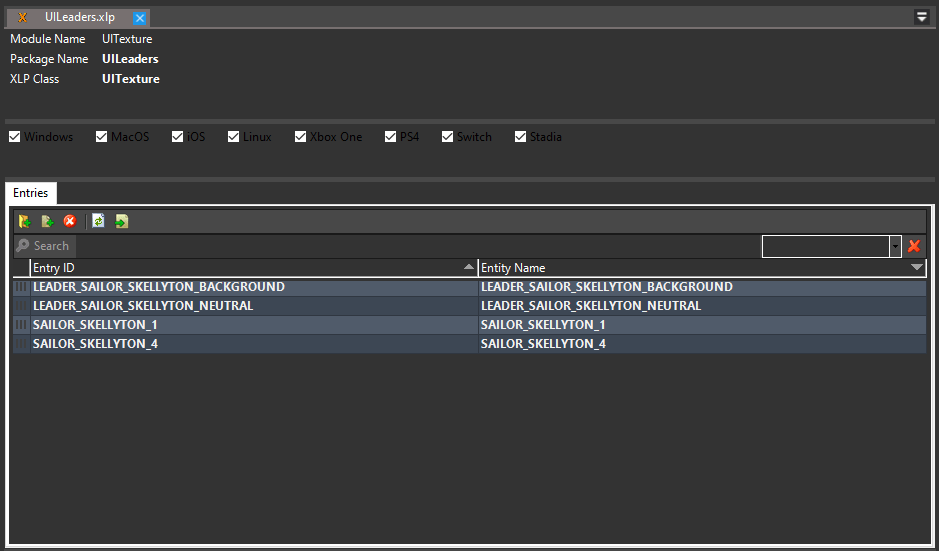
Click the second folder icon in the Entries panel, and a prompt will pop up. Click Add Source File… -> Choose your LEADER_X_NEUTRAL image, LEADER_X_BACKGROUND image, and your _1 and _4 images. Now, in that same prompt, change Exporting Class to UserInterface, then click Apply to Selected. Click Import at the bottom right. Ctrl+s to save, Ctrl+w to close.
⠀
⠀
LeaderFallbacks.artdef
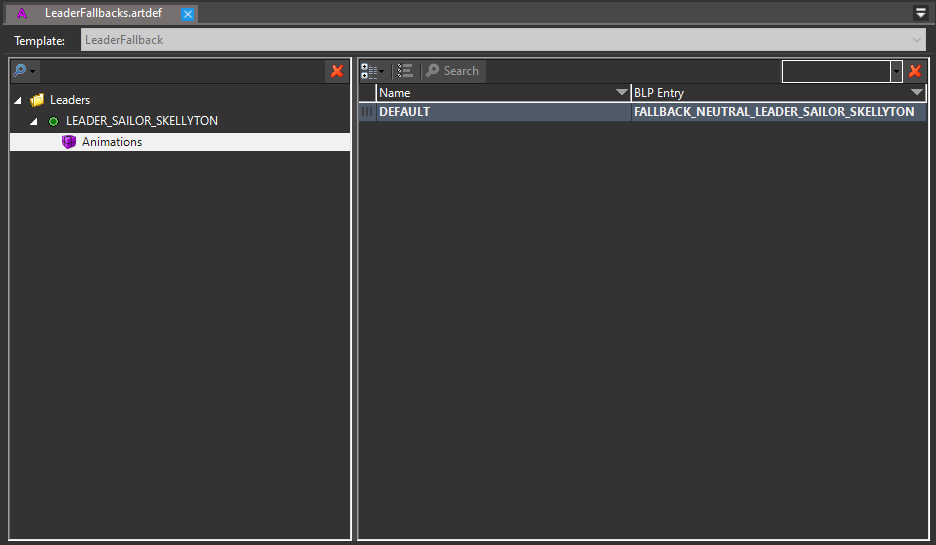
File -> Open Art Def -> LeaderFallbacks.artdef. Expand the folder and your LEADER_ element so that you can see the Animations entry. Select Animations. In the pane to the right, change the BLP Entry field to the name of your FALLBACK_NEUTRAL_LEADER_ file (without the extension). Ctrl+s to save, Ctrl+w to close.
Close Asset Editor.
Icons.xml
Copy + paste the following into your Icons.xml file. Then find and replace LEADER_SAILOR_SKELLYTON with your leader’s LeaderType.
<GameInfo> <IconTextureAtlases> <Row Name="ICON_ATLAS_LEADER_SAILOR_SKELLYTON" IconSize="32" IconsPerRow="1" IconsPerColumn="1" Filename="ICON_LEADER_SAILOR_SKELLYTON_32.dds"/> <Row Name="ICON_ATLAS_LEADER_SAILOR_SKELLYTON" IconSize="45" IconsPerRow="1" IconsPerColumn="1" Filename="ICON_LEADER_SAILOR_SKELLYTON_45.dds"/> <Row Name="ICON_ATLAS_LEADER_SAILOR_SKELLYTON" IconSize="50" IconsPerRow="1" IconsPerColumn="1" Filename="ICON_LEADER_SAILOR_SKELLYTON_50.dds"/> <Row Name="ICON_ATLAS_LEADER_SAILOR_SKELLYTON" IconSize="55" IconsPerRow="1" IconsPerColumn="1" Filename="ICON_LEADER_SAILOR_SKELLYTON_55.dds"/> <Row Name="ICON_ATLAS_LEADER_SAILOR_SKELLYTON" IconSize="64" IconsPerRow="1" IconsPerColumn="1" Filename="ICON_LEADER_SAILOR_SKELLYTON_64.dds"/> <Row Name="ICON_ATLAS_LEADER_SAILOR_SKELLYTON" IconSize="80" IconsPerRow="1" IconsPerColumn="1" Filename="ICON_LEADER_SAILOR_SKELLYTON_80.dds"/> <Row Name="ICON_ATLAS_LEADER_SAILOR_SKELLYTON" IconSize="256" IconsPerRow="1" IconsPerColumn="1" Filename="ICON_LEADER_SAILOR_SKELLYTON_256.dds"/> </IconTextureAtlases> <IconDefinitions> <Row Name="ICON_LEADER_SAILOR_SKELLYTON" Atlas="ICON_ATLAS_LEADER_SAILOR_SKELLYTON" Index="0"/> </IconDefinitions> </GameInfo>
IconDefinitions tells Modbuddy what texture atlas to look at for the icons for your leader. IconTextureAtlases tells Modbuddy what the files are, and where to look in them. It could be more complicated than this, but K.I.S.S.
Finished
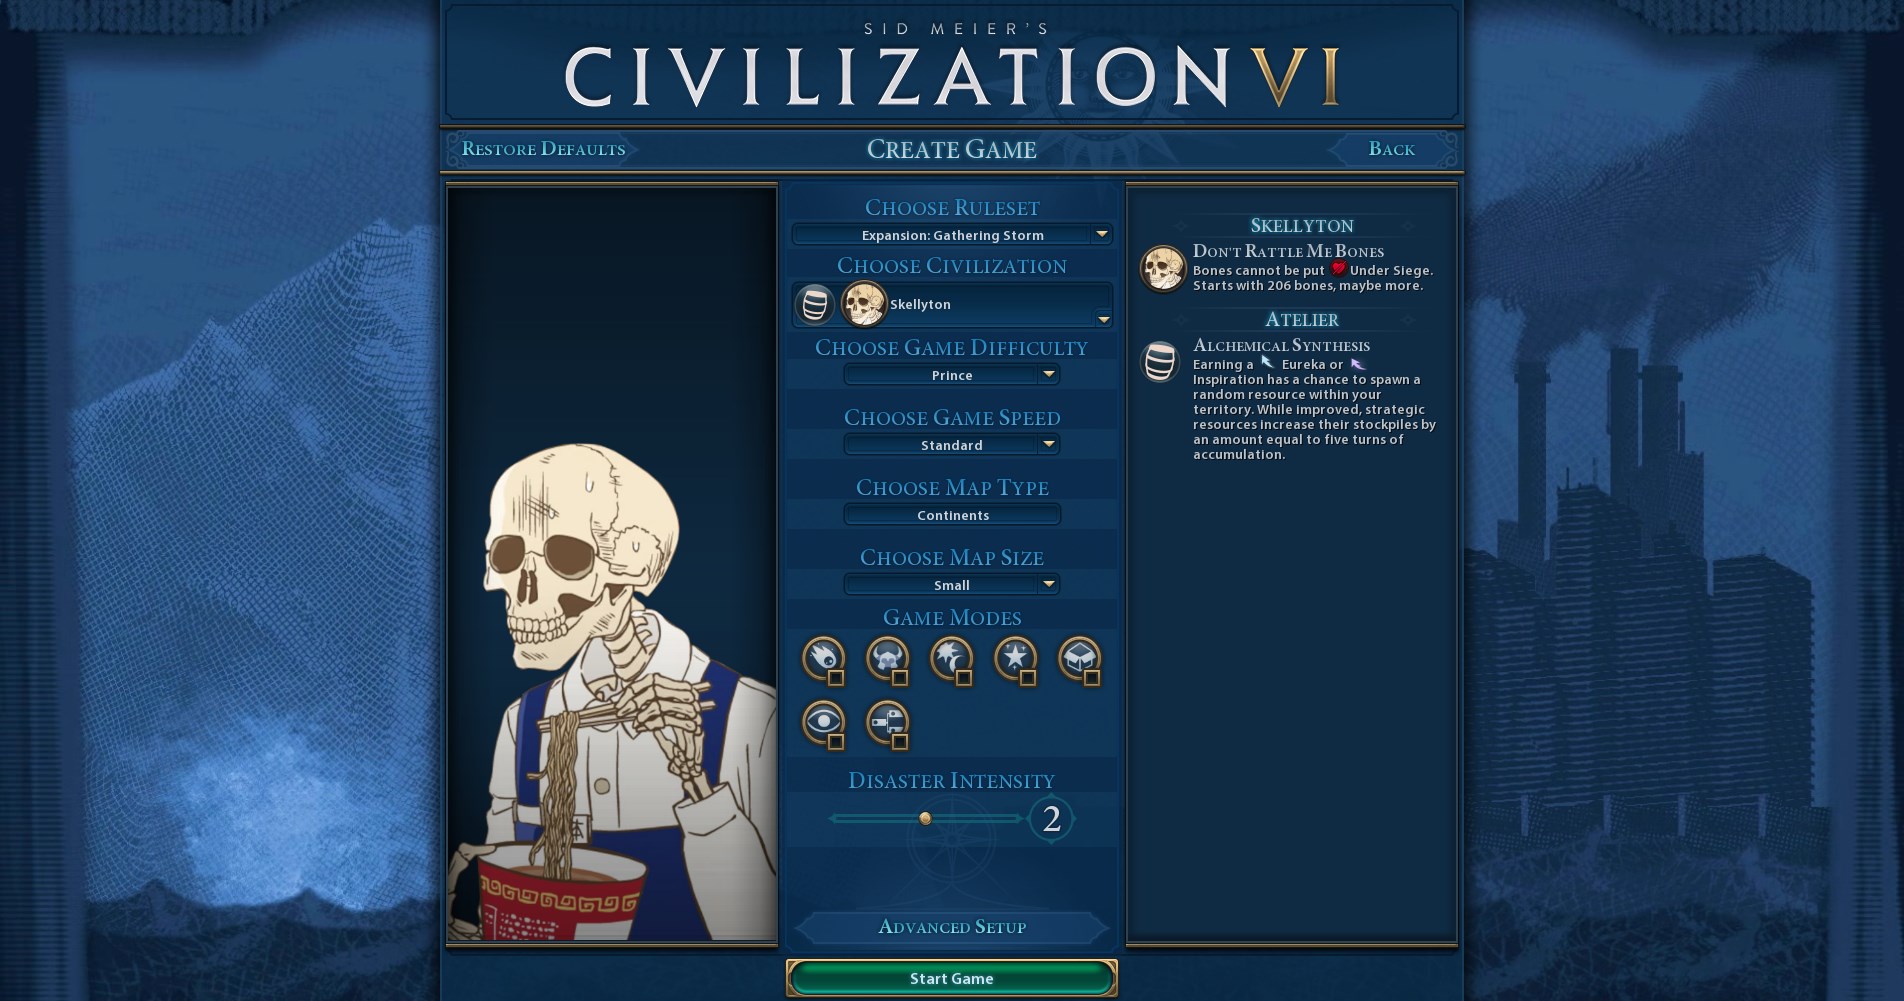
Ctrl+Shift+s, build or rebuild your solution. Easy peasy bones over easy.
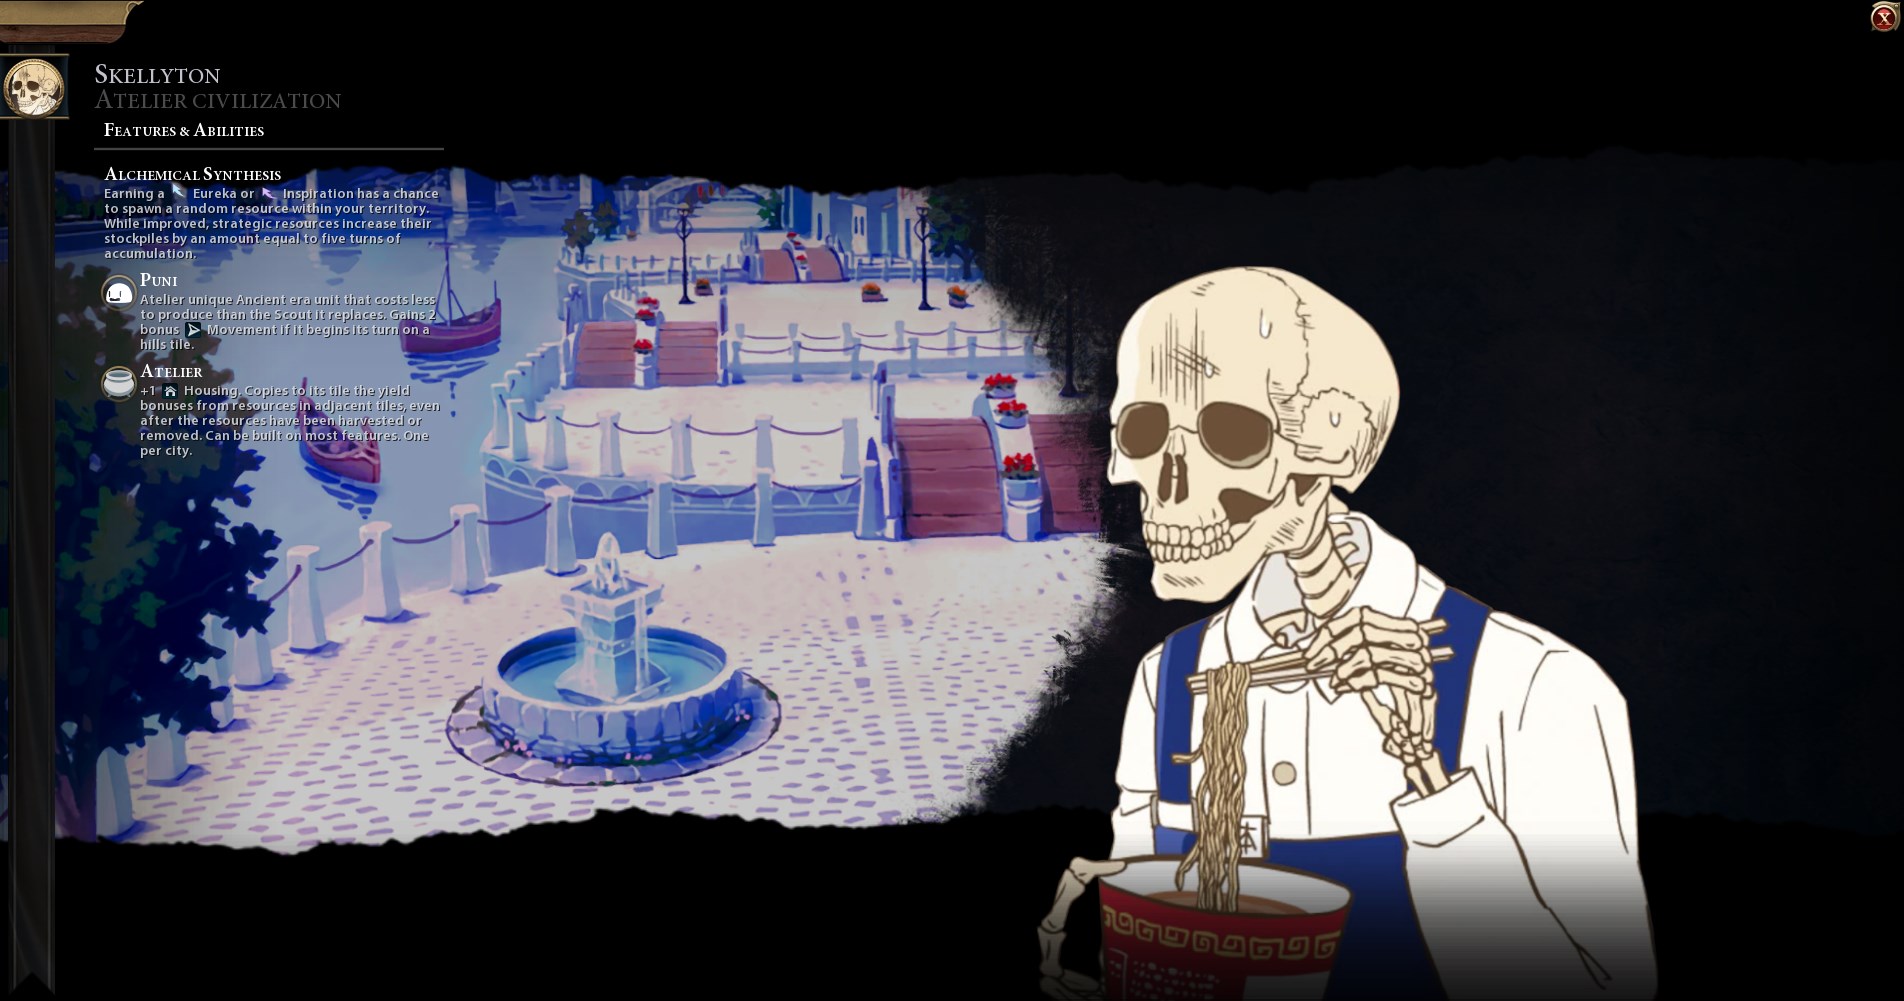
Addendum: Only icons?
Let’s say you’re adding something that doesn’t require an artdef, like a new project for the Preserve district. Then you’ll run into an issue with the game not generating a BLP. To get around this, create an artdef called UserInterface.artdef. Copy + paste the following into the artdef, replacing “Project Name Here” with the name of your project.
<AssetObjects::ArtDefSet> <m_Version> <major>3</major> <minor>0</minor> <build>215</build> <revision>207</revision> </m_Version> <m_TemplateName text="UserInterfaceBLPs"/> <m_RootCollections/> <m_BLPReferences> <Element> <xlpFile text="Atlas.xlp"/> <blpPackage text="Project Name Here.blp"/> <xlpClass text="UITexture"/> </Element> </m_BLPReferences> </AssetObjects::ArtDefSet>
I hope you enjoy the Guide we share about Sid Meier’s Civilization VI – Modding Tutorial: Icons and Leader Images; if you think we forget to add or we should add more information, please let us know via commenting below! See you soon!
- All Sid Meier's Civilization VI Posts List


Leave a Reply