Hi, welcome to this post, we hope you find our Serious Sam Classics: Revolution – How to make a basic custom player model Guide to be useful.
Learn how to create a basic custom-made player model using existing parts and editing textures.
Requirements
You’ll need:
– 7-zip (or other compression file management software compatible to.gro).
https://7-zip.org/download.html – [7-zip.org]
– Serious Sam Classics Revolution Toolkit: Located in the Tools section within your Steam library.
(Or another compatible software with.tga such as Photoshop or GIMP).
https://www.getpaint.net/download.html – [getpaint.net]
Guide
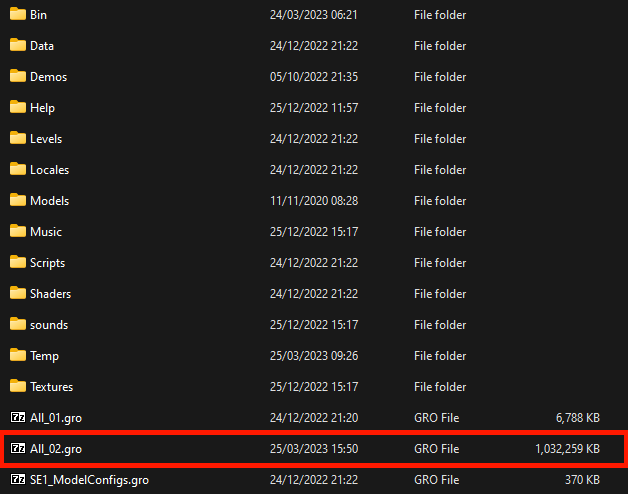
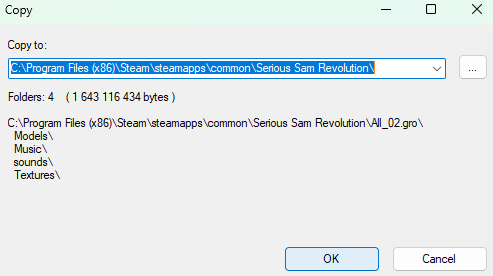
Find the archive labelled “All_02.gro” in your Serious Sam Revolution folder (Steam\steamapps\common\Serious Sam Revolution)
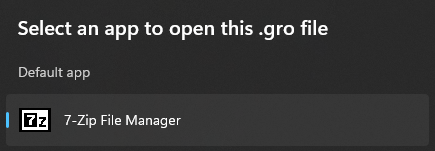
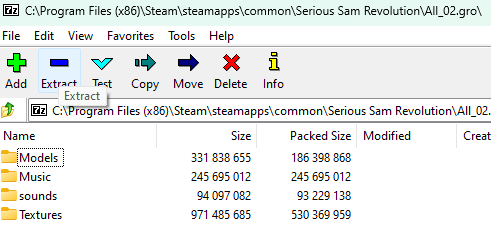
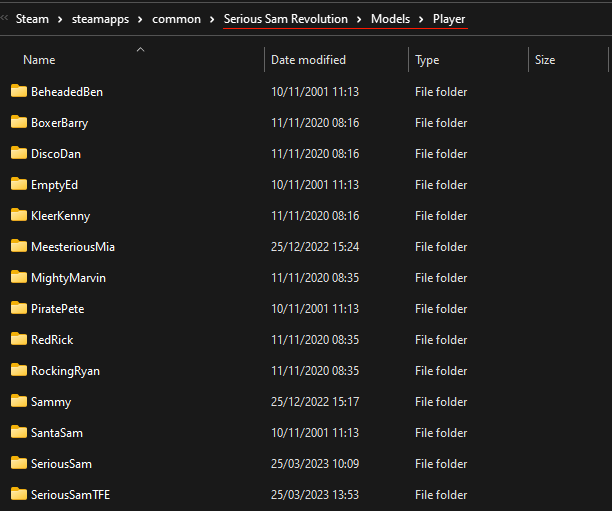
Open All_2.gro using 7-zip and extract all the contents back into the Serious Sam Revolution folder, so that you can find the playermodels in common\Serious Sam Revolution\Models\Player.
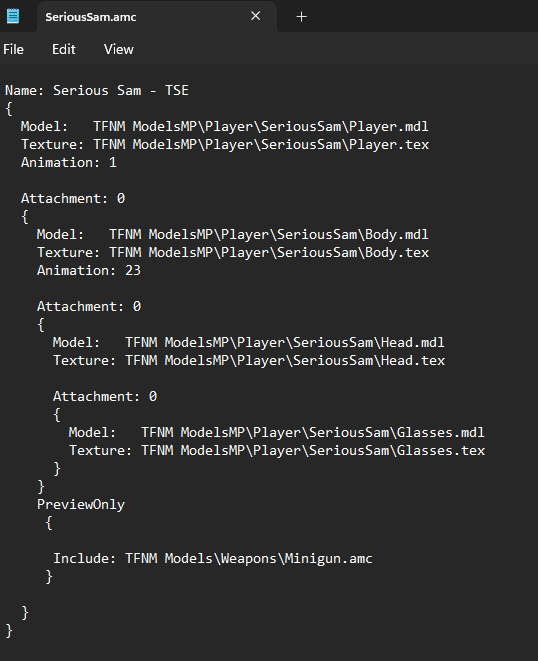
Make a backup of one of the.amc or.des files found in the Player folder (for this example, I’m using SeriousSam). Open them with any text editor (I’m using Notepad). SeriousSam.des is simple. It only holds the name and description for the character that you see when you scroll through the character select menu in the game. Below is SeriousSam.amc.
Name is the name of the character you see underneath the moving model after choosing them from the menu. Each model is divided into Player (legs), Head (torso and arms), and Body (torso, arms, and head). These are essential. A fourth attachment of glasses will be shown, which can be optional.
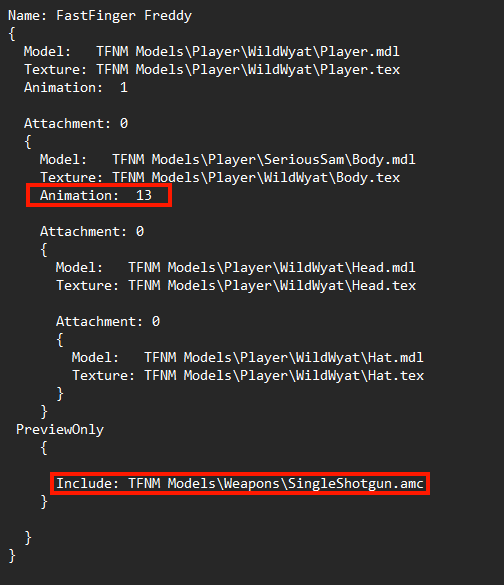
If you follow the pattern of curly brackets, PreviewOnly will fall under Body. This block contains the weapon you want the character to use in the preview. In this case, it is the minigun. You will also find “Animation 23” under Body. This is the animation to hold a minigun. To display your character with a different weapon, check the.amc files for other characters to determine the animations and filepaths of the weapon models. FastFingerFreddy.amc has the configuration for the single barrel shotgun.
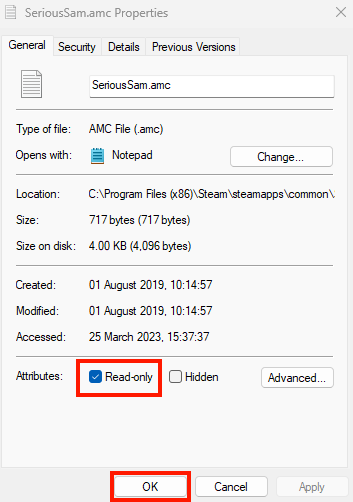
All files in the.gro folder have been set to read-only by default. You must turn this off before making any changes. Right-click the file and go to Properties. Uncheck “Read-only” near the bottom of the “Attributes : ” label. Click OK.
Once you have chosen your character parts, grab the corresponding.tex files and place them in a new folder. To avoid confusion later, it’s a good idea name the folder after your character. Change the last part of your filepath to include textures from e.g. SeriousSam/Body.tex to [YourCharacter]/Body.tex.
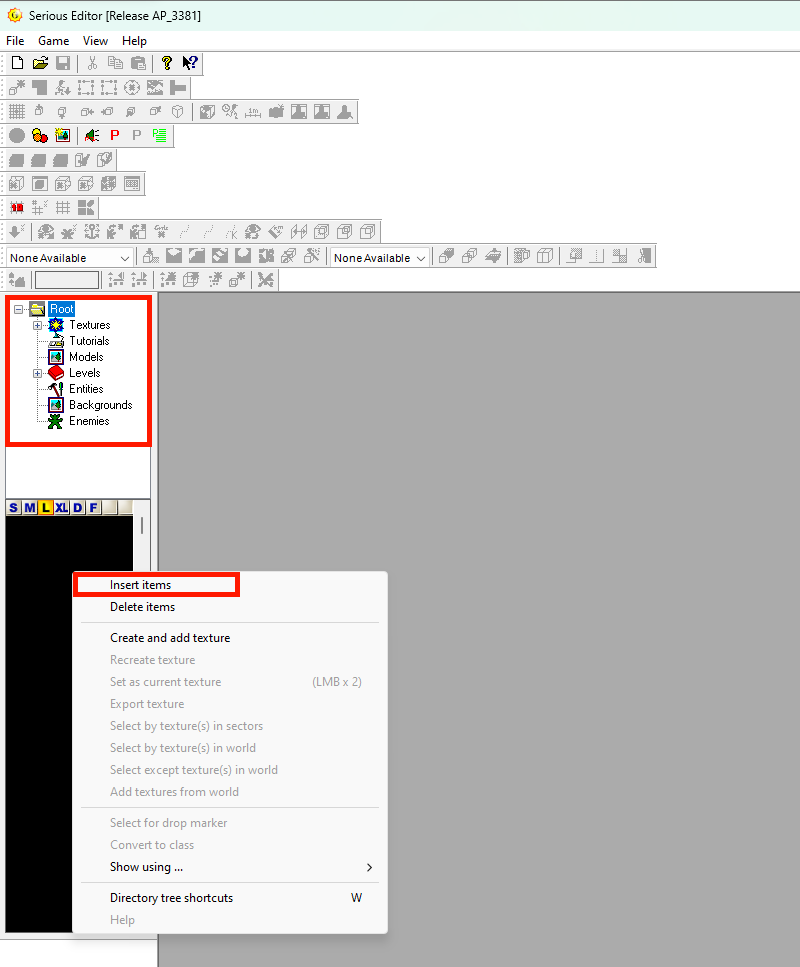
After downloading Serious Sam Classics Revolution Toolkit, launch it and choose the launch option “Tool : Serious Editor”. Once the program loads click the Root folder or any of the folders in the lower right file tree until you see a black window. This can either be empty or filled with map assets. Right-click an empty area of the black window and choose “Insert Items” from the popup menu.
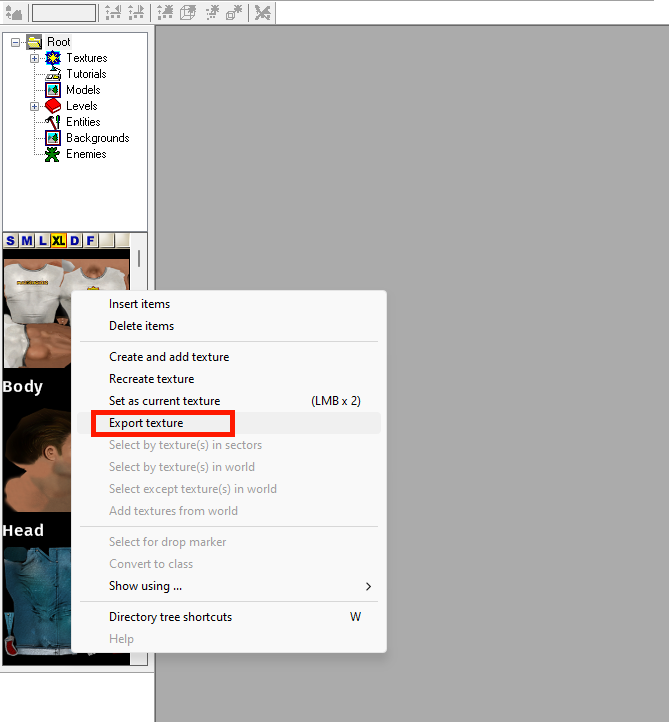
This should be done for all.tex files, until they appear in the black window. Right-click each one and select “Export texture”. This will convert all.tex files to.tga, and save them in their current folder. These files can then be edited as any other image.
paint.net – [paint.net]
or any other image editing software that supports the.tga.
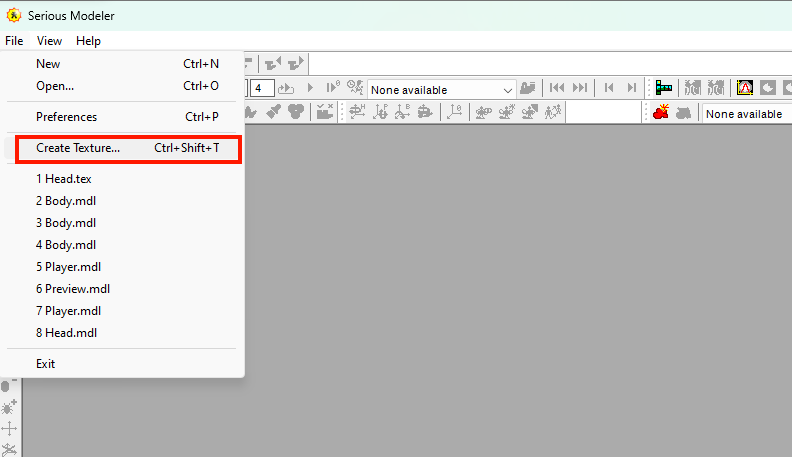
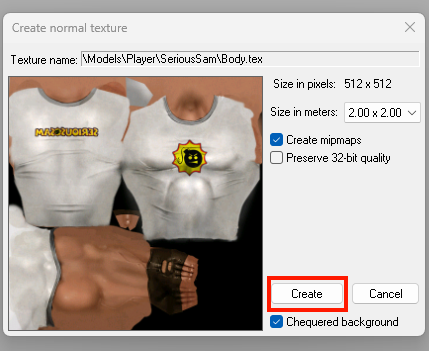
Once you are done with your textures, or if you want to see how they look in-game, you can convert them back into.tex. Launch the Toolkit again with “Tool: Serious Modeler” Once you’re inside, click “File/Create Texture …”” and select “Normal texture”. Click on “File/Create Texture…” to open the.tga file. Leave all settings as they are and click “Create”. If you get an “access denied” popup, it means that you didn’t enable Read-only on the file. The program cannot overwrite it.
This is how you create thumbnails for your character. Many image formats work, even animated gifs. However, the file must be stored in a folder with your.amc or.des files. The file name must include “Tbn” at end. SeriousSamTbn.jpg (.tex following conversion).
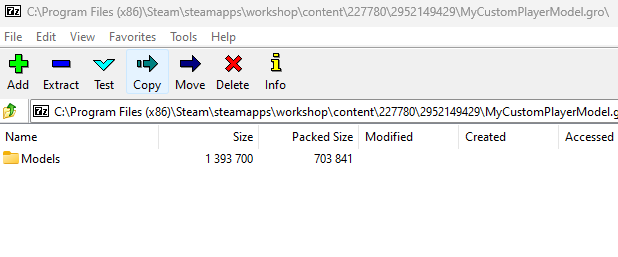
Once you are ready to upload your model, copy the.amc and.des folders into your empty folders. Right-click the Models folder in your chain of folders, and choose “Compress To Zip File”. You can rename this zip file to whatever you like (cannot contain spaces though), and change the extension to.gro (this file is your content file). You should see the Models folder when you open the new.gro file with 7-zip.
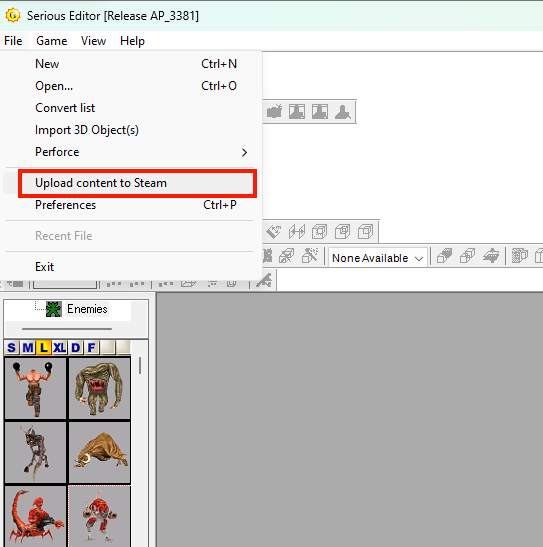
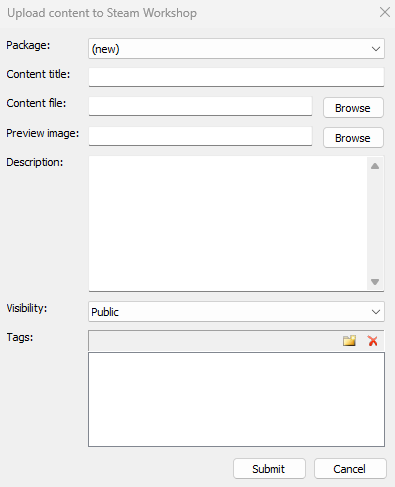
Open Serious Editor, and click on “File/Upload content for Steam”. Set Package to “(new),” if you haven’t yet uploaded files to Serious Sam. Select the title of your workshop, click browse to upload your.gro content file, and select a preview image to use for your workshop upload. It is best to set visibility to private so that you can verify that your mod works before making it public. Once you are done, click Submit. You can update your model later by selecting the Workshop Upload in the Package box.
I sincerely hope the Serious Sam Classics: Revolution – How to make a basic custom player model was enjoyable for you to read. Please let us know in the comments box below if you find any errors in the post or have any recommendations for how it may be improved, and we will do our best to solve them as soon as possible. Thank you for your feedback! Don’t stress about it, and have a wonderful day! The inspiration for this piece came from the author/creator David_Sh. Also, if you like the post, don’t forget to add this website to your bookmarks; we publish new posts every day with additional material, so be sure to check back with this website frequently for more posts.
- All Serious Sam Classics: Revolution Posts List



Leave a Reply