You will need Blender & a basic understanding of how to work in it. This also means we will be preferring .blend files most of all, but we will also like .obj/.mtl and .fbx files. Since I don’t own 3D Studio Max .3ds and .max are out and I won’t be covering how to handle those. Also, fair warning that I use Photoshop a couple times, but you can do anything I do here in Gimp, just Google how.
We will work in two parts – first to make Blender look like what we expect to see in game, and second to import this into Rolling Line. My examples will have a desert theme as that is what I’m working on, but the methods used will apply to various situations you might see with any model.
Finally, it’s your responsibility to make sure any files you post are available under a non-commercial use license, unless you own it.
Getting Started
If you’re new to modeling some of the below might be confusing, so let me try to help you understand which situation you have.
The first part is going to be the file type you’re importing. As I mentioned above, Blender will be the best, as there is no importing. Blender is also very friendly with Wavefront Objects, which is also what we export, and FBX files, which might be what someone exported from 3D Studio Max.
The second part will be what the artist has used for materials. Specifically, artists typically either use Blender’s internal coloring capabilities or an external image texture. You can check this after importing your model by going to the Material Properties, or the Shading tab (which you might have to add to the list up top by clicking + > General > Shading) to you look at the nodes to see if there is an Image Texture node or only a color referenced. Most issues are due to missing colors or image textures.
If you File > Import and everything looks like it should, which seems rare, you can skip to the “Into RL” part of this guide!
Blender File
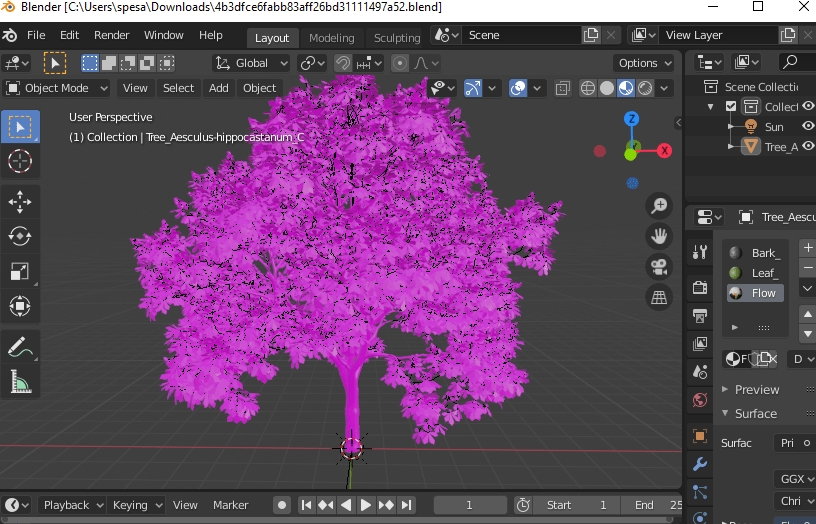
If you open a Blender file and it doesn’t have any textures then use File>External Data>Find Missing Textures, which should fix any issues where the texture render looks like this before hand (Viewport Material Preview):
If you do this and most textures show up but some are missing, go check out the Missing Image Texture section below on how to fix.
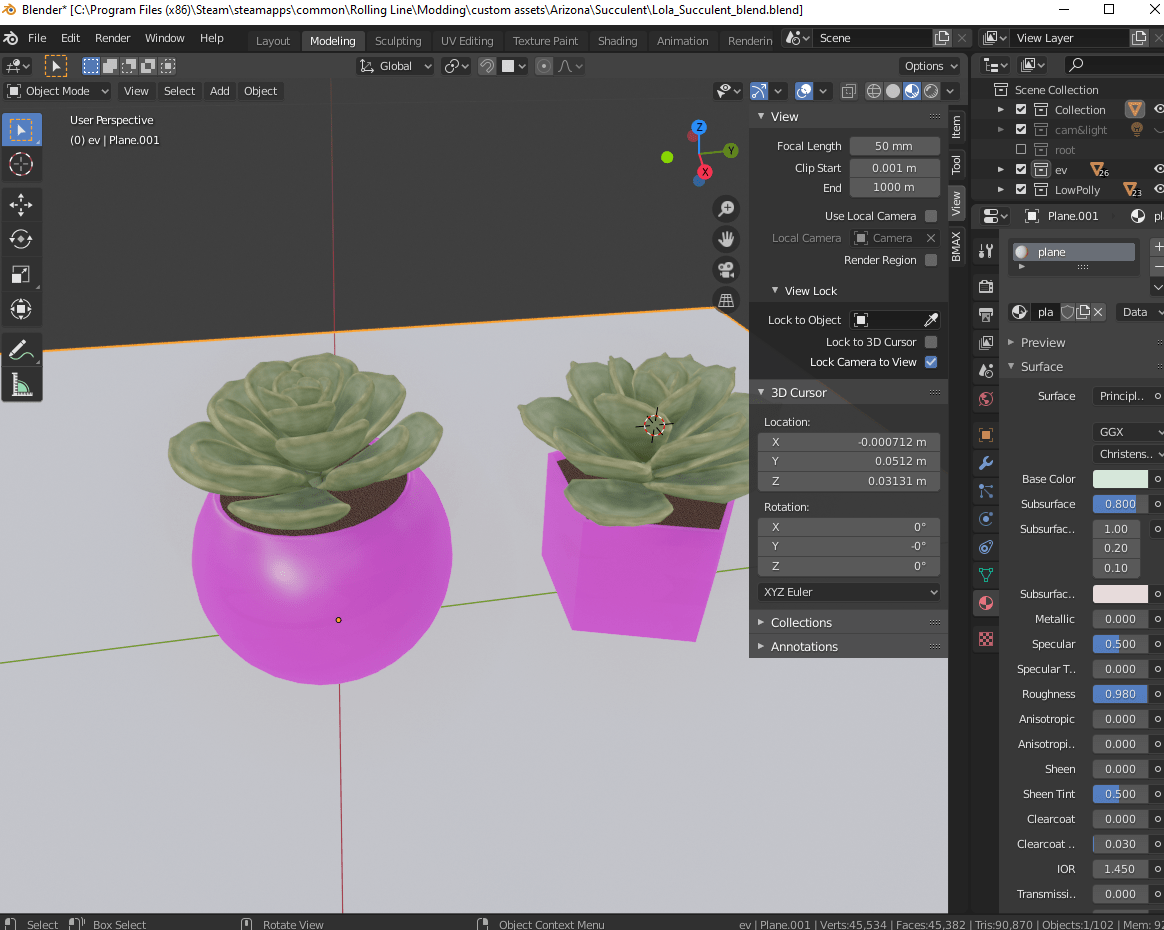
Don’t be afraid to borrow an object from a scene that someone has published. One of these is high res and the other low res, so once I join the leaves together of the low-res version then delete the rest of the scene and I have my model. If you’re wondering, yes Find Missing Texture does find the vase texture, but I’m deleting this anyway so who cares.
This is from: https://www.cgtrader.com/free-3d-models/plant/pot-plant/echeveria-lola-succulent
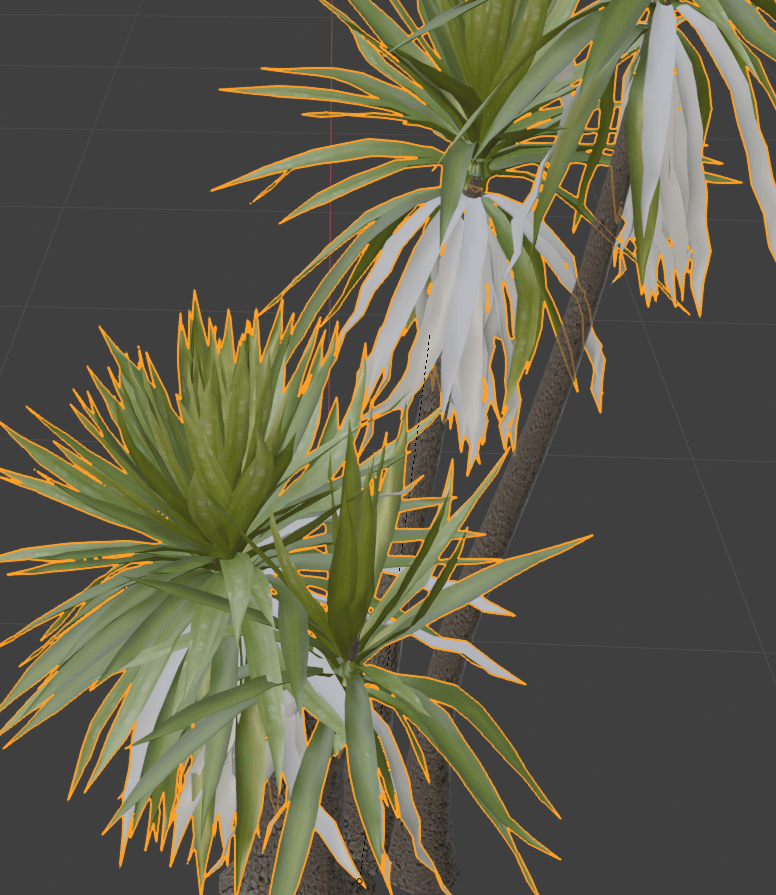
Missing Image Texture – Yucca Plant
https://3dsky.org/3dmodels/show/yucca_aloifolia_2
This model imported almost flawlessly (File>Import>FBX), but we’re missing one of the materials.
Any time you’re missing textures after import, the first thing to try is File > External Data > Find Missing Files and browse to the folder where the textures are. This time this didn’t work, I’m not surprised as it found the other textures, but this usually works when nothing is found.
There are a few ways to do this, but my preference is from the shading node editor.
Up top, open the Shading tab, you might have to open a new one by clicking + > General > Shading
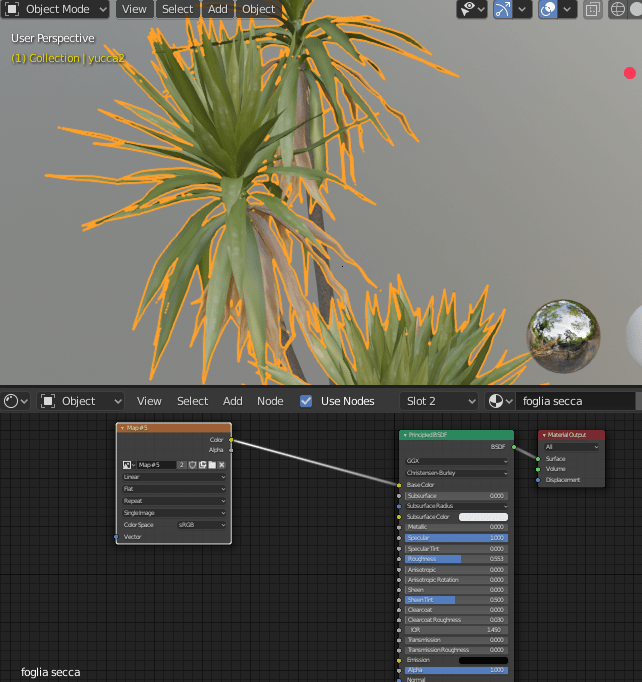
Also open up the Material Properties. In this case a quick glance shows that it’s only the ‘foglia secca’ material missing, so click that.
The problem here is simple – we’re just missing the Image Texture node. If you glance at the other materials you can see the image texture nodes being processed into material output, but ‘foglia secca’ has none!
Down in the shader editor window click Add > Texture > Image Texture. The image not linked appears to be ‘yucca-foglia-2.jpg’ as we know visually these are the brown dead leaves. Click Open, select the texture, hit OK, and then finally drag a line from the yellow dot on the right side of the image texture to the left side of the Principled BDSF Base Color. It should fix the issue and look like this:
Missing Color + Normals Problem – Agave Plant
https://www.cgtrader.com/free-3d-models/plant/bush/agave-ground
We will be using the .obj and .mtl files from this model.
Go to File>Import>Wavefront .obj and select your obj file, make sure the mtl is in the same folder as Blender automatically tries to import material information when importing Wavefront Objects.
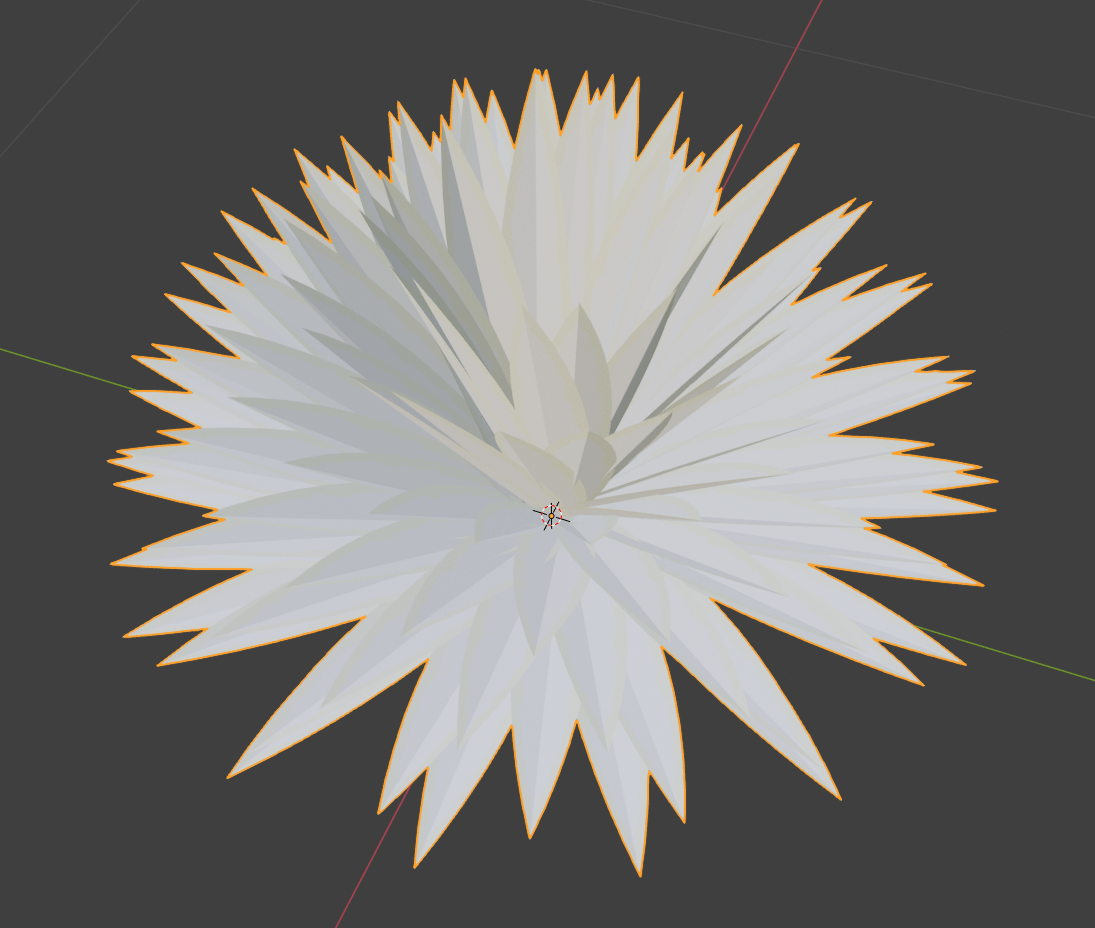
Make sure you’ve changed the Viewport Shading to Textured. You can’t see materials in wireframe or solid. When I open this it’s not as expected, why aren’t my leaves green?
There is a green tinge towards the edges, so something is clearly working here, let’s dig in to find out what the artist did.
Go to the Material Properties section, we see there are two colors applied to this model – no textures. I can see the one labeled E05 has that green tinge, but G16 looks flat white.
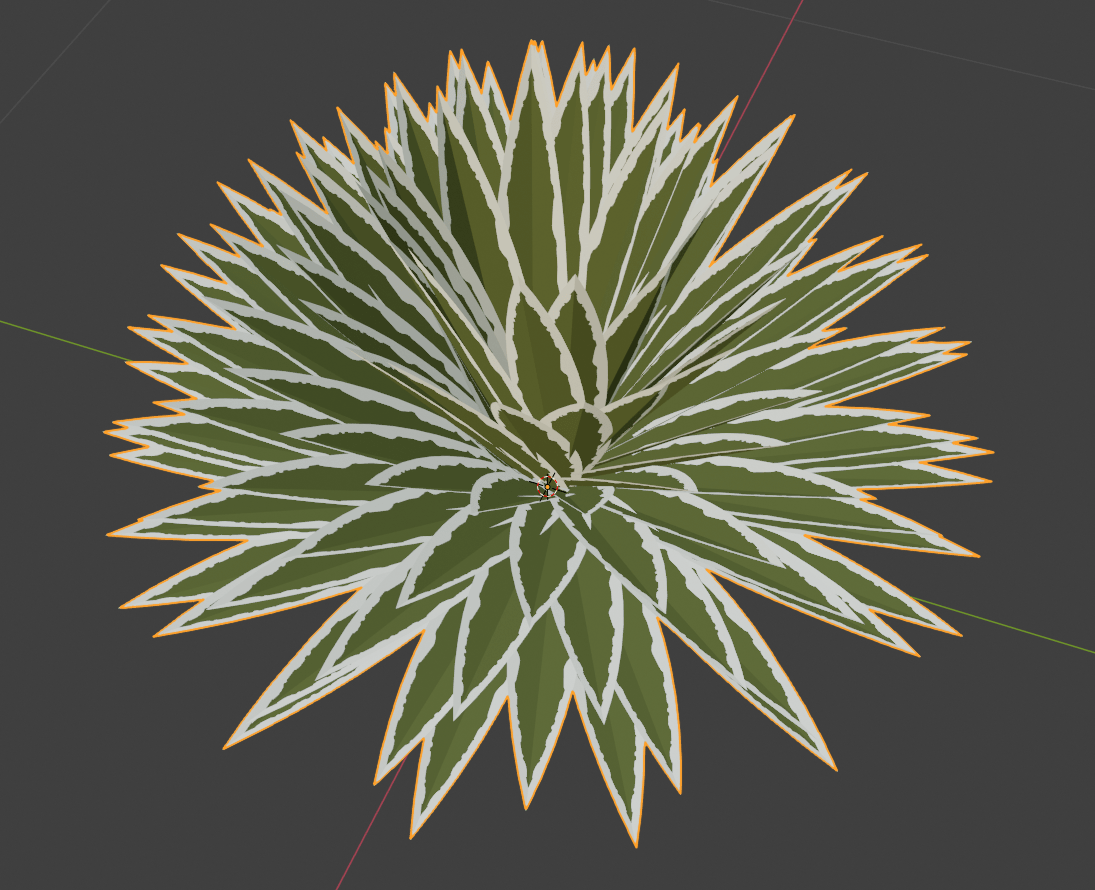
We just need to change this color. With the material selected click Base Color and select your new color. In my case I pulled the artists screenshot into Photoshop just to eye dropper the right color. You can also do this easily in Gimp which is free, and technically I believe there is a way to do it natively in Blender, go Google it if you’re interested. Also note the color dialogue can switch between RGB, HSV and Hex; I’ve just used hex 565e2f.
This was a pretty quick fix:
However, if you import this model in game you’ll find another issue. From top down, half of the faces are missing!
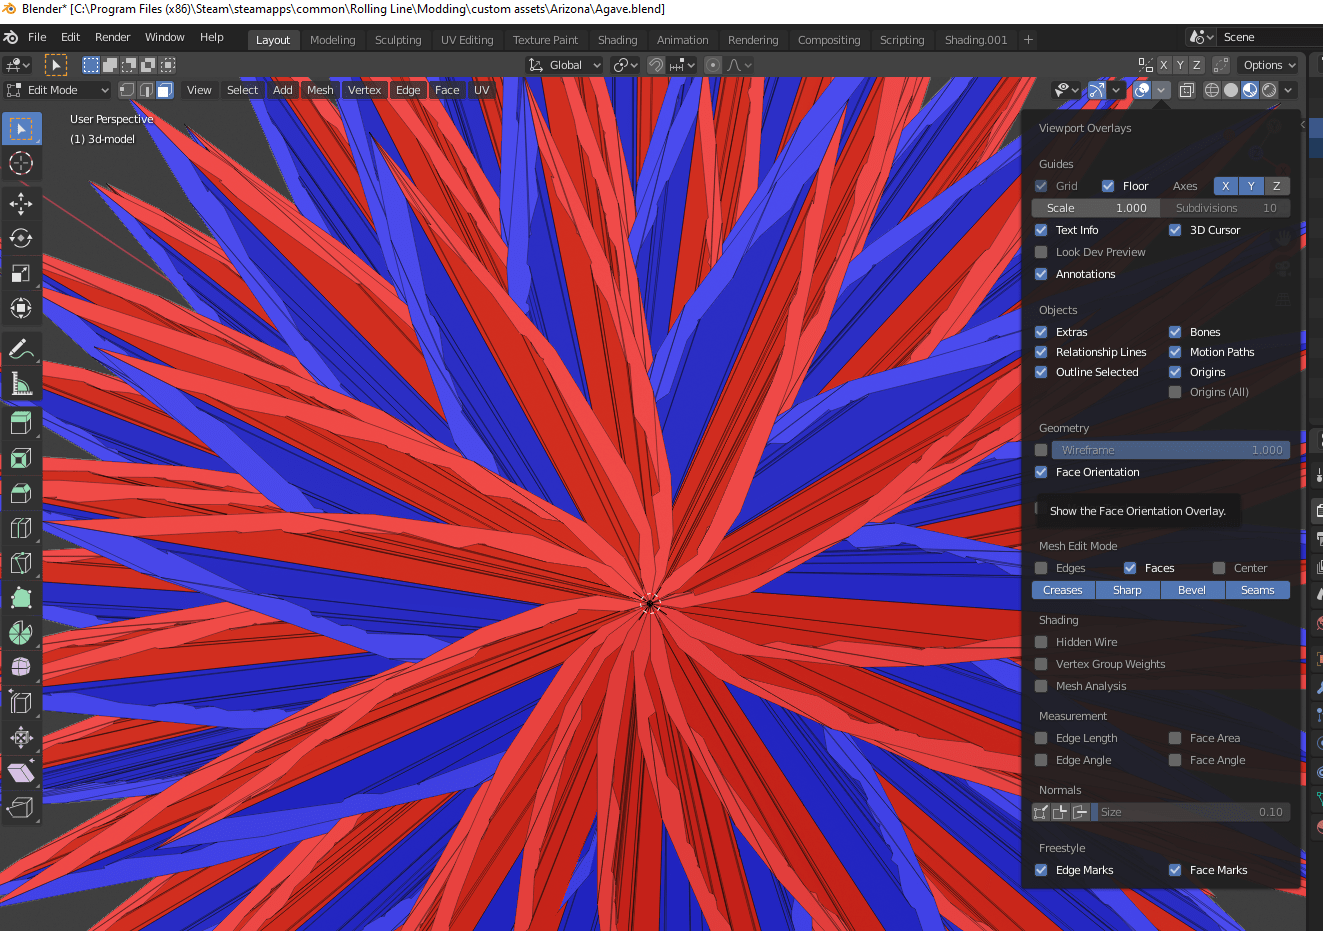
Turn on Face Orientation in the Viewport Overlay to see normals:
We want to only see blue, the reds won’t show up in game. Since this is a plane, one side of it will always be invisible in RL.
We can try to recalculate normal by selecting everything and using Mesh > Normals > Recalculate Outside. In this case, it changes but we have the same problem. After selecting a red normal I also tried to Select > Similar > Normal, but again in this case because these are unlinked meshes so this doesn’t work.
Unfortunately, I’m going to have to fix this manually. What I’m going to do is use the L key to select linked faces on all of the red faces, and then Mesh > Normals > Flip.
That fixed one issue, but now you’ll notice the other in game – the backs are transparent! Since these leaves are flat planes, we’re going to have to duplicate the object, select all faces, and flip the normals for it to be visible from below. The two together now look like they have both sides, but be aware we are doubling the poly count, which can be hard on performance.
What’s exciting in this case is it gives me the opportunity of having 2 separate meshes to bring both in game and give the bottom mesh a darker texture, for more realistic shading!
No Textures – e.g. STL files
If you’re in love with the model you found but it doesn’t load in any material info at all, or is an STL, you’re stuck texturing the model yourself. It’s that or consider making it paintable, which would mean you need to check the other prop mod guide. Google some free textures that fit your purpose and look up some tips on how to apply a material and UV map the model. This will be tough, but you’ll learn a lot. Good luck!
FBX File – Version Error
You might get this error when using an older FBX file:
The fix is to use this file converter, then re-import the new FBX files:
https://www.autodesk.com/developer-network/platform-technologies/fbx-converter-archives
Alpha (Transparent) Textures
OK, let’s talk about the culling issue & alpha textures. If you’re using a leaf texture, for example, that utilizes transparency, you need to be aware of how Rolling Line handles culling. First, most of these leaves are a single plane with no back to it, which won’t render in Unity. You technically can fix this by doubling the leaf geometry and doing a Mesh>Normals>Flip, but you’re doubling your faces so it’s hard on performance. Make sure if you’re doubling faces you use Select > Similar > Material so you don’t double the branches or anything else. You can quickly duplicate anything in Edit Mode with Shift+D, Enter (don’t move it, or hit Esc if you do), P to separate to its own object, then Mesh>Normals>Flip.
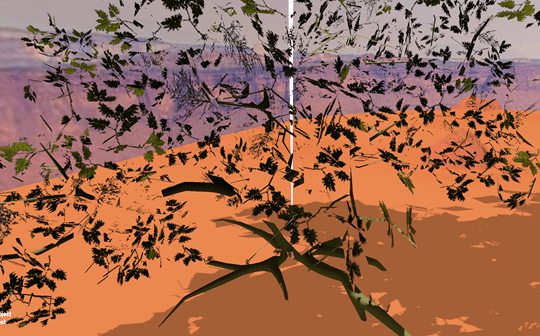
This model will never be published because the culling issue is so bad, but it looked cool in Blender:
This culling issue also means that transparency on a model will visually block the rest of the model, but nothing else behind it. Possible solutions to this are cutout shaders, and Z-writing which would make it so objects in game can no longer be transparent, which obviously isn’t an option.
If you’re determined to use these, which I don’t recommend but have clearly personally done, you might also need to get rid of the blackest colors after you bake. In Photoshop you can double click on the right side of a layer to bring up the prompt, where you drag the Blend If > This Layer left side up and it drops out the darkest black colors. Pretty sure you can also easily do this in Gimp but you’ll have to Google how.
Finally, make sure you’re using material type Alpha when importing in Rolling Line. It doesn’t appear to save it (it reverts to ‘Normal’ if you leave that menu and re-enter) but it works, so don’t worry about what it says.
Poly Count
Please learn from my lessons and pay attention to this section – performance counts! For comparison, the Berkshire is about 40k polys. But if that was a high poly bush and you want 25 of them in the layout that’s 1 million polys for just bushes! So we want to make models as slim as we can.
In Blender ‘Tris’ will be our poly count. A lot of Rolling Line modelers love the vert count, but they should be roughly related.
Both ways to lower poly count that I’ve found frequently cause visual issues. Regardless you should eliminate what you can without causing issues.
The most common form of poly reduction is the Decimate modifier, which has three different modes. Planar will try to combine by angle which is great to make take a complicated leaf structure and simplify it, there is Un-subdivide which does iterations, but I find myself using Collapse most of all. Though it might seem drastic, I often am using a Ratio somewhere in 0.2-0.5 depending on the starting state and the complexity of the geometry. Recently I find myself starting with Planar up to 15 degrees and then use Collapse.
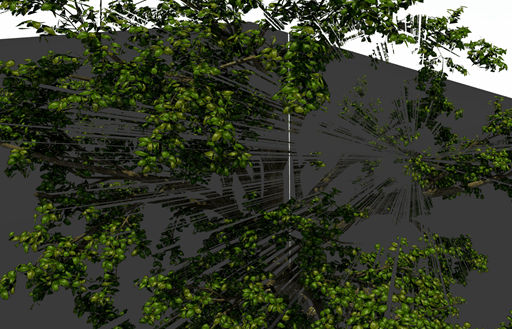
However, if you just do this and try to take it in game you might see this issue:
What’s happened is that we have some stranded edges without associated faces causing UV mapping issues. First, go into Edit mode, hit A to select all, and try a Mesh > Cleanup > Delete Loose.
If that doesn’t fix it all you can try find one of these stranded vertice and select it, but mine are so small I’ve selected a random vertice and used E to extrude out an edge with no faces, and then used Select > Similar > Amount of Adjacent Faces to delete them all. You might have to redo your UV map, but this should fix your issue.
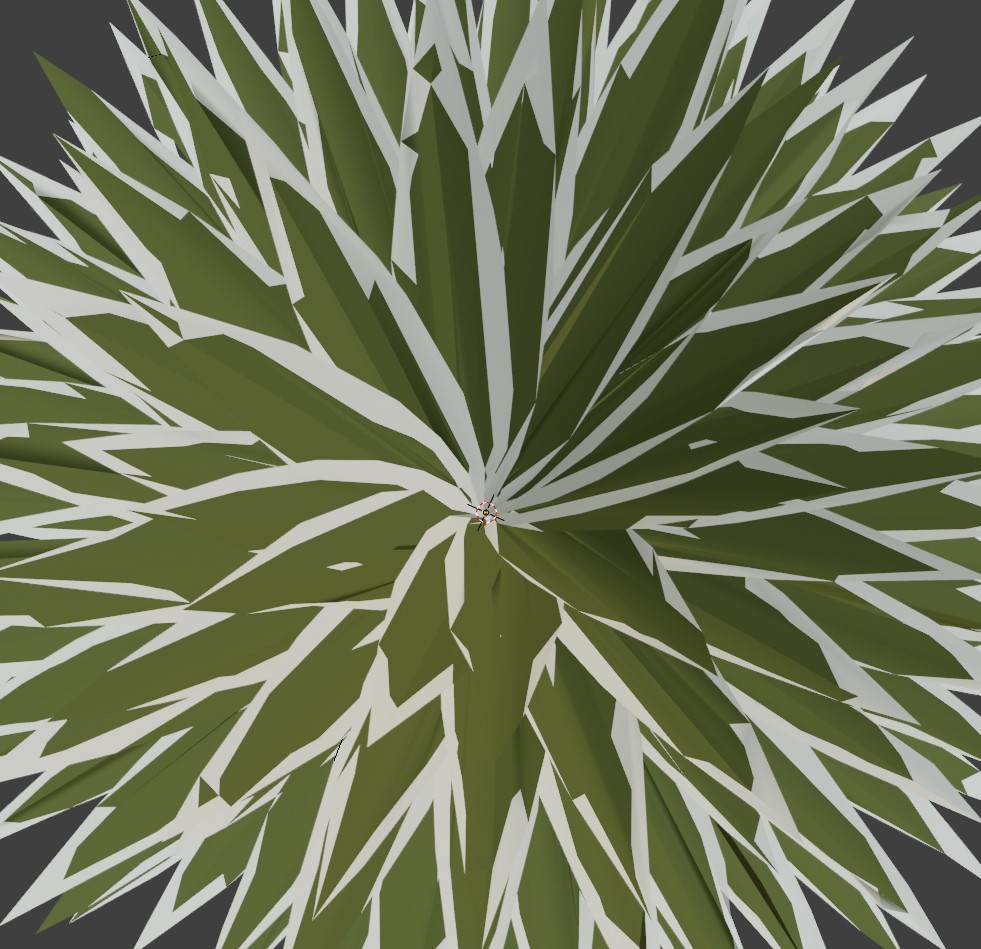
Merge by distance is the other option to limit the number of Tris. In Edit mode, you can simply press Alt+M and click By Distance. From there you can open up the Merge By Distance box and adjust the distance it uses. Higher number means more reduction, but this comes at a cost. See what happened when I did this to the Agave? Watch for distortion when you’re simplifying models!
Finally, you also can use a Boolean modifier pointing to some geometry you’ve created to remove parts of a model, or even select by hand which geometry you want to remove.
Into RL – Texture Baking
The question remains: how do you get all these separate textures into one PNG to import into Rolling Line? The answer is texture baking. This means making a new UV map using one image and baking all of the visible image textures together into this one image.
Make sure at this stage your models are all a single object. If they aren’t already select them all and hit Ctrl+J to join them.
Here is a Youtube video to use, if you prefer that, or if you just need some visual cues to what I’m talking about below, but my notes below have some tips he doesn’t cover.
1. First thing to decide is if you’re pre-lighting the textures or not. I’ll be using Blender lighting as I think it looks more realistic in game, but it’s really up to you.
a. If you want exactly what you see in Viewport Material Preview (not Rendered) that means you want to be using color only, no lighting. You can skip ahead to step 3 but you’re going to have to change every material from Principled BDSF (or any other possible option) to Diffuse BDSF and use the Diffuse Bake Type with only ‘color’ selected.
2. In Layout, Add > Light > Sun. You can control the angle of the sun, the color, and the intensity. I like to use a yellowish sun and turn intensity down to ~50%, so the shadows are less stark, and brighten the PNG later, but this is totally up to your preference. Change Viewport to Rendered to see your lighting.
3. Open Object Data properties (upside down triangle), open UV Maps, and hit + to make a new one. Note that here we could click the camera to change our render to this new UV Map, but we will never do this, we want to see the original UV map rendered.
4. Go to UV Editing tab & make a new image (Alt N), name it Bake. For the size it depends on the size of your model and the detail you would like, but the default 1024×1024 might work. With colors lower resolution can work but with image textures you’ll likely need 2048×2048 for it to show up with much detail, and I occasionally use 4096×4096. For example, the Yucca group is using 4096×4096 but the single plant I separated is using 2048×2048.
5. Go to your Shading tab so we can see the material nodes, and switch to the Material Properties. In order to bake we must create a new image texture node in every material that points to the bake, and make sure it’s active/selected.
a. In the Shader Editor Add > Texture > Image Texture and click on the left to select the Bake image we just made
b. Repeat for every Material. You can copy & paste the node. Make sure this Image Texture node is selected and nothing else is!
6. We need to create the new UV Map, so go to the UV Editing tab.
a. Make sure the new UV Map is selected but not rendered (camera should still be highlighting original UV map).
b. Go into Edit mode, hit A to select everything.
c. U > Smart UV Project > OK
i. Note you can also use the regular Unwrap, or even Lightmap Pack, go Google what the difference is. This step might take a while on complex objects.
7. Time to bake!
a. Go to Render Properties (looks like back of a camera), change Render Engine to Cycles.
b. Open the Bake area below; we’re going to use Bake Type Combined.
i. If you’re using Diffuse to get ‘color only’ make sure all materials are using Diffuse BDSF and you correct any issues made with the change in the nodes. When I did this, I had to re-add the Image Texture node and point it to the Diffuse Base Color. De-select direct & indirect lighting options.
c. Under Output change the Margin to 3 pixels. This means the texture should go 3 pixels past what’s mapped to avoid issues, but larger numbers cause overlaps.
d. Finally, we can hit Bake! This should take some time but will ‘bake’ all the original textures into our new bake image.
i. You might get a circular dependency error, which you should cancel the bake for. This can be complicated as lots of things could be wrong, but often it’s that a texture is being referenced multiple times: check which texture is causing the error, go to the node in the shading tab (or UV Editing tab and pull up the texture), and click the number on the right side of the texture name to make individual copies to reference, then update the references in the nodes. Make sure your bake image texture node is still selected/active. Try to bake again!
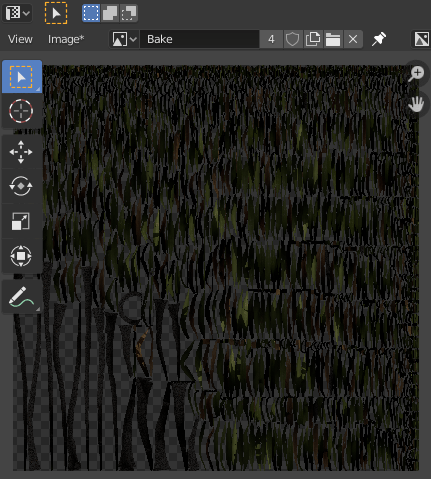
My Yucca group Bake texture in Blender UV Editor:
Into RL – Export from Blender
Exporting from Blender doesn’t take lots of work. We just need the baked texture and the .obj.
To save the texture go to the UV Editing tab, pull up your baked texture, click Image > Save As… and save it to \Steam\steamapps\common\Rolling Line\Modding\custom assets
Model position – you should try to get the model at exactly 0,0 X,Y coordinates. For Z on some models, like trees, you might go slightly below 0 Z coordinate so that when it’s placed on a hill the base isn’t visible. Leaving it at 0 Z would cause the user to have to lower the model in game every time.
To save the .obj go to File > Export > Wavefront .obj
Save this to the same folder but first change the scale! While it varies, and really small models I export at 1, most of the models I’ve used need to be export at ~0.1 scale, and some are better at 0.05. Since we can scale in game it’s not the end of the world if every model doesn’t start in the same scale but try to get close if you can.
Your baked texture might look dark if you followed what I did exactly. This was intentional, so now I’m going to open it up in Photoshop, up the brightness, maybe lower the contrast a bit, but if you go too crazy you might as well have just lit with sun intensity 1.0. Sometimes I adjust the hue/saturation a bit, and you can drastically adjust hue/saturation to create a ‘new’ model by just using a different texture, like the Realistic Line bushes.
Into RL – Import into Rolling Line
Load up any Rolling Line layout. Open the Modding menu.
Click Add New – give it a name. There’s lots going on here, so I’ll try to take each section at a time.
1. First, to import the model we’ll have to use that Mesh section. Click into main. Click the Mesh and point it to your .obj. Click the Texture and point it to your baked .png. Change from Normal to Alpha if you’re using a transparency (and go re-read the Alpha section of this guide), otherwise leave it as Normal. Most of the time you’ll want shadows, unless it’s a room piece (e.g. a backdrop). Click Refresh Preview Prop down below to see your model. If it’s way too big, try to navigate around until you can click the Remove Preview button and redo your export scale. Note you can also add multiple models with their own textures, like we did in the terrain tutorial. Done Editing. Animation needs to be another guide.
2. Tags, up top. Pick your category, I’m using Vegetation. Pick your Region, but a lot of things will be Global. Add some custom tags so people can find your stuff. I’ll be using ‘Realistic’, ‘desert’ and a few others that describe this Yucca Group.
3. General Options. Edit Layer, most models will be Details like it defaults but double check. Align to walls only if you’re making something for the walls, like windows. Align to surface will override the Z coordinates you exported, which you rarely want but works for certain models. For Randomizers it depends on your models, I use scale & angle randomizers for my vegetation, but I don’t believe hue works on textured models. Interactions should be covered in an Animation guide.
4. Collision Options. A lot of things don’t need collision in RL and if they do a box is good enough. But if you’re doing something like terrain you might want to use the mesh for collision. You can also manually adjust the box bounds if you’d like.
5. Audio Options. Not really what this guide is about but you can make an mp3 play. Most you’ll want to have loop, you can adjust the volume and making it a 3D audio source will make it so you can adjust the distance you can hear it from.
6. Snapping Options. This is a little complicated and I’m still a novice with it, but basically you can create your own snapping layer, or use one already in game. Add a new snap point, click into it. Now you can see the yellow and pink arrows noting the position and angle. Most snapping objects will need at least two snap points, one at each end. Pick up your model, test it, and adjust.
Click Save, and now you can Spawn this model or Upload it to the workshop. Great job!
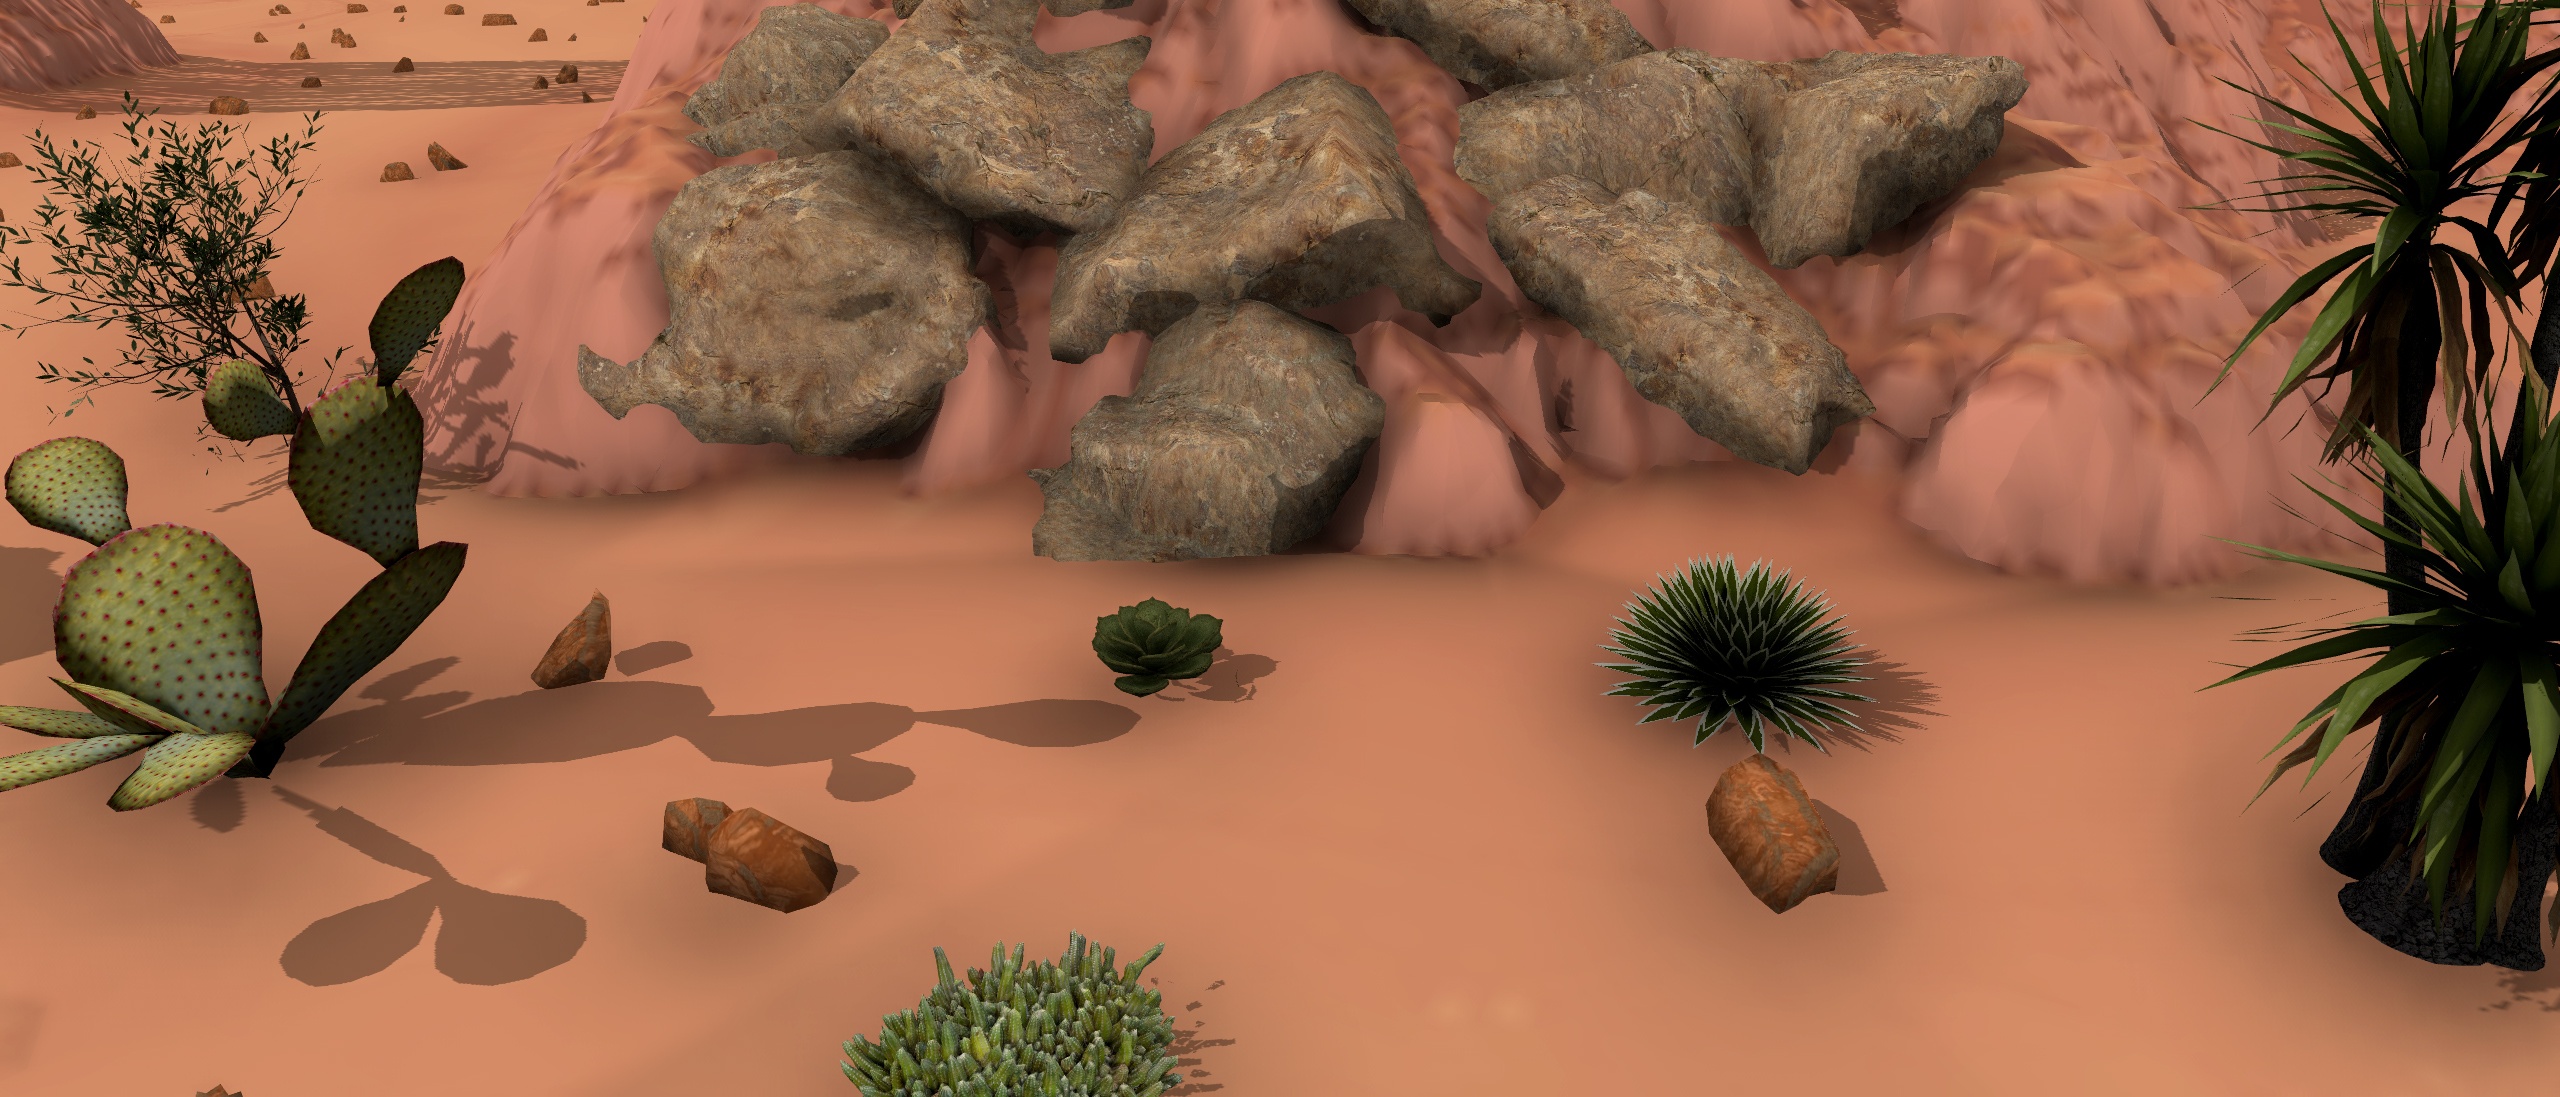
Not finished yet, but an example of how these models look in game:
This is all about Rolling Line – Beginner’s Guide to Textured Models; I hope you enjoy reading the Guide! If you feel like we should add more information or we forget/mistake, please let us know via commenting below, and thanks! See you soon!
- All Rolling Line Posts List


Leave a Reply