How to add this Steam version of Retroarch to another Emulator Frontend. Allowing you to use Steam exclusive features like Cloud Saves, whilst still keeping your existing emulation setup and negating the RetroArch UI almost entirely.
Frontend?
Seeing as Retroarch releasing on Steam is sure to bring a large influx of new users to the Emulation scene, I thought I’d give some details on what a Frontend actually is. If you already have your frontend set up, skip to the next section for instructions.
Emulator frontends are programs that act as a library for your Emulated Games, just like Steam does. Whilst more recent Emulators are making efforts to display your games in an more aesthetically pleasing manner, older ones often don’t even have a games list!
You provide a Frontend with the location of your games (Roms), An Emulator for each console you wish to use, and it’ll handle all the rest. Displaying your games in a satisfying view and launching them properly, without you having to touch the UI at all after the initial setup. Retroarch itself is technically a frontend, though its emulators are built-in, and you can’t add more than the ones provided.
By using a Frontend with its own Emulators in addition to Retroarch, you can build yourself an Emulation suite, capable of playing almost any Console you like and all accessible from a single program!
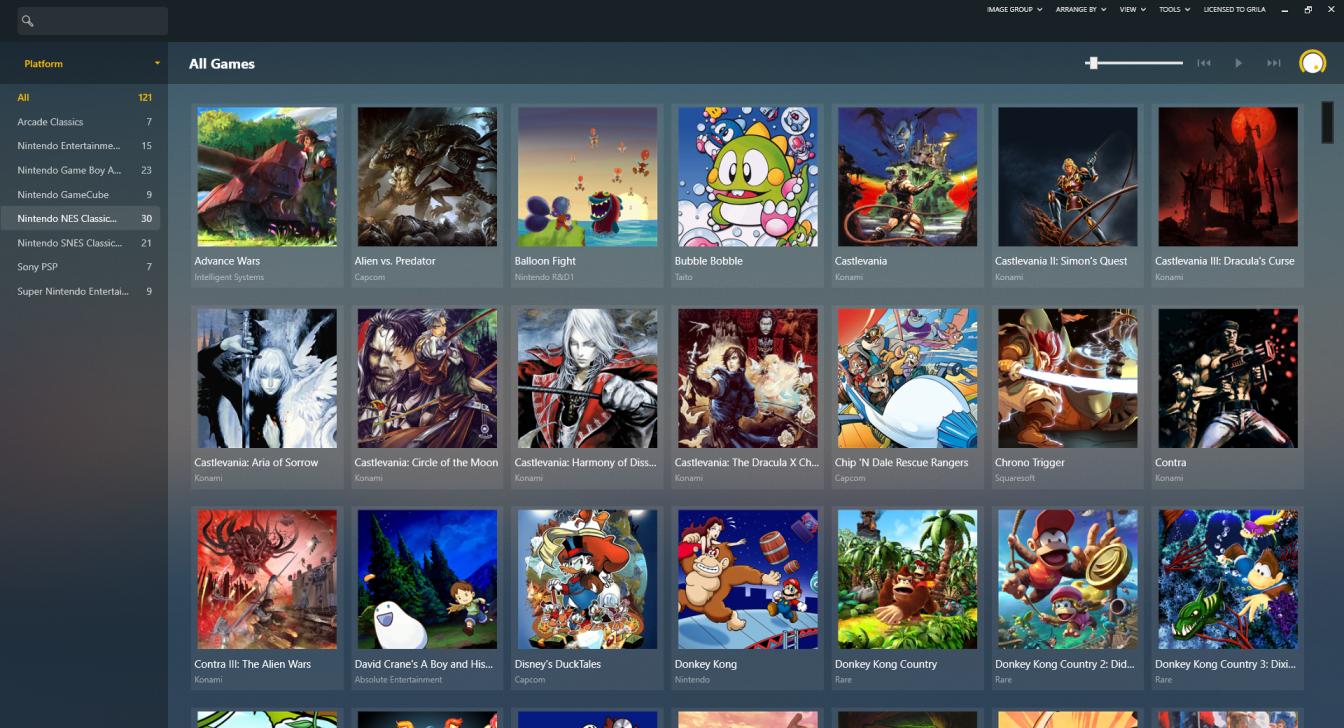
Below is an example of a Frontend, Launchbox with the LBPlex Theme.
There are many Frontends available, including Launchbox – [launchbox-app.com] , Pegasus – [pegasus-frontend.org] and Attract Mode – [attractmode.org] . Each of them have minor differences in Theme and Functionality, but they’ll all display your games just fine. Just pick whichever looks best to you and have a try!
Instructions
First you need to copy the path to your main Steam.exe file. On most installations, this’ll be at C:\Program Files\Steam, or C:\Program Files (x86)\Steam. Hold shift and right-click Steam.exe, then choose Copy as Path.
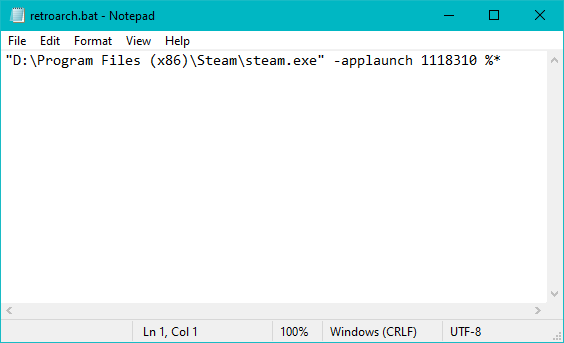
Next open Notepad and paste the Steam path you just copied, then add the following text after it:
-applaunch 1118310 %*
For anyone curious, this command tells Steam to launch a game by its ID, provides the ID for Retroarch, and then passes whatever parameters it was given (In this case, it’ll be your frontend providing the path to your intended Core and Rom) to Retroarch as it launches.
Choose Save As, set the filetype as “All Files”, name the file “Retroarch.bat” and save it somewhere it can easily be accessed.
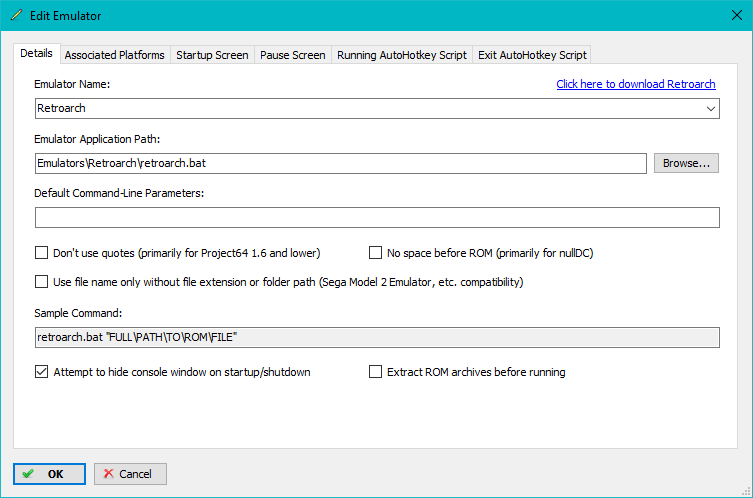
From there, in your frontend, you can just replace any paths that would lead to Retroarch.exe with one to the Retroarch.bat file instead. You can see an example of the correct settings in Launchbox in the image on the left.
Now if you start any game that you have assigned to use Retroarch as its emulator, it should launch through the Steam version. Providing you with hour tracking, and automatic cloud saving support.
I hope you enjoy the Guide we share about RetroArch – Adding Emulator Frontend to Steam version of Retroarch Guide; if you think we forget to add or we should add more information, please let us know via commenting below! See you soon!
- All RetroArch Posts List


Leave a Reply