A visual guide to finding all the secrets in Quake’s Horde Mode.
Useful Information
Introduction
To play it select Multiplayer from the main menu and then select Local Play to play solo/local co-op or Online to play online co-op.
Horde Mode contains 15 secrets across 7 levels.
Items
In Horde Mode there are item respawn locations scattered around all of the arenas. Items regularly respawn after being picked up and can randomly appear as Health, Armor or Ammo. Extra item respawn locations are sometimes hidden within secrets.
Quad Damage and Pentagram of Protection also function slightly differently in Horde Mode. Both items now have a chance to be dropped from slain enemies but also have a much shorter duration of effect.
Weapons
| Axe | Shotgun | |||
|---|---|---|---|---|
| Double-Barreled Shotgun | Nailgun | |||
| Super Nailgun | Grenade Launcher | |||
| Rocket Launcher | Thunderbolt |
Ammo
| Small Shells | Large Shells | |||
|---|---|---|---|---|
| Small Nails | Large Nails | |||
| Small Rockets | Large Rockets | |||
| Small Cells | Large Cells |
Powerups
| Green Armor | Yellow Armor | |||
|---|---|---|---|---|
| Red Armor | Small Health | |||
| Large Health | Megahealth | |||
| Quad Damage | Pentagram of Protection |
HORDE1: Tower of the Apprentice
Secret 1 of 5
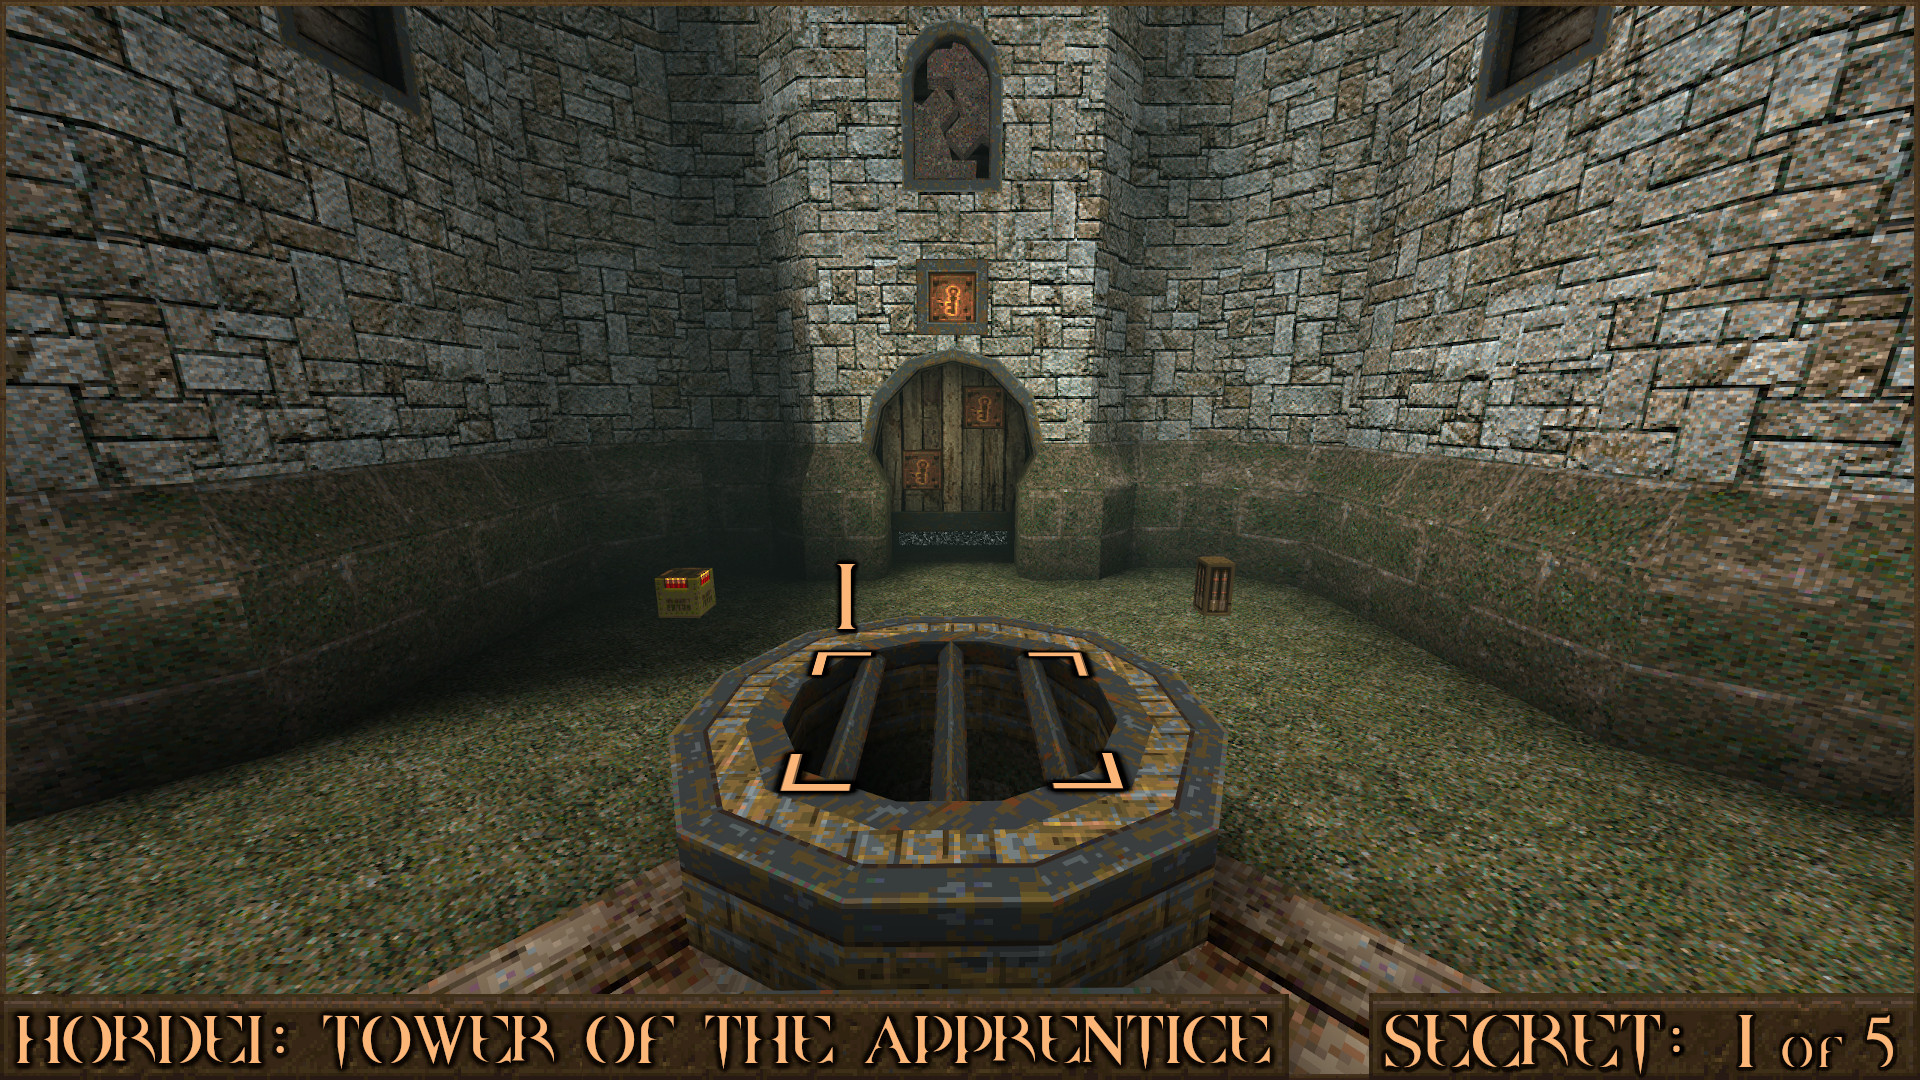
First you need to pick up the Grenade Launcher from the middle of the arena. Now head over to the Gold Key Door and look down the nearby pipe that is covered with three metal bars (). Shoot a grenade down the pipe and wait for it to explode. If it has worked correctly the message “You have discovered a secret area!” will appear.
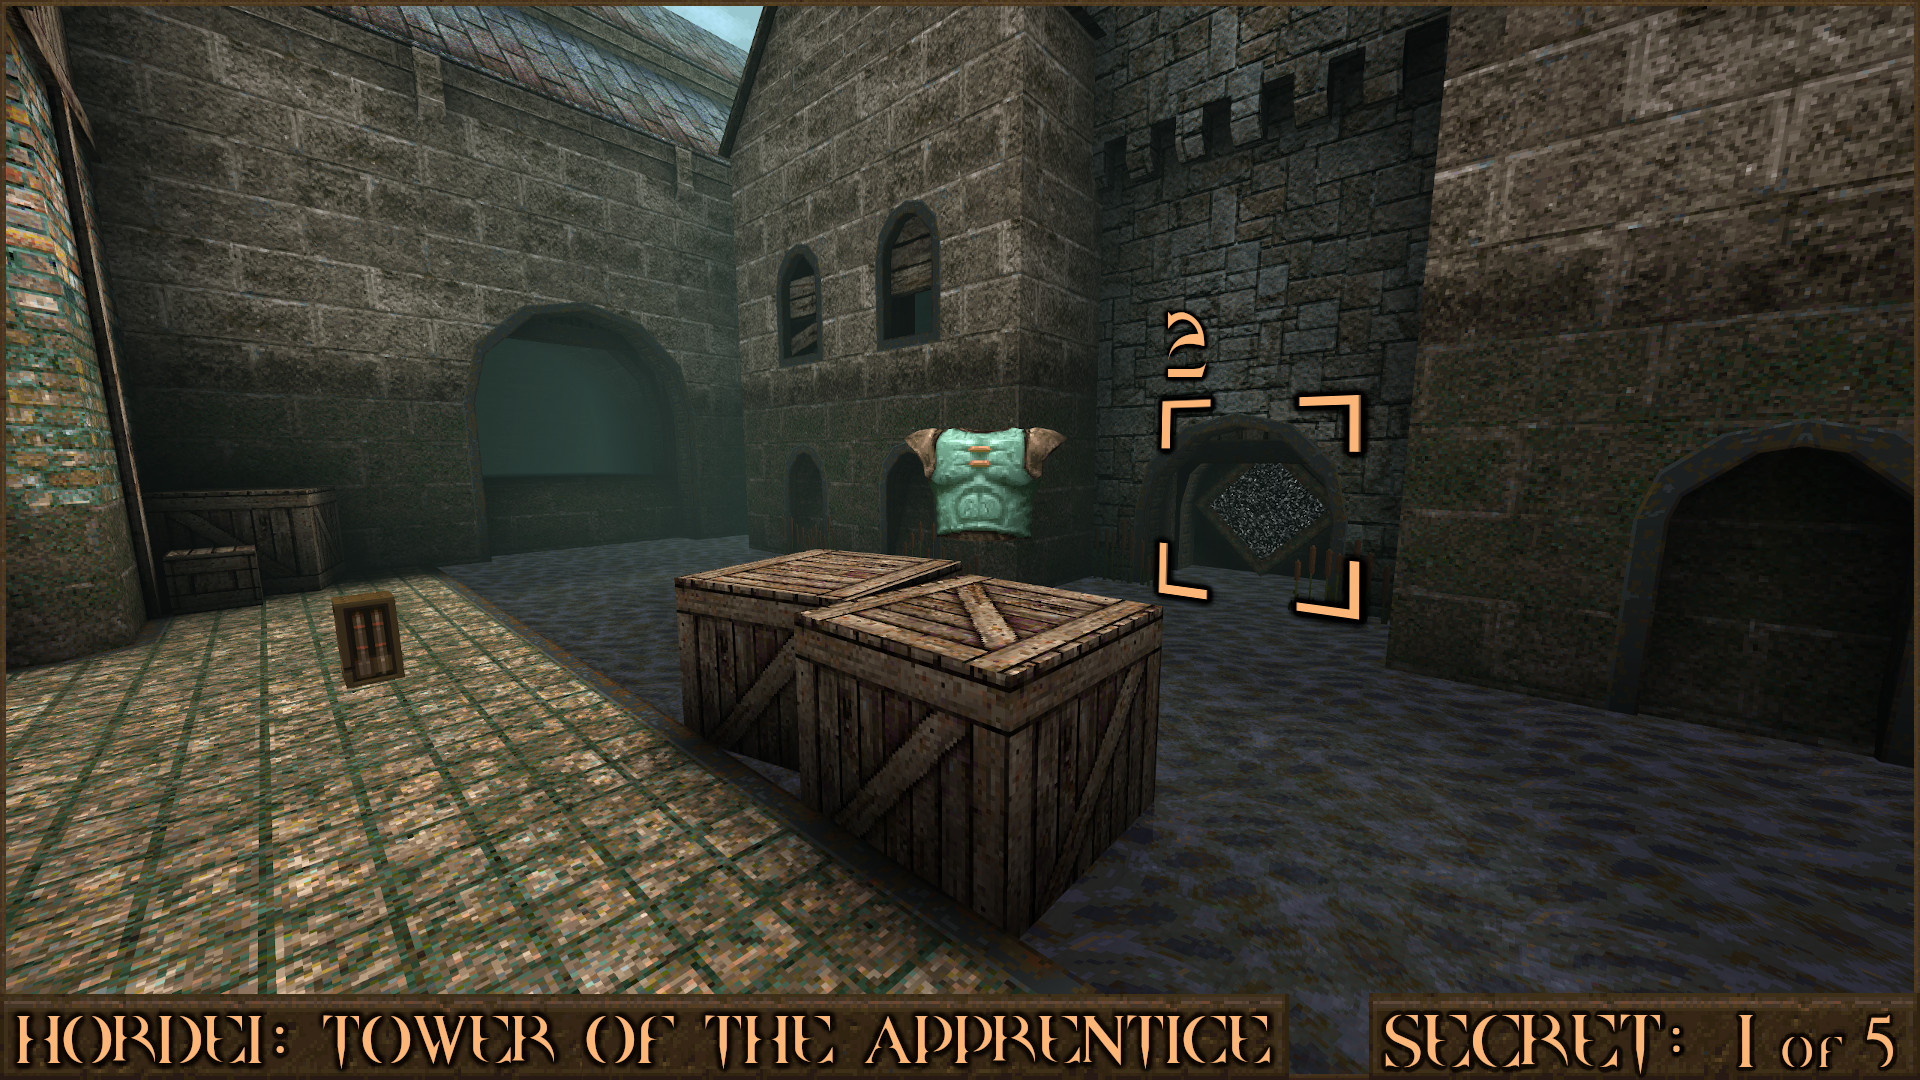
From the Gold Key Door head left and down in to the shallow water. You will see a teleporter has been revealed (). Entering it will teleport the player to the location of the Spiked Sphere floating around the map that will be used to find Secret 2.
Reward: None
Secret 2 of 5
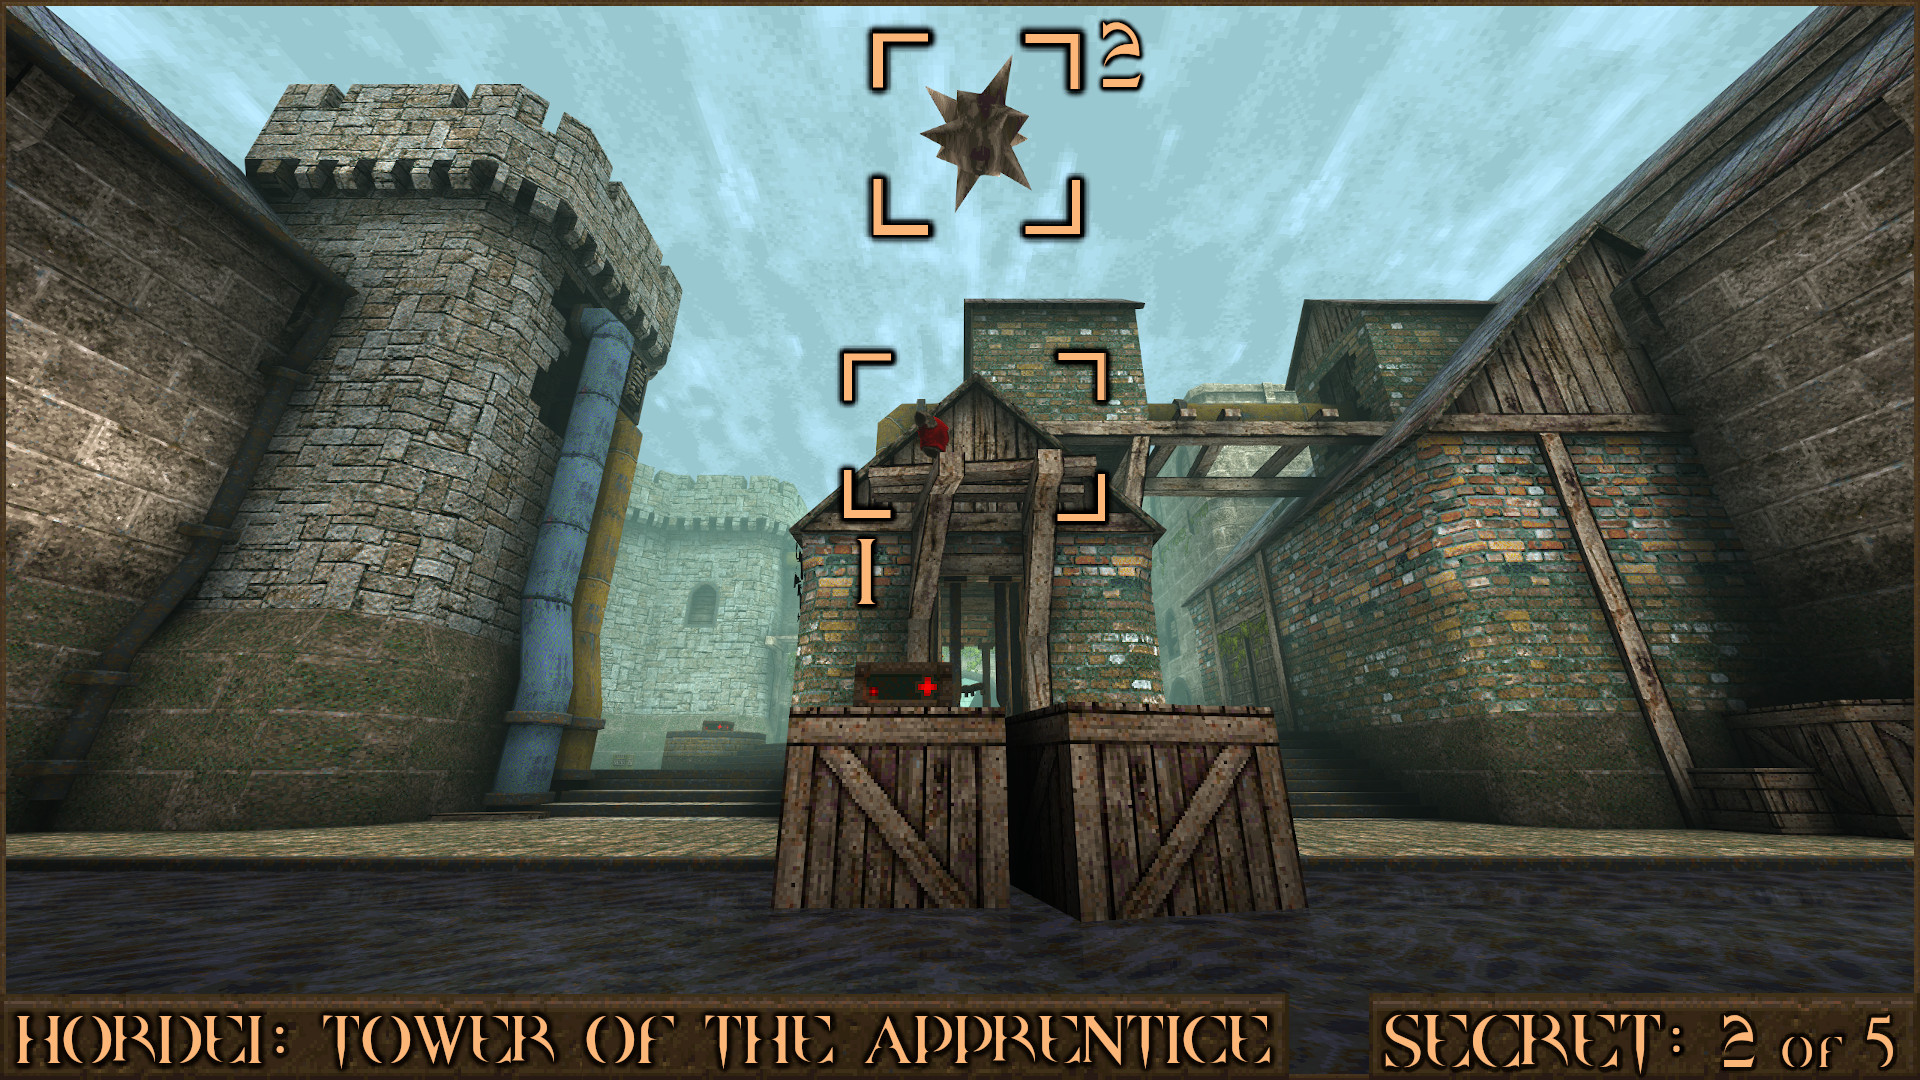
Head over to the teleporter that you revealed in Secret 1. Turn around and look up to see a Red Armor up on a platform (). Wait here until the Spiked Sphere (
) floats directly between the teleporter and the Red Armor. Enter the teleporter now and you will automatically appear on the secret.
Alternatively, if you have acquired the Rocket Launcher you can wait until an enemy drops a Pentagram of Protection and simply rocket-jump up to the ledge.
Reward:
Secret 3 of 5
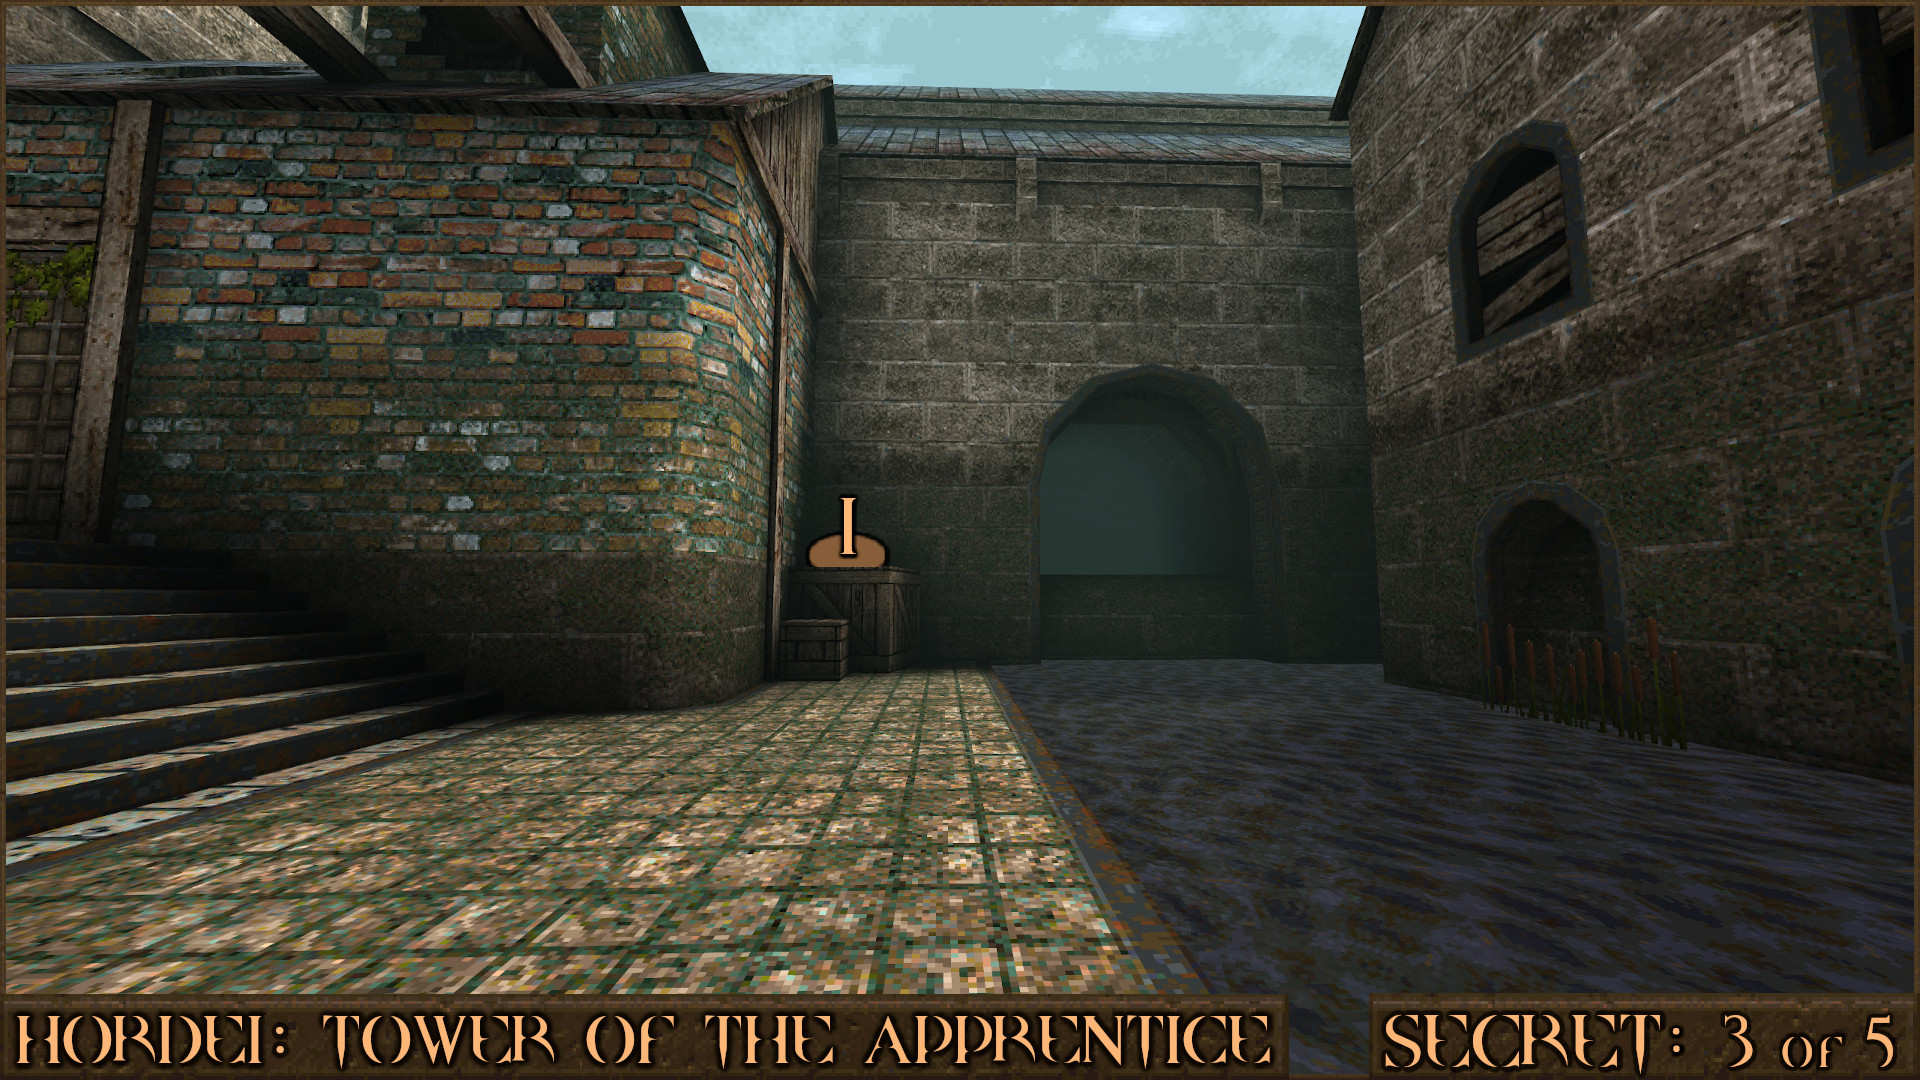
Head over to the side of the level with the teleporter from Secret 1 & 2. Jump on top of the two crates stacked in the corner ().
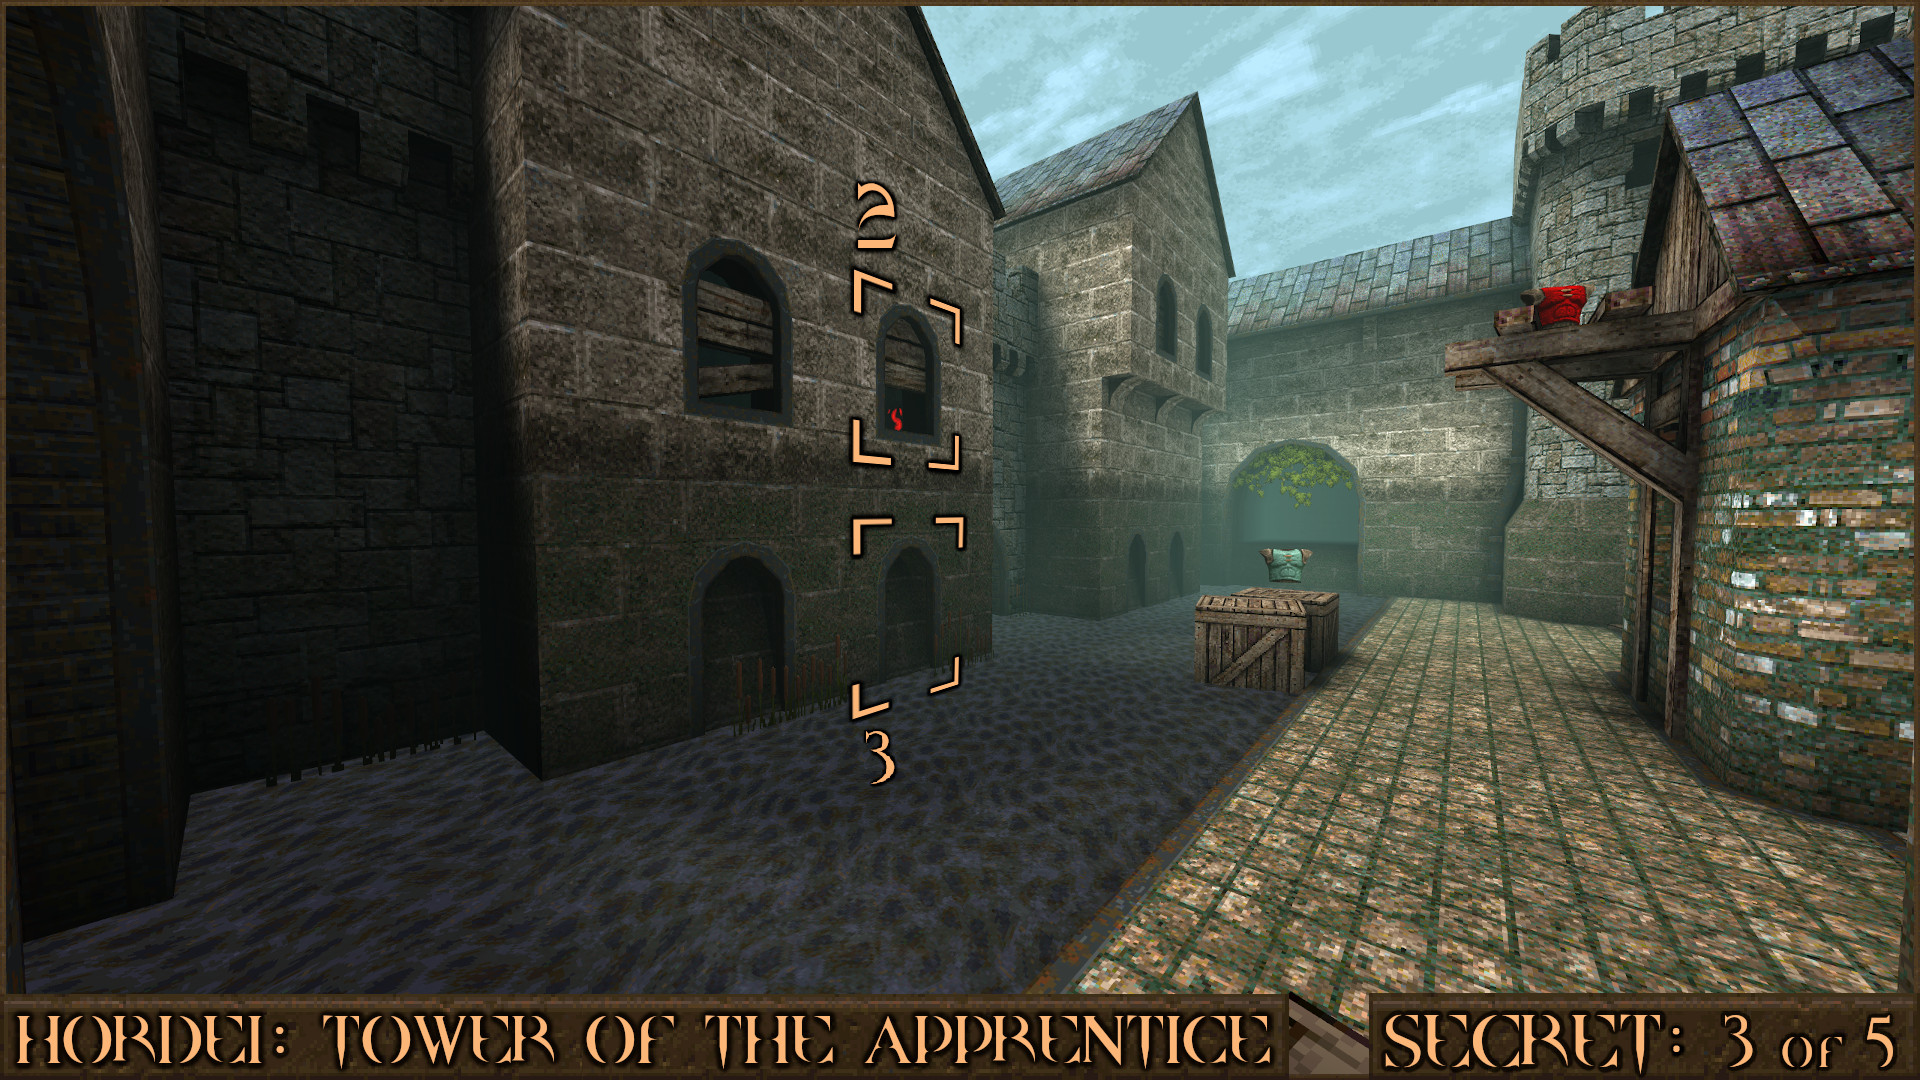
Look carefully through a gap in the nearby window and you can see a red rune block () that you can shoot. Doing so moves a wall (
) directly below the window allowing access to the secret.
Reward:
Secret 4 of 5
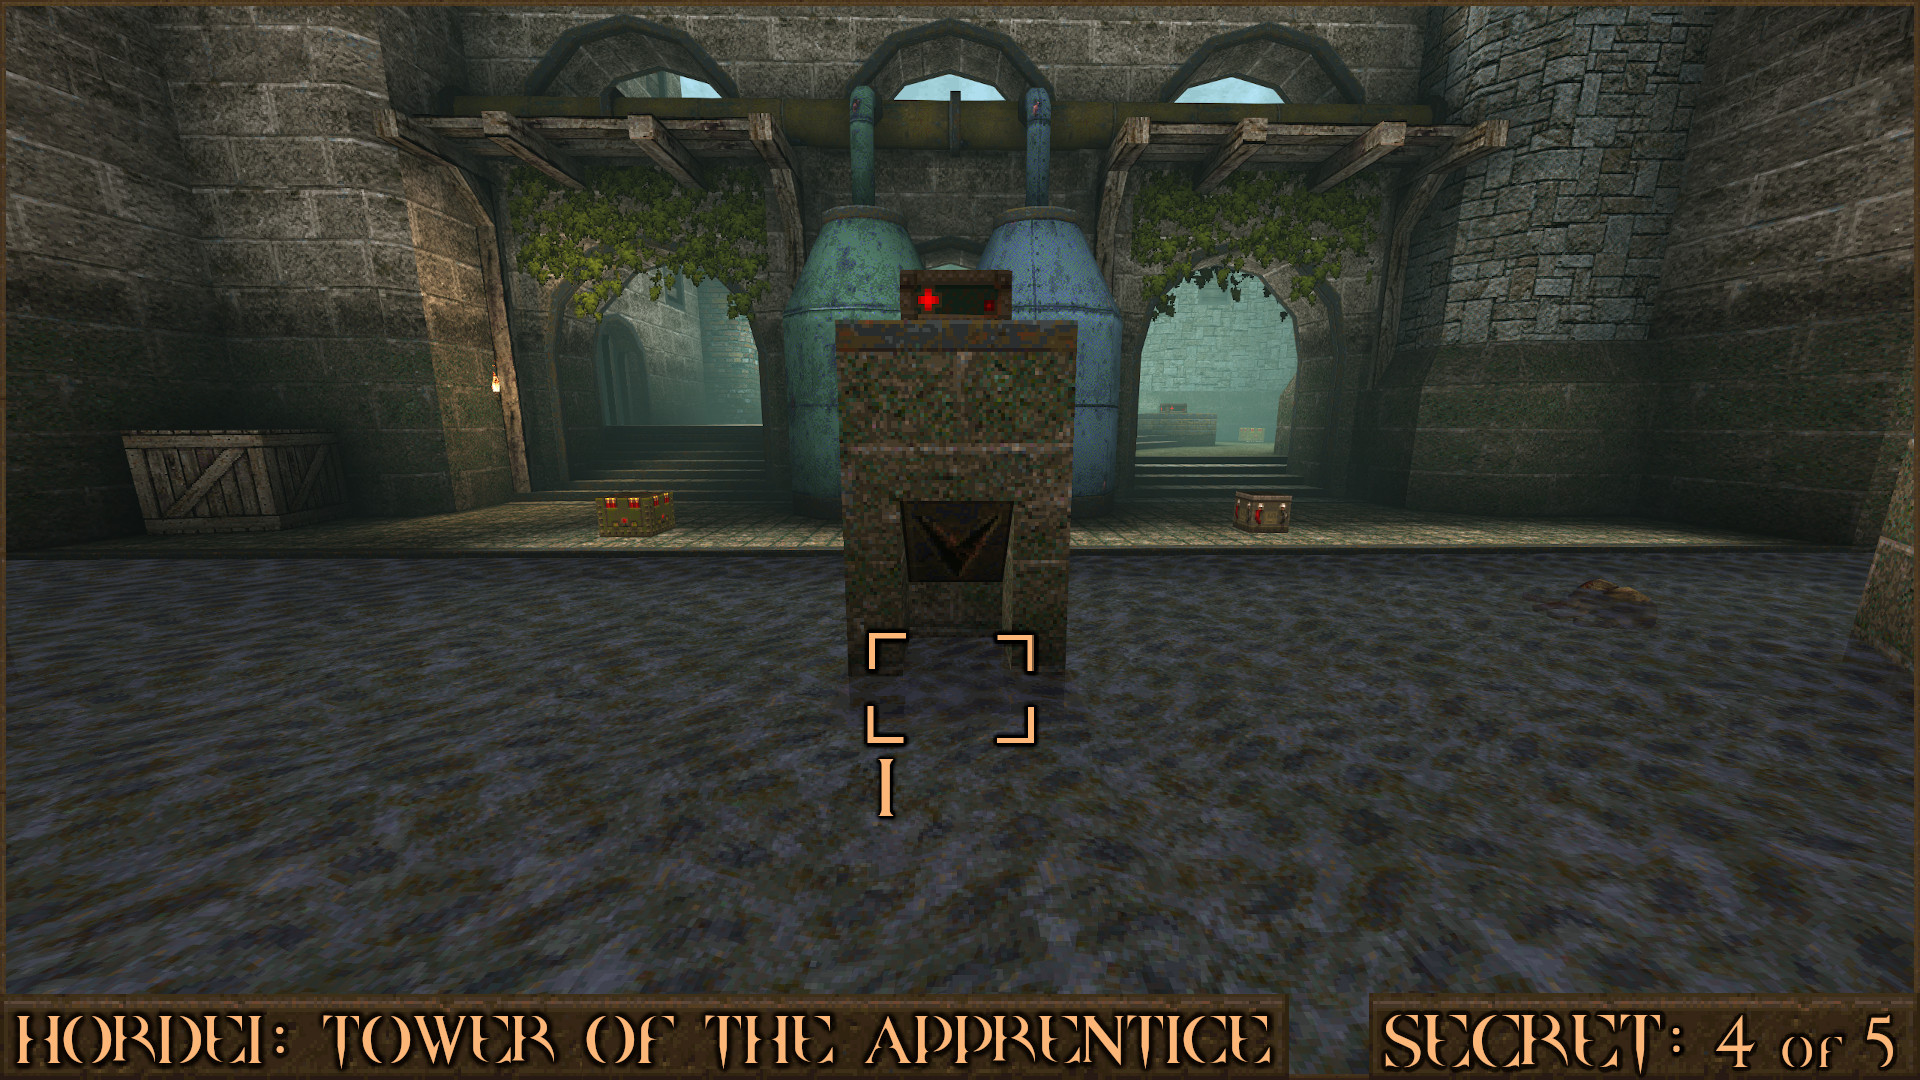
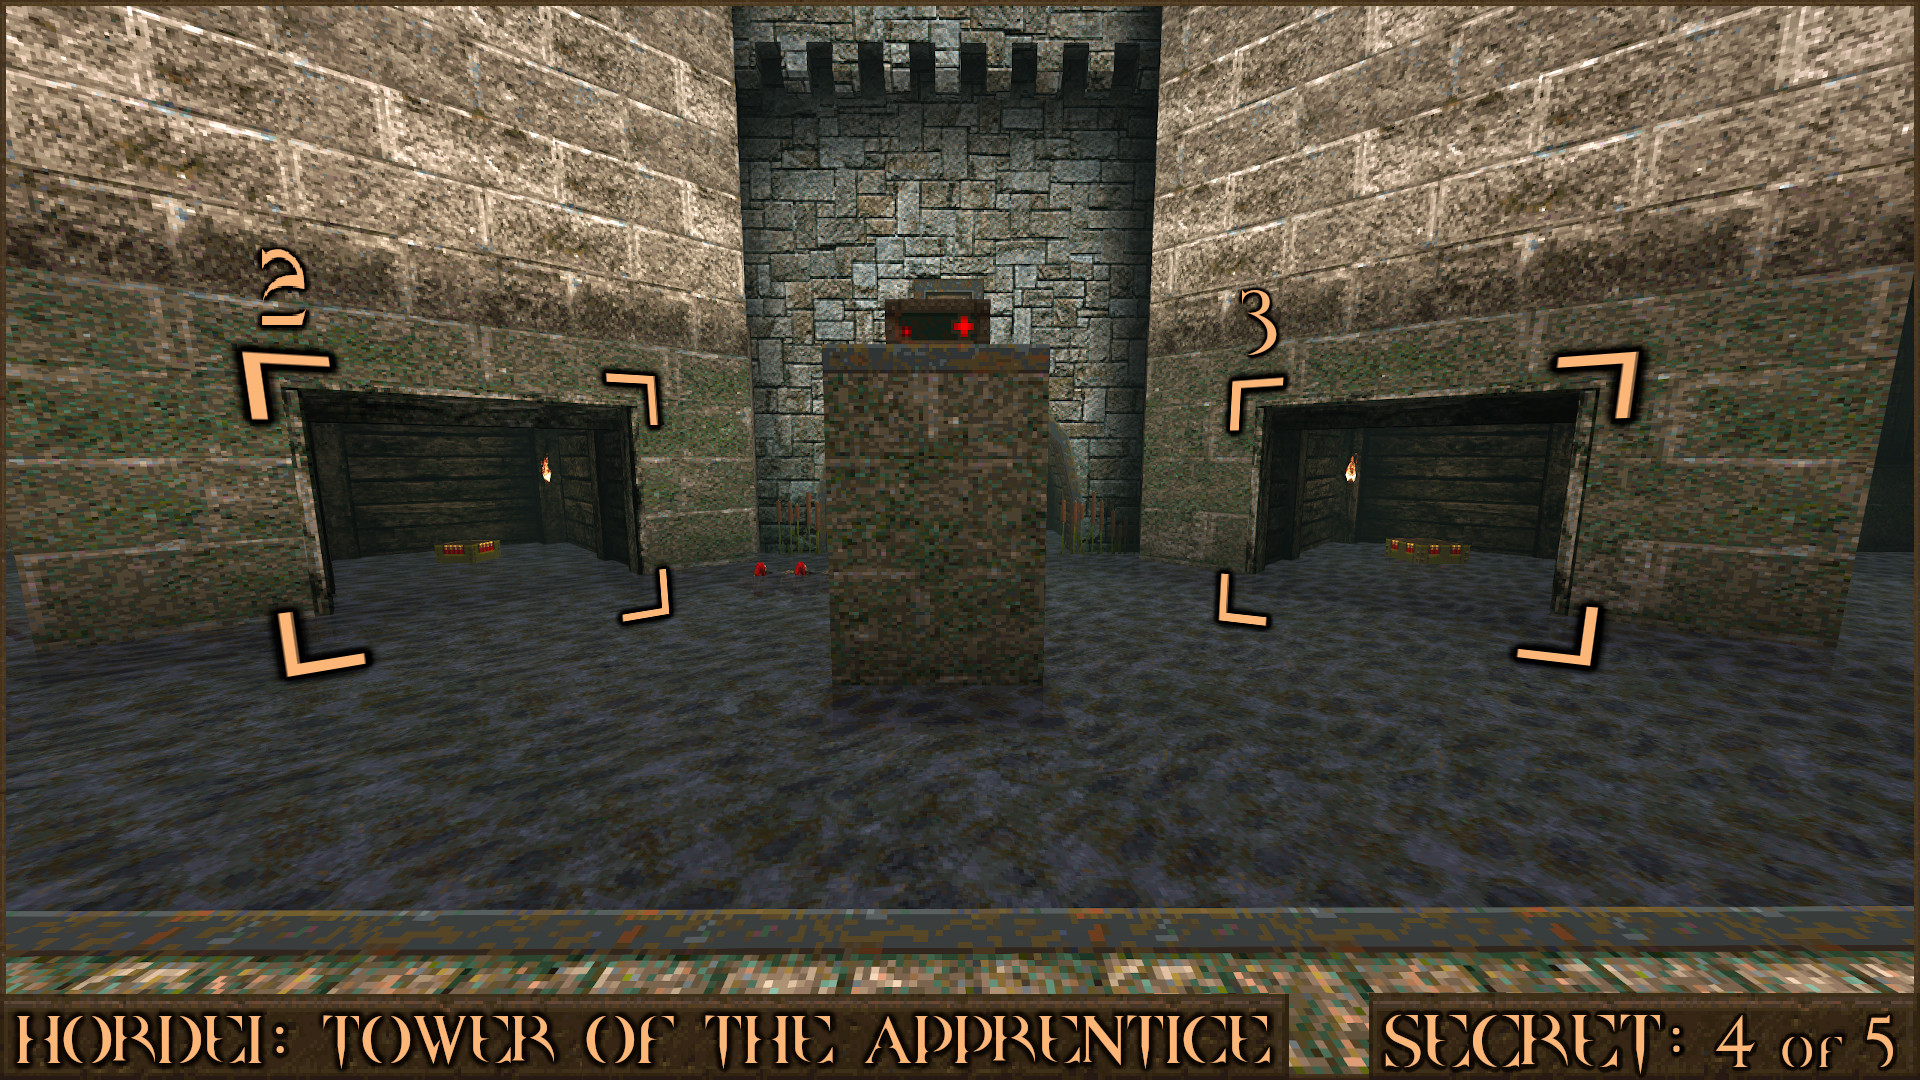
Head over to the Silver Key Bars that have a Rocket Launcher behind them. Just in front of this is a small pillar that will occasionally move up and down. When it is in the raised position look around the back of it to see a metal arrow pointing downwards. Shoot a grenade or rocket down where the arrow points ().
This will make the nearby wooden barriers (+
) move and reveal two random item respawn locations.
Reward: Random Item Respawn x2
Secret 5 of 5
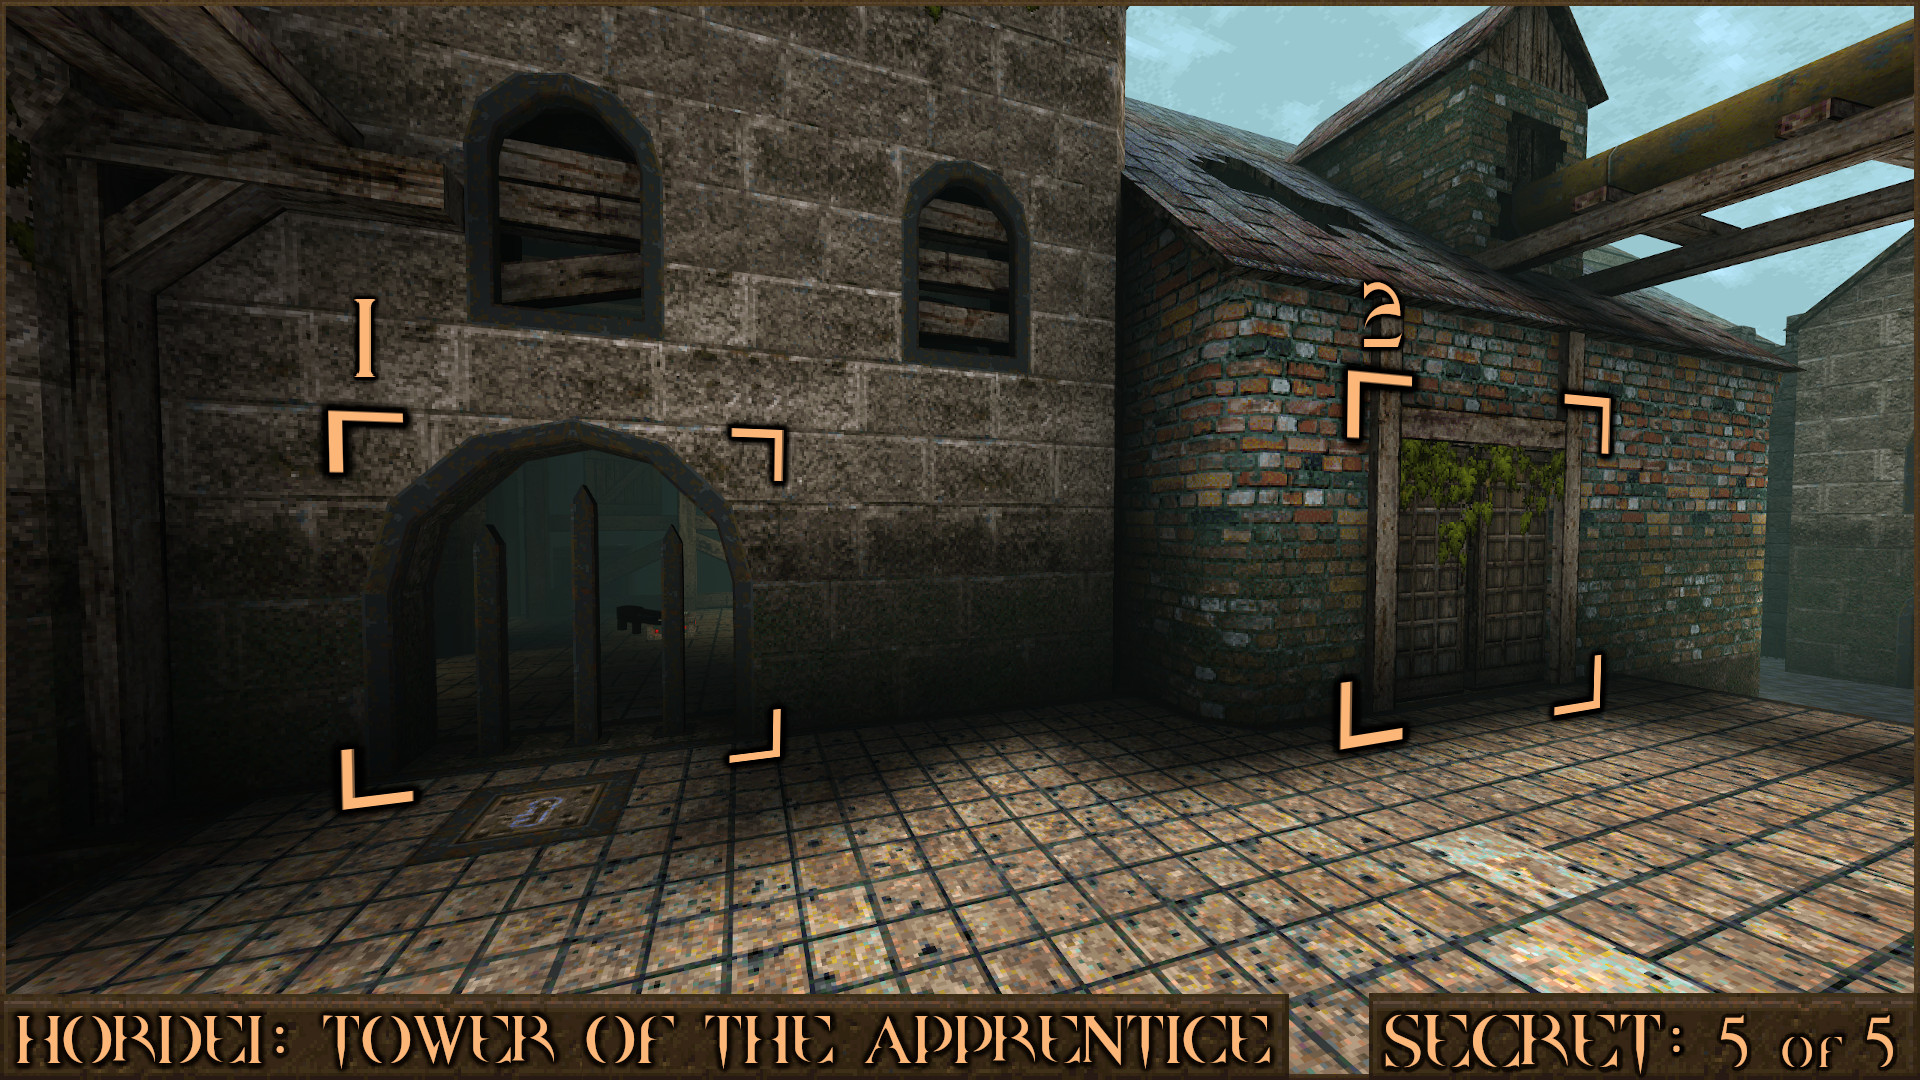
After completing a few waves a Silver Key will appear. Pick it up and use it to unlock the Silver Key Bars that have a Super Nailgun behind them (). Doing this also unlocks the set of doors to the right (
) so enter these instead.
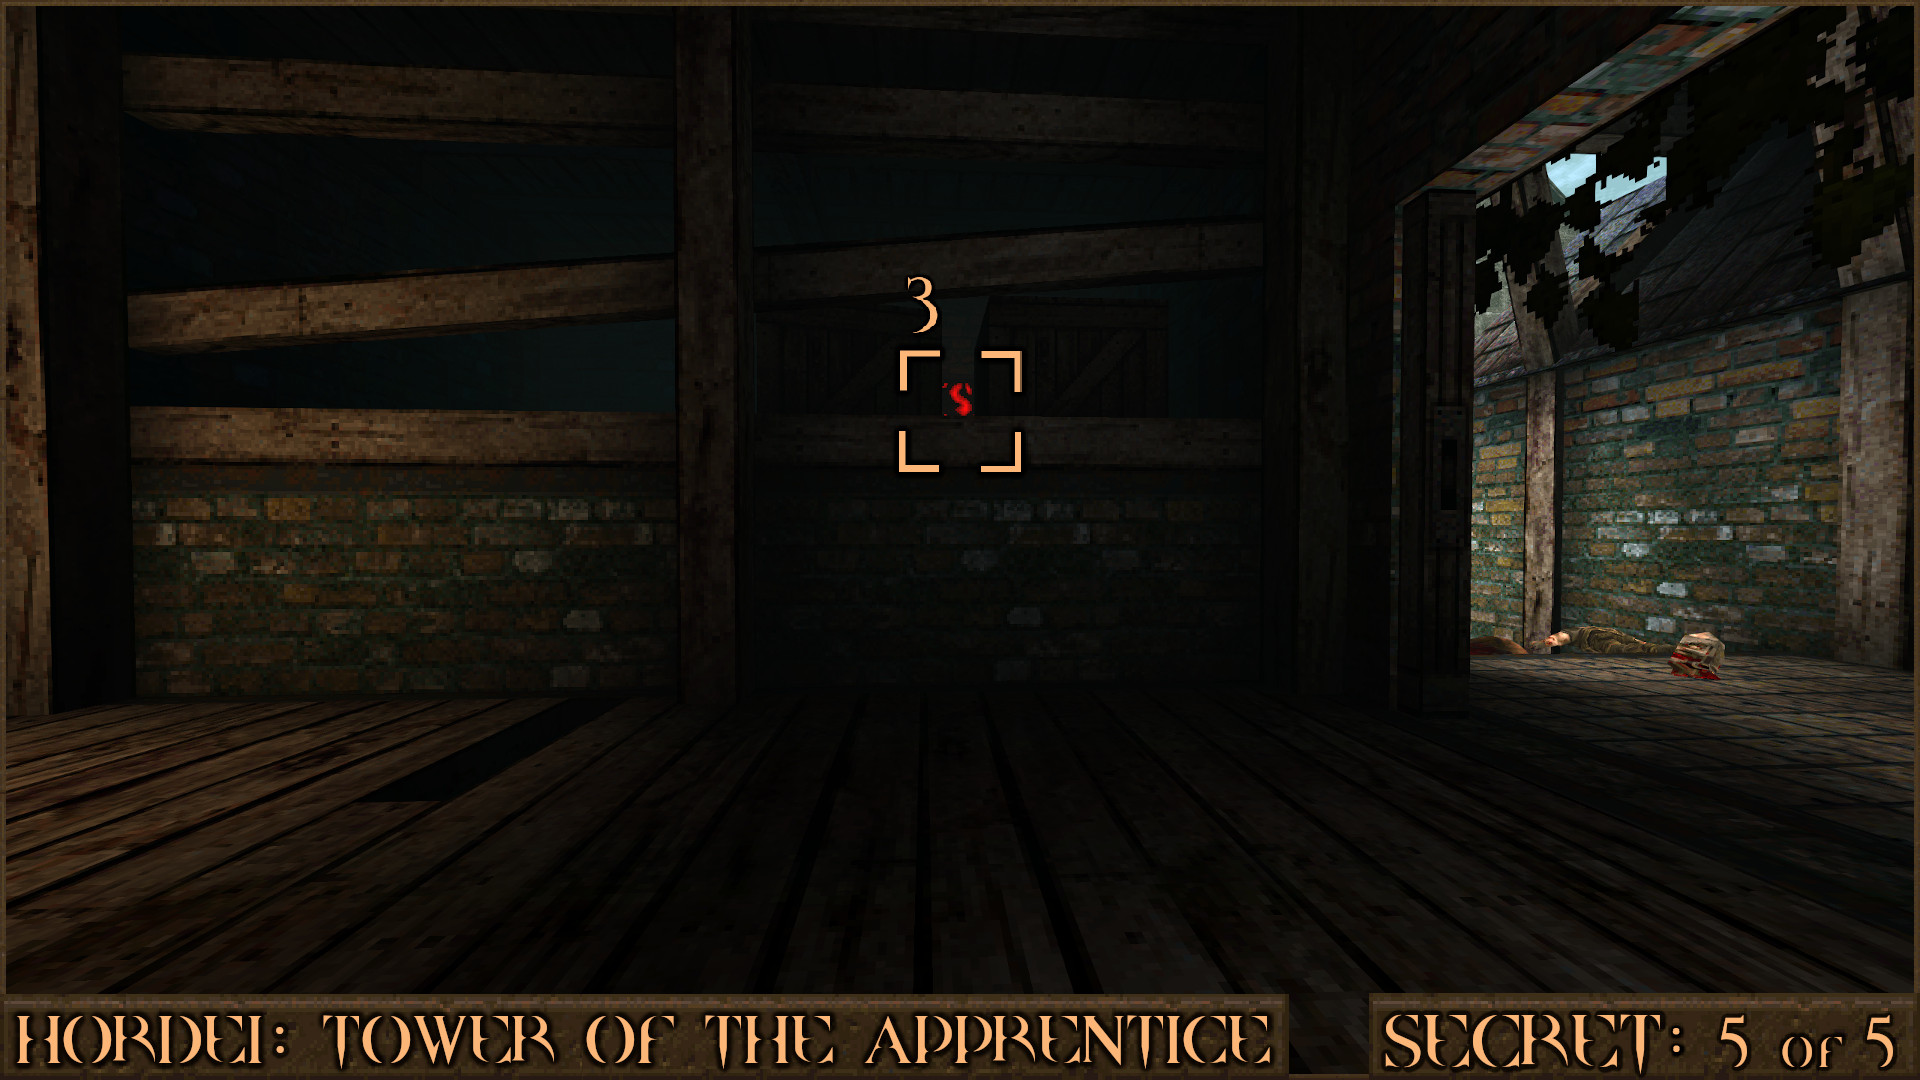
As you go in turn right and look carefully between the crates to see a red rune block (). Shoot it then turn around and head in to the room that contains the Super Nailgun.
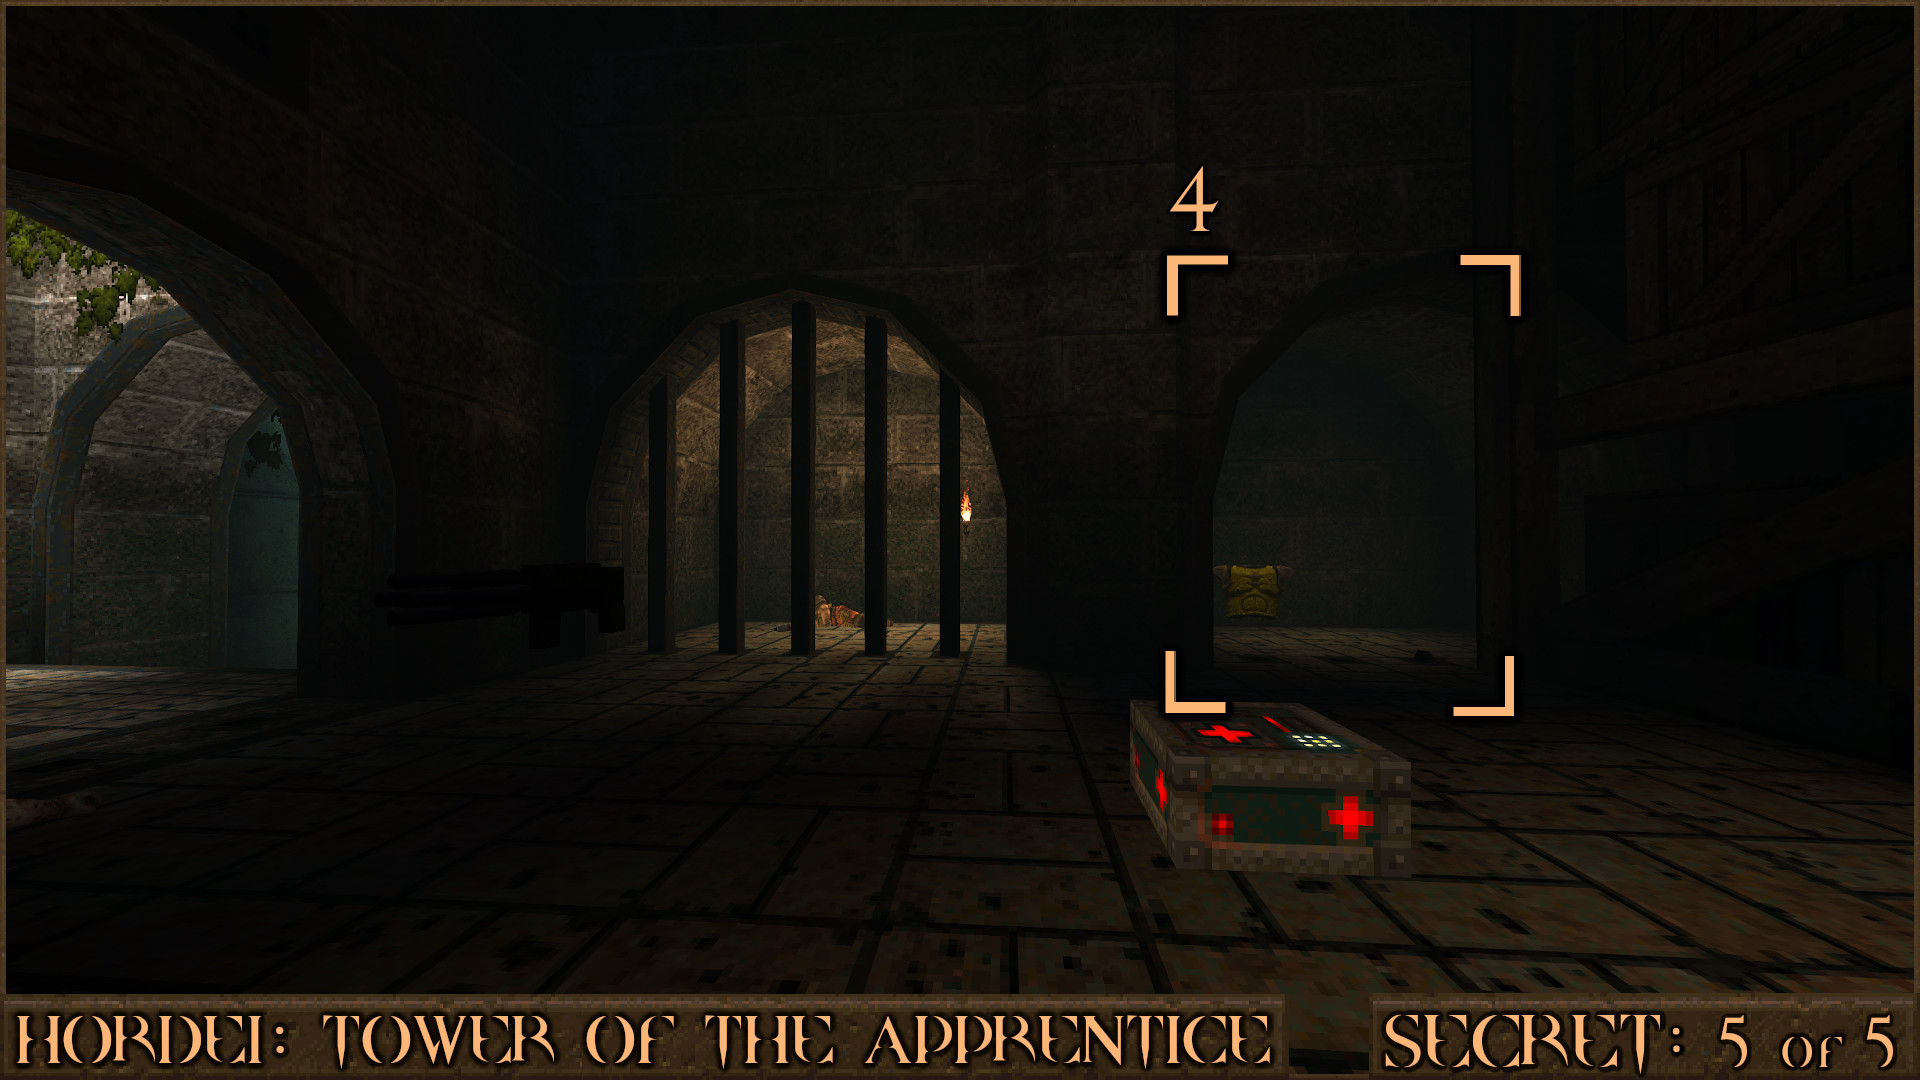
In a dark corner you should see some bars already descending in front of a Yellow Armor (). Once they have fully descended go inside to claim the secret.
Reward:
HORDE2: Frozen Court
Secret 1 of 1
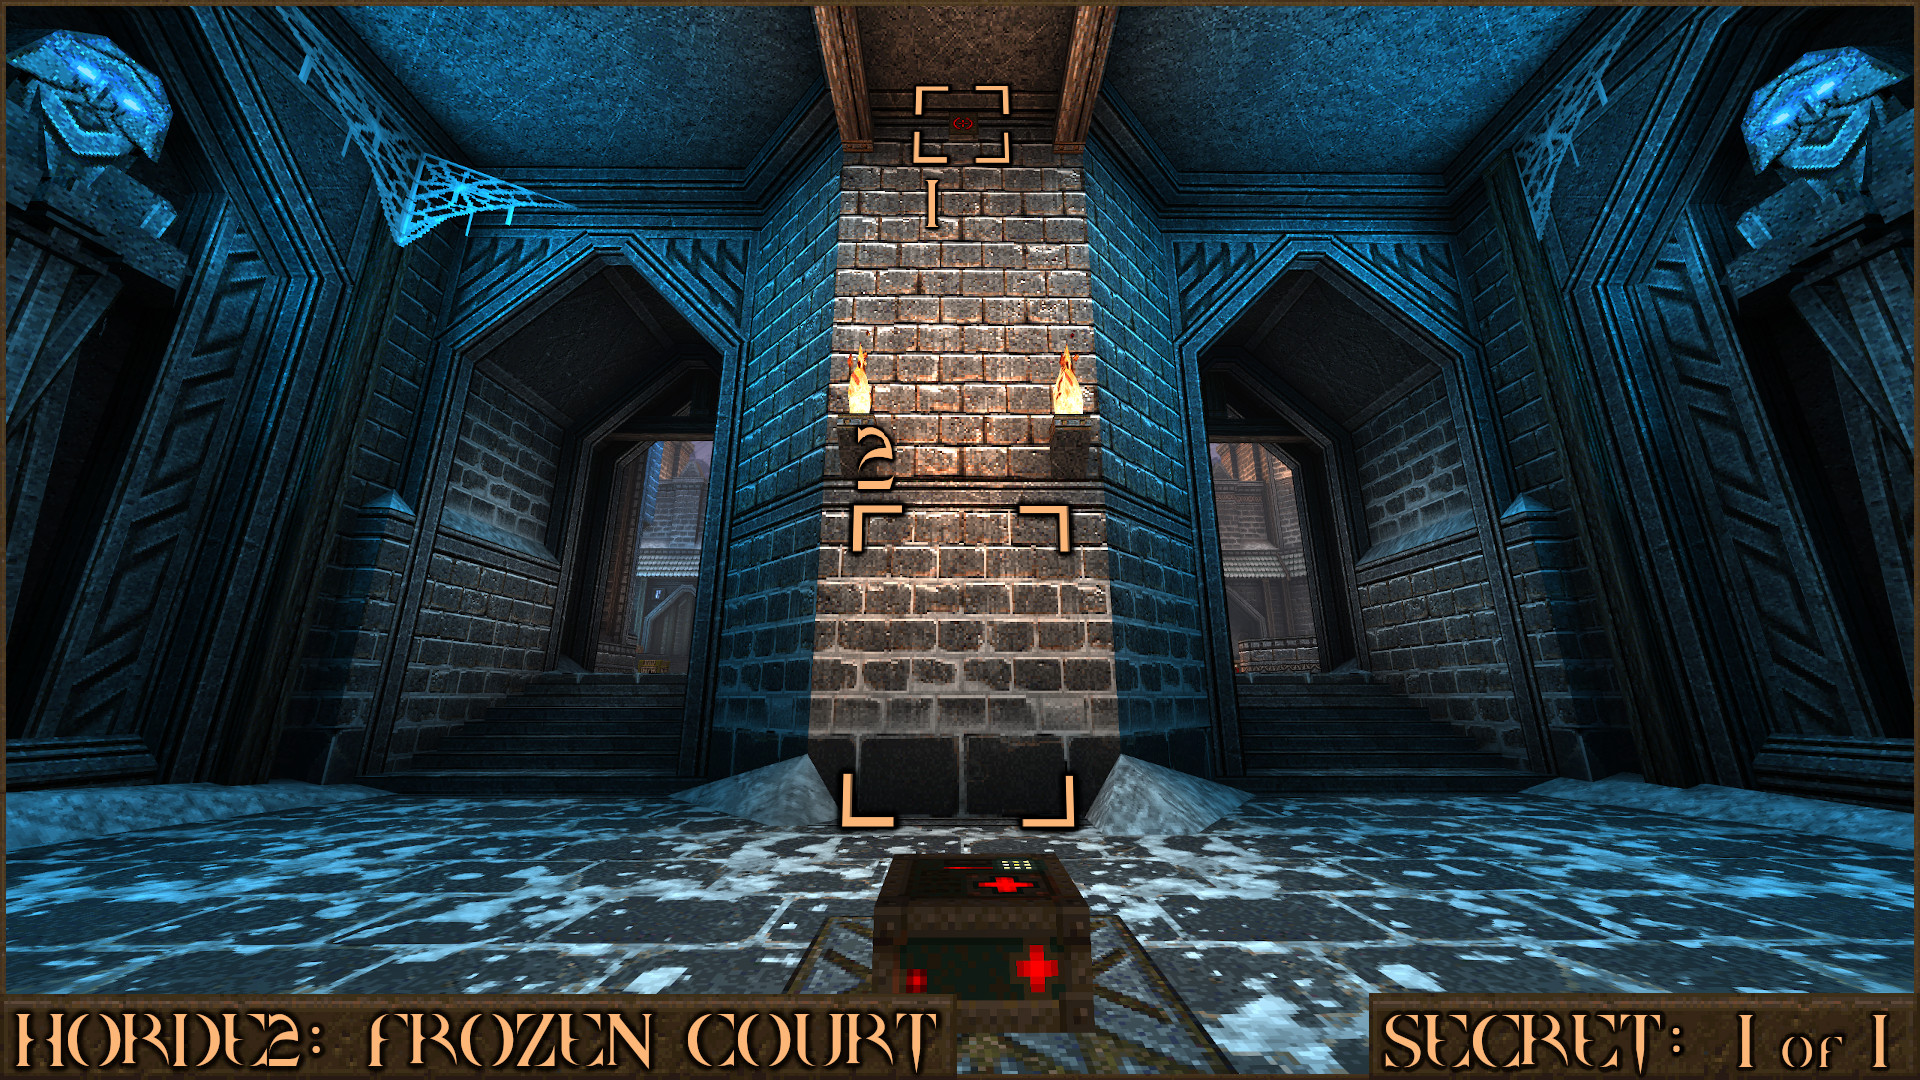
On either side of this arena are two identical looking small areas, you may have to search both to find the one containing the secret. Go down the steps at the side of the arena to find a small area with a respawning item, two large statues and two torches on the wall. Look straight up above the two torches and you will see a red shootable switch (). Shooting it will activate a door below the two torches that contains the secret (
).
If you don’t see the red switch above the torches then you are in the wrong place so head to the opposite side of the arena to find an identical looking area and check there instead.
Reward:
HORDE3: The Foundry
Secret 1 of 1
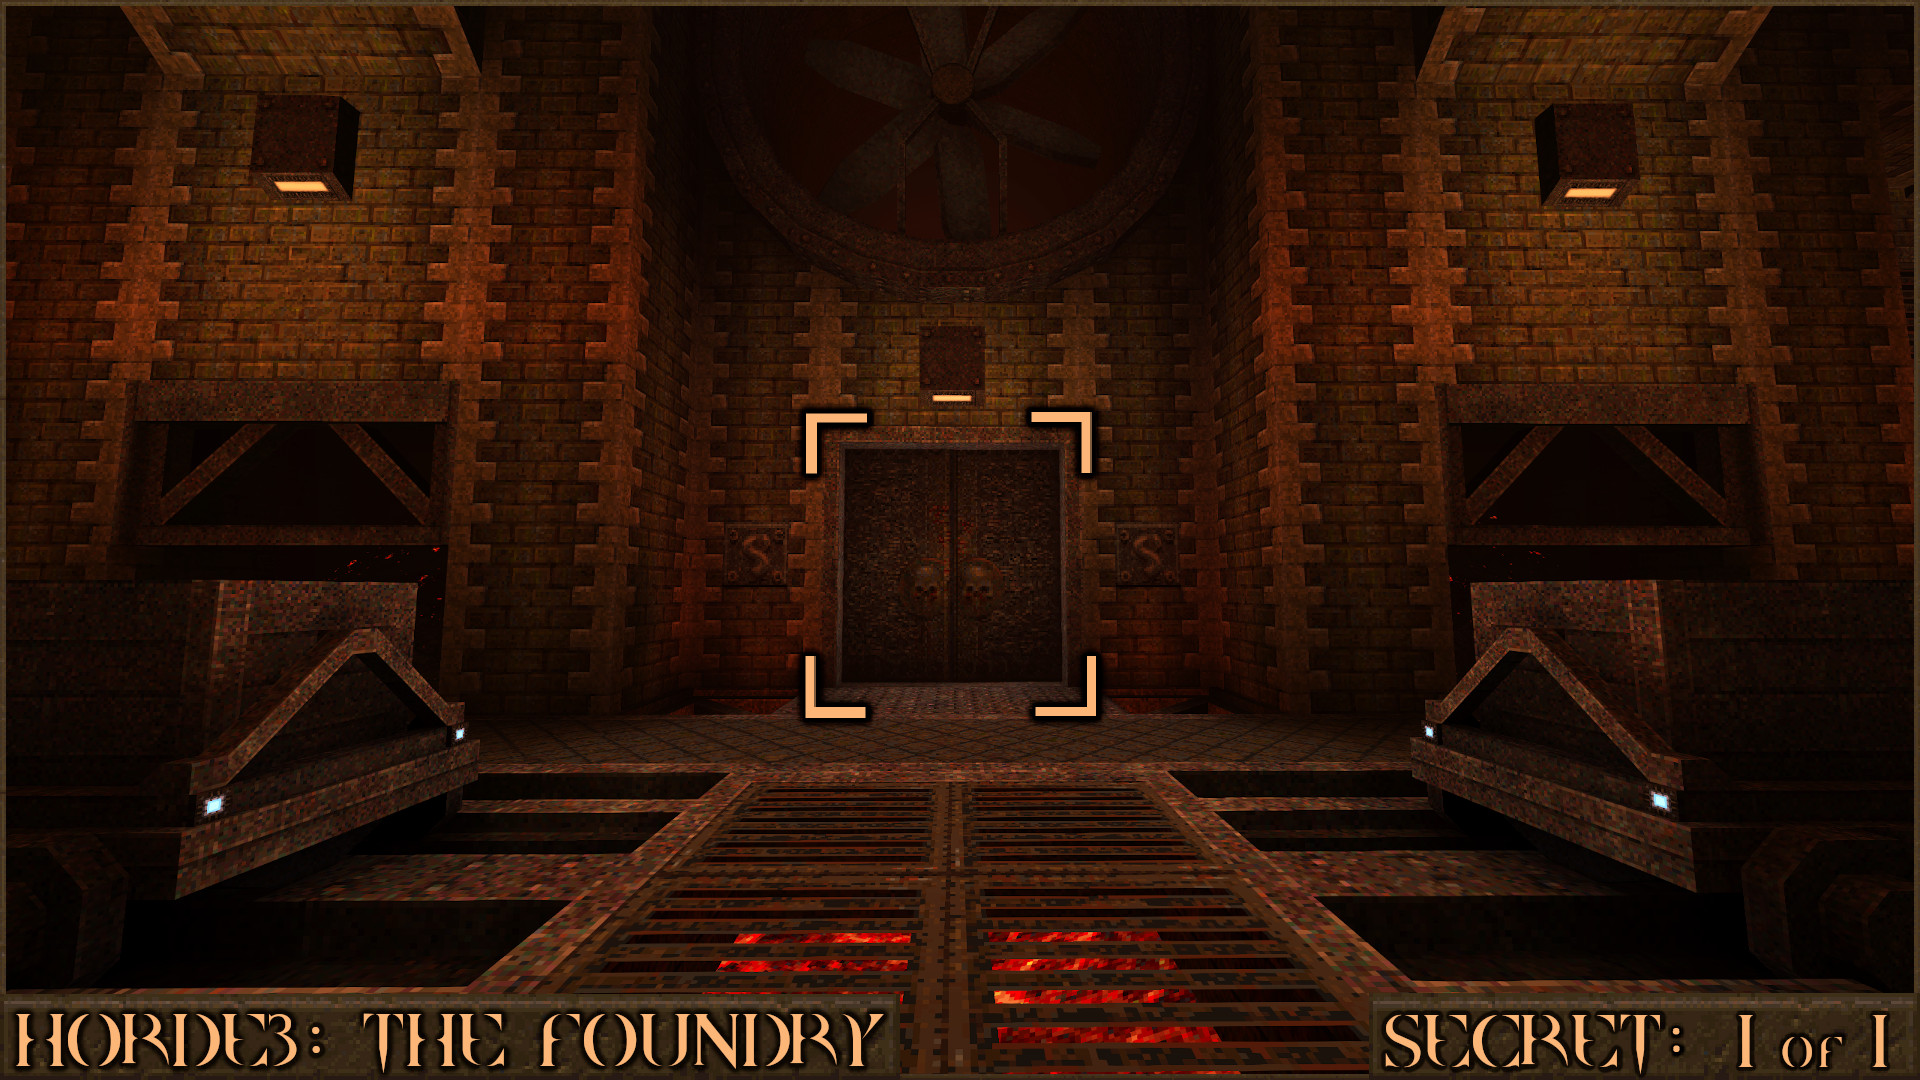
Fight through the waves of enemies until a Silver Key appears. However don’t use this on the Silver Key Bars that are located on the edges of the arena, instead head over to the metal double doors with skulls on. This is actually an unmarked Silver Key Door. Open it and enter the teleporter to be transported to a secret room that contains some items and also several cryptic messages…
Reward:
HORDE4: The Hunt
Secret 1 of 2
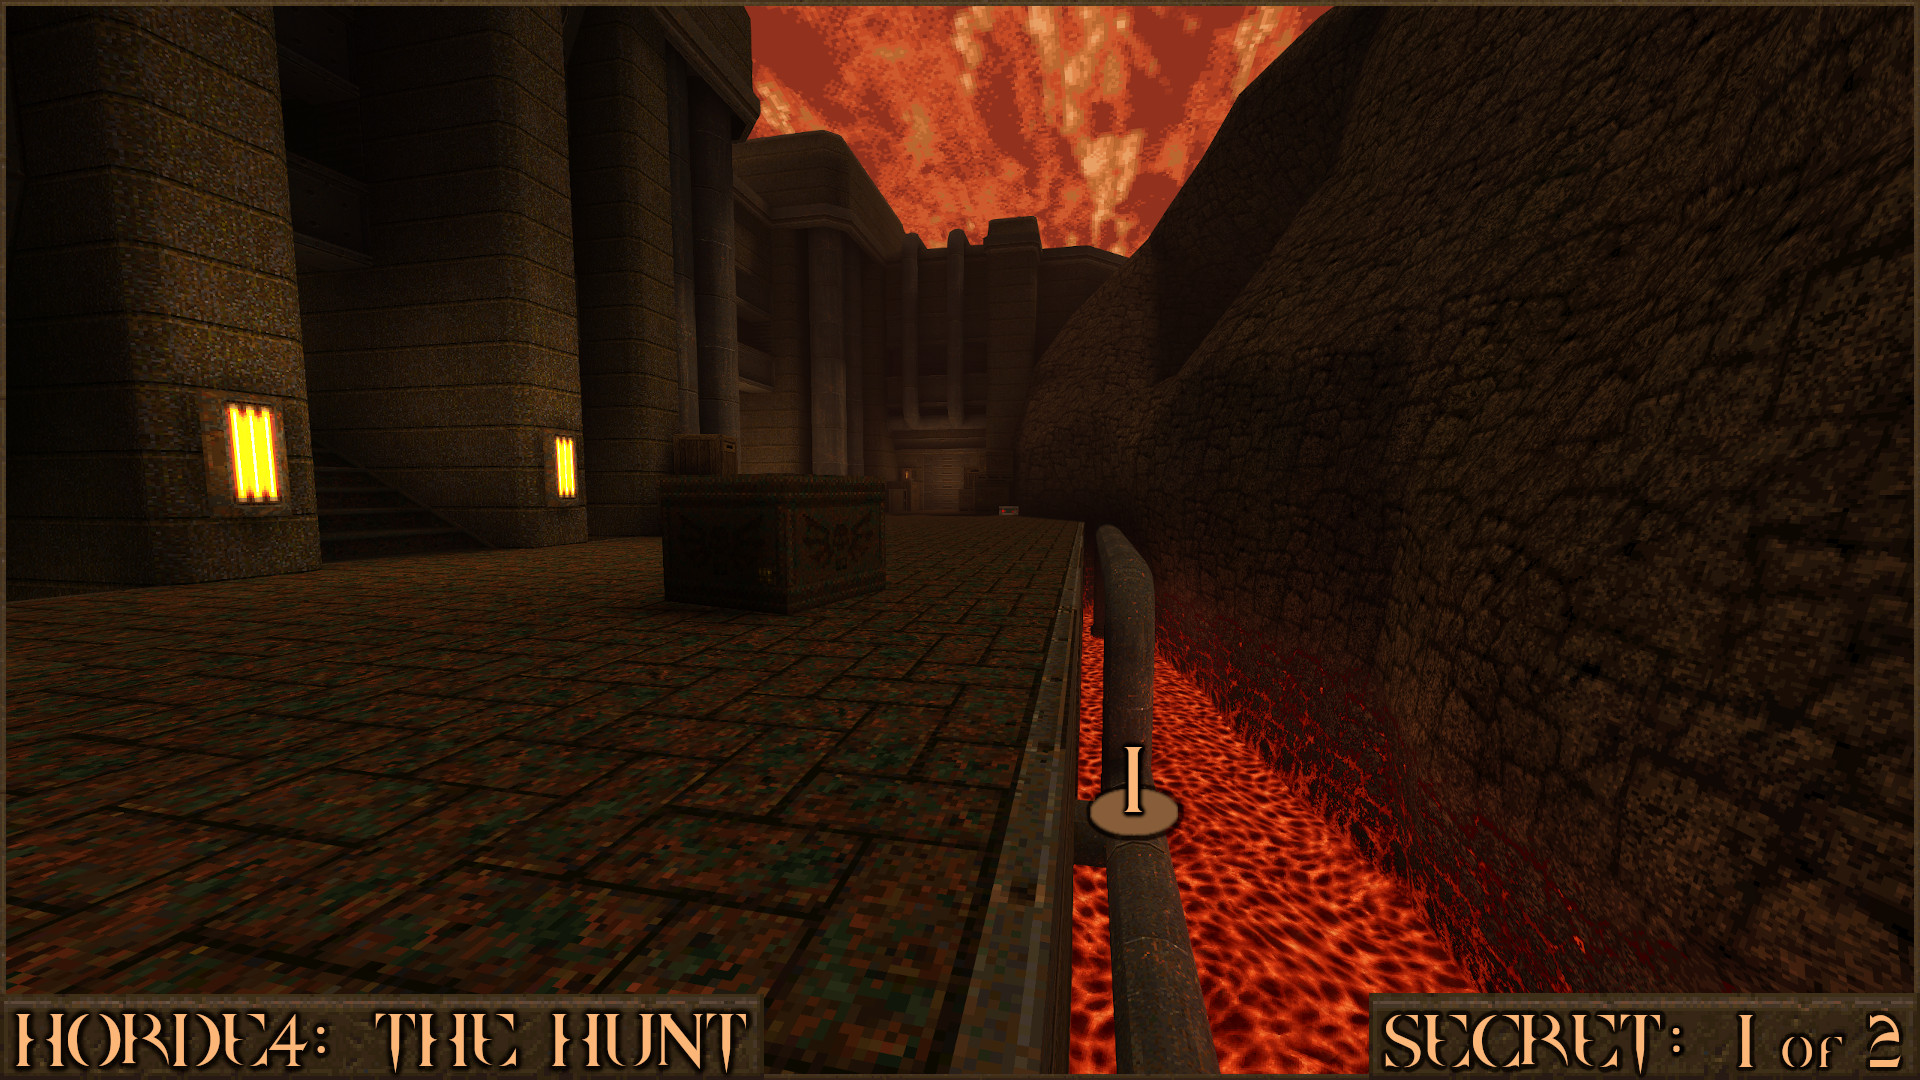
Head over to the large cliff wall in this arena. Below it is some lava and a small metal pipe ().
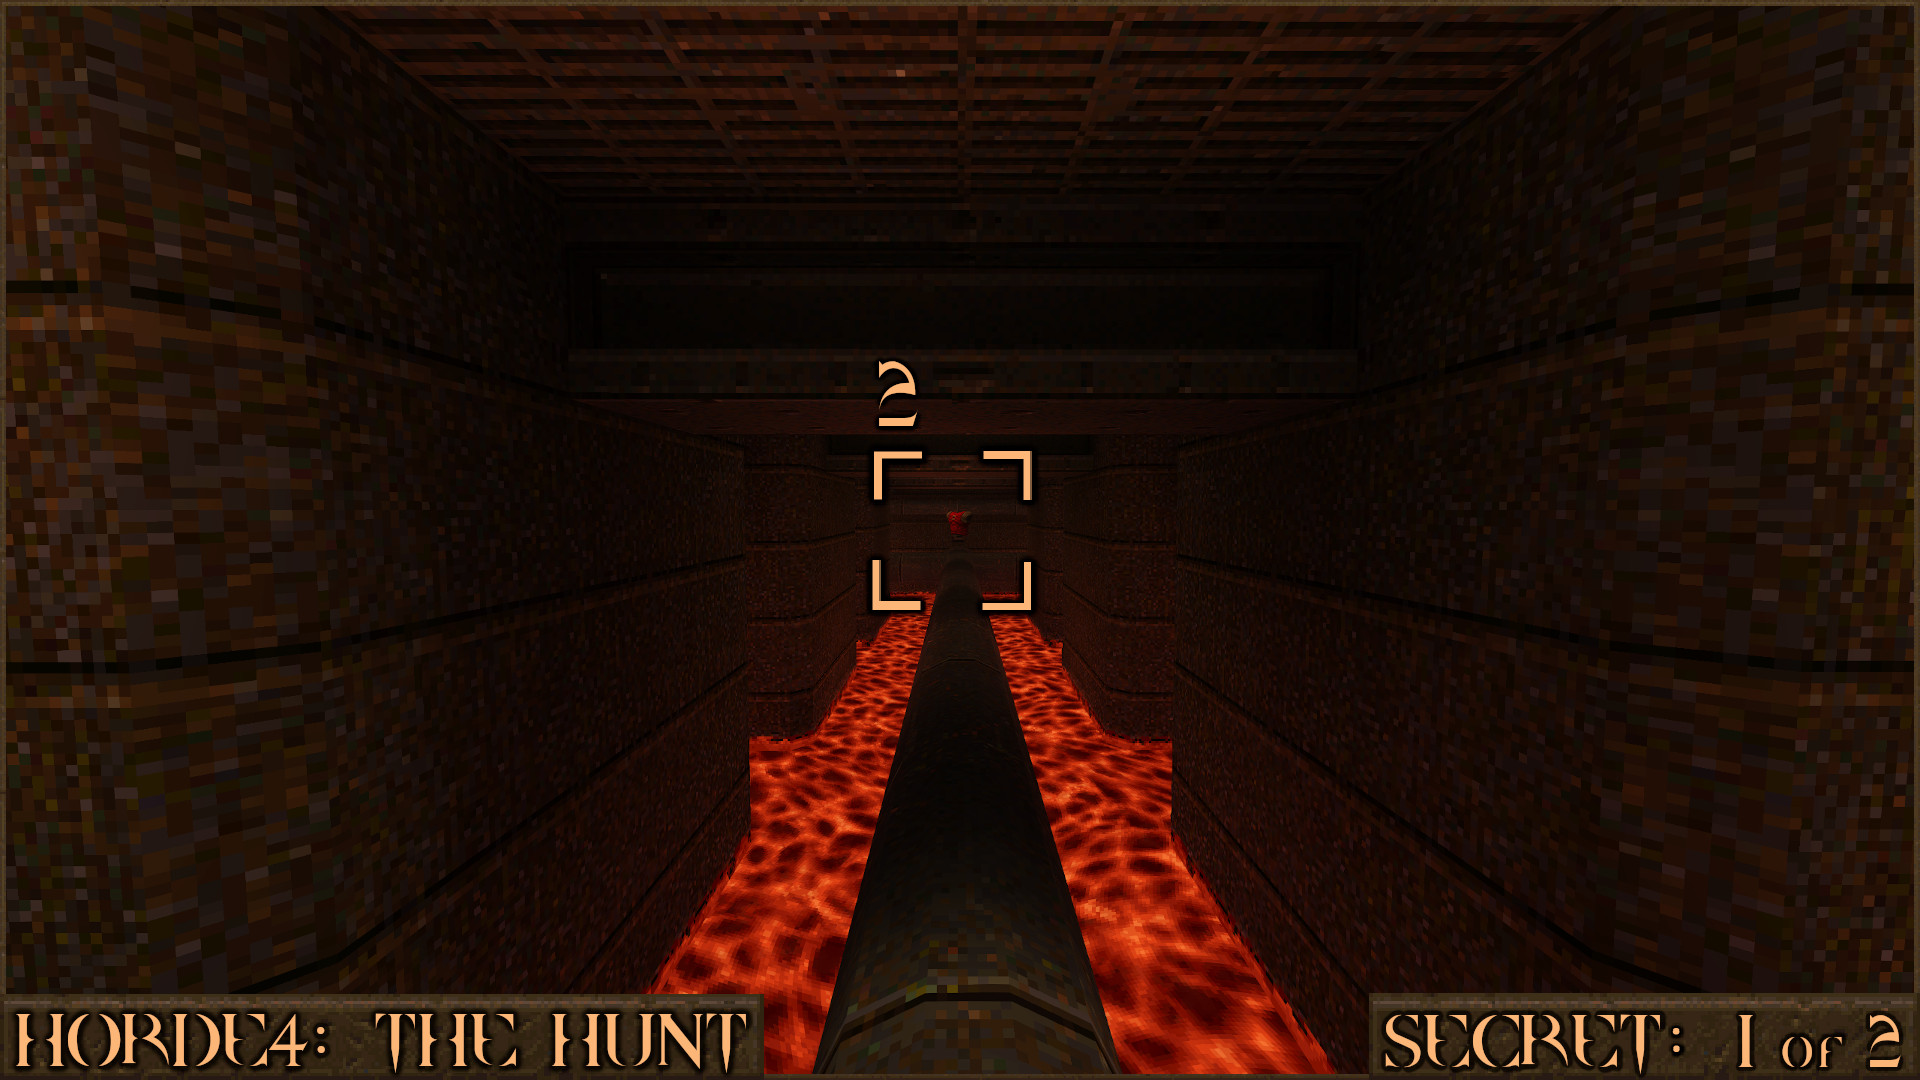
Jump on the pipe and follow it under the floor to find a Red Armor () but be wary of the nail traps that activate when you approach.
Reward:
Secret 2 of 2
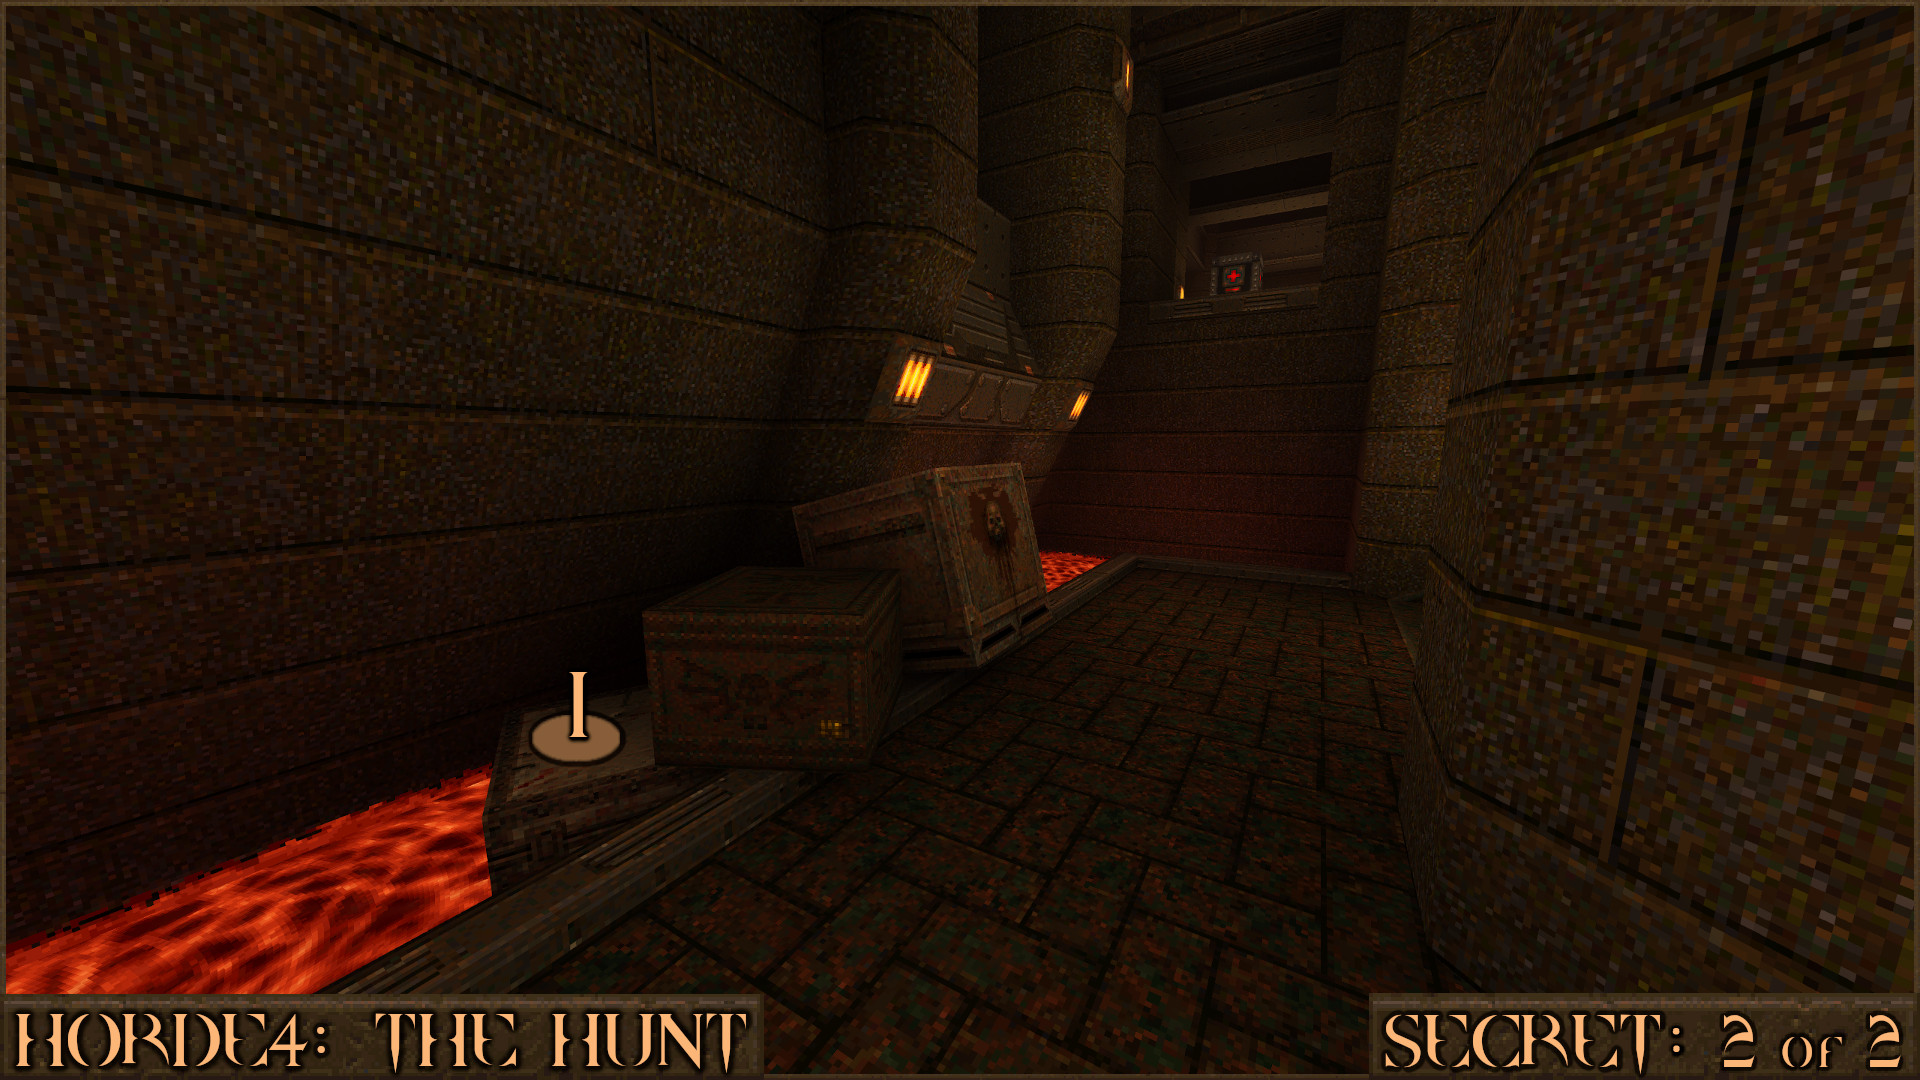
At the edge of the arena look for a stack of three crates (). You can also see a Megahealth high up on a ledge nearby.
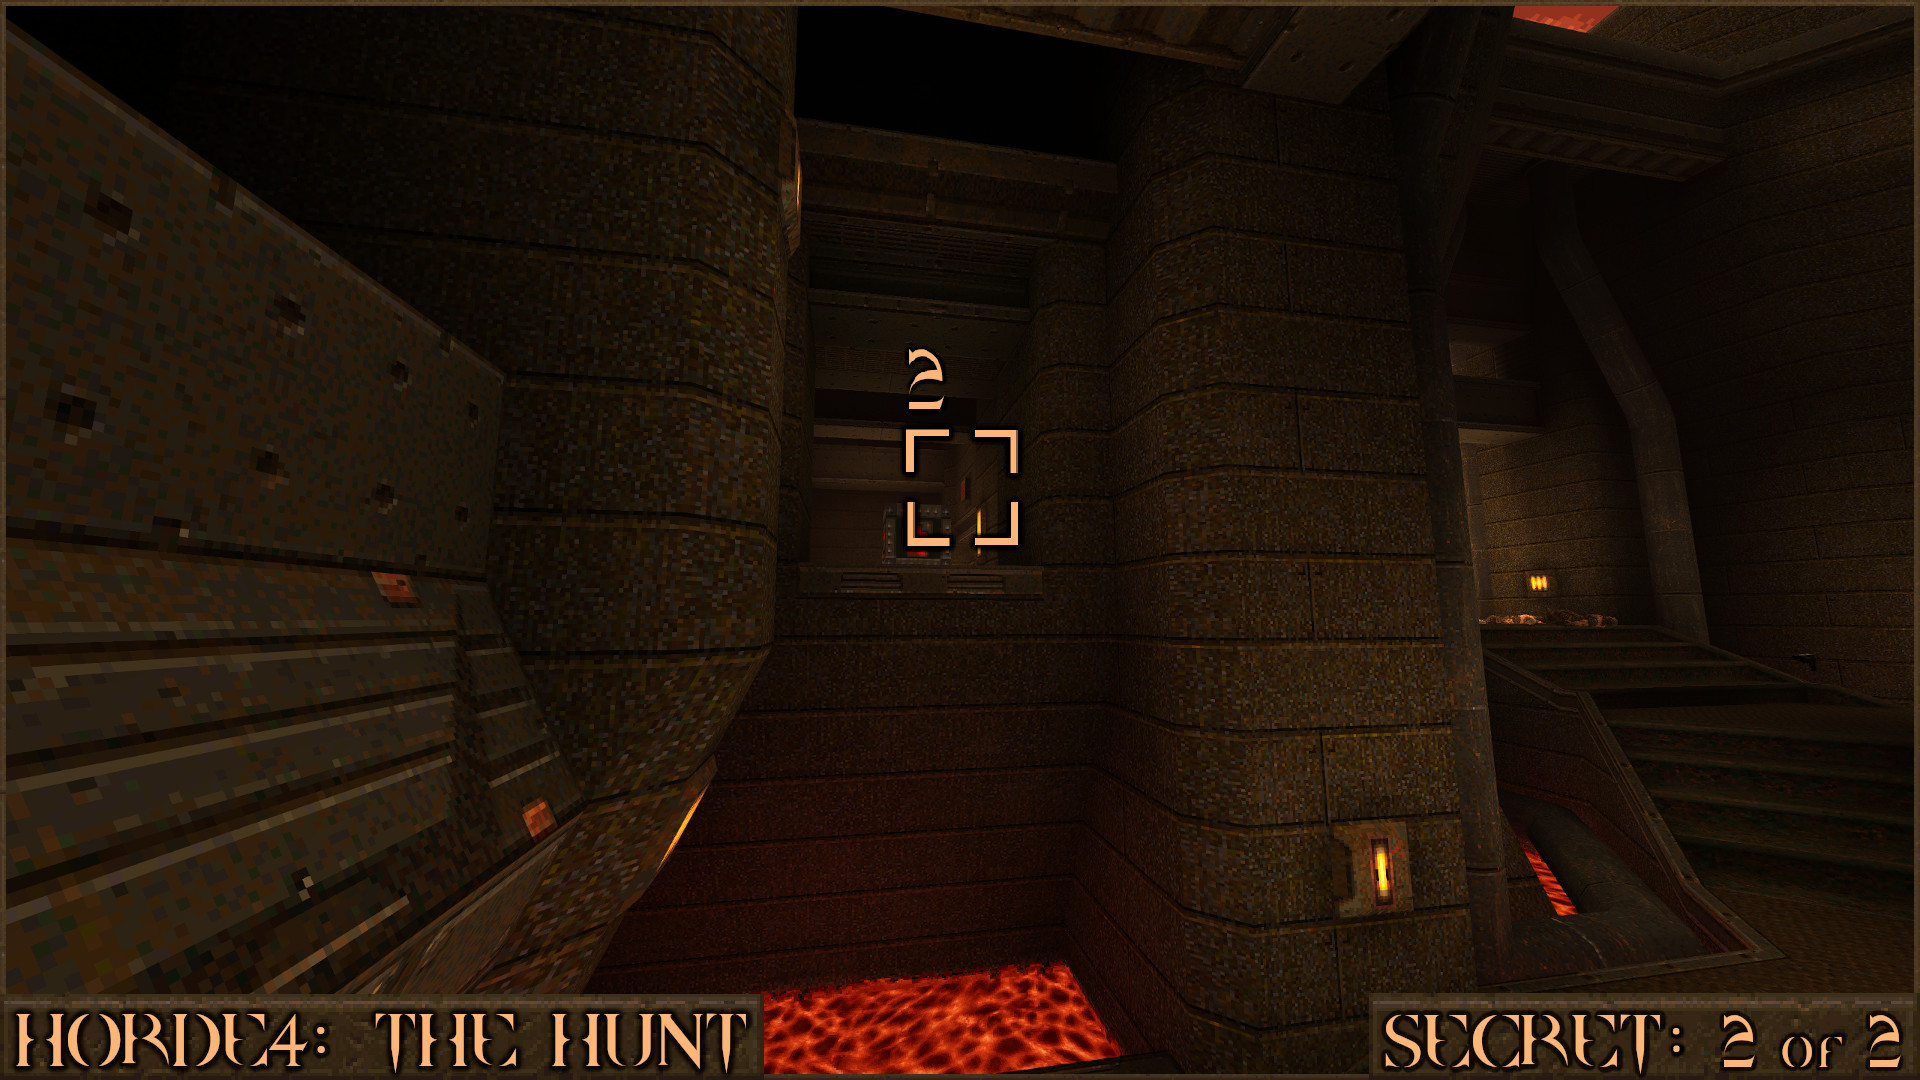
Jump up the crates, look towards the Megahealth and in the distance you can just see a red shootable switch (). Shoot it to activate a door beneath the switch.
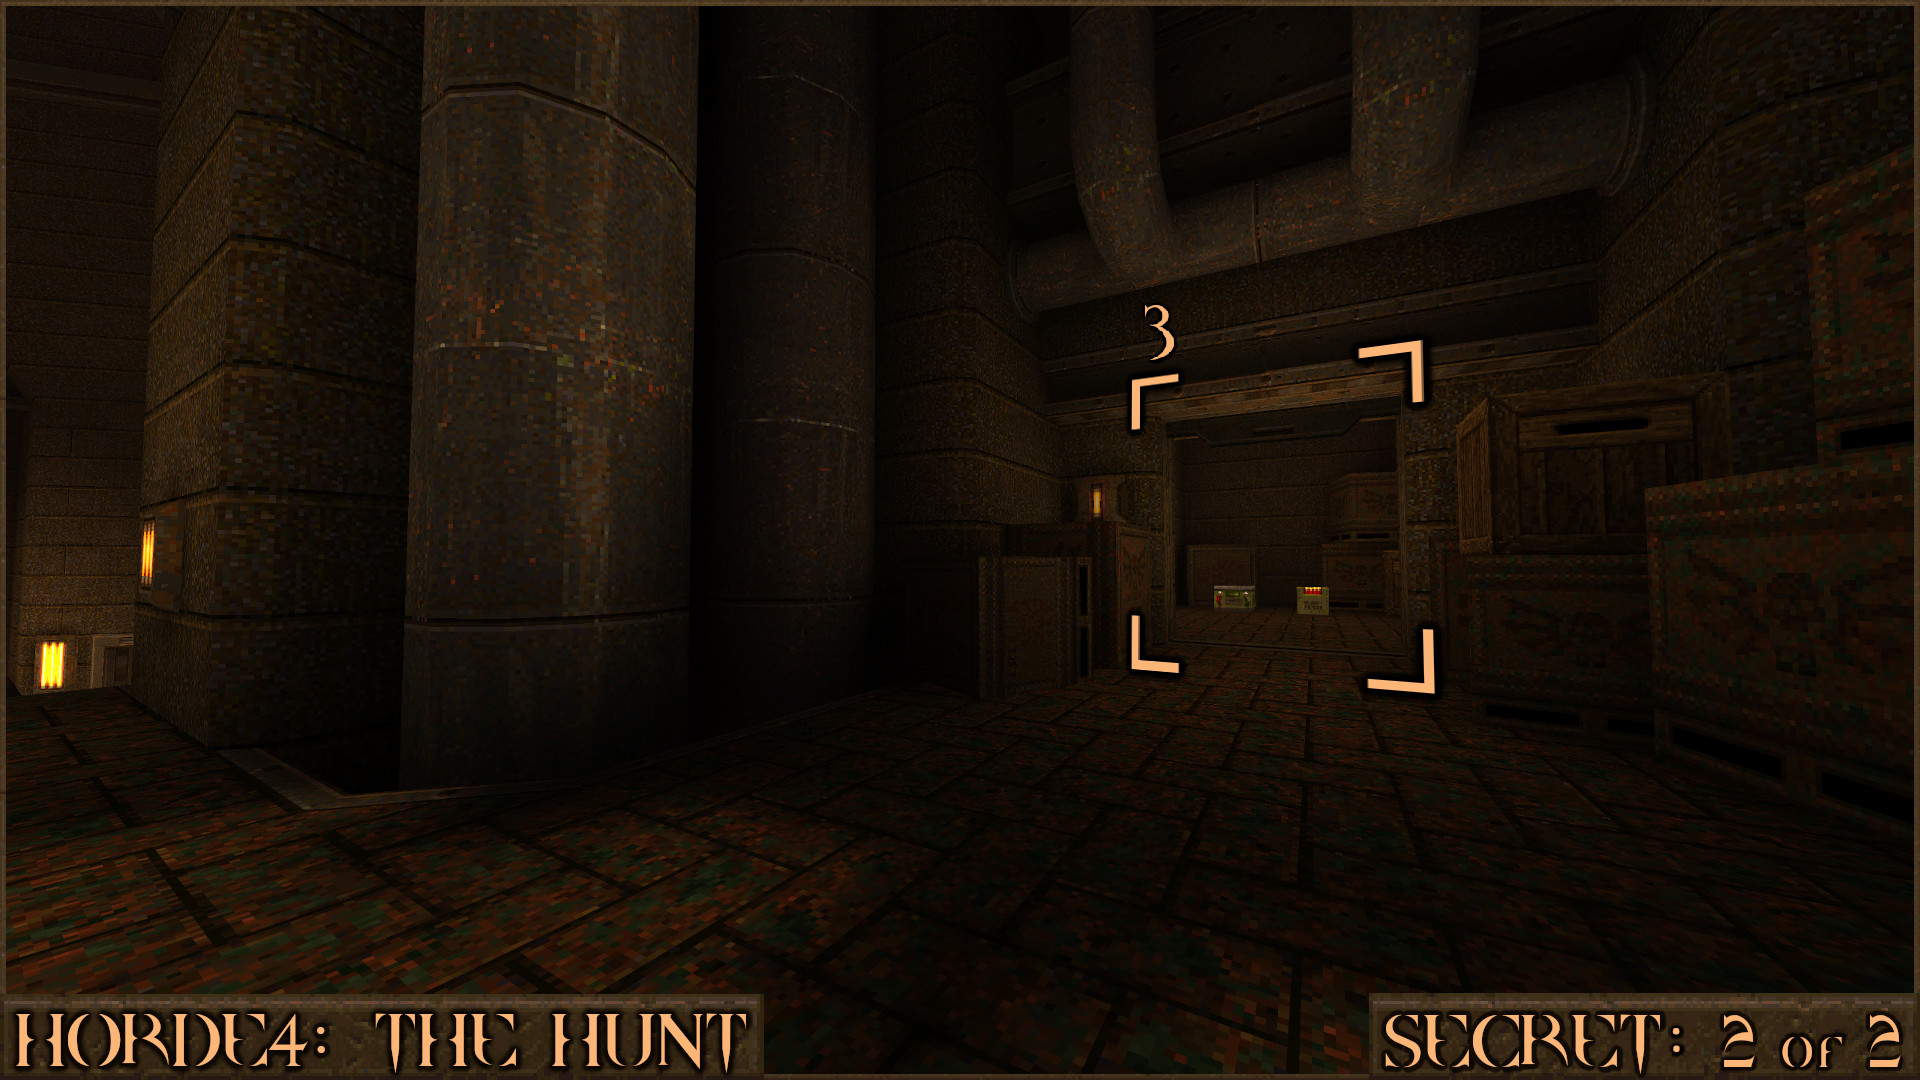
Drop down and head over to the door that was in that direction to find it is now open () and allows you access to the secret.
Reward: Random Item Respawn x2
HORDE5: Relic
Secret 1 of 1
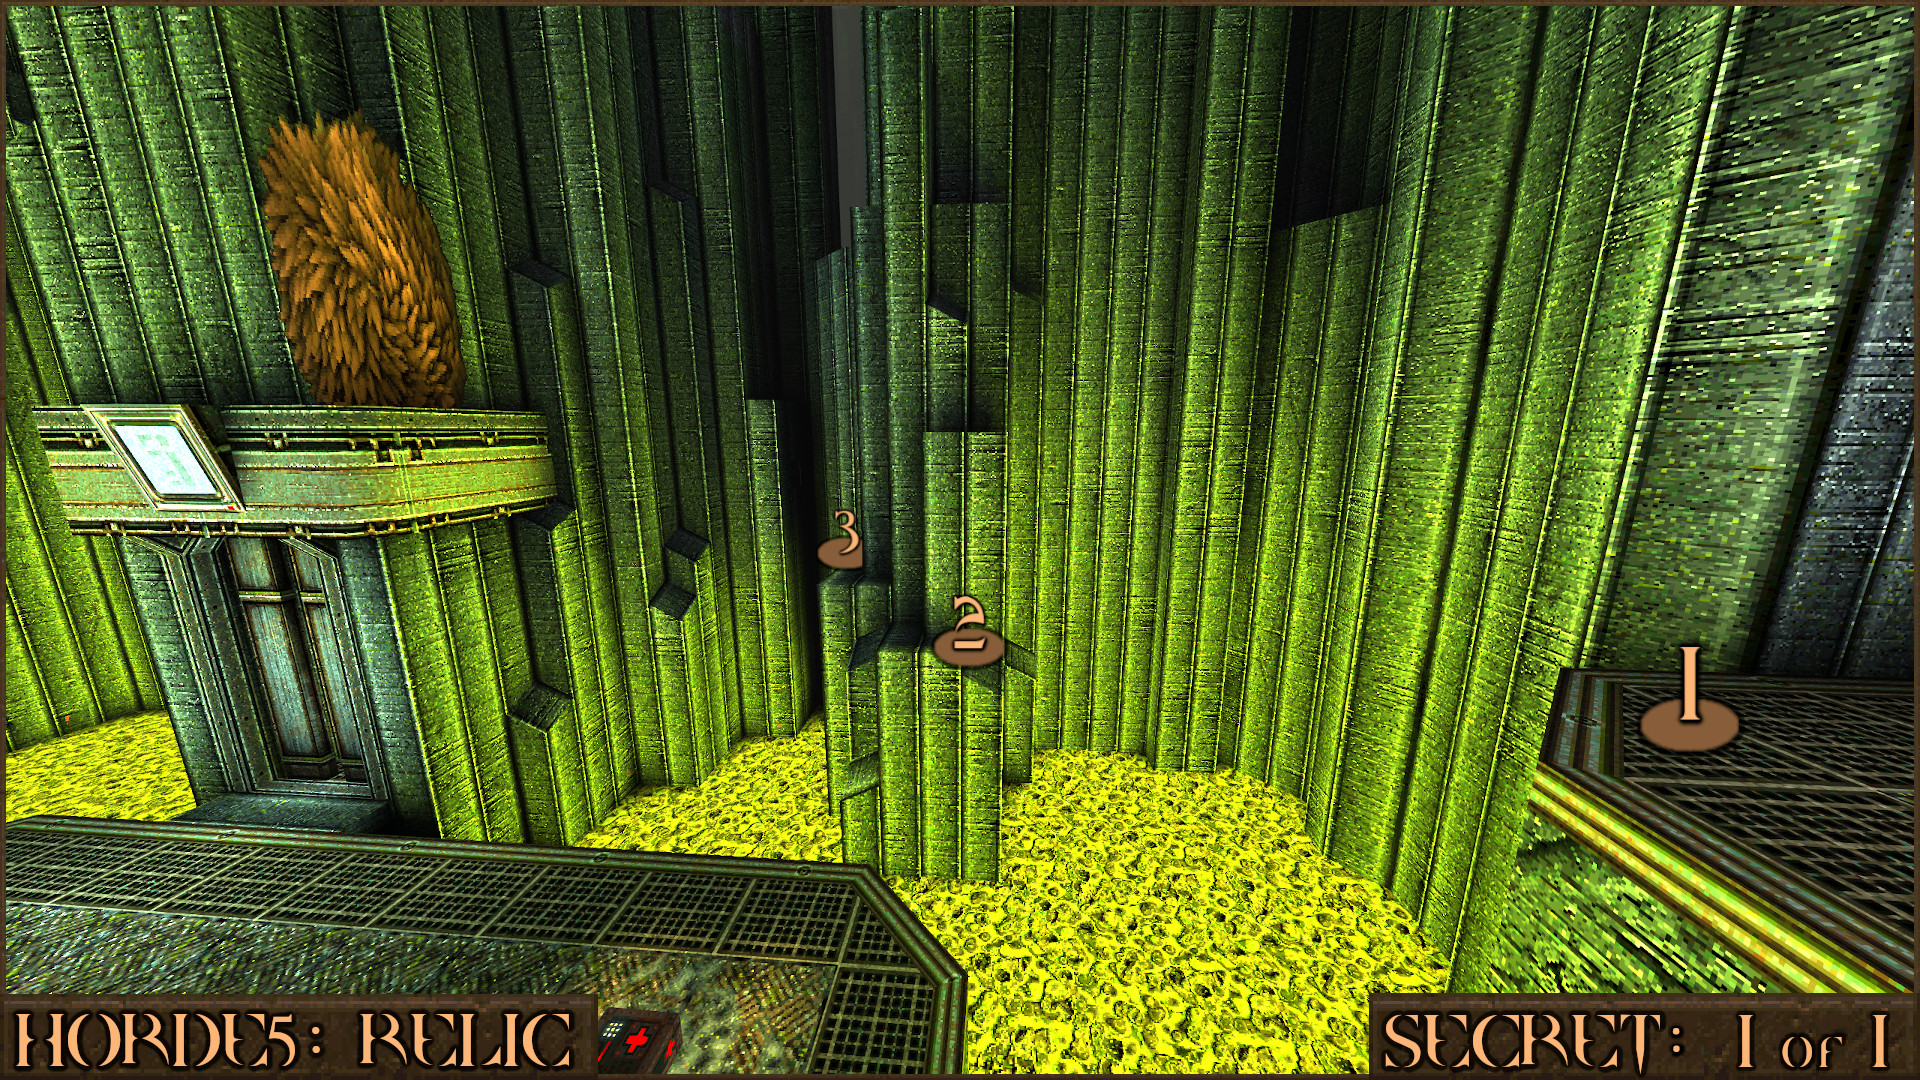
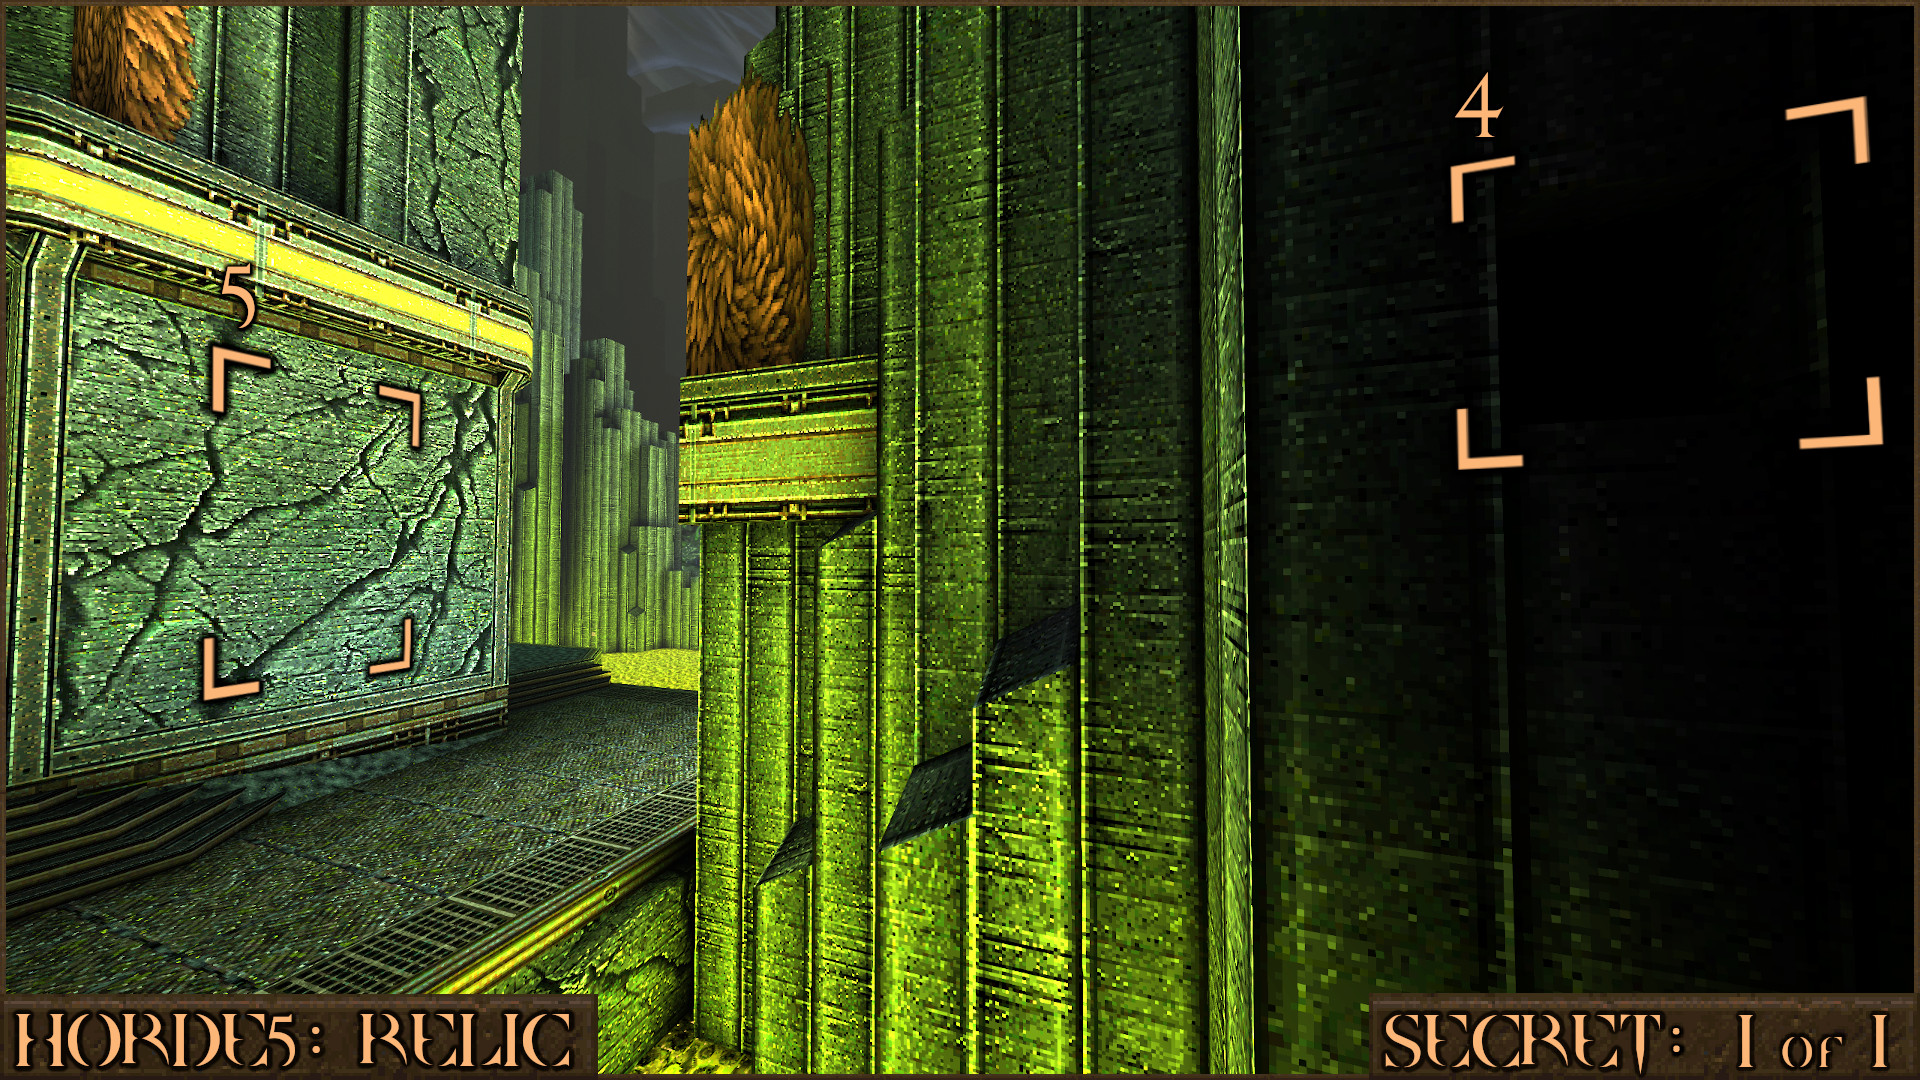
Head to the centre of the map and pick up the Grenade Launcher. Then go to the upper area and find the corner ledge () that overlooks the Silver Key Bars that contain the Thunderbolt. From here make a big jump over to the small ledges that are part of the wall (
). Carefully follow this small ledge around the corner (
).
From this little nook inspect the nearby wall. There is a small square opening hidden in the darkness (). Use the Grenade Launcher to shoot a grenade in to the hole and it will activate a secret trigger. Now look to your left to see a wall move (
) and the secret will reveal itself.
Reward: None
HORDE6: The Trial
Secret 1 of 4
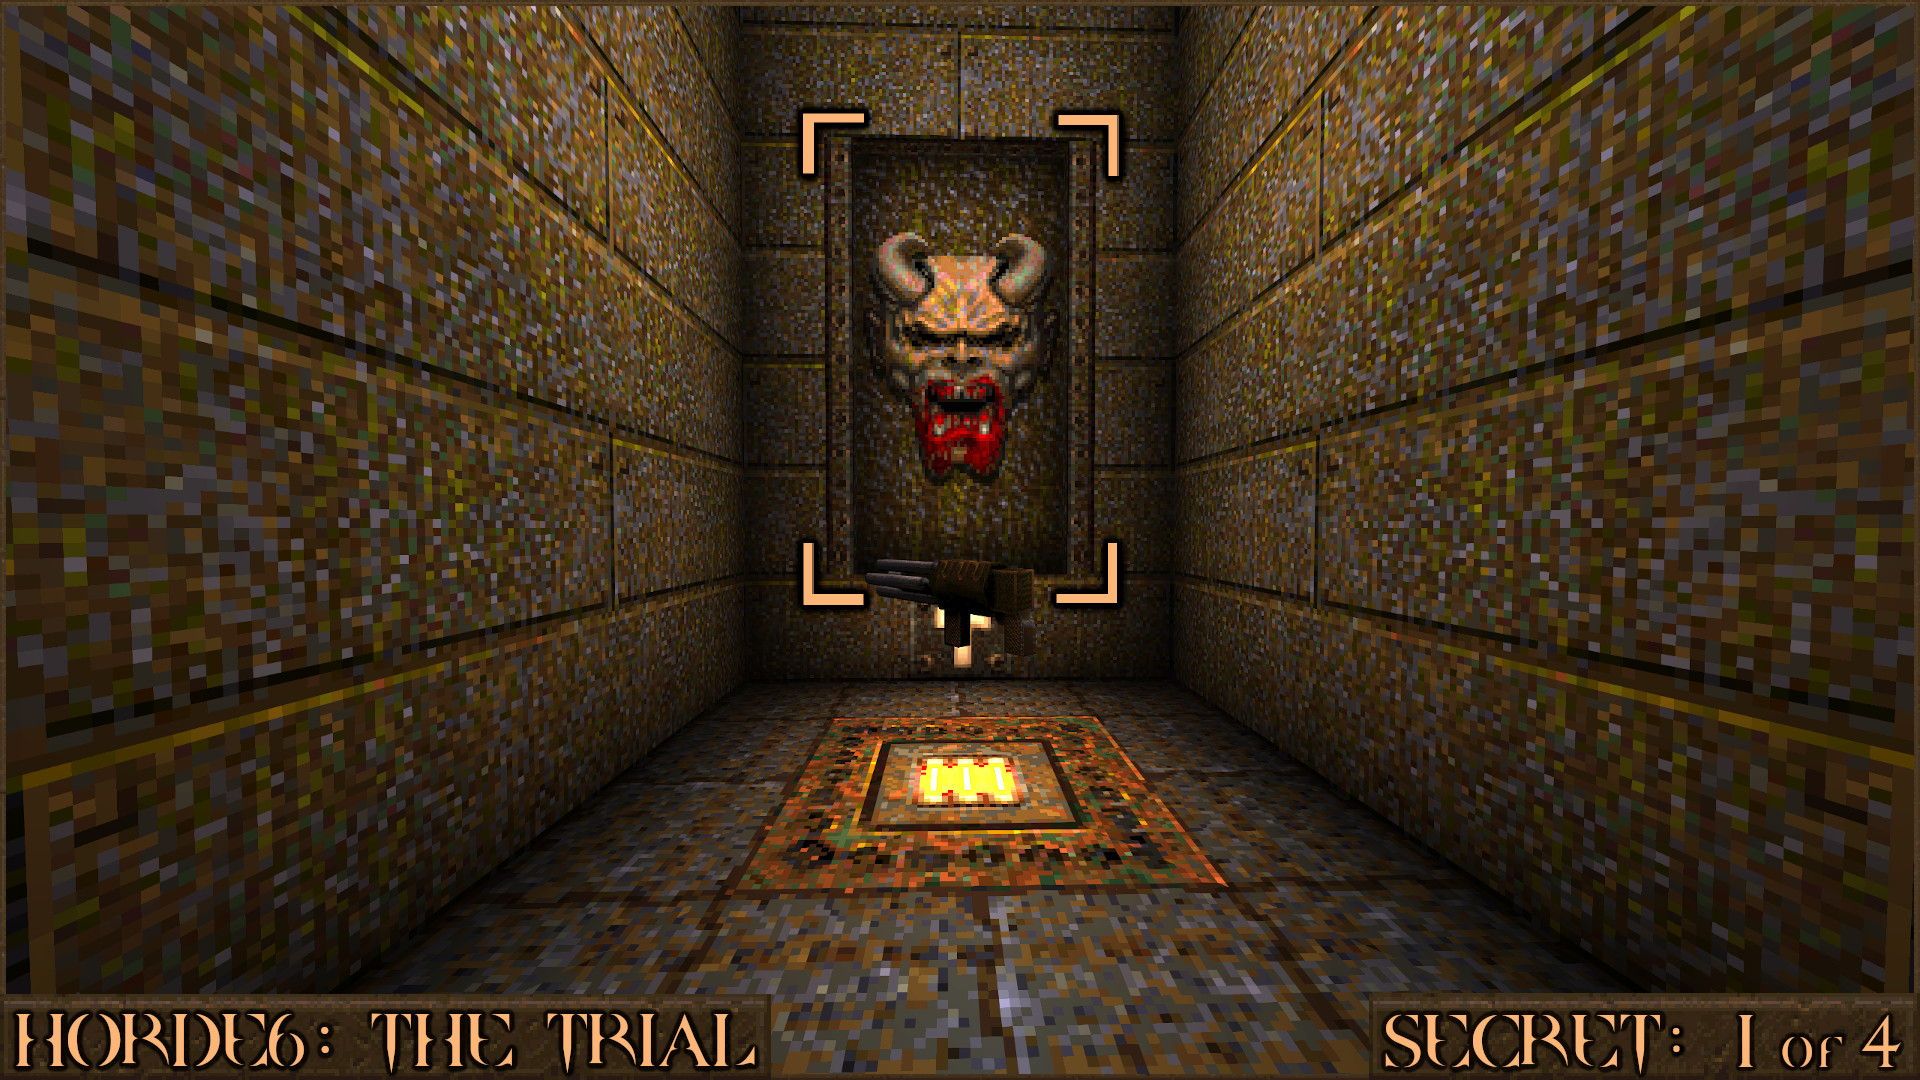
Fight through the waves of enemies until the first Silver Rune Key appears in the centre on the map. Pick it up and activate the Silver Key Bars that contain the Super Nailgun. Behind the Super Nailgun is a monster face panel that will move when shot to reveal a secret.
On the other side of the arena behind the Rocket Launcher is another monster face panel but this only contains an enemy Spawn and doesn’t count as secret.
Reward:
Secret 2 of 4
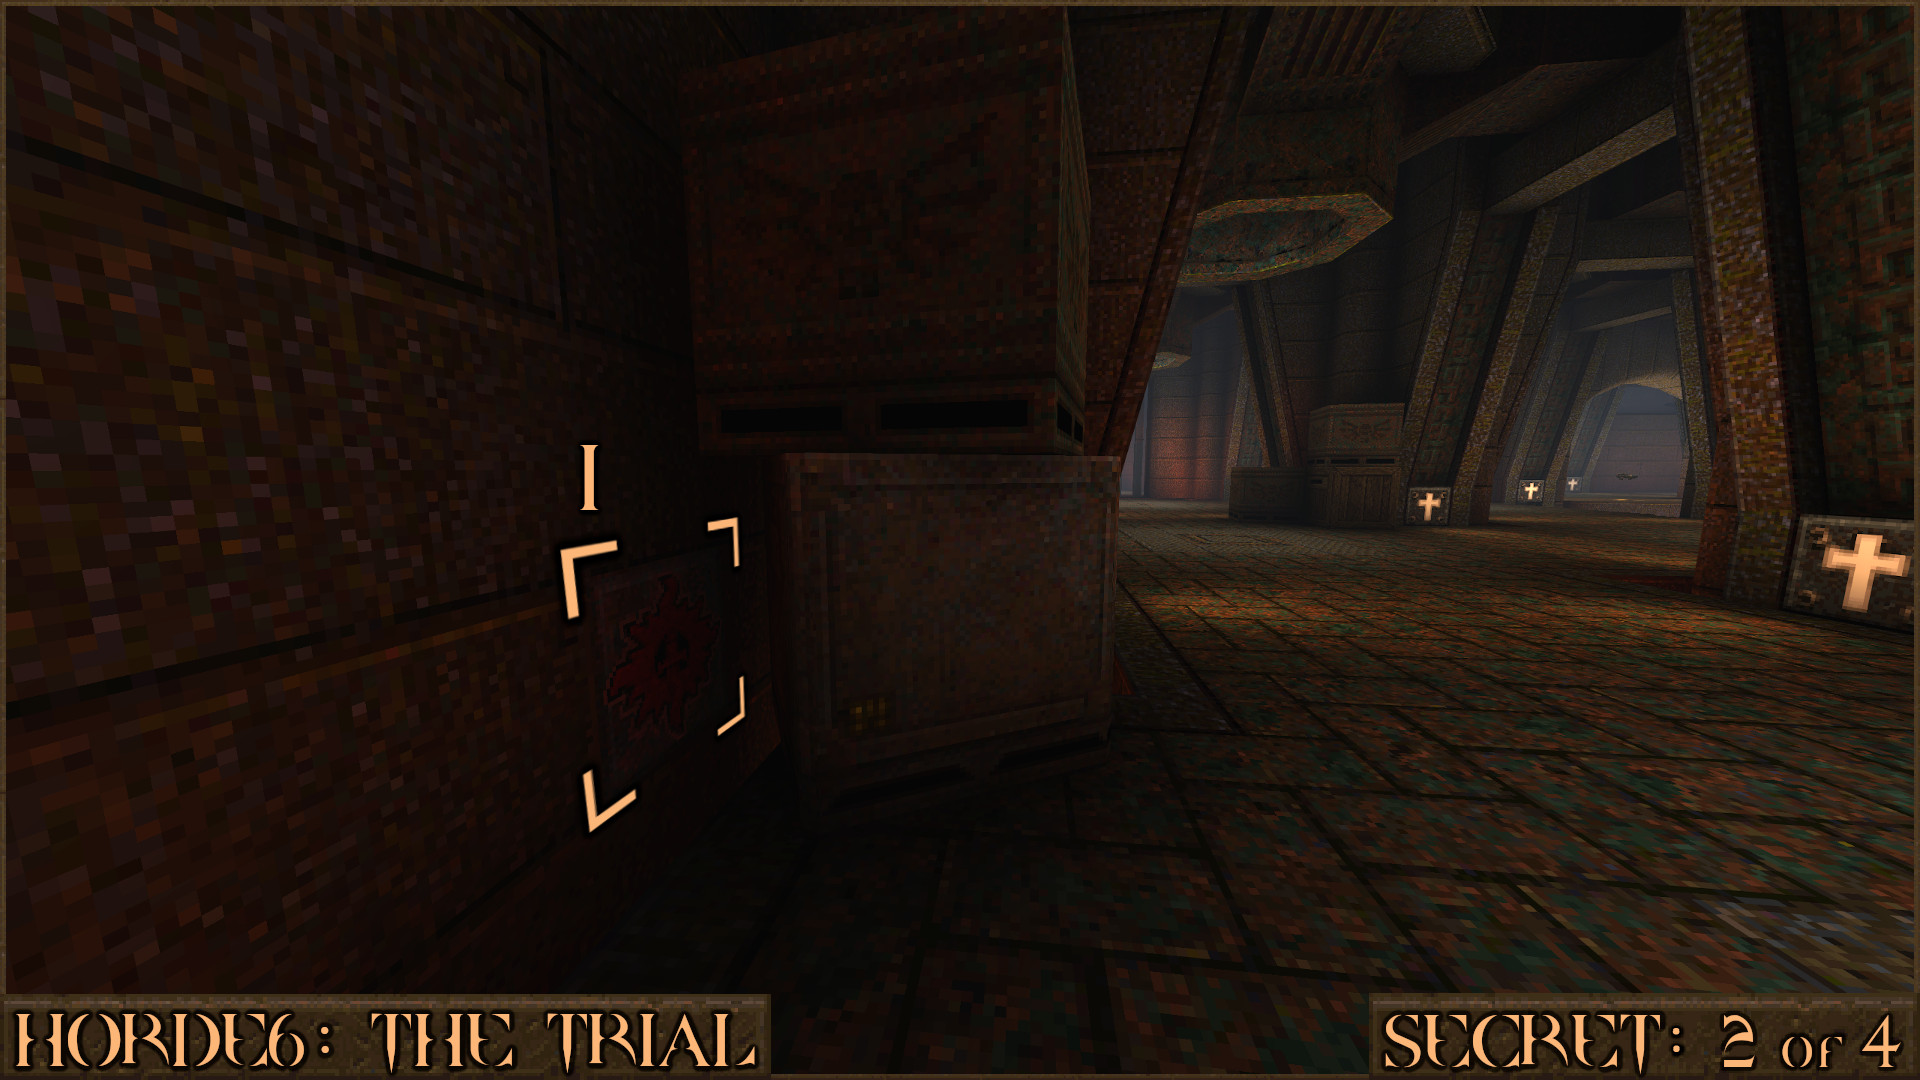
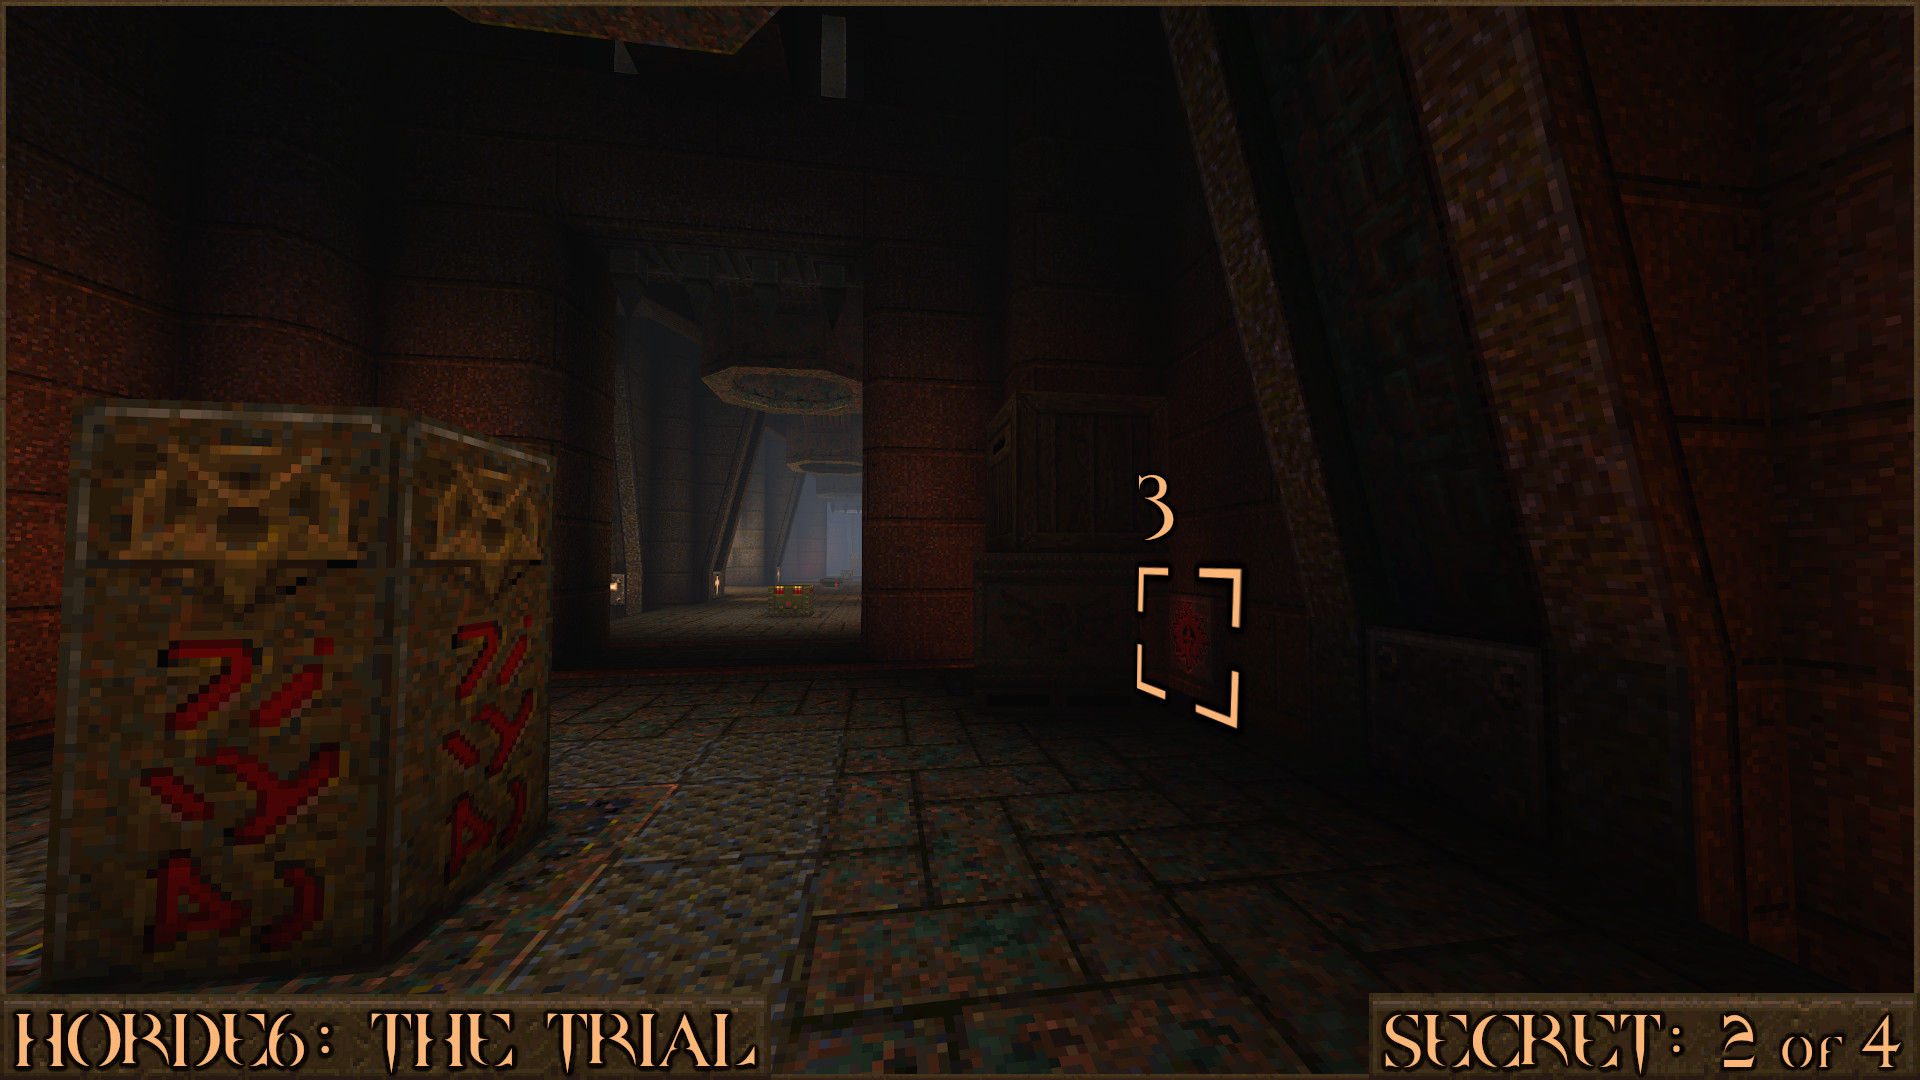
This secret involves shooting four red switches hidden all around the arena. From the start of the level turn right around the first corner and look for a stack of nearby boxes. Behind them is the 1st red shootable switch ().
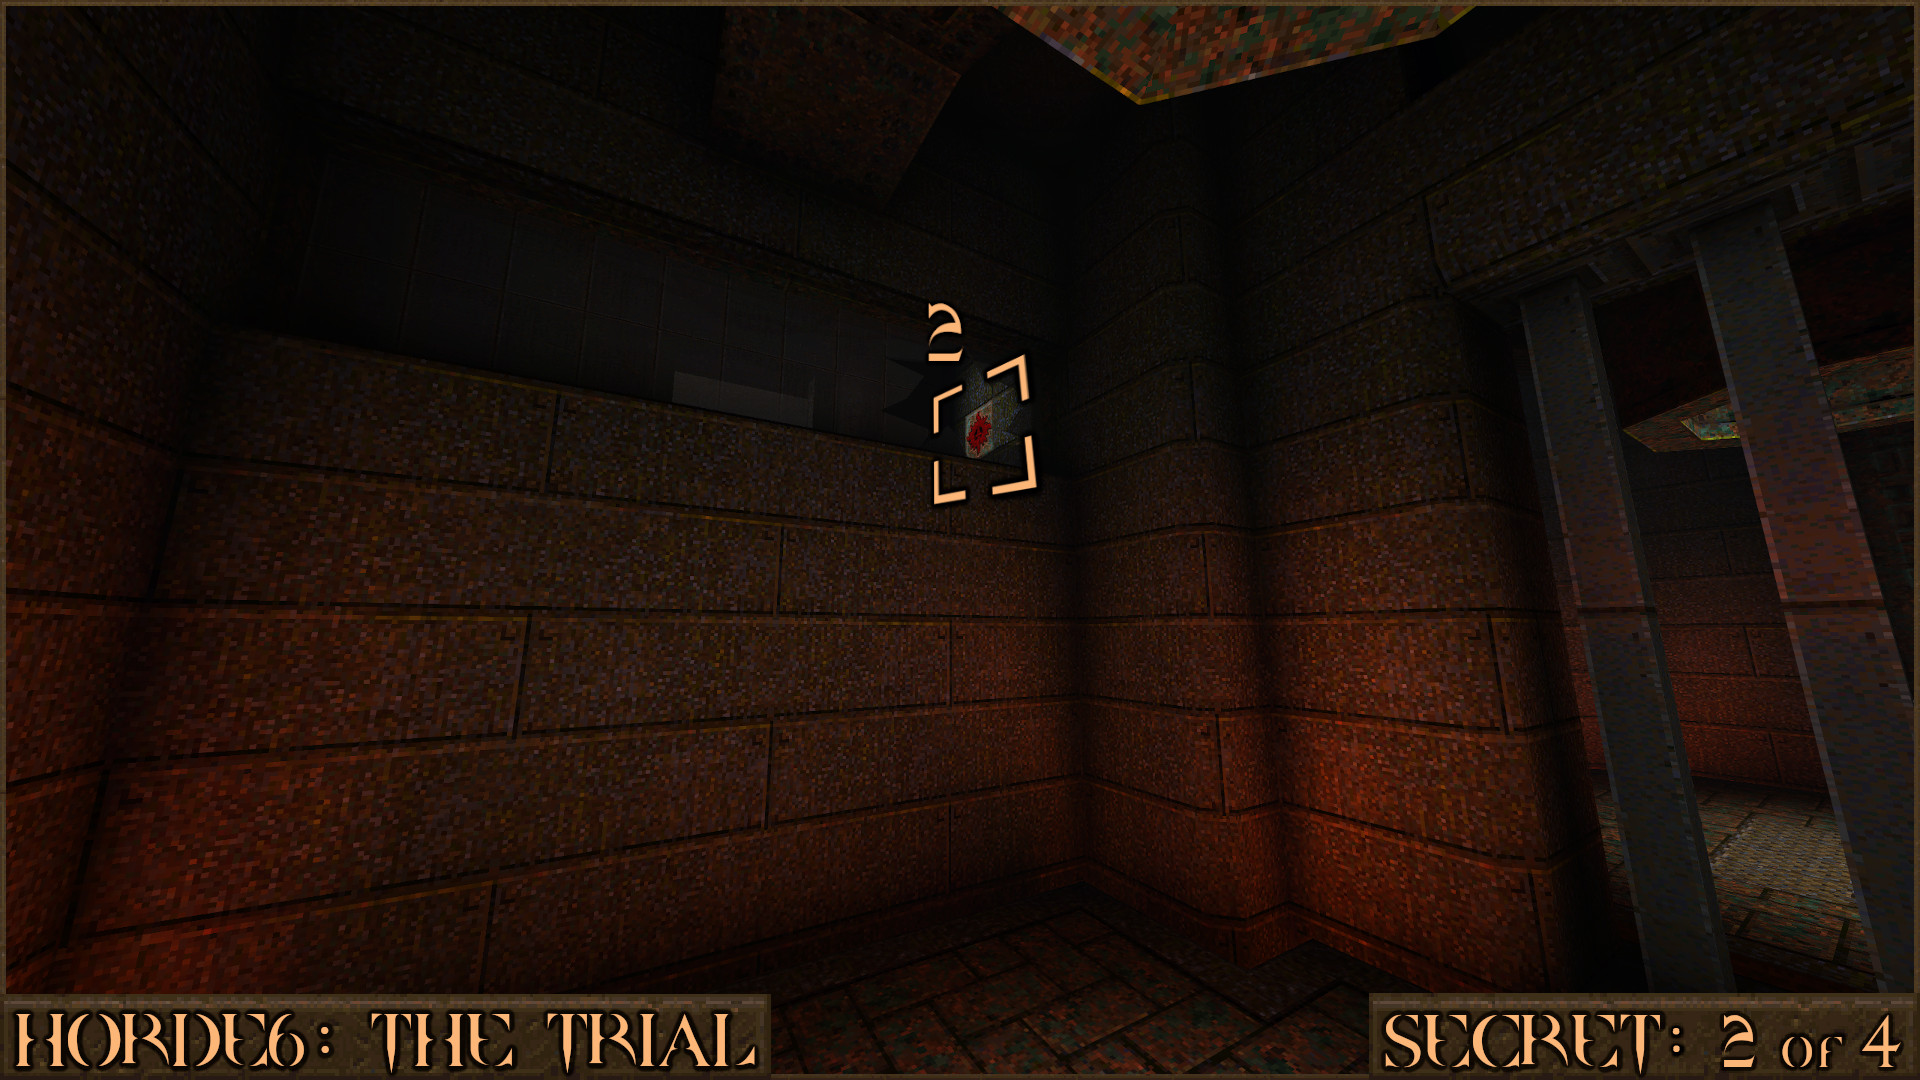
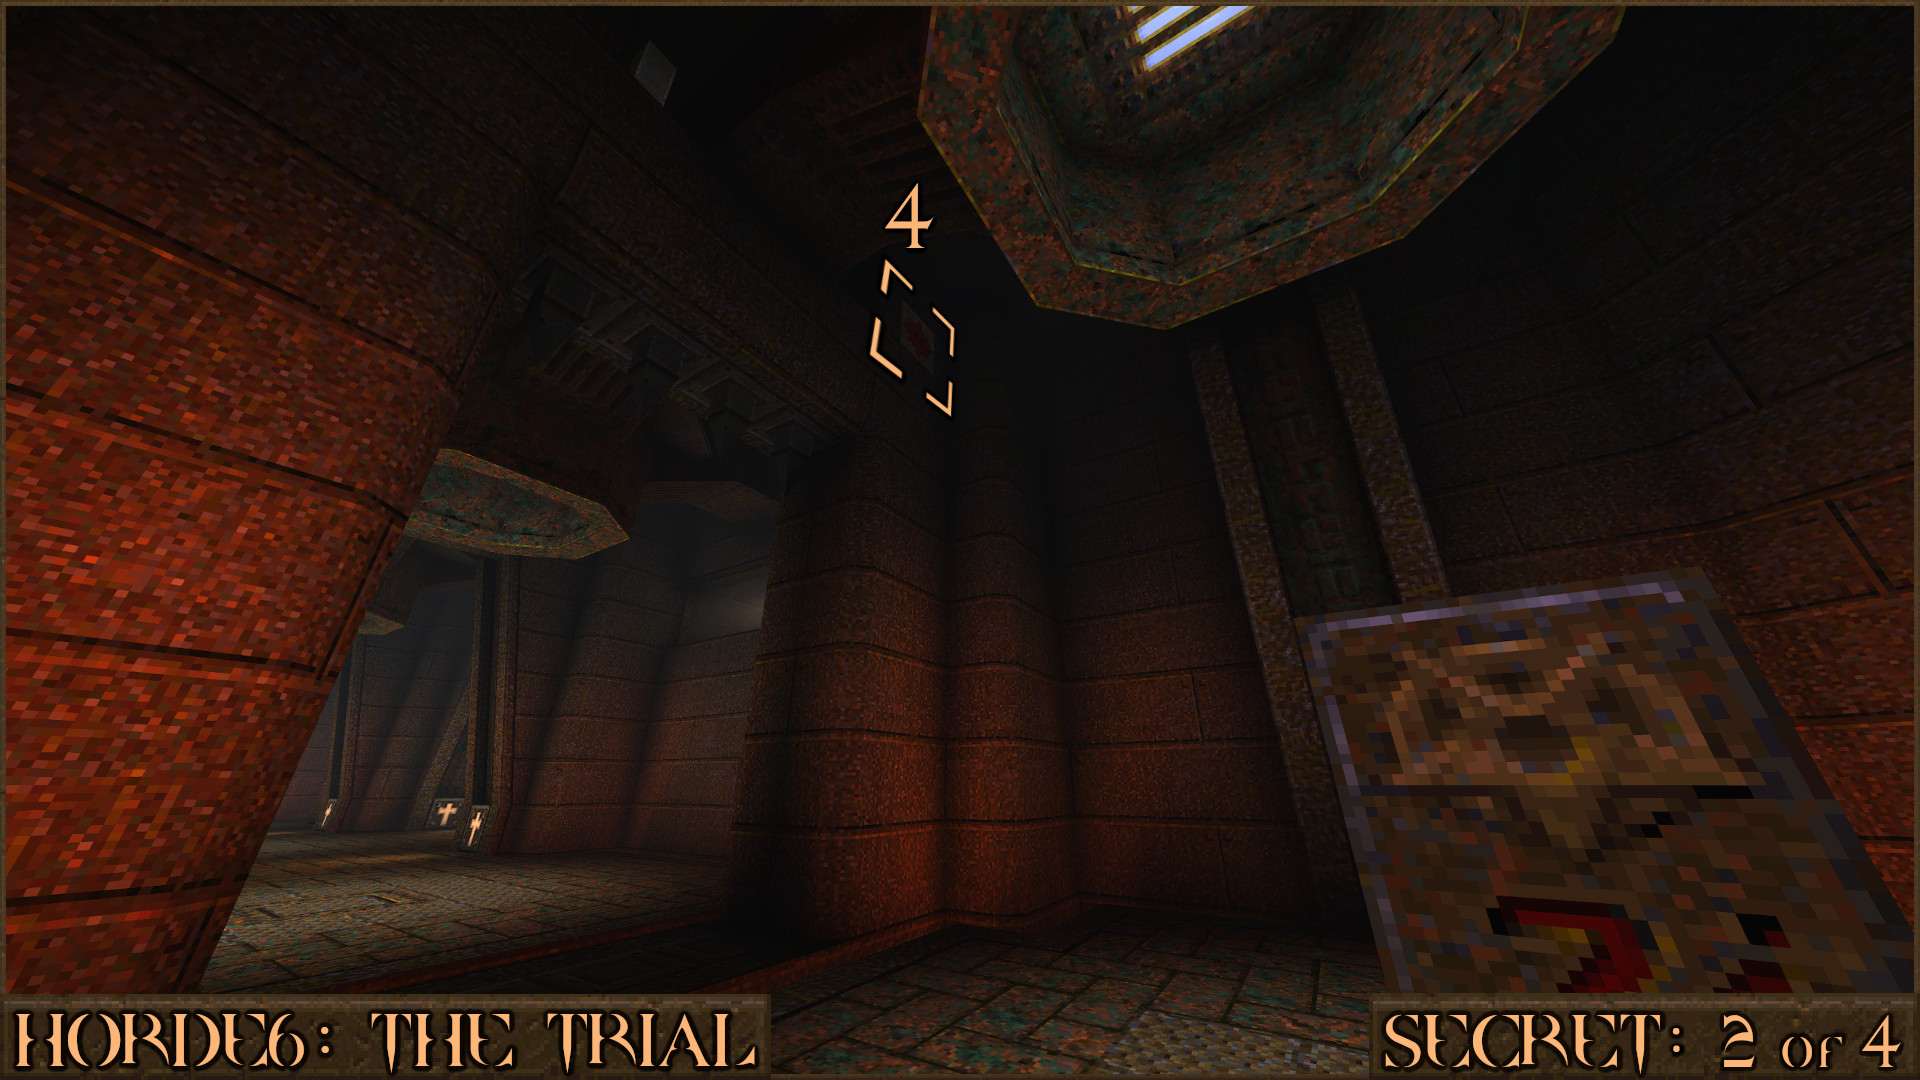
Now go to the side of the arena that has the Silver Key Bars that block the Rocket Launcher. To the right of this look up at the upper window to see a smashed corner and the 2nd red shootable switch ().
At this point you must continue fighting enemies until a Silver Rune Key appears. Pick it up and immediately activate the nearby Silver Key Block. This will open all four rooms located in each corner of the arena.
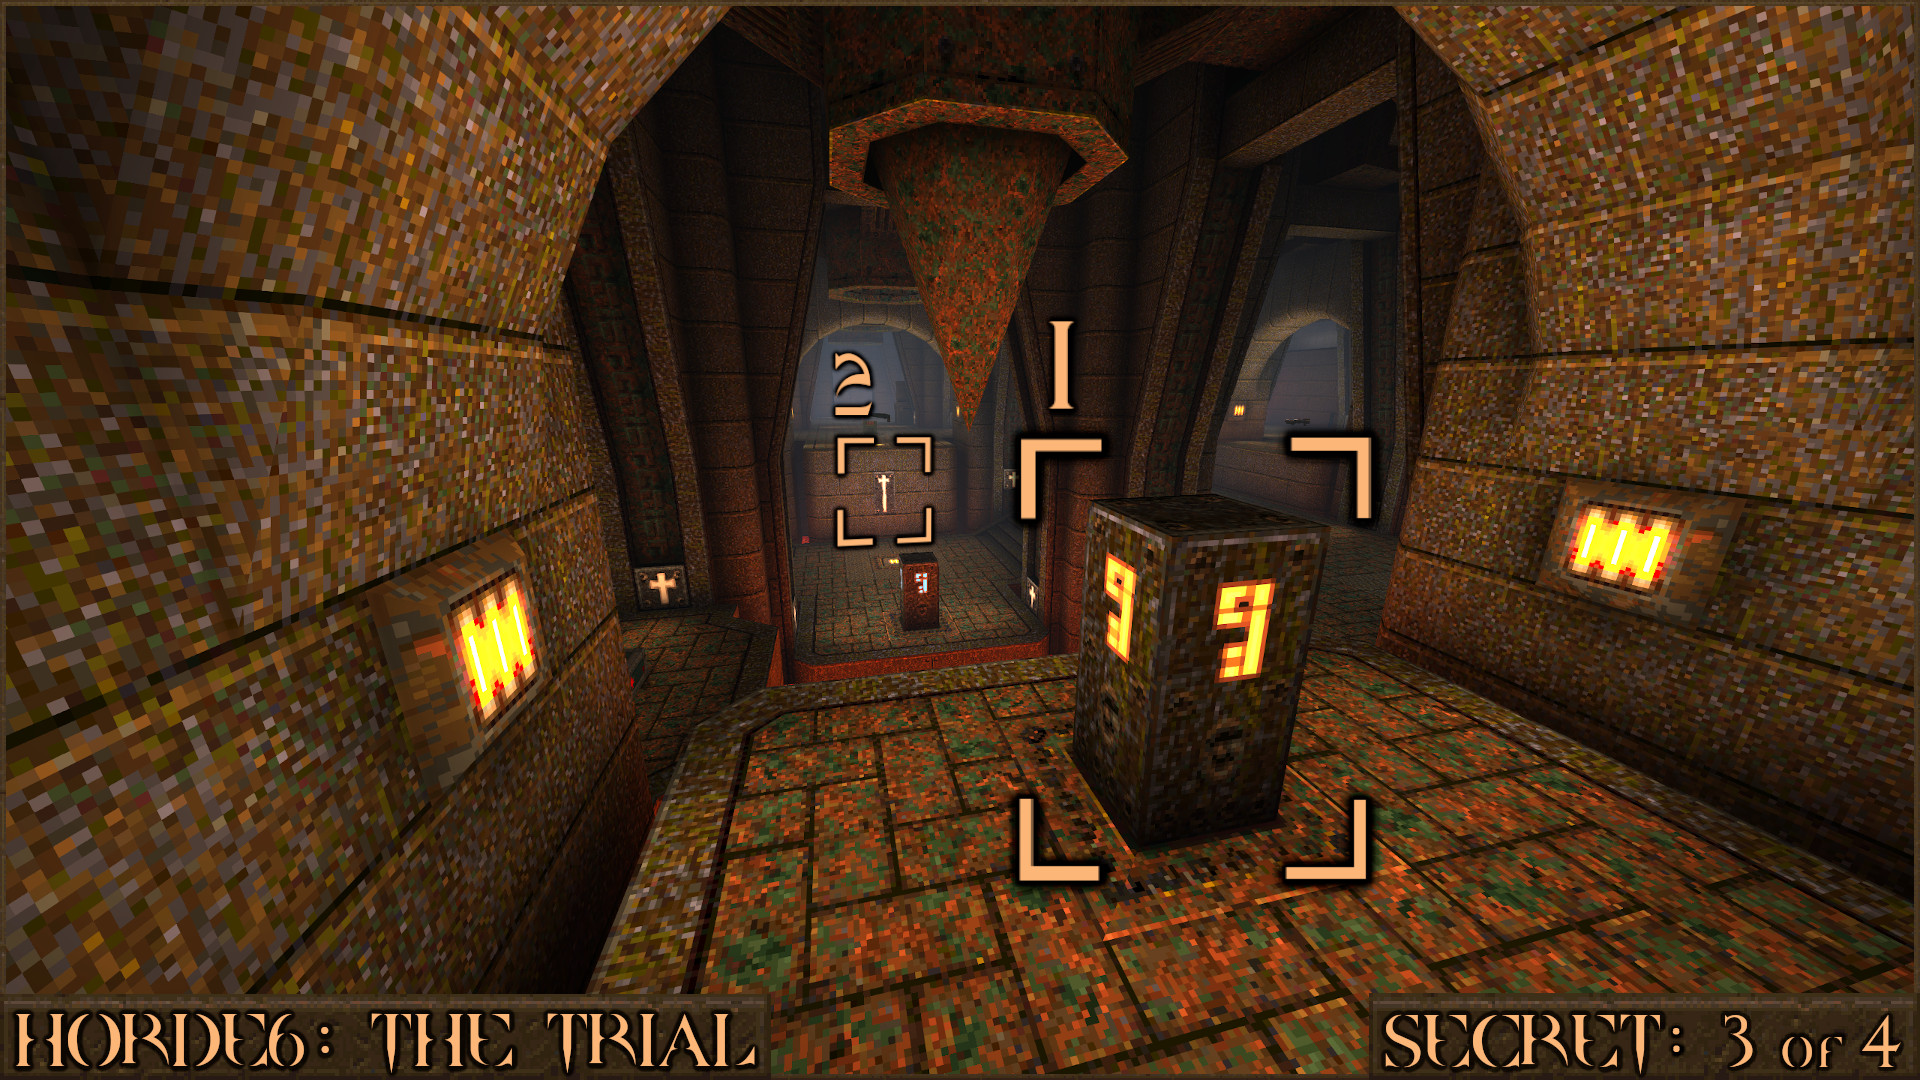
Head over to the Super Nailgun area from Secret 1 and look to the left of it to see a now accessible corner room. In this corner room behind a stack of crates is the 3rd red shootable switch ().
Head back over to the Rocket Launcher and look to the left of it to see another corner room. Inside the room look up above the door way to see the 4th red shootable switch ().
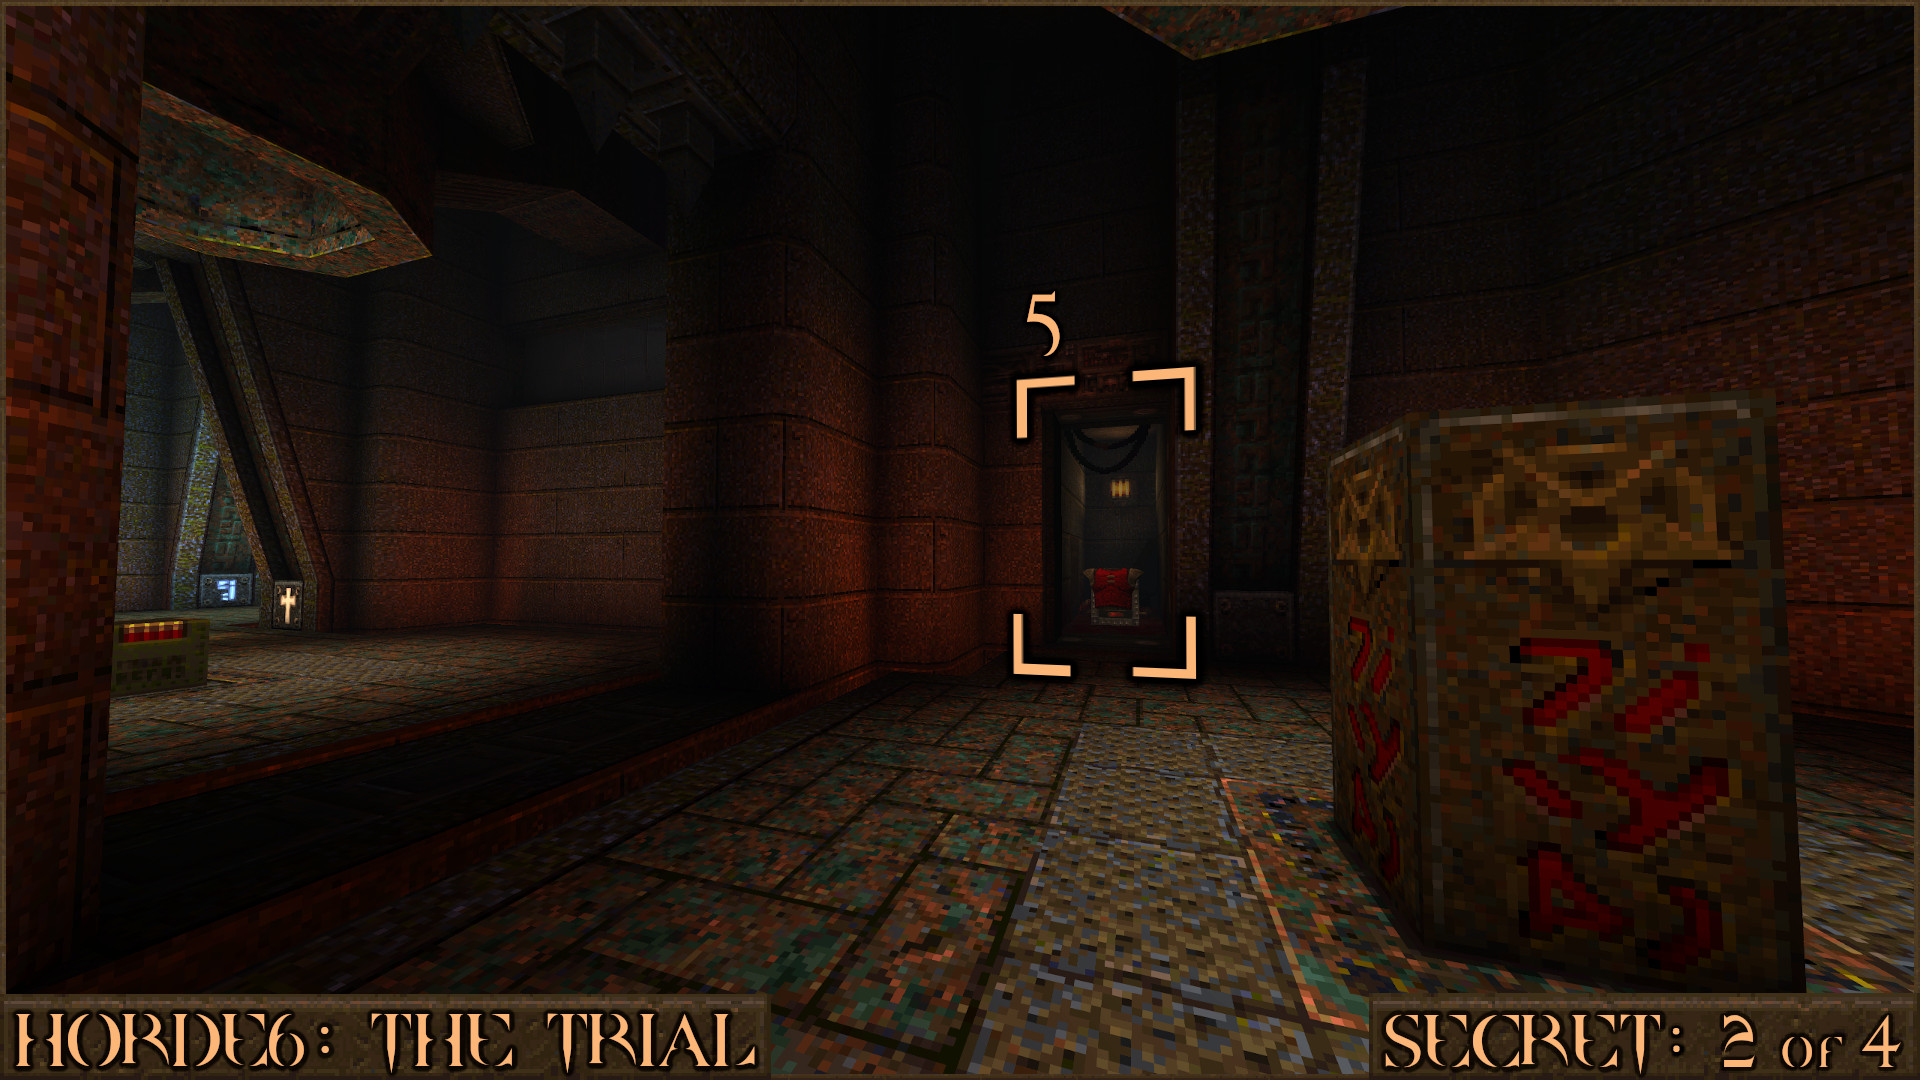
Now all the switches have been activated a hidden door has moved. Head back and face the Rocket Launcher again but this time go in to the corner room on the right and you will see the small secret area () is open.
Reward:
Secret 3 of 4
Keep fighting through the hordes of enemies until the Gold Rune Key appears. Do not use this on the nearby Gold Door as this locks you out of the secret. Instead use it on the nearby Gold Rune Block (). This will reveal a teleporter in the distance (
) that will take you to an extremely well stocked secret area.
Reward:
Secret 4 of 4
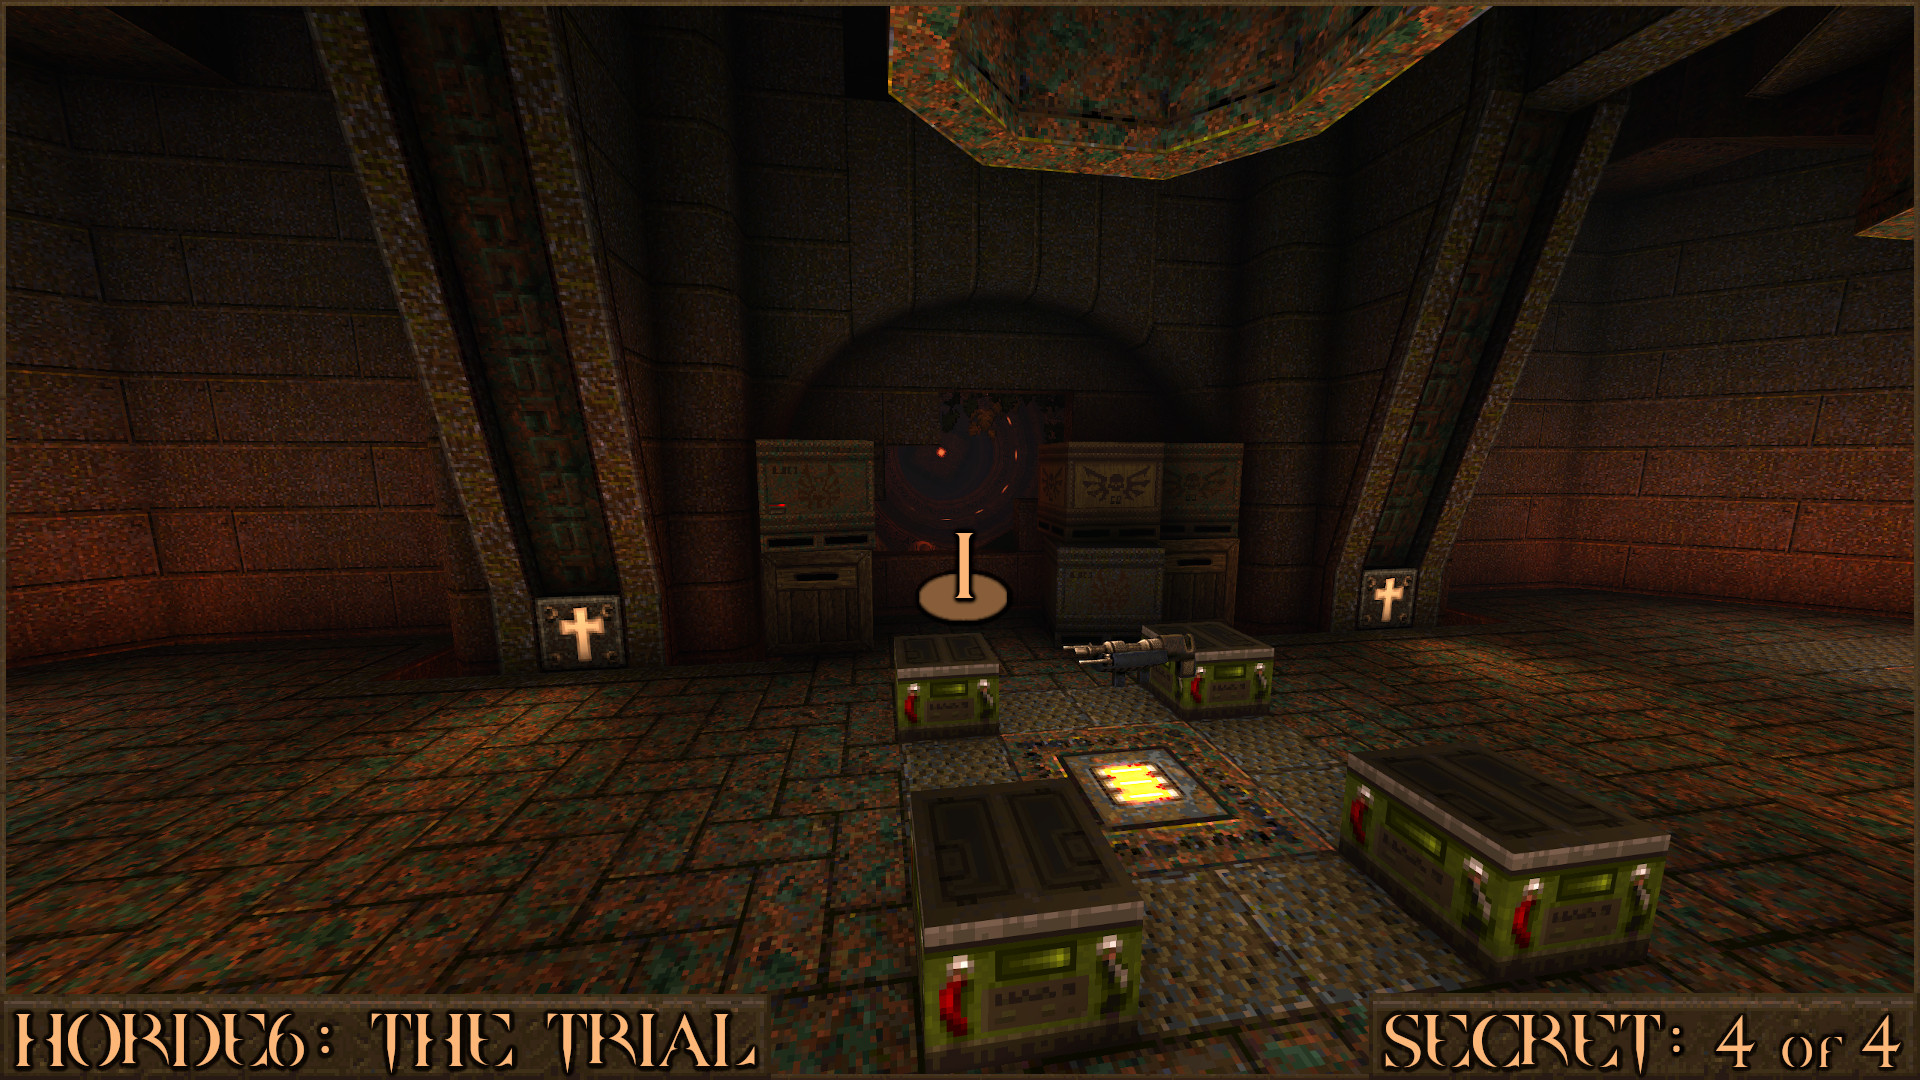
While still in the secret area from Secret 3, move between some crates () near the Thunderbolt weapon to see a mysterious machine and claim this secret.
Reward: None
HORDE7: The Tower
NOTE: This level is also known as The Tech Spire.
Secret 1 of 1
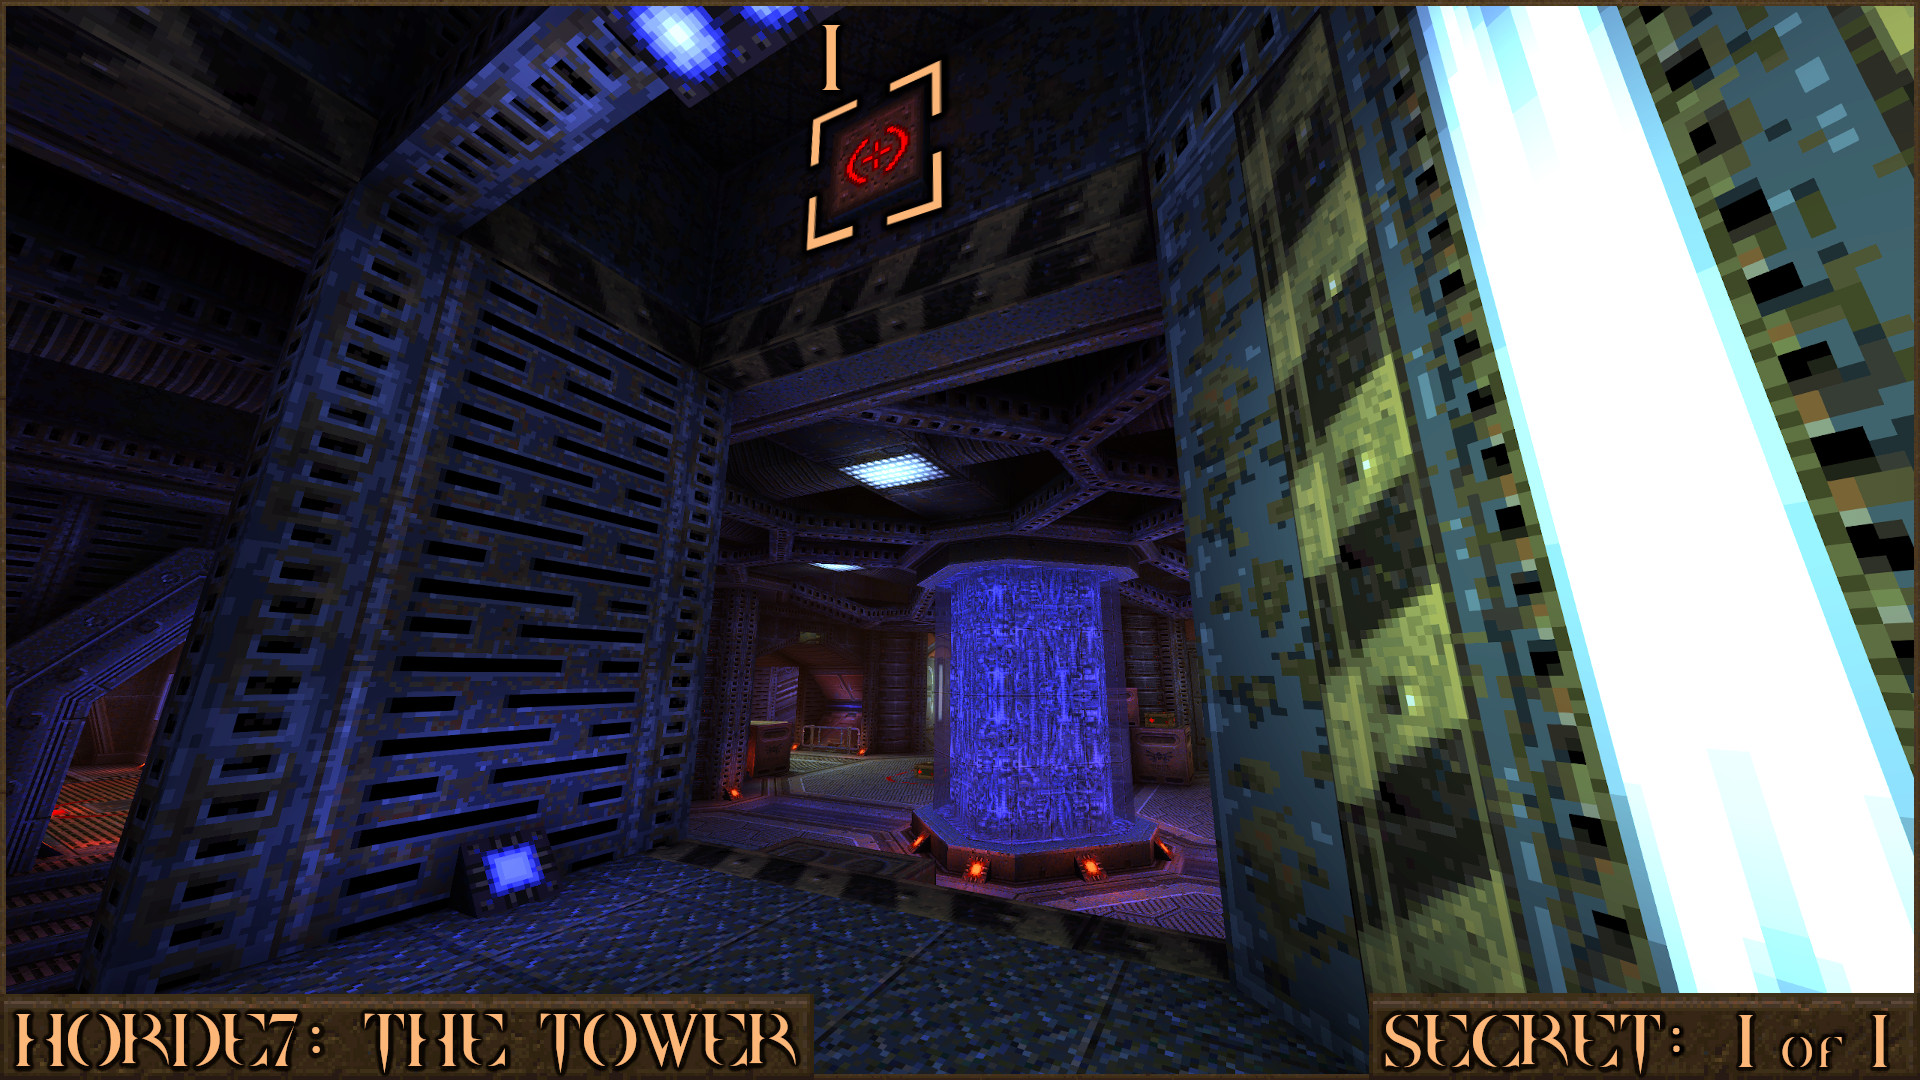
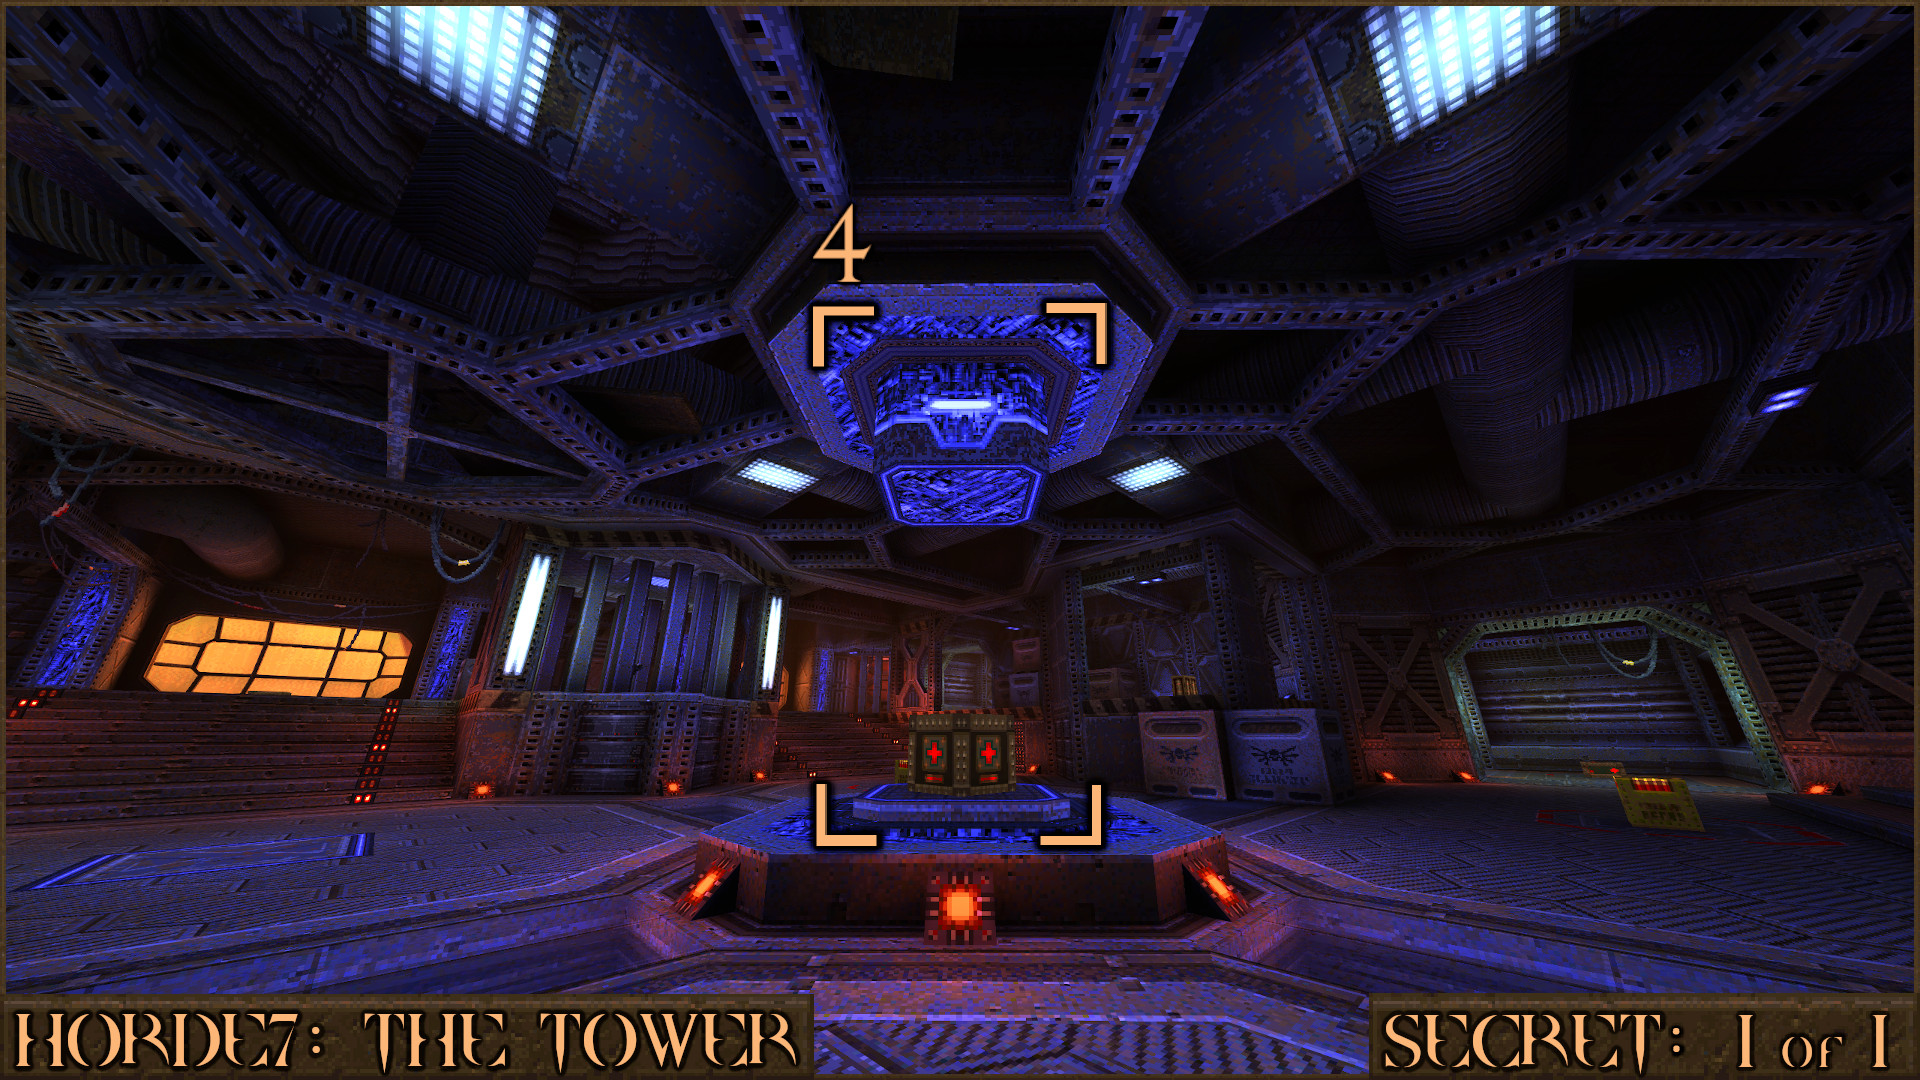
For this secret you have to find three red shootable switches that are hidden throughout the level. Head to the central room with the blue pillar and go up some nearby stairs to a raised platform that overlooks the pillar. From here look up in to the alcoves to see the 1st red shootable switch ().
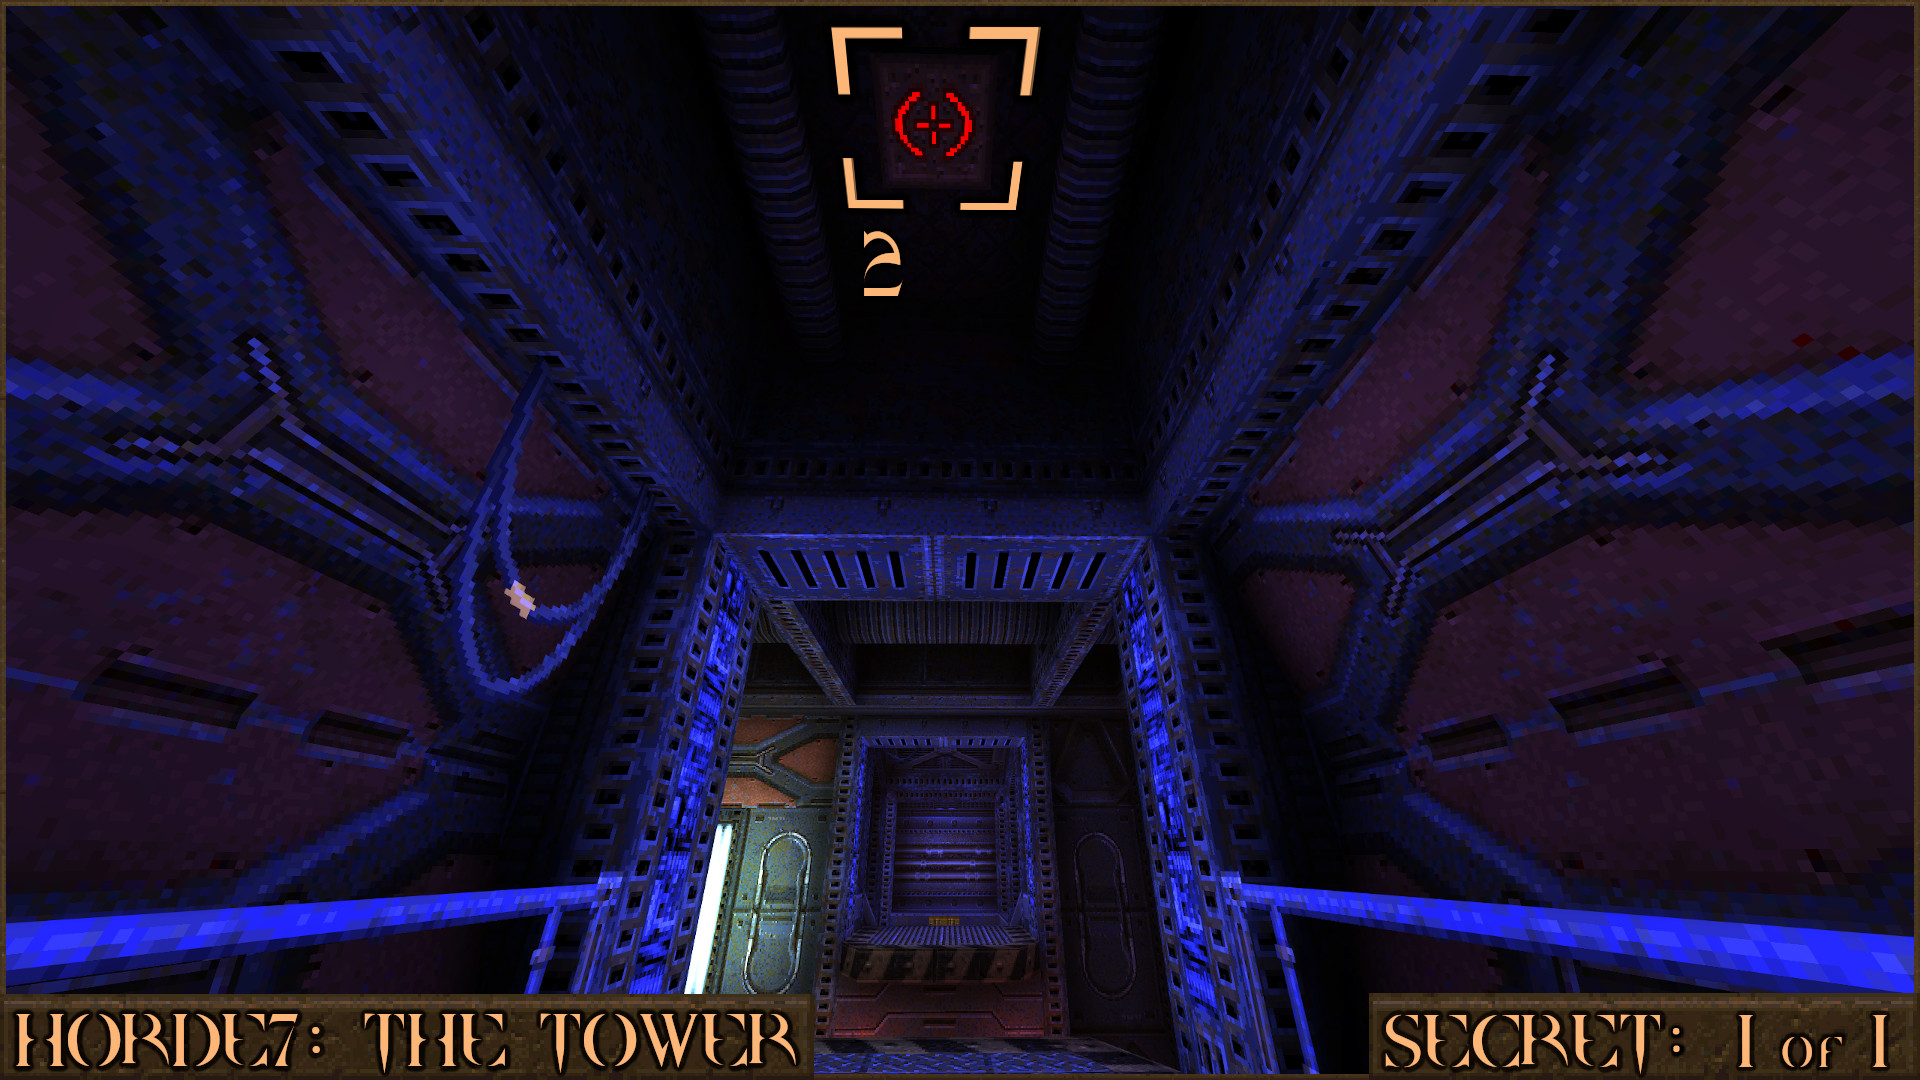
Head over to the Silver Key Bars that block the Rocket Launcher. Near to this you will see two ledges with black and yellow hazard striping. Make your way up to the right ledge and then look up to the ceiling to see the 2nd red shootable switch ().
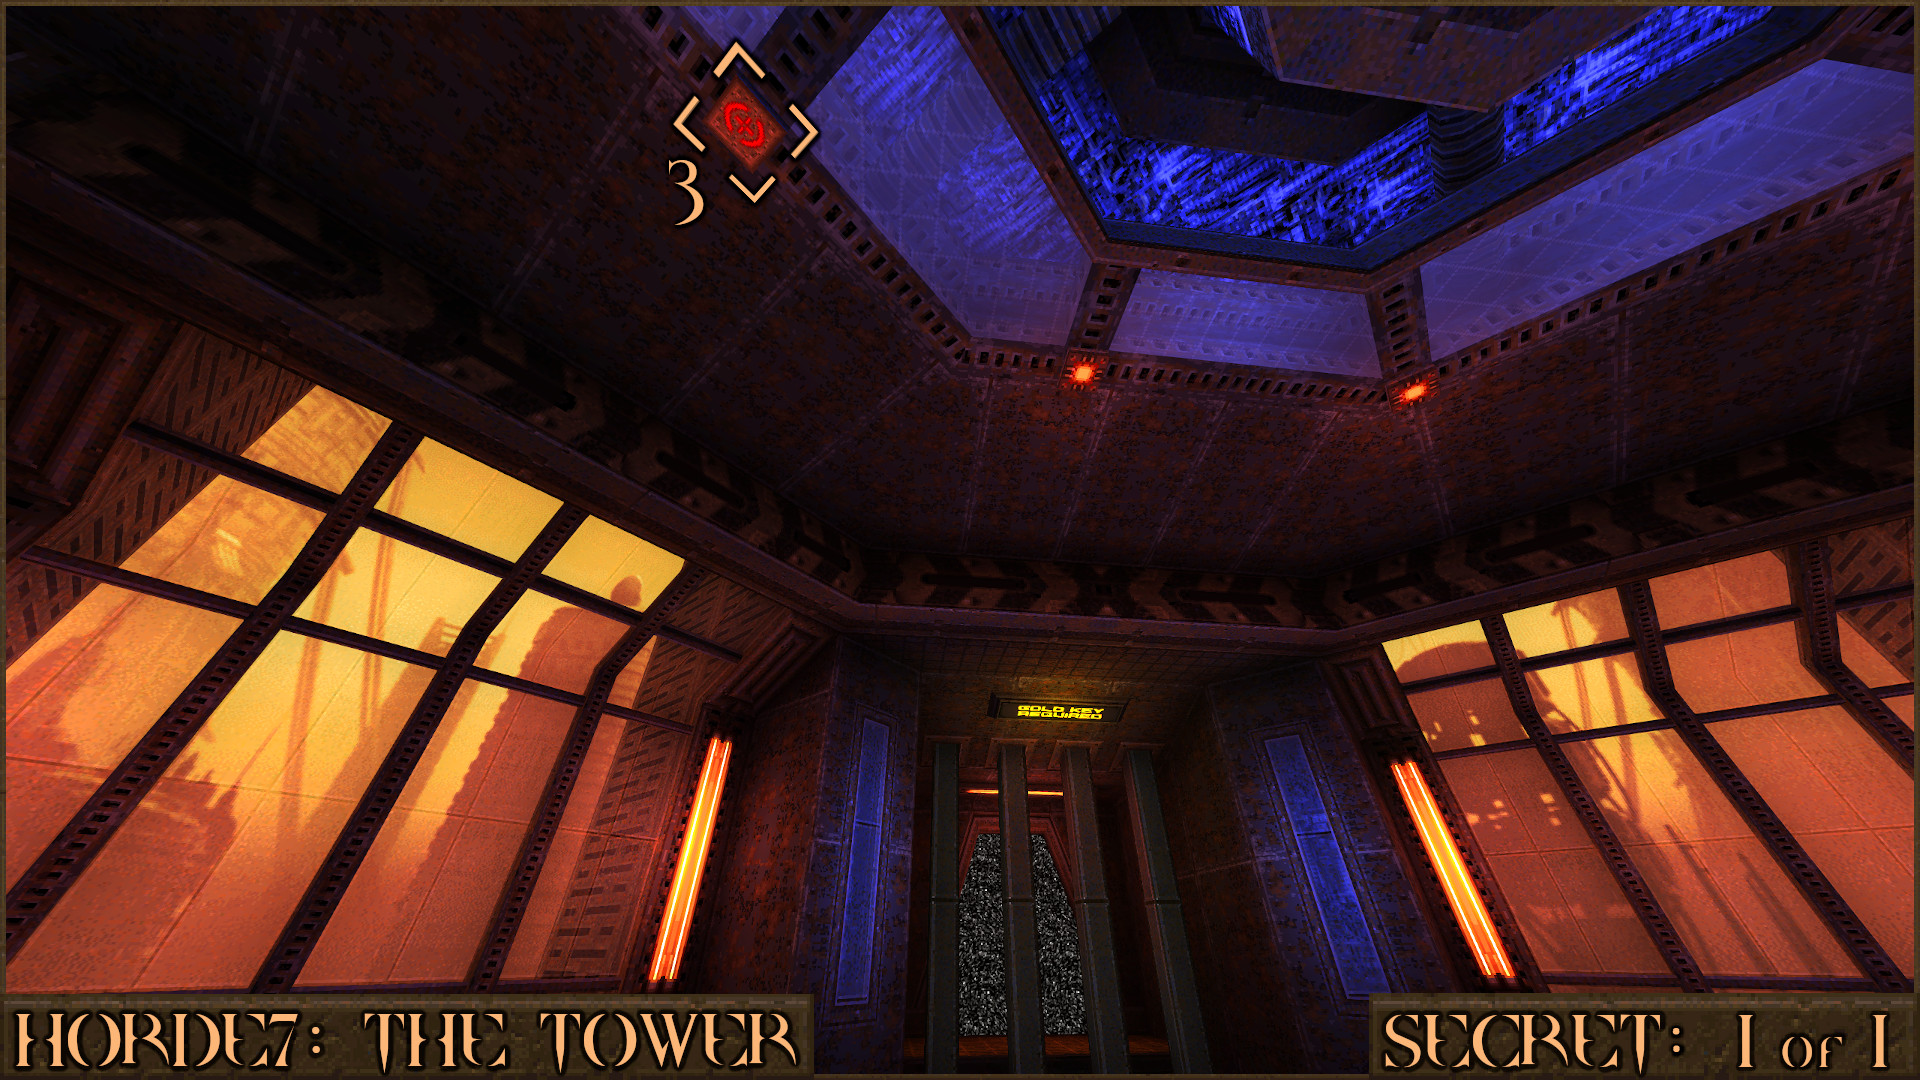
Go to the Gold Key Bars that can be found in a corner of the level. Look at the ceiling nearby and look closely at the red ceiling lights. One of these is actually the 3rd red shootable switch ().
Now that all the switches have been activated return to the centre of the map to see that blue pillar has moved () to reveal the secret.
Reward:
More Quake Secrets Guides
By Xazuki
Hope you enjoy the Guide about Quake – Finding all the Secrets, if you think we should add extra information or forget something, please let us know via comment below, and we will do our best to fix or update as soon as possible!
- All Quake Posts List


Leave a Reply