You’ve made PETI maps but you want to make cooler looking maps? You want to learn SDK but are in a rush?
Introduction
This guide will contain all of the knowledge I have gathered from my use of Hammer SDK for Portal 2. In its current state, this guide is incomplete and could remain as such for a long time. Because I don’t have much time to work on this guide and its creation has been taking so long, I will publish it early. If you want something added to the guide just comment for it.
Getting Portal 2 Authoring tools
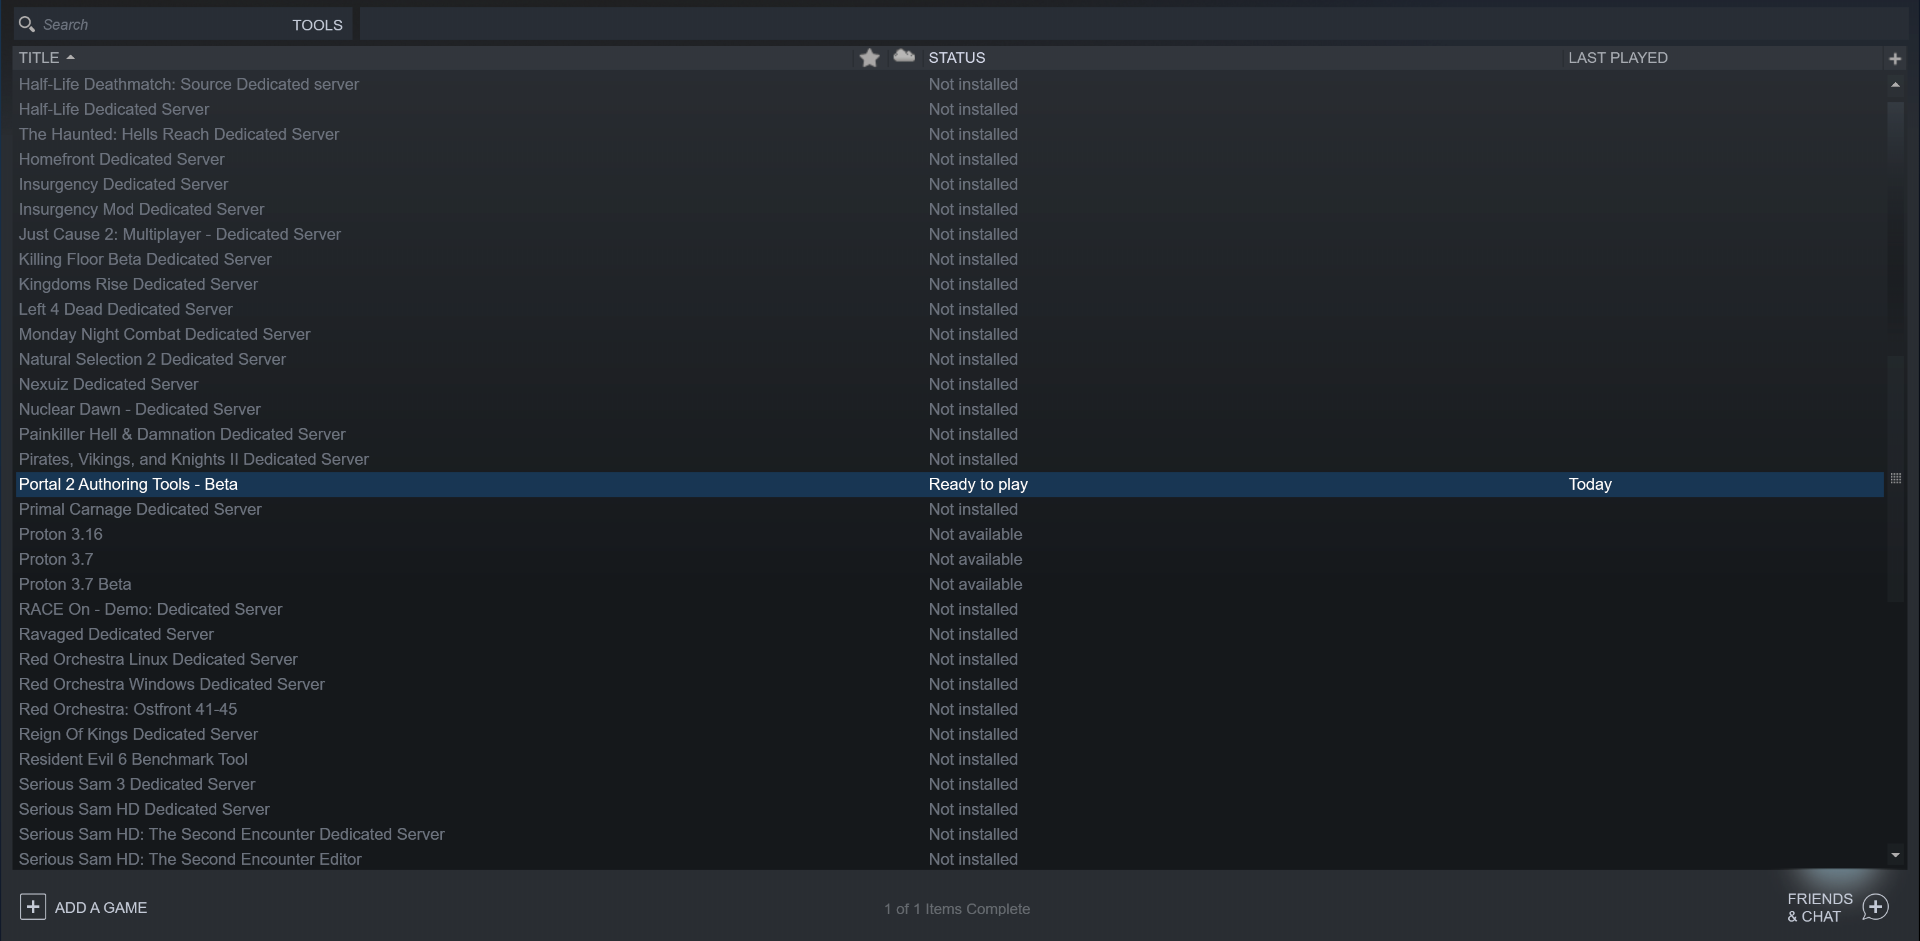
First off you need to download Portal 2 Authoring Tools – Beta. It can be found in the tools section of the library.
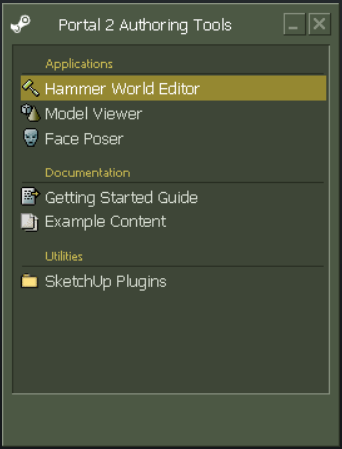
Once it has finished downloading, open the software and select Hammer World Editor.
Brushes
The blocks you saw in PETI are called “Brushes” in Hammer. Those blocks were 128x128x128 Hammer units; most textures are normally 128×128 units, however x and y scale can be modified.
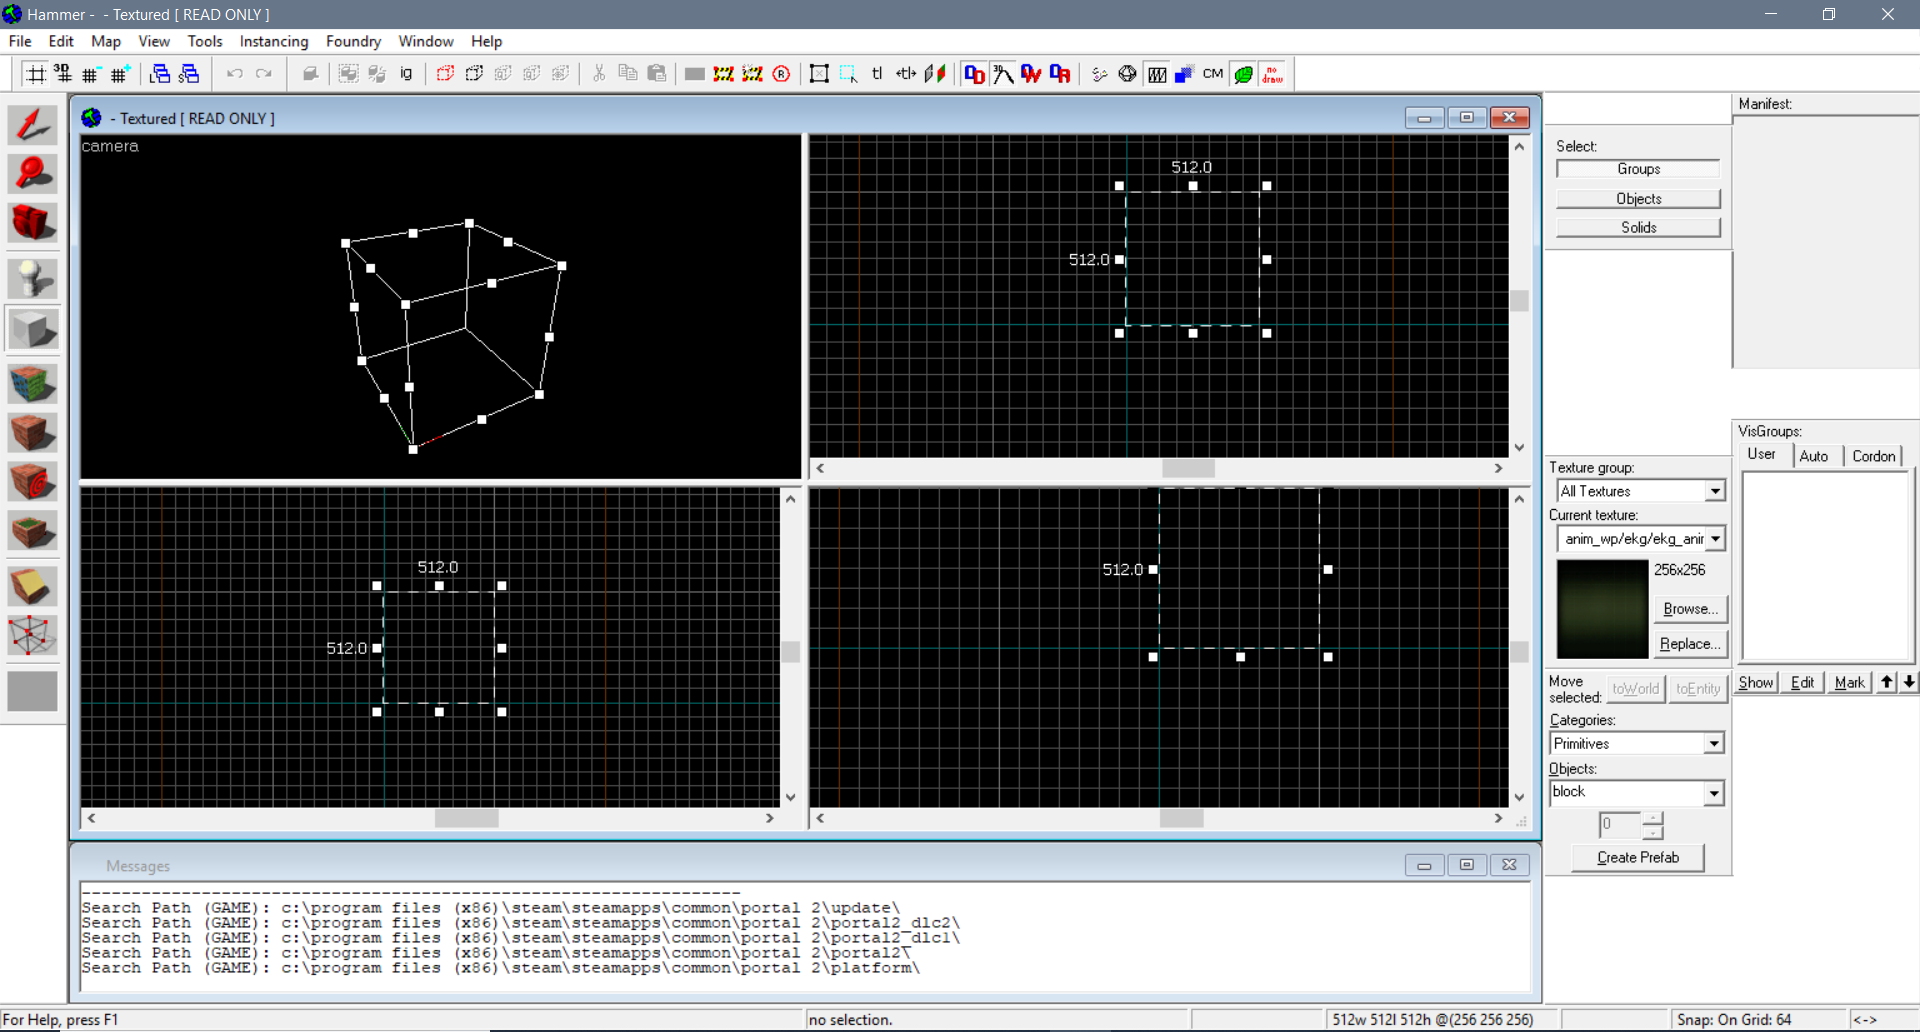
To create a brush, simply select the block button that looks like a white cube, then use the 2D views to change its dimensions and location.
Texturing Tools
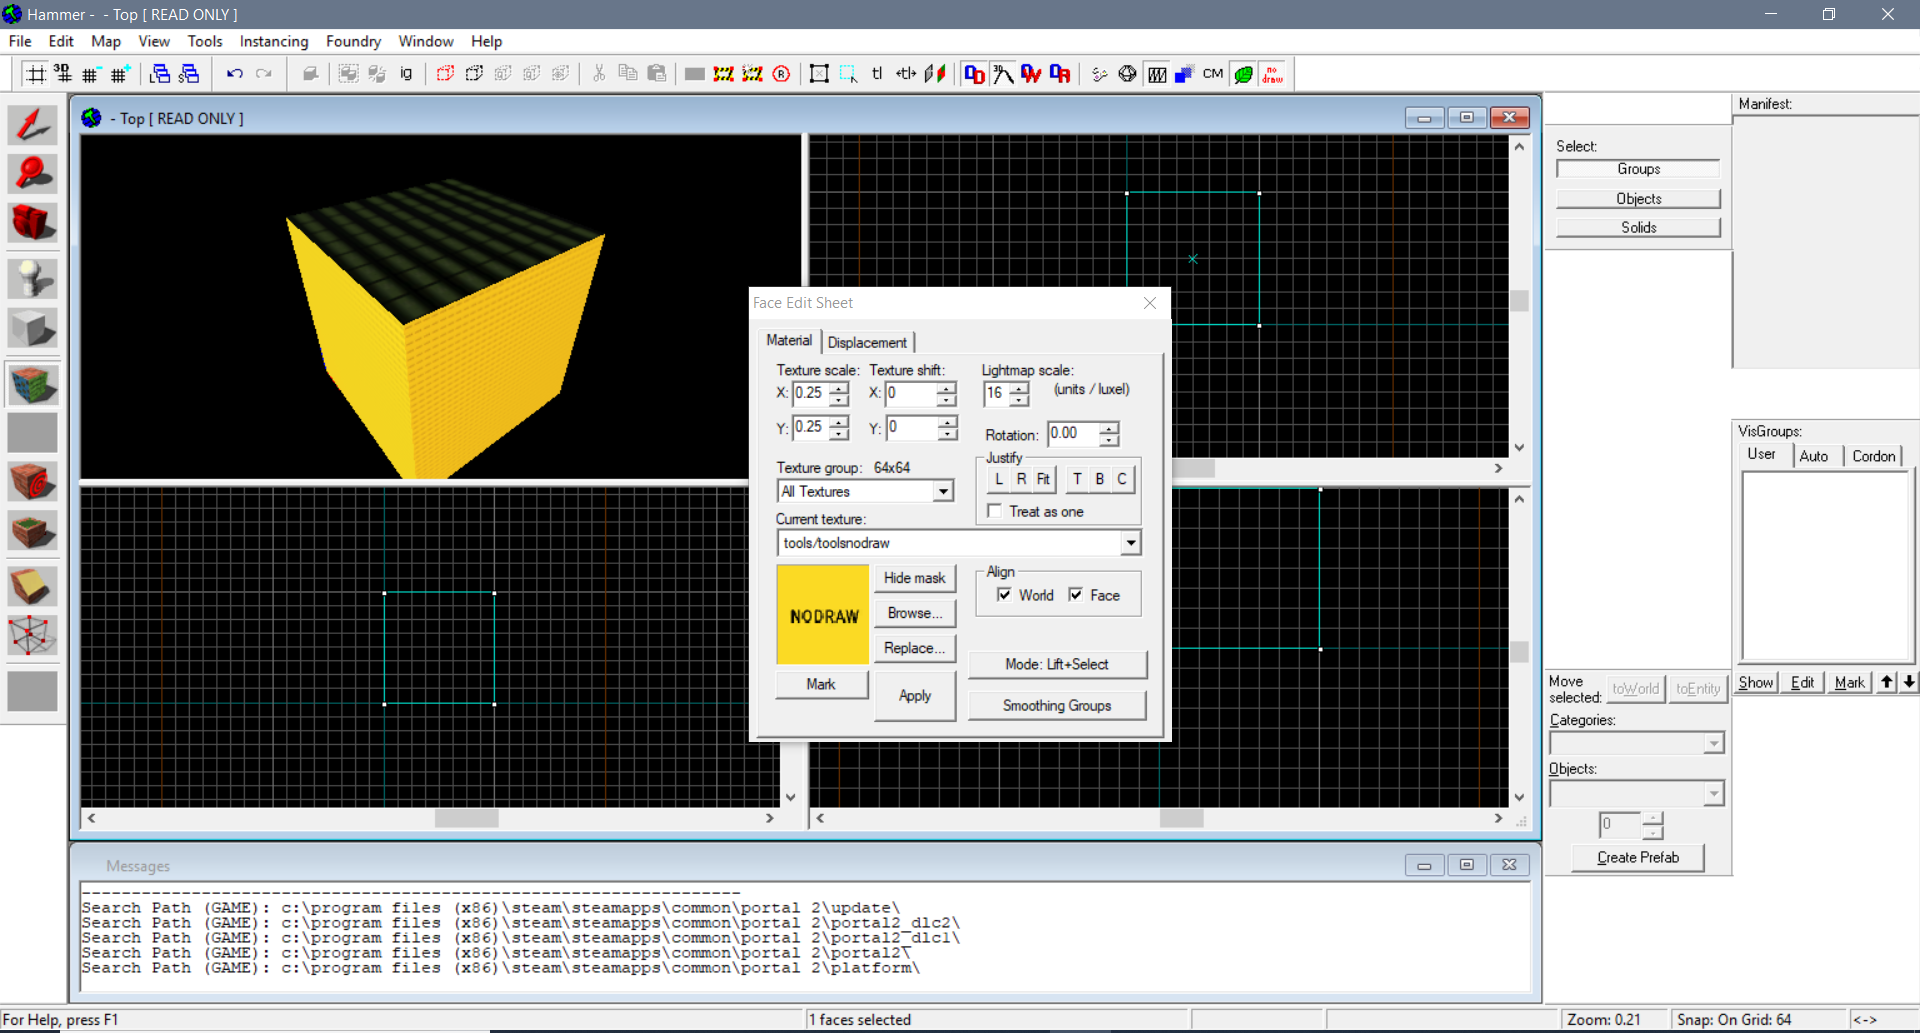
The first button with bricks will apply textures to faces, while the second button will apply the currently selected texture to an entire brush. When selecting a texture, avoid using vertex textures as they render in-game with odd lighting.
For most brushes that you create, you will want to start with the faces textured with nodraw. Nodraw surfaces are invisible yet solid to the player in-game. Because nodraw faces are not rendered, they are excellent for saving processing power by leaving hidden geometry with this texture. Use this for faces outside of the play area or completely obscured by other brushes or props.
Clipping Tool
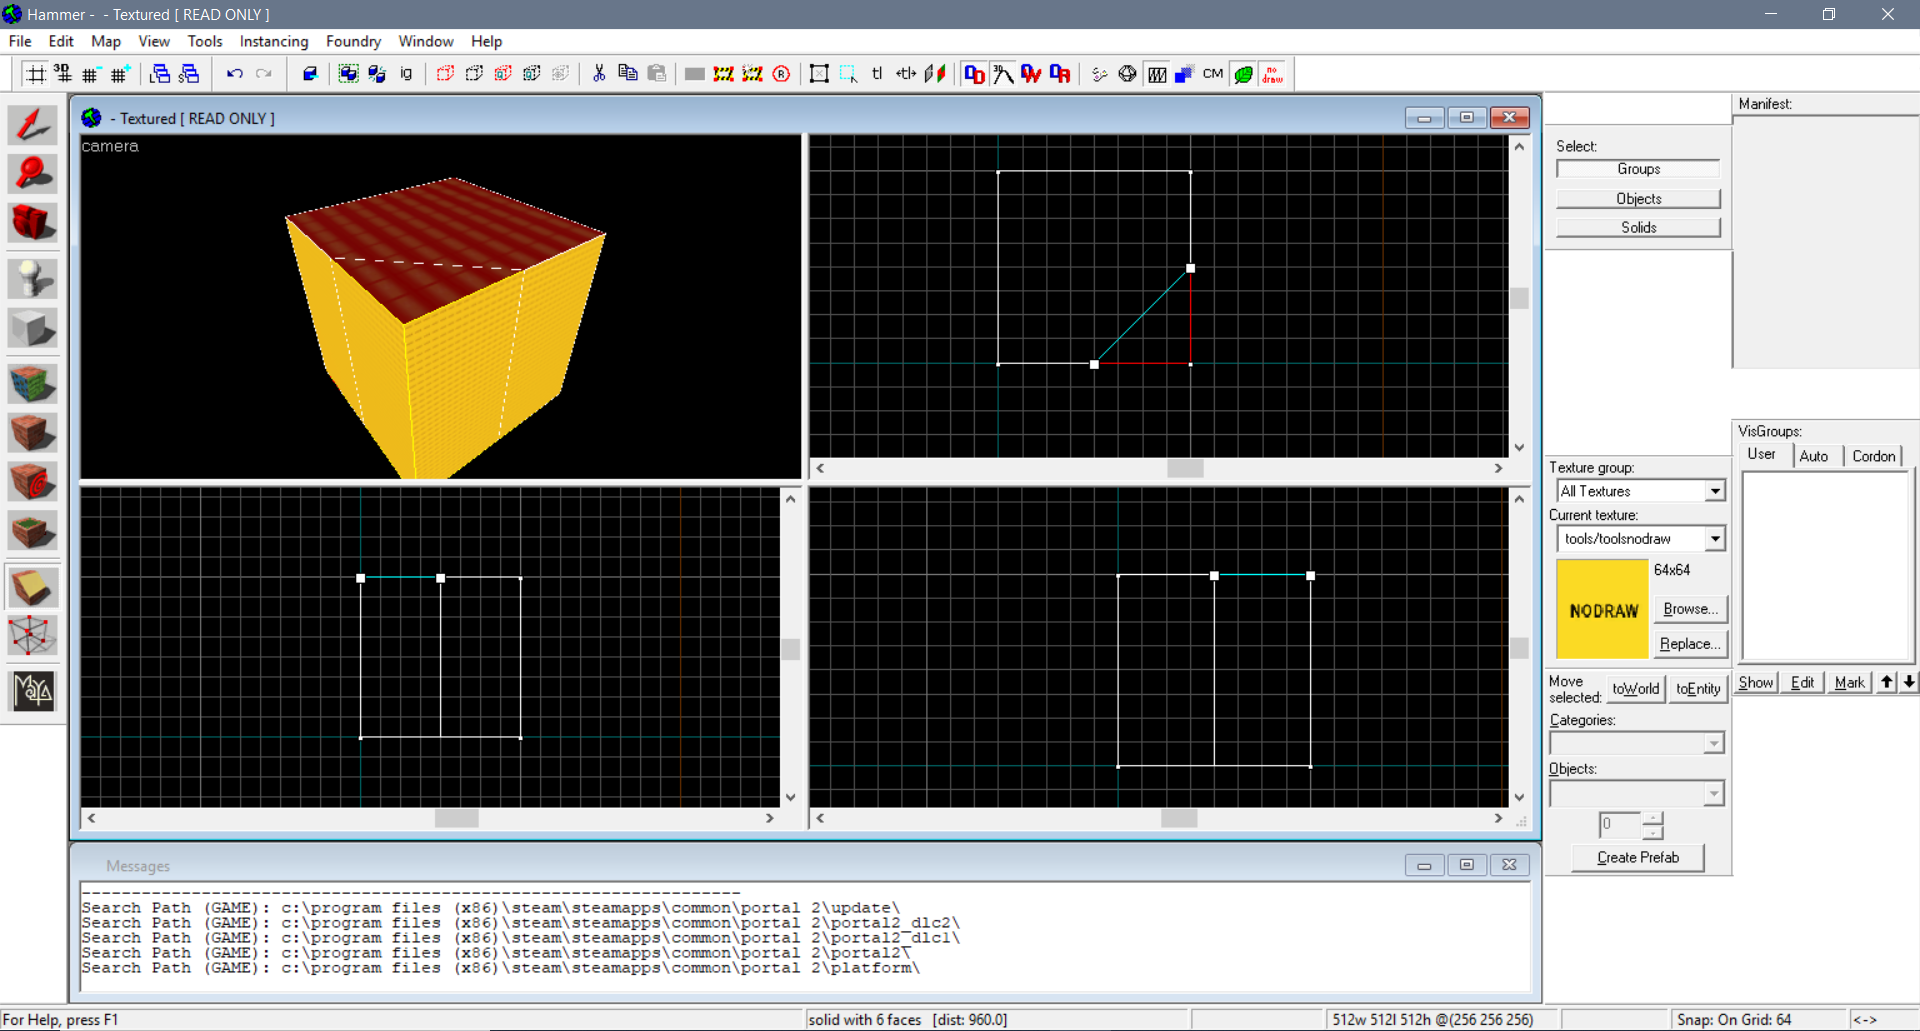
Brushes can also be cut by the clipping tool which has a button that looks like a ramp. select where you wish to cut using the 2D views.
Vertex Tool
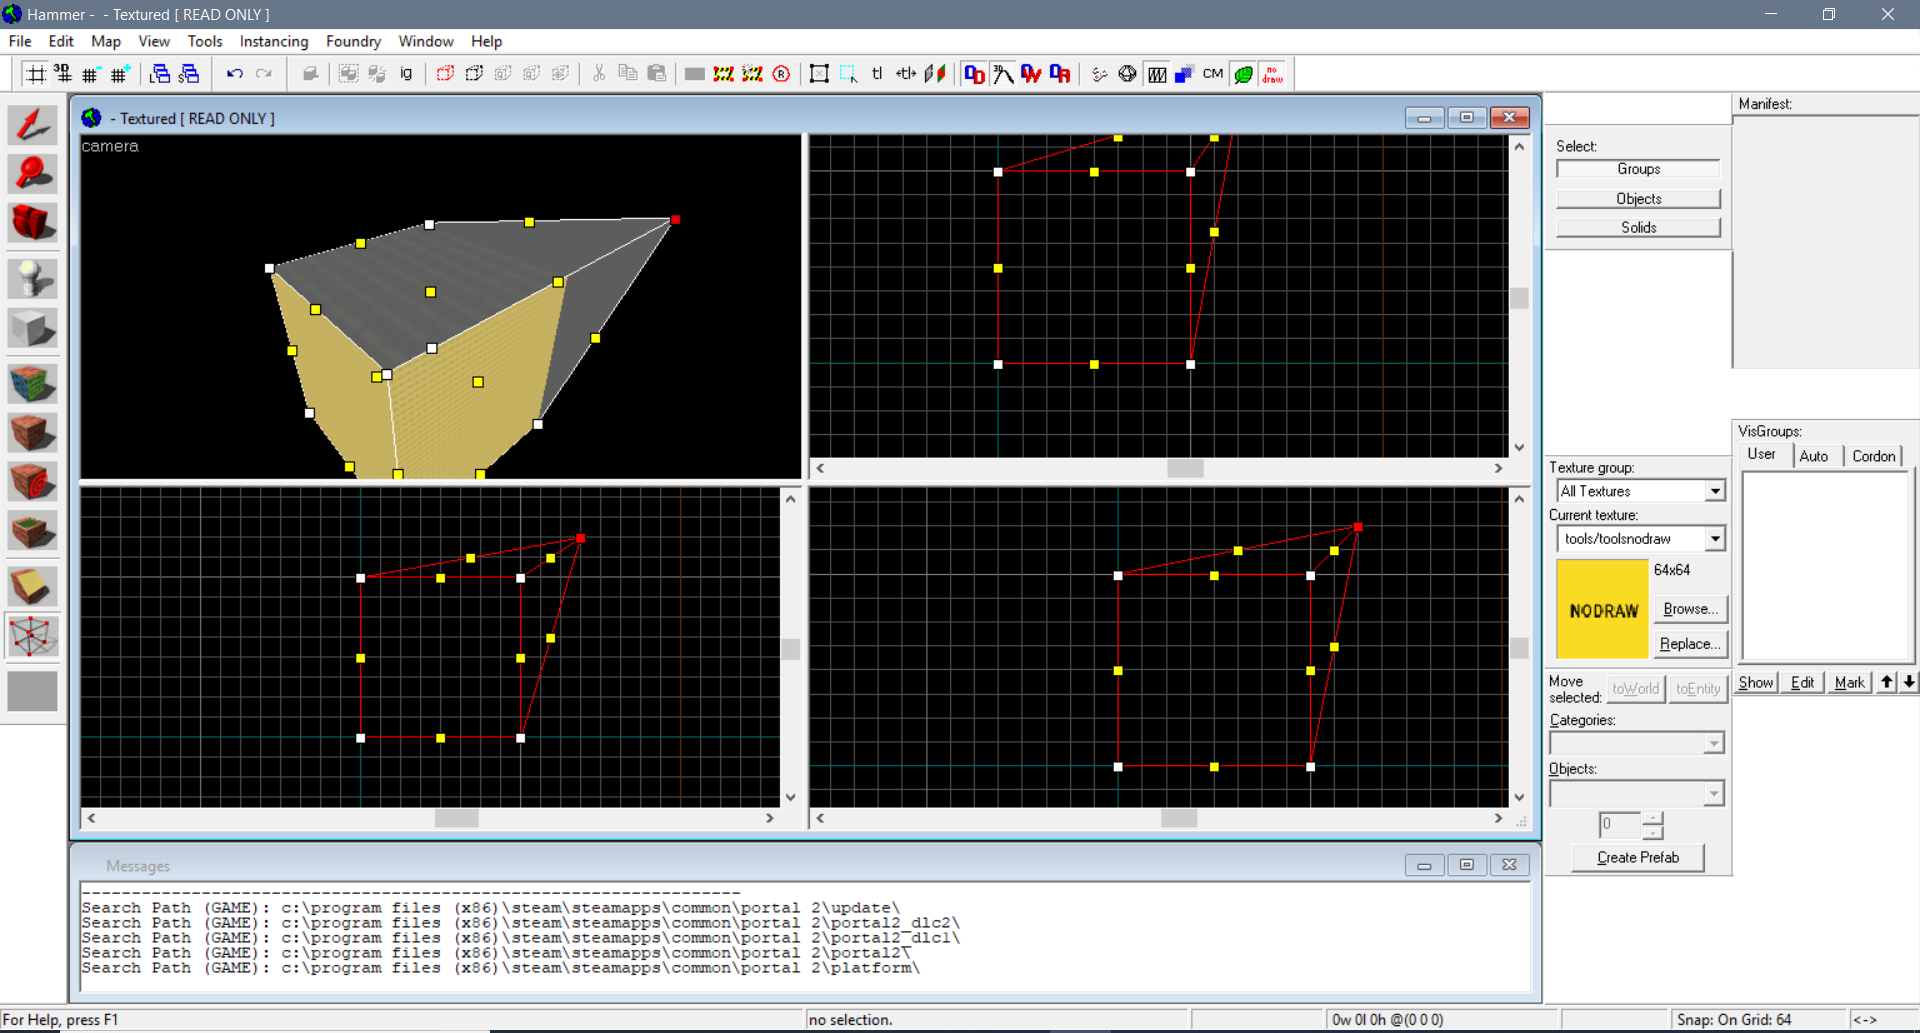
The button that looks like a box with orange corners is the vertex tool. Use it to reposition or delete your brushes vertexes.
Dispacements
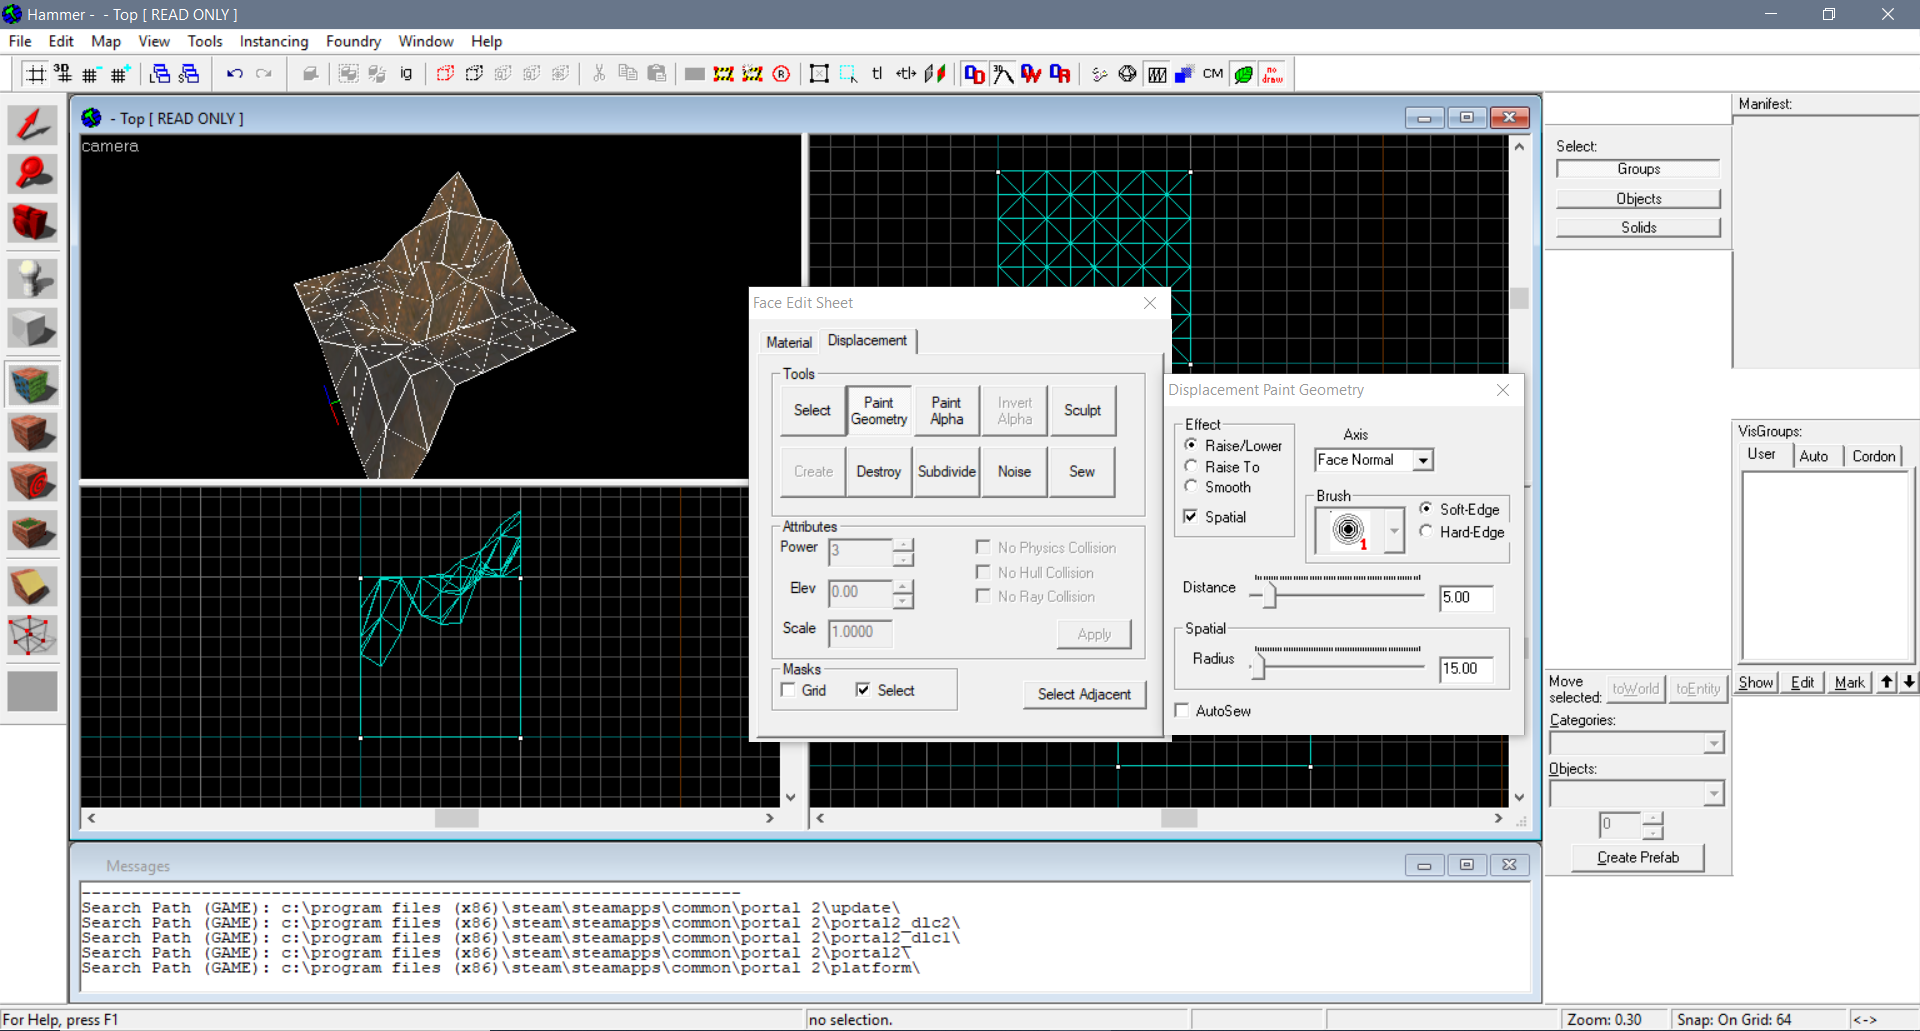
To create more natural surfaces, you can use the texture button to create displacements. Go to the displacement tab and create when you have your correct face selected. You can paint geometry to raise and lower terrain, or you can paint alpha to switch between 2 blend textures.
If you press Shift+T you can change what type of brush you have, be it func_detail (used for most brushes but cannot seal holes to the void), trigger (used to call and event when something enters it), or func_brush (used to give properties to a brush or refer to it in an event).
Frame work is 16 or 8 units thick, tiles are 2 units thick.
Basic Geometry Using Brushes
Every Source game map exists as one or more boxes floating in a void. The game play should probably not occur in the void as within there props don’t render and the player could fall forever. Another thing to understand about the void is that it is completely separate from the playable area in a map. If you try to compile your map and you have left a hole in your level box or you have put a prop in the void, the compilation will fail and an error message will be sent to you. To get acquainted with the void you can use the console command noclip to fly outside of any map. Now that you know about the void, you must learn how to manage it.
Actually making something
To start actually making something, set your active texture to NoDraw and use your brush tool in a 2D view to create a box, this will be your first wall/ceiling/floor. Create a total of 6 flattened rectangular prisms with the edges of each touching that of its neighbors. Make sure that the brushes do not actually phase through each other or you will have a sloppy foundation for your puzzle. These surfaces should be about 32, 16, or 8 units thick in most cases. Any smaller and they become difficult to line up with, and any larger and you might have trouble making more complex shapes out of your first room. The length and width of the blocks should in most cases be multiples of 128 units. This is important because most puzzles and textures come in increments of that size. The inside of your box should look like a proper prism, the outside should have more faces exposed to the void.
Entities
Enitities range anywhere from lights to turrets. The first entity you should probably add to your map is the info_player_start to tell the game where to spawn the player. Next you might want to add a weapon_portal gun by the player’s feet so that they have a portal gun at the start.
When a map has no lighting, it is set to mat_fullbright 1: everything is illuminated. When you add any lighting, it is set to 0 and by default everything will be dark unless lit by your light. Lights and light_spots are versatile and basic options for lighting. Every map can contain at most one active env_Projected_Texture to cast dynamic and detailed shadows.
Before you start spawning cubes as entities, you should know that there is an easier way. You can use func_instances to quickly add almost any puzzle element to your map quickly.
Ambient_generics are an easy way to add music to your map.
When adding props to a map, one must pay attention to the details of their model; some models are only prop_static, prop_dynamic, or prop_physics.
Props
Portal 2 has various gameplay elements that you either know from PETI, single player, or you don’t know at all. This section will explain doors, switches, lifts, and vents. Test chamber doors can be either prop_testchamber_doors or prop_dynamics. To open and close them, you can use trigger brushes or just standard puzzle elements like buttons. The events for prop_testchamber_doors are open and close. For a prop_dynamic an animation must be added and its last frame should be held.
Props can be colored like
Testing Maps
Hammer takes a long time to compile map, but there are ways to counter this. Either one could adjust the build settings, or one could optimise their maps.
Build Settings
Optimization
Optimizing maps will speed up map compile time and boost in-game performance. In order to begin the optimization process, one must first understand how the Source engine renders objects in maps. Areas are divided into vis-leaves: groups of props and brushes that the game renders. When the player is able to see a vis-leaf, the game renders everything in the leaf by default. Thus a good way to create vis-leaves is to set rooms to their own vis-leaves. To divide a vis-leaf, a brush marked with Skip on all sides but one that is marked with Hint. The Skip faces are ignored by the game while the Hint face acts as a border between vis-leaves. Hint faces should be placed on windows, doors, or at changes in geometry.
Other
Another way to optimize is to use Area-Portals. Area-Portals are brushes with the Area-Portal texture with their type set to Area-Portals. They are used to hide everything behind a doorway or window that the player cannot see while keeping rendering everything in a direct line of sight with the player.
Motion
Be it pistons, unstationary scaffolding, or vacume pipes, a large portion of moving test elements are at least in part thanks to the func_tank_train. The tanktrain is a brush entity that follows corresponding path_tracks.
Pistons
Crushers
Unstationary scaffolding
Vac Tubes
Custom Content
Portal 2 allows for custom textures, models, audio, and .nut files. Unfortunately, the game doesn’t allow for custom particle systems (though you can add a texture named after a nonexistant-texture refered to by a particle system. However, this would not allow one to customise particle behaviors) or new entities. To make custom content, I would recomend the following softwares: VTFedit, GCFscape, Crowbar, [VMFtoSMD], [Wallworm], [BlenderPlugin], Blender, 3DSmax, Gimp, Photoshop, [hxd], and Notepad++.
Textures must be VTF files. Use Photoshop or Gimp to make the image and export as a TGA. Next open the TGA in VTFedit and export as a VTF. [VMT]
Models can be made in 3DSmax, Blender, or something else. Animations can be given to models with bones, unless it is a vertex animation, where in that case bones are not required. Vertex animations are difficult to impliment and though I have not been able to properly make any of my own, others have.
Particles
The particle browser may appear blank for you. Some people use the Alien Swarm hammer editor to get around this. I have a different work-around. If you decompile the particles using GCFScape and put them in your Portal 2/portal2/particles folder then they will appear in game. I don’t know about packing custom particles into maps, but I have been able to import a custom Portal 1 particle into portal 2 at least locally (you use a launch command in portal1 for the particle editor tool, should work with all/most orange box games though). Alternatively, you can use an untextured particle effect of which there are plenty and create your own appropriately named texture for it.
Packing and publishing
To use custom assets, you need to pack those assets into the BSP map file. Many online videos suggest using PakRat. I however recommend the TeamSpen210 Hammer Tools at https://github.com/TeamSpen210/HammerAddons – [github.com] . It will automatically detect what assets are used in a map and pack only those on compile. It also comes with a number of other tools like a custom FGD for better menus, unique hammer icons for entities, custom entities for easy vac tube creation, 3d cables, and advance logic like flickering.
Maps can be published using the p2map_publish.exe program in /Portal 2/bin.
Hope you enjoy the Guide about Portal 2 – How to Get Portal 2 Authoring Tools + Hammer Puzzles, if you think we should add extra information or forget something, please let us know via comment below, and we will do our best to fix or update as soon as possible!
- All Portal 2 Posts List


Leave a Reply