Porting models has never been easier!
Porting models using outdated methods is still a viable option, but it doesn’t mean that you should stay in the past because of this! Porting models to PAYDAY 2 For Dummies allows you to quickly dive into the world of weapon and mask modding. Get this book now only for $29.99!
I. What do we need?
Simply porting the models is actually pretty easy. You just need the basic knowledge of the 3D editor of your choice, a model to work with, textures to go along with it and some patience.
When it comes to the software, all you would need is
- Diesel Model Tool – [modworkshop.net] by Kythyria Zapdos/Grey Haron. A small explanation for why this version in particular was chosen will be given below.
- Diesel Bundle Viewer – [modworkshop.net] by Luffy + regularly updated Hashlist – [github.com] . Used for getting stuff out of the game.
- Some 3D editing software. In this guide, I will use the Blender 2.92.
Why Model Tool by Kyth and not by Znix – [znix.xyz] or I am not a spy… – [modworkshop.net] ? I am not a spy’s version aka the original is simply outdated and there is a reason why a rework by Znix exists. Znix’s version is the last version to support FBX, which makes it desirable for working with character models and anything that involves using a skeleton in general. Unfortunately, I am too smooth-brained to work with it, so I can’t give you any more information on this. Finally, Kyth’s version is a fork of the Znix’s version that drops the FBX support in favor of the GLTF support (+ animation support added later by Cpone) that gives us the most advanced workflow for editing already existing models and creating new ones. Thus the recommendation.
With this out of the way, let’s get started.
II. Replacing an existing model
NOTE: While in this chapter I am replacing a weapon part, the process is basically identical for masks or melee weapons.
II-1. Poking around with DBV
Before we will start poking a giant but a harmless beast that is PAYDAY 2, let’s prepare the tool required for it.
- Download the file and extract it somewhere on your PC.
- Get the hashlist file from the link I’ve given in the beginning. You can DL the repository as a ZIP file, clone it to your PC, etc etc, we need just 1 file.
- Put this file into the Data folder of your extracted Diesel Bundle Viewer.
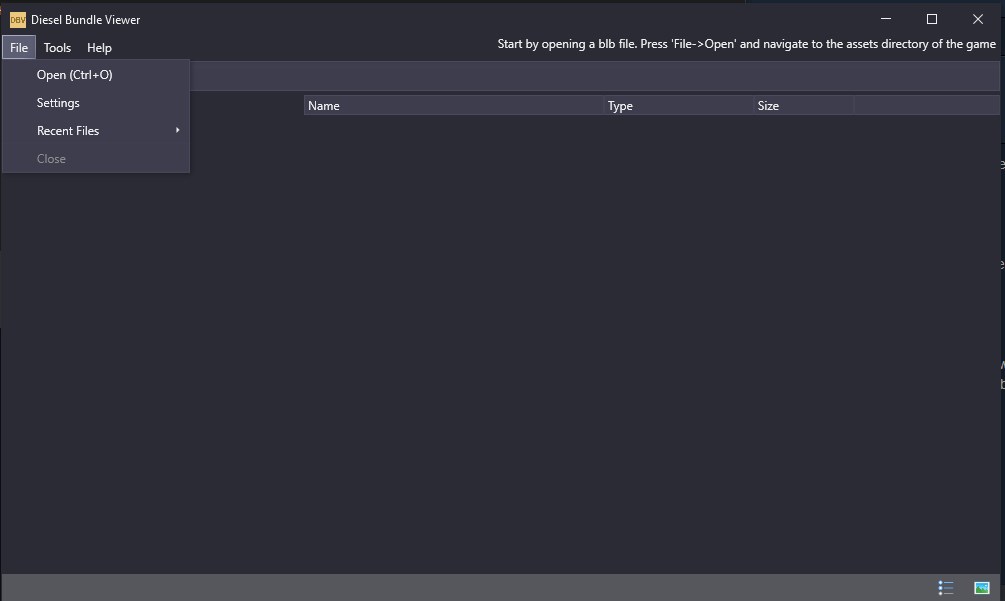
Done! Now, launch the tool. Press File->Open (Ctrl+O).
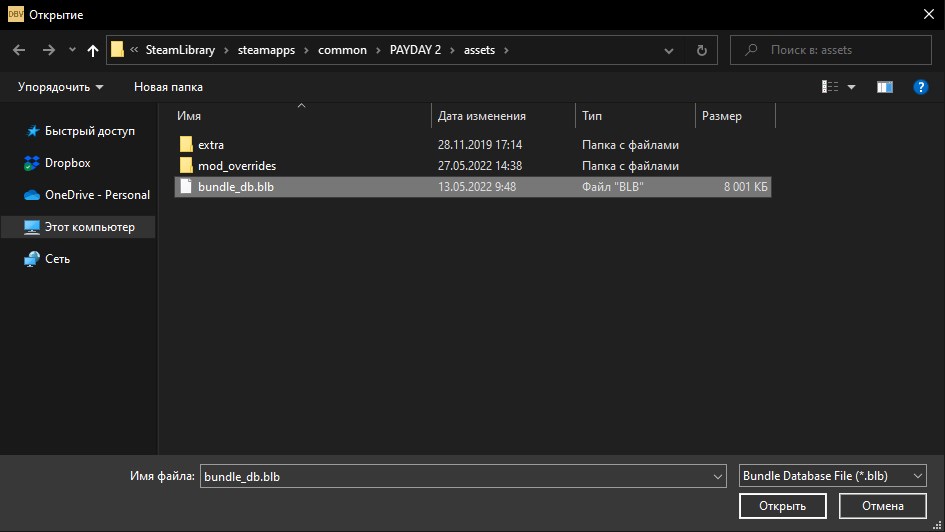
Go to the location where PAYDAY 2 files are stored on your machine, open the assets folder and select the bundle_db.blb file inside. After that, just wait.
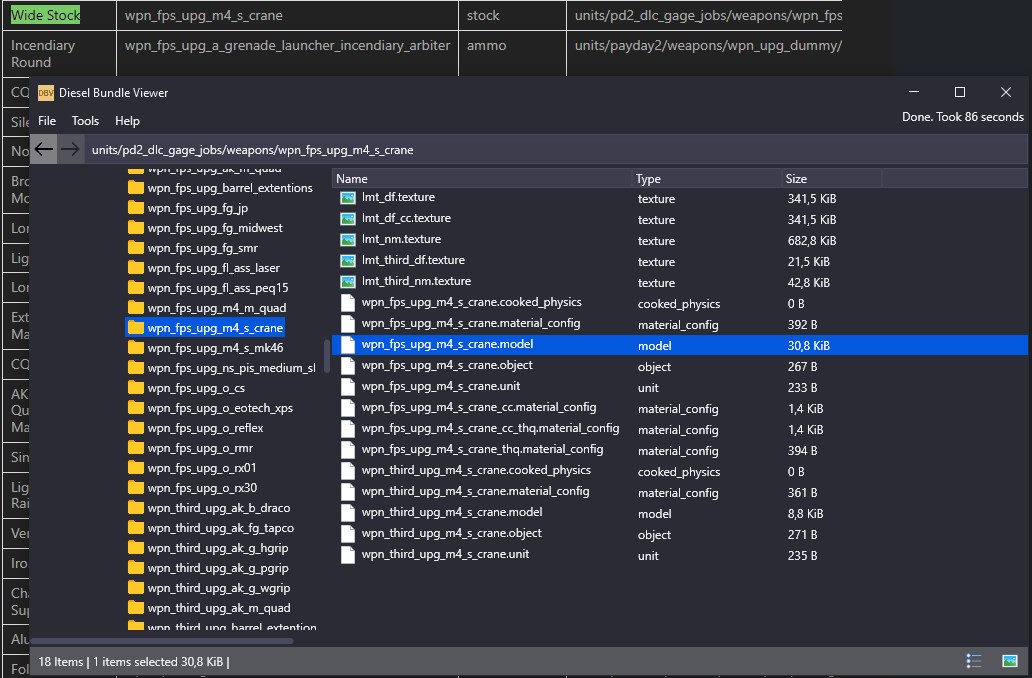
Now, decide on what you are planning to use as a base for your own model. You can find the full path to the thing you need on the following MWS wiki pages: Weapon Mods – [modworkshop.net] , Weapons – [modworkshop.net] , Masks – [modworkshop.net] . When it comes to weapons, in general, unnamed default parts tend to be located in the folder with the name like wpn_factory_id_pts where wpn_factory_id is, as you can guess it, a factory ID of the gun, with the obvious exceptions like AR-15 or AK guns where their parts can be scattered among multiple folders.
Let’s say we are going to replace a vanilla Wide Stock with an obviously superior model of the SOPMOD stock from Escape From Tarkov. Let’s open Weapon Mods page and Ctrl+F our way through it to find the path to it in the game files.
For now, extract a set of textures (I am not going to touch the 3rd person model) and a .model file. For this to happen, you just have to drag-n-drop what you need from the DBV window.
II-2. Exporting the model
Once again, after downloading the Diesel Model Tool file, extract it somewhere and replace the hashlist with the one you downloaded.
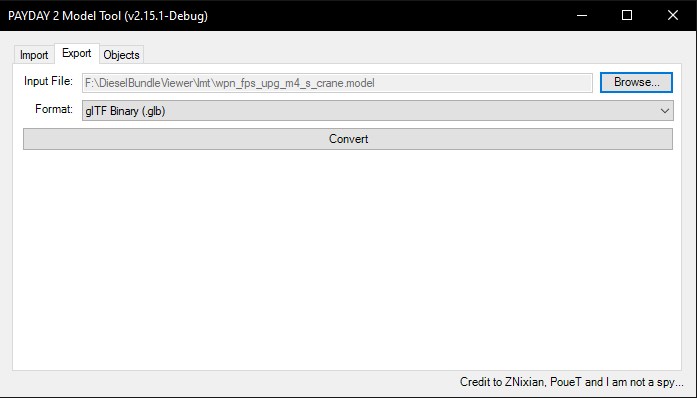
Open the program, switch to the Export tab, select the model you just exported. In the Format list, choose glTF Binary (.glb).
Press Convert. Now you can find a .glb file in the same folder with vanilla model.
II-3. It’s Blender time!
From this point on, I am going to describe the process for Blender users.
Starting from Blender 2.80+, Blender got the GLTF support “out of the box”, meaning that you can start working on your mod right away. For Blender 2.79+, you need to install this add-on – [github.com] before we can start.
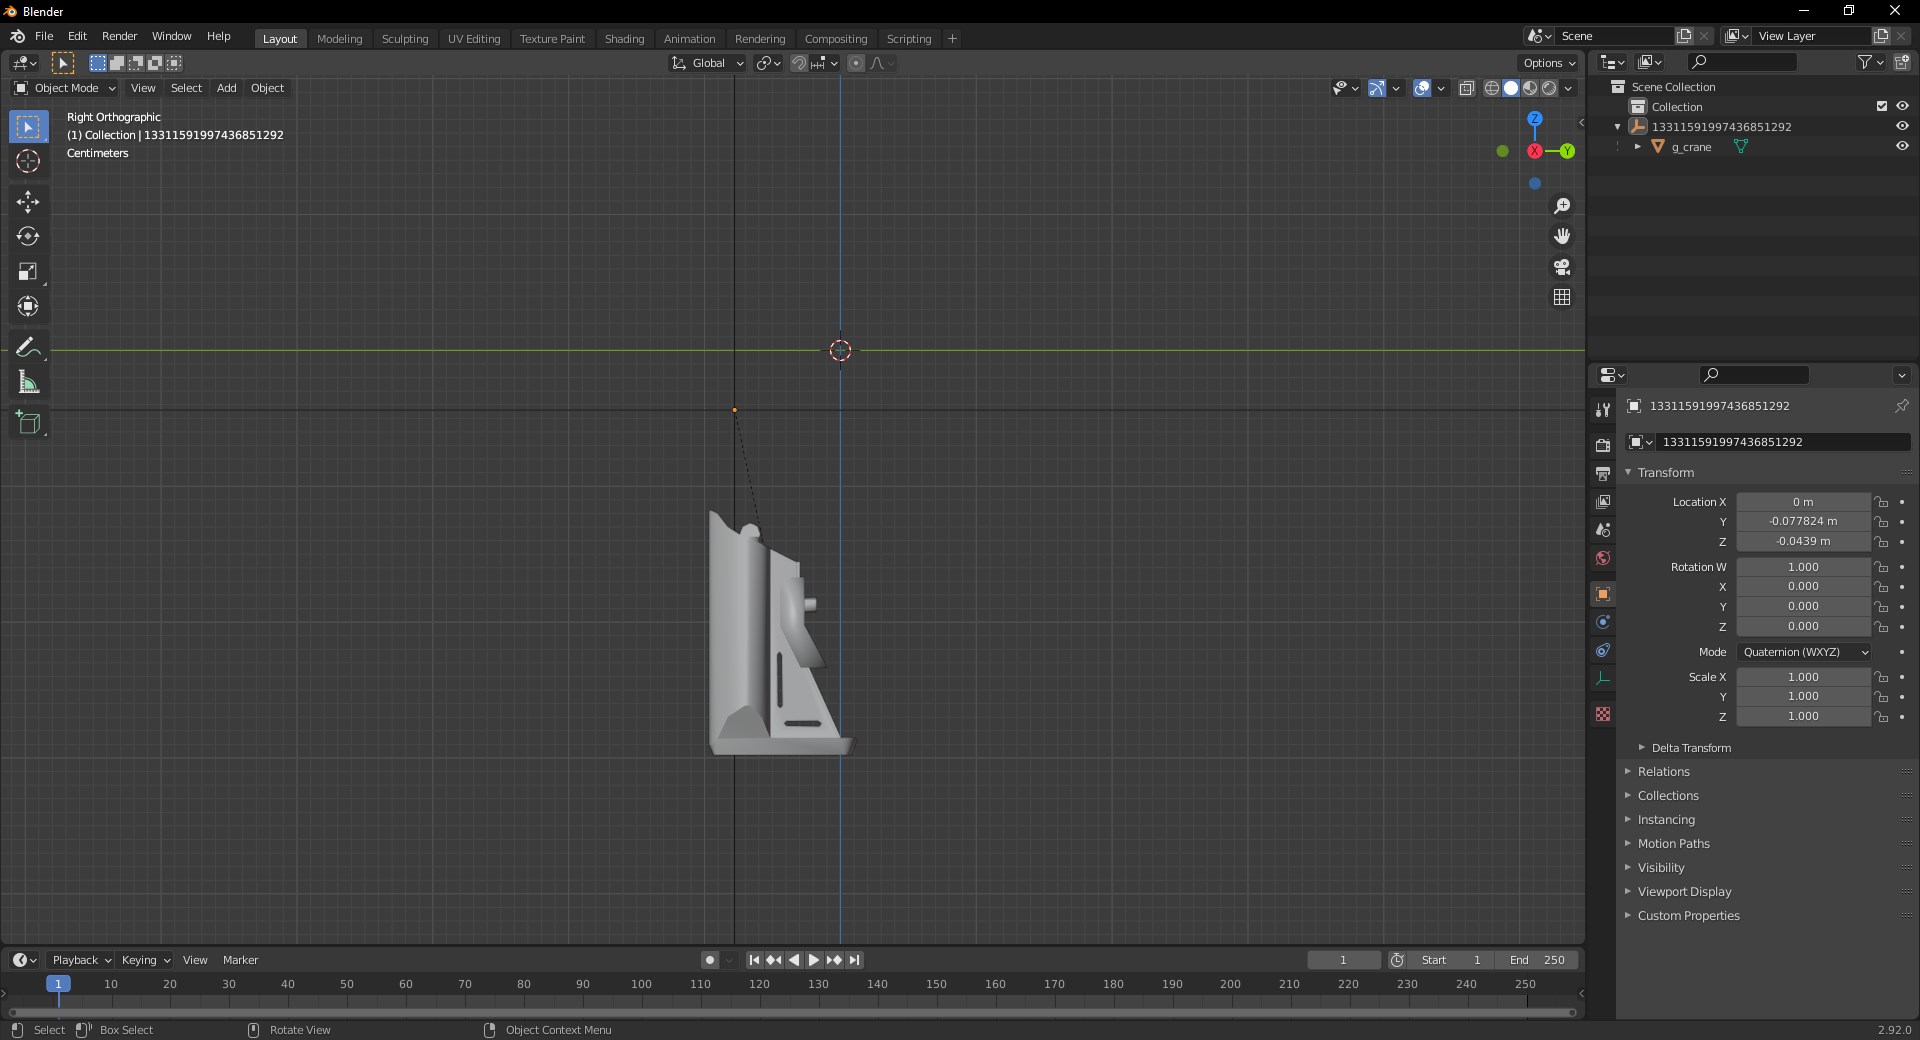
Start your Blender, import the newly created .glb.
If you are familiar with importing OBJs of PAYDAY models, there are 2 concepts that make GLTF so advanced compared to the old ways. First of all, the relative position of the model and its related rootpoint is preserved, meaning that you don’t have to guess where to place your own model anymore, but rather just, I don’t know, you can just place it where you want it to be located. Let’s do just that.The concept of rootpoints will be looked upon in further chapters.
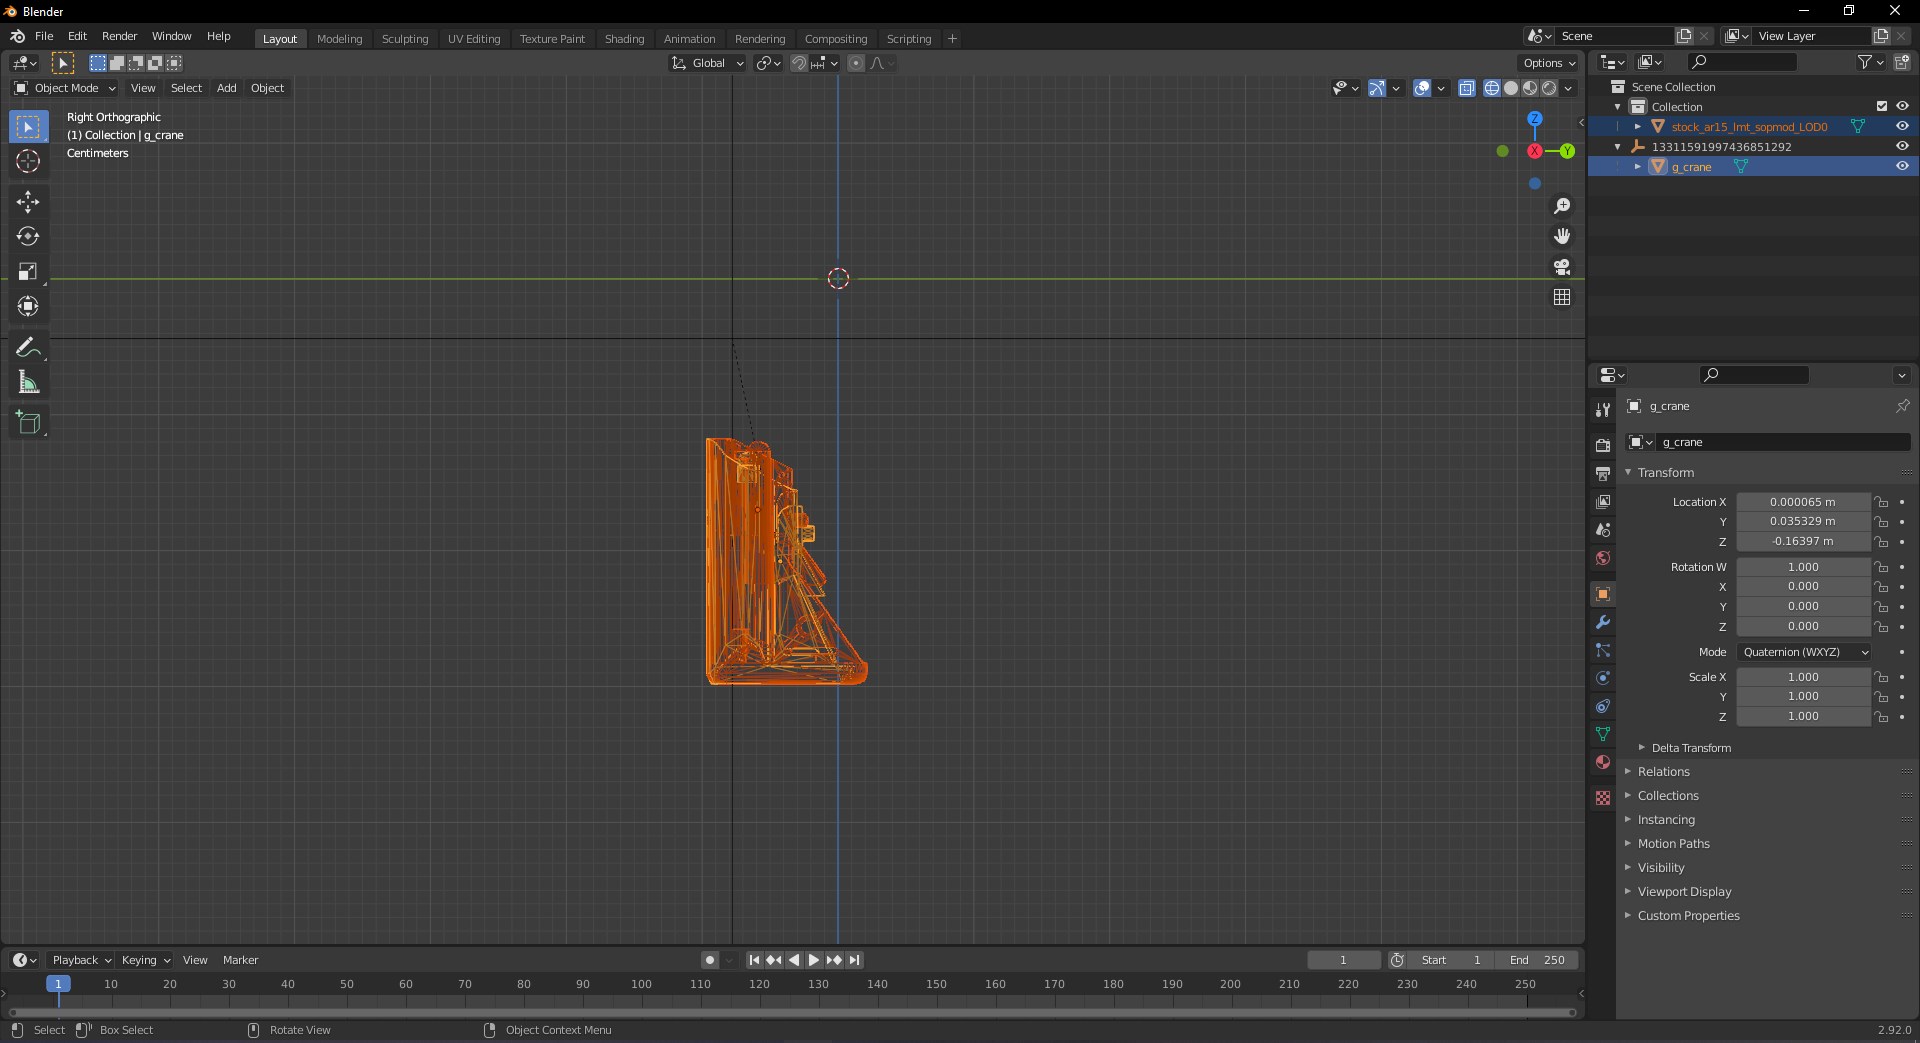
Roughly align your new model with the model you are replacing.
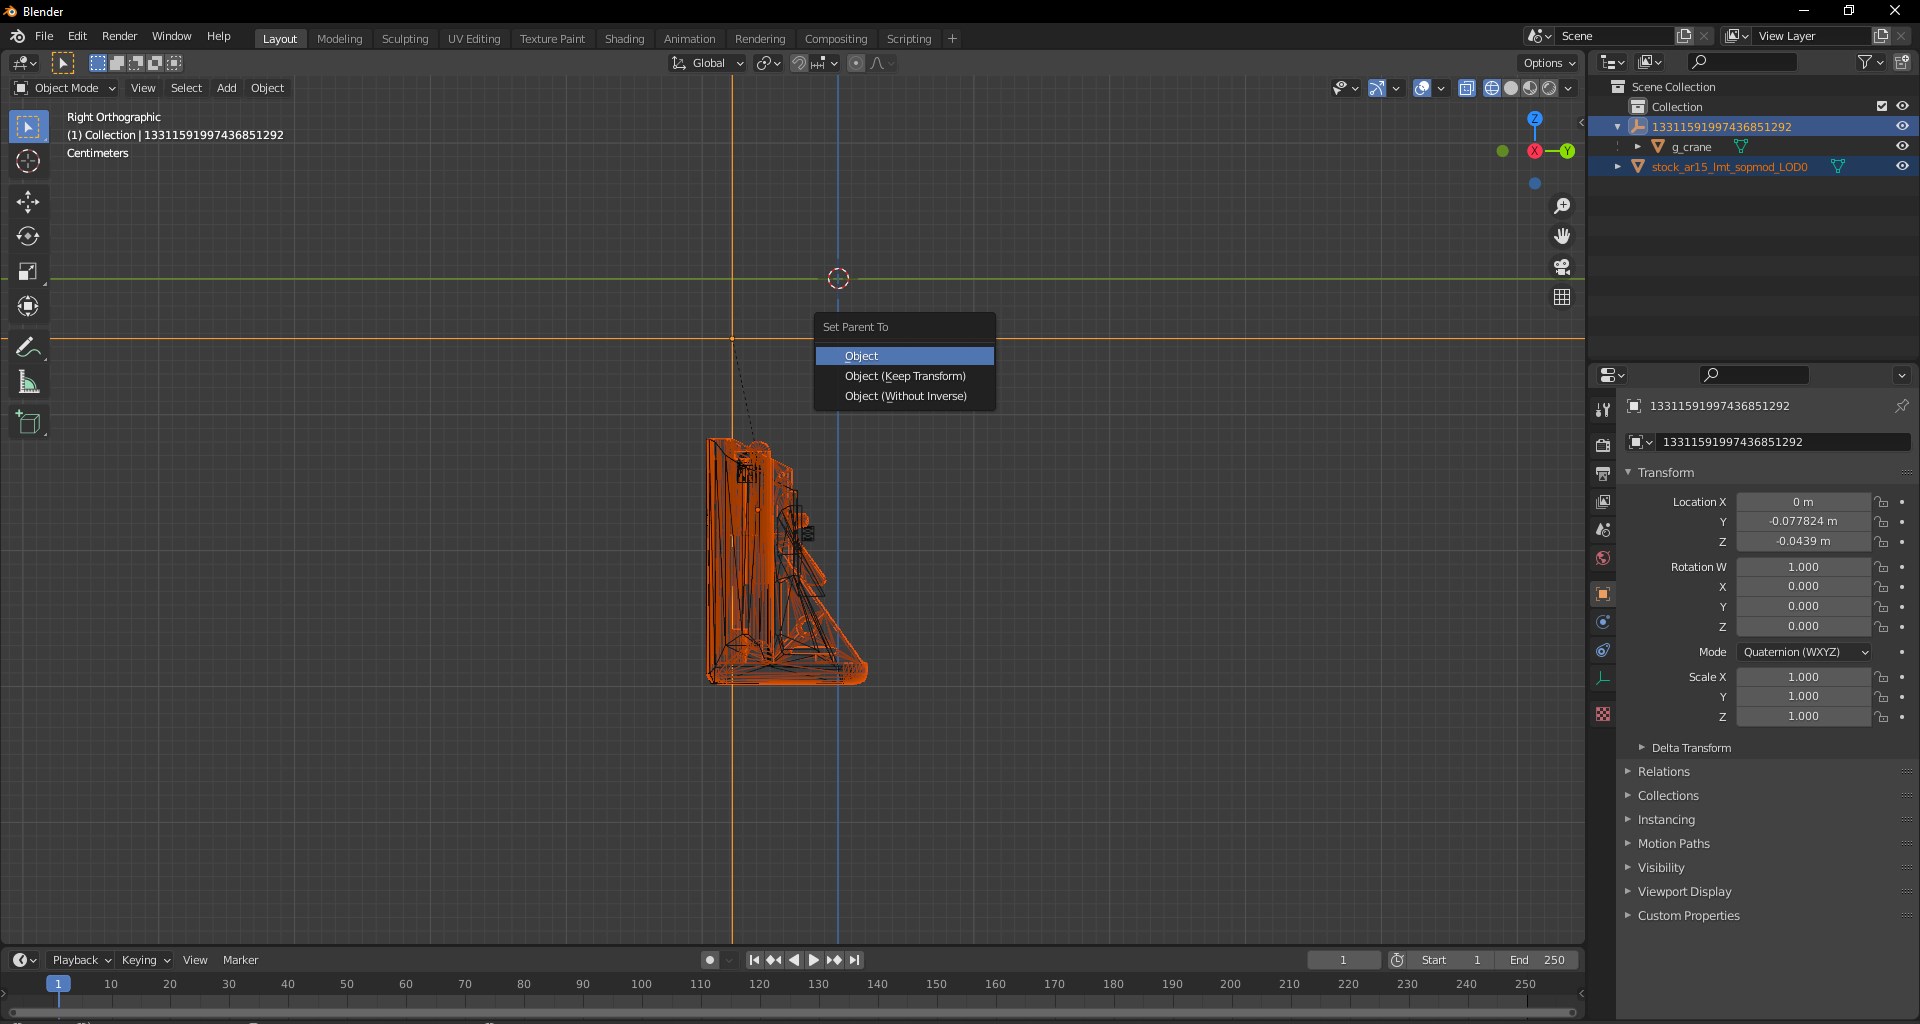
Now, select your model and parent it to the empty with numbers instead of a proper name. In order to do this, select your model first, empty second, Ctrl+P to Object. In order for this to end successfully, both of the objects need to stay in the same collection.
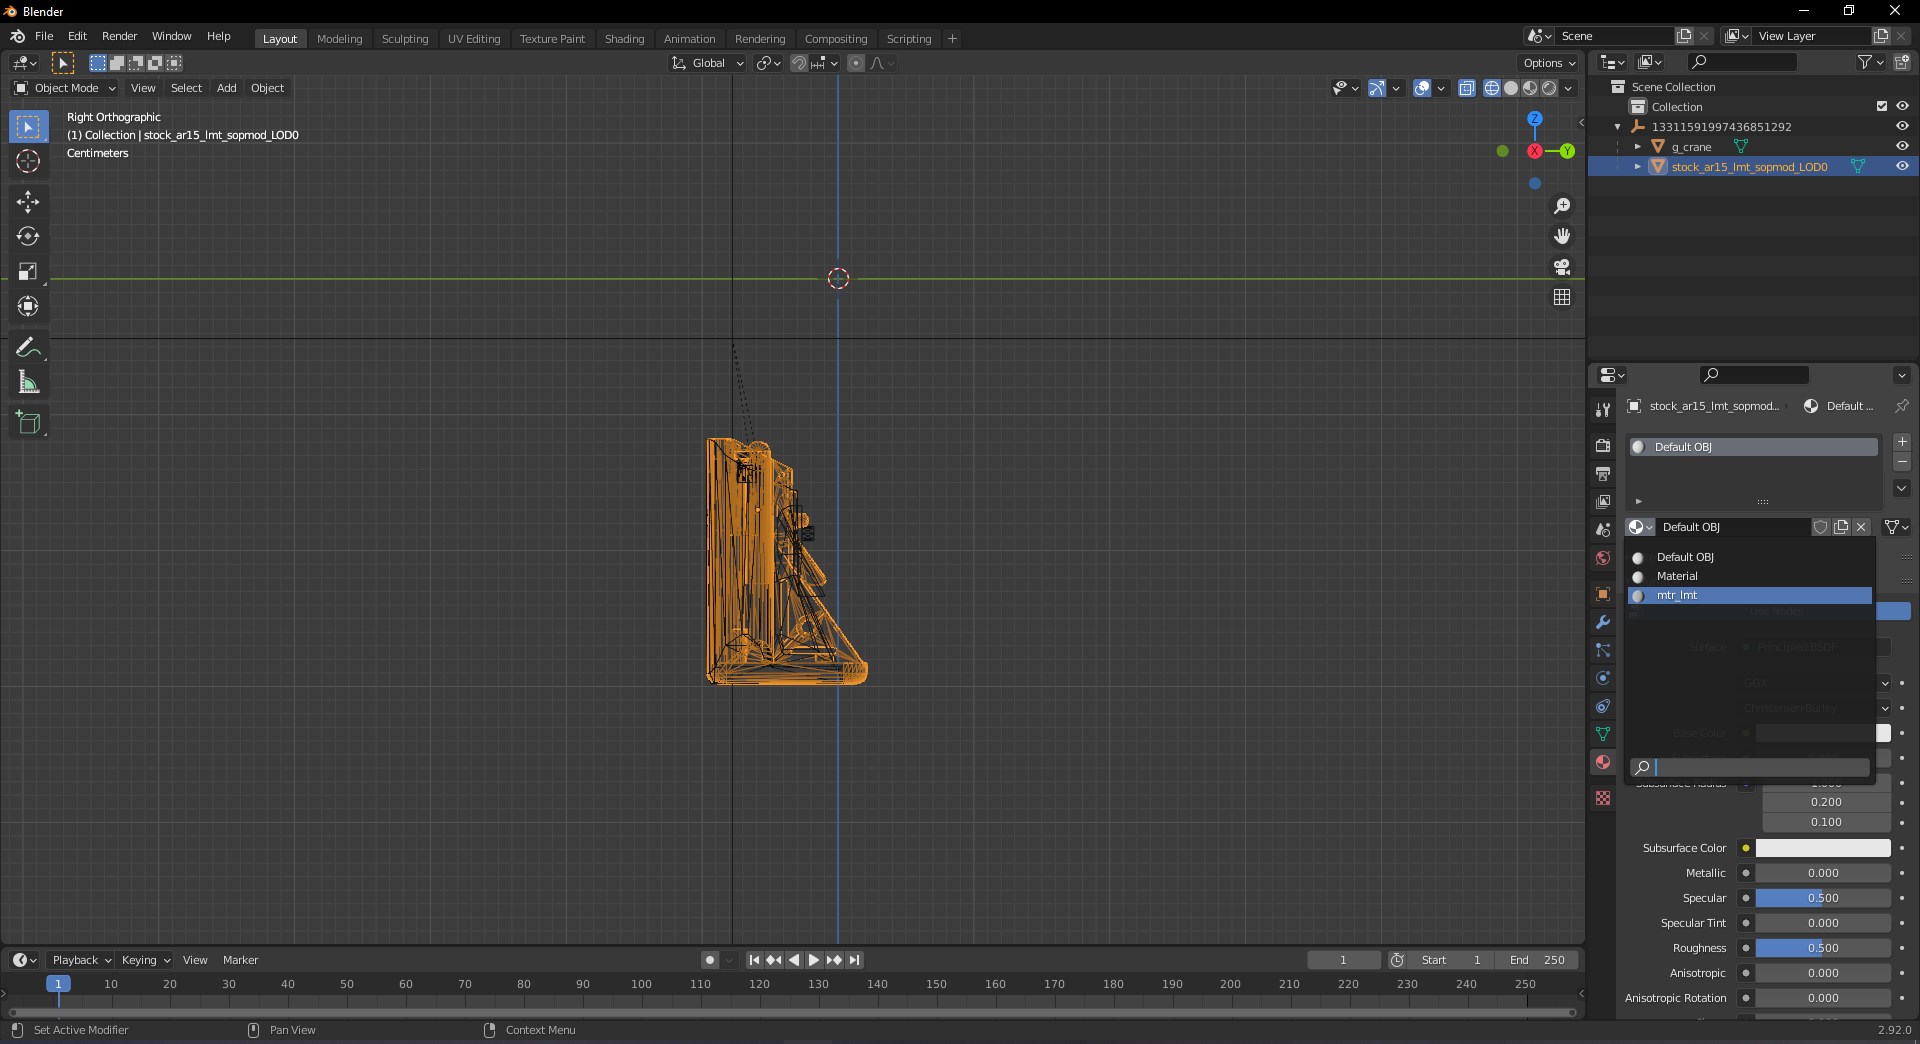
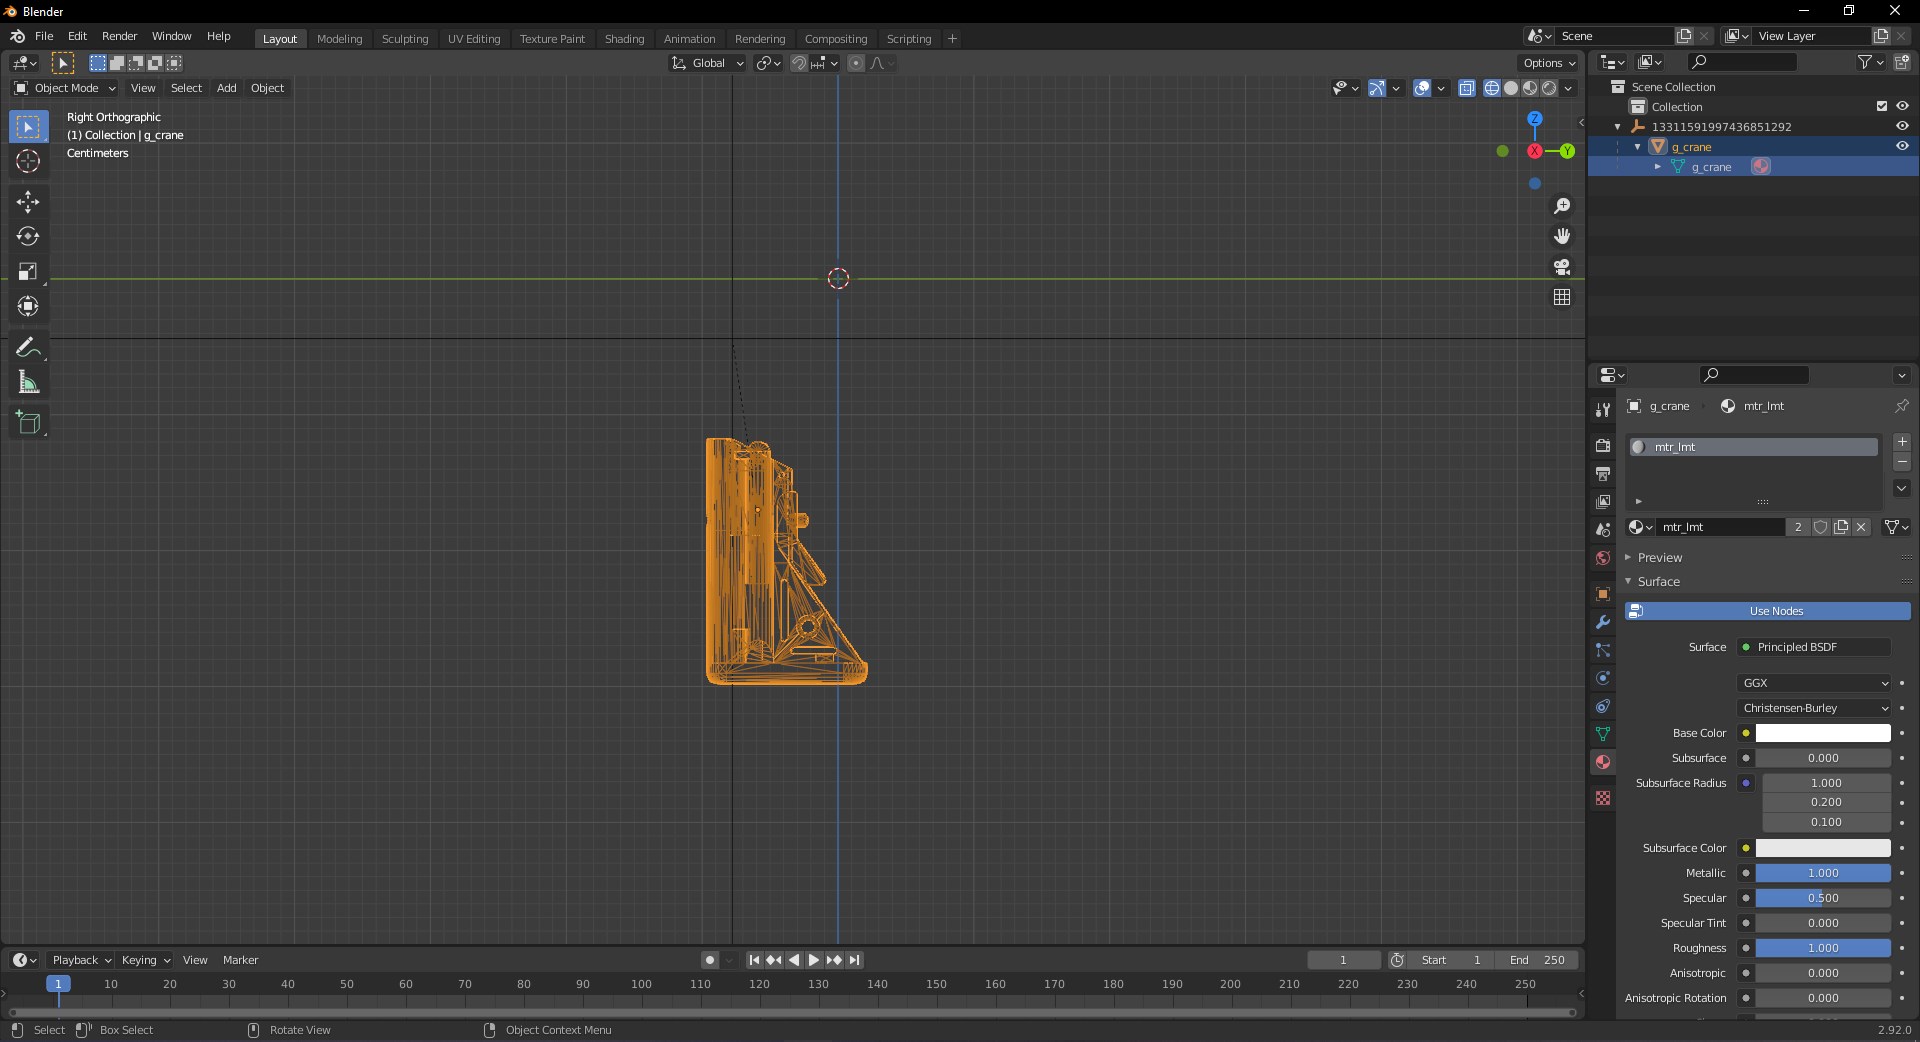
Change the material on your model to the one used by the vanilla model. In my case, I have to set it to mtr_lmt.
Next, copy the name of the existing vanilla model and rename your model to the name you just copied.
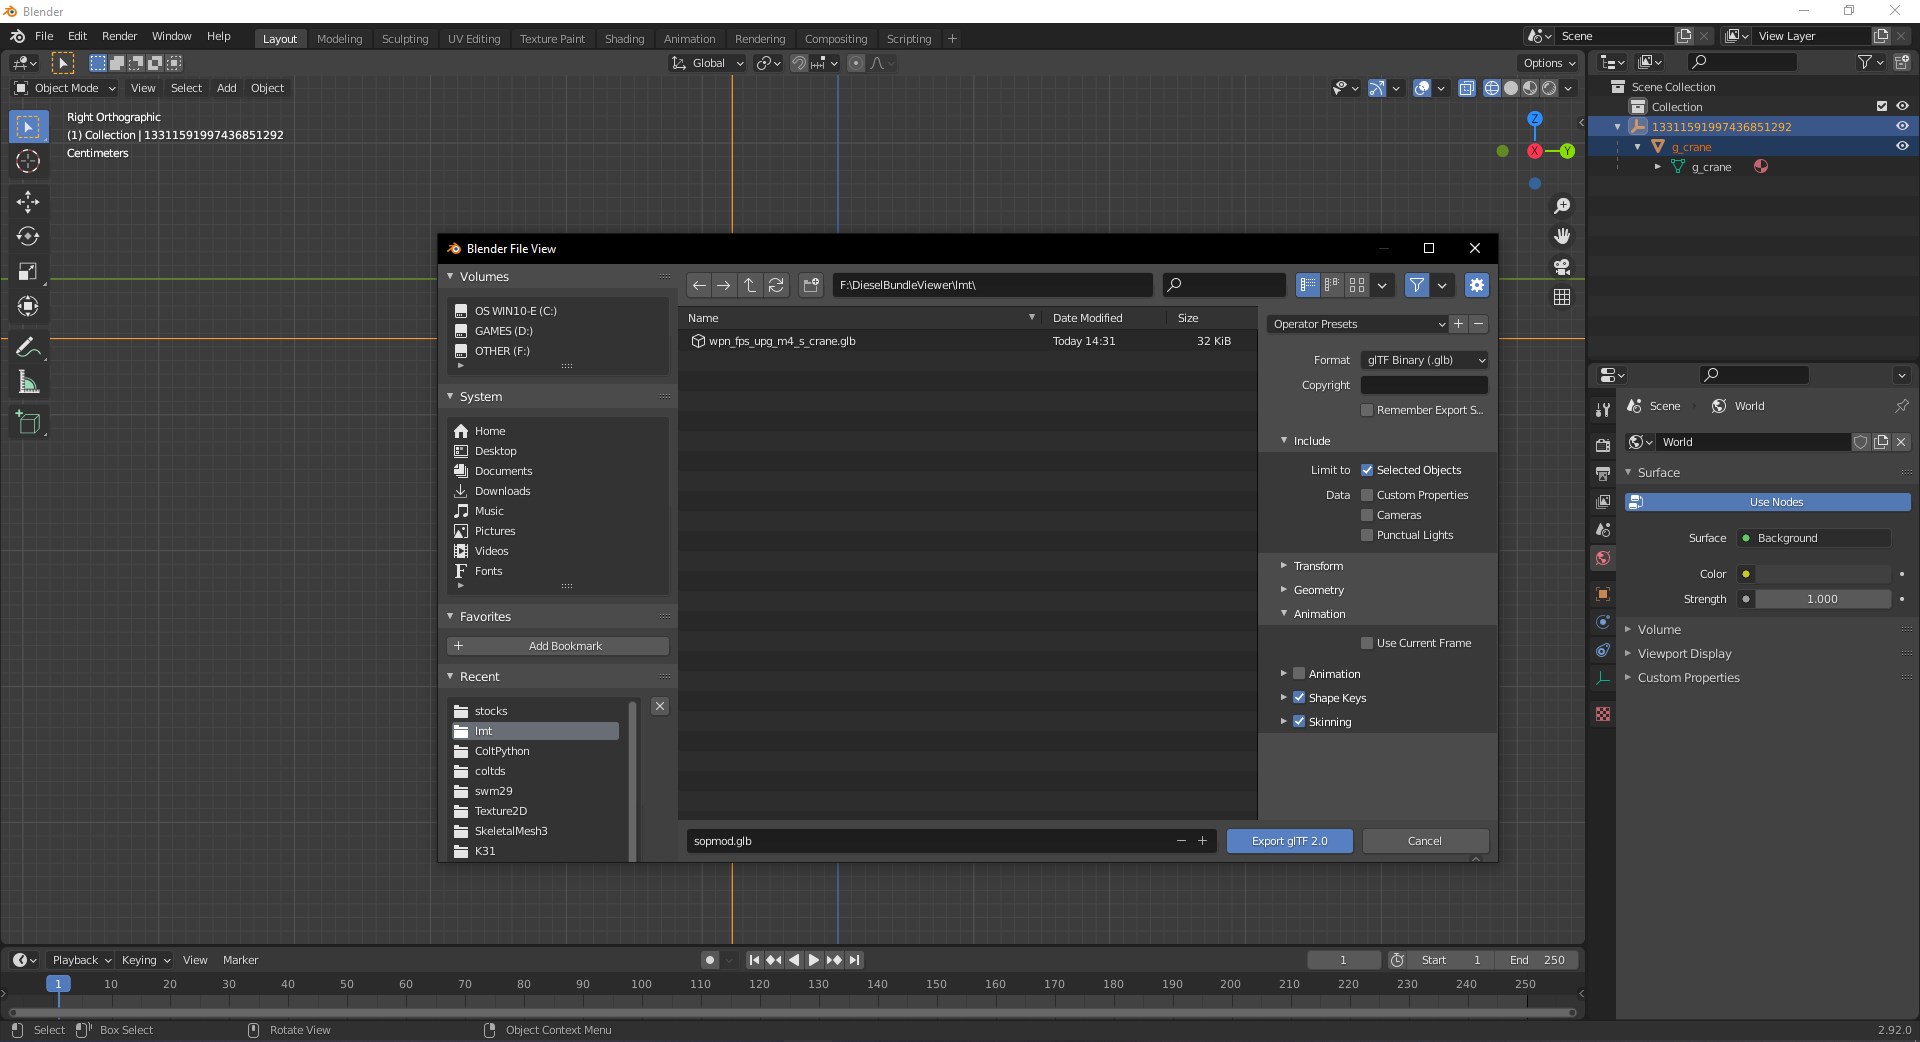
You are pretty much done. Select both the parent Empty object and the child model and export them with the following settings:
- Include: Limit to Selected Objects
- Animation: Untick the animation box.
NOTE: You might be wondering, “Mason, the numbers, what do they mean?”. Well, you can open the .object file that can be found in the same folder with the .model in DBV (it is just a renamed .xml, so DBV will automatically open it in the text editor that you set to open .xml files by default. In my case, it’s Notepad++). The name of the “main” (the topmost Empty object in Blender) can be found right next to the orientation_object attribute. In case of the Wide Stock, it’s rp_wpn_fps_upg_m4_s_crane. The numbers just mean that the name was hashed but wasn’t given a translation in hashlist. You can replace the numbers with this name if you want to, the model tool will understand it correctly even in this less understandable form anyway.
II-4. Importing the model.
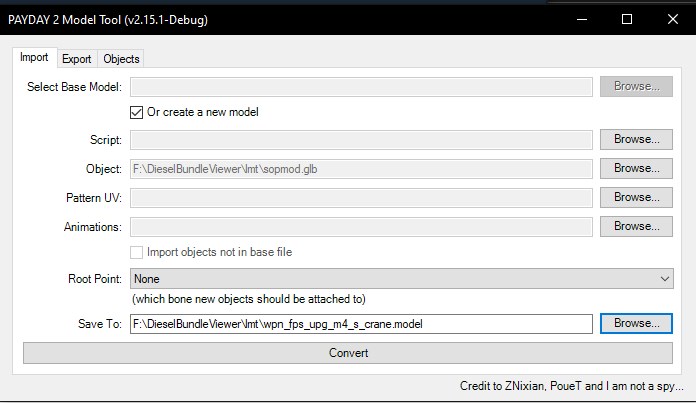
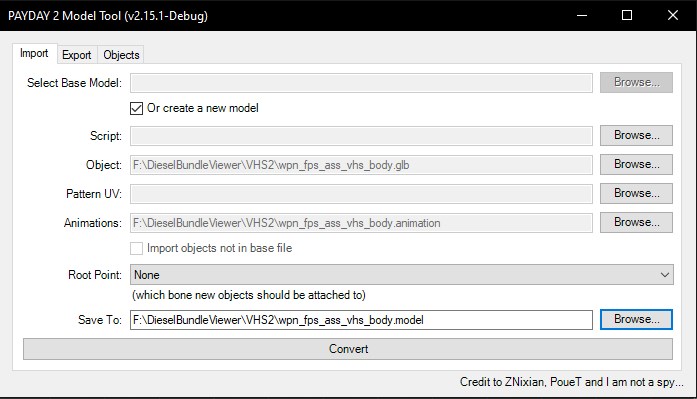
Back to Diesel Model Tool. Switch to Import tab. Tick the Or create a new model checkbox. It is a necessary step if you are porting models in GLTF/GLB format. For Object, select the newly created .glb file. For Save To, select the folder where you wish to save the replacement model and give it the same name as the model you are replacing (in this case, it’s wpn_fps_upg_m4_s_crane.model).
Click Convert.
II-5. Getting your model to show up in the game.
NOTE: The next few chapters are basically identical to the material covered by Gunsmith Noob or Babyforce. Nothing has really changed about setting up replacers.
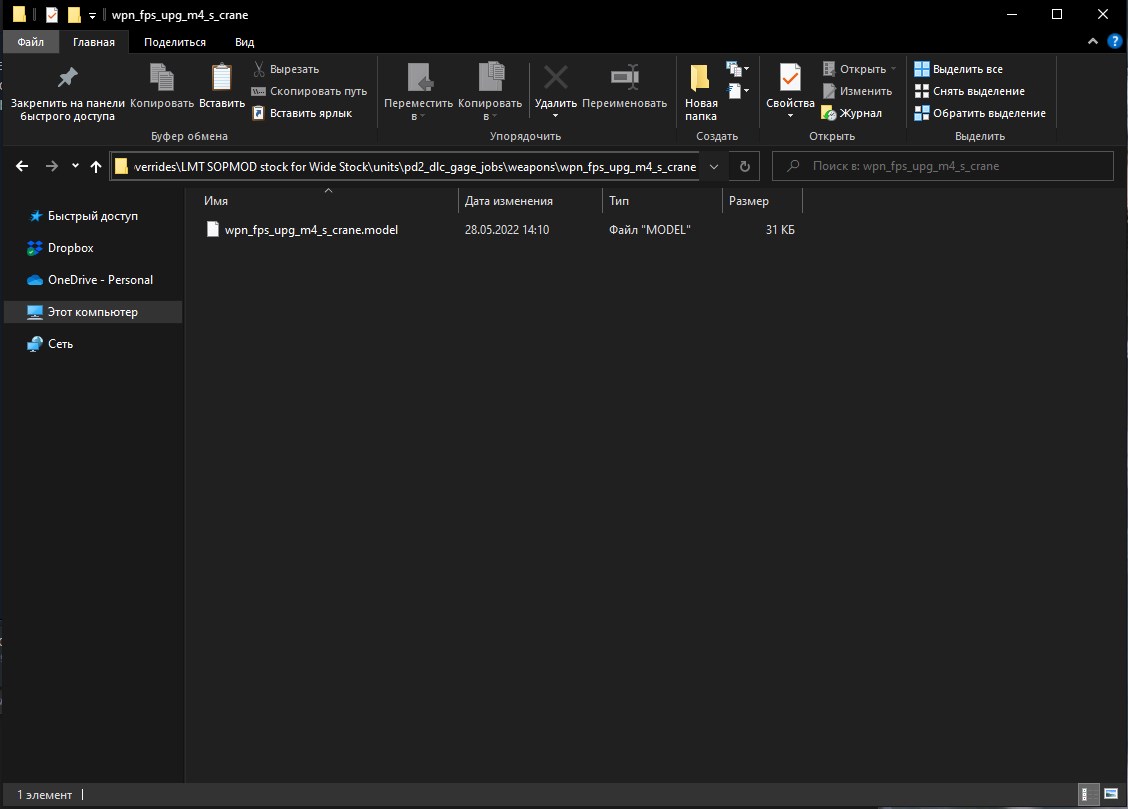
In the game folder, inside the assets/mod_overrides folder, create a new folder and name it however you like. What we are going to recreate is a path that you have already seen on the wiki page or can still see in the DieselBundleViewer. So, in my case, I need to create a folder units inside my mod folder, pd2_dlc_gage_jobs inside units and so on.
Inside the last folder, we are going to drop our newly created .model file.
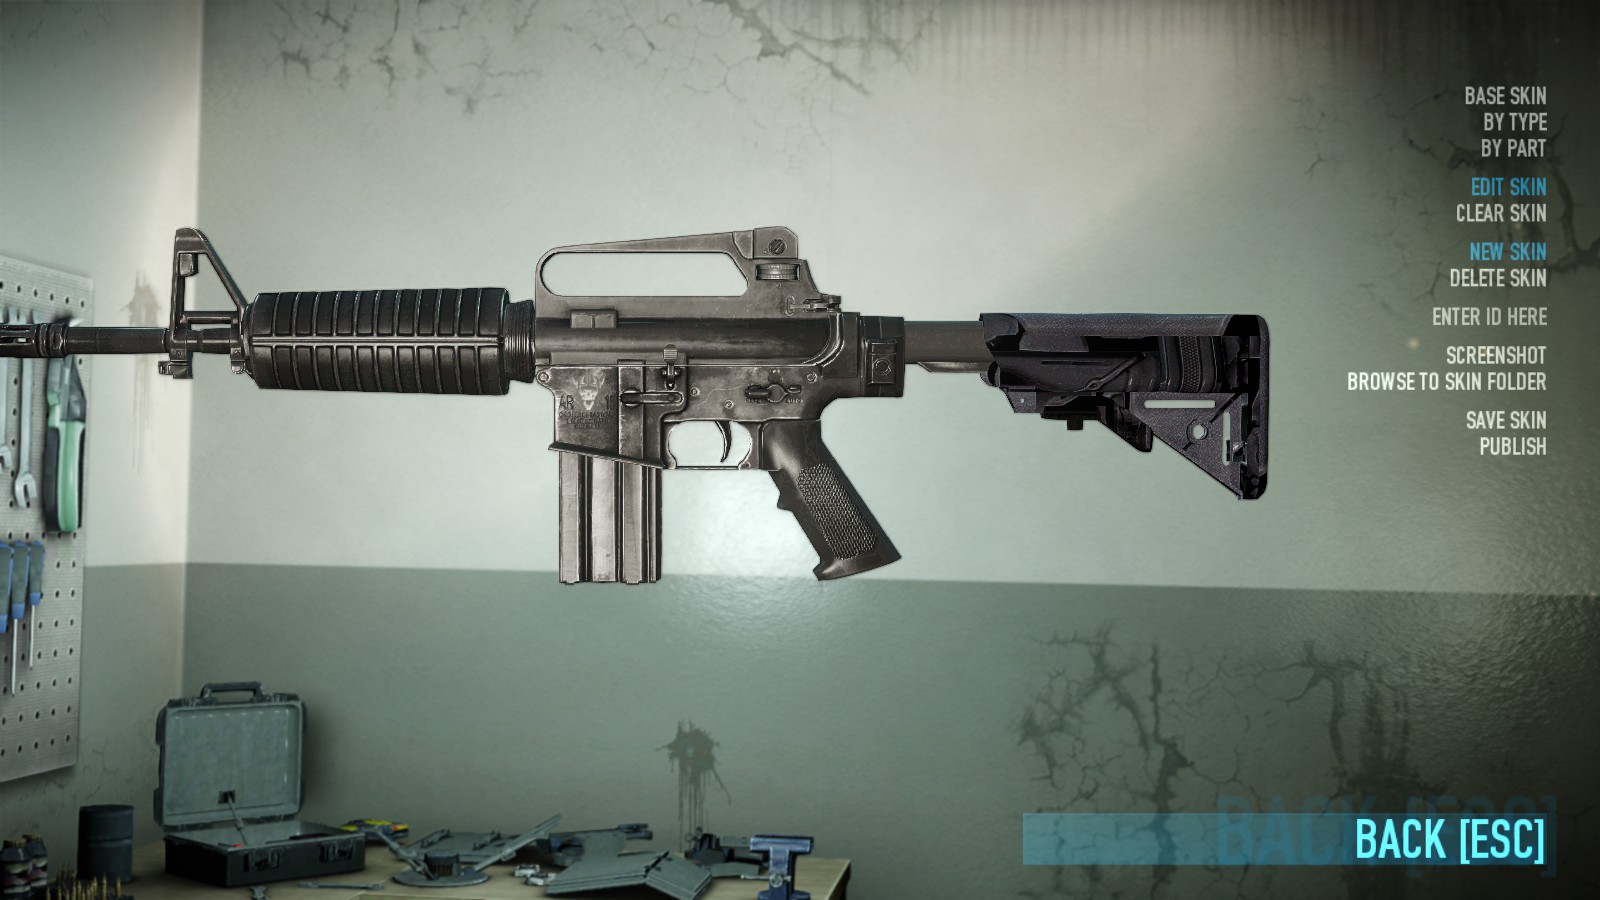
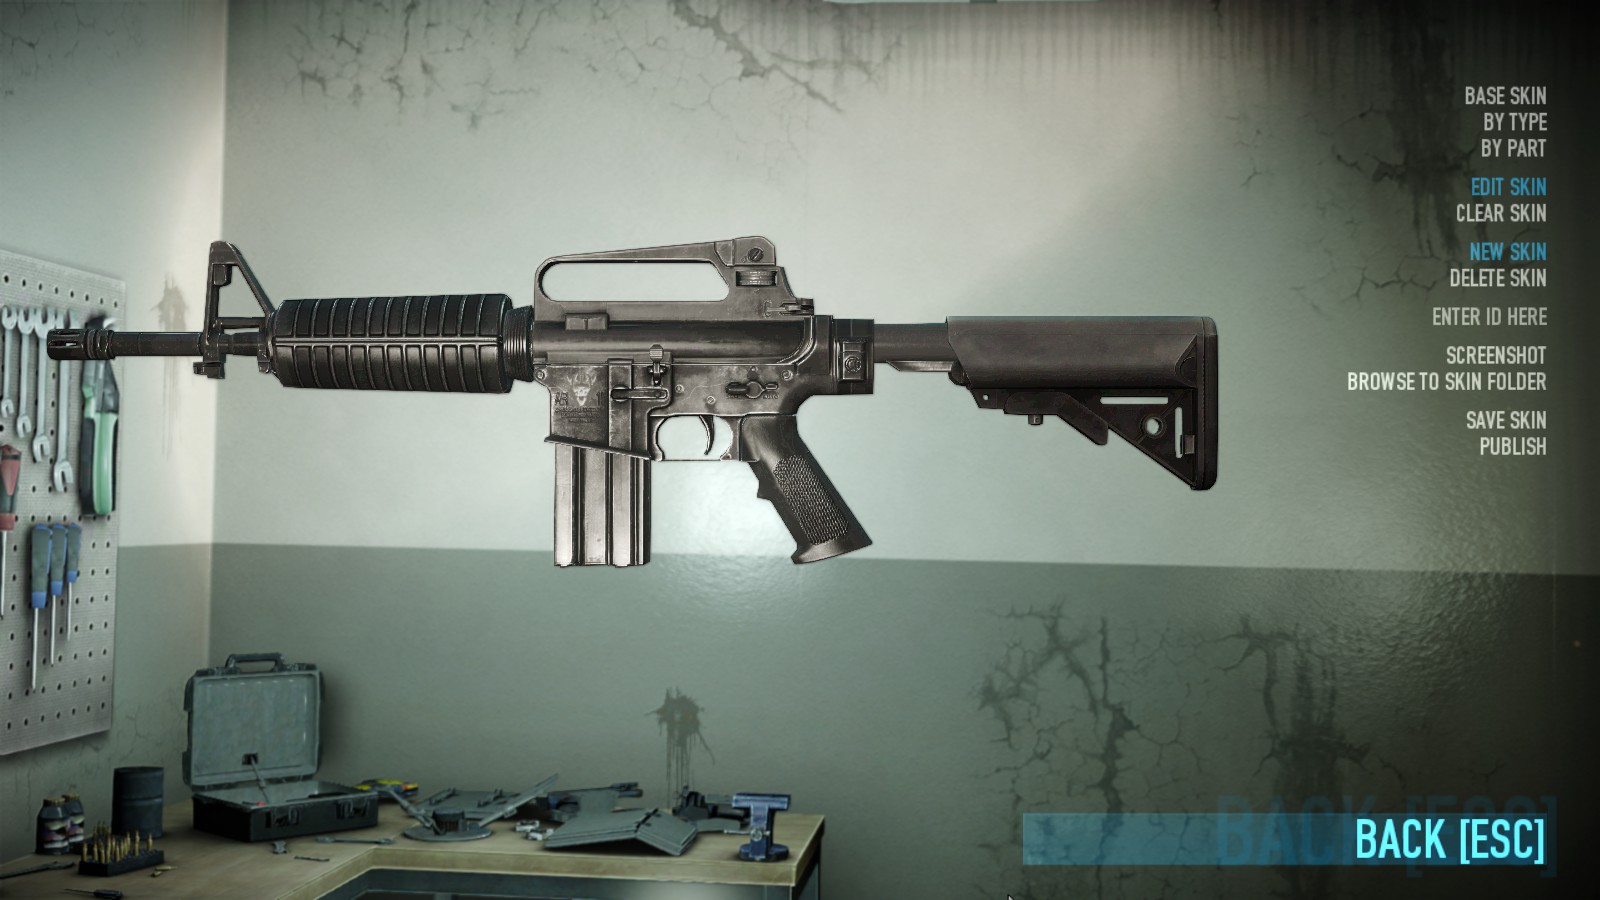
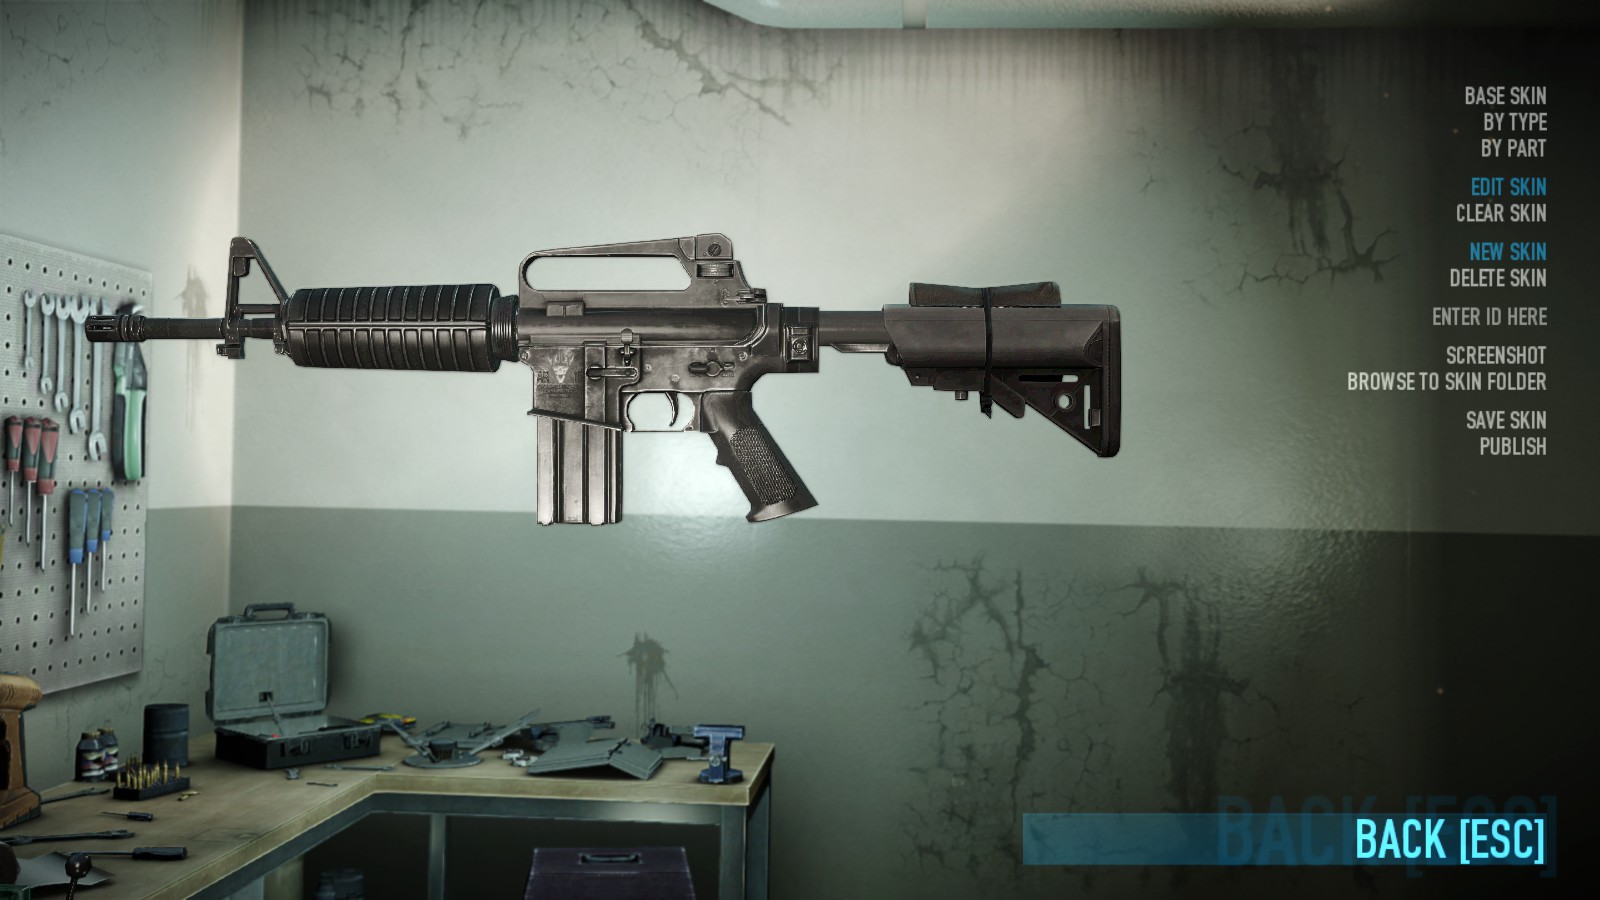
Let’s start the game up and check if the model was replaced correctly.
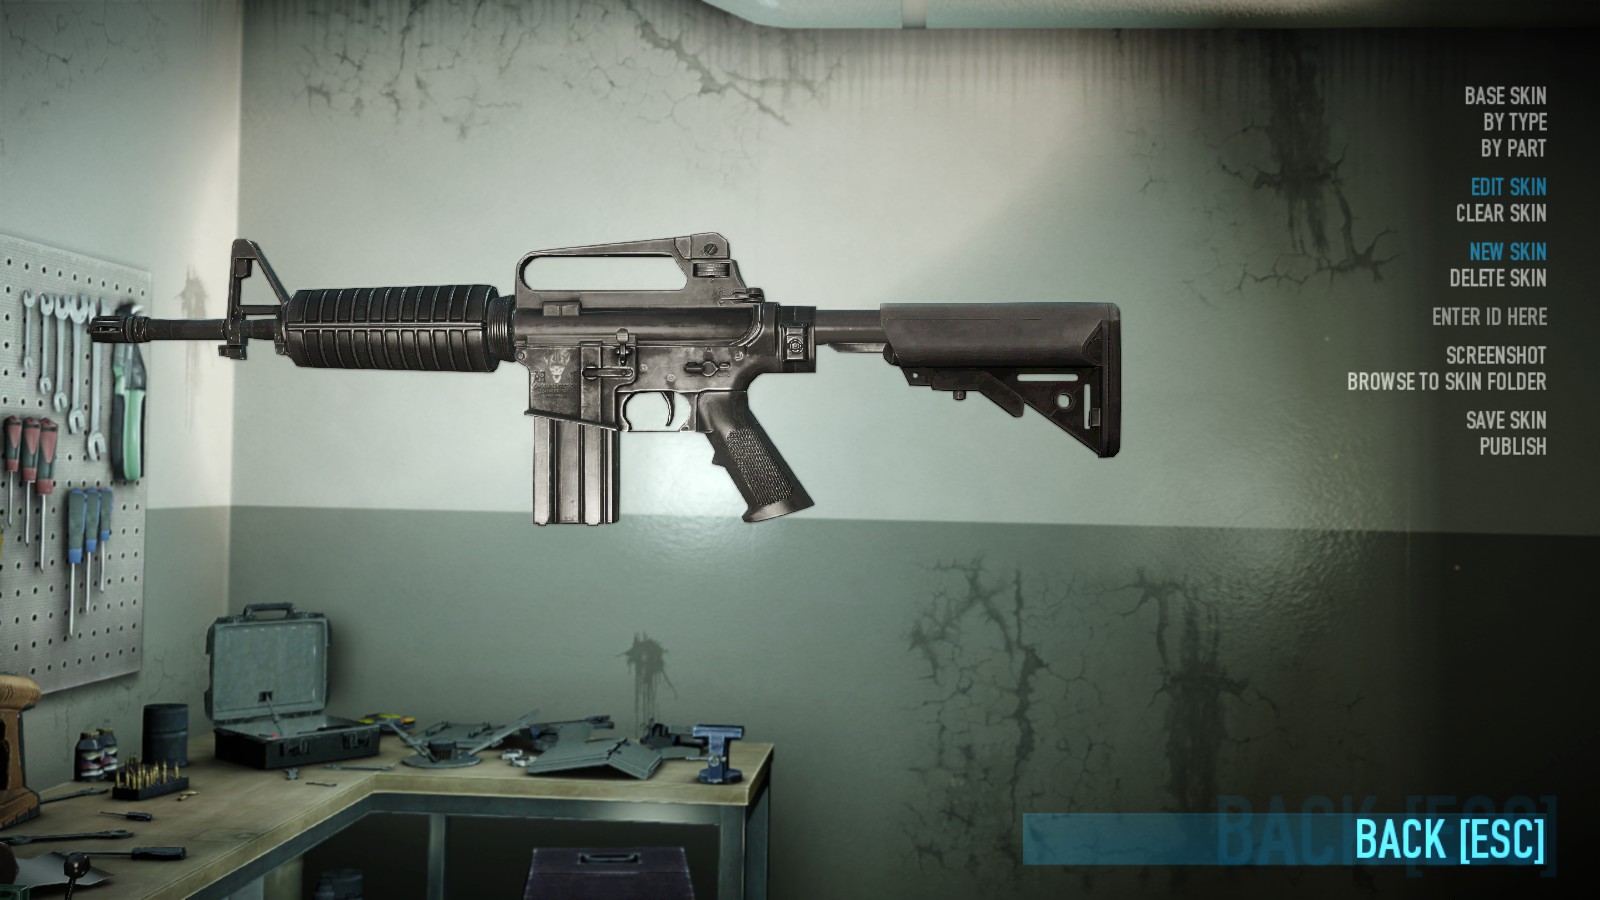
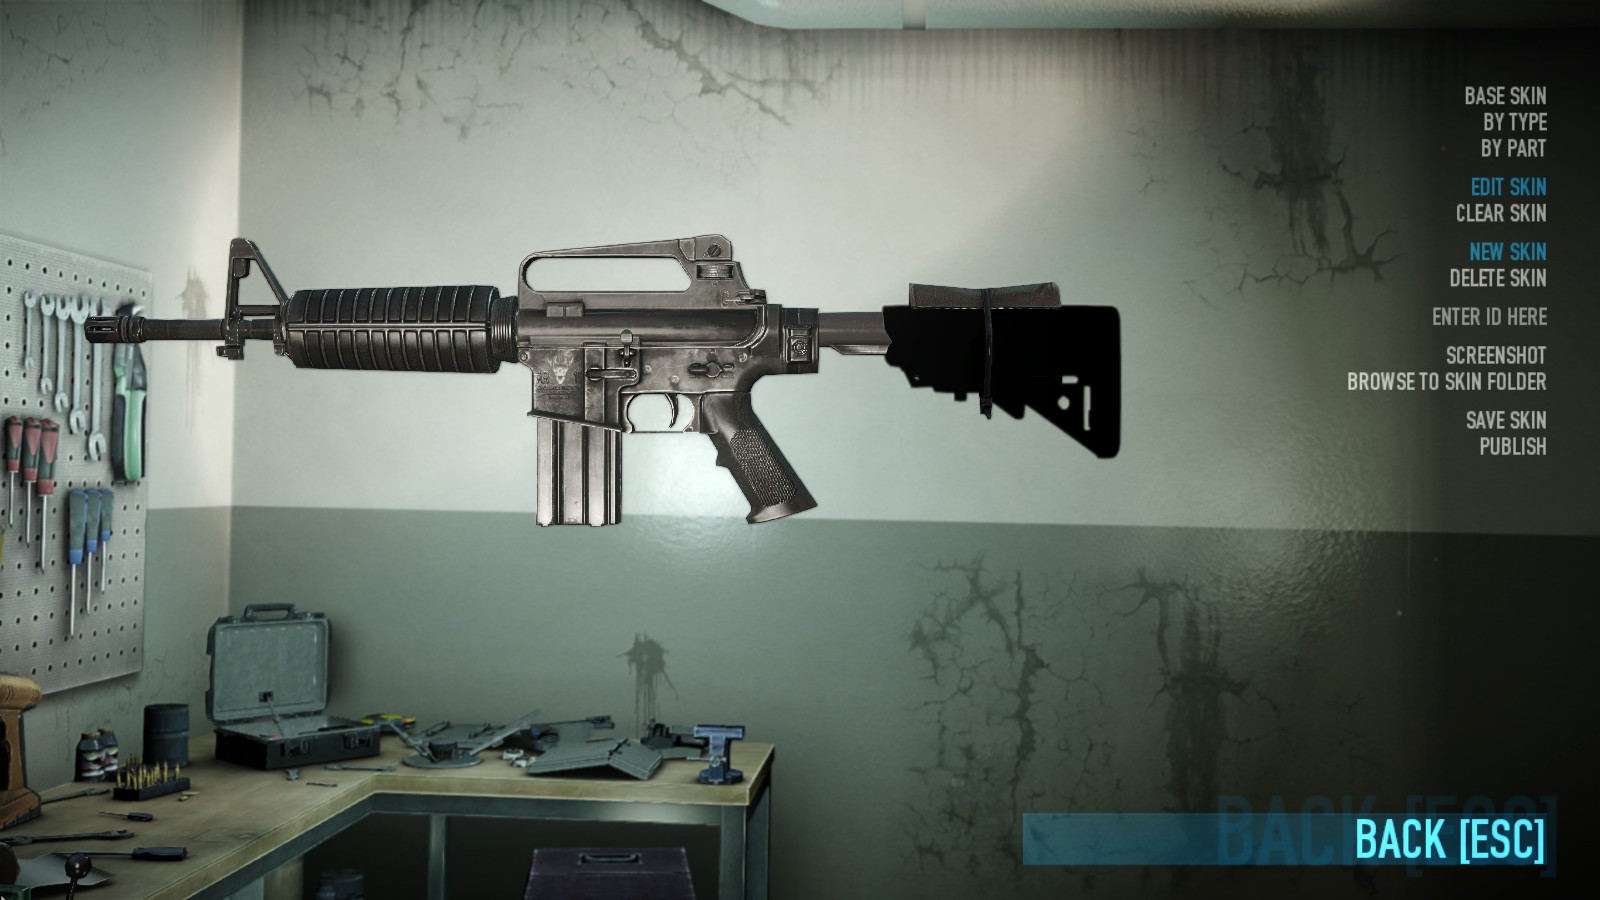
The model is not crashing the game, is not pitch black (on Nvidia GPUs) or blindingly white (on AMD GPUs) and simply got a case of vanilla textures not fitting the mesh. Good! That means we didn’t mess anything up while importing the model.
If the model is crashing the game, check if the rootpoint name (or its hashed form) in Blender doesn’t contain any foreign characters like .001 and so on that Blender adds to objects that have the same name with some object in the scene. If the model is black or white, check if you didn’t forget to set the proper material name.
II-6. Working with textures
Now it’s time to get the textures working.
.texture files used by the game are simply renamed .DDS files. In order to work with them, you need to get a plugin for the image editing software of your choice. Since I am using Photoshop, I am going to link the Intel – [github.io] and Nvidia – [nvidia.com] plugins. I haven’t checked the latest version of the Nvidia plugin, I am still using the legacy version, so keep that in mind.
Most of the models in the game use diffuse+normal. Some newer models can use GSMA setup (standard diffuse map, normal map and the GSMA map that stands for Gloss/Specular/Metalness/Alpha?). I am not familiar with GSMA so I am not going to cover it.
Diffuse map
Diffuse map in Diesel looks like you would expect it to look like. Alpha channel of this map serves as a specular map, there is no dedicated specular map unless GSMA is used.
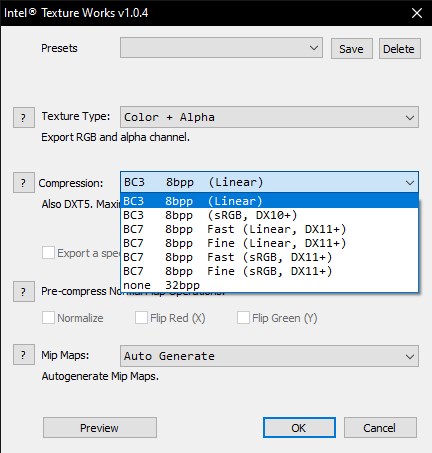
In Intel plugin, save texture as Linear BC3 as it is the only DDS format among other present that is supported by the game. In legacy Nvidia plugin, simply save it as DXT5.
Normal map
If you’ve played the game long enough, you probably have seen what happened after the Update 199 to a lot of custom weapons. Improperly saved normal maps caused the issue with how the guns were lit.
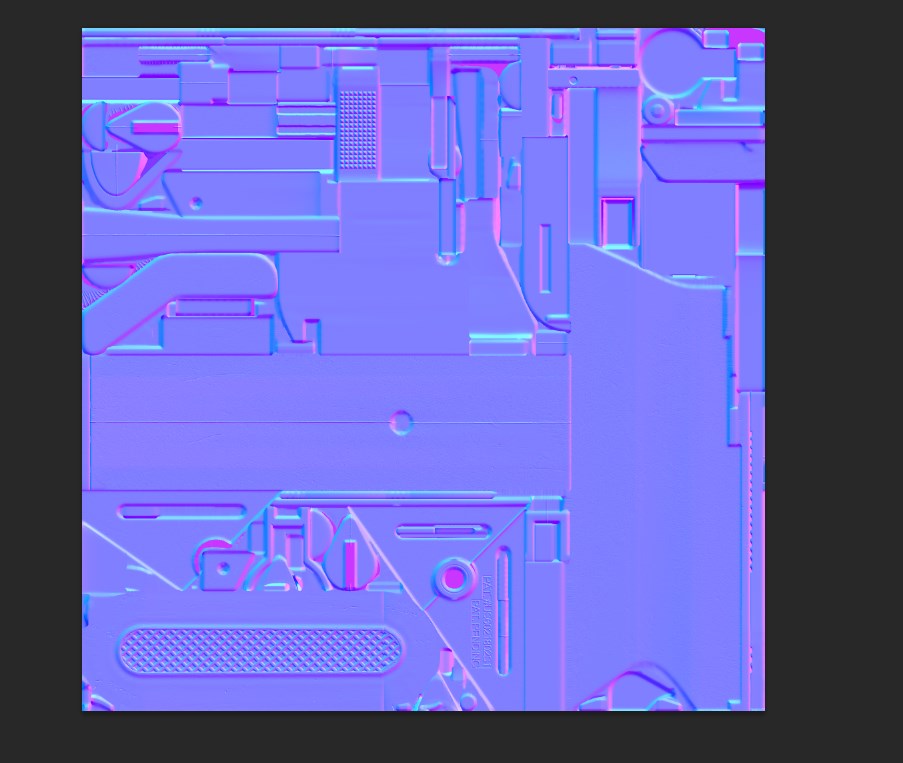
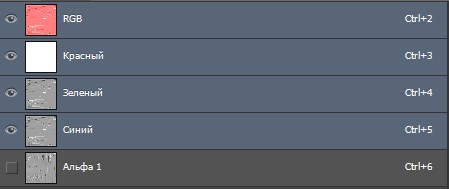
In order to not get this issue again, save the normal maps properly. The most space-saving way to do it is to simply save it as DXT5_nm in Legacy Nvidia plugin. However, in order to do this, normal map should look like this:
Unity games, however, have normal maps saved in a weird way. They’ve got X layer stored in Alpha, Y in Green and Blue and blank white in Red.
In fact, if you copy the content of green or blue channel to red, you can save this map right away using A8L8 format (a proper way to save normal maps, but the one that makes them twice as big compared to DXT5_nm maps and present only in legacy Nvidia plugin).
In order to make use of DXT5_nm in this case, we have to copy Alpha channel to Red and fill Blue channel with white color. After that, we save the map like usual.
The last map that is usually present is the so-called df_cc map. Just read through this – [modworkshop.net] if you are interested in how they work.
Once you are finished working with textures, give them a proper name, place them in the same folder with the model and launch the game once again.
If you can see the proper textures appearing, then congratulations! You just made a replacer for the existing model.
III. Messing with an already existing model. And some theory.
Now, moving onto the best part. In the past, you were required to learn how to write .mscript’s in order to add new attachment points or modify them, as well as attach parts to correct attachment points. Well, you don’t need to learn anything anymore!
You can add new parts the way you want, you can add new attachment points wherever you want! Just don’t forget to add the respective code.
Anyway, let’s get to work.
III-1. New materials
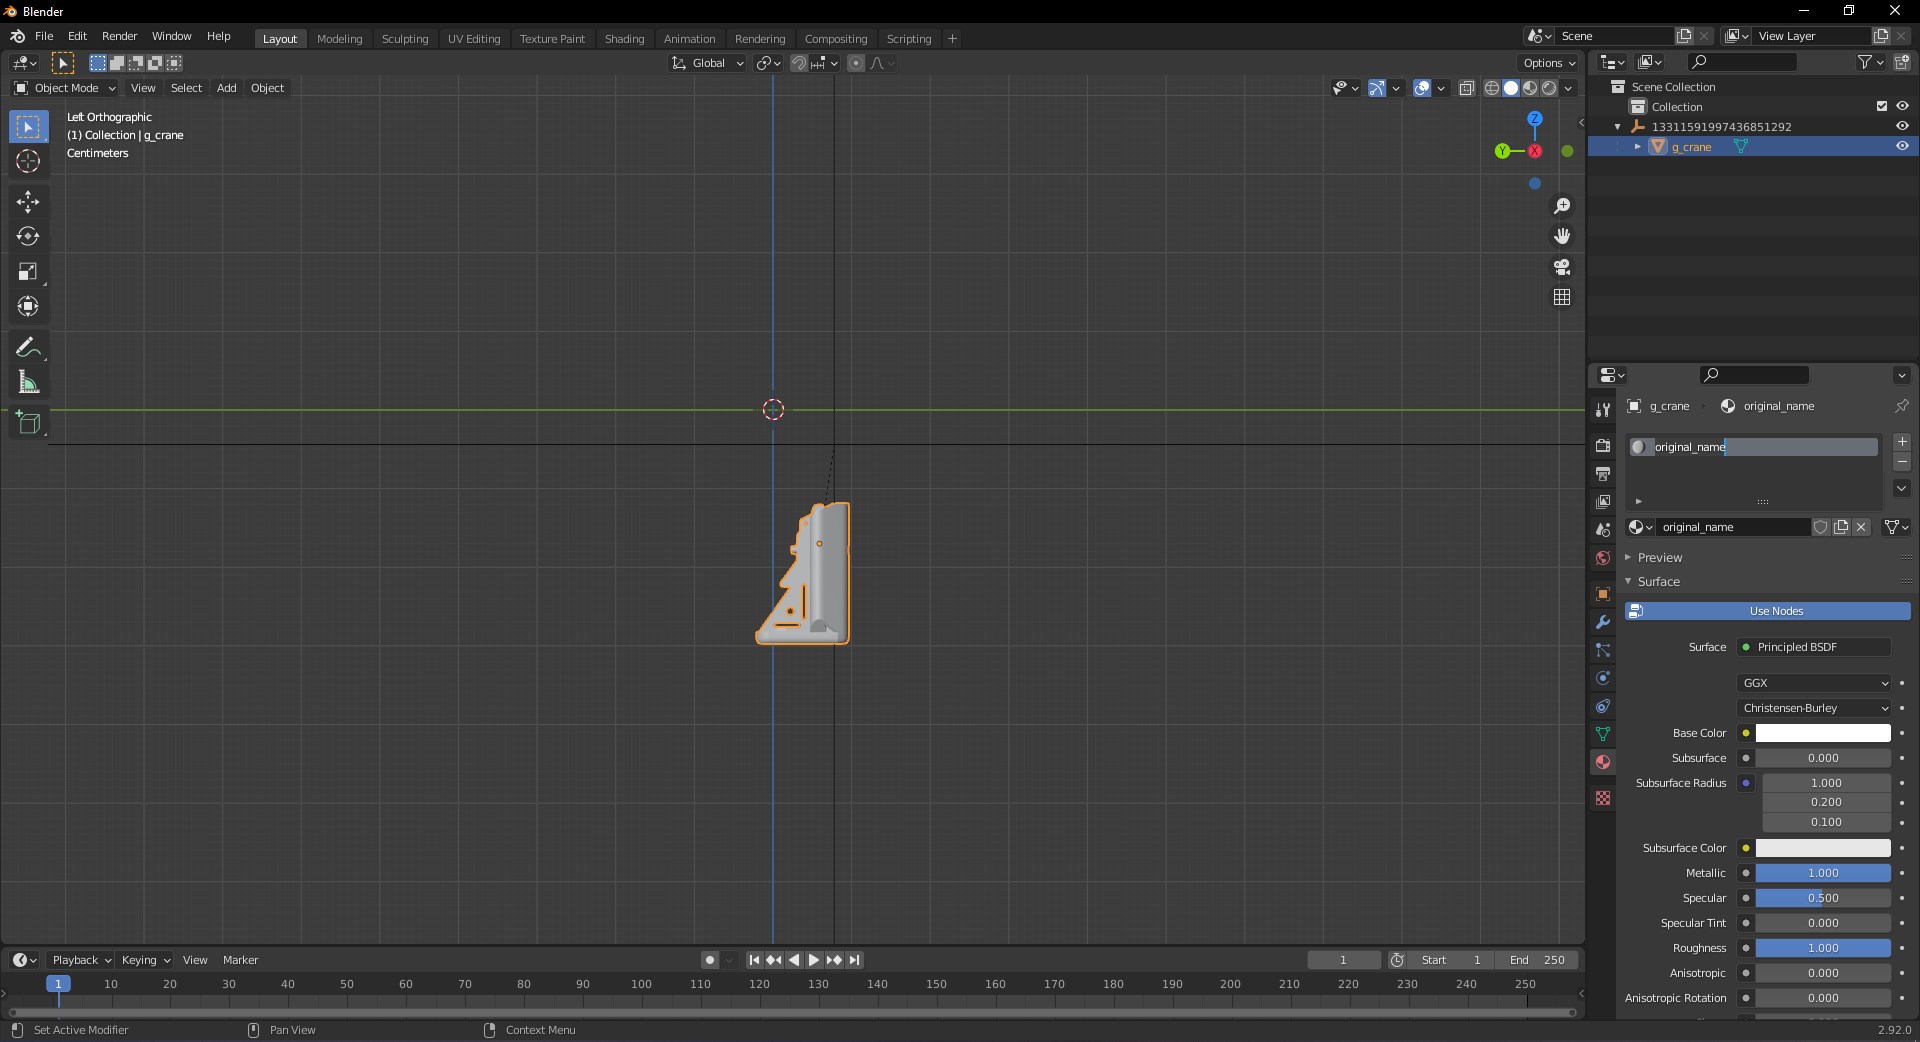
While in the initial example I reused vanilla materials for the model, you are not actually limited by them! In that same example, I could have easily given the material used by this model some name like original_name, and get away with it. Let’s do just that.
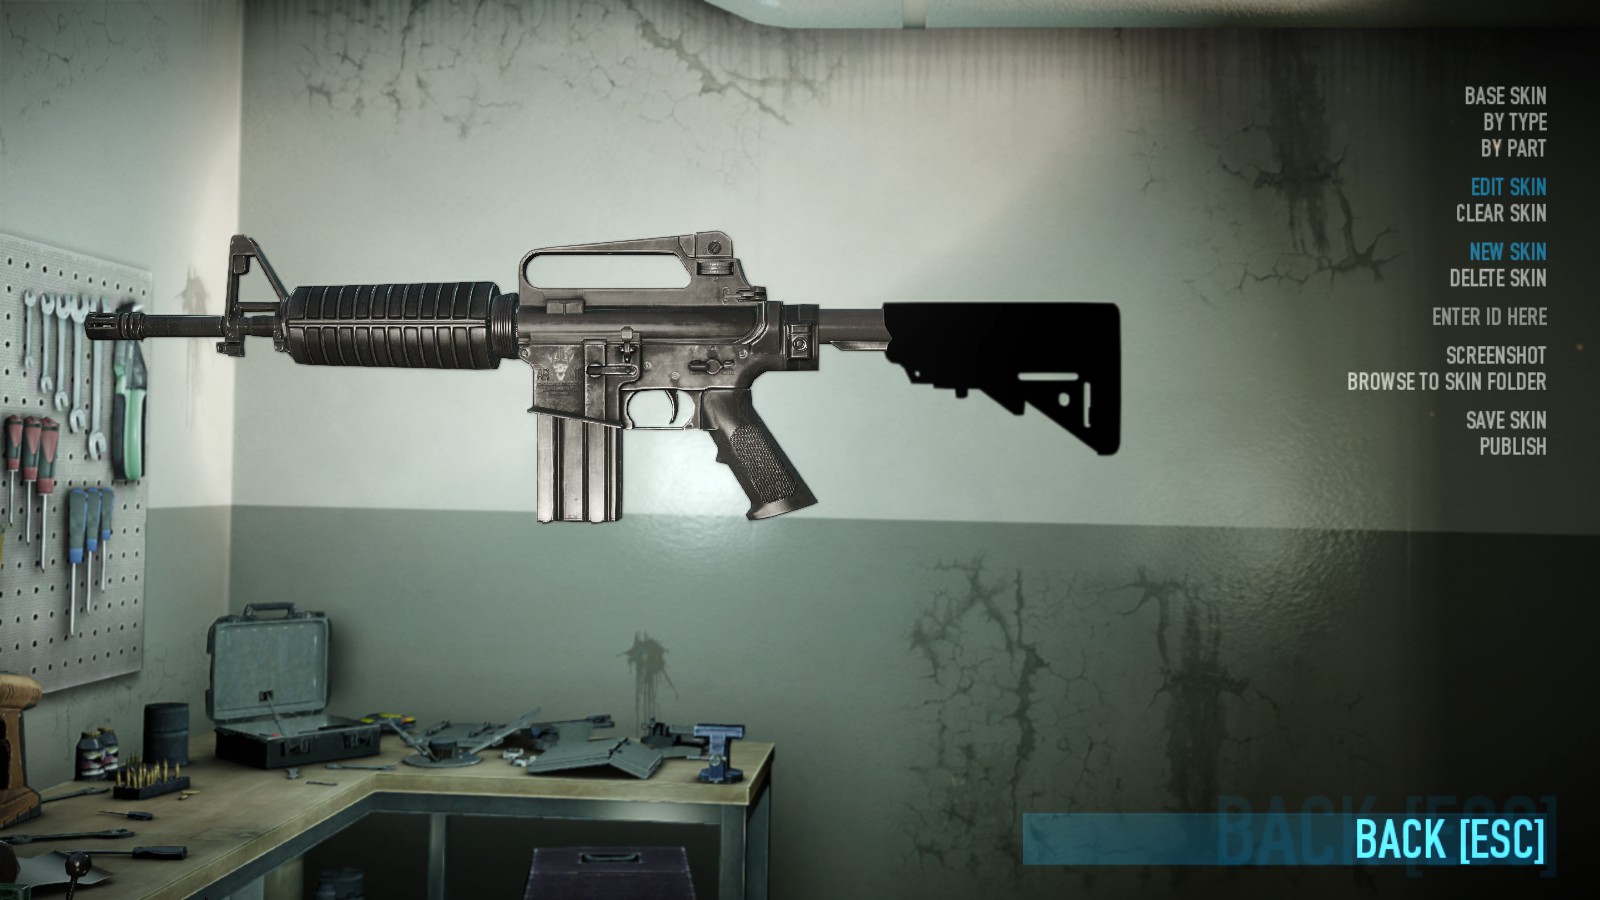
If we are going to launch the game now and take a look at our model, we will be greeted with this. It’s either pitch black or blindingly white depending on your GPU.
Did I mess anything up, you might ask. You didn’t. That’s where we are moving onto the next type of file involved in making your models to show up in game, material_config. You could notice 4 matconfig files while looking for the .model of your attachment. What are these files? Well, they define the materials that are used in-game and basically correlate to material names in 3D editor. Let’s break down wpn_fps_upg_m4_s_crane.material_config file for example.
<materials version="3" group="weapon_group">
 <material name="mtr_lmt" render_template="generic:DEPTH_SCALING:DIFFUSE_TEXTURE:NORMALMAP:NORMALMAP_UV1" version="2">
 <diffuse_texture file="units/pd2_dlc_gage_jobs/weapons/wpn_fps_upg_m4_s_crane/lmt_df"/>
 <bump_normal_texture file="units/pd2_dlc_gage_jobs/weapons/wpn_fps_upg_m4_s_crane/lmt_nm"/>
 </material>
</materials>
The most interesting parts are:
- material name – you can guess what it is
- render_template – defines, well, how the models are rendered. The most commonly used one is generic:DEPTH_SCALING:DIFFUSE_TEXTURE:NORMALMAP:NORMALMAP_UV1 for first person models, where DEPTH_SCALING is responsible for rendering the model on top of everything else.
- diffuse_texture – contains the path to the diffuse map.
- bump_normal_texture – contains the path to the normal map.
Nothing too complicated, right? All we really need to do is to extract this matconfig, place it in the mod folder next to the model, and replace the material name with the name we’ve given to our material, in this case it’s original_name. Let’s launch the game again.
But why there are 4 matconfig files and not just one? _thq matconfig is responsible for the appearance of the model in third person when HQ weapons option is enabled (otherwise, the model will use wpn_third_blabla model instead). The only difference from the first person matconfig that this one has is a different render_template and that some _thq matconfigs use a lower quality mipmap. If you want to know what will happen if you will simply reuse first person matconfig for _thq one, take a look at this pic.
_cc and _cc_thq matconfigs are used for skins. That’s where my knowledge ends, because I don’t really understand nuances of skin creation and usually just reuse skin matconfigs.
III-2. Working with .object files
Sometimes you might need to add completely new meshes to the model, the ones that were not present there originally. If you will simply parent them to the main rootpoint and import this resulting model into the game, you won’t see your new mesh. Or maybe you are just petty and don’t like Overkill’s detailed rootpoint names. Let’s get through the process to see how we can get around this.
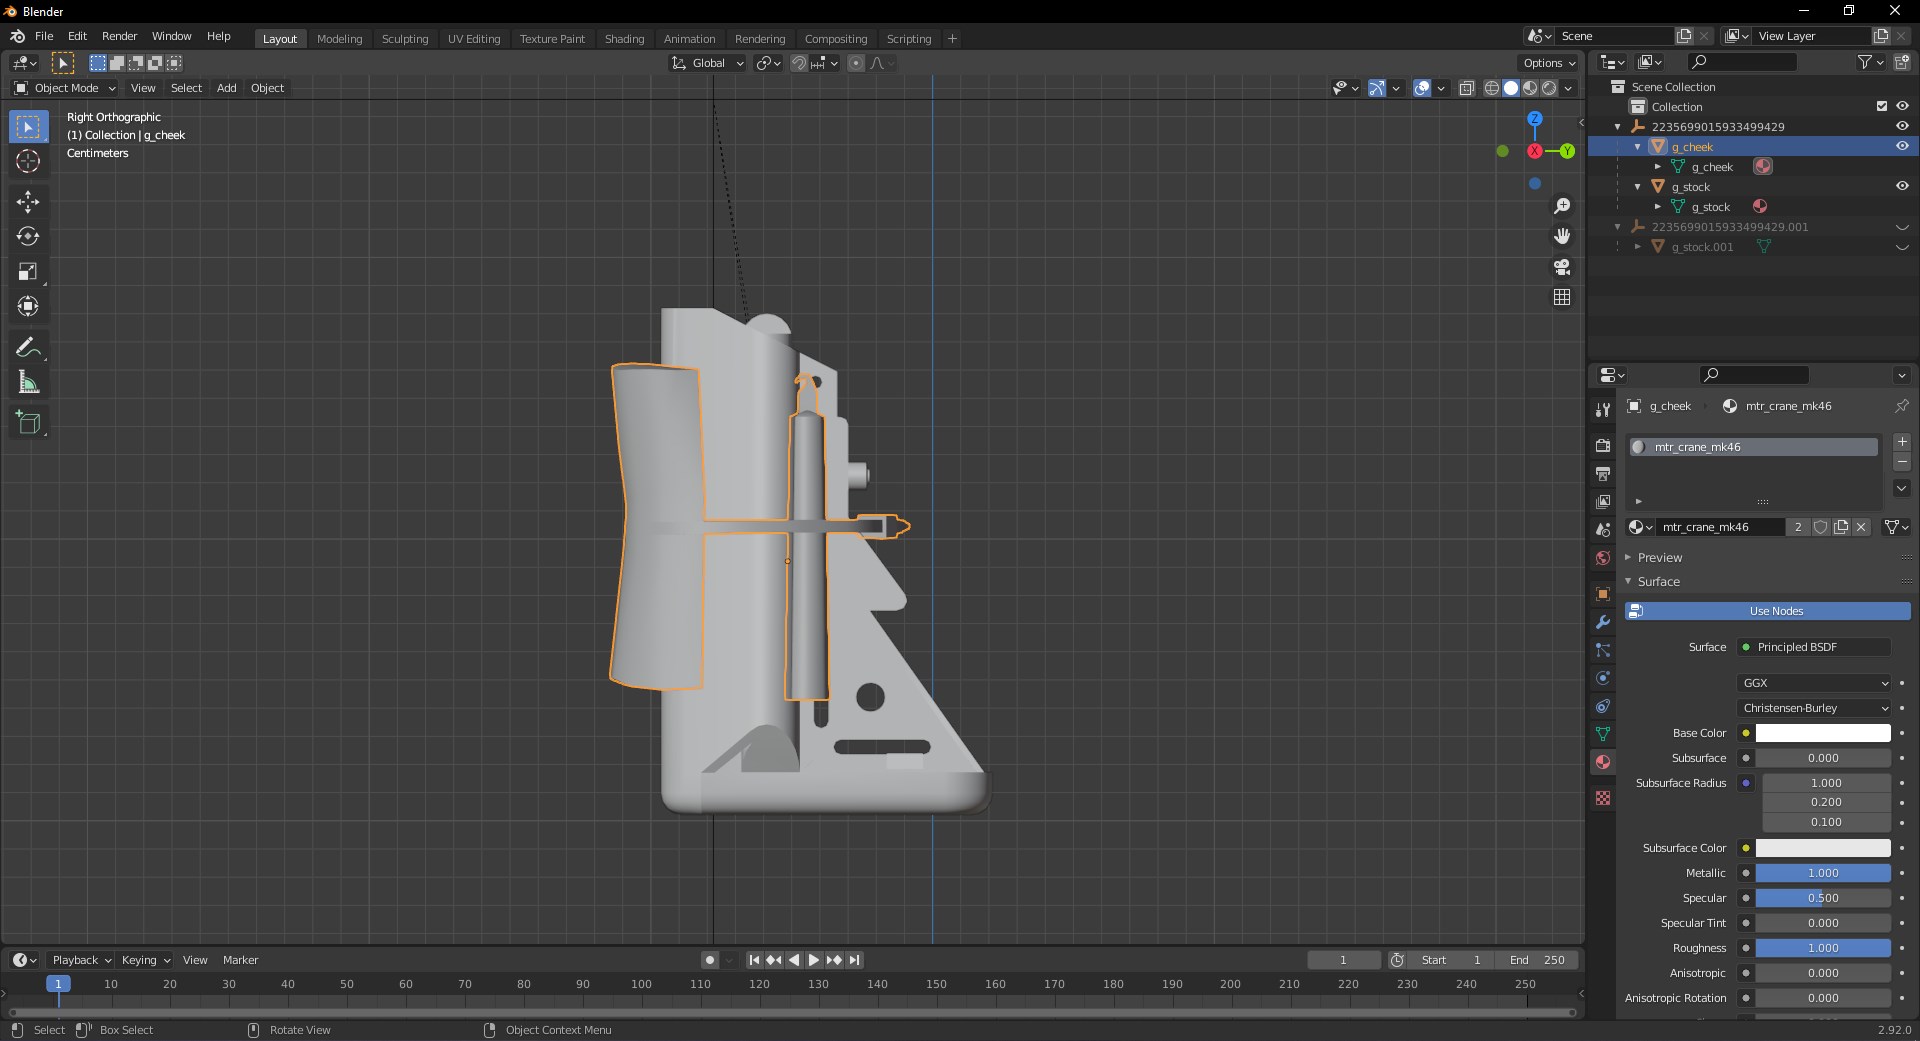
Let’s make a replacer of the War-Torn stock by separating all the required bits from vanilla stock and slapping it onto our already existing replacer. Since I am going to make a replacer for another model, I am going to go through the process I described earlier in chapter II-5 and create a folder for wpn_fps_upg_s_mk46.
In this example, I am going to make use of two different materials, so we are going to practice with matconfigs as well. Improvised cheekpad is going to use vanilla War-Torn stock material named mtr_crane_mk46, while the stock itself is going to use the material from the previous example named original_name. Stock model is going to use vanilla name g_stock, while cheekrest is going to get a new name, g_cheek.
Let’s import this model into the game.
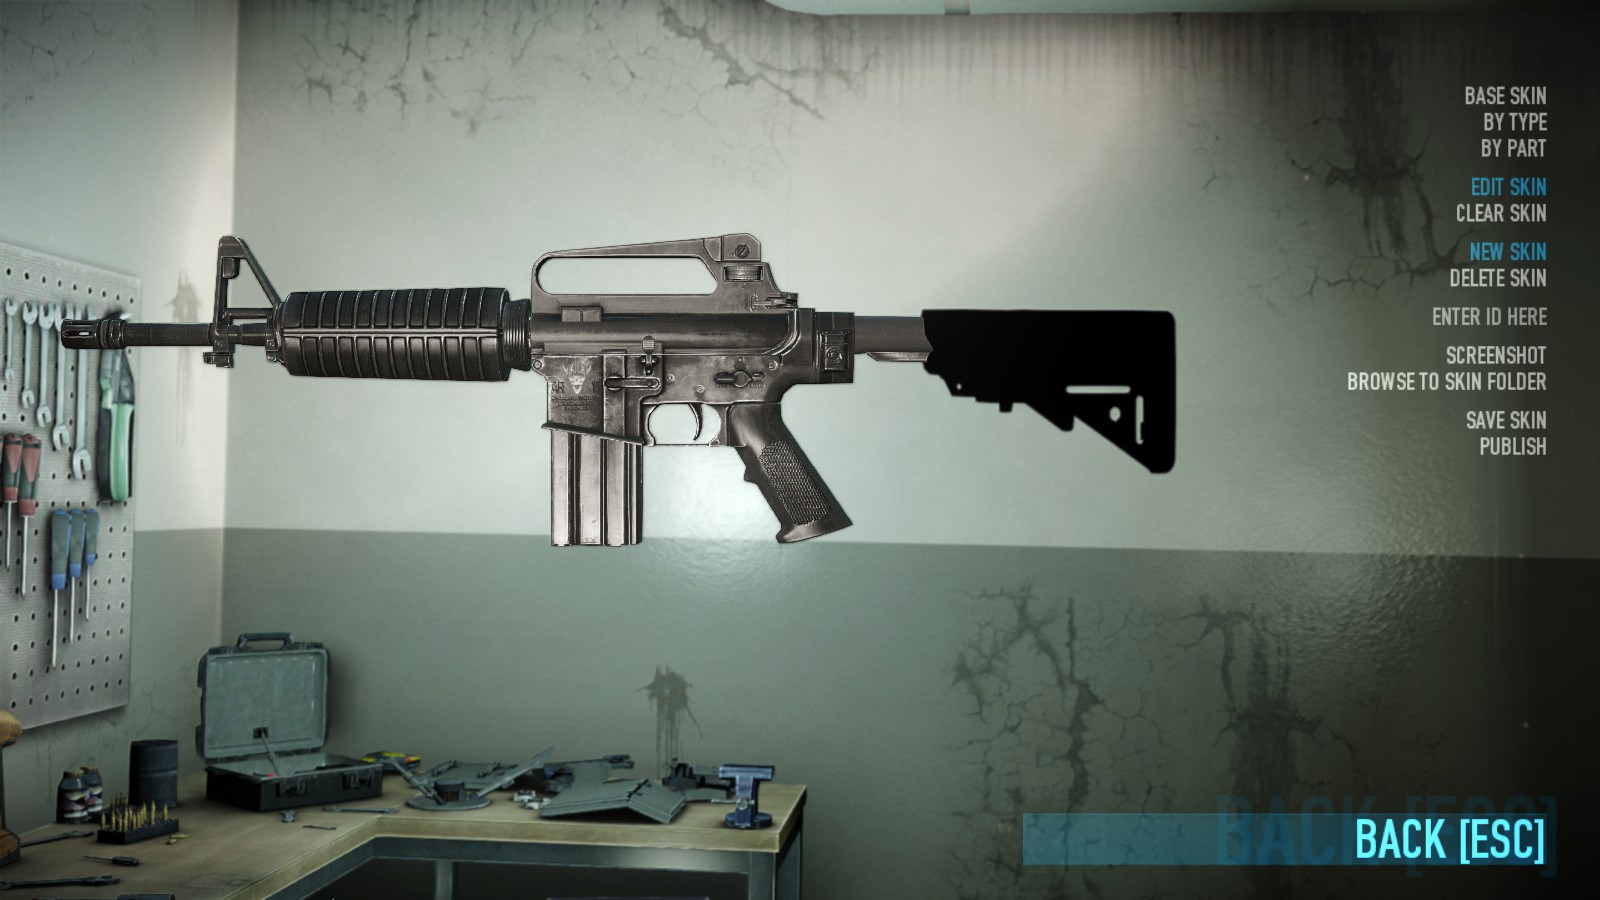
Since we didn’t modify material_config files yet, the pitch black stock was to be expected. And, like I said, this cheekrest hasn’t appeared. What do we do here?
Time to learn something about .object files. In order to understand how they work, let’s breakdown wpn_fps_upg_m4_s_mk46.object.
<dynamic_object>
 <diesel materials="units/pd2_dlc_gage_jobs/weapons/wpn_fps_upg_m4_s_mk46/wpn_fps_upg_m4_s_mk46" orientation_object="rp_wpn_fps_upg_m4_s_mk46" />
 <graphics>
 <object enabled="true" name="g_stock" />
 </graphics>
</dynamic_object>
What do we have here?
diesel materials – path to the material_config file. More often than not, it is located in the same folder as the model, but you can tell the game to use some other material_config if you wish to do so.
orientation_object – the main rootpoint. Basically, it’s an orientation object that is used for storing relative positions of all objects in space.
object name – well, you can guess it.
object enabled – if set to false, the model will not be rendered. If set to true, it should be obvious what will happen.
To make our cheekrest appear, we should duplicate the object entry, but rewrite it for our new mesh. In the end, it will look like this:
<dynamic_object>
 <diesel materials="units/pd2_dlc_gage_jobs/weapons/wpn_fps_upg_m4_s_mk46/wpn_fps_upg_m4_s_mk46" orientation_object="rp_wpn_fps_upg_m4_s_mk46" />
 <graphics>
 <object enabled="true" name="g_stock" />
 <object name="g_cheek" enabled="true" />
 </graphics>
</dynamic_object>
I intentionally changed the order of name and enabled in order to show that the order is not important.
Unfortunately for us, mod_overrides does not allow the modification of .object files by default. In order to get around this, we are going to make a very simple BeardLib mod.
In the root folder of our mod (LMT SOPMOD stock for Wide Stock in my case), let’s create a main.xml file and fill it with the following content:
<mod name="Mod name" min_lib_ver="3.38">
 <AddFiles auto_generate="true"/>
</mod>
There is nothing too complicated here. <mod> element defines the area where we describe our mod. Since we only really need BeardLib to add new files for us, we are going to use AddFiles module (link to wiki – [gitbook.io] ). auto_generate will generate the list of newly added content for us. name is the name of our mod and min_lib_ver is a minimal version of BeardLib required and that is typically set to 3.38.
Let’s launch the game.
In the root folder, a new file, gen_add.xml, has appeared. This file contains paths to all the files we have modified, and we might need to remove it every time we modify something new, in order for BeardLib to re-generate this file.
The cheekrest has appeared, so now all we need to do is to finish working on the matconfig.
Let’s duplicate the whole <material …> entry so it will look like this:
<materials version="3" group="weapon_group">
 <material name="mtr_crane_mk46" render_template="generic:DEPTH_SCALING:DIFFUSE_TEXTURE:NORMALMAP:NORMALMAP_UV1" version="2">
 <diffuse_texture file="units/pd2_dlc_gage_jobs/weapons/wpn_fps_upg_m4_s_mk46/lmt_mk46_df"/>
 <bump_normal_texture file="units/pd2_dlc_gage_jobs/weapons/wpn_fps_upg_m4_s_mk46/lmt_mk46_nm"/>
 </material>
 <material name="mtr_crane_mk46" render_template="generic:DEPTH_SCALING:DIFFUSE_TEXTURE:NORMALMAP:NORMALMAP_UV1" version="2">
 <diffuse_texture file="units/pd2_dlc_gage_jobs/weapons/wpn_fps_upg_m4_s_mk46/lmt_mk46_df"/>
 <bump_normal_texture file="units/pd2_dlc_gage_jobs/weapons/wpn_fps_upg_m4_s_mk46/lmt_mk46_nm"/>
 </material>
</materials>
Let’s rework the second entry to fit our needs. Give it a new name and change paths so they will lead to respective maps of the Wide stock (or copy it from Wide stock matconfigs). In the end, it will look like this:
<materials version="3" group="weapon_group">
 <material name="mtr_crane_mk46" render_template="generic:DEPTH_SCALING:DIFFUSE_TEXTURE:NORMALMAP:NORMALMAP_UV1" version="2">
 <diffuse_texture file="units/pd2_dlc_gage_jobs/weapons/wpn_fps_upg_m4_s_mk46/lmt_mk46_df"/>
 <bump_normal_texture file="units/pd2_dlc_gage_jobs/weapons/wpn_fps_upg_m4_s_mk46/lmt_mk46_nm"/>
 </material>
 <material name="original_name" render_template="generic:DEPTH_SCALING:DIFFUSE_TEXTURE:NORMALMAP:NORMALMAP_UV1" version="2">
 <diffuse_texture file="units/pd2_dlc_gage_jobs/weapons/wpn_fps_upg_m4_s_mk46/lmt_mk46_df"/>
 <bump_normal_texture file="units/pd2_dlc_gage_jobs/weapons/wpn_fps_upg_m4_s_mk46/lmt_mk46_nm"/>
 </material>
</materials>
In the game, it will look like this:
Note: You can change the rootpoint name as well. Don’t forget to do it both in 3D editor and in .object file though, or else your game will crash.
III-3. Working with models with animations
Most of more modern weapons contain all the animations in a single, main weapon file, usually named like wpn_fps_category_name that is stored in the wpn_fps_category_name folder. Other weapons contain animations in weapon parts instead. Whatever the case might be, simply replacing the models the way it was described earlier might lead to parts being completely immovable during, say, reload animations.
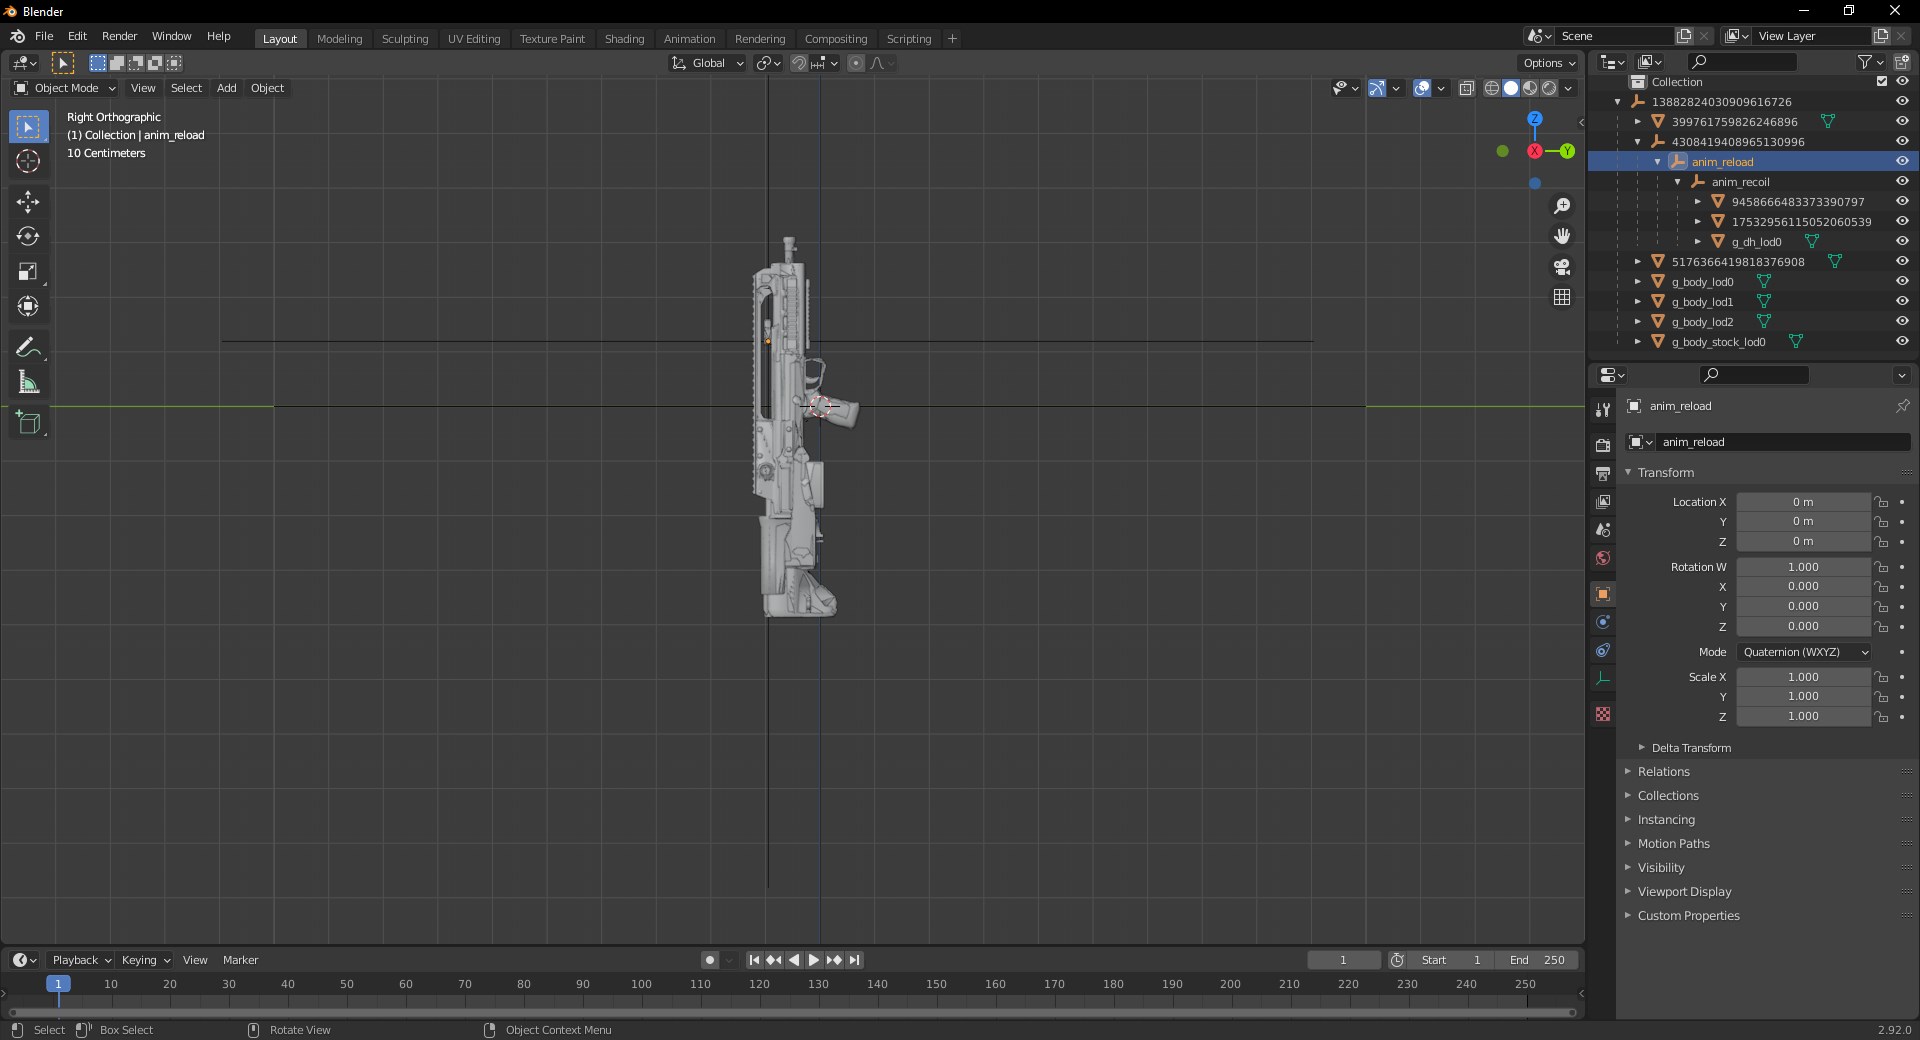
How do you distinguish such models? There are two ways. First way is to go to the “Objects” tab in Diesel Model Tool and select a model. If under <Animation> in the AnimationData keyframe length is not equal 0, then this model will require this method of import/export. The second way is to just import the model into 3D software and check if there are any additional empties under the main rootpoint. For example, take a look at the VHS-2/Lion’s Roar body model.
If you see bones like anim_reload or anim_dh_reload or something like that, then most likely than not this model got animations included.
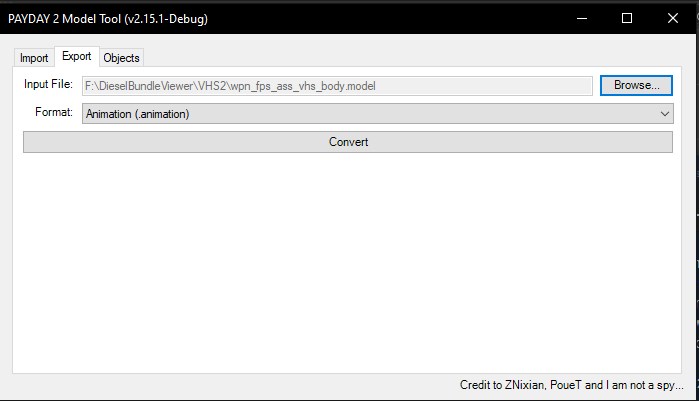
In order to include these animations, first we need to export them from the vanilla model. To do this, under Export tab, in Format select Animation (.animtion), in Input file select the model and click Convert.
Next, under Import tab, go through the process described in chapter II-4. In Animations, select the .animation file you exported earlier.
That’s pretty much it.
Conclusion
I described everything I know that I could remember. If anything is missing, feel free to ask me here, or The Armory Discord server – [discord.gg] , where quite a big number of weapon modders hang out as well. I am also available at ModWorksop Discord server – [discord.gg] , although I am not really active there as I used to be.
In any case, I hope this guide was helpful in any way.
This is all about PAYDAY 2 – Porting models tutorial guide; I hope you enjoy reading the Guide! If you feel like we should add more information or we forget/mistake, please let us know via commenting below, and thanks! See you soon!
- All PAYDAY 2 Posts List


Leave a Reply