A comprehensive guide on the EASIEST perk deck in the game.
Some other guides to check out along with this
Introduction
NOTICE
As of recently there have been comments expressing disagreements regarding my opinion on this deck being the hardest in the game to learn and use. While I respect differing beliefs, if you disagree and want to comment, please keep it civil and respectful, or at least give a proper reasoning. Please also note that my guide aims to help people become more proficient at the deck in a normal public co-op setting, and NOT necessarily for solos.
On with the guide…
It’s been a long time coming, but I’m making a guide on the best deck in the game 😀 under the request of Vlad, and under the guidance of Yokai, arguably the greatest Sicario player in the game who also taught me everything I know about the deck (love you both uwu).
I will add more clips and tips along the way too, since there’s just so much about this deck.
Sicario is a dodge-based perk deck that comes equipped with the smoke bomb throwable. The smoke bomb is one of, if not the most versatile perk deck throwable in the game. But before we get to that, let’s get to understand the perk at its face value…
A quick word on Dodge
Dodge is an in-game mechanic that is both underrated and overrated in the PAYDAY community. On one hand, it is seen as RNG reliant and purely “luck-based”. On the other hand, it is overly abused seen as the only way to play DSOD because 221 armour gets lost in one shot (hypothetical example, just referring to how your armour gets lost so quickly).
Dodge is basically the chance for a player to not take damage when shot and hit by a single cop. There is a misconception that dodge is the chance to not take damage from all enemy fire.
This is wrong.
Every time you’re being shot and hit by a cop, you’re basically “rolling the die” the same number of times you’ve been hit. This means that, for example, if you were sprinting to cover and you were shot twice, you would be “rolling the die” twice. So if you had 70% dodge, the chance of you dodging twice would be 0.7 x 0.7 = 0.49, 49% chance. This chance further decreases the more shots you get hit by (remembering that dodge just means you won’t take damage when hit).
With this in mind, what’s the best way to utilise dodge? Well, it’s pretty simple. The best way to play with dodge…is to not rely on it.
It seems counterintuitive, but it makes sense if you look at the example I gave. The more cops you expose yourself to, the more you’d have to “roll the die” to not take damage. And in order to maximise the chances of you not taking damage, you would try to “roll the die” as little as possible. By positioning yourself well, using cover, making space and playing the game as if the dodge mechanic wasn’t there, the more you turn dodge decks into less of an RNG reliant deck. You’d also feel like dodge will “save” you a lot more by playing a more careful and less risky playstyle. And this goes back to “rolling the die” as little as possible. Less cops will be shooting at you, meaning the likelihood of you dodging all shots would be higher since you’re rolling for that dodge chance a lot less.
TL;DR Do not rely on dodge.
The Perk Deck
Smoker
Unlocks and equips the throwable Smoke Bomb.
When deployed, the smoke bomb creates a smoke screen that lasts for 10 seconds. While standing inside the smoke screen, you and any of your allies automatically avoid 50% of all bullets. Any enemies that stand in the smoke will see their accuracy reduced by 50%.
After the smoke screen dissipates, the Smoke Bomb is on a cooldown for 60 seconds, but killing enemies will reduce this cooldown by 1 second.
The math behind this isn’t too important, but the smoke bomb allows for a greater survivability chanceif you or your allies stand inside it. If enemies stand inside the smoke, they become less accurate. The fact that you can reduce the cooldown by 1s per kill further reinforces an aggressive playstyle when using the deck.
Twitch
Every time the player gets shot, 20% dodge chance is gained. This effect is reset once the player dodges and will not occur for the next 4 second.
If you get hit, you gain more dodge. On the surface, you don’t need to worry about dodge values since it is constantly changing. However, this skill can become very useful when in the smoke bomb. More on that later.
Subtle
Your chance to dodge is increased by 15%.
…you get more permanent dodge. (20% for suit)
Agility Shield
Dodging will replenish your armor.
Similar to Twitch, you don’t need to worry too much about this skill on the surface level since it just happens by itself. However, this skill can also be utilised in tandem with Twitch in the smoke bomb. More on that later as well.
Unseen Shadow
All of your perk deck effects are increased by 100% while you are standing in the smoke screen. While any of your allies are standing in the smoke screen, they gain 10% dodge chance.
The smoke bomb gets an upgrade as well as allowing your teammates to gain 10% dodge while in the smoke. This means that the smoke can also be used to support your teammates if they need that extra dodge when performing objectives. It’s not much, but they don’t lose anything from it.
How to build for Sicario
There are some skills that are pretty much necessary if you want to use Sicario to the best of its ability. Note that this is just the “foundation” for building with Sicario, use your remaining points on whatever you need.
Medic
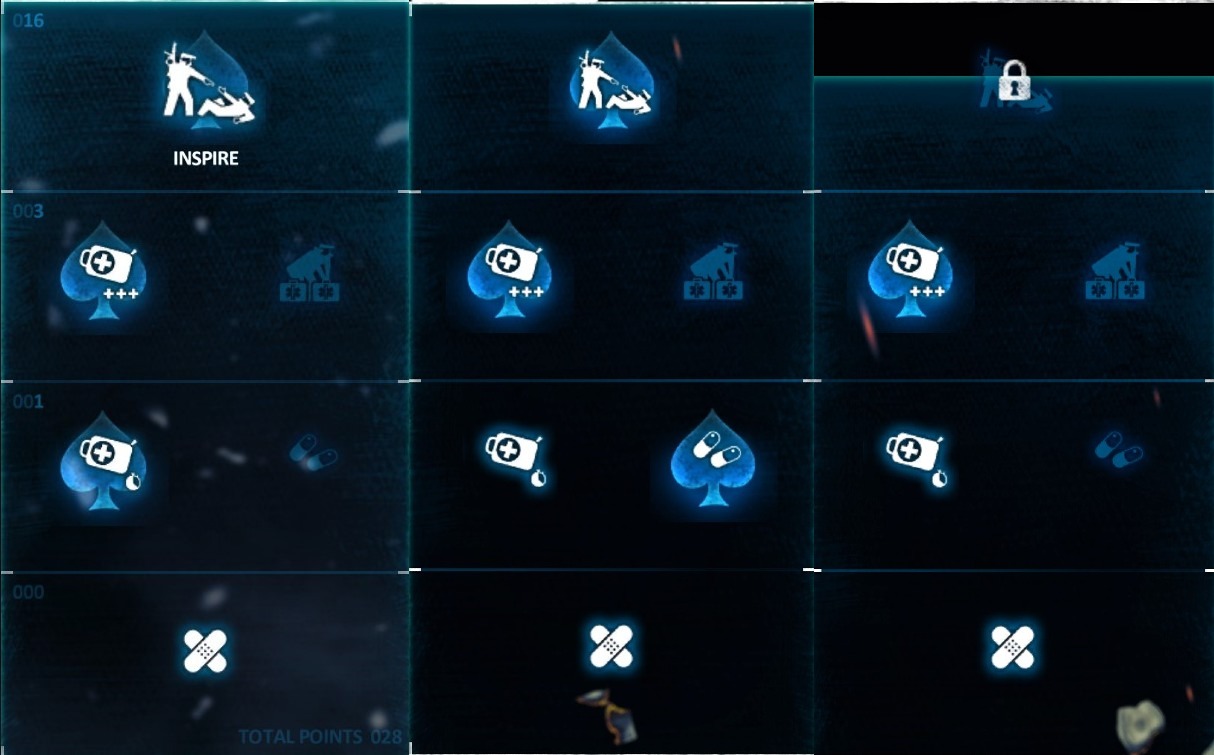
Sicario is best utilised with first aid kits. This allows for more aggressive plays and gives you a “safety net” when playing risky. When building for Inspire, if you have the points, it’s best to get Painkillers aced since it helps your team take a few extra shots to get back into cover. However, if you don’t have the points, going for the usual Quick Fix aced for Inspire isn’t the worst thing in the world.
You can also play without first aid kits and go for medic bags, but first aid kits are still much better for the deck. (Do NOT get medic bags with Quick Fix and Inspire Aced, either get Quick Fix Inspire basic or Painkillers Inspire aced)
Controller
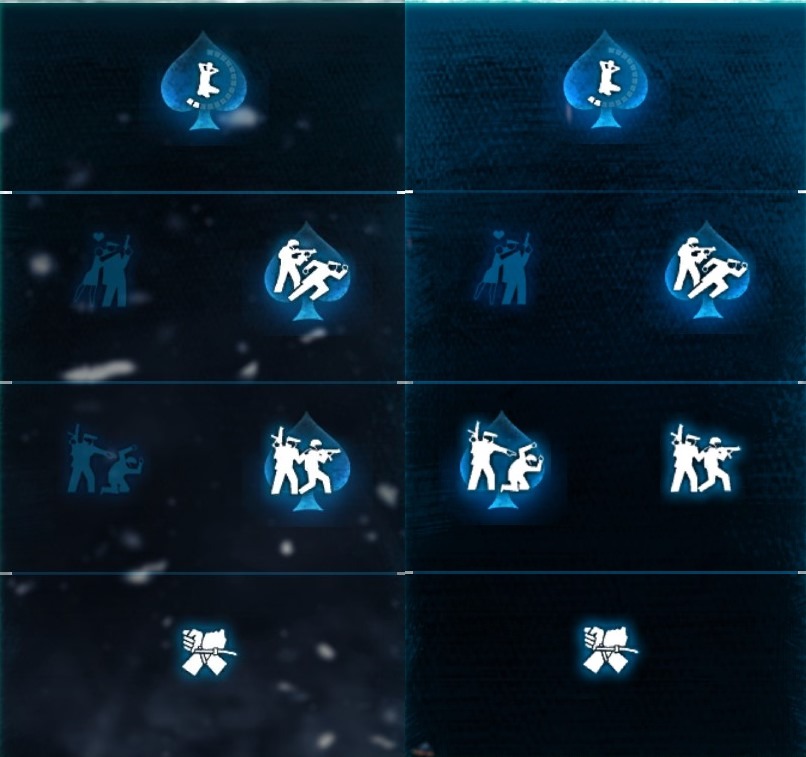
Hostage Taker and jokers are the skills you’d want here. You can pass it for other skills if you have first aid kits, but the passive healing is way too good to leave behind. It helps with the aggressive nature of this deck and can help you conserve first aid kits for better situations.
Jokers need no introduction; they are good meat shields that can tank a lot as well as take enemy aggro away from you and your team. They are also vital for Sicario, since you can play along with cop targeting for better survivability in the smoke. You can choose to go for either one or two jokers.
Tank
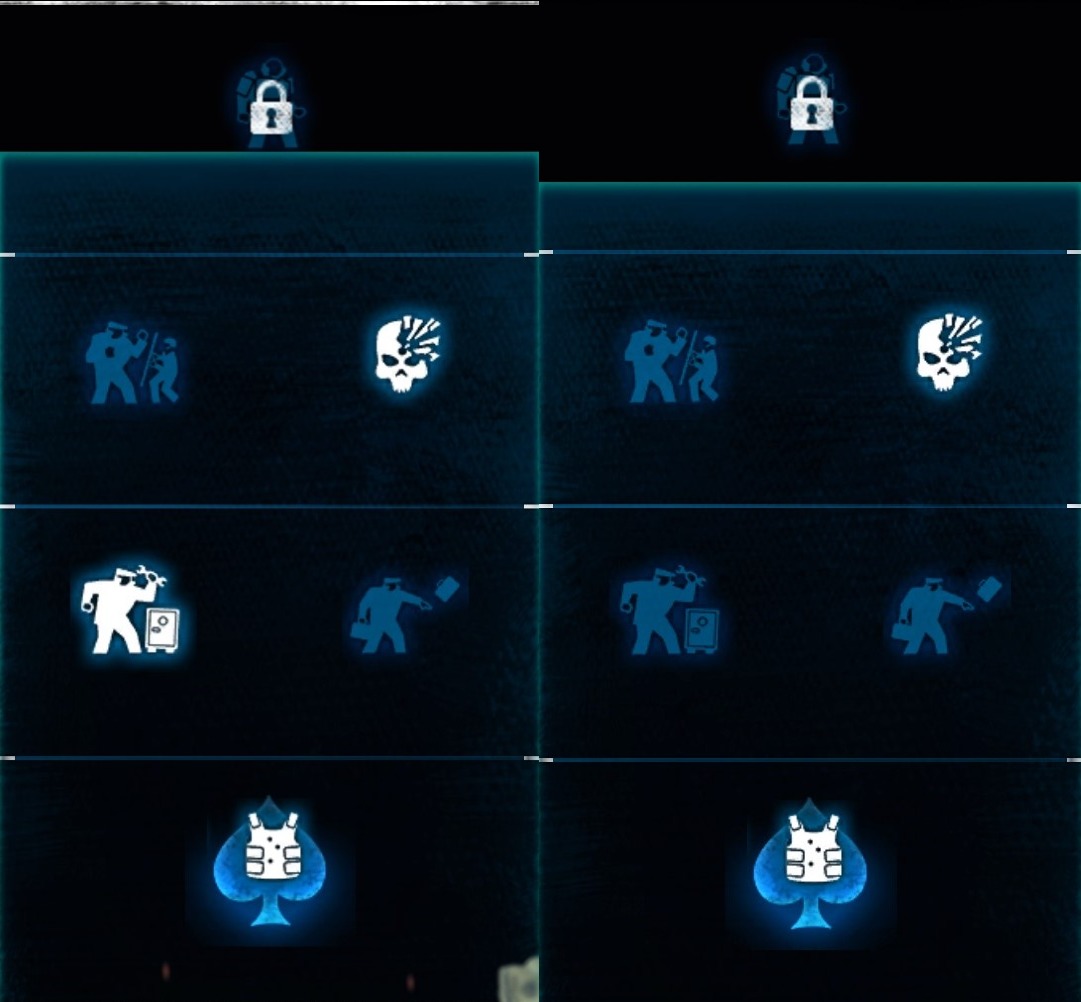
Bullseye is 100% absolutely necessary for Sicario. It’s already a skill that is necessary for most decks in the game, but on Sicario, it’s an absolute godsend. Proc-ing bullseye at the right time can help you trigger Twitch, allowing for more dodge, which gives you even more survivability, especially in the smoke.
Die hard is personal preference; it allows you to take 1 extra health shot assuming you’re on full health at the risk of being graced right after finishing the objective.
Ammo Specialist
Scavenger basic is also a very good skill to have with just about any deck. With Sicario, it does save you some range when using smoke to reach for ammo in the open.
Breacher
Hardware Expert is a good skill for pretty much all decks, but it’s very good for Sicario. Fixing drills normally take about 10s without the skill and 7.5s with the skill, and since the smoke lasts for 10s, you would have an extra 2.5s time window to use the smoke or run back to cover.
Artful Dodger
Duck and Cover aced is really all you need for Sicario. Some may argue for the use of Sneaky Bastard since Sicario is a dodge deck. But ideally, you shouldn’t rely on pure dodge in the first place. It’s not bad, but getting Hostage Taker over Sneaky Bastard is much better for Sicario in general because of its passive healing. If you were to take Sneaky Bastard, you should also get first aid kits to heal up as well as make aggressive plays. It’s basically another playstyle for Sicario, though not the best one.
Silent Killer
Second Wind basic is good for getting that additional speed to get back to cover, but the main skill here is Optical Illusions basic. This gives you less chance to be targeted, which allows for more plays based on cop targeting, whether it is your teammates taking aggro or your converts. Also, most people take this skill anyway, so it’s just good to take it so you don’t take more aggro.
Smoke Bomb – Basics
Here are some basic uses of the smoke on surface level.
Performing objectives
The most straightforward use of the smoke is for doing objectives. The smoke allows you to survive most situations and so rushing objectives using the smoke, especially with FAKs, is not always a bad idea.
Killing groups of enemies
If there are a group of enemies, you can choose to throw your smoke and go in to kill them.
Killing Dozers
If you see a dozer that you want to kill, throw your smoke and go for it. Keep in mind that dozers can still melee you, so be careful of that.
Picking up ammo
If you’re running low on ammo and see a lot of ammo boxes out in the open, throw your smoke, get the ammo and run back.
Reviving (Basic)
This is also pretty straightforward. If you want to revive a downed teammate, throw the smoke, go in and revive. If there are two teammates downed near each other, assuming you have Inspire aced, it is also possible to throw the smoke to the teammate closer, run in, inspire the teammate further away, and help the closer teammate.
Switching cover
If you want to switch cover but it’s too far away or if there are still some cops hanging about, throw your smoke to the middle, run to the smoke, then to the cover. This can also help when doing objectives.
Getting converts
The idea is similar to performing objectives; throw the smoke, go in, convert, and get out.
Defending yourself
Sometimes. enemies can rush you for no reason. You can therefore just throw the smoke underneath yourself as an “emergency” button to defend yourself.
Reducing enemy accuracy
People tend to forget that enemies inside the smoke are 50% less accurate, and so rarely use the smoke for this purpose. However, when used at the right time, it is very beneficial to you and your team.
Smoke Bomb – Advanced
Now that you’ve got the basic uses of the smoke down, it’s time to step into some more advanced uses of the smoke. Part of why this deck is hard to use is that you’re relatively weak without the smoke.
On paper, Sicario is weaker than both Hacker and Rogue without the smoke. This makes the deck very unforgiving if you fail to utilise the smoke well. However, this also doesn’t mean spamming 3 every 60s. Most people seem to have this notion that if you have something, you must utilise it as many times as possible. This can apply for something like Hacker or Kingpin, since the cooldowns on both the pECM and the Injector respectively are very short (assuming you make a lot of kills) and are therefore much more forgiving. But with Sicario, wasting a smoke (such as using the smoke during a clear fade) can come back to bite later when your smoke is on cooldown. Therefore, knowing when and how to use the smoke to make the most out of it is incredibly important. It’s easier said than done though.
And as Yokai taught me, to master using Sicario, you always have to be thinking ahead. You need to consider the environment around you to know when and where to throw your smoke so that you end up making the most out of it without dying in it.
Targeting
Despite being pretty inconsistent, cop targeting can be taken advantage of when using the smoke which, if timed well, can ensure 99% survivability chance when in the smoke. There are many different ways to take advantage of targeting.
In this example, after doing the objective, I placed a first aid kit since I was taking health damage (not mandatory, but is a pretty good safety net. I was about to use the first aid kit to get my health back, but instead, I decided to wait for the cops to stop shooting at me. The moment they stopped, I sprinted onto the ship for cover and to perform the next objective. Yokai has a better example in this run:
At 3:14, Yokai throws a smoke to get his convert while all the cops are focused on him. After converting, he takes advantage of cop targeting and waits for the cops to switch their target towards the new convert. The moment they stop targeting him and focus on the convert can be shown by the hitmarkers, and he runs back to cover without taking damage.
Another way to take advantage of targeting is killing groups. Let’s say there is a group of about 5-6 cops that you would like to kill. If there is no way for you to position yourself to take them down safely, there’s always the option to throw the smoke bomb near them and clear them all. But you should also consider their targeting. If they are focused on a teammate or a joker, for example, this increases the chances of you surviving in the smoke while clearing them since little to no aggro is on you. However, if you mistime your smoke and every enemy focuses on you, the chances of you getting out alive is a lot lower. Mastering Sicario is all about knowing when and how to use the smoke in situations where you at least have an 80% chance of surviving, since taking risks can come with high reward.
There’s also the way you mod your weapons to consider when it comes to targeting. If your weapon is not silenced and you shoot towards an enemy, they will then turn their attention to you, which will lower your survival chance in the smoke if you decided to use it.
Those are just some examples out of many, since there are situations where you might not have jokers to take enemy aggro (which is where good positioning comes in handy), but that’s the kind of things you’d have to consider when you want to use the smoke bomb to the best of it’s ability.
Bullseye proc
Good timing of bullseye can increase your survivability while in the smoke. How? Thanks to both Twitch and Agility Shield. As mentioned before, Twitch gives you +20% dodge every time you get hit, with a cooldown of 4s, while Agility Shield replenishes your armour every time you dodge. Noting this, we can proc bullseye in the smoke such that we can increase our dodge and hence survivability in the smoke. So it would be something like:
Get hit (armour) -> Proc Bullseye -> Get hit (armour) -> Get hit (health) -> Dodge
The more you get hit, the higher your dodge becomes. Good timing of bullseye allows you to take an extra shot before losing health and therefore another chance to increase your dodge. Obviously it won’t work exactly as above since:
1. You can still dodge with your base 20% and
2. Twitch has a cooldown of 4s.
But if you can utilise it in tandem with Agility Shield, your survival chance in the smoke will be much higher.
Using walls/floors
The smoke bomb works through walls and floors. Why? Ask Overkill. But because of that, you can take full advantage of this to throw the smoke bomb in much safer areas such that it still fulfils its purpose as if you had thrown it directly to where you want it to.
Here, I wanted to throw the smoke at the stairs to clear the group of enemies there, but that would be risking exposing myself to enemy line of sight as well as the stupid aimlock in this game. So instead I threw the smoke at the wall beside the stairs so that the effects of the smoke still works through the wall. (the enemies that were there went away for some reason, but the general idea for the smoke use is there).
Throwing the smoke on the floor or the wall also has the added benefit of being able to maintain your vision while still being under the full effects of the smoke.
Reviving (advanced)
Using Inspire aced is good, especially with Painkillers aced. It allows for your downed teammates to get an insane damage reduction for 5s, which is more than enough for them to find cover.
However, this mainly works on higher armour decks.
For dodge decks, your teammates will likely have suit, which has 20 armour, as well as only 23 health on DS. Even with Painkillers aced, their armour and health is simply too low for the effects of Painkillers to give them a higher chance of survival. So what can you do?
Throw a smoke in for them, and then Inspire.
With both Smoker and Unseen Shadow, your teammates have a 50% chance of not getting hit PLUS an extra 10% dodge. This comes in very handy for dodge decks since they have a decent amount of dodge, and will definitely benefit from more dodge. Note that an increase in dodge does NOT make a deck weaker in any way, just because it’s RNG. The chances of you not taking damage are higher, with no losses in survivability.
Smoke positioning
Good smoke positioning relies on knowing where to throw your smoke to maximise the amount of benefits the smoke can provide you.
Not the best example yet, but here, I noticed a dozer that I wanted to kill. Since the area was clear it wouldn’t have been a bad idea to just yeet the smoke and go in. But here, I threw the smoke in between the dozer and the boxes so that if in case I do get flanked, I will still be guaranteed survival because of the cover. Not to mention, by throwing the smoke there, I was also able to make the dozer become less accurate while boosting my own survivability and being able to engage at a good distance.
Slightly better example of the same situation. I threw a smoke to the middle of the mini dozer and cover so that the dozer became less accurate and my survival chance in the smoke was higher. This works especially well on mini dozers since they have a very high fire rate.
Bonus clip – How to rush to boat on Alaskan Deal
Playstyle
Be aggressive
Contrary to what people think, Sicario is an aggressive deck, and should be used as such. It does lack the survivability that aggressive decks such as Hacker, Kingpin and Anarchist, which is why you shouldn’t be as aggressive as those decks. Remember that Sicario does not forgive misuses of the smoke; it has a longer cooldown compared to other throwables. The fact that you get a 1s cooldown reduction per kill further justifies an aggressive playstyle. The better you can utilise your smoke by playing off the mechanics of the game such as AI, targeting, armour gating, etc., the more aggressive you can be.
Here’s an example of Yokai being aggressive with the deck:
This is an example of an aggressive play with this deck, and why first aid kits are best for Sicario. It’s not recommended to make such risky plays like that without the smoke, but it’s just an example of what is possible with the deck without its main utility.
Get converts
Not only do they provide passive healing with Hostage Taker, but they also mean less cops will be focused on you. This will allow you to make more smoke plays based on this targeting.
Use First Aid Kits
Playing without first aid kits is perfectly fine, but Sicario definitely benefits from using them. First aid kits are what allow Sicario to profit as an aggressive deck, and will almost guarantee you survival when rushing for objectives (unless you’re going to the middle of nowhere with 69 cops shooting at you). You can still play without them, but you’ll have to be more passive to wait for your health to fully regen before considering rushes.
You shouldn’t be dying in the smoke
If you use the smoke well by utilising all the tips given above, you really shouldn’t be dying in the smoke. There are some occasional BS that can happen from time to time such as grace periods, but besides those, dying in the smoke should never happen if you use the smoke well.
What NOT to do with the smoke
There are 3 situations where you shouldn’t use the smoke:
SNIPERS
Snipers only need one good shot through the smoke to deplete more than half of your health and exposing your health, leaving you very vulnerable in the smoke.
TURRETS
Turrets have a very high rate of fire, which means you would be “rolling the die” way more than usual. This puts your survival in the smoke in the hands of RNGsus, so it’s not worth smoking in the line of sight of a turret (unless you can time the smoke with the turret’s targeting).
LARGE GROUPS OF ENEMIES
This is the same as the turret, the more cops you expose yourself to and hence you’re “rolling the die” a lot more. The only time where this would be fine is if only a few (2-3) are targeting you or if you’ve placed a first aid kit. Other than that, it’s not worth the risk.
Conclusion
So I hope this guide has helped you understand how to play this amazing deck beyond what it offers on the surface level. If you have any questions regarding the deck as well as on builds, feel free to comment below. Speaking of builds, Yokai and I have made Sicario build guides on Steam, check them out:
[Yokai’s one to be updated]
https://steamcommunity.com/sharedfiles/filedetails/?id=2560020766 – [steamcommunity.com]
Check out Yokai’s channel, he makes amazing content 😀
https://youtube.com/c/YokaiIAm – [youtube.com]
This is all about PAYDAY 2 – Overpower Sicario Build and Perks Deck Guide; I hope you enjoy reading the Guide! If you feel like we should add more information or we forget/mistake, please let us know via commenting below, and thanks! See you soon!
- All PAYDAY 2 Posts List


Leave a Reply