A mechanics reference guide for the veteran
Welcome
A minimalist and retro Role-Playing and Strategy game incorporating elements of multiple other genres to create a unique gaming experience. You’ll uncover the mysteries of a world forgotten, build a town, meet refugees and of course, create your own paths so you can fight monsters.
This is a guide for everyone
I call it a manual so that it’s clearly understood to contain all of the essentials a new player need to get started, from zero. The guide is roughly divided between that section, which I call the Manual and an advanced Mechanics section for those already familiar about the game or who simply want to know the good stuff.
There’s an in-game encyclopedia too!
It takes some resources to unlock from the town interface but in it you will find endless information and unlock-able lore about the game.
It’s dangerous to go alone…
There’s only so much a steam guide can do. Beside all of the other excellent guides on steam for Loop Hero, there are great resources online which I suggest such as:
Make sure to took a look at the docs.google.com – https://docs.google.com/spreadsheets/d/1Ao1ZytpfxEqS70jTamTUOPA8MmF1pWEbrEP52XdfyMs/edit?usp=sharing
Not everything can fit nicely in a Steam Guide. Such things as a detailed listing of every game tiles, every cards and every monsters raw stat can be found docs.google.com – https://docs.google.com/spreadsheets/d/1Ao1ZytpfxEqS70jTamTUOPA8MmF1pWEbrEP52XdfyMs/edit?usp=sharing.
Manual: The basics
Perhaps you’ve just downloaded the demo, or you bought the whole thing, either way is good and now is a great time to get started. Let’s fire it up either from a client such as Steam or directly from your desktop by clicking its icon.
You’ll be greeted with a menu such as the one on the right. There’s a lot to unpack here. I suggest you click that shiny “Start” button and get right into the action.
A short in-game cinematic will play.
As the cinematic play, as any other time a dialogue option might appear, you can press anywhere with your mouse or gamepad to advance, the back button to read the previous test or the …X button to quickly go to the end.
For the purpose of this guide only the mouse and keyboard interface will be mentioned for brevity from now on.
The Tutorial
As you start the tutorial, pay close attention to your screen as the game introduce the various basic elements to you. Important to note is that the game is divided in two phases; the Planning phase where the world stand still for you to comtemplate and build and the Adventure phase where your hero move by itself and fight monsters.
To your upper left is a bar indicating the time of day. Usually it goes forward from left to right as you walk or fight. Once the bar is full a new day begin. Many things can happen on a new day, but for us, in the immediate, this mean the appearance of a new monster, a slime.
Fighting is hands-off. Automatic. Your hero select an enemy to attack randomly and will fight it until one of you or the monster dies. Then he repeat the process, while enemies largely do the same.
To equip an item, click on it, then click again the slot you want to equip it in. You might notice you can’t unequip it afterward. This is normal; in Loop Hero items are equipped only once. The only way to remove it is by equipping a new item instead which will destroy the old one.
In Loop Hero worlds are created one tile at a time using cards acquired in various ways but usually by killing monsters. To place a tile with ease, first switch to Planning mode (Right-Click or Spacebar) then select where you want to place it. The game will helpfully light up the squares in which you can place the tile.
To your upper right is your character resource stash. Resources are acquired in many ways. Stepping on particular tiles. Fighting monsters. Created with Alchemy. In this tutorial, we obtain one Pebble from placing a Rock tile and one Branch from placing a Forest tile. Resources will be used later to build up your town.
Important: There are two type of ressources. The Small pieces and the Whole ressources. This goes for almost all resources. Many smalls make one big, automatically. From Pebble to Stone, from Branches to Wood.
As noted by this tutorial, clicking the bottom right “Running Man” will allow you go leave the map. Once you leave, you cannot go back to that map. You also cannot save a map and leaving it by using the exit menu will bring you back to town later.
Manual: More Tutorials
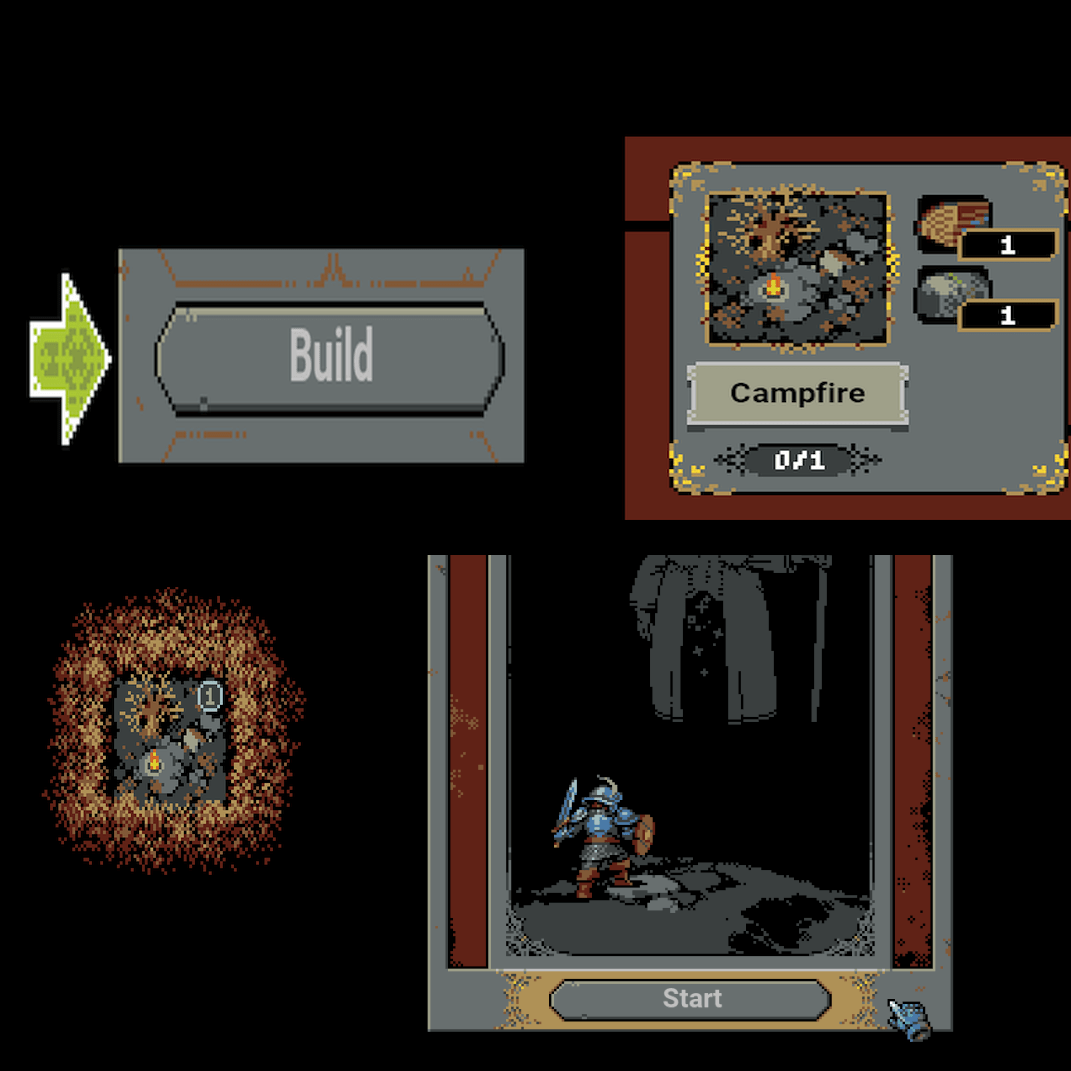
After every adventure comes a time to relax and build. This time is no different and as soon as you finish your first tutorial you will reach a void and get the opportunity to create a campfire. As this segment is very short I will skip it for now and revisit it in the next chapter. You can always skip ahead if you want to know more about town building but for now, let’s continue the tutorial with your first real adventure.
Chapter 1
Leaving town toward the wilderness a new random map path is created. The goal, ideally, is to fill the Boss meter up to full by placing tiles, which will make the Boss appear. You can find the meter to the top left of your screen just under your you Daytime meter. It looks like this.
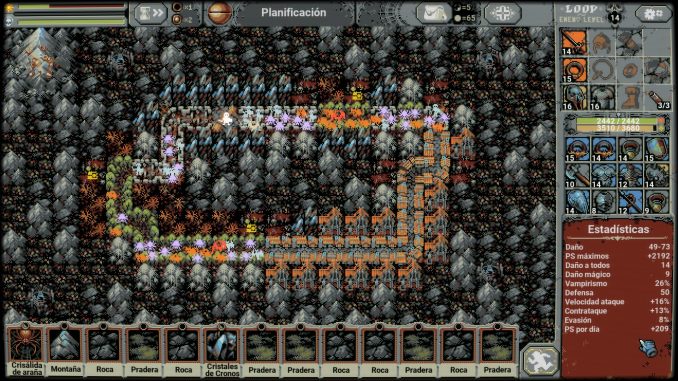
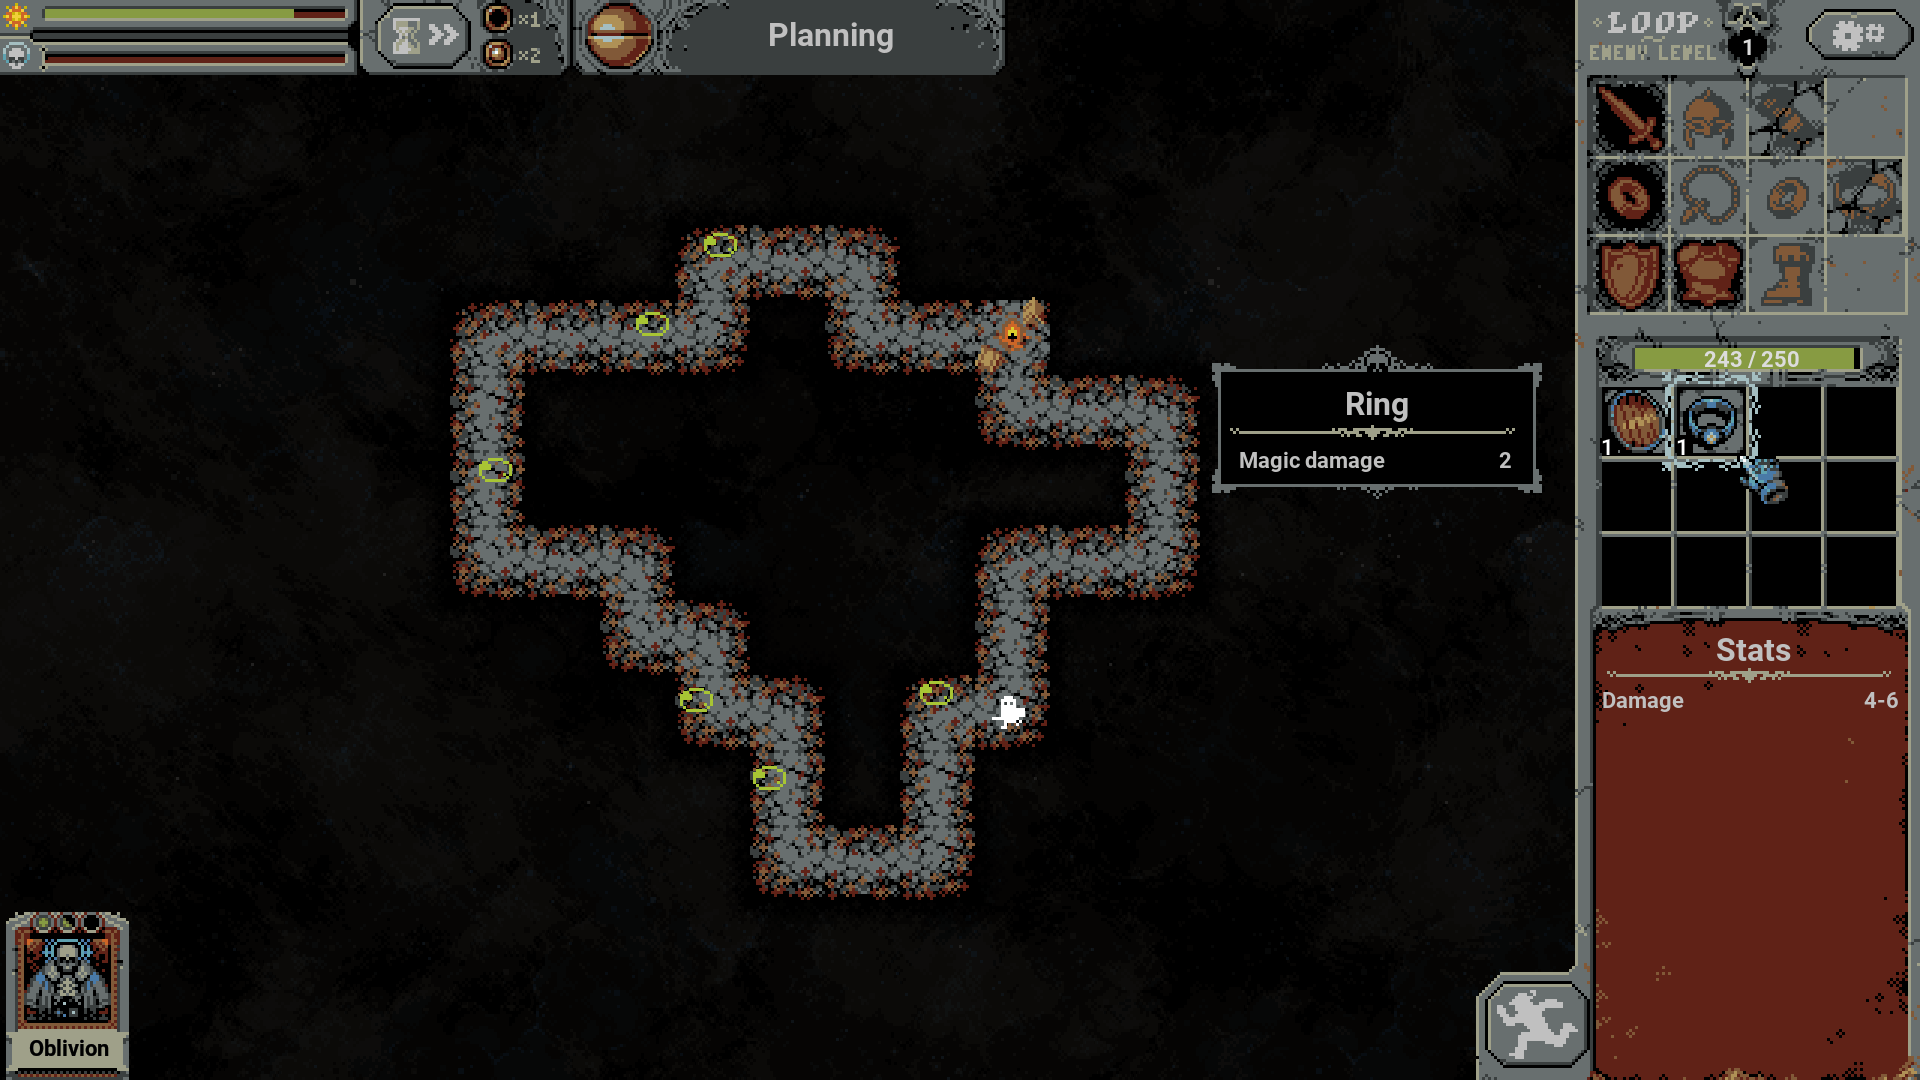
Let’s take a loot at what such a map could look like. As you can see we’ve already killed our first Slime which rewarded us with good loot to begin our adventure. Click the image to make it bigger!
On the left is a shield. Shields are the cornerstone of our young Fighter’s Defense. Do not underestimate Defense! The rule of thumb is that every point of Defense reduce damage by one. When multiple monsters attack you at once this can stack up particularly fast! When it comes to shield, pay particular attention to how much Defense it give you as it’s by far the main source of it!
On the right, highlighted by our cursor, is a Magic Ring. Rings offer your hero all sort of effects! Stats and effects are discussed later, but for now, take a closer look and notice it says “Magic damage”. That’s. Awesome. Defense might be king of survival but, for now anyway, Magic damage is king of damage. It completely ignore monster Defense… what a good start!
- Kill monsters, get cards as loot, create more tiles and more monsters!
- Equip your strongest, highest level weapons
- Equip items with strong Defense
- Equip magic items with Magic Damage if you find them
- Keep your monsters separated
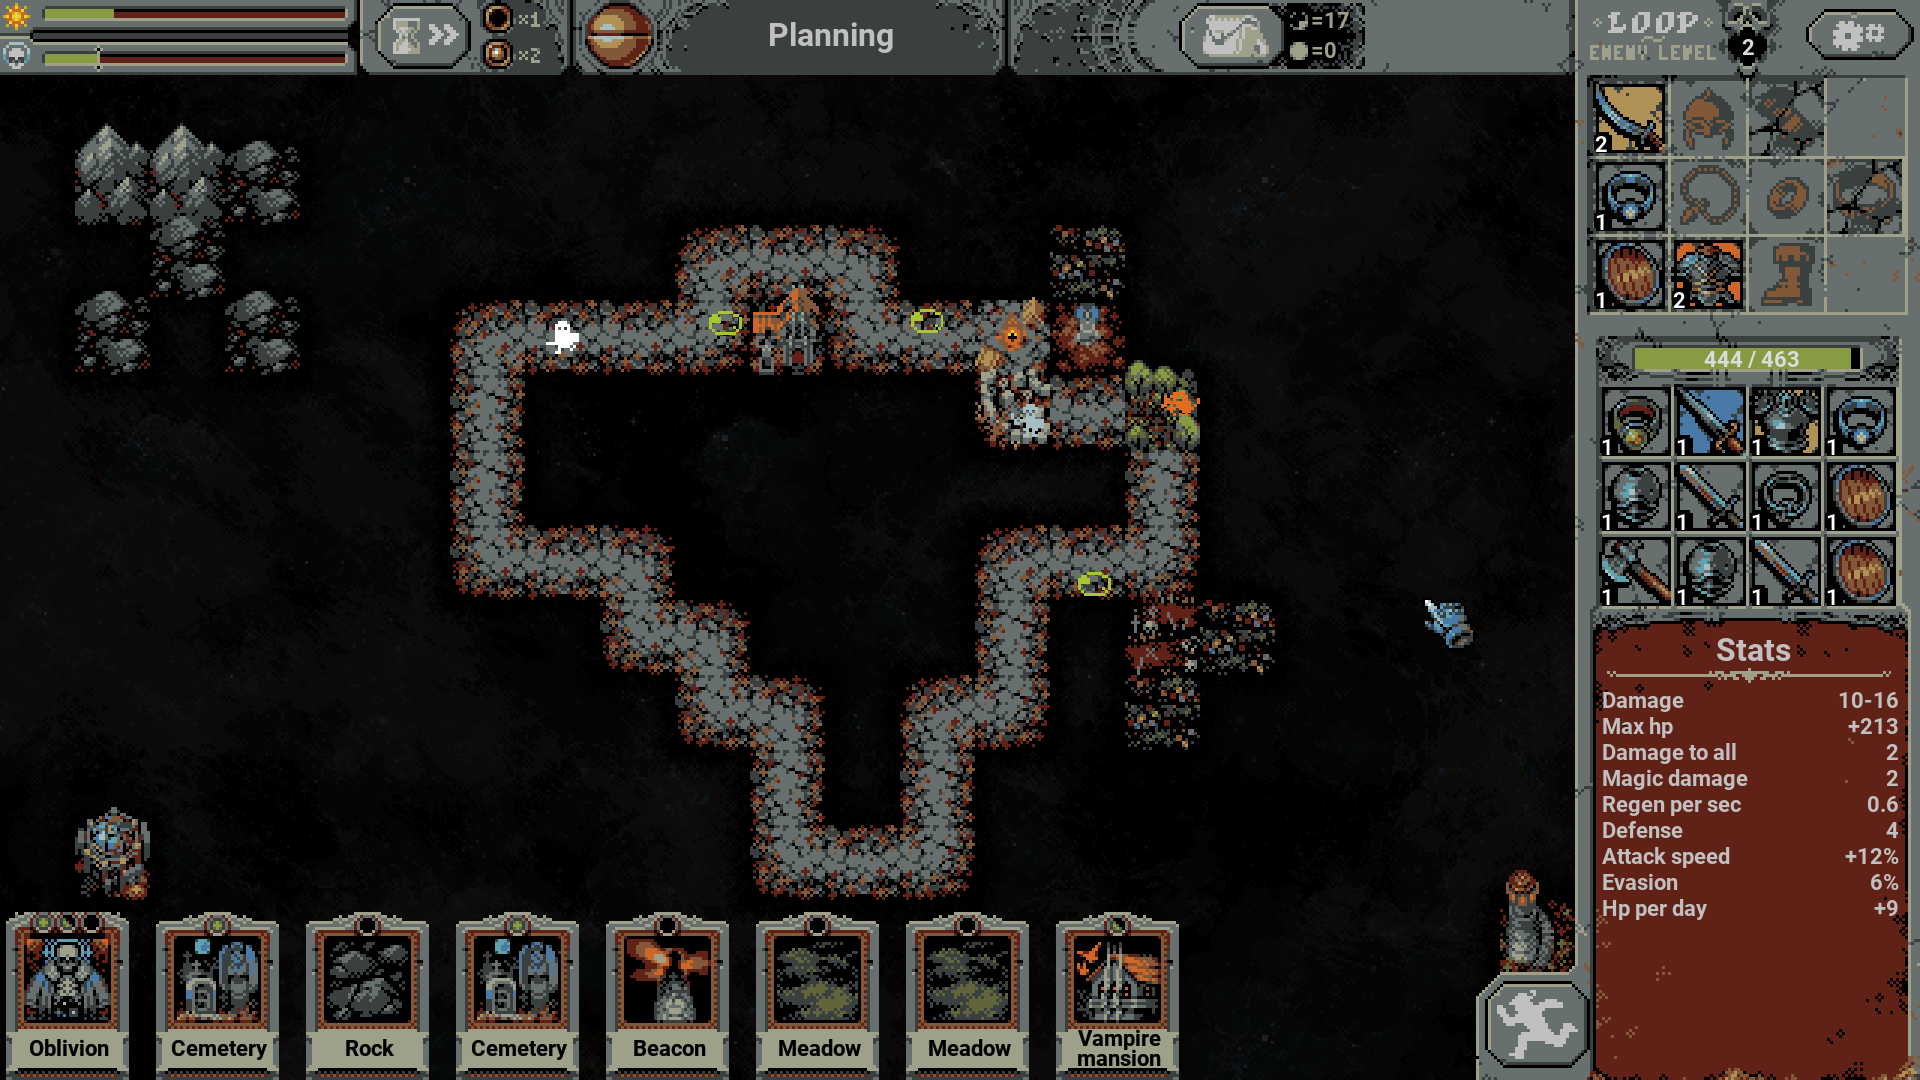
Let’s equip this good stuff and go for another loop or two. We’ll kill many Slimes and loot them for Cards and Equipment. Let’s take a look at our map again near the end of Loop 2. So much as changed, it almost makes you wish I had taken an intermediary screenshot! No matter, we’ll break it down in small chunk and see what’s what.
First is our Camp. As you might have noticed by now, your Camp remain safe, free of monster and a source of Healing whenever you reach it.
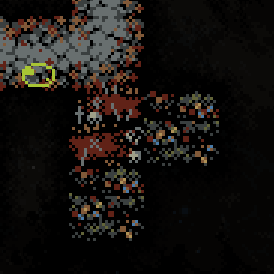
Right to the south of it is a Cemetery. Cemetery create strong Skeletons for you to fight every few days. Be careful not to fight more than one at once if you can! The reward for fighting Skeletons are items with many magic properties.
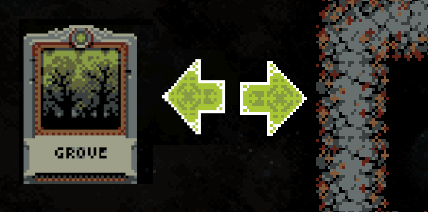
To the right of the Cemetery is a Grove. Many Ratwolves lurk in Groves and they love to spread around up to one tile away. The last thing we want right now is fight BOTH a Ratwolf and a Skeleton… which is why they are spaced away by one entire tile.
Let’s ignore the lantern and notice the meadows instead. These give you health upon every new day and when placed near other non-meadows tiles… they bloom for even more health!
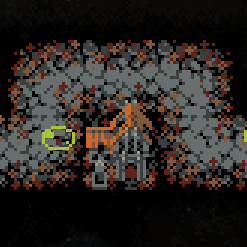
Far to the left of our camp is a lonely Vampire Mansion. Lonely, because it will only come into play whenever you fight any Slime appearing nearby. Vampires aren’t too though and if you feel adventurous you can place them near your other monsters… but there’s a risk. Vampire make every monster gain Health upon hitting! So I placed it near a Slime and you can be sure more Slimes will spawn soon nearby so that you can fight those Vampires with easy Slimes henchmen.
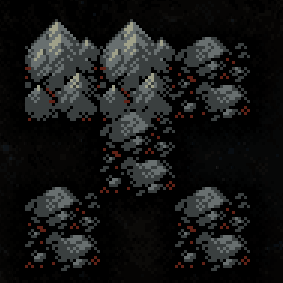
To the upper left are rocks and mountains. By placing them in a 3 by 3 grid they will evolve into a Peak, which give as much HP as 9 mountains AND spawn a creature for you to fight for more Cards and Loot. While to the south of our camp is a Battlefield. Battlefield will create a Chest every time you start a new loop. Try to keep it near your camp if you can, since the level of the loot scale with the level of the loop. One might want to combine it with a Vampire mansion so you get to fight “only the Vampire” but there’s a small amount of risk as sometime the chest… can be more than it seems.
It’s Boss Killing Time
As mentioned earlier, as you place tiles, the boss counter grows and when it reach it’s max a Boss monster will spawn.
The Boss of the first chapter is one though cookie. He hit hard, has a lot of HP and special abilities.
A lot could be said and a lot could be spoiled but discovery is part of the fun so just know that the game has special dialog just in case you lose, which you might, unless you’re either very brave, very lucky or just very experienced at video games!
I’ll give you a pro-tip though. Place one Beacon which cover only the squares including your Campsite. Beacons are normally a boost to enemies… but not to Bosses!
On this you might want to finish the tutorial or take a look at the next section which deal with more in-depth look at equipment. At any time you can also go back to the town, if you do it at the camp, you keep all your resources while you’ll lose some items if you leave far from your camp and almost all of them if you die.
Manual: Items and Stats
Every Hero needs them. Destructive weapons. Protective regalia. Items of power.
Loop Hero is no different. What are those items, how do you obtain them and how, exactly, do they work? Let’s take a look.
Acquiring new items
This is very straightforward. You kill monsters. That’s it.
There are of course some exceptions. A notable one is that you can start with some items if you upgrade your town. You can also get items as rewards for hunting monsters, known as quests. You’ll need to unlock Villages by building up your town for this. Finally sometime you don’t get the items right away. You might have to kill monsters, get their trophies and THEN reach the end of the loop to get your hand on new items. No matter; there will be lots of monster slaying involved if you want your loot.
Items categories
Let’s take a look at the various elements that differentiate equipment pieces:
- Item Slot: Most class start with 4. The fighter has: Sword, Ring, Shield and Armor.
- Type: A mace is different than a sword. Armor have their own visual types.
- Level: An higher level mean more damage on your weapon, more defense on your shield, etc.
- Rarity: That’s the color of their background. Blue is better. Yellow is great. Orange is best.
Additionally there are some basic rules to understand as to how you acquire items namely:
- Some monsters drop different Rarity and Level of loot.
- Every monster can drop every Item Slot and Type of items.
- Some monsters can focus on dropping more or less of some Type.
- Monsters will never drop an Item Slot which you can’t equip.
Statistics
Separated in Offensive and Defense categories.
Listed in a rough order of importance of a new player using a fighter.
So if you don’t know what to use, try use the stuff that’s on top of their relevant category.
- Magic damage: Damage which completely ignore Defense.
- Damage all: Damage which applies to all enemies including your target.
- Counter: When you get it, you hit back.
- Attack speed: Reduce the time between your attacks.
- Defense: Block some damage. Very roughly 1 HP to 1 Def.
- Vampirism: Restore X% amount of health from your attacks and counters.
- Evade: When you would get it, you don’t get it.
- Regen per sec: Restore health over time both in combat and out.
- Max HP: Add to your Maximum HP
There are, additionally, stats specific to unlockable classes as well as various other stats. We won’t touch on them right now.
Manual: Cards and Tiles
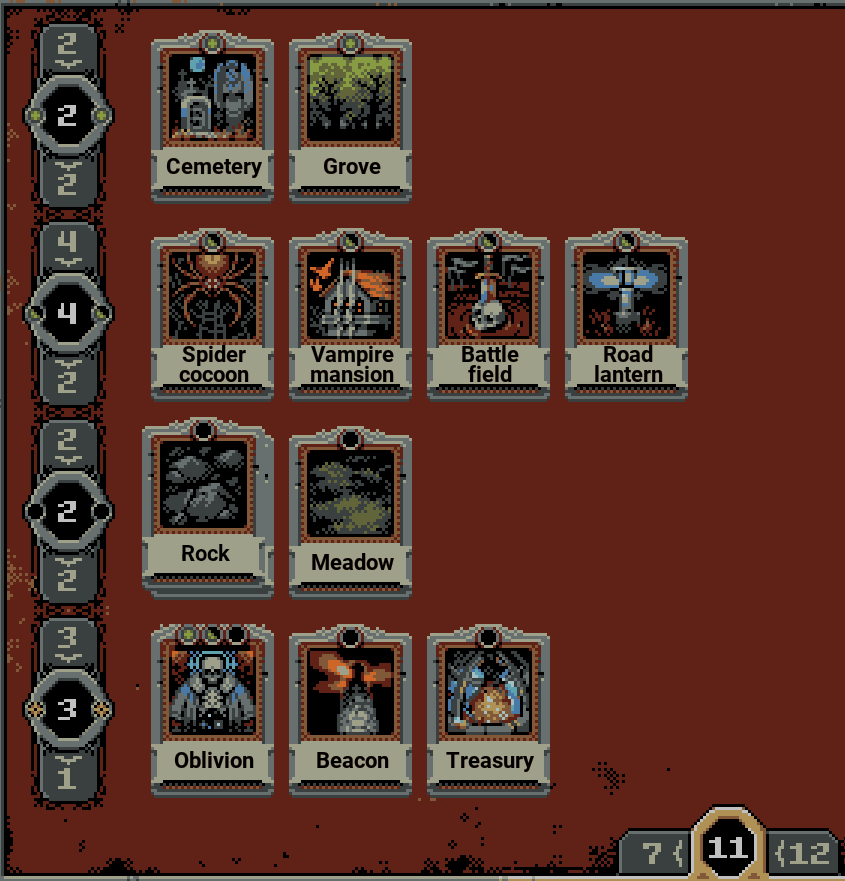
Perhaps you’ve finished the tutorial, are still right in it or just need a reminder, but in any case, when starting out a new game of Loop Hero you start out with a deck of basic cards. You can see them on the right here. We’ll go over those basics cards, one at a time, but first some explanations.
There are 5 categories of card. Those are not the real name of their categories but in order those are:
- Path cards. They go… on the path.
Denoted by a full green circle on their art. - Sides. They must be placed right next to the paths. Half green circle.
- Wilderness. Placed in the nothingness filling up the map. Empty circle.
- Special. Basically the same as Wilderness cards… but different.
- Gold. They’re literally made out of gold.
When adjusting your deck in preparation for your next expedition you must choose at least X cards of each category, but no more than Y. The same is true of your total number of cards. You can see all those numbers to the left of the cards themselves and to the bottom for the total.
Example: You must pick at least 2 but no more than 4 Sides cards.
Example 2: Your deck must consist of a total of at least 7 cards but no more than 12.
Those limits will increase as you obtain more cards.
Finally not all cards follow the placement rules. By example, rivers, an unlockable Wilderness card, can follow paths and even cross them.
docs.google.com – https://docs.google.com/spreadsheets/d/1Ao1ZytpfxEqS70jTamTUOPA8MmF1pWEbrEP52XdfyMs/edit#gid=1922490772
Without further ado…
| Name | Main purpose(s) |
| Cemetery | Spawn Skeletons every 3 days. Skeleton are hard hitting creatures rewarding loot of high rarity. |
| Groves | Spawn Ratwolves every 2 days. Ratwolves are average creature rewarding loot of high level. Can wander one tile away from the grove itself. |
| Spider cocoon | Spawn a Spider every day. Spiders are weak creatures rewarding average loot but a good number of cards in the early game. |
| Battlefield | Spawn one chest upon reaching your camp. Chest don’t fight back… or do they? |
| Road lantern | Reduce the maximum amount of monsters on a tile by one down to a maximum of zero. |
| Rocks/Mountain | Increase your maximum HP. Place 9 in a 3 by 3 grid to transform it into a peak which spawn a monster. |
| Meadows/Blooming Meadows | Restore some HP every day. Place next to a non-meadow tile to make them bloom. |
| Oblivion | Destroy Goblin camps or anything else. |
| Beacon | Increase yours and the enemy attack speed but not Bosses |
| Treasury | Place other tiles near it for extra random resources. Surround it completely to turn it into an Abandoned Treasury which spawn a monster. |
Introducing a card, any card, into your deck, reduce the odds you’ll be drawing all of your other cards. It’s all one big pool of odds weighted against each others. More on that later.
Manual: Monster Academy
Behind the scene every creature is assigned a certain number of Health, Attack and Defense. This number is then multiplied by the loop number.
You inflict damage to the enemy roughly equal to your Weapons Damage minus your enemy Defense.
The enemy inflict their damage in the of their Attack minus your own Defense.
For the most part, combat is that simple.
A Combat Scenario: The first five Loops
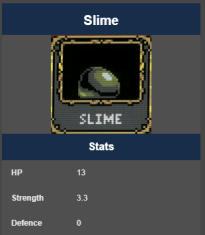
Let’s take for example Slimey over here with its stats shamelessly plundered from theloophero.fandom.com – https://loophero.fandom.com/wiki/Slime. The following examples are real, don’t try it at home, etc…
You begin a new expedition. You look down your path. You see slimes. It’s always slimes.
Slimey is… doing whatever slimes do. He looks at you, probably impressed. While you, being the brave Hero that you are, will stumble upon Slimey and fight him sooner than later. The combat will go something like this.
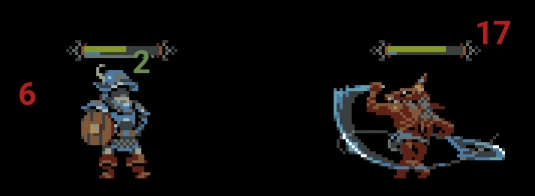
You’ll bravely hit Slimey a few time with your stick until you inflict 13 point of damage which will kill him. That stick do 5 damage, so that’s about 3 hits to his 13 HP. In the meantime Slimey will oh so cruelly fight back inflicting between 3 and 4 point of damage to you, the undefended hero, per each of his hits. You win, obviously. Cue victory music, a shower of cards, epic loot and more importantly… a shield with 4 Defense! Our nak*d hero promptly equip his shield.
Fast forward to our next gooish encounter. As before, hit, get hit, but this time there’s a noted difference. Our hero only take 1 (and rarely 2) point of damages per vicious Slime hit. Why not zero you might ask? Because there is a hidden damage formula which says this is how it works. The rule of thumb stated before, where 1 point of Defense protect against 1 point of damage, is just that, a rule of thumb. Damage cannot be completely avoided by Defense alone.
You loop around once. Slimes are harder, but you can still fight them. You loop a third time. Now let’s recap your current situation as Loop 3 begin.
You have: A Stick which does about 5 damage and a Shield which provide 4 Defense.
The Slime Soldier has roughly*: 36 HP and 9.9 point of damage. Still 0 defense. They are literally liquid ¯\_(ツ)_/¯
As you start your next fights, you realize the balance of power is starting to shift. The Slimes, quite furious now, hit you for an average of 6 damage. Sometime 5, sometime 7. You’re still hitting them for a formidable 5 damage… but Slimes can take a lot more hits with all their HP. Your health is slow and if you can’t find sometime better than a stick and a shield to fight with you’ll be in real trouble…
*Many other factors influence the actual stats of monsters including by example which Chapter you are in, which cards you play, etc.
Through luck or sheer perseverance our Hero not only survive but thrive and arrive to Loop 4 with improved equipment… Which, as it turns out, was in his bags all along. That sure is convenient!
Currents Hero stats:
14-22 Damage (Weapon add to base unarmed damage)
9 Defense
Current Slime stats:
5. HP
13.2. Damage
0 Defense
As you can see, our hero was on the receiving hits for 5, 5 and 7 damage. This mean our 9 Defense protected us for a little less than 8 damage per hit… Not bad!
On the other hand our little slime was completely obliterated. It’s time for a better opponent. Hopefully.
Out of the corner of your eye you spot him:Shia LaBoeuf. A Goblin Leader.
h14-22 Damage
9 Defense
Goblin Leaders Stats at Loop 4
6. HP
16.1. Damage
3 Defense
Before we recap what happened in the battle lets take do some math.
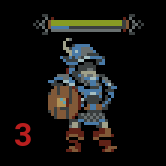
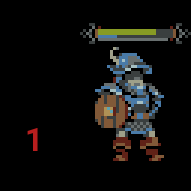
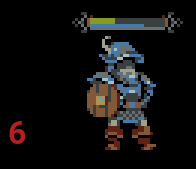
We do an average of 18 damage to the Goblin 3 Defense so we can expect something around 15 damage. While the Goblin Leader does 16 Damage to our 9 defense, meaning we expect to take roughly 7 Damage.
Note: Our Hero noticed he had a better shield in his bag and equipped it during the fight. Damage was unchanged. That was very smart of him but not so much of me. We’ll discard those two hits.
The Goblin Leader inflicted: 9 6 6 7 7 7 9… for an average of 7.3 damage as predicted.
The Hero inflicted: 17 19 16 14 21… for an average of 17.4, again, roughly as predicted.
It’s all well and good to know how to inflict damage and how to protect yourself against it, but there are much more to combat that this. Before you know it you could be facing huge threats which either crush your defense or completely ignore it, as well as swarms of enemies… maybe even backed by archers.
The good thing is their appearance are entirely up to you!
Manual: Town and Crafting
Between adventures you can rest here. The town is a gathering point for refugees and craftsmen of all kind. When you fight monsters or explore the world you gain materials that you can use here to expand you Town with new buildings, learn new cards and create useful items for your townspeople which will help you on your epic quests. Like cheese!
Building
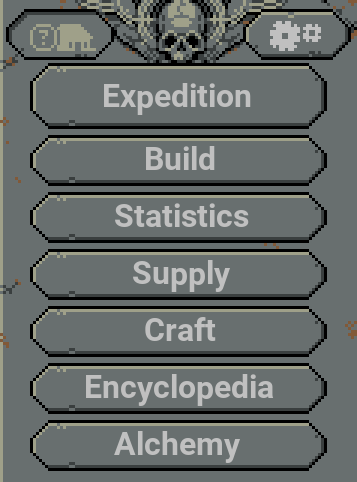
Take a loot at everything there is to be unlocked. Many options will be missing at first. As you expand and build, those options will appear. From the very beginning we can Build. We’ve already built a campfire before back in the tutorial. For now let’s try and build something new. A kitchen would be lovely. First, click on Build to your upper right. Right under the scary skull.
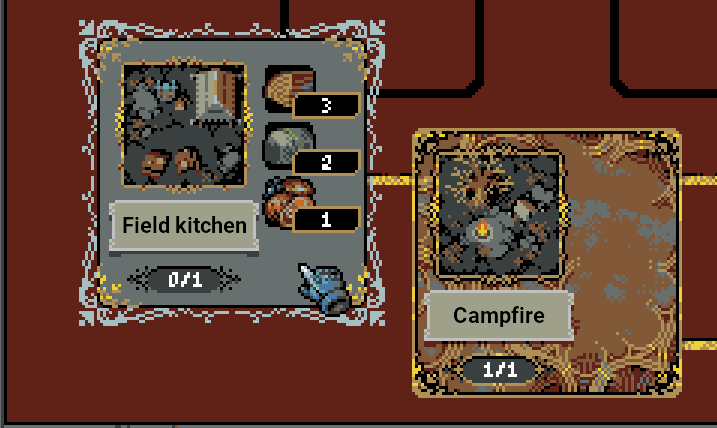
Then, we’ll click on the Field Kitchen. Hopefully we have enough resources to build it. Otherwise, we might have to go and fight a few more monsters in an expedition. If you do have the materials, we’ll next place the building itself. Somewhere cozy, preferably and with a good view.
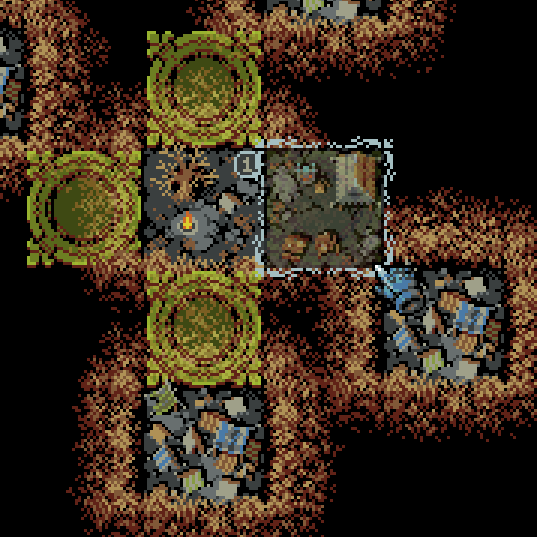
Here. Perfect. You have built your first addition to the town itself. There will be many more to come. Farms. A Smithy. Everything an adventurer need.
Perhaps now is a good moment to take a break and familiarize ourselves with the Statistics menu. It’s right there under the Build option. There’s not going to a be a lot in there. We probably just started out. Nor is a particularly useful option, to be honest. Still, it’s nice to know that there’s somewhere out there dutifully taking notes of your accomplishments.
this would be it. There’s a lot more to explore and we will. That being said we’re entering spoiler territory. Explore Loop Hero, or read on, the choice is yours.
Mechanics: Combat and Stats
- Magic damage: Damage Bracket which completely ignore Defense.
- Damage all: Damage Bracket which applies to all enemies including your target. Your enemy can evade it, many are strong or immune against it, Swarm are weak against it, defense apply fully to it unless on your main target.
- Counter: When you get hit, you hit back. Applies all your modifiers, but your enemy can evade it and it docs.google.com –
- Skeleton Level: Skeleton scale like monsters because they are monsters. Without levels they are nothing.
Damage Types
Normal Damage: Affected by Defense on a 1 to 1 basis before cap and/or diminishing returns. Def is a stat which many enemies have little or none of (and sometime a lot), which make for a lot of variance when fighting various enemies.
Magic Damage: A Bracket of Damage which Ignore Defense. Nothing else. Reflect will still reflect, etc.
Damage All: A Bracket of Damage which is added to both your target and all other main screen enemies.
A very few set of enemies either take less (such as Skeletons) or more (Swarm type enemies) damage from it. Untested single target. Tested with secondary enemies which are fully affected by Defense, drastically reducing its utility particularly considering some enemies are completely immune to it in later chapters thanks to special abilities.
Retaliation: Untested by myself. Seems at first glace to be similar to Damage All. Please let me know if you know or tested this.
Others: Lightning, Ranged, “attack perks” Damage, etc: I don’t know.
Stamina
Illustrated by a Grey bar during combat. Is meant to balance high attack speed and evading.
Starts at 100, regenerate 15 points per second and gain 10 point when hit.
2. are spent on attacks/counter-attacks and 10 points on Evading a hit.
Attack speed
Add attack speed together from all your gear and tiles
Multiply with the base which is (after rounding) .6667/seconds for Fighter. This is 90 frames.
Example at 12% attack speed: 0.66 * 1.12 = 0.74 attack per second
Beacons stack multiplicatively with Gear+Tile value.
docs.google.com – https://docs.google.com/spreadsheets/d/1X1kTGvmIO2-kr4F6WXT-eKiz5er4MifLfB5chSDC1Jo/edit#gid=1683875531
Mistake on my part, rounding, flooring, breakpoints, alignment of the moon, I don’t know.
Prioritization (auto-target) of enemies is random but some enemies such as Chests are targeted last, same with Mimics unless hurt first.
Monster scale their stats such as HP and Strength linearly, plus a small percentage bonus noted on the expedition screen. Example: 10hp -> 20.2 hp -> 30.5hp.
Strength is a monster Damage stat subject to some randomization and attack speed
Many monsters have an amount of Regeneration and/or Evade
Mechanics: Item Drops, Cards Weights
Item Drops
All the data is found either online, in the wiki, in various sheets or docs.google.com – https://docs.google.com/spreadsheets/d/1Ao1ZytpfxEqS70jTamTUOPA8MmF1pWEbrEP52XdfyMs/edit#gid=428425464.
Explained by example. All values noted can be seen in the game files and are docs.google.com – https://docs.google.com/spreadsheets/d/1X1kTGvmIO2-kr4F6WXT-eKiz5er4MifLfB5chSDC1Jo/edit#gid=109283393.
Value types for a test subject: Ratwolf.
Item Chance: 40%
Double as both the Card/Equipment Divide and the Chance of Additional Items over the minimum if any.
Item Minimum: 1
This mean this monster will always drop at least 1 item, no matter what.
Almost all enemies have at least minimum 1. Even Slimes. Some, such as Mosquitoes, Goblin and Fishmen have 0.
If playing the Rogue equipment drops are baubles instead.
Item Maximum: 2
This mean this monster will drop up to 2 items, by (item) chance.
A common value. Most monster have either 1 or 2 as their Item Maximum
Average Items gained from killing a Ratwolf: 1.4
This is not an actual game value but is calculated by means of Item Min + Item Chance for each possible drop in surplus.
Some monsters have increased chance to drop items with specific affixes.
docs.google.com – https://docs.google.com/spreadsheets/d/1Ao1ZytpfxEqS70jTamTUOPA8MmF1pWEbrEP52XdfyMs/edit#gid=980641869By example, our Ratwolf here has a 2% chance to drop a Yellow Item.
Card Weight and Probability
Monsters have a stat called Item Chance.
This determine (also) if an item will be a Card or an Equipment Piece
Some monsters like Chest (not to be confused with Mimics) have 100% Item Chance and will never drop any Card.
While Books, have only 15% item chance to drop Equipment on an item by item basis. They are an obvious good source of Cards if you can farm them efficiently.
With 15-25 item drops with a 50% Item Chance, the Frog King has the highest possible Card Drop chance total in the game.
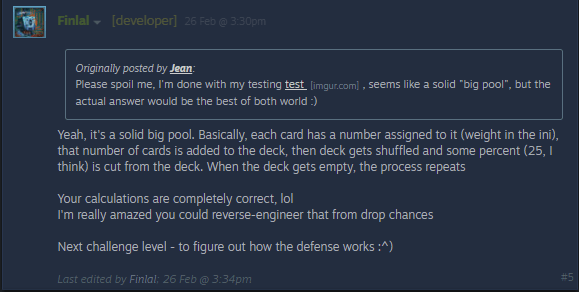
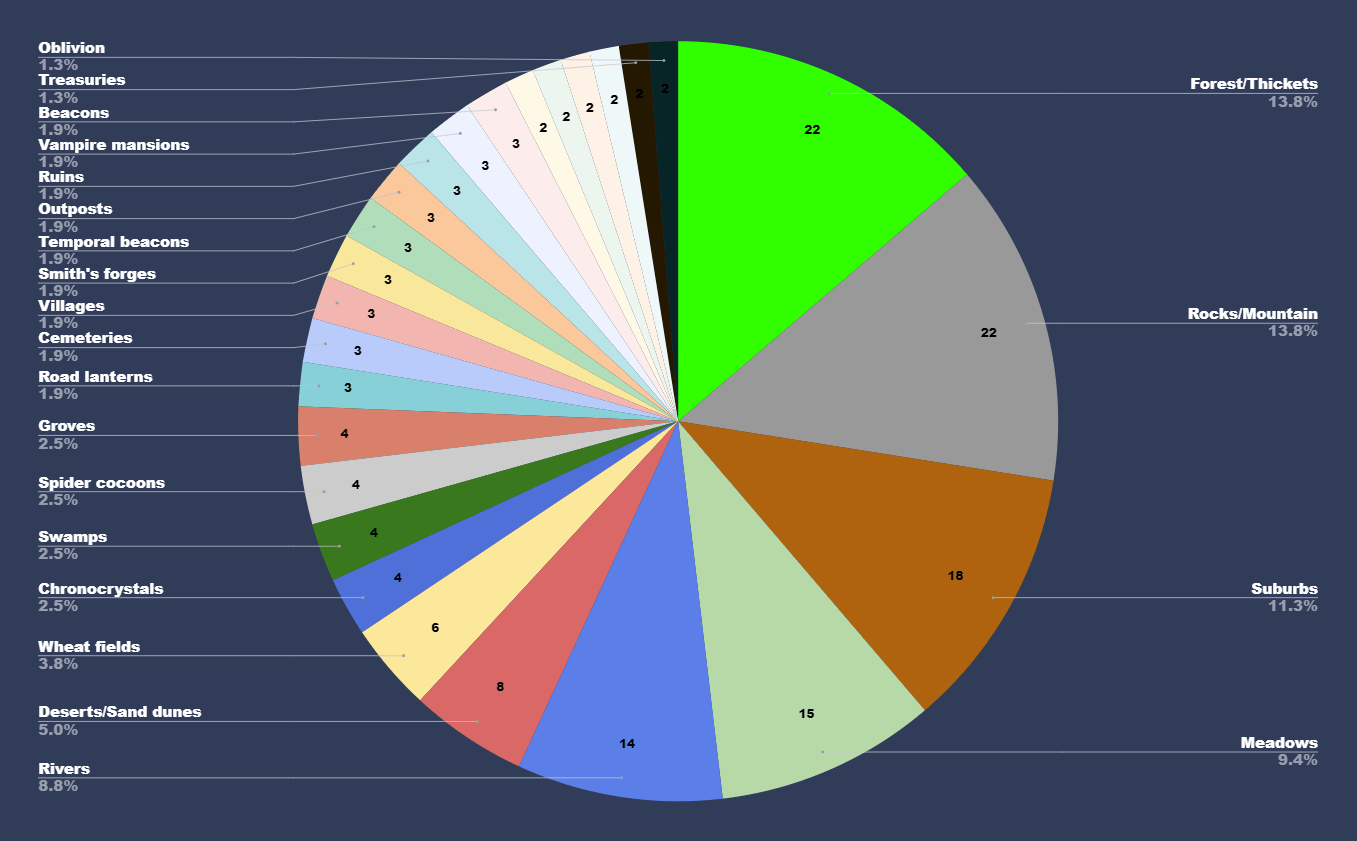
Cards are weighted against each other on a “big pool” basis. Categories play no role.
In pratical terms this mean that inserting a card with a huge card weight, such as a Wilderness card by example, reduce your odds of drawing every other cards you placed in your deck.
Examples of an high weight card are Suburb, which have a weight of 18 while a small card weight would be Oblivion which has a weight of only 2.
Weights are not to be confused by probability. By example a deck consisting of only Suburbs and Oblivion would have a 10% chance to be drawn while the Suburbs would have 90%.
In simple math you add the total weight of your chosen cards to get your total weight.
Then divide one cards weight by that that total weight.
Again with the example above: 20 total weight. 2 / 20 equal 0.10 so 10% for Oblivion.
The entire deck is used every time but 20% of the cards are randomly removed upon shuffling.
Refer to the above where I mentioned that a certain % of cards is removed from each shuffle. Any cards with a low weight is, in untested theory, more likely to be cut.
Mechanics: Information, Perks, Modding
Boss Traits (Perks)
Killing a monster reward you with a choice of a Trait or resources.
Choose carefully as you cannot go back and the trait will forever make your old traits less likely to appear on level up, even that really good one you need to build your character around.
Just pick the resources if you don’t want the Trait.
Maximum of 3 perks chosen perk boss. Not sure how this work with the 4th boss who drop perks from all bosses, presumably giving you another chance at missed perks.
Modding
Variables.ini is the file containing most of the game settings, such as movement speed and enemy statistic. Do not recommend, will break stuff, maybe your game, I suggest making backups, but it is there. Can also be useful to check if any information is out of date.
The stuff that doesn’t fit anywhere else
- Paths are made up of 34 tiles.
- Bosses appear in X amount of tiles which I need to count but if you know let me know pls.
- Zero milestone (the gold card) make the tiles near it be weaker and vice-versa, pay attention to the in-battle buff which appear where the ghost and other areas appear.
- Experience gain is calculated as base monster xp + 3 per extra monster. Quests don’t impact XP. Example: Killing the first slime (4 base xp) in a 3 slime battle award 10xp, the second slime 7xp and the third 4xp.
- Monsters XP are usually equal to the monster’s Item Tier X 4.
- Extra monster trick: By purposefully keeping your damage low you can drag out fights to pass time and make more monsters spawns.
- If you use an app that maximize your windows (such as Borderless Gaming) you can have the game keep going when you alt-tab.
Secrets
An hidden multi-boss encounter: First combine 6 tiles providing Area of Effect such as the Blood Grove, Hungry Groves, Bookery, Abandoned Bookery, etc…
This will make sparks appears on a tile subjected by those 6 auras.
Cast Oblivion on one of those tiles.
The reward for winning is a jump to the main menu.
Fighting a slimy being: Fill your entire path with Swamps.
Then a green being will appear.
Reward is a whole bunch of cards.
Can be repeated with the help of an oblivion.
Questions
Just stuff I’m asking myself
Do Necromancer gain HP from the Arsenal when their Skellies get the kill?
Do Magnifying glass apply to rogue? Almost certain that no but didn’t test empirically.
Necromancer pets don’t seem to have any scaling at all from hero stats but I didn’t test it and sorta kinda am wondering if really true.
What are the mechanism of retribution?
The various special damage perks?
How does the rogue two-weapon benefit from damage all and magic damage (seem to be only once) and how do those interact with special damage perks?
What does the Mirror reflect if anything beside Magic Damage from the Lich and Tomes? Does it really “reflect” lightning under 100%? I assume yes but there’s no prompt.
The 60% Ranged perk reflect Scorched and Archer but anything else?
How many tiles to be placed between each bosses or mini-bosses? I assume all times are the same value of 1 but not sure.
This is all about Loop Hero – An Unofficial Manual, Mechanics Guide + Sheets!; I hope you enjoy reading the Guide! If you feel like we should add more information or we forget/mistake, please let us know via commenting below, and thanks! See you soon!
- All Loop Hero Posts List








Leave a Reply