Have you glanced at the highscore table and wonder how some people obtain scores orders of magnitude higher than you? Are you perhaps looking for an extra layer of depth to a game with a frankly already ridiculous scope? Or maybe the default paint-the-map type gameplay is a little too passive for you and you want to spice it up. Either way, look no further!
Note: this guide might contain minor spoilers regarding depot locations and specific game mechanics in certain countries.
How are scores calculated?
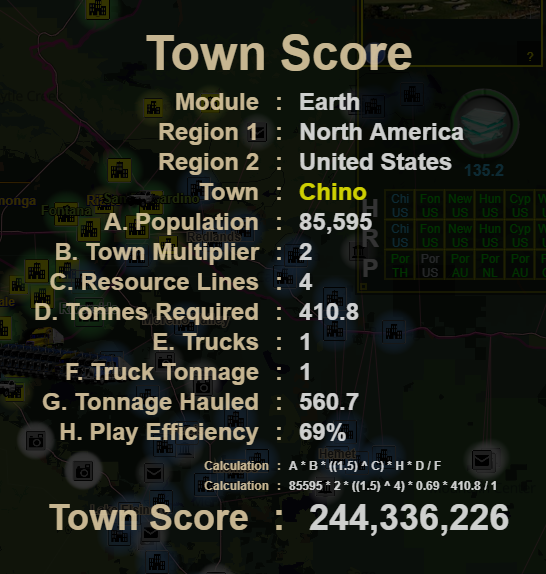
if you click on the score of any completed town, a screen pops up showing you exactly how the score for a town is calculated. It looks like this:
Let’s take a look at each of these factors, and see how it relates to the score.
- Population: this is simply the size of the town. Towns with a higher population give a higher score, but usually also have higher demands.
- Town multiplier: this is a hidden value denoting the general difficulty of a region. It is a multiplier to the resources a town needs, but also the score obtained. In Earth, this value ranges from <1 in easier regions such as New Zealand to 6 in difficult endgame areas.
- Resource lines: the number of different resources a town requires. As seen in the formula, this number is an exponent of 1.5, meaning towns which have many different demands are exponentially better for score. A town that has 4 inputs of 100 ton will score higher than the same town with 1 input of 400 ton.
- Tonnes required: the sum of all town inputs. It simply multiplies the score by the total tonnage.
- Trucks: the number of trucks used to complete the town – not used in the score calculation.
- Truck tonnage: the total tonnage each of your used trucks can carry. E.g. if you use 4 8-tonners to complete a town, the truck tonnage is 32. Since the score is divided by this number, using a lower total truck tonnage means a higher score.
- Tonnage hauled: the total tonnage delivered to the town. Not directly used in the score calculation, but it is part of the play efficiency.
- Play efficiency: I won’t delve into how this is calculated exactly (mainly because I still haven’t figure out the exact formula), but the general gist is that the more of your delivered resources go to waste – either through consumption or overfilling – the lower your efficiency. A lower efficiency means a lower score.
Now let’s see what this means for us. The single most important factor for high scores is the amount of different demands due to its exponential nature. Other than that, towns requiring a higher tonnage and with bigger populations give a higher score.
Of these factors, there are only two that the player can directly influence: the truck tonnage and the efficiency. So obtaining the highest possible score will consist of using as few trucks as possible, without losing too much efficiency and making the town impossible.
Because every factor in the score formula is either multiplicative or exponential, the score can grow incredibly high for the right towns. With optimal play, a tiny village requiring 3 tons of one good might only give 100k score, while a major city with 10 demands of thousands of tons can give hundreds of billions of score. This means that probably over 90% of your score will come from only a handful of towns. If you are just aiming for a spot on the overall leaderboards, you can probably get away with simply optimizing these high potential towns.
Preparation
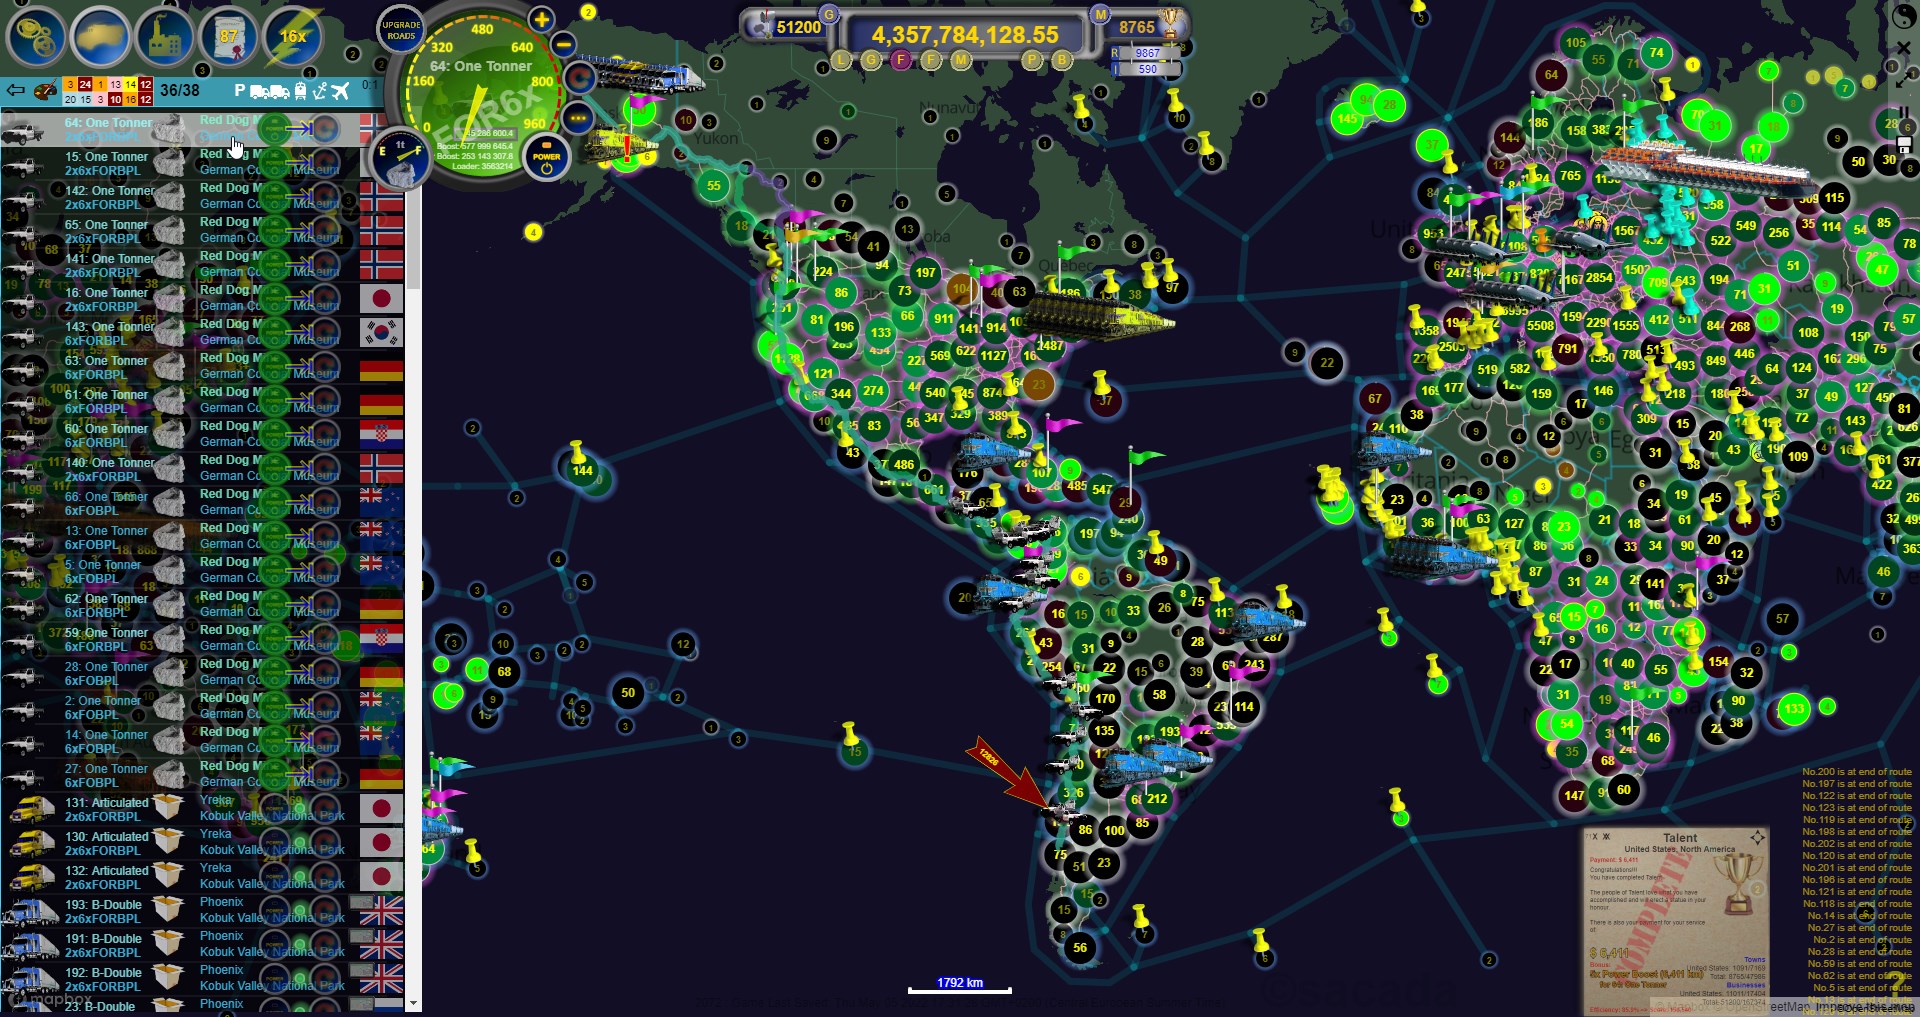
Before you can start to achieve high scores, you will need to do a lot of preparation – and I mean A LOT. You will effectively need to unlock access to most depots and every industry – a process which can take hundreds of hours in Earth. And during this unlocking process you can’t actually score attack too many towns, as you often won’t have access to the industries required to finish nearby towns so you can use them as a storage hub. The rest of this guide will therefore assume that you have repaired every road (9876 in total) and upgraded every industry to level 3 (590 in total).
All the roads and industries done! Now I can finally play the game!
During the unlocking process, you will need to complete a fair amount of towns to complete contracts. You often will not be able to get the optimal score from these towns. I personally wouldn’t worry about them too much, they are only a handful in the grand scheme of things, but you can still try to do somewhat well on them with the resources you have.
First of all, you will need a fleet of small trucks capable of tackling big cities. You might think it’s impossible to complete a big city that needs thousands of tons with anything other than a large amount of big trucks. however, the key realization is that the loading and unloading speed is the same for every truck, regardless of size. That means that as the travel distance approaches 0, tiny one-ton trucks will start to perform almost equally as good as big 40-ton trucks. Sure, they can only carry 1t at a time, but they deliver it so quickly that they can deliver 30-40 loads in the time it takes a 40-ton truck to deliver a single load. it also means that smaller is always better: 20 one-ton trucks will perform better than one 20-ton truck.
In Earth, the smallest available trucks are 0.25t tuk-tuks, but their average speed is a lot lower than that of other trucks, and you can only buy 5 of them ever. That isn’t really enough to properly score attack on the major cities, but they can definitely help you eke out a number one spot in some smaller island countries. One-ton trucks however are readily available at most depots, and are powerful enough to finish even major cities.
One-ton trucks are available from the following truck depots:
- New Zealand (6)
- South Korea (6)
- Japan (5) (2x boosted)
- Germany (5)
- Norway (5) (2x boosted)
- France (5)
- Croatia (3)
Trucks from all of these locations can be equipped with floaties and ocean floaties (at the depot in Japan), so they can be used anywhere. You can also purchase one-ton trucks from the depot on Martinique, but they cannot leave the island so they are useless after the tutorial phase.
This gives you a total of 35 potential one-ton trucks. 20 is actually enough to complete almost all of even the biggest cities, believe it or not, but you might want some more to make those a bit less tedious. Of course, prioritize the 2x boosted depots as those trucks will be faster and have a higher efficiency. You will also need a fleet of bigger trucks to finish businesses and build industries. I use 13 40-ton trucks for that, but you can easily get some more from various depots, once you have enough slots unlocked.
Next, all of your trucks will need the following boosts:
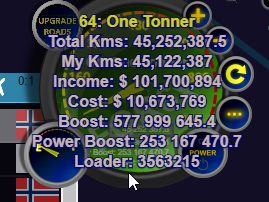
- Power Boost: you don’t need too much of this because you’re usually only travelling short distances. Try to get 1m+ km on every truck. An easy way to get this is by finishing airfields – use your main trains and trucks to finish most of them, then use the one-tonner to finish it off. This will often give millions of kilometers of boost.
- Load Boost: this is the main workhorse of score attacking. it is absolutely essential that you do not attempt towns without this. Sadly, 1 boost is consumed per load; and since you use one-tonners, one load is only one ton. So you need a huge amount of this. Airfields are decent to bootstrap your trucks with 50-100k loader each, but since they cap at 2k loader, you will eventually get more from towns. On the plus side, most of your town will be completed with a single truck so that’s the only one that really needs a lot of it, and it will accumulate basically automatically as you finish towns.
- Superboost: this is the 2x/4x/6x speedup you get from completing businesses. it’s pretty much impossible not to get these since they automatically spread out, but obviously you should not attempt score attacks without them.
- (Ocean) Floaties: these allow you to use your score attacking fleet everywhere in the world. Get them at the depot in Japan.
- Self-Repair Unit: you unlock these after upgrading the Bionics industry to level 3. They will prevent your trucks from deteriorating and thus losing efficiency when completing towns.
Should be enough for a while…
With all that in place, I like to send all of my trucks on a long route to test which is the fastest. There is actually quite a big variance in speed between trucks, even if they are brand-new and have the same boosts. Have them start in the same location and send them somewhere far away, and as they get close to the destination, pause the game and see in what order they will arrive. Then reorder your vehicle list from fast to slow. This way you can easily use your fastest truck to finish most locations.
Over a large distance, the variance in speed is easy to see. The fastest trucks are almost twice as fast as the slowest ones!
If you really want to optimize things, I suppose you could even sell off your slower trucks and purchase new ones to try and get a faster fleet overall, but that’s something I have personally never bothered with.
The fun part
When your fleet is ready and you have unlocked every industry, you can finally begin completing countries to get on top of the leaderboards. The basic process of completing towns will look somewhat like this:
- FInd a town to complete.
- Figure out which locations are the closest. The distance by road is what matters here, not straight line disttance!
- Build storages or industries in those locations to supply the required goods.
- Determine how many trucks you will need to finish the town. As a rule of thumb: a single one-ton truck can handle about 250 tons of demand if the supply point is very close (<5km or so). This is something you will mostly have to get a feeling for yourself. When in doubt, use fewer trucks than you think necessary, and keep adding more if the efficiency is too low. Adding more trucks only costs a negligible amount of efficiency, but it is impossible to remove them from the equation even if they only deliver a single ton.
- Particularly for very large towns, save the game beforehand. This will allow you to try again if you misjudge the overfilling required.
- Fill up the demands one by one. Overfill every demand as you go – enough that you won’t need to top it up later, as that will most certainly be impossible to do while also fighting to complete the rest – but not so much that you lose out on too much efficiency. This is again something that you mostly need to get a feeling for. As a rule of thumb, for a 10 demand town at 50% efficiency, overfill the first demand 2.5-3x, then fill up the rest as you go to the same (by now reduced) level. I like to start with the largest demand just to make sure my fleet can handle that, then go from the smallest demand upwards, since it is faster to overfill them.
- if you did everything right, when you finish the final demand, all of the other demands should be close to running out. If they still have a lot left over, that means you overfilled too much and wasted some efficiency potential. If you really want to you can reload your save and try again, but I usually don’t bother. Note that as soon as you finish the town your score is uploaded and you won’t be able to overwrite it on the leaderboard, even if you reload your save and get a higher score.
- After completing the town, click the red S button on top of the town window to check your position on the leaderboard. Congratulations!
This is what you do it for! Was it worth it? Probably not…
Various (micro-)optimizations and other notes
There are a lot of optimizations you can make to squeeze out even more score. Some have a huge impact, others are almost unnoticeable. Here is a list of some of them.
- Storage Swapping. Sometimes, a town will have more demands than the closest location has build spots. You can often just use another town that is slightly further away. but sometimes there is no other close town for dozens or even hundreds of kilometers. A good strategy to use for such a scenario is storage swapping. Finish off one of the demands of the town, then while your one-tonners work on filling up the next one, sell off the storage and replace it with another one, and use the rest of your fleet to fill the new storage. Repeat for every demand.
- Airfields. Countries have airfields near the capitals of provinces / states / oblasts / other first-level administrative divisions. These are initially usually only accessible by train, but after finishing 3 demands they will get a road connection when possible. This is very convenient as they are often located right next to major capital cities with high demands, and they also get a lot of storage slots. They can also provide an entry point in a certain region as you do not have to complete any towns to get a foothold.
- Upgrading roads. When you press B, you enter the road upgrading mode, and you can click on roads to mark them for construction. After finishing the roadworks the road gets upgraded to the next highest level. Bigger roads allow trucks to travel faster on them. Especially with towns that are a bit more remote, upgrading the roads to the largest size can quite significantly increase your efficiency.
- Slowing down the game. For some of the biggest cities, you have to overfill thousands of loads. And every one of those loads requires pressing Q or clicking the power button. I tend to slow down the game to 10x instead of the usual 16x for cities like these, because I cannot keep up my mashing speed with the speed of the trucks. This makes it a bit more efficient (and also prevents me from completely destroying my finger joints for an arbitrary number). If the travel distance is very short, you can also just hold Q which from my experience is almost as effective as mashing, and a whole lot easier on your fingers.
- Large cargo. A few types of cargo can only be transported by 20-ton or 40-ton trucks. if a town requires one of these cargoes, it obviously significantly reduces the score potential from that town. Even if you optimize it you will be a lot closer to the rest of the leaderboard. it’s up to you how much you want to bother with these.
- China. China has some special mechanics in place. There are a couple of towns with very large requirements (up to 30k). The consumption for these towns reduces as you complete other towns in China, up to a minimum of 10%. This also applies as a multiplier to your score: 10% consumption, 10% score. You obviously will not be able to complete them at 100% consumption, but going as low as 10% might be too wasteful. Plan your route through China carefully so that you can complete these towns before reducing their consumption too much.
I hope you enjoy the Guide we share about LOGistICAL: Earth – Highs Score Table + Various (micro-)optimizations Guide; if you think we forget to add or we should add more information, please let us know via commenting below! See you soon!
- All LOGistICAL: Earth Posts List



Leave a Reply