
Include these files in the root folder of your mod: info.json and thumb.png
Make sure the root folder of your mod includes these two files:
- info.json
- thumb.png
As an example, let’s look at the mod “https://steamcommunity.com/sharedfiles/filedetails/?id=2556348205&searchtext=“:
Here’s what the info.json file for that example mod looks like:
{
  "Title": "Example: Editing Genres",
  "Description": "Using genres.json and ignore.json to replace default music genres",
  "Author": "Glitch Pitch",
  "Version": "1.0",
  "Tags": ["example", "gameplay"]
}
And here’s what the thumb.png file looks like:

Recommended: 512×512 png, file smaller than 1MB
Uploading your mod for the first time
Step 1
Place your mod’s folder inside this folder:
PC:
C:\Users\*username*\AppData\LocalLow\Glitch Pitch\Idol Manager\Mods\
Mac:
~/Library/Application Support/Glitch Pitch/Idol Manager/Mods/
Step 2
Launch the game, open “Mods” menu, click “Upload” on your mod:
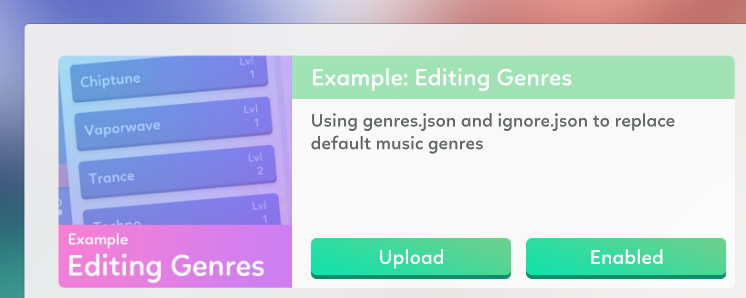
Step 3
Verify that all of the information is correct. If you need to, you can enter “change note” text, which will be displayed in the “Change notes” log on your mod’s page. Click upload:
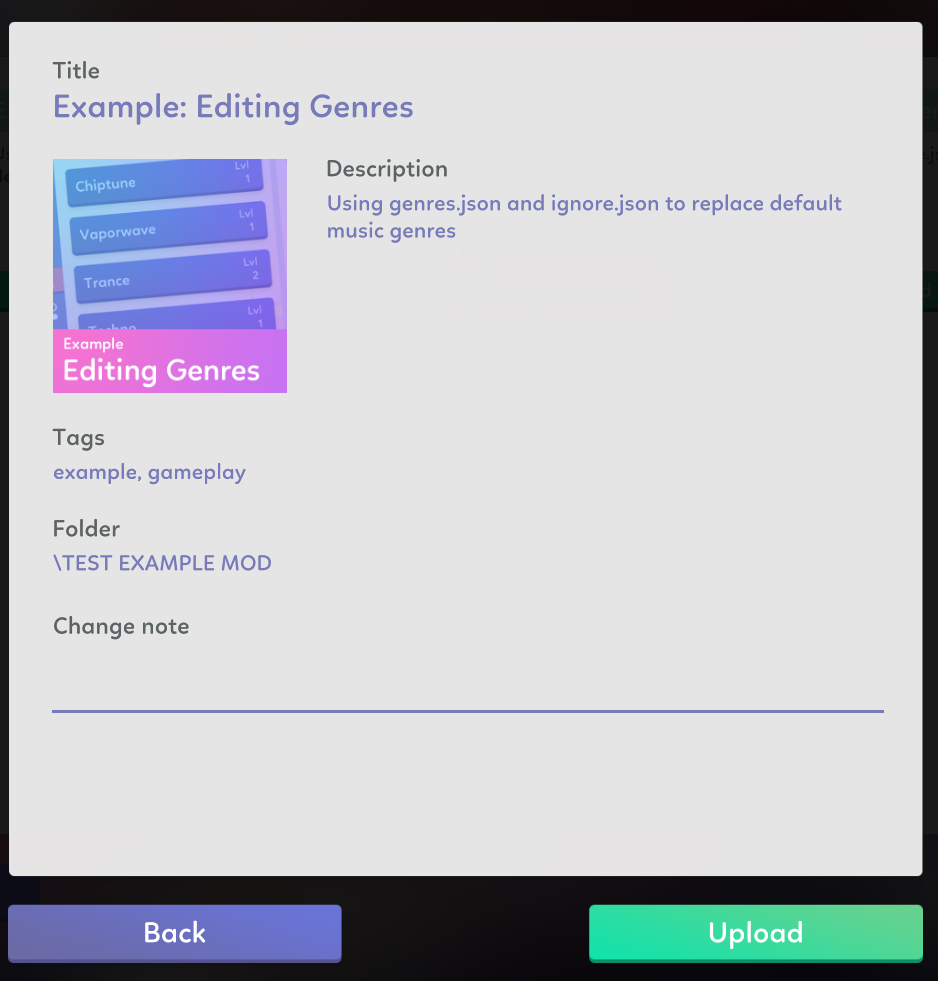
Step 4
If everything went okay, you should see a message popup with a link to your mod:
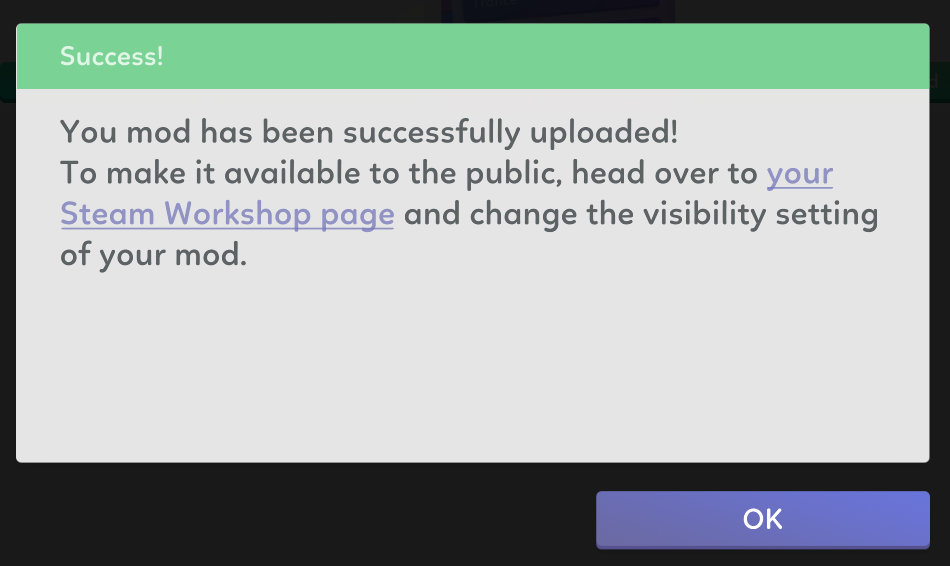
Click the “your Steam workshop page” link.
Step 5
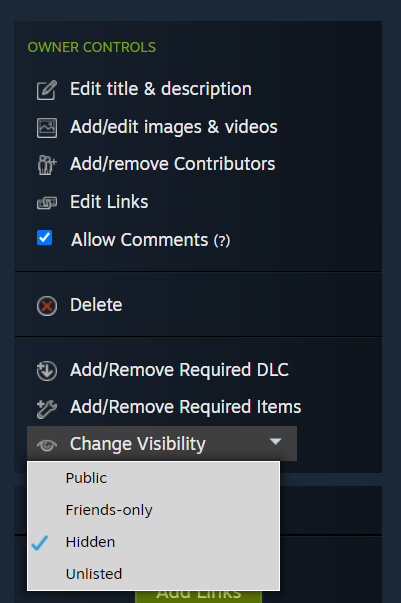
After following the link to go to the Steam workshop page, change mod’s visibility from “Hidden” to “Public” when you’re ready to publish it and show it to the world!
Updating your mod
Step 1
Place the new version of your mod in the Mods folder:
PC:
C:\Users\*username*\AppData\LocalLow\Glitch Pitch\Idol Manager\Mods\
Mac:
~/Library/Application Support/Glitch Pitch/Idol Manager/Mods/
Step 2
Go to the Steam workshop page for your mod and make sure you are Subscribed to it.

Step 3
Updating your mod will overwrite the description on the Steam workshop page with the description in your mod’s info.json, so if you want to keep a record of the old version, copy the text on the Workshop page and save a copy somewhere.
Step 4
Launch the game and open the “Mods” menu. You should see two copies of your mod: Steam and local.

Note: if you’re having difficulty telling them apart, look for the Steam logo next to the name of the mod:
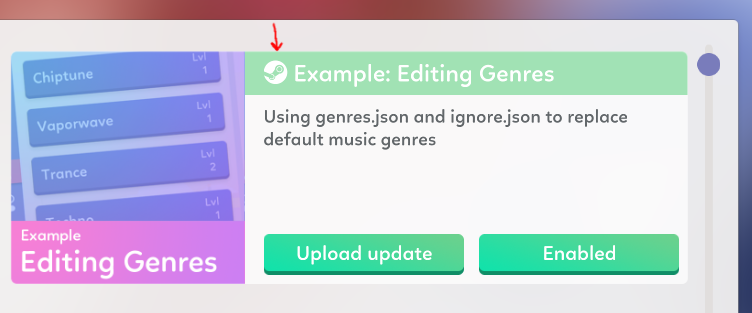
Additionally, the button under the local version should be “Upload,” while the button under the Steam version should be “Upload update.”
Step 5
On the Steam version of the mod, click “Upload Update”
Step 6
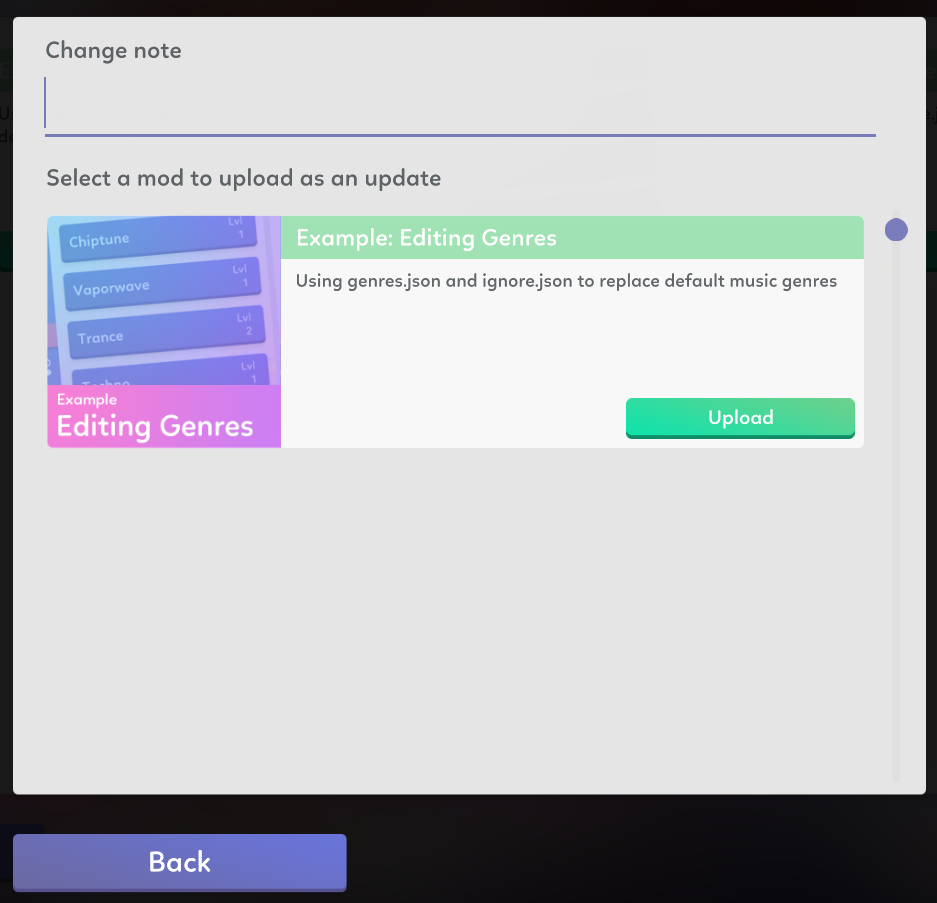
Enter “Change note” text if needed. Select the local version of your mod and click “upload”:
Success!
Step 1
Place the new version of your mod in the Mods folder:
PC:
C:\Users\*username*\AppData\LocalLow\Glitch Pitch\Idol Manager\Mods\
Mac:
~/Library/Application Support/Glitch Pitch/Idol Manager/Mods/
Step 2
Go to the Steam workshop page for your mod and make sure you are Subscribed to it.

Step 3
Updating your mod will overwrite the description on the Steam workshop page with the description in your mod’s info.json, so if you want to keep a record of the old version, copy the text on the Workshop page and save a copy somewhere.
Step 4
Launch the game and open the “Mods” menu. You should see two copies of your mod: Steam and local.

Note: if you’re having difficulty telling them apart, look for the Steam logo next to the name of the mod:

Additionally, the button under the local version should be “Upload,” while the button under the Steam version should be “Upload update.”
Step 5
On the Steam version of the mod, click “Upload Update”
Step 6
Enter “Change note” text if needed. Select the local version of your mod and click “upload”:

Success!” title=”Idol Manager – How to upload and update your mods – Updating your mod
Step 1
Place the new version of your mod in the Mods folder:
PC:
C:\Users\*username*\AppData\LocalLow\Glitch Pitch\Idol Manager\Mods\
Mac:
~/Library/Application Support/Glitch Pitch/Idol Manager/Mods/
Step 2
Go to the Steam workshop page for your mod and make sure you are Subscribed to it.

Step 3
Updating your mod will overwrite the description on the Steam workshop page with the description in your mod’s info.json, so if you want to keep a record of the old version, copy the text on the Workshop page and save a copy somewhere.
Step 4
Launch the game and open the “Mods” menu. You should see two copies of your mod: Steam and local.

Note: if you’re having difficulty telling them apart, look for the Steam logo next to the name of the mod:

Additionally, the button under the local version should be “Upload,” while the button under the Steam version should be “Upload update.”
Step 5
On the Steam version of the mod, click “Upload Update”
Step 6
Enter “Change note” text if needed. Select the local version of your mod and click “upload”:

Success!” />
Written by Kuiper
This is all about Idol Manager – How to upload and update your mods; I hope you enjoy reading the Guide! If you feel like we should add more information or we forget/mistake, please let us know via commenting below, and thanks! See you soon!
- All Idol Manager Posts List


Leave a Reply