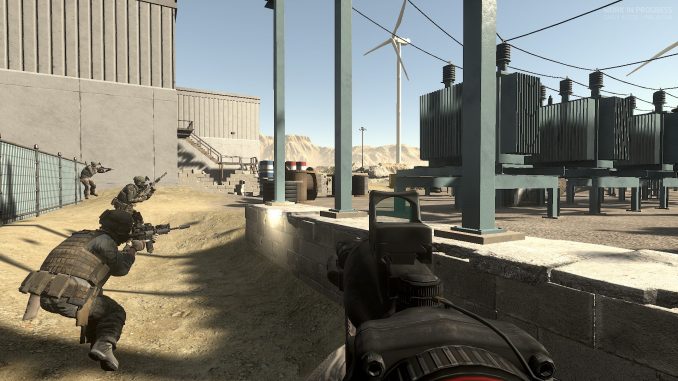
Introduction
Welcome to my unauthorised guide for using the Ground Branch mission editor. The mission editor generates a file (along with a specific lua script) to deal with spawn placements, various objectives etc for both PVE and PVP game modes. The mission editor can be used to modify the current files for the TH or intel retrieval game modes or make new ones entirely.
This guide predominantly focuses on the PVE game modes (although there is considerable overlap).
- This guide was generated whilst experimenting with the mission editor for GB1031.1.
- The mission editor is a work in progress and it is anticipated that this guide will need to evolve as the mission editor is further developed along with further AI and game capabilities.
- This guide uses the convention for using the character ` to open the console (top left hand corner of the keyboard). For some setups this maybe * so all the console commands in this guide would need to be switched around.
- This guide predominantly goes into using the mission editor with the existing lua codes in GB. AV is generating a guide for modifying lua code for custom game modes which can be found here:- https://www.youtube.com/playlist?list=PLle5osICJhZJwHxGOb1iBXoyu_uk9yXMY
- Please leave a comment down below if I missed something, something in the guide doesn’t work, something needs further clarification or there are other ways of doing things.
At the time of writing this guide (1031.1 but apparently 1031.2 will be coming soon) the main game programmer is trying to get new animations, a new skeleton, new weapon reloads, new door mechanics, vaulting, prone, weapon collisions reworked, health system, weapons bracing and new games modes (DTAS and VIP). So please be patient with the mission editor.
Getting Into the Mission Editor
The mission editor currently only works in the “Lone Wolf” type gameplay. It does not work on any of the servers or on the listen server, even with settings such as “enablecheats” on.
Method 1: Lone Wolf – From the ready room
From the ready room type `editmission
The mission editor will start from the players position in the ready room, the current mission file will load if applicable and show the start position for the various items in the mission file.
Method 1b
A similar setup can be done from opening a map from the main menu (say ‘open Smalltown and then from that ready room typing ‘editmission
In this case as no mission type was selected the mission editor will open with no mission.
Method 2: Lone Wolf – In round
Once the round has started (and you have been transported from the ready room to the round and the pre-start timer has closed), type `editmission
The mission editor will start in game from the player’s position and show the current AI positions along with the other mission items in their initial state in the current mission file.
- The edit screen can be a lot more cluttered as it shows the initial position of the items in the mission file along with all the AI moving.
- New AI spawn points / defend points / patrol routes can be added but the AI will ignore them as they were not placed at the start of the round.
- Enemy AI will kill the player if they find him. It is best to make the player invisible to the AI during these edits by typing `notarget as well as making the player impervious to damage by typing `god
- It does enable the editor to see what behaviours the AI will exhibit with there patrol / defend points as placed in the file.
- The position of the defend points and the position of the node points for the patrol route can be changed in real time to see the AI behaviour or guide the AI to a particular location etc. This has potential cinematic implications discussed towards the end of this guide.
I don’t know if this method is intended to be in the game. Hopefully it will not be taken out.
Known Issues for Starting
- Typing `editmission from Spectator will crash the game after loading in the editor
- Typing `editmission whilst slomo=0 will also crash the game. Note that the items in the top right hand pane do not appear also.
Mission Editor Basic Instructions and Issues
Basic Commands / Instructions
Go to AV’s introduction on using the lua code and a much better introduction to basic editor functions than the one below.
- To move around use the right mouse button along with [w] [a] [s] or [d] with the mouse movement to change direction.
- Clicking on an item in the top right hand corner and hitting [f] will teleport the editor close to the object.
- The name of the items in the top right hand corner can be changed by hitting [F2]
- The position of an item can be changed by using the arrow commands, the rotation by using the rotation key, and the scale by using the scale key. This could also be done by using the number pad in the middle right hand pane.
- Items on the left hand pane can be dragged and dropped into the mission area.
Known Issues
- The scale tool is useful for scaling the extraction zones and the like, however it can currently be used to scale the AI up and down (so you can be dealing with 3 foot high midgets to 60ft high giants), and with a similar effect for the laptop. As the AI animation is based on the normal size AI the movement of the large or small AI is far from real.
The player spawn locations modules can be scaled however this does not change the size of the player once they have spawned in. - “In Use” check box not currently working for AI spawns
For each item there is an “In Use” checkmark. This does not work for the AI spawns at the moment. Unticking the box will not prevent AI from spawning in at that location. - Using the lua code from the base Terrorist Hunt / Intel Retrieval game modes, AI set to all groups and not just the notional OPFOR (team = 100) will spawn in.
- The console command to freeze the AI, debuggamecommand freezeai can be problematic. For AI on the defend mode it may not freeze the AI while they are walking between defend points, however once they do reach the next defend point they generally freeze. Similarly for the patrol the AI may not freeze until they reach the next patrol point.
AI Structure and Behaviours
AI Teams
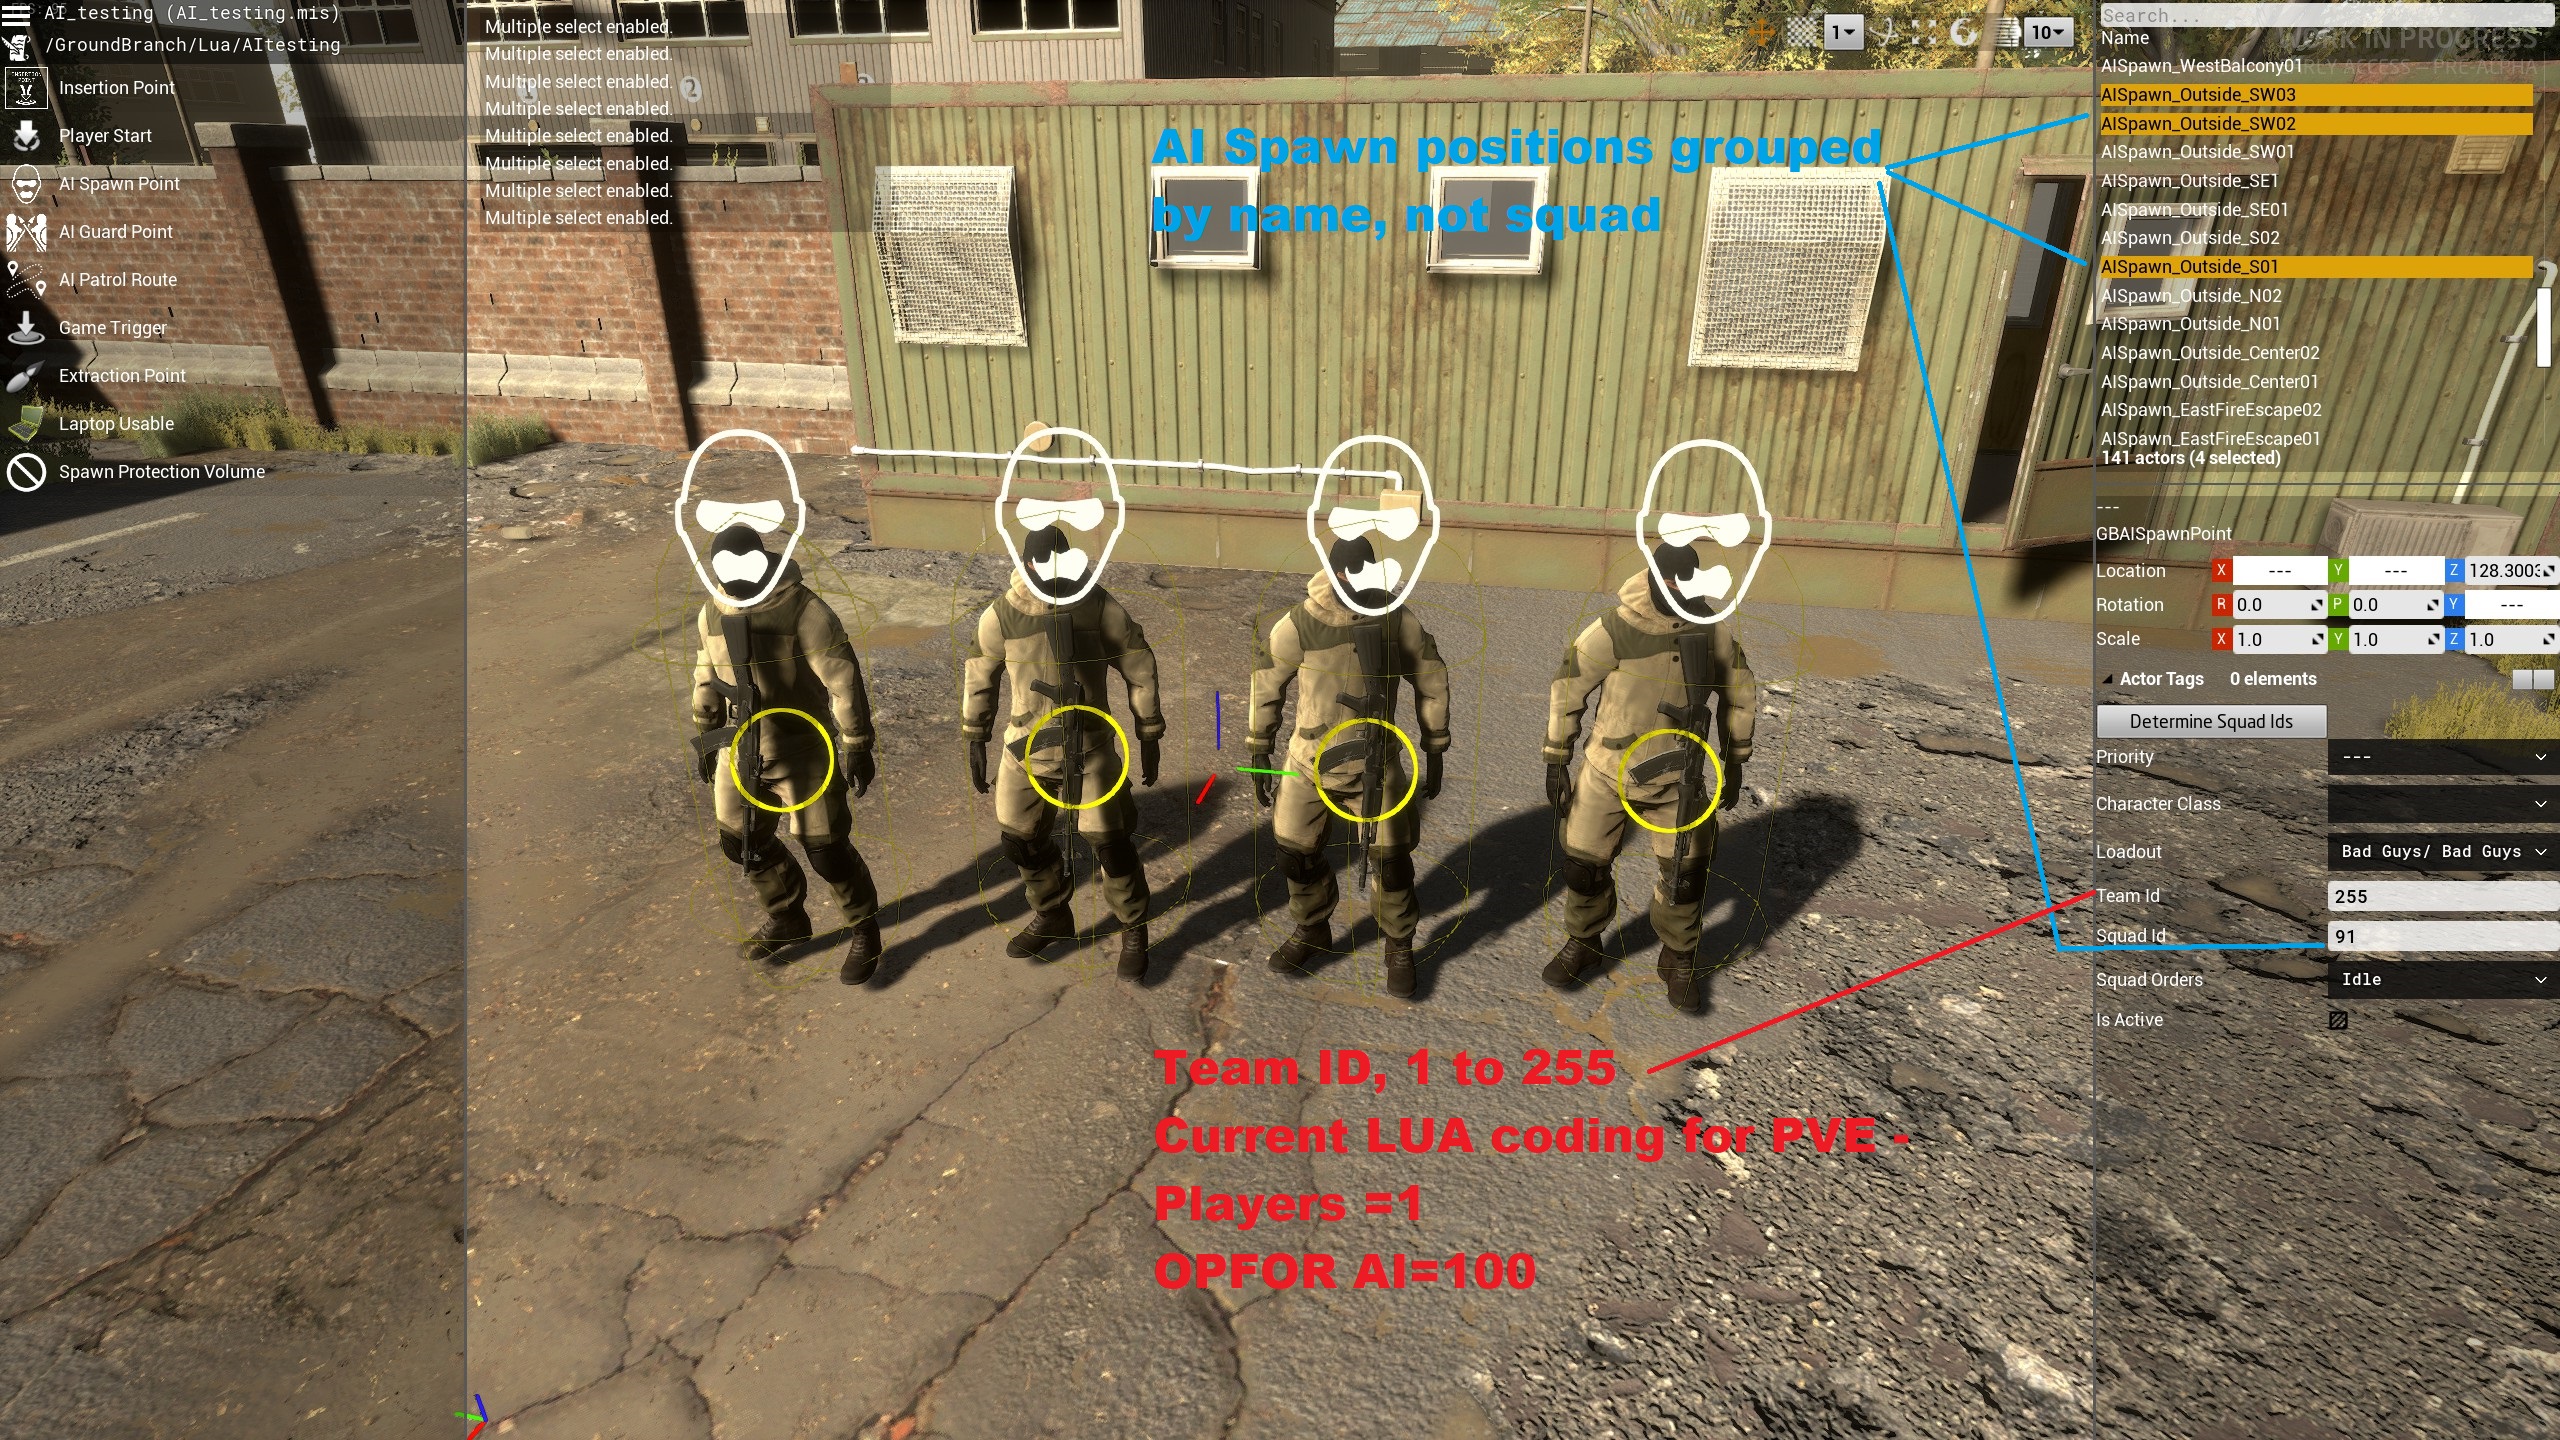
The available teams (or factions) for Ground Branch is 1 to 255.
- The current lua coding for PVE game modes sets the players as Blufor as team 1 and Opfor ai as team 100.
- It is possible to set the AI to other teams / factions so that the AI will be fighting each other
- Each team / faction will try to wipe all other factions out. Currently there is no way to assign ROE between the different teams. (For example in Arma none of the factions would fire upon the civilian faction and the independent faction could be set to be friend or foe or neutral to NATO or CSAT.)
- Team 255 is its own team. It does not try to balance the teams like for the bots. (For the bots, using the addbots command, 255 would assign the bots to a particular team to try and balance numbers.)
AI Squad
AI can be assigned to a particular squad in the box at the right hand pane. Currently that list does not re-organise itself to align the squads into one particular area (like Arma).
The game assigns a “squad leader” for the squad who takes the lead on patrols or who will determine what set of defend points to head to (more on that later on). The game mechanism for determining this is not clear at this point.
AI Squad Orders
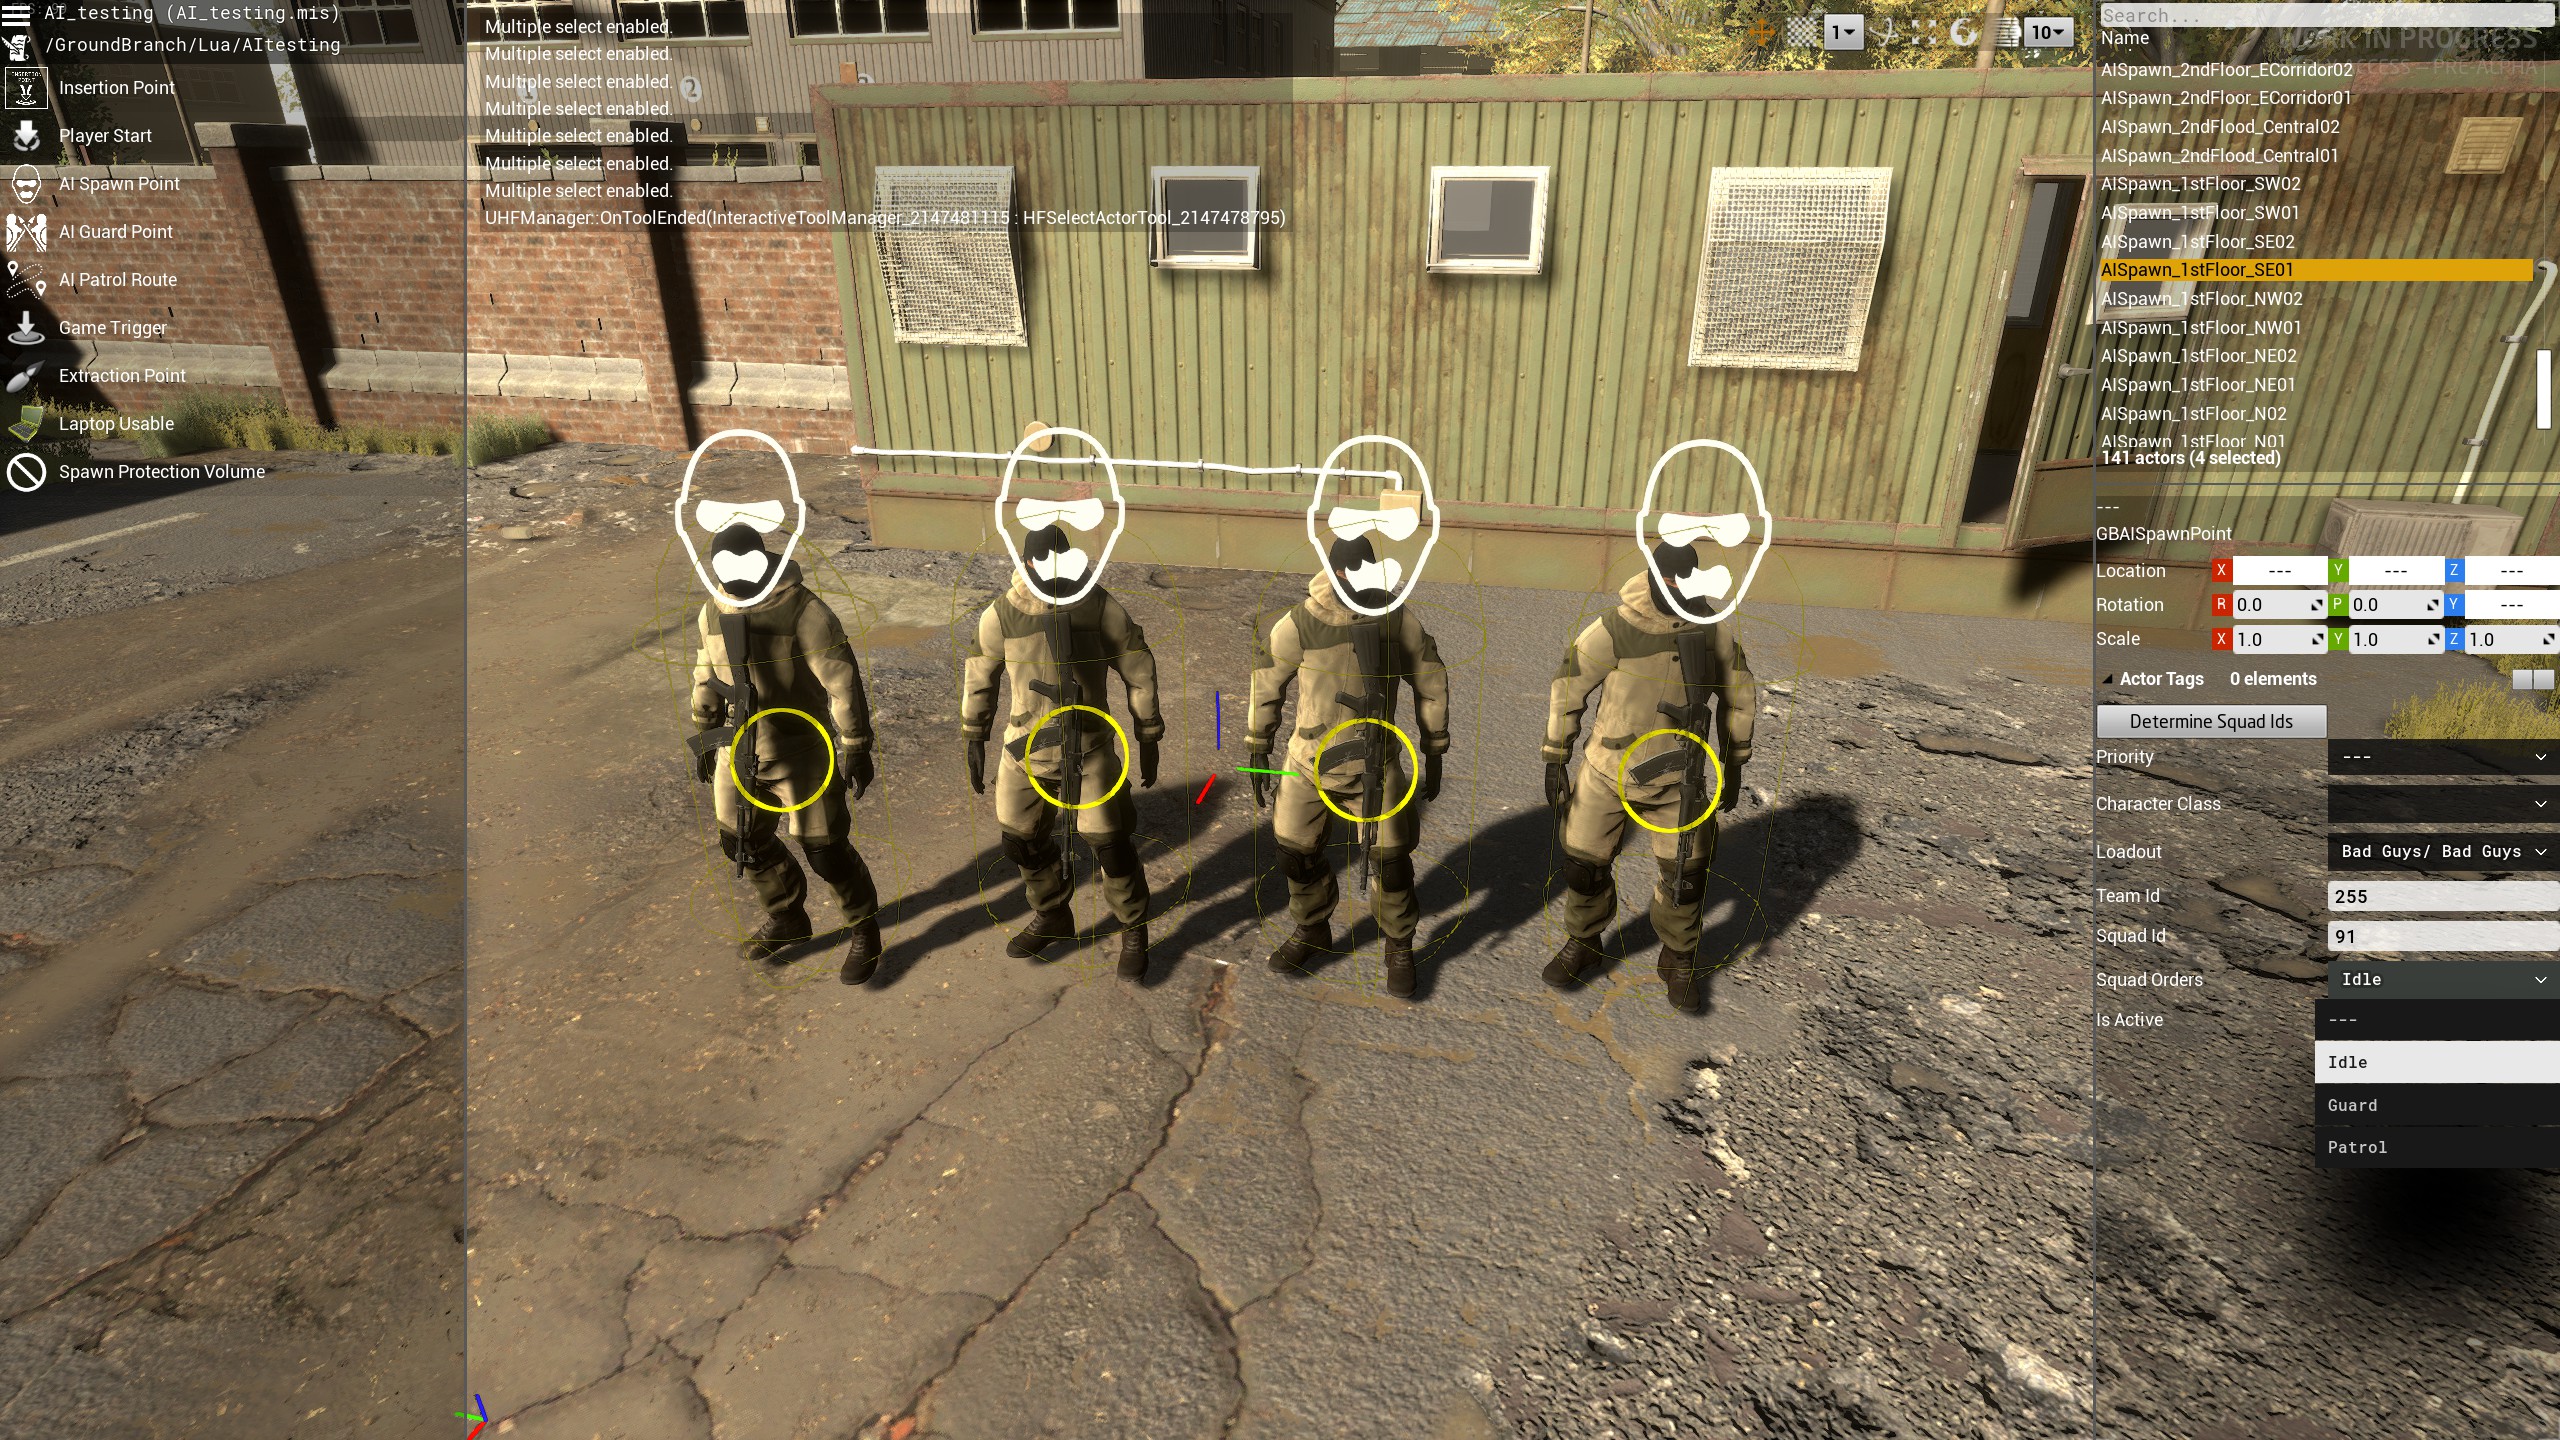
The game currently has 3 basic orders which can be assigned to the AI – idle, patrol and guard. These are described later in the document in more detail.
Currently it is possible for different members of a particular squad to be assigned different behaviours. In general the entire squad will do one particular behaviour which I believe to be that of the “squad leader”.
Bot interactions
Using the “addbots” command it is possible to add bots at the player spawn positions. Note the following behaviour:-
- On a server or a listen server the bots appear to be assigned to their various teams, which may result in them fighting the player when they are aligned with the AI team.
- On the lone wolf mode the bots tend to be aligned with the player, regardless of the team they were assigned to. The AI tend to hunt them down and kill them regardless of the team the bots were assigned to.
Spawn Priority
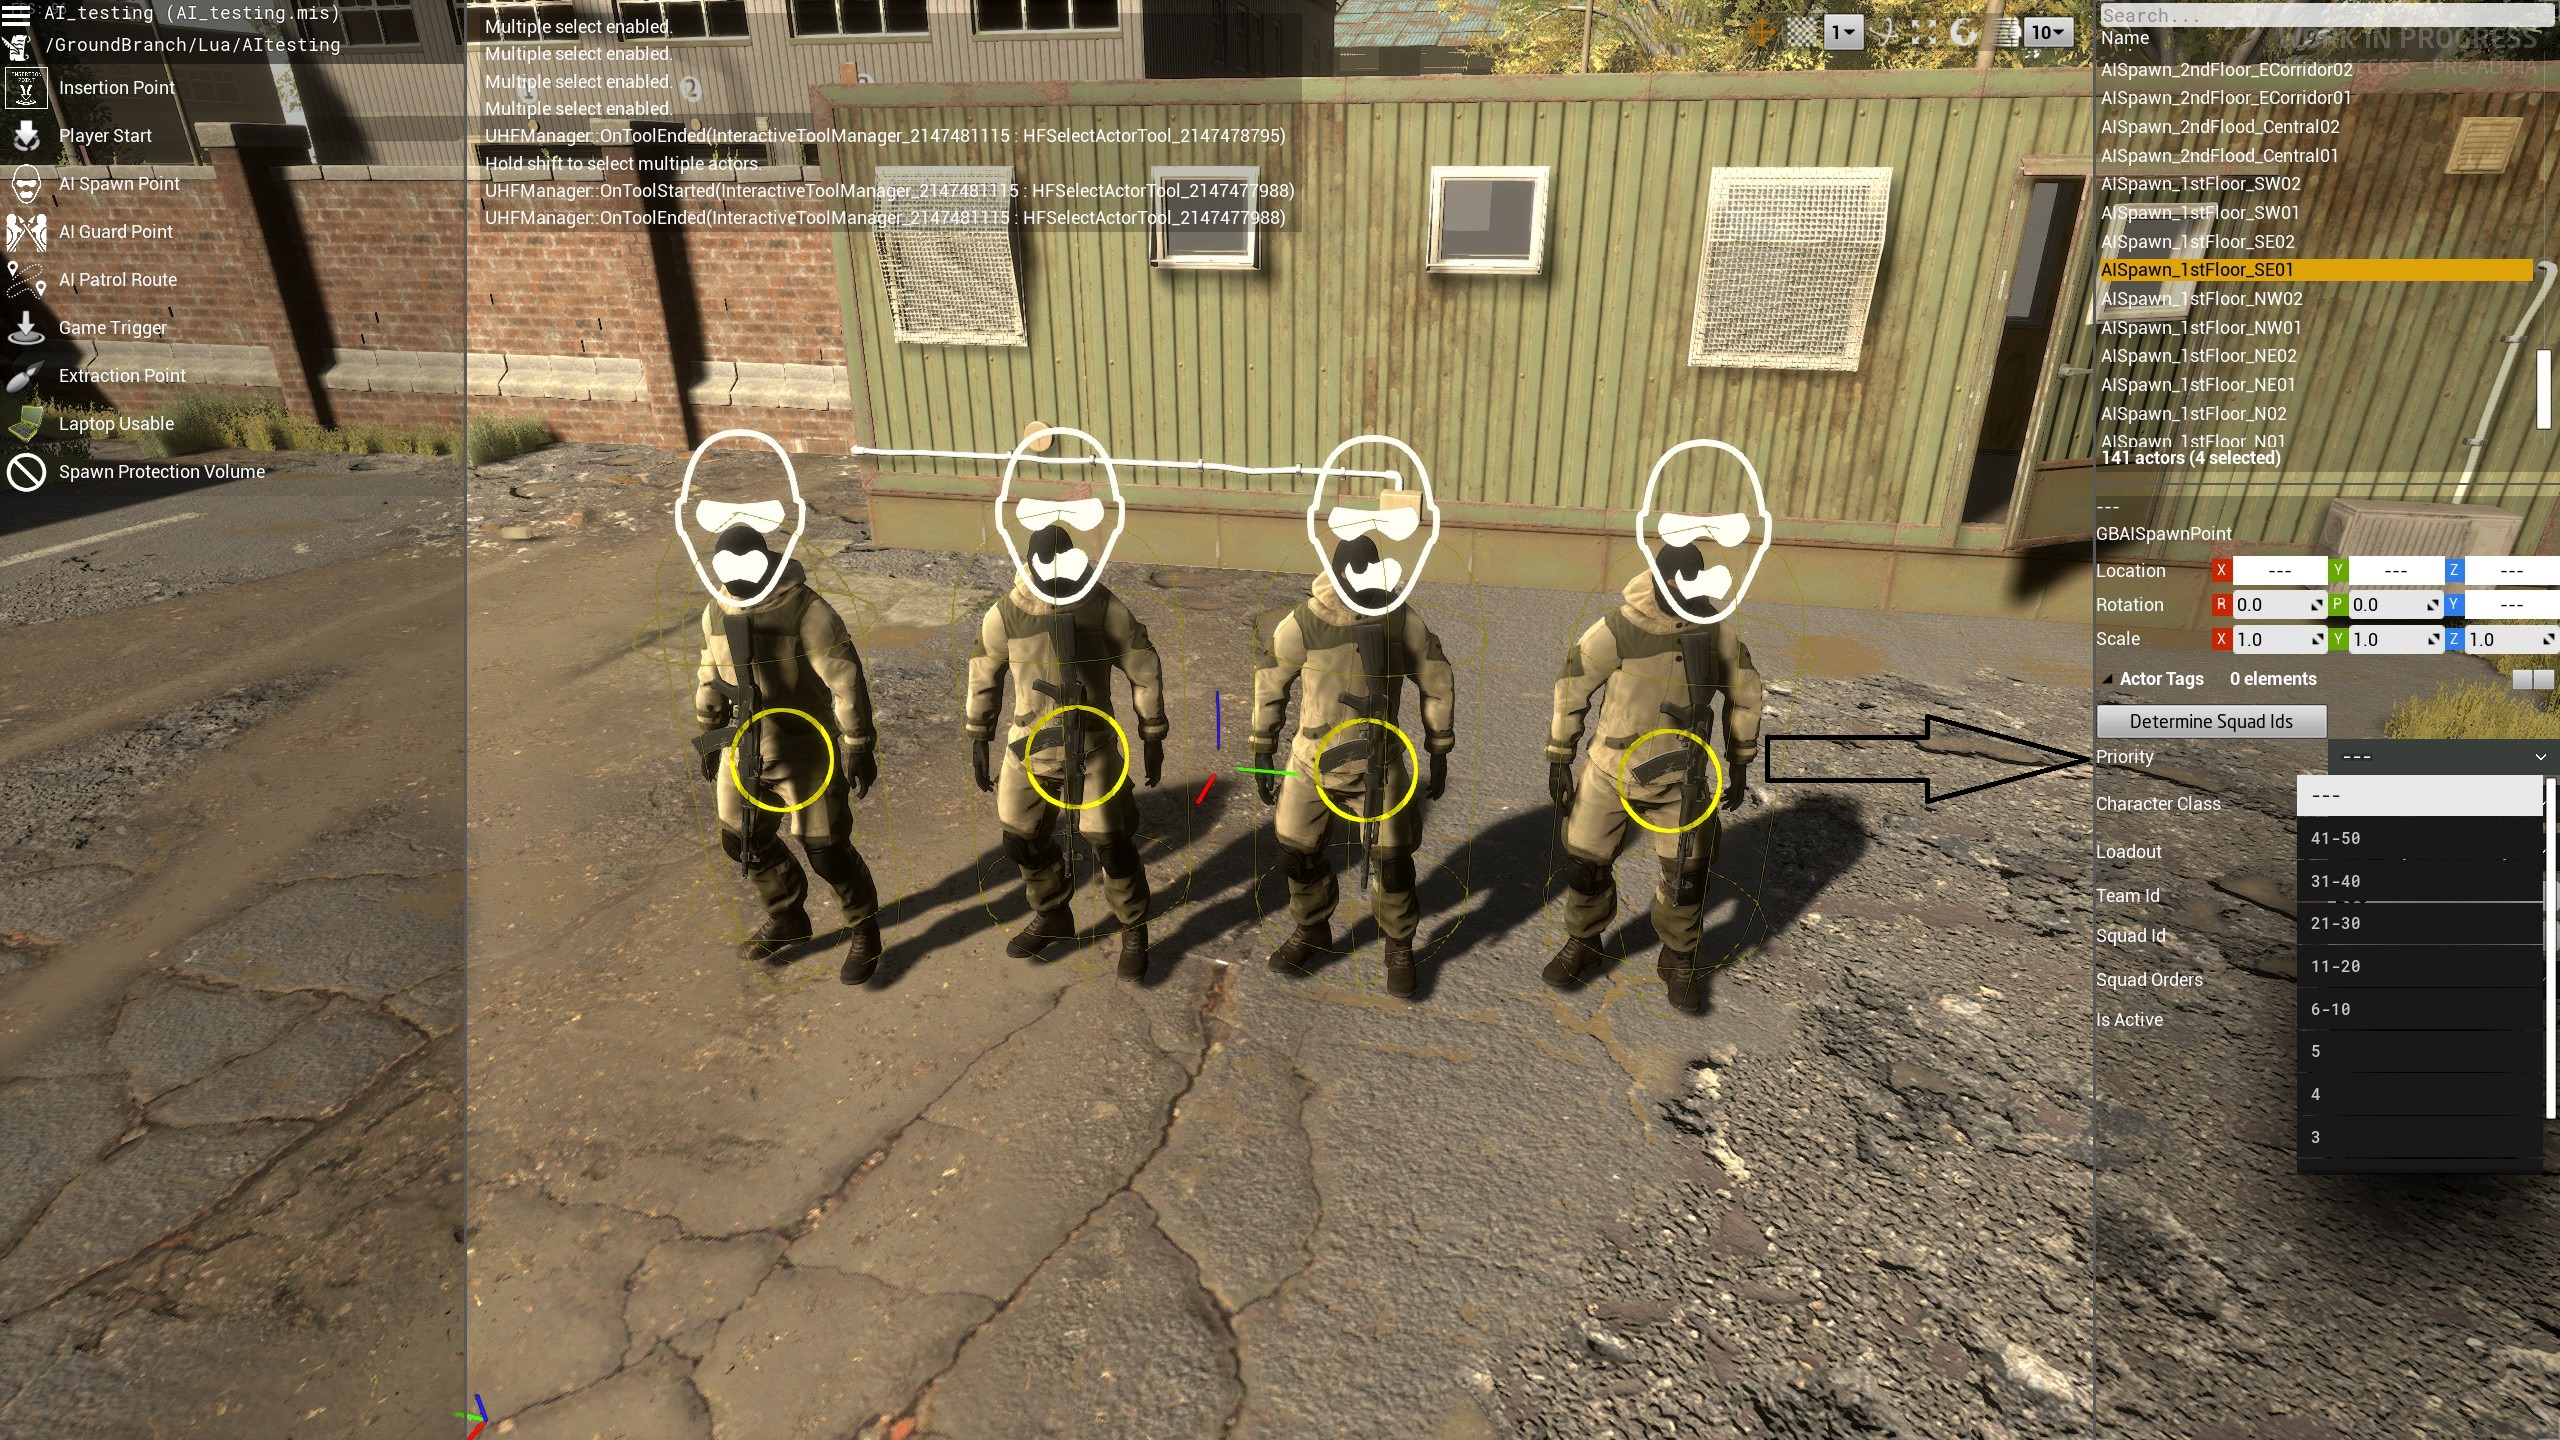
The spawn priority is the class assigned to each spawn point. The current LUA coding using this to create a table to decide which AI to spawn in depending on the number of AI to spawn in. A lower number means a higher chance the AI will spawn in.
AI Behaviour – Idle
“Idle” AI are a semi QRF who initially stand with weapons slung. Once a member of another team come within a given range (even if behind the AI) then the AI “sense” the opposing team, shoulder weapons and start to manoeuvre on the “spotted” team members.
Testing appears to show that the AI don’t communicate the players position even if they are in the same squad. Refer to the v YT vid below – the AI placed in the basement appear to react more to the gunfire and have to search based on the sounds then the AI on the roof giving the position – even though they are all in the same squad.
AI Behaviour – Patrol
To set up a patrol route:-
- On the left hand pane drag and drop a patrol icon onto the map
- Click on that node and on the right hand pane click on the add additional patrol point.
- Repeat until finished. It is possible to close the loop using the close loop button which will close the loop to the nearest node.
- The patrol route needs at least 2 nodes. A single node will not work.
Issues for note regarding patrol behaviour:-
- Initially the AI will have their weapons slung. However if the AI detect a dead fellow team member then they will shoulder their weapons. If the AI come under fire then they will shoulder their weapons and react to the fire. They may or may not resume the patrol after they deal with / no longer can detect the threat to them.
- The AI will randomly select a direction for the route (particularly those in loops).
- Where multiple squads are on the same patrol route each squad will independently randomly select the patrol direction – it is possible for 3 squads to be patrolling in the same direction for a loop patrol route.
- After the initial spawning the AI will move the patrol route closest to the squad leader. The squad leader leads the squad with the remaining members following is 2 lines.
- The squad leader will move from each node on the patrol route. The other squad members will move towards the squad leader, so if they get hung up on the terrain it is possible to see them slice the corner of the patrol route.
- The nodes generally only need to be on the navmesh for the patrol to move between them. Although not specifically required additional nodes can be placed so that the patrol moves along a certain route say along a road or in cover behind a hill etc.
- The navmesh is not perfect. There can be a lot of items on the ground (fallen logs particularly in depot, fallen cabinets in rundown) which the AI do not detect. Currently it seems that the AI will not try to vault over these items and the squad leader (and hence the entire patrol) will get stuck. Note that it is possible for the AI to get stuck going in one direction but be fine in the other direction.
- At the moment it does not appear possible to add additional node points into a patrol route.
- All nodes need to be in an area on the nav mesh, and need to be between ground level and roughly 2m above ground level. If the node is not on the nav mesh (for instance is in a wall or a non enterable structure (like a small process tank) then the AI will stop and hold indefinitely at the previous node.
Particular Issues when using the mission editor in an open mission:-
- The AI will not follow any new patrol routes as they select the patrol route to follow at the start of the mission.
- The position of the nodes for the patrol routes can be changed. But note that once the squad leader gets to a node he calculates the route to the next patrol point instantaneously. Changing the node after this does not do anything. If the node position is move than 2m above ground or below ground, or in an area with no nav mesh, when the squad leader hits the previous point then the patrol will stop as it cannot calculate a path to the next node.
AI Behaviour – Guard
To set a series of Guard points:-
- On the left hand plane drag and drop guard point onto the map and adjust to the desired location.
- Enter in the name of the group of guard points that this belongs to
- The orientation that the AI will face can also be adjusted using the rotate function
- The pitch of the viewpoint can also be altered in the box on the right
- Other parameters can also be tweaked here:-
- The magnitude does not currently work. Note that UE4 works in centimetres but even throwing that out to a really large number will not change the AI from trying to go to exactly the defend point on the mission editor.
- The sweep angle, the angle in the plan view, for the guard point can be varied.
- The pitch angle, the angle to the horizontal plane, can also be varied.
- The nominal time that the AI will stay at the guard point is defined by the base time (enterable) and a variation time along with a hold time and a variation. This appears to introduced to aid some randomness of how long the AI stays at the guard points.
Issues to note about defend points:-
- The AI squad will randomly go to the guard points belonging to the group of guard points closest to the squad leader.
- Guard points must be on the nav mesh and generally at ground level to within 2m of the ground / structure level to be recognized by the AI. Above this and the AI just seem to ignore the point. If the AI is slightly of the nav mesh (say it is in a parked car) then they will go as close as possible to the point.
- AI currently try to go to the exact centre of the guard point. This makes them somewhat predictable after a while as they end up exactly at the same point.
- The AI will use the nav mesh to navigate between sometimes far away points. If the AI encounters an obstacle (or another AI at a choke point or the like) then after 20 seconds or so the AI will try a different route to the destination.
- If there are no guard points, or the last guard point has been moved so it is more than 2m above the ground / structure level, then the AI seem to move randomly in the area to various cover points in the area.
Particular Issues when using the Mission Editor in an Open Mission
- As per above, it is possible to move the guard point below ground or sufficiently above the ground / structure level so that the guard point no longer works.
Other Opportunities
- Using the guard point it is possible to semi-command AI in game to behave a particular way for cinematics etc, particularly if the AI appearance is changed (refer below).
- As a single AI can be placed into its own squad, it may be possible to continuously update the guard marker position and orientation to that of a player. For this the hold times should be set to 0, the scan time to something low like 0.5 sec and the deviation to 0. This may be useful in creating a primitive hostage (the hostage etc is coming but appears to be in a long, long time).
AI Appearance and Loadout
AI Appearance Sets
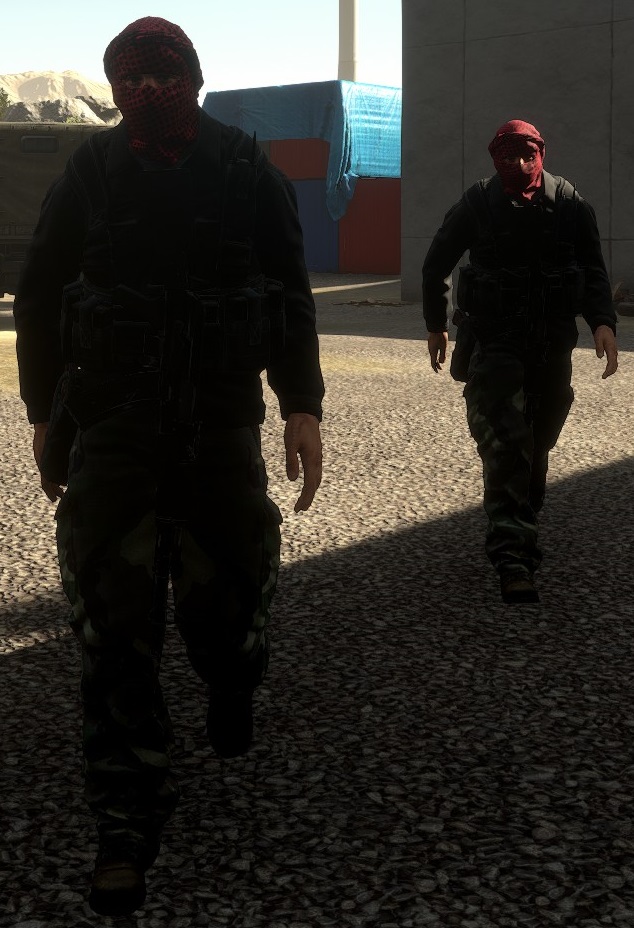
There are currently 3 AI character classes. The millitant (generally in woodland with a shemagh), the low visibility (currently only encountered on depot), and the Russian (newish on Rundown). These are legacy models. (New assets are scheduled for 1032. It is not clear if these will replace the old assets or be added).
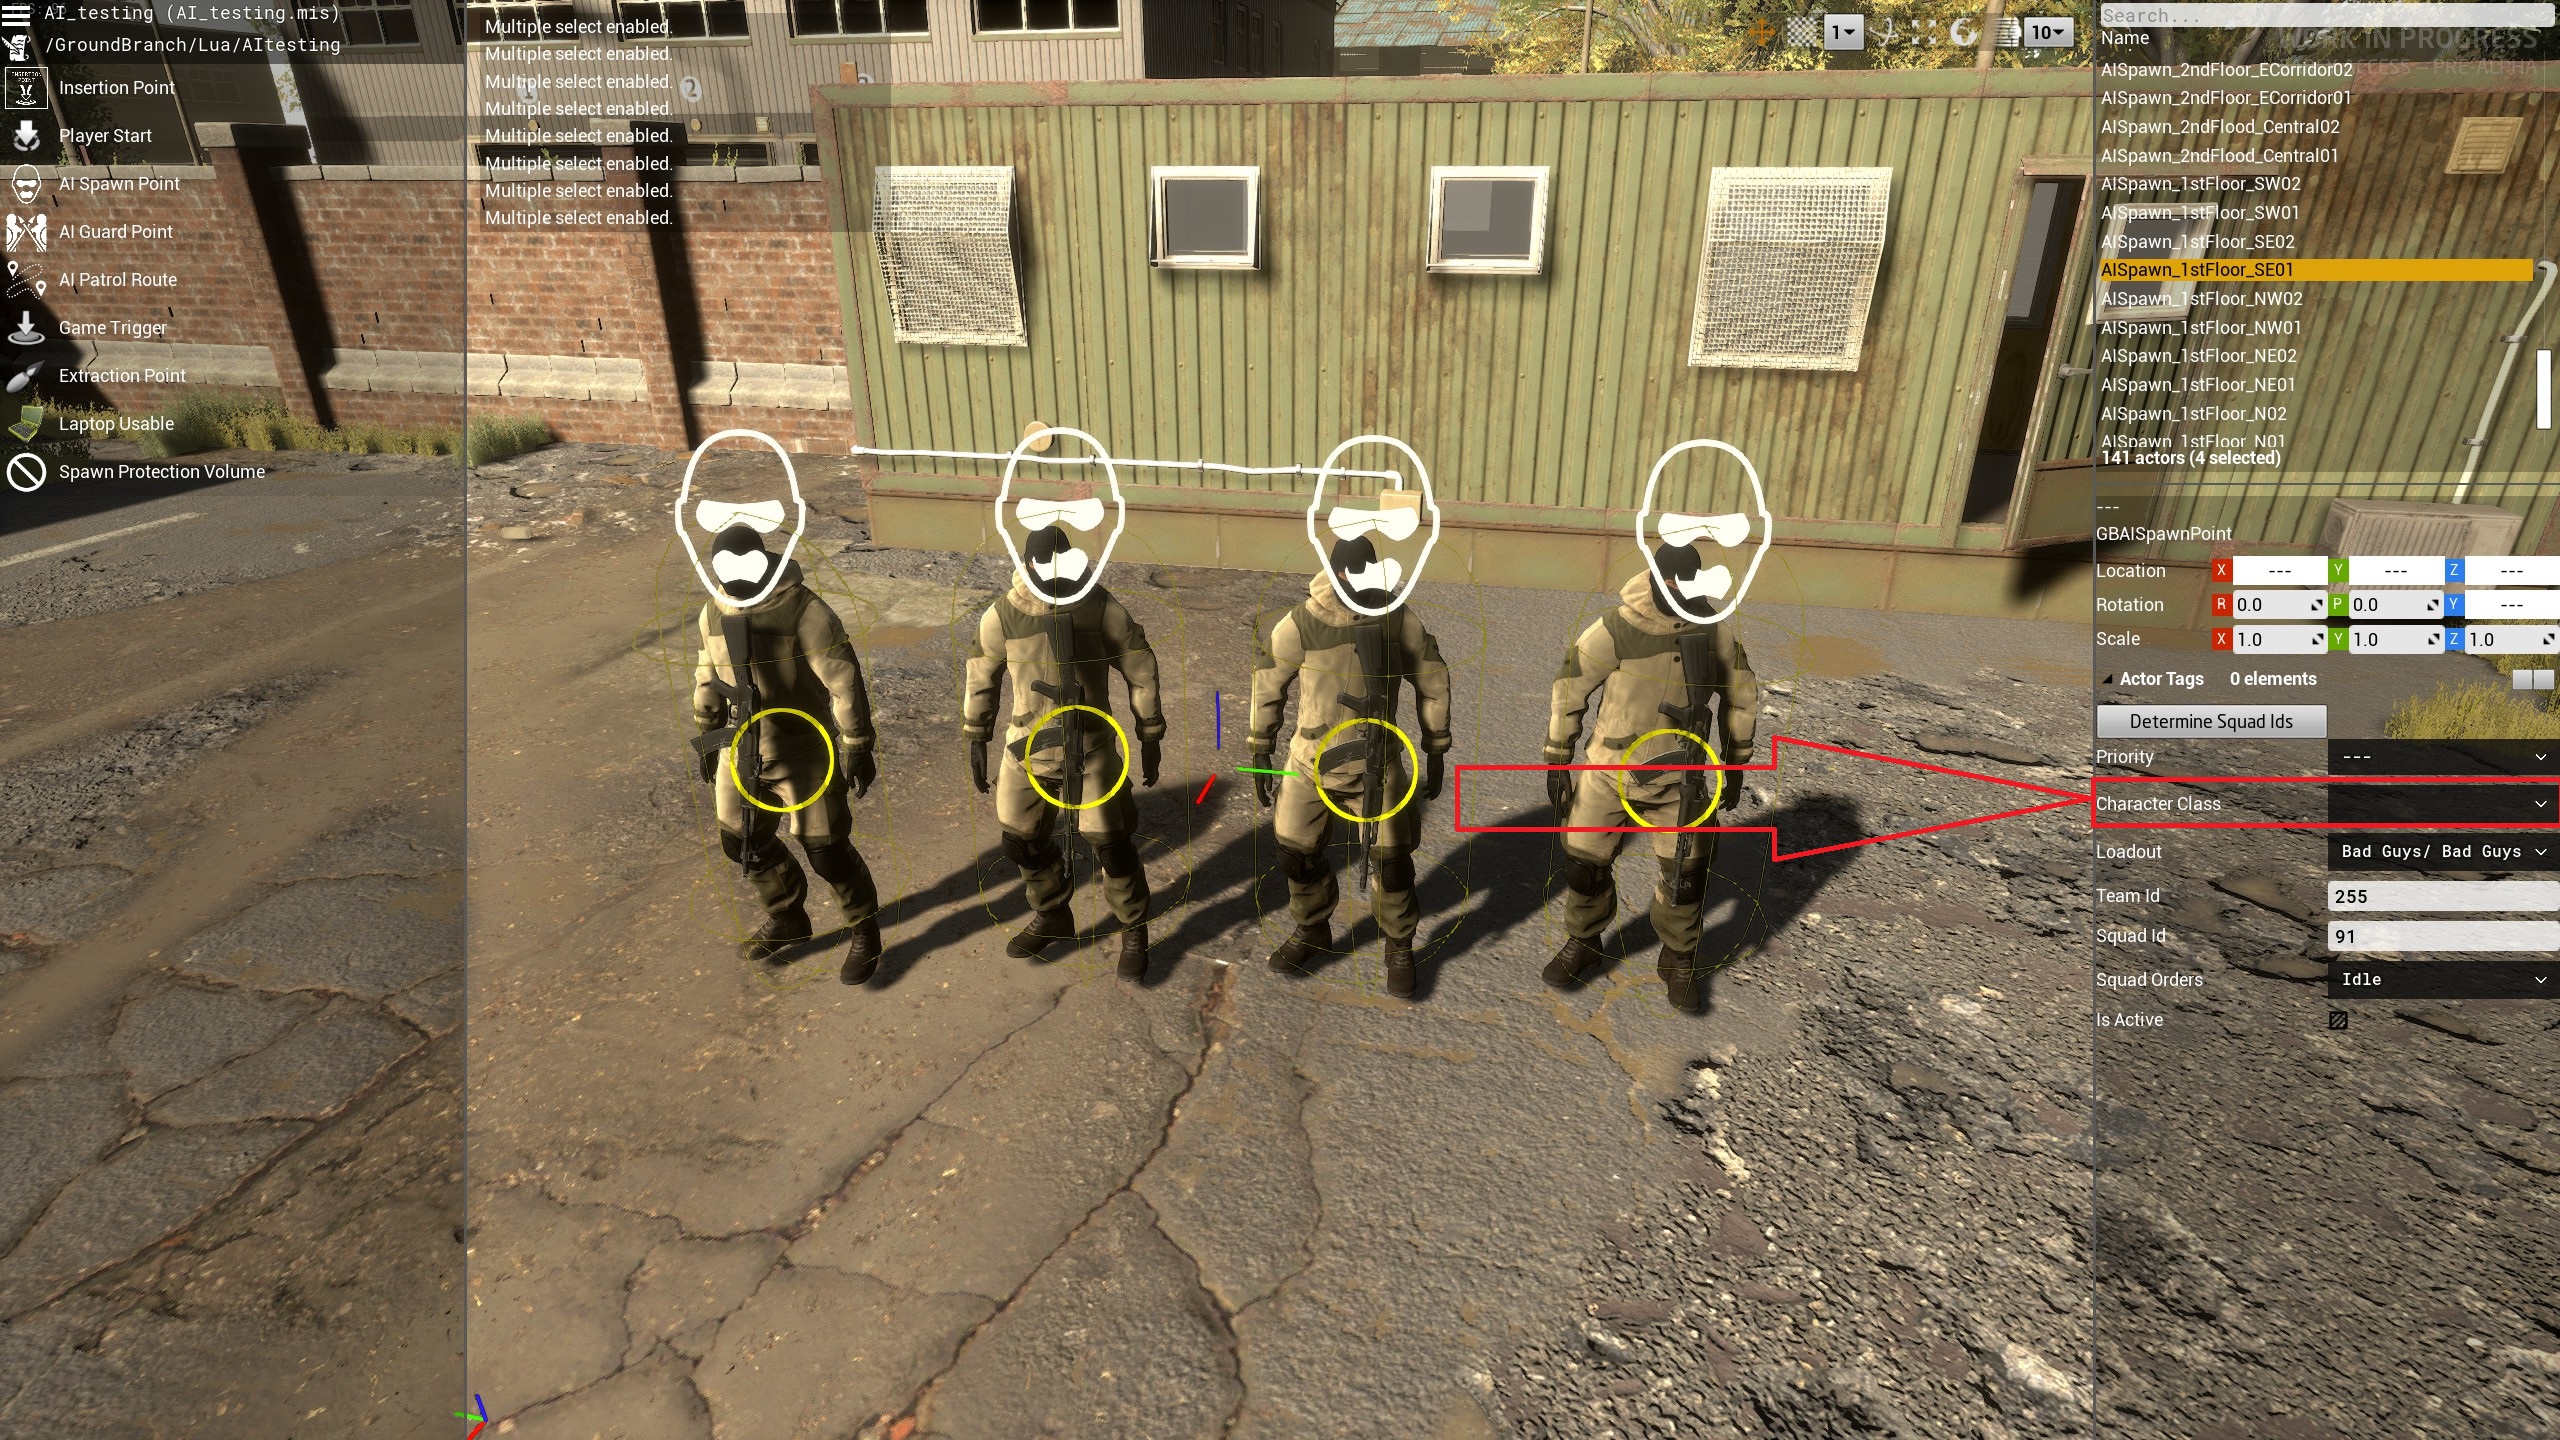
Low Vis
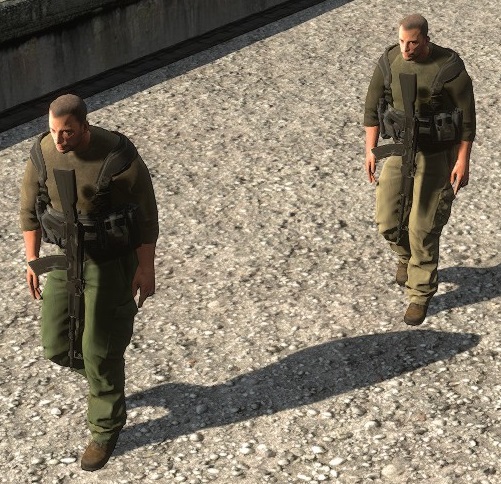
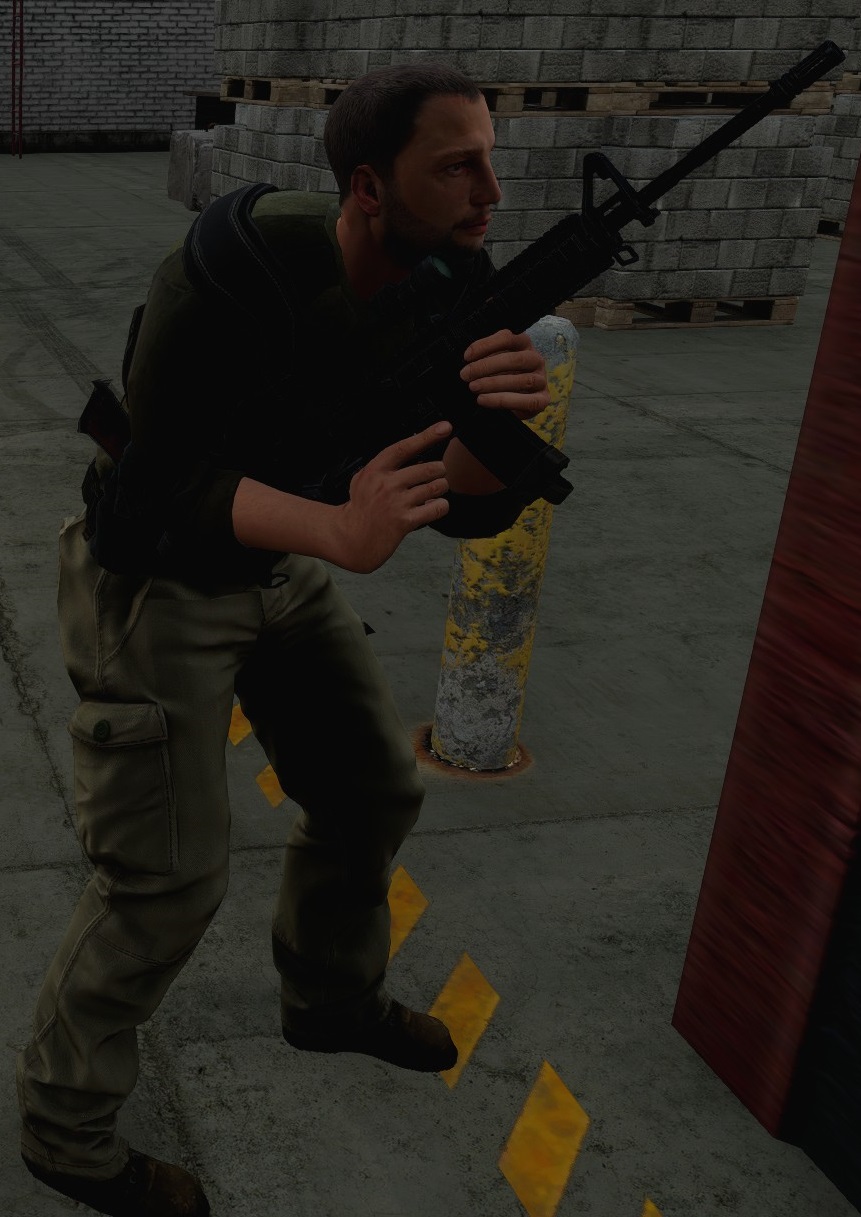
Militant
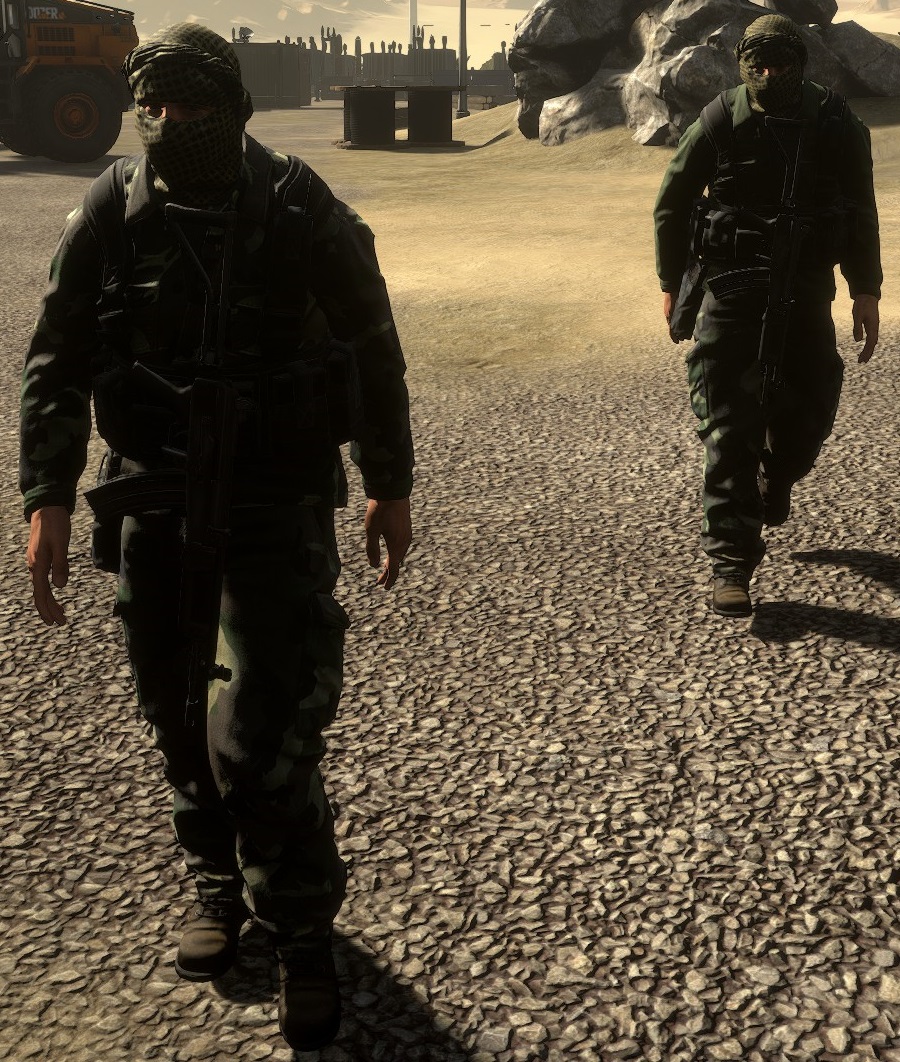
Russian / Bad guy
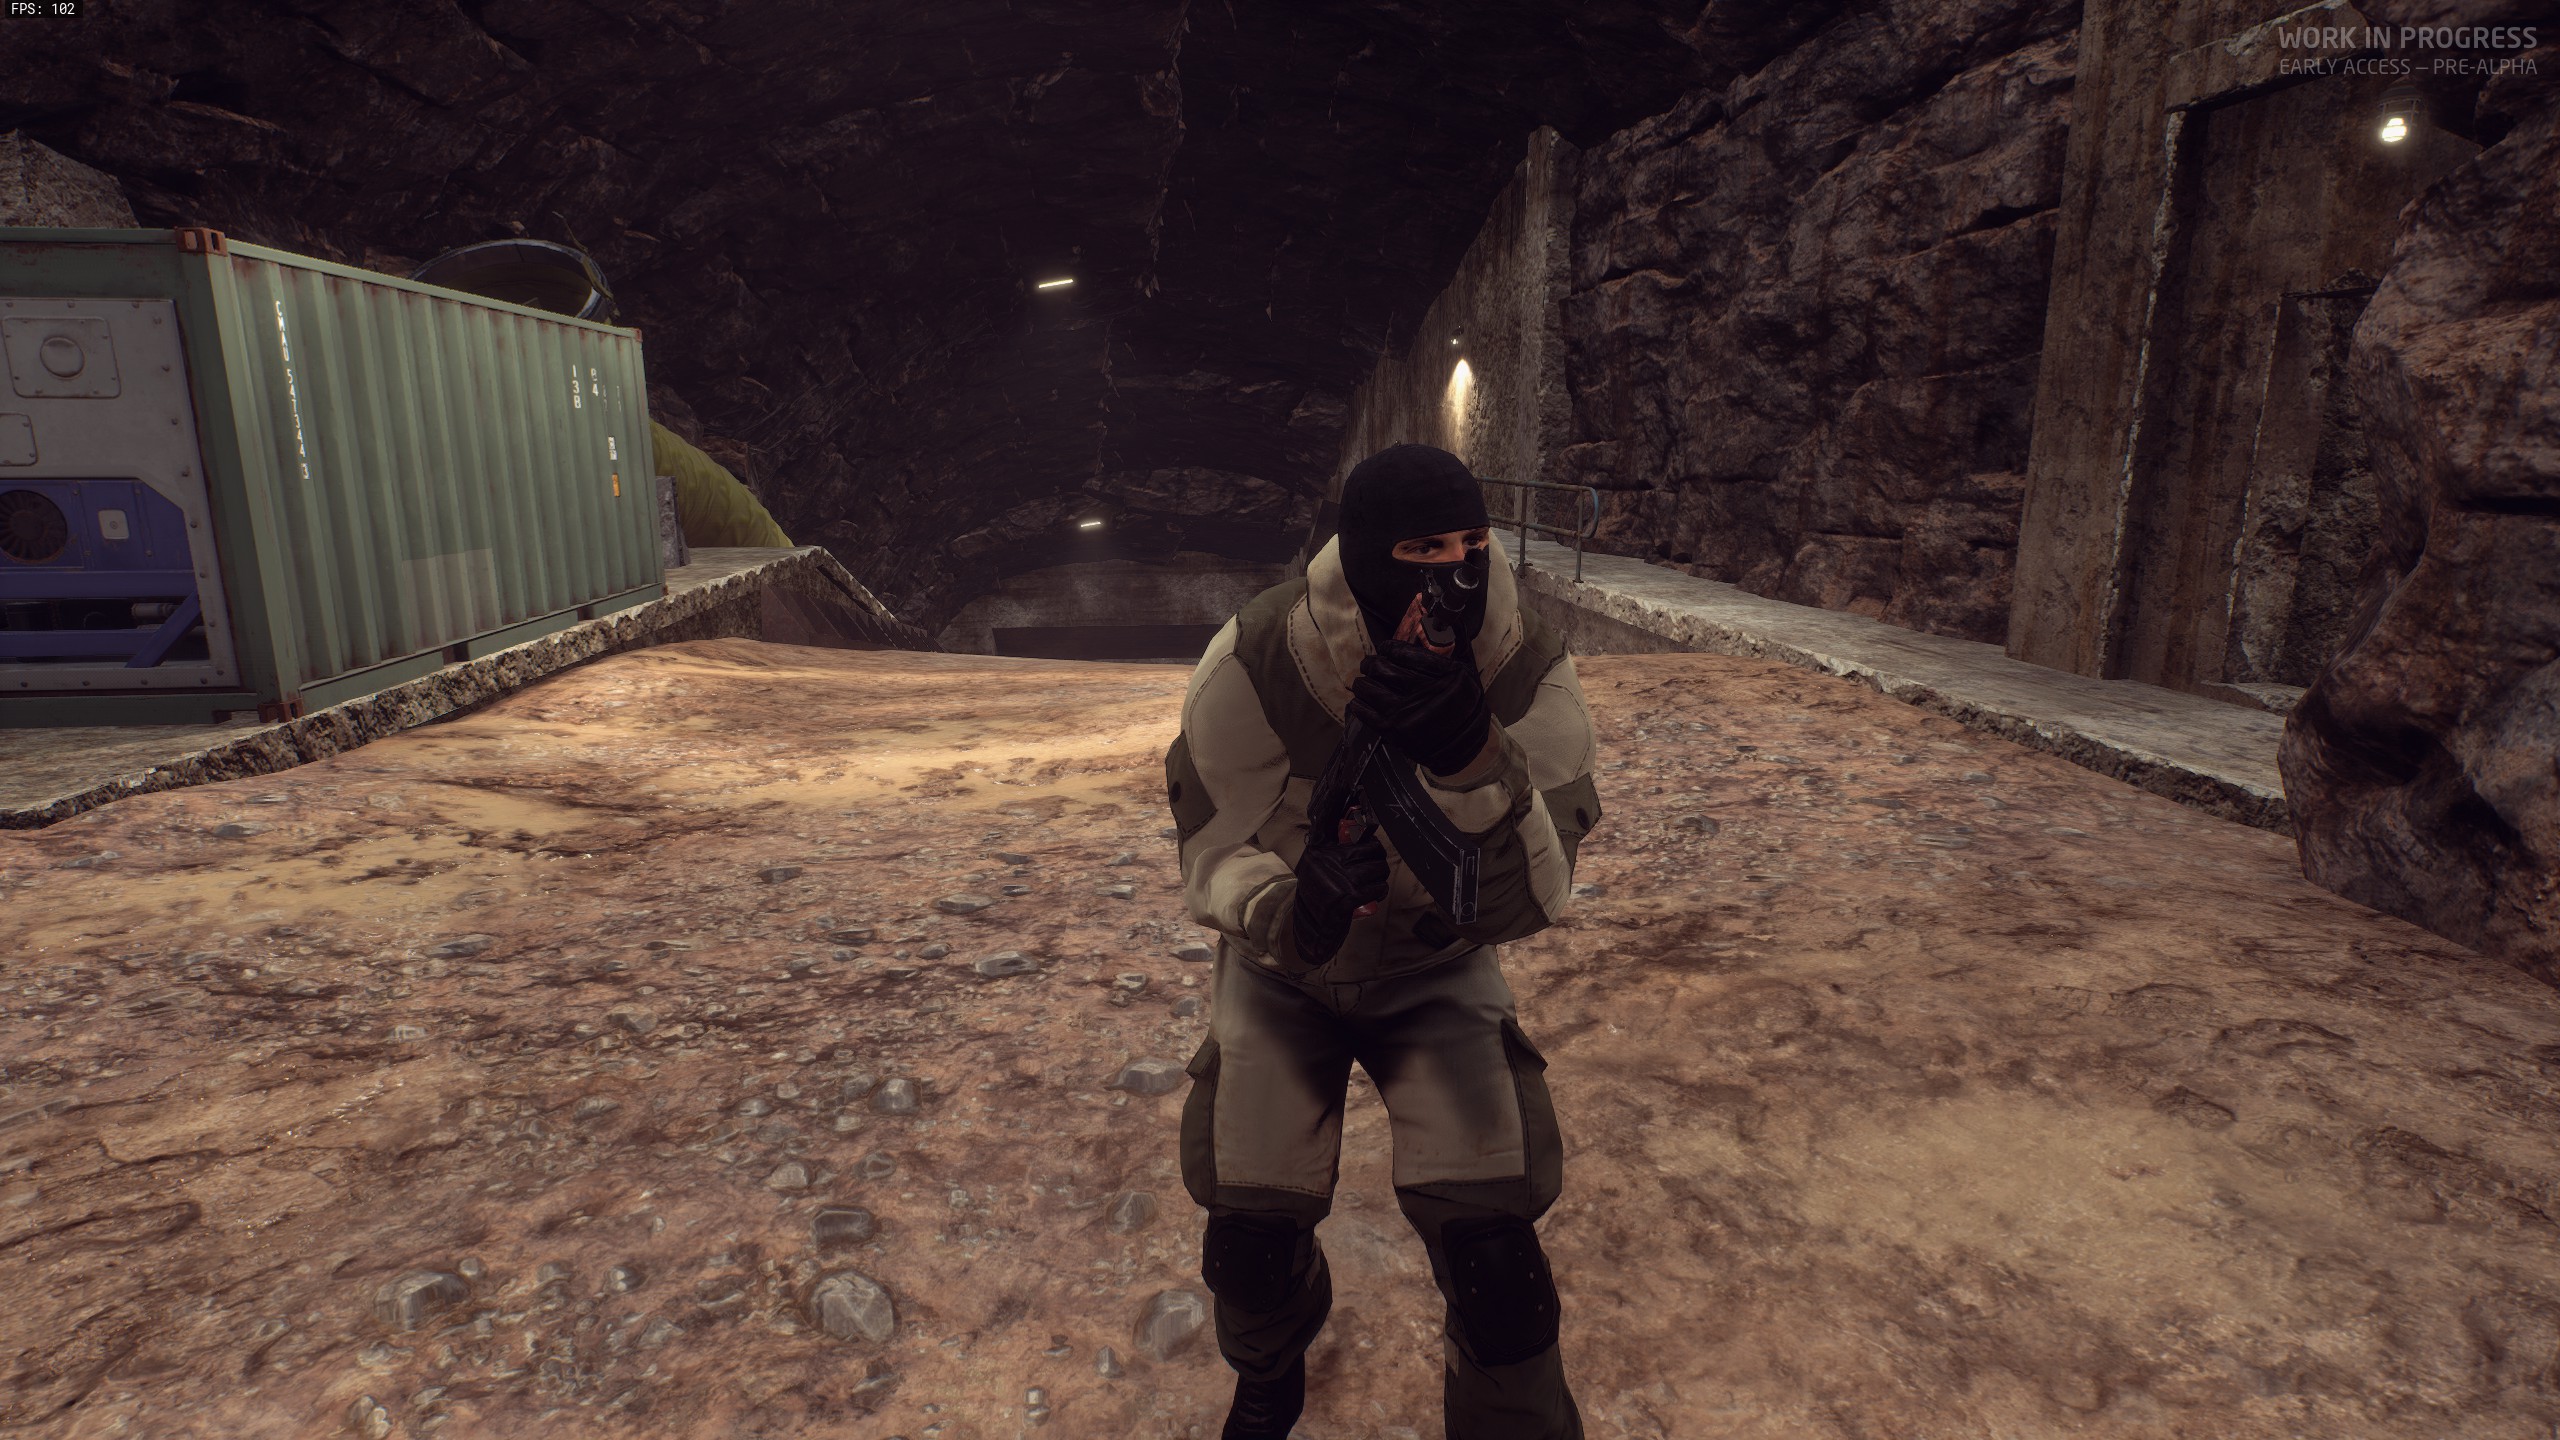
Due to a bug in 1031 it is not possible to change the Charcter class for the AI in the existing PVE modes. All new spawn points for all maps are for the millitant only. It is hoped that this bug will be fixed with 1032 with the introduction of new assets.
AI Loadouts
Loadouts can be changed by selecting through the loadout scrollbar. Currently the loadouts are named with the appearance kit type and then a loadout, however any loadout can be applied to the AI, it may not just be a suitable style.
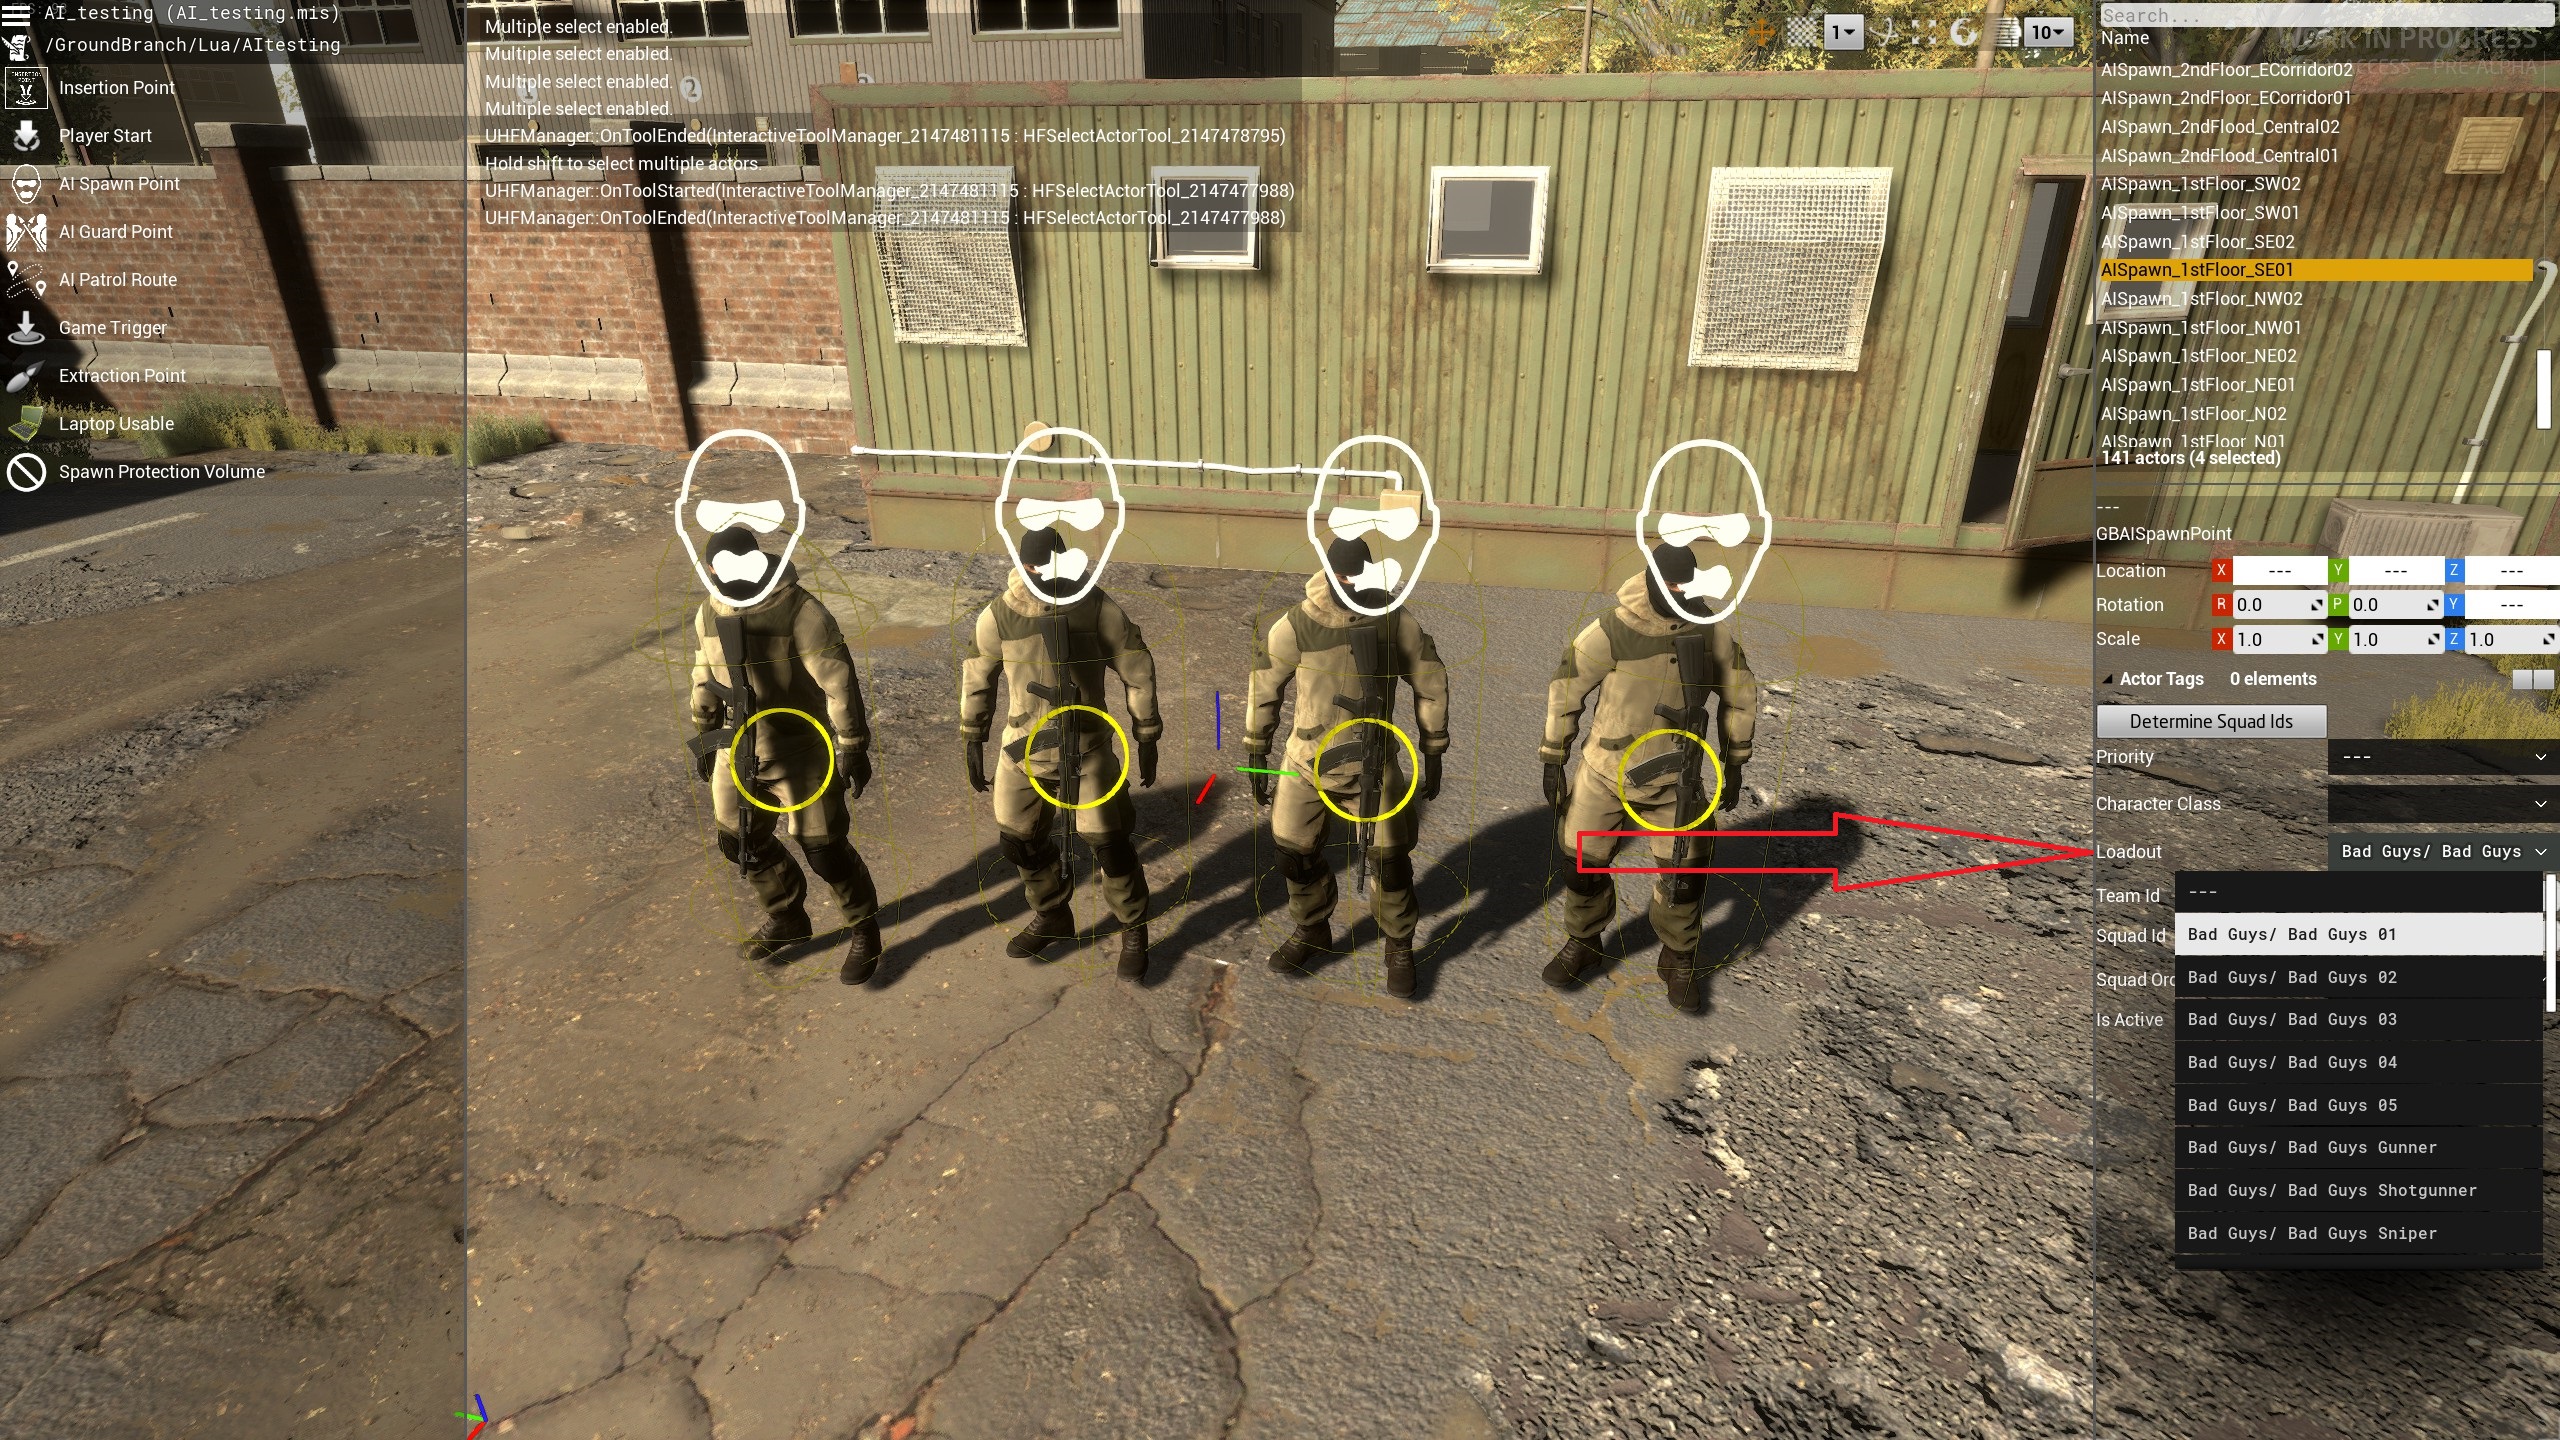
- Due to a current bug, the loadout scroll bar references the list of files in the following directory F:\SteamLibrary\steamapps\common\Ground Branch\GroundBranch\Content\GroundBranch\AI\Loadouts\_BadGuys
- However the loadouts themselves need to be placed in the following directory
F:\SteamLibrary\steamapps\common\Ground Branch\GroundBranch\Content\GroundBranch\AI\Loadouts\BadGuys - I generally find it easier to customise the operator to whatever the AI is to be set to and then copy the data over. The files for the custom kits can be found here Documents\GroundBranch\ItemBuilds. A few things to note:-
- I find it easier to do things one item at a time, for instance get the rifle changed and checked, then vest, then belt etc rather than dumping everything in at once and it taking a lot longer to debug if there are any issues.
- The new system for the kit files can mess up the colour of the items as this is no longer specified in the individual item files. For some pouches the colour is not a simple “tan” or the like and in my experience you may need to live with black.
- Check the ammunition type as well as sometimes it does not change over in the kit files.

Directories for AI loadouts

Directory for saved arrangements for primary, secondary, vest, belt, helmet etc
Important points to note:-
- Current Arrangement
The millitant and low profile type AI have a vest and side arm build into the character model. The pistol is never used. All AI have unlimited ammunition for the primary weapon. Armour is currently not implemented into the game and it is not clear how armour will be implemented for the AI. - Potential FPS effects
Adding in additional elements for the game to render due to additional items on the AI rifles or additional vests / belts with pouches may incur some change in fps. It is also possible to get the new platform / belt clipping through the current AI assets for the millitant and low vis AI types. - Adding ammunition in a belt / platform
Once ammunition is added to the AI loadout (for primary weapons only) the AI will use that ammunition all up and then essentially be “dry” and not be useful anymore. From a viewpoint perspective the new vest will overlay AI shirt and there maybe some clipping to the original character assets underneath. - Adding a pistol
Once a pistol has been added then the AI will fire off the primary weapon first. Once all the rounds in the magazine / belt have been expended the AI changes to the pistol and begin a new loop. The AI continuously fires the pistol and reloads, even if they should have emptied all the secondary magazines on them. They do not change back to the primary weapon and try to reload it. (The bots (using the addbots command) follow a similar logic. - Adding NVGs
Adding NVGs on a helmet changes the profile of the AI significantly and makes PID a lot harder. If a IR strobe is on the helmet then it will only be visible if you are on the same team as the AI.
At night time the NVGs on the AI do not flip down (they did in previous builds).
Conclusion
The mission editor, even in its initial state, enables significant changes to the current Ground Branch game play, all that it takes is some time.
Some of the User Interface for selecting missions etc will need to be thought out, however as these missions may be tied to the steam workshop (let us hope), it will take some time.
Kris has previously bragged that he spent more time limiting the weapon customisation to prevent “artists making masterpieces” than setting up the weapons customisation system in the first place. Then he makes a mission editor…
Hope you enjoy the Guide about GROUND BRANCH – Mission Editor Tips and Tricks, if you think we should add extra information or forget something, please let us know via comment below, and we will do our best to fix or update as soon as possible!
- All GROUND BRANCH Posts List


Is it possible to make a map in ue4 and load it into Ground Branch then use the mission editor to open the map and spawn AI on the map?