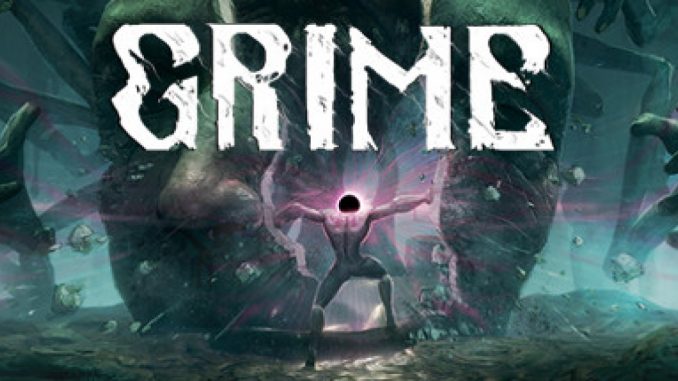
GRIME – All Maps in Game + All Checkpoint Locations

GRIME - All Maps in Game + All Checkpoint Locations 2 - steamlists.com

GRIME – All Maps in Game + All Checkpoint Locations

Hey there, fellow GRIME enthusiasts! Ready to dive deep into the twisted, surreal world of this mind-bending game? Buckle up, because we’re about to embark on an epic journey through every nook and cranny of GRIME’s universe. Whether you’re a newbie just starting out or a seasoned player looking to conquer every last bit of the game, this guide’s got your back. Let’s get cracking!

Quick Answer

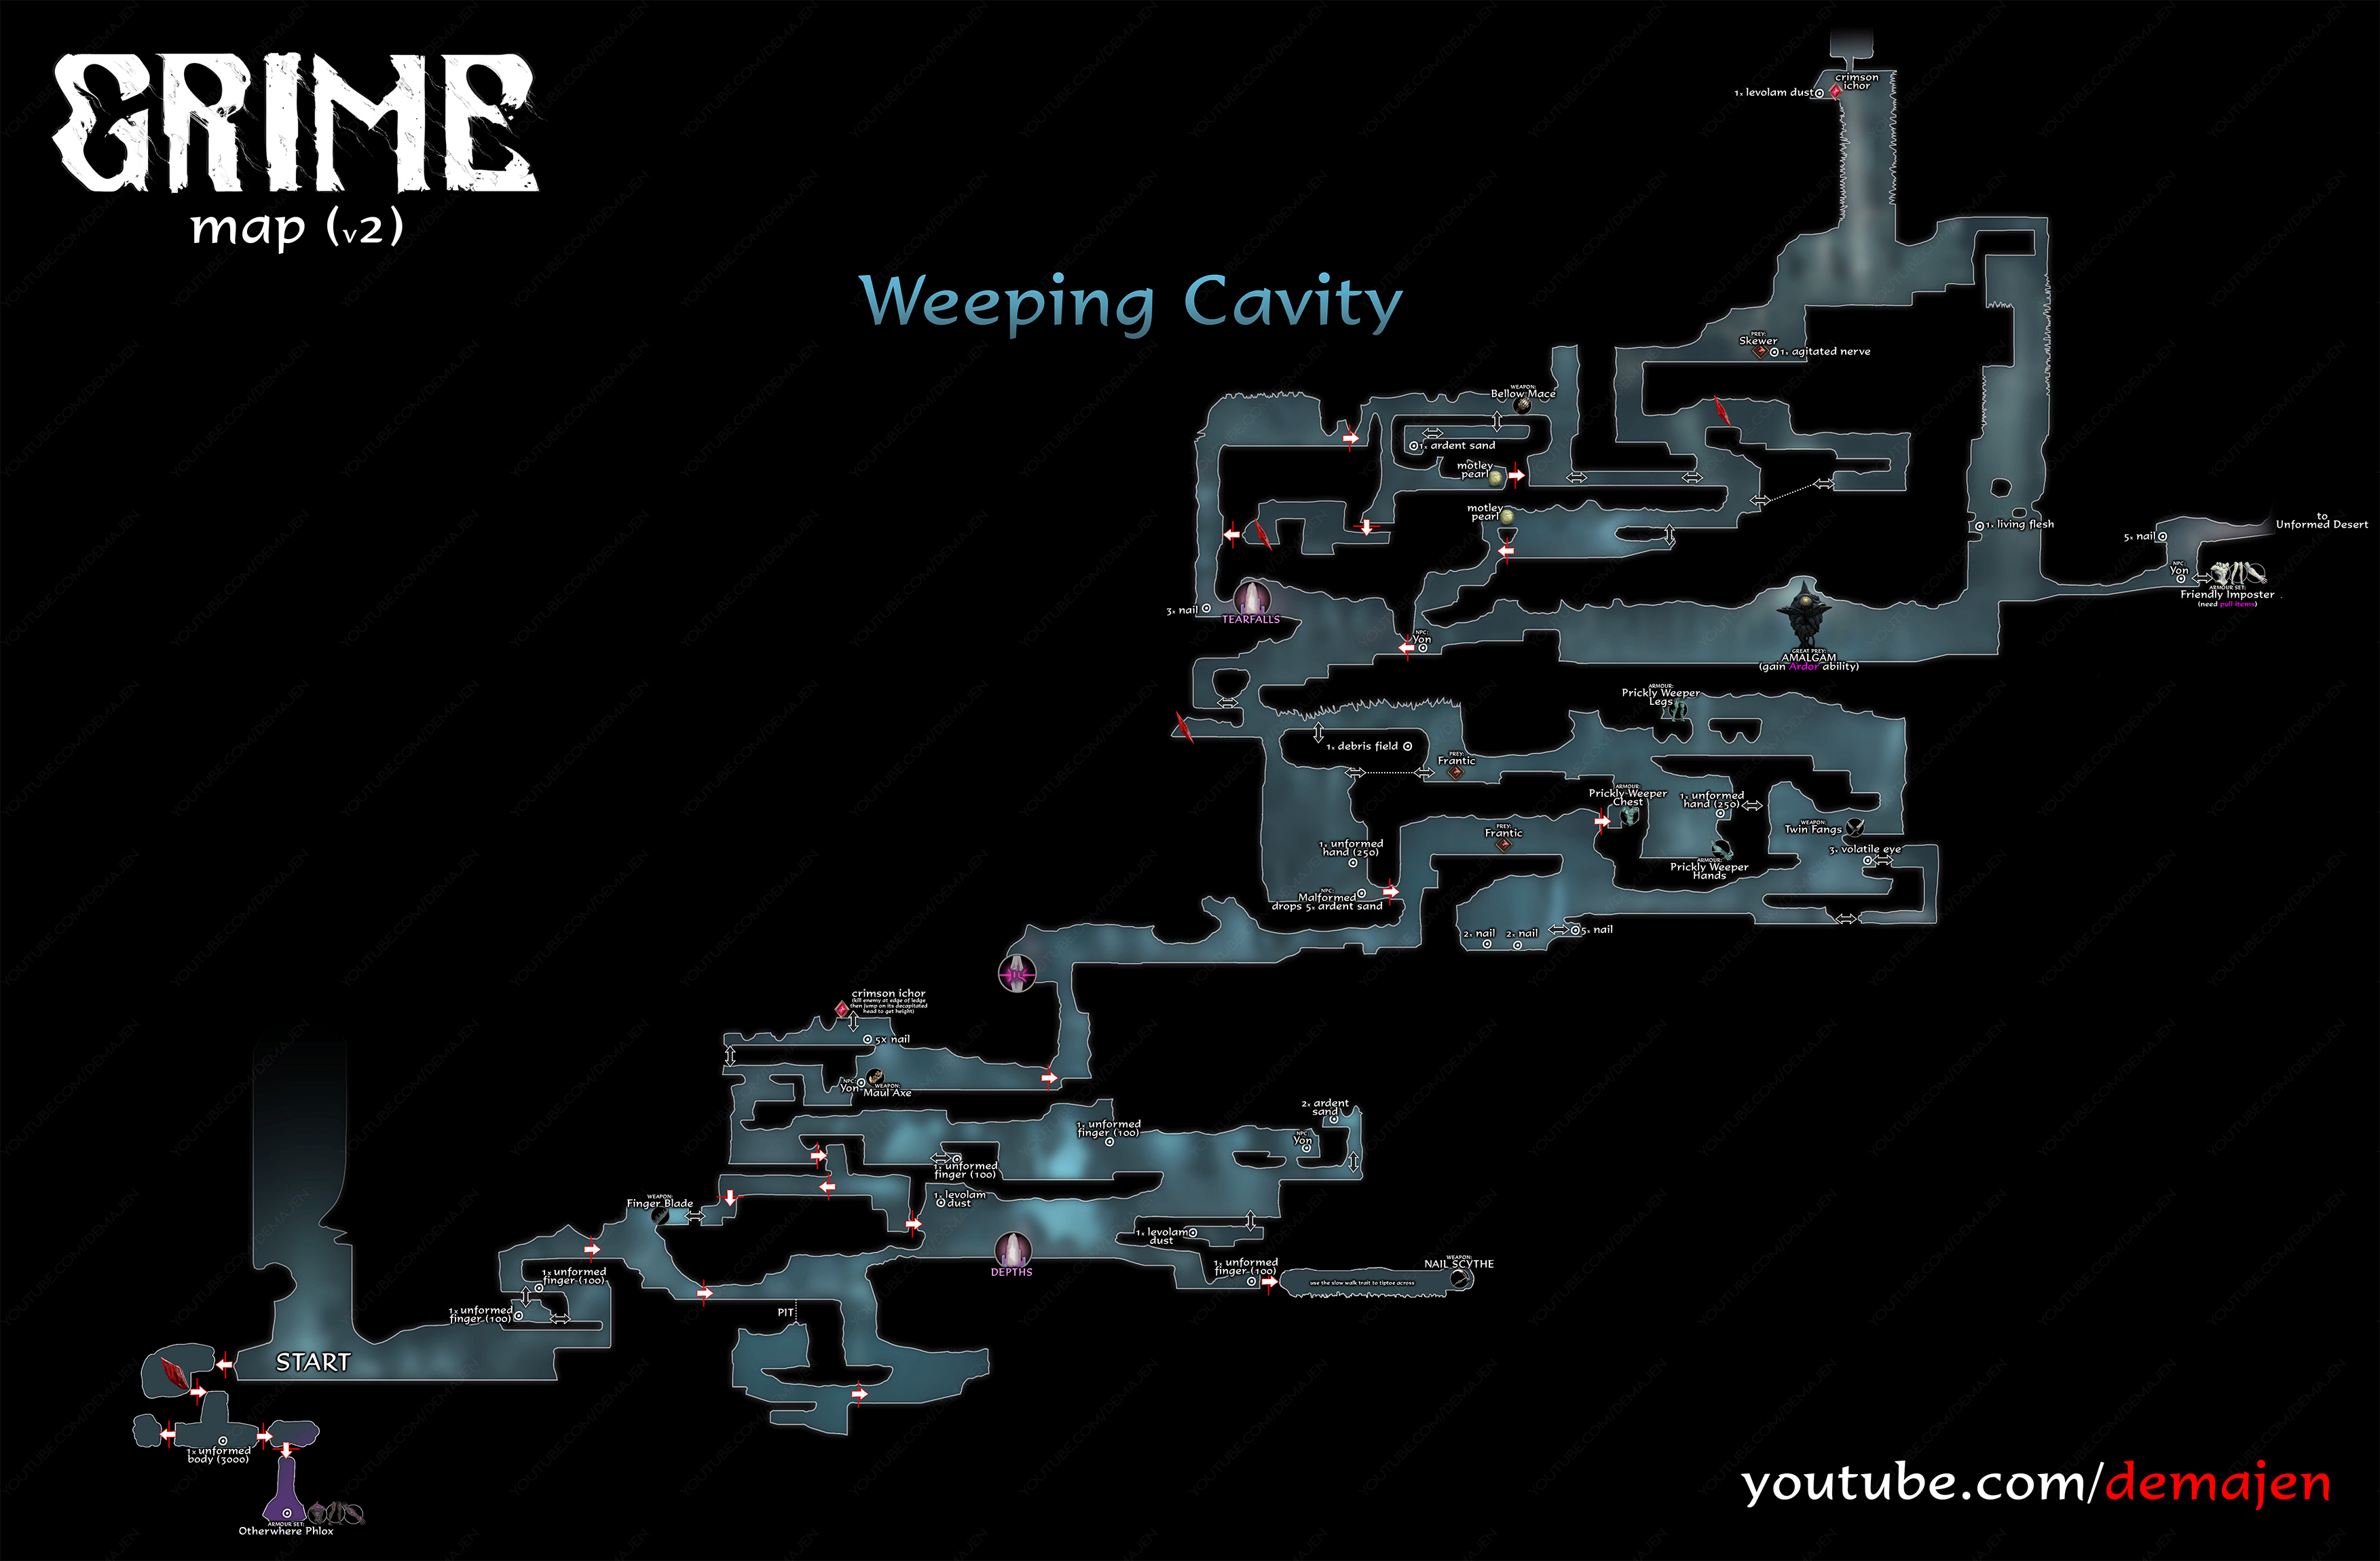
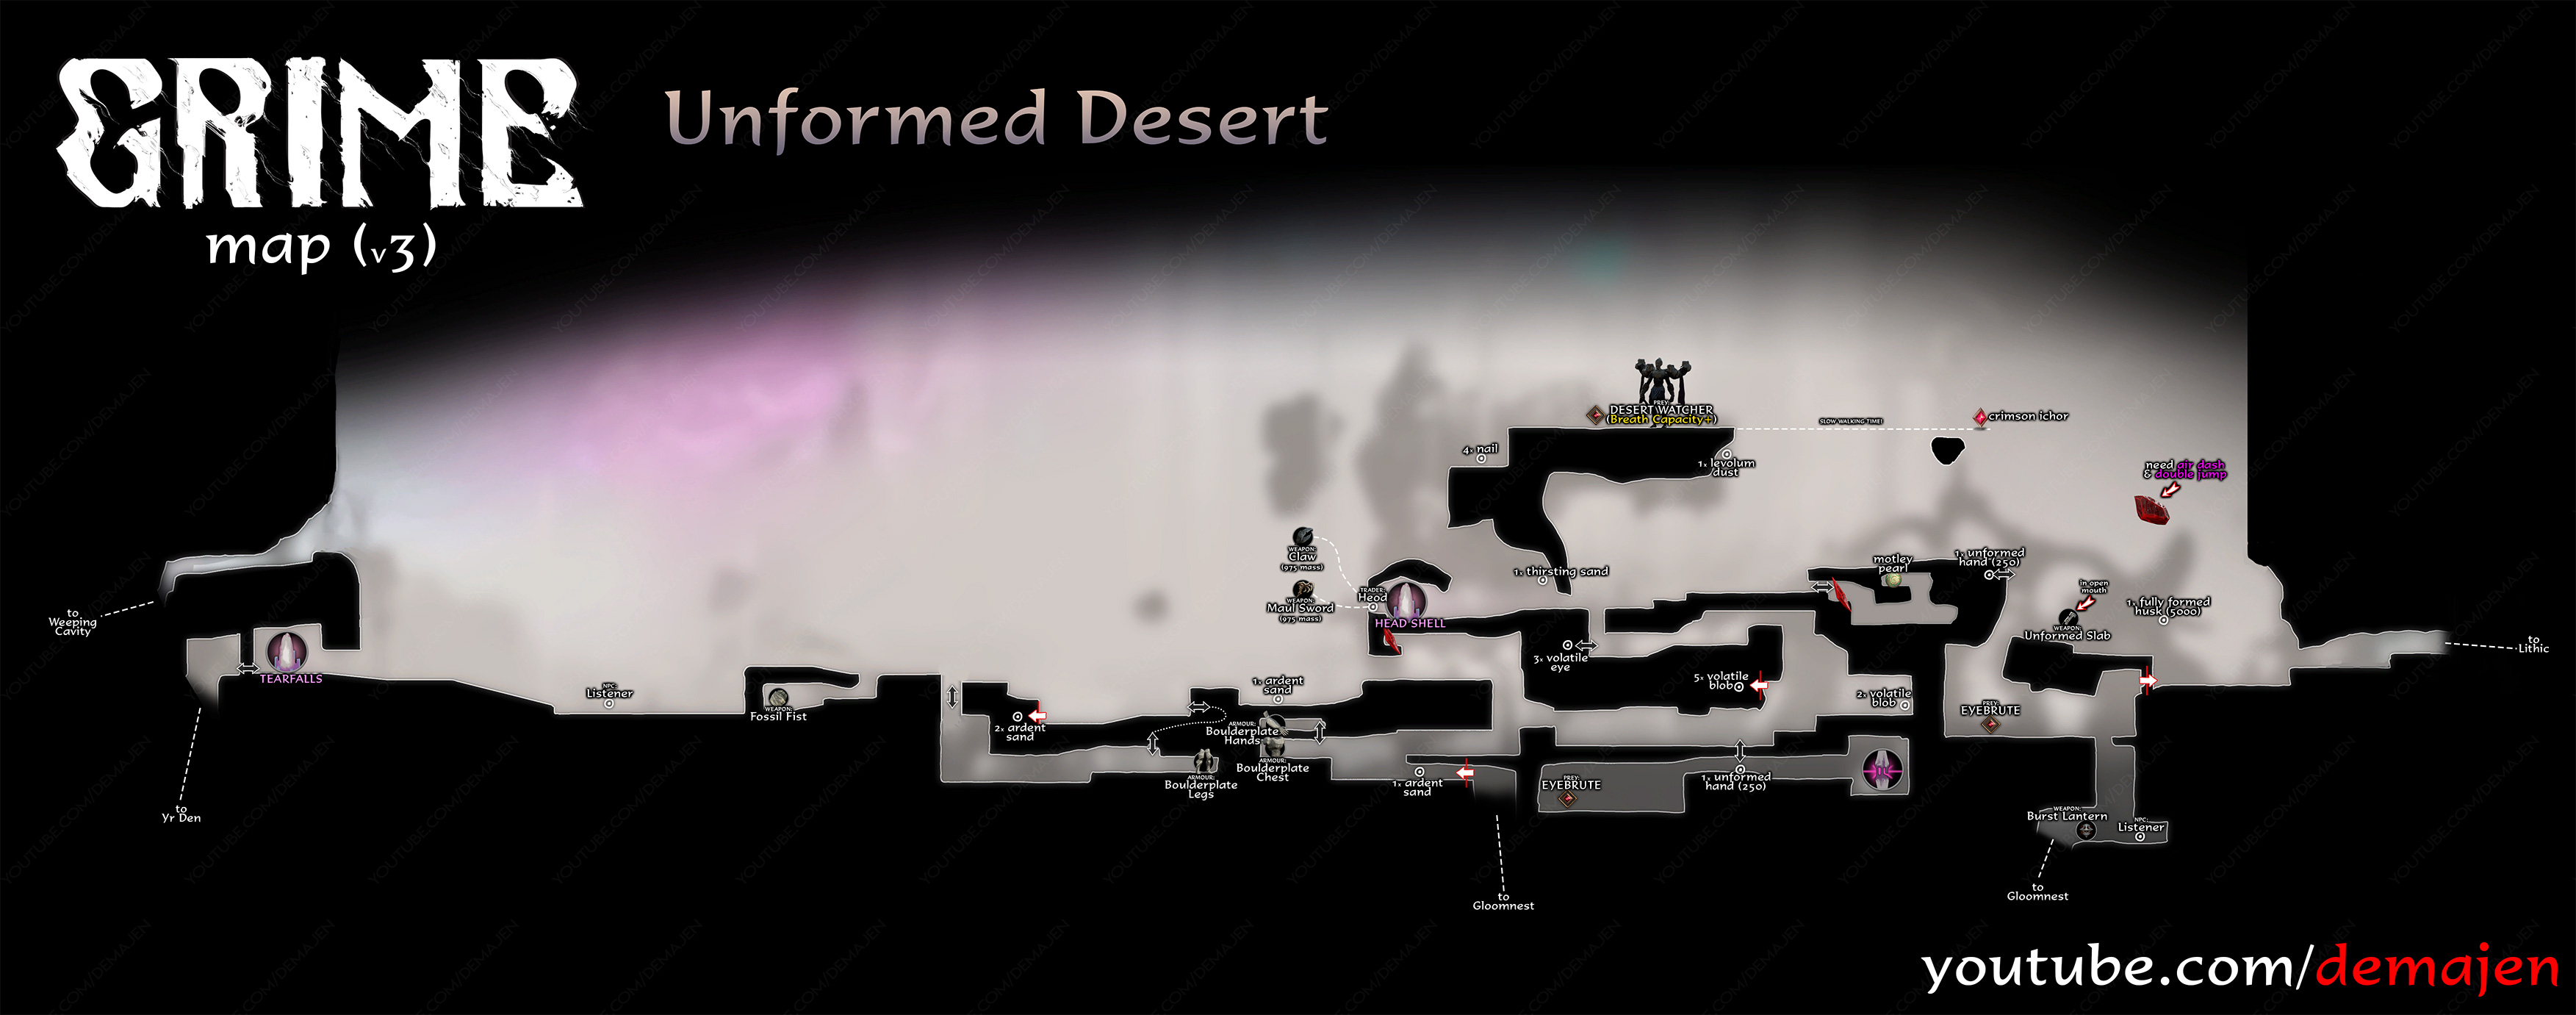
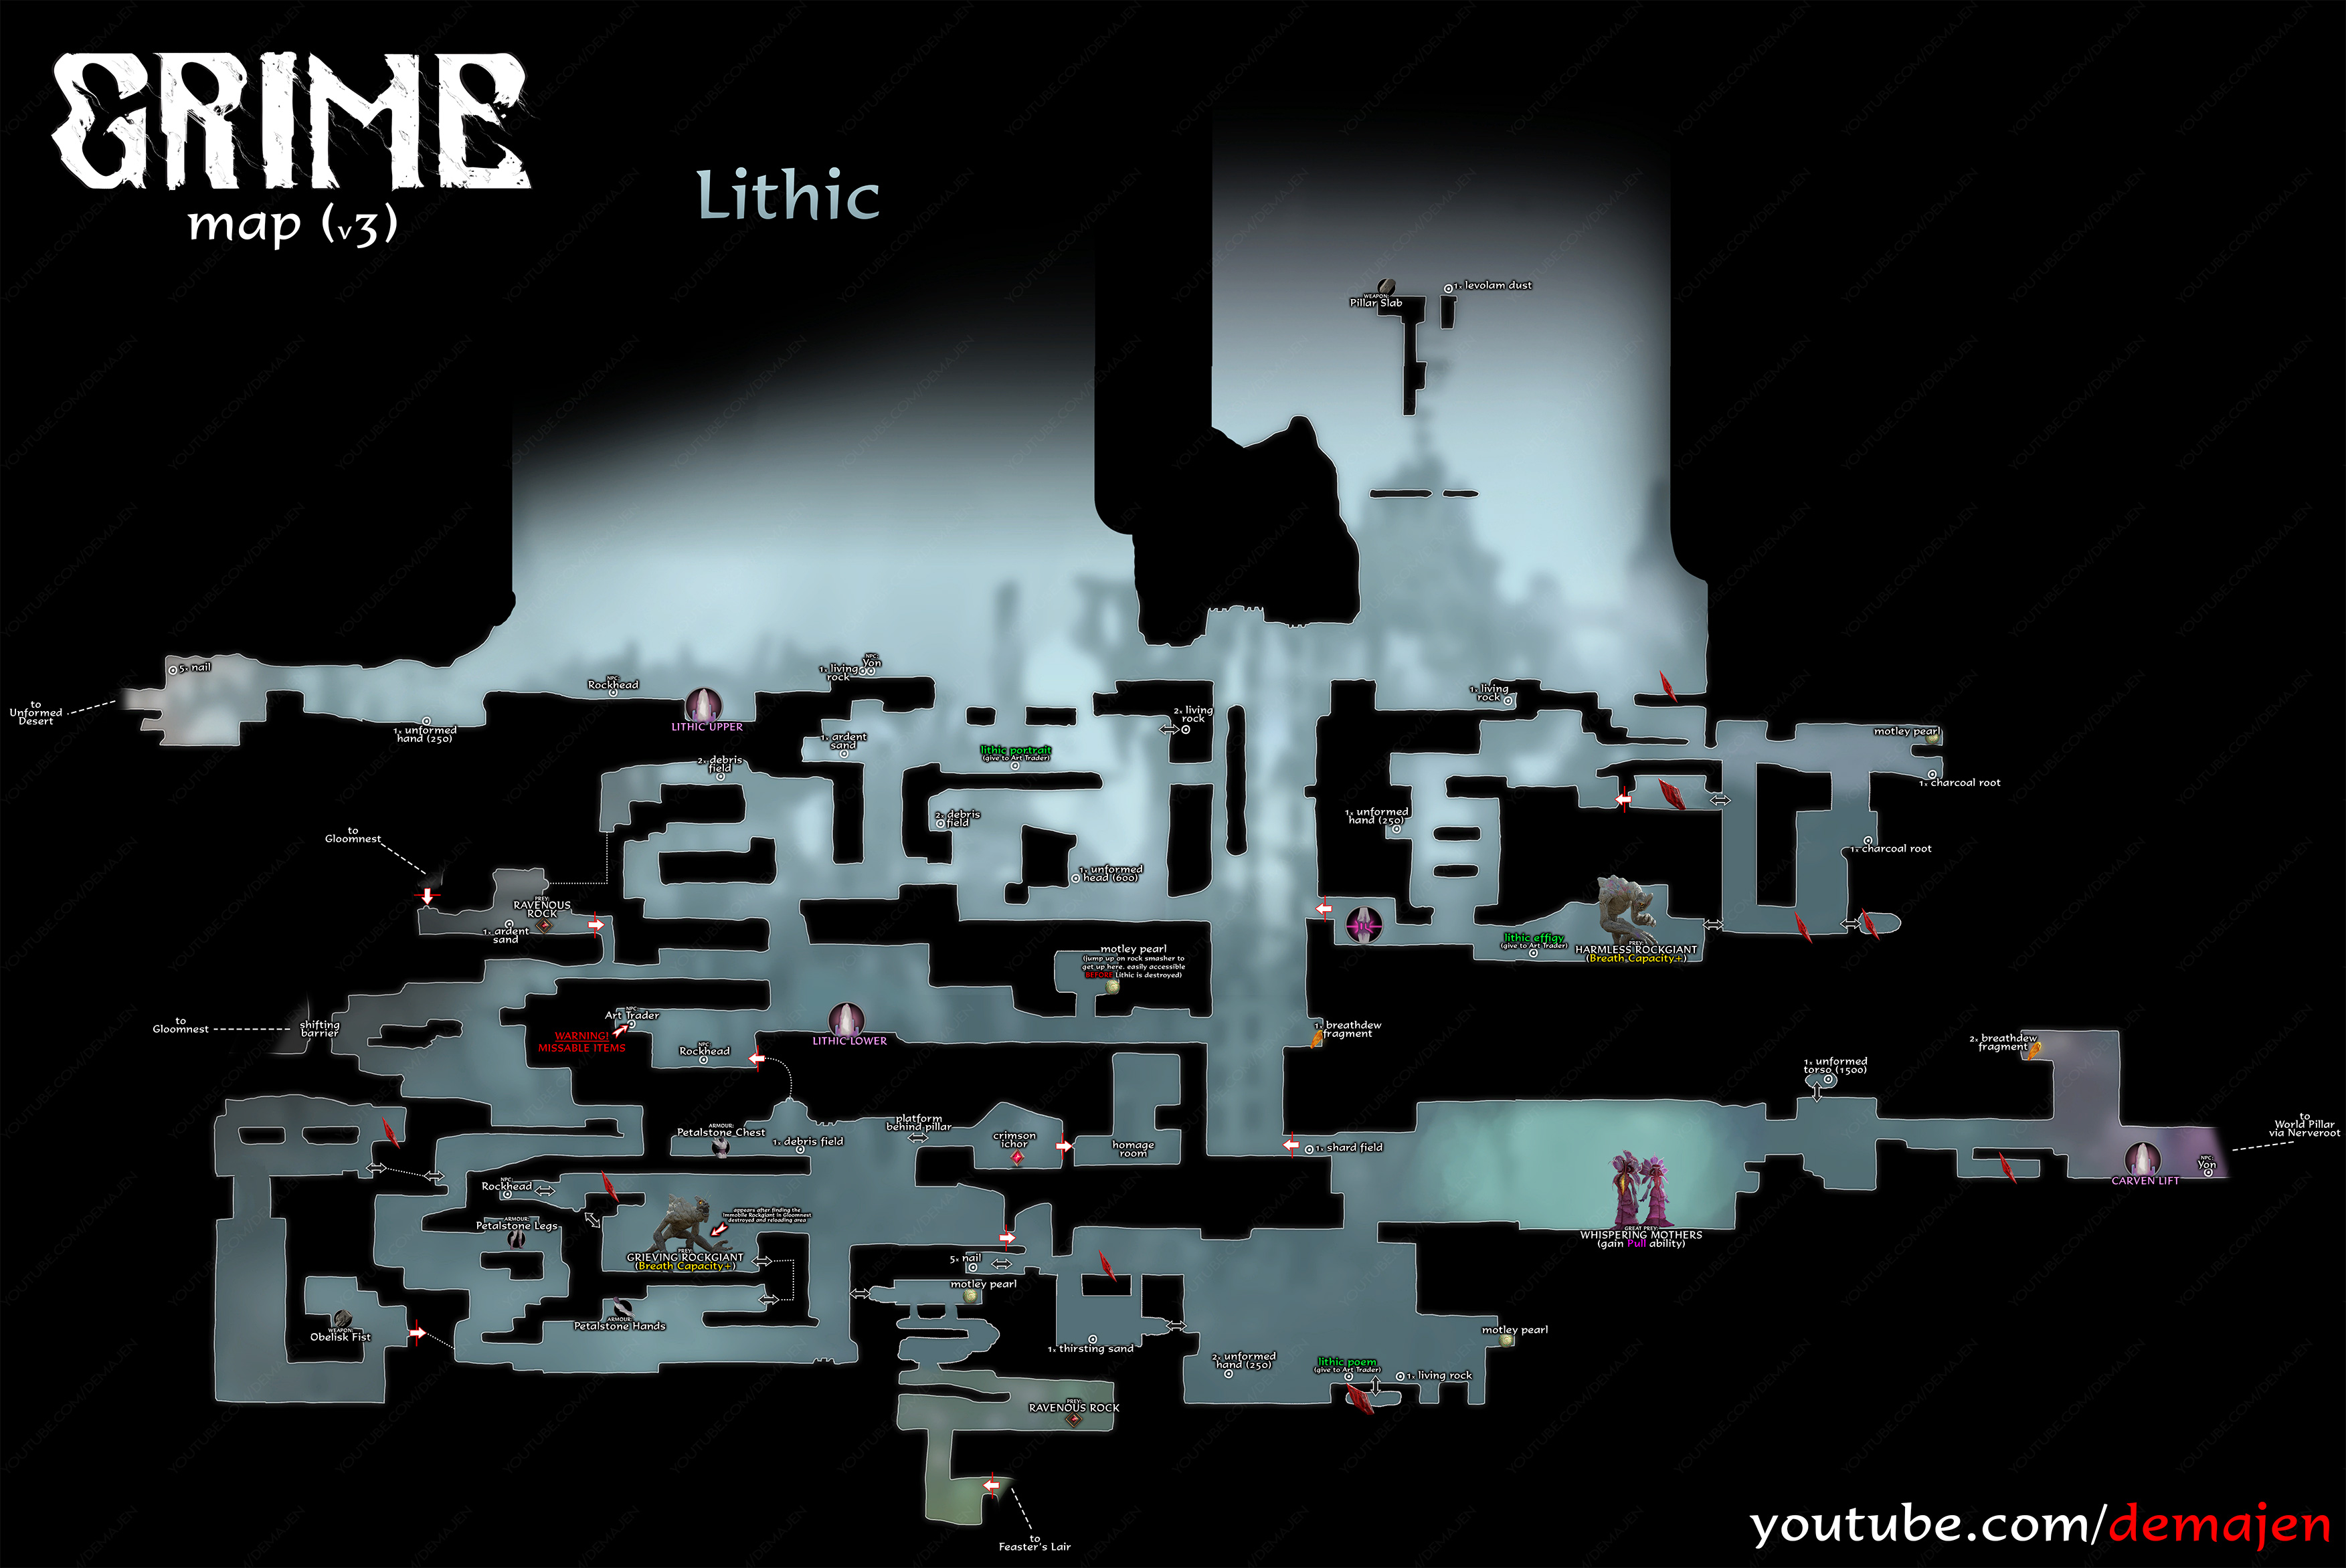
GRIME features 8 main areas and 5 spoiler areas, each with multiple checkpoints. The main areas are Nerveroot, World Pillar, Gloomnest, Yr Den, Feaster’s Lair, Servant’s Path, Carven Palace, and Garden. Each area typically has 2 checkpoints, often hidden or guarded by enemies.

My GRIME Adventure: A Personal Tale

Before we dive into the nitty-gritty, let me share a quick story. When I first started playing GRIME, I was totally lost. I mean, who wouldn’t be in this crazy, shape-shifting world? I remember stumbling around Nerveroot, desperately looking for a checkpoint after barely surviving a tough fight. Just when I thought I was done for, I spotted a faint glow behind some weird, pulsating flora. Bingo! My first checkpoint. That moment of relief and triumph? Priceless. From then on, I made it my mission to uncover every single checkpoint in the game. And now, I’m here to share that knowledge with you!

Understanding GRIME’s World

GRIME isn’t your average walk in the park. It’s a challenging action-adventure game where knowing your way around and finding those precious checkpoints can mean the difference between victory and, well, a lot of frustration. The game’s world is divided into several distinct areas, each with its own vibe, enemies, and hidden secrets. Let’s break it down, shall we?

Main Areas and Checkpoints

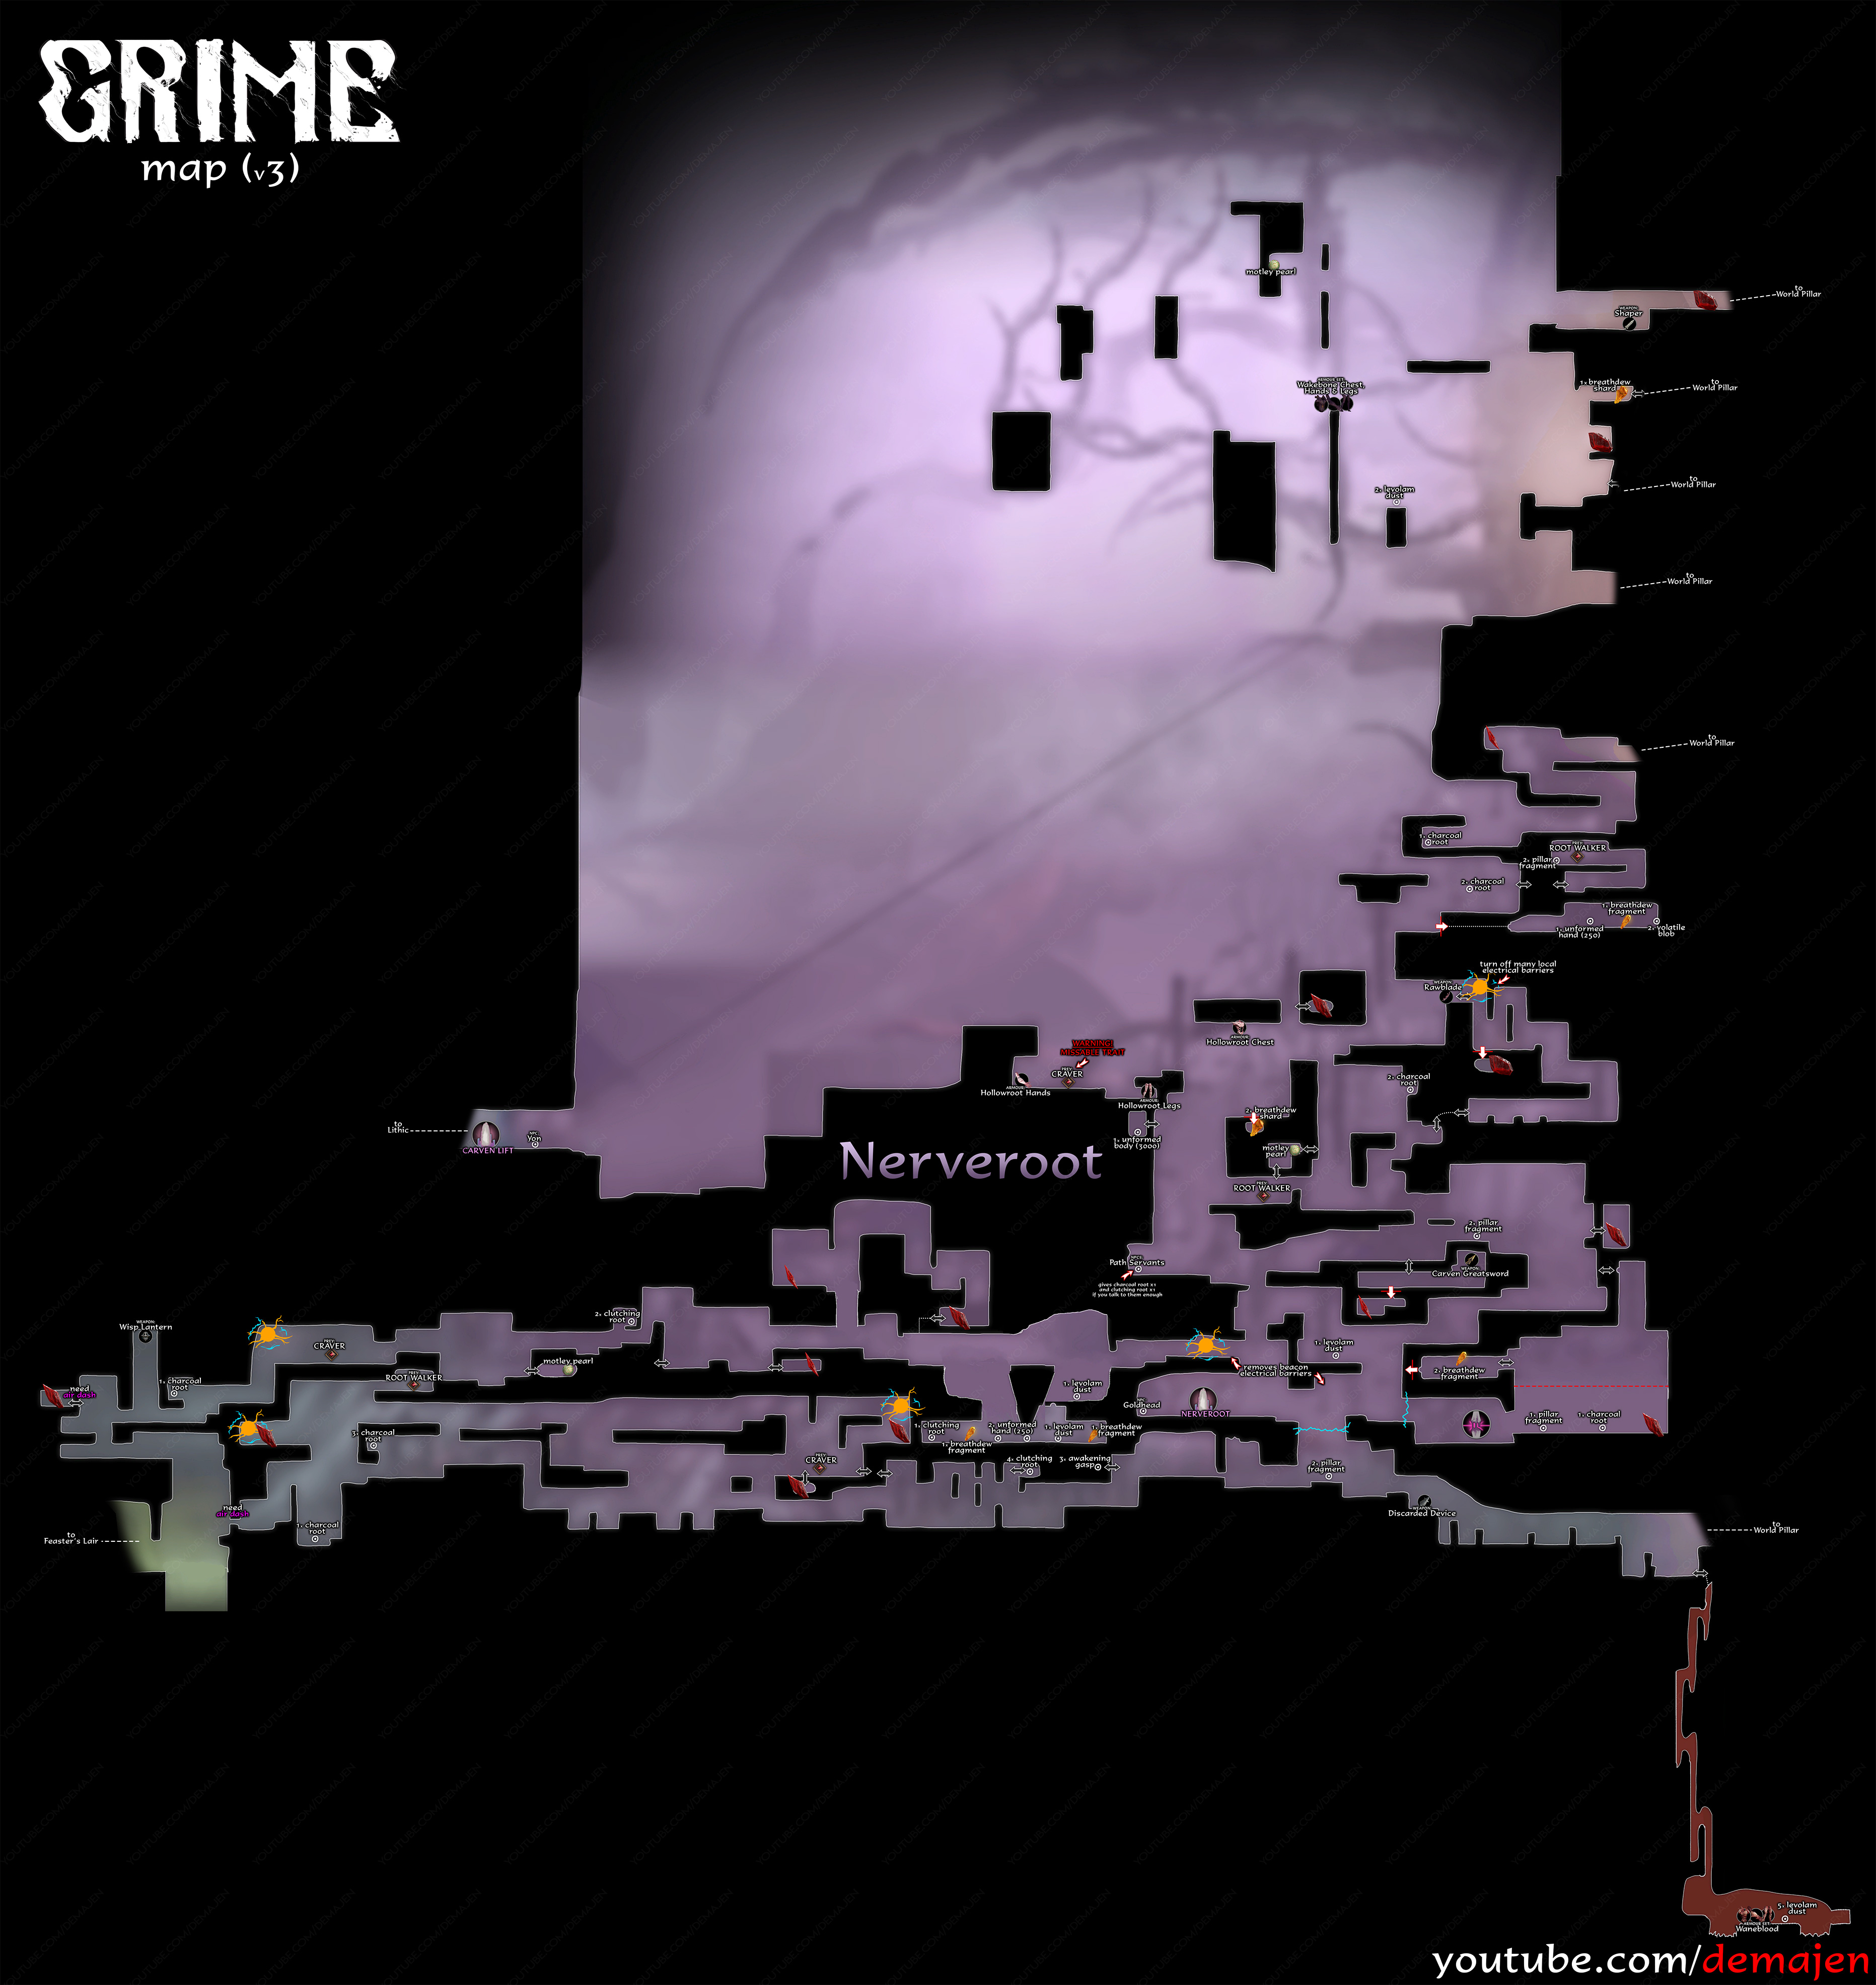
1. Nerveroot

Ah, Nerveroot. The starting point of our weird and wonderful journey. This place is like a twisted version of a root system, all tangled and alive.

  • Checkpoint 1: You’ll find this bad boy near the entrance, right after you take down your first mini-boss. Trust me, you’ll need it after that fight!
  • Checkpoint 2: This one’s a bit trickier. It’s tucked away in the lower caverns, but here’s the catch – you can only get to it after you’ve unlocked the wall-break ability. Talk about a test of patience!

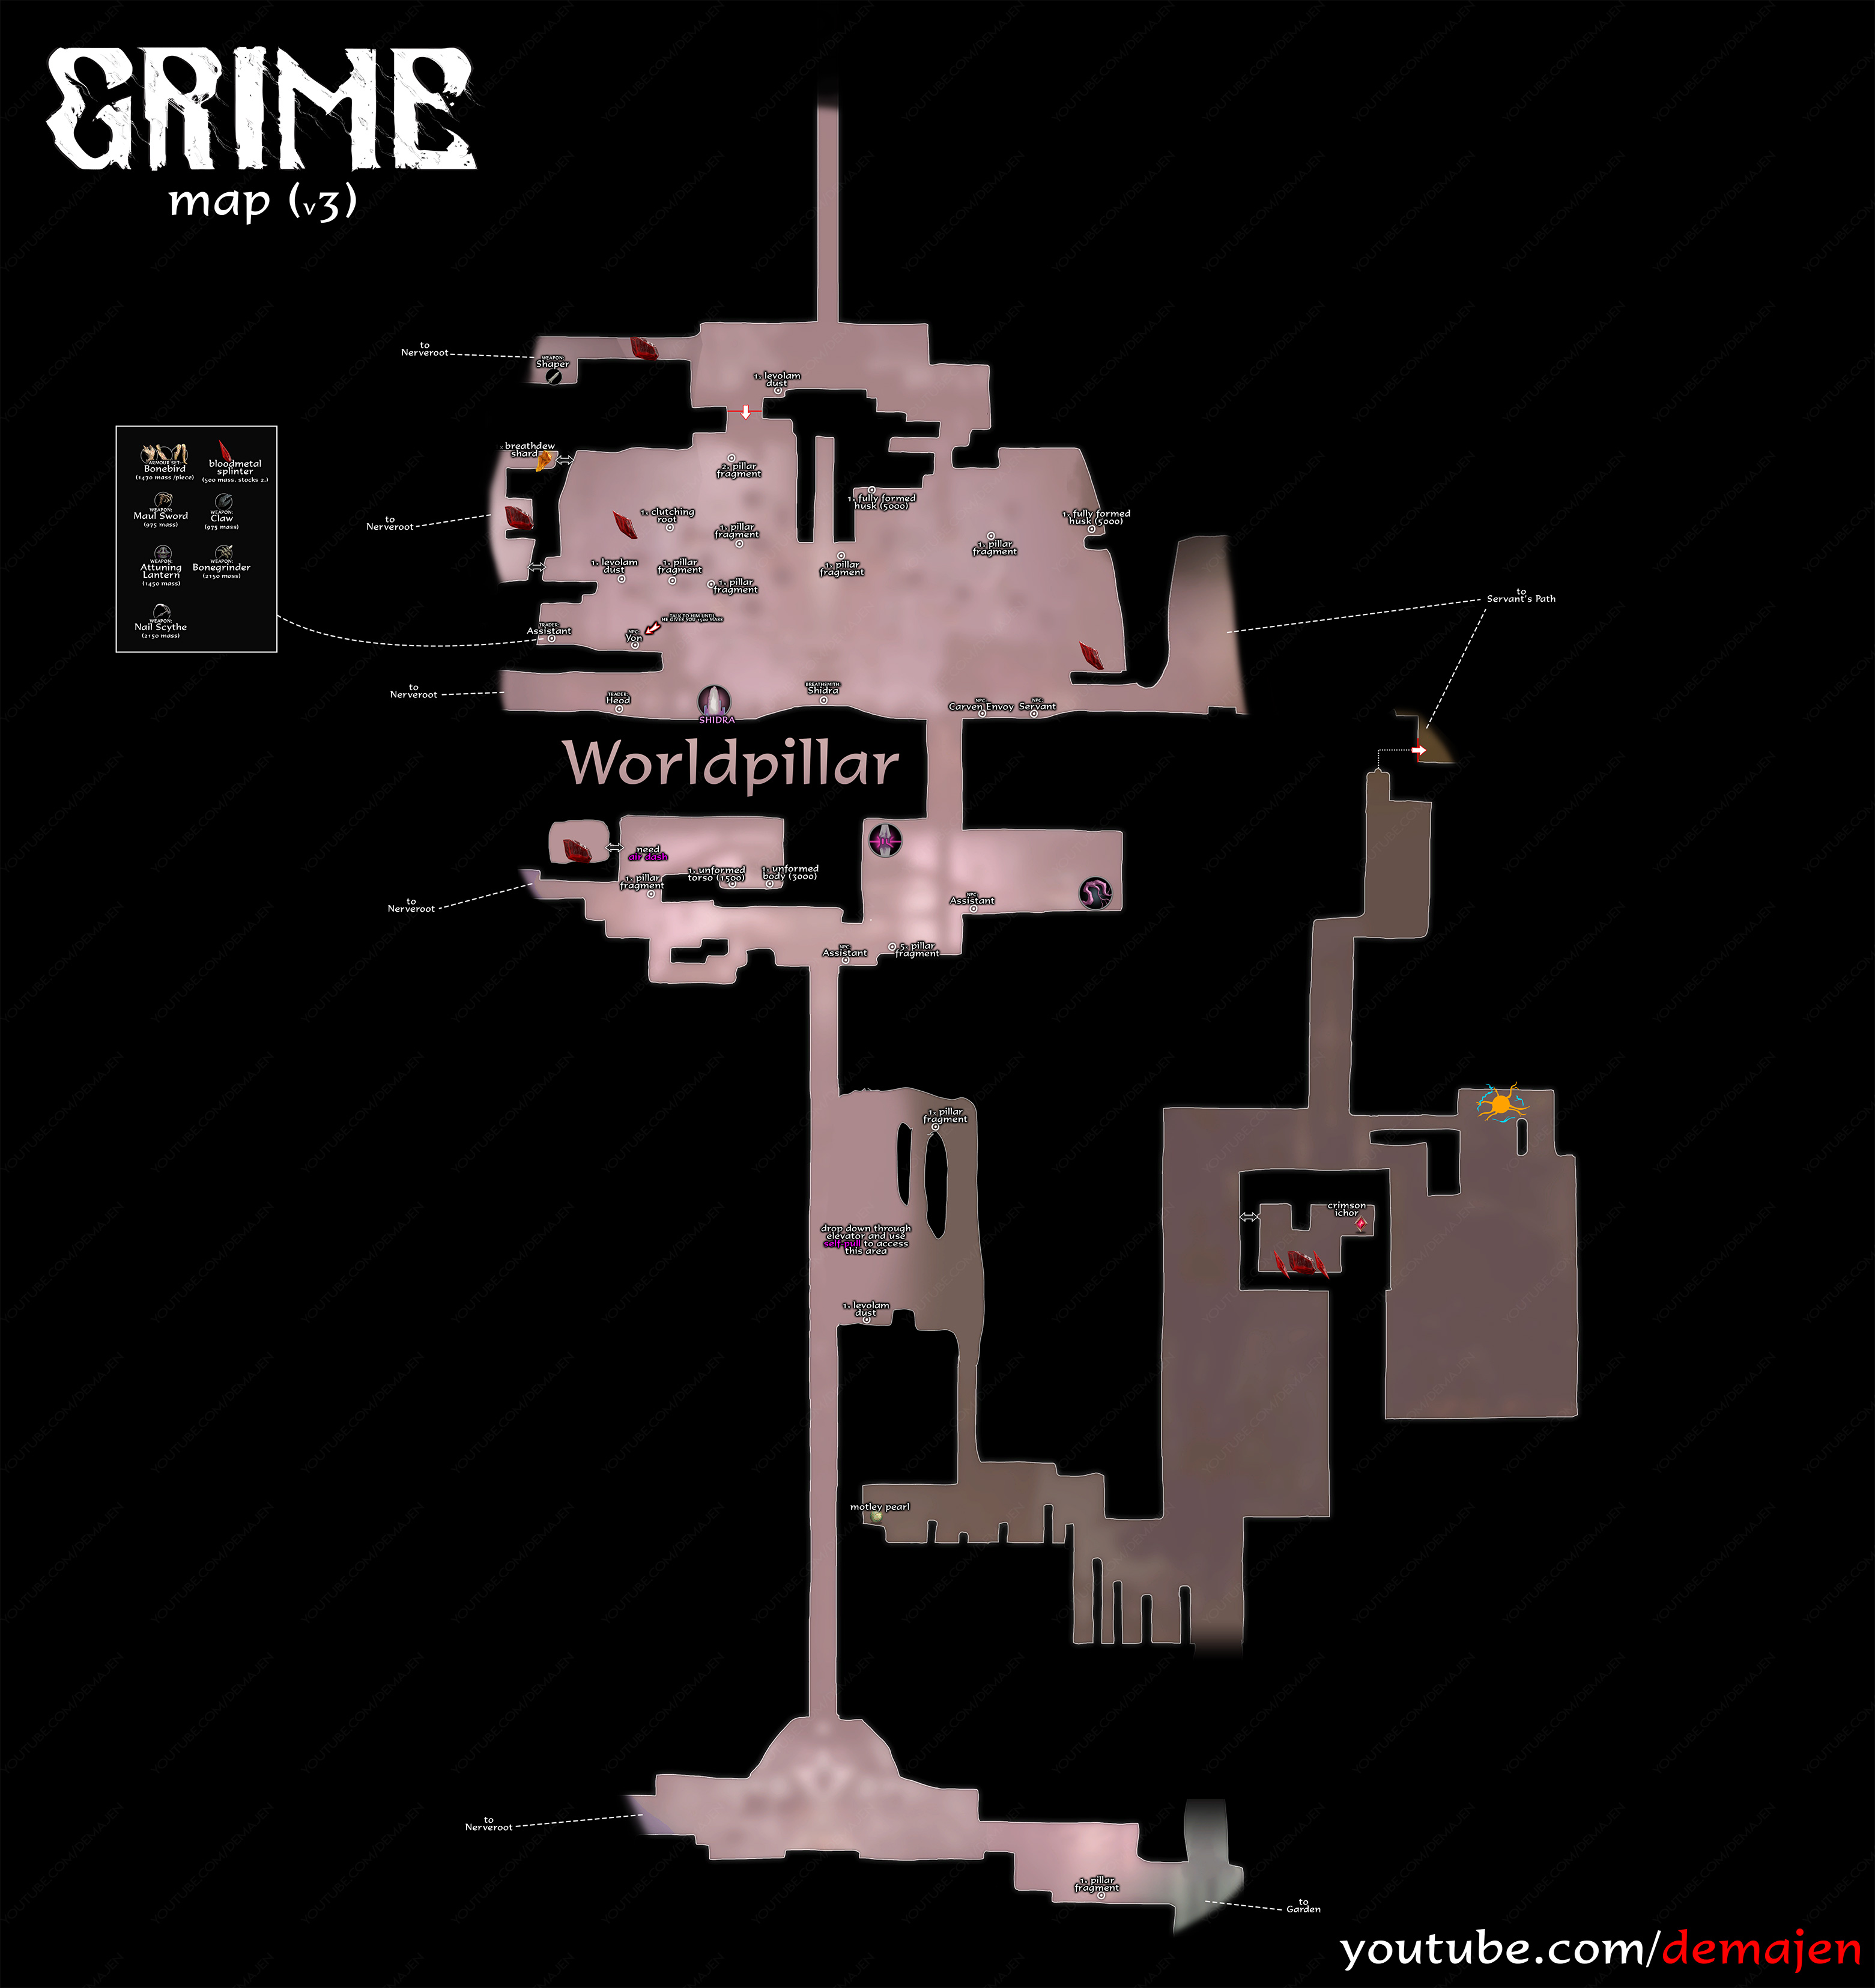
2. World Pillar

The World Pillar is exactly what it sounds like – a massive column that seems to hold up the entire world of GRIME. It’s a vertical challenge that’ll test your platforming skills.

  • Checkpoint 1: You’ll spot this at the base of the pillar, just after you’ve warmed up with some initial platforming. It’s like a little pat on the back saying, “Good job, keep going!”
  • Checkpoint 2: Midway up the pillar, this sneaky checkpoint is hiding behind a breakable wall on the left. Keep your eyes peeled!

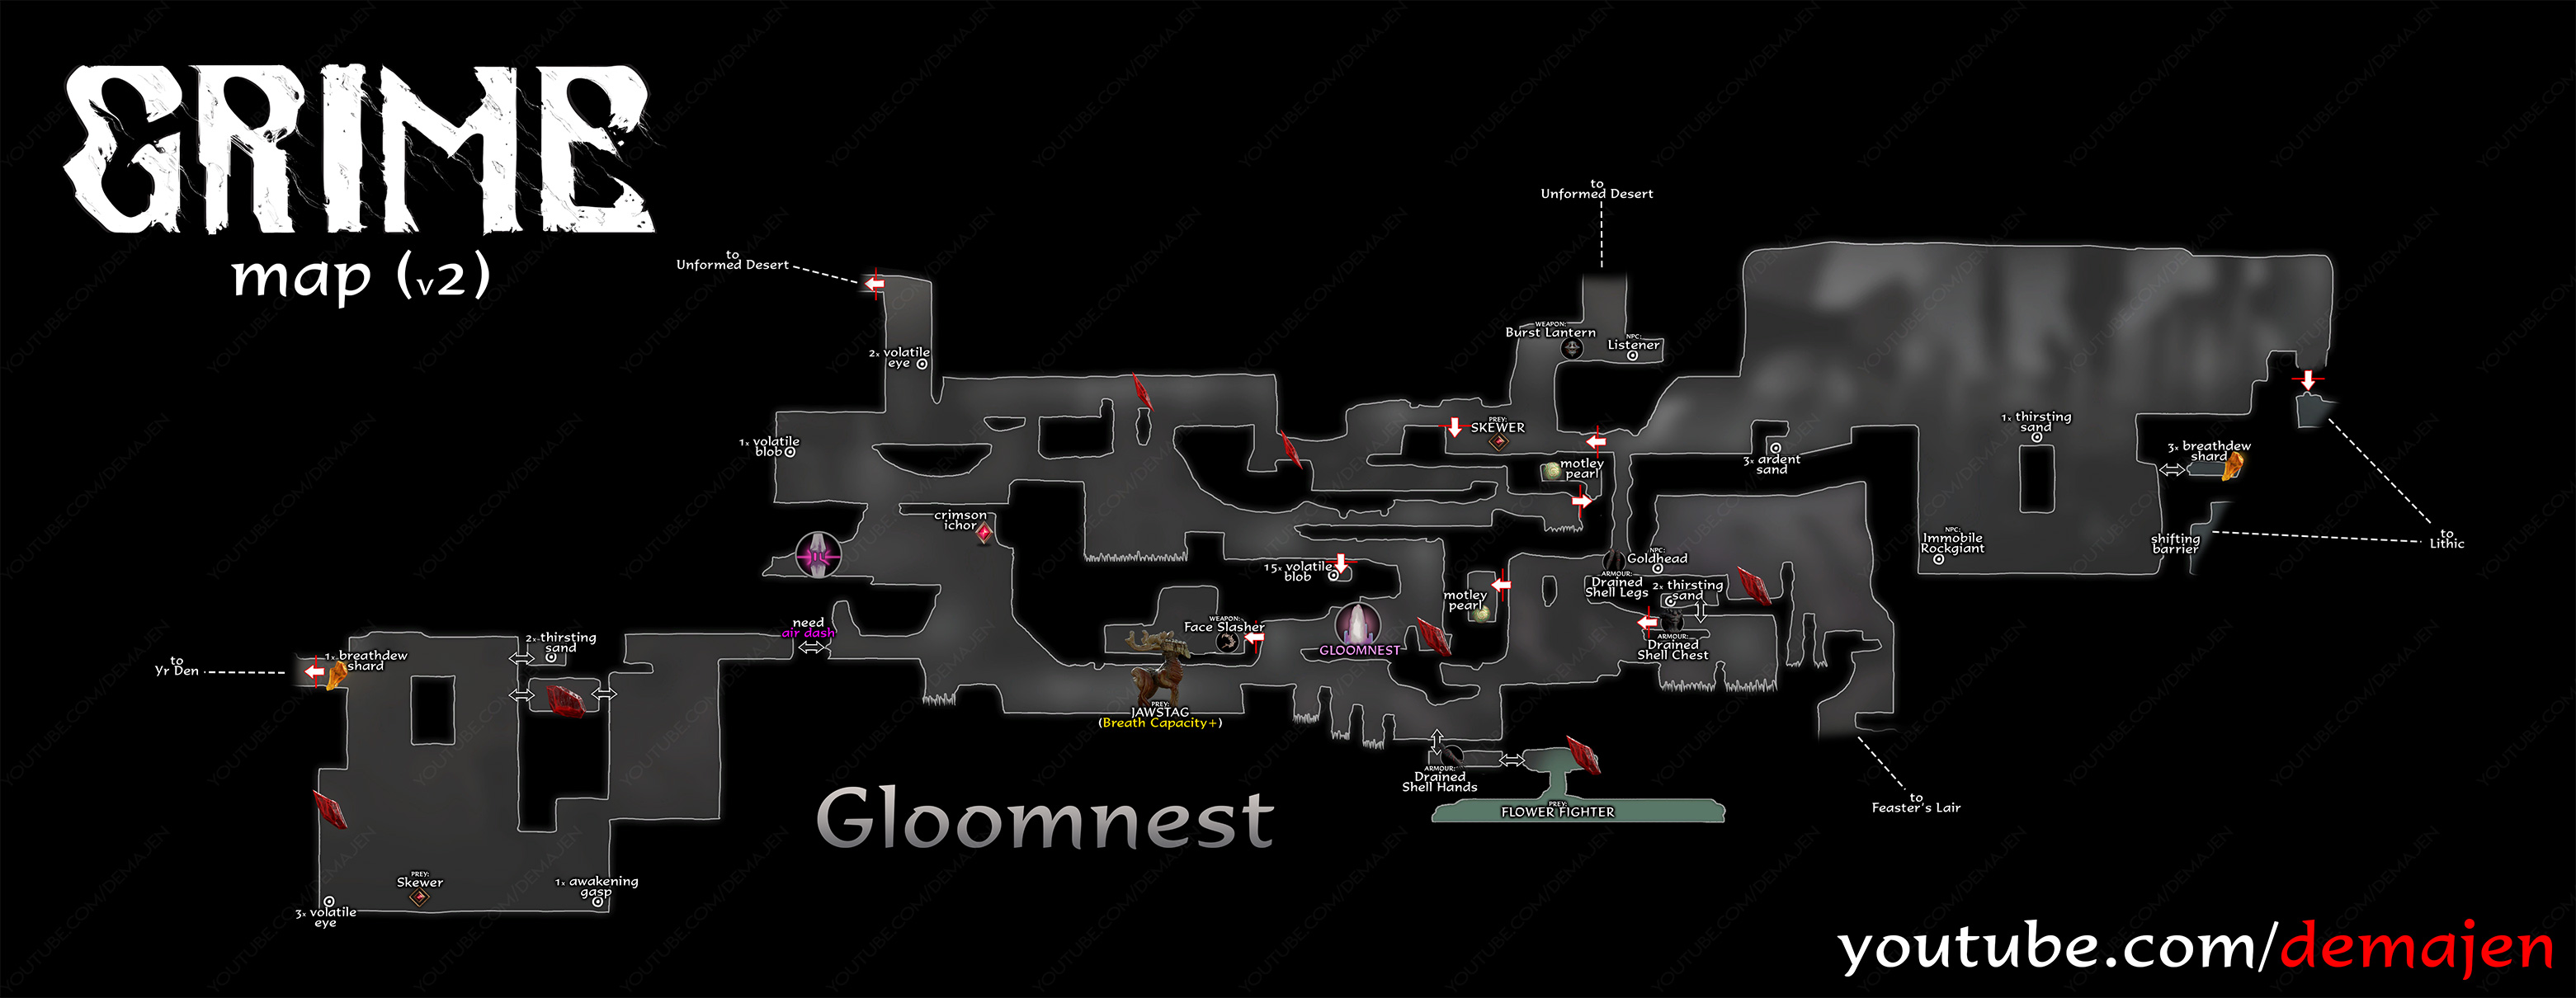
3. Gloomnest

Gloomnest is… well, gloomy. It’s a dark, foreboding area that’ll have you jumping at shadows.

  • Checkpoint 1: This one’s near the entrance, but don’t think it’ll be easy to reach. It’s hidden behind a cluster of enemies. Time to put those combat skills to use!
  • Checkpoint 2: Deep within the nest, just before you face off with the area boss. Trust me, you’ll be glad it’s there.

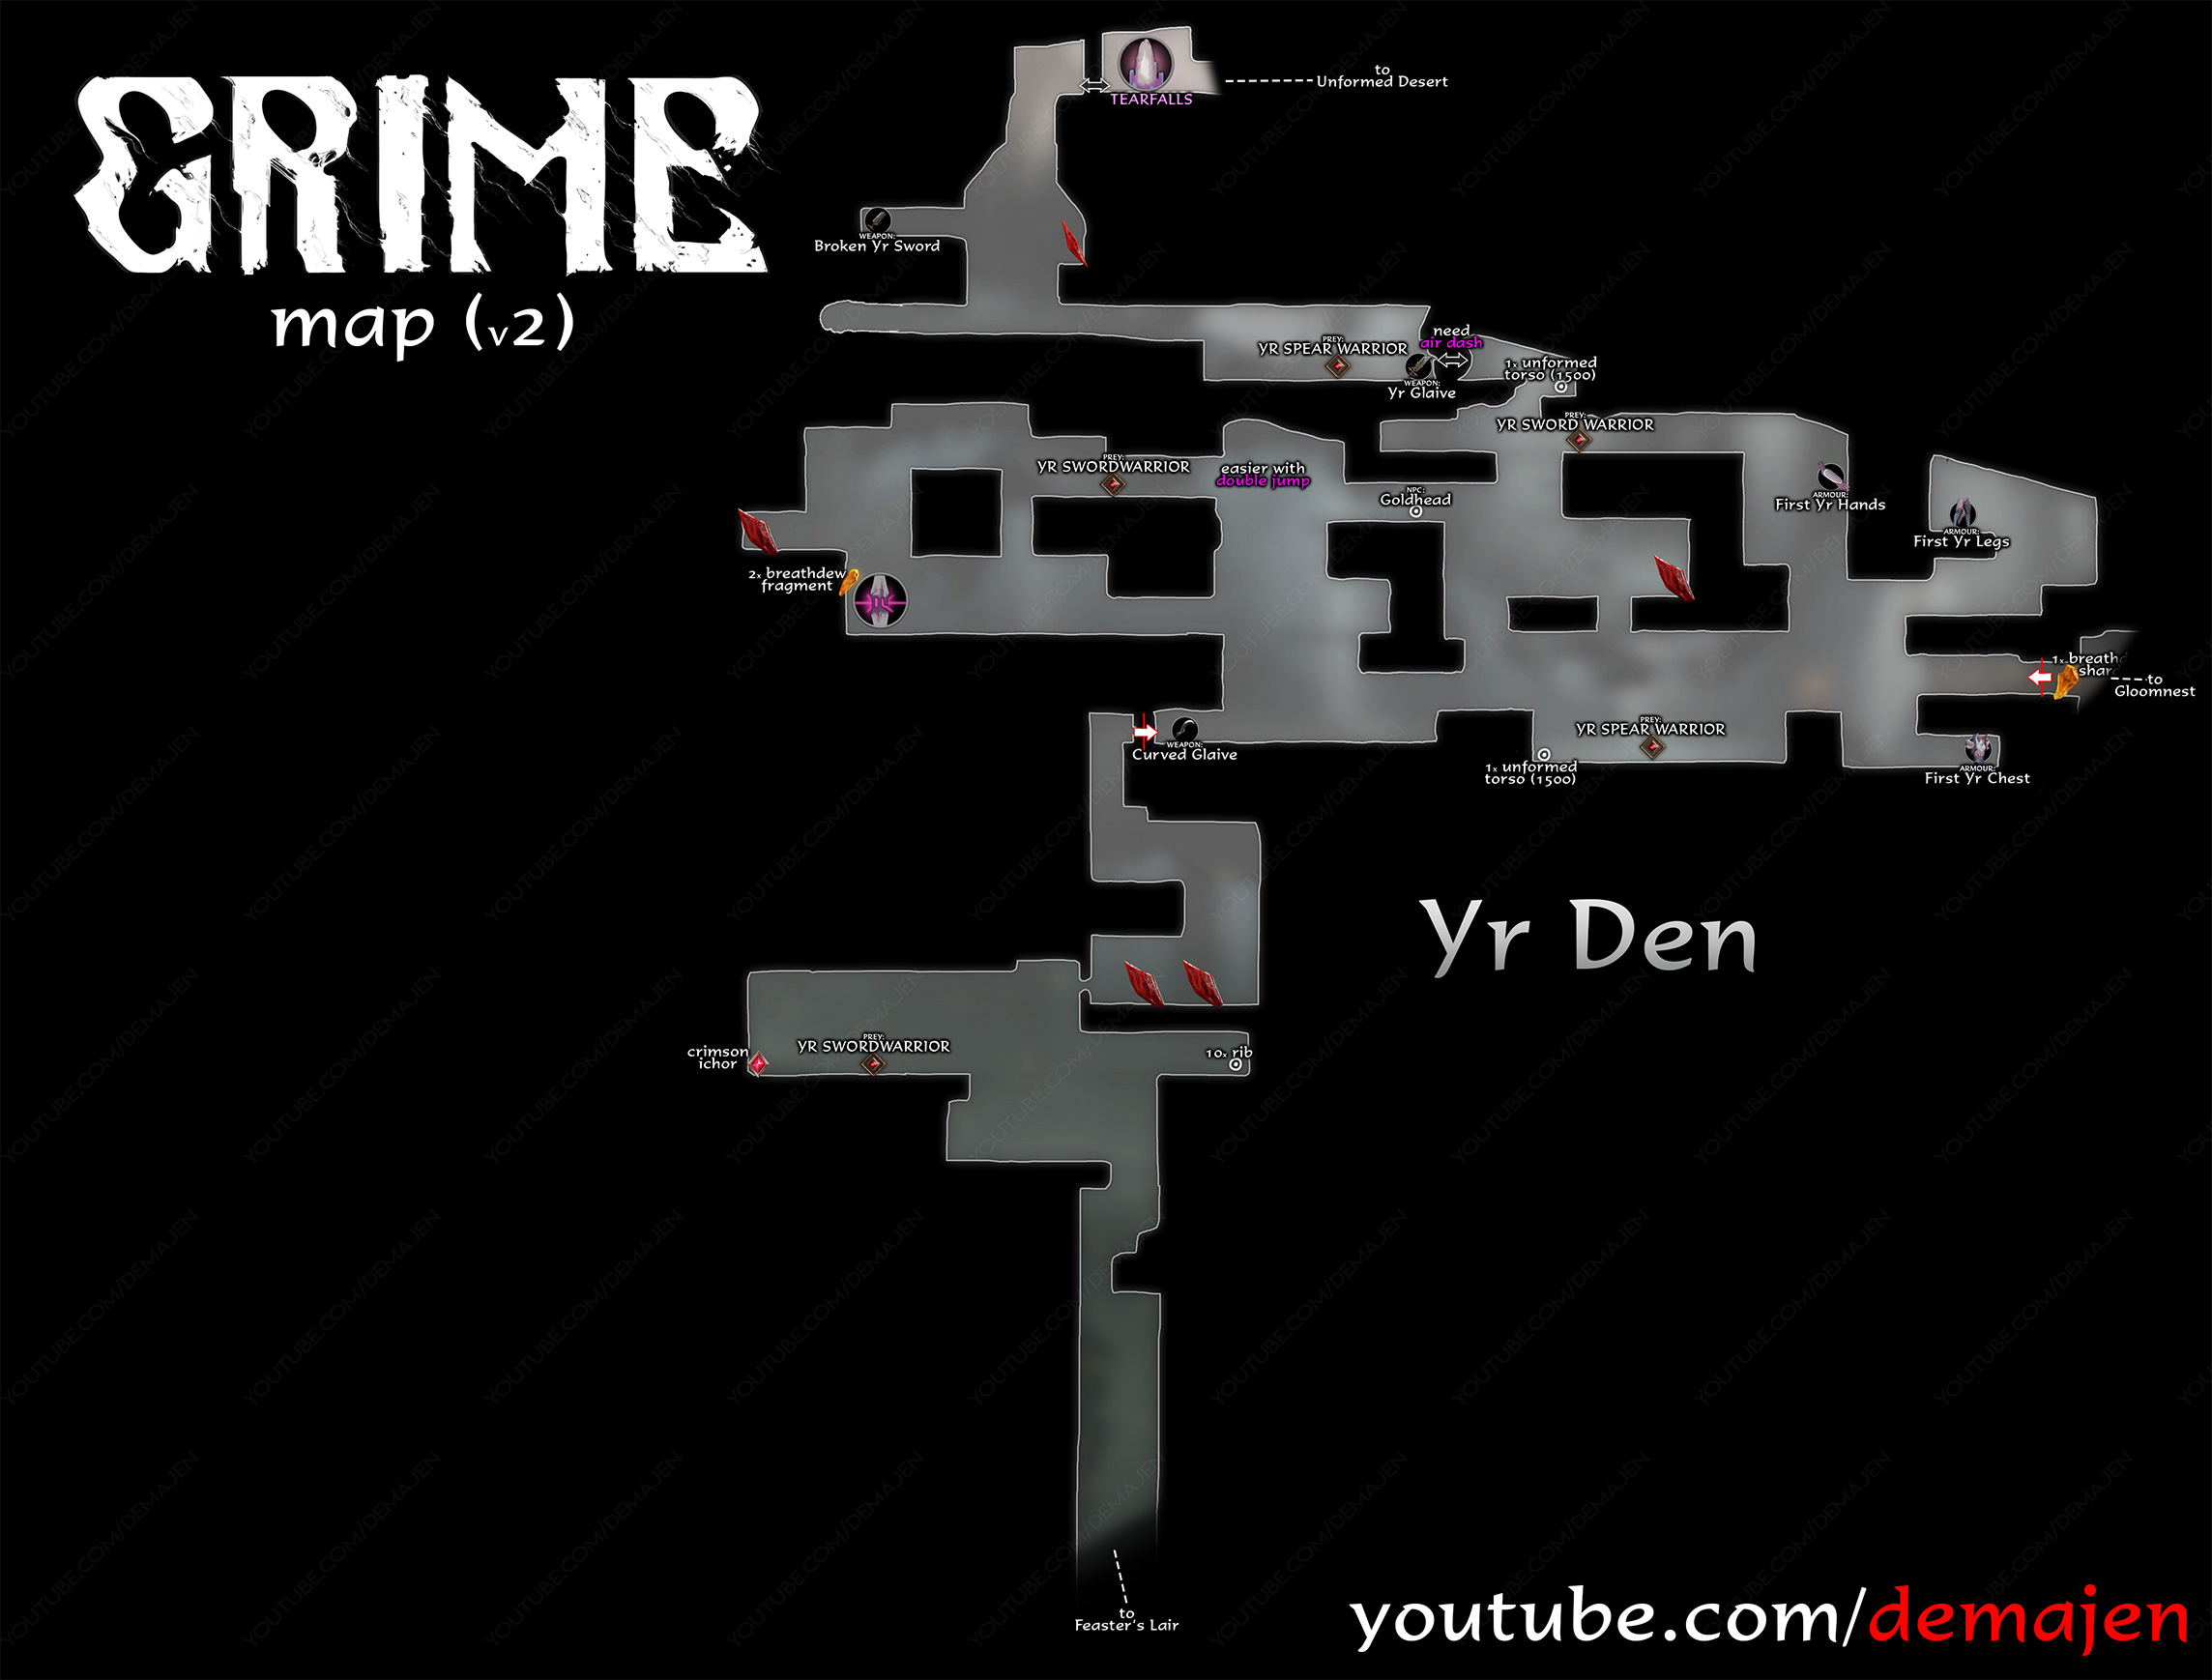
4. Yr Den

Yr Den is a maze-like area that’ll test your navigation skills. It’s easy to get lost here, so pay attention!

  • Checkpoint 1: You’ll find this one smack in the middle of the area, but you’ll have to earn it with a series of tricky jumps. Practice makes perfect!
  • Checkpoint 2: This checkpoint is playing hard to get. It’s close to the area’s exit, but guarded by some tough elite enemies. Time to show ’em who’s boss!

5. Feaster’s Lair

The Feaster’s Lair is not for the faint of heart. It’s a gruesome area filled with, well, things that want to feast on you.

  • Checkpoint 1: You’ll stumble upon this one near the beginning, but only after you’ve managed to sneak past the Jawcrab. Timing is everything!
  • Checkpoint 2: This checkpoint is buried deep within the lair, past several deadly traps. Keep your wits about you!

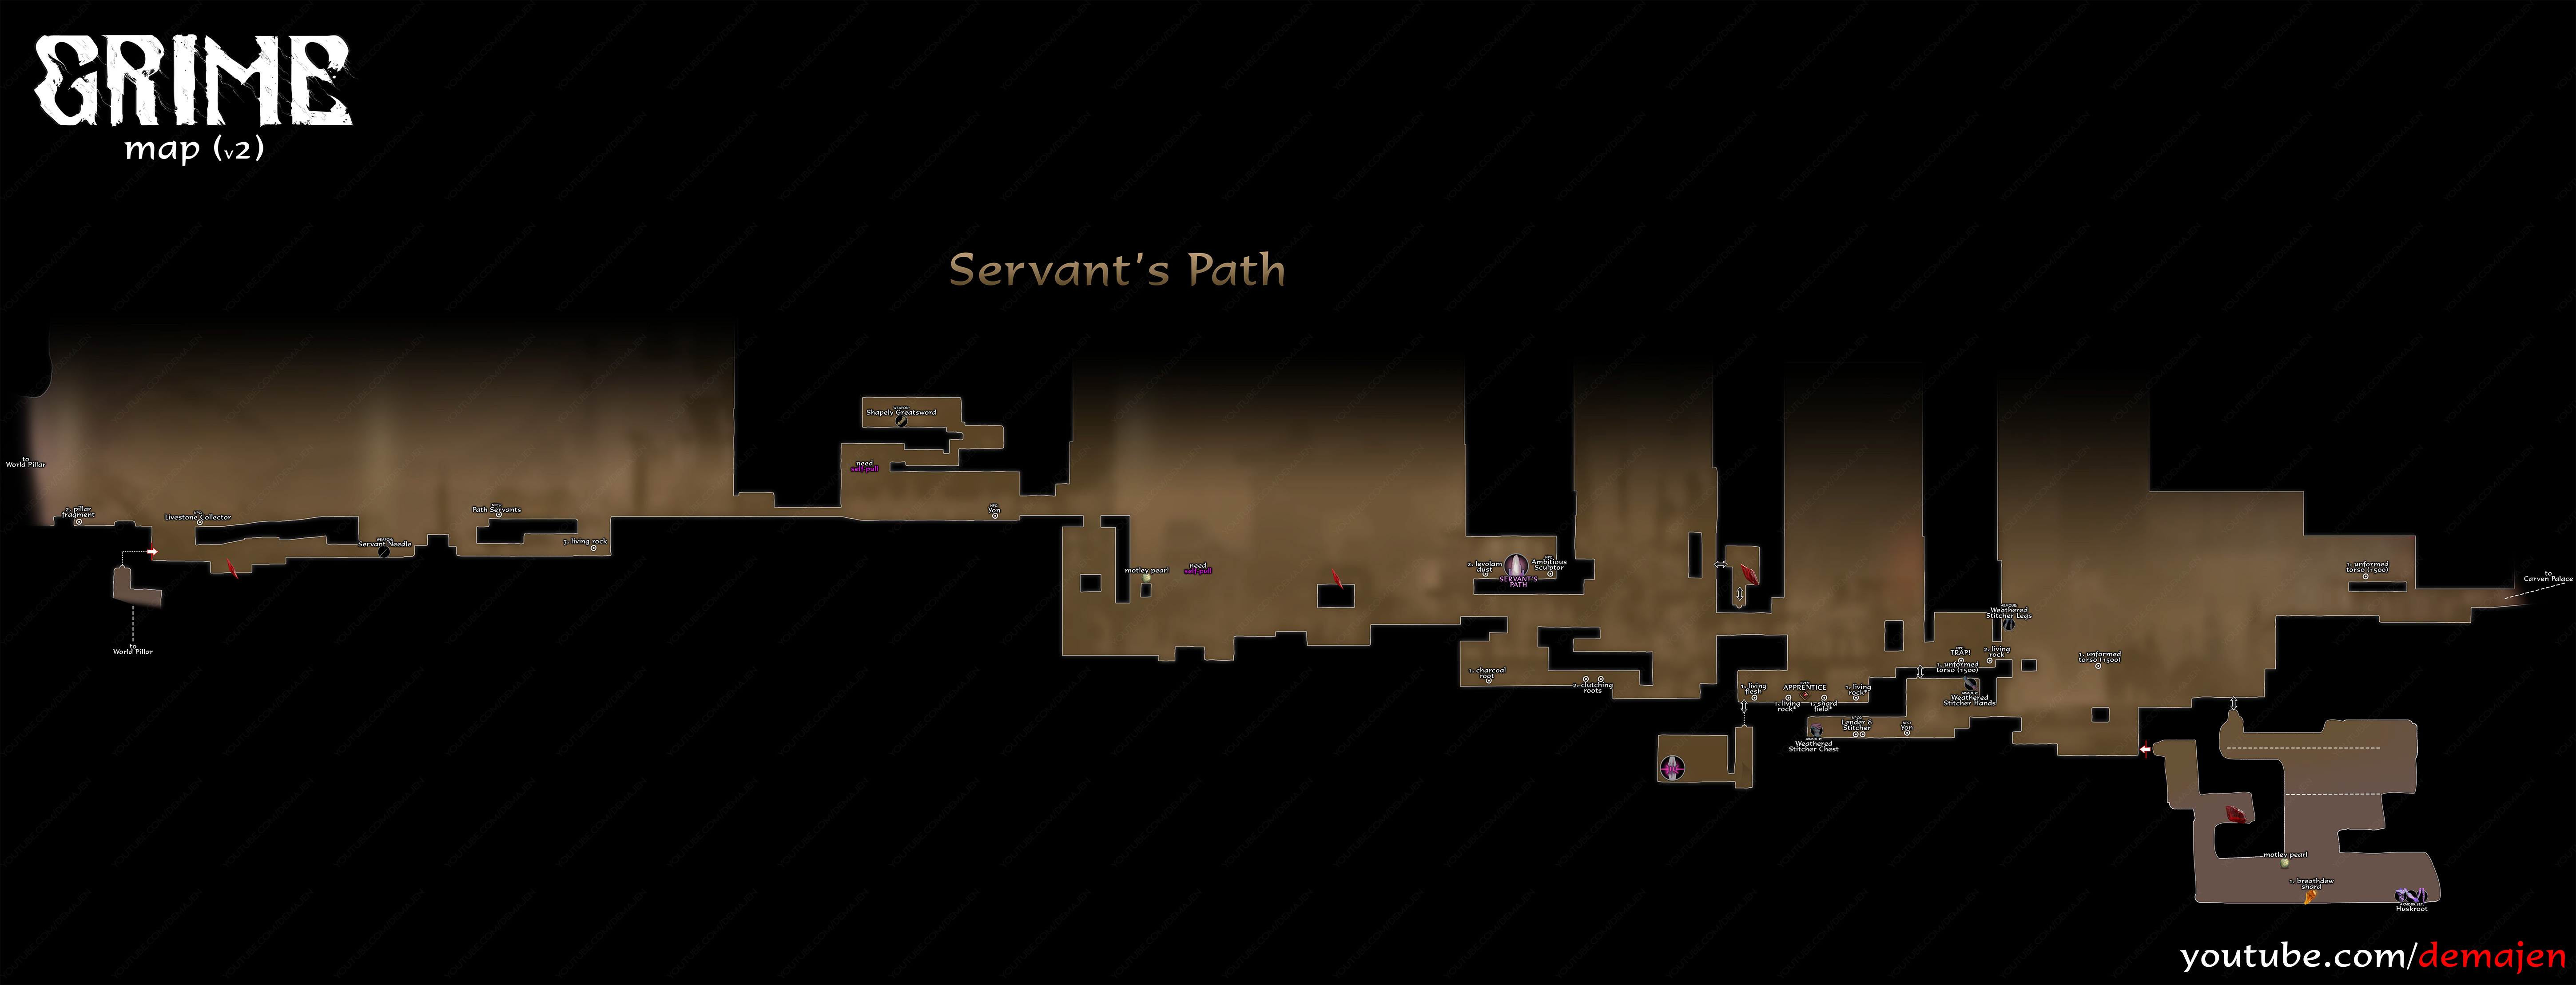
6. Servant’s Path

The Servant’s Path is a long, winding road filled with challenges. It’s a test of endurance as much as skill.

  • Checkpoint 1: You’ll find this lifesaver midway through the path, but only after you’ve survived a major enemy wave. It’s like a reward for your bravery!
  • Checkpoint 2: This one’s at the end of the path, just before you enter the next area. A final respite before new challenges!

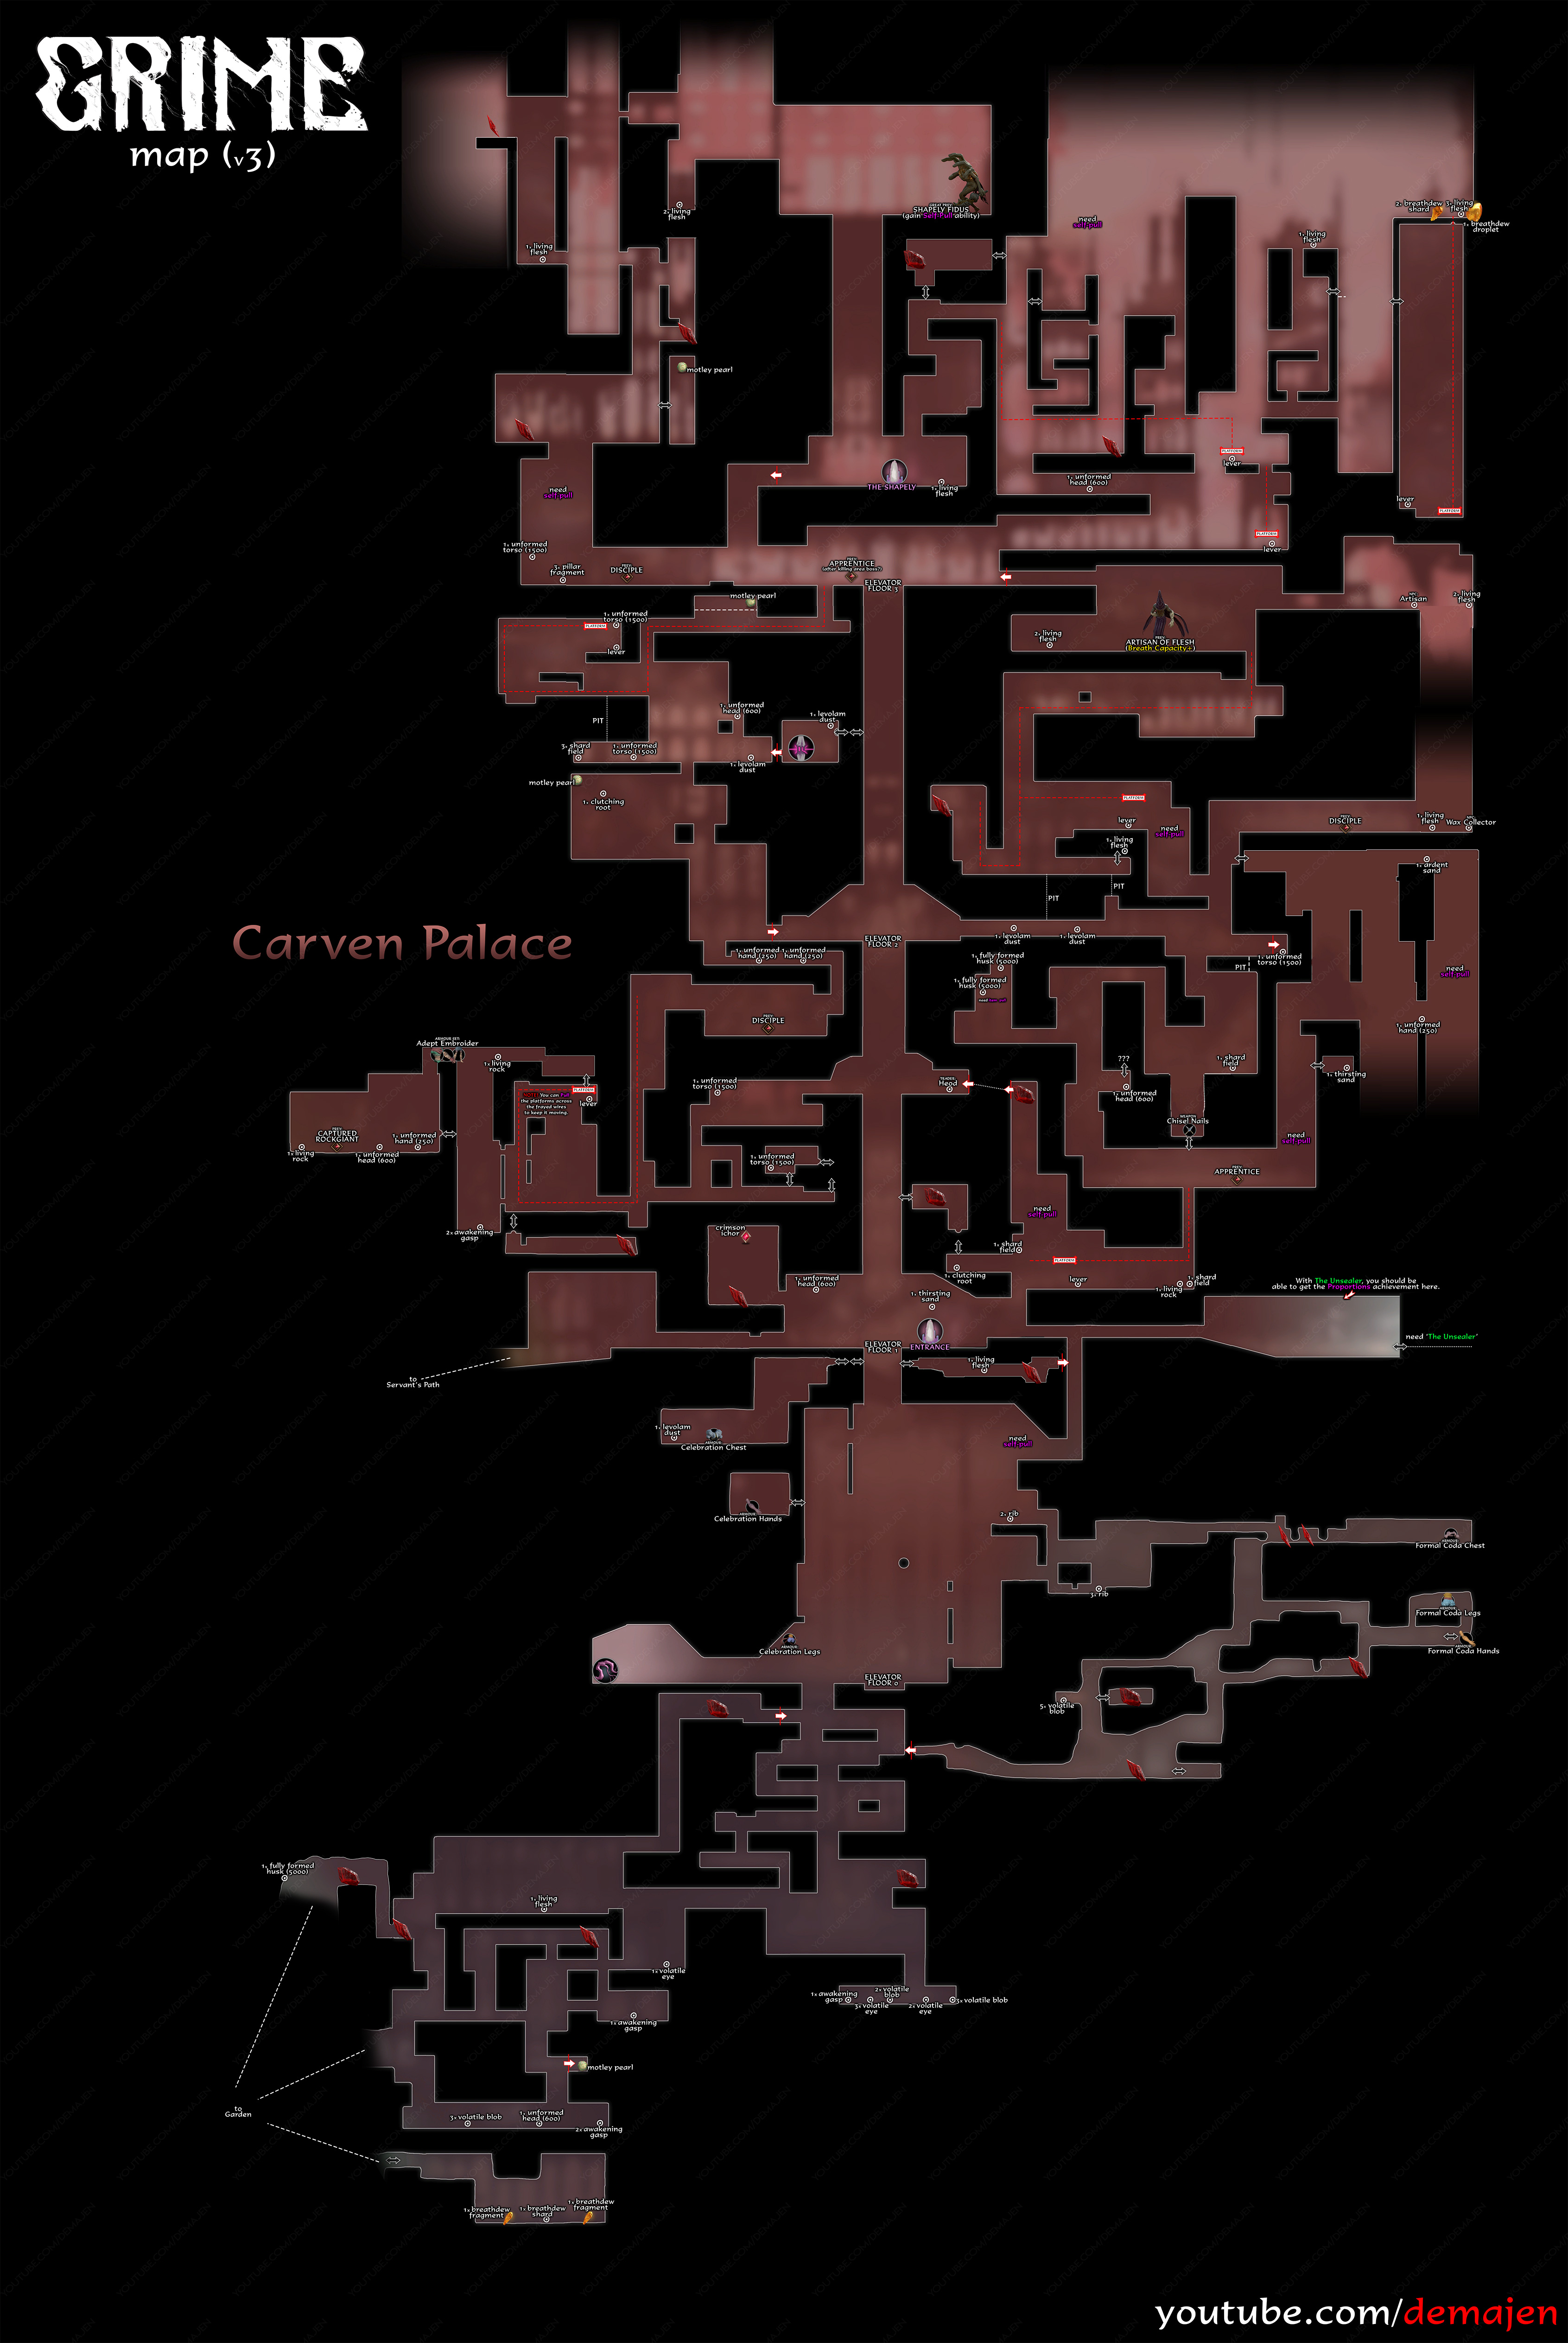
7. Carven Palace

The Carven Palace is a majestic yet eerie place, full of grand halls and hidden passages.

  • Checkpoint 1: This one’s easy to spot – it’s right inside the palace entrance. A welcoming committee of sorts!
  • Checkpoint 2: Near the throne room, this checkpoint is playing hide and seek behind a hidden door. Time to channel your inner detective!

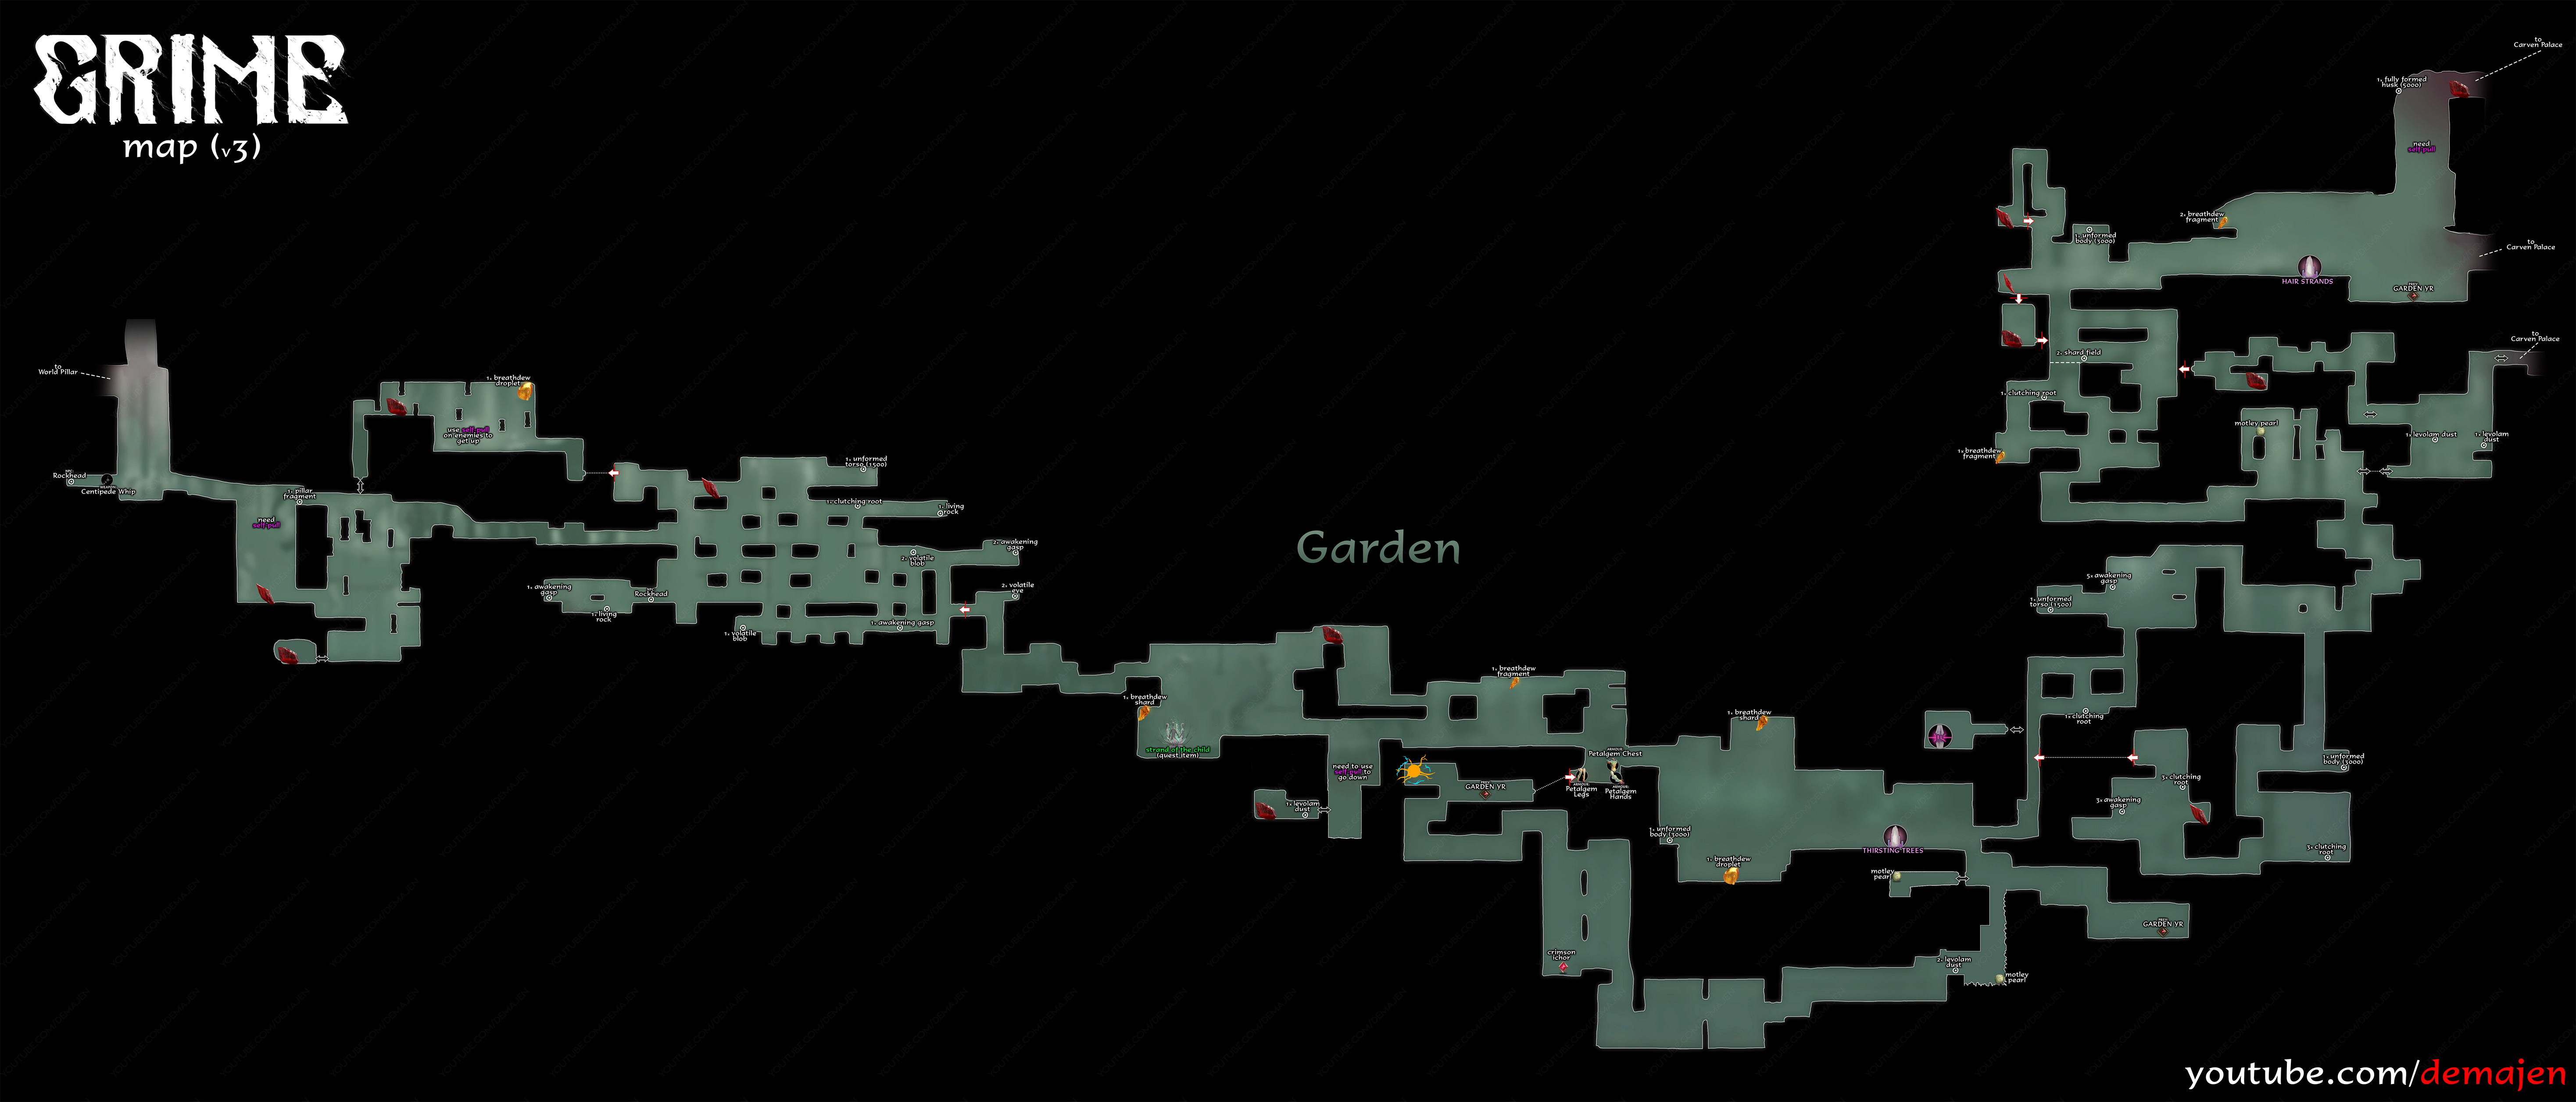
8. Garden

Don’t let the name fool you – this ain’t your grandma’s garden. It’s a wild, overgrown area teeming with hostile plant life.

  • Checkpoint 1: You’ll find this one right at the garden entrance. A little breather before you dive into the green chaos!
  • Checkpoint 2: This checkpoint is nestled deep within the garden, near a massive tree with visible roots. It’s like a little oasis in a sea of hostile greenery.

Spoiler Alert: Secret Areas Ahead!

Alright, brave adventurers, we’re about to venture into spoiler territory. If you’re all about discovering things on your own, you might want to skip this part. But if you’re curious about what lies beyond the main areas, read on!

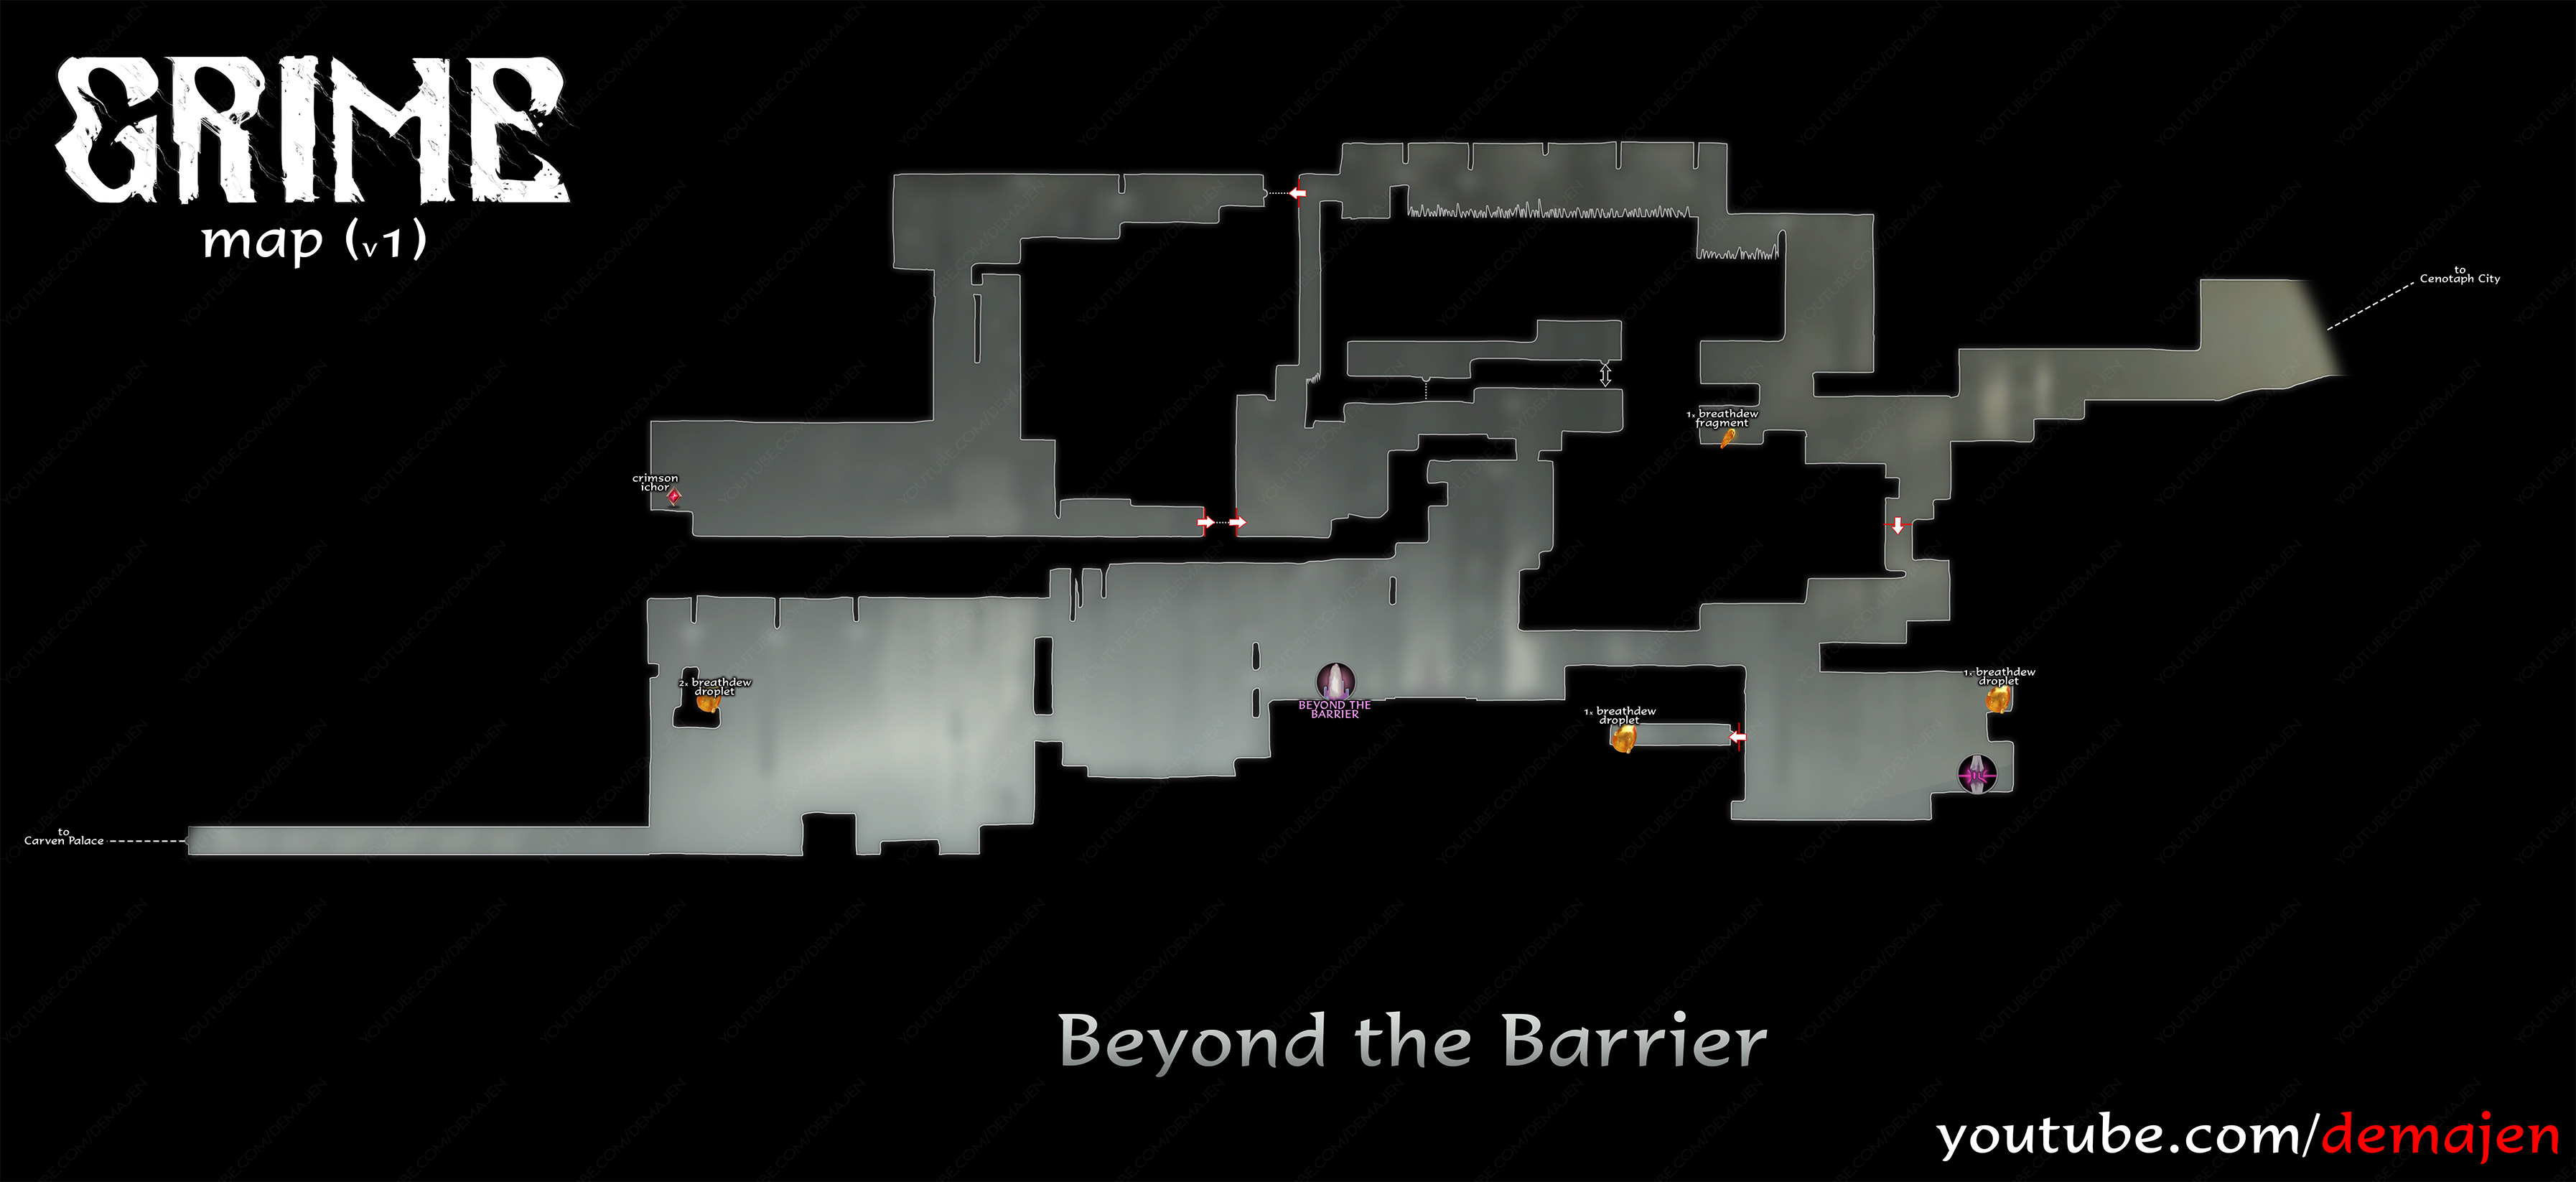
Spoiler Area 1: Beyond the Barrier

Remember Shidra’s quest? Complete that, and you’ll be able to cross the sealed barrier in Carven Palace. This hidden area is a treasure trove of healing items and even contains a crucial Crimson Ichor. Talk about a game-changer!

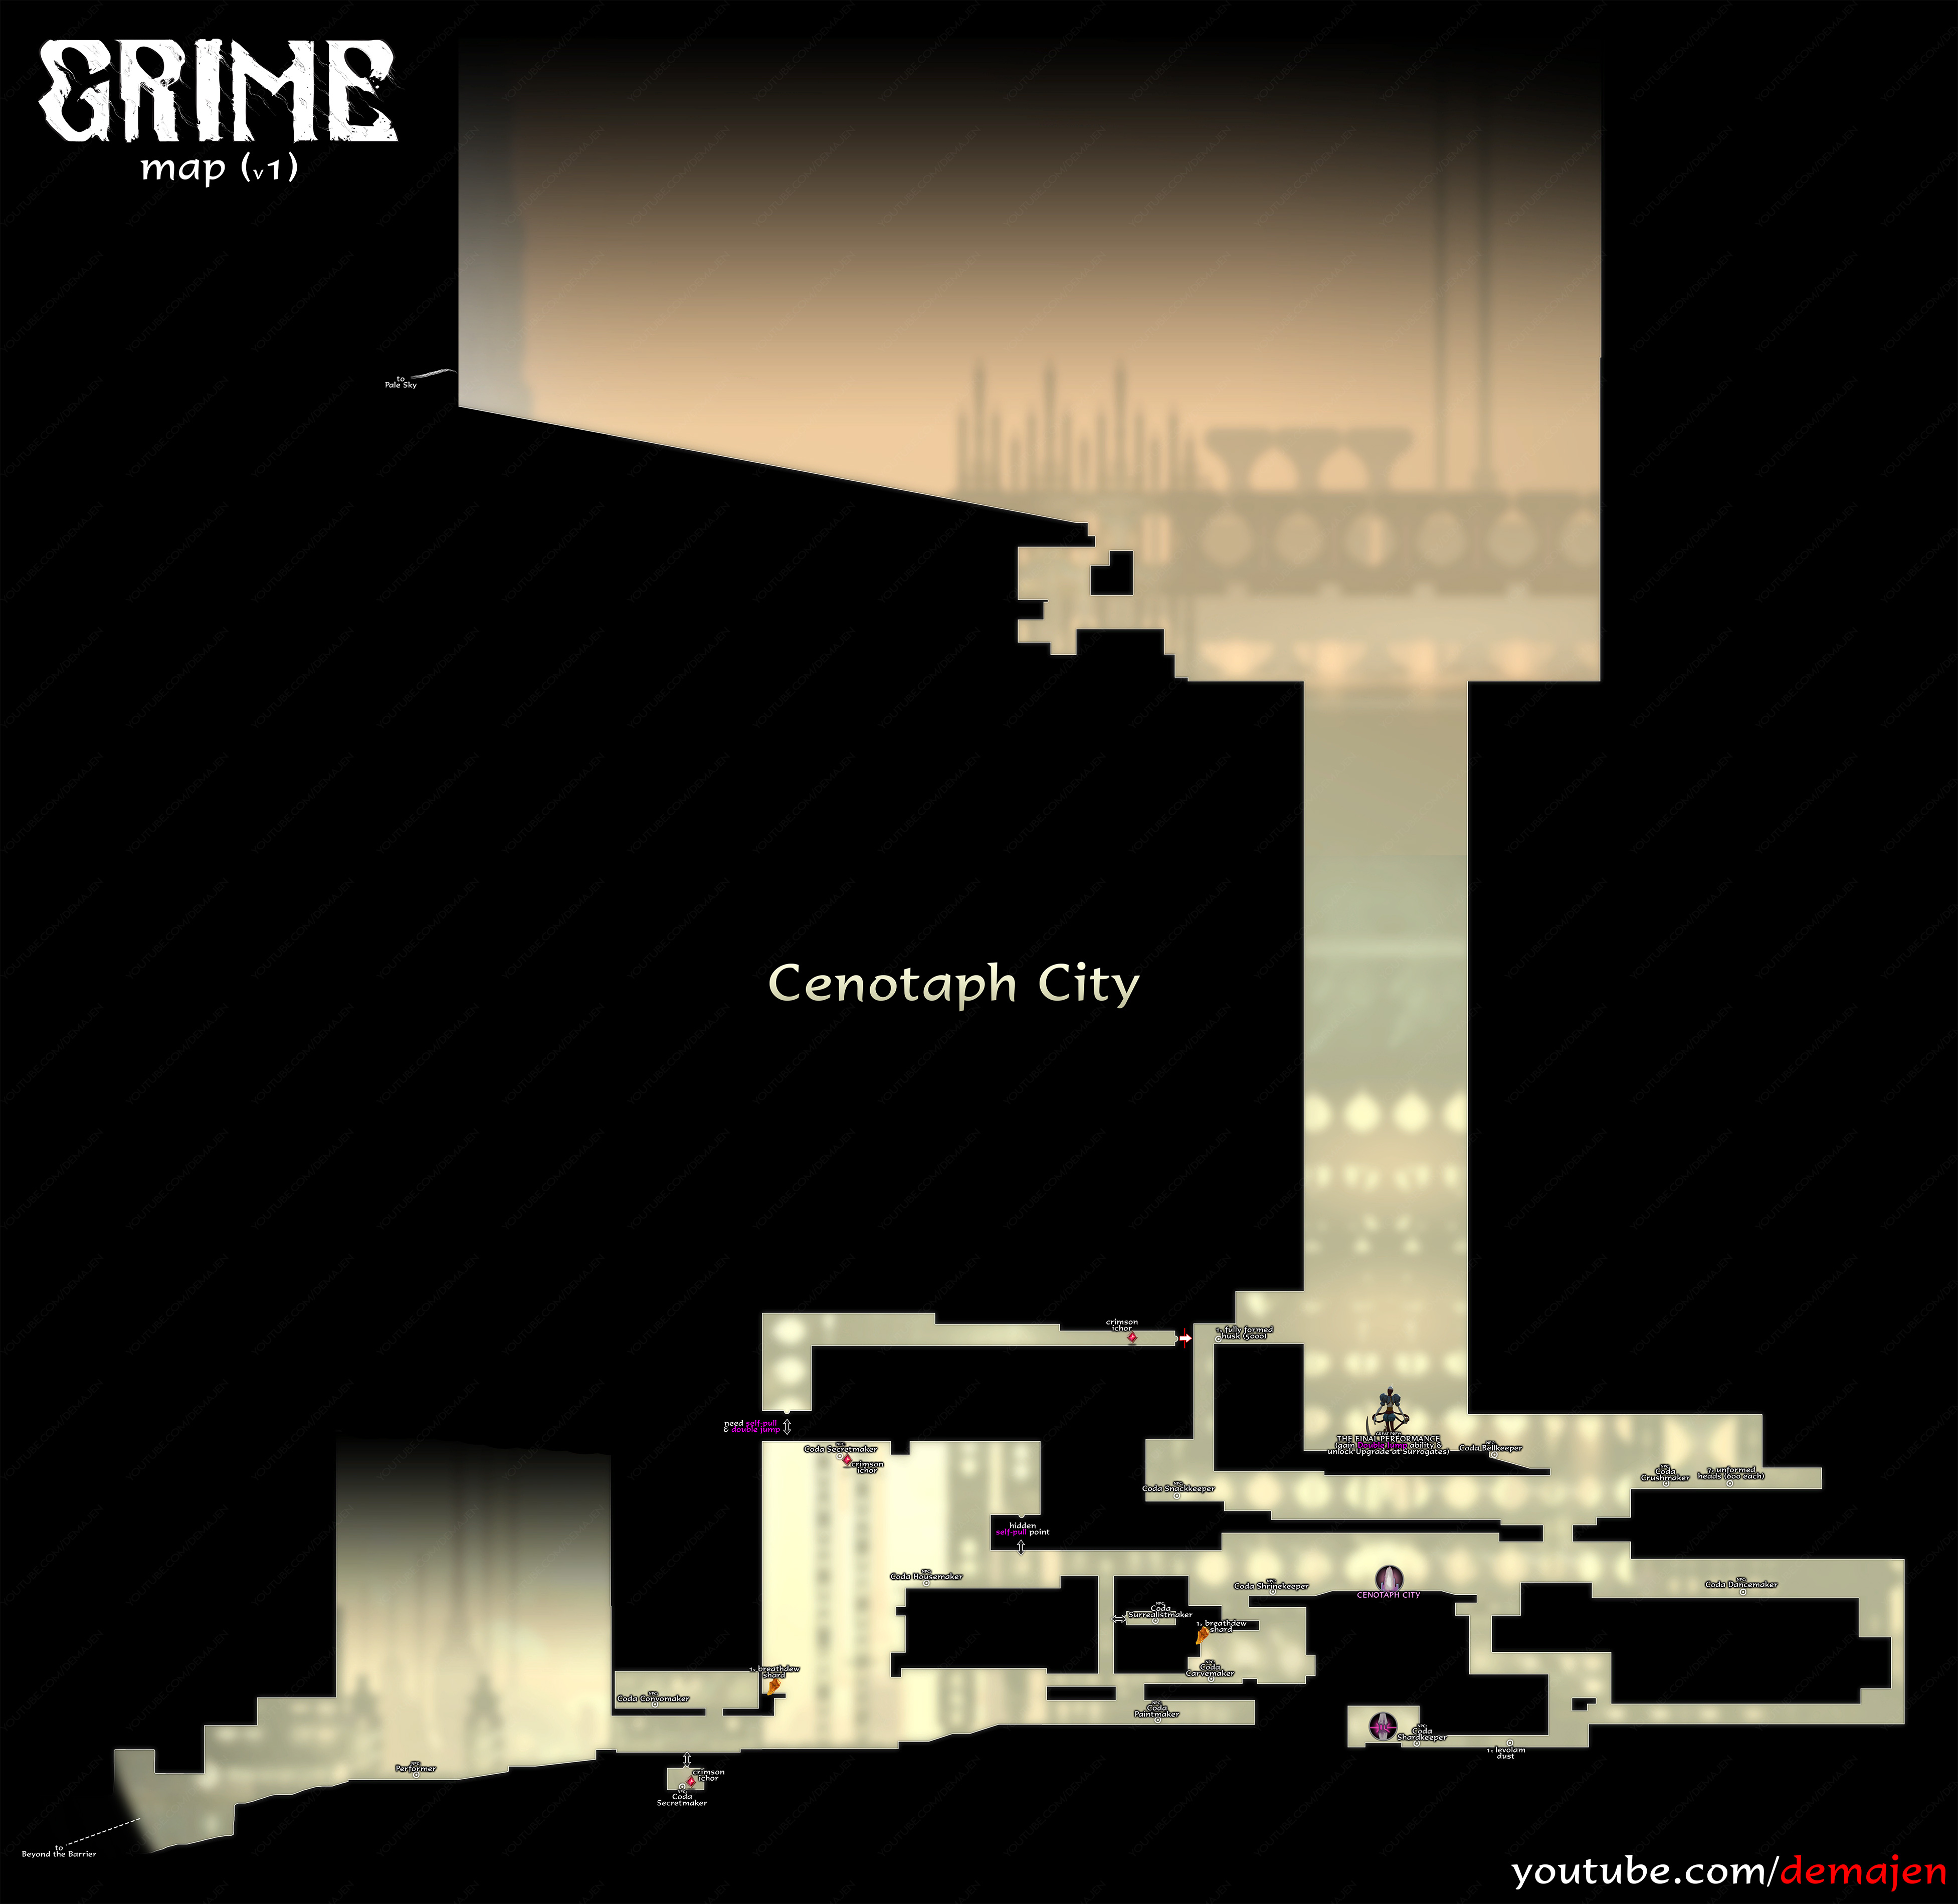
Spoiler Area 2: The Double Jump Challenge

This area follows hot on the heels of Spoiler Area 1. Brace yourself for some intense platforming challenges and a boss fight that’ll push you to your limits. But the reward? Oh boy, it’s worth it – you’ll unlock the DOUBLE JUMP ability. Suddenly, the whole game opens up!

Spoiler Area 3: The Story Unfolds

This area is all about the narrative. While it does involve some platforming, it’s mostly focused on fleshing out the story. Plus, you’ll get a nifty health buff that’ll make exploring a whole lot easier. Win-win!

Spoiler Area 4: The Warp Master

Here’s where things get really interesting. This area contains a major boss fight, but the reward is incredible – you’ll gain the ability to warp between all surrogates. Missed some content earlier? Now’s your chance to go back and clean up!

Spoiler Area 5: The Lore Keeper

Keep your eyes peeled for purple columns of light in this area. They’re not just pretty – they offer important lore and tips that’ll deepen your understanding of GRIME’s bizarre world.

Pro Tips for Checkpoint Hunting

After countless hours of exploring every inch of GRIME, I’ve picked up a few tricks that might help you on your checkpoint hunt:

  1. Look for the glow: Checkpoints often emit a faint glow. In dark areas, this can be your beacon of hope.
  2. Check behind breakable walls: The devs love hiding checkpoints behind these. If you see a suspicious-looking wall, give it a whack!
  3. Expect a checkpoint before boss fights: More often than not, you’ll find a checkpoint just before a major battle. If you’ve been exploring for a while without finding one, you might be approaching a boss!
  4. Don’t be afraid to backtrack: Sometimes, new abilities will allow you to reach previously inaccessible areas. These often hide checkpoints.
  5. Trust your gut: If an area feels important or particularly challenging, chances are there’s a checkpoint nearby. The game is tough, but it’s (usually) fair!

Wrapping Up: Your GRIME Journey Awaits!

And there you have it, folks – a comprehensive guide to all the maps and checkpoints in GRIME. Armed with this knowledge, you’re ready to take on whatever this weird and wonderful game throws at you. Remember, every death is a learning experience, and every checkpoint reached is a victory.

As you venture forth into the twisting, surreal landscapes of GRIME, keep this guide handy. But more importantly, keep your wits about you, your reflexes sharp, and your sense of adventure alive. The world of GRIME is waiting to be explored, conquered, and ultimately, understood.

Got any cool stories about your own GRIME adventures? Found a checkpoint that gave you particular trouble? Or maybe you’ve discovered a secret I missed? Don’t be shy – share your experiences in the comments below. After all, we’re all in this strange, pulsating, shape-shifting world together!

Now go forth, brave explorer. May your jumps be true, your attacks swift, and your checkpoints always within reach. Happy GRIMEing!


Be the first to comment

Leave a Reply

Your email address will not be published.


*