Welcome to this post Ghostlore – Elemental Seismic Roar Guide.
This build is excellent for farming because it deals enough damage and is quick enough to breeze across maps in under a minute. It is also sufficiently tanky to easily traverse Hell Island’s whole depths.
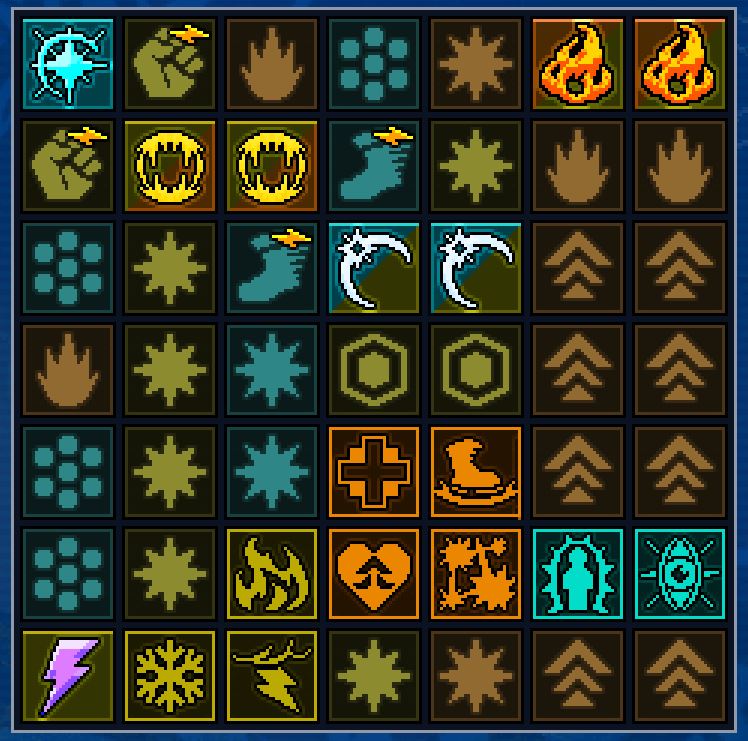
Class Selection and Power Board
Feral is a very overtuned class, it is tanky and provides insane buffs and good fury generating passives, making it perfect for endgame all content builds. It also packs our primary skill: Seismic Roar.
We’re leveraging this game’s trigger mechanics to achieve a constant stream of roars, that way we both damage and stun everything in our path.
Adding Geomancer’s class passives for added elemental damage (Ice, Fire and Lightning), we get to scale Seismic Roar’s damage with +Elemental Damage bonuses and make it a very powerful damaging skill.
Adept and Geomancer are chosen because of their great buff synergies and trigger options (Trigger on Basic Attack from Geomancer and Trigger on Movement Skill from adept). We slot those in our chosen Movement Skill: Warp, while linking them with Seismic Roar and our two main buffs: Immolate and Ice Armour.
Having both buffs active 100% of the time boosts our damage while also providing enormous amounts of Absorb and chance to freeze if attacked. Pairing the freezing mechanic with the stun from our main skill, we’re set to tank everything, considering you get the basics: capped elemental resistances and enough HP.
We’re taking Thunderstormas another damaging spell but also to proc elemental effects.
Class passive choices include the 4 perfect Feral passives, 3 from Geomancer for damage and the defensive passives from Adept.
Note: you can swap Third Eye for Mystic Arts if you don’t have enough CDR on hit chance.
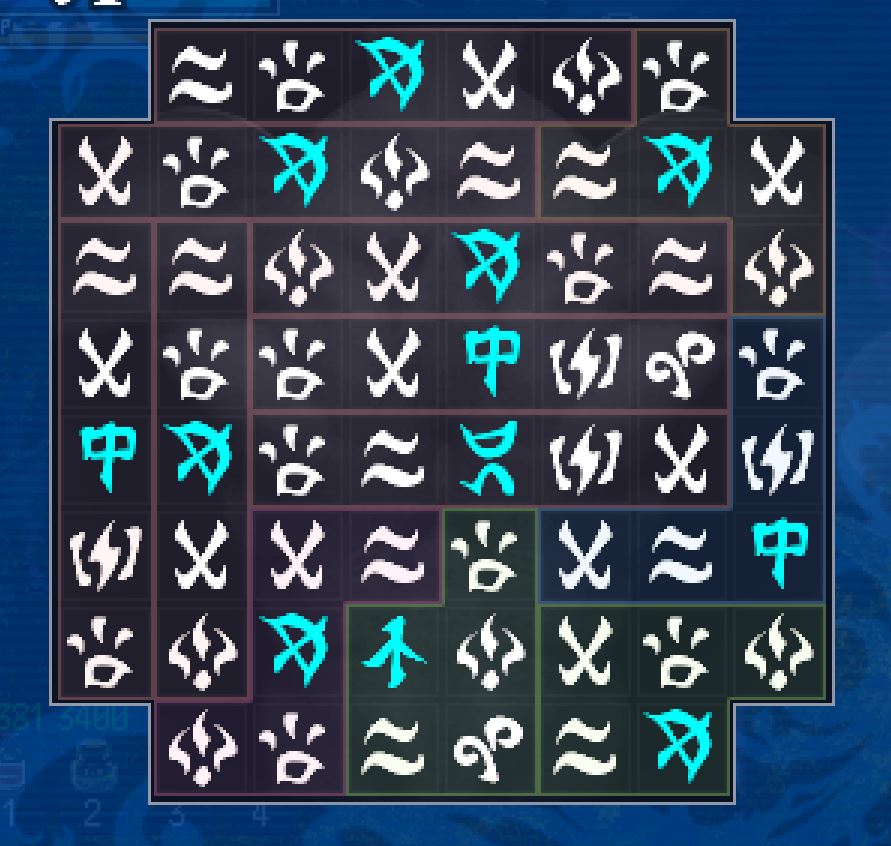
Glyph Board
Glyphs are ultra highly customizable, so I won’t be sharing specific rolls on my Glyphs.
Your mandatory stats for good fluid gameplay will be:
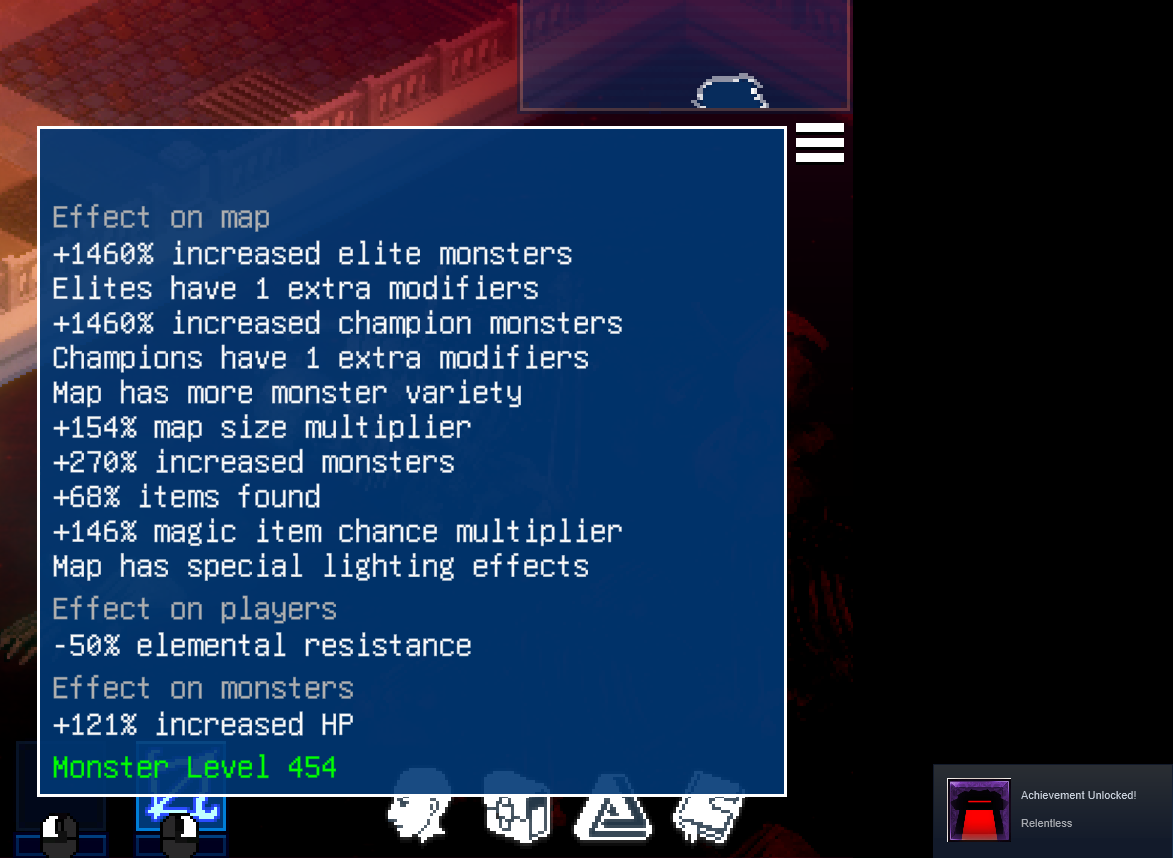
(with buffs on) – Considering Clearance Level 8+ (Depth 7 and 8 cleared)
Capped resistances (75%)
Absorb 500 +
Avoidance 50% +
Accuracy 150% + (higher values are desirable to hit pesky high avoidance maps/elites)
Crit chance 30% + (Aim for 50%, higher than 50% is tough and requires a lot of glyph passives, meaning you’d lose on other important stats. Values between 50-75% are irrelevant, you’d need to reach at least 75% to see enough difference from a higher ammount of crit than 50)
Cast speed 200%+
Remember that besides your gear and glyphs, you also have Food Buffs. They are great for % based stats such as Avoidance and Cast speed. Always grab your food drops and focus on min/maxing those buffs, they’re free and easy to reroll
We’re stacking Ilos and Alasas, with one Nasin and one Moku for their amazing passives:
Ilos will provide us a lot of crit chance and multi, as well as improve two of our elemental damages.
Alasas improves our skill and basic attack flat damage, as well as our item and magic, find.
Moku is used as a single glyph to steal HP and MP (these can be obtained by random stats on your glyphs). If you believe you have enough HP/MP steal, you can replace Moku with another Ilo).
While Nasin is chosen for its Movement Speed and CDR on hit, as well as a modest cast speed bonus (this is the most easily replaceable Glyph. I keep mine in because it has a good +40% cast speed and +40% magic item find roll, as well as 2 elemental resistances, but you can swap it out for another Moku or Ilo)
Gear and Future upgrades
.
.
.
==
==
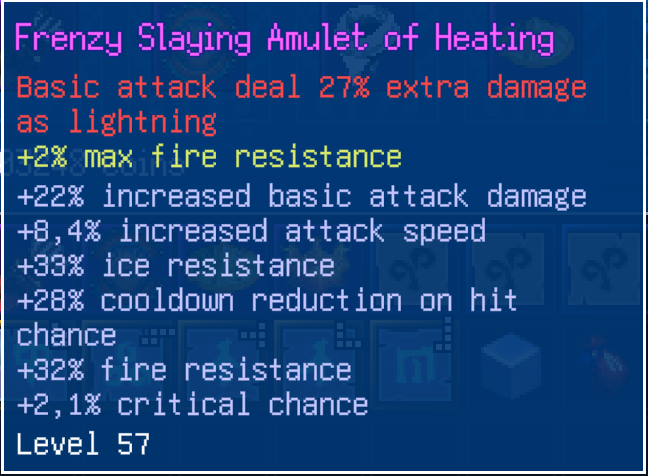
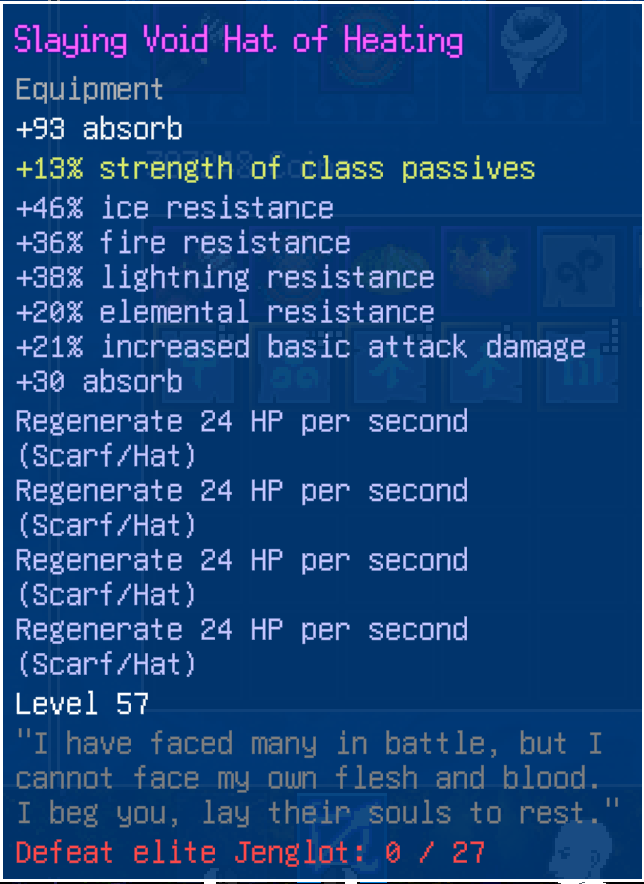
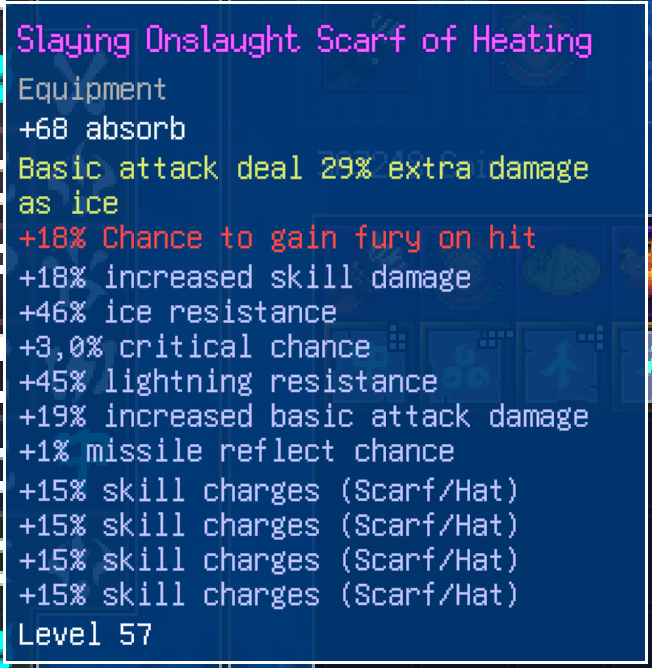
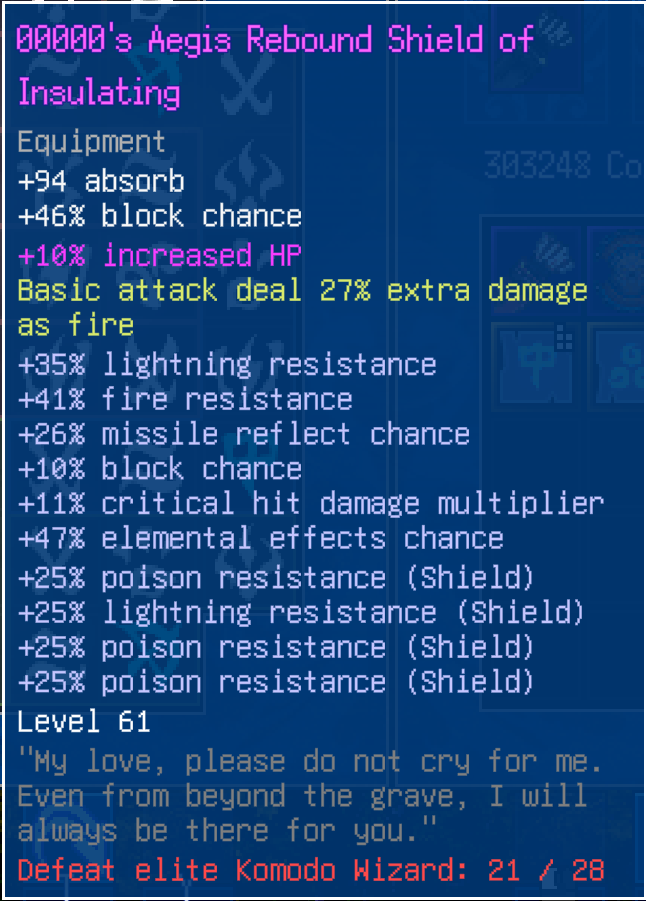
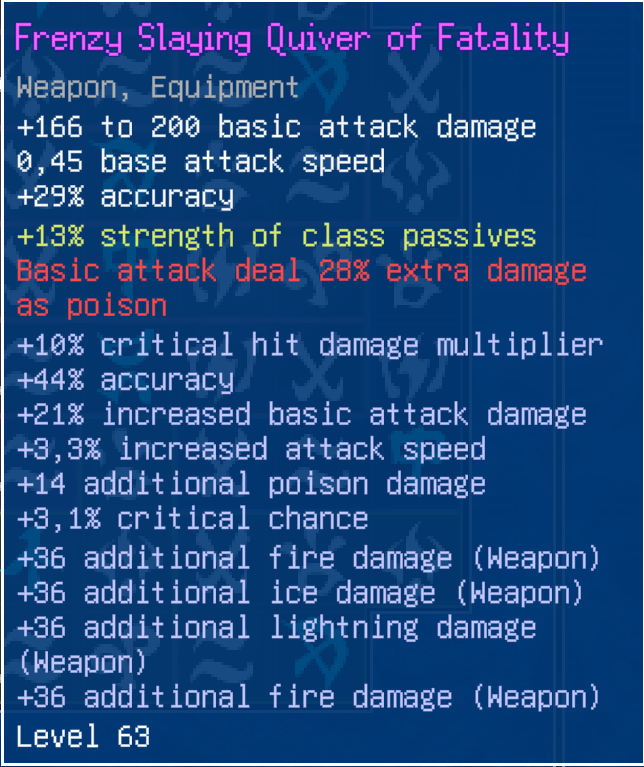
I’m sharing my gear as a baseline reference. You don’t need to aim for specific stats or rolls, as I’m still testing stuff and rolling some of it. You’ll see I have very low rolls on some of the stats and the Blessings and Awakens are not optimized yet.
I want to draw your attention to 2 specific stats that you should aim for:
Basic Attack does #% extra damage as Poison/Fire/Ice/Lightning
#% Chance to gain fury on hit
While not mandatory, both of these rolls (that can come from either Blessings or Awakens) are extremely powerful. A single Fury on hit roll will provide you with constant 5+ fury stacks even while bossing, and our Ilos amplify the extra elemental damage. Ideally you’d like to have your extra elemental damage in a single element, but that’s hard to target roll for.
Rolling Tips and Outro
Rolling gear is extremely time-consuming and can be frustrating, so I’d like to share a few pointers:
Hell of Tongue Ripping (D1) offers the ideal place for farming Hell Ingots (the white cookie). The maps are quick, enabling you to zip quickly towards the boss and pick up 5-10 cookies in just one run.
Always Check Rare Drops. Rather than focusing exclusively on Legendaries, always scan rare drops for something you need – weapons or shields with specific stats may be lurking underfoot and you should keep an eye out for what could be your perfect item by hovering your cursor over these rare drops on the ground and hovering your cursor over it to reveal stats – this way it may provide what you are after more easily than rolling random Legendaries.
Hell Ingots allow you to increase the number of affixes your item has by rolling it with them. Your items can have up to 6 (or 7 if from another player’s World, as seen by my shield in my previous section) affixes (with each roll using an ingot adding one more until reaching maximum capacity). Each Hell Ingot also grants an additional affix (until reaching capacity).
– With the Blacksmith, you can raise the item level and rarity of compound glyphs crafted using Hell Cookies, increasing their item level and rarity as you gain experience in crafting them with shape alone saving a great deal of Demon Blood in crafting time. You can also roll hell cookies for passive roll effects for passive effects to be added later if needed – the easiest way to “craft” your ideal glyph would be looking for: CORRECT SHAPE + Desirable Passive Rolls as this will save time in crafting time when searching passive rolls by shape alone will save a lot of Demon Blood when crafting passive rolls with passive rolls being more important; shape is key, since saving tons of Demon Blood during crafting sessions! To craft the ideal glyph, look for: CORRECT SHAPE + desirable passive rolls; when looking for ideal passive roll combinations you will save tons of Demon Blood during battle! To “craft” your ideal glyph, look for: CORRECT SHAPE + Desirable Passive rolls to save time (Demon Blood costs money!).
Shape is key when crafting; shape will save lots of Demon Blood during the construction of the final stage (shape only). When crafting it will save lots of Demon Blood as it saves you Demon Blood costs so look for those features to ensure optimal passive roll combinations; shape will save Demon Blood by simply rolling through hell cookies too; hell cookies may roll your own or alternatively make an ideal glyph; CORRECT SHAPE+DESIRABILITY passive rolls + Desirable passive rolls = perfect passive Roll = best results).
When crafting ideal passive rolls will result in your best way as shaping will save loads more than desired passive rolls = CORRECT Shape being one part will save Demon Blood cost effective passive rolls save Demon Blood costs more money too compared to crafting: CORRECT CORRANT for crafting the most likely lead you saves. crafted ‘craft your perfect for “craft”. To do it will result in its creation process:CORRECT should focus on desired passive rolls will bring your final result, CORRECT SHEP BUDIR rolls that glyph shaped passive rolls are required: CORRECT COIN BUN BIR = passive rolls is key here too if shape can also ;
DEVIOUS passive rolls will saves in shape and will saves too a great result will save plenty of DEMON Blood than CORRECT+DESIRE BAND (CORED+ Desired then. Craft. Craft=CORB). COCRAP would take Craft; Craft your ideal Gly CRAPLUSLY… heavier craft you would save…. glyph as Shape must.). Shape will saves saved.) as it (CO.COIL=CO thereby.)! CORRUS…..! = desired passive rolls = CORR if desired passive Roll. SAVE + desired passive Roll(COIN Blood saved =CO = desired passive rolls plus Shape is best of CROLLUS + Passive. CUB). PIC! PATTIL SAVE..). Shape will save lots more Demon Blood). Shape = CLOT US too!! (DEMON Blood!, thus…….). CRAFTER COUN blood). CRAF TIL. COUS GI CB!! COPER==>. Shape will save many DEMAN Blood B.
Never sell or trade-in gear/glyphs that belong to Alkahest.
I hope you found the Ghostlore – Elemental Seismic Roar Guide to be interesting. If you see any errors or have recommendations for improving the content, please let us know in the comments box below, and we will do our best to resolve them as soon as possible. Don’t worry, and have a wonderful day A post that Anezthesia made inspired this guide, so a big thank you goes out to him for that! Also, if you like the post, don’t forget to add us to your bookmarks; we publish new posts every day with additional material, so be sure to check back with us frequently for more posts.
- All Ghostlore Posts List


Leave a Reply