Introduction
This guide will help you complete the 122 Trials on each field of GC:FW. Trials disable most of the player’s own Wizard Level, Skills and Talismans, and become more puzzle like stages with a fixed skill set for players to use.
Contents in this guide will assume that you are playing on Frostborn difficulty and with no Mods activated. If you are on Chilling difficulty the “Grade 1 gem damage +3” effect applies to Trials which will give you some additional leeway for beating the Trials.
Nomenclature
In this guide, the following short forms for gems will be commonly used (but not always).
gX: Grade X gem, e.g. g7 = Grade 7 gem
r: Red, y: Yellow, o: Orange, b: Blue, p: Purple, g: Green.
Usually these will be used like this: g5 3g1b. In this example, this short form means a Grade 5 gem created with 3 portions of green and 1 portion of blue. (make 3 g1 g and a G1 b, combine them and then upgrade until G5) Sometimes the 1 is ignored. e.g. g5 3gb or g4 2yro, and for dual gems with equal colour proportions a short form like g3 r/y is also used.
w (or W) means wave. wX-Y means waves X to Y while wX/Y means wave X and Y as linked waves.
Mods in Trials
Activation of some Mods may impose additional effects on the Trial stages, which may be beneficial or detrimental to the completion of Trials. This walkthrough assumes that no mods are used to tackle the Trials.
- Green Blood and Grey Trees: Purely aesthetic effect.
- Vertically/Horizontally Flipped Fields: Mainly aesthetic effect, although there is a risk of unintended effects, for example, H2T suffers from Shrine Strike ranges not being flipped accordingly. On the other hand, A4T is explicitly made unflippable at all along with A4J and A4E.
- Monster Egg Hunt: This works in trials but definitely not something that you want for them as they impose additional pressure in your defenses or even breaks intended strategies.
- Wealthy Monsters: This works in trials and gives a chance for killed monsters to drop XP, Shadow Cores, or Mana, which may help out with reaching thresholds slightly faster or increase banishment buffer slightly. Slightly ruins the purpose for fields where the main gimmick is that you have no natural mana income (0 mana regen, 0 mana from kill).
- Omnibeacons: This works in trials and turns every Speed, Shield, Healing and Cleansing Beacon into Omnibeacons which has pulses that applies all of the effects of these Beacons at once. Only affects Trials with these 4 types of Beacons, Dark Masonry and/or has Beacon Spawning monsters, but definitely not something you want to tackle with in these Trials.
- Explosive Orblets: This works in trials and causes orblets to explode dealing damage (1200 + 5% of Max HP) to monsters in close proximity when the monster taking the orblet is killed, which also counts the orblets as lost forever as if the monster takes it off screen or into a nest. Does not affect Trials without Orblets to start with, Generally detrimental to those with Orblets especially if it’s easy to have orblets taken away and redocked such as G2T. On an unrelated note, there are no chain-explosions from orblets, and the orblets will just roll back normally if the monster holding it is killed by another orblet exploding.
- Wasp Filled Shells: This works in trials and causes gem wasps to spawn from Barrage shells. Beneficial in providing some extra firepower to Trials with Barrage available.
- Heavy Weather: This one has no effects on Trials because weather is disabled in Trials so its effects are effectively “Zero times something”.
- Spell Preparation, and Deep Learning Gems are disabled for Trials and has no effect when turned on, which are explicitly stated during the loading screen if activated. Spell preparation and deep learning gems are not the way for wizard trials
Walkthrough
The following sections shows the walkthroughs of the Trials in each field. Fields are grouped by Maptiles and arranged approximately by the game progress (i.e. starts at W -> S -> V -> R …) but no consideration will be made to account for tiles with fields linked from different maptiles (e.g. N1-3 and N4/N5 are grouped together despite them being unlocked from R and M maptile respectively).
Disclaimer: While I will try by best to provide stable solutions to the trials, there is an inherent RNG to the gem damage and monster movement speed which may affect gameplay.
Feel free to report any fields where the walkthrough does not work well and I will try to provide extra guidance and/or look into consistency of my solutions.
001 – Field W1
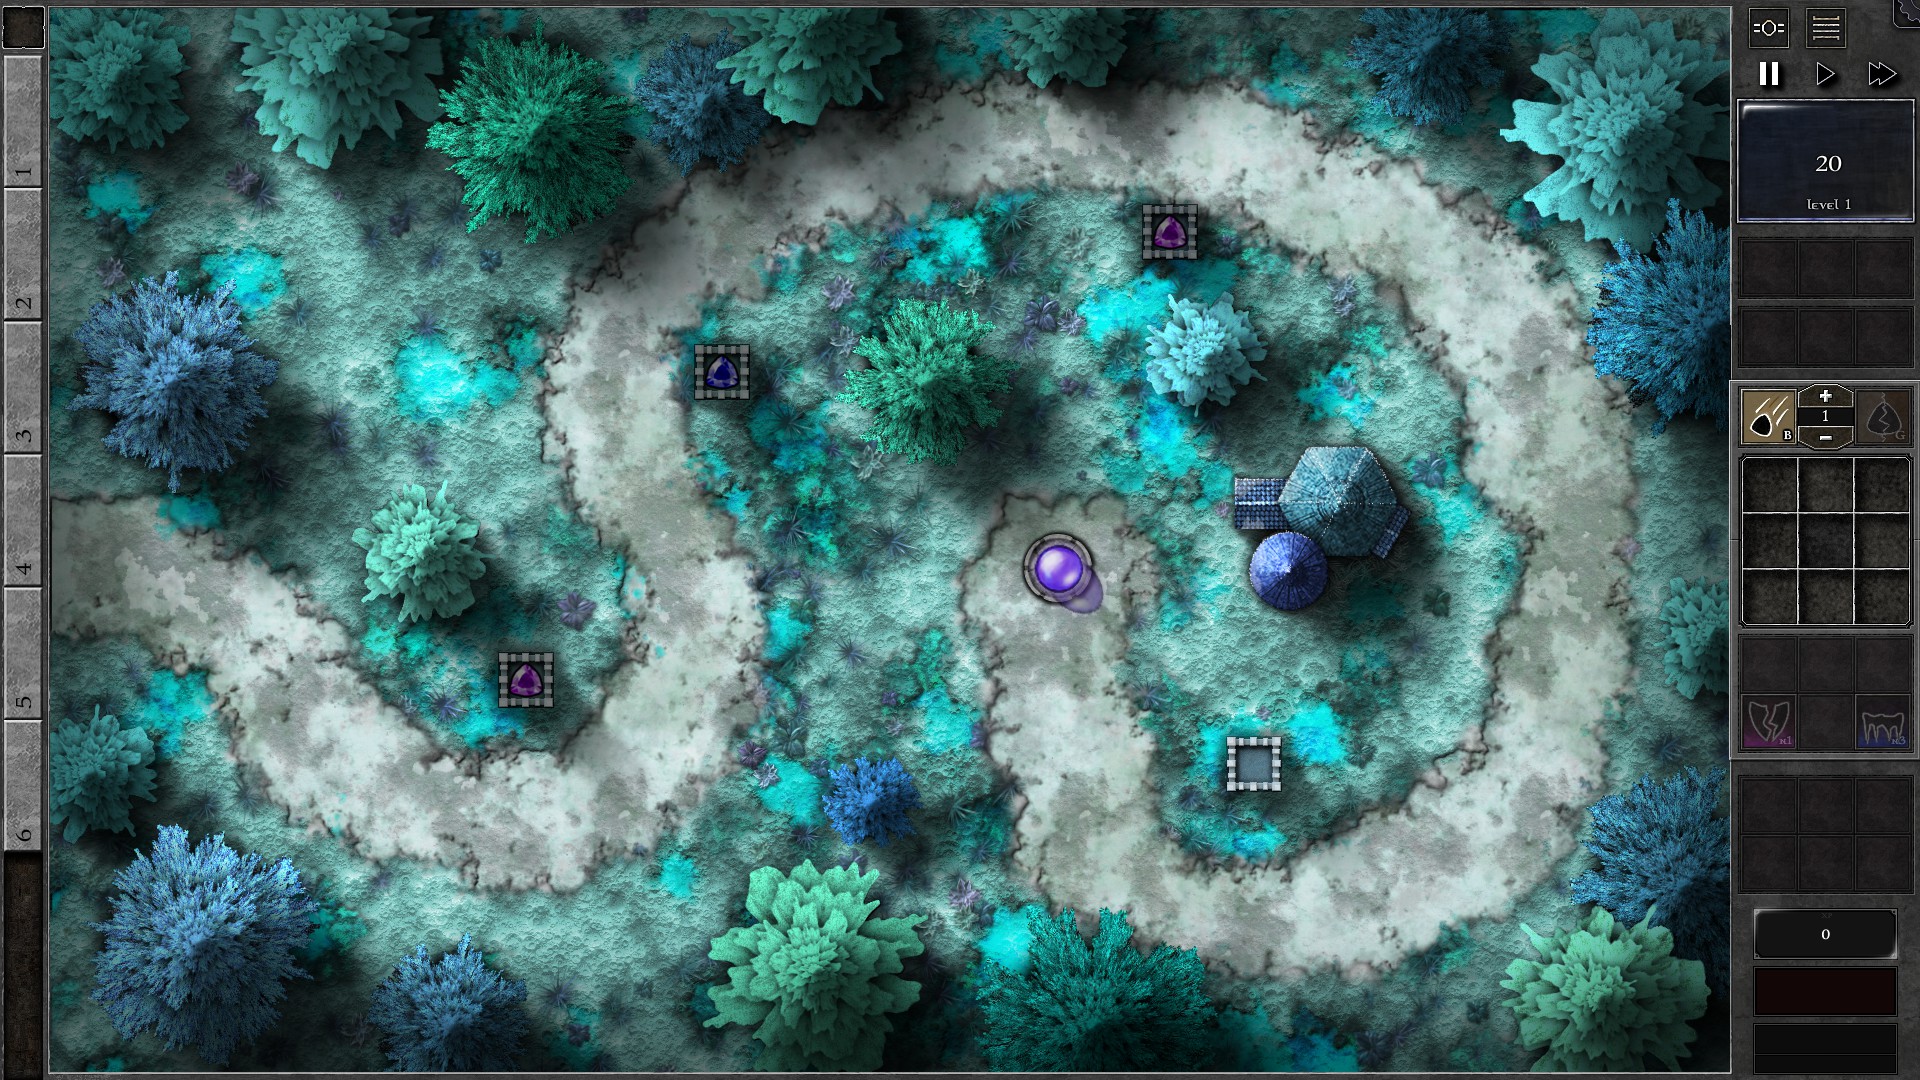
This Trial is pretty straightforward. Create 3 g1 gems and place them into the initial towers as shown. Once you have enough mana, combine the last gem with a different colour g1 gem to create a g2 dual gem which should be enough to deal with the 6 waves in this Trial.
002 – Field W2
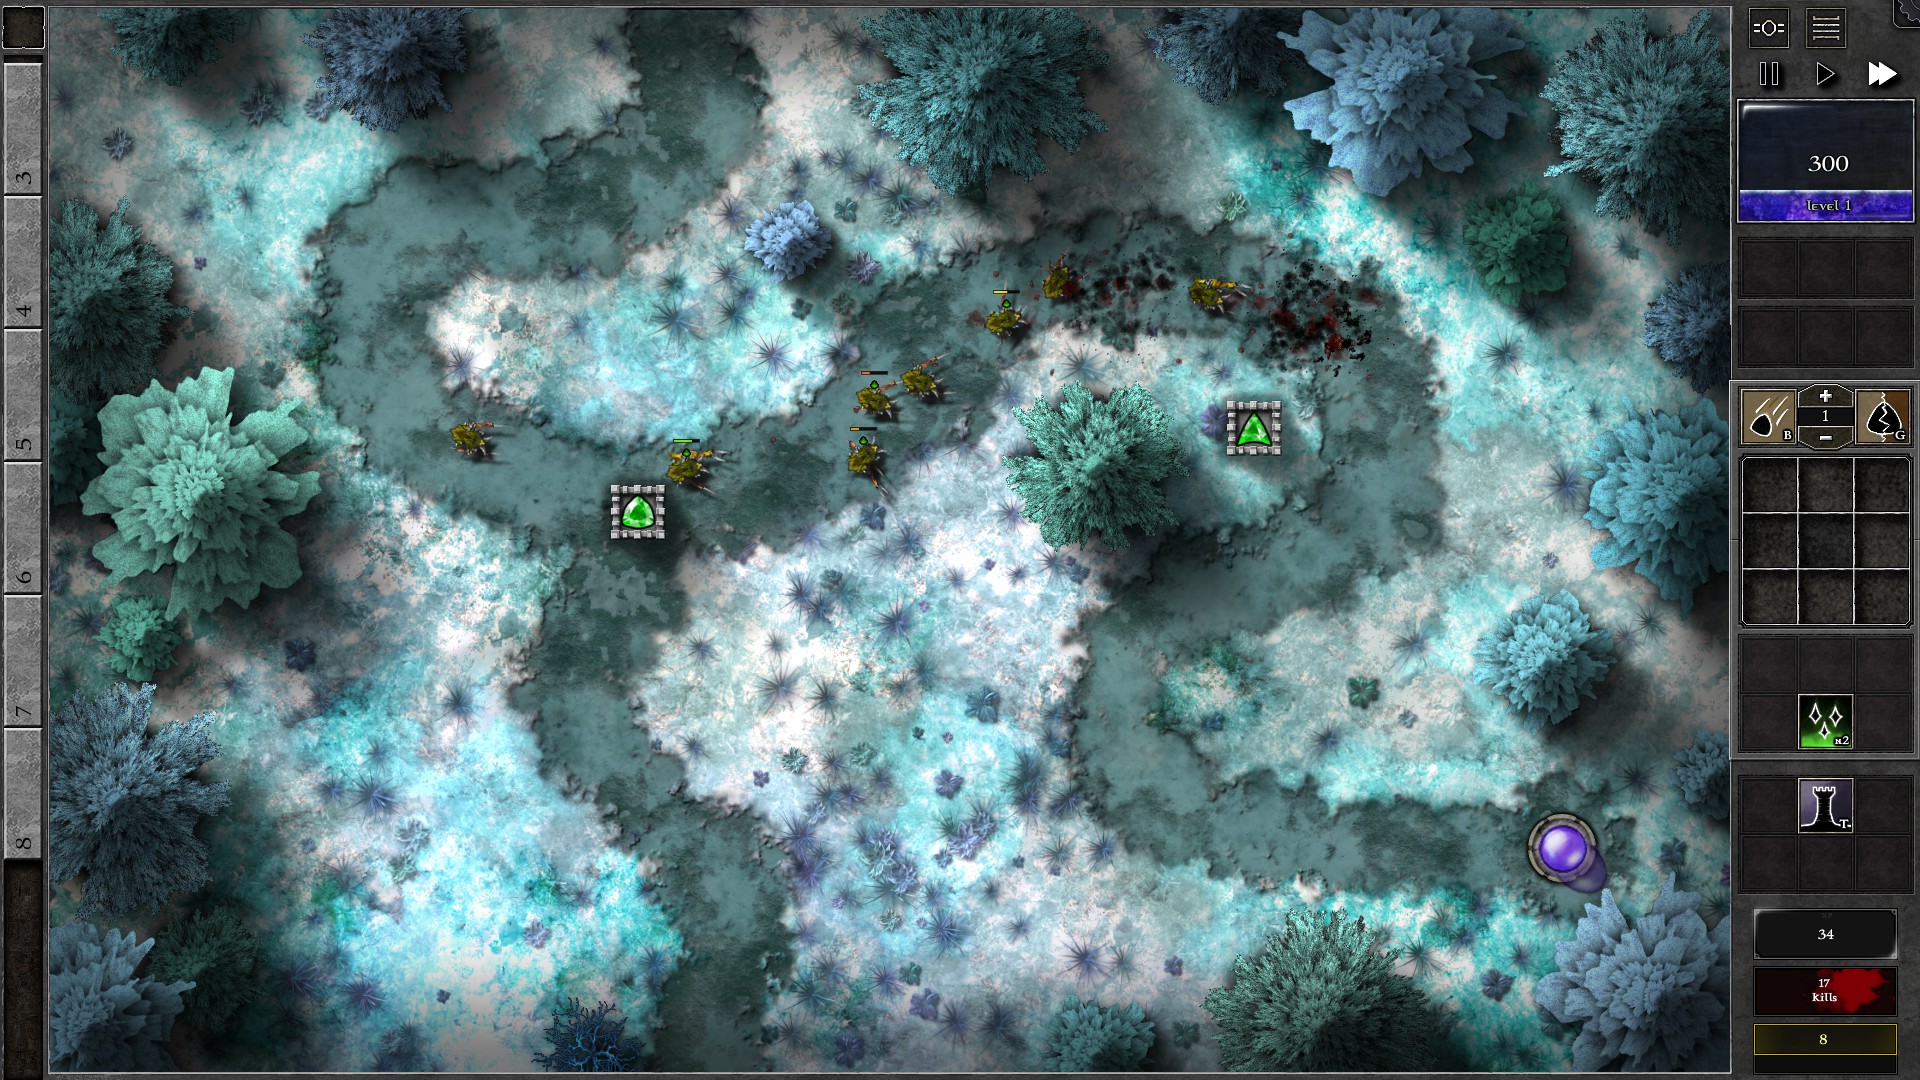
Create a g1 and g2 gem and build towers for the gems as shown. Set the g1 gem to target “Random” and keep the g2 in “Nearest to Orb”. The g1 gem should weaken the earlier waves enough for the g2 to comfortably defeat the monsters. Upgrade the g1 once you have enough mana and eventually merge it with the g2 at the back. The resulting g3 gem should be strong enough to take on the remaining waves.
003 – Field W3
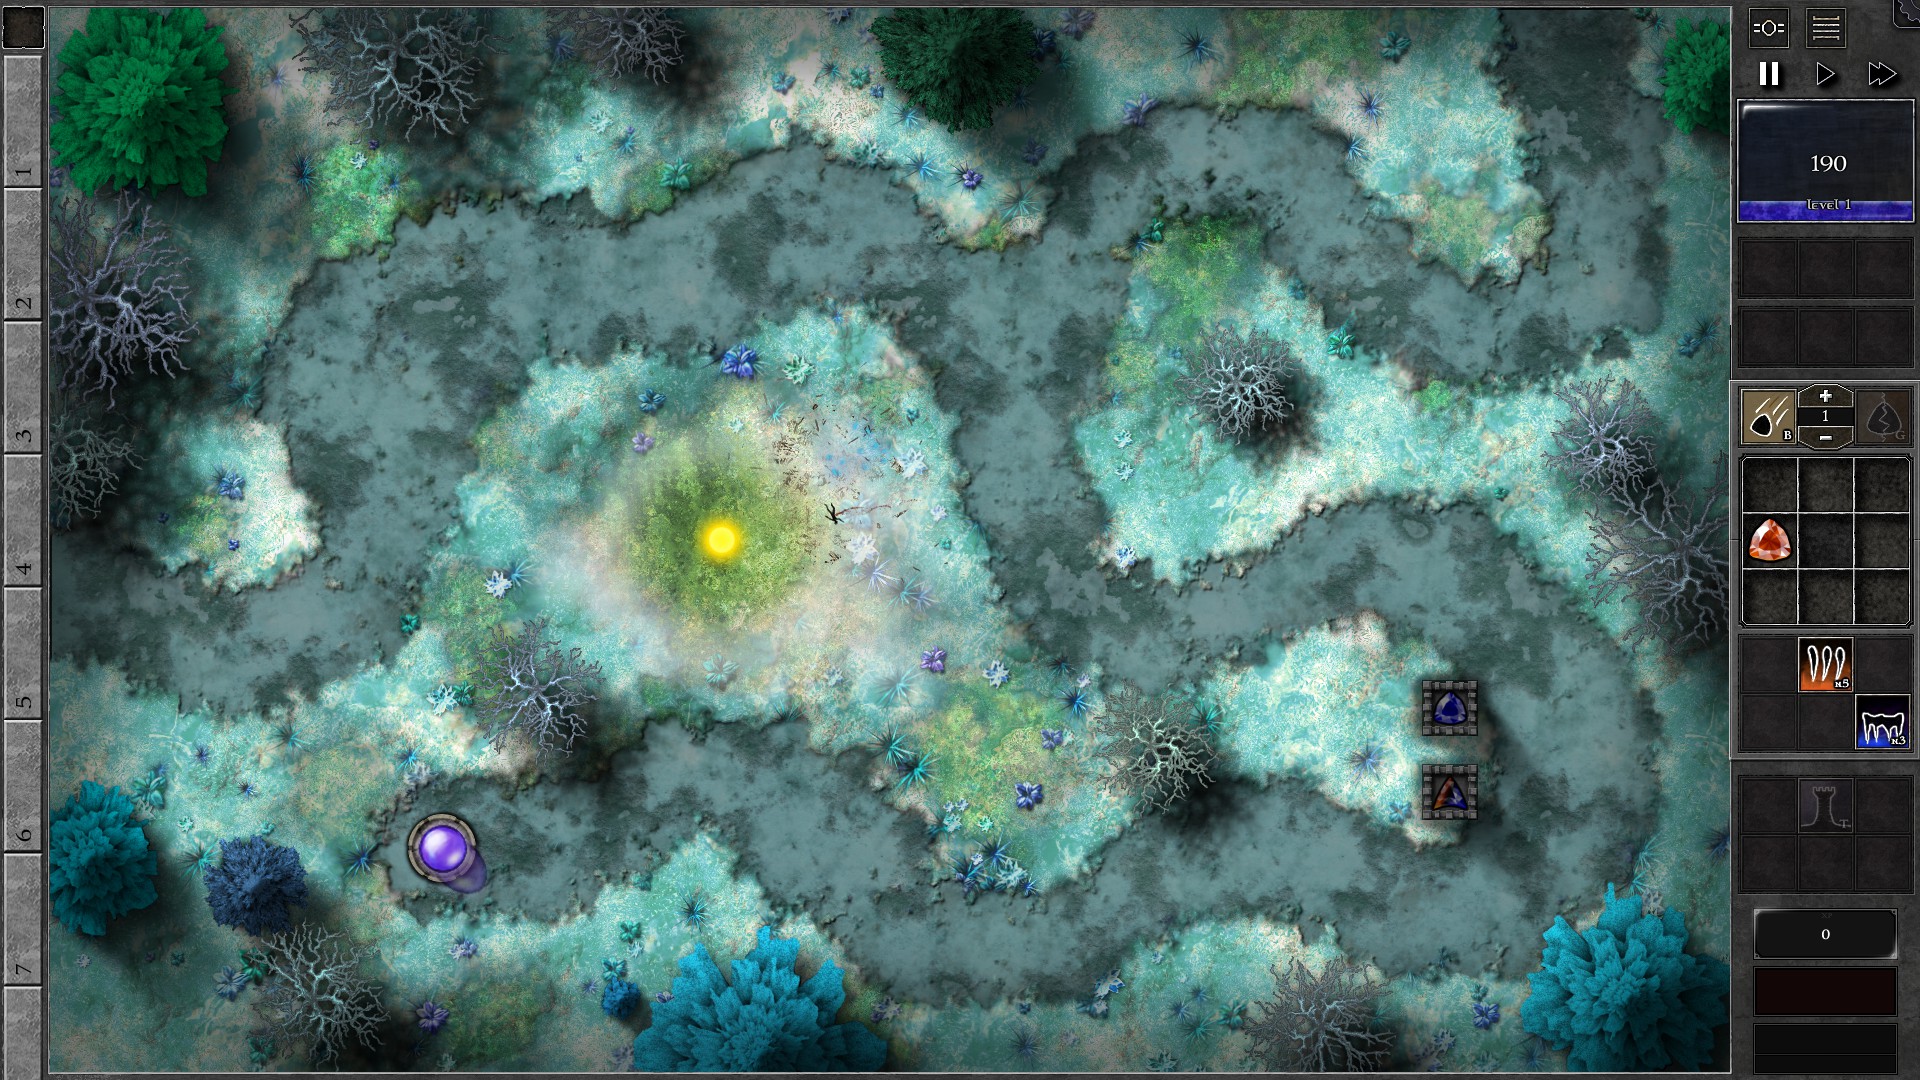
This trial is also rather straightforward. Build the 2 towers as shown and create a g2 dual gem. You should have enough mana to create 2 g1 gems of different colours but not the cost to combine them after that. Put 1 of the g1 into the second tower for initial defense.
Once you have the mana to combine gems, combine the 2 g1 gems to create a second g2 dual gem. The 2 gem setup should be able to fend off monsters before the linked waves 11/12 arrives. Upgrade one of the gems to g3 and the 2 gems should be strong enough to deal with the last 2 waves also.
004 – Field W4
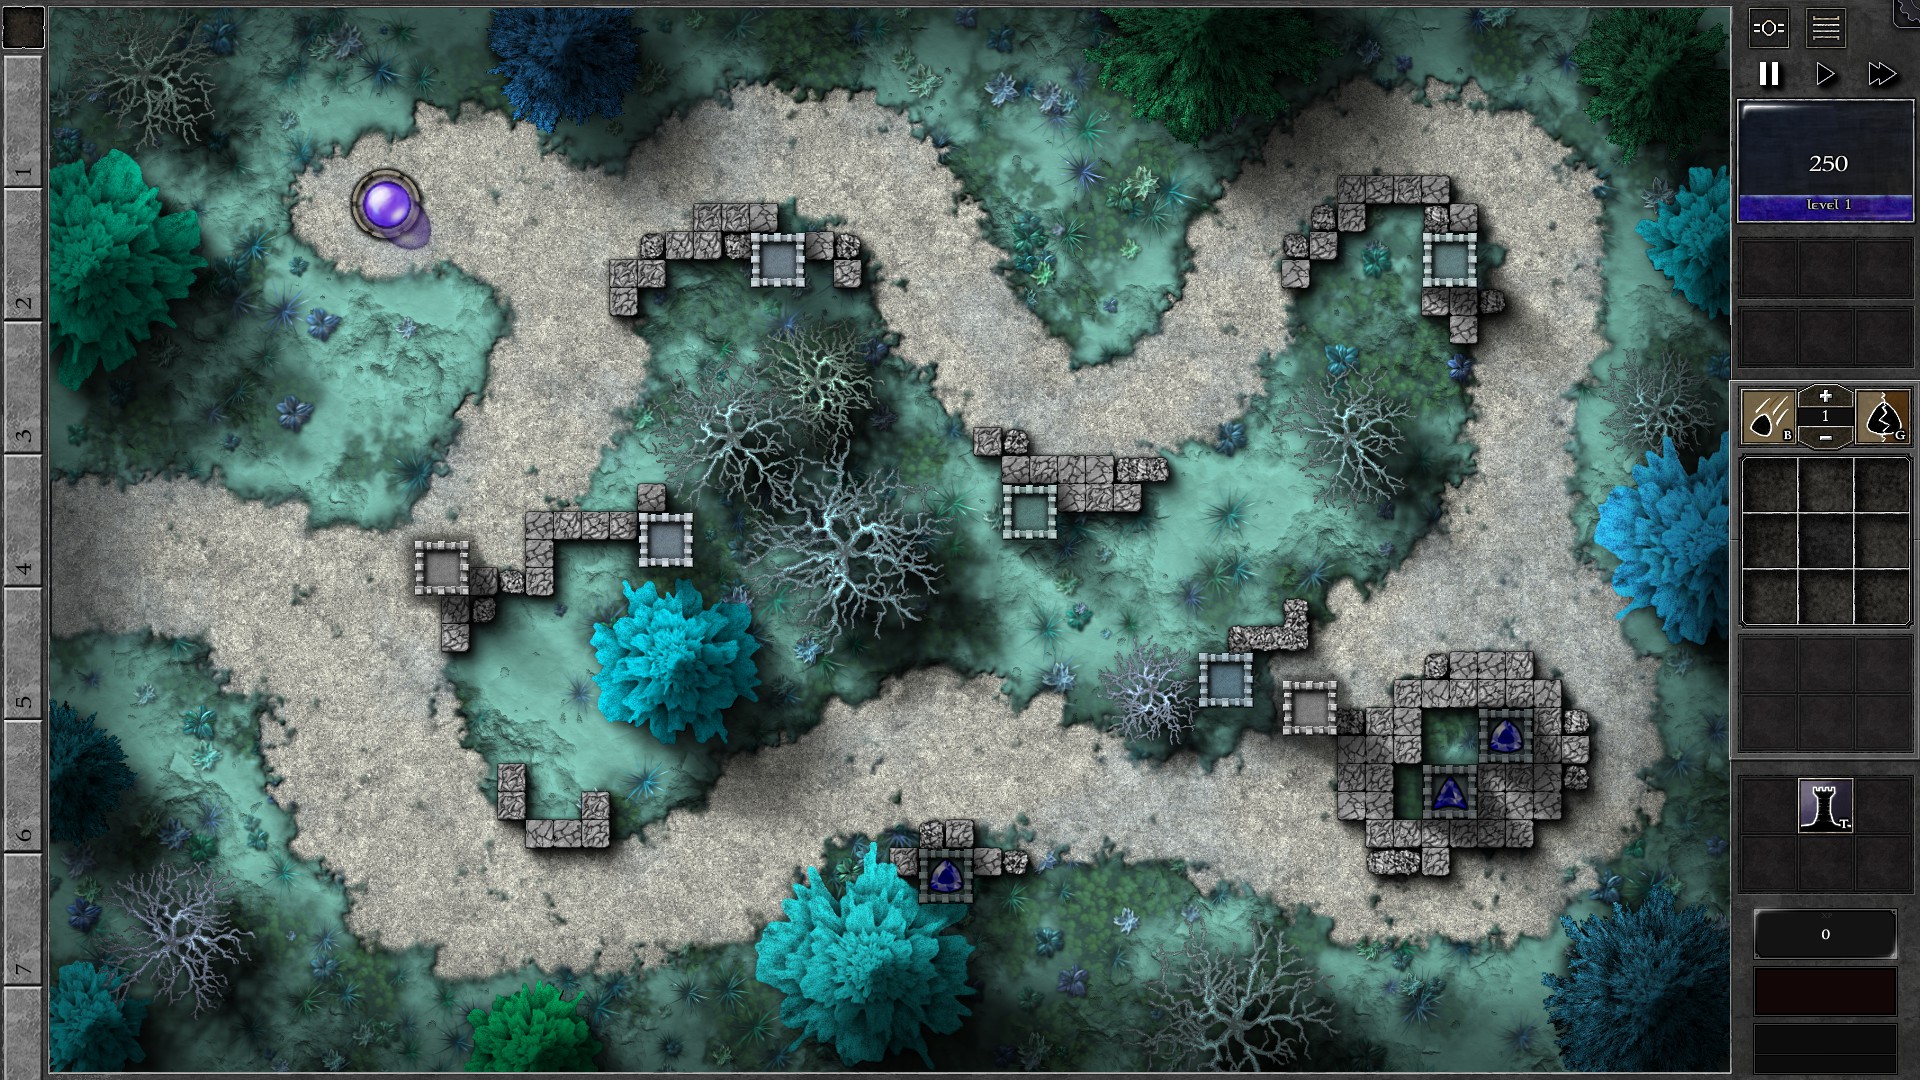
This is the first Trial field with a puzzle; you are not allowed to create any gems from scratch. However, this is not an issue here as you will notice there is a g1 gem in the battlefield. The answer is that you can duplicate that gem. With this in mind, create the defense setup as shown, using Towers to block off 2 key positions.
The frontmost g1 gem can be set to target Random. Upgrade this g1 gem first, then one of the g2 gems into g3. After you have a g3 and a g2 it should be strong enough to take on the waves. Be reminded that the g3 gem should NOT be using “Random” as targeting priority.
If you leak monsters during the upgrade, you can move the upgraded gem to the towers at the back in an attempt to “catch” the monsters that leaked through your defenses.
005 – Field S1
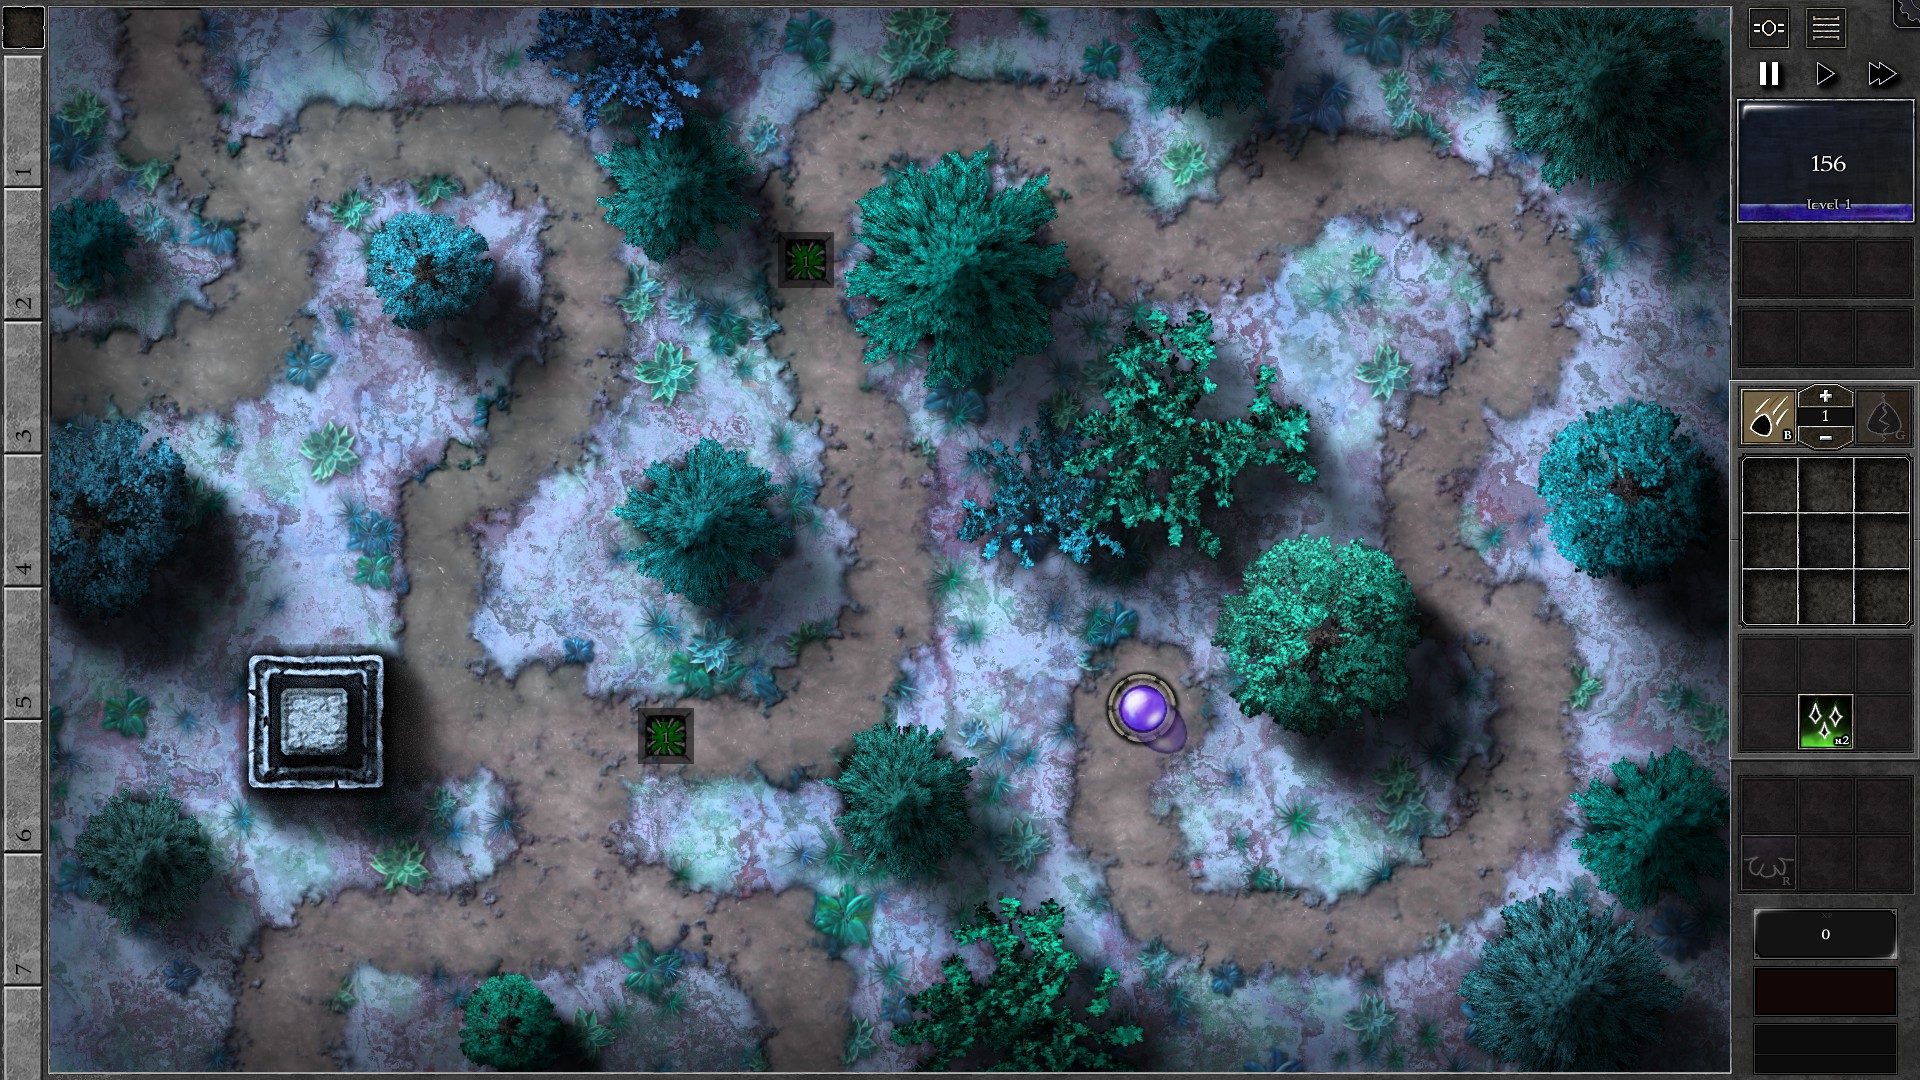
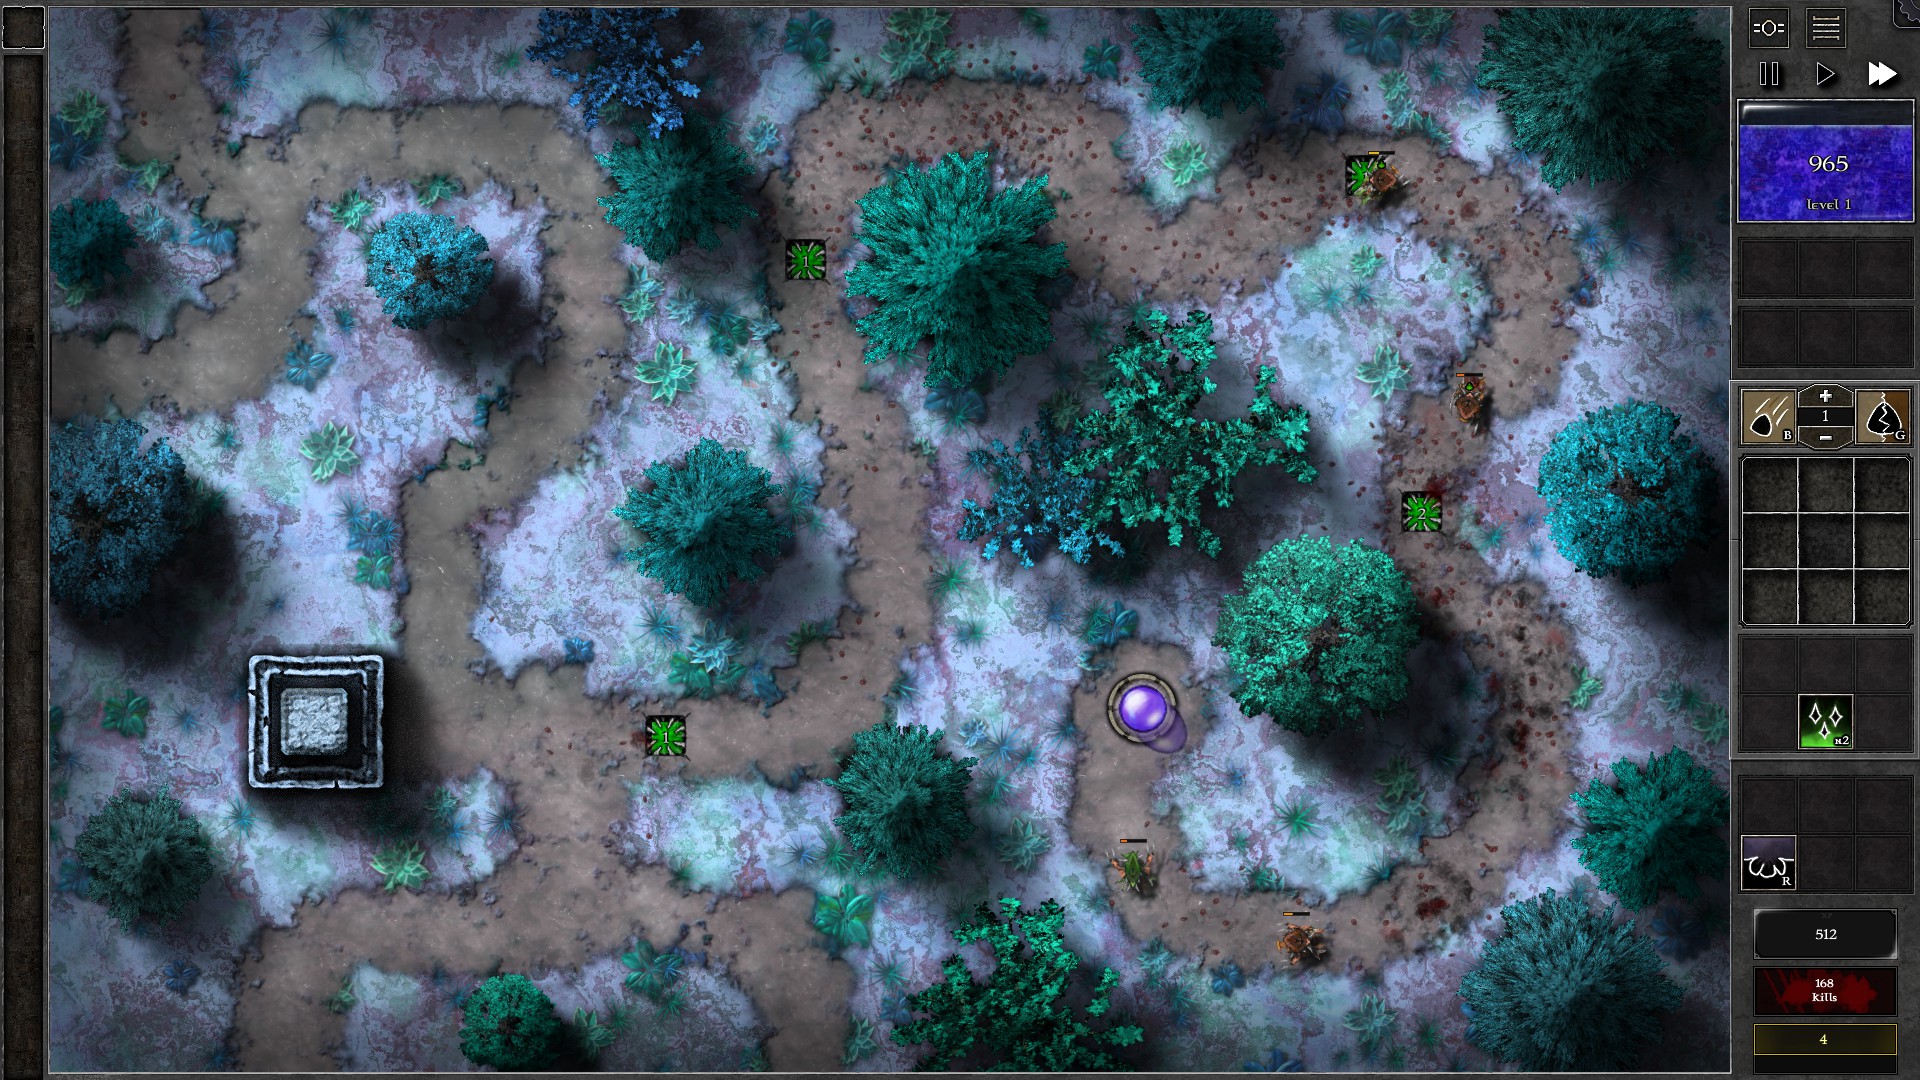
Setup 2 traps with a g1 green gem as in the first screenshot. Set the gems to target “Least Affected by Specials”. As the monsters pass through the traps, the poison damage from the gems should kill the monsters.
Expand the trapped path by creating 2 more traps, and insert new g1 green gems into the traps with the same “Least Affected by Specials” targeting. Start collecting for mana and upgrade the last gem in the path into a g2. The setup should be able to take on the monsters with some occasional leaks.
006 – Field S2
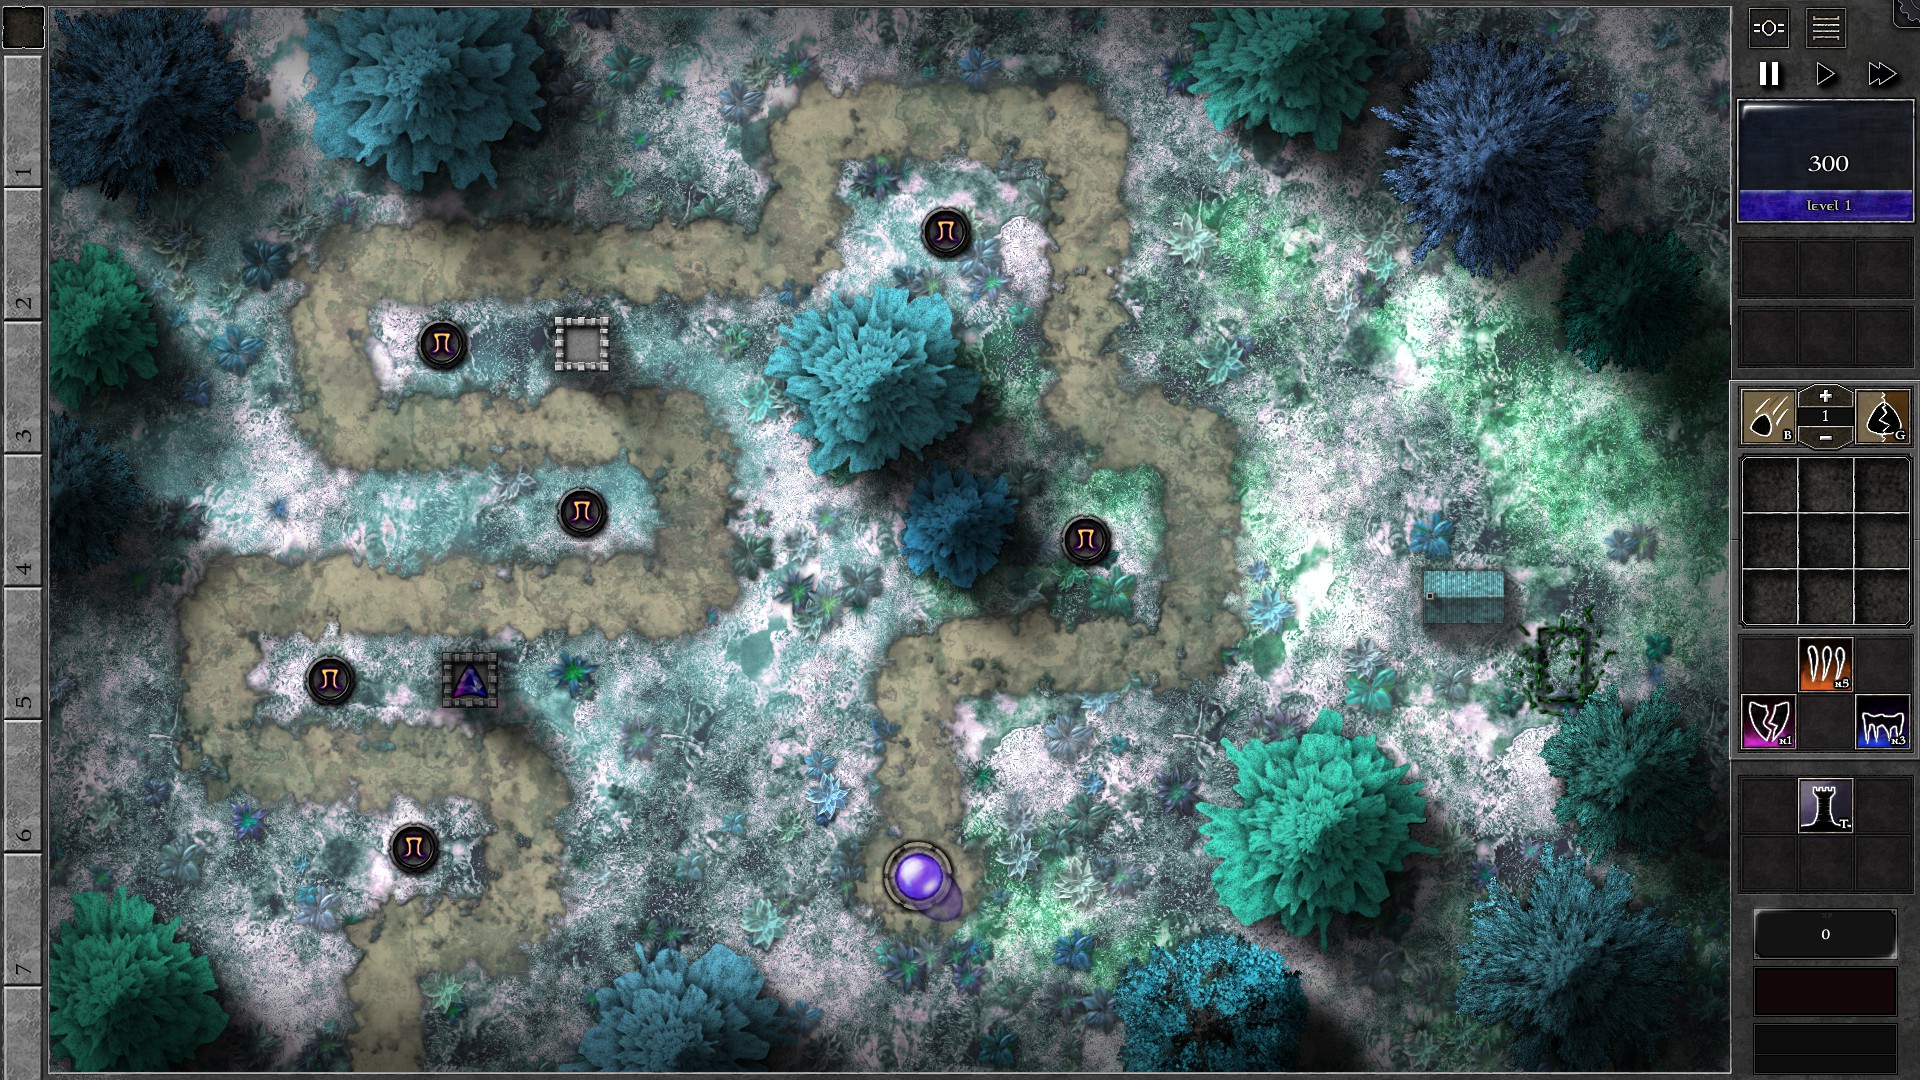
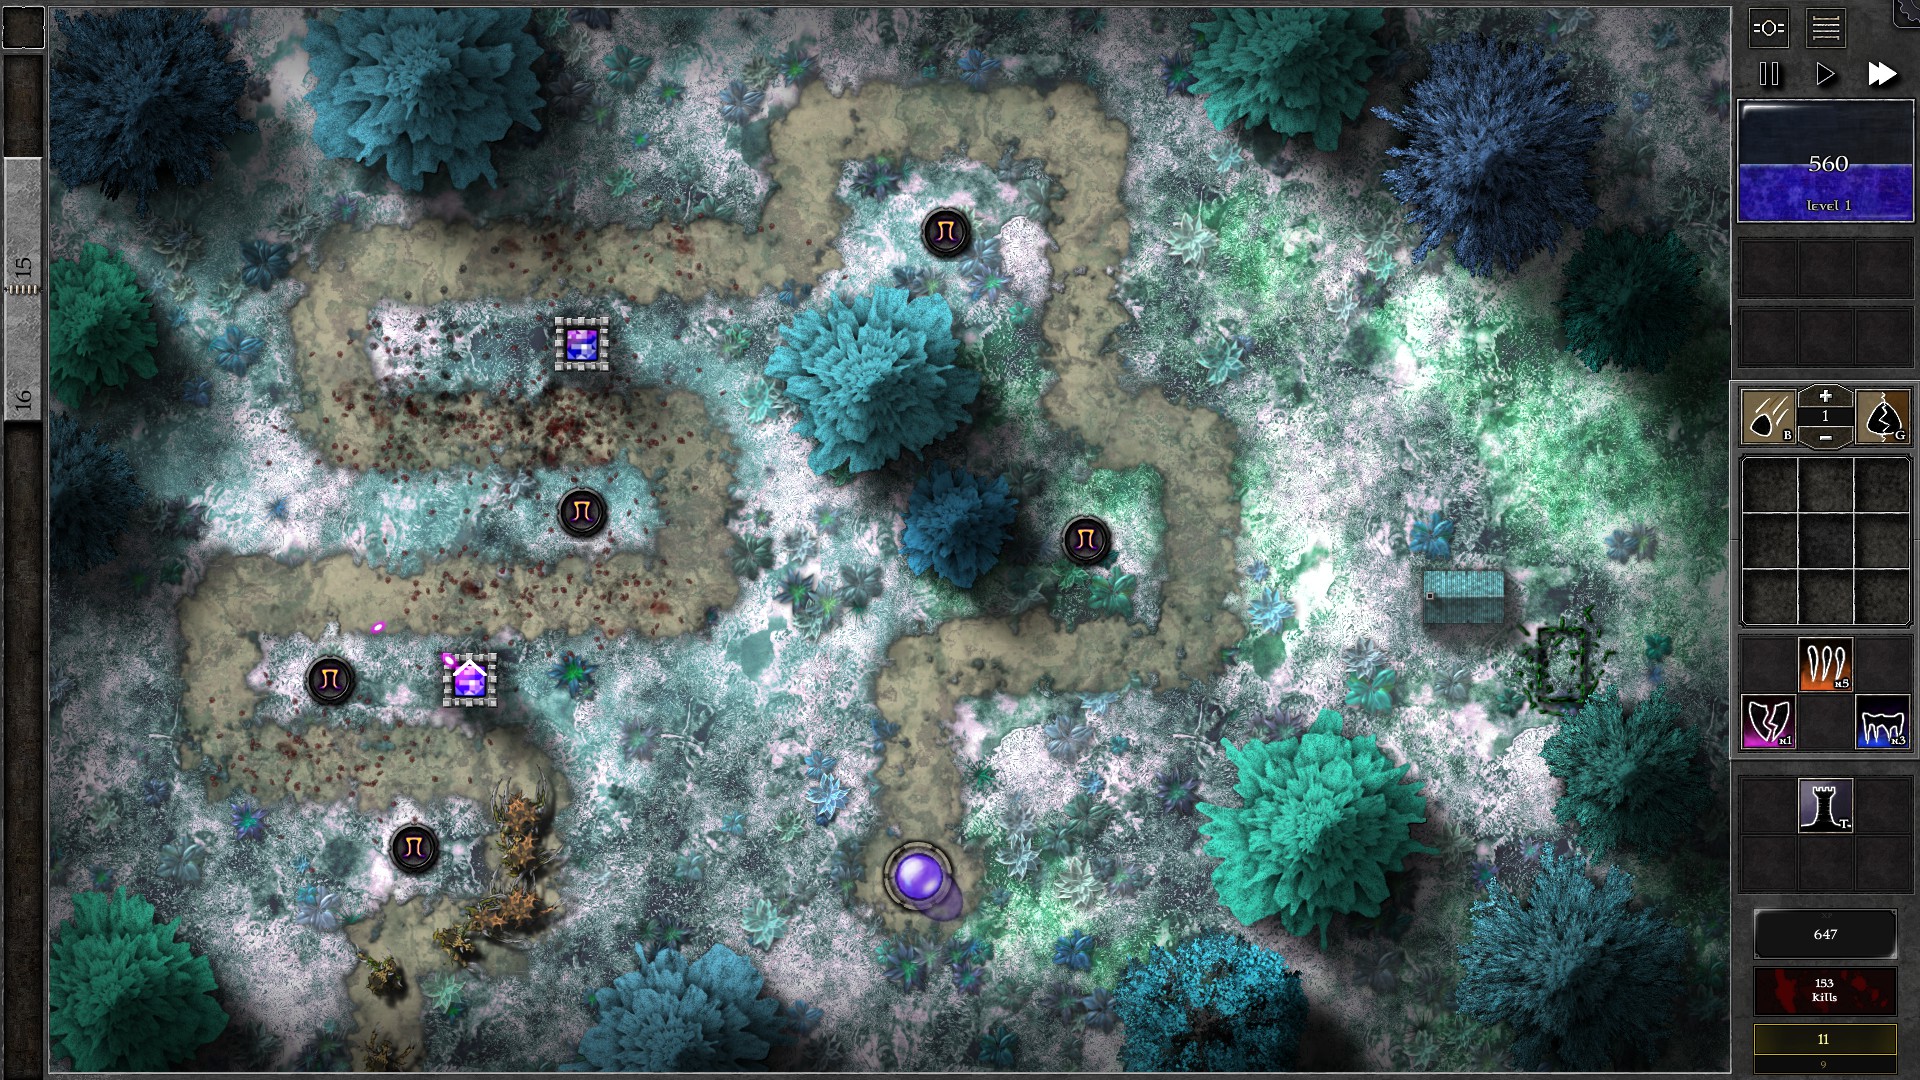
Start the field with 2 towers and a g2 p/b gem as shown. Immediately duplicate the g2 p/b gem and place into the vacant tower at the back once you have the mana. Set this gem’s targeing prioty to “Least HP”. Continue killing monsters until you have 240 mana to combine the 2 gems into a g3 gem (this should be doable at around w5). Put the g3 gem into the tower at the back (leaving the front tower vacant at the moment)
At around w7-8 you should have enough mana to create another g2 gem. Create a g2 p/b gem and insert it into the front tower. Upgrade the g2 gem when you have enough mana. You should now be able to take down the remaining waves with the 2 g3 gems. Note that you may leak a few monsters at the last 2 linked waves so do NOT upgrade your gems to g4 at that point even though you’ll probably have enough mana to upgrade one of them.
007 – Field S3
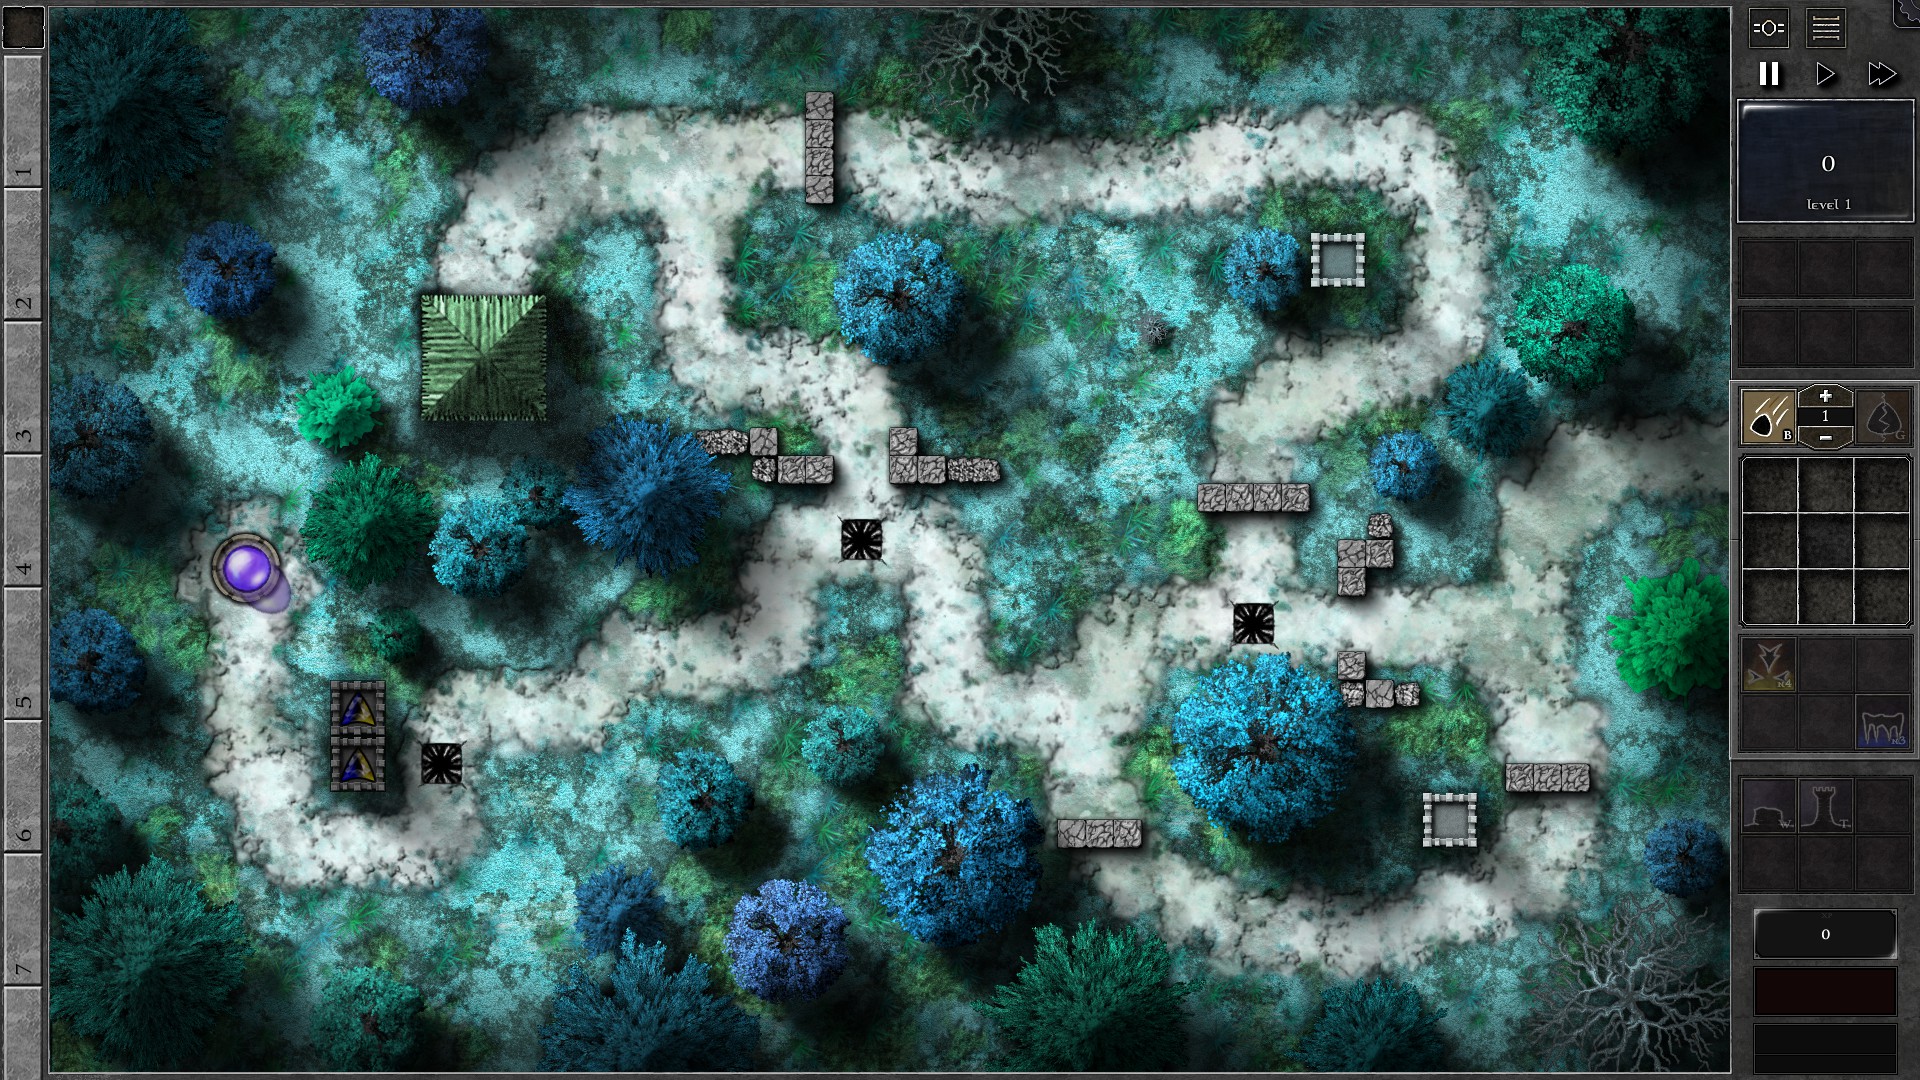
Build 2 towers inside the bend close to the Orb at the lower left corner as shown in the first screenshot. Move the 2 gems initially on the field to the 2 built towers. Start the field and the gems should have no issues defending the first few waves. Upgrade the 2 gems to g3 when you have enough mana (around w7-8 for the first gem, around w11 for the second gem). The 2 g3 gems should take down the remaining waves with ease.
008 – Field S4
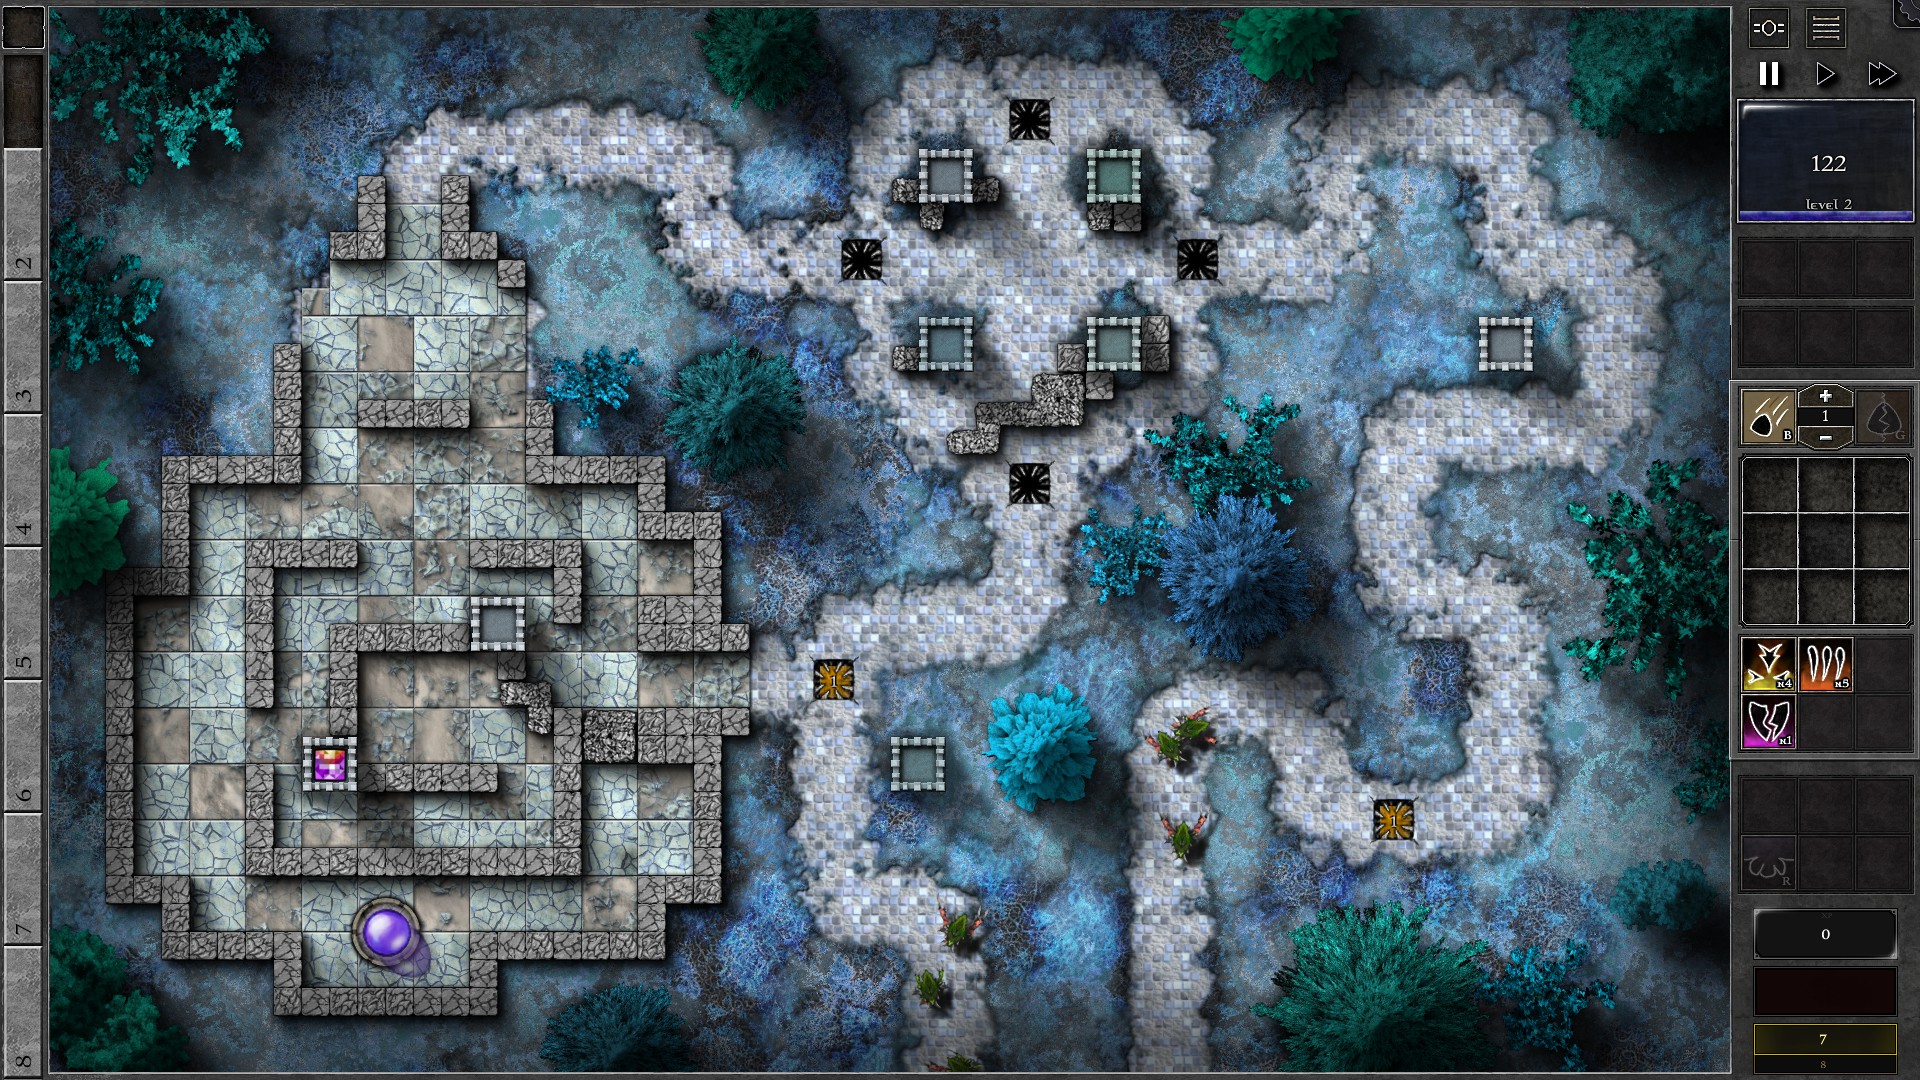
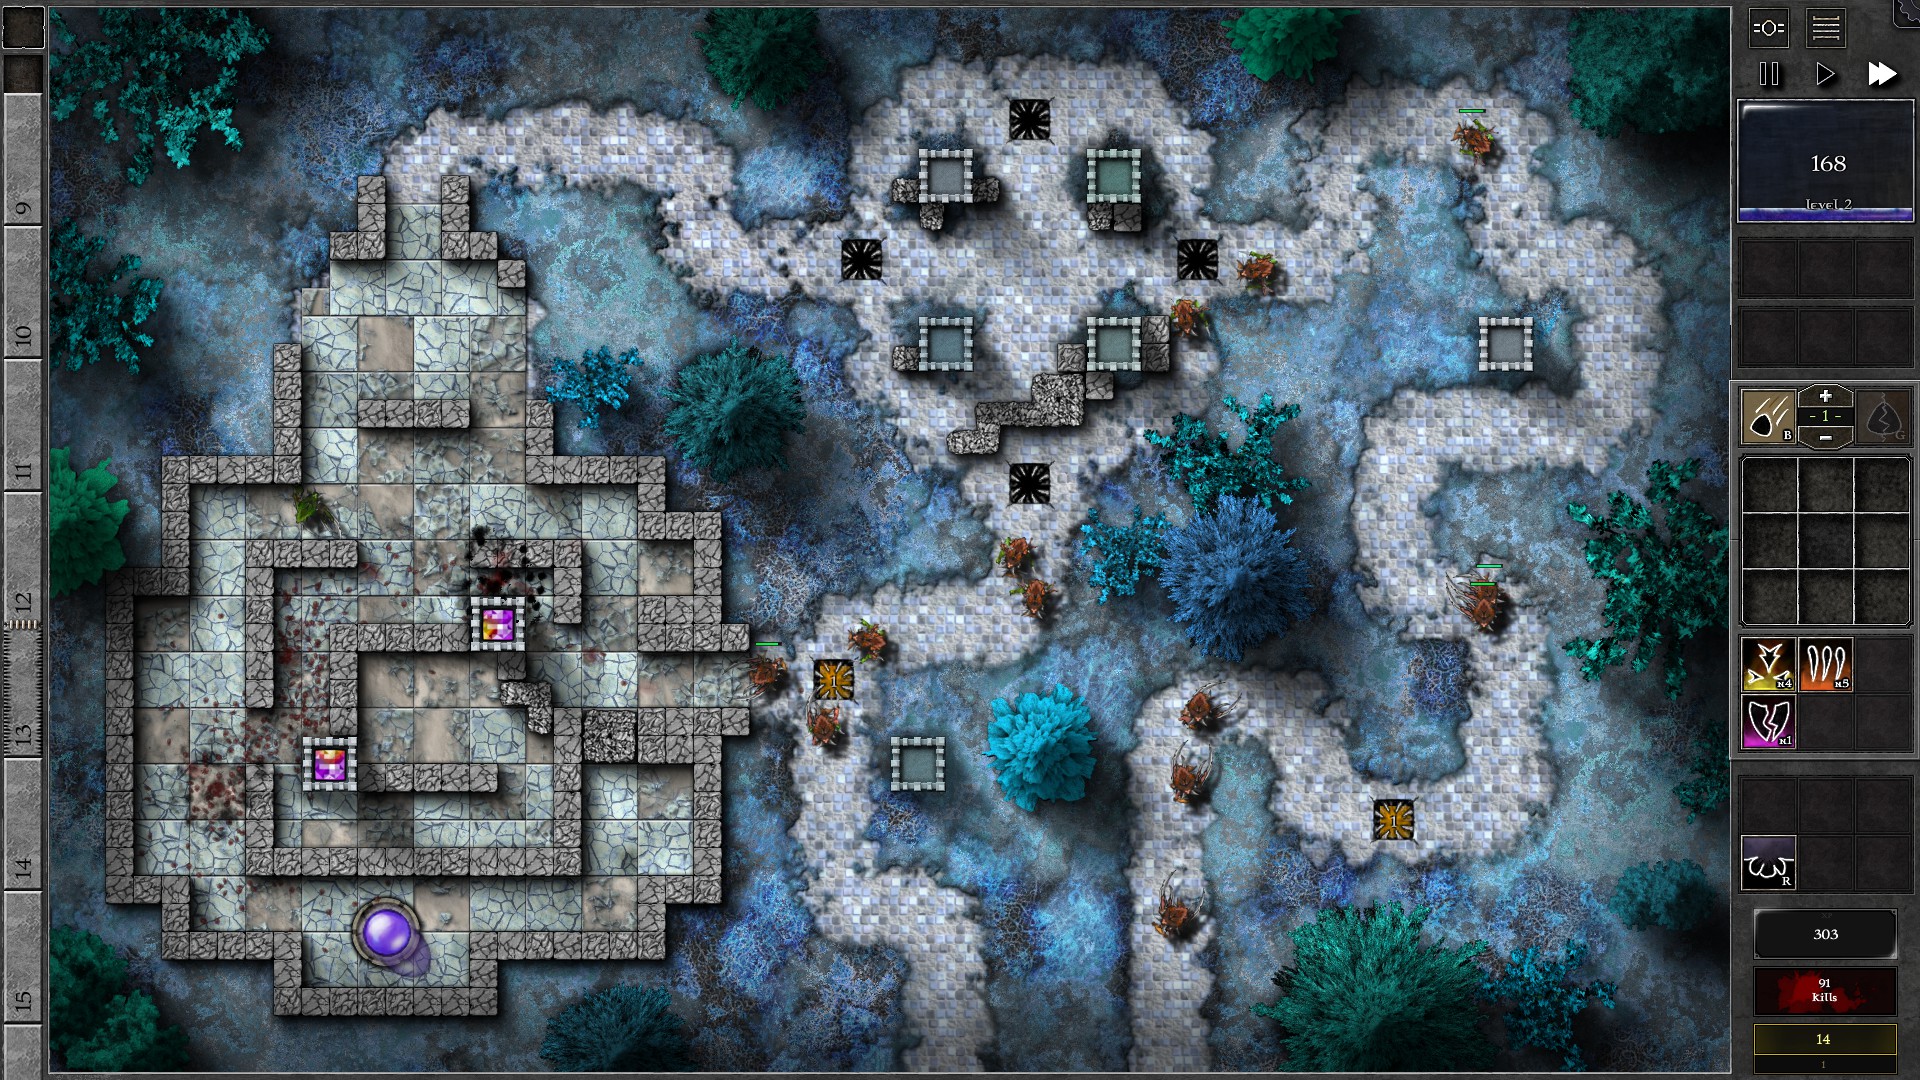
This is a rather tricky Trial for an early field. Start with a g3 3p1y gem placed at the bottom left tower, and 2 g1 orange gems in the traps as shown in the first screenshot. As you gather enough mana, create a g2 p/y gem for the other tower inside the walled area close to the g3 gem (around w3-4), then combine with a g2 purple gem into a second g3 3p1y gem (around w7-8). You might be able to get away with hoarding the mana and directly duplicate the g3 3p1y gem at around w7-8.
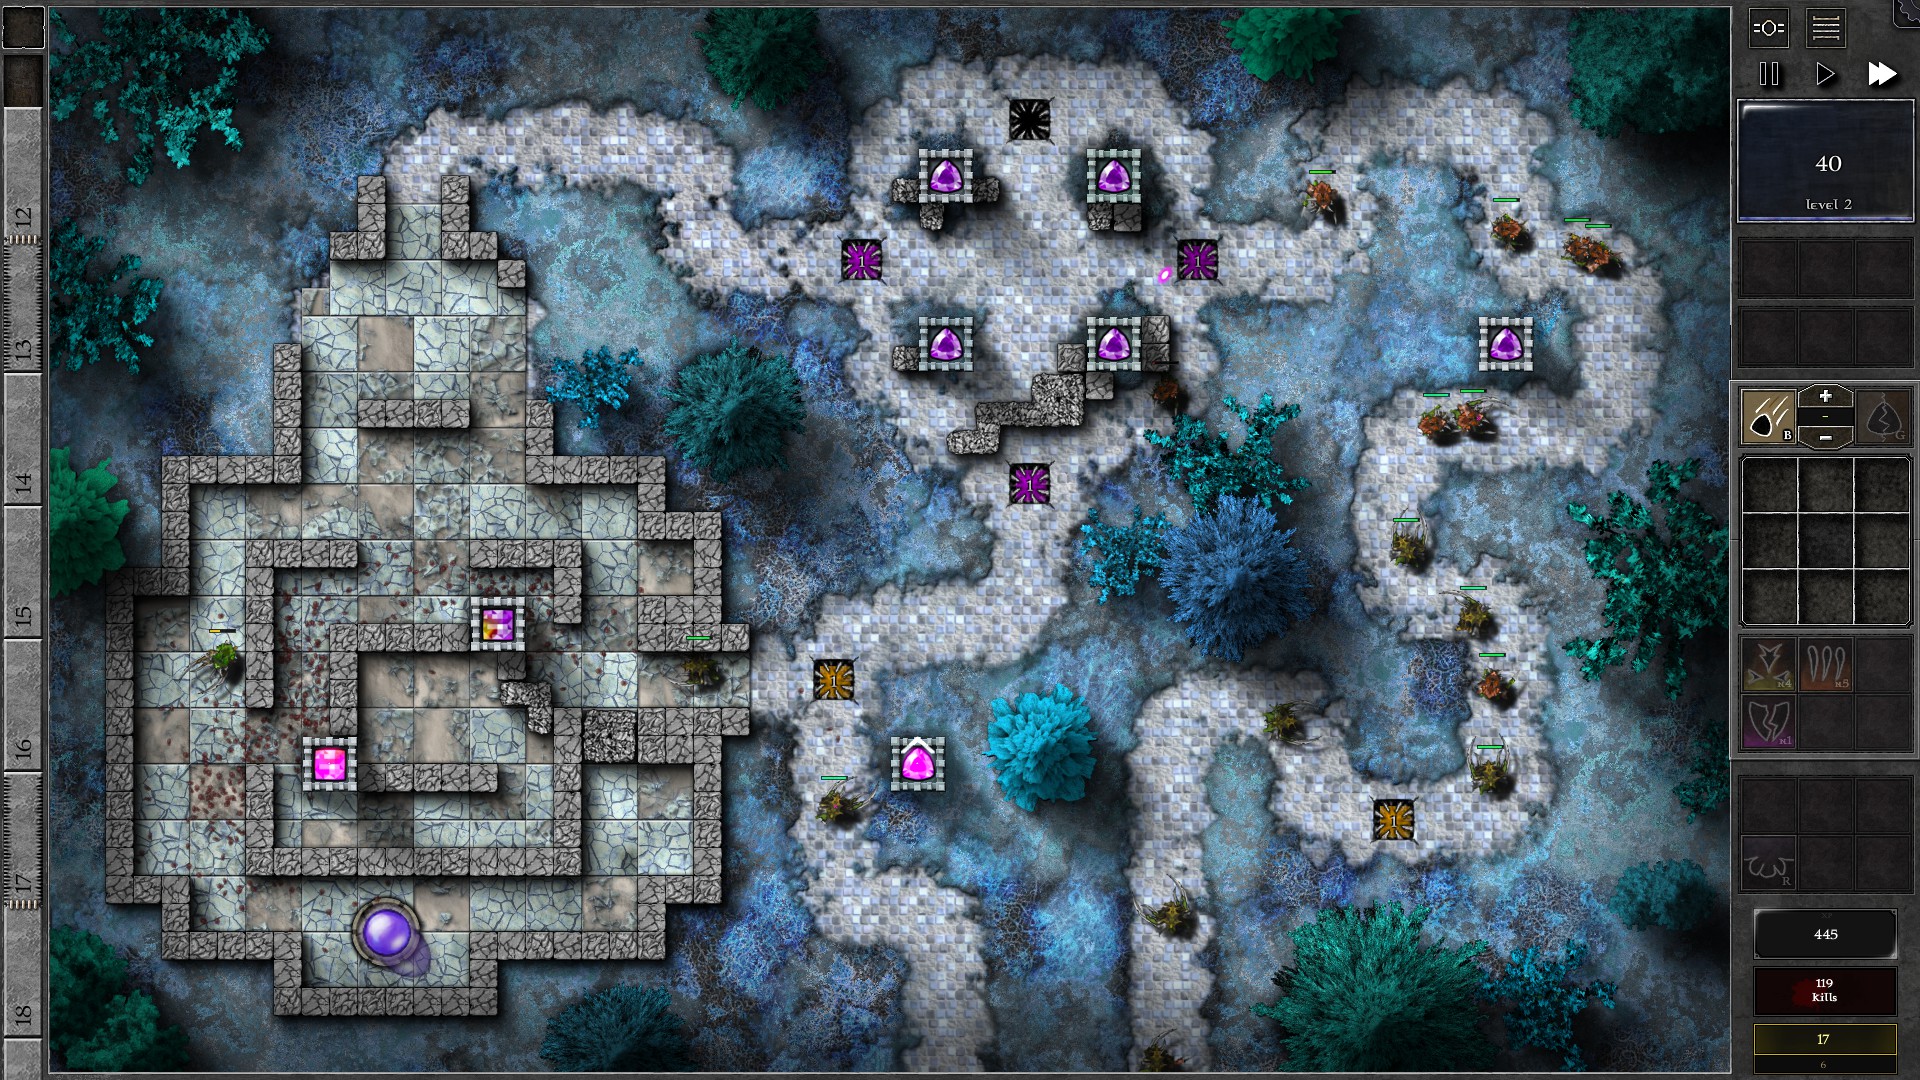
Now you need to start preparing for a tough linked w12/13. As your 2 g3 3p1y gem is killing monsters, start creating g1 purple gems. Set the g1 purple gems to target “Shielded/Highest Armor” and fill every existing towers and traps (except the trap at the very top of the screen) with these purple gems (total 9 gems). You should be able to do this before w12/13.
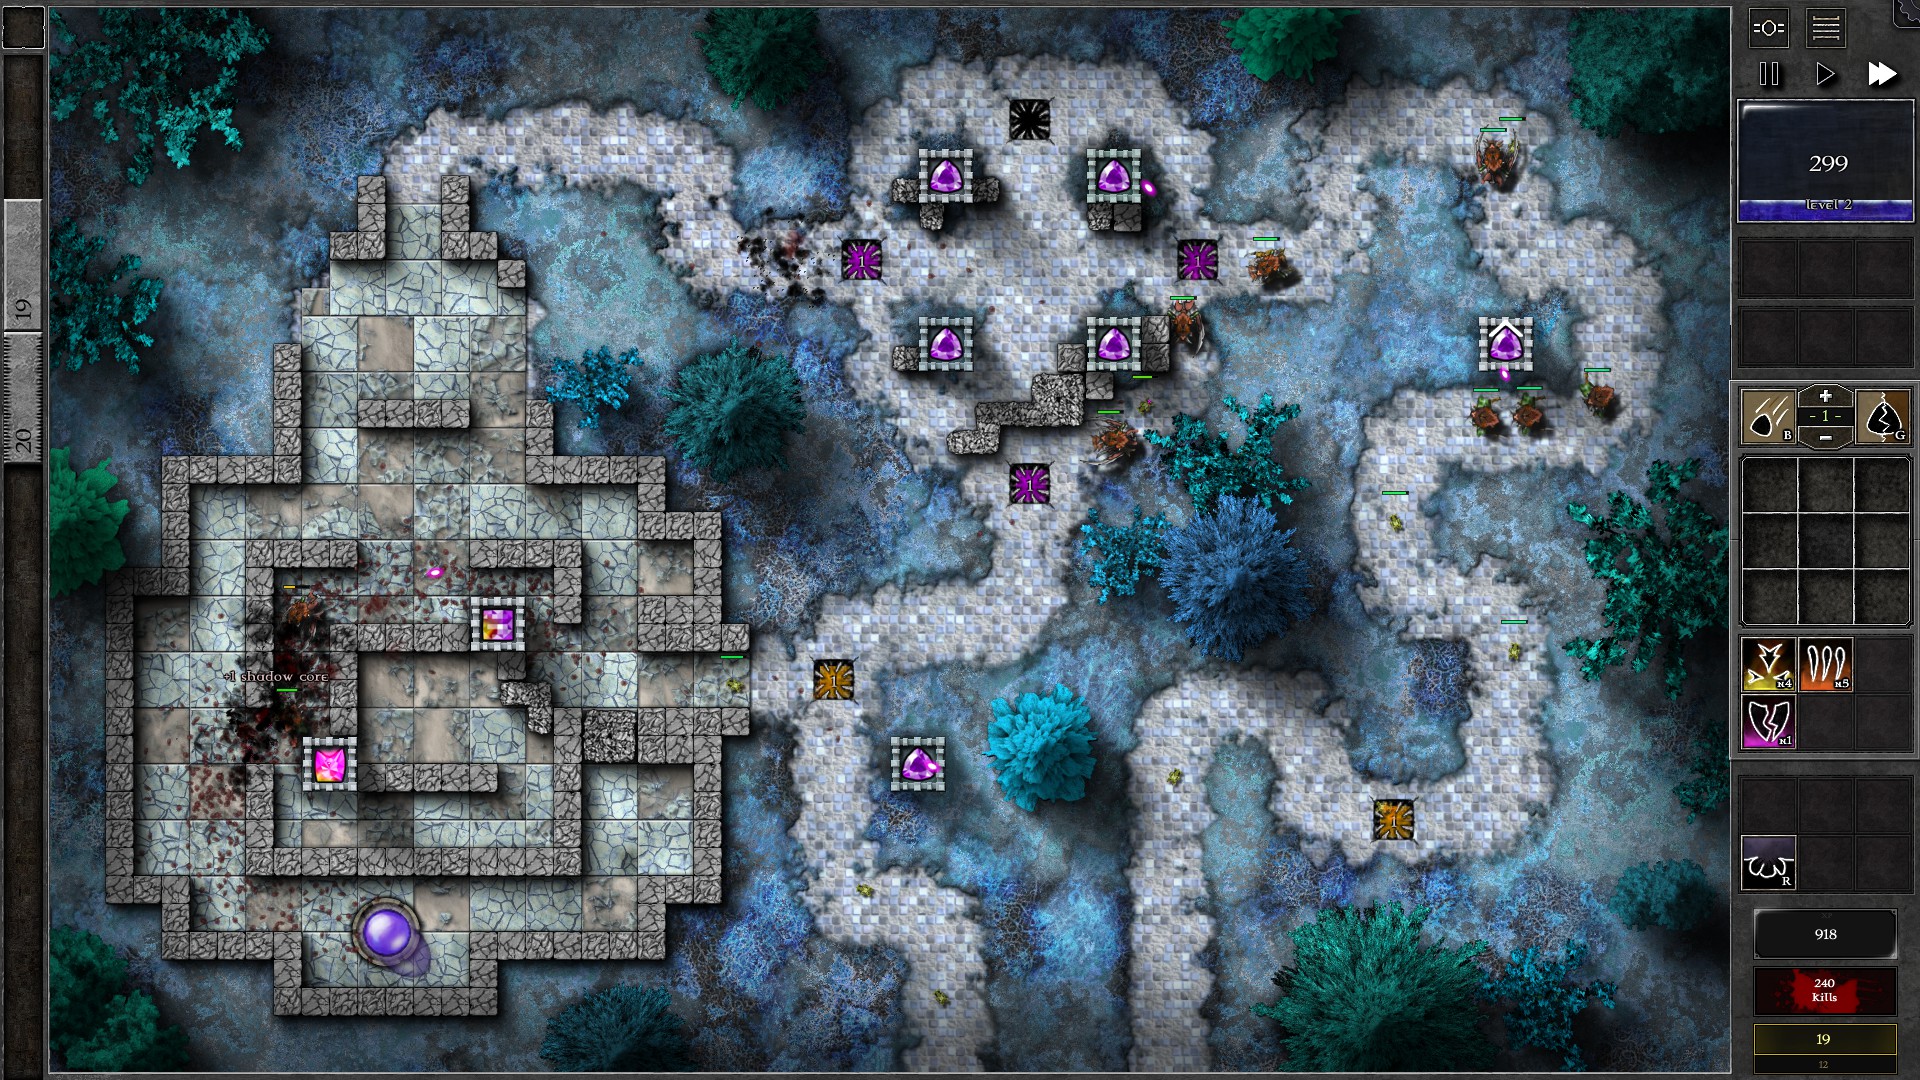
As w12/13 storms in, don’t spend any mana and save them for the occasional banishments. The g1 purple gems should shred off most armor from the monsters in the farther entrance, which helps greatly in dealing with them as they converge with the monsters from the closer entrance. Once you survive w12/13, keep the purple gems setup which will also help on the later waves. Upgrade the bottom left g3 3p1y to g4 as you gather enough mana and you will defeat the remaining waves.
009 – Field V1
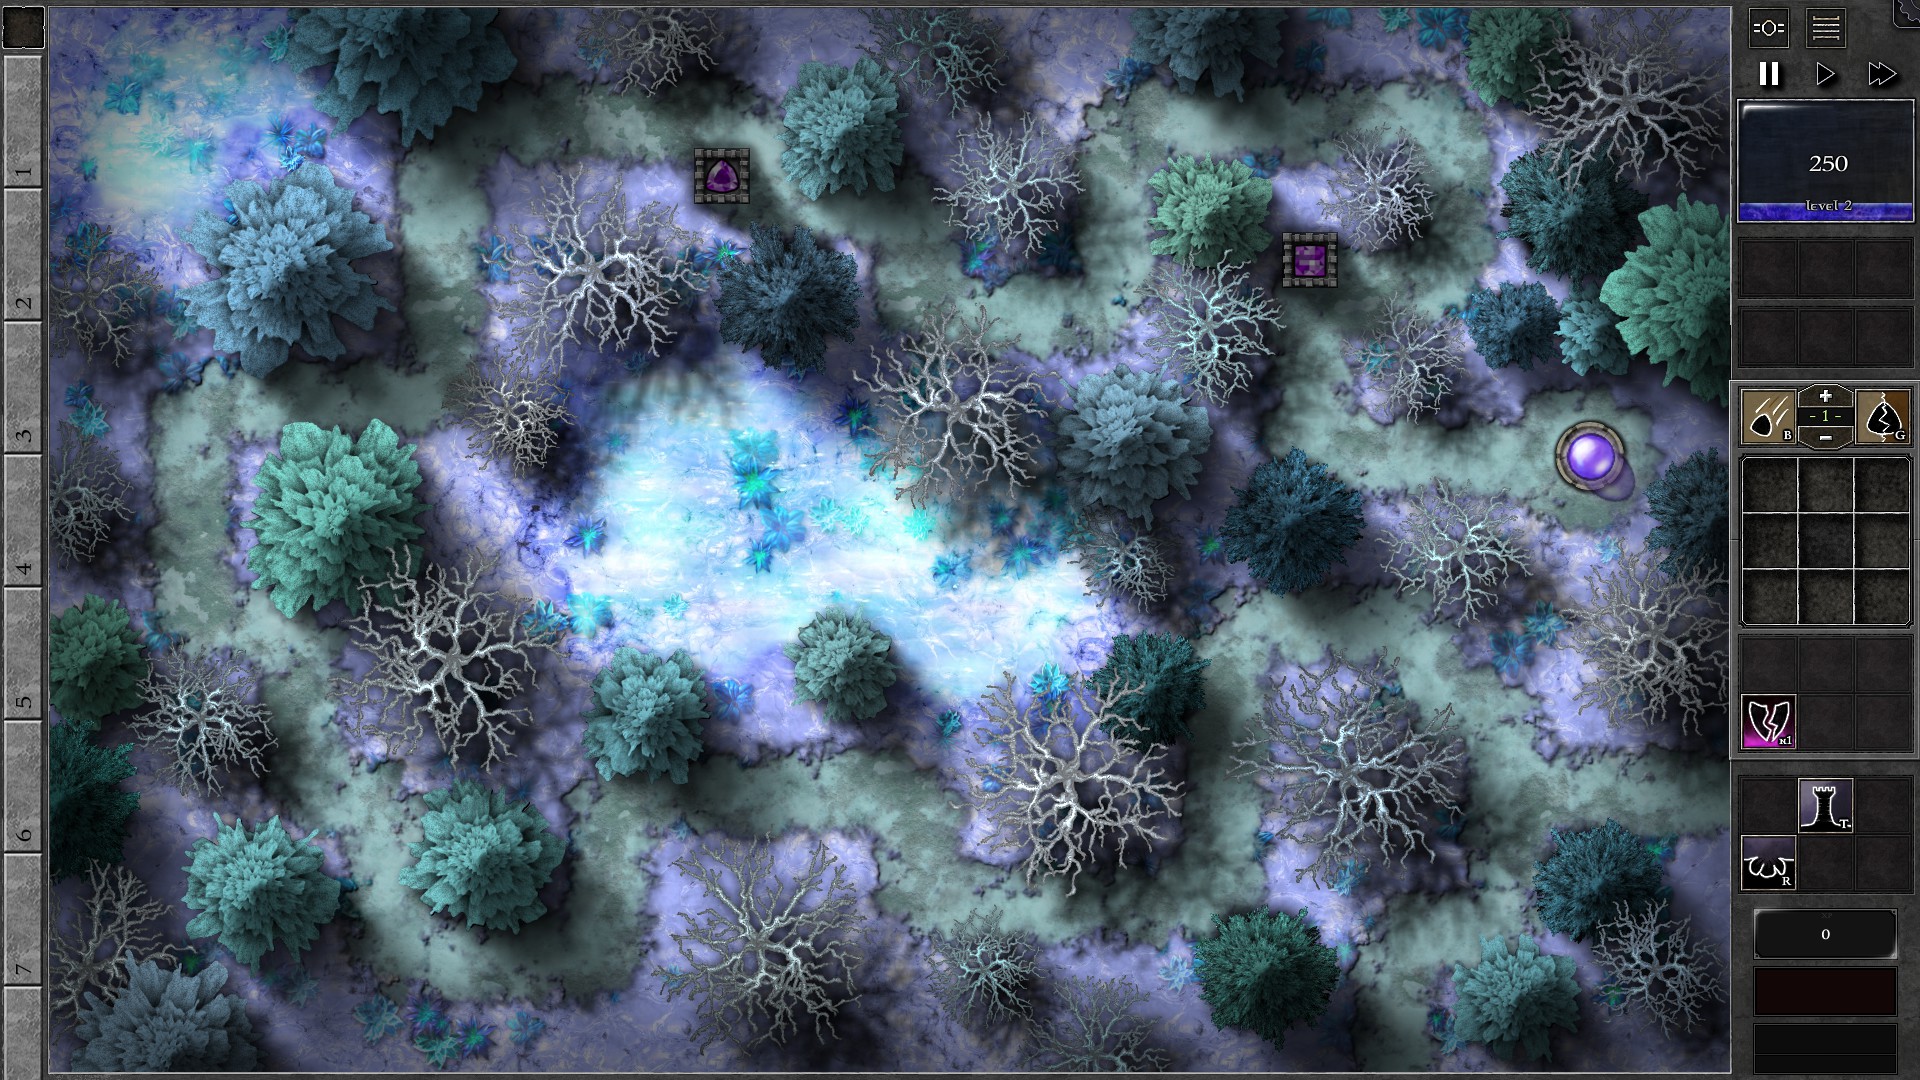
While the addition flora in this Trial heavily restricts your tower placements, you can still find some decent locations for your towers. Start by building 2 towers with a g3 and g1 gem respectively as in the screenshot. You should have enough mana to upgrade the g1 before the monsters arrive.thanks to the 6x mana regen rate.
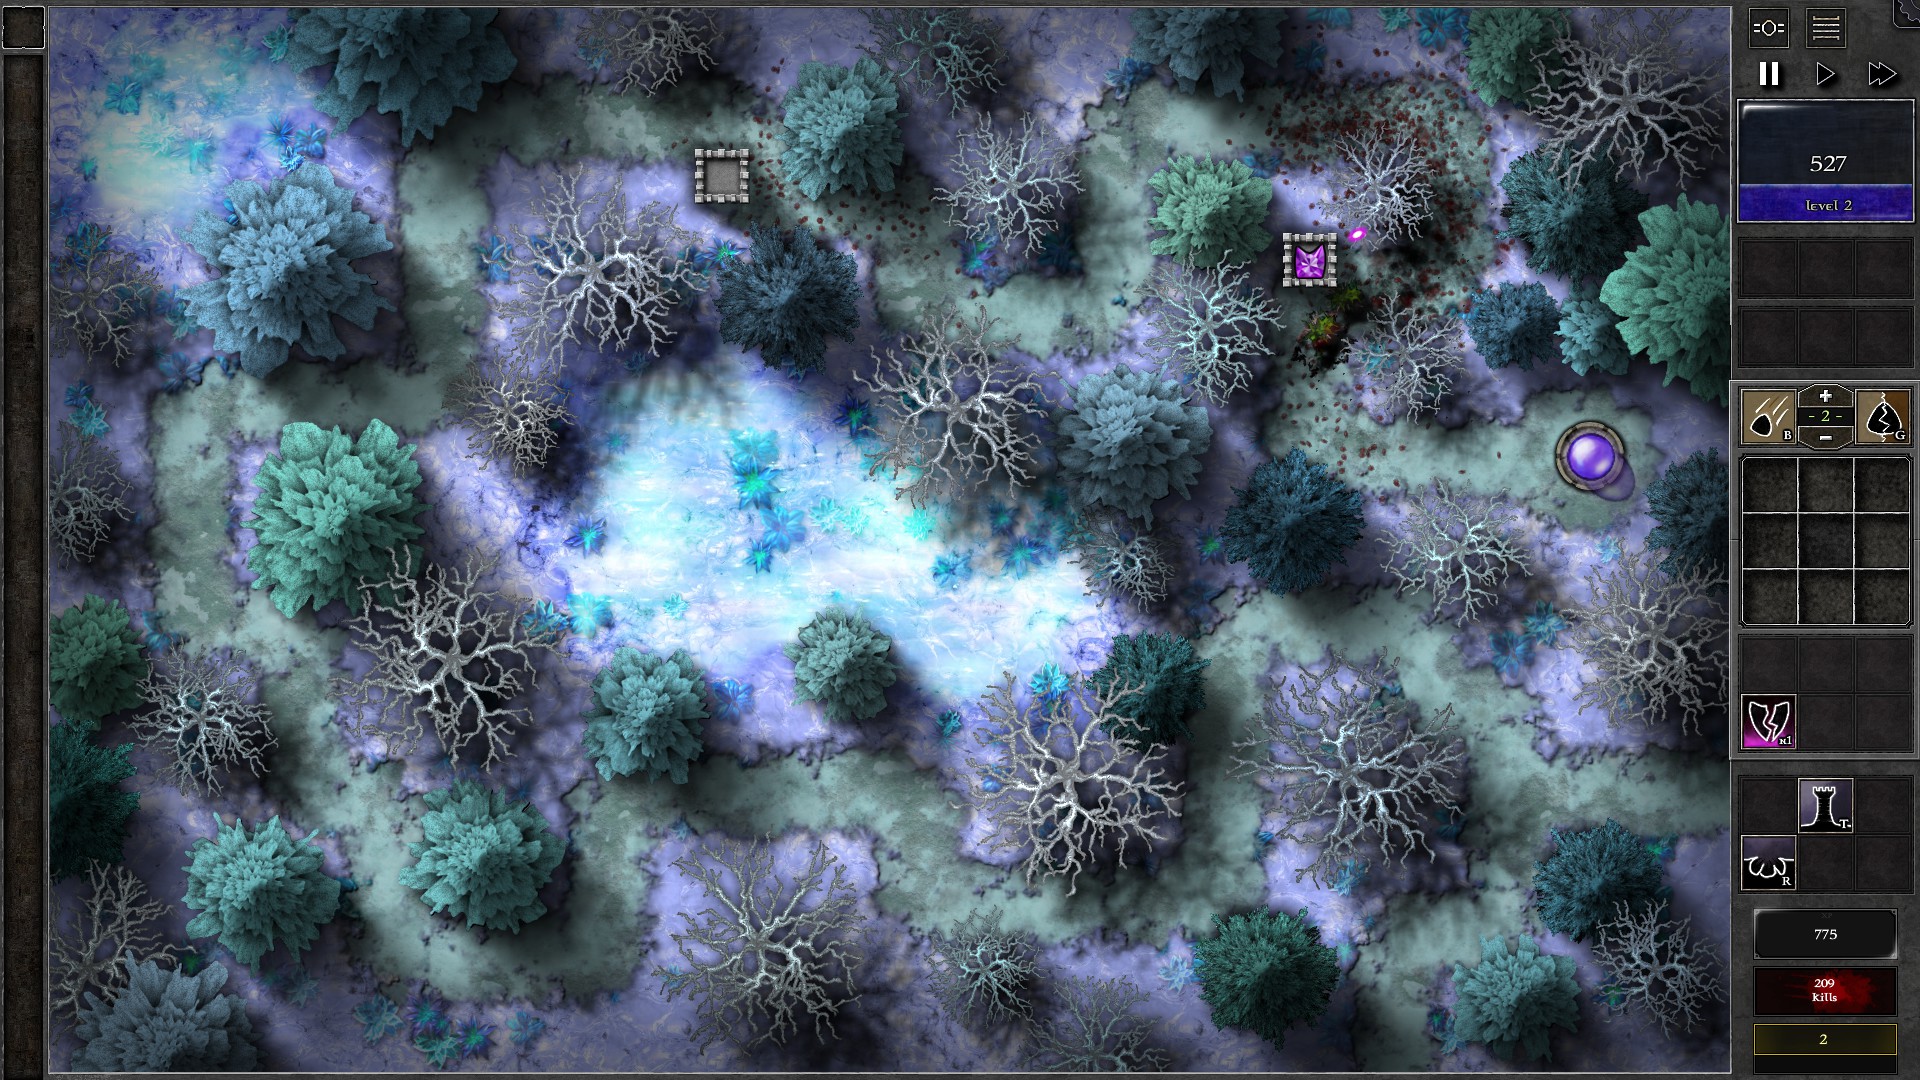
At around w10 you should have enough mana to upgrade the g2 gem. Now, gather enough mana to combine the 2 g3 gems, but be careful of the monsters; any banishment during the resocketing period is likely fatal. The combined g4 gem should be strong enough to take on the monsters, although there might be some pressure from the linked w17/18.
010 – Field V2
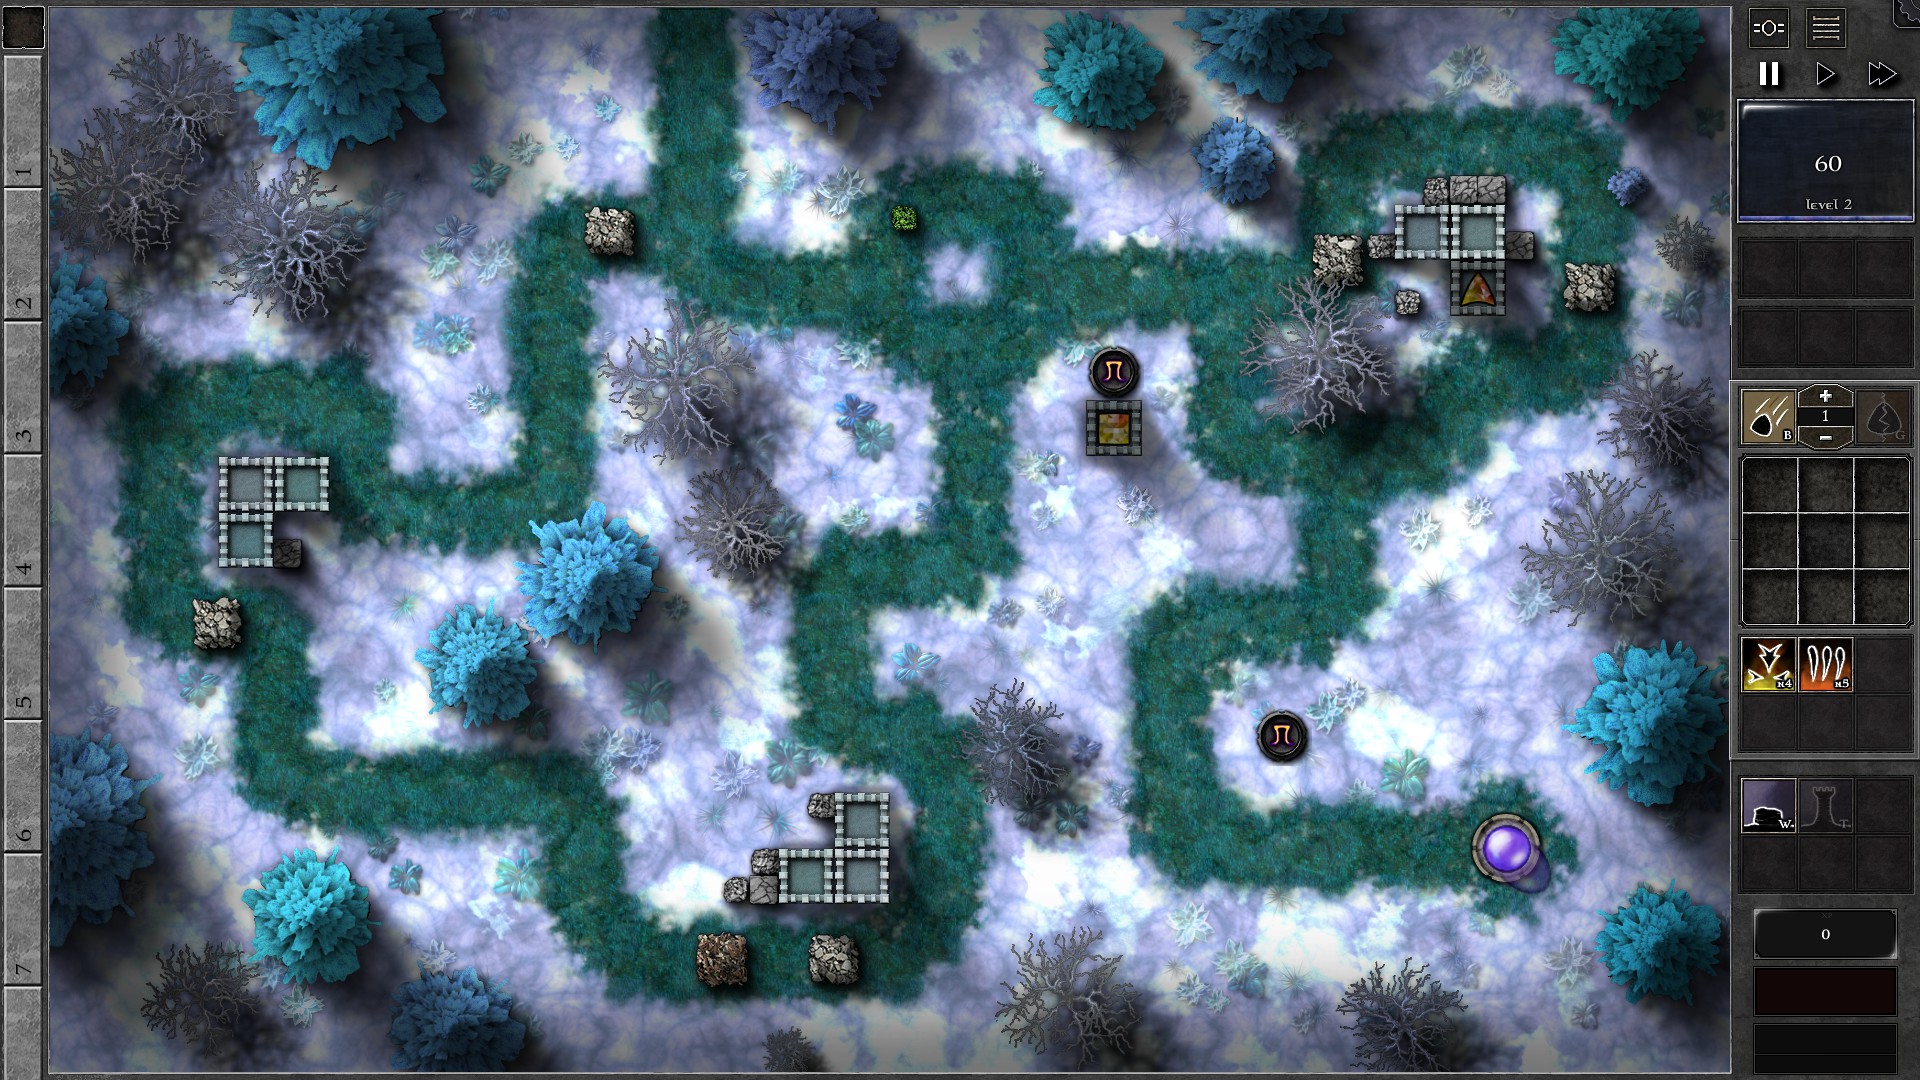
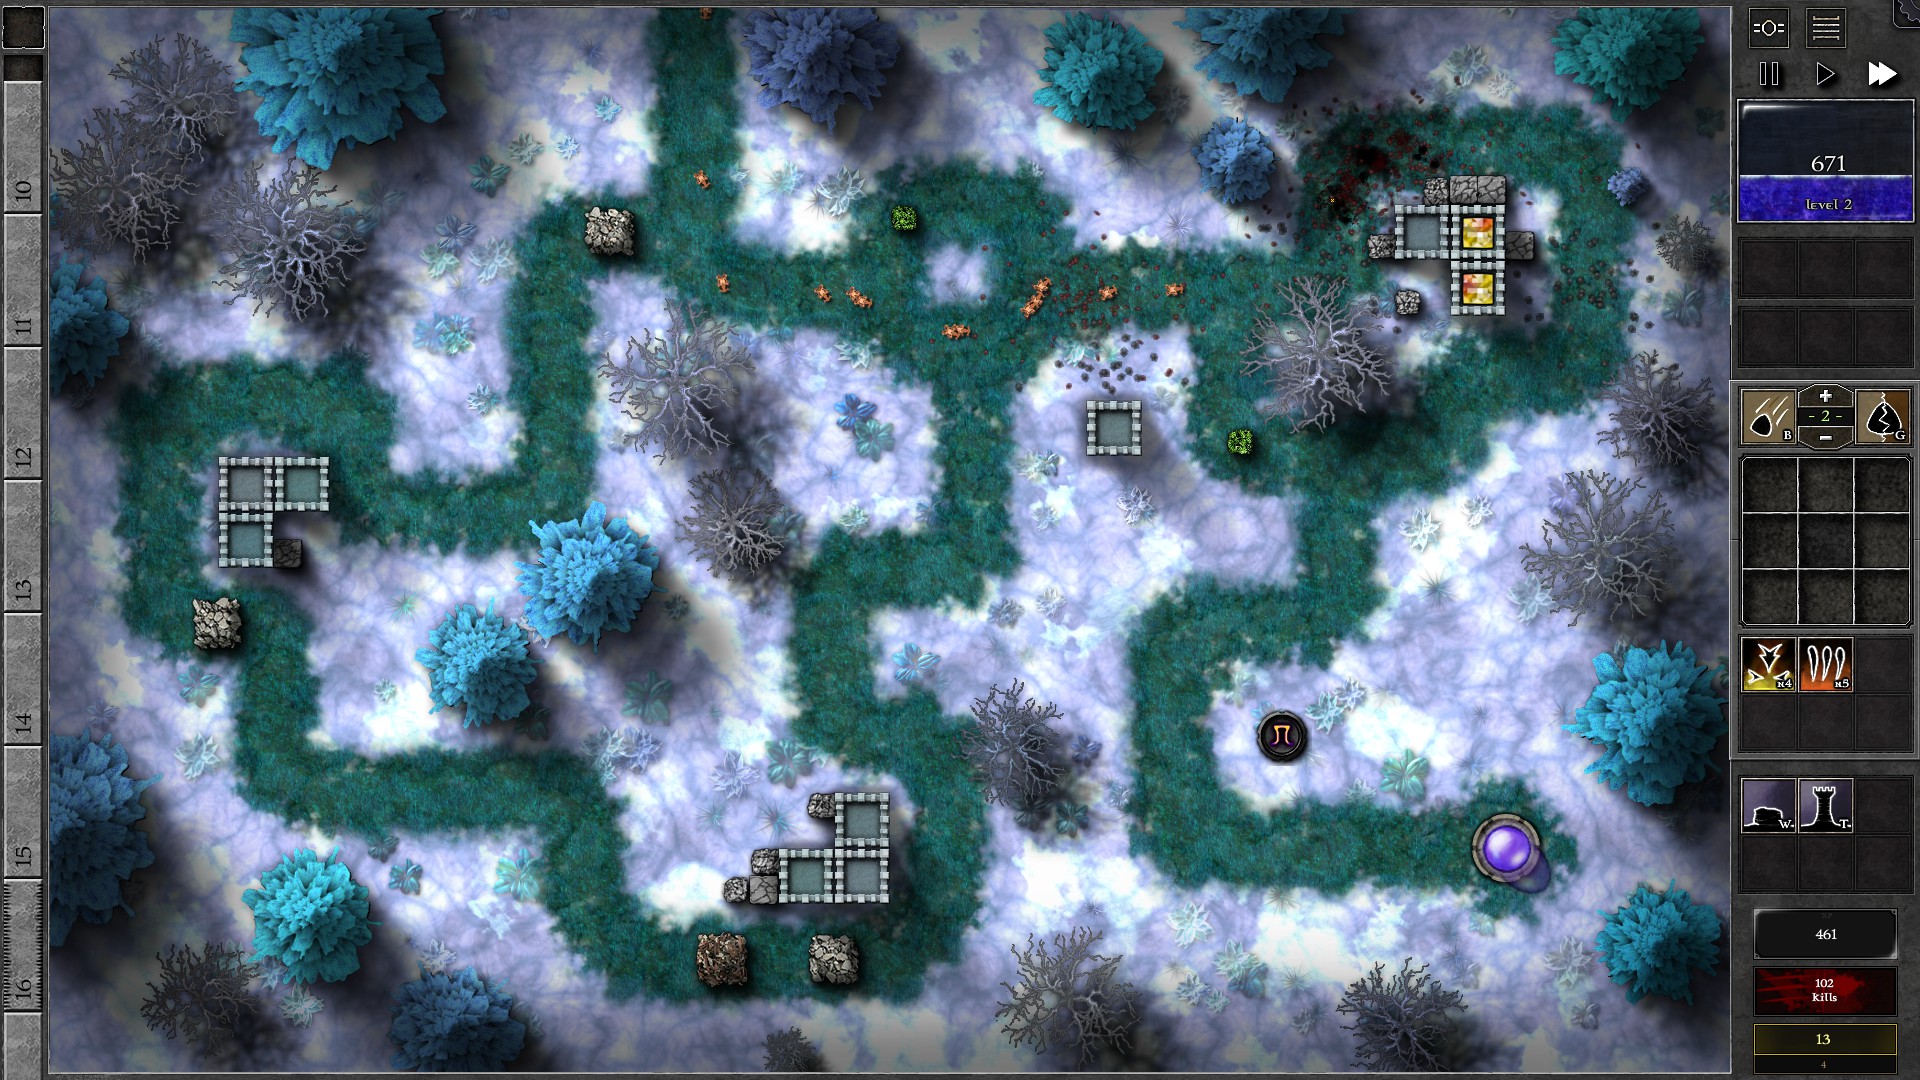
Setup the field as shown in the first screenshot with walls, a g3 3y1o gem and a g2 y/o gem. Set the g2 gem to target “Structures”. Start the waves and your g2 gem should soon take down the 2 Barricades blocking the path to the upper right corner.
Once the 2 Barricades are gone, build extra walls to force monsters to go through the upper right corner. Move your g3 gem to the upper right towers and set the g2 gem to target “Nearest to Orb”. At around w5 you should have enough mana to create a g2 yellow gem and combine with the g2 y/o gem. Now you have 2 3y1o gems which you continue upgrading them as you gain enough mana. 2 g4 gems will be enough to fend off all the monsters in this Trial.
011 – Field V3
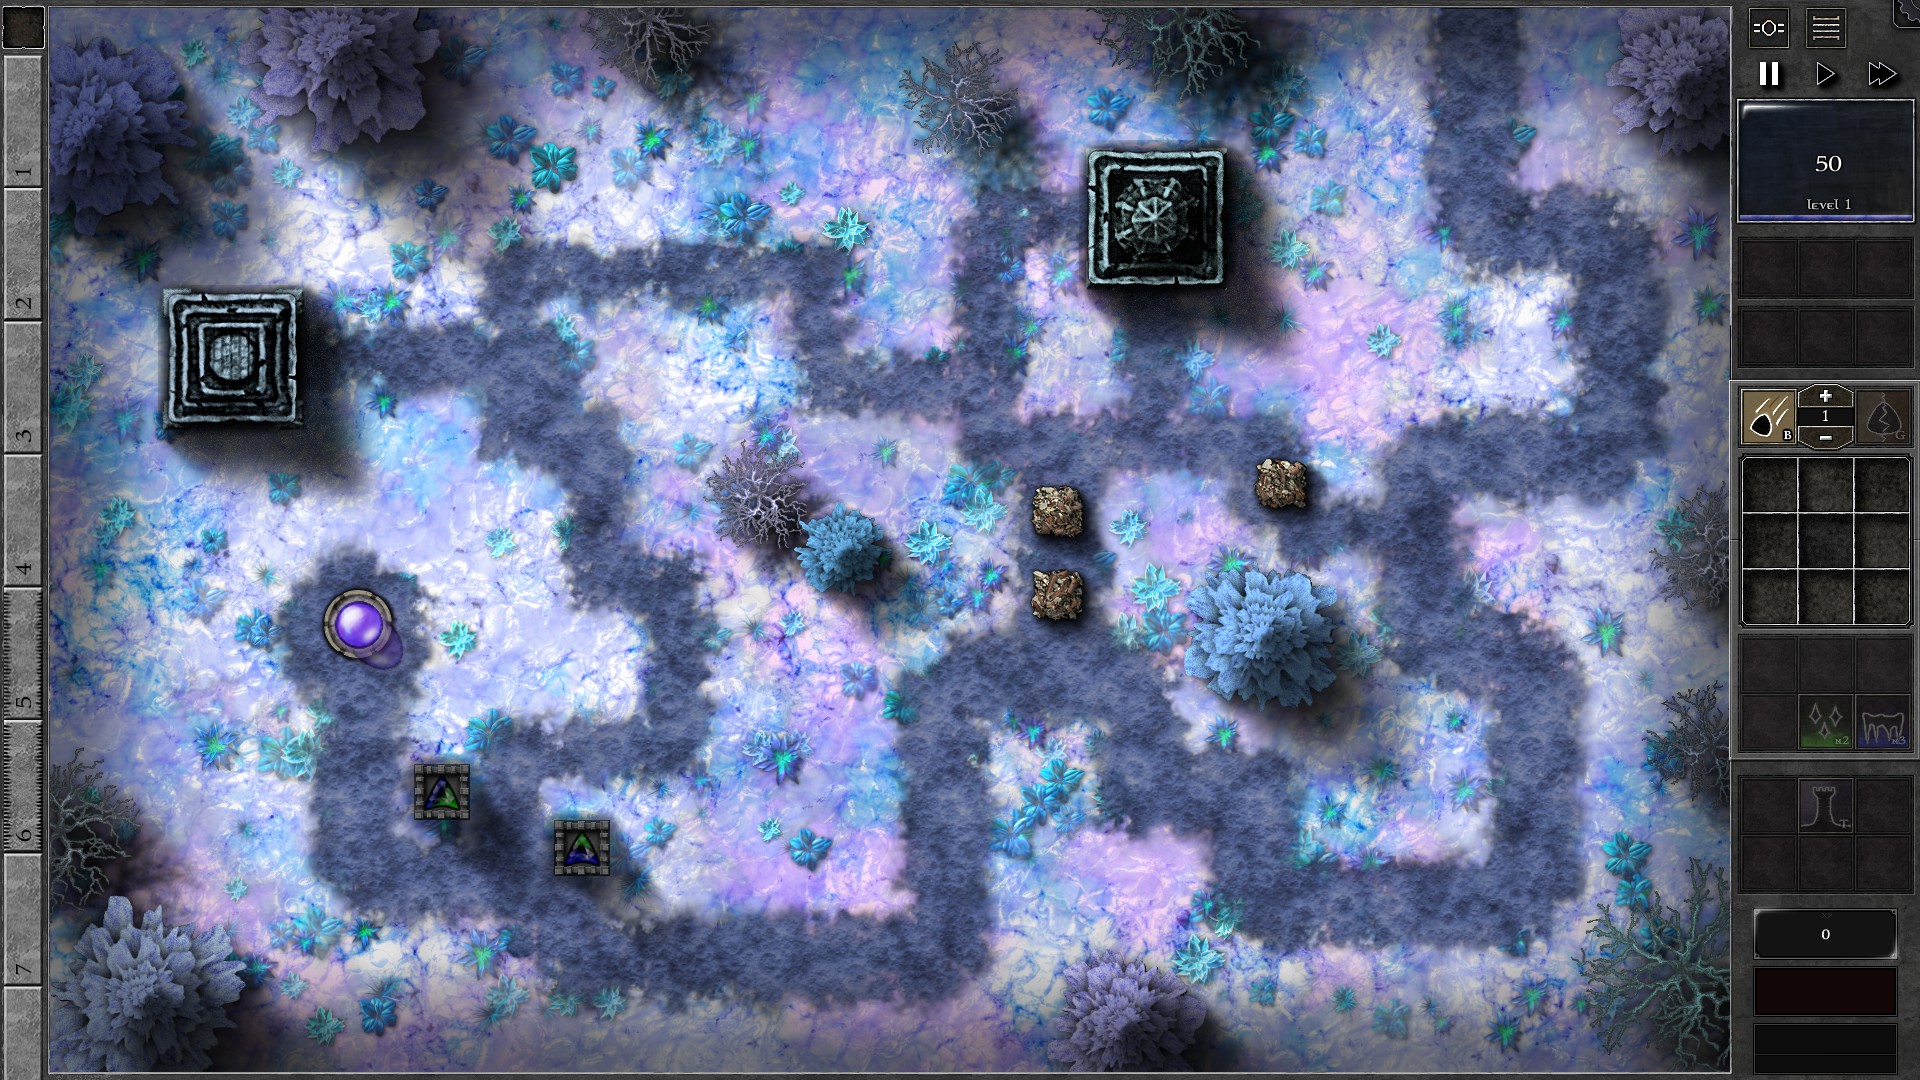
Another straightforward Trial. Setup the towers as shown with 2 g2 g/b gems. Upgrade the gems as you collect mana, while being cautions of monster formations; The monsters arriving from the top right may arrive at the towers just as monsters from the next wave coming from the nests arrive. The first upgrade to g3 should be available at around w7 and the second one around w12. You will then further upgrade both gems to g4 (first one at w17-19, second one before w24) which will survive the second half of the waves.
012 – Field V4
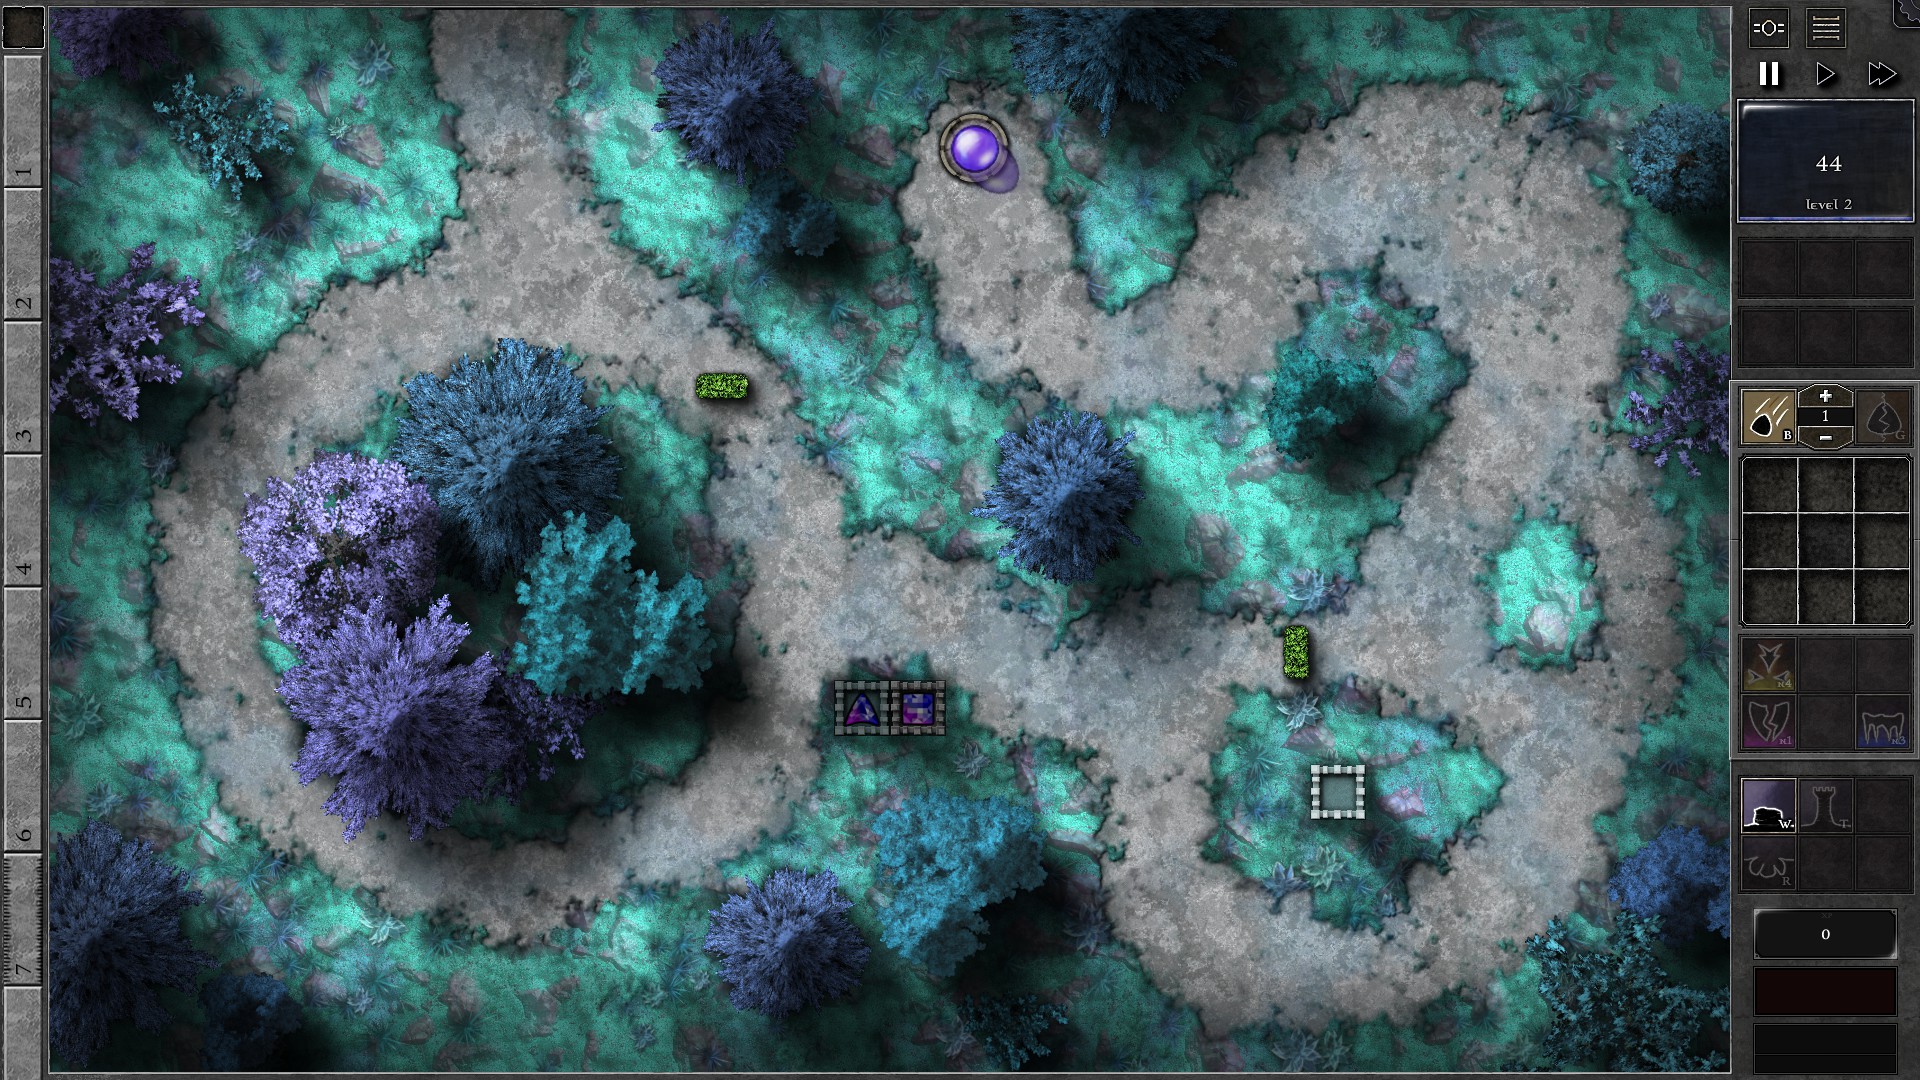
Build walls, and a tower close to the existing tower in the centre of the field. Insert a g3 p/b gem and a g2 p/b gem into the 2 towers as shown. As you collect mana, upgrade the gems evenly (upgrading milestones are w5, w10, w14-15 and w21). You may get a few leaks in w7 and possibly w20 but this should not be much of a concern unless you are upgrading the gems and end up with no mana to banish monsters. You will end up with a g5 + a g4 as you defeat the monsters in this Trial.
013 – Field R1
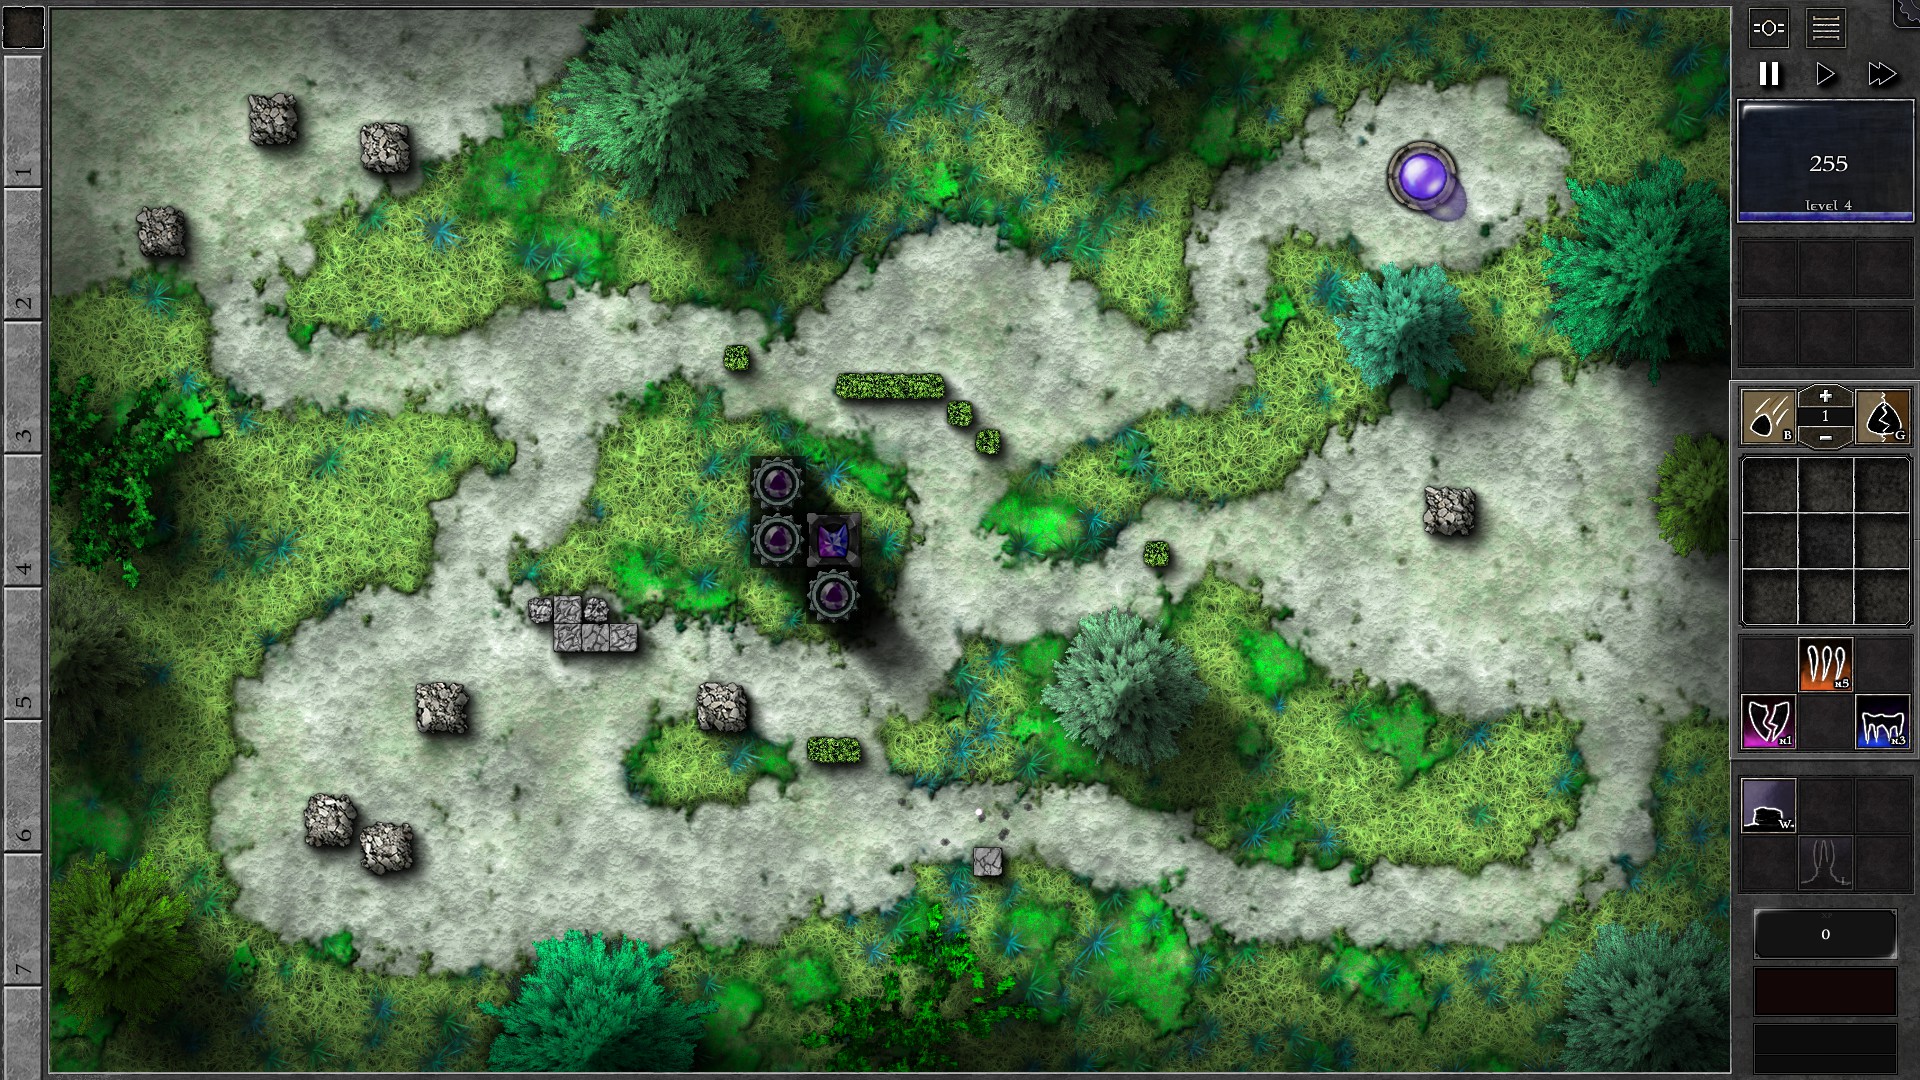
Destroy the walls at the bottom to open up a new path, then build walls and a lantern as shown. Insert a g4 p/b gem into the lantern and g1 p gems into the 3 amplifiers. With the coverage of the lantern gem, you should have no issues killing the initial monsters with zero leaks.
At w10-11 you should be able to afford upgrading the lantern gem into g5. After that, upgrade your amplifier gems to g2 p/b (combine g1 b into the g1 p) and you are set for the remaining waves.
014 – Field R2
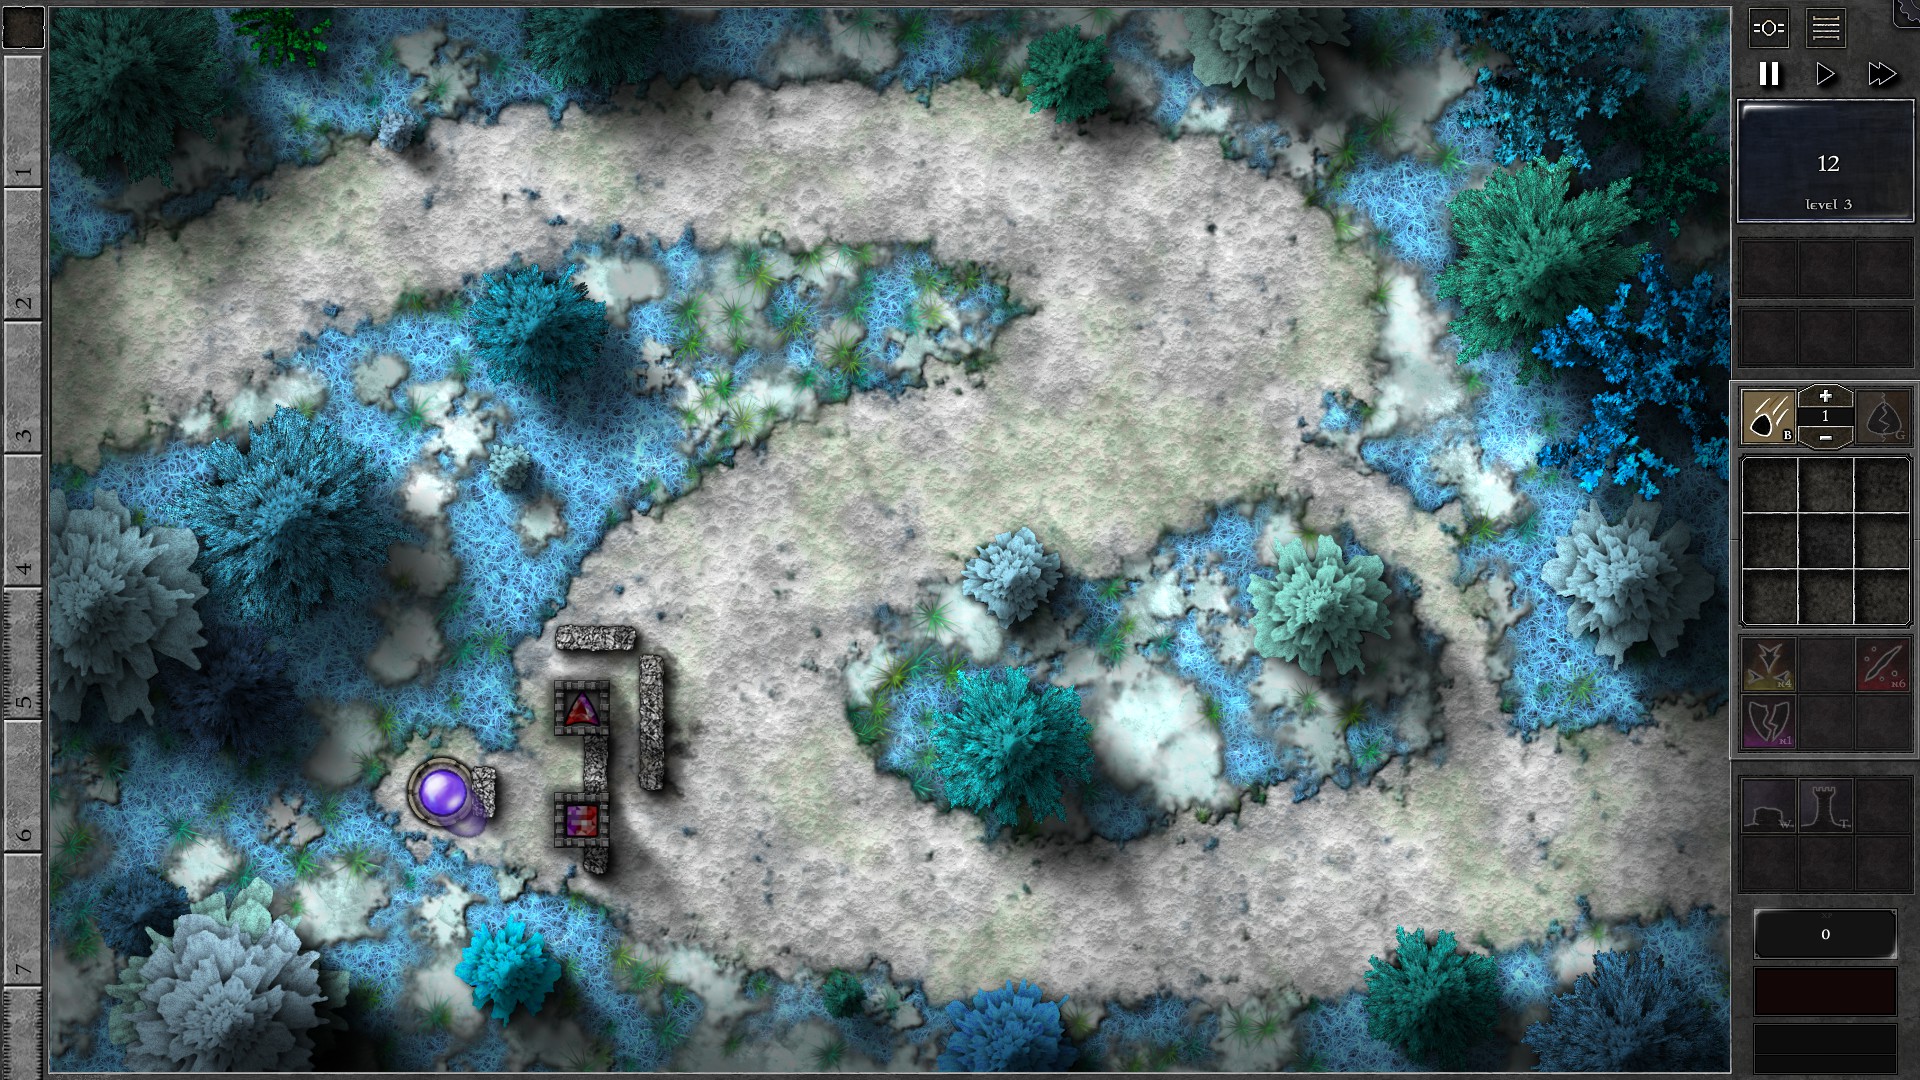
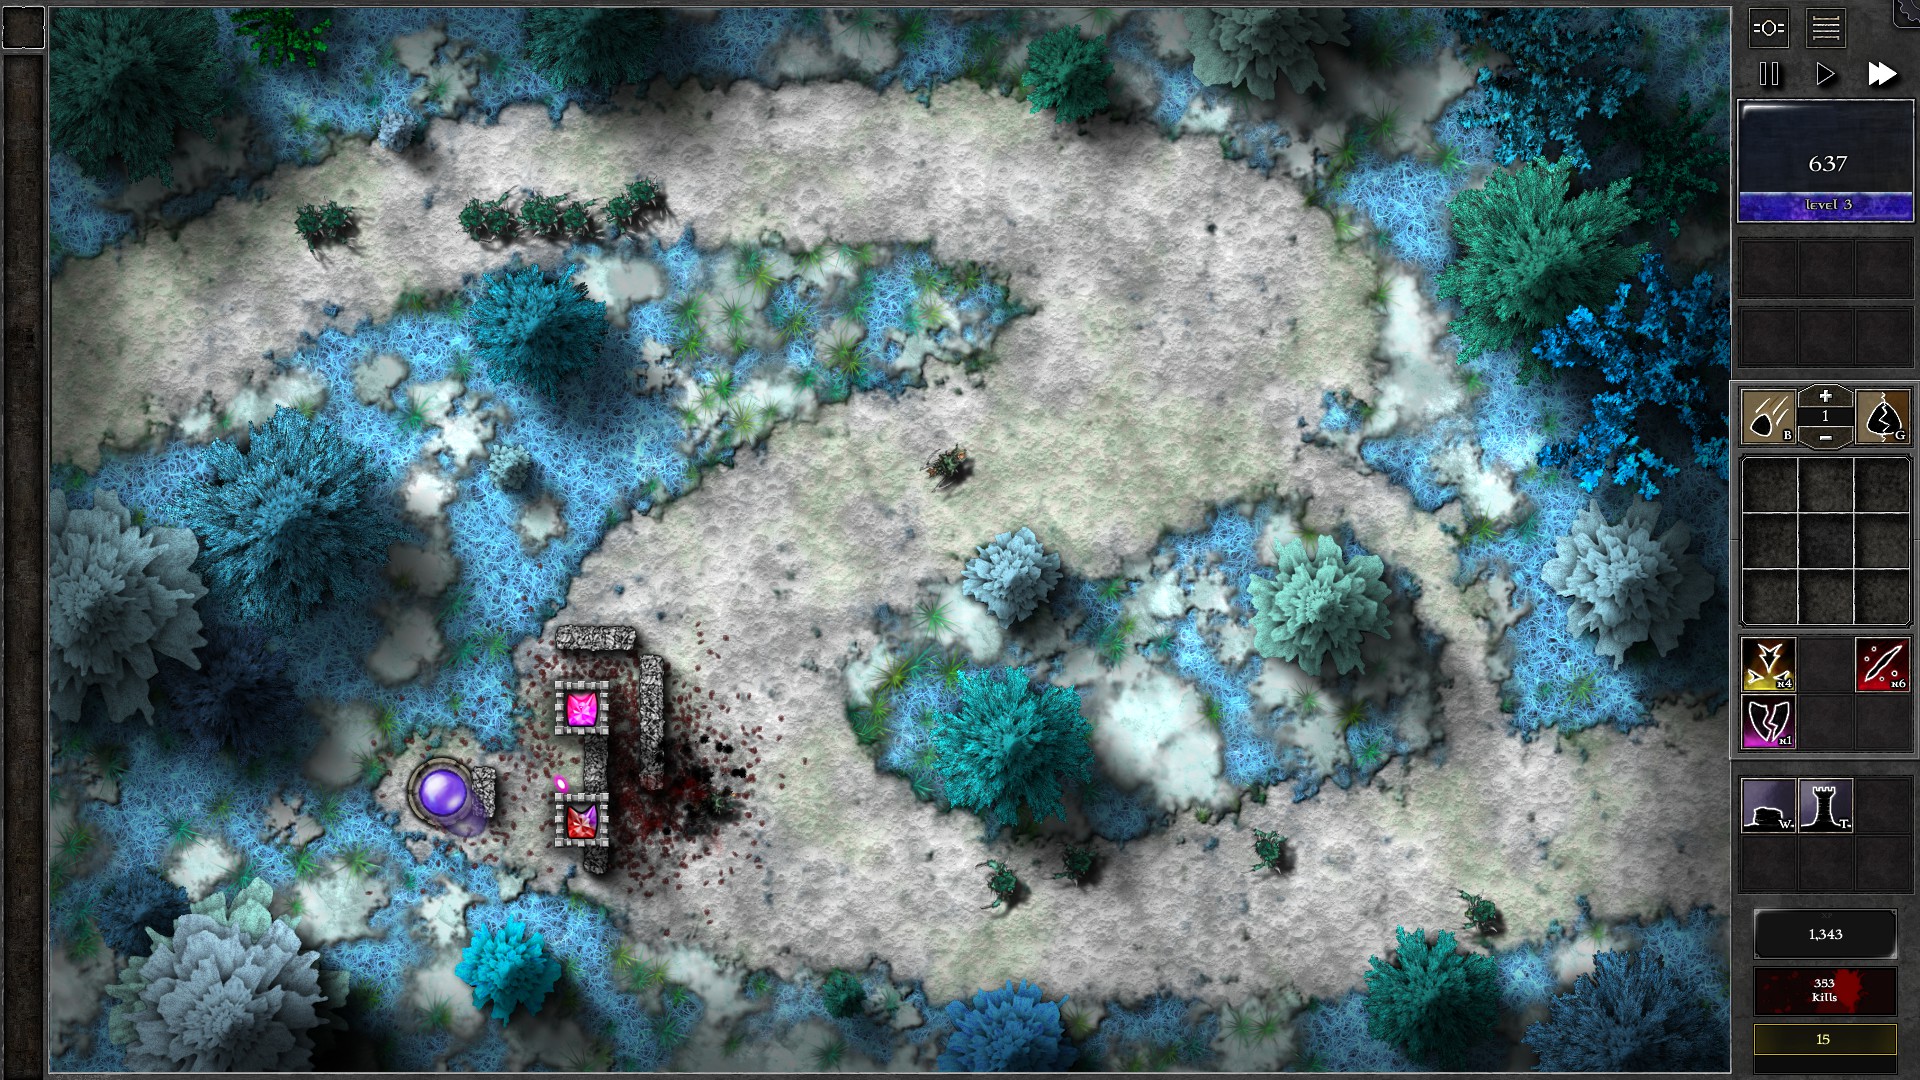
Start the field with walls, 2 towers, a g3 p/r gem and a g2 p/r gem. At around w6 you should be able to upgrade the g2 gem into g3. In w8 the swarmlings tends to spawn close to w9 reavers as a large horde which may put some pressure on your defenses, but you should have enough mana to banish a few monsters.
Keep gathering mana by killing monsters and you should be able to upgrade the 2 gems into g4 before the last wave and finish the Trial (around w13-14 for the 1st gem, around w18 for the 2nd). Try your best to get both g4 gems before w19 as the tight formation of monsters in w19 may require some banishments.
015 – Field R3
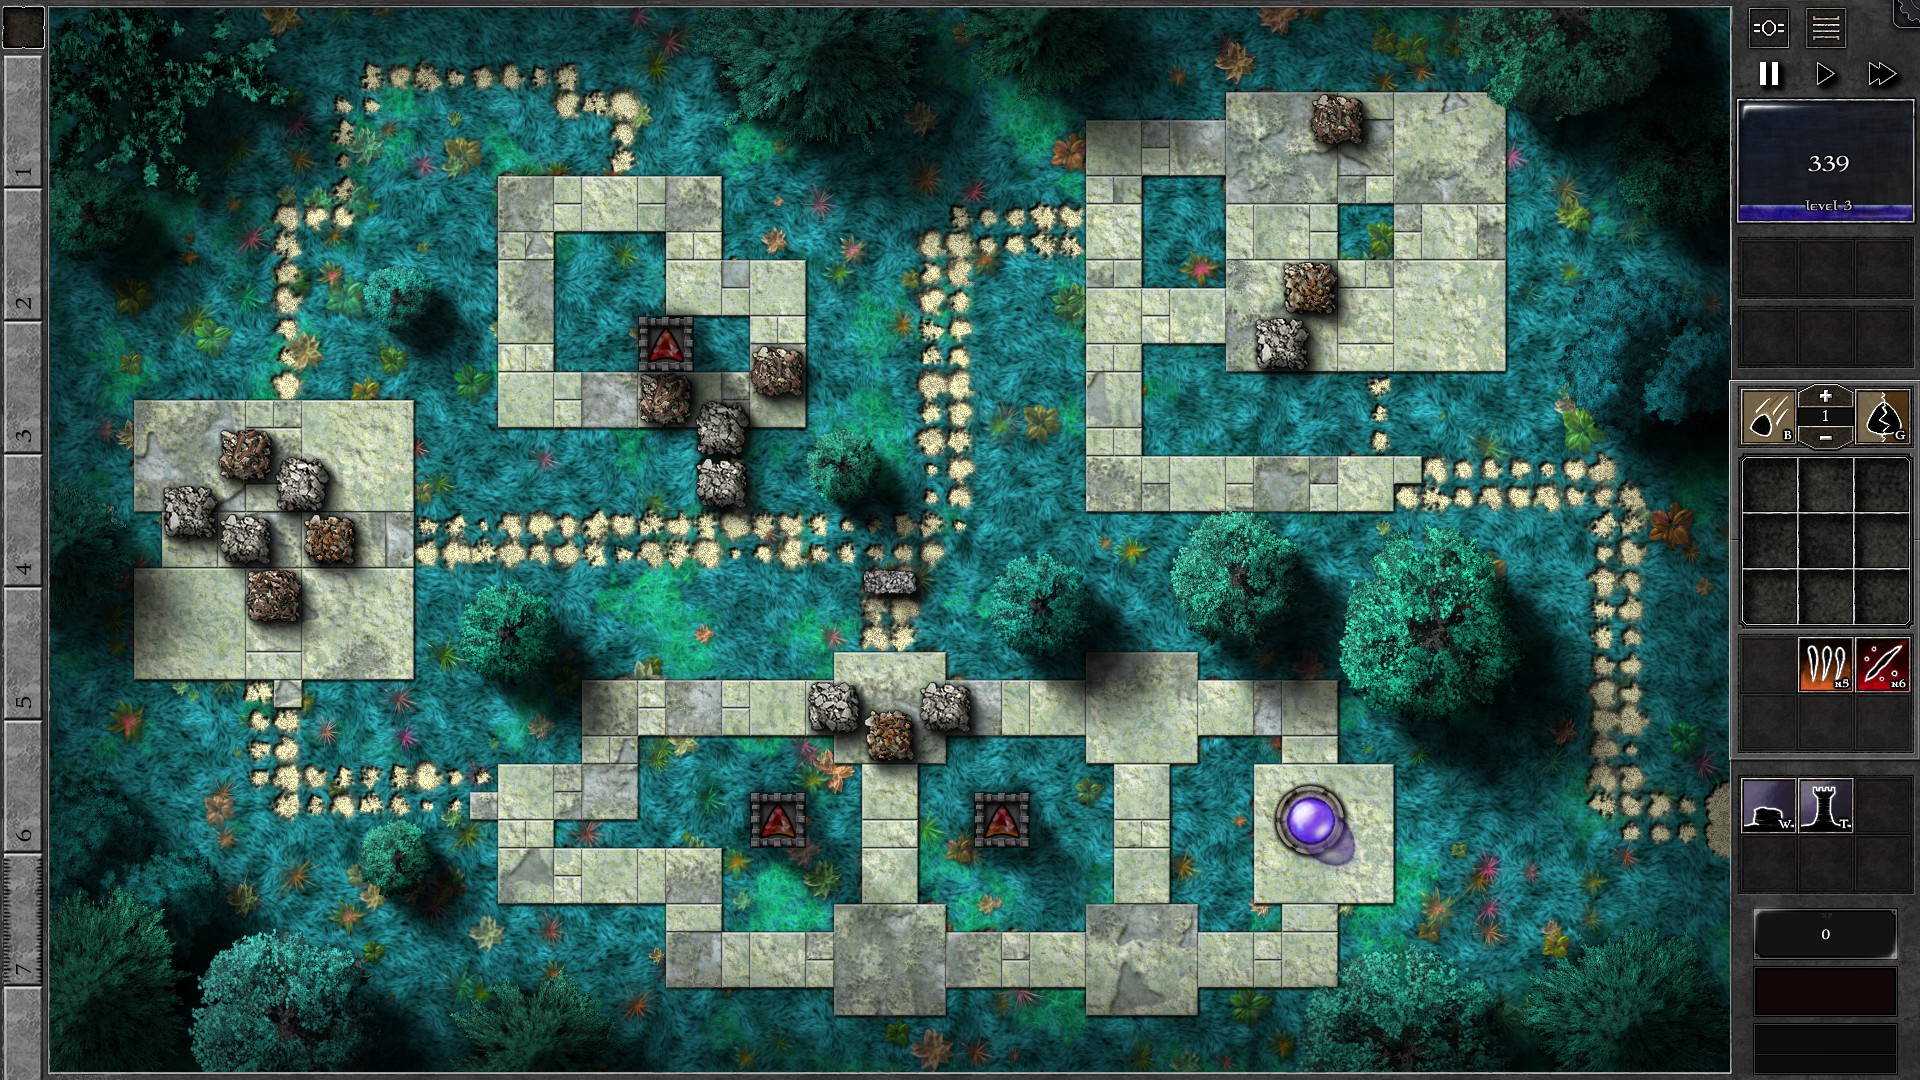
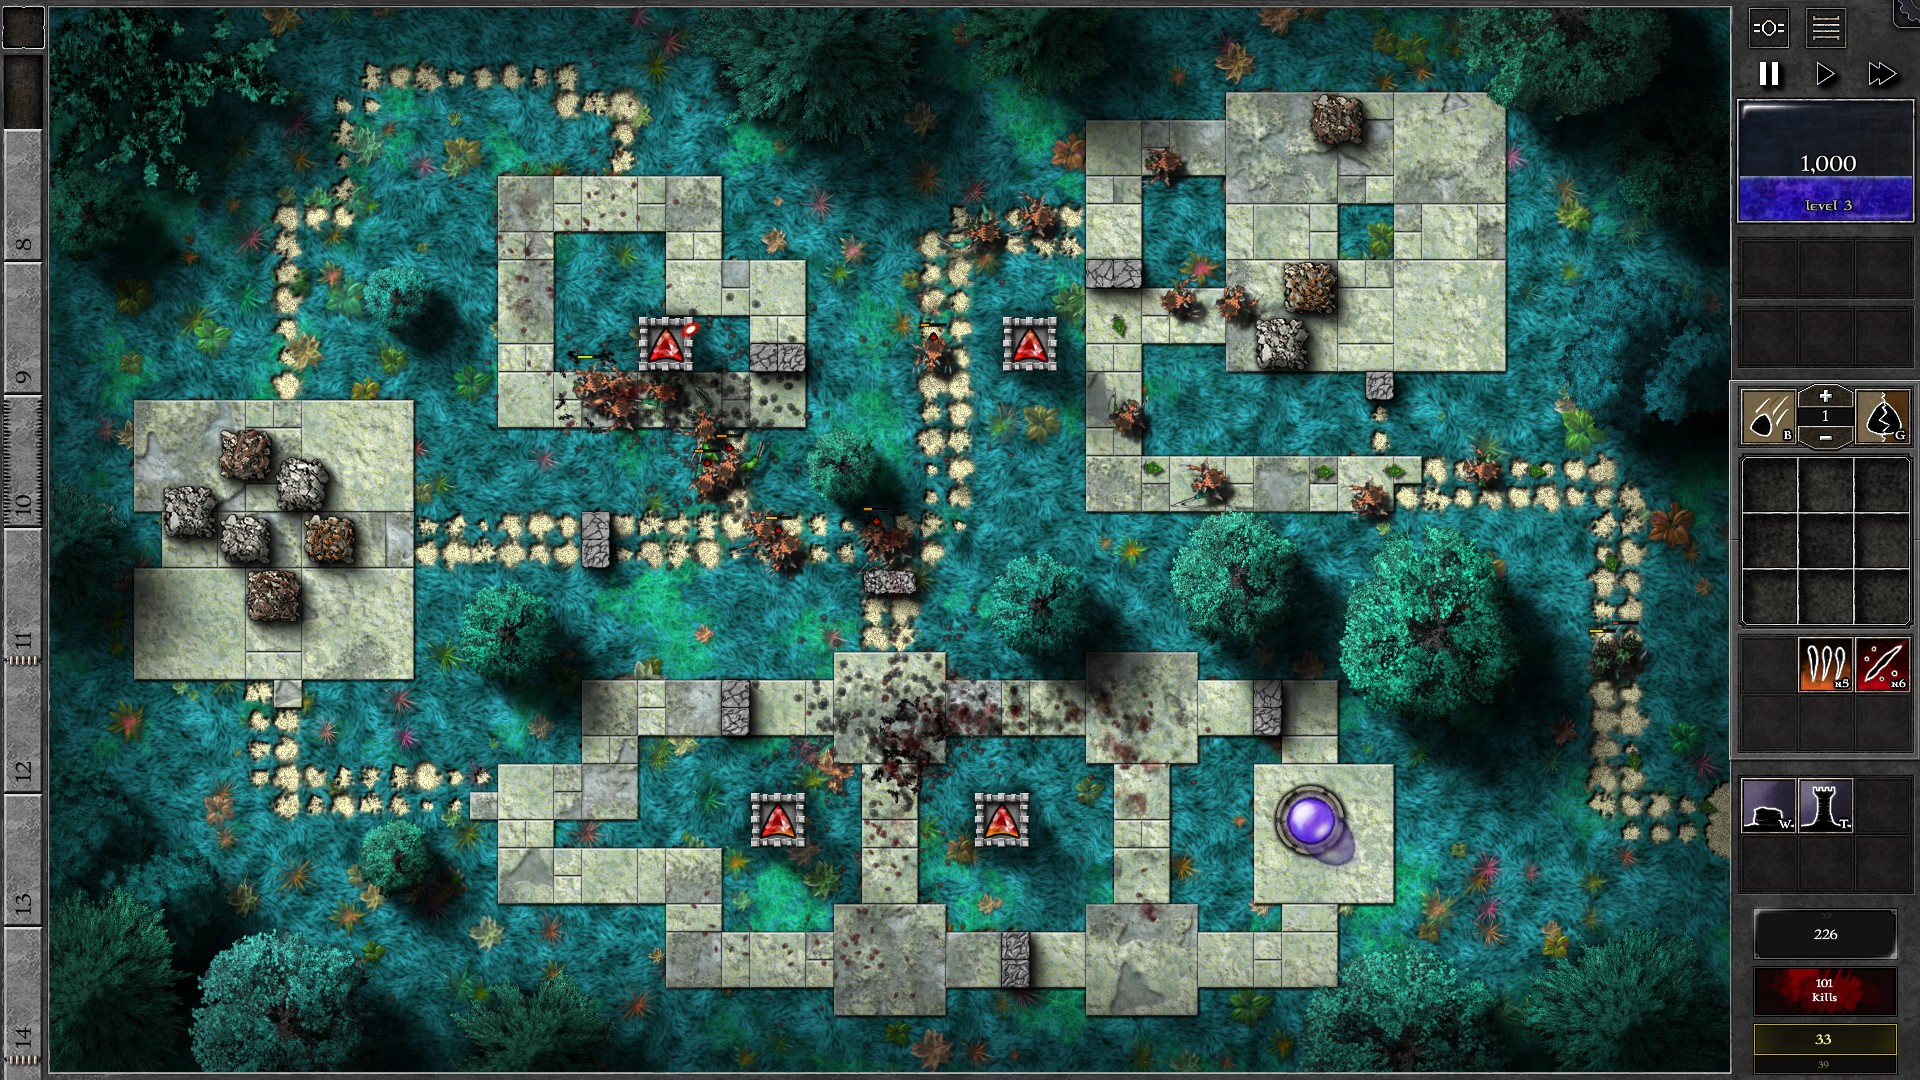
Start the field as shown in the first screenshot with 3 g2 r/o gem all targeting “Structures” to demolish the barricades around them. Once the barricades are destroyed, revert the gems to target “Nearest to Orb” and start building additional walls to further lengthen the path (as shown in second screenshot) and let the top left tower join the fight. Note that monsters will likely arrive at the bottom 2 towers before the upper 4 barricades are destroyed. Quickly deploy the 4th tower (top right) with the same g2 r/o gem after you gather enough mana.
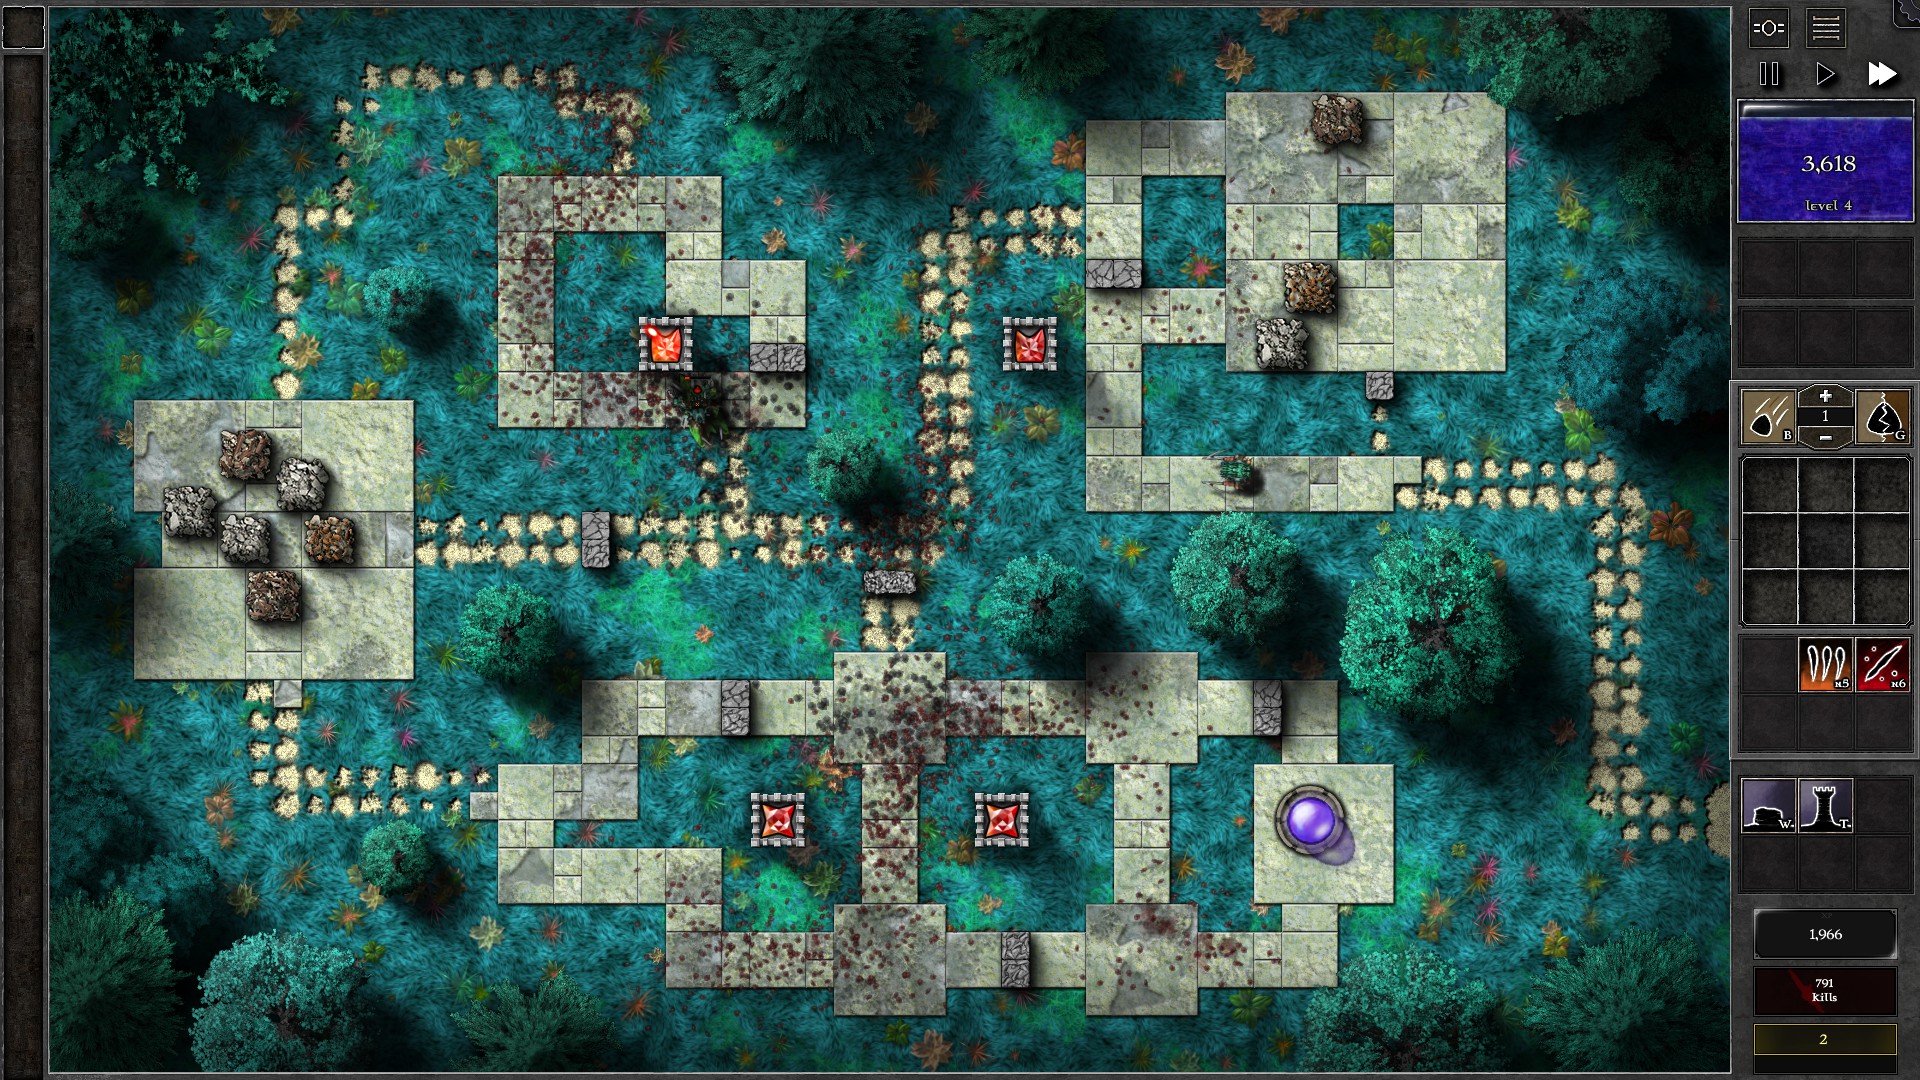
After all 4 towers are deployed, start upgrading the gems evenly in the 4 towers. All 4 gems should have upgraded to g3 by w11/12 and g4 by w23/24. Watch out when upgrading gems as you will likely need to banish some monsters that you cannot kill on time during the several linked waves. Further upgrade the bottom 2 gems to g5 as you collect mana and you should be set for the remaining waves.
016 – Field R4
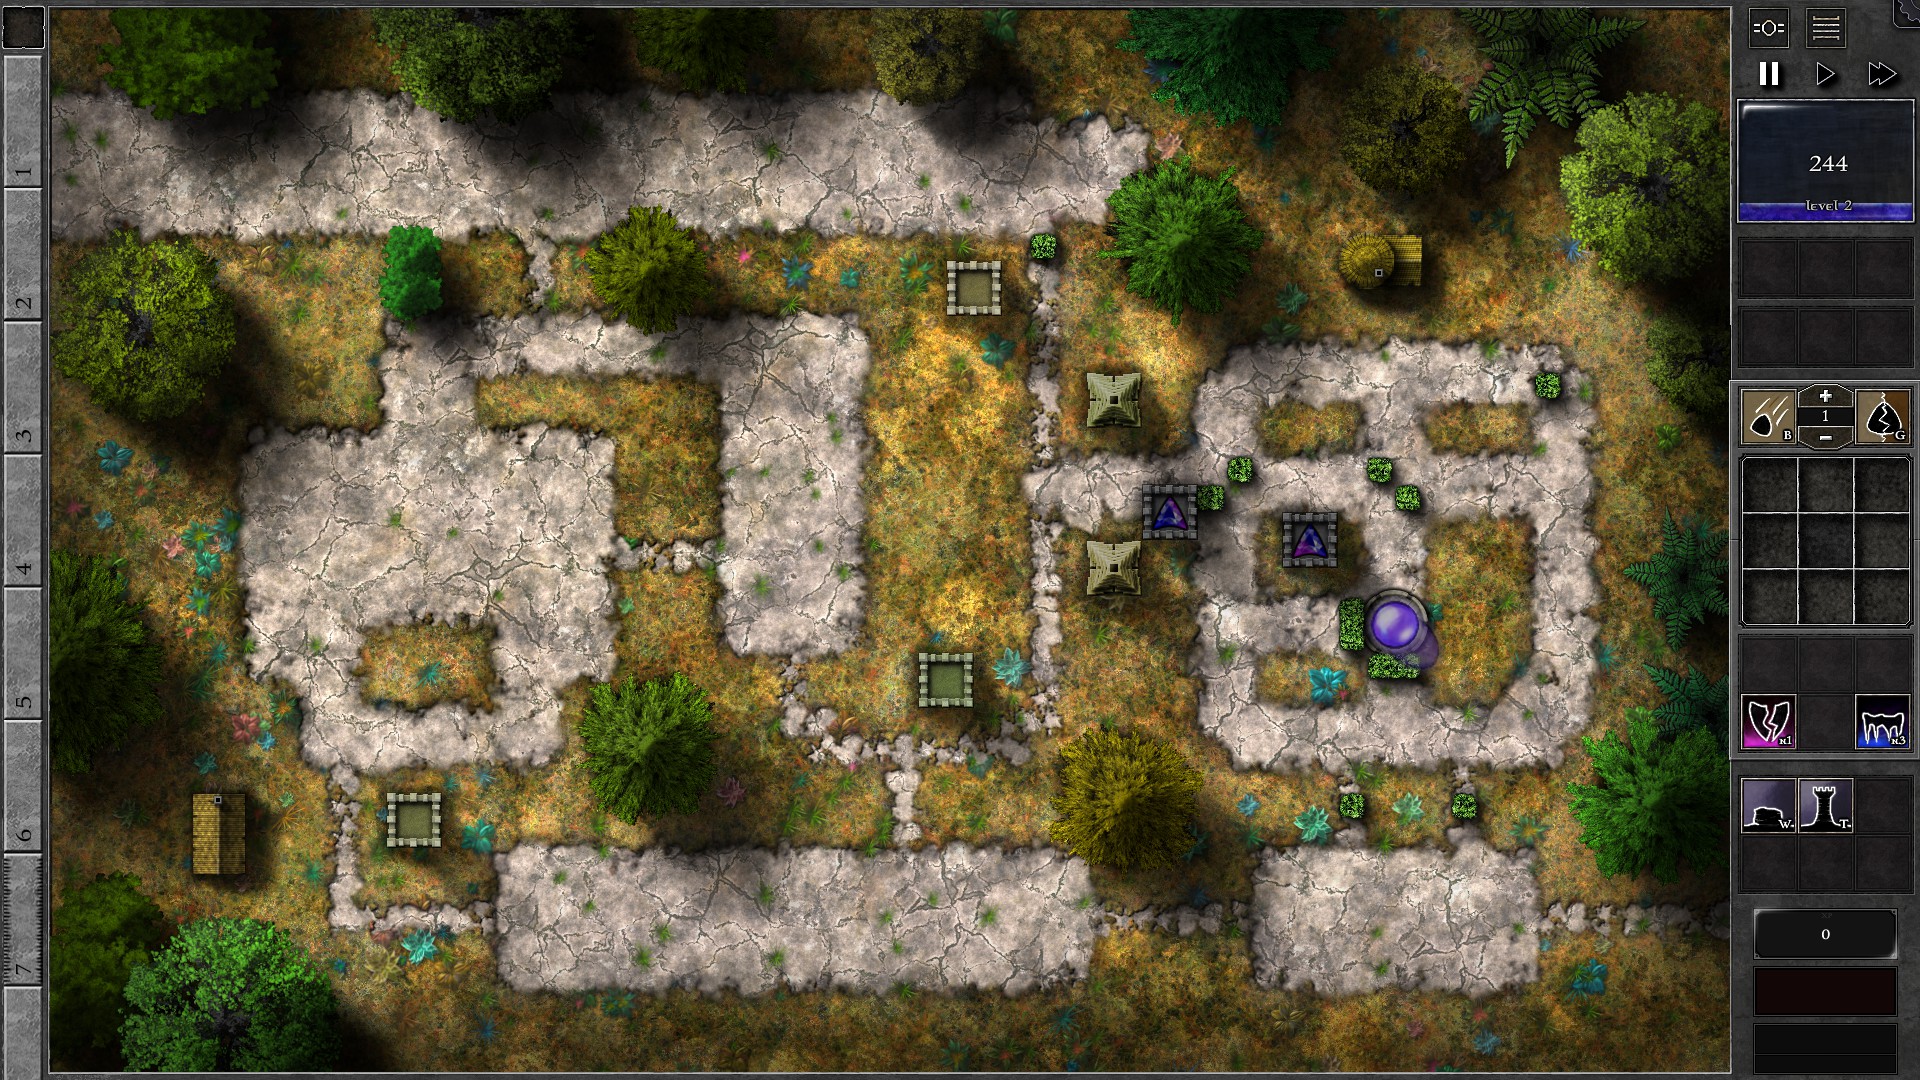
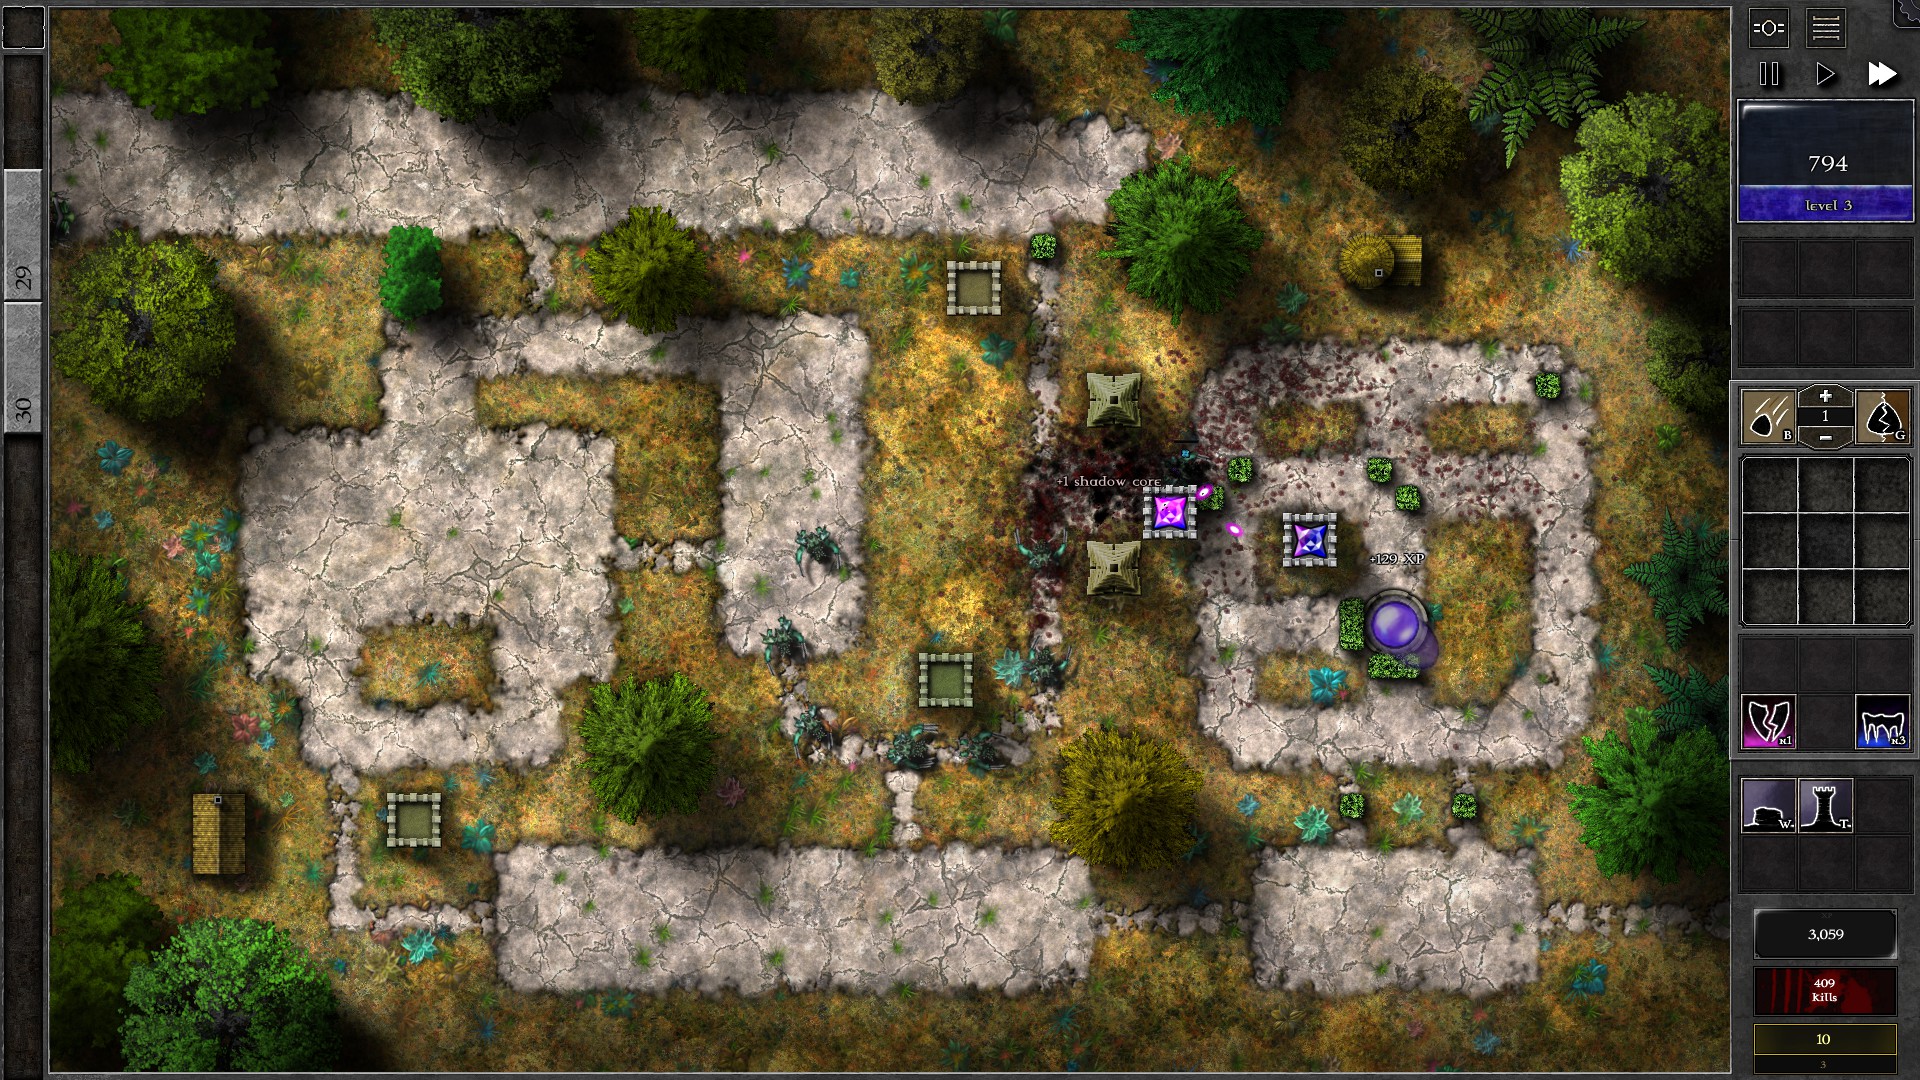
Setup 2 towers with g2 p/b gems, and walls to guide monsters through the grid of paths around your Orb. The left tower should be firing at the Pylons while no monsters are in range. There should not be significant issues on defending the Orb as long as you keep your gems upgraded. The milestones for gem grades are:
- 2 g3 gems around w6
- 2 g4 gems around w15
- g5 + g4 around w22
- 2 g5 gems around w26
Prioritize upgrading the left gem hitting the pylon first which will help in increasing pylon damage. In addition, you may consider using “Structures” targeting on the left gem to focus on the pylons once you only have giants on the field.
017 – Field R5
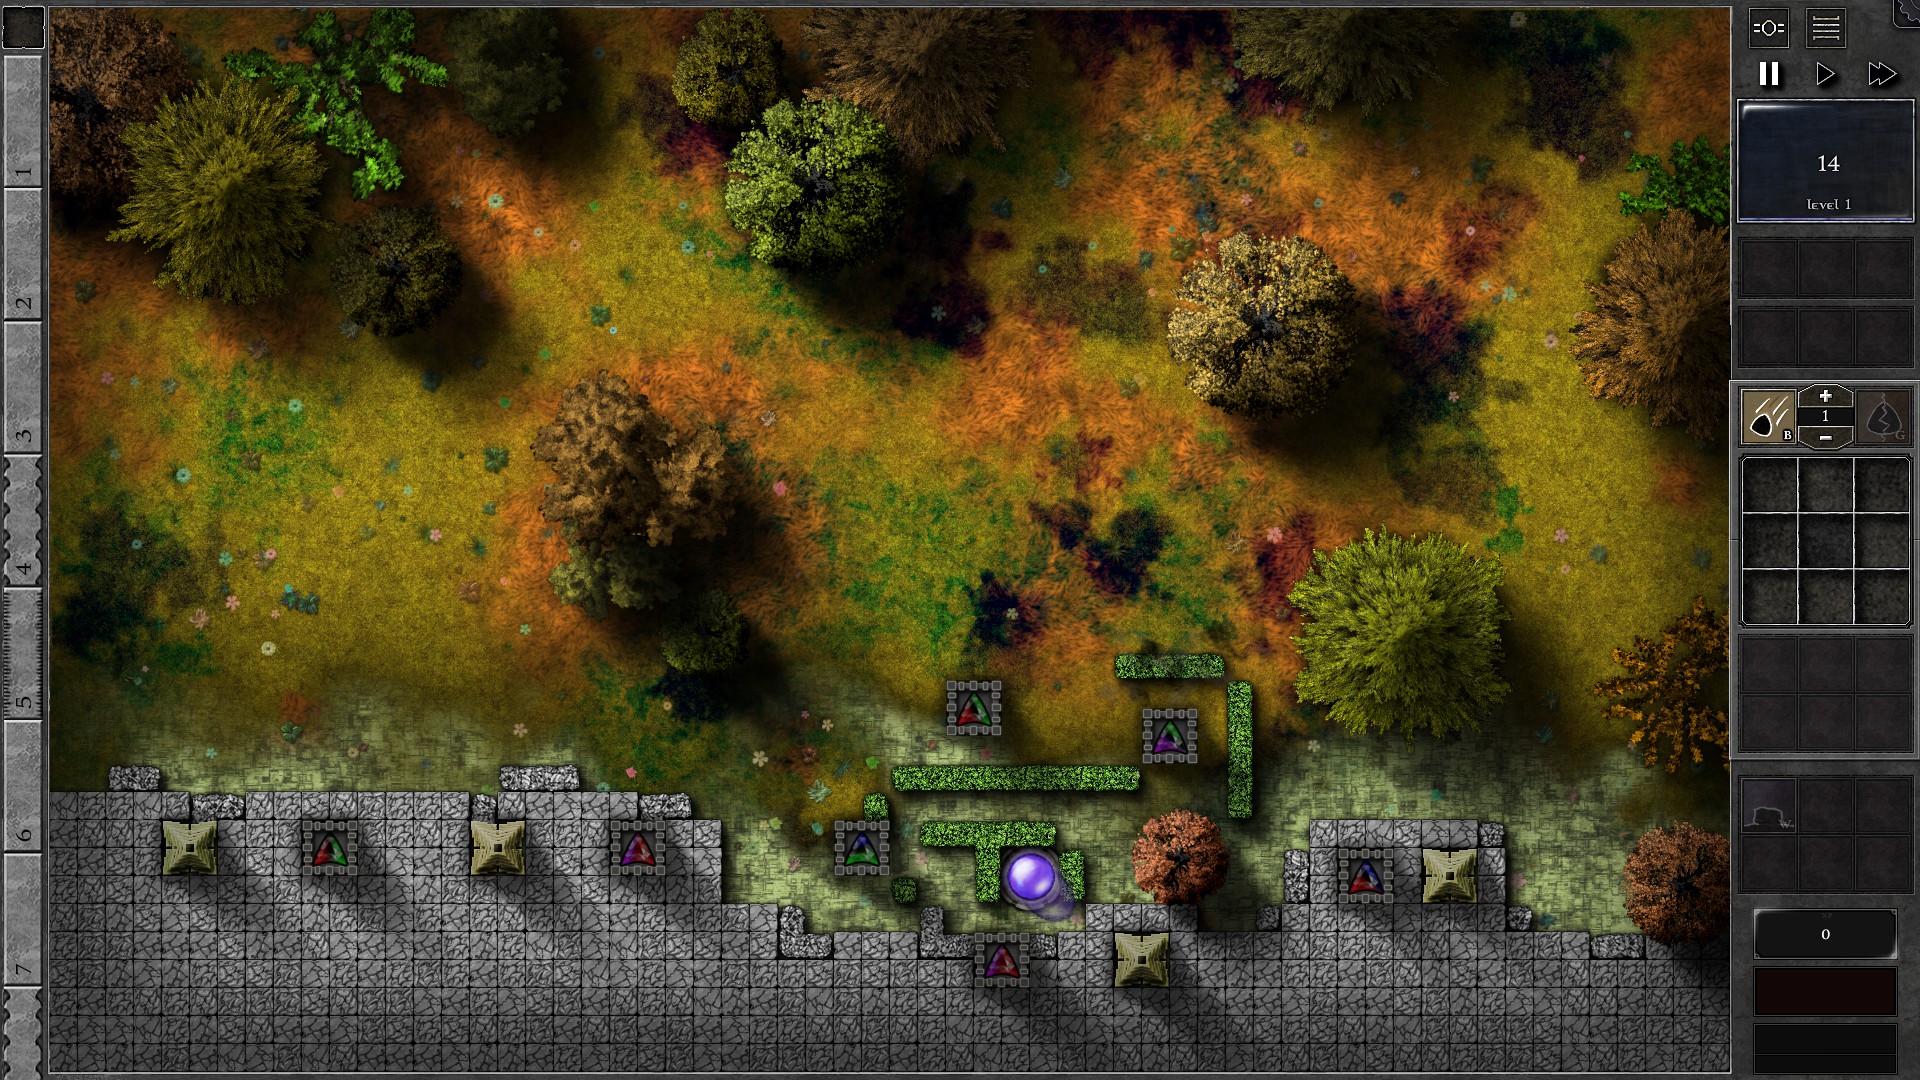
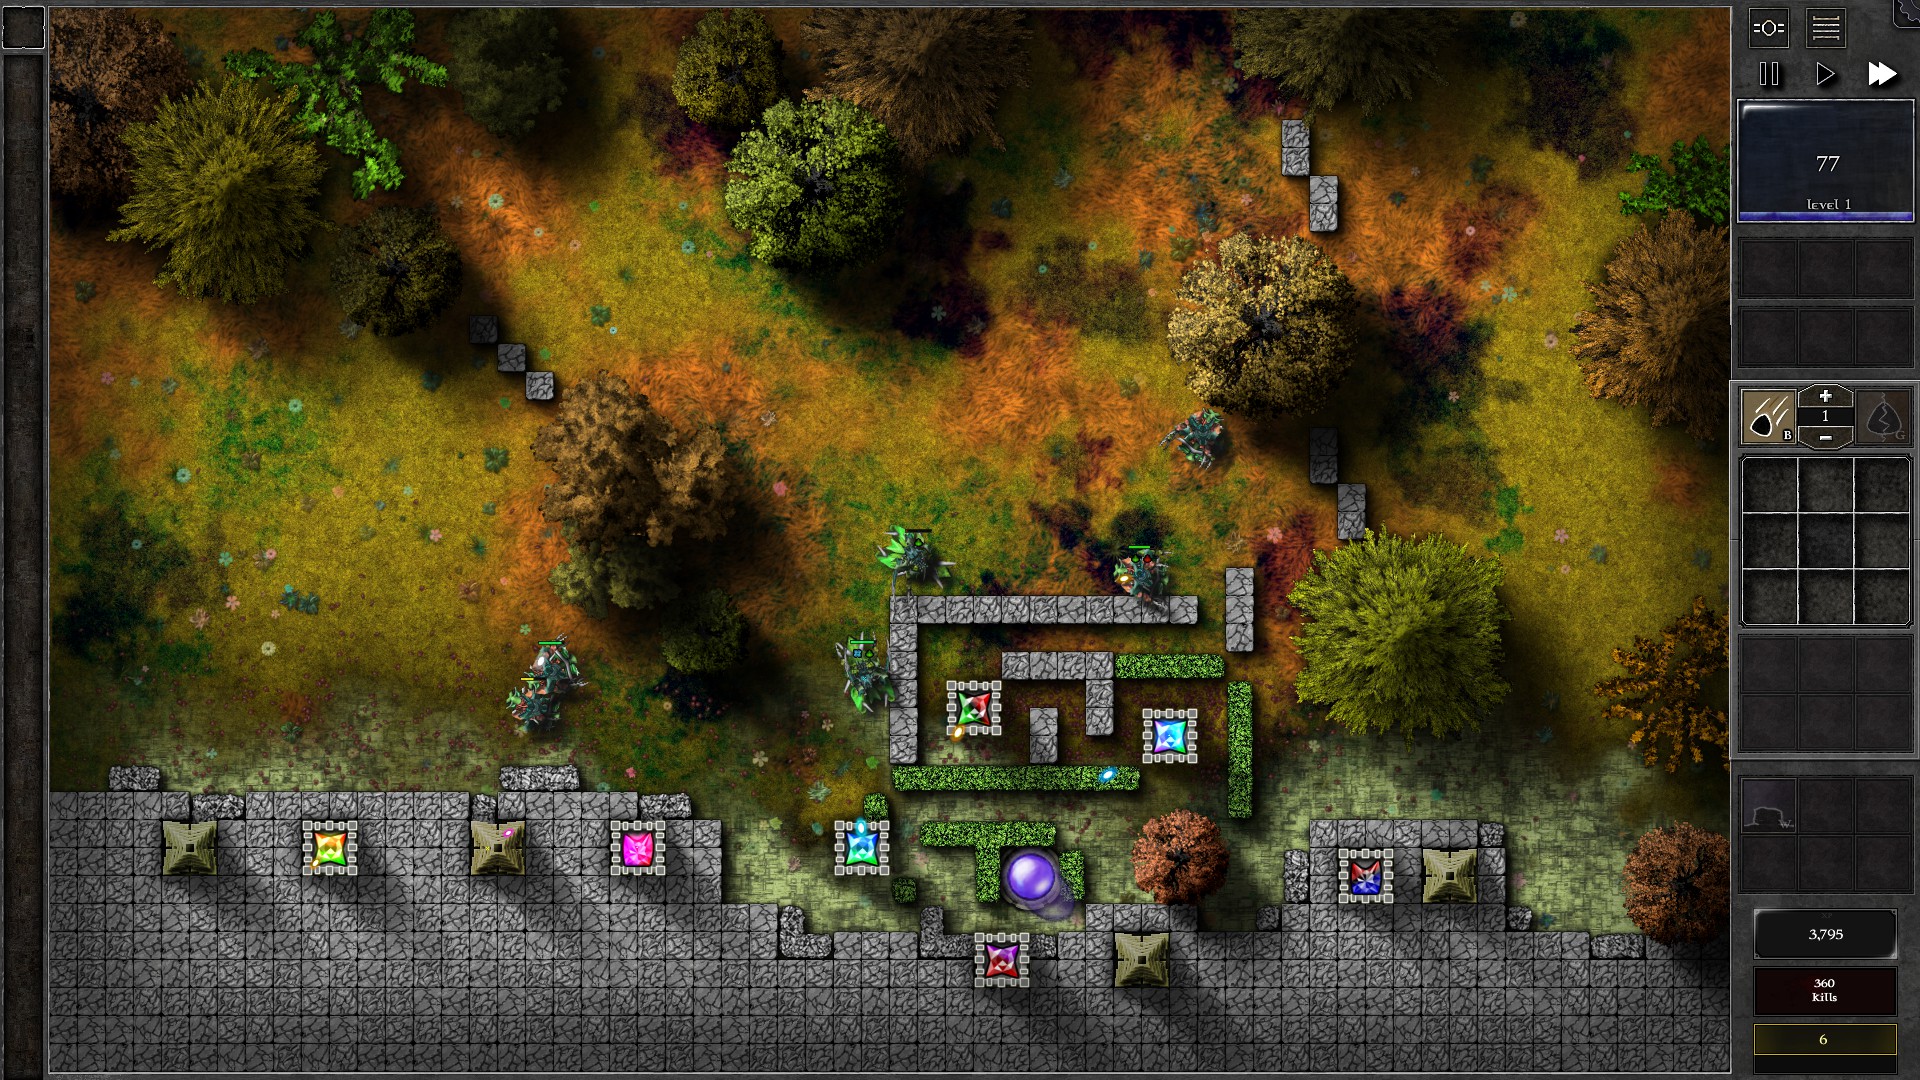
This is a Trial of path planning. Start the field with the walls as shown (shrub walls in first screenshot). The Spiritforge gems should be able to take on the first few waves of monsters. As you gather mana, extend the maze with new walls. You can also block off portions of the field to force monsters go through the pylons farther away from your Orb for extra damage.
The Spiritforge gems upgrade themselves so there is no need to worry about firepower in the late waves. A sample layout at the end can be referred to in the second screenshot.
018 – Field R6
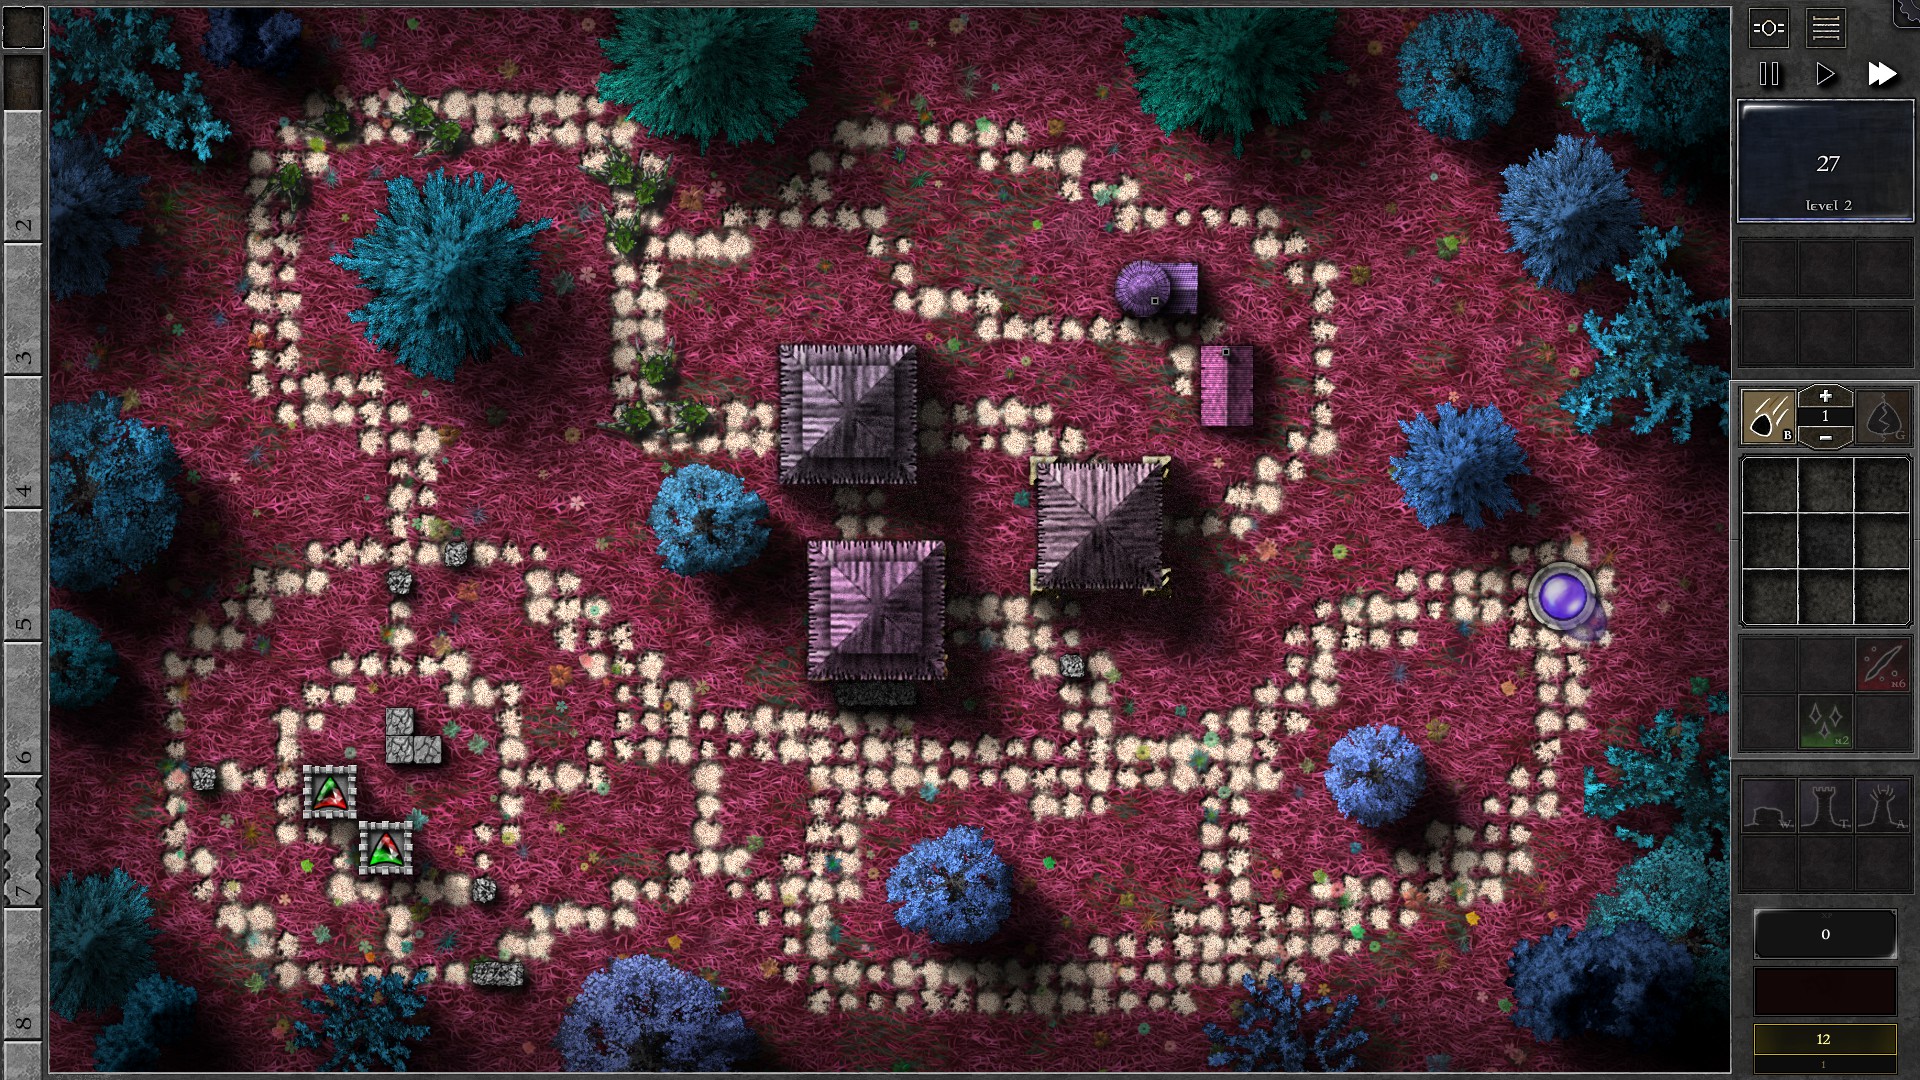
This field has a reduction multiplier to both your natural mana regen and monster mana drops. In order to gather enough mana to strengthen your defenses, you need to kill the apparitions that flies in from time to time.
Start by building the walls to guide the monsters to the lower left corner, and set up 2 g2 dual gems in towers as shown. When apparitions fly in, build towers and move a gem (preferably your weaker gem) to take down the apparition for mana, Upgrade your gems evenly to kill off the ever stronger monsters, but be careful of reavers leaking through; due to Corrupted Banishment, leaked monsters become much harder to kill and may eventually ruin the run.
If you notice reavers and giants moving into the defense at the same time when you removed a gem for apparition killing, consider using “Least HP” targeting on the remaining gem to take down reavers first. Your defenses should be strong enough once you have 2 g5 gems.
019 – Field Q1
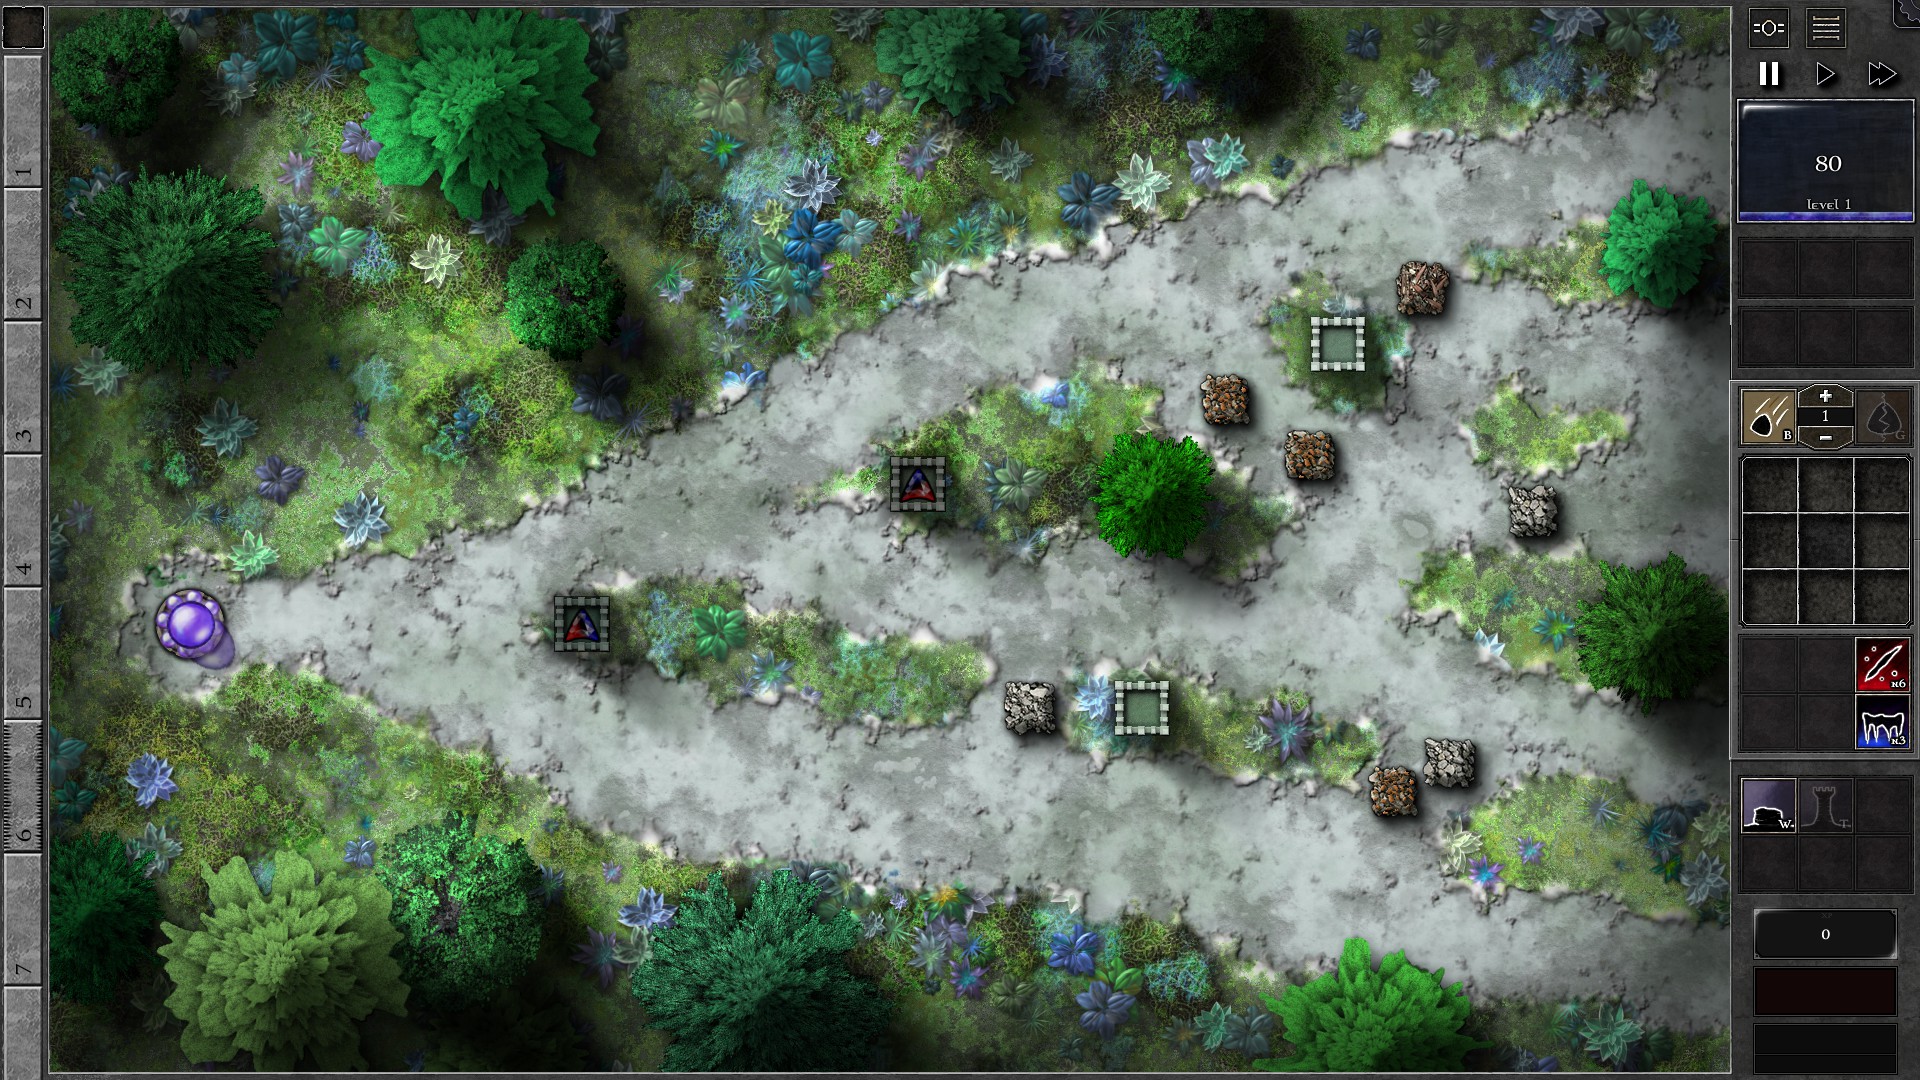
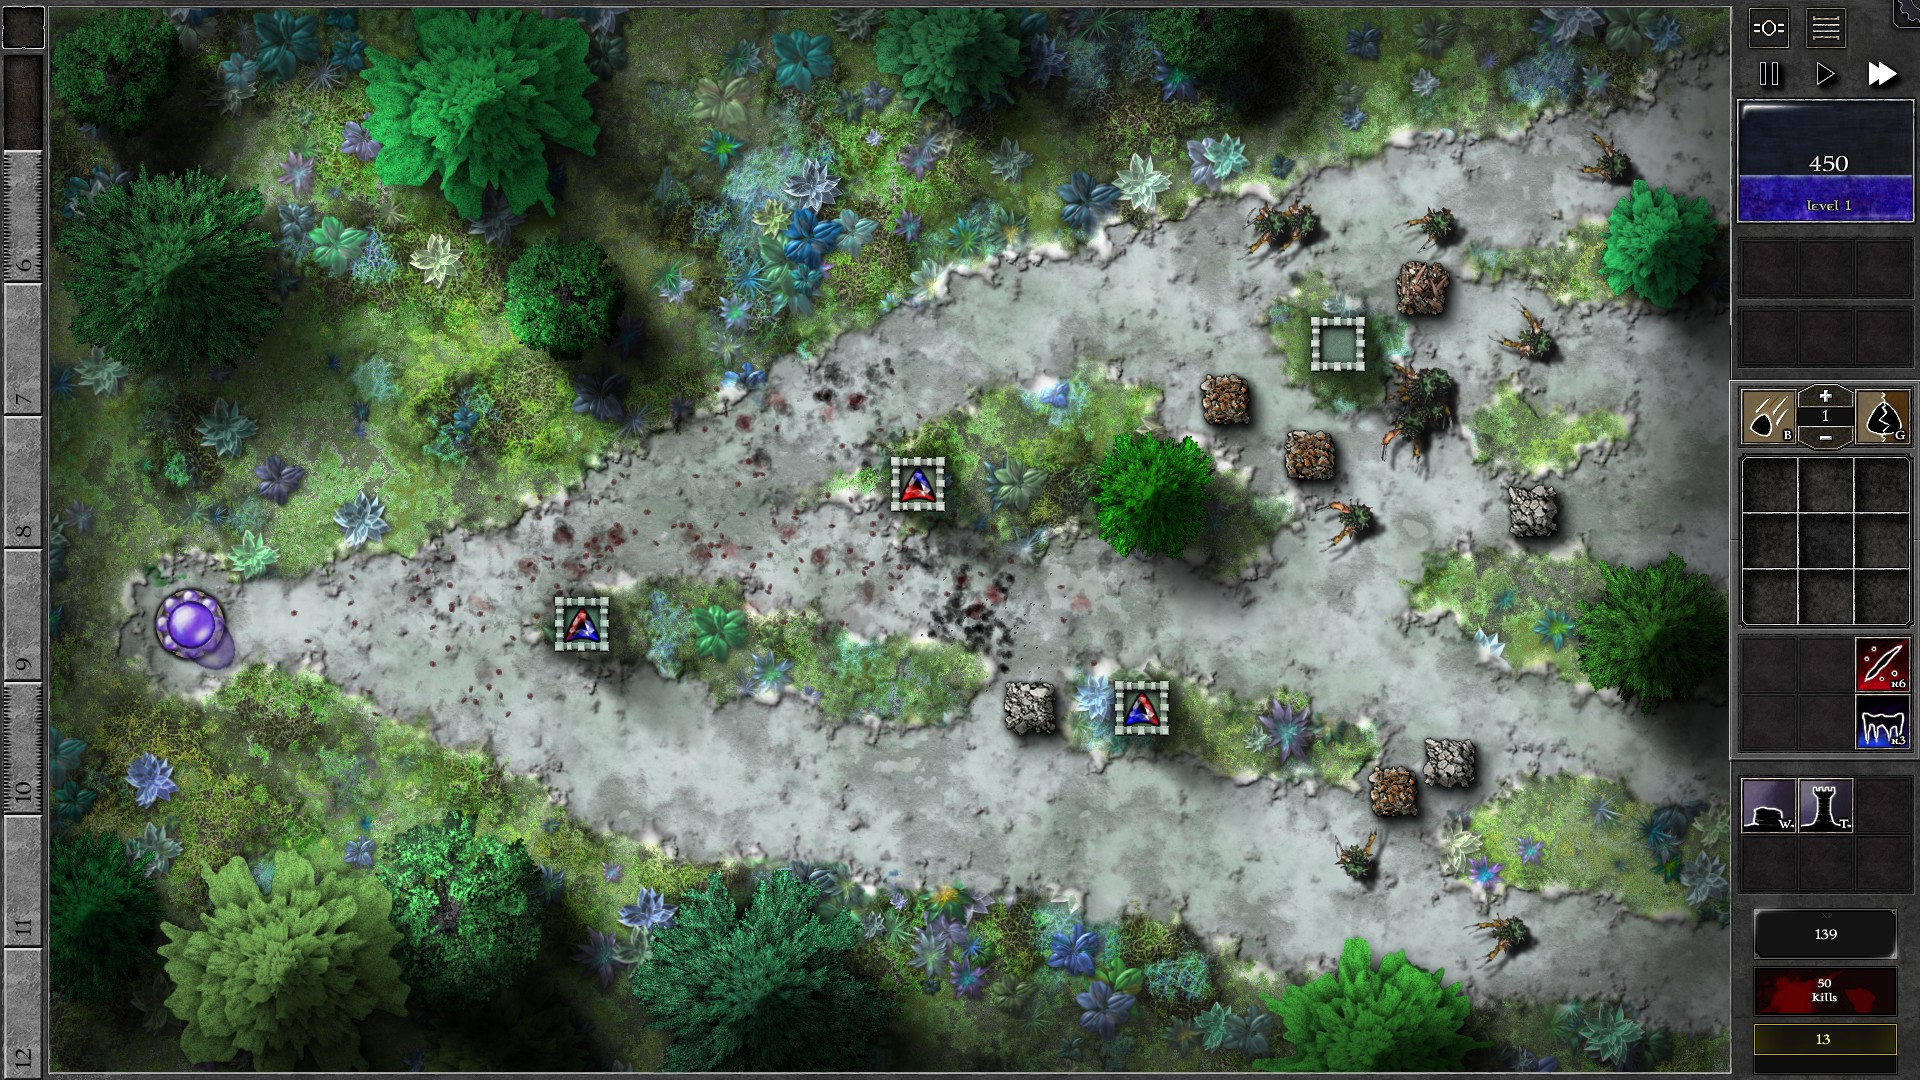
Start the field with 2 r/b gems inserted into towers as shown (1st screenshot). Whenever you notice monsters taking orblets away, try to save the orblets by focusing your firepower into these monsters (you can click on a monster to force-target it). At w4 you should have enough mana for a 3rd g2 gem; duplicate one of your gems and insert into the tower closer to the bottom (2nd screenshot).
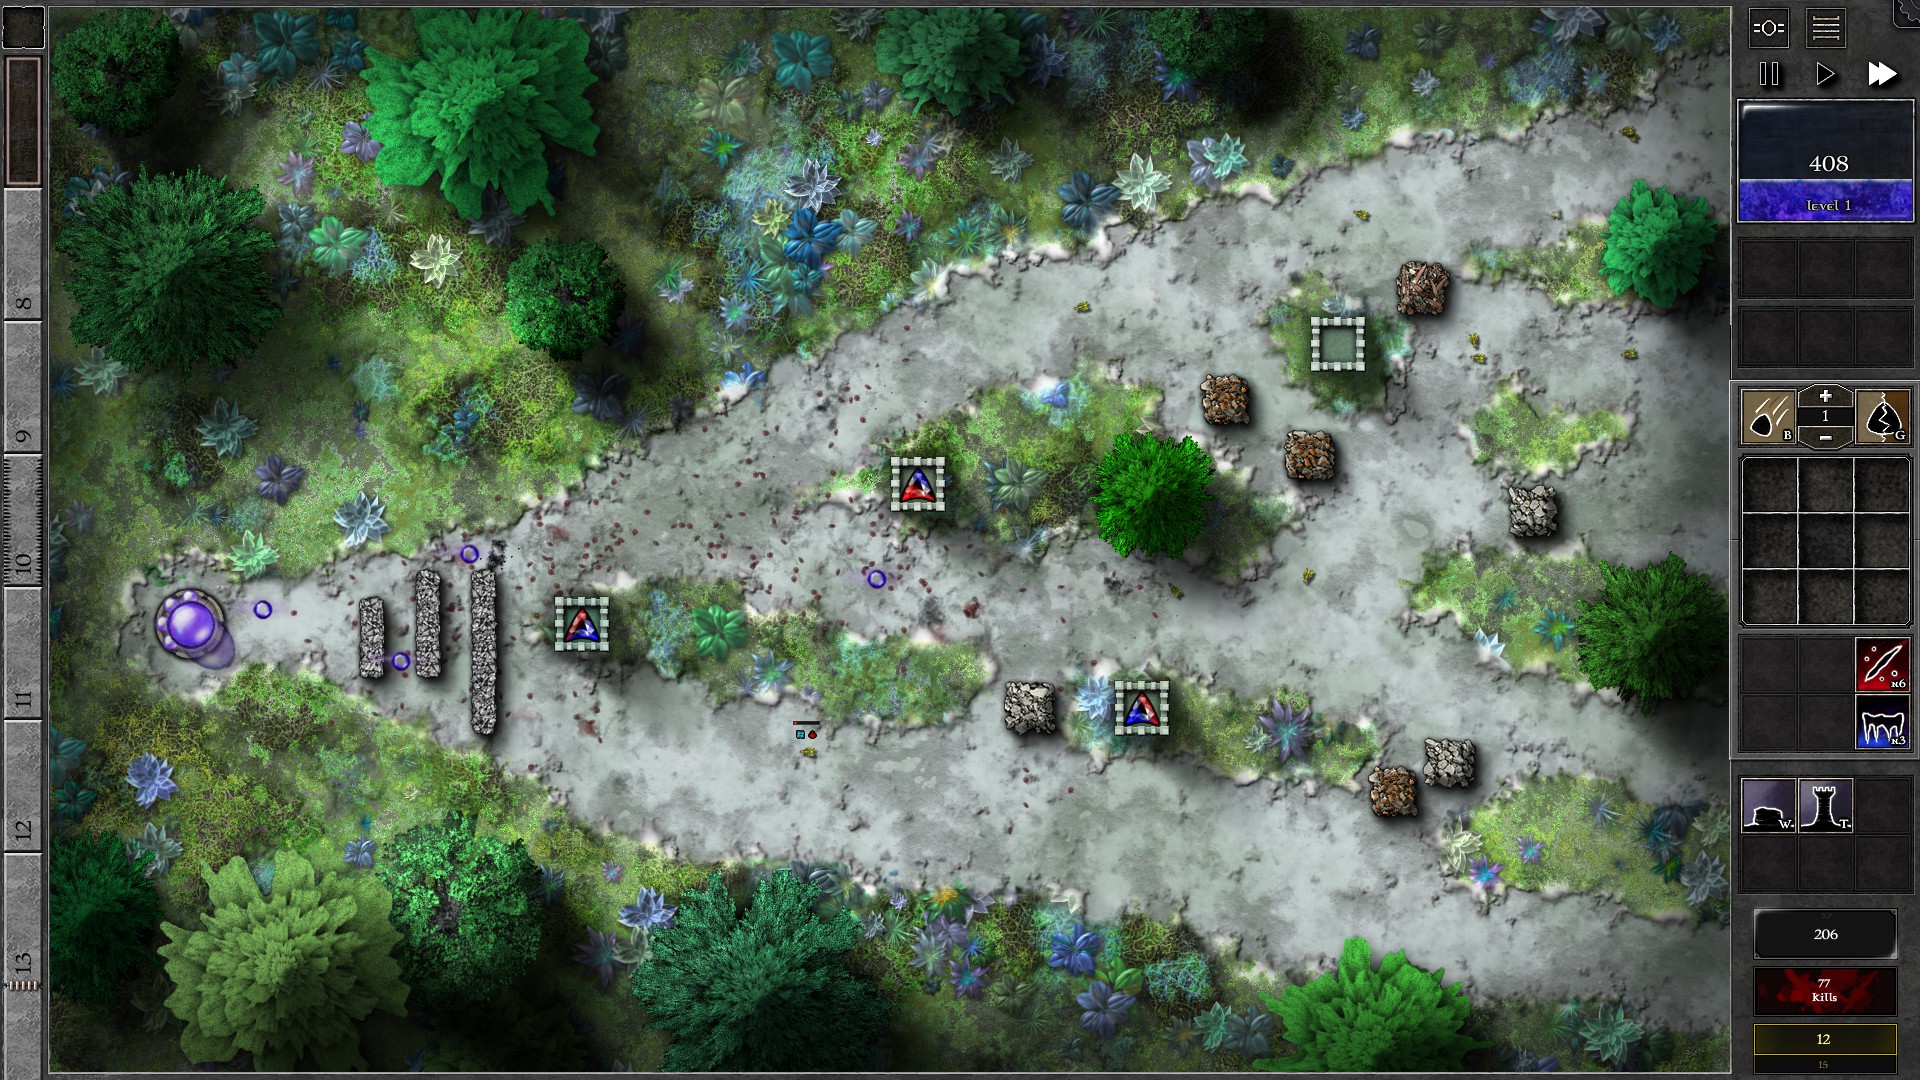
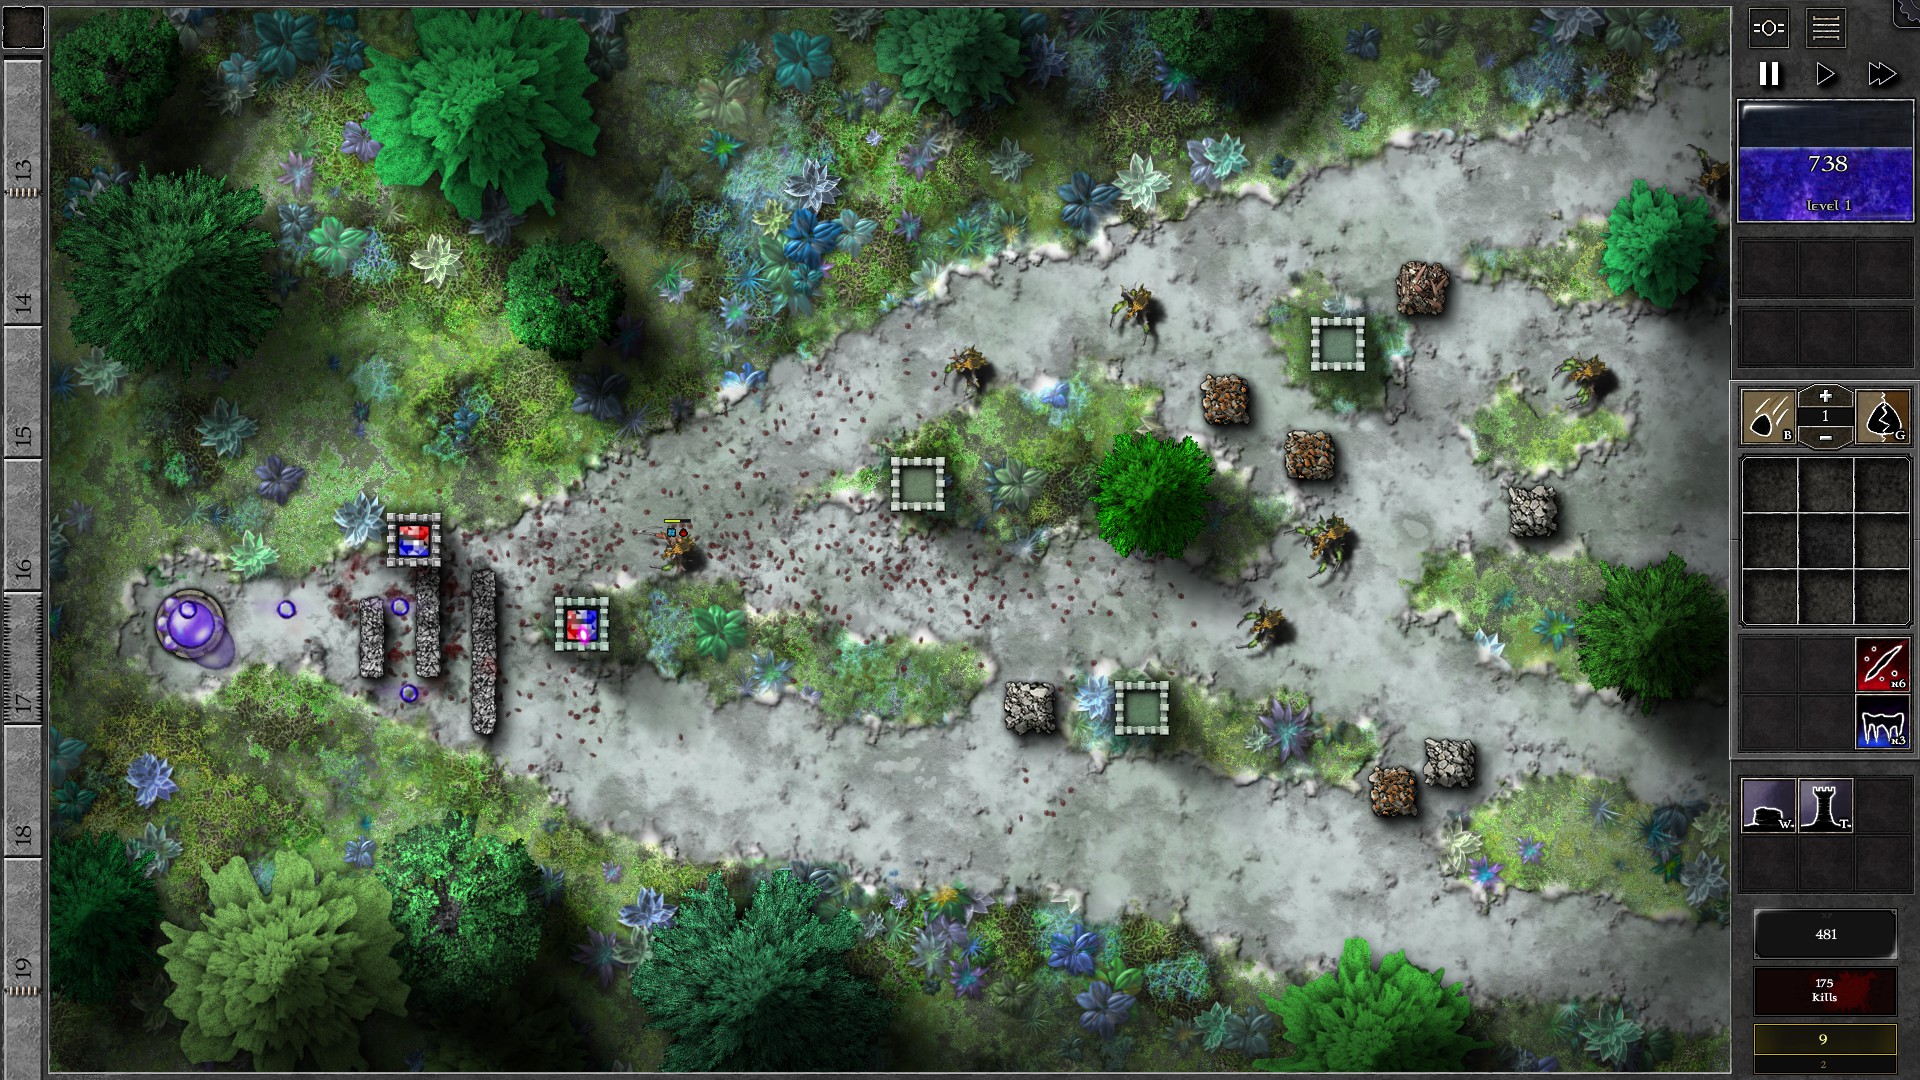
Once you have 3 g2 gems, start building additional walls close to the Orb to lengthen the monster’s path after converging close to the Orb, which should be completed before w8. After that, build a tower close to the walls an insert a 4th g2 r/b gem before w10. Now you can convert your setup to 2 g3 gems by combining the 2 g2 gems farther away from the Orb to the 2 g2 gems closer to the Orb.
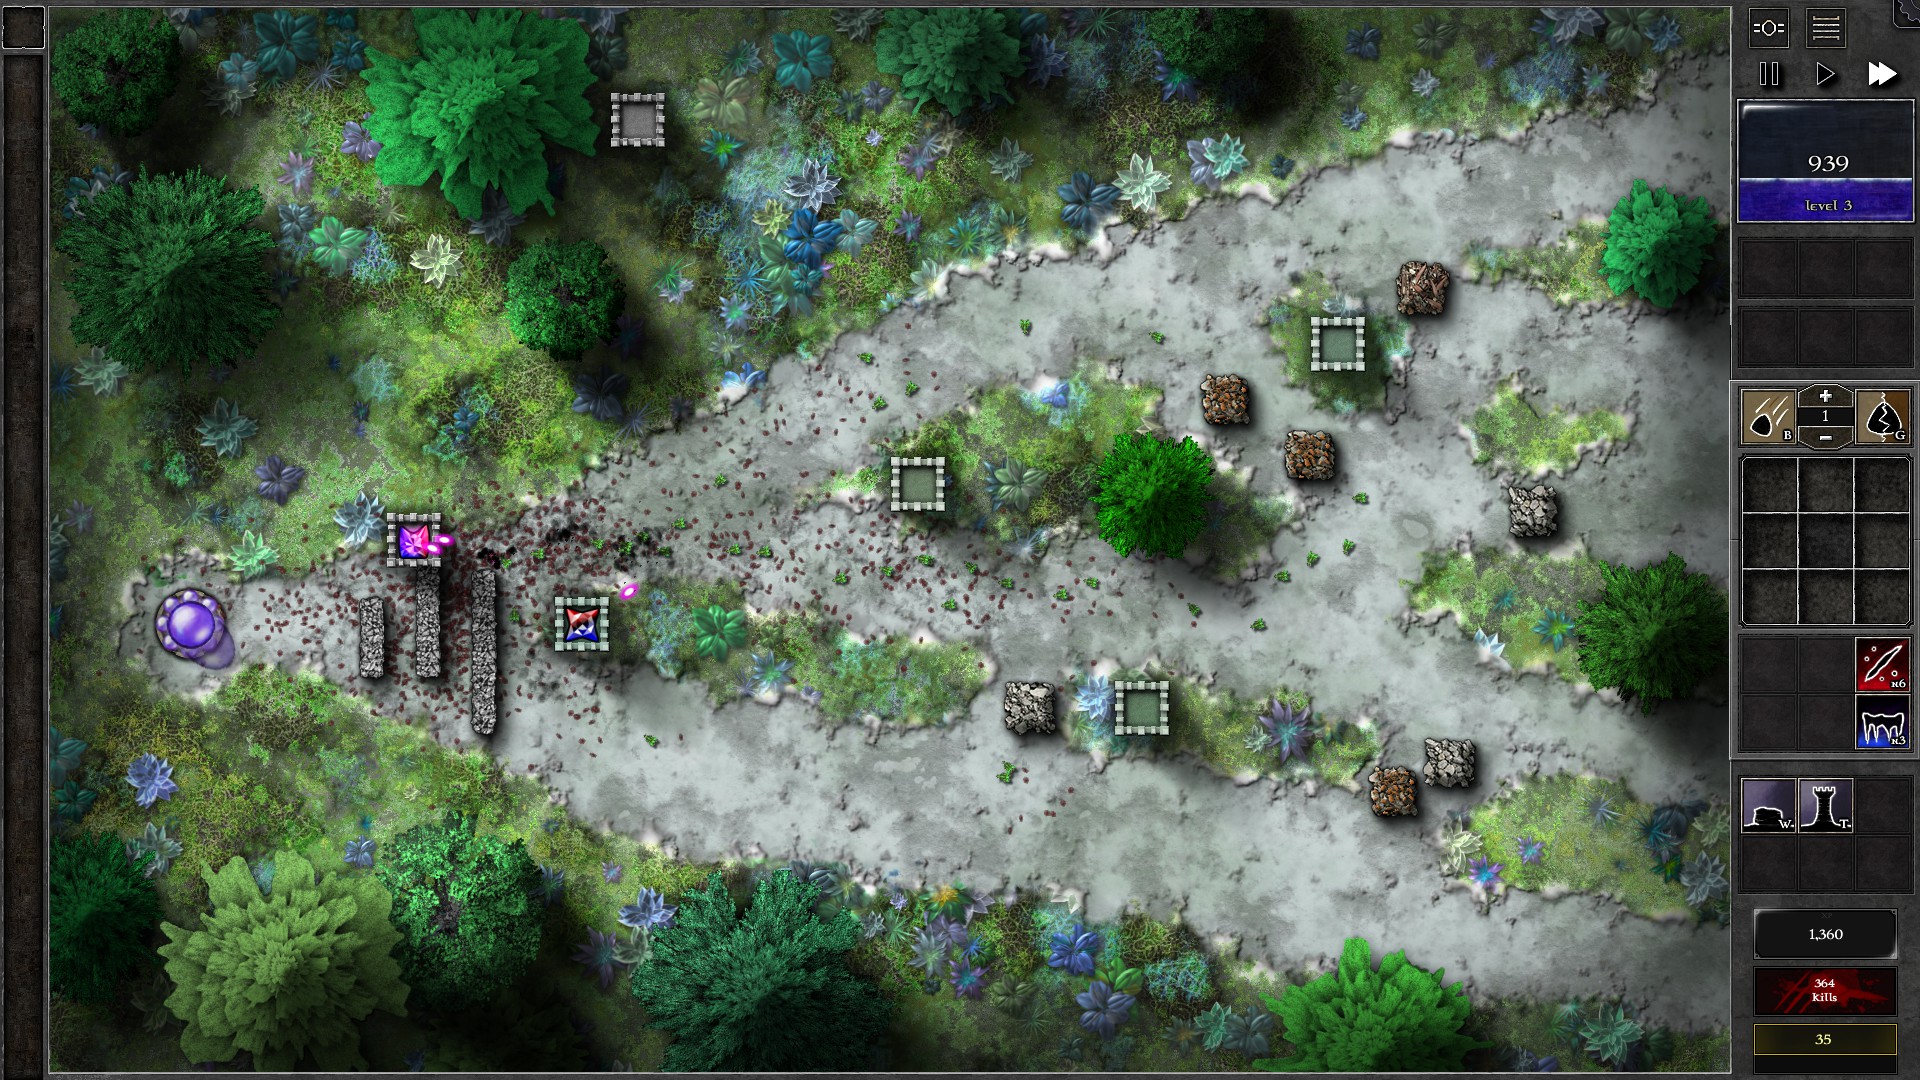
At w13/14 an Apparition should fly and you should have close to enough mana to upgrade a gem to g4. However, you will also probably be busy dealing with the crowded monsters in w13/14. Consider using “Carrying Orblets” targeting priority to help pick off the orblet carrying monsters, and try your best to catch and kill the Apparition without sacrificing your defense. Continue upgrading your gems and you should fend off the remaining monsters with a g5 gem + a g4 gem (or 2 g4 if you fail to catch the Apparition and spent too much in banishments).
020 – Field Q2
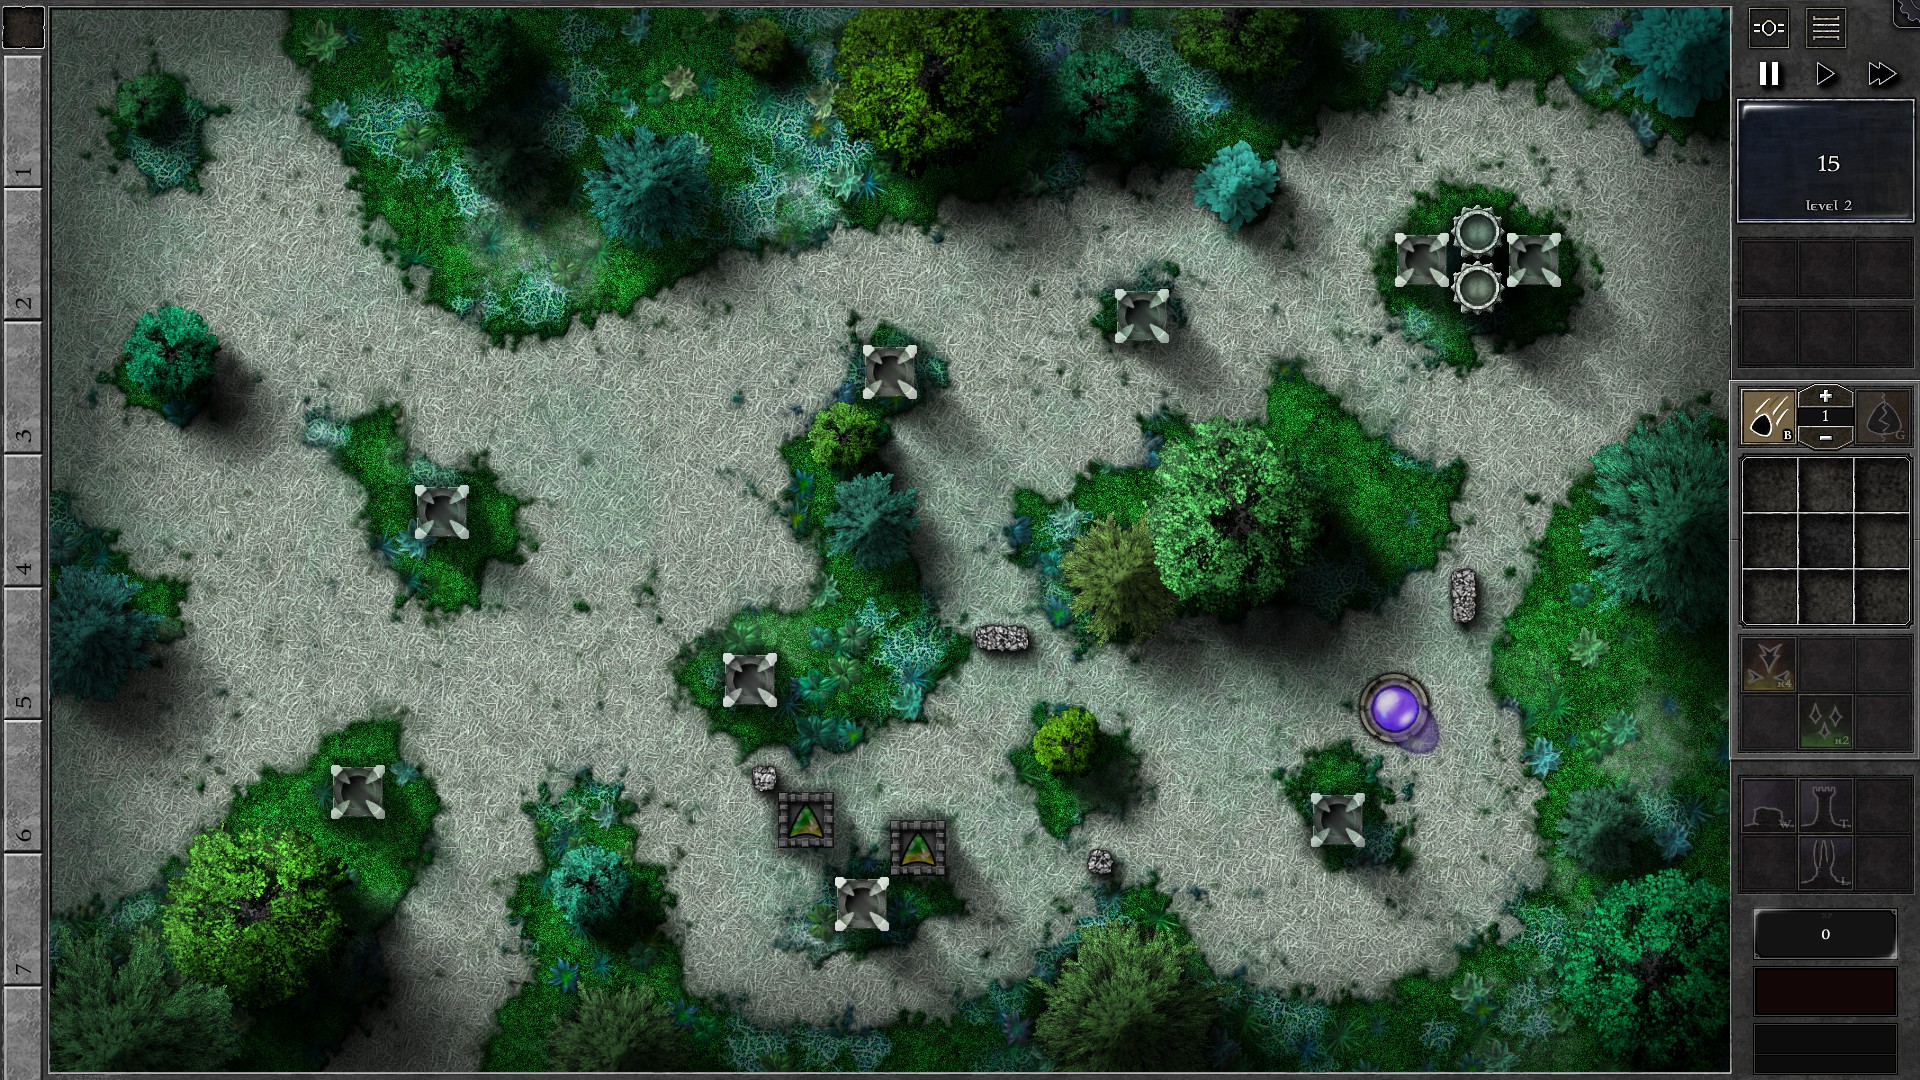
A rather straightforward Trial. Setup 2 g2 g/y gems with towers and walls to block off paths and force monsters to go through the towers. Upgrade the gems evenly as you gather mana; you should have 2 g3 gems by w9 and 2 g4 gems by w20. There shouldn’t be much difficulty overall apart from a few potential banishments.
021 – Field Q3
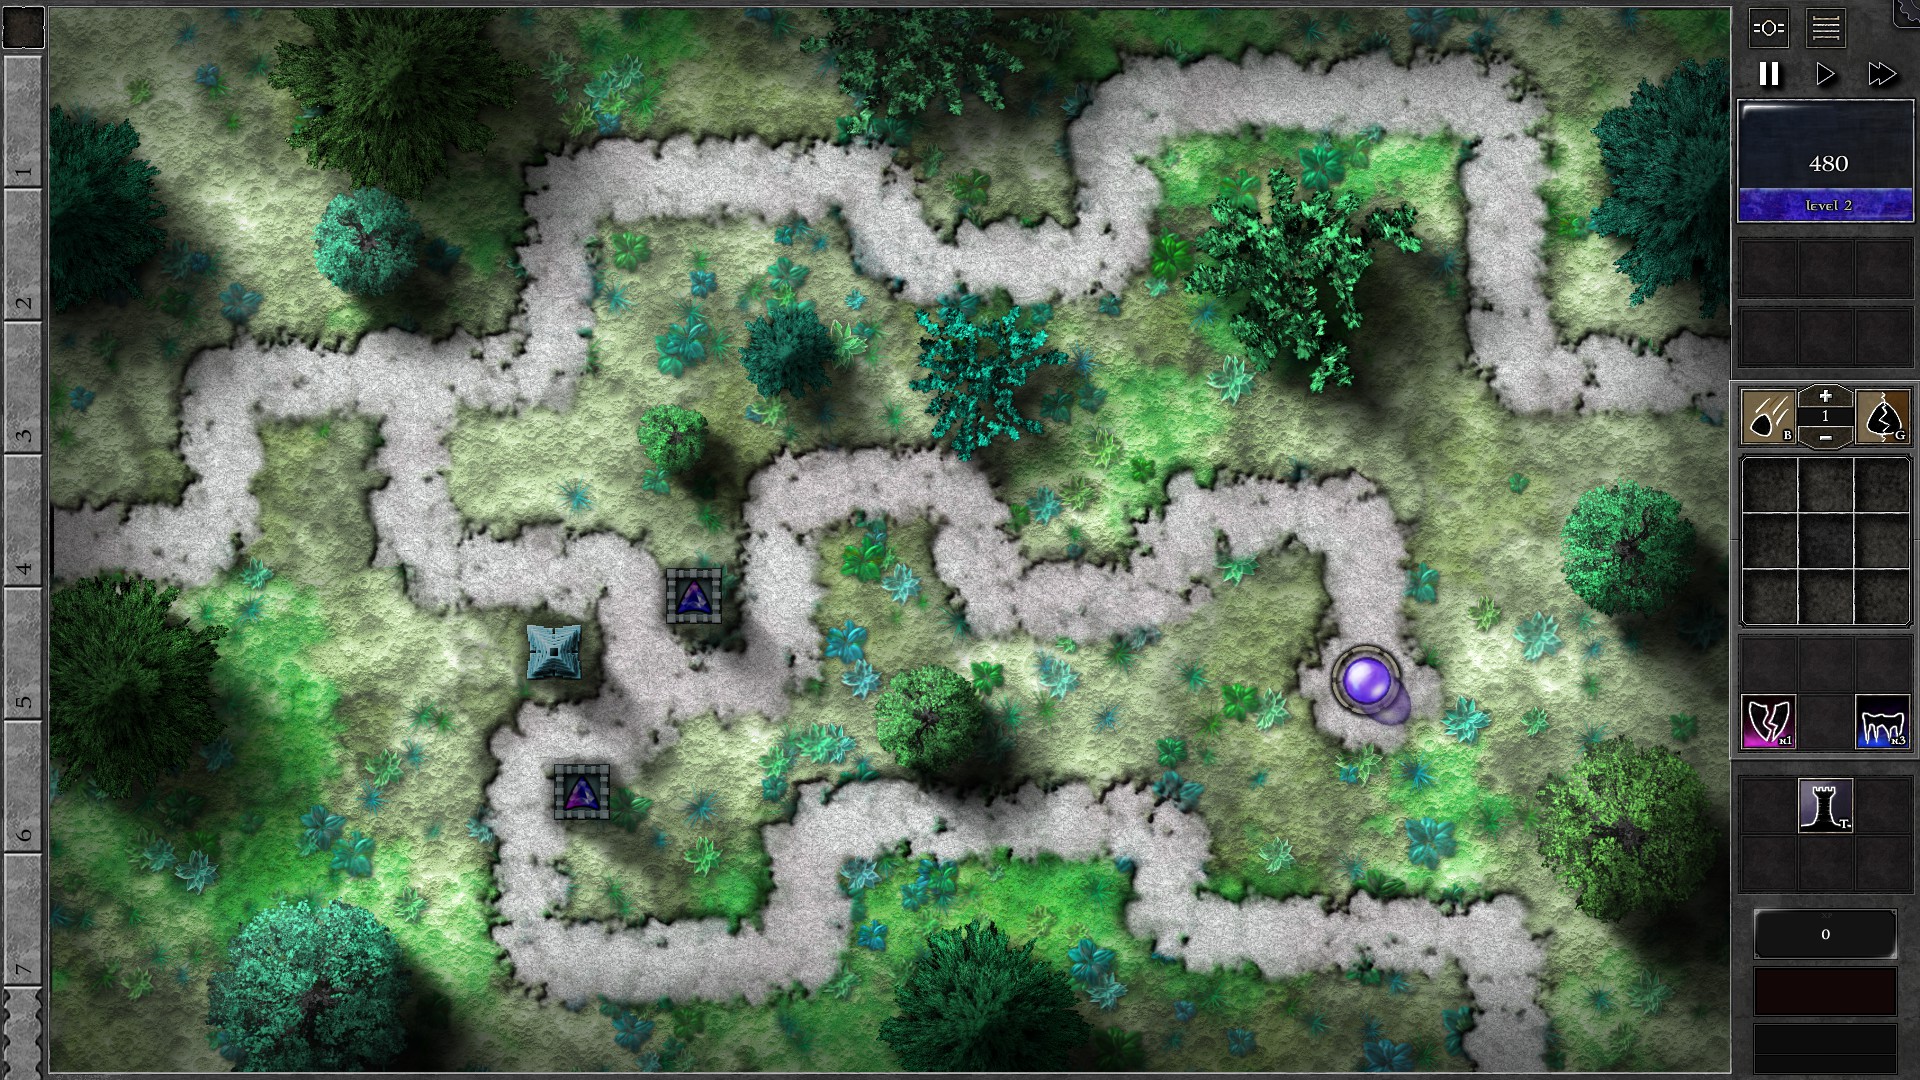
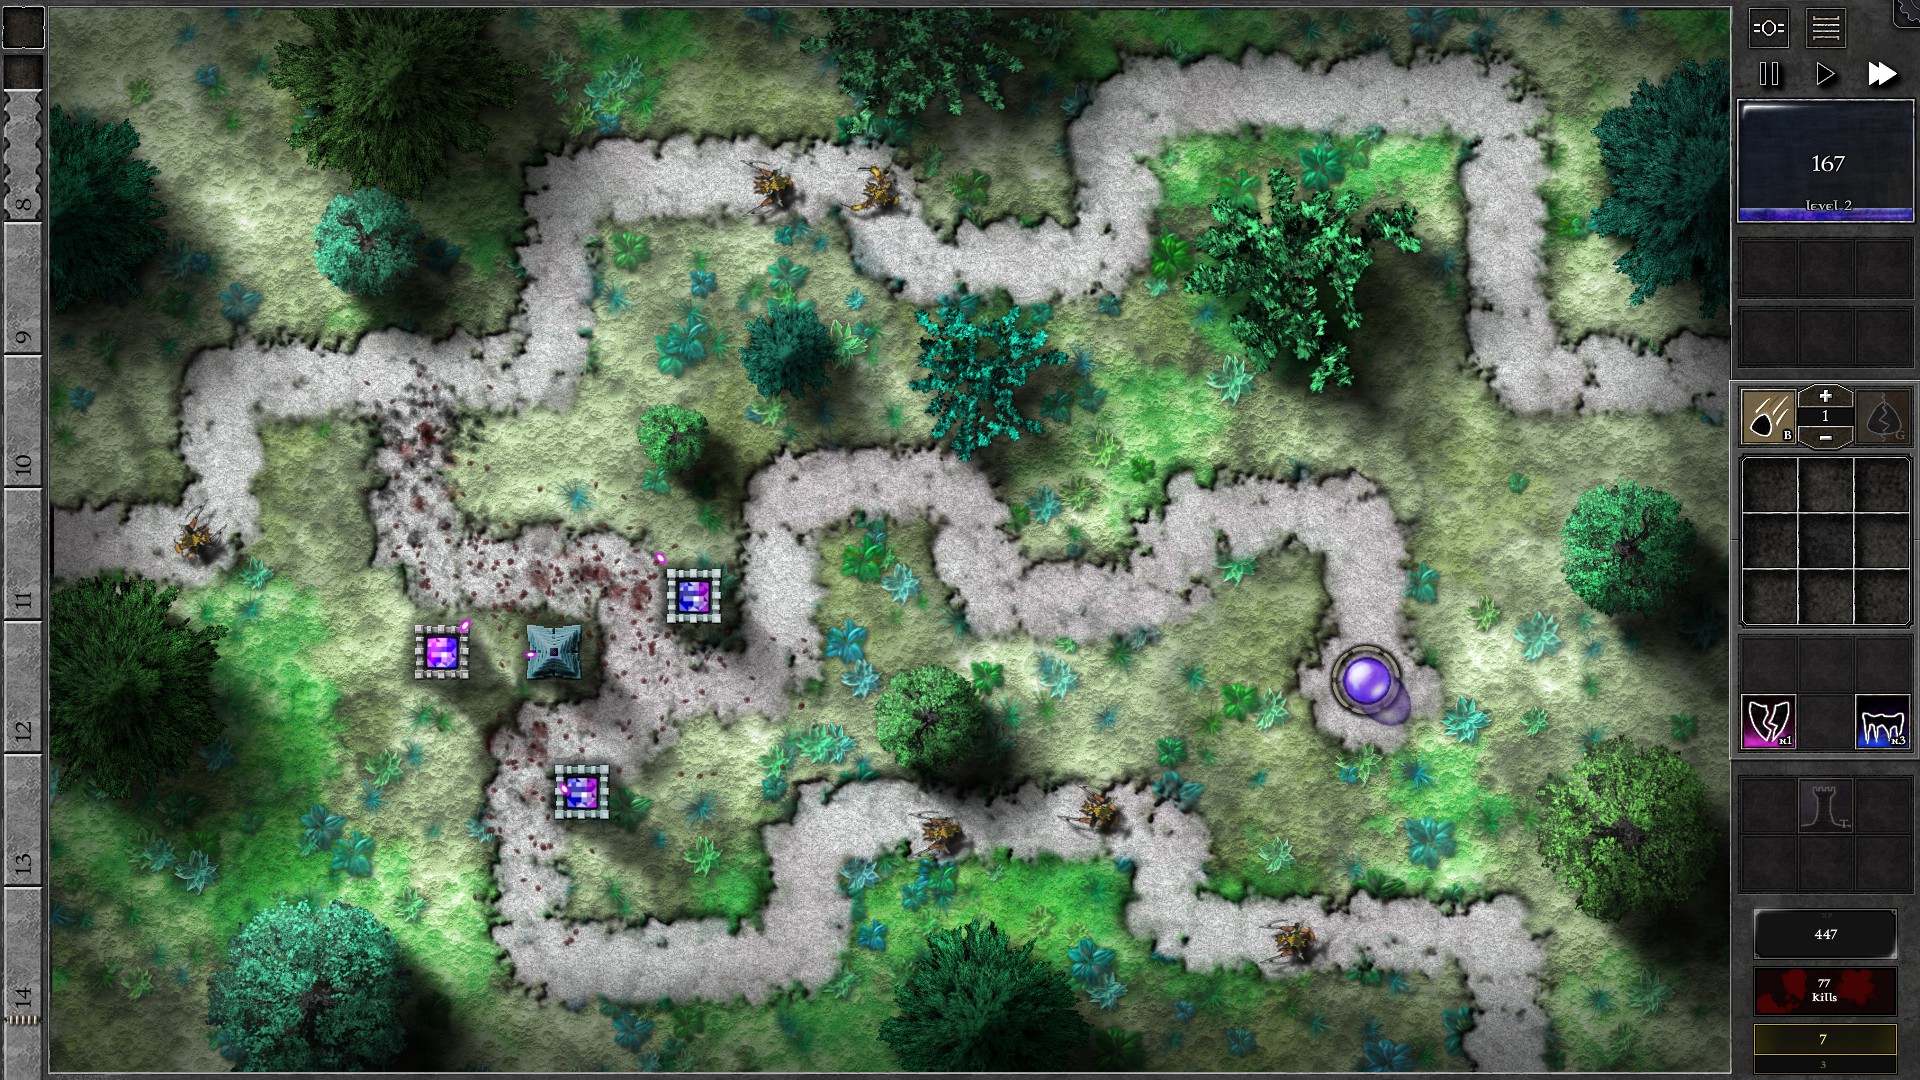
Create 2 g2 p/b gems, insert into the towers and set both gem to target “Structures”. Make sure you keep both gems and any other new gems in this Trial to target “Structures” as the monsters in this Trial have ridiculously high armor for your gems and you need to use pylon shots to ignore armor.
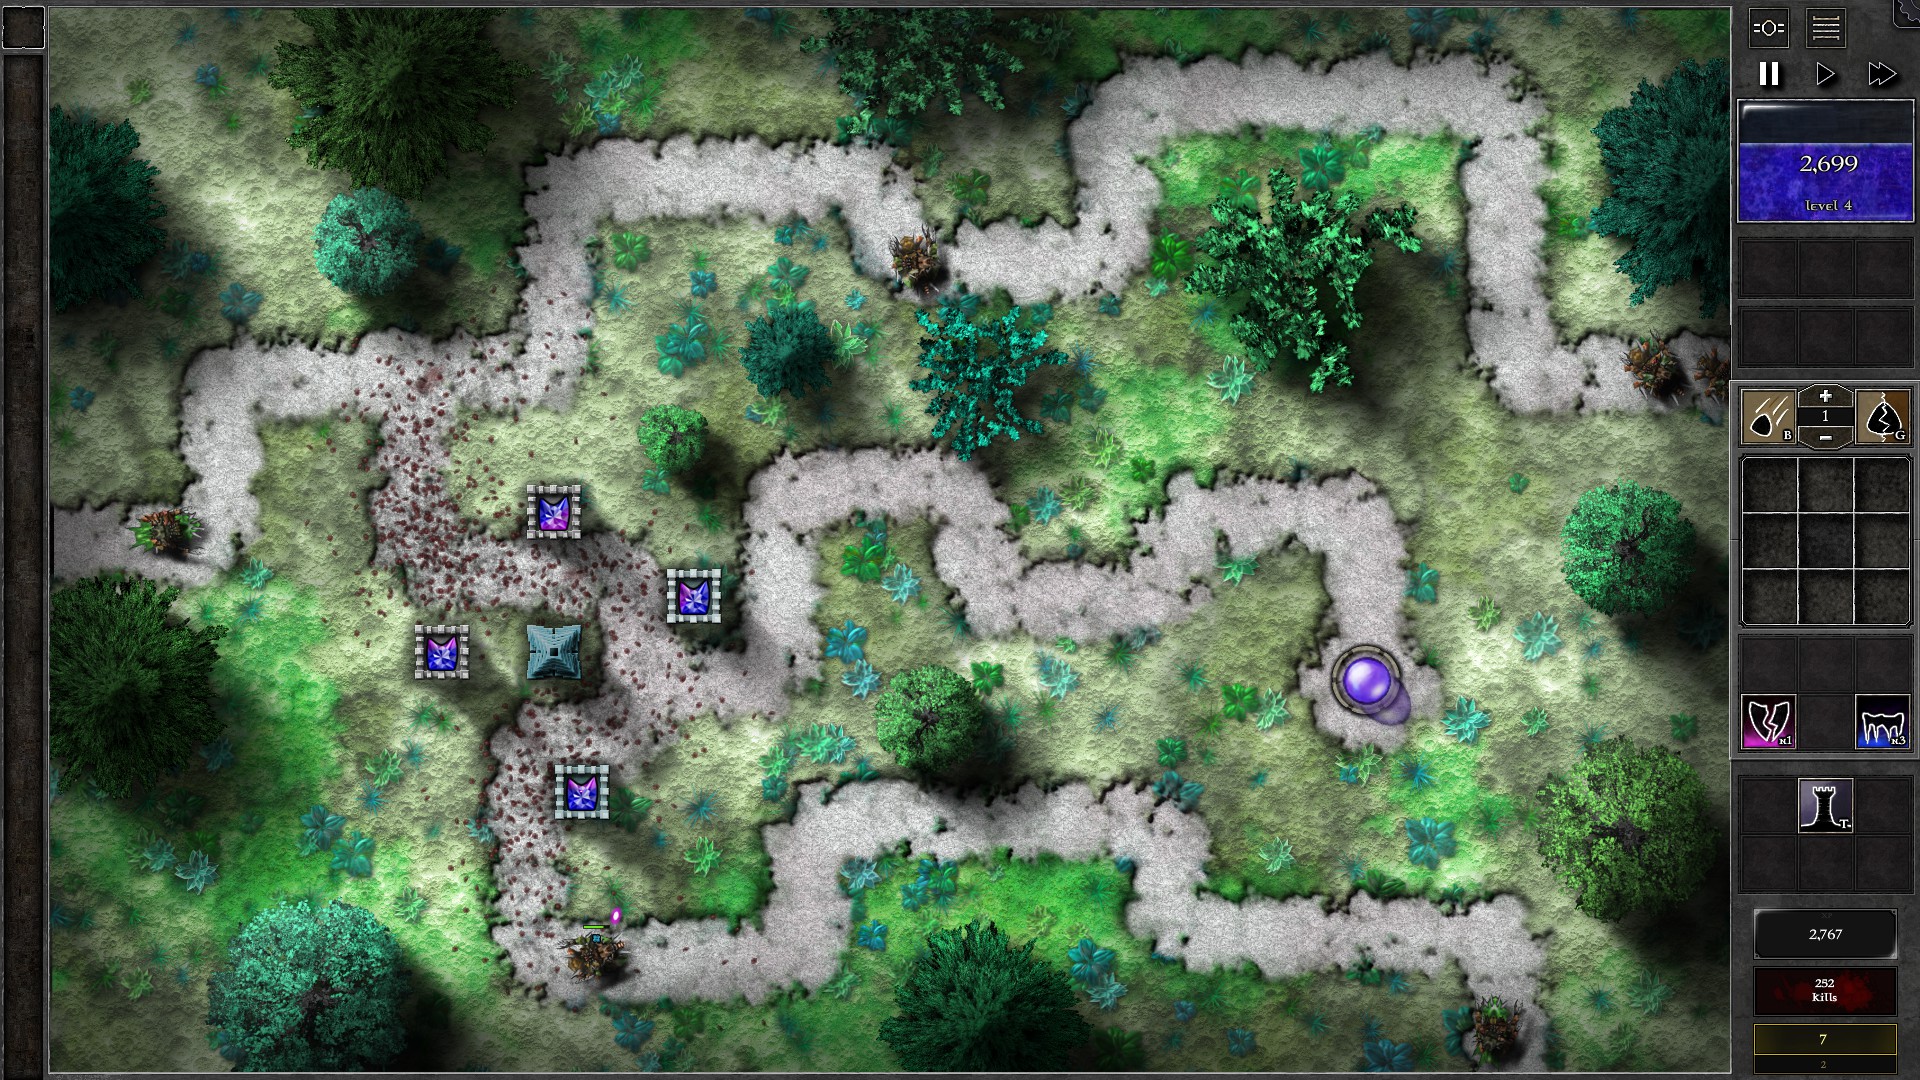
Soon after you kill the first few monsters, you can afford to build a new tower with a g2 p/b gem so that you have 3 gems firing at the pylon at the same time. Start upgrading the gems to g3 as you gather mana from monster kills. Monsters in this Trial gives large amounts of mana so you should be able to upgrade all 3 gems to g3 at around w7. Now collect mana and build another new tower with a 4th g3 p/b gem, which should be doable by w12. Continue upgrading your gems evenly and you should have no problems on killing the remaining waves. You will probably end with at least 4 g4 gems.
022 – Field Q4
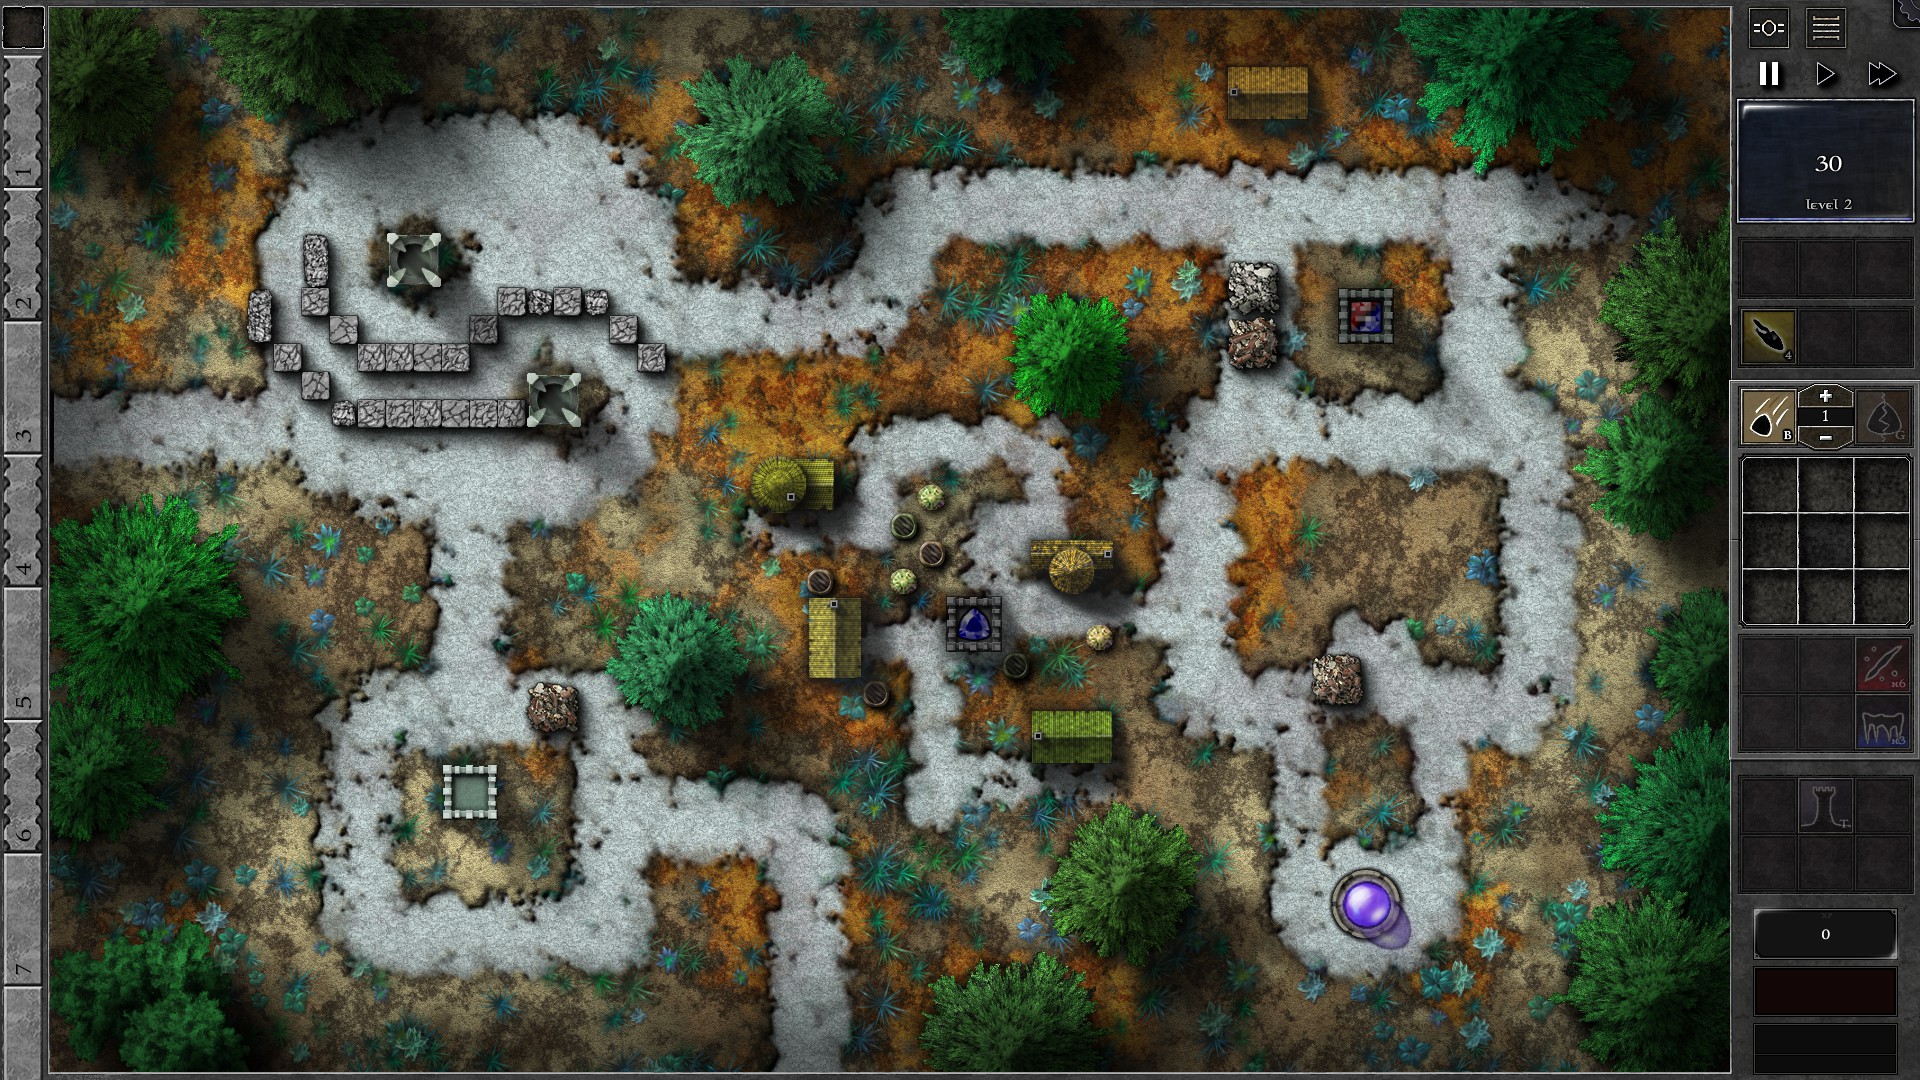
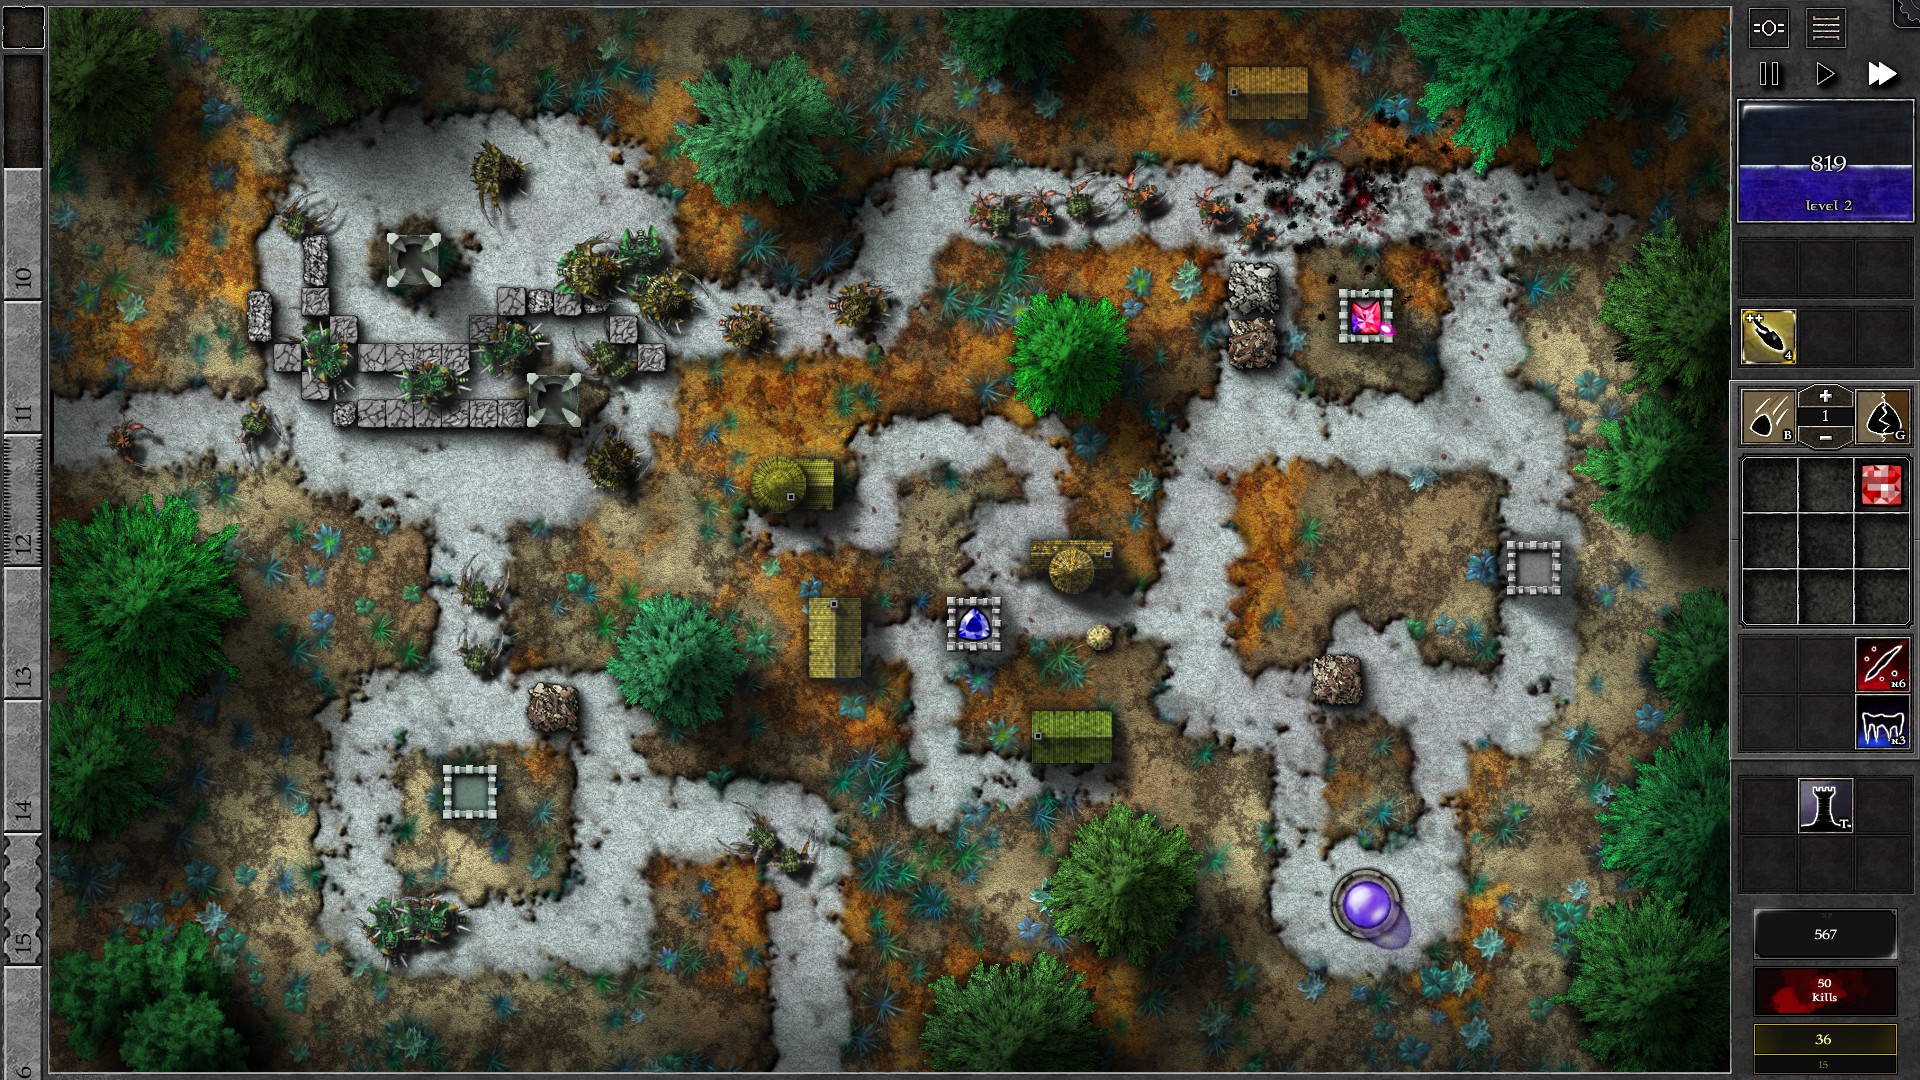
NOTE: The solution for this Trial is dependent on RNG of the Drop Holders, Try to restart if you don’t get a good result from the drops.
Start the field as shown with a g3 r/b gem in the top right tower and a g1 gem in a new tower built close to the group of drop holders in the centre of the field. Set the g1 gem to target “Structures”. Let the waves come naturally (don’t send waves early) and at w3 you should have your Bolt spell ready.
Use Bolt on the centre g1 gem; the Bolt charges should break 7 of the 8 drop holders which should give you various loot, Unless you have some bad luck you should be able to upgrade your g3 gem to at least a g4 and halfway to a g5 which should take down the initial monsters much more effectively (Restart the Trial if you can’t). Block the right path with a tower so that monsters need to go around your main gem. As long as you can upgrade to g5 before w10 and g6 at around the last wave you should have no issues taking down the remaining waves with the help of Bolt.
023 – Field Q5
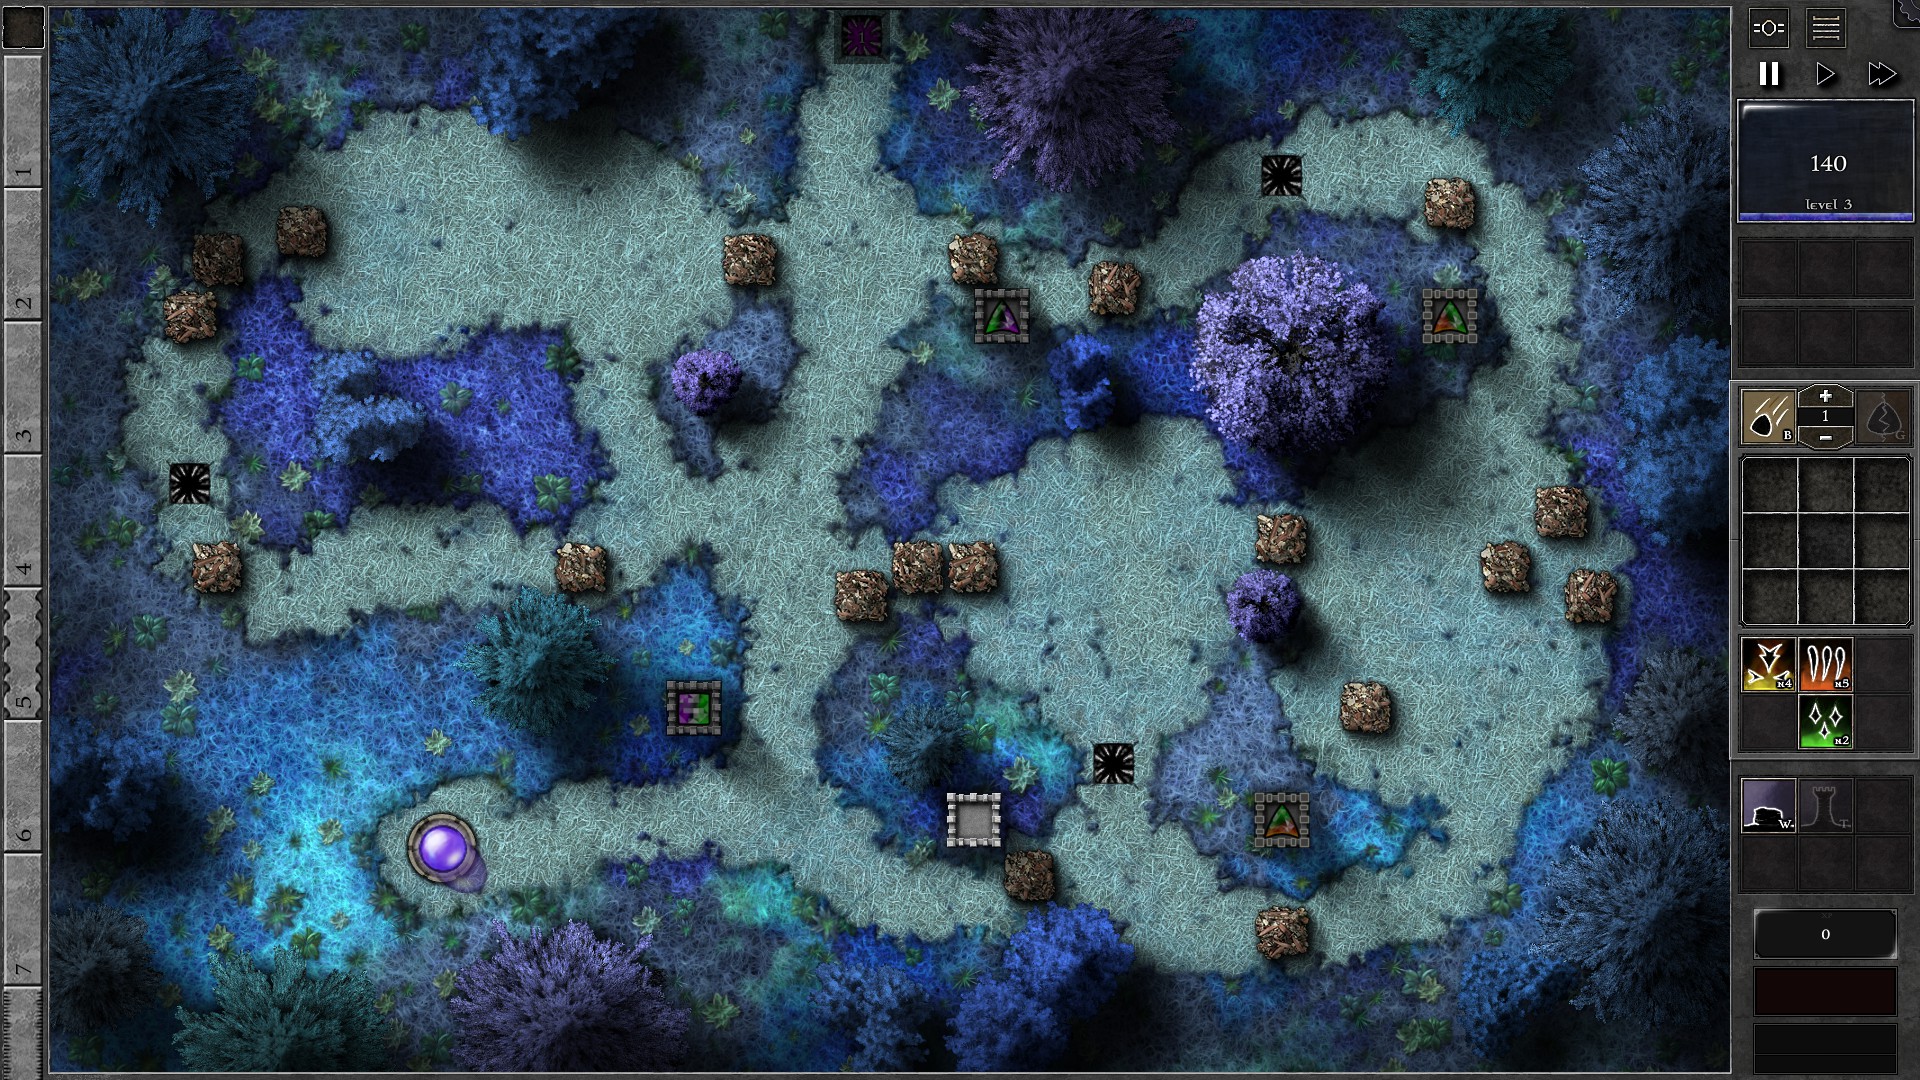
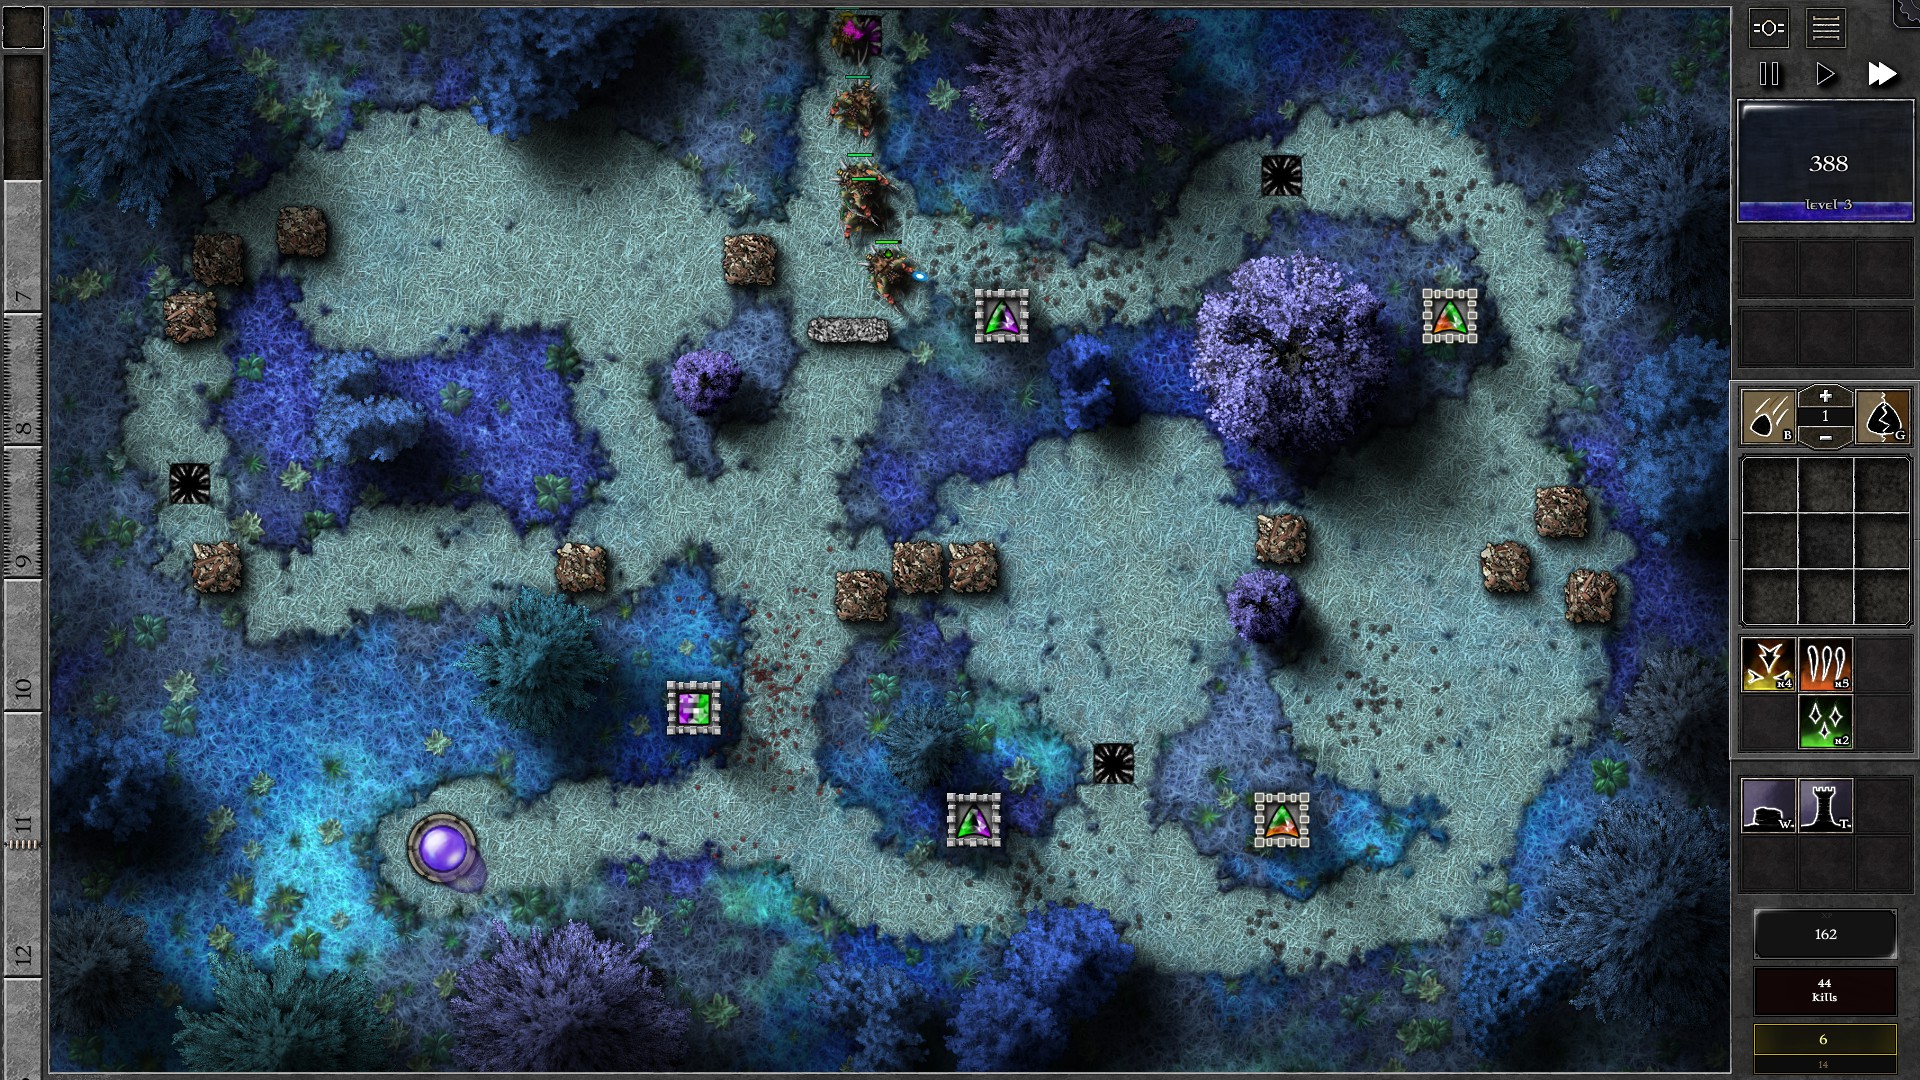
Setup the field as shown with a g3 p/g gem and a g2 p/g gem. If you haven’t noticed, there is a g1 p in the trap at the entrance which you can duplicate for extra purple gems; do not combine that gem with anything else so you keep the option. Set the g2 gem to target “Structures” so that it will actually fire at the 2 barricades close to it.
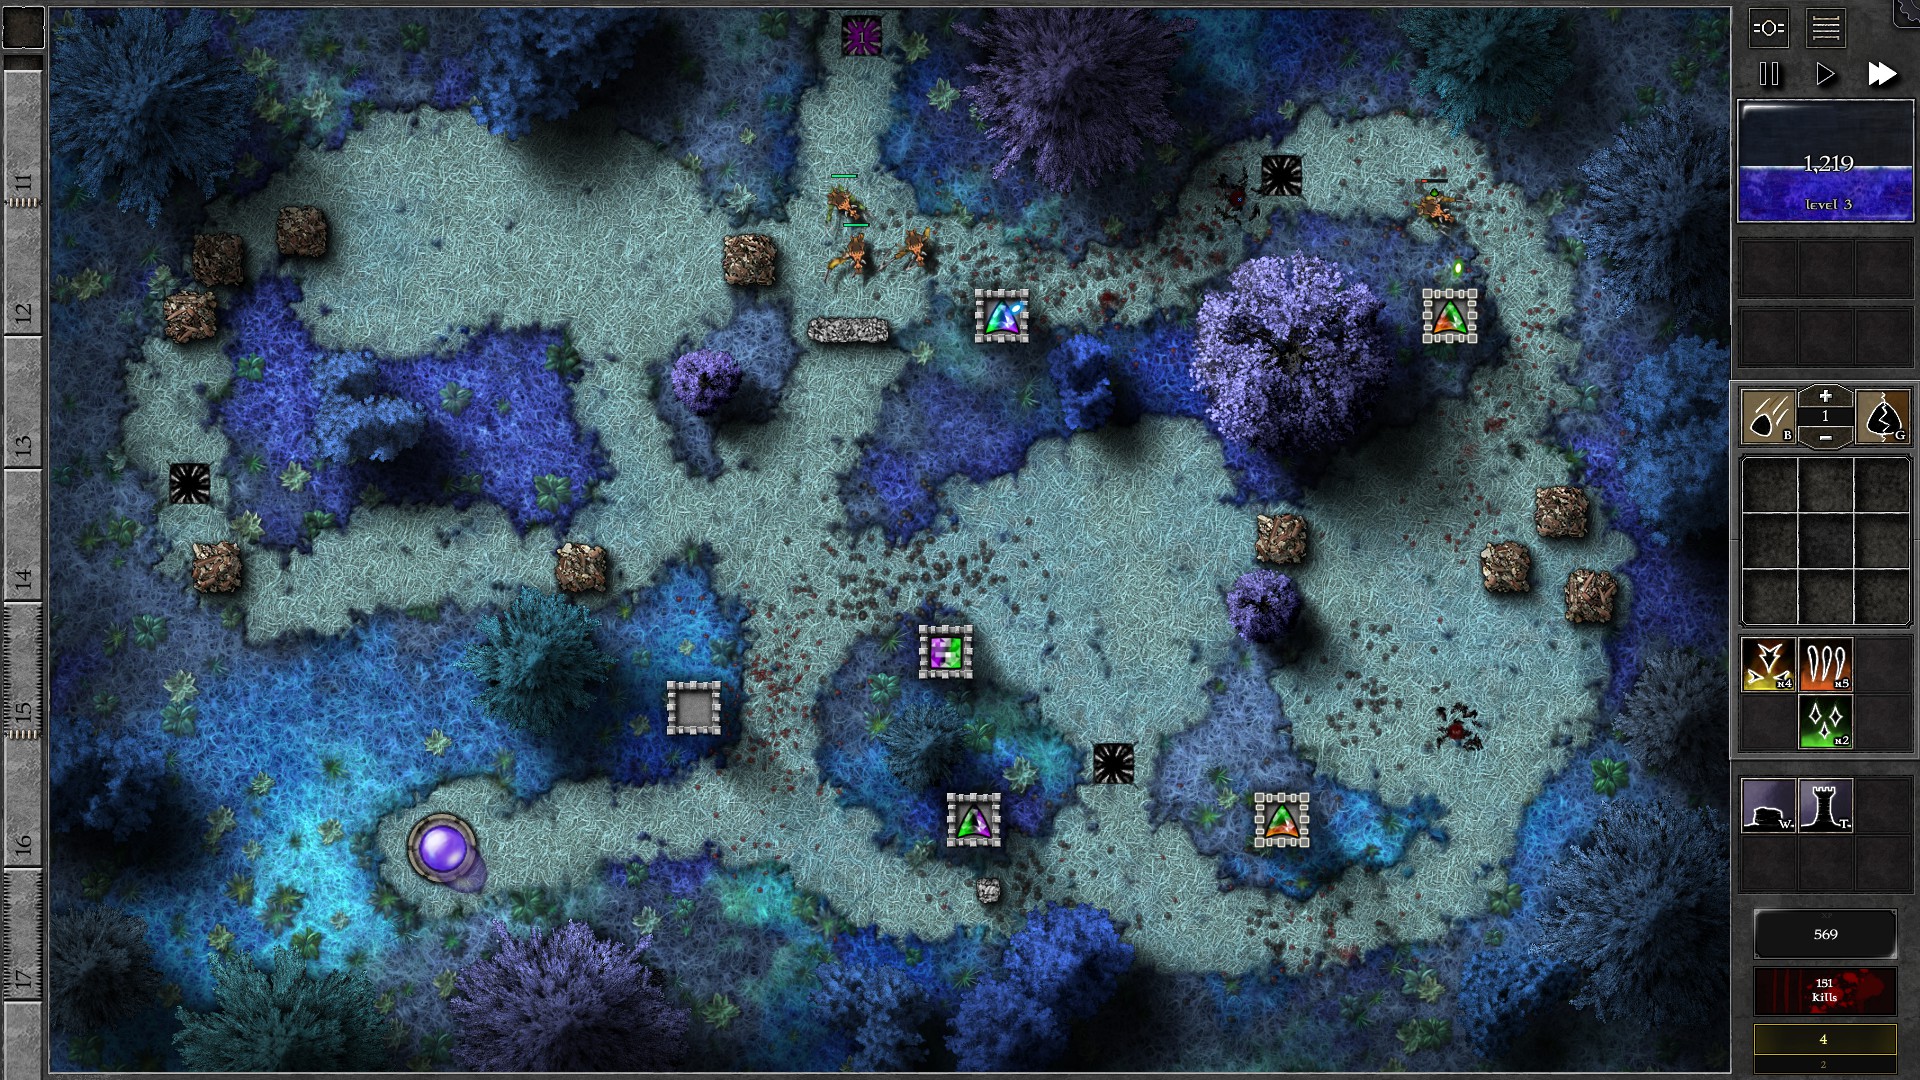
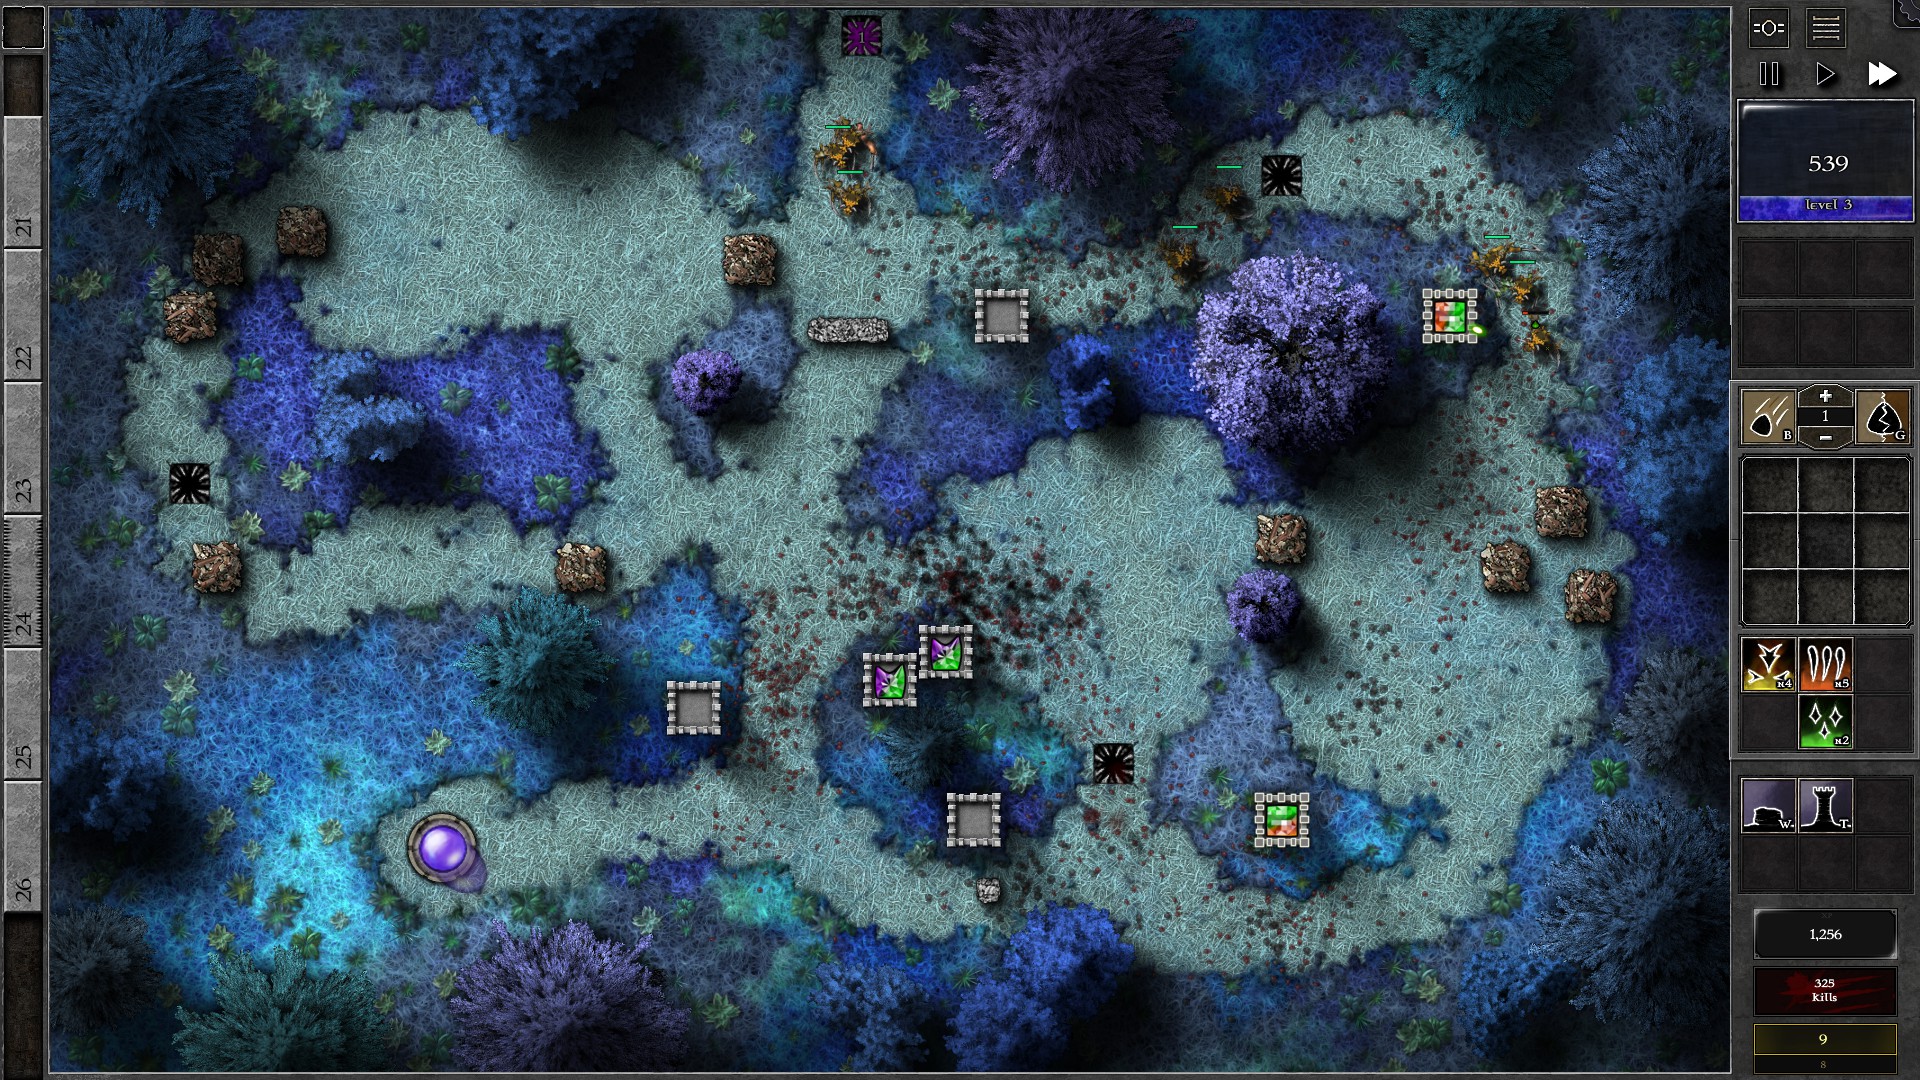
Quickly create another g2 p/g gem that you can insert into the built tower with no gems in. It should fire at the 200 HP Barricade close to it. At around w4 all the barricades in gem ranges should be destroyed which will open up a path to the right. Build walls to force monsters go through the right path. Now you can move your g3 gem to destroy the 3 barricades at the centre of the field. At w9 you should destroy all the barricades which allows you to build walls to further lengthen the path.
Combine your 2 g2 p/g gems into a g3, and build another tower to enjoy the better coverage of tower range on the large bend. Start upgrading your p/g gems; you should reach 2 g4 gems by w20 which should be enough to take care of the remaining waves.
024 – Field T1
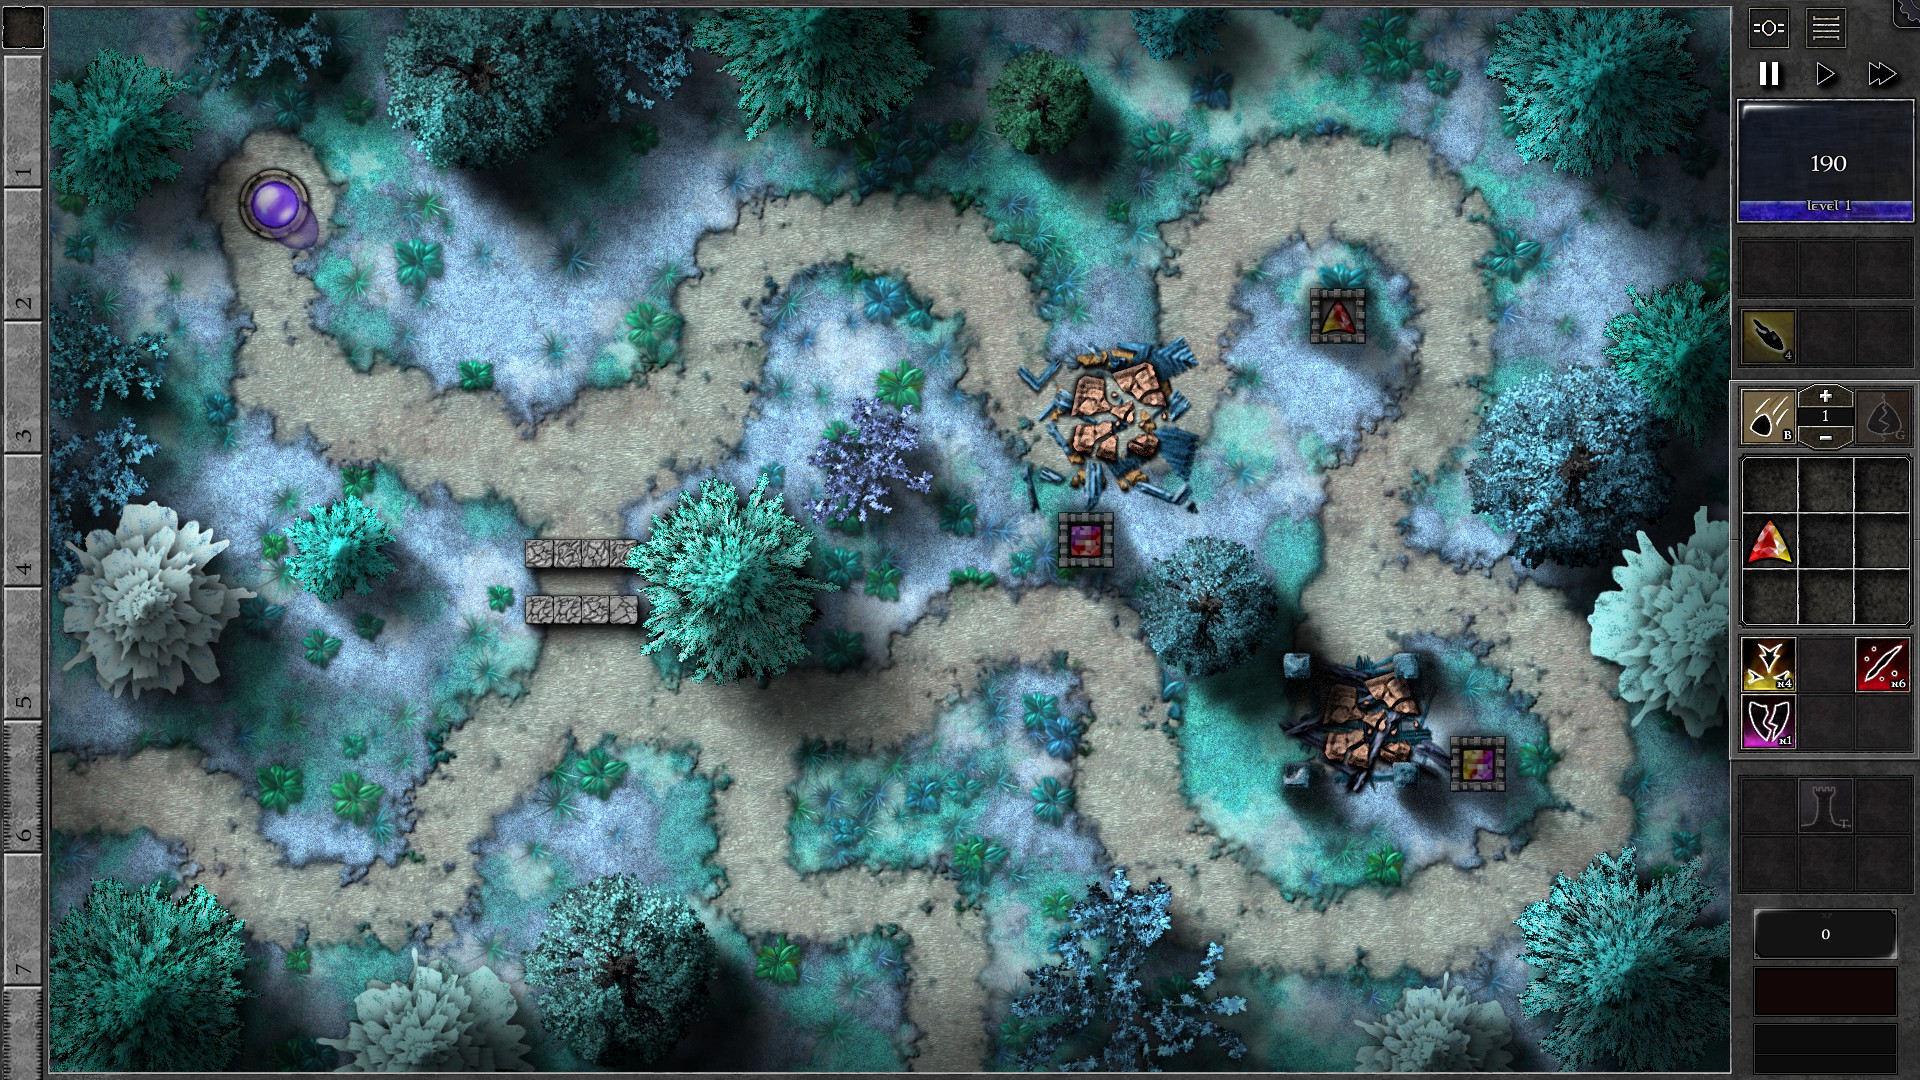
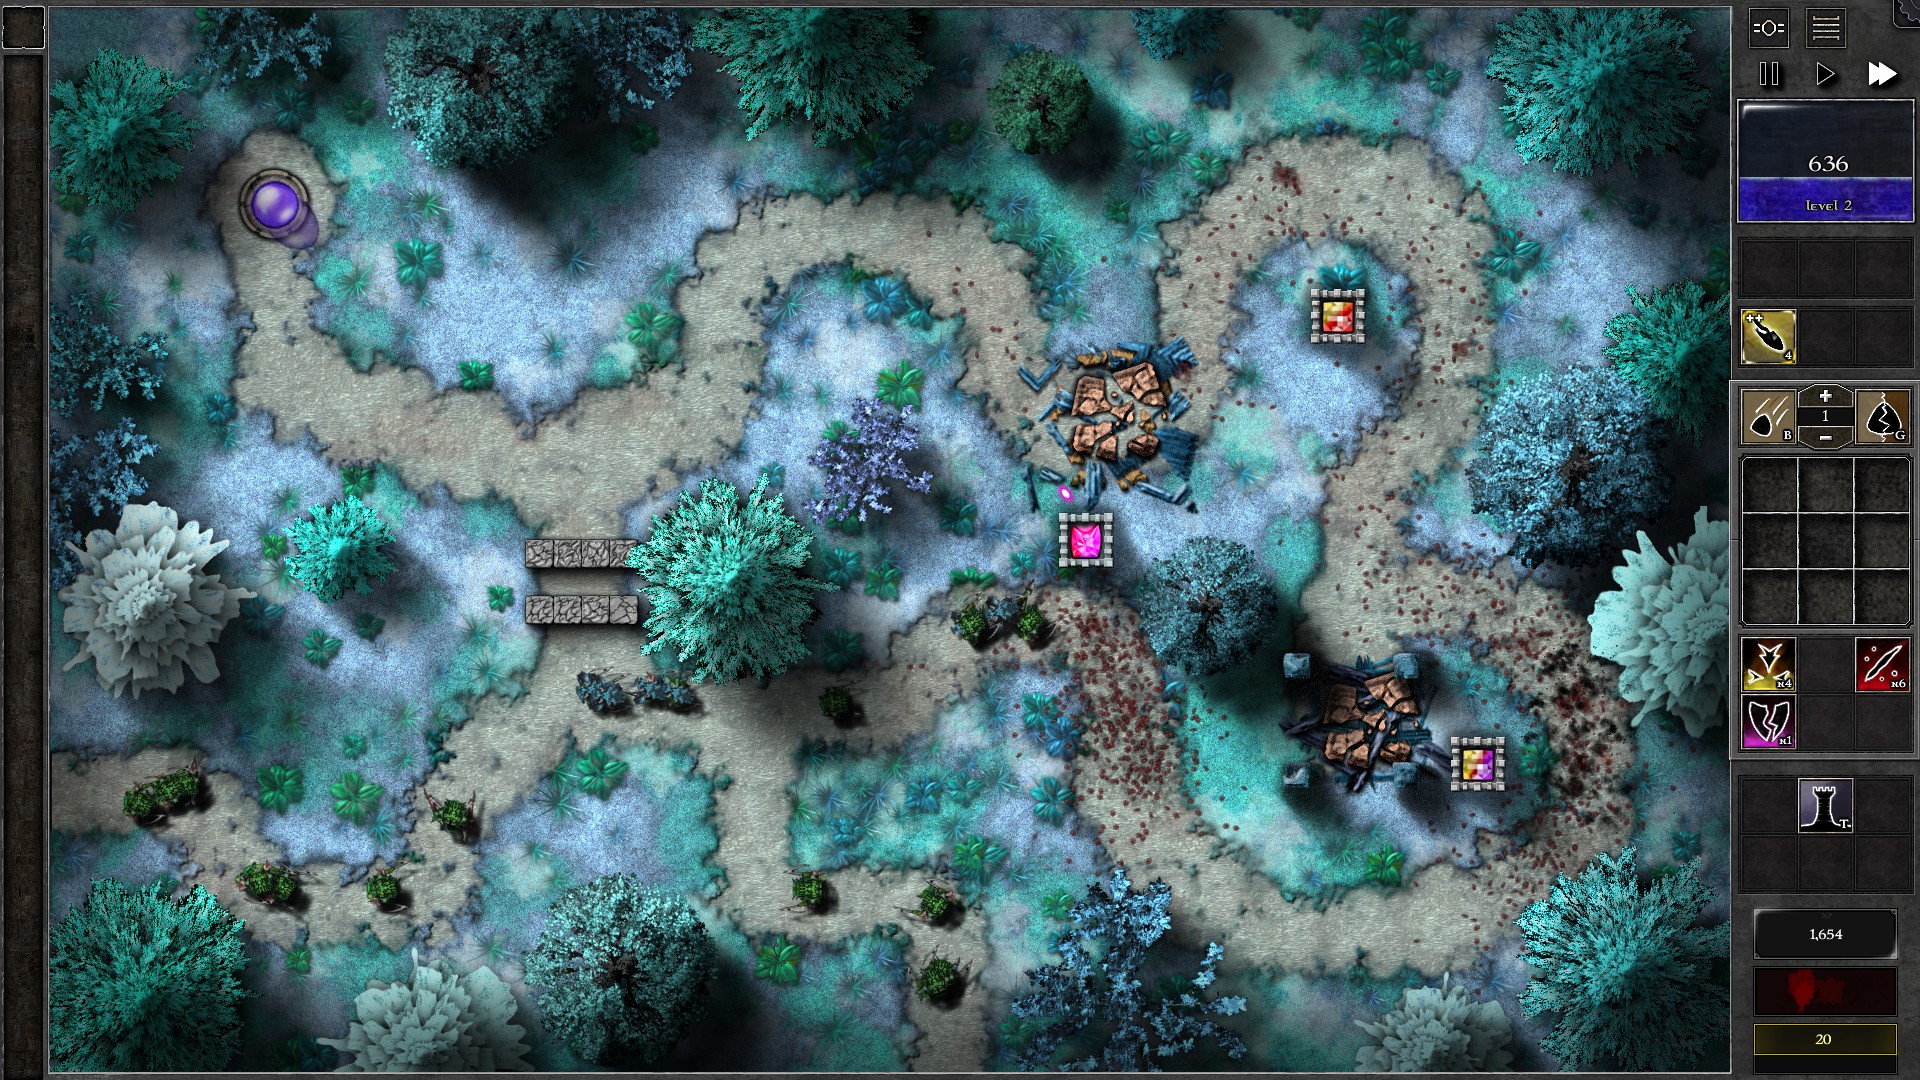
Build 2 towers at the key locations giving towers a good coverage of the path. Combine the 2 g2 p/r gems into a g3 p/r and the 2 g2 p/y gems into a g3 p/y, then insert gems into towers as shown in the first screenshot. Start the waves, soon you should have enough mana to combine the remaining g2 r/y gem into the r/y tower for a g3 r/y gem.
You have a decent mana recovery but monsters barely give any mana, which makes upgrading gems very difficult. After getting 3 g3 gems you will probably need to take a lot of time for another upgrade. Use Bolt to help get you out of sticky situations and take on larger amounts of monsters, especially after w15 where monsters starts to get tough for your g3 gems.
At w17 you should have enough mana to upgrade a gem to g4. Upgrade the p/r gem to g4 and insta-resocket the gem with Bolt to help take on the swarmling waves. You should be able to defend the remaining waves with the help of Bolt spells on the g4 gem.
NOTE: If you have banished monsters before, you may not have enough mana to upgrade at w17, you should still use bolts to help out on the swarmling waves, and take caution when upgrading your p/r gem later.
025 – Field T2
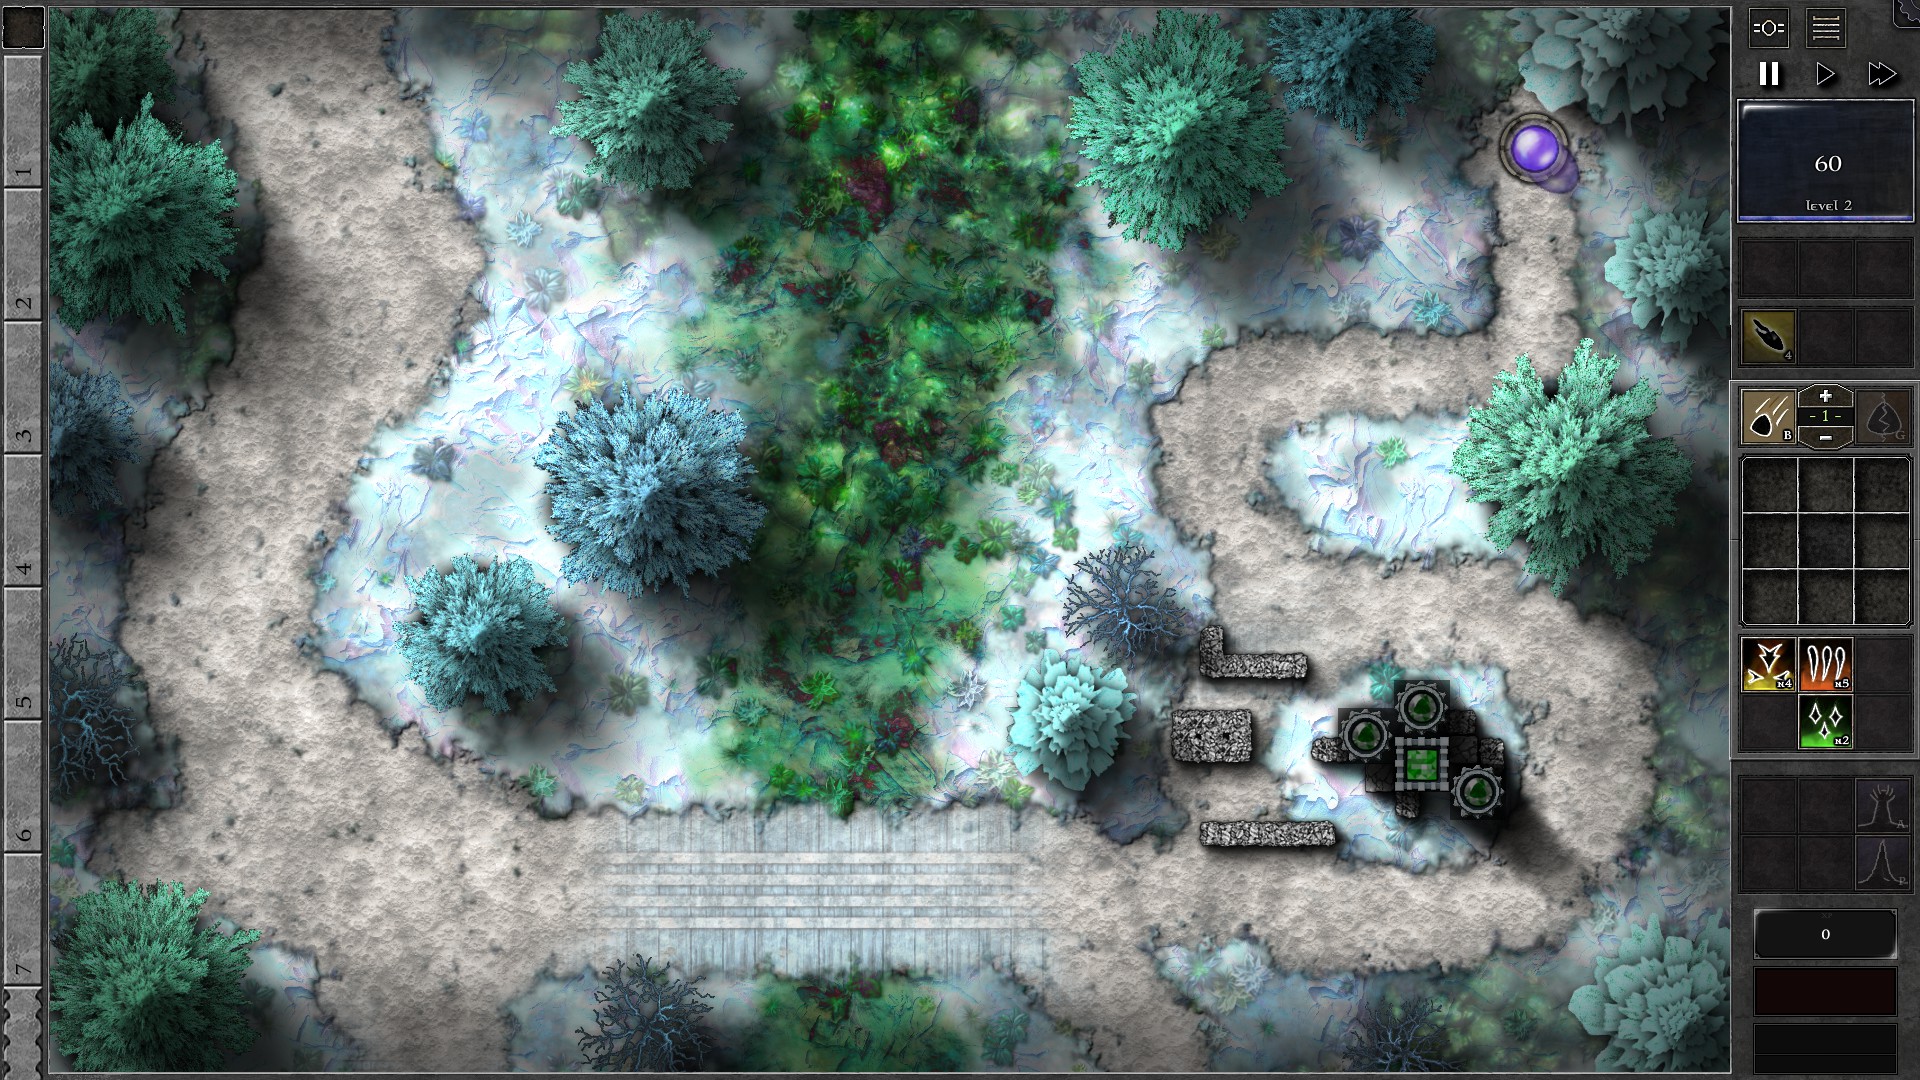
Setup the tower and amplifiers with g3 and g1 green gems respectively. Set the g3 tower gem to target “Random” and start the field. The tower gem should spray poison damage to the monsters and kill them without giving any regard to their ridiculously high armor. You should also use Bolt that also kills monsters while ignoring armor whenever you have them ready. At around w8 you should be able to upgrade your tower gem to g4 while saving enough buffer against occasional banishments (or have Bolt ready to insta-resocket the gem).
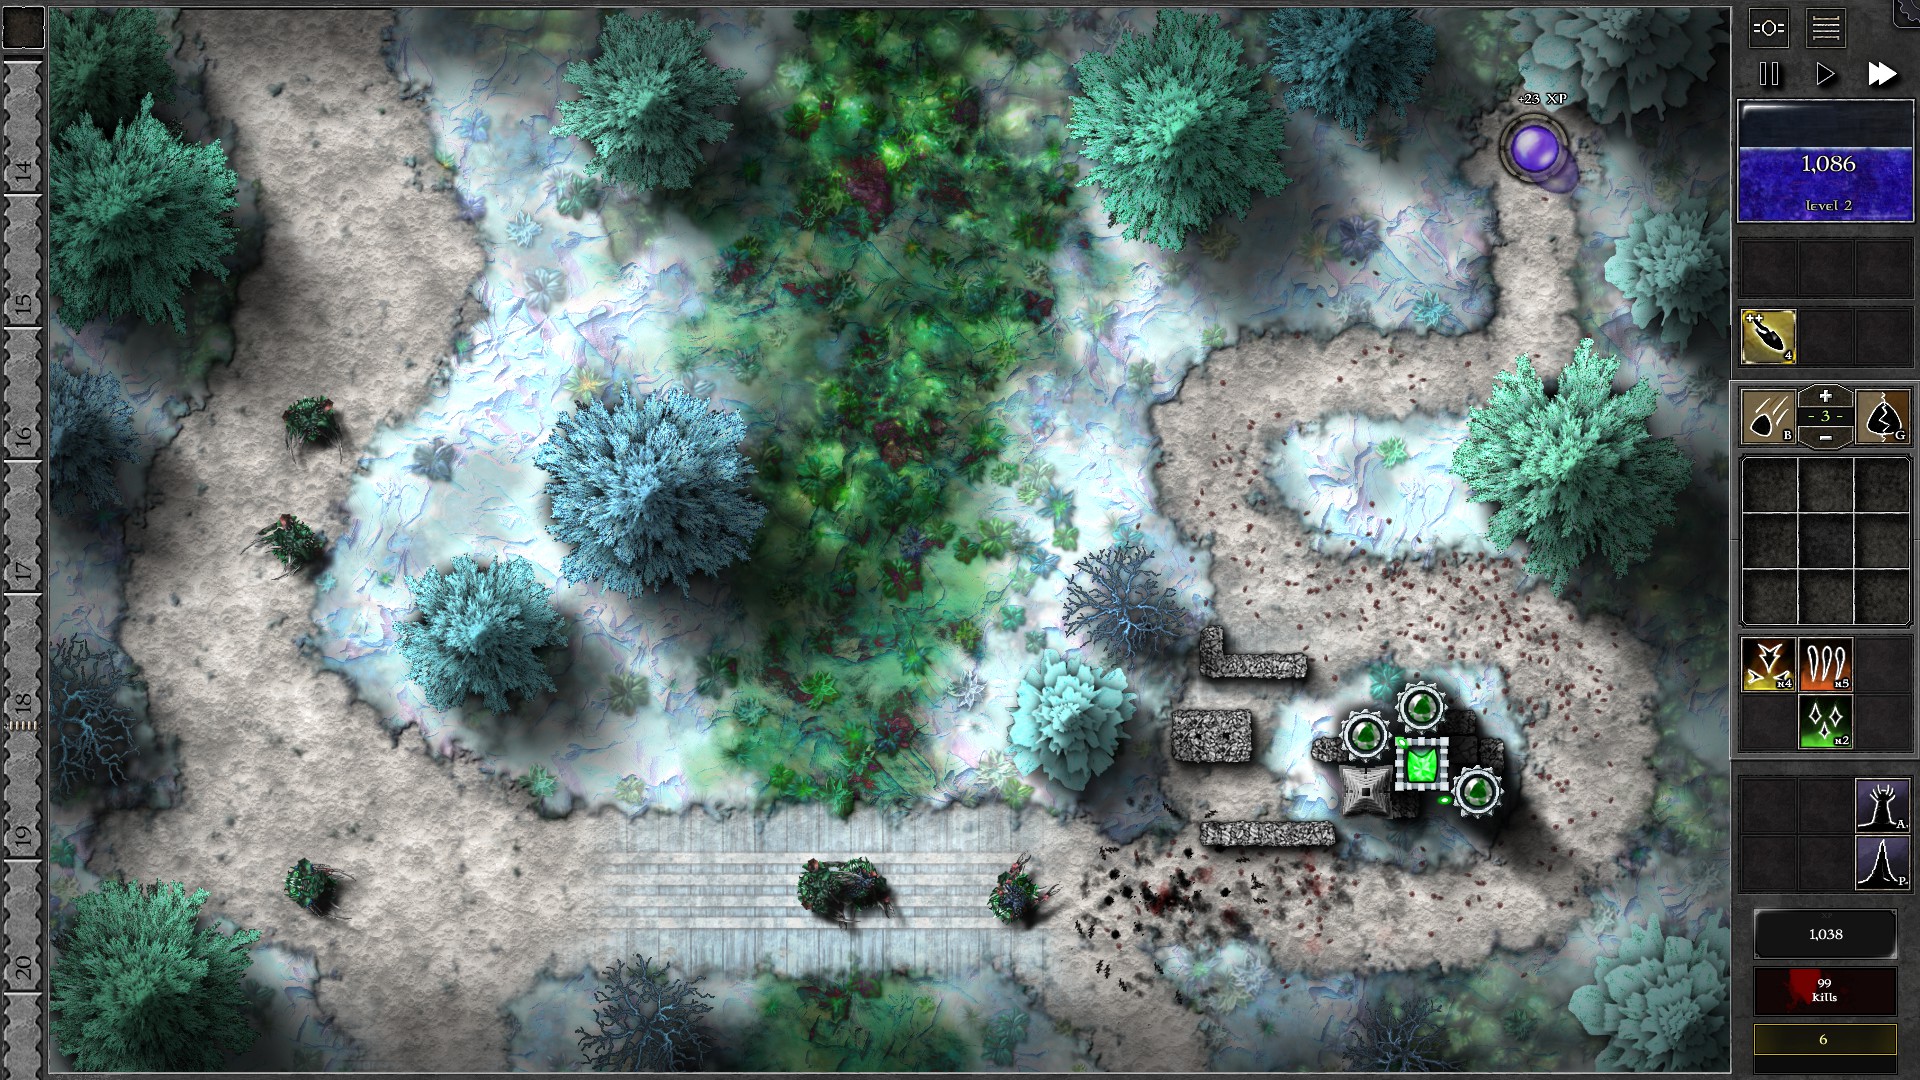
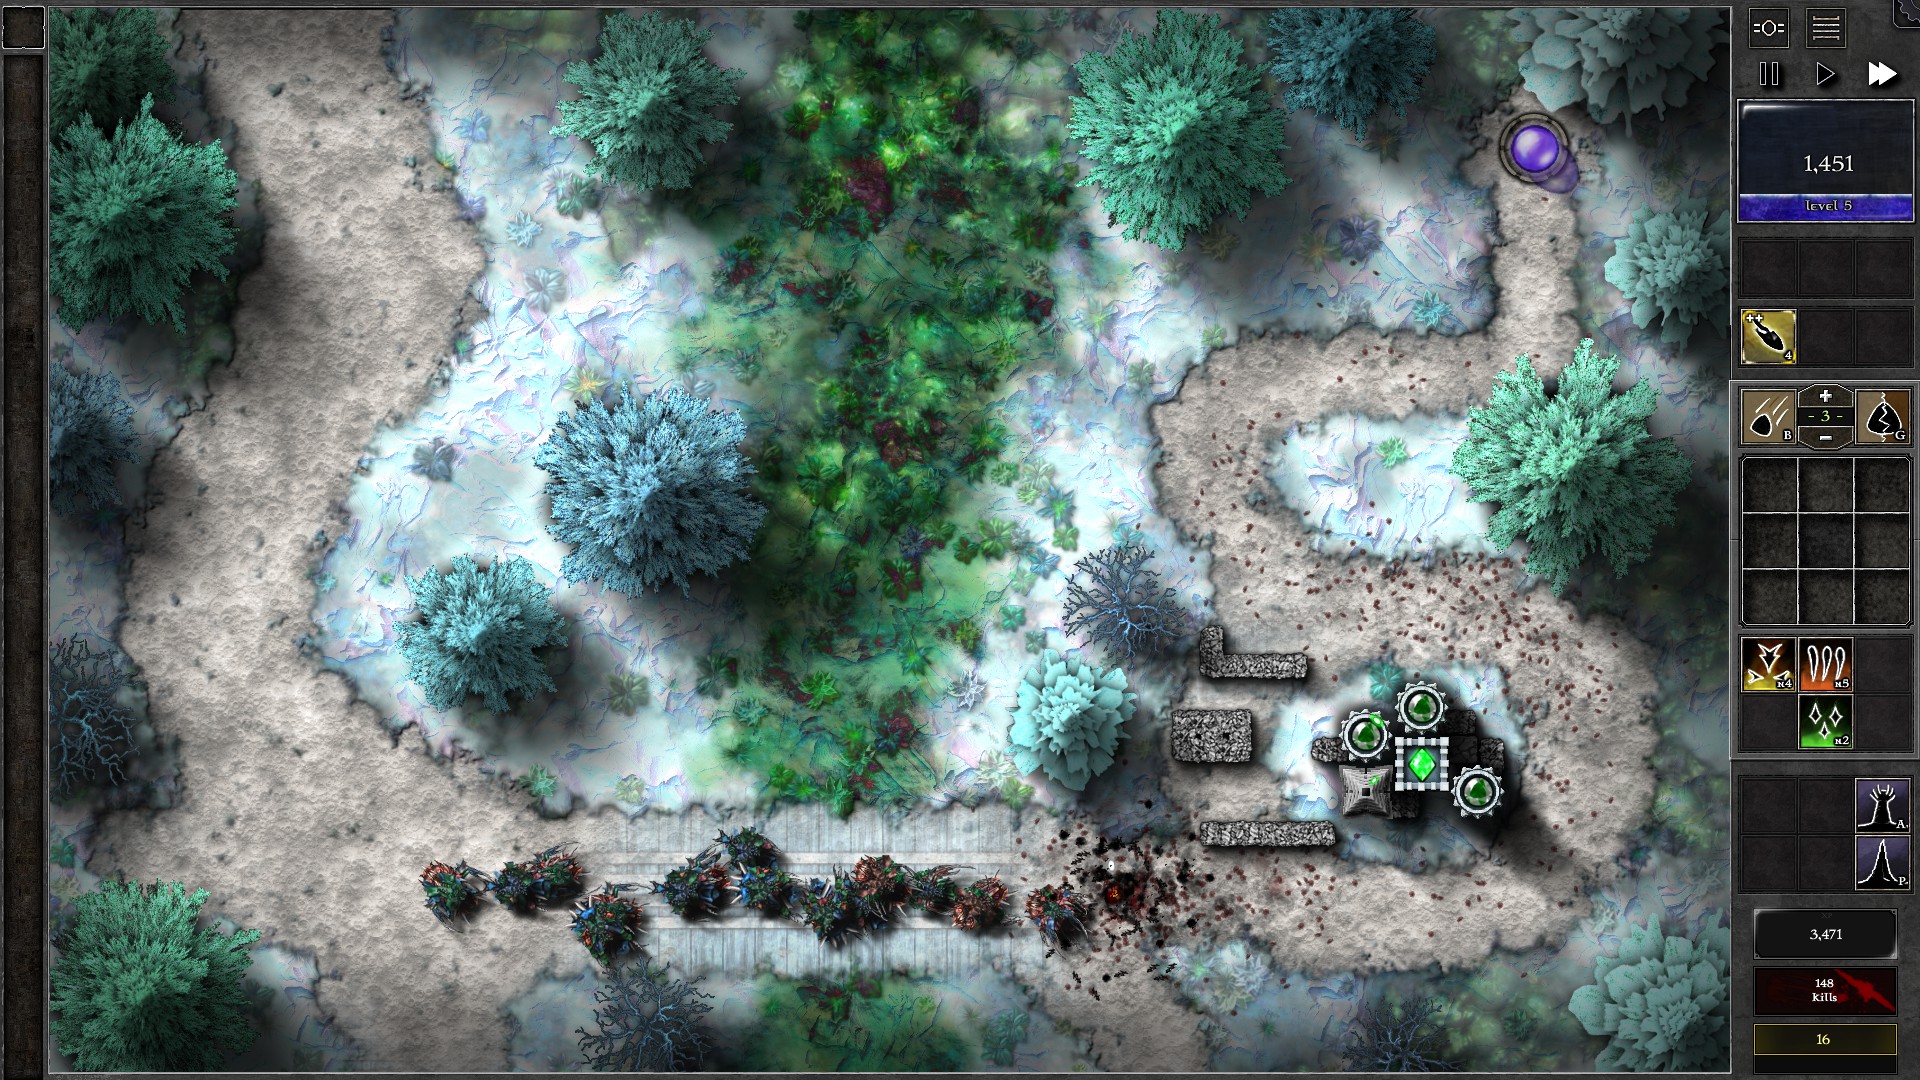
From w8 almost all the waves are giant waves. Now, save up enough mana to build a pylon close to your g4 tower gem while covering most of the path around the group of buildings. Set the g4 gem to target “Structures” and it will focus on charging the pylon. The pylon should now become your main source of armor-ignoring damage. Upgrade the tower gem to g5 once you have enough mana and you should have no problems dealing with the rest of the Trial. You will also likely be able to afford another upgrade to a g6.
You can even call most of the giant waves early and use the extra mana to further upgrade your tower gem to g6 earlier and take on the larger amount of giants at once.
026 – Field T3
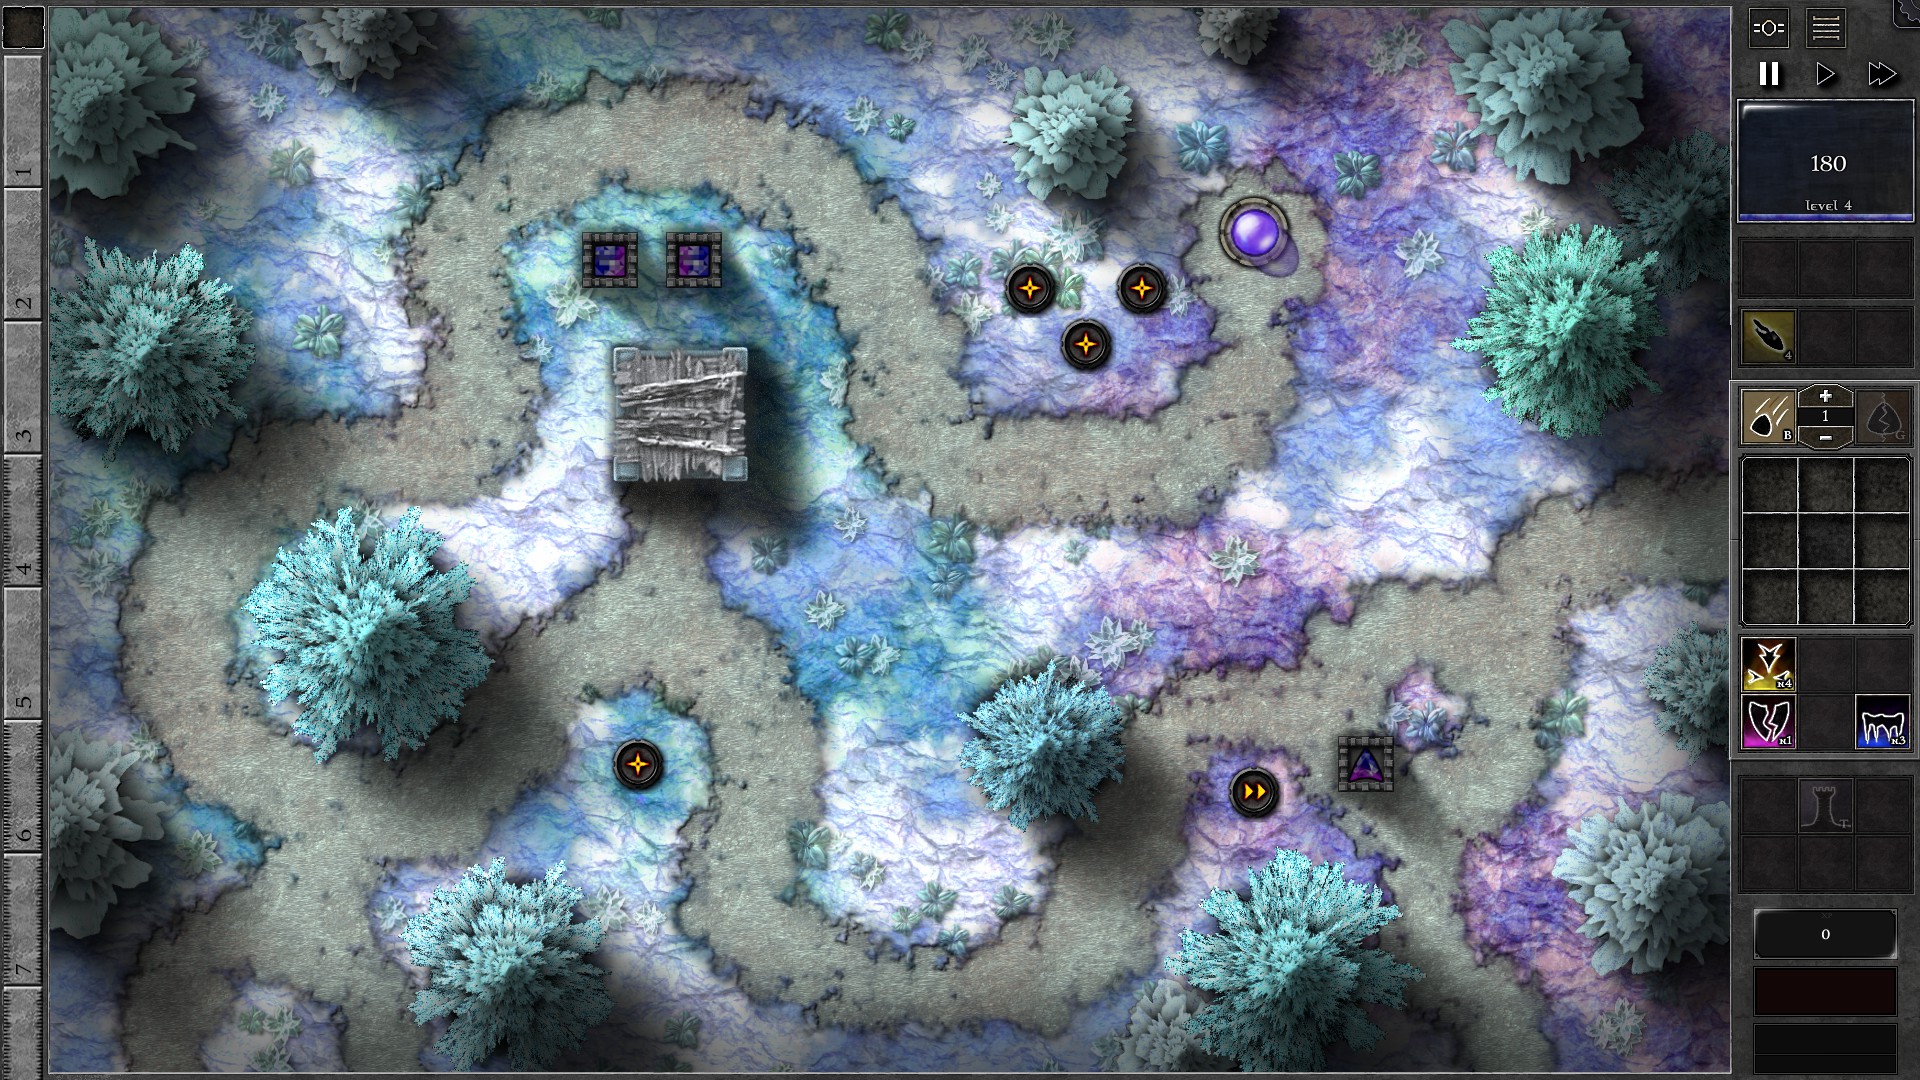
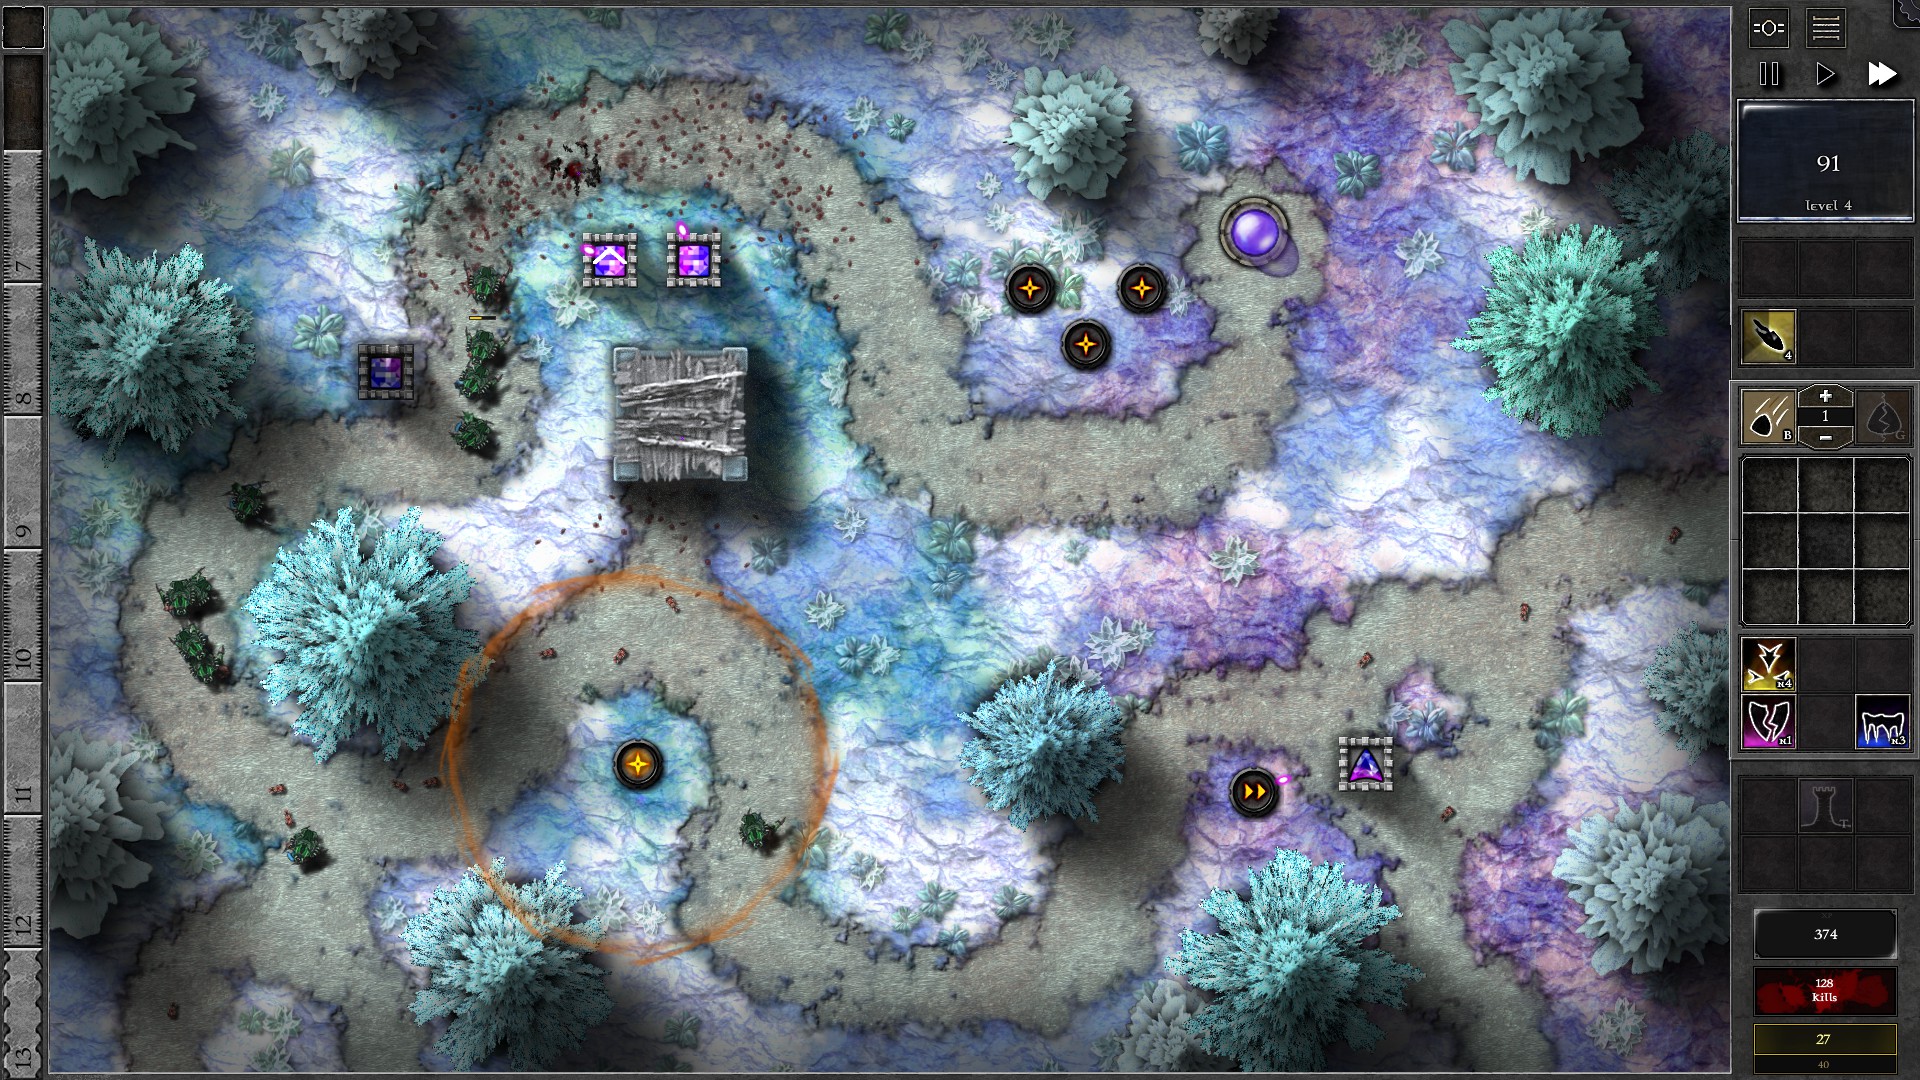
Start the field with 3 towers, 2 g3 p/b gem and 1 g2 p/b gem as shown in the first screenshot. The g2 gem should target “Structures” to focus on taking down the speed beacon. At w4-5 where swarmling waves start to pour in, use both Bolt spells on the 2 g3 gems to survive the initial attack, then build a 4th tower with a g3 p/b gem once you have enough mana (tower as shown in second screenshot). After building the 4th tower, upgrade the beacon hitting g2 gem to a g3, which should destroy the beacon at around w12.
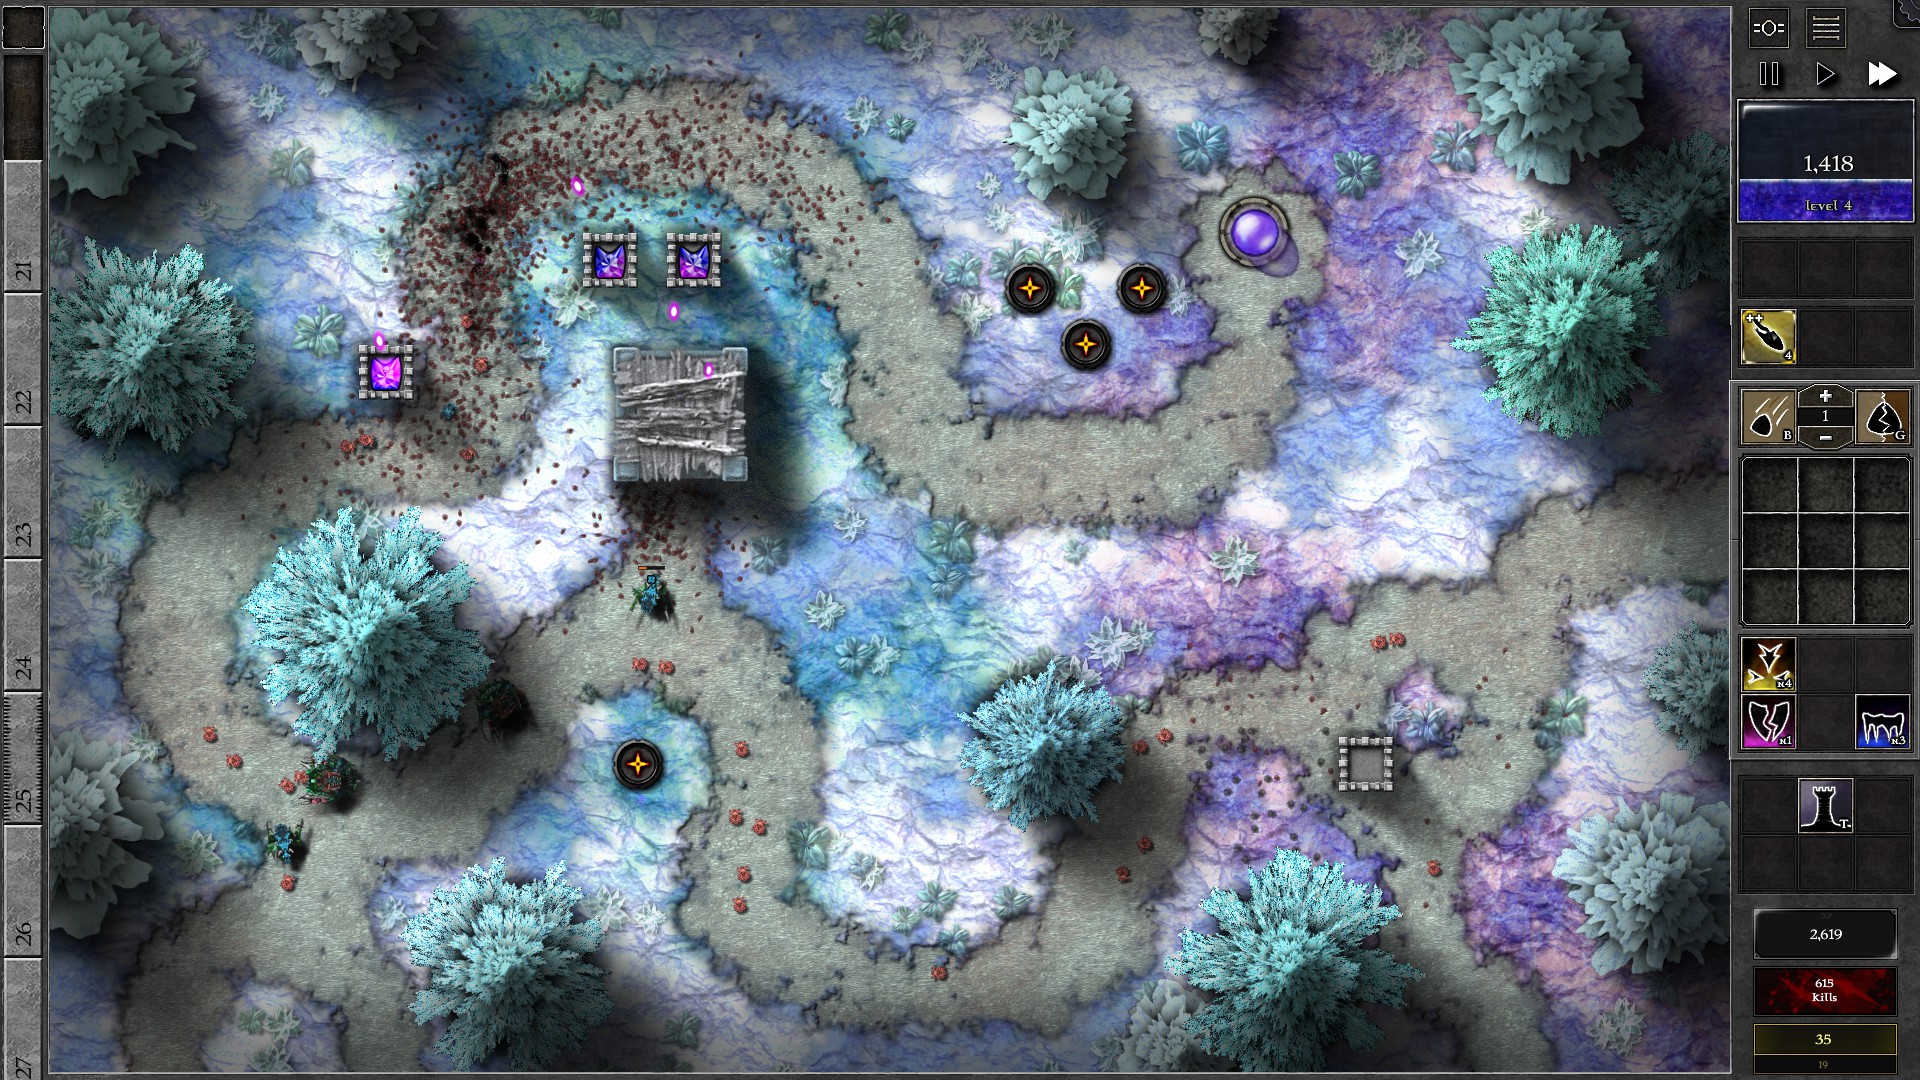
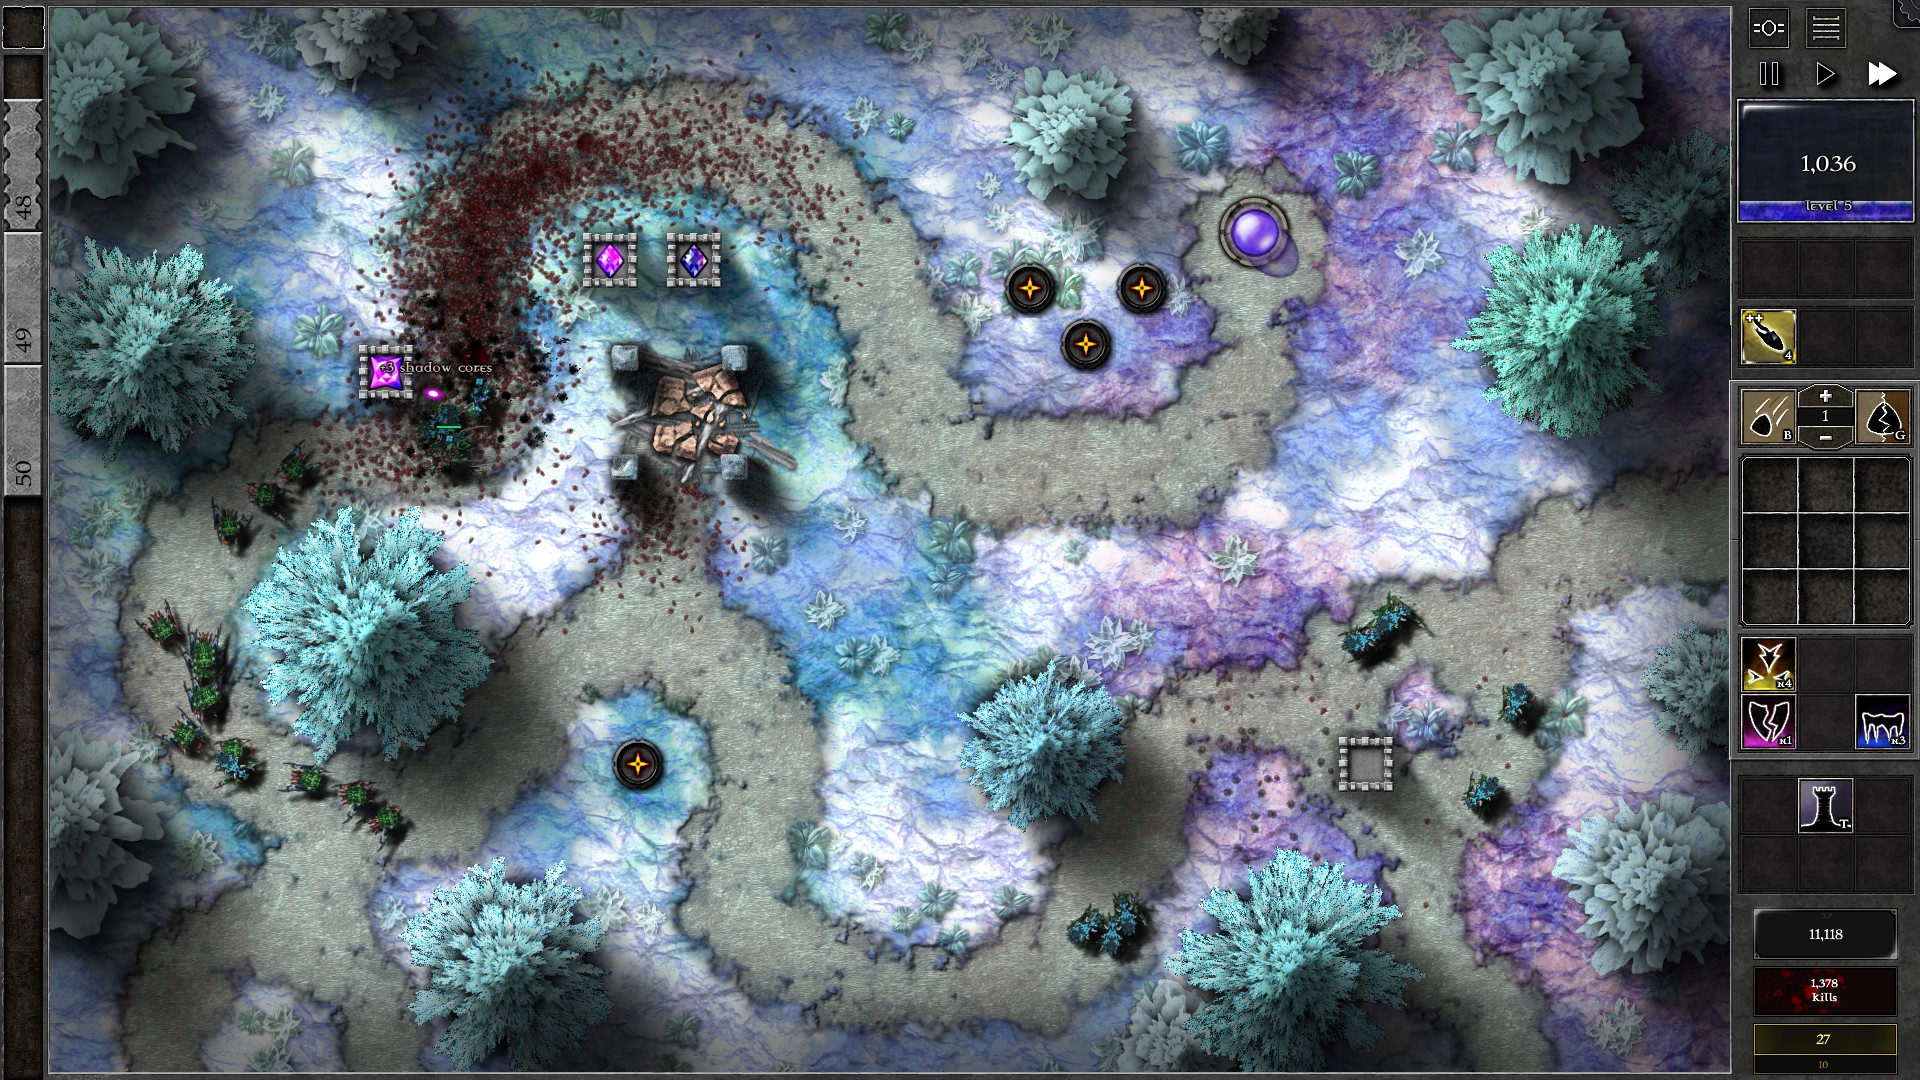
Once the speed beacon is destroyed, some giant waves (w13-15) should be incoming. Upgrade one of the top 2 tower gems to a g4, and combine the beacon hitting gem with the other tower gem into a second g4. Finally, upgrade the remaining g3 gem into a g4 when you have enough mana, which should be doable before w20. Use Bolt during this period to help insta-resocket upgraded gems or take on more monsters if necessary.
From now on, upgrade the 3 tower gems evenly and you should be able to defeat the remaining waves (watch out for a fast swarmling w34). You should reach 3 g5 gems around w32, get a first g6 gem at around w40, and end up with 2 g6 + 1 g5 gems.
027 – Field T4
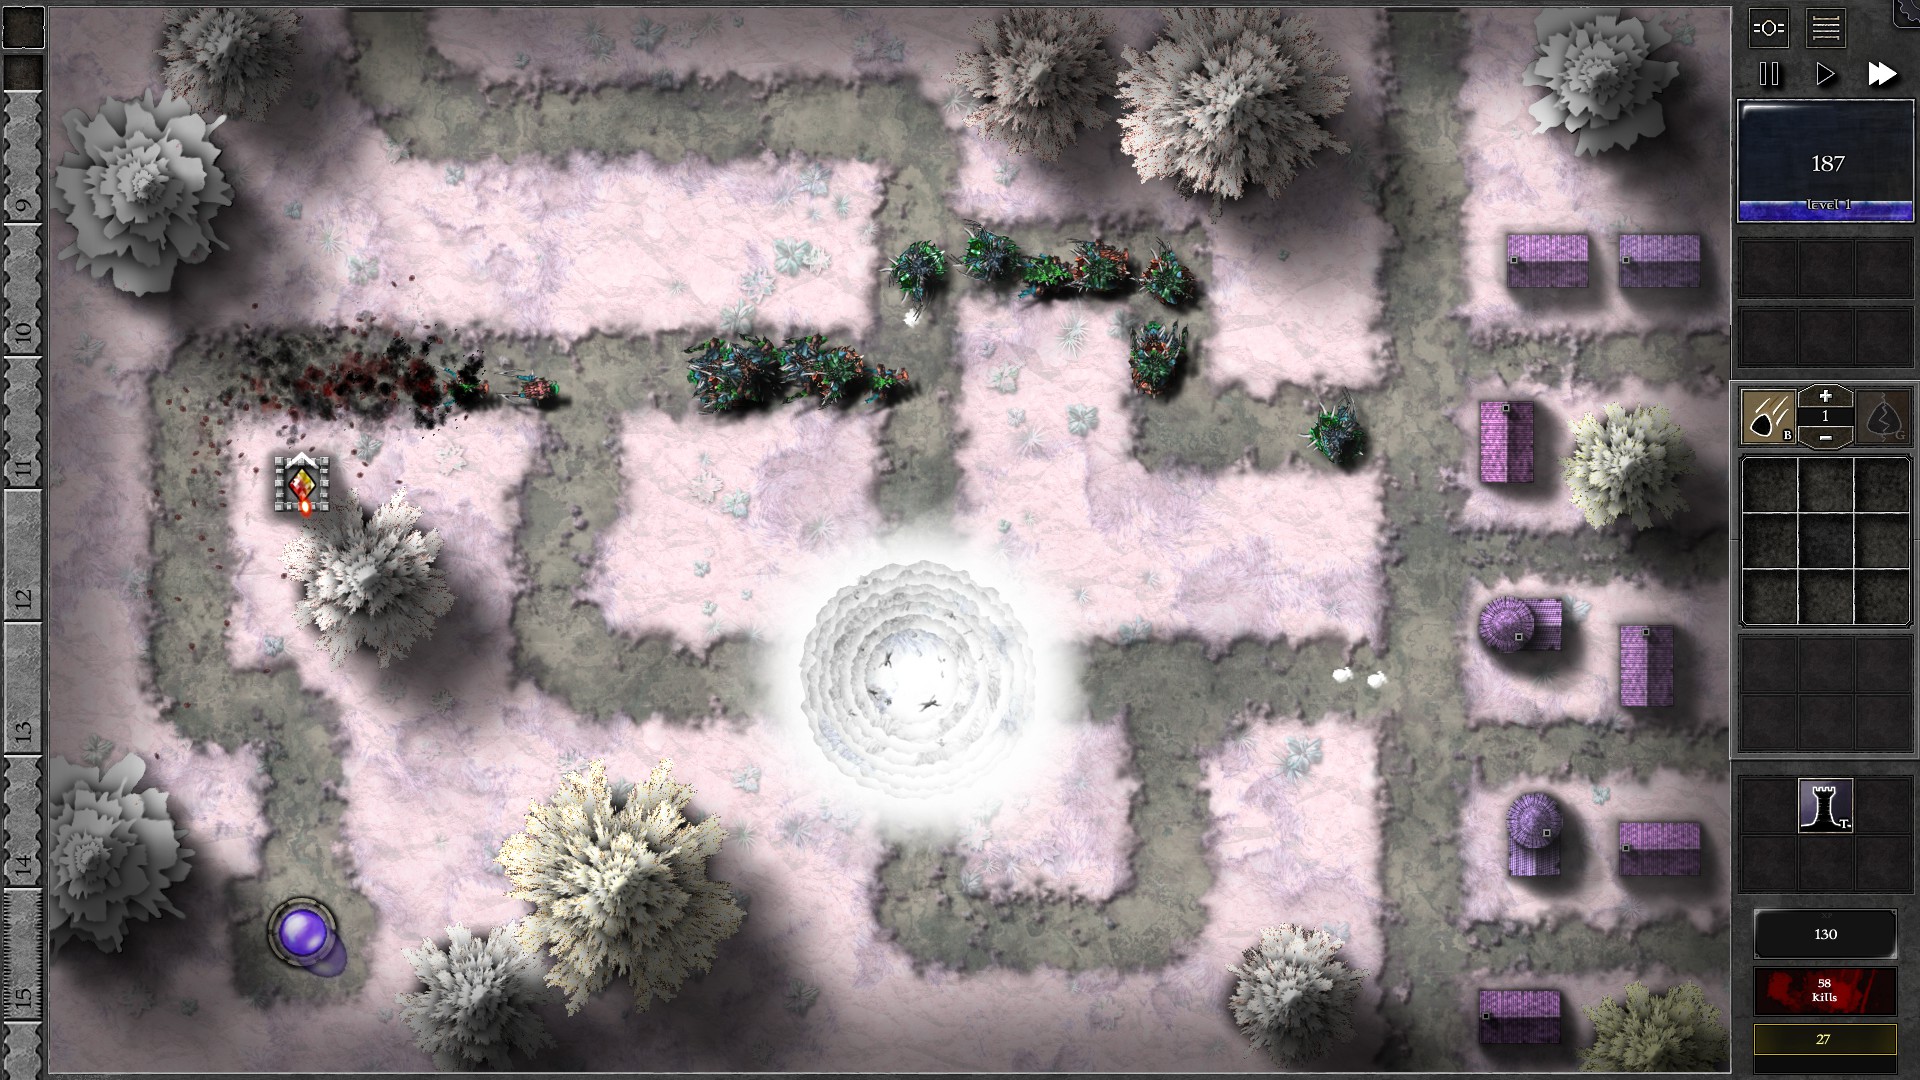
It looks like you have no way of setting up a defense in this field, but once you recall that early waves give extra mana, you can solve this Trial. Send the first 6 waves early; this should give you enough mana for a tower. Build the tower and immediately put in the g6 gem given by the Trial. The g6 gem should kill through all the monsters in this Trial without much need for player intervention.
028 – Field T5
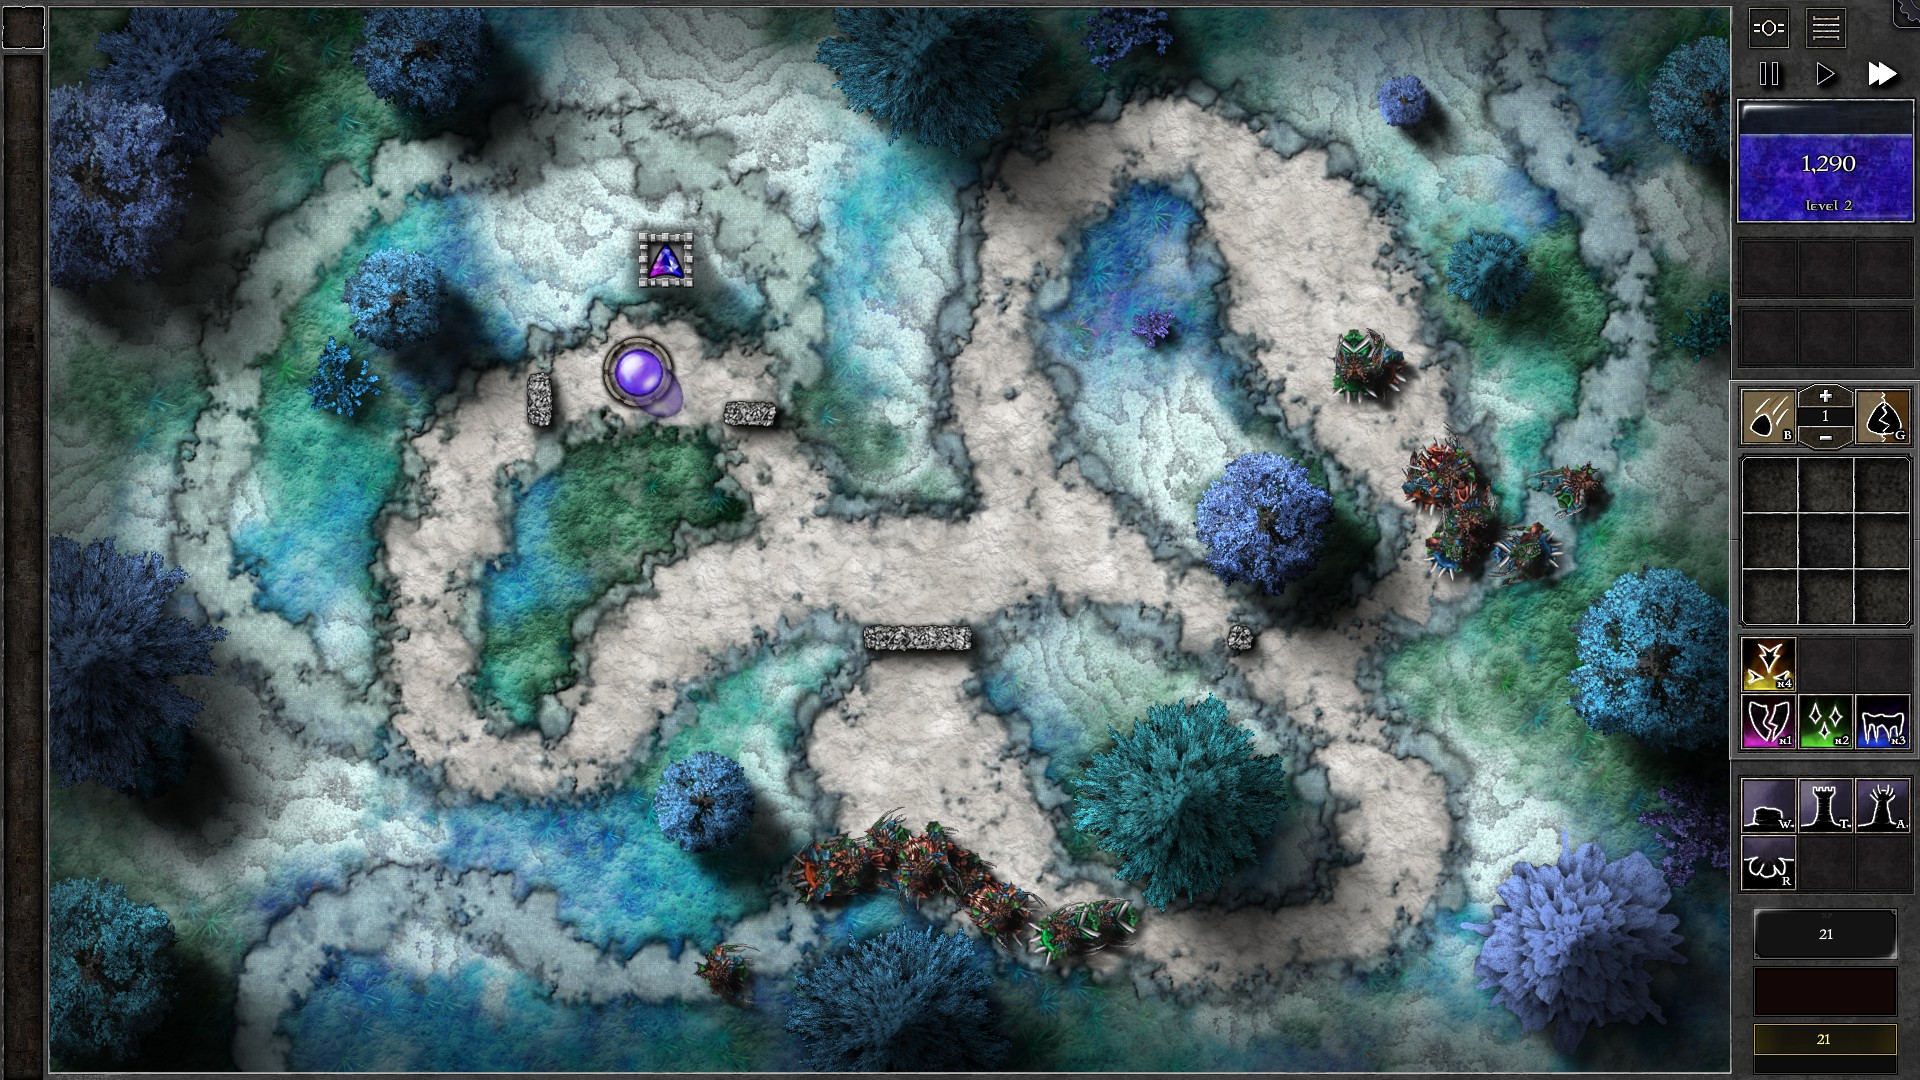
Setup the field as shown with a g2 p/b gem set to “Least HP” and send all 6 waves early immediately. You will notice that you can upgrade your g2 p/b gem quickly due to the 60x mana regeneration rate. However, wait until you reach Mana Pool LV5 (Mana pool upgrades makes the already fast mana regeneration even faster), then upgrade your gem to g5 ASAP (may need a bit of extra mana regen).
NOTE: Whenever you upgrade your gem, be careful of any imminent banishments.
With “Least HP” targeting, a g5 gem should do quick work to the w1-2 giants before they get banished. Once all the w1-2 giants are gone, start building several towers at key location to have your gem follow and kill the remaining giants. Start with the w3-4 giants first while upgrading your gem to g6, then work through w5-6 giants after you kill the w3-4 ones.
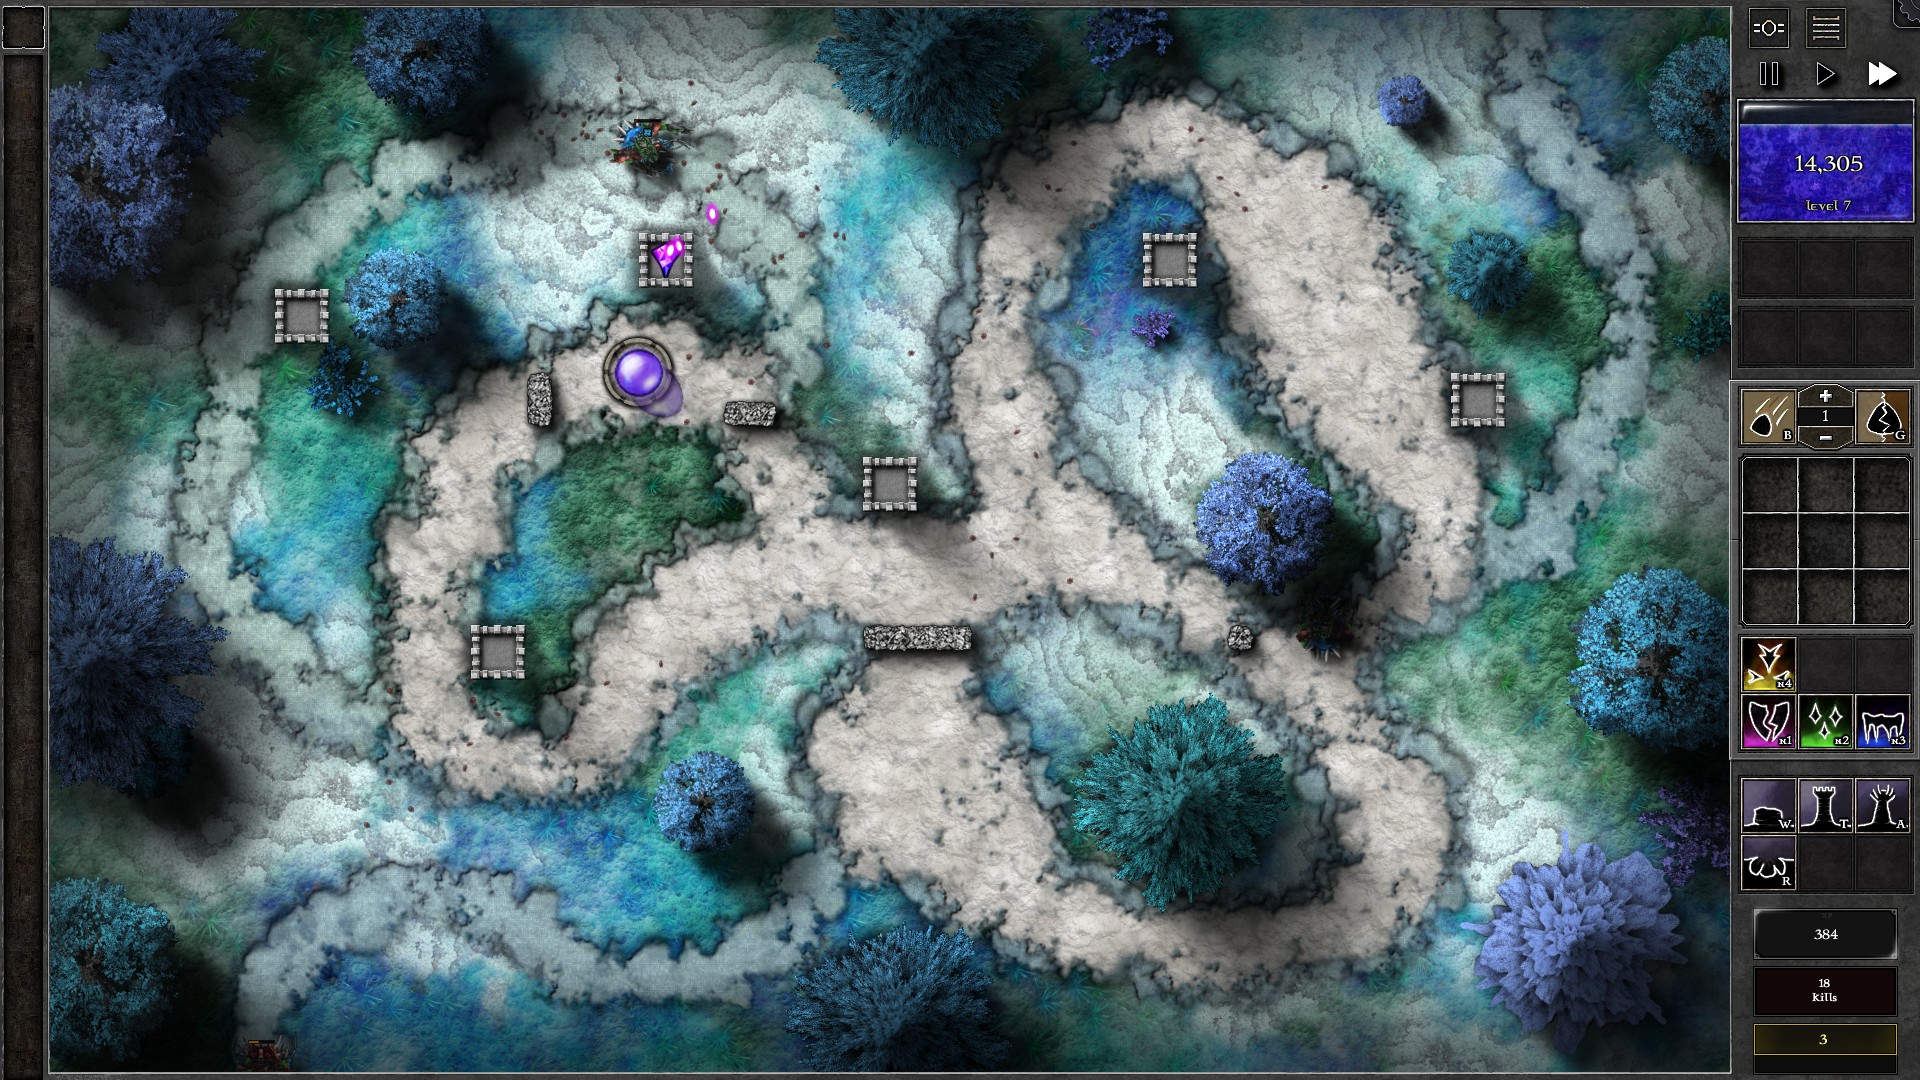
Upgrade your gem to g7 when you have enough mana. w5-6 giants has much more HP that you will need several banishments before you kill them. Start noting where the giants respawn and take out those coming from the entrance closer to the Orb (top right entrance for the setup in the screenshot). A g7 gem should take down the giants before they cost too much to banish. Finally, remember that you can click on monsters to force your gems to fire at the selected monster.
029 – Field U1
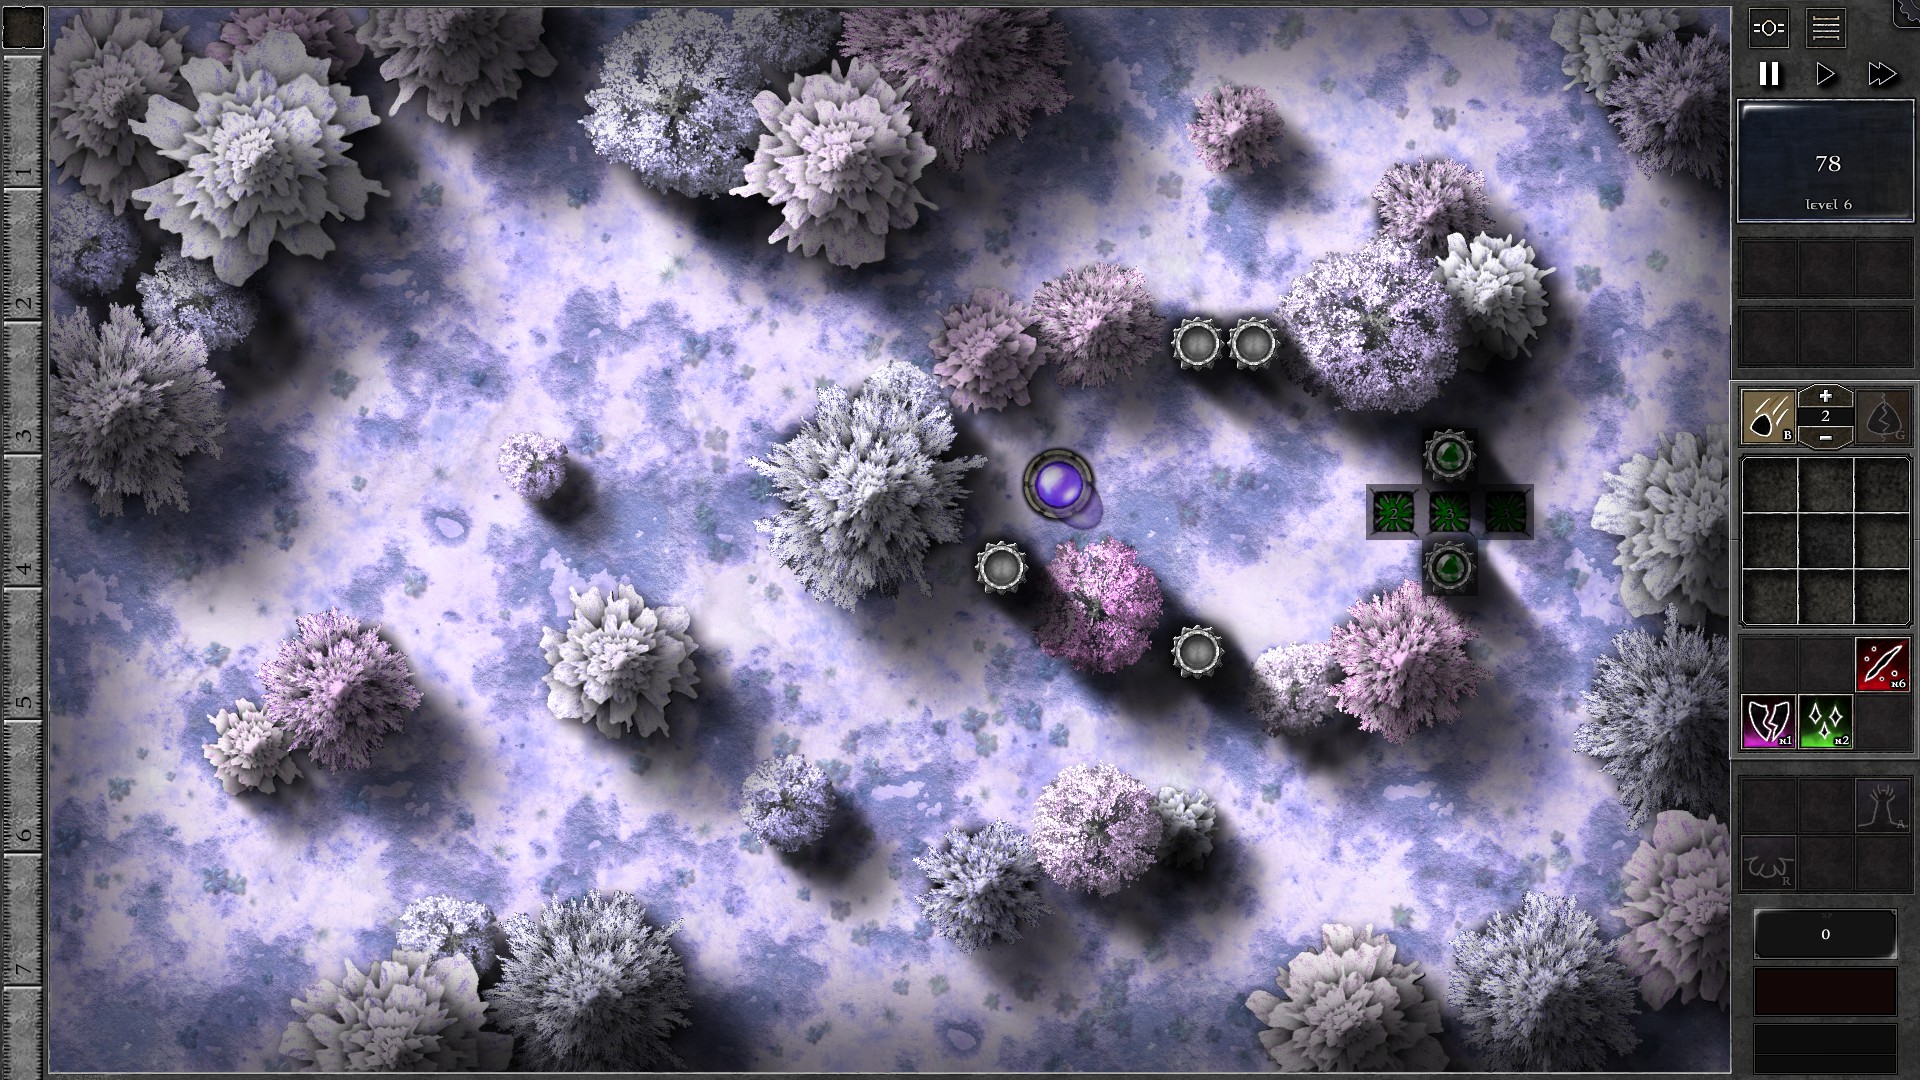
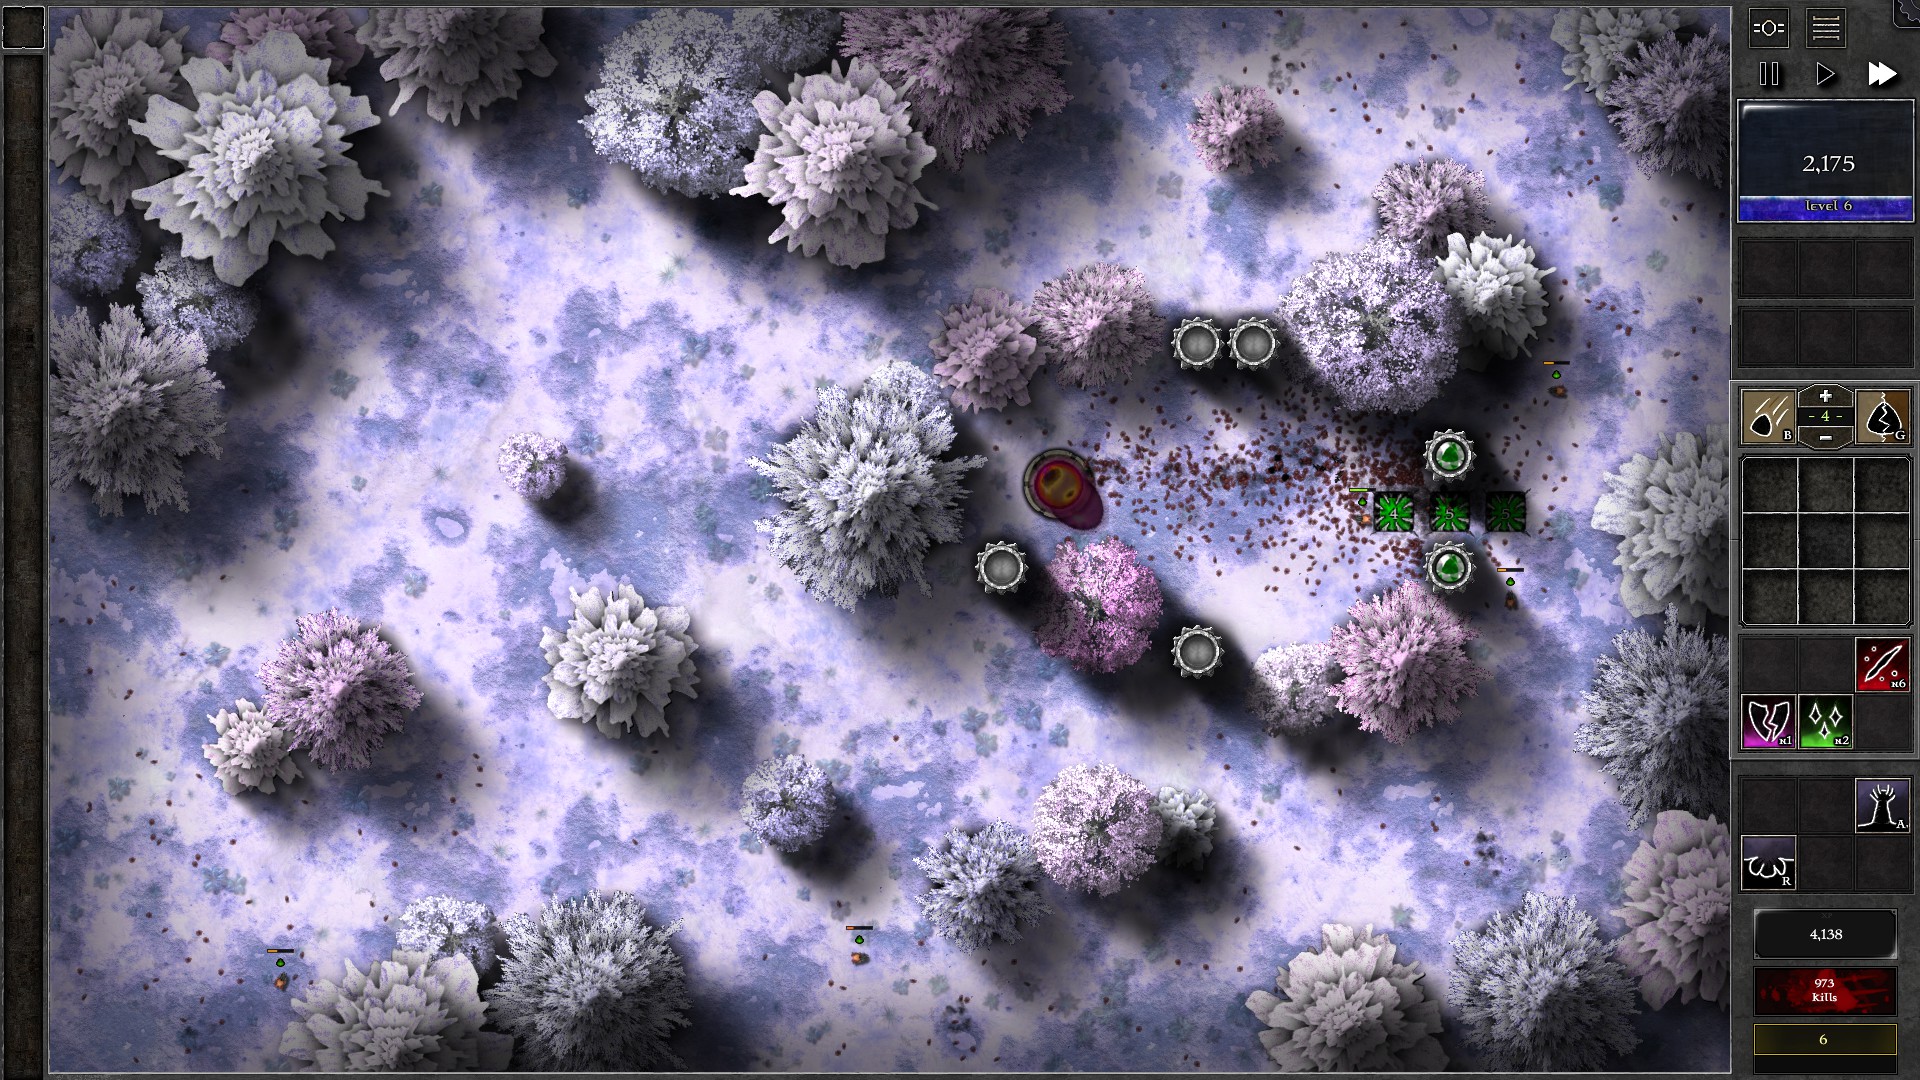
Build 6 amplifiers and 3 traps for a killzone and to block off other paths towards your Orb. Insert 5 pure green gems into the 3 traps and the 2 amplifiers close to it, g1 for the amps and 2 g3 + 1 g2 for the 3 traps.
The large multiplier of mana regeneration helps in fending off the banishment costs in this Trial. You should quickly upgrade the g2 gem to g3, which is doable by w3. Continue upgrading your trap gems evenly as you gather mana, but always remember to have some extra mana to buffer against monster banishments before you upgrade the gems. 3 g4 gems should be achieved at around w15, and you should expect to have 2 g5 + 1 g4 at the end of the Trial.
030 – Field U2
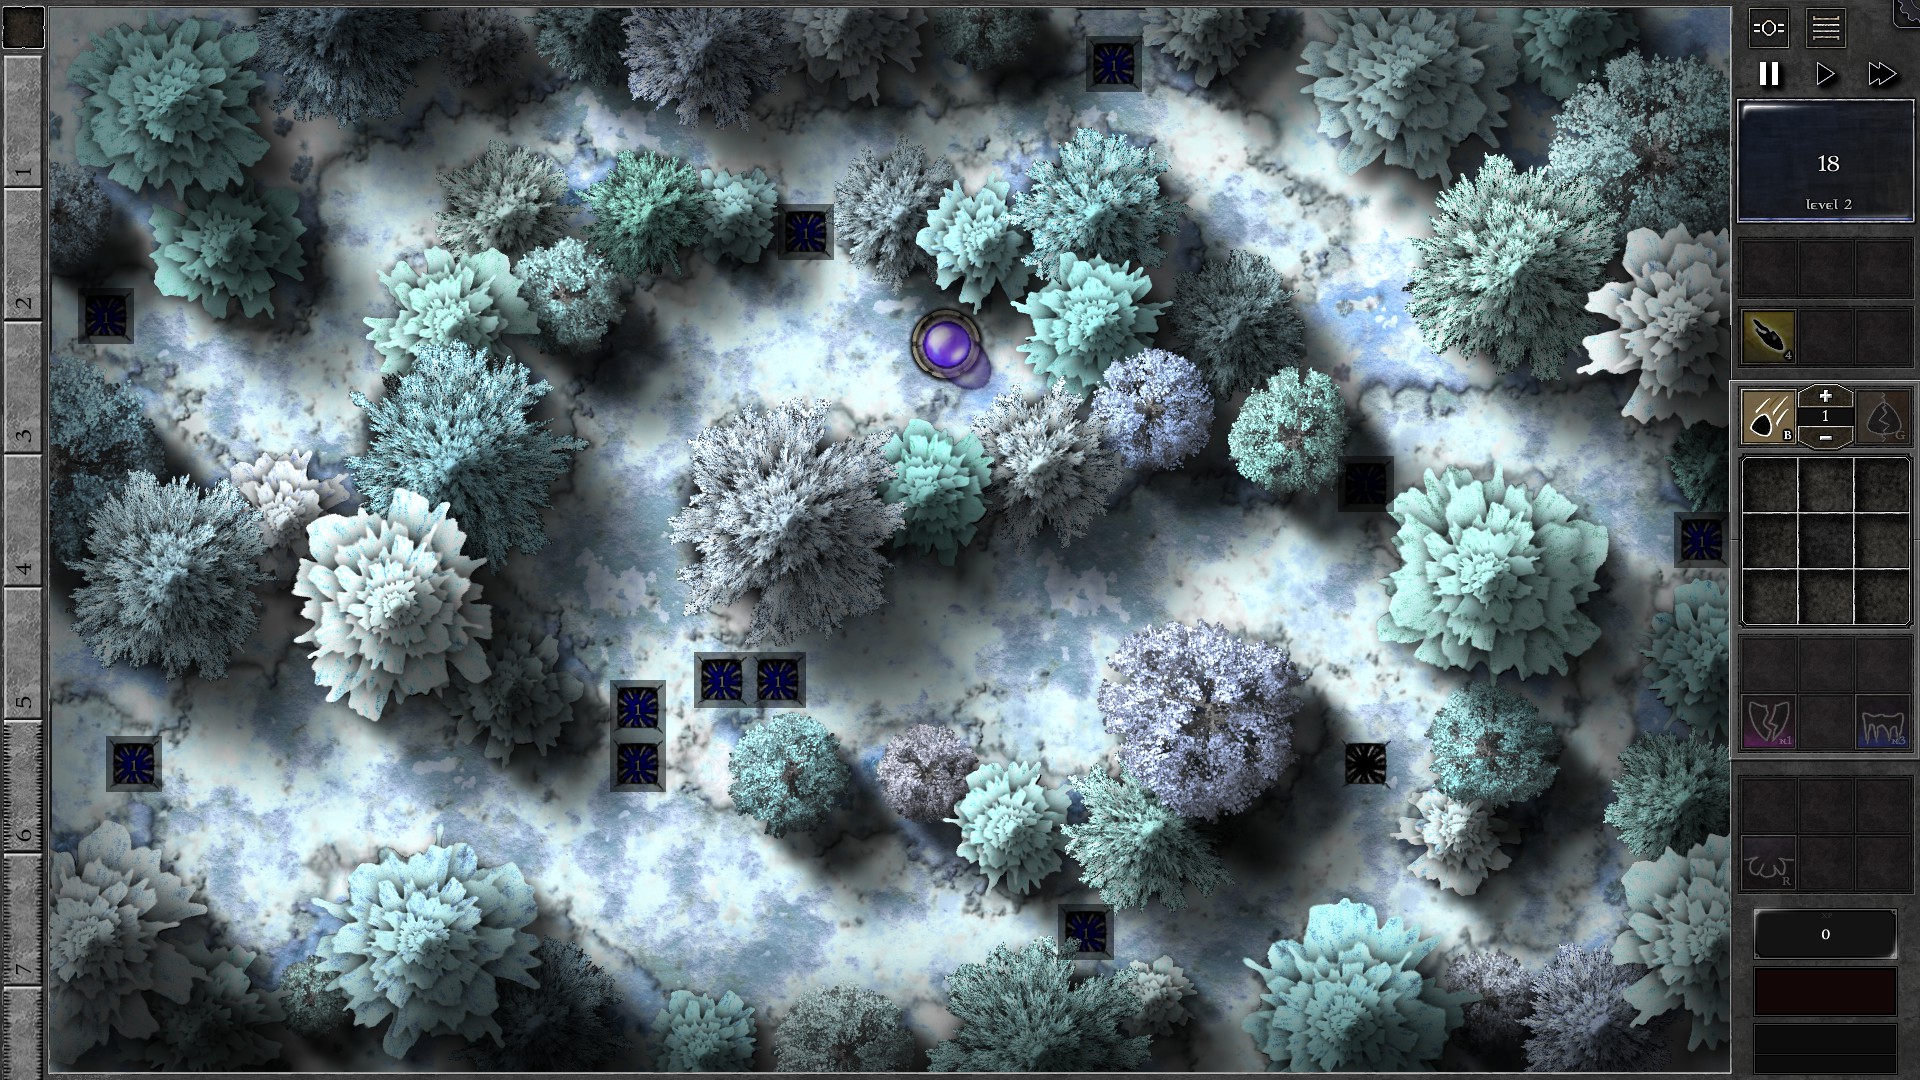
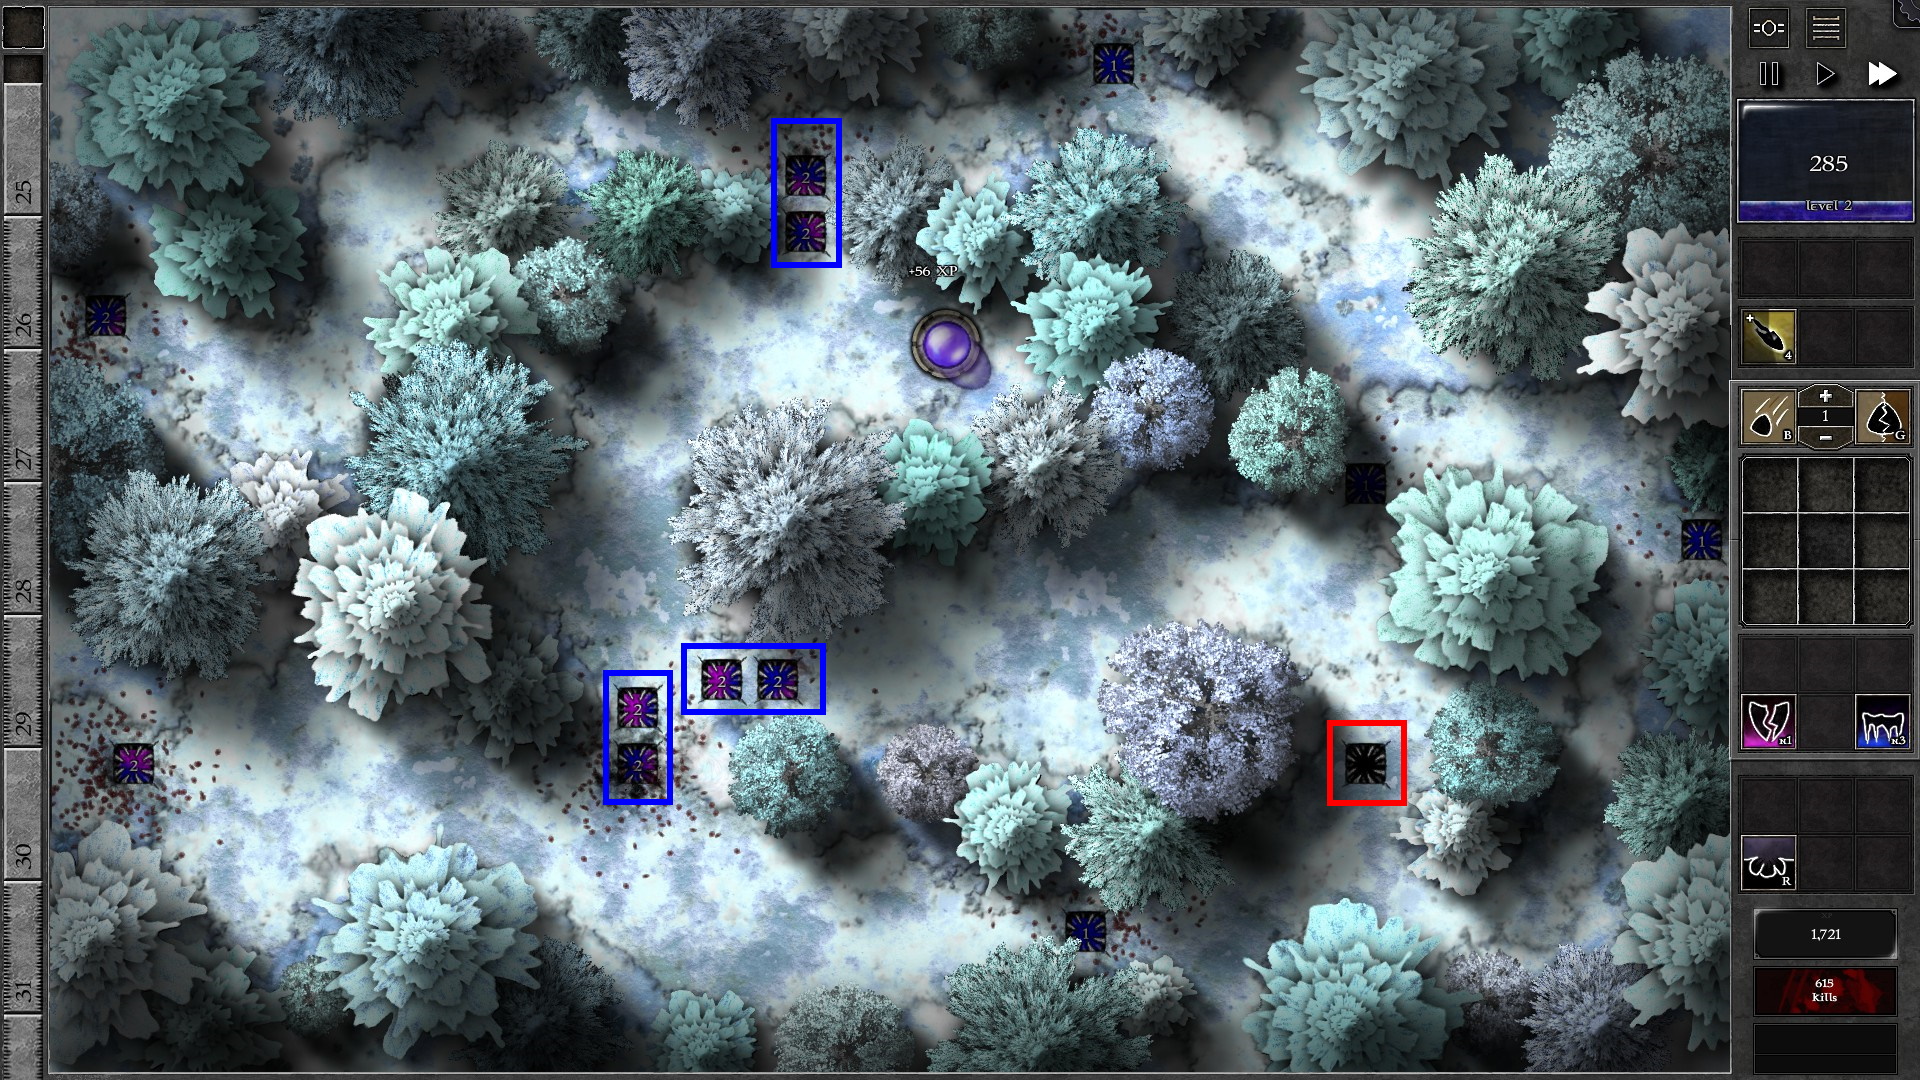
The paths in this Trial is vastly different from Journey/Endurance mode so take caution when defending. Build 3 more traps as shown and insert g1 blue gems into the 11 traps shown. As you gather mana (around w3-4), build a 12th trap just after the converging point of the upper paths (which results in 2 consecutive traps]) and insert another g1 b.
NOTE: There is no need to insert gems into the Trap marked Red in the second screenshot; no monsters will go through that trap.
You will start to get Bolt spells ready. Cast them into the trap gems to increase their damage, starting from the 6 traps in the centre of the field (marked Blue in second screenshot). In addition, upgrade the gems in these 6 traps into g2 p/b (combine with g1 p) as you gain more mana. Bolt spells should prioritize the gems not yet upgraded to g2 and gem upgrade should be done evenly across the 3 branches of paths while prioritizing gems not yet enhanced with Bolt.
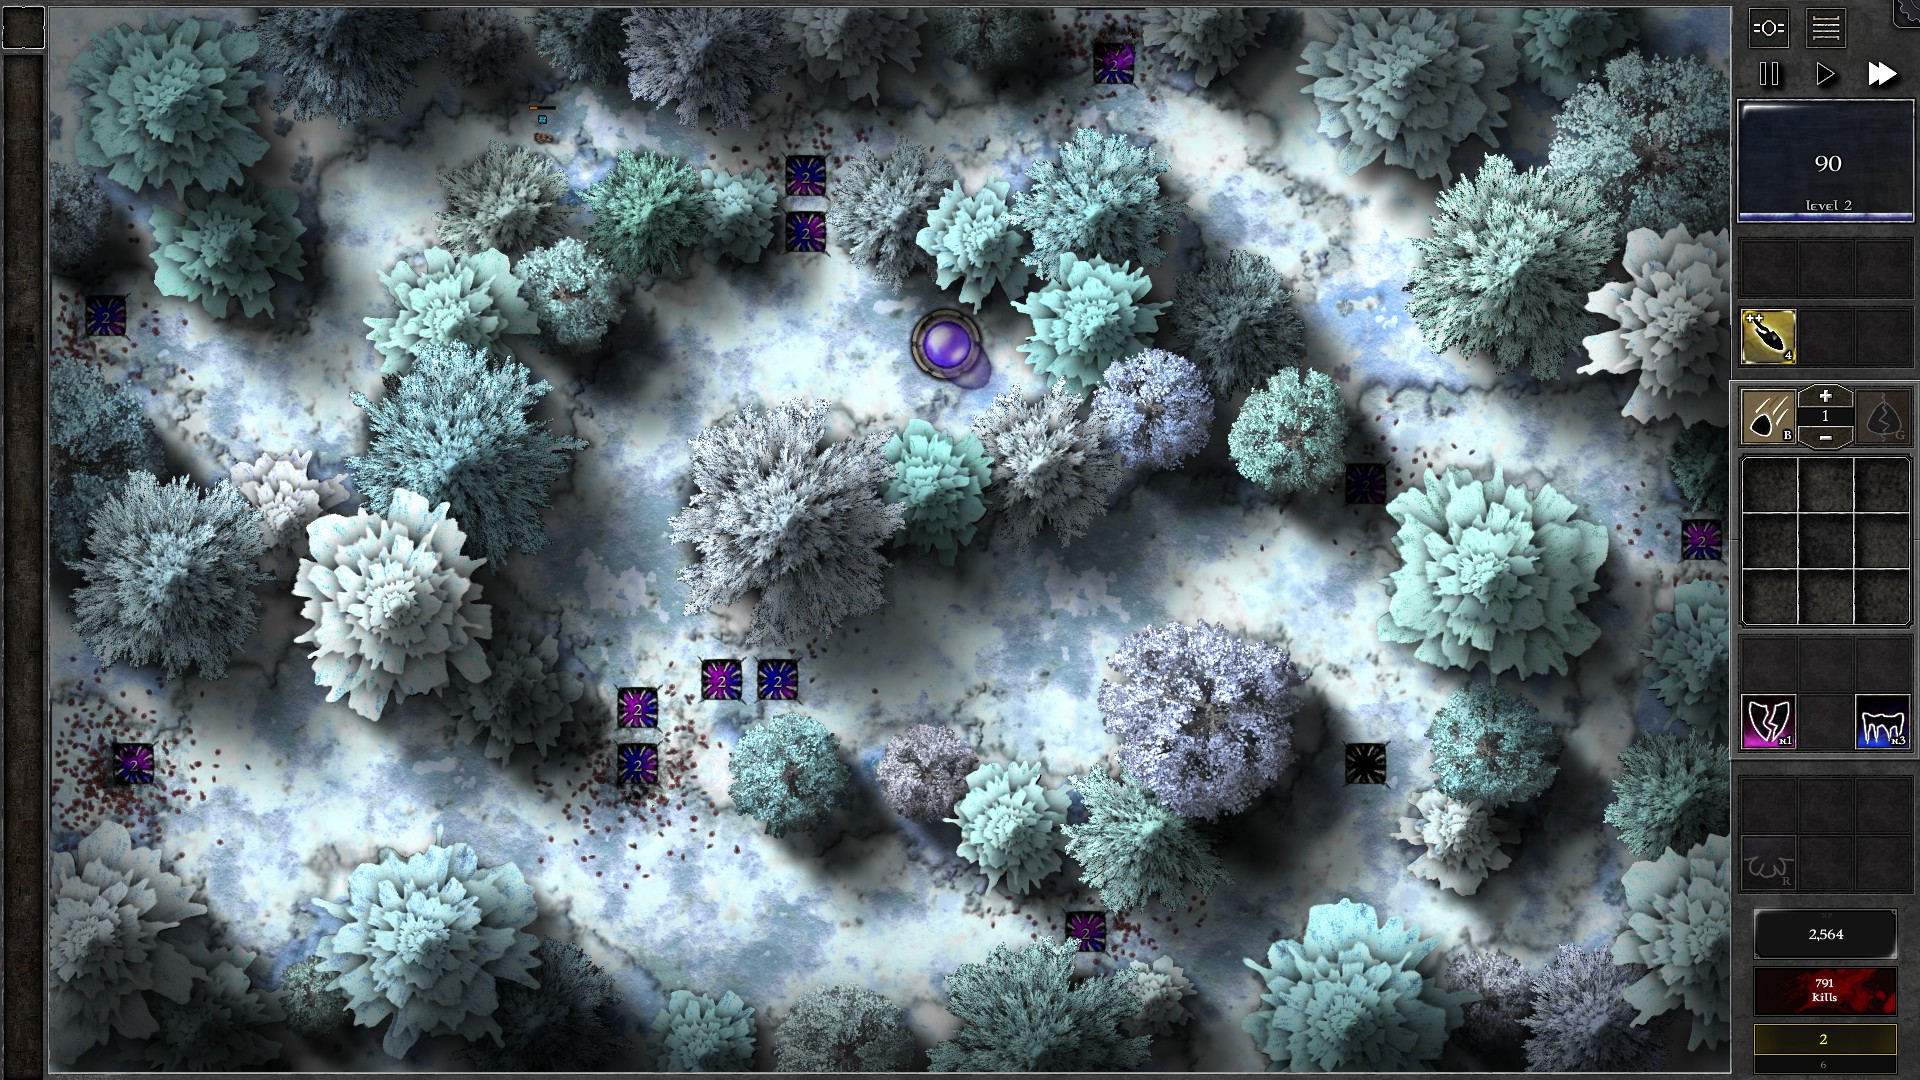
At w12 all 6 gems in the centre should be enhanced with Bolt, and at w20 your 6 gems in the centre should all be upgraded to g2 p/b gems. Start enhancing and upgrading the other 6 gems off the sides as you proceed through the Trial, At the end all 12 gems should be Bolt enhanced and upgraded to g2 p/b.
031 – Field U3
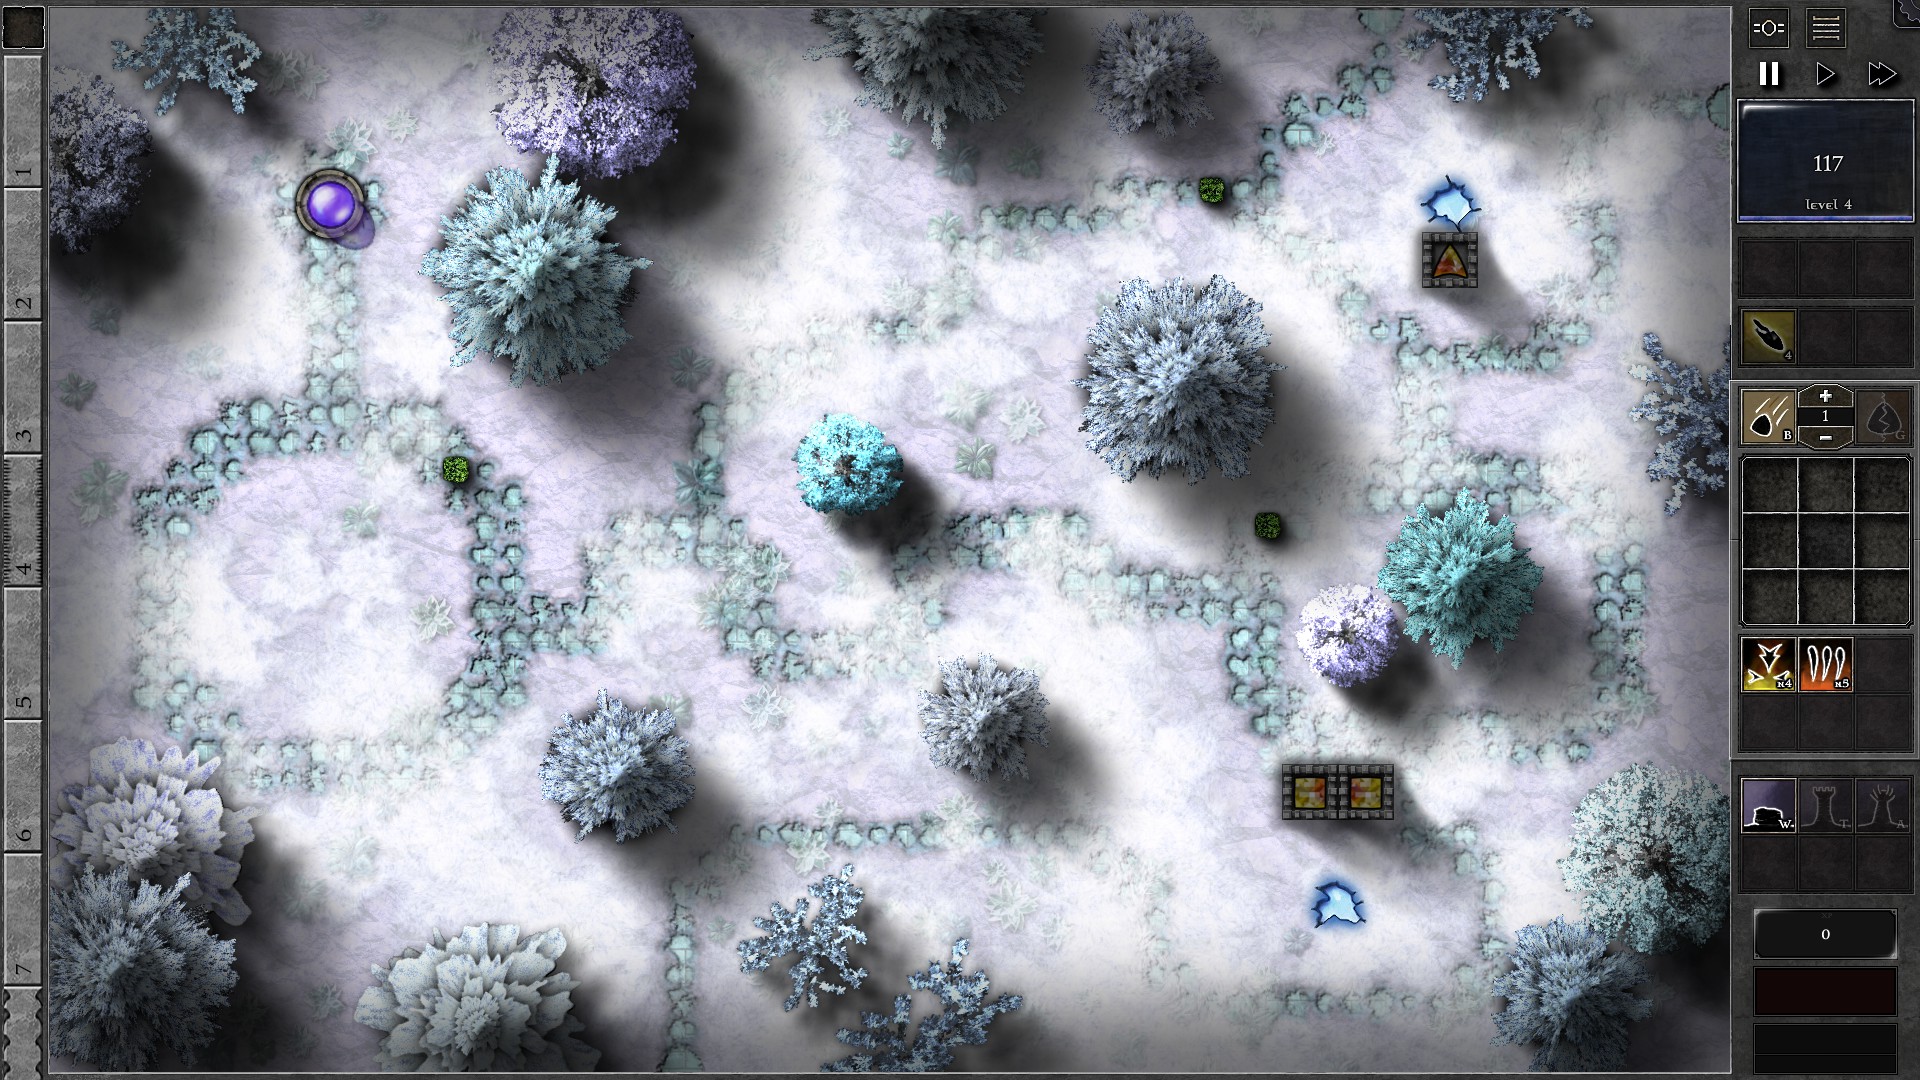
Setup the field with walls and 3 towers. The bottom 2 towers are g3 3y1o and are the main defending forces, and the top g2 y/o gem is set to target “Structures” to farm on the Mana Shard.
You will get mana quickly in this Trial as the g3 gems will also farm on the mana shard close to them while there are no monsters to fight. At w4 use a Bolt enhancement to help take on the denser reavers without leaking. You should be able to upgrade both g3 gems to g4 before w7. After that, upgrade the g2 gem into a g3 3y1o gem (combine with g2 pure yellow) ASAP and you can upgrade one of the g4 gems to g5 before w11.
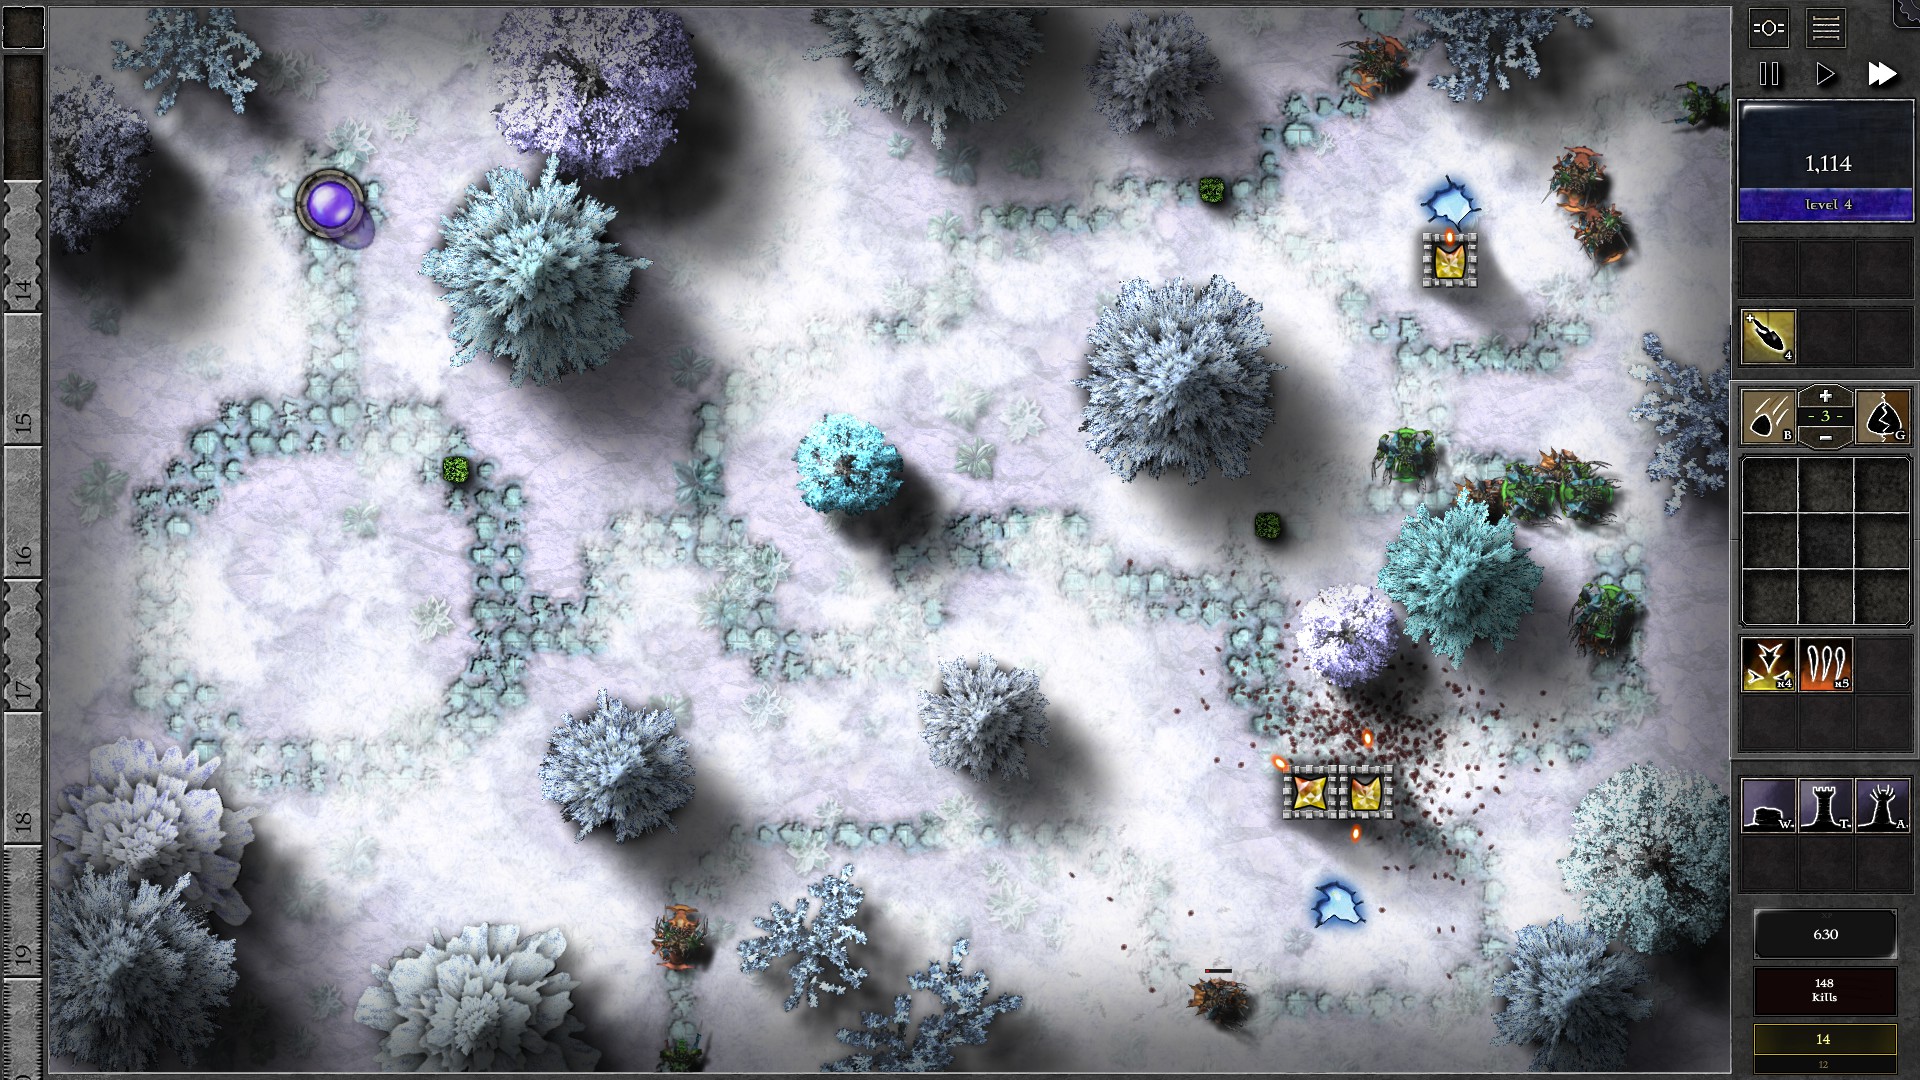
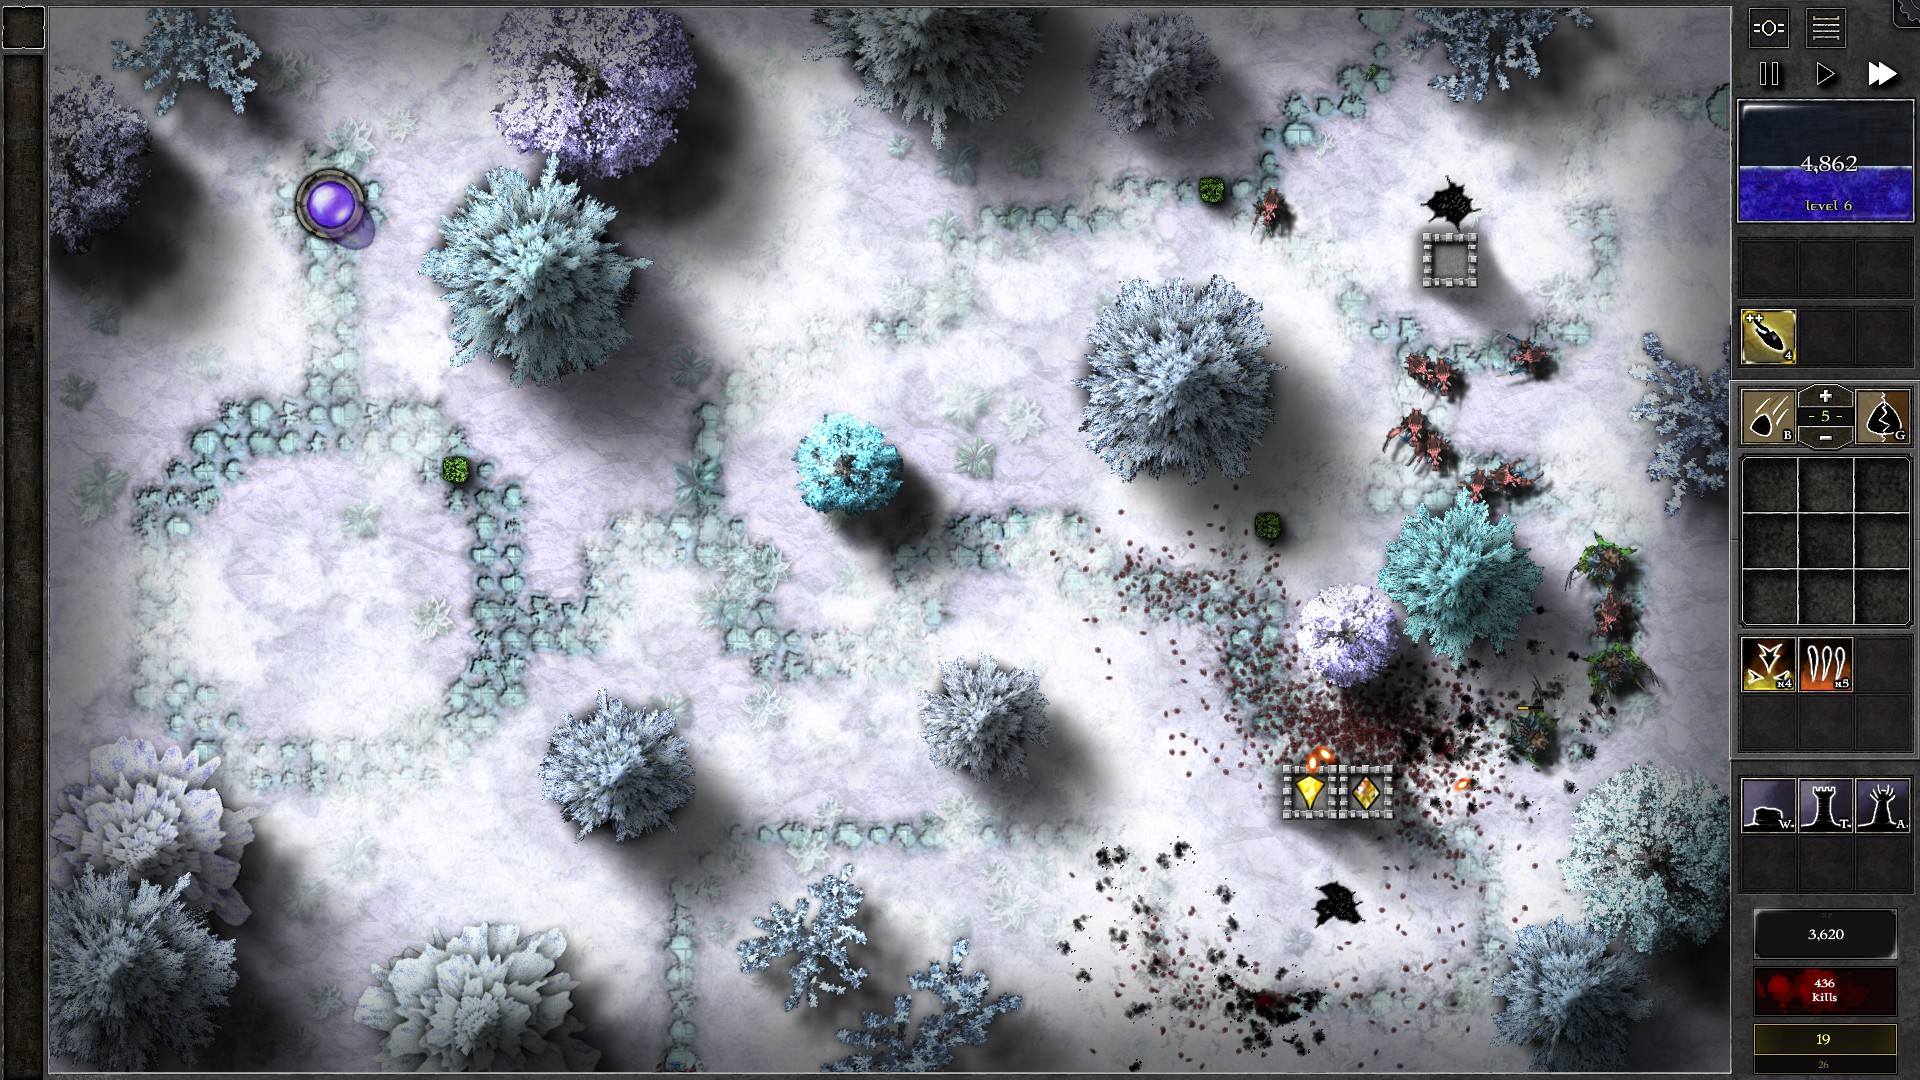
Use Bolt on the g5 gem to help take on the giants, all while upgrading the g3 shard farming gem to g4, then all the g4 gems to g5 by w18. Use Bolt whenever monsters start passing through the defending towers in larger groups. There shouldn’t be much concern left in terms of monster killing after upgrading both bottom tower gems to g6. Once the top mana shard is depleted you can even upgrade the shard farming gem to g6 and combine it with the defending g6 gems for a g7, making the late waves even easier.
032 – Field U4
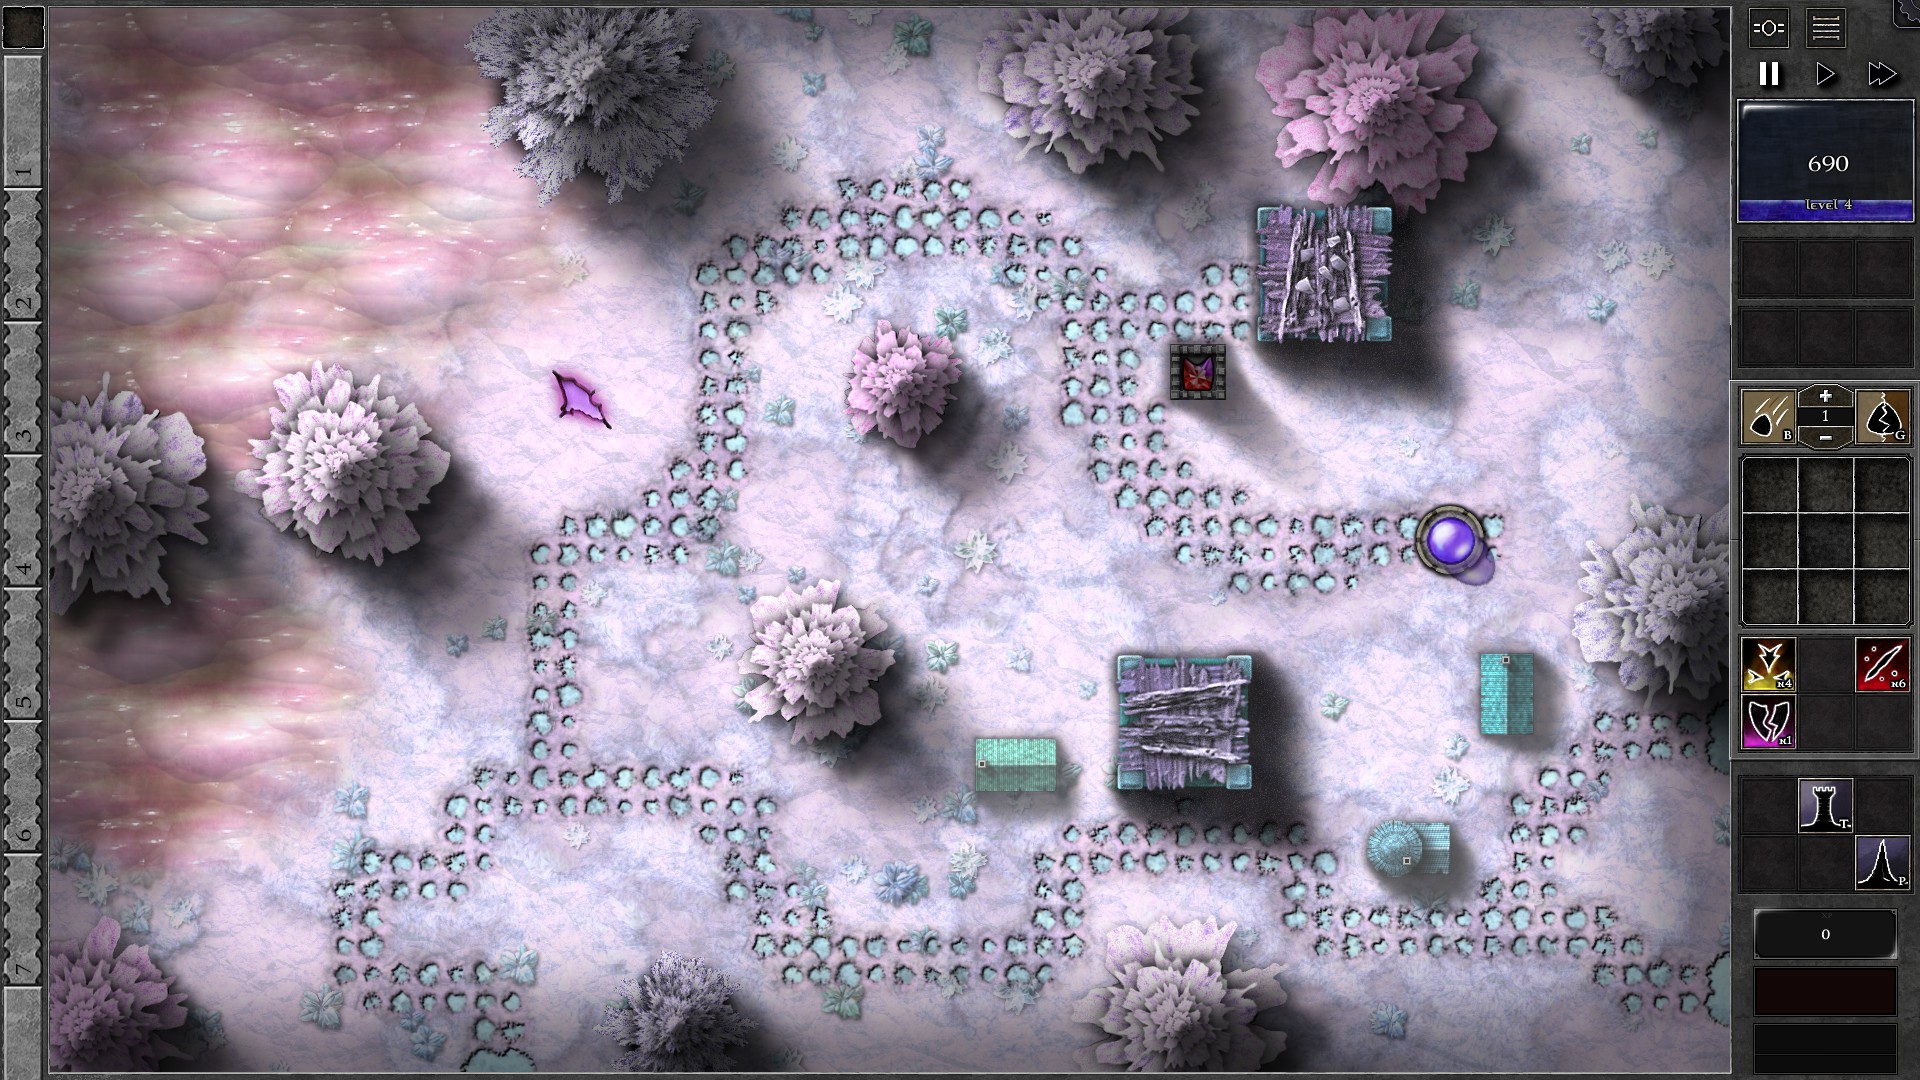
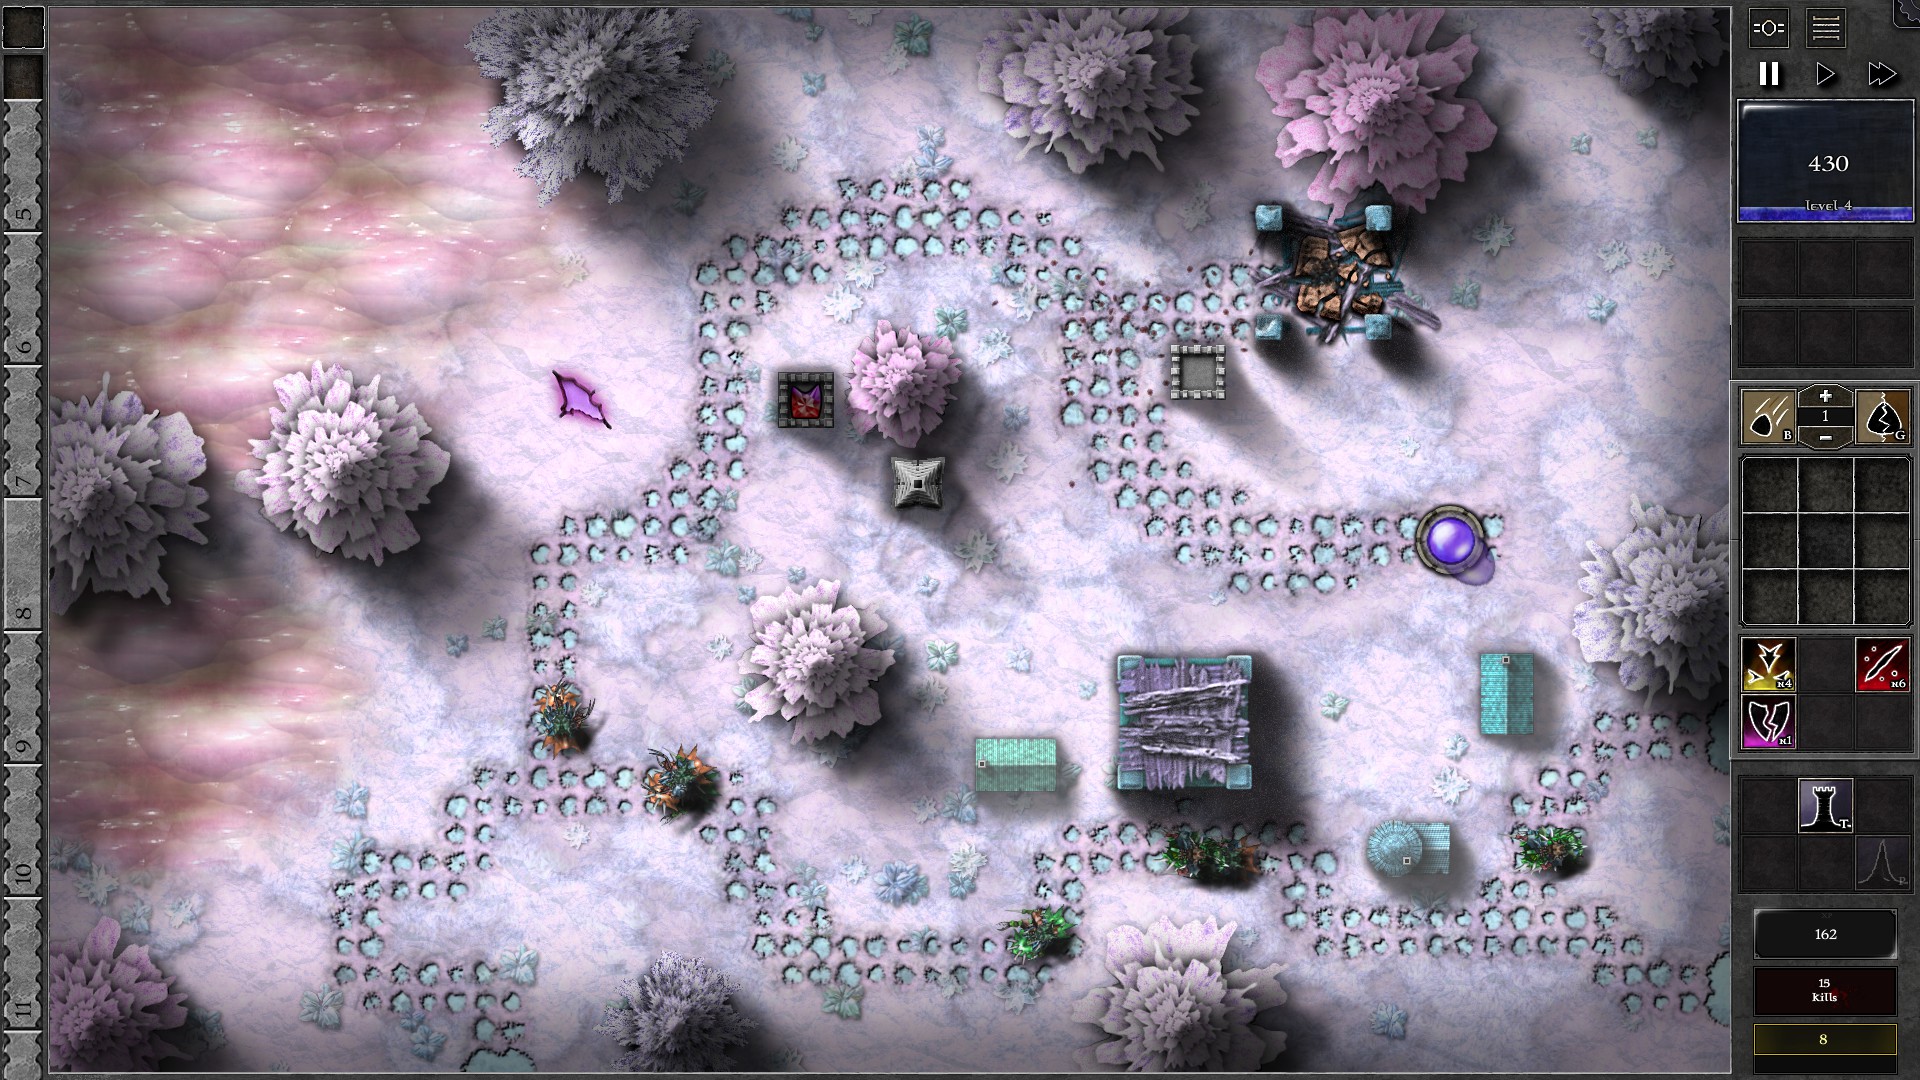
Start the field with a g4 p/r tower close to the top right Monster Nest (which is close to your Orb). Let the g4 gem kill through the w1 reavers (and any Giants that come out from the Nest) and use its downtime to keep firing at the Nest to destroy it. You should be able to destroy the monster nest during w4.
After destroying the Nest, move the g4 gem to a new tower as shown, and build a Pylon that can cover most of the upper bend in the path. Set your g4 gem to target “Structures” after killing all the reavers in w8 as all the remaining waves are giant waves and you can kill them more efficiently with the pylon. Upgrade your gem as you gather enough mana and you should have no problems completing the rest of the Trial (g5 at w12, g6 at w25).
033 – Field Y1
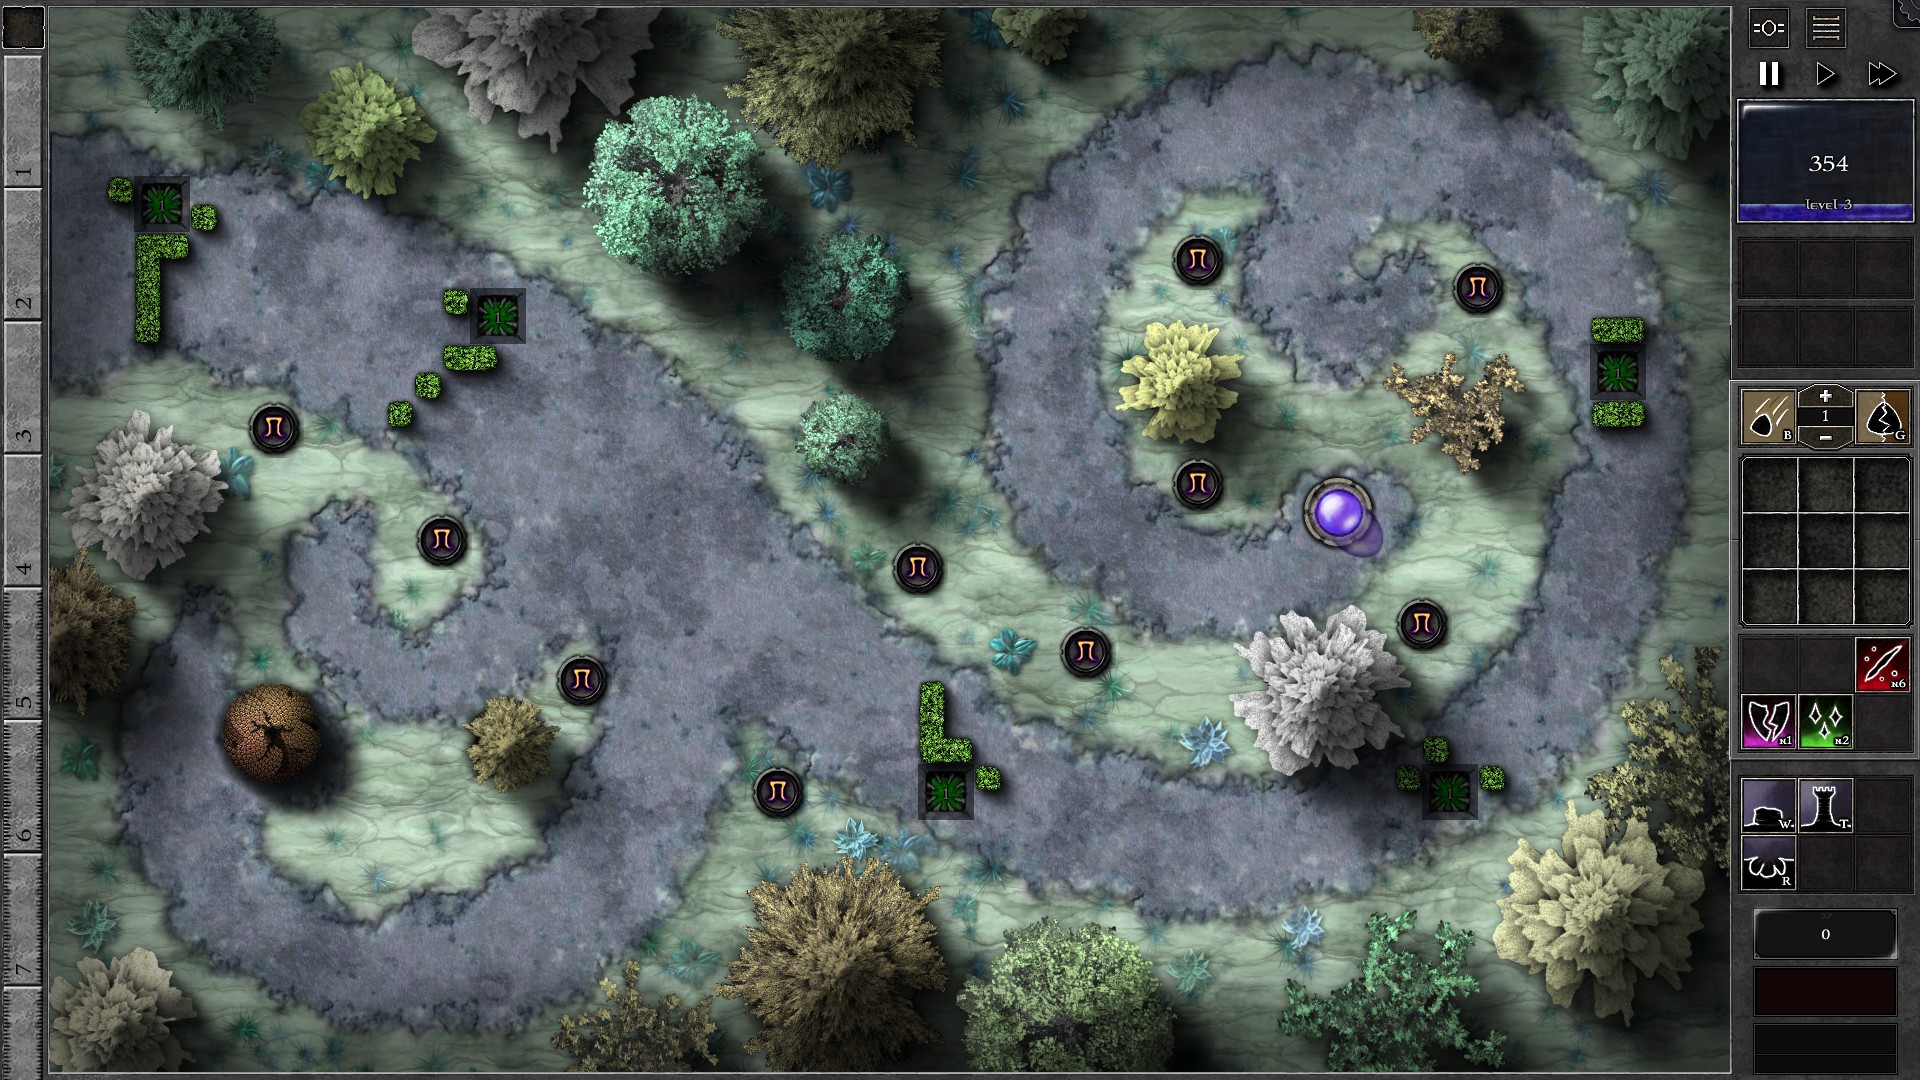
Setup the field as shown with 5 g1 green gems in traps set to target “Least Affected by Specials”. As you kill through the initial waves, upgrade your trap gems evenly (you should have the mana to actually upgrade 1 gem before you start). When upgrading gems, it’s usually better to upgrade the gems closer to the entrance first, but sometimes you may want to upgrade a gem closer to the Orb first if larger groups of monsters are closing into traps closer to the Orb. You should reach 5 g2 gems before w13 and 5 g3 gems before w29 which is enough to take on the waves of monsters.
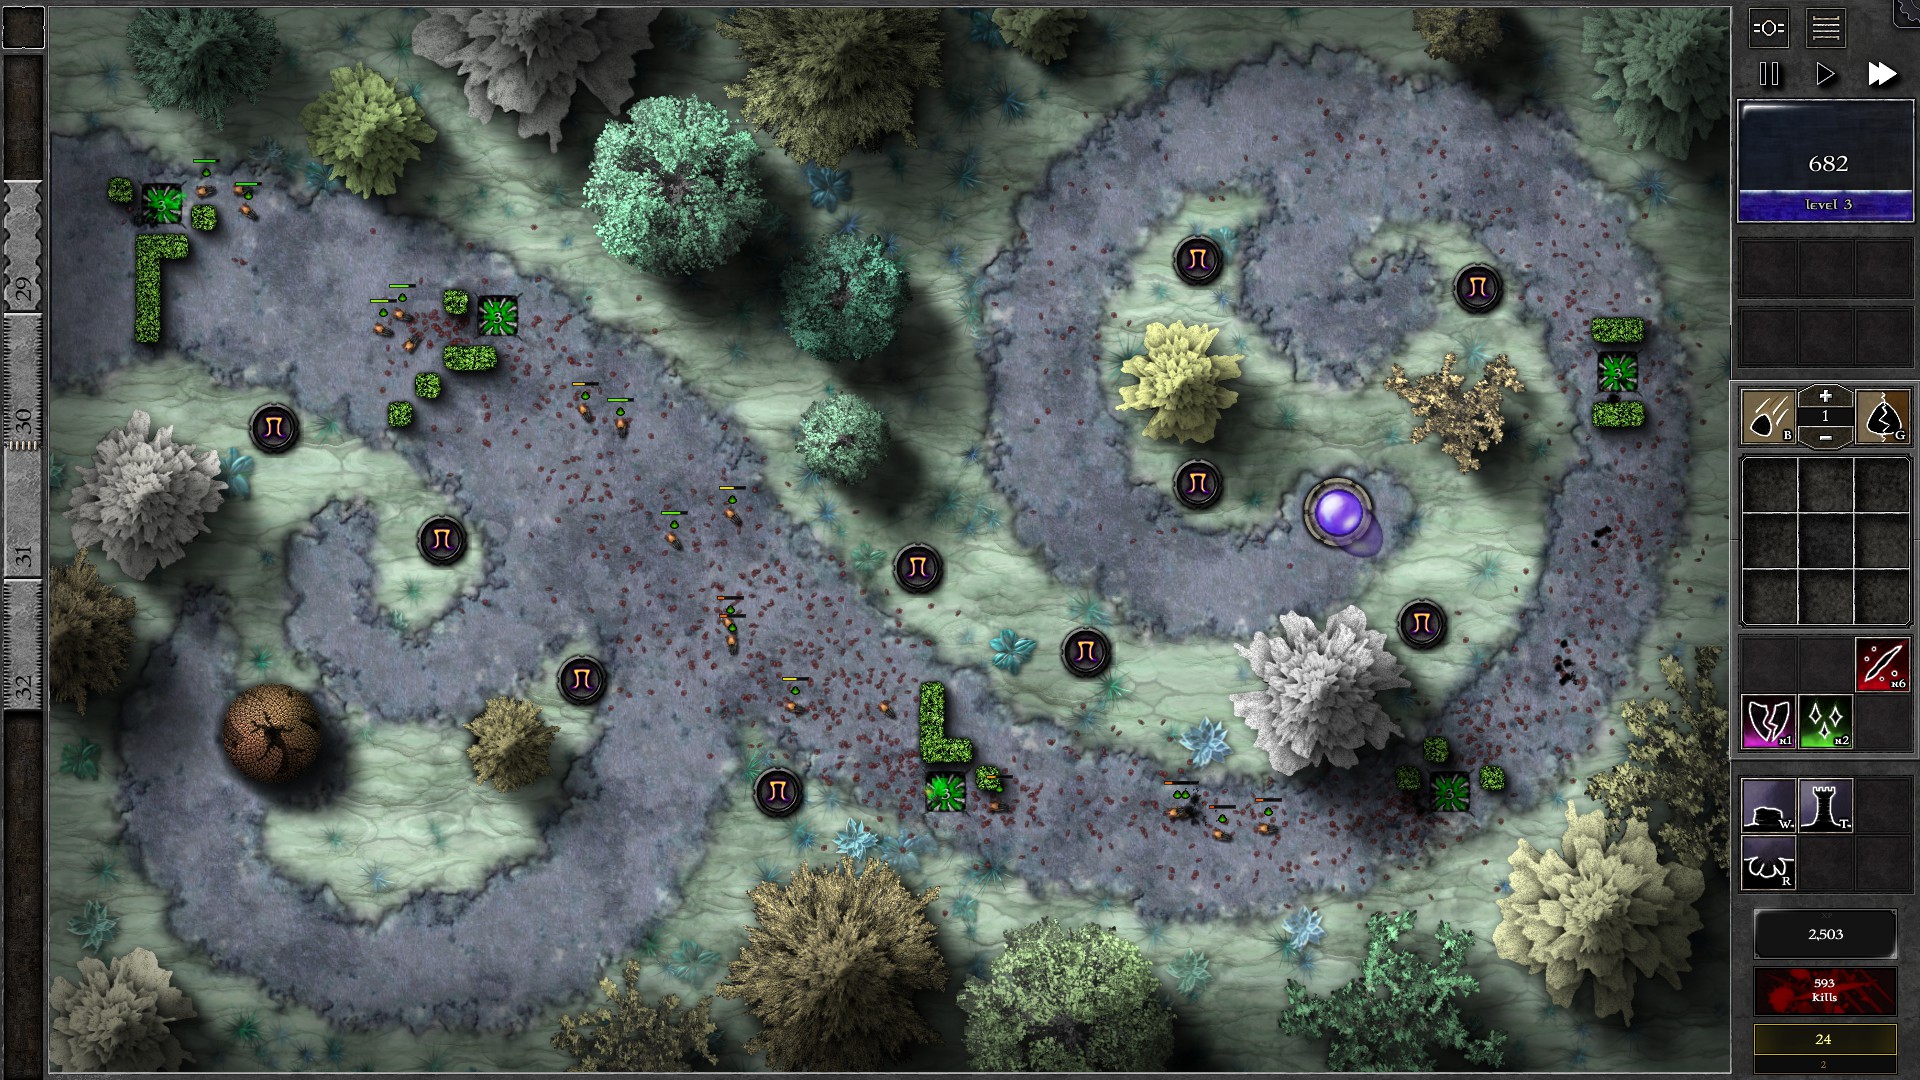
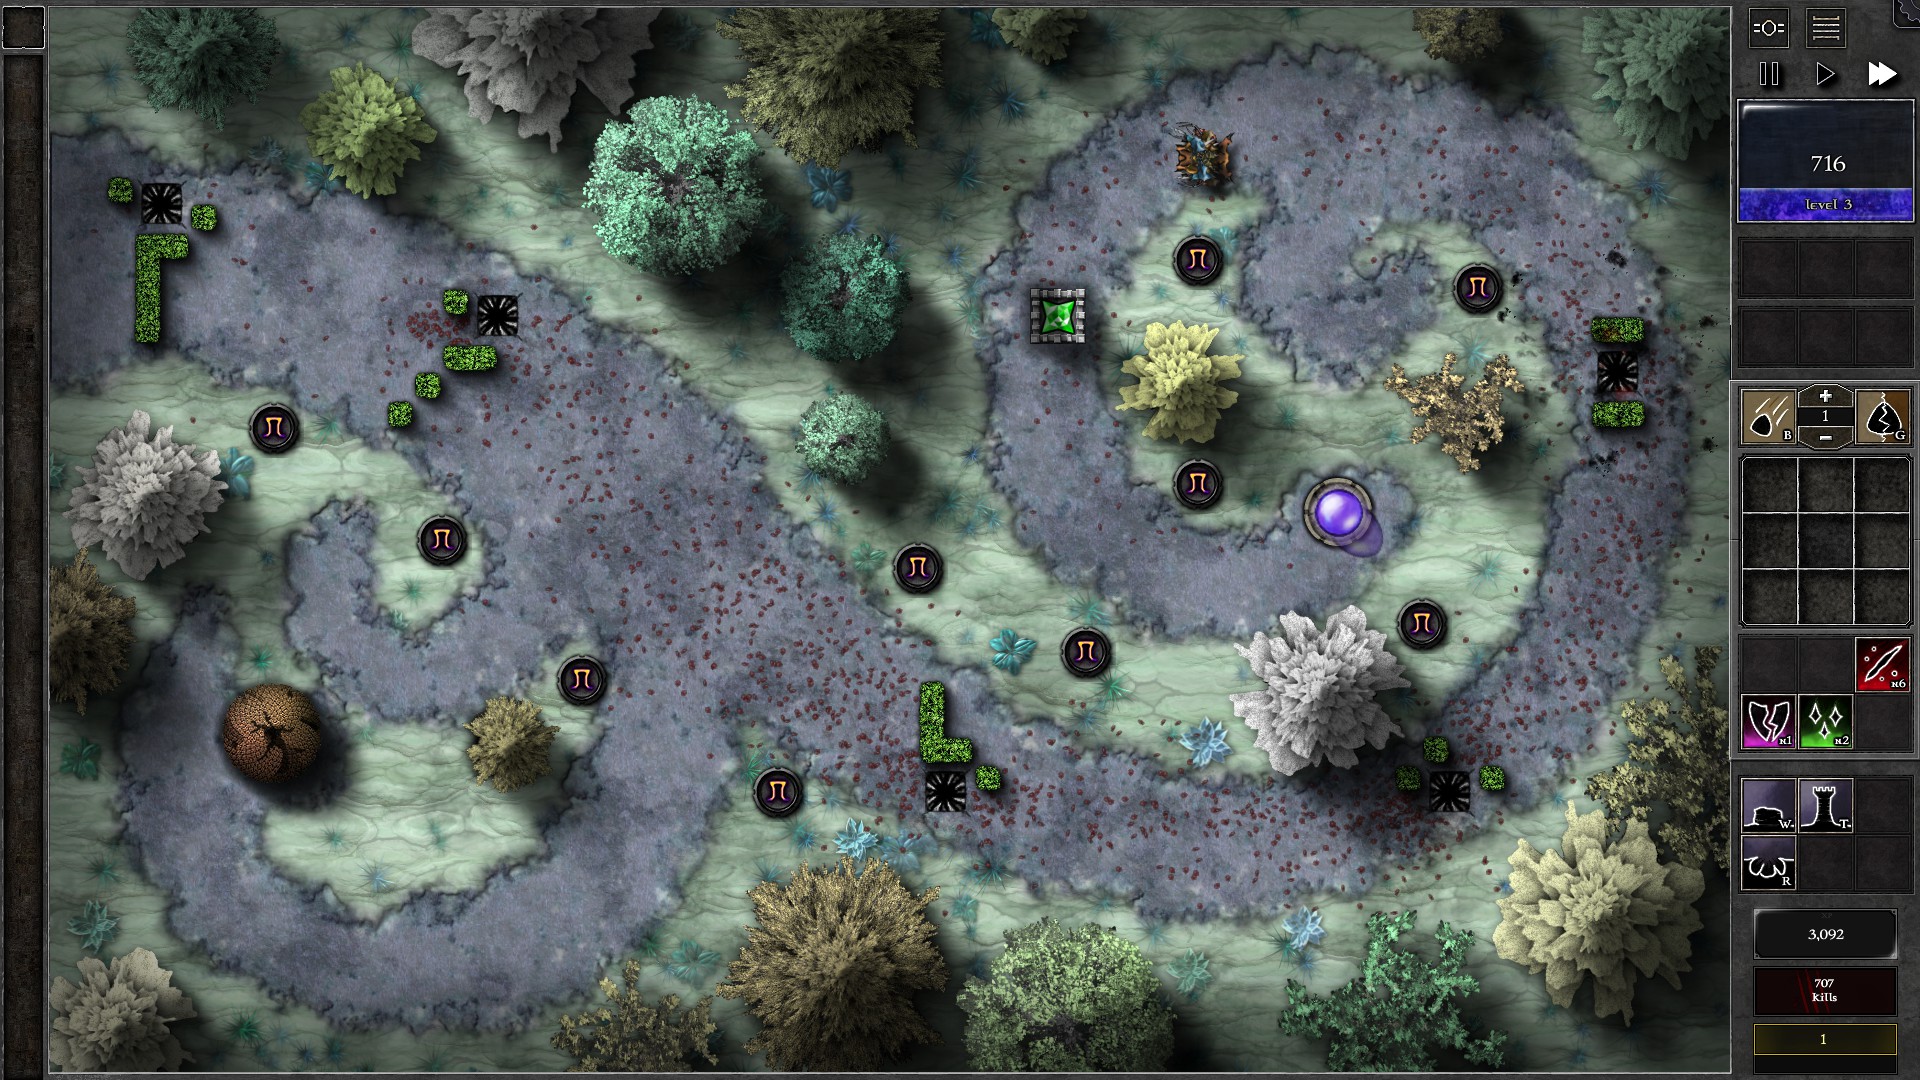
For the w28/29 giants in the end, you should kill these after all non-giants are gone. Sell one of your g3 gems and combine the rest into a g5 gem. You should follow the giants with the g5 gem to keep them poisoned, and build additional traps/towers to take down the giants before they destroy your Orb.
Note: If you use towers at the end, make sure to change your targeting priority. Otherwise “Least Affected by Specials” will become “Structures” in tower gems and the g5 gem will ignore the giants and fire at the Static Beacons.
034 – Field Y2
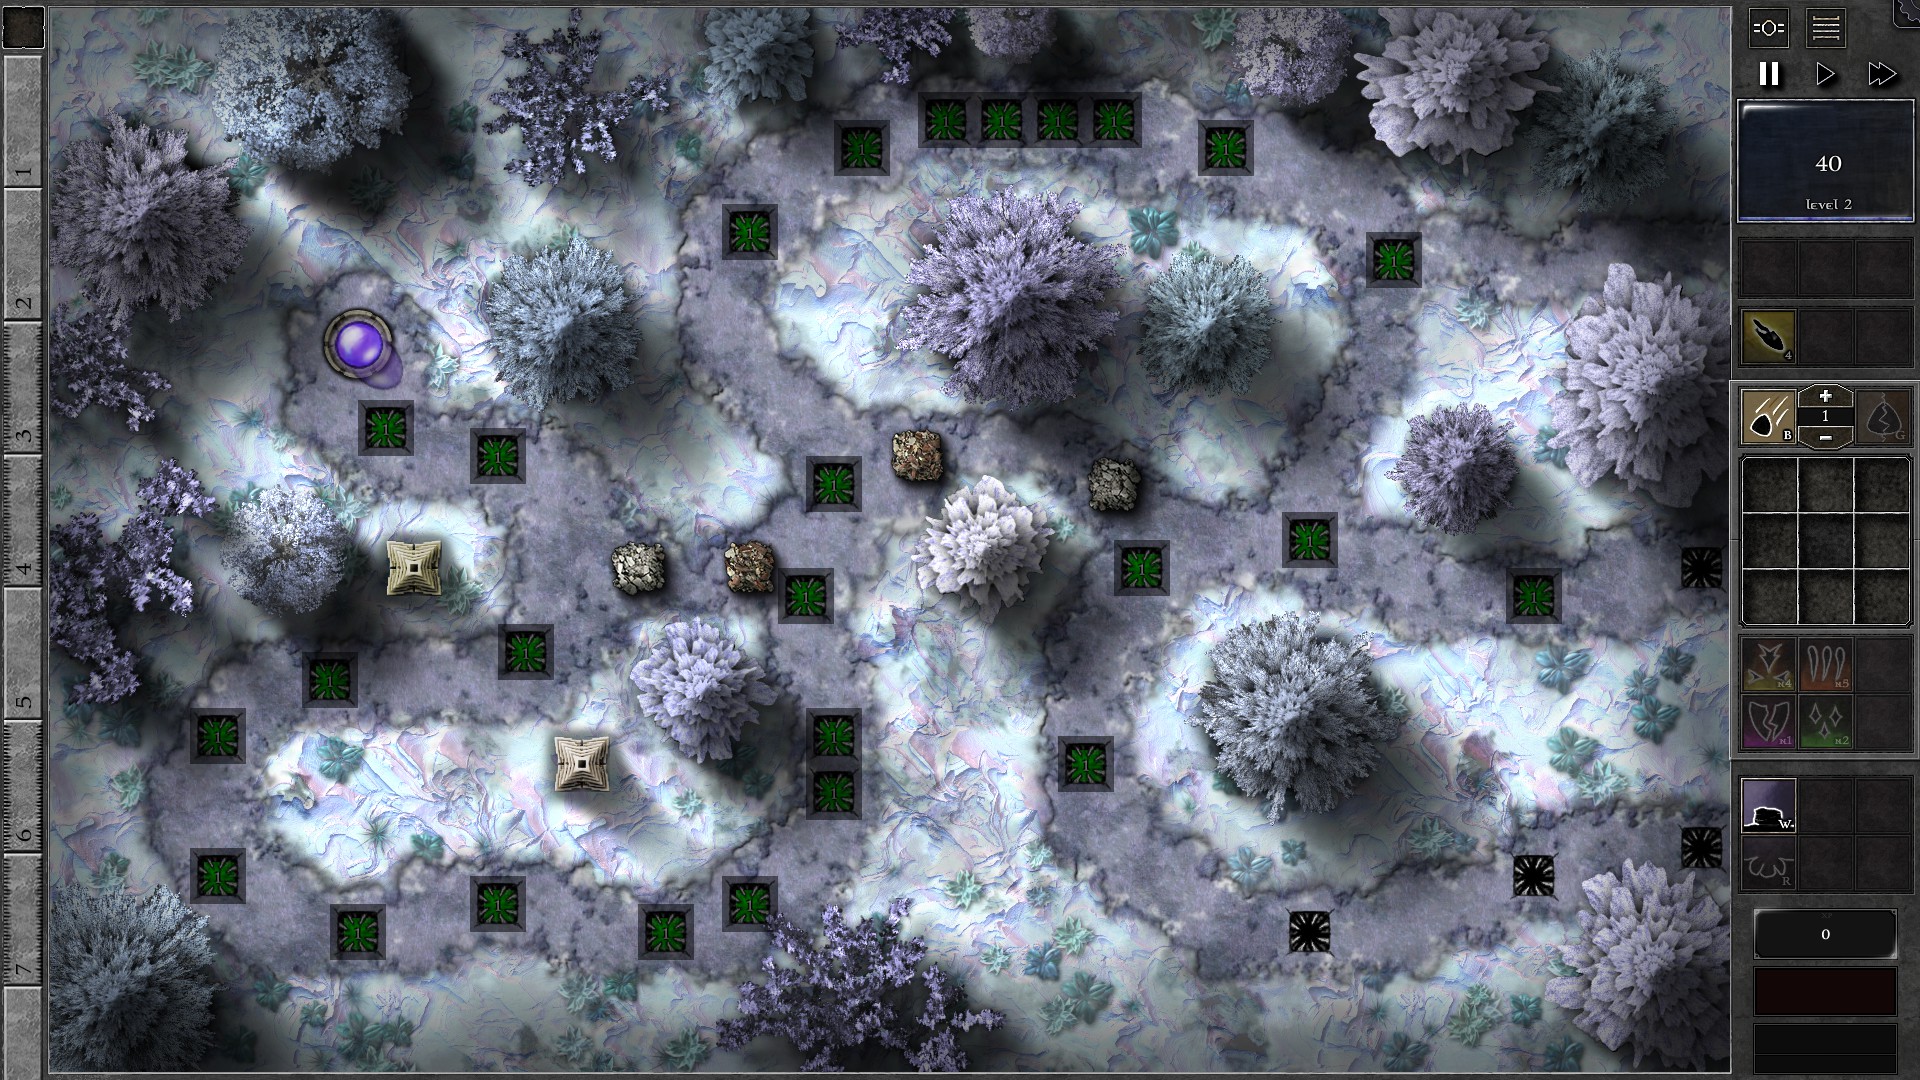
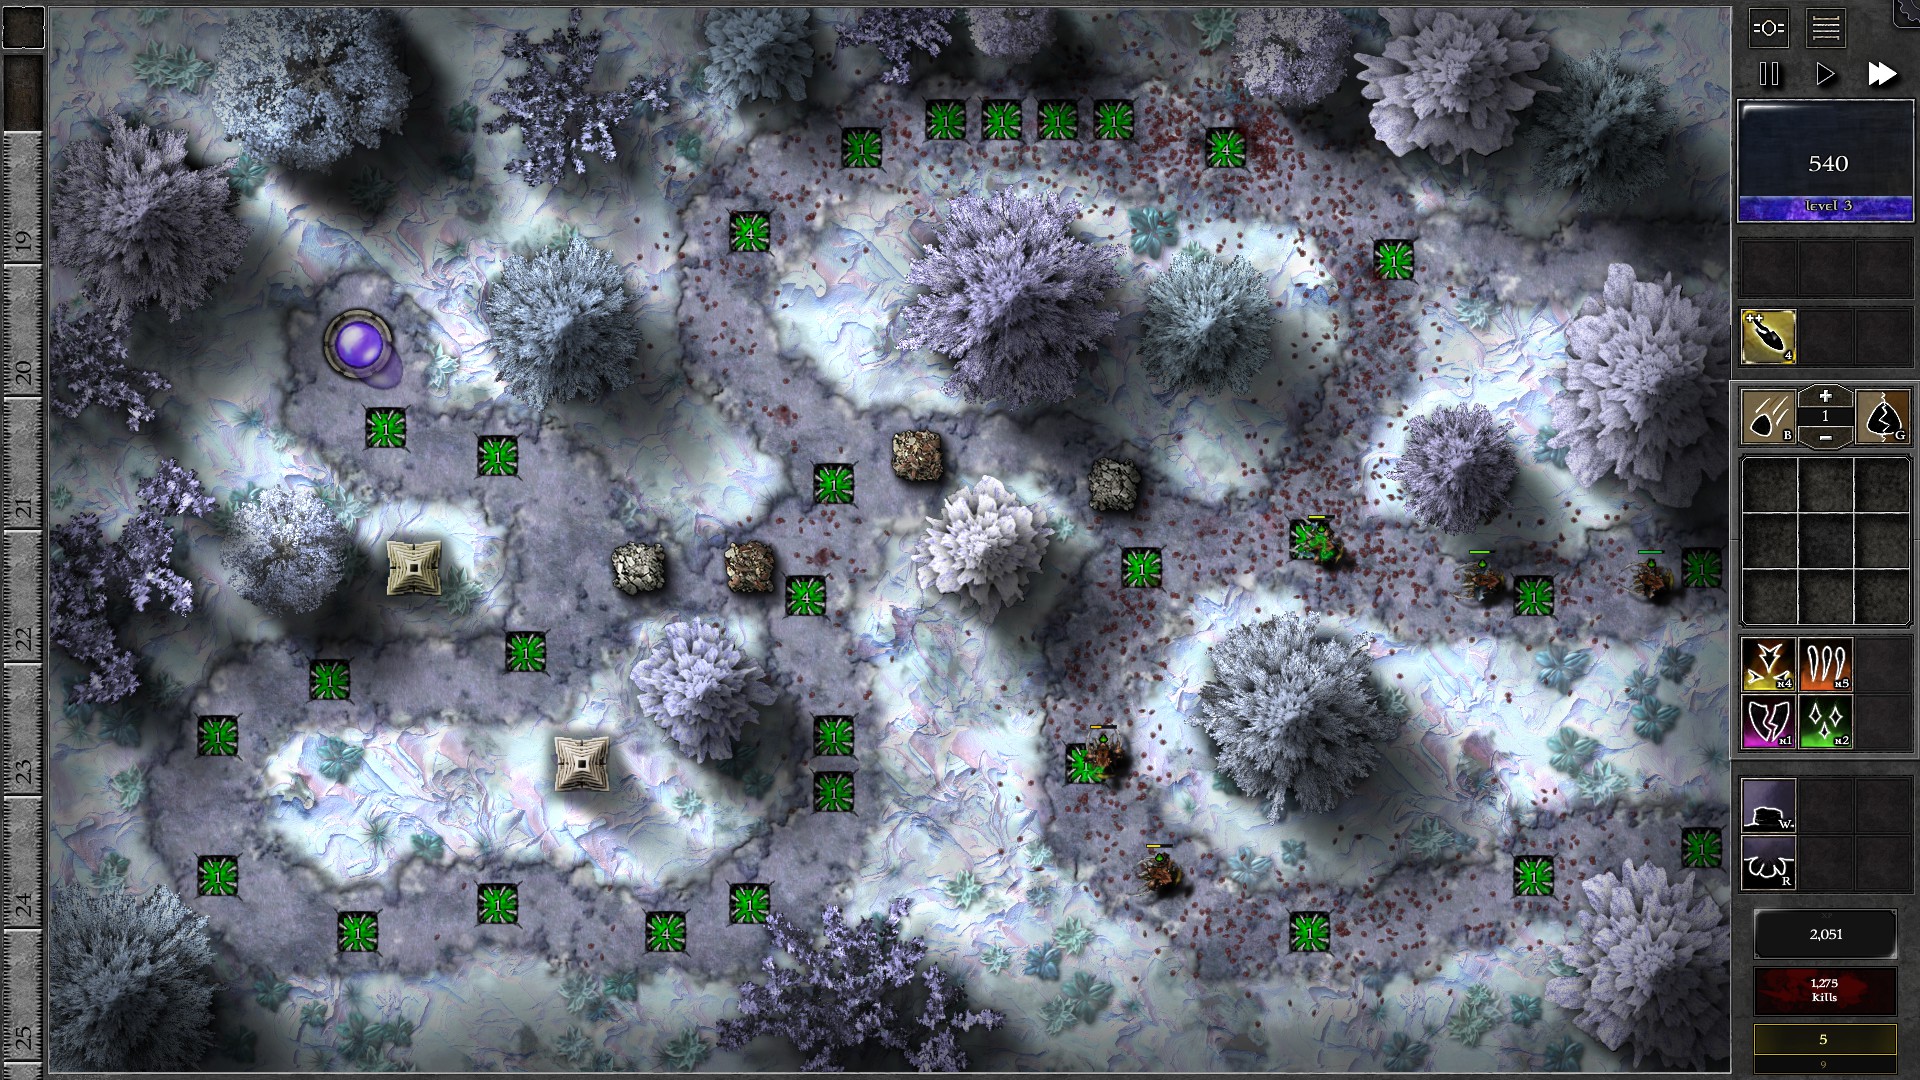
Create as many g1 green gems as you can and insert into the traps, starting from the traps closest to the Orb. Fill up the rest of the initially provided traps as you gain mana before w3.
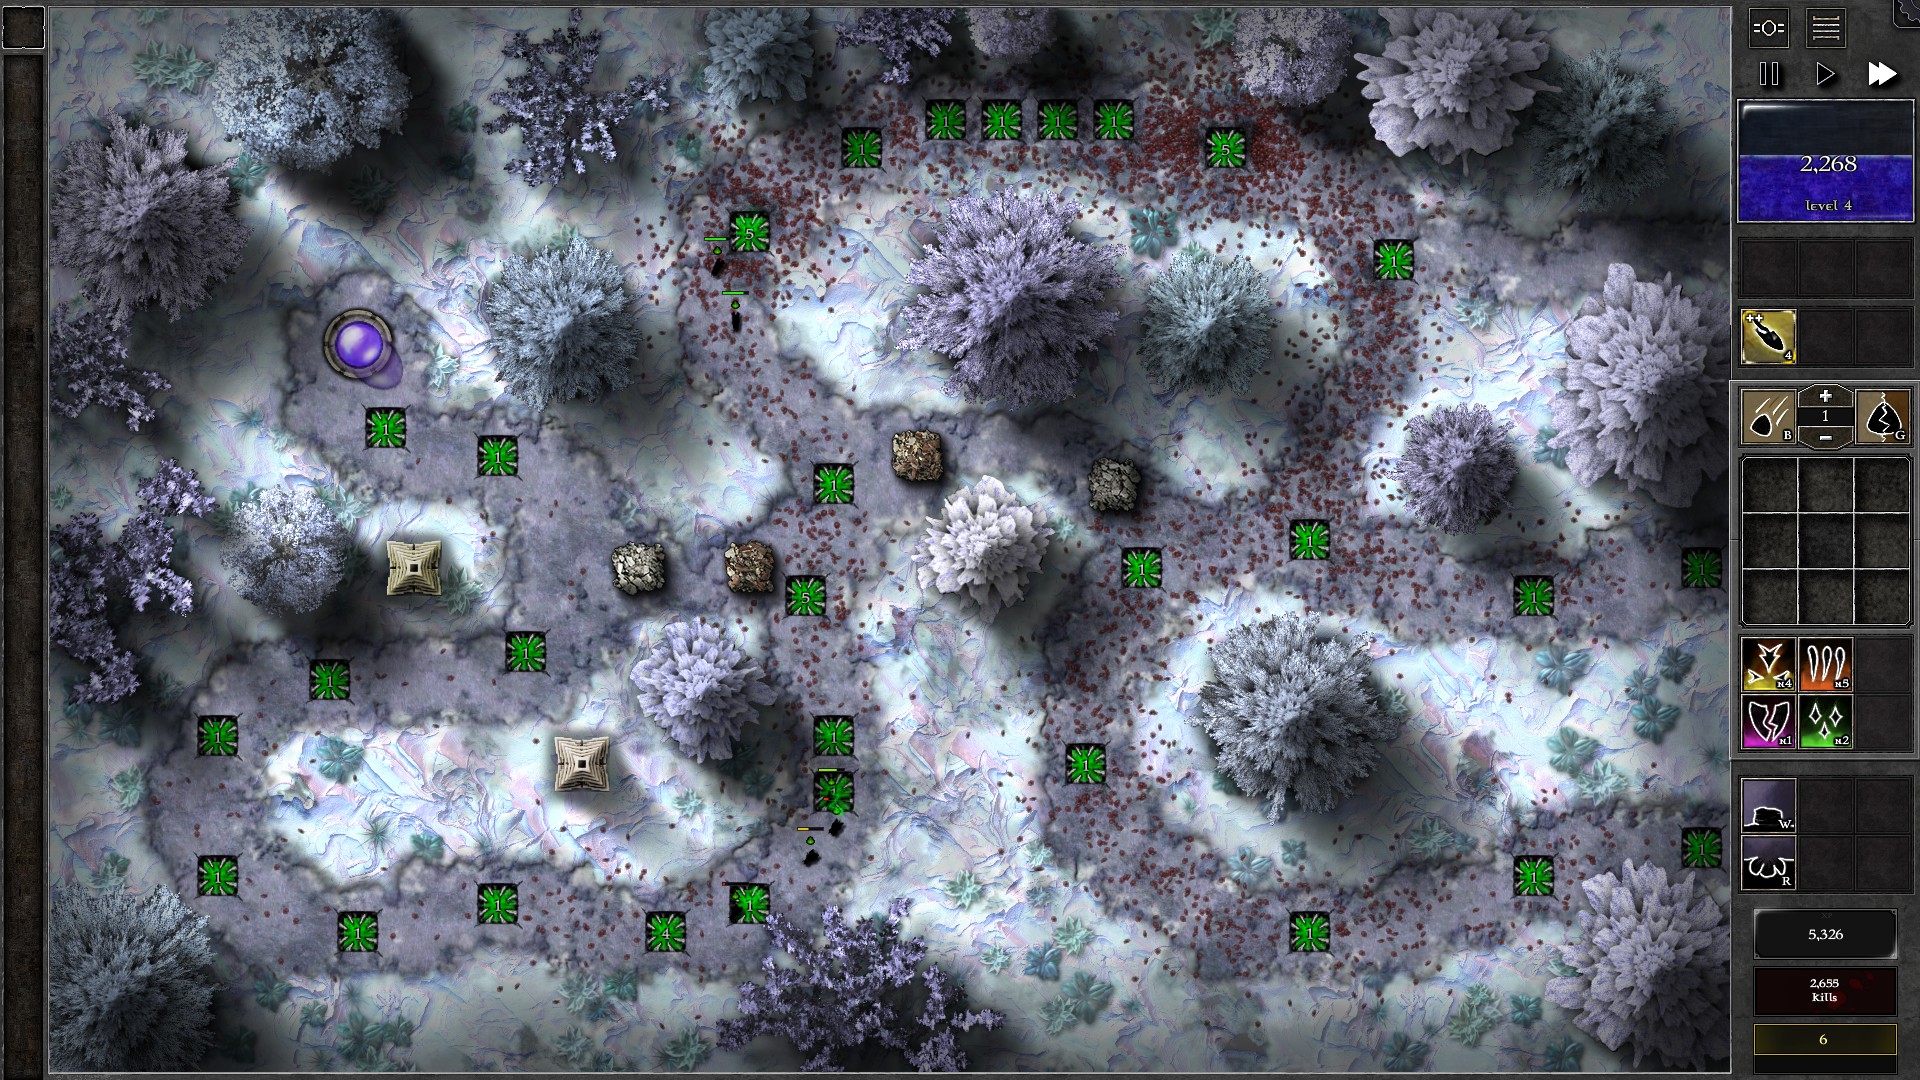
After filling every trap with gems, select 4 gems in the converged path, not too close to each other and your Orb, and start upgrading them evenly. You should also change these 4 gems to target “Least Affected by Specials”. The 4 gems should all reach g4 before w20. Continue upgrading the gems and you should have 2-3 g5 gems at the end which should deal with the late wave monsters. Watch out for the larger volume of monsters rushing towards your Orb when upgrading as they may take away a decent amount mana through banishments.
035 – Field Y3
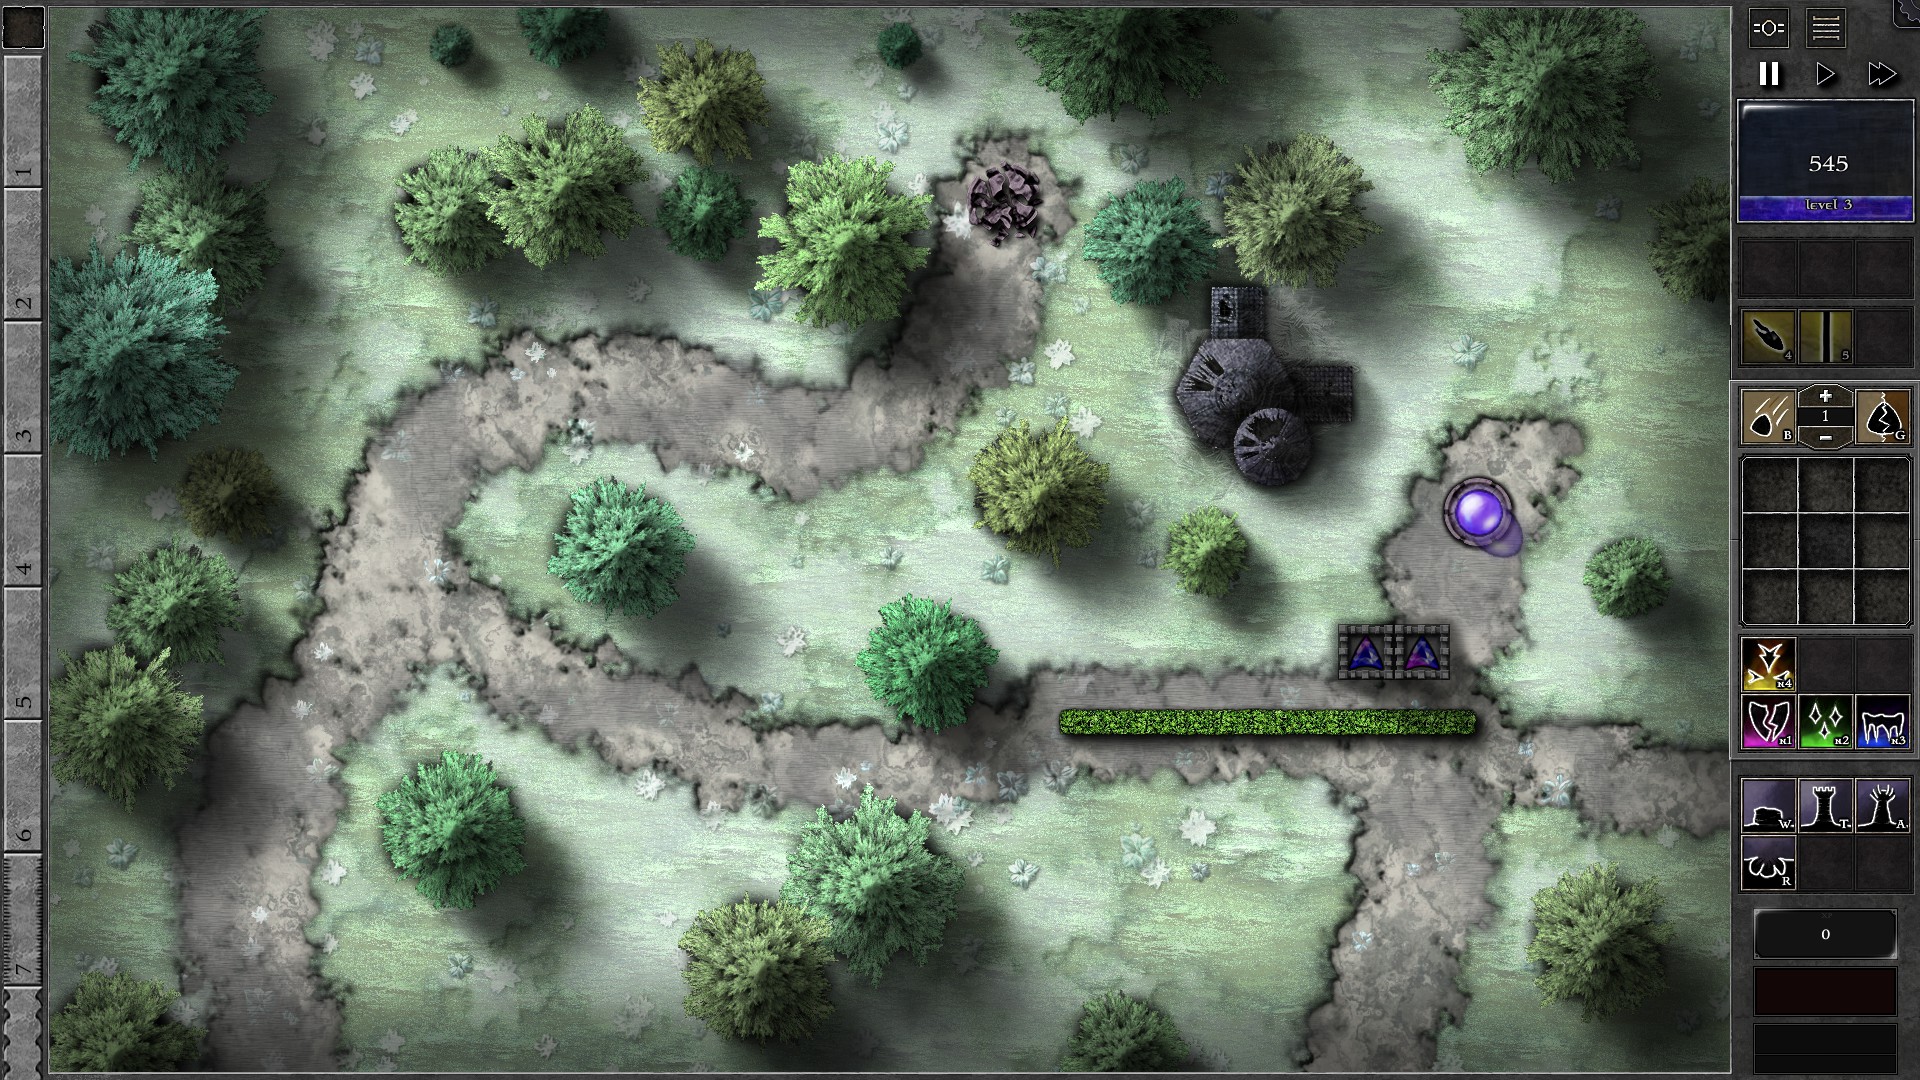
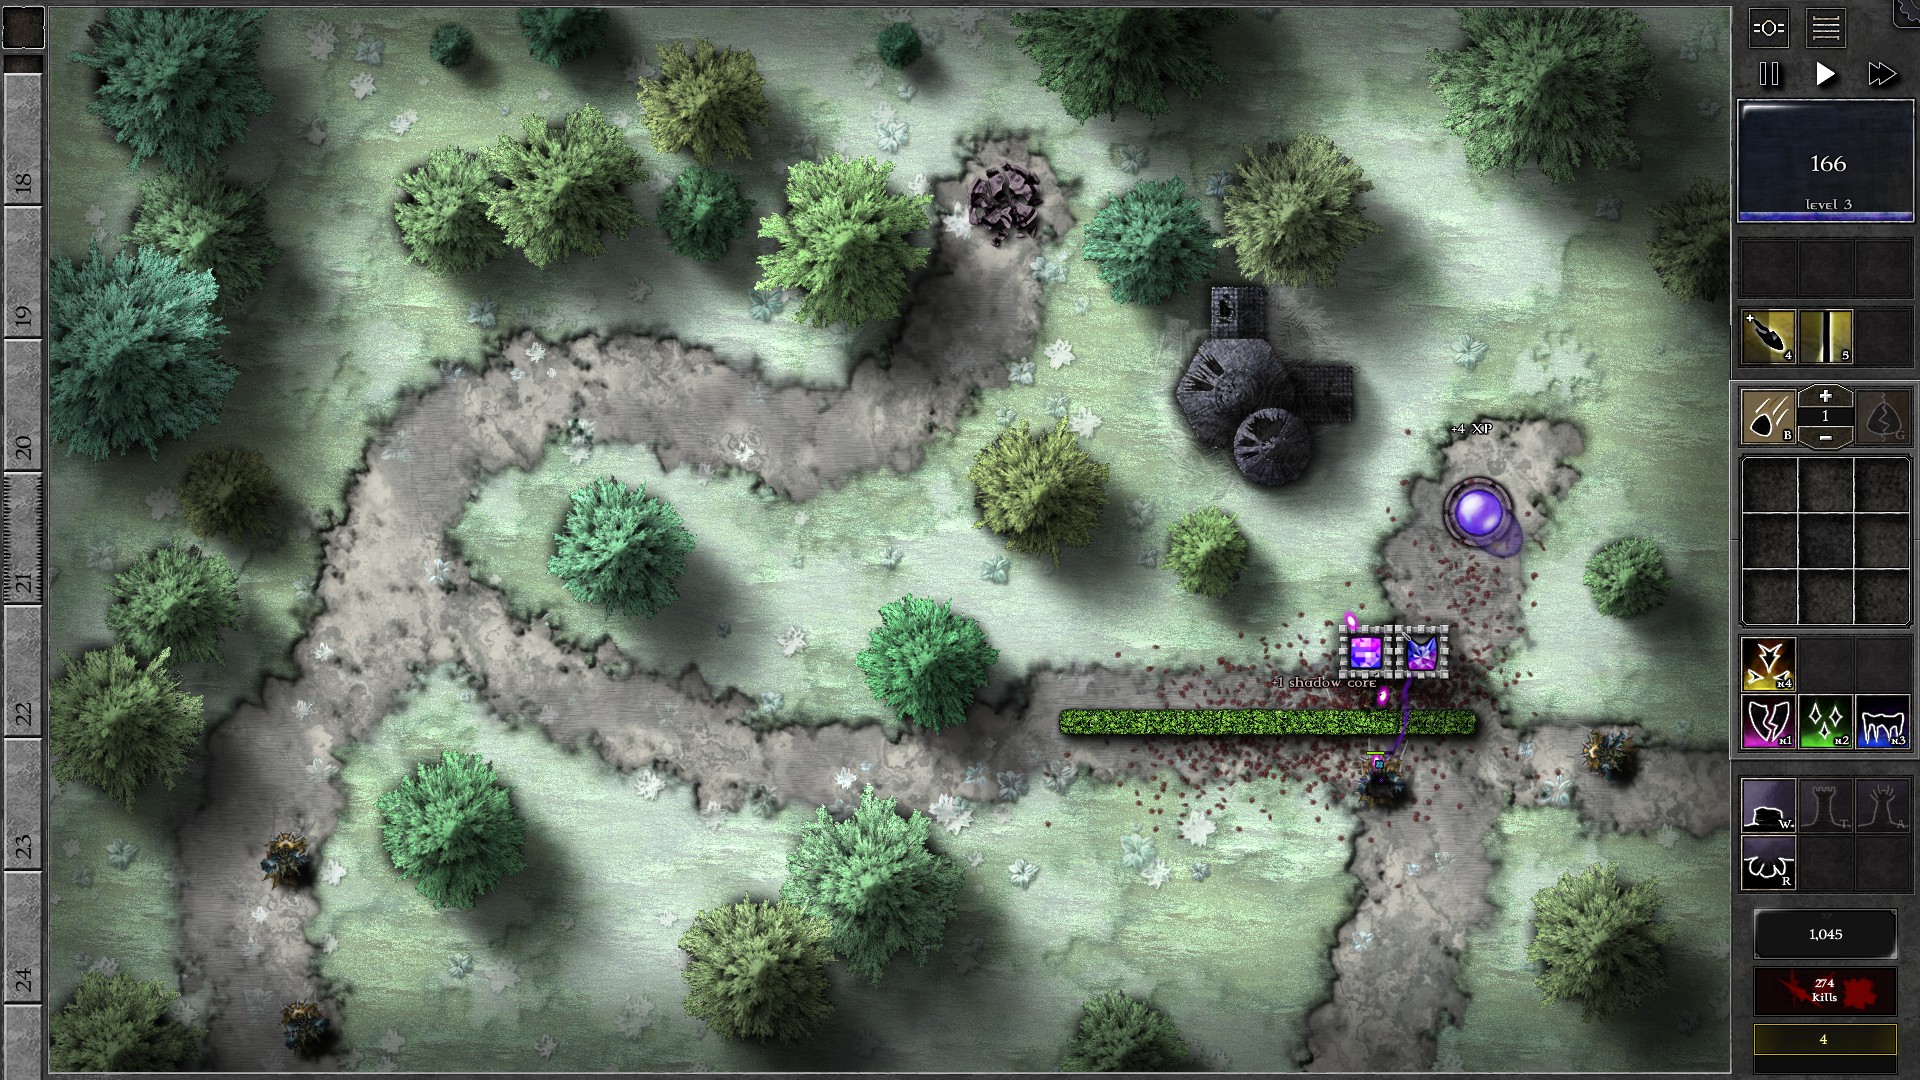
Setup the field as shown with a long wall segment and 2 towers with g2 p/b gems. Hold off the first 2 waves of monsters, then upgrade one of the gems to g3 as your spells charge up; you will want to insta-resocket the upgraded gem with an enhancement spell. At w6-7 you should do the same when upgrading the other gem to g3.
At around w12 the giants from previous waves will start to approach your towers together with the newly spawned in swarmlings and reavers. You’ll want to use spells on both towers to take on the larger monster horde. Consider one gem with Beam targeting “Least HP” and another tower with Bolt targeting “Nearest to Orb”. You should soon reach enough mana for a g4 at around w15-16, but the tight monster formations in w13-16 makes it difficult to upgrade as leaking monsters at this point would be lethal and you will probably run out of spells due to the high demand at these waves. Consider delaying the upgrade to around w17 once the situation deescalates.
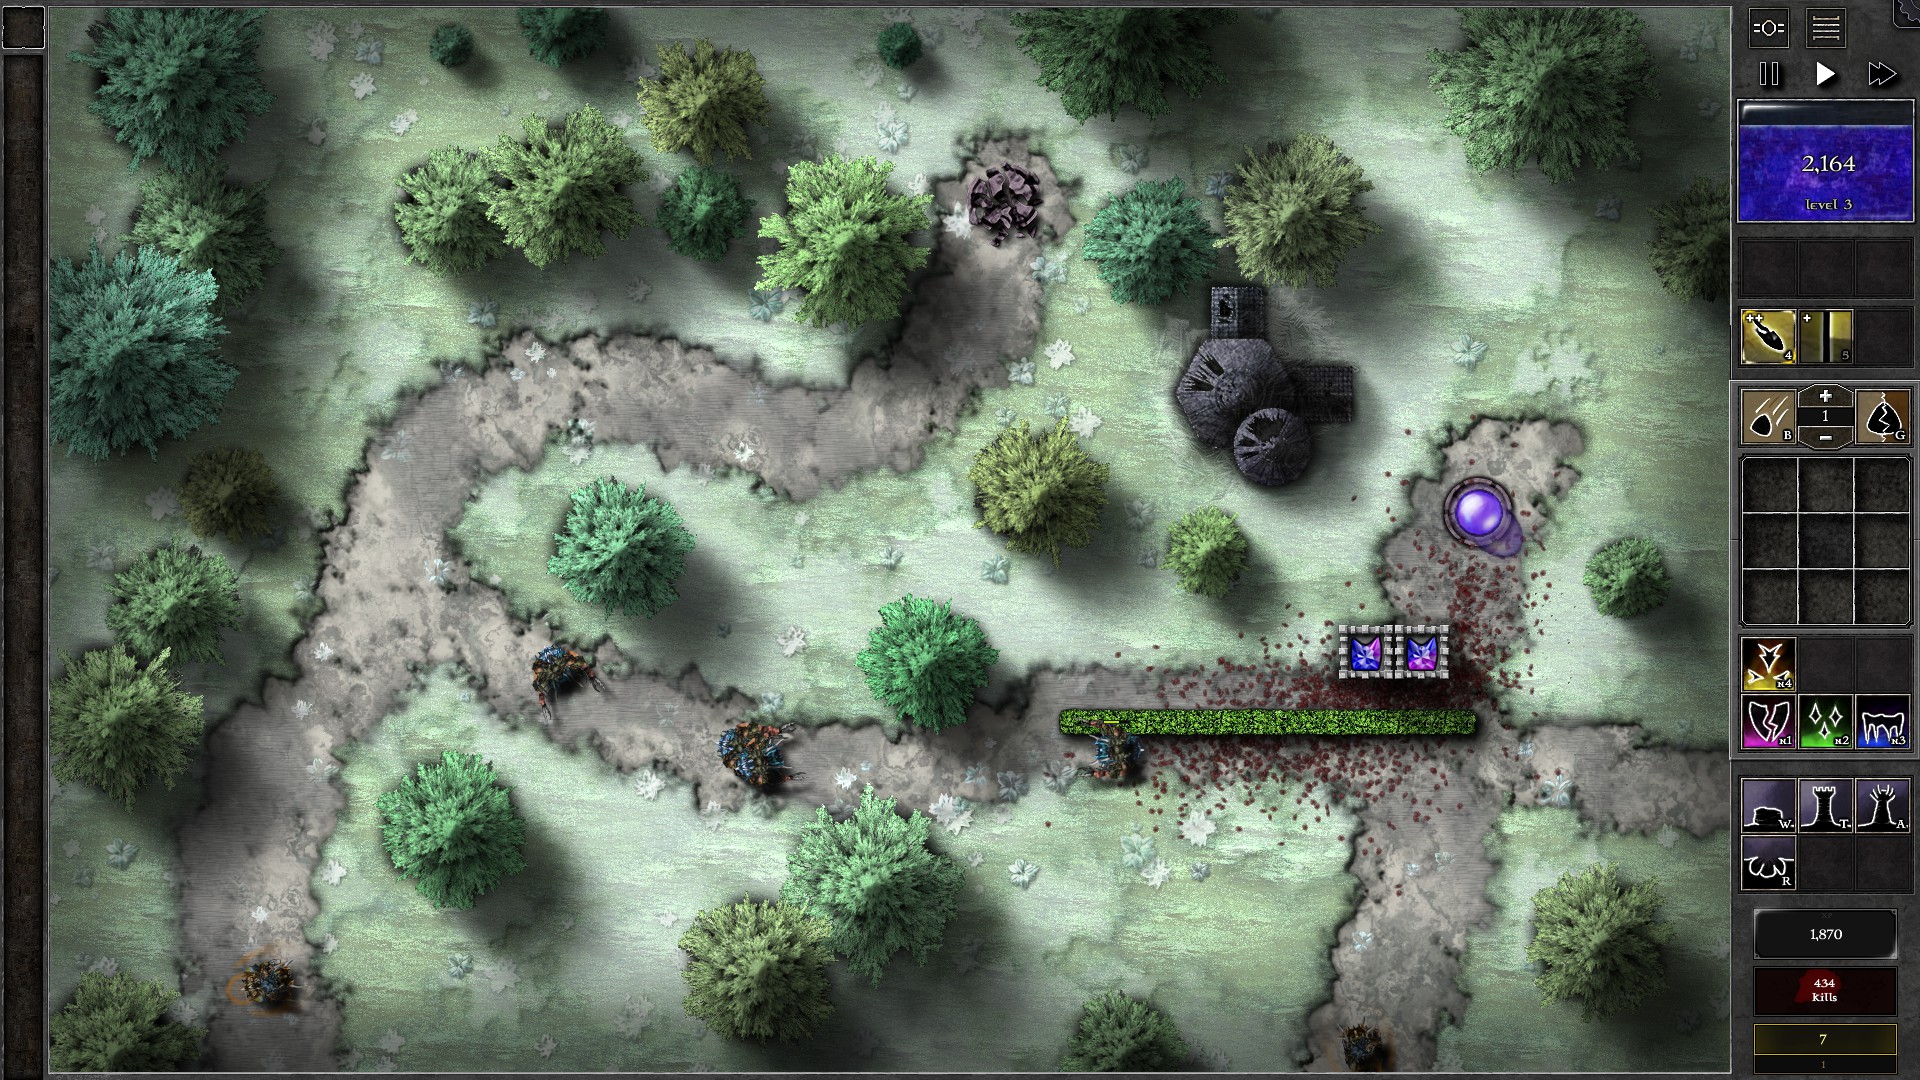
Upgrade the other gem to g4 at around w22 and insta-resocket with spells while being vigilant on monster leaks. 2 g4 gems should be sufficient to take on the remaining waves of monsters with the spells at your side. Don’t upgrade your gems to g5 though; the mana is better saved for extra banishments. In addition. try to kill everything else before the w30 beacon spawning giants to minimize the Beacons’ impact on the field.
036 – Field Y4
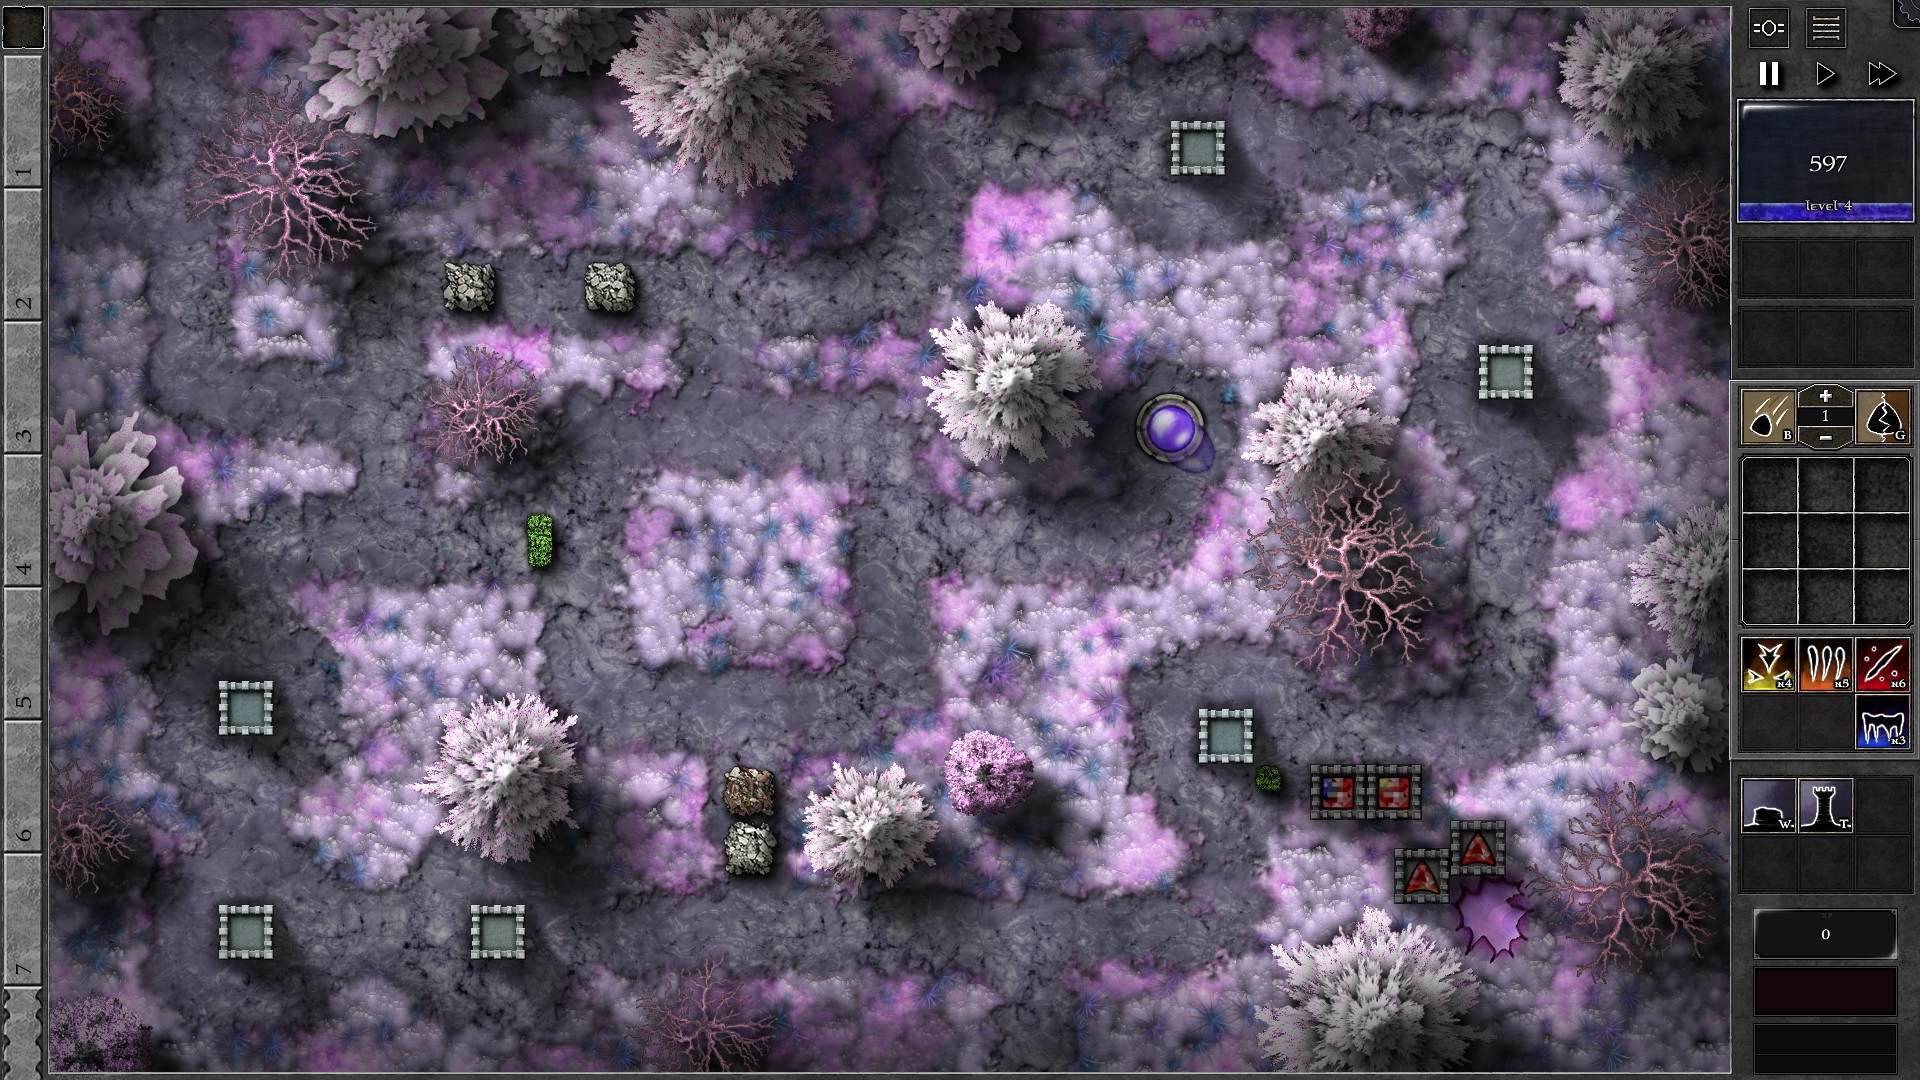
Monsters in this Trial does not give any mana when killed, which means you are forced to farm the mana shard for mana as you don’t have a significant mana regeneration.
Setup the field as shown. The 2 g2 r/o gems given at start should target “Structures” to keep firing at the Mana Shard. The r/y gem given should be combined with a g2 pure red gem into a g3 3r1y gem. Create another g3 gem, 3r1b. The 3r1b and 3r1y gems will become your main defense, while the 3r1y gem also serves to hit the mana shard while there are no monsters to fight.
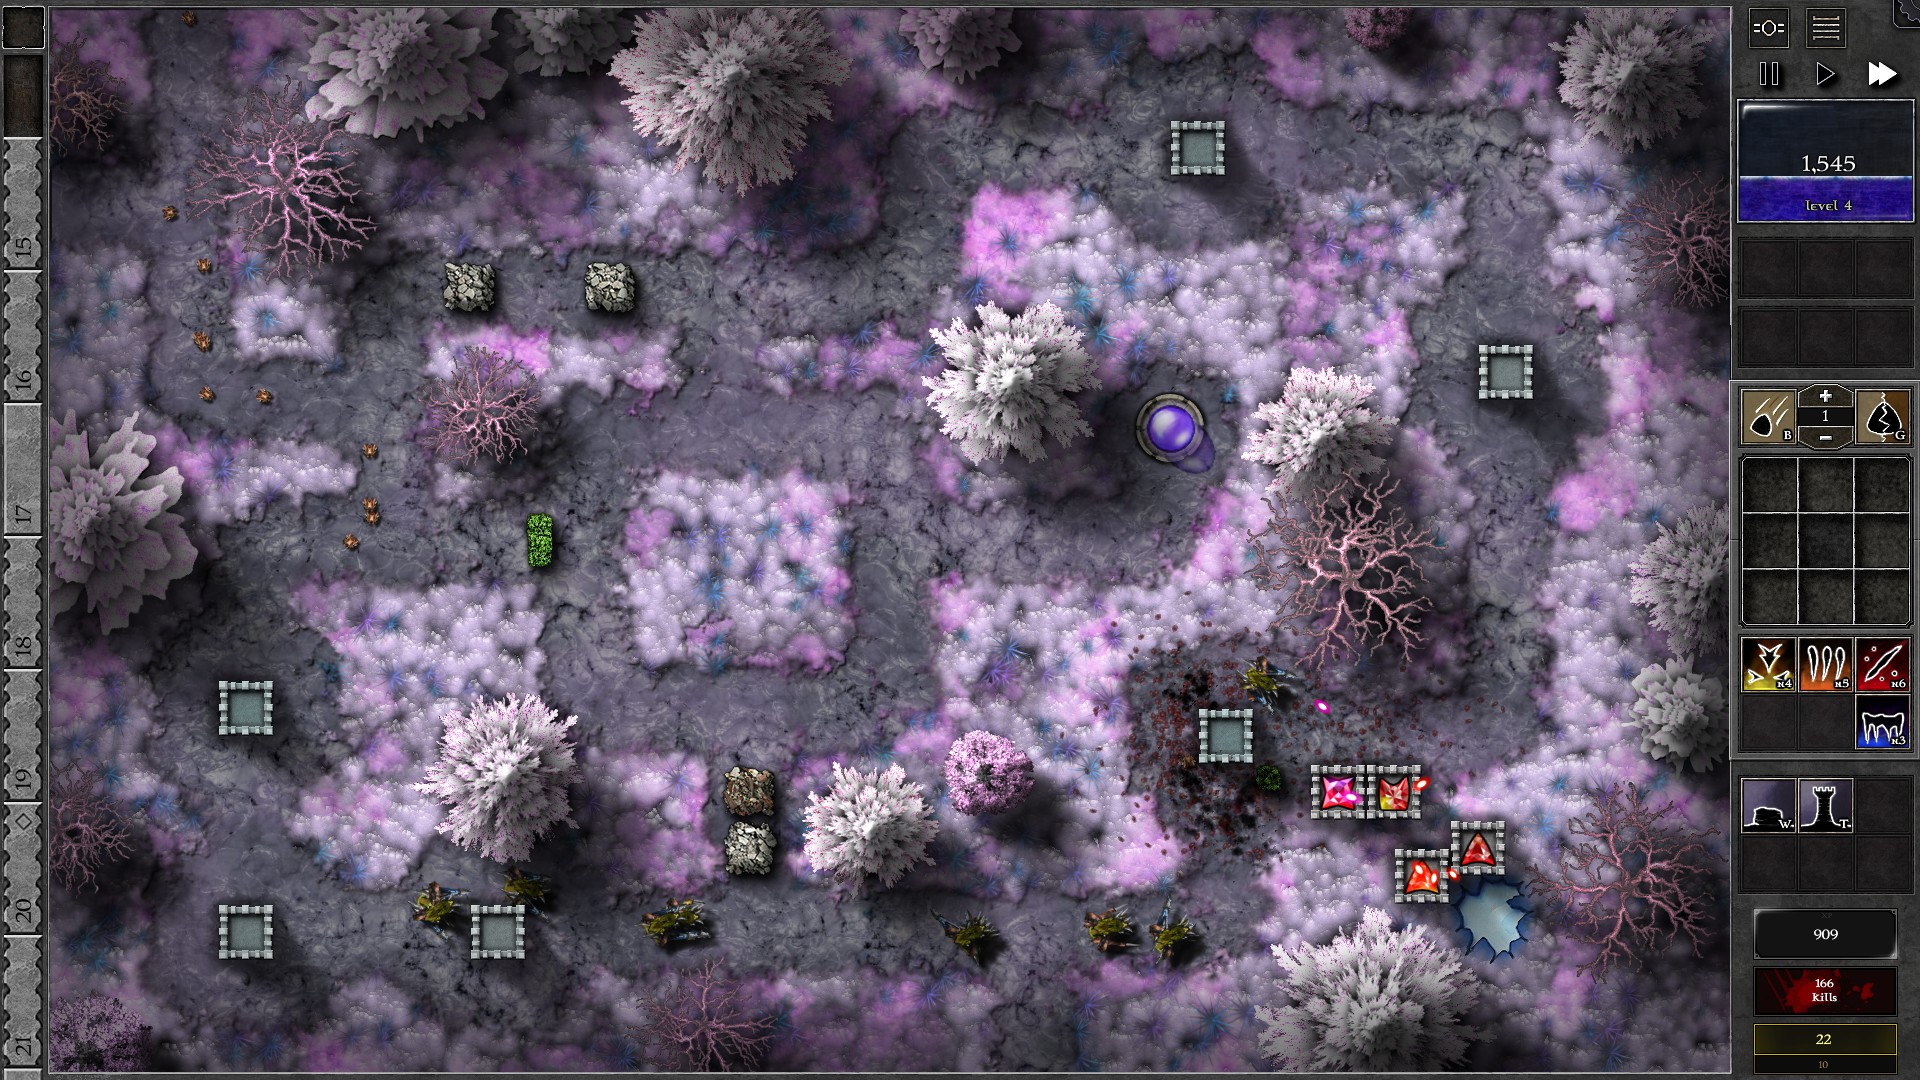
The mana shard should be opened before w4 while you fight off the initial fields. Soon you should upgrade the 3r1b gem to g4 as you get enough mana before w5, then the 3r1y gem to g4 before w8. Upgrade the 3r1b gem to g5 at around w12-13, which should allow it to join in farming the mana shard when there are no monsters around. You should have both the 3r1y and 3r1b gems at g5 and the r/o gems at g3 before w18.
At this point you will see longer downtime for your gems as more giant waves arrive, which should help you earn mana much faster. Start saving up mana and you should have the 3r1y and 3r1b gem upgraded to g6 by w24-26 where more reavers and swarmlings are incoming. As you fight off the mixed monsters (watch out for fast reavers in w25), upgrade both r/o gems to g4 before w30.
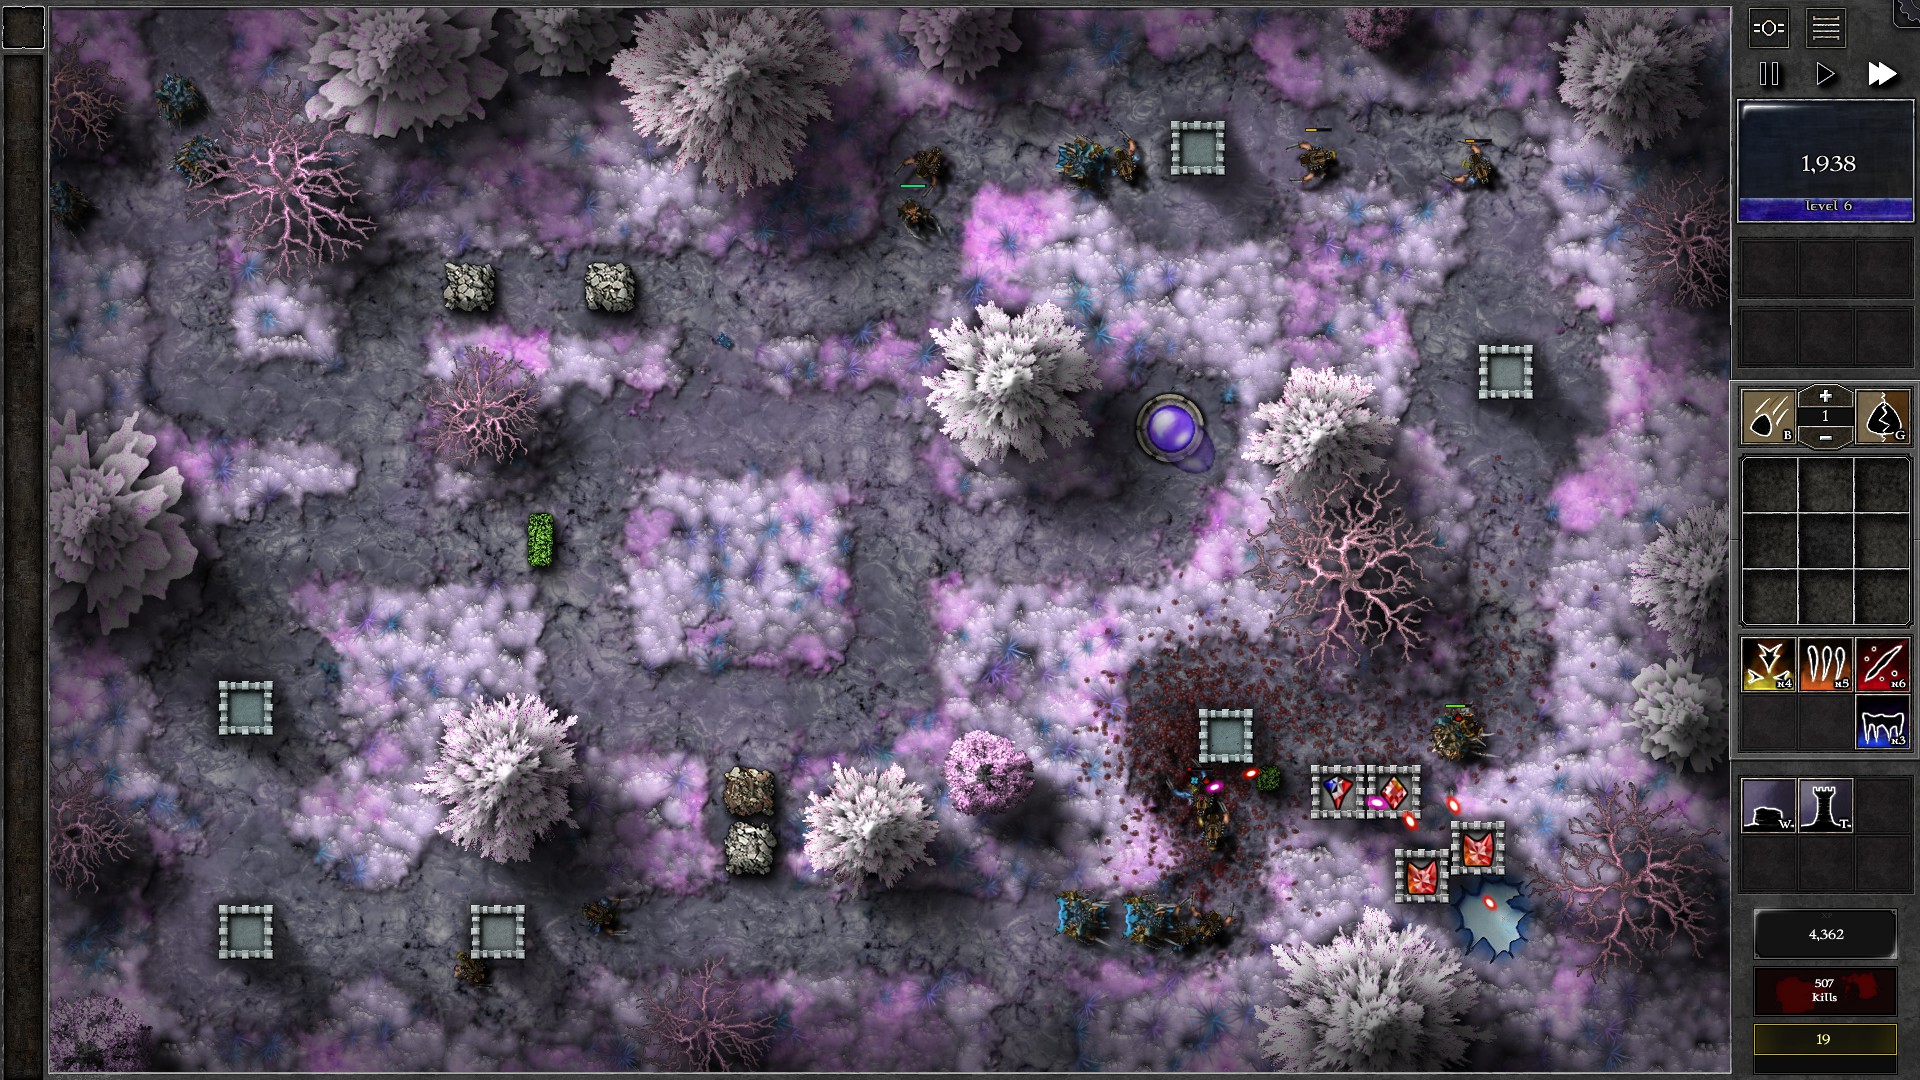
Collect mana to upgrade your 3r1b gem to g7 before the last wave. Watch out for the late wave giants which start to have some significant armor for even g7 gems; consider using “Least HP” on your g6-7 gems to kill the reavers and swarmlings first. You should also be careful when upgrading the gem to g7 due to the larger amount of banishments at the end.
037 – Field X1
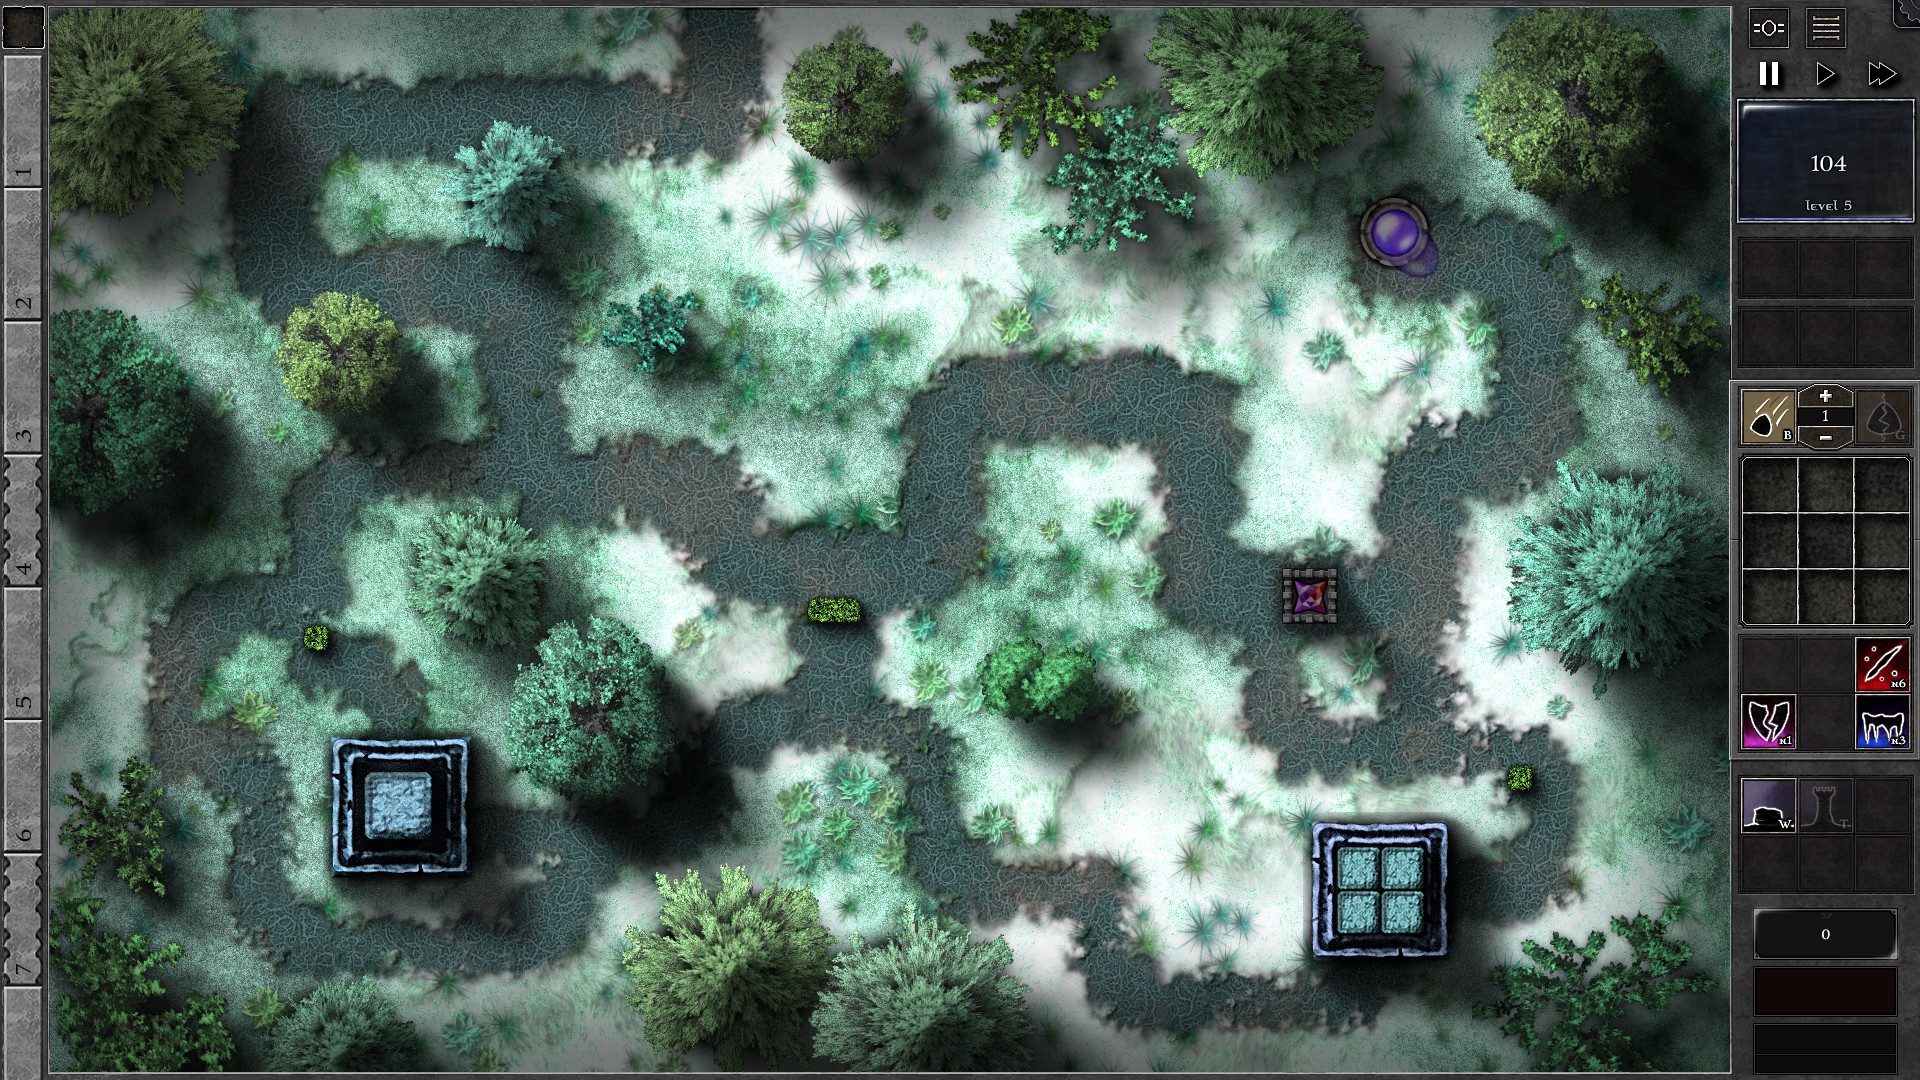
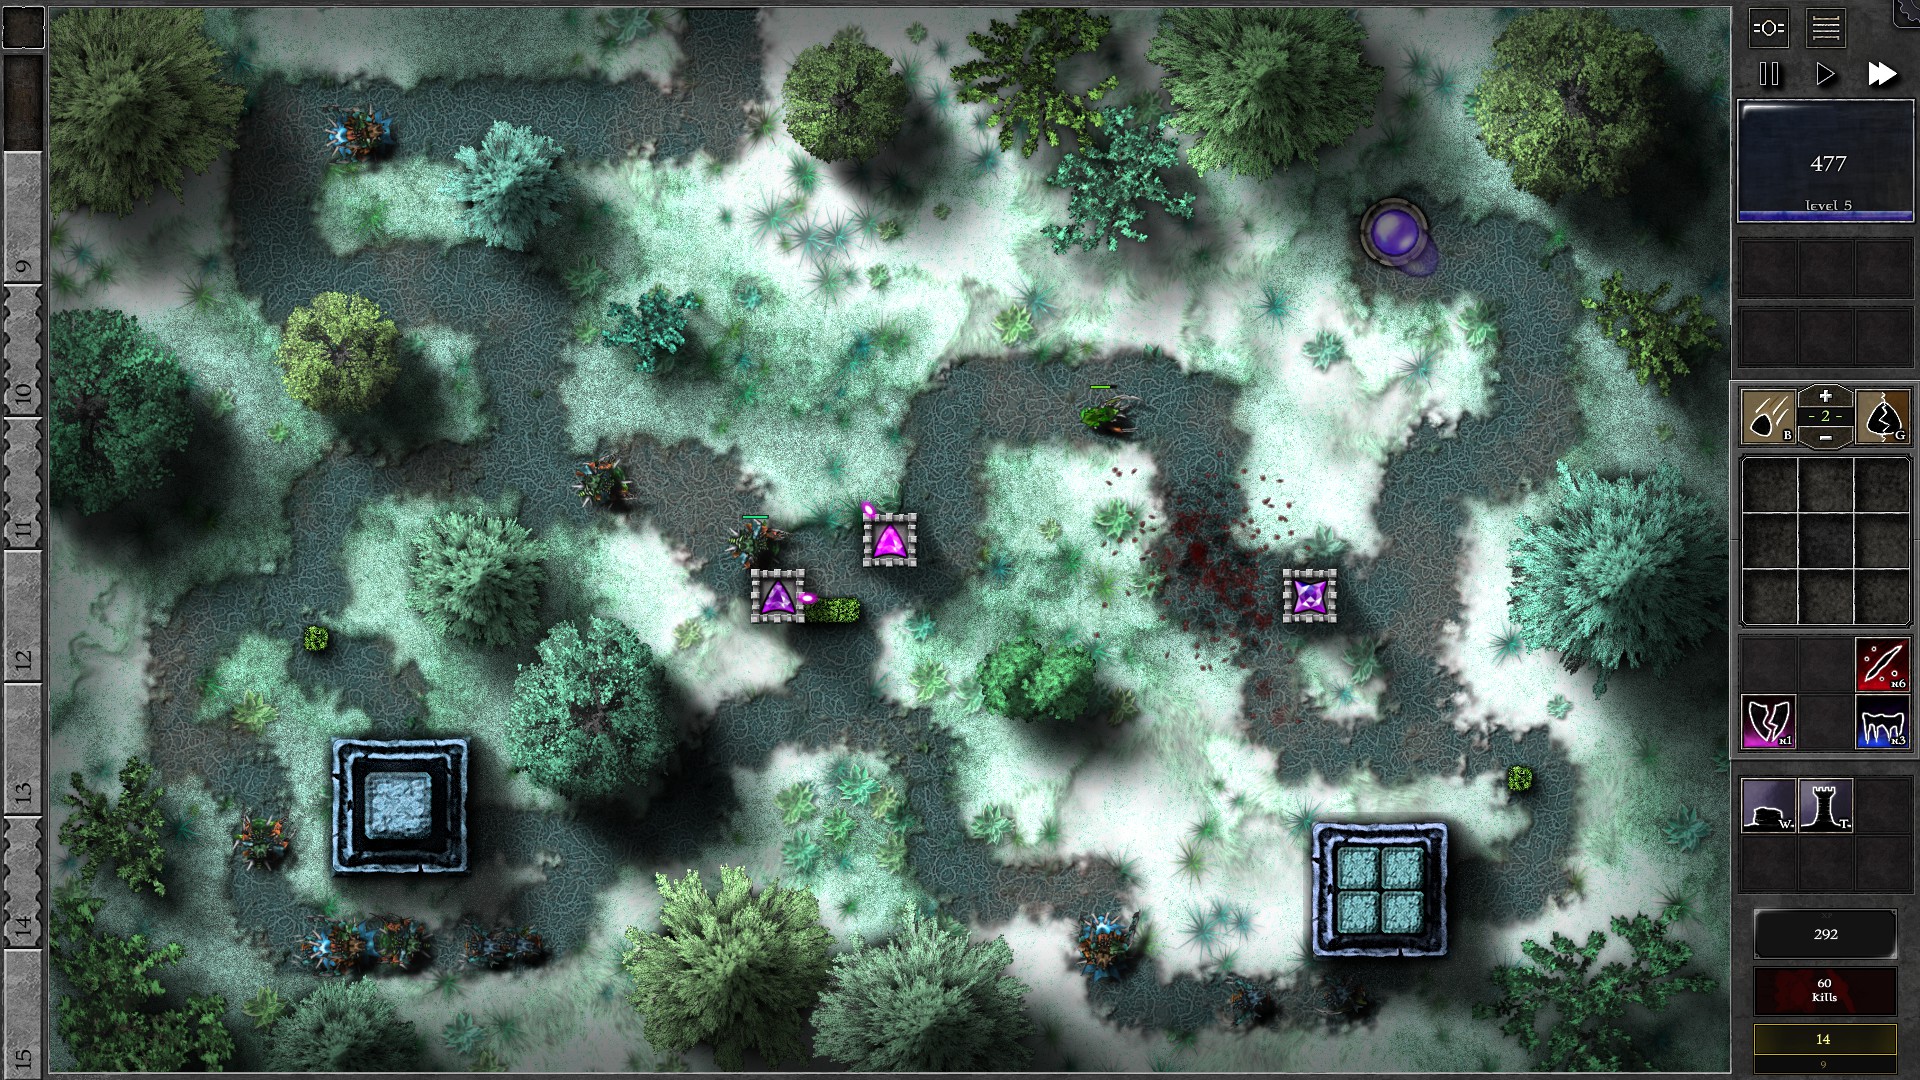
Build walls and a tower with a g5 15p1b gem (create g2 p/b gem, then combine with pure purple gems of same grade until reaching a g5). Note that monsters in this Trial have low HP growth but a decent armor growth.
Around w6-8, start setup 2 new towers in the middle as shown and insert g2 p gems into the new towers. Set the g2 gems to target “Shielded/Highest Armor” to help take off armor from monsters and upgrade the g2 gems evenly. You should be able to upgrade both gems to g4 at around w16. Now, combine the g4 gems for a g5 p, then combine the g5 p into the g5 dual gem, resulting in a g6 31p1b gem.
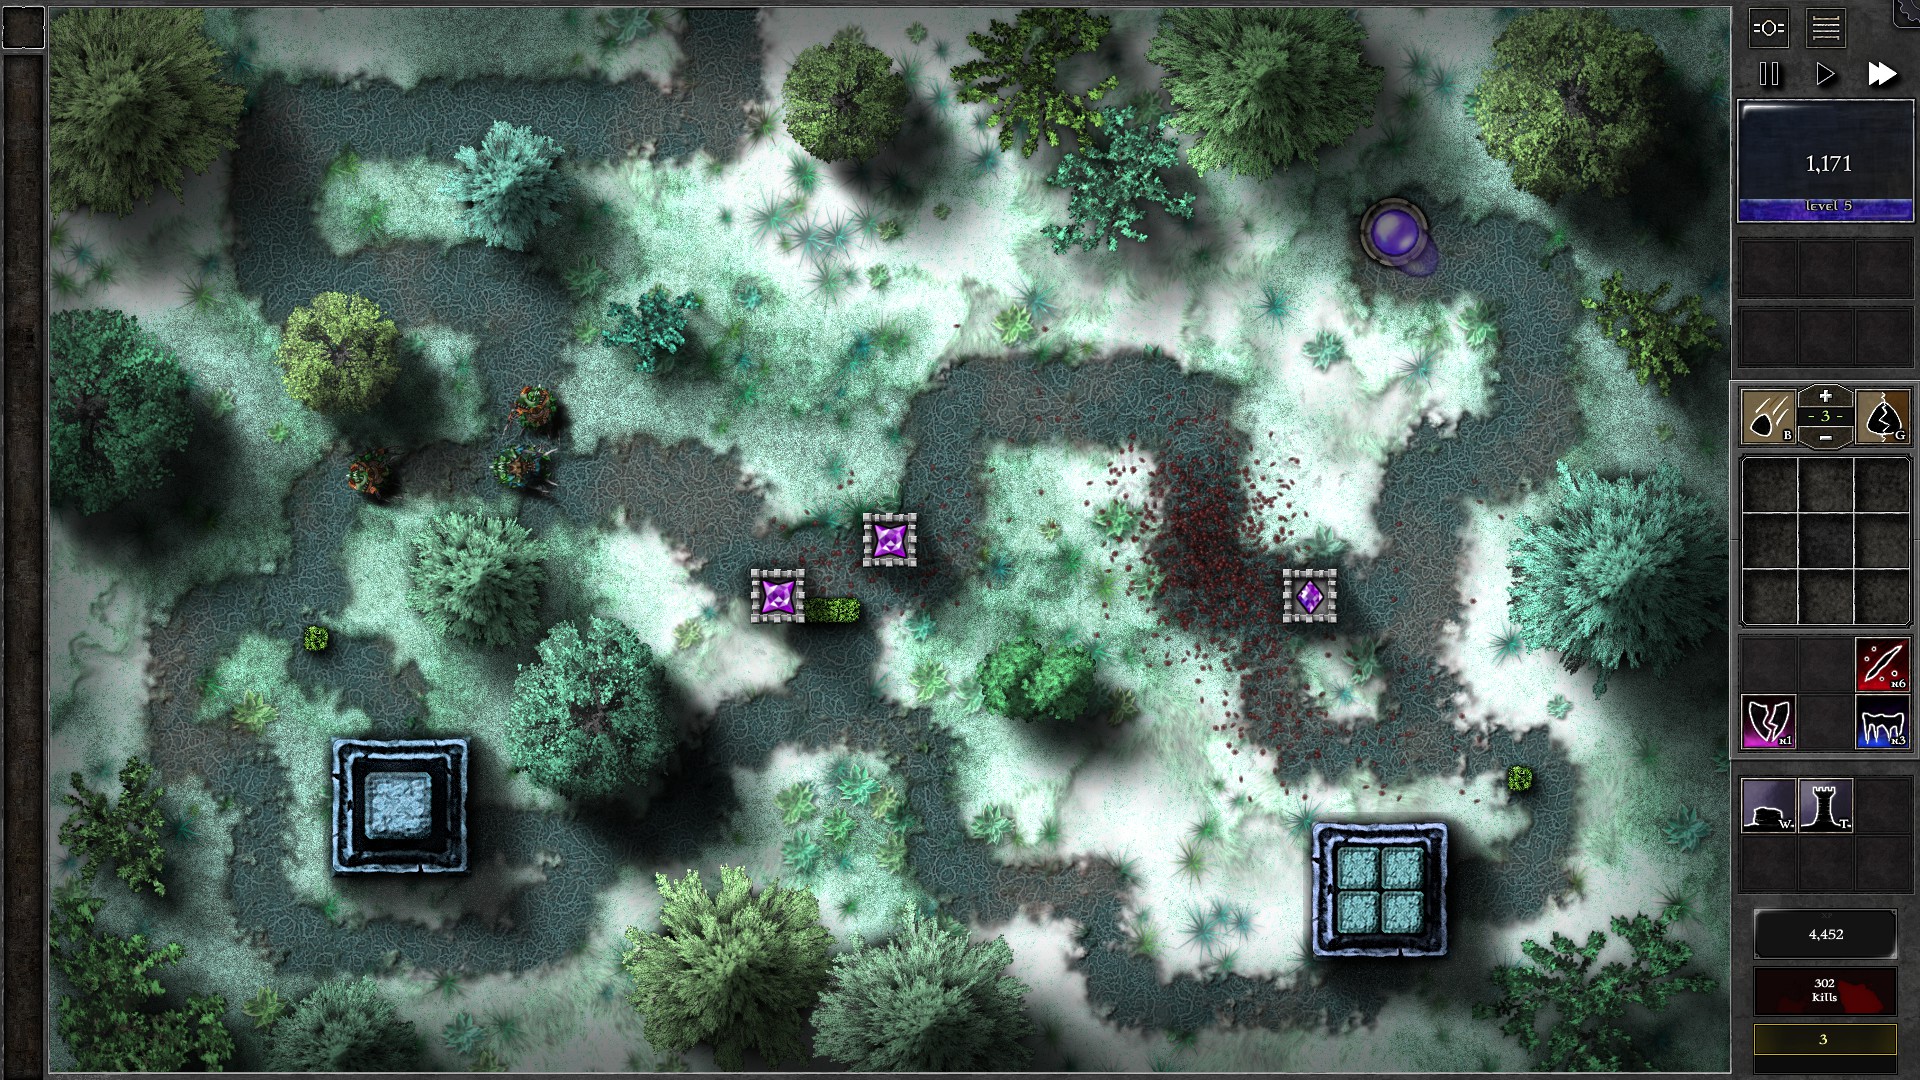
The g6 gem should fare better against the monsters in later waves. Meanwhile, start refilling the 2 towers in the centre with g2 p gems and upgrade them as you gather mana. You should reach 2 g5 p gems at the end of the Trial, but it’s not necessary to use these to upgrade the g6 gem to fight off the last waves.
038 – Field X2
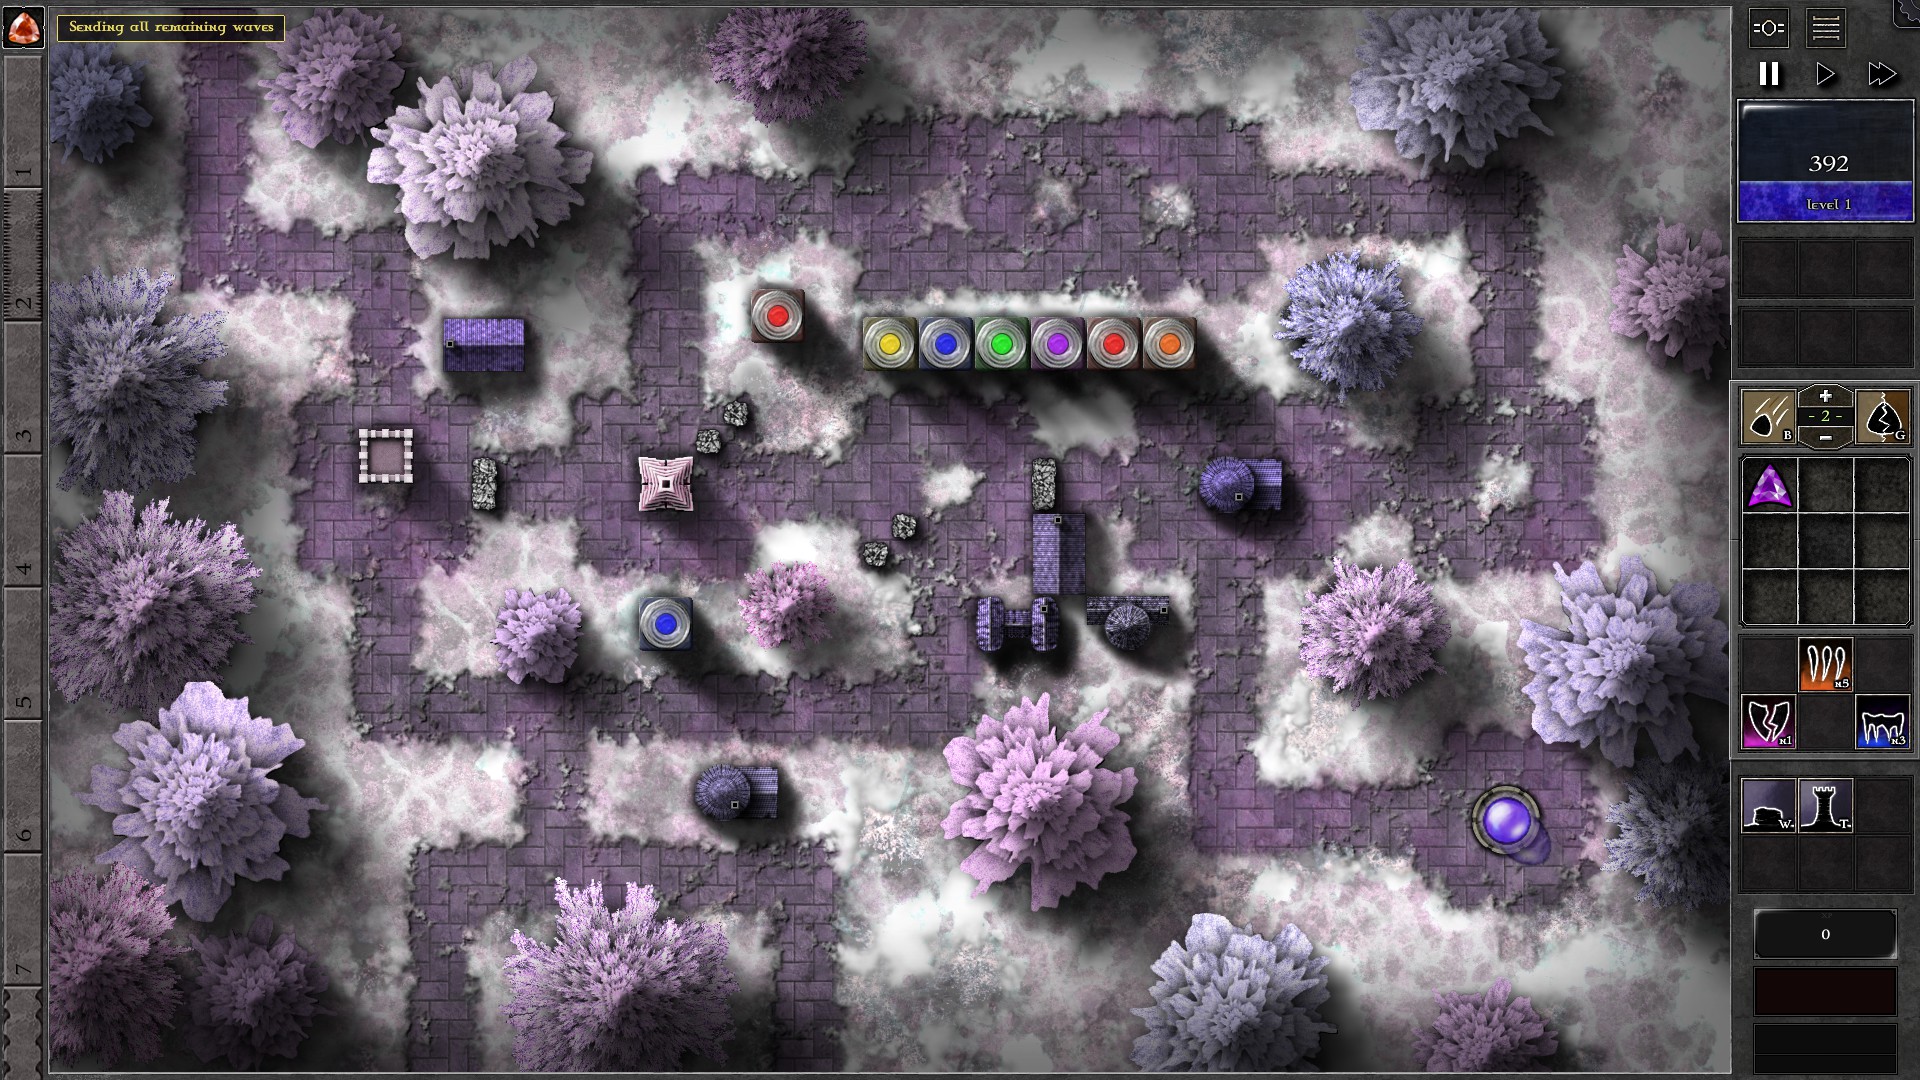
One of the easiest Trials in the game and a easy way to get “Get This Done Quick” (Beat a Trial with at least 3 waves sent early) and “Too Easy” (Beat a Trial with at least 3 waves enraged). It also gives about 150k EXP which is a decent boost to your WL at this point of the game
Start by building a few walls to converge the monsters and lengthen the path. Now you can send every wave immediately by Ctrl-clicking on the wavestones. (Optional: If you want “Too Easy” achievement, put a g1 gem into the enraging socket before sending the waves and remove the gem after the first 3 waves are sent)
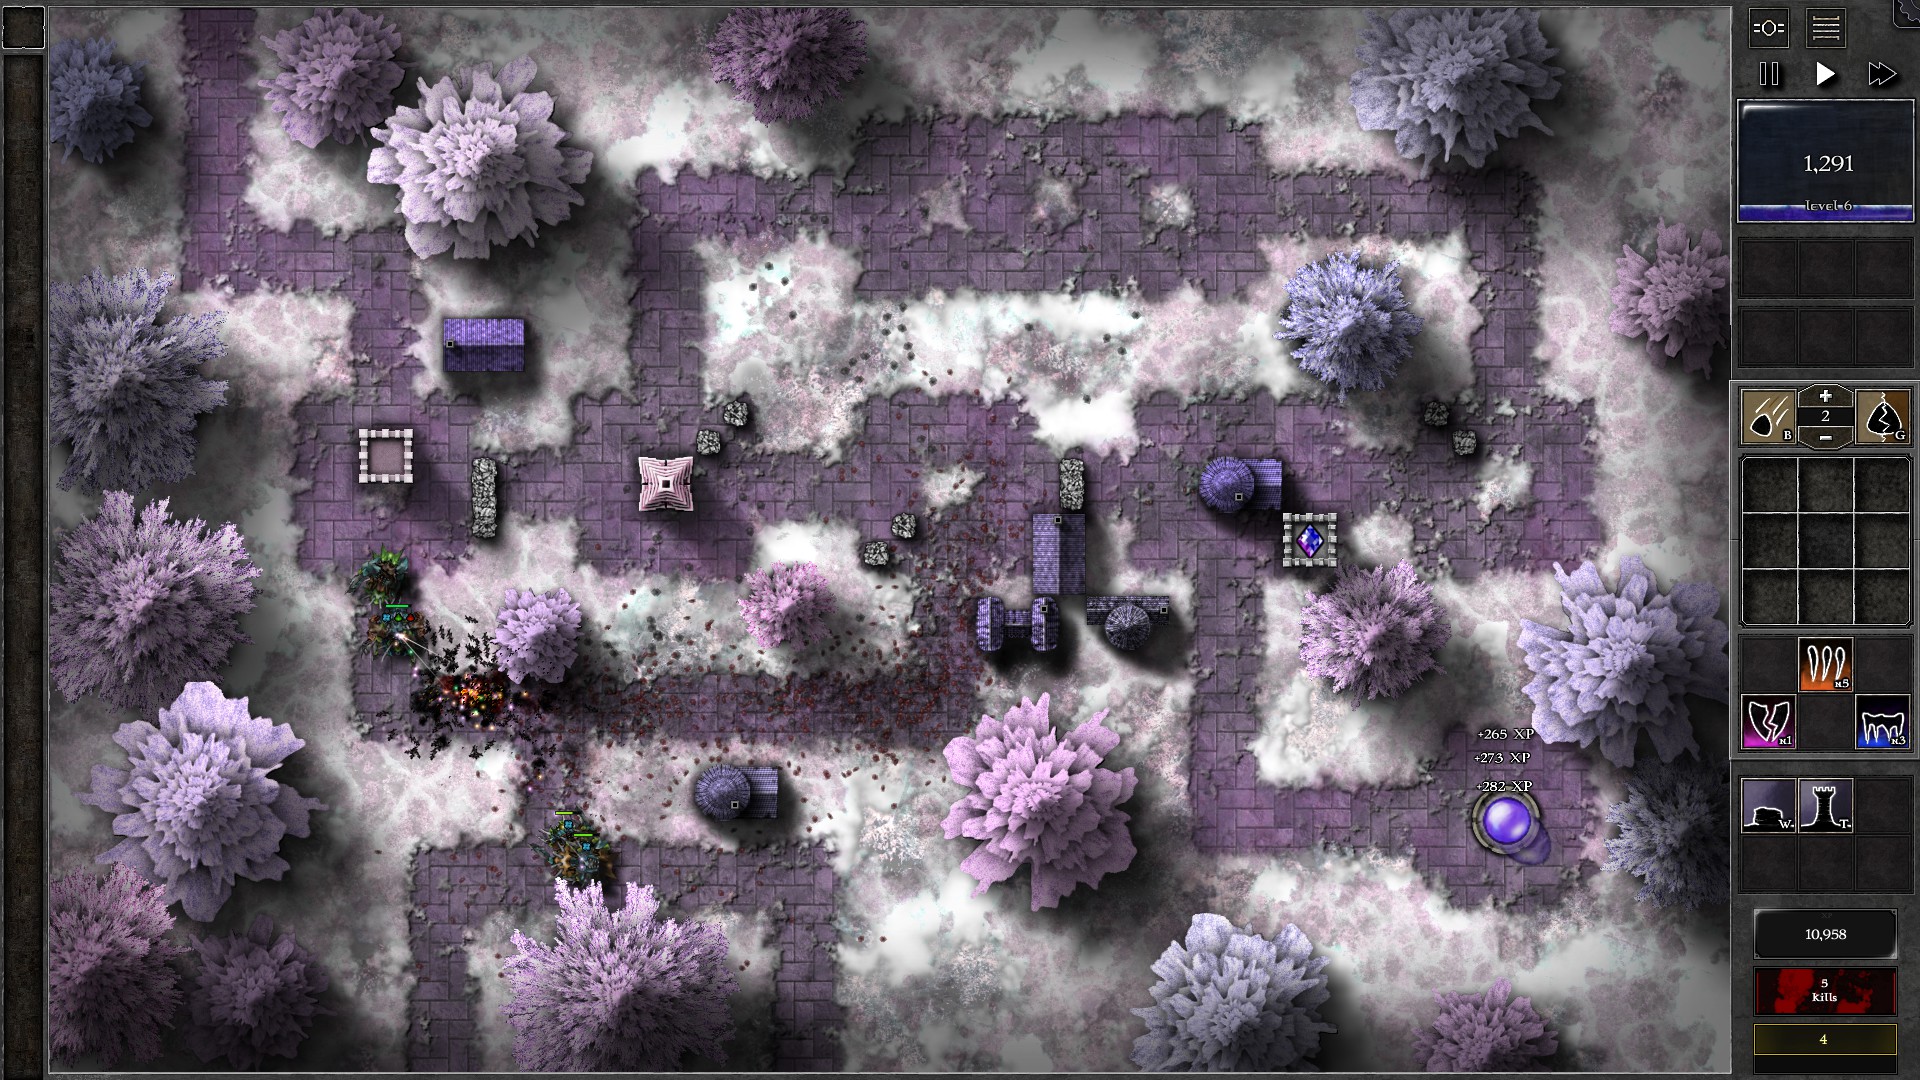
As monsters approach and you gain mana through sending early waves, start breaking the Wasp Jars one by one. A g2 purple or blue gem bomb (but not orange) should have enough damage to break one Jar in one go. Start by breaking the Blue Wasp Jar closest to the converging point, then the Red Wasp Jar to the left, and finally the remaining 6 Jars. The gem wasps should be strong enough to handle every wave of monsters with only a few leaks provided that you use the mouse to help guide the gem wasps to monsters (gem wasps will follow your cursor if you move it close to the wasps).
You can set up a gem close to the orb to catch the occasional leaks. This gem can go as high as a g5 or even g6 just from the monster kills and the early wave mana.
039 – Field X3

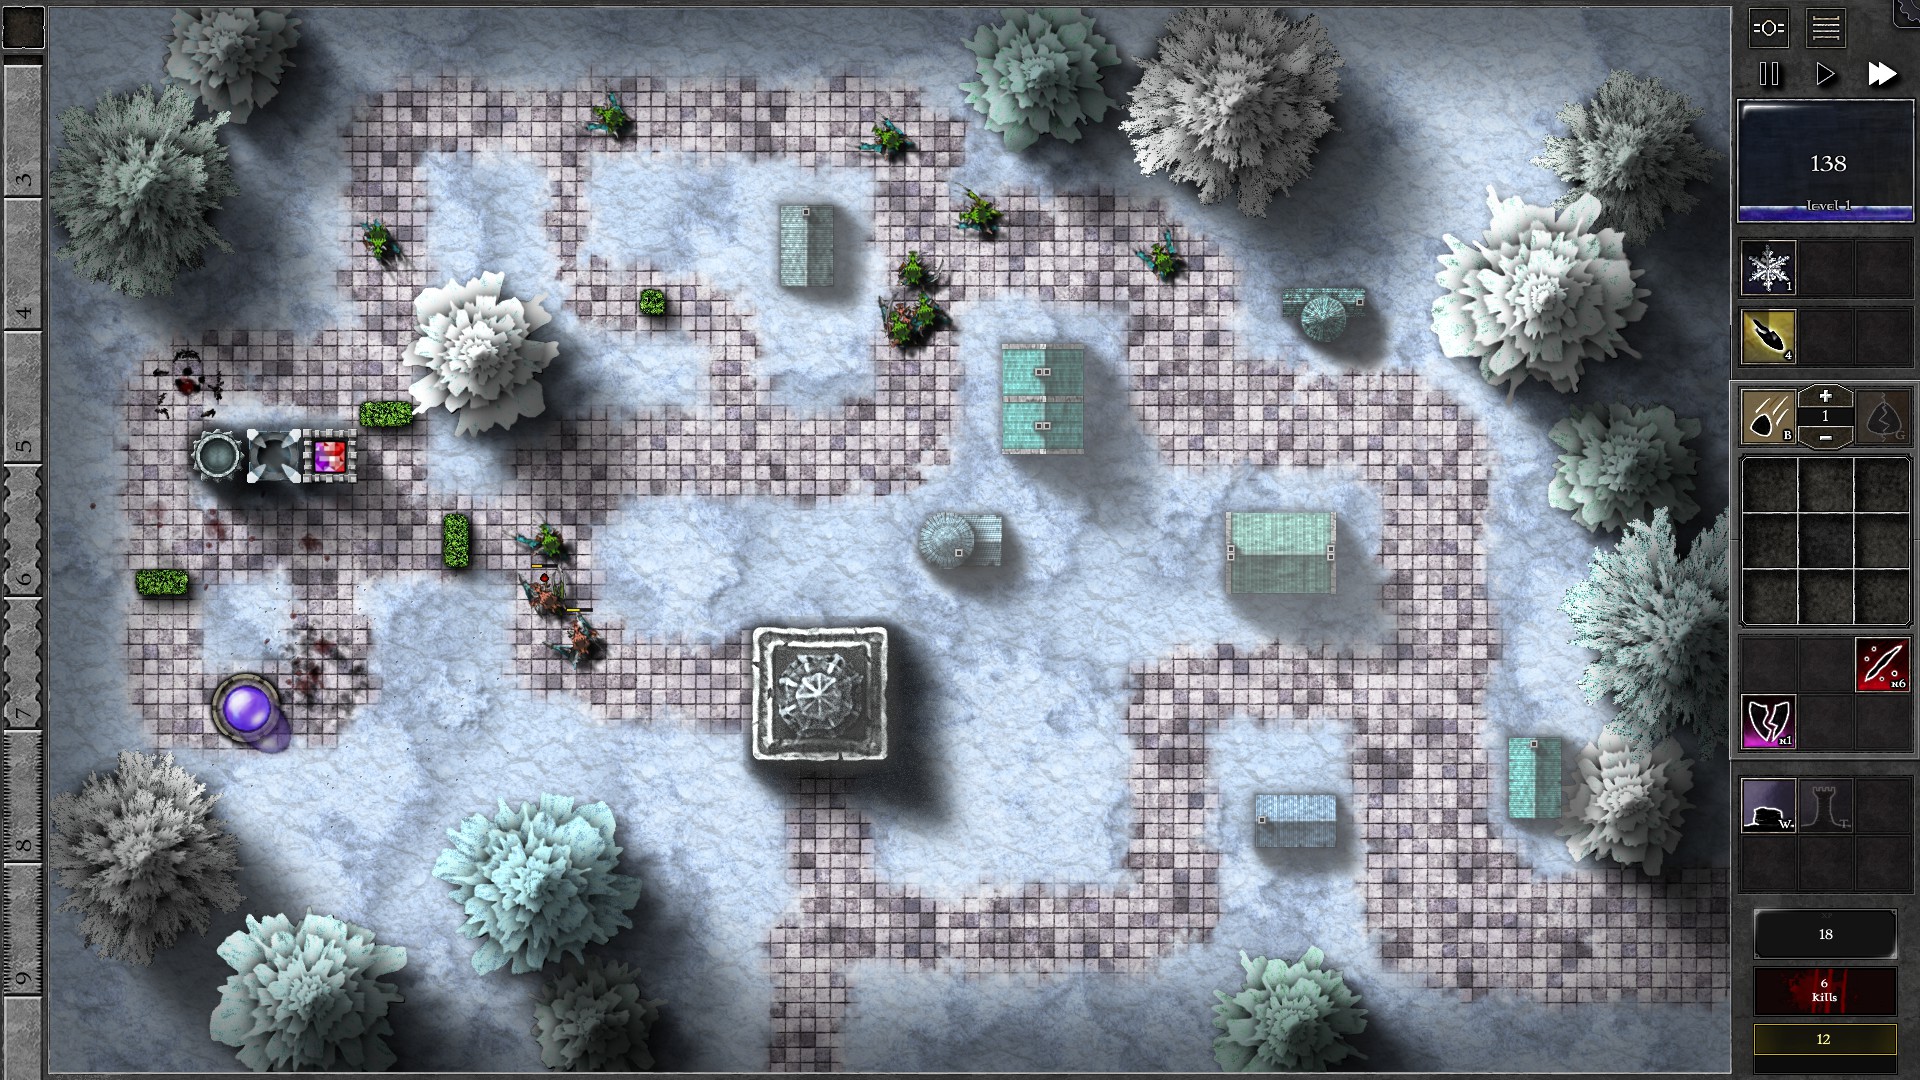
Although you cannot build anything at the beginning, you can use the huge mana regeneration multiplier (50x) to your advantage. Start the waves first but do not send early waves. As you gain mana, start building walls and towers as shown to force monsters to take detours, then insert the given p/r gem once the tower is built.
NOTE: This has worked for a w1 with Speed as high as 1.77, but you should have much more time to build if your w1 is slower. With w1 speed below 1.65 you should consider the alternative scheme as in the second screenshot which makes it much easier to control the initial waves.
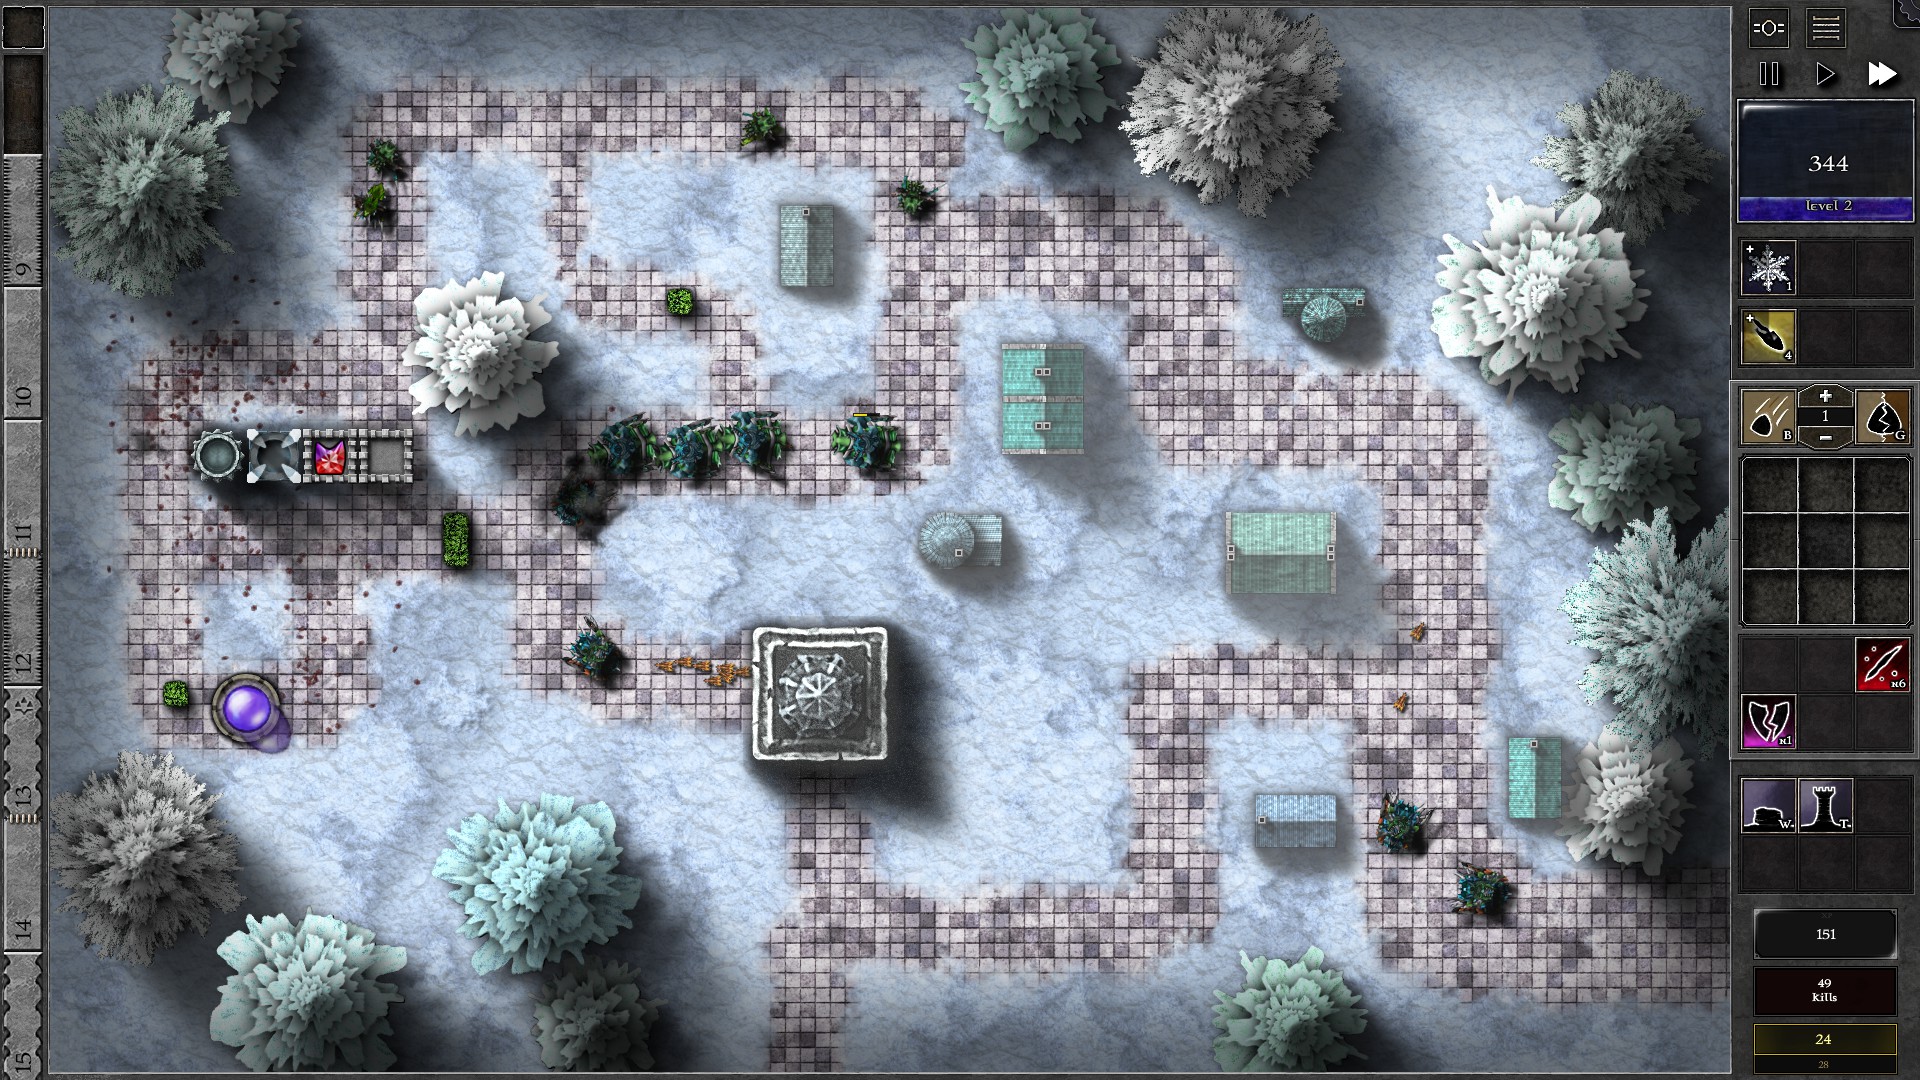
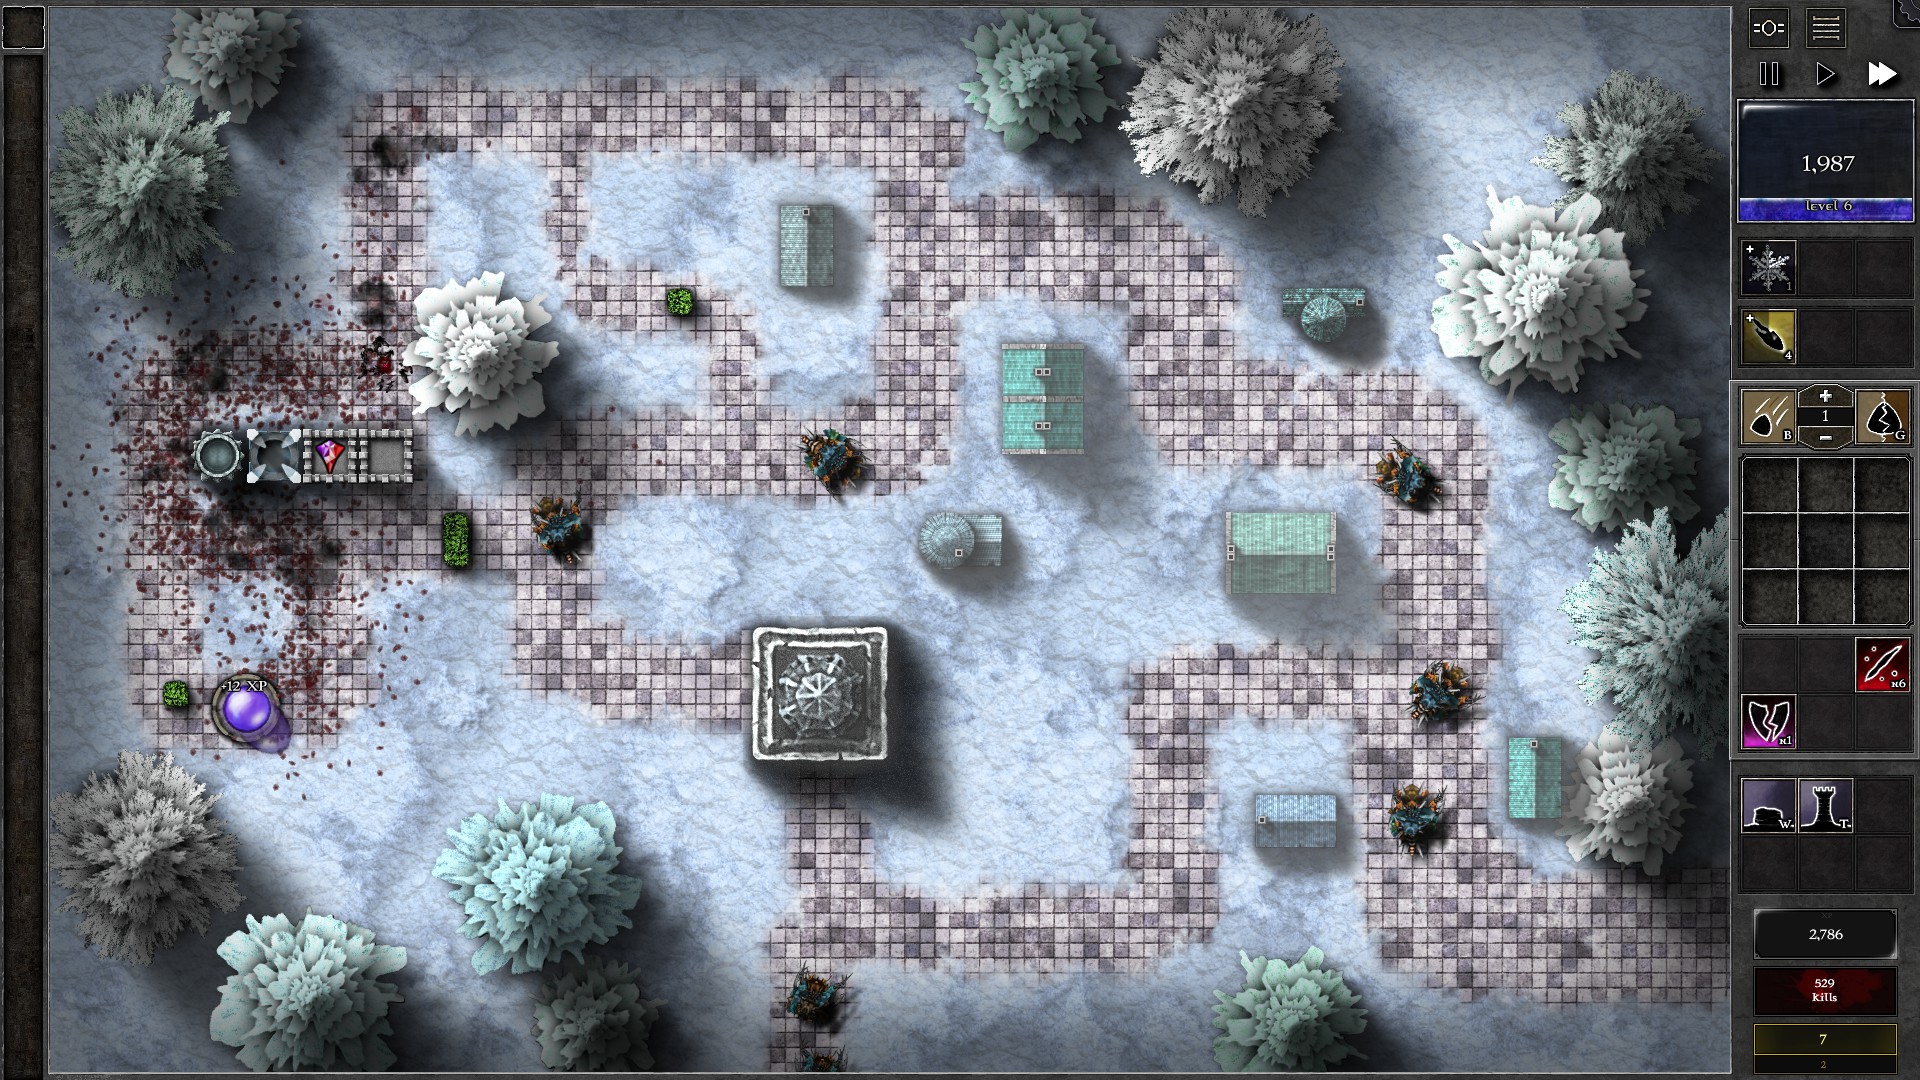
At around w3, start slowing down the monsters with Bolt and Freeze to stabilize your defense. Now you can take advantage of the fast mana regeneration to upgrade your defenses. If you used the first screenshot’s scheme, build a tower closer to the initial lantern (better path coverage) and move your gem there while upgrading the gem to g4. This should be doable before w8.
Continue upgrading your gem as you gather mana and you should have no problems facing the remaining waves with Bolt and Freeze available (g5 at w14-15, g6 at w21, g7 before w33). Finally, watch out for the mana burners in w28 and w31 and make sure that you can kill them before they can touch your Orb.
040 – Field X4
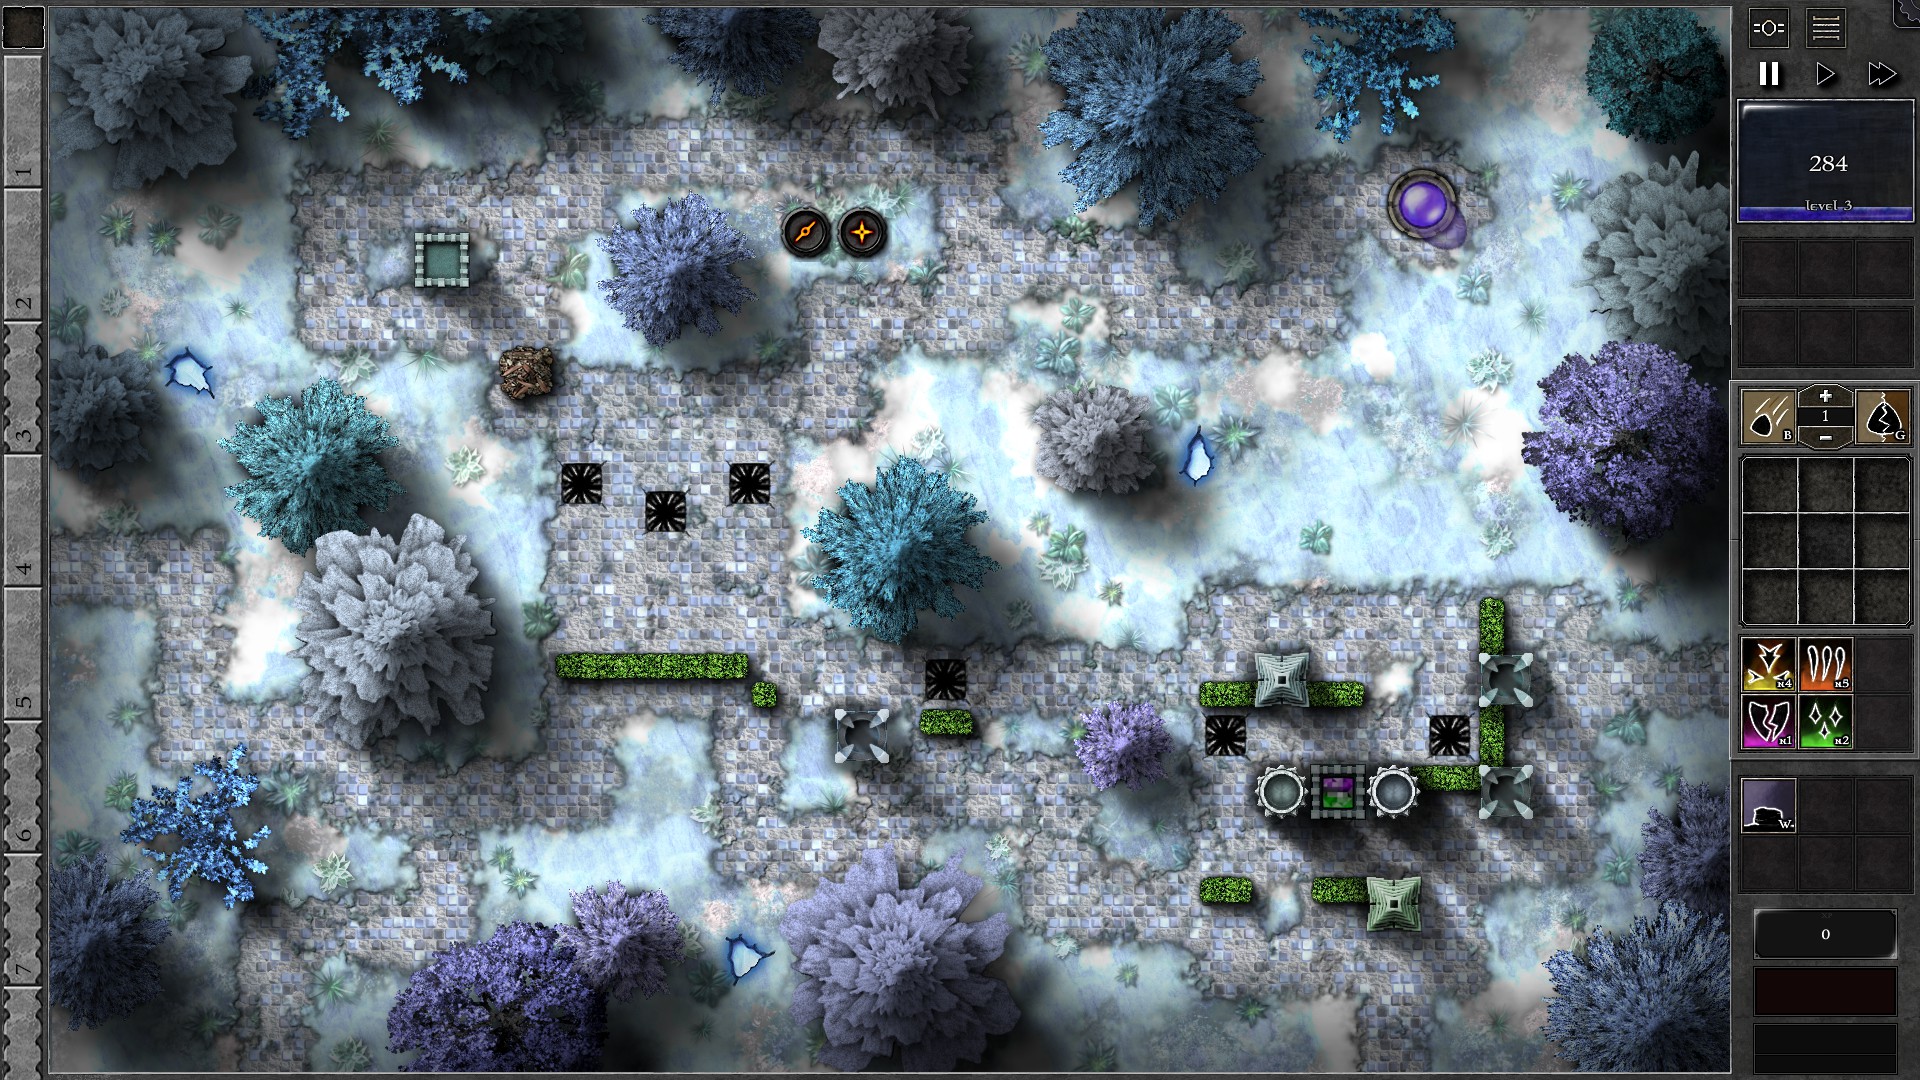
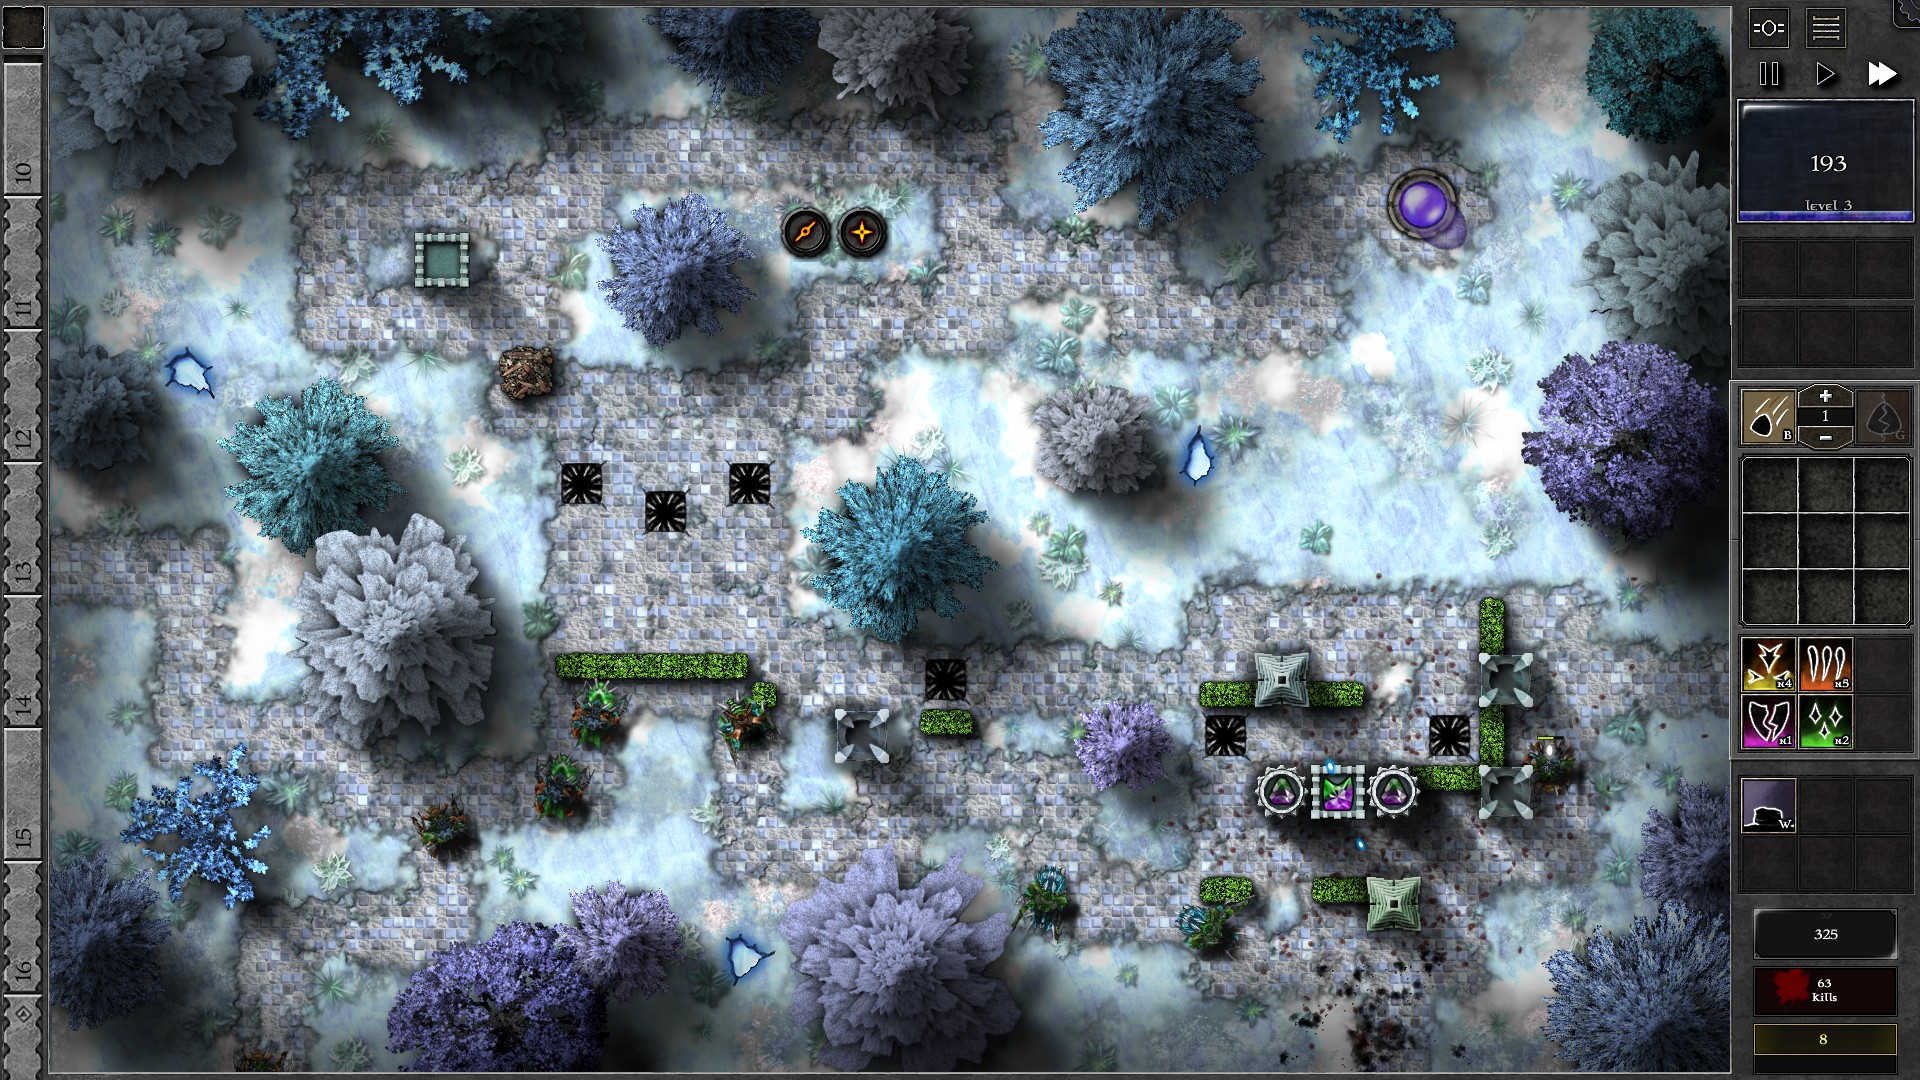
Create a g3 p/g gem and setup walls as shown. Set the gem to target “Structures”; you will be using the pylons as the main damage output. At around w7-8 you should upgrade your gem to g4. After that, create 2 g2 p/g gems and insert them into the 2 amplifiers next to the tower gem.
NOTE: Your gem will attempt to charge the bottom pylon first, however in some situations you can click on the top pylon to charge it if you want some extra coverage against the monsters.
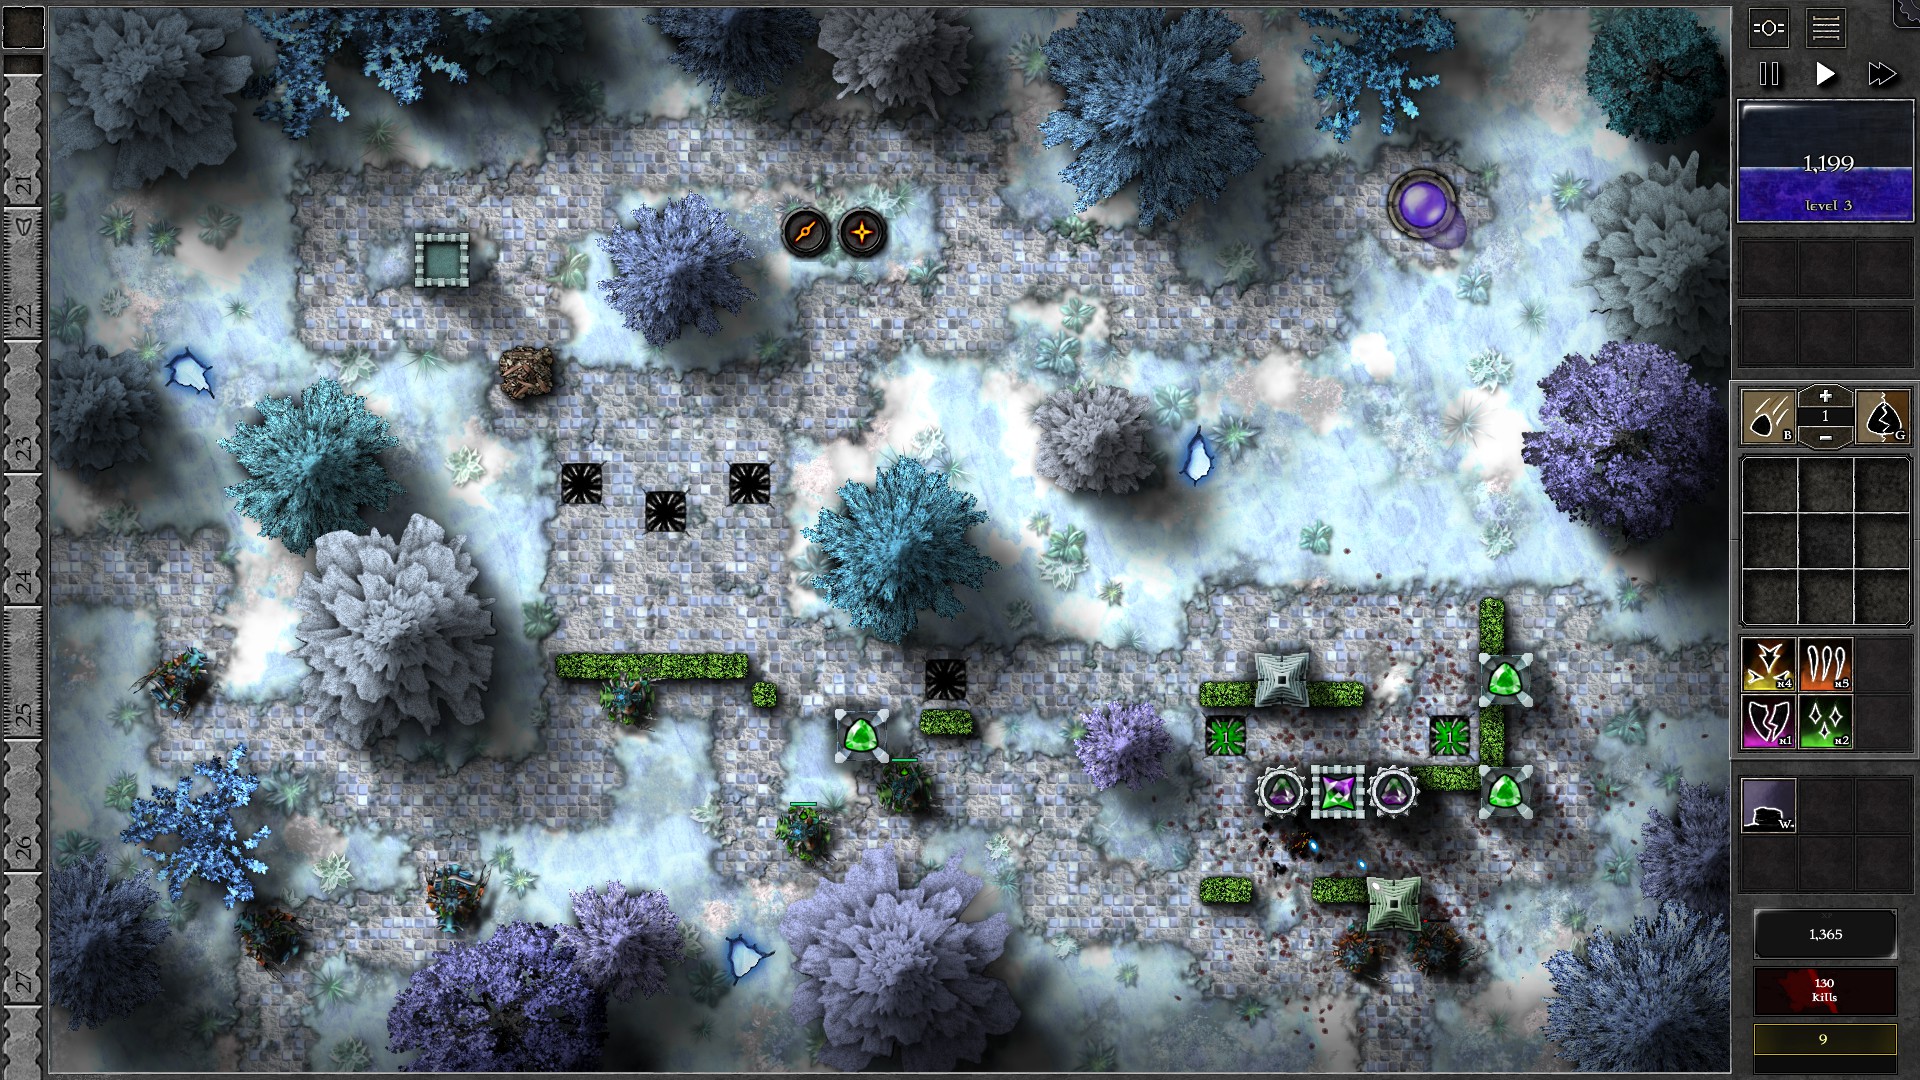
You will soon reach w17-18 and have the mana to upgrade the g4 tower gem to g5. Now, start preparing for the shielded swarmlings in w22. Create 5 g1 (green or purple) gems and insert into lanterns and traps as shown, all targeting “Shielded/Highest Armor”. Once w22 arrives, set your g5 tower gem to target “Least HP” or “Swarmlings” to attack the swarmlings. You can temporarily resume targeting “Structures” to kill the remaining giants, but change priorities again when w25 swarmlings arrive.
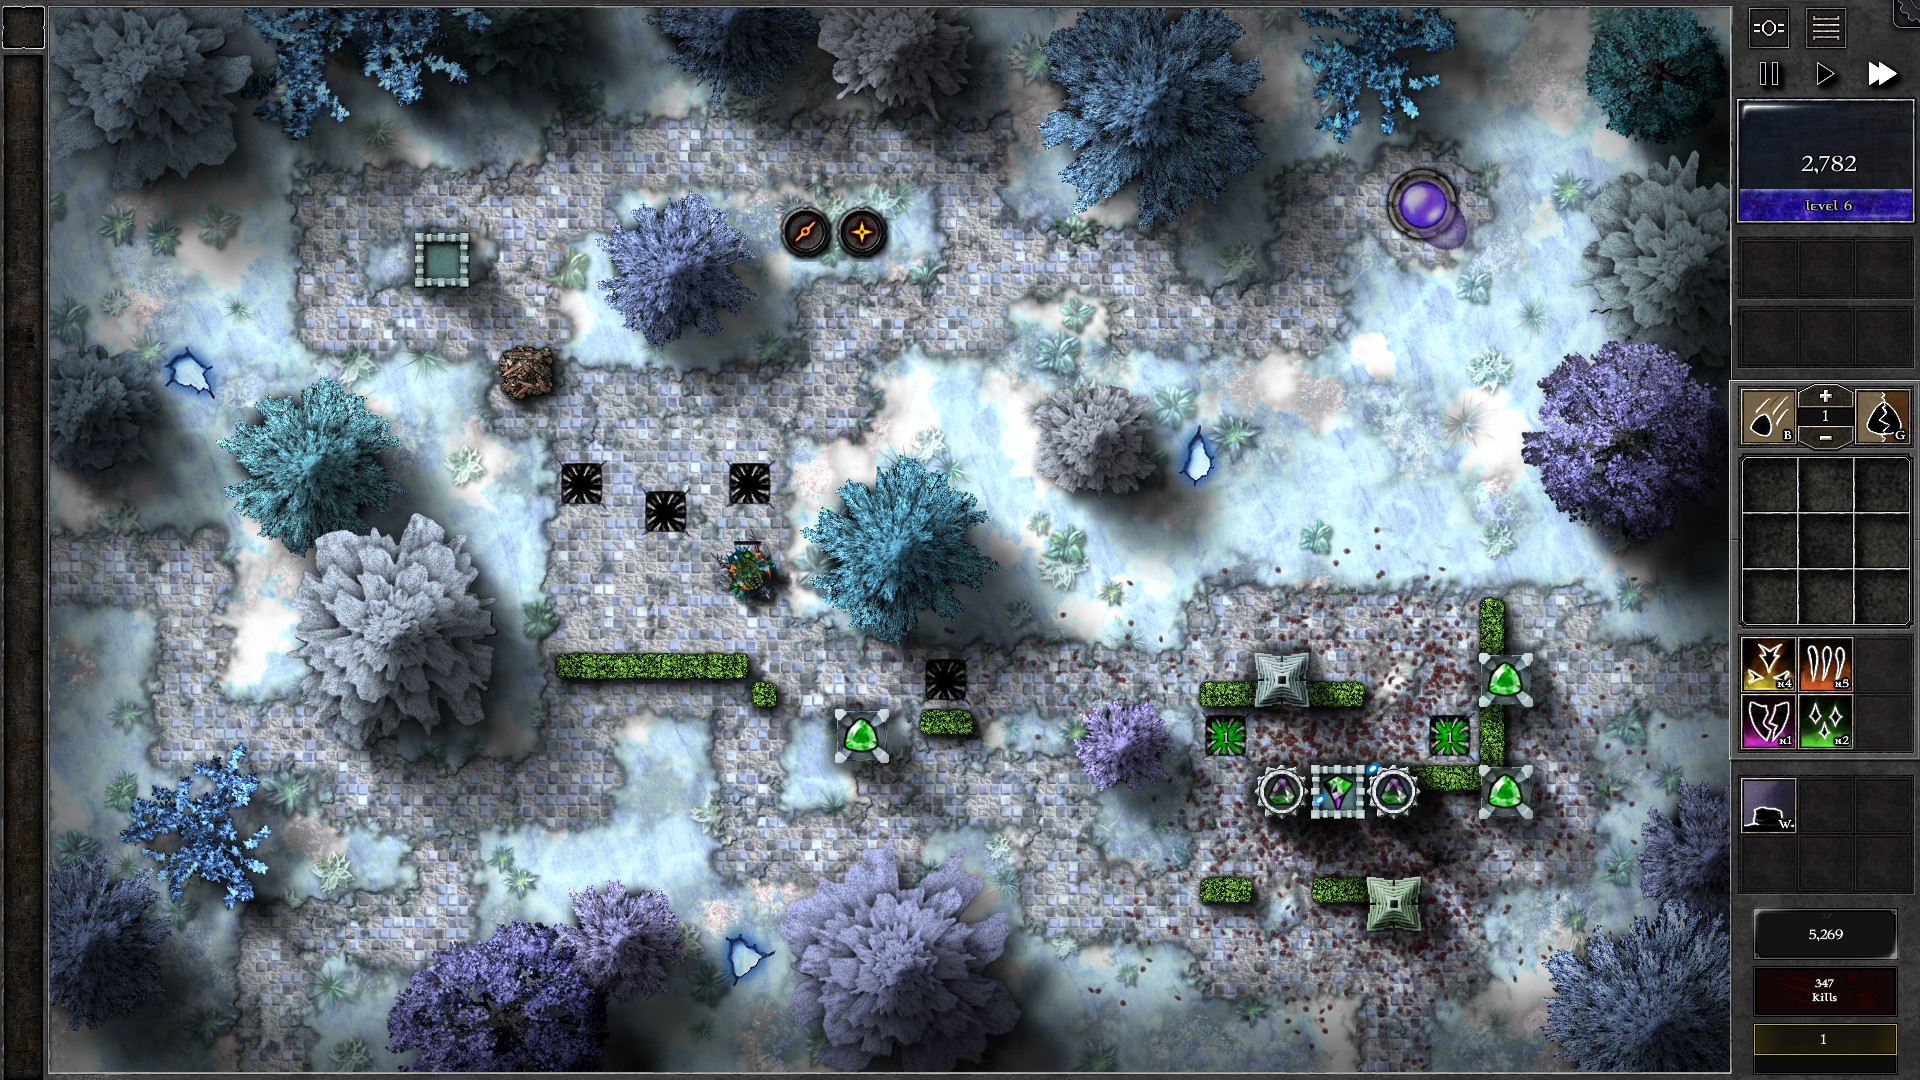
Switch back the g5 tower gem to target “Structures” once the swarmlings are gone. Upgrade your tower gem to g6 at around w30. You should have no problems dealing with the remaining monsters but be careful around reaver waves (especially w43-45) and you may want to use “Least HP” on your tower gem to kill these first. Pylon shots does not work well in mixed groups of monsters as they tend to bounce into giants (targeting options on pylons only work on the initial hit but not in subsequent bounces) which reduces their efficiency. Finally, you might have enough mana to further upgrade your gem to g7 at the end but don’t upgrade unless you are safe from the w43-45 reavers.
041 – Field Z1
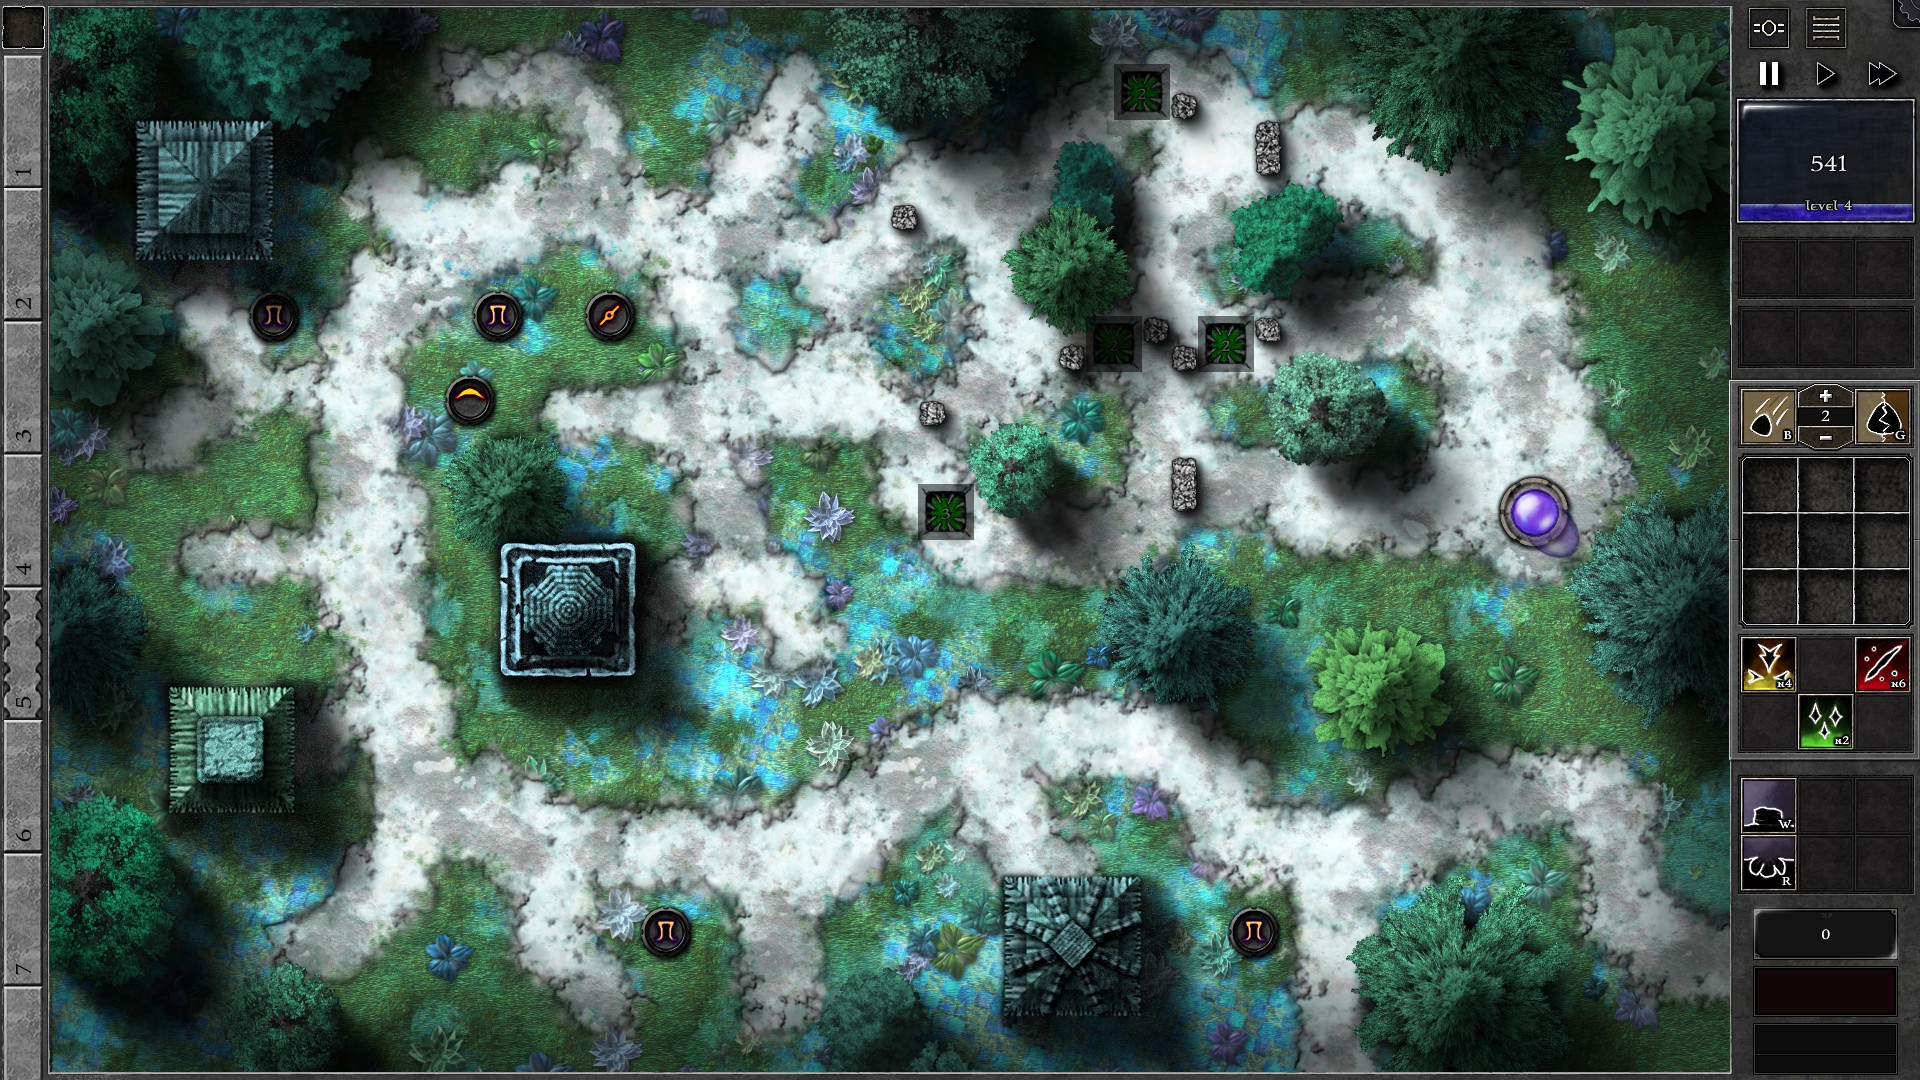
Wall off the top right area into a maze, then create 4 traps and insert pure green gems in the traps as shown. The 1st trap along the path should be g3 targeting “Least Affected by Specials” and the rest should be g2 targeting “Nearest to Orb”. Start by upgrading the g2 gems to g3 as you gather mana. At around w10 all your gems should be upgraded to g3.
Tip: You can click on the giants to make sure they take as many hits as they can from the poison traps as they pass through the traps. This is generally safe at least for the 2nd trap where the 3rd and 4th trap can cover the faster reavers/swarmlings passing through the 2nd trap. If they are already on the trap, use Ctrl-click on the monster to select it instead of the gem below.
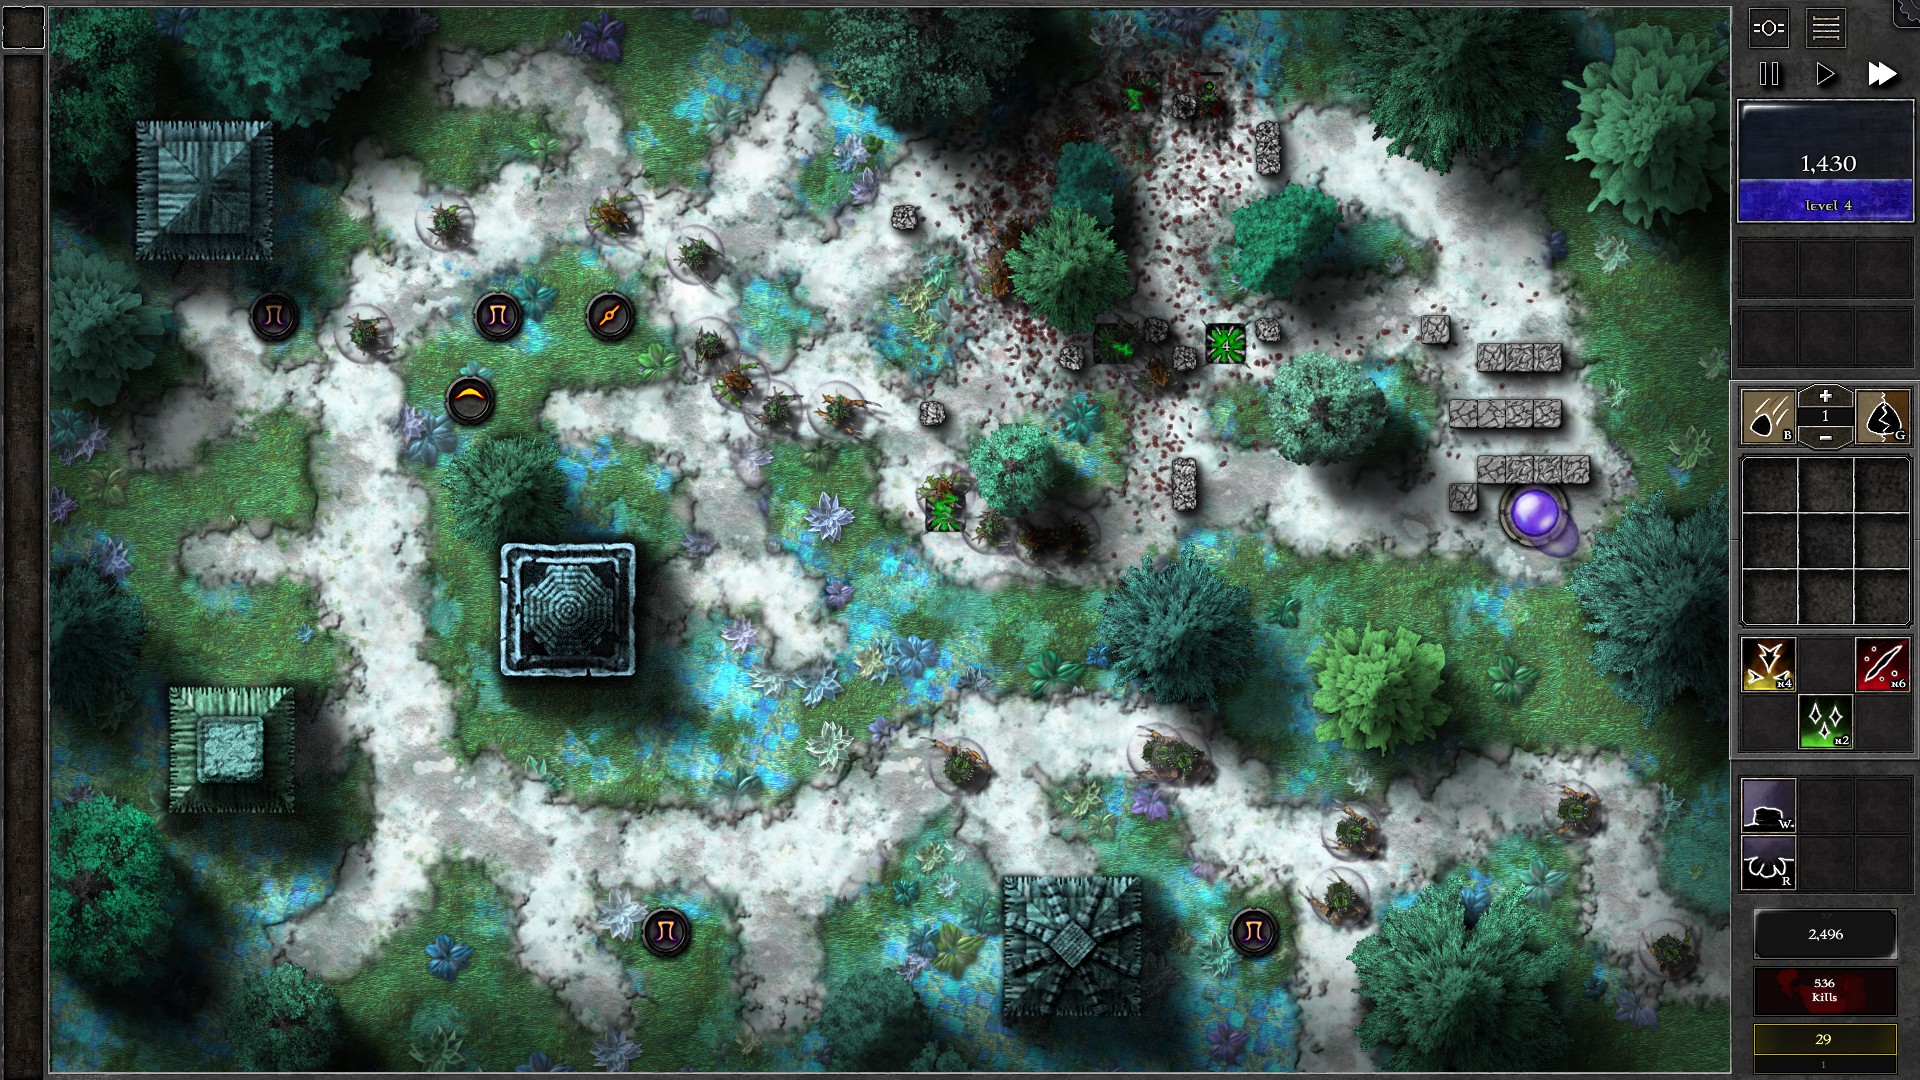
Upgrade the first gem to g4 when you get enough mana at around w15, all while being careful against potential banishments. The remaining traps can be upgraded to g4 evenly as you gain mana and should all be upgraded by w28, Finally, upgrade your 1st trap to g5 and you should survive the remaining waves of monsters. You can optionally spend some additional mana to lengthen the path between your Orb and your last trap (megalithic wall in last screenshot).
042 – Field Z2
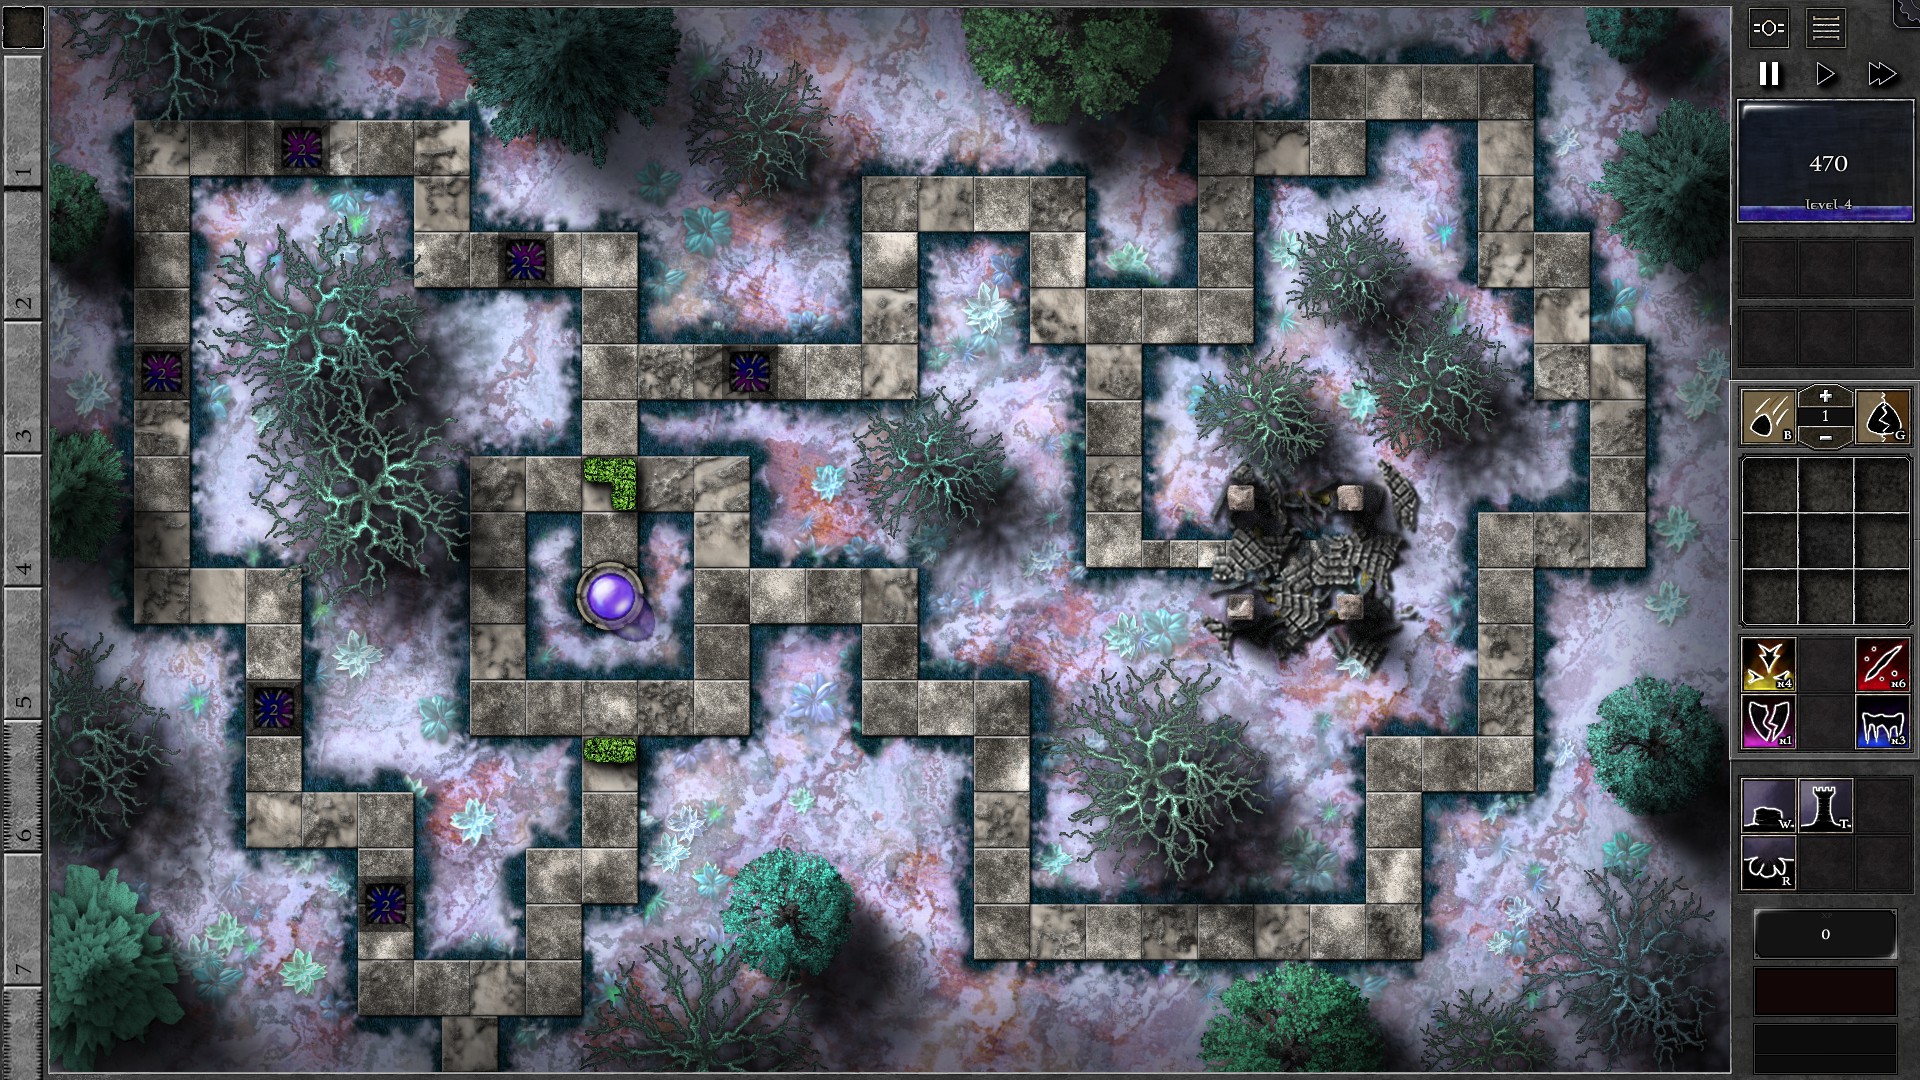
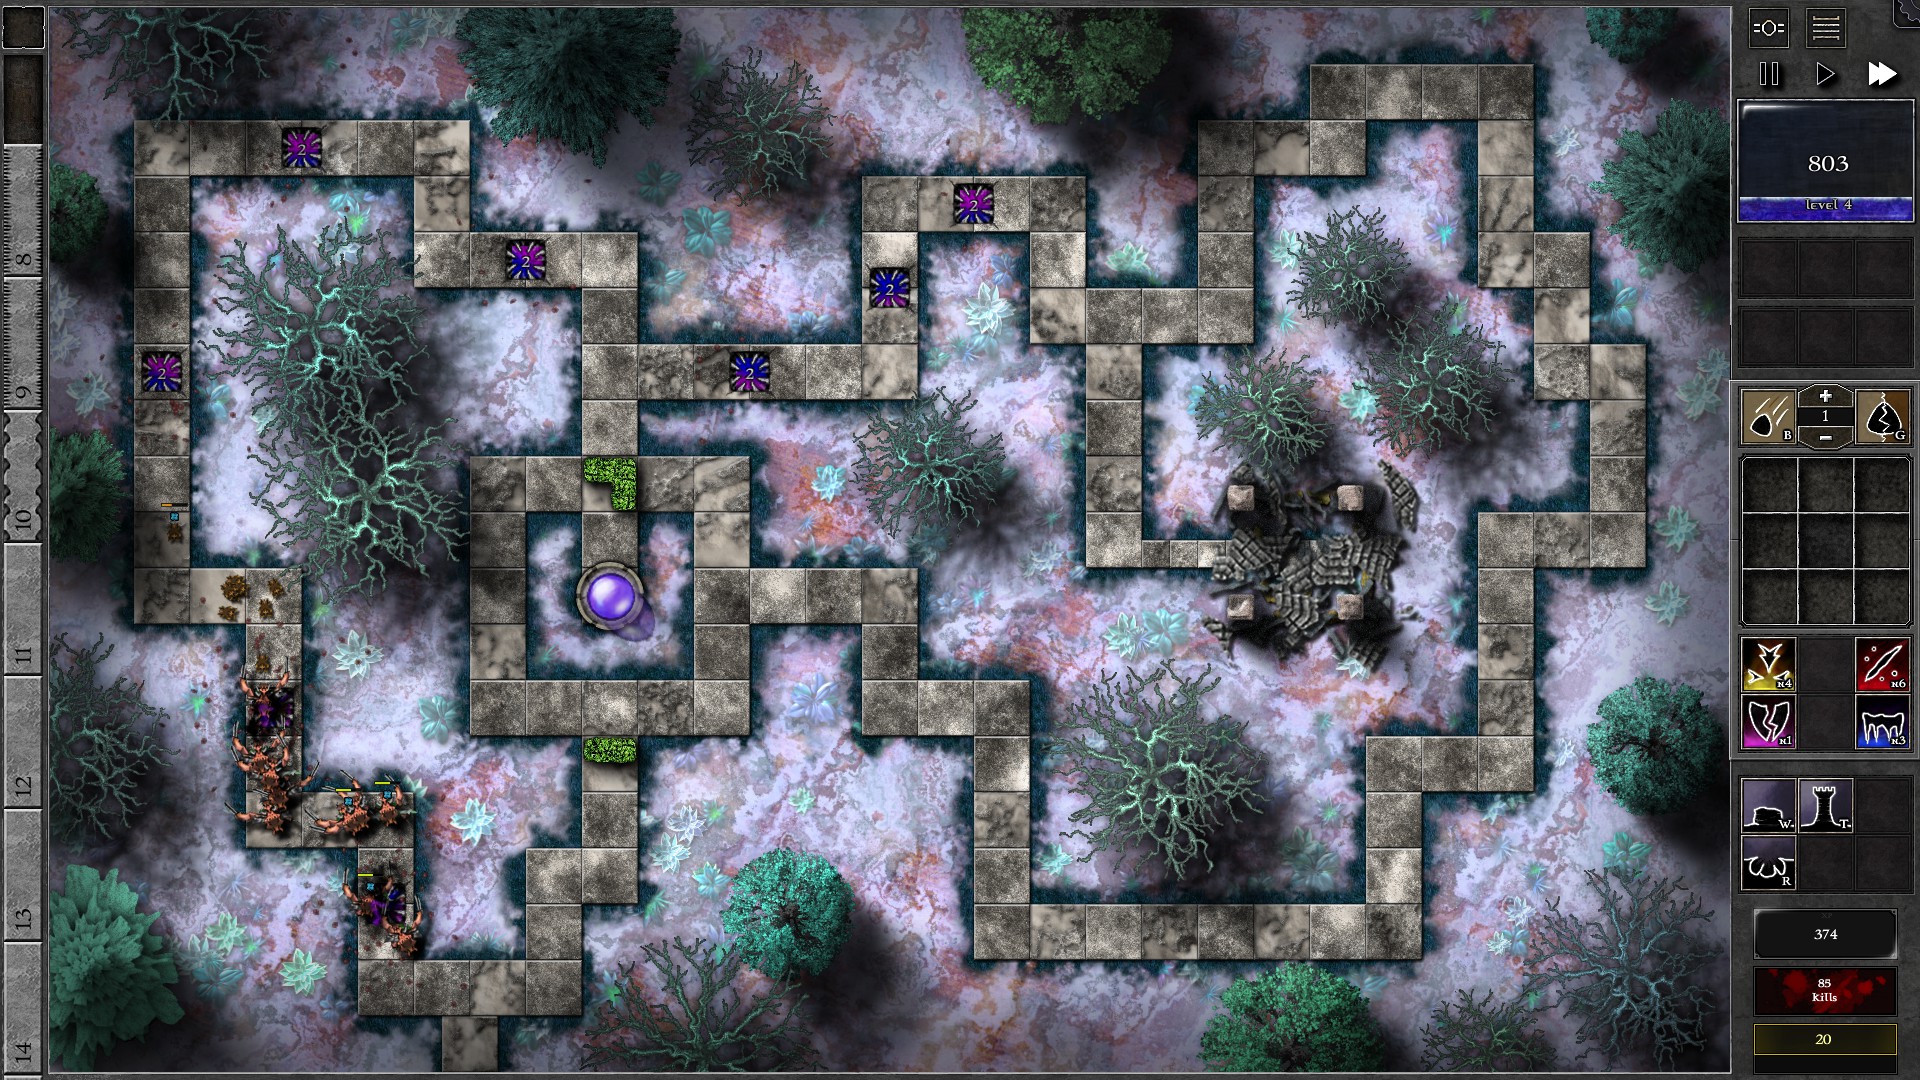
Although the monsters in this Trial have extreme armor, you can easily ignore their armor by using traps as your source of damage. Start by building walls to create a long path, and build 6 traps each containing a g2 p/b gem. Quickly create 2 more traps with the same g2 gem by w5.
Once you have 8 traps in action, start upgrading the gems evenly as you gather mana and there shouldn’t be much complications in this Trial. You should have all 8 gems upgraded to g3 at w16-17, and to g4 at w33-34. Finally you will have 3-4 gems upgraded to g5 at the end of the Trial. For the tougher monsters in the late waves, you can consider building additional traps to follow them with a g5 gem if you have the mana to spare.
043 – Field Z3
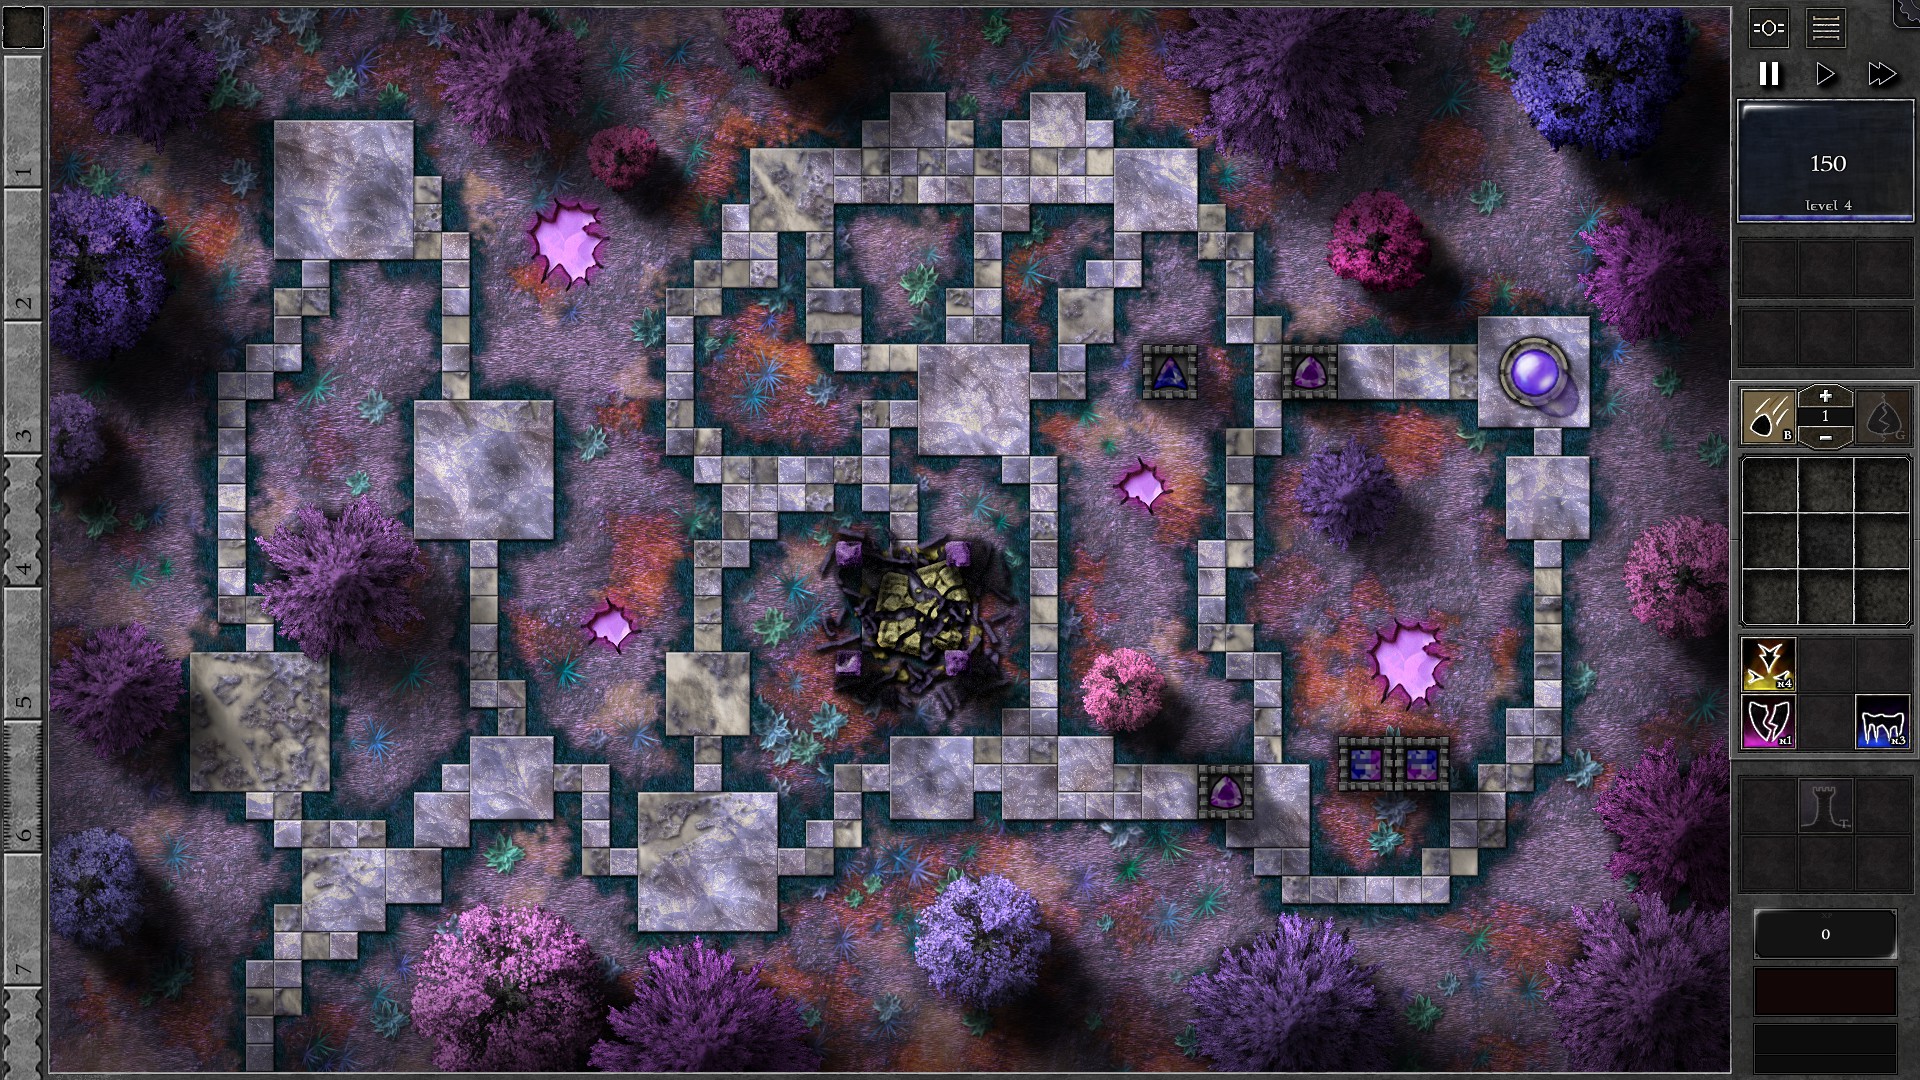
You will need to farm the mana from mana shards as monsters only provides minimal mana when killed. Setup the field with 5 towers as shown. The 2 g3 p/b gems serves to kill monsters and farm the 5700 Mana Shard when inactive. The g2 p/b gem is set to target “Structures” and farms on the 1100 Mana Shard close to it. The g1 p towers are built to block paths, and the g1 gems are set to target “Shielded/Highest Armor” to help remove shields from monsters.
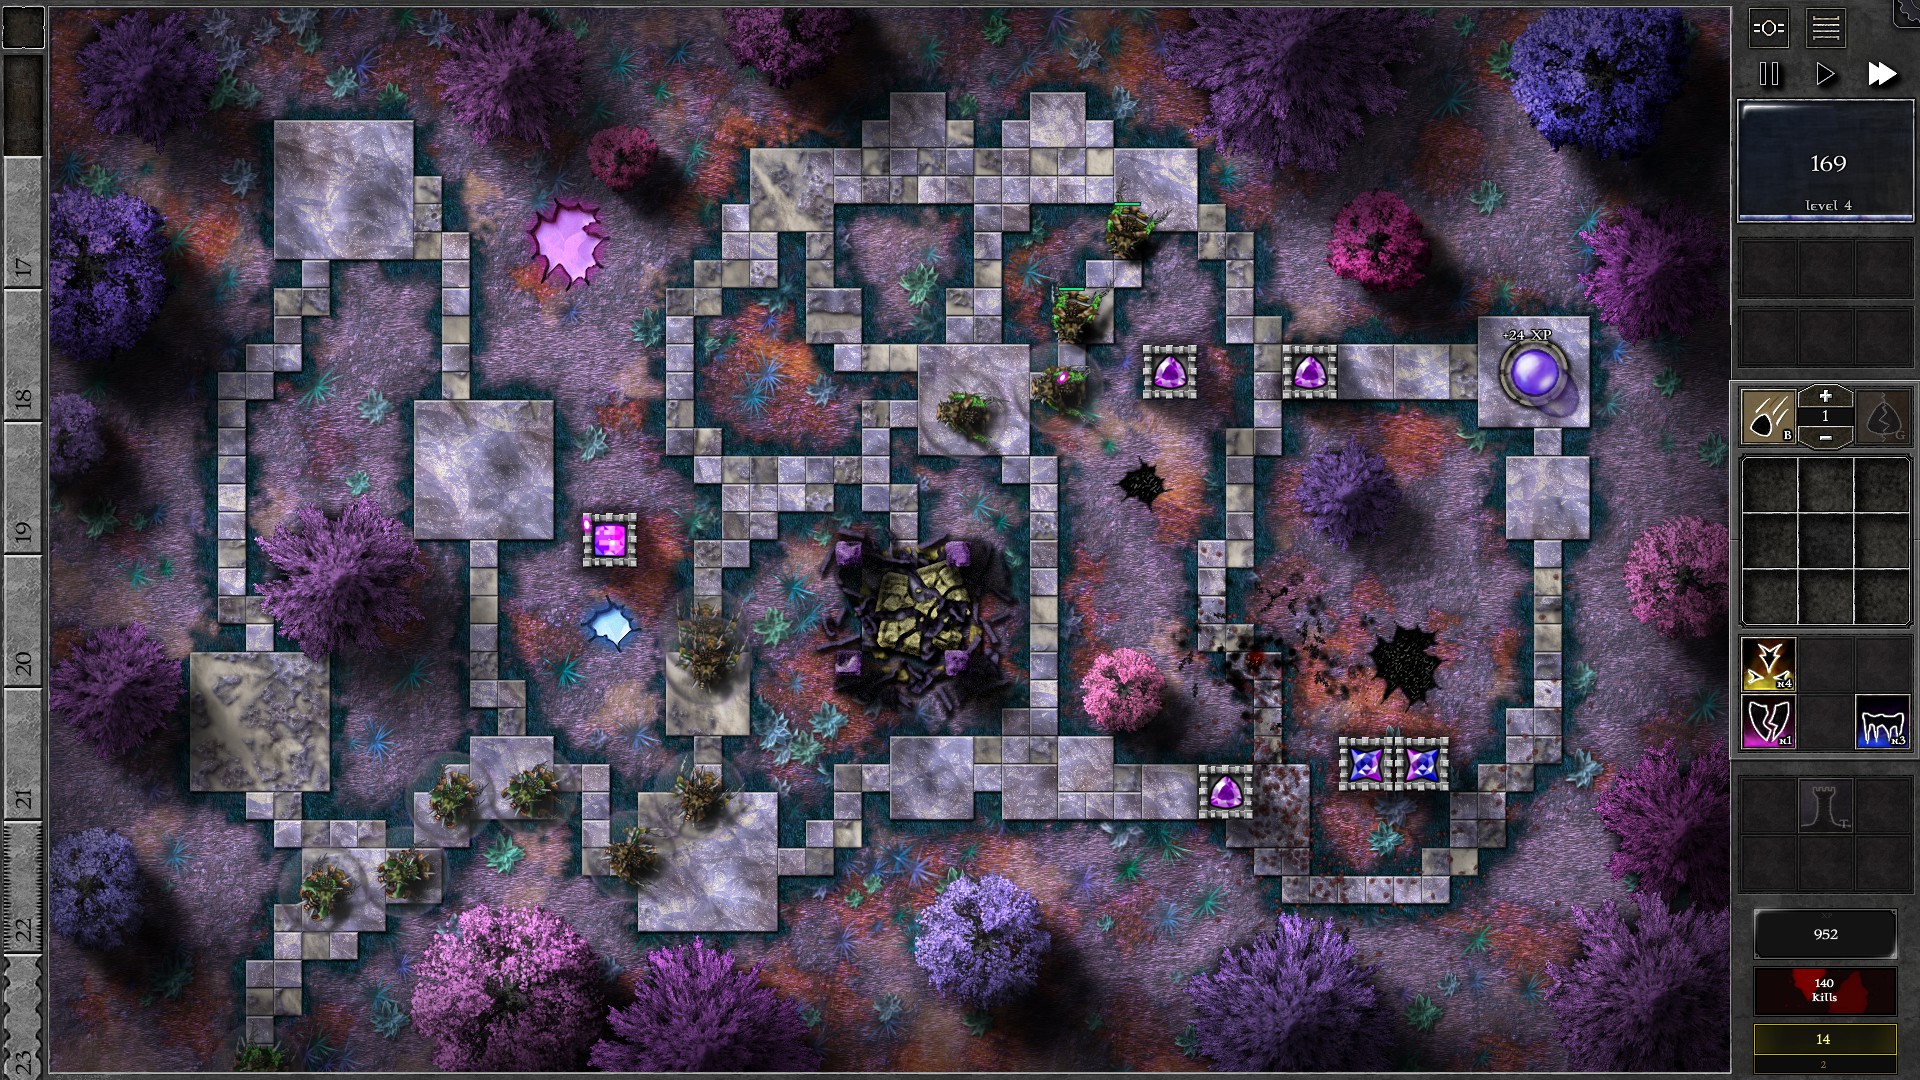
You will soon break open the 2 mana shards close to the towers and gain enough mana to upgrade a g3 gem to g4 by w5, then the second g3 gem to g4 by w9. At around w10, the small mana shard should be depleted. Upgrade the shard farming gem to g3 and build a tower close to the 1600 Mana Shard to start farming it. The now empty tower should be filled with another g1 p gem targeting “Shielded/Highest Armor” to remove shields.
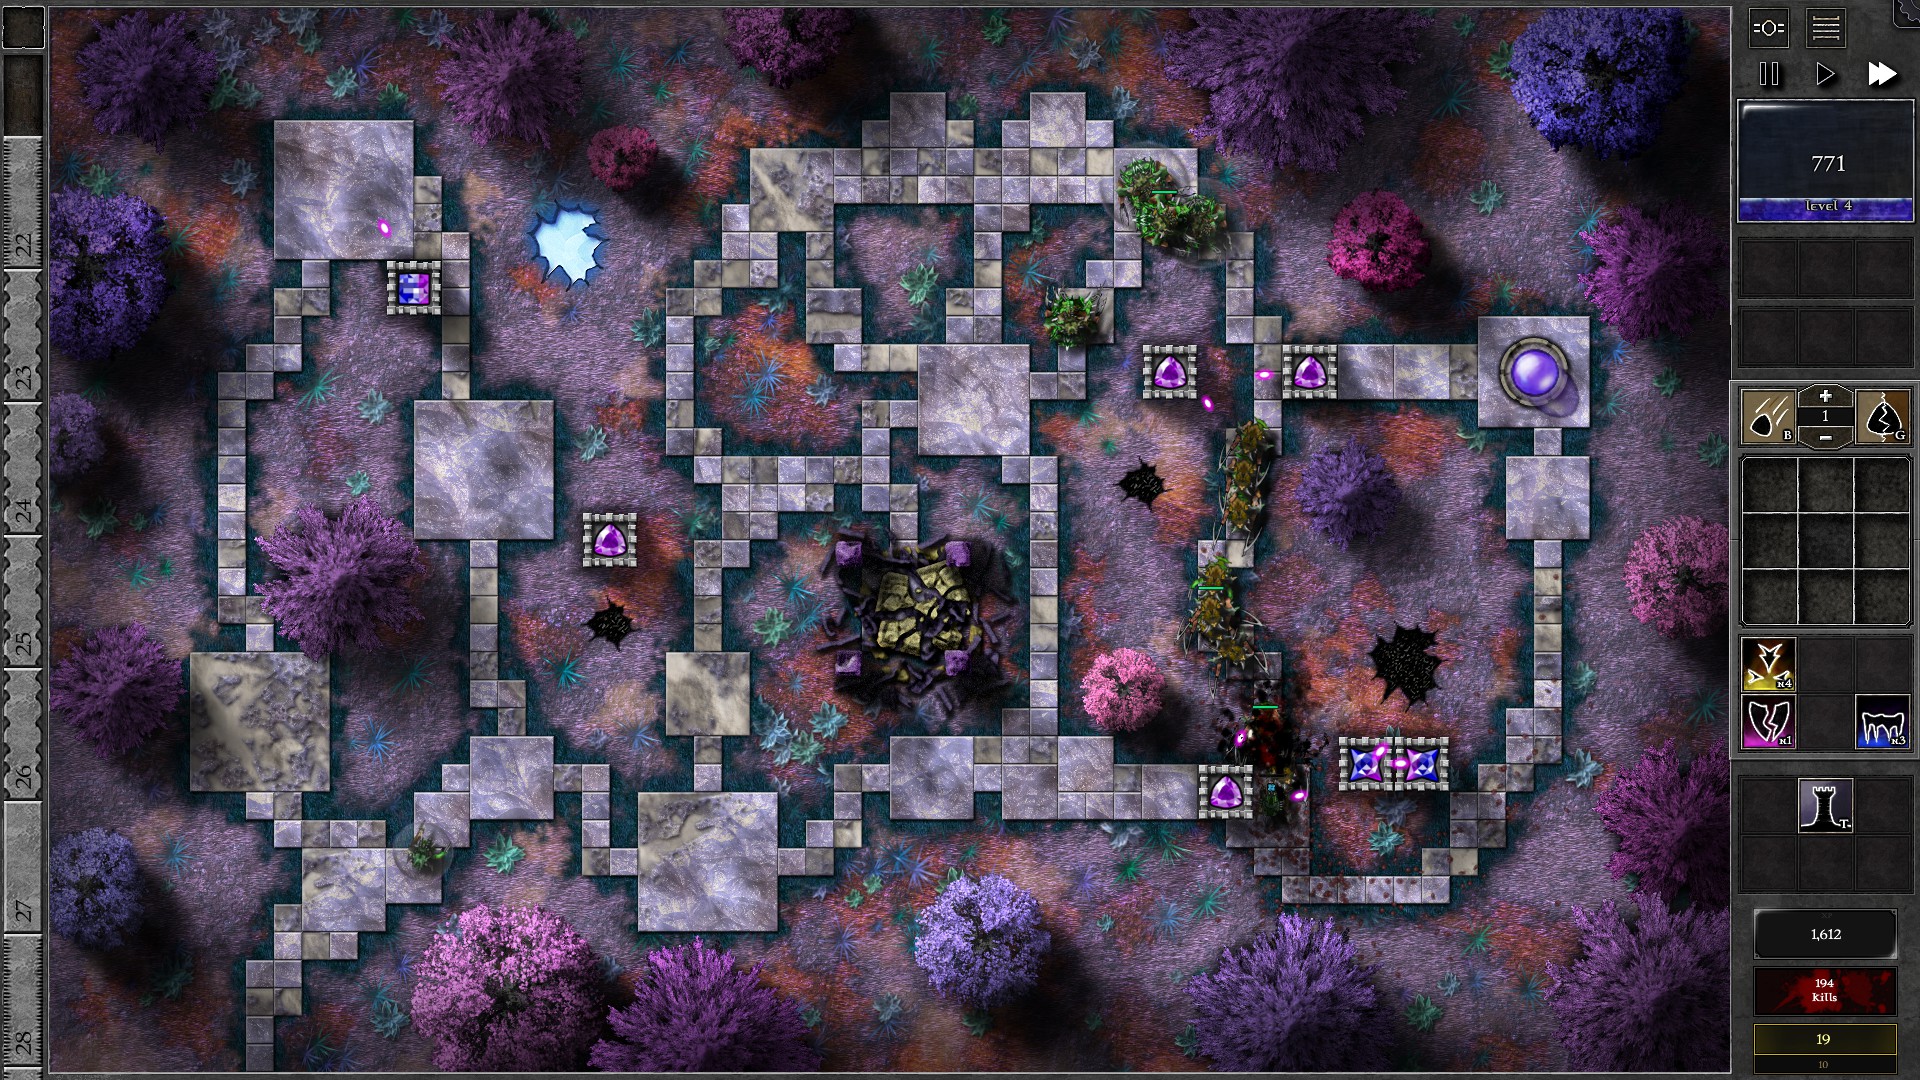
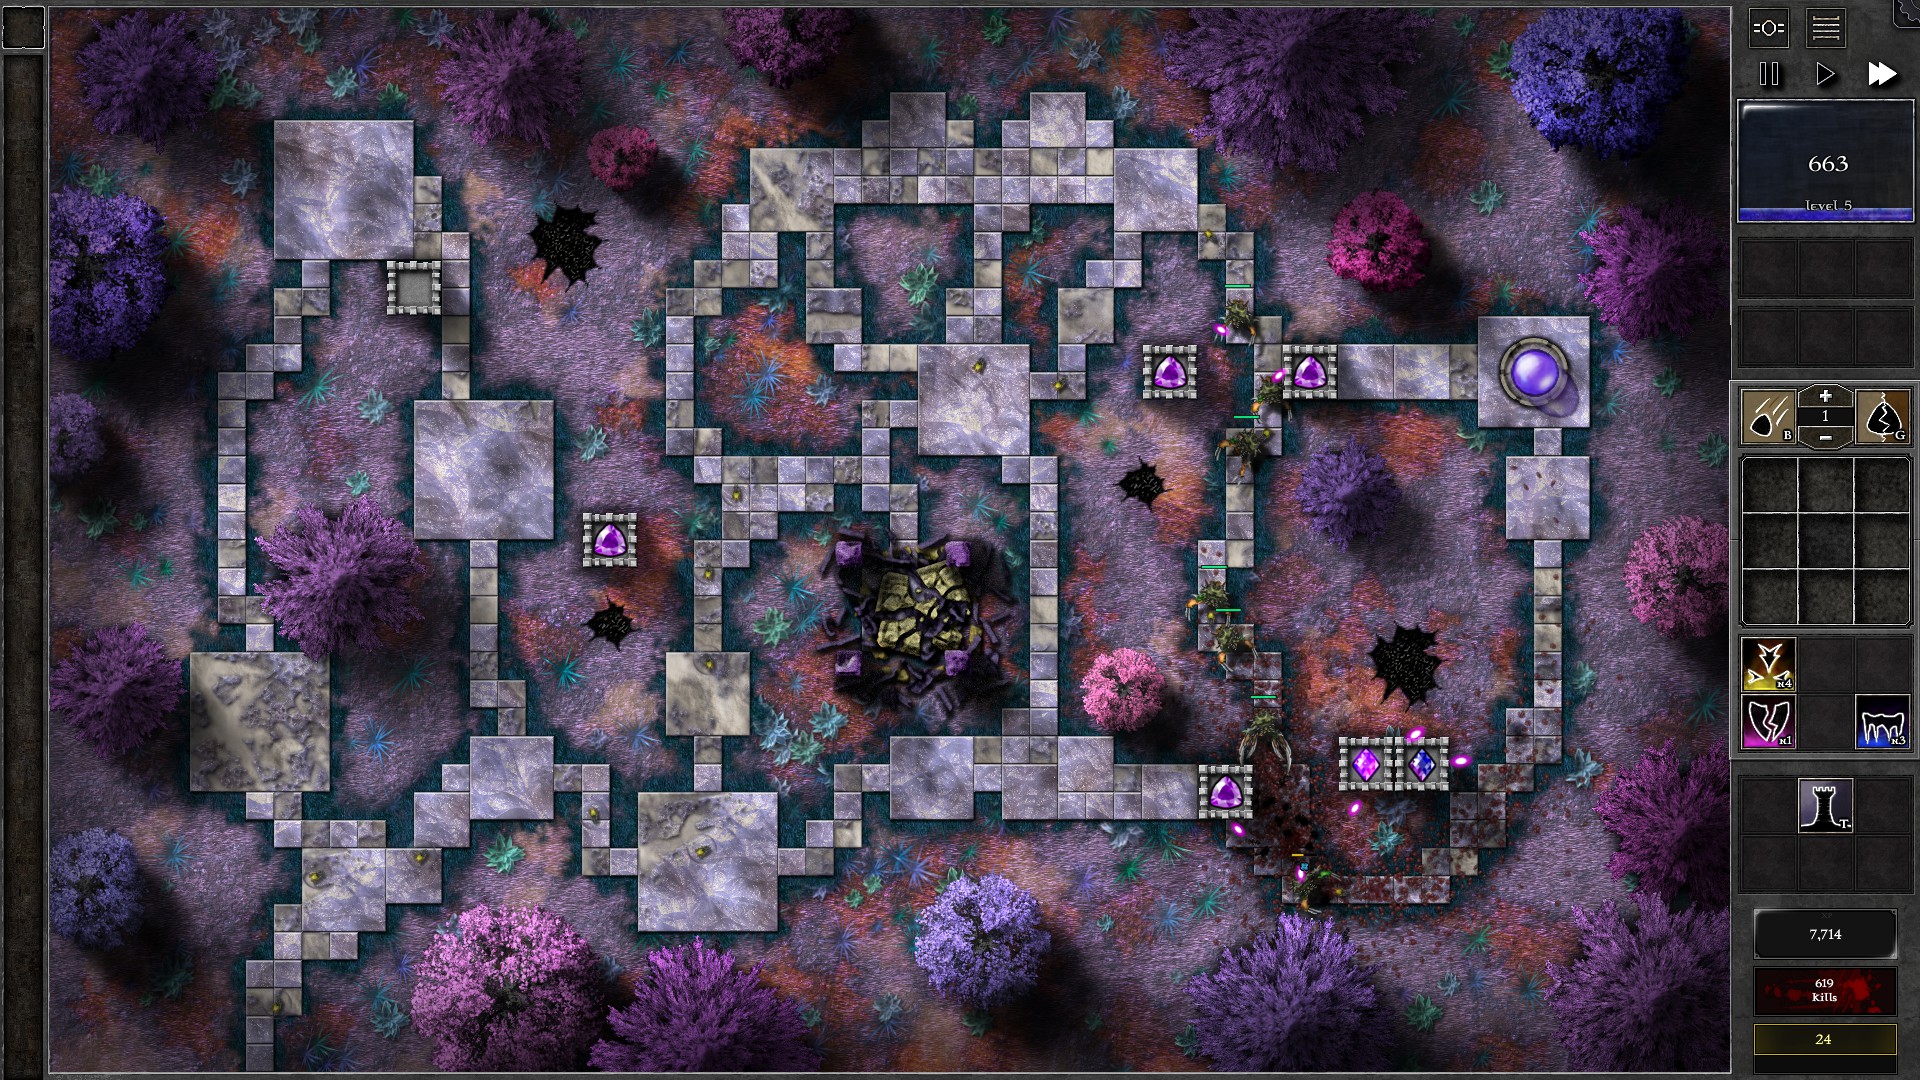
The 5700 Mana Shard should be depleted in w15. You should have both g4 gems upgraded to g5 soon after the Mana Shard is depleted. The 1600 Mana Shard will also be depleted soon at around w19-20. Move the shard farming gem to a new tower close to the 7800 Mana shard. Insert another g1 p gem targeting “Shielded/Highest Armor” on the empty tower.
Upgrade the shard farming gem to g4 and g5 once you farm enough mana from the last Shard. The 7800 Mana Shard will be depleted at around w38. Now you can combine the shard farming g5 with a g5 gem defending the Orb for a g6 gem. You should still have around 5100 mana which you can use to upgrade the other g5 gem to g6. You should now be able to defend the remaining waves.
NOTE: You will be tight on mana after getting both g6 gems so you don’t have much room in banishments. You may want to consider keeping the other defending gem g5 and use the mana for banishing monsters.
044 – Field Z4
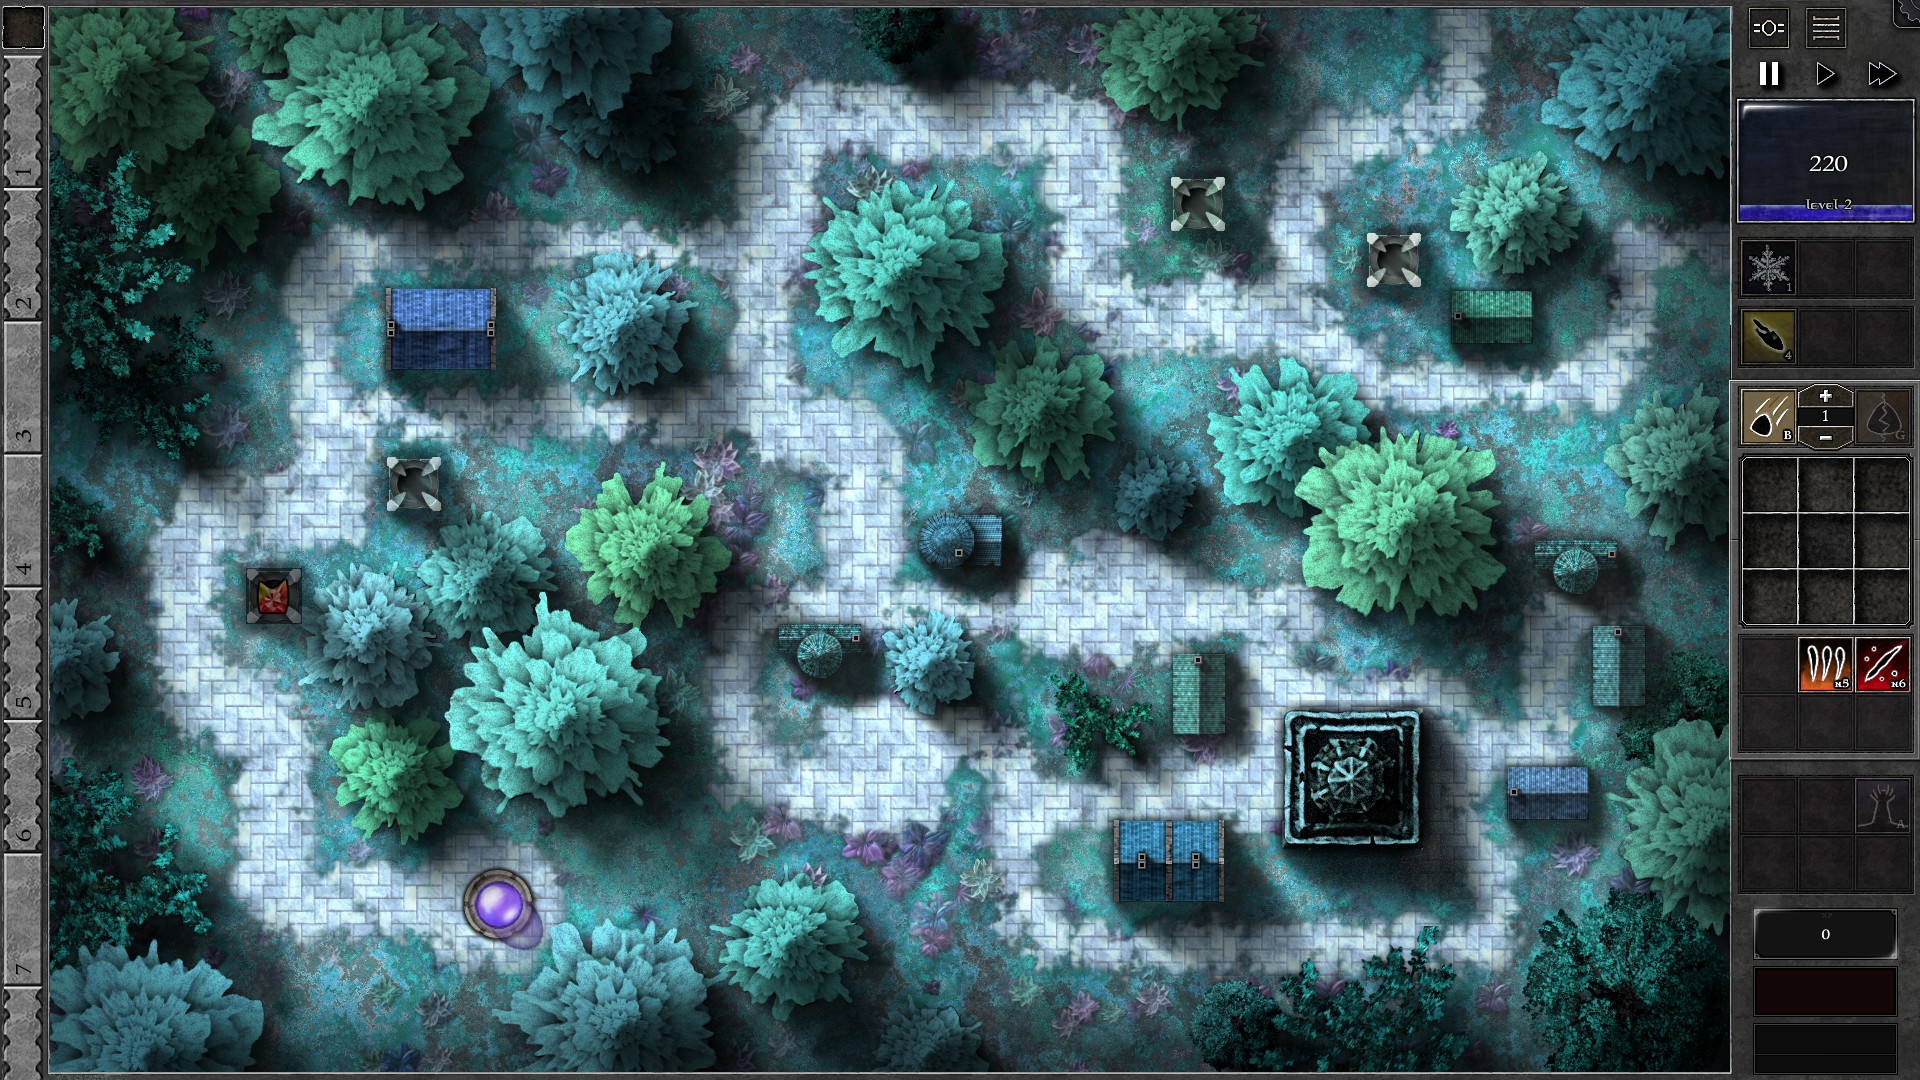
Either duplicate or upgrade the g2 r/y gem given at start, then combine all the gems into a g4 r/y gem. Insert the g4 gem into the leftmost Lantern and start the waves.
You will notice that your gems won’t have enough damage to get through the monsters’ armor at all. However, Bolt should be available as the first monster (from w3) approaches the lantern. You need to use Bolt enhancement on the lantern gem to make its pulses ignore armor which allows the gem to kill the monsters.
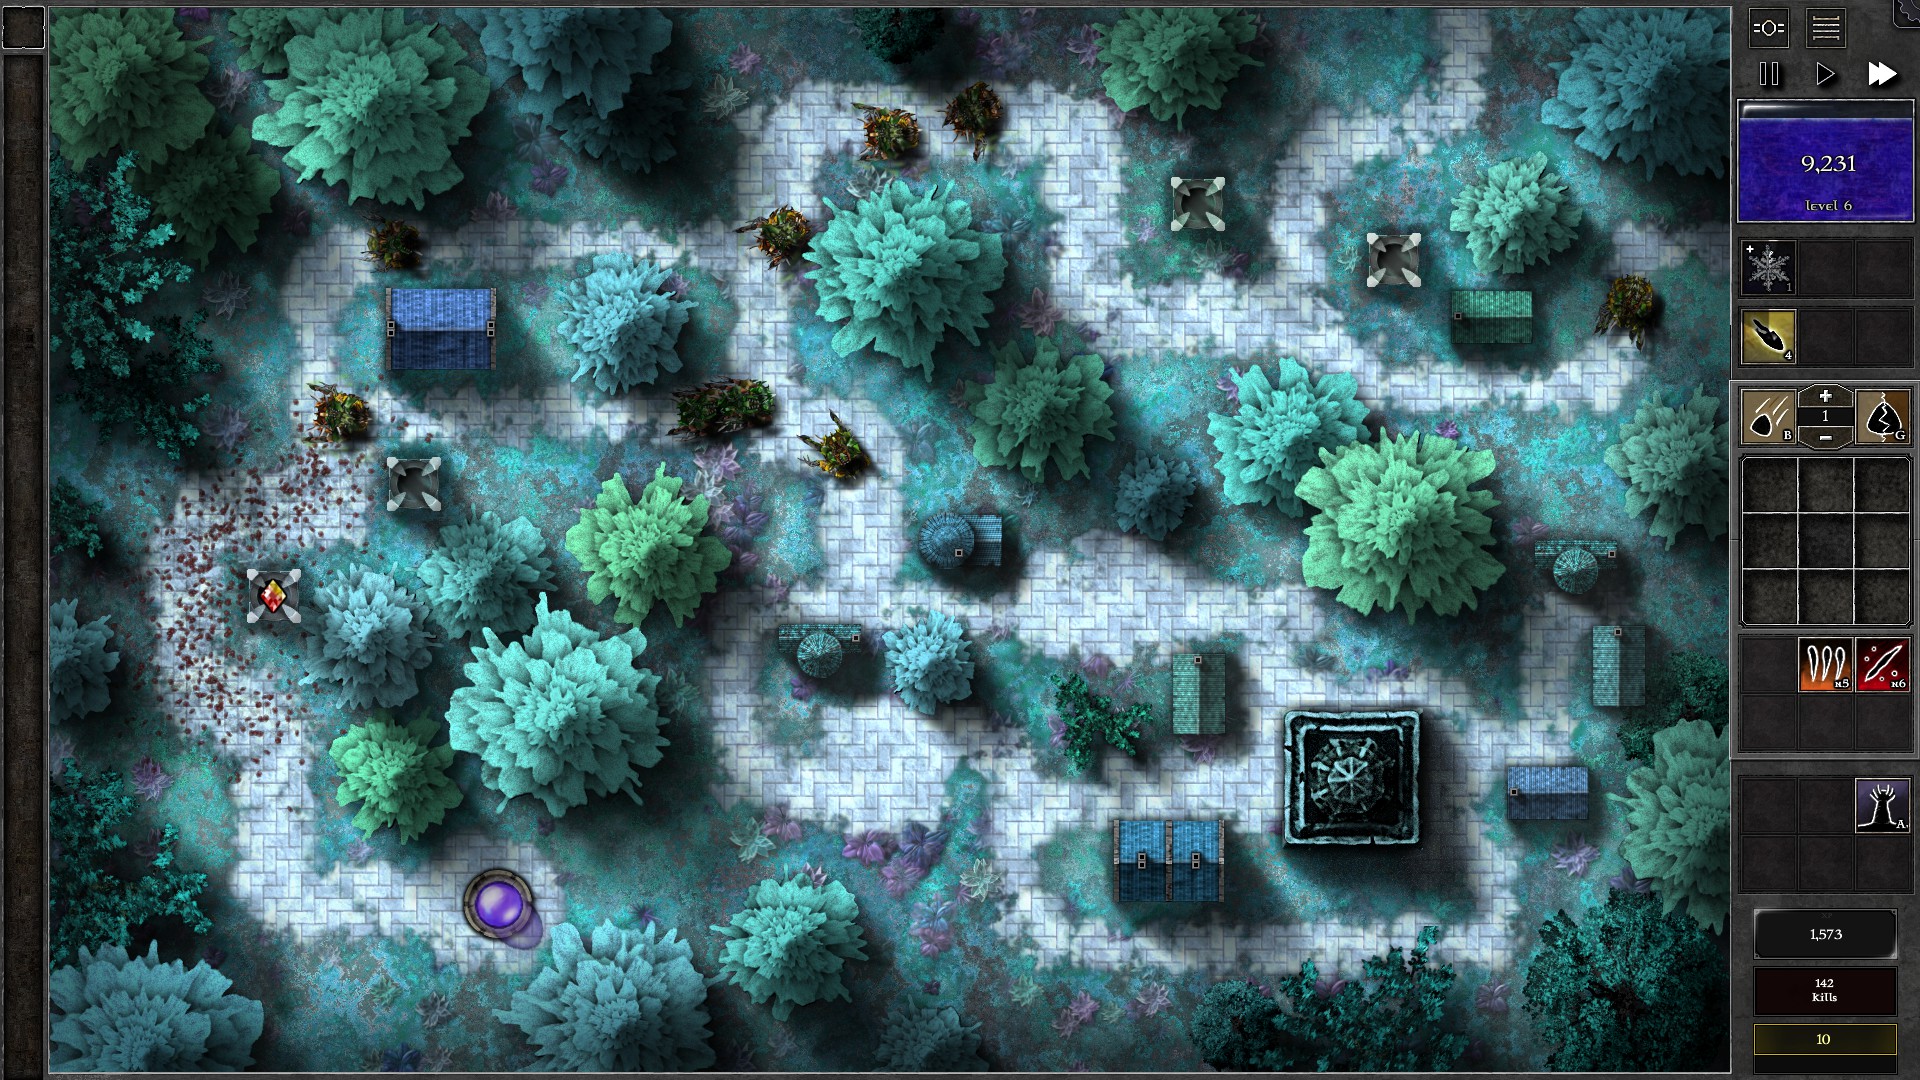
As you fight through the monsters with the lantern, upgrade the gem when you gain enough mana, while being cautious with monster leaks (consider upgrading when you have Bolt available so you can insta-resocket with Bolt). The first upgrade to g5 should be doable before w10, and you can reach a g6 gem in around w16-18. Use Freeze to stop monsters briefly as you have no Bolt shots for your lantern or to exploit frozen corpse damage.
For the last waves, watch out for the w22/23 linked reaver waves. You may want to pick off the reavers first by using “Least HP” on your lantern. A g6 gem should be enough to take on all 24 waves, and it’s not advised to upgrade the gem to g7 even if you gain enough mana for it.
045 – Field Z5
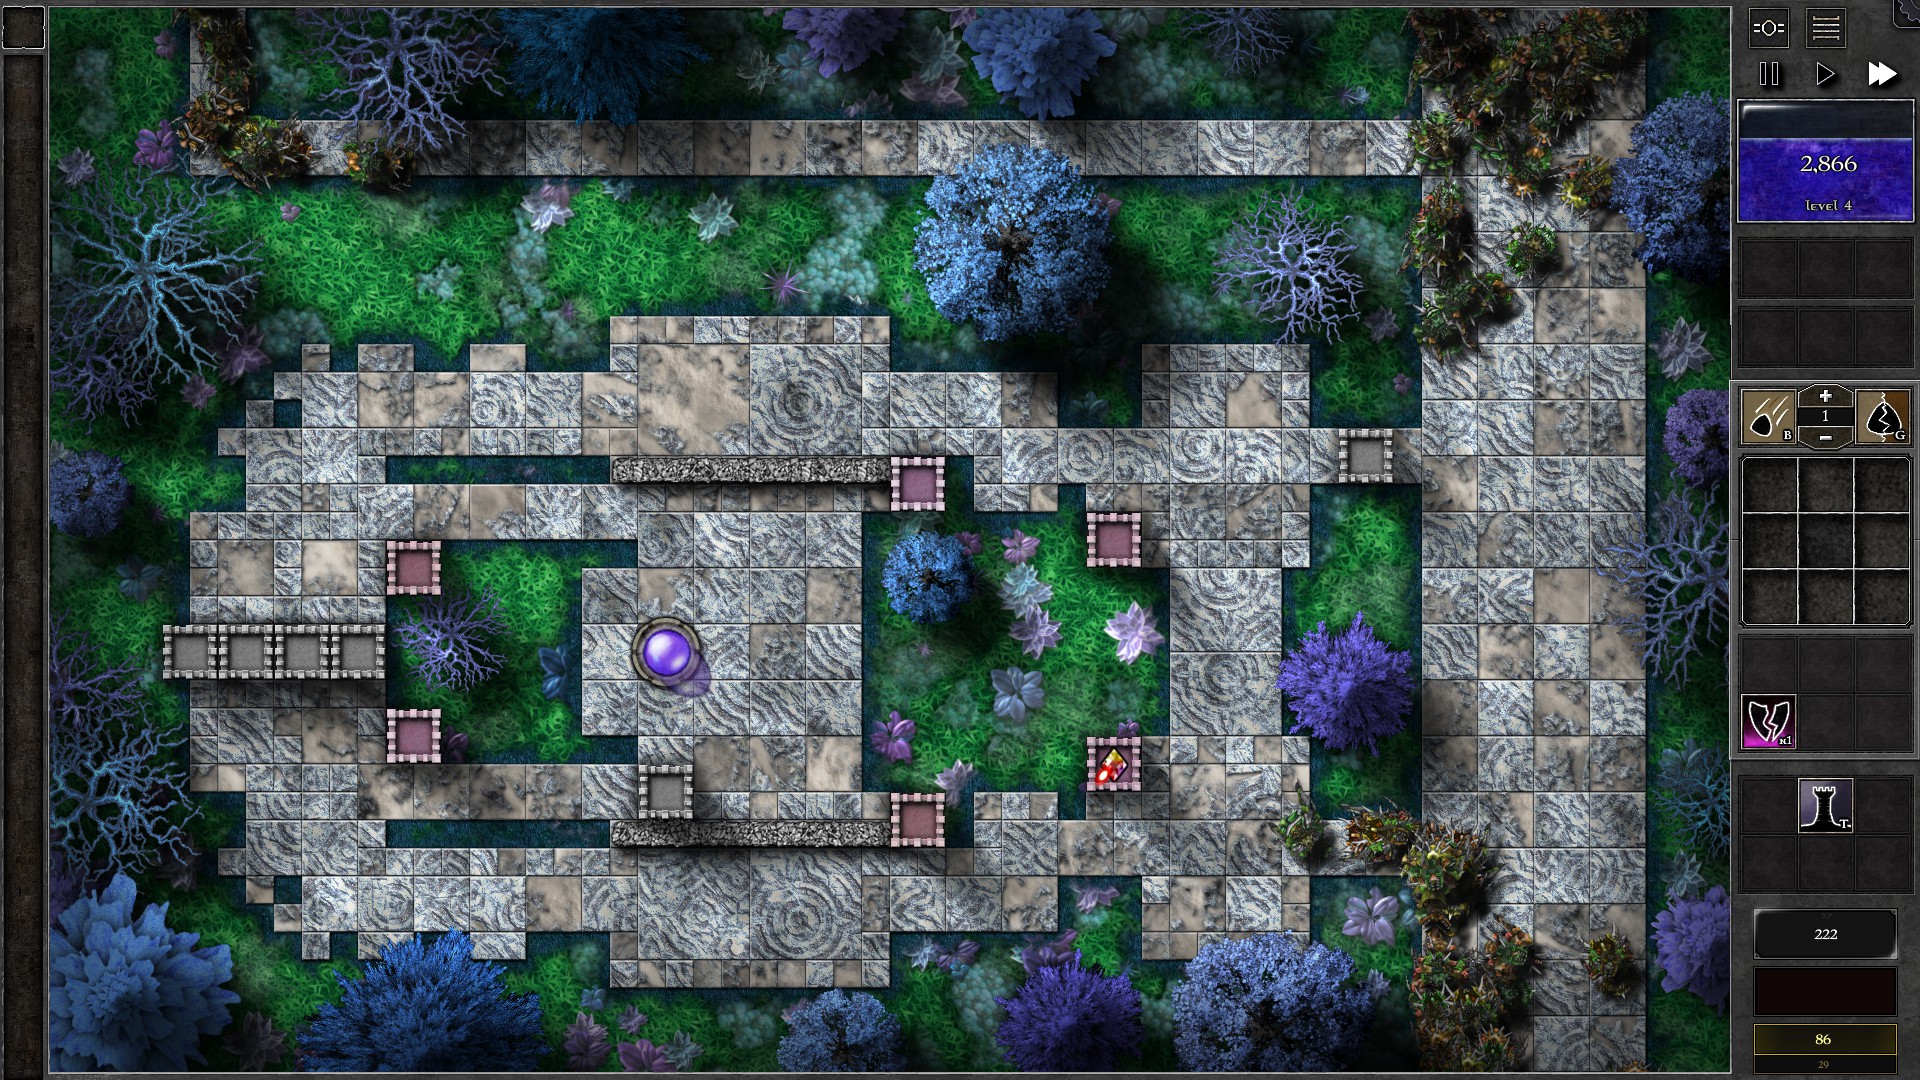
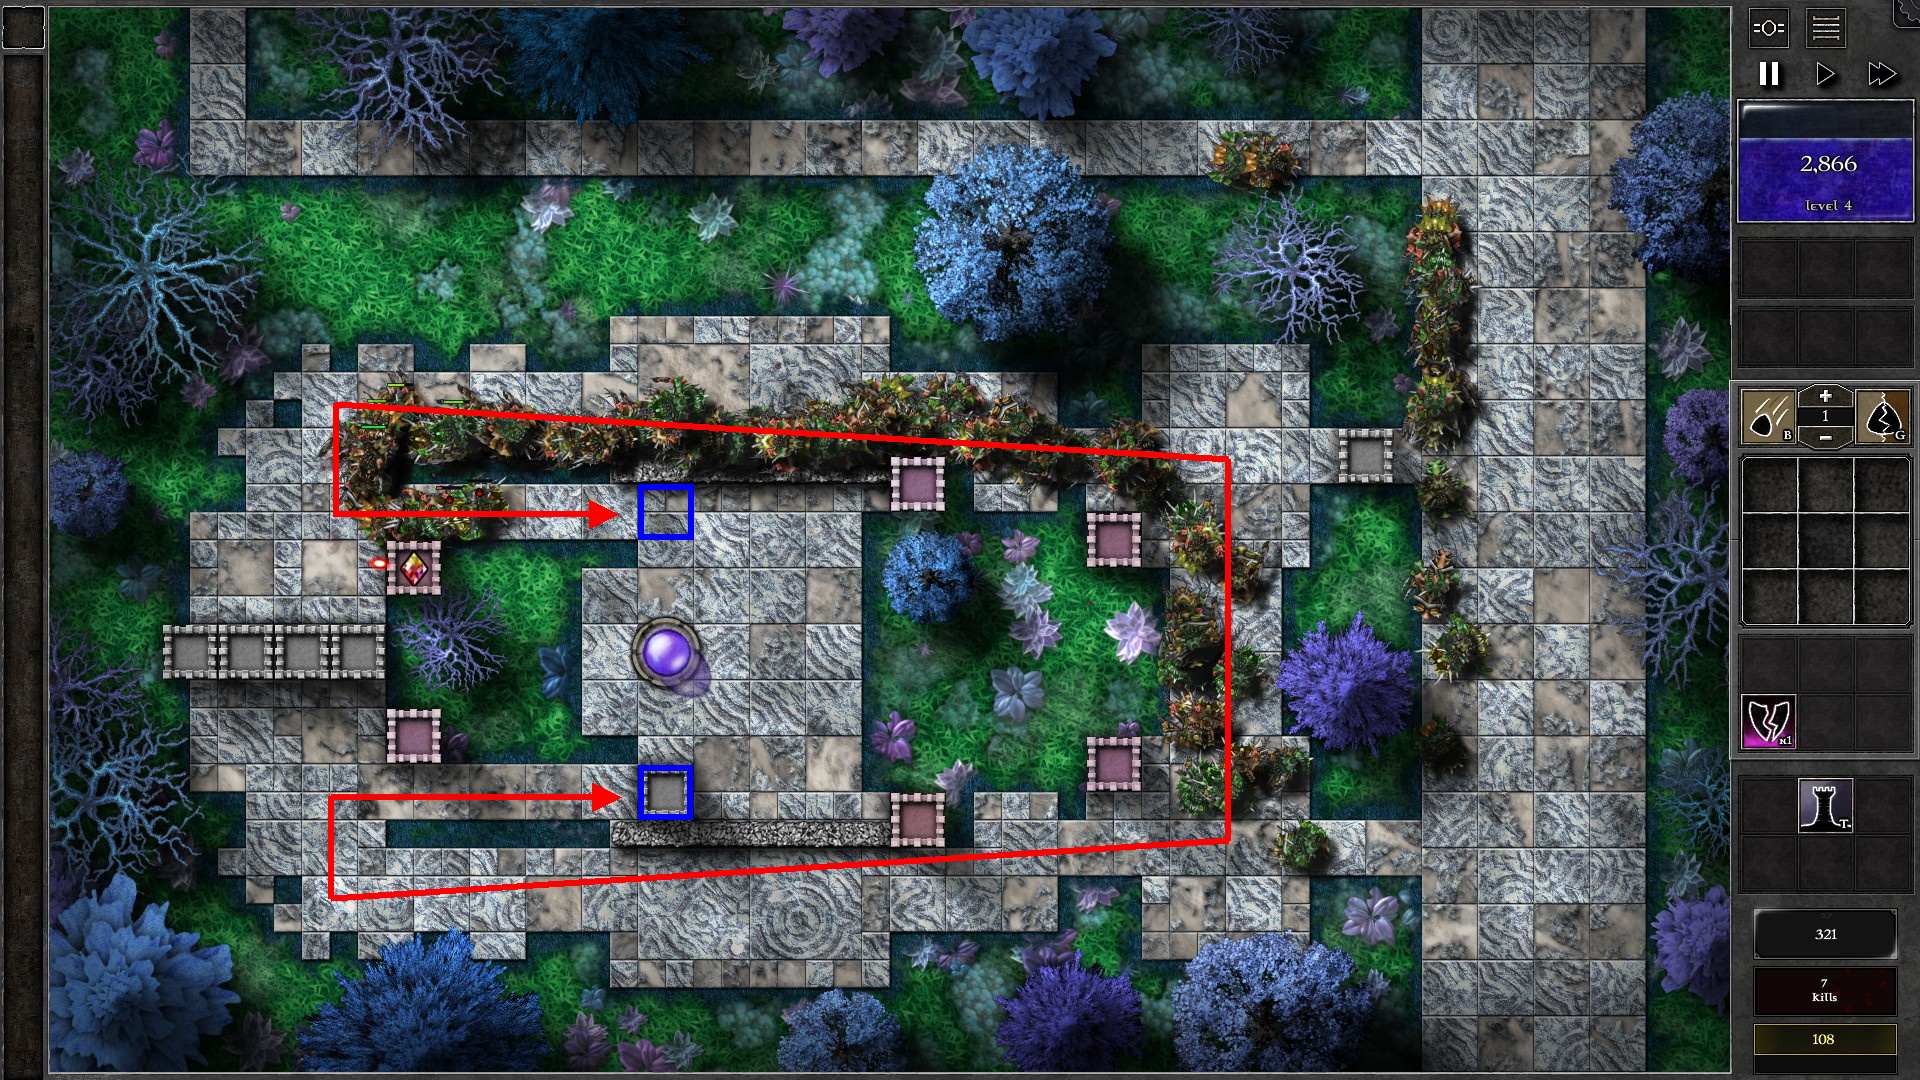
Combine the 3 gems given into a g6 gem and insert into the bottom left tower, then call every eave early (Ctrl-click on a wavestone). With the extra mana from calling early waves, setup the field as shown. The monsters should go through the upper portion of the central area to your Orb. Follow the monsters by moving your gem to keep firing at them.
As they get close to the area marked with a blue square, you need to start juggling the monsters. Demolish the tower on one of the marked blue squares (throw g1 gem bomb to the empty tower), then rebuild a tower at the other blue square (as shown in second screenshot). This should force the monsters to reverse course and move towards where the demolished tower was. Repeat as they approach this blue square, and the monsters will go back and forth along the path marked red. You should be able to kill off all the monsters with all 6 demolitions available.
046 – Field N1
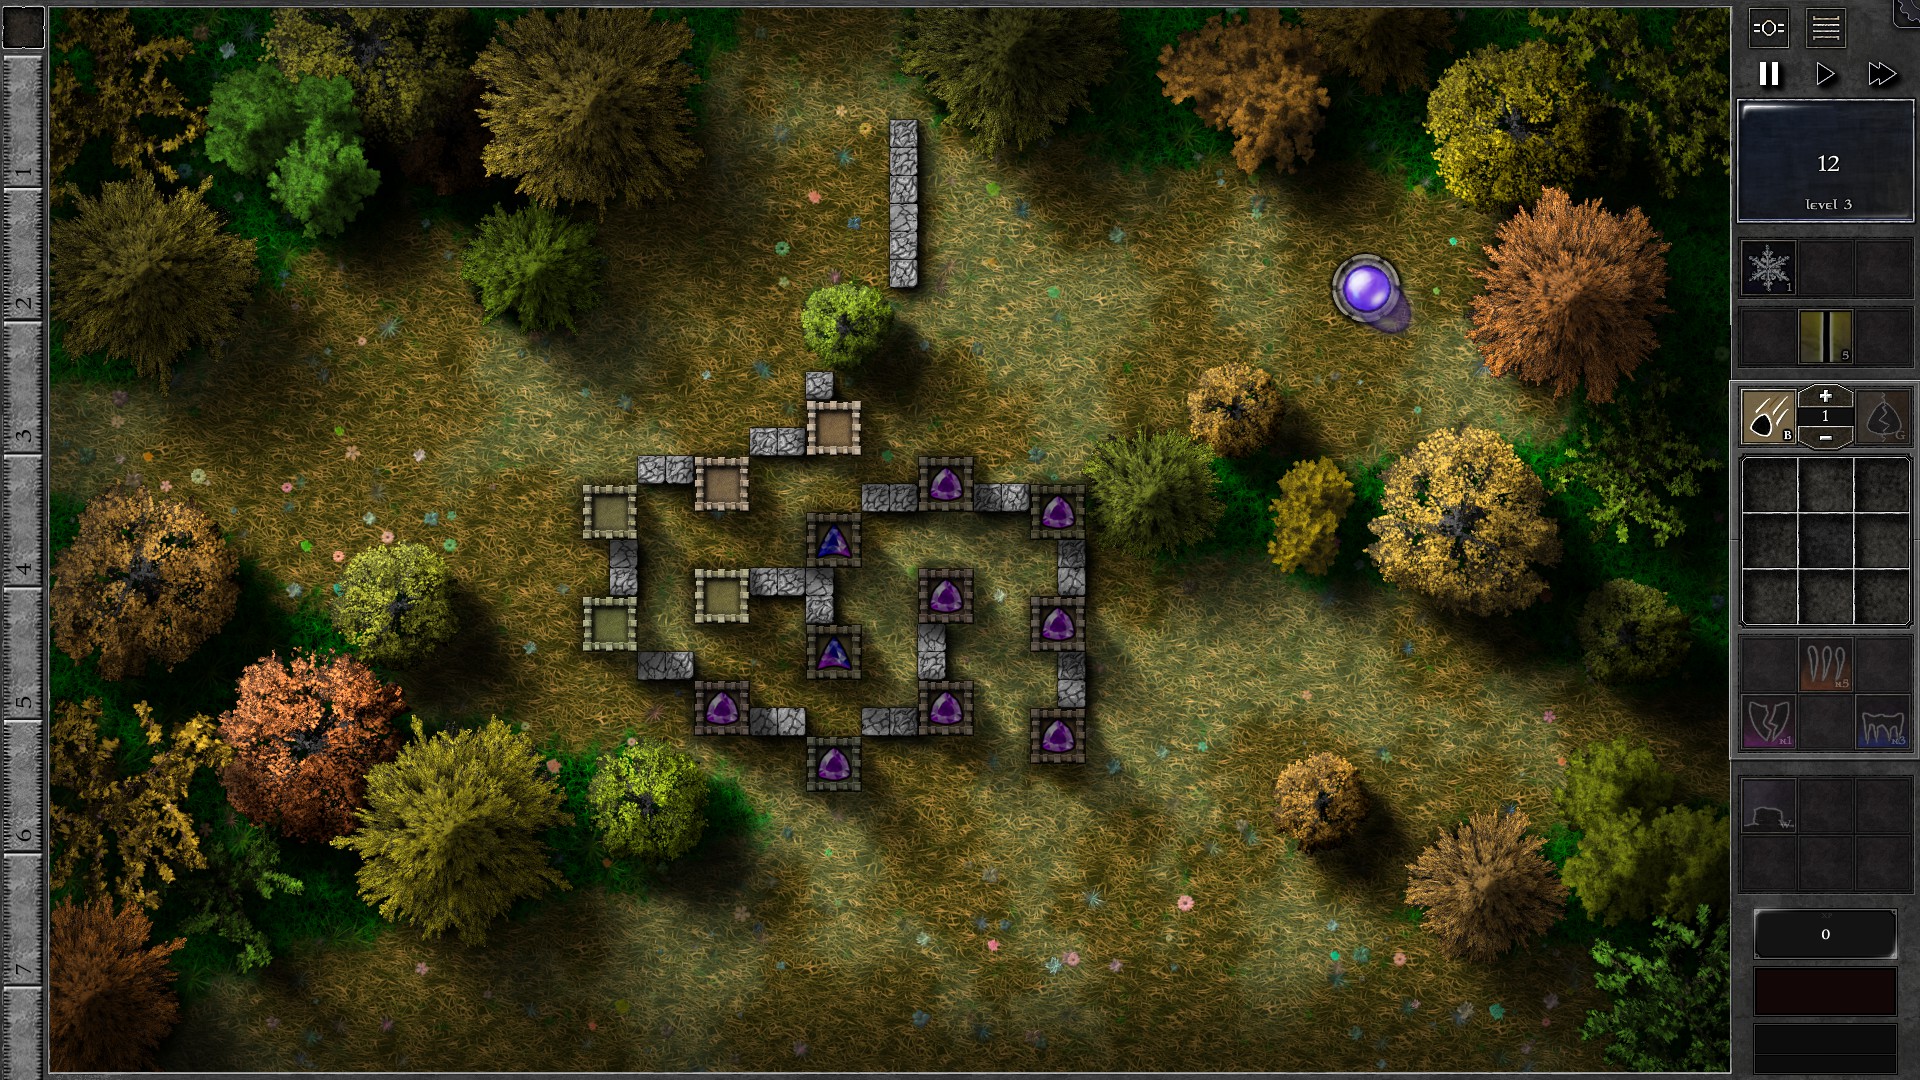
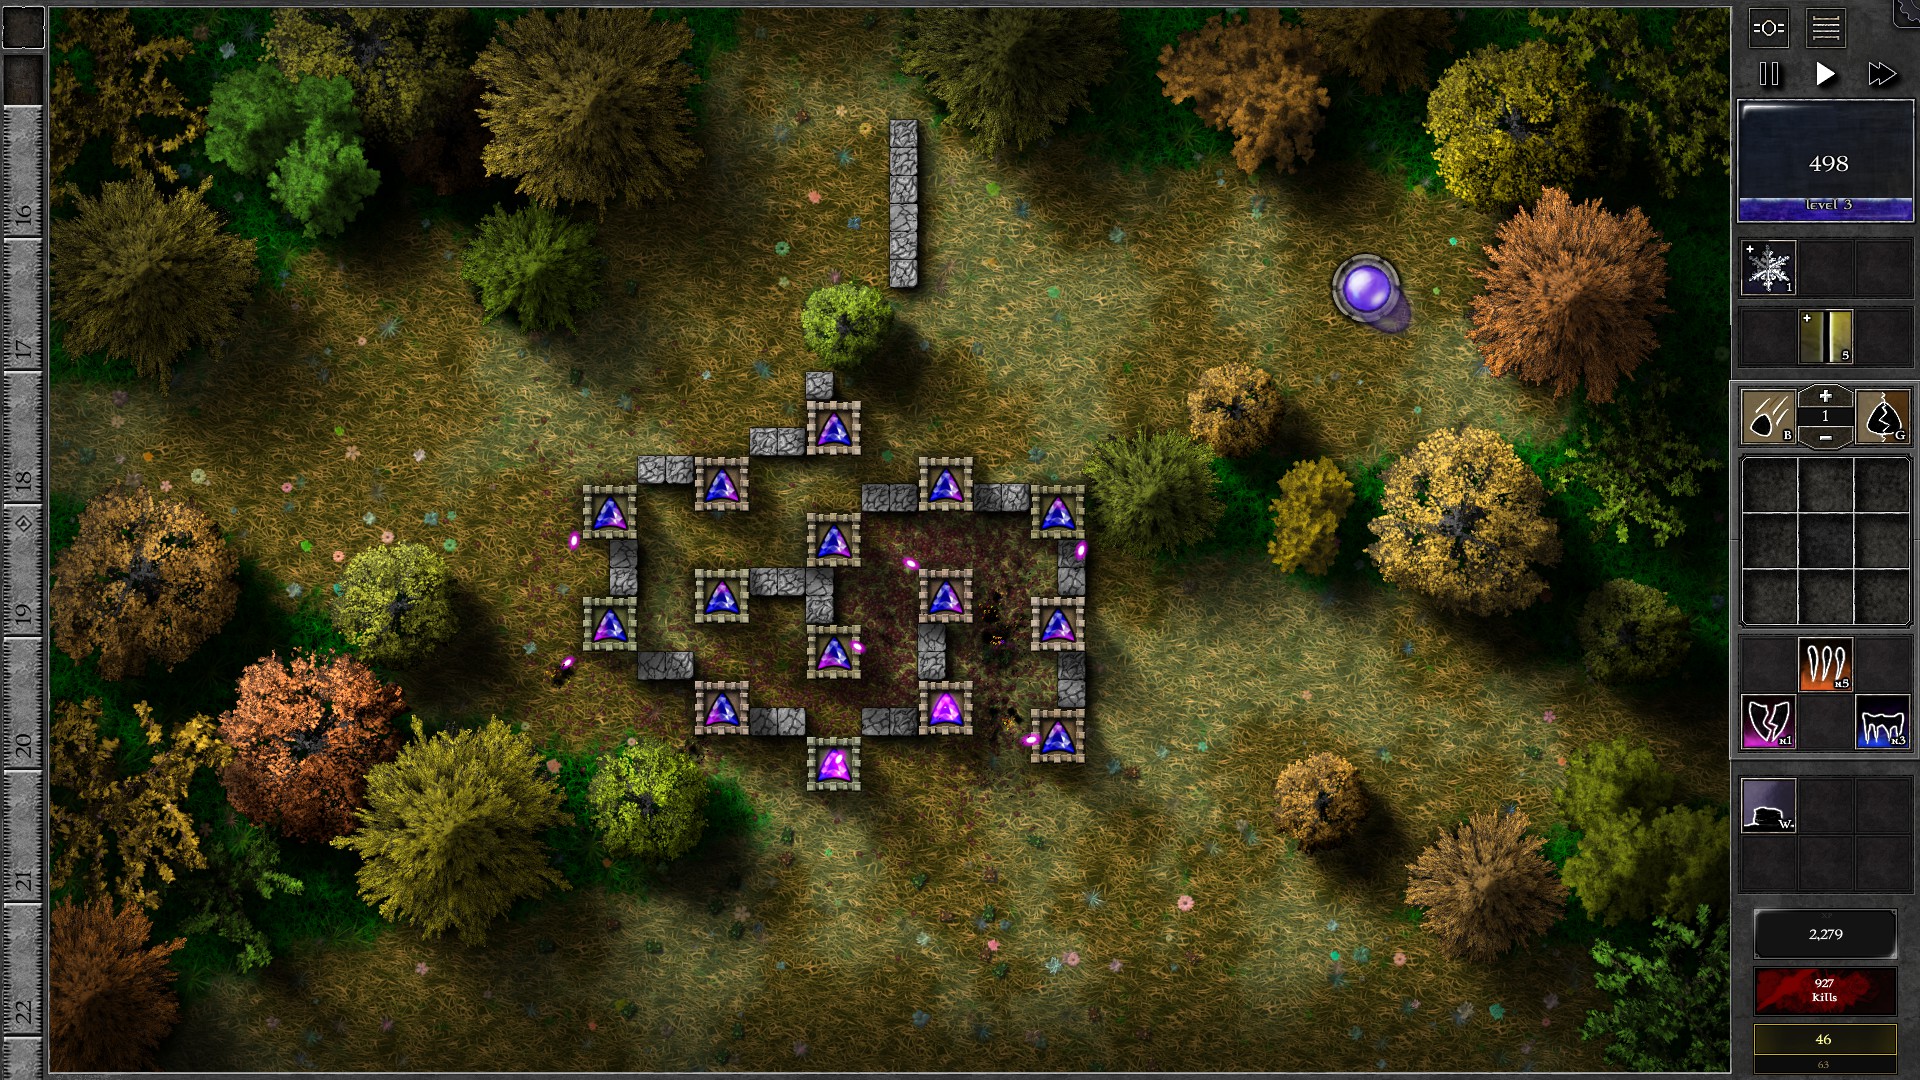
Build the walls as shown and insert gems into the towers. You can afford 8 g1 p gems and 2 g2 p/b gems with the initial mana. Once you start the waves, quickly fill the remaining empty towers with g1 p gems (this should only take 2-3 waves). At around w5 your first charges of Freeze and Beam should be ready; use these as you notice monsters pushing through the maze.
At this point, start upgrading your gems. First, create g1 b gems to combine into the g1 p gems for g2 p/b gems, starting from the 2 remaining gems in the central 4 towers and work you way to the 11 gems in the outer ring of towers. At around w15 all your gems should be upgraded to g2 p/b gems.
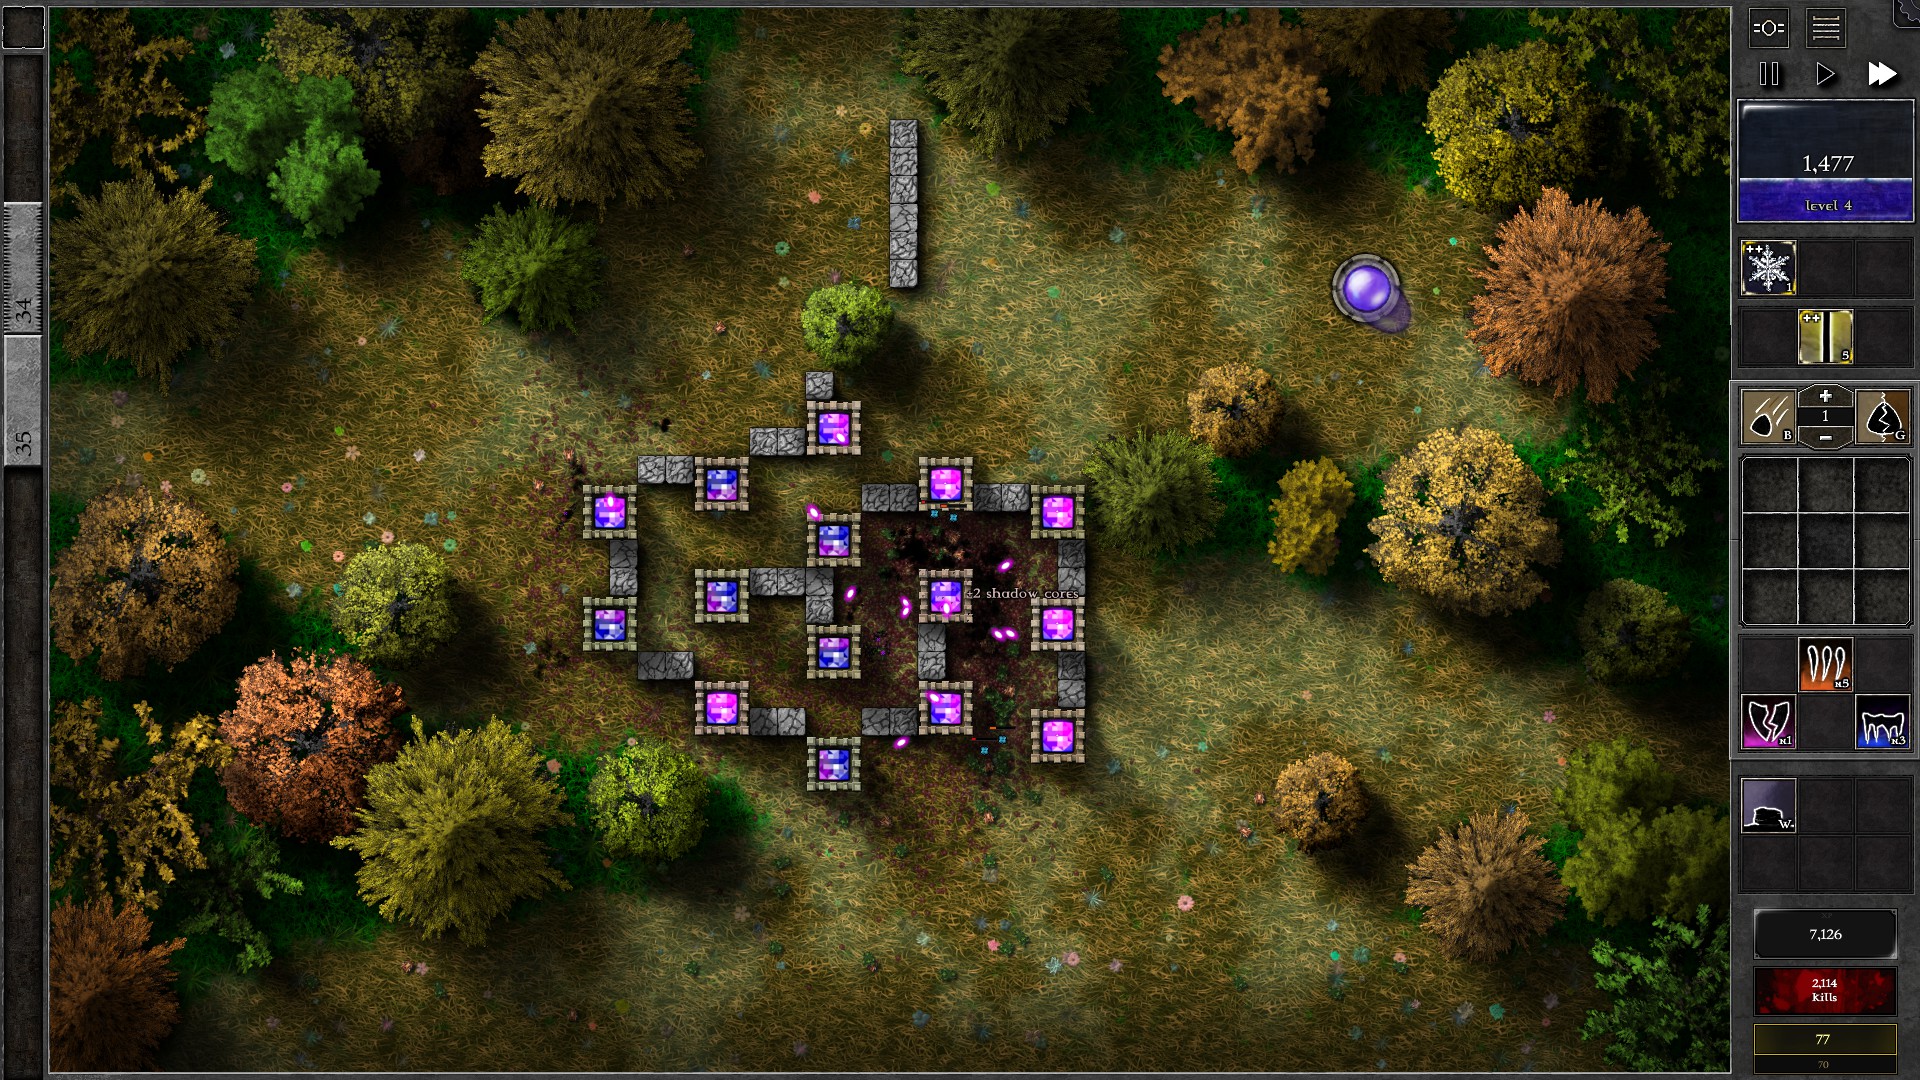
Continue upgrading your gems to g3 as the battle goes on. Watch out for w24/25 and w32/33 linked waves; try to hold some spells for the 2 waves of monsters coming in together. You should be able to upgrade all gems to g3 at around w30 which is enough for fending off the remaining monsters.
047 – Field N2
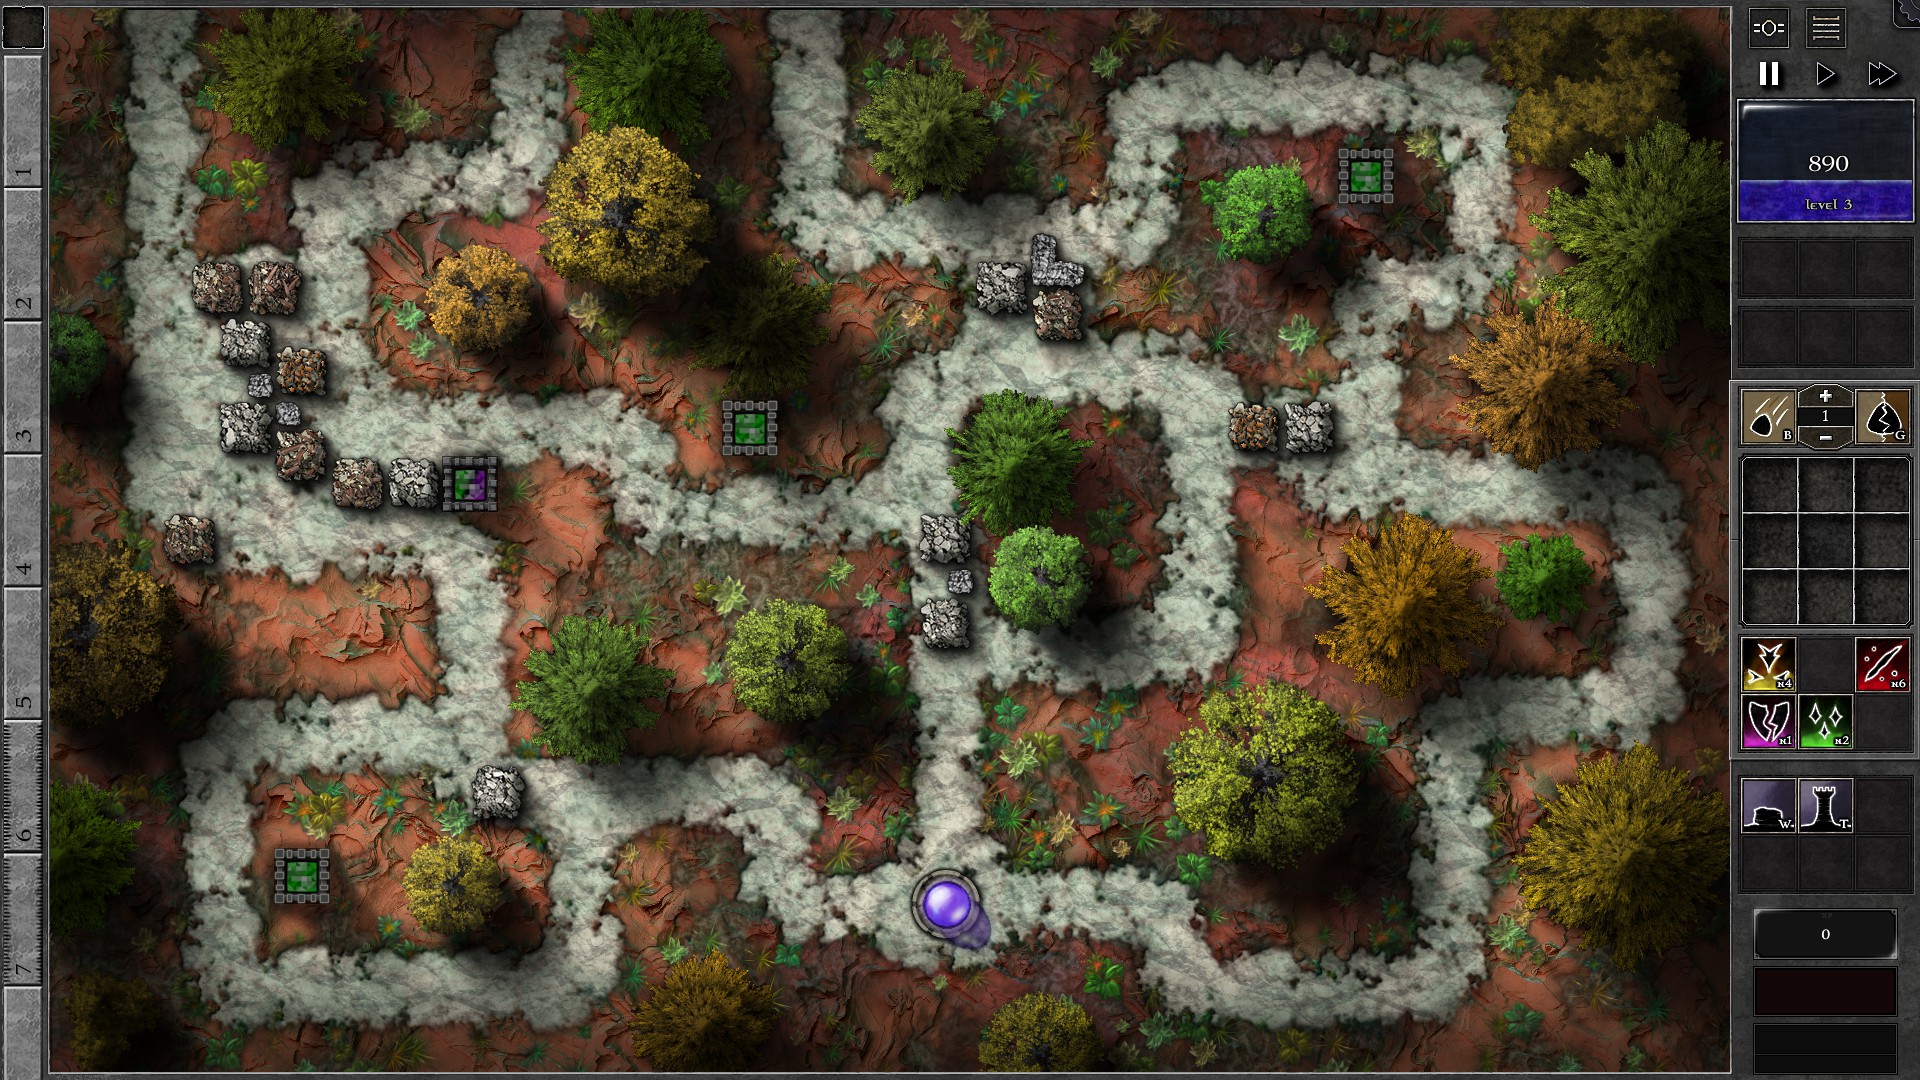
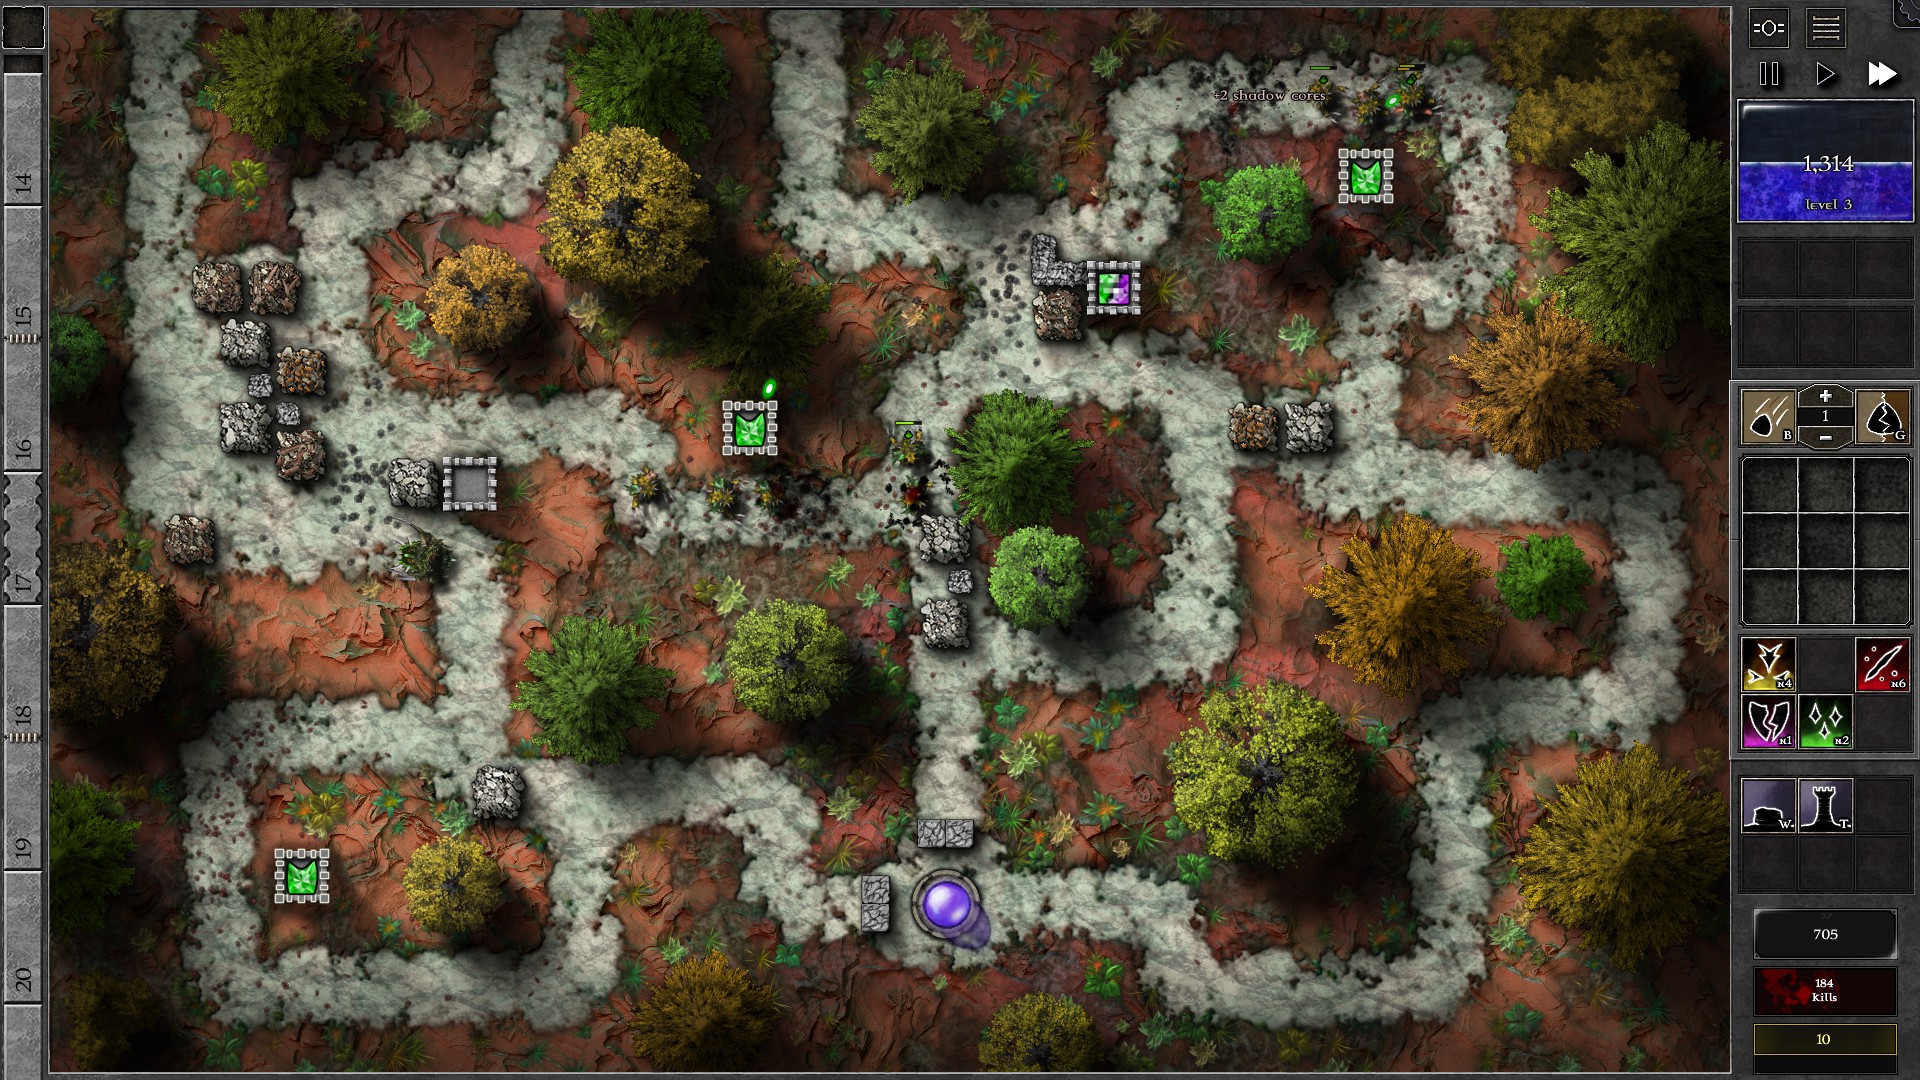
Start the field as shown with a g3 p/g gem targeting “Structures”. Your p/g gem should fire at the 4600 HP + 70 Armor Barricade while the Spiritforge gems do their job in killing the monsters. Some occasional leaks of 1-2 monsters can be observed but they should generally be tolerable.
NOTE: The Spiritforge gems in this Trial generally do their work well enough that they don’t leak too much monsters, but you can also force them to attack certain monsters by clicking on a target monster to better utilize poison damage or select better targets if you are into micromanaging.
Once the barricade is destroyed, move your p/g gem to a new tower close to the group of 2 barricades. It should fire at the 5100 HP + 60 Armor Barricade and eventually destroy it. Now, you should have enough mana (or almost) to upgrade the p/g gem to a g4. Set it to target “Nearest to Orb” (or anything that is not “Structures” depending on specific needs) so it starts to help in monster killing.
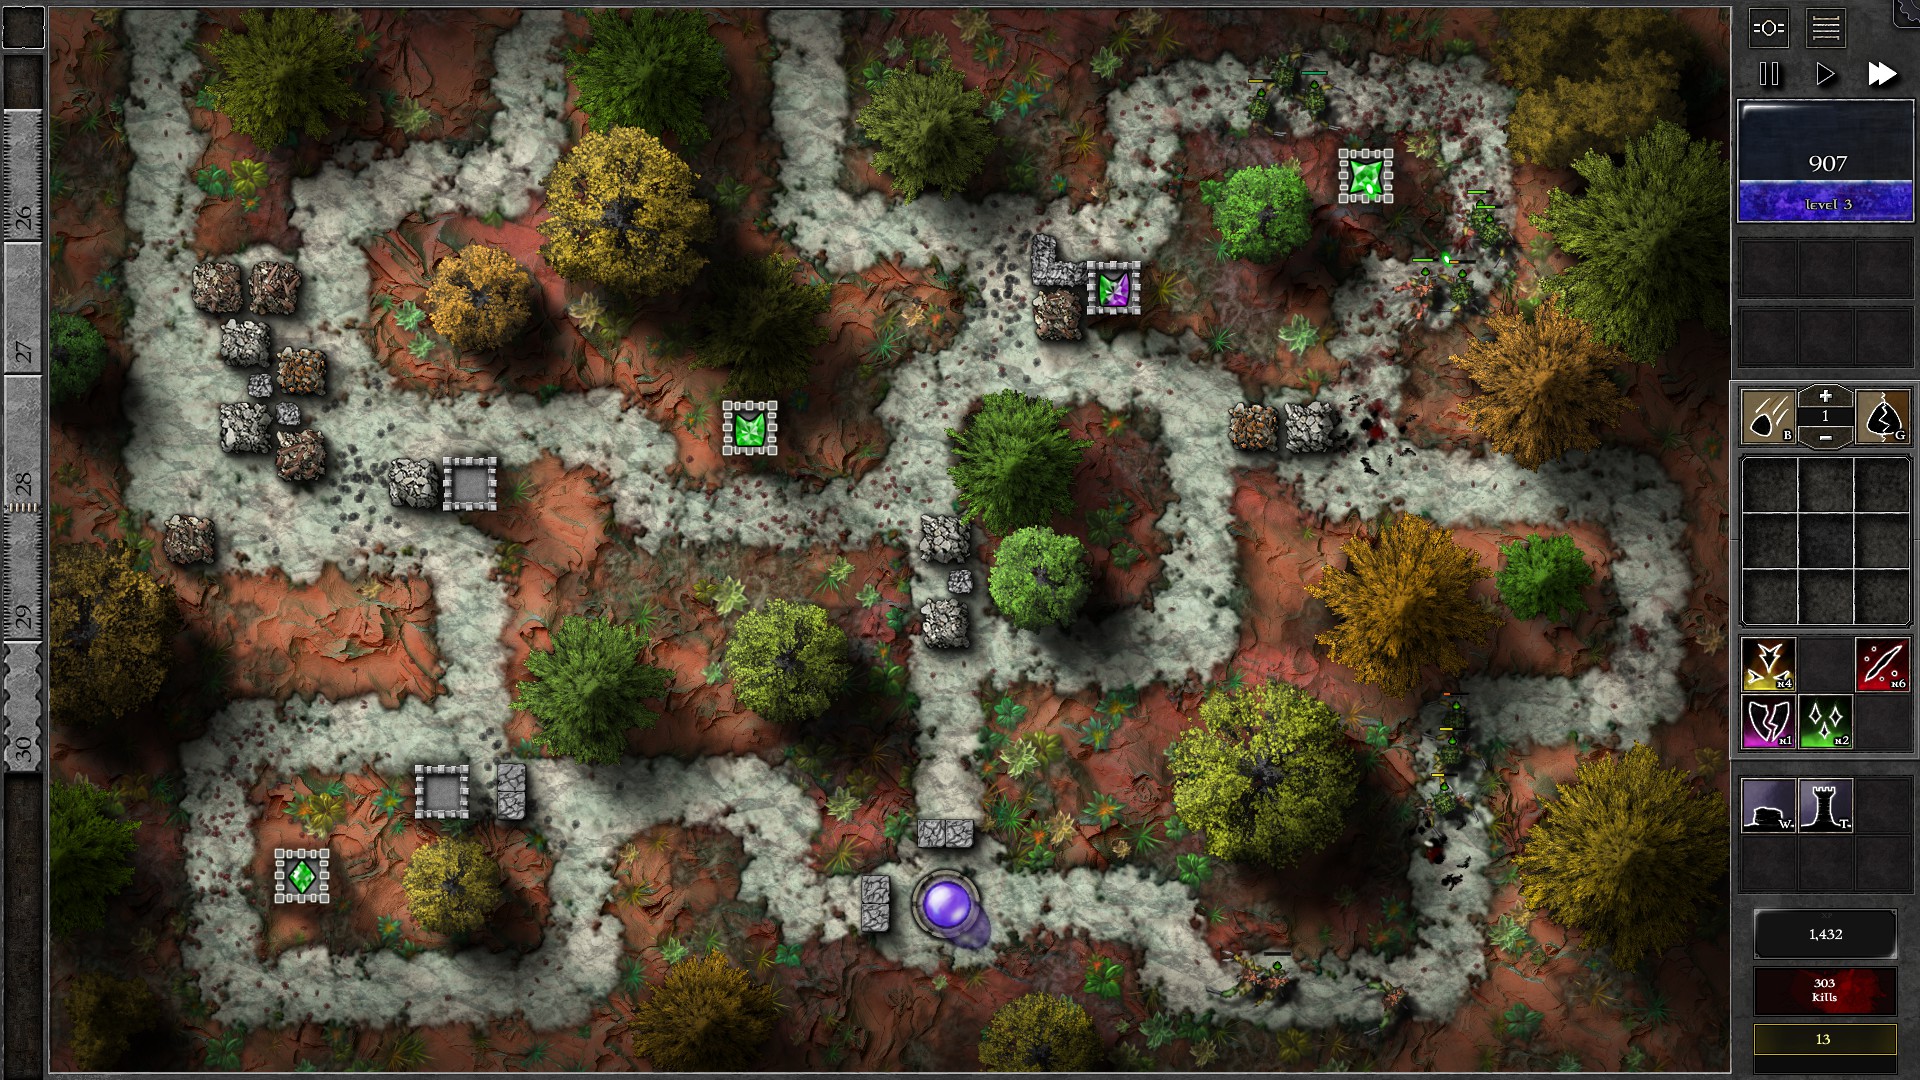
Build the walls close to the Orb as shown to force all monsters go through the right path. This should allow some monsters to get weakened by the middle Spiritforge gem and your p/g gem while the top right Spiritforge gem does most of the killing work. At around w18-19 you can consider to start demolishing the bottom left Barricade (7200 HP + 70 Armor) and rebuilding walls to block the path, which should help in the last waves should the need to juggle monsters arises (demolish wall to the left of Orb, rebuild at the right, and vice versa). You should generally have no significant problems dealing with the monsters after the path redirection.
NOTE: If you don’t destroy the barricade at the bottom left, the bottom left Spiritforge gem will start firing at it when the gem upgrades to a g6 at w24/25. This may affect juggling strategies but otherwise has minimal impact as monsters are all redirected to the right path.
048 – Field N3
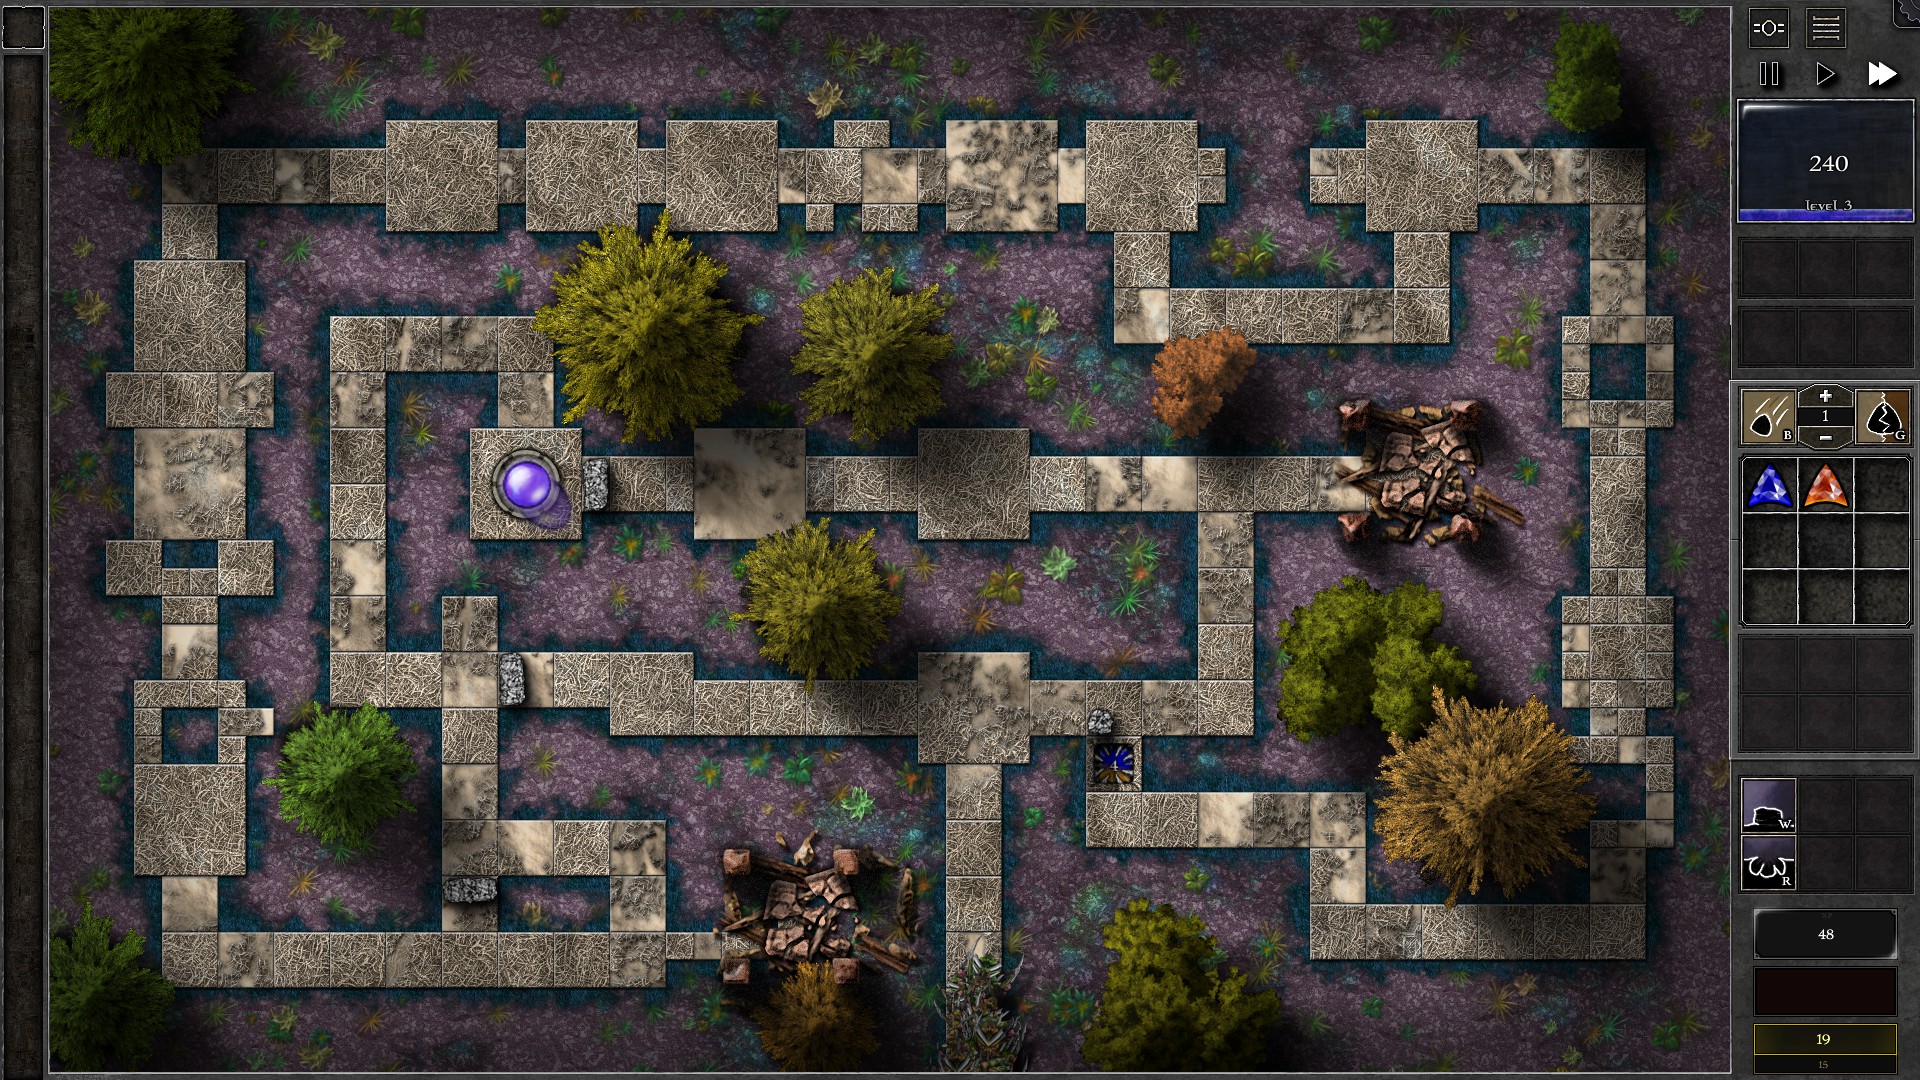
This is a Juggling Trial. Start by building the 3 sets of walls on the left, and then call all 10 waves of monsters immediately. You should have enough mana now to make a g4 b/o gem by duplicating the 2 starting gems, combine the duplicated and upgrade once. Put the g4 gem to “Least HP” and place into the trap as shown.
To complete this field, you need to follow the giants by building new traps to attack them once most of the giants moved through the trap. This gives about 4-5 traps when the giants arrive on the left side. When the giants close in to the location marked blue in the screenshot, duplicate a gem, and use it to destroy the wall marked red in the screenshot and build a wall in the location marked blue. The giants are now forced to go all the way back to attack your orb through the red location.
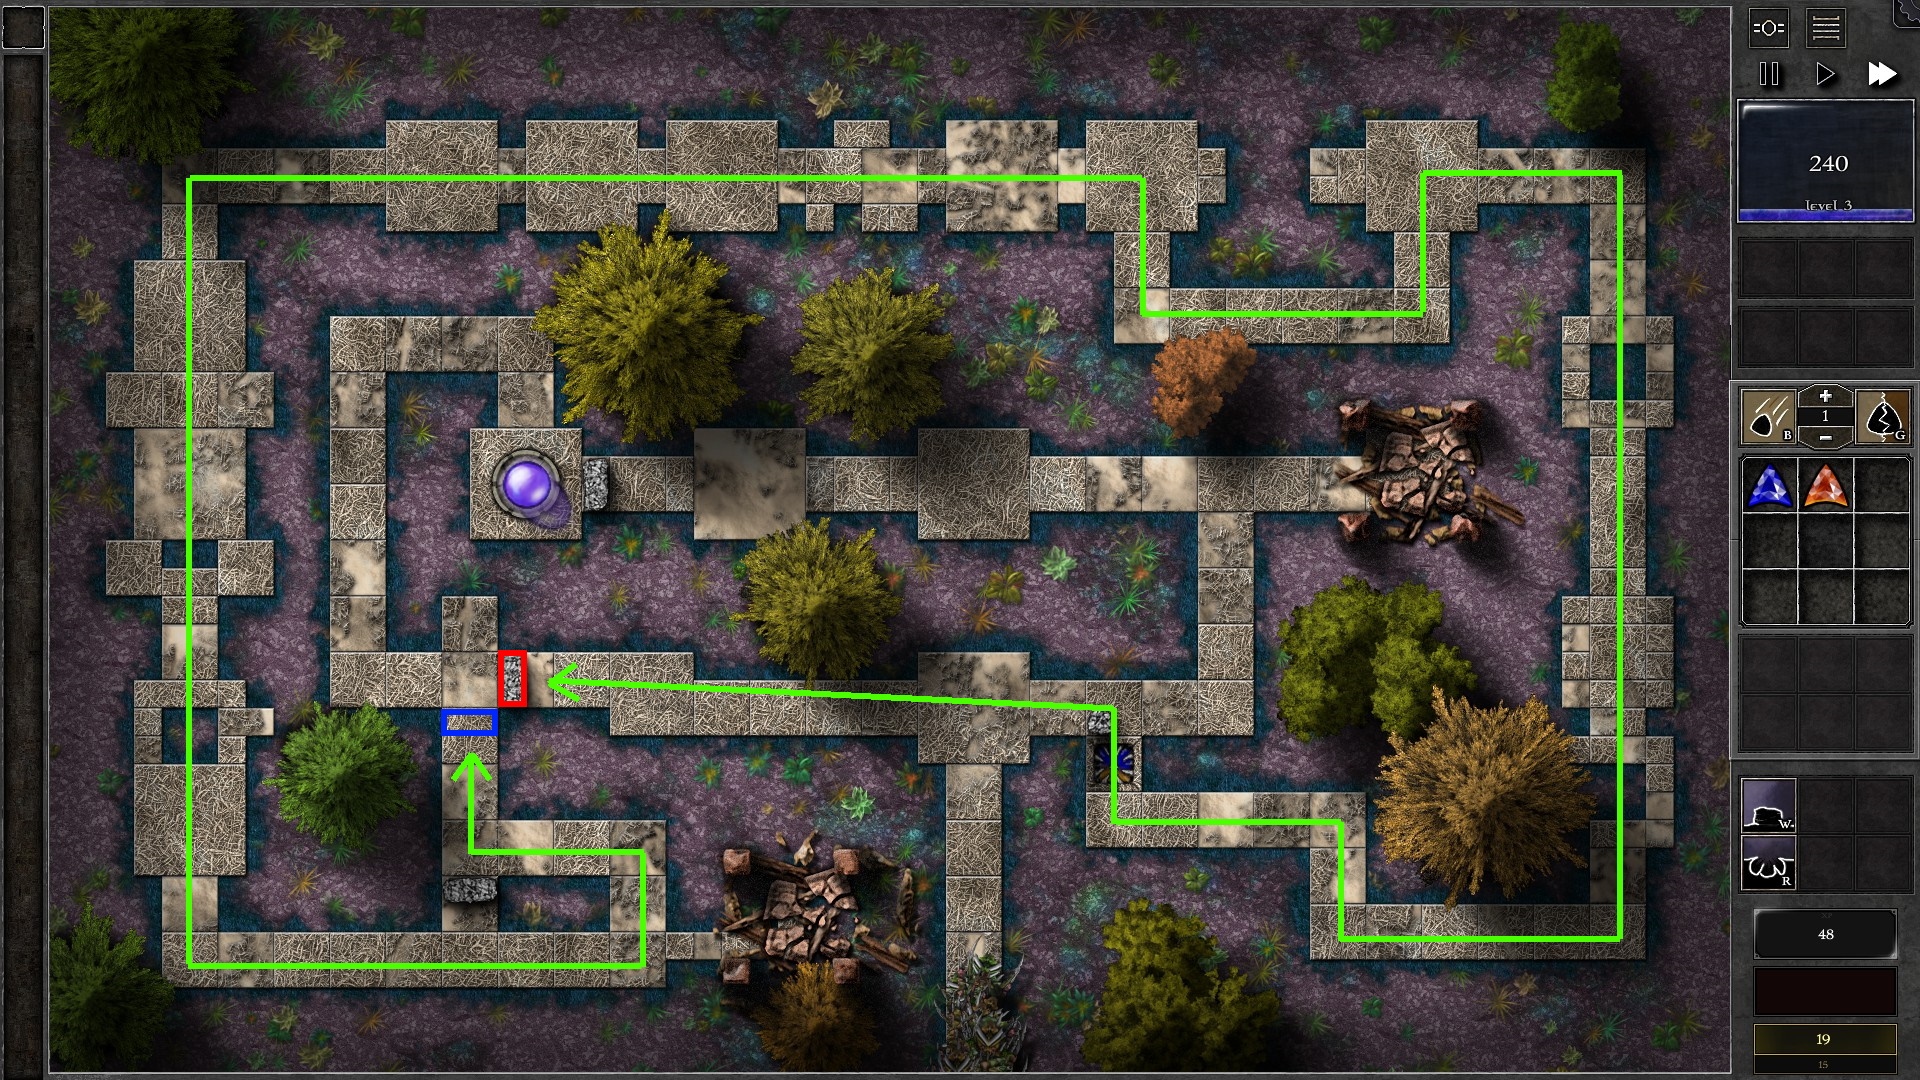
You need to do this again when giants arrive at the red location again, but by destroying the wall in blue and build at the red location. This will make the giants go back and forth through the green path. After several cycles and following the giants with your g4 gem the giants should be defeated eventually.
049 – Field N4
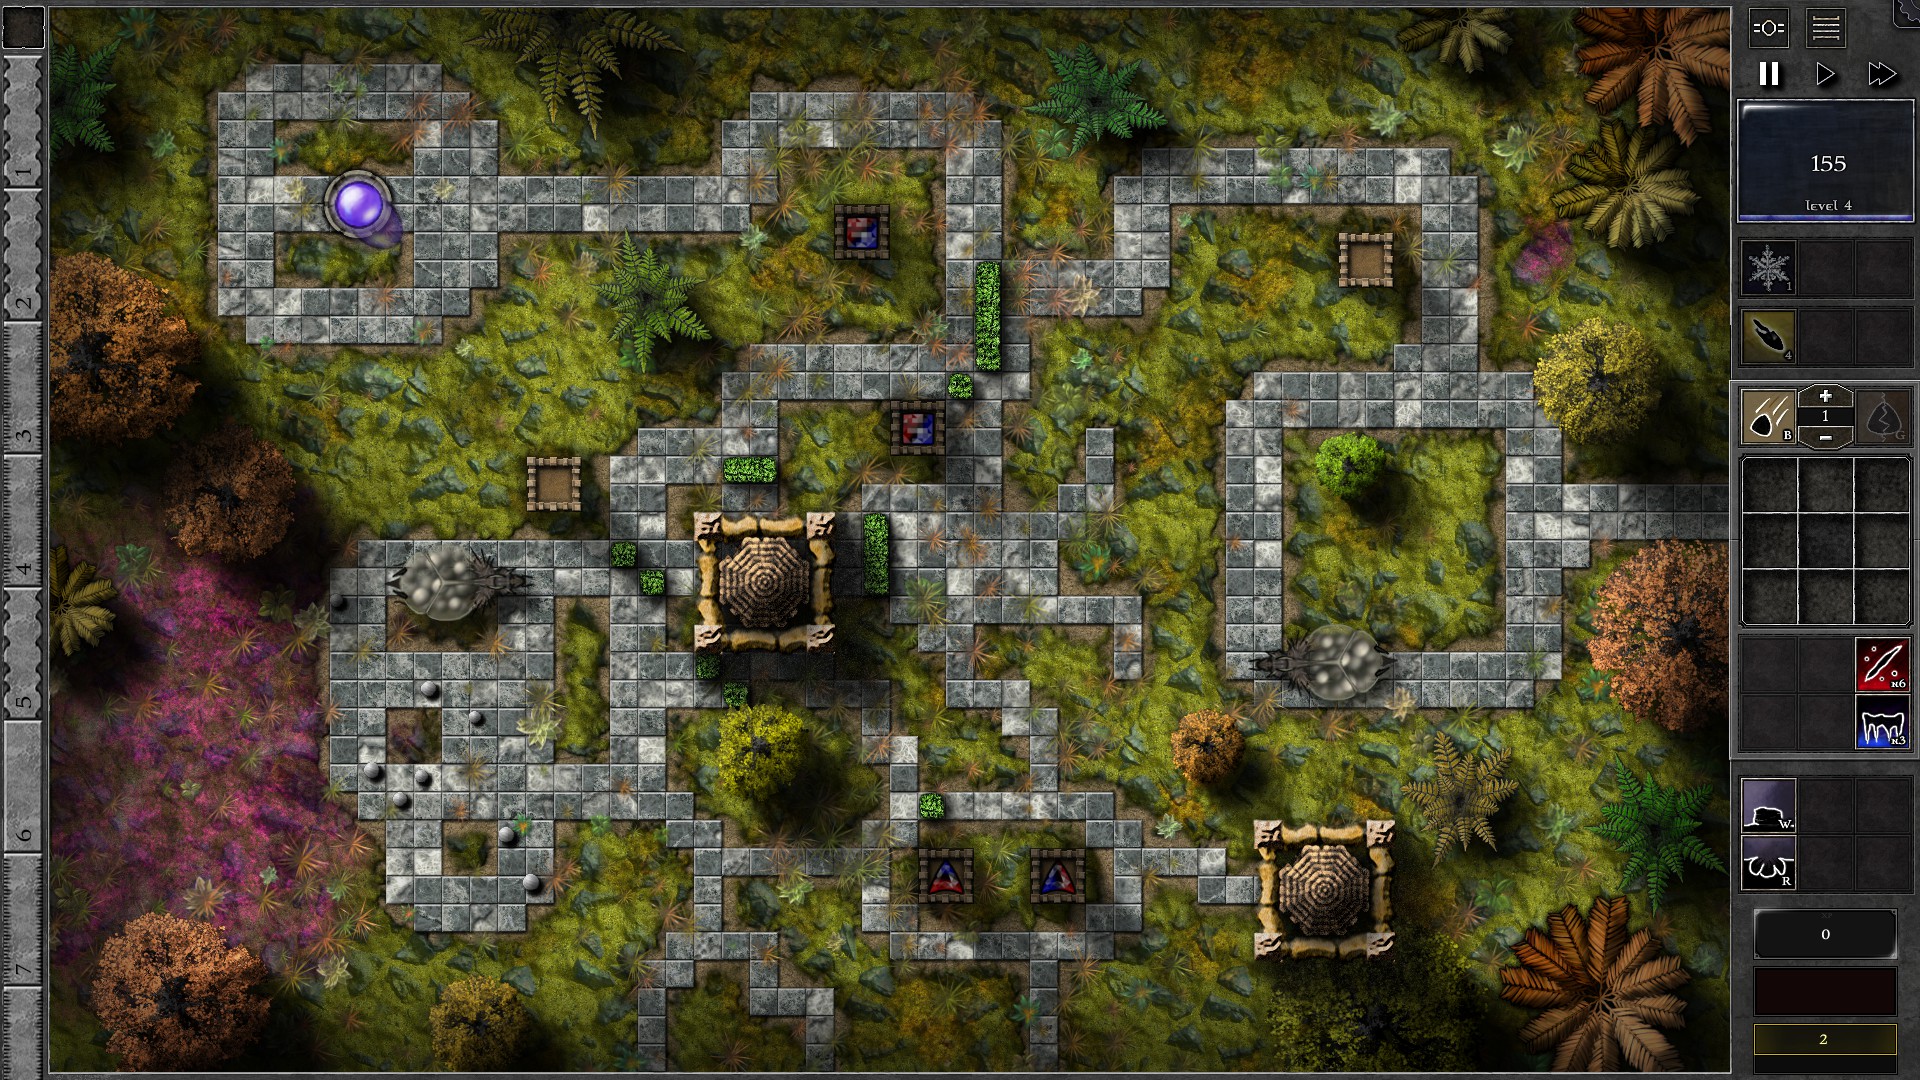
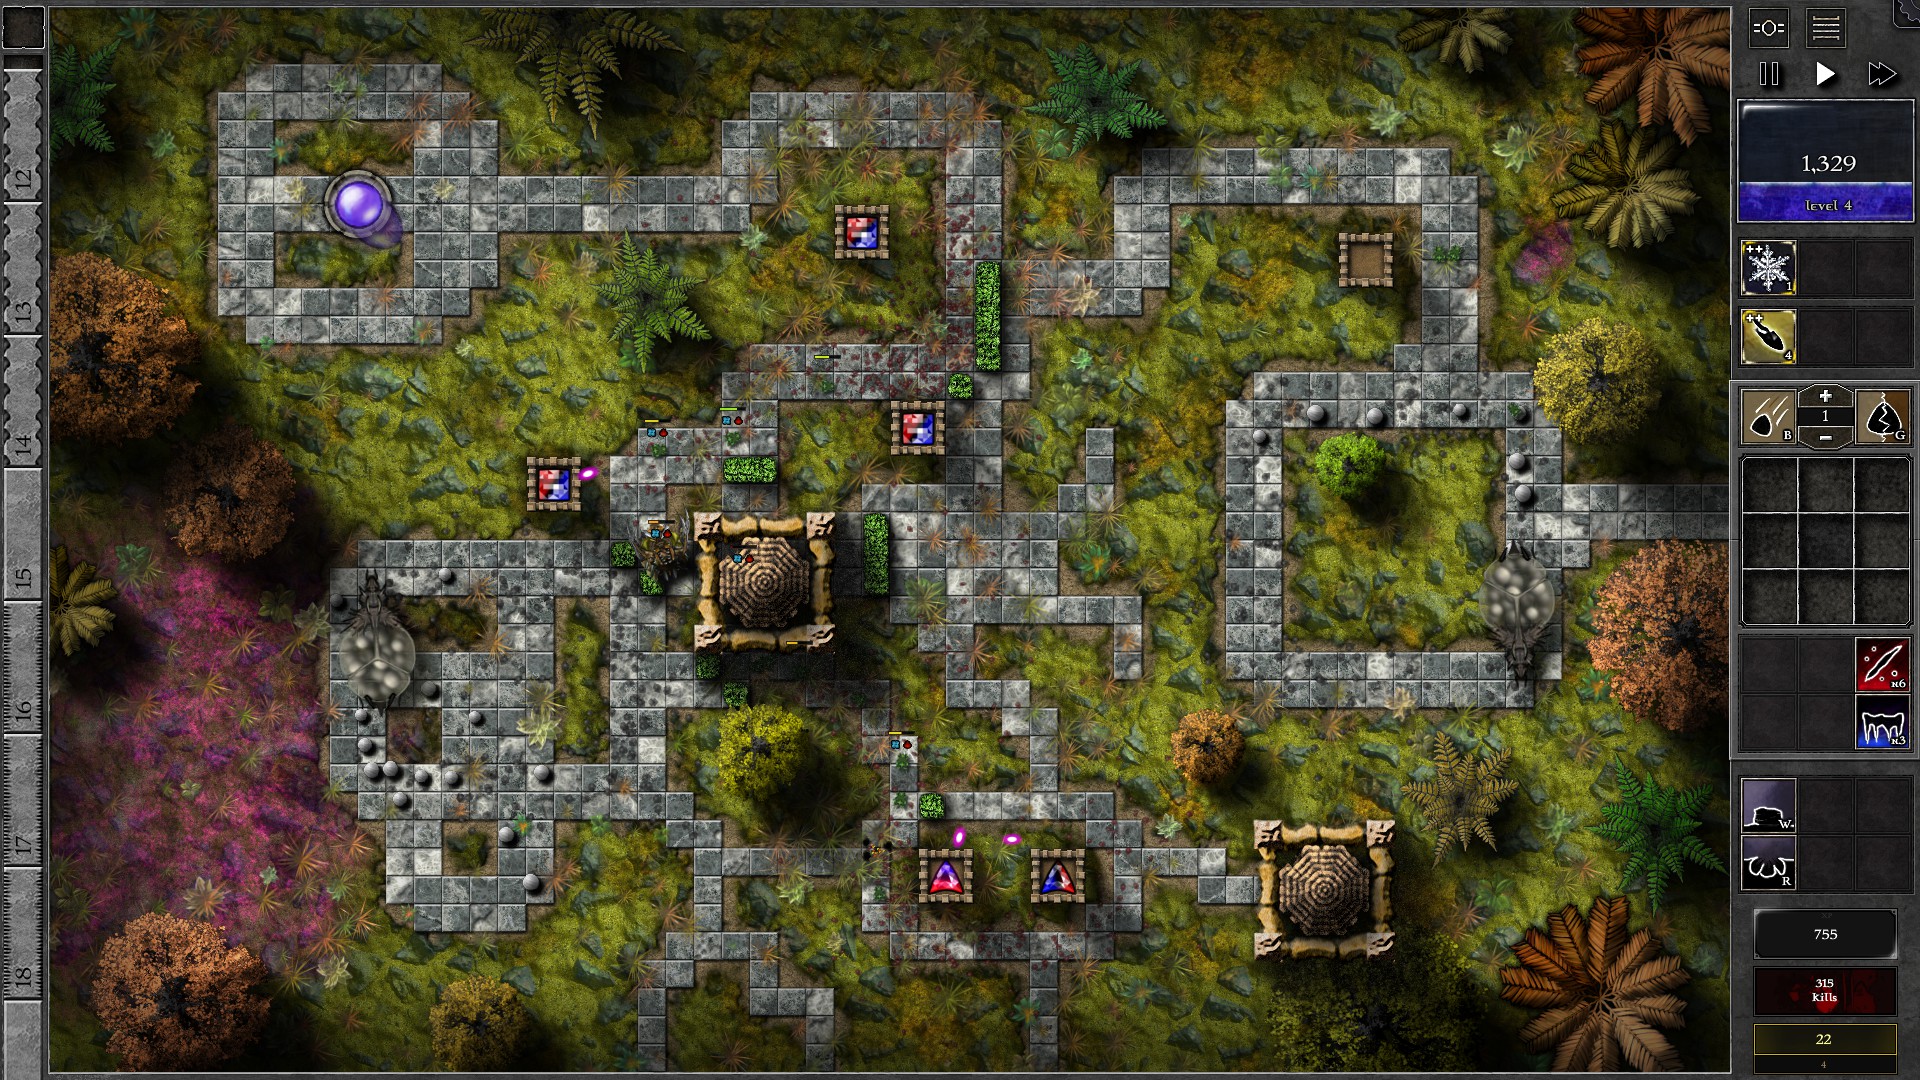
Setup the walls and towers as shown with 2 g3 r/b gems and 2 g2 r/b gems. Set the bottom 2 towers with “Least HP” targeting to help out with the hatching monsters. You’ll need to monitor the status of the gems at the top and use spells there when necessary.
At around w6, duplicate a new g3 gem (target “Special”, to be called “special” gem) to start attacking the Swarm Queen at the left and give it Bolt when your gems at the top is not under pressure. Upgrade your top-most gem to g4 at around w10-12. Use most of the Bolt on the “special” g3 gem on the left Queen and you should be able to take it down at around w13.
Save Freeze spells as you take down the Queen and immediately freeze all the swarmlings from the Queen’s death (preferably twice). Click on the frozen swarmlings repeatedly to have the “special” g3 gem kill as many swarmlings before they unfreeze. Prepare your gems to deal with the remaining swarmlings by saving Bolt on the higher grade gems (target “Swarmlings” if the gem is not the last in defense) and Freeze for when the swarm approaches the main gems.
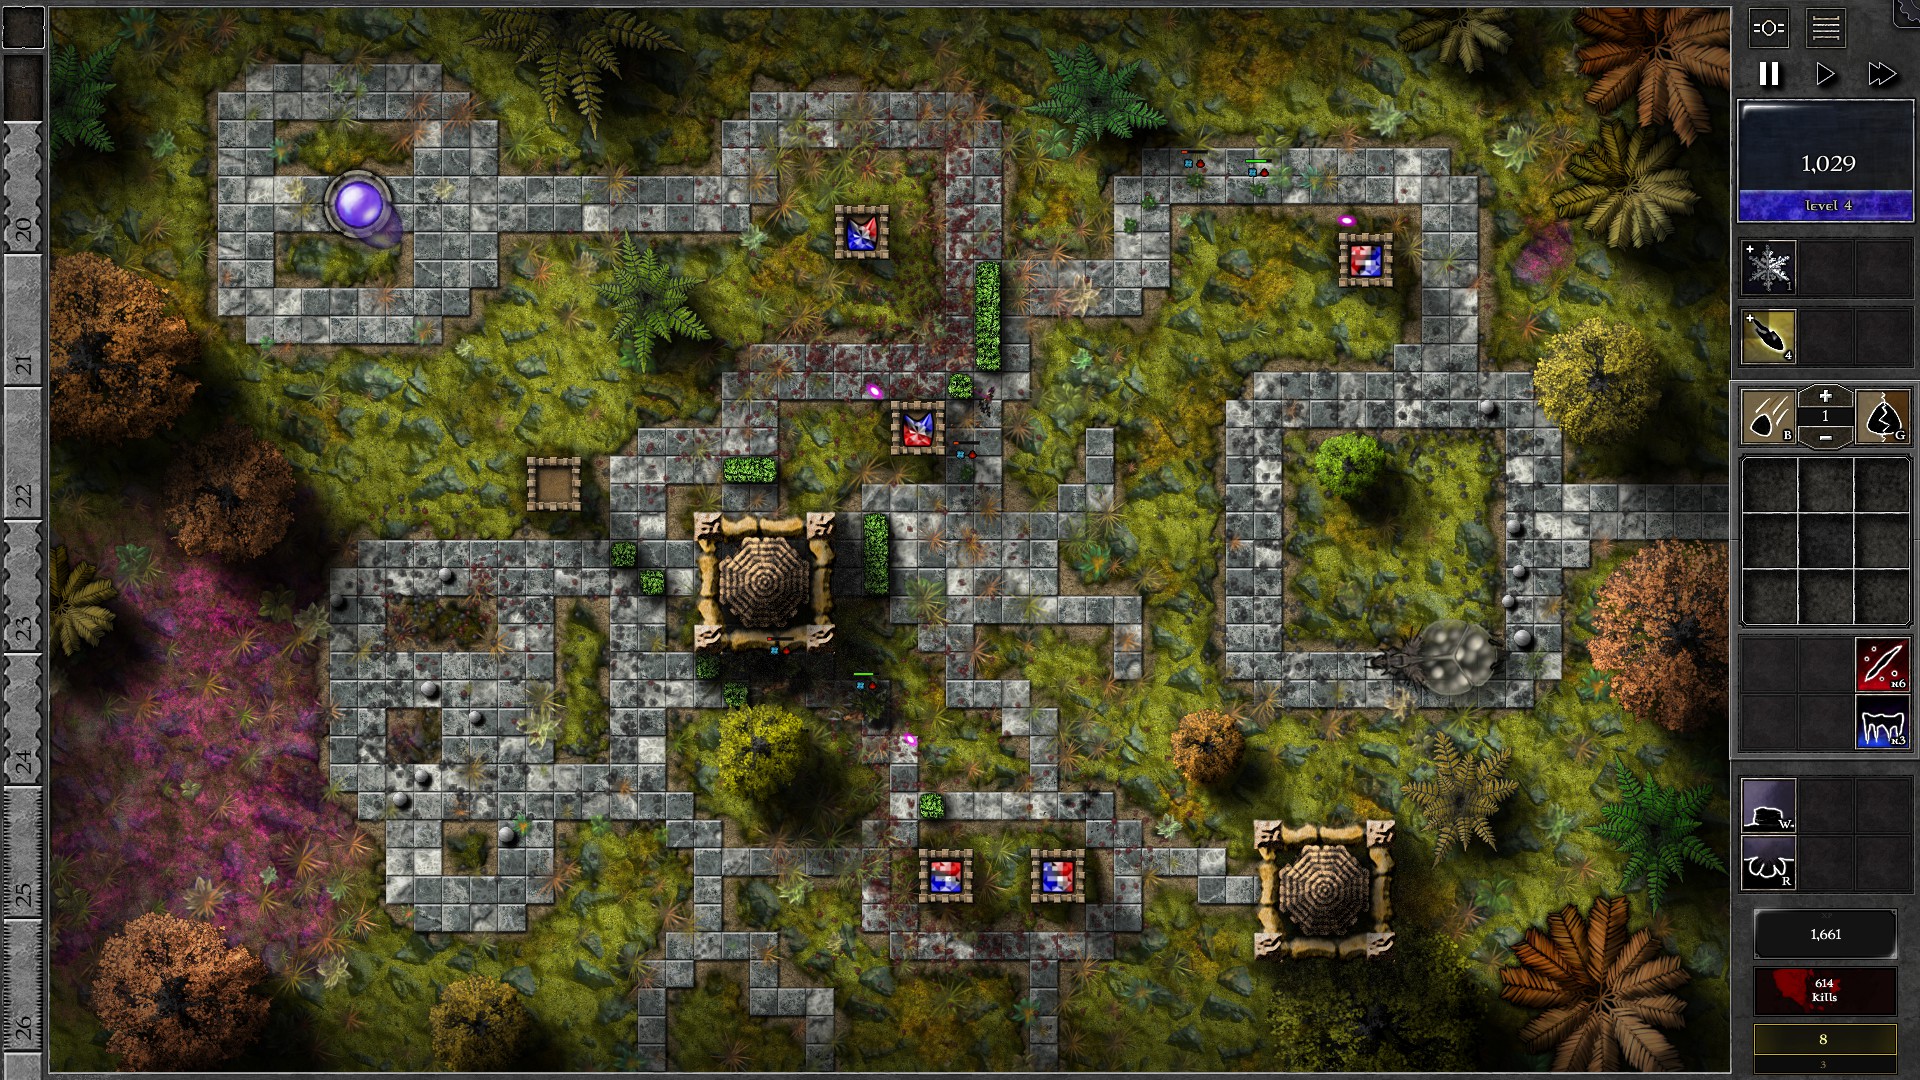
You should be able to take out most of the swarmlings from the first Queen by w16. Upgrade both bottom gems to g3 to help deal with the back-to-back swarmling waves, and move the “special” gem to start hitting the right Queen. Meanwhile, upgrade the middle g3 gem and the “special” gem to g4. The right Queen should get close to the “special” gem at around w22-23. Start attacking it with Bolt and try to have 2 Freeze spells ready for the post-death swarmling storm. The Queen and its swarmlings should be eliminated at around w26. (If you cannot pop the Queen at around w23, you need to wait for a second round, but try to upgrade the bottom 2 gems while you wait for the Queen to loop back in range.)
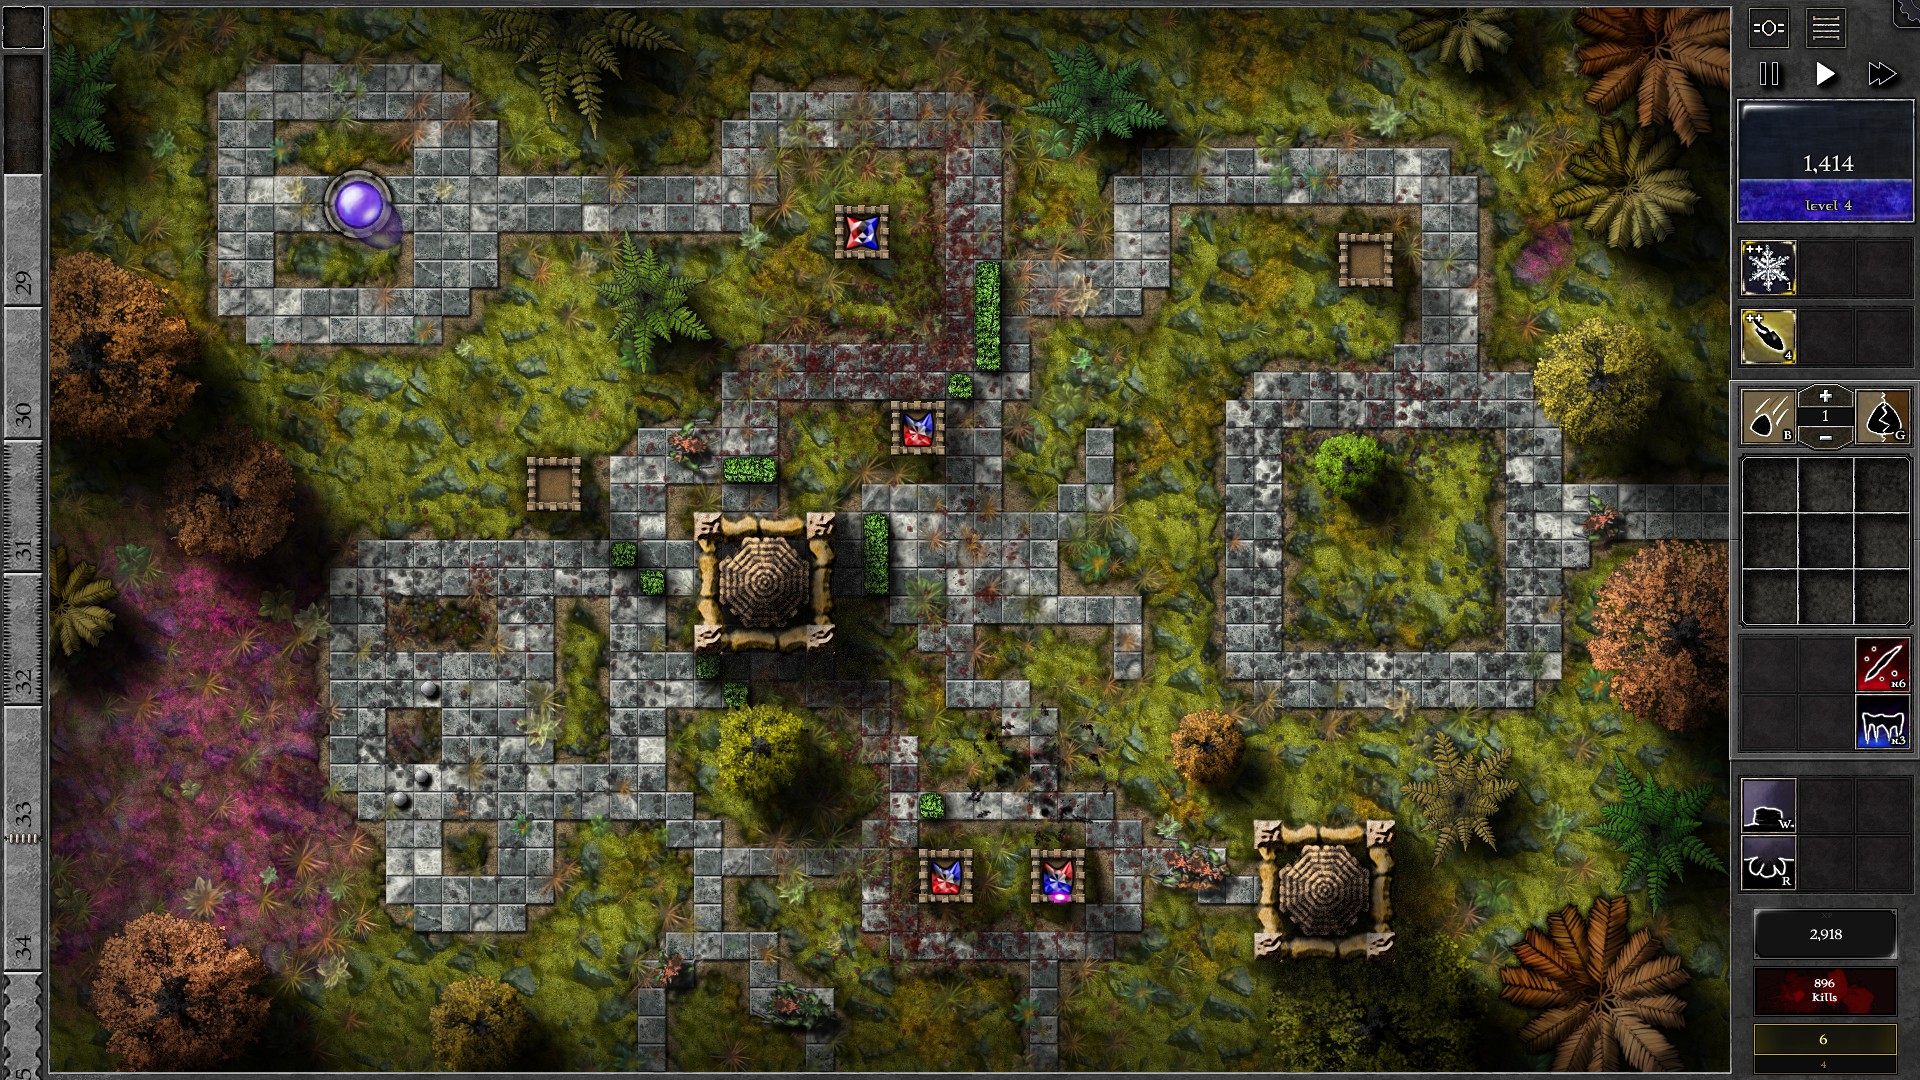
After defeating both Queens, combine the top gem with the “special” gem for a g5. You will also probably have enough mana for upgrading one (or both) of the bottom gems to g4. The defense should be strong enough to fend off the remaining waves after both bottom gems are upgraded to g4 and both upper gems are upgraded to g5. If you have the firepower to spare, you can also use Bolt to take down the Monster Nest at the middle to force monsters to enter from farther entrances.
050 – Field N5
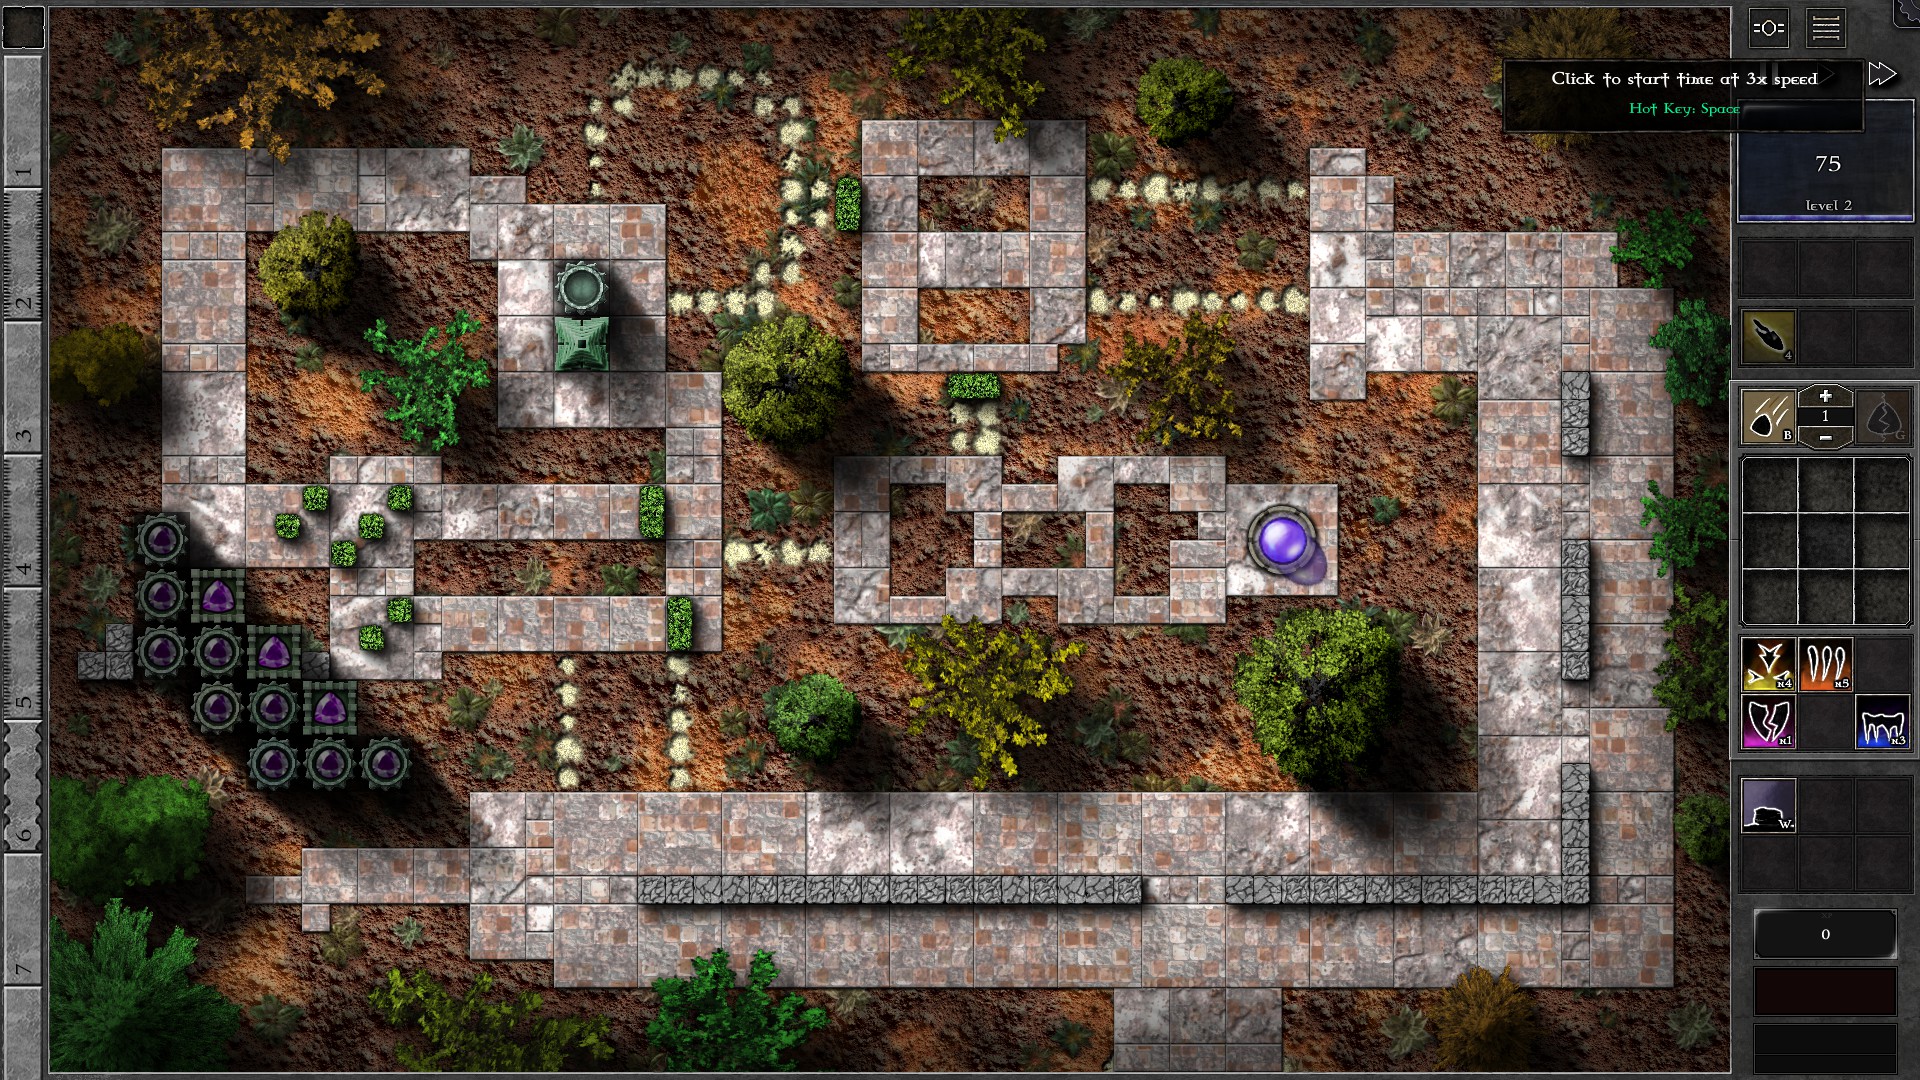
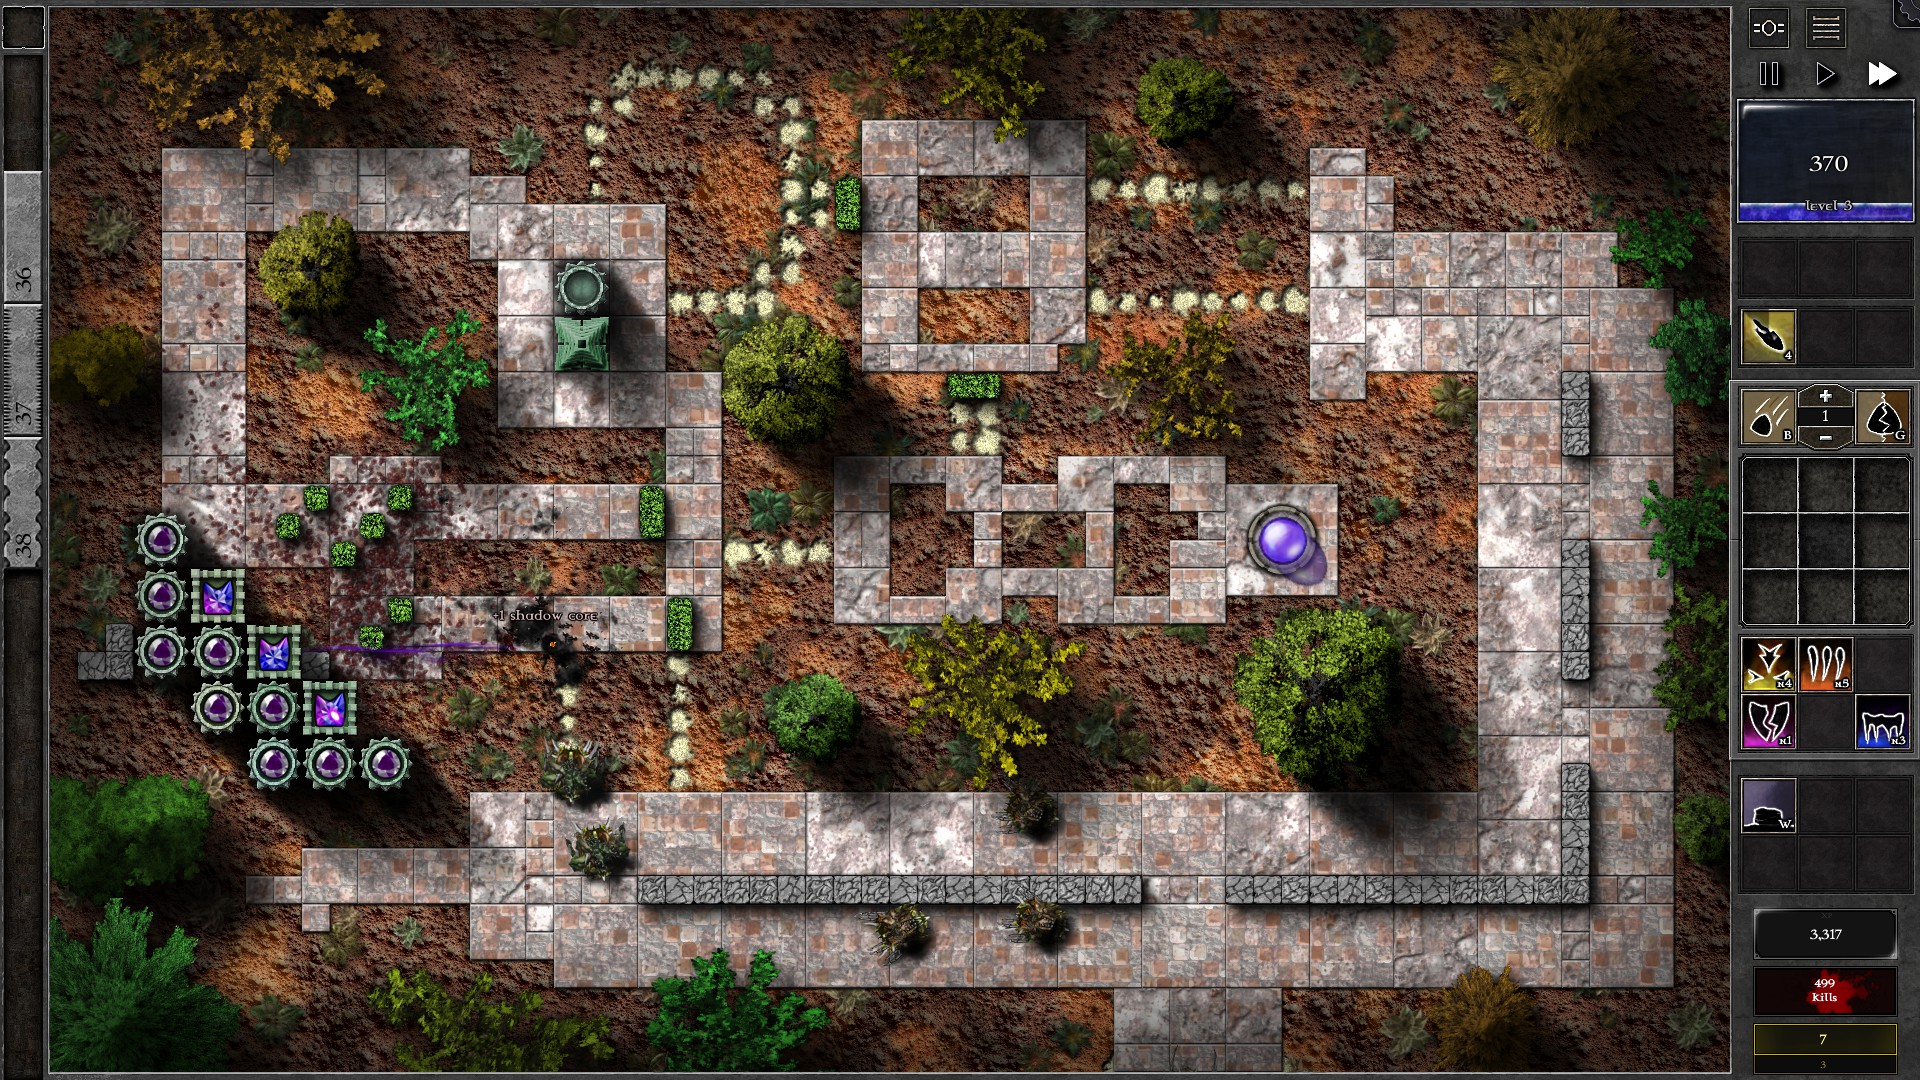
Setup the field as shown with walls and 12 g1 purple gems all inserted into the group of buildings to the bottom left. As you collect mana, create g1 blue gems to combine into the tower gems, making them g2 p/b. Use bolt when necessary.
After getting 3 g2 p/b gems, continue upgrading them evenly throughout the course. You should prioritize the 2 p/b gems that are amplified by 4 amps first. The 3 gems should all be upgraded to g3 at around w20 and to g4 at around w35. Watch out for the swarmling wave and shielded reaver wave at w29-30. You may want to use Bolt more aggressively for these waves. Otherwise, there shouldn’t be much difficulty in the last waves if you keep up with the tower gem upgrades.
051 – Field O1
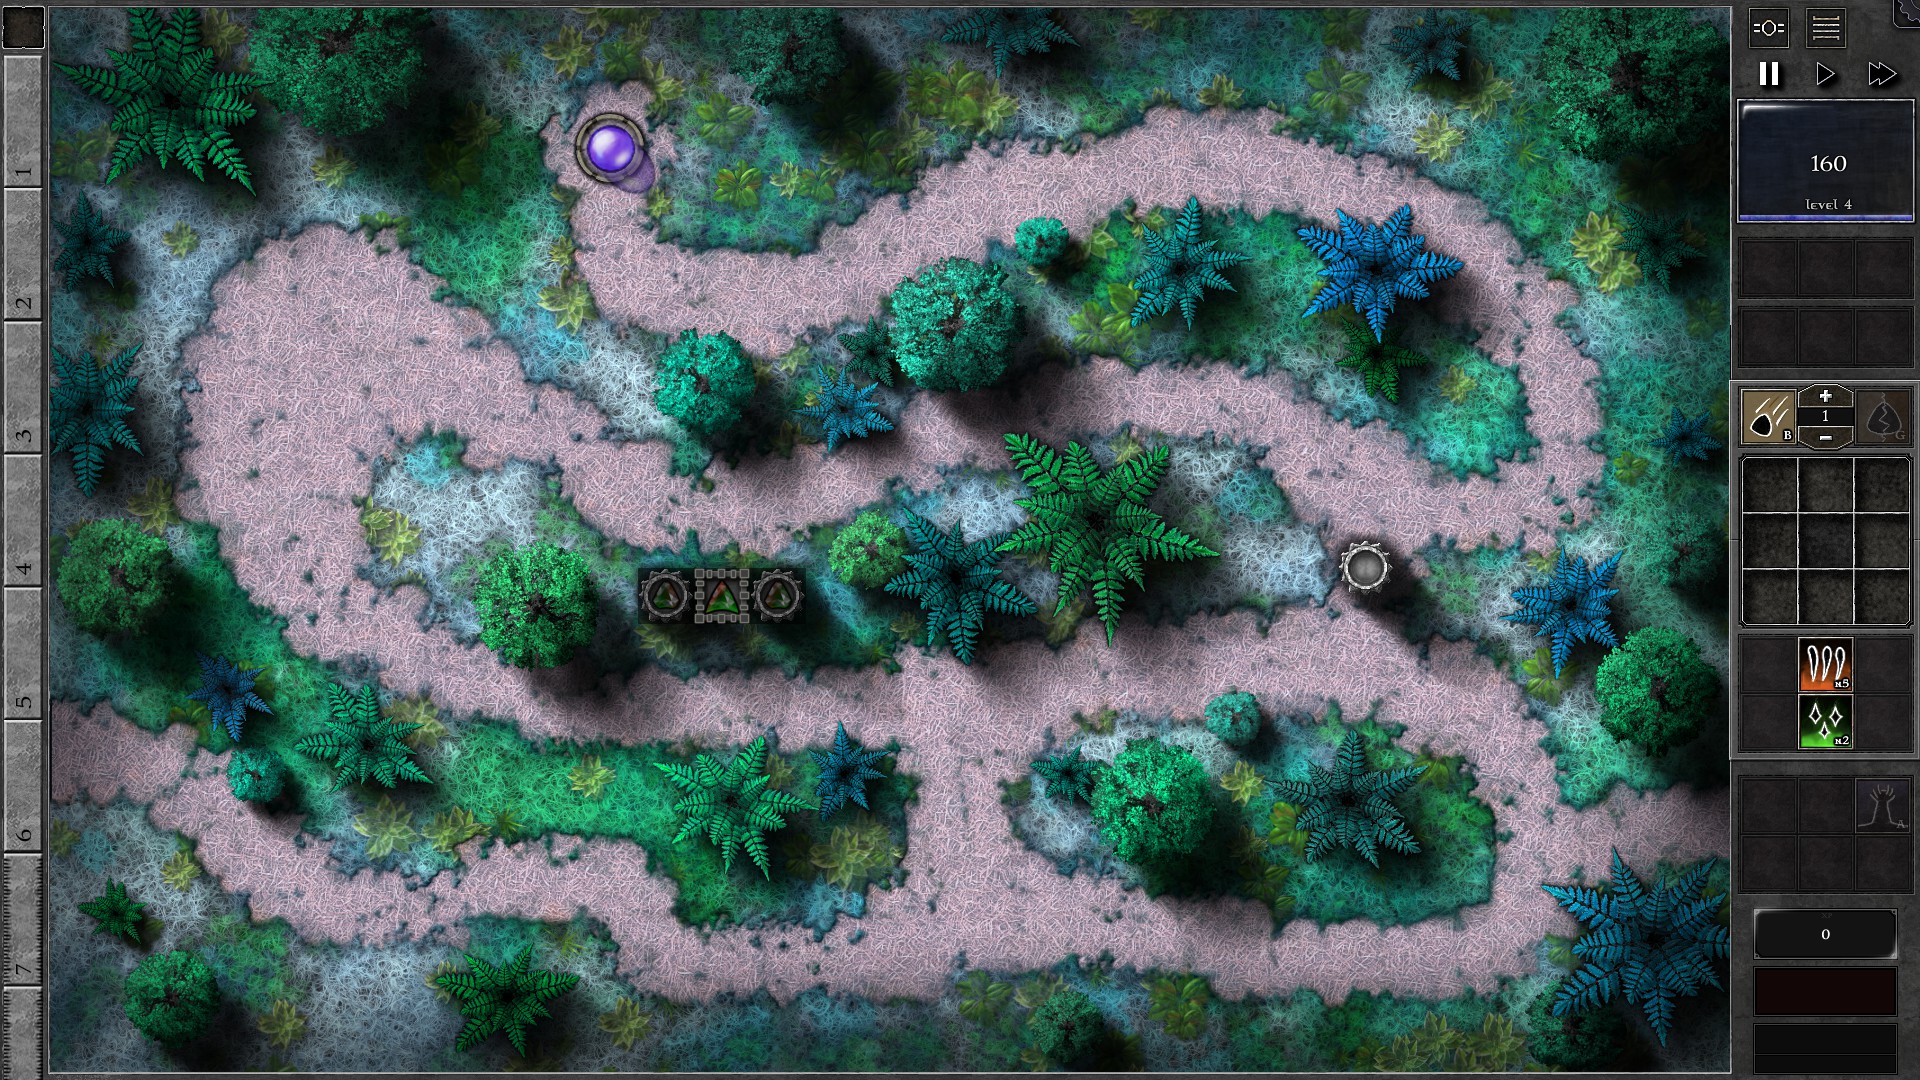
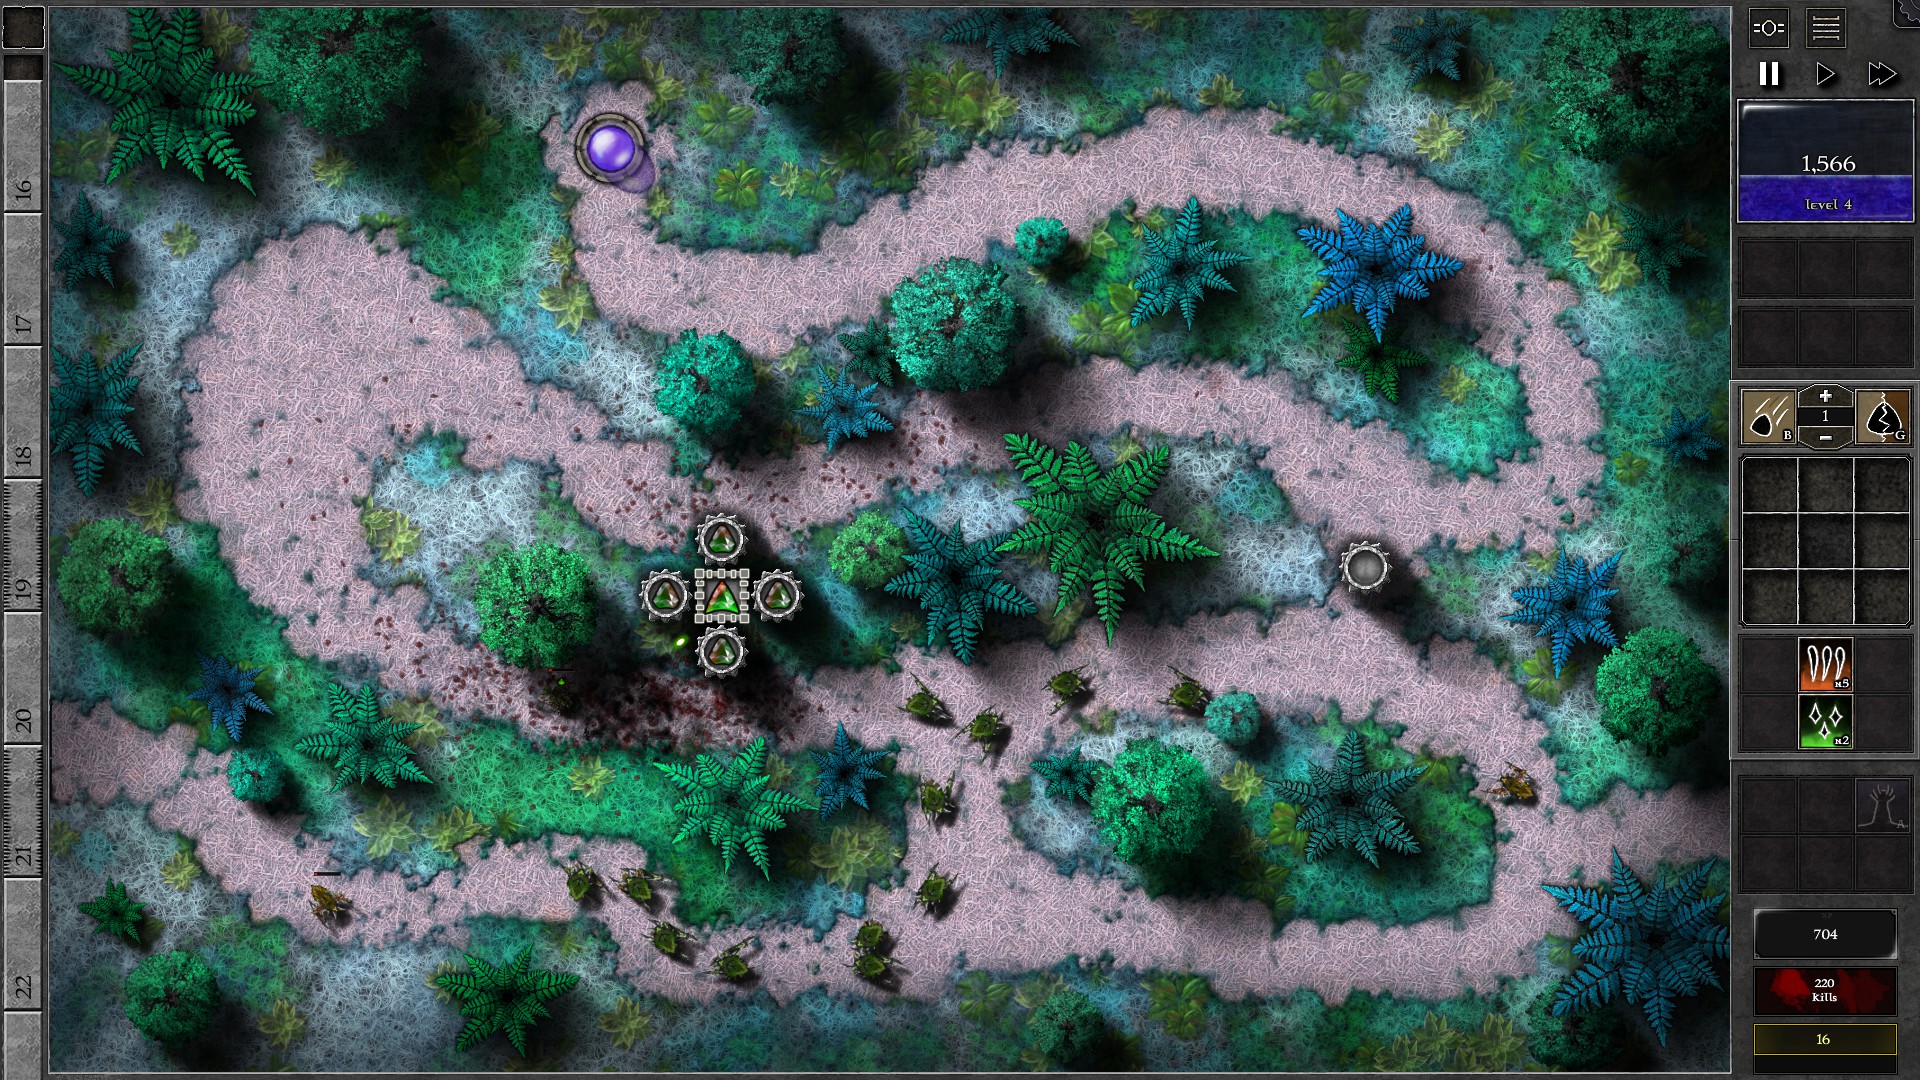
Start the field with an amplifier blocking the shortcut to your Orb, and 2 amplifiers around the Spiritforge tower. Insert g2 g/o gems into the 2 amplifiers supporting the tower. As you earn mana through the waves, build 2 more amplifiers around the tower and insert the same g2 g/o gems into the amplifiers. This should be doable around w12-15.
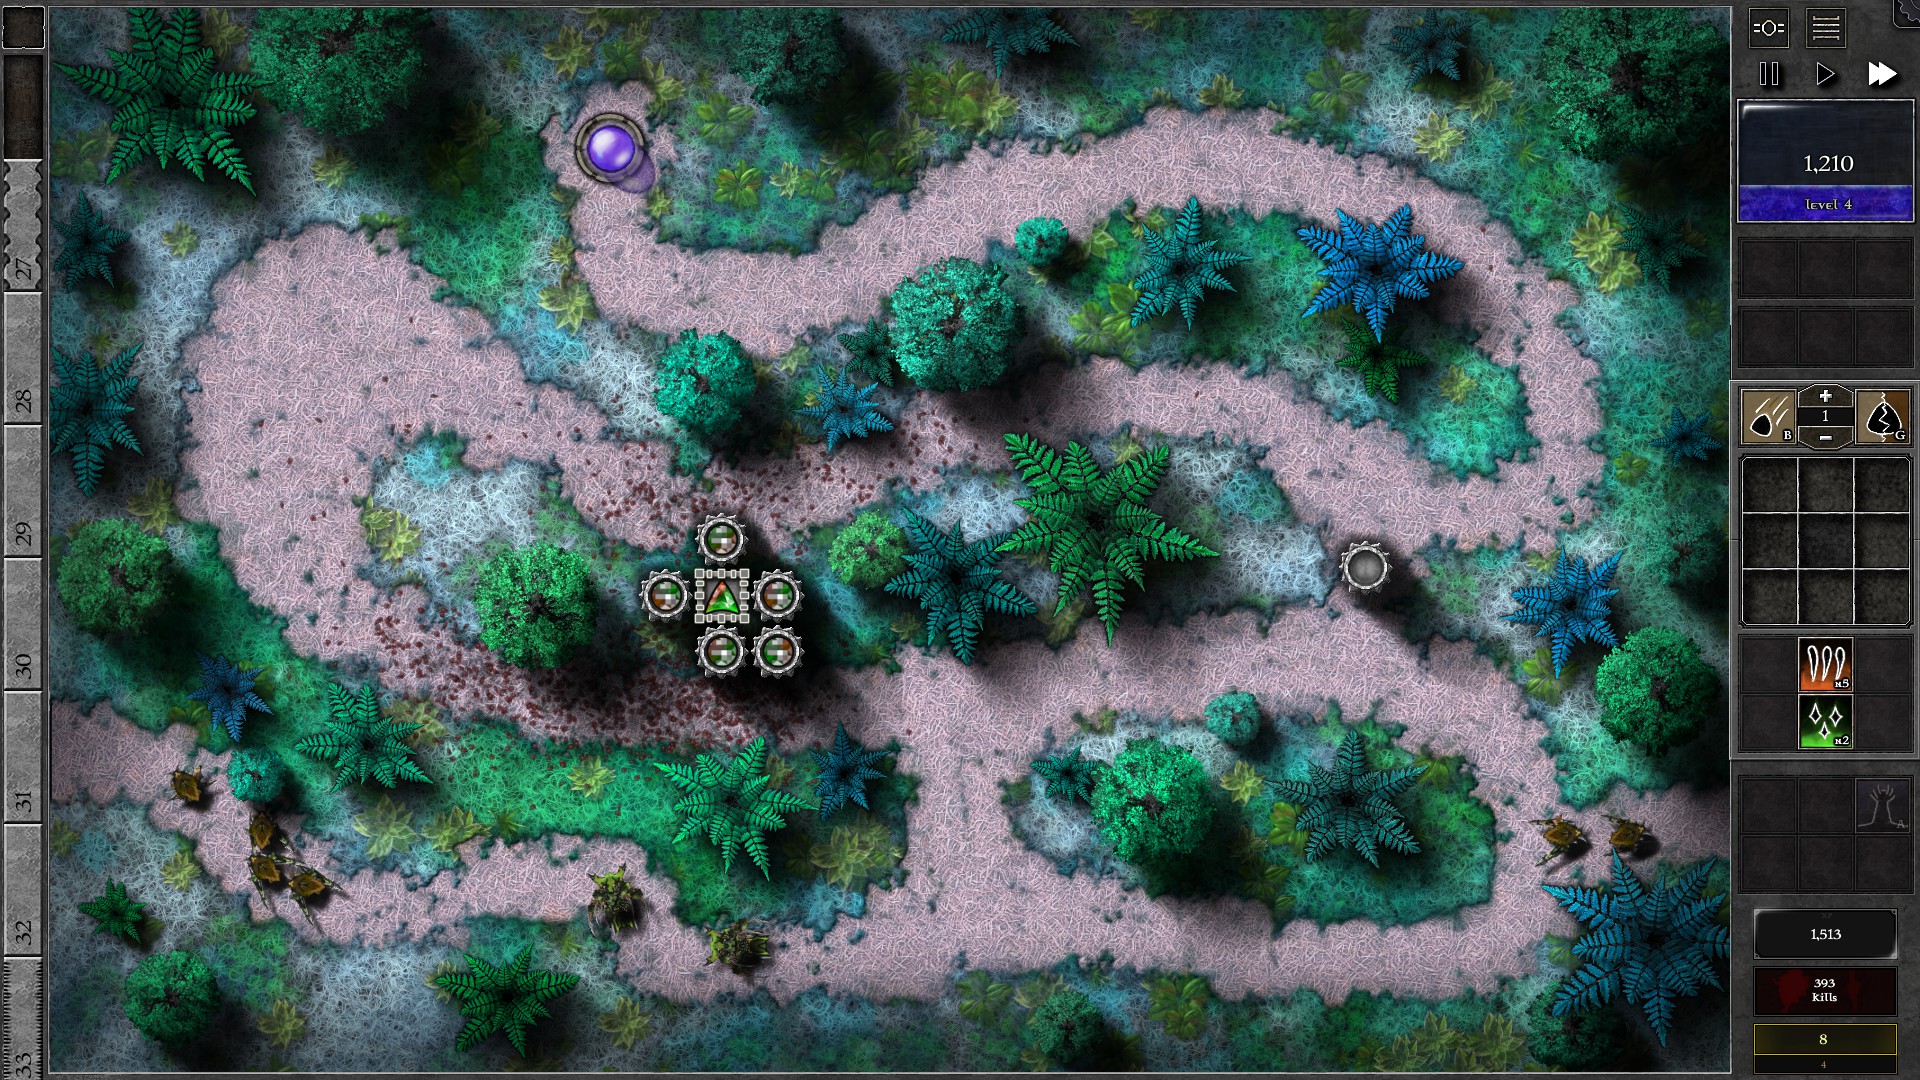
After you have 4 amplifiers, upgrade your 4 amplifier gems into g3 gems. Build a 5th amplifier around the tower, and insert another g2 g/o gem into it. Upgrade this gem to g4 as you collect mana. You should be around w26-27 when you have 4 g3 + 1 g4 supporting the Spiritforge tower. While you upgrade the amplifier gems, notice for the arrival of w25. Send w26 early immediately as w25 arrives.
WARNING: Some micromanagement is needed for the end of this field. Be prepared to click monsters.
Stop spending more mana as you should now start to foresee/face an annoying issue: the w25 and w27 giants will start to attract your tower’s attacks, causing most reavers and swarmlings to bypass your tower unharmed. As you notice larger groups of monsters go through the tower’s range, start clicking on the reavers and swarmlings to make your tower lock into firing at that monster (don’t click rapidly though, click on one, wait until you have enough damage to kill it or it’s out of range, then click the next one). The w25 giants have enhanced speed so you shouldn’t need to click too many monsters before they leave your tower range naturally.
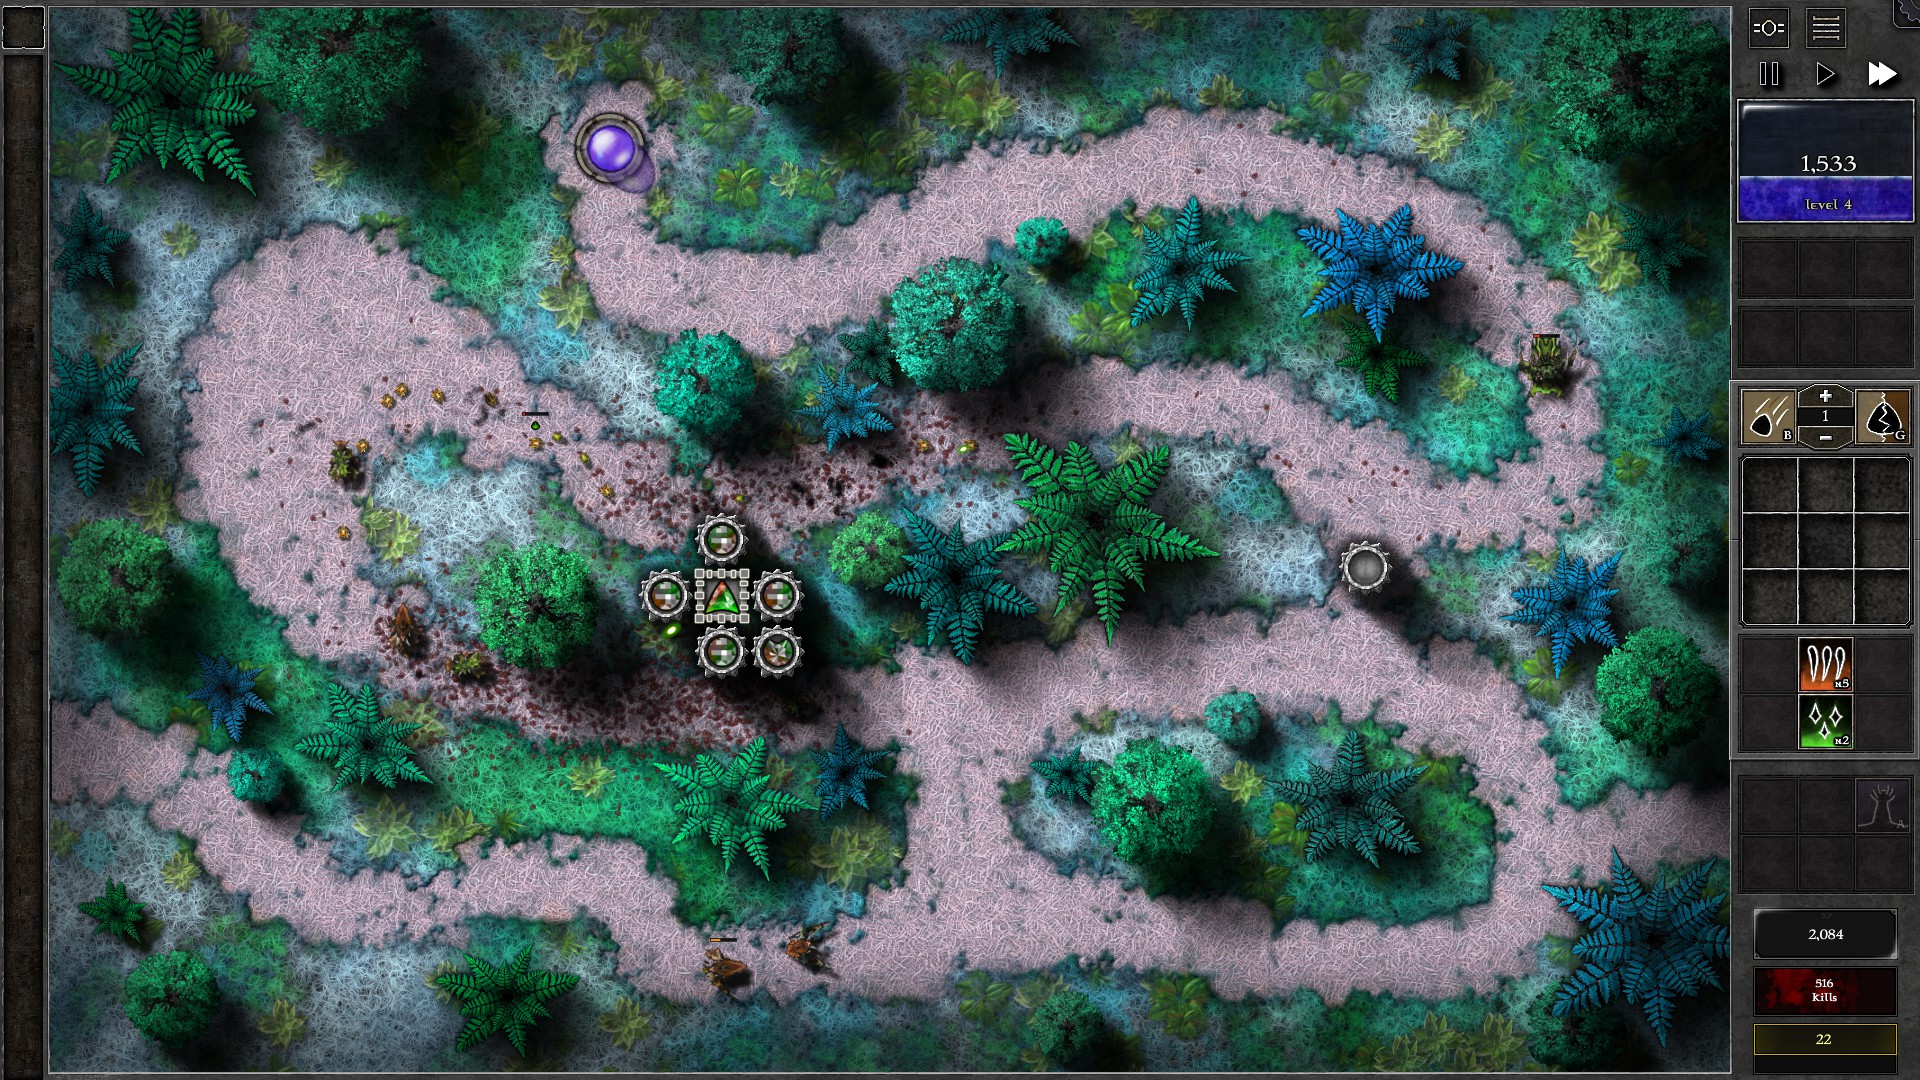
Let the giants be banished at least once while you focus on making the tower kill reavers and swarmlings. You will also likely need to banish quite a number of monsters as the w33 and w34 swarmlings enter the field, but the tower should eventually prevail if you actively prevent it from being distracted by the giants too much.
P.S. While probably NOT the intended way to beat this Trial as it involves using a (likely) bug, you can combine your gems with the Spiritforge tower gem to upgrade it. If you upgrade the gem like this you should have much less trouble killing through even the last waves.
052 – Field O2
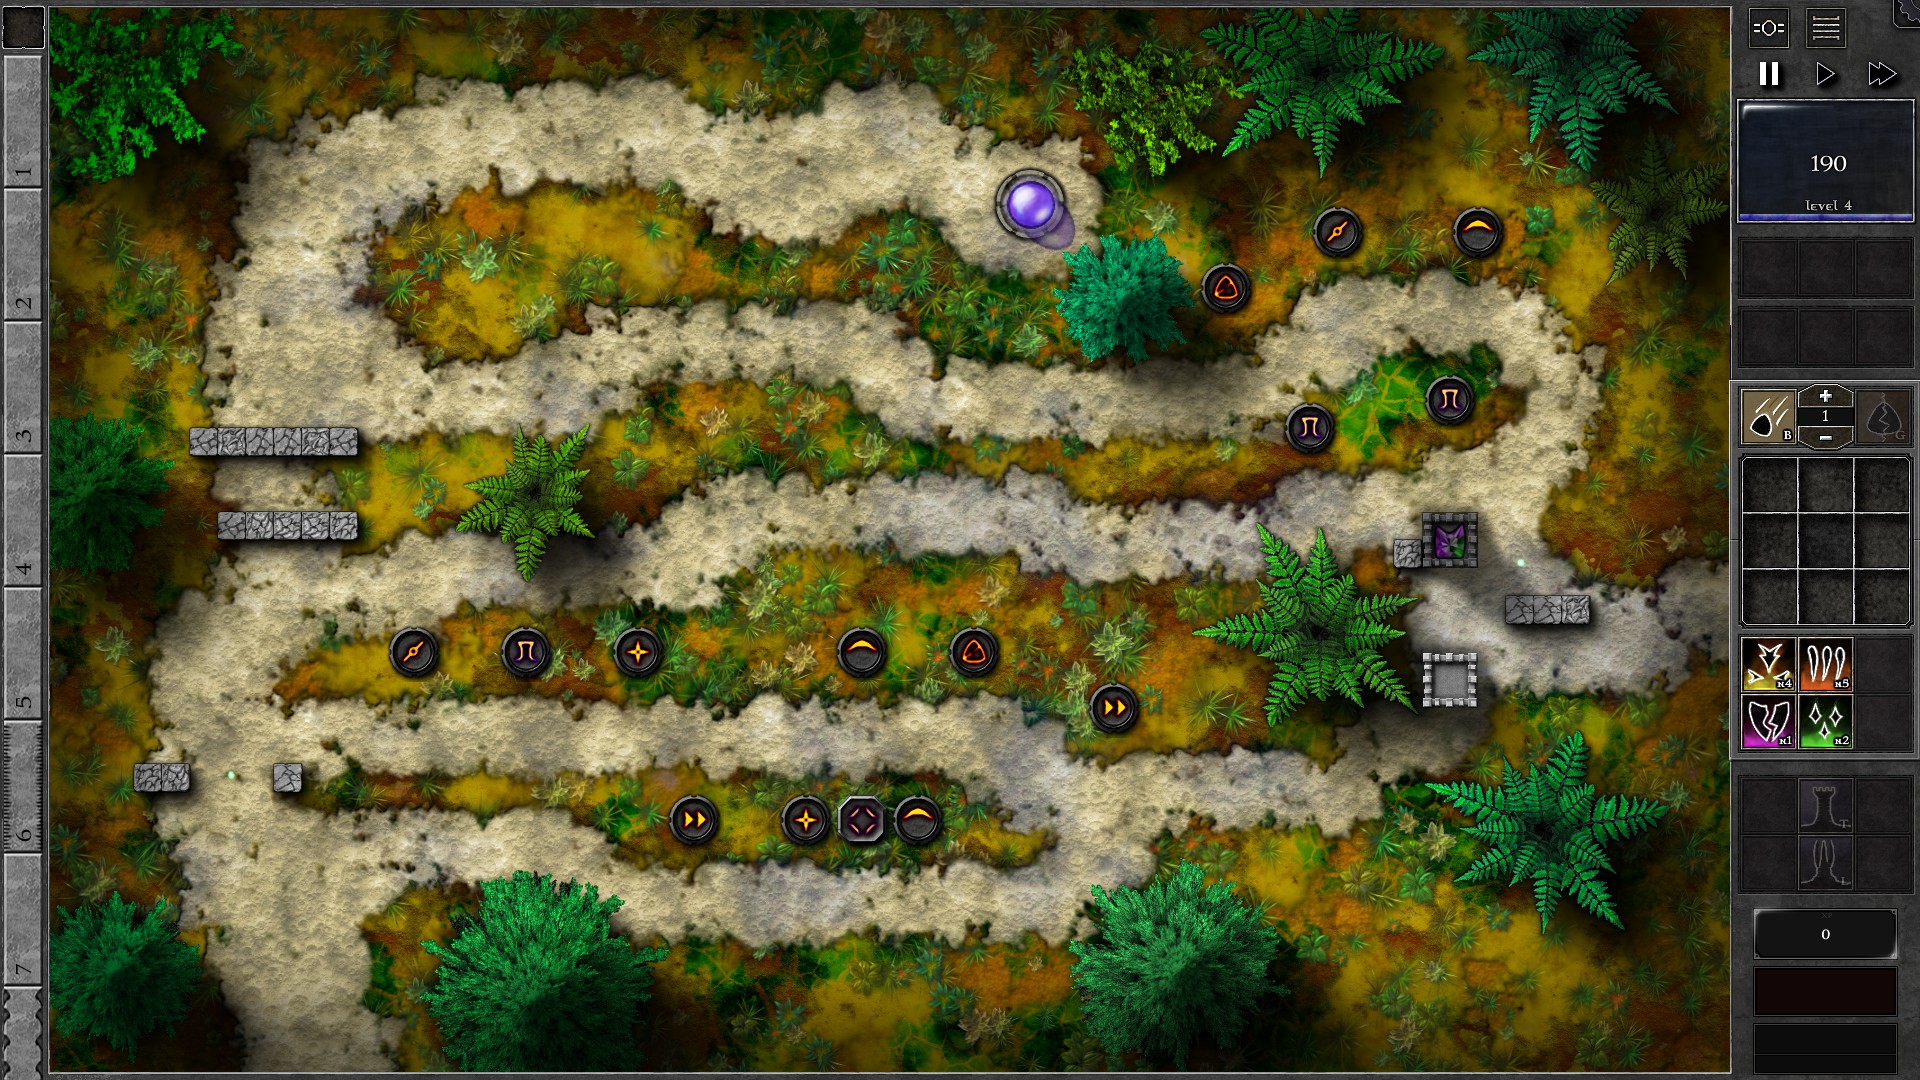
Setup the field as shown; use 2 g1 gems to destroy the walls at the bottom left and the right to open up paths, then build 2 towers and insert a g4 3p1g gem into 1 of the towers. The 2rd tower acts as a wall only. Quickly build another tower and insert a g2 p/g gem to take down the Shield Beacon just to the left of the bottom Discharging Beacon (set targeting to “Structures”). The g4 gem should fight through the first 10 waves of monsters with a few occasional banishments (most likely during w6 swarmlings).
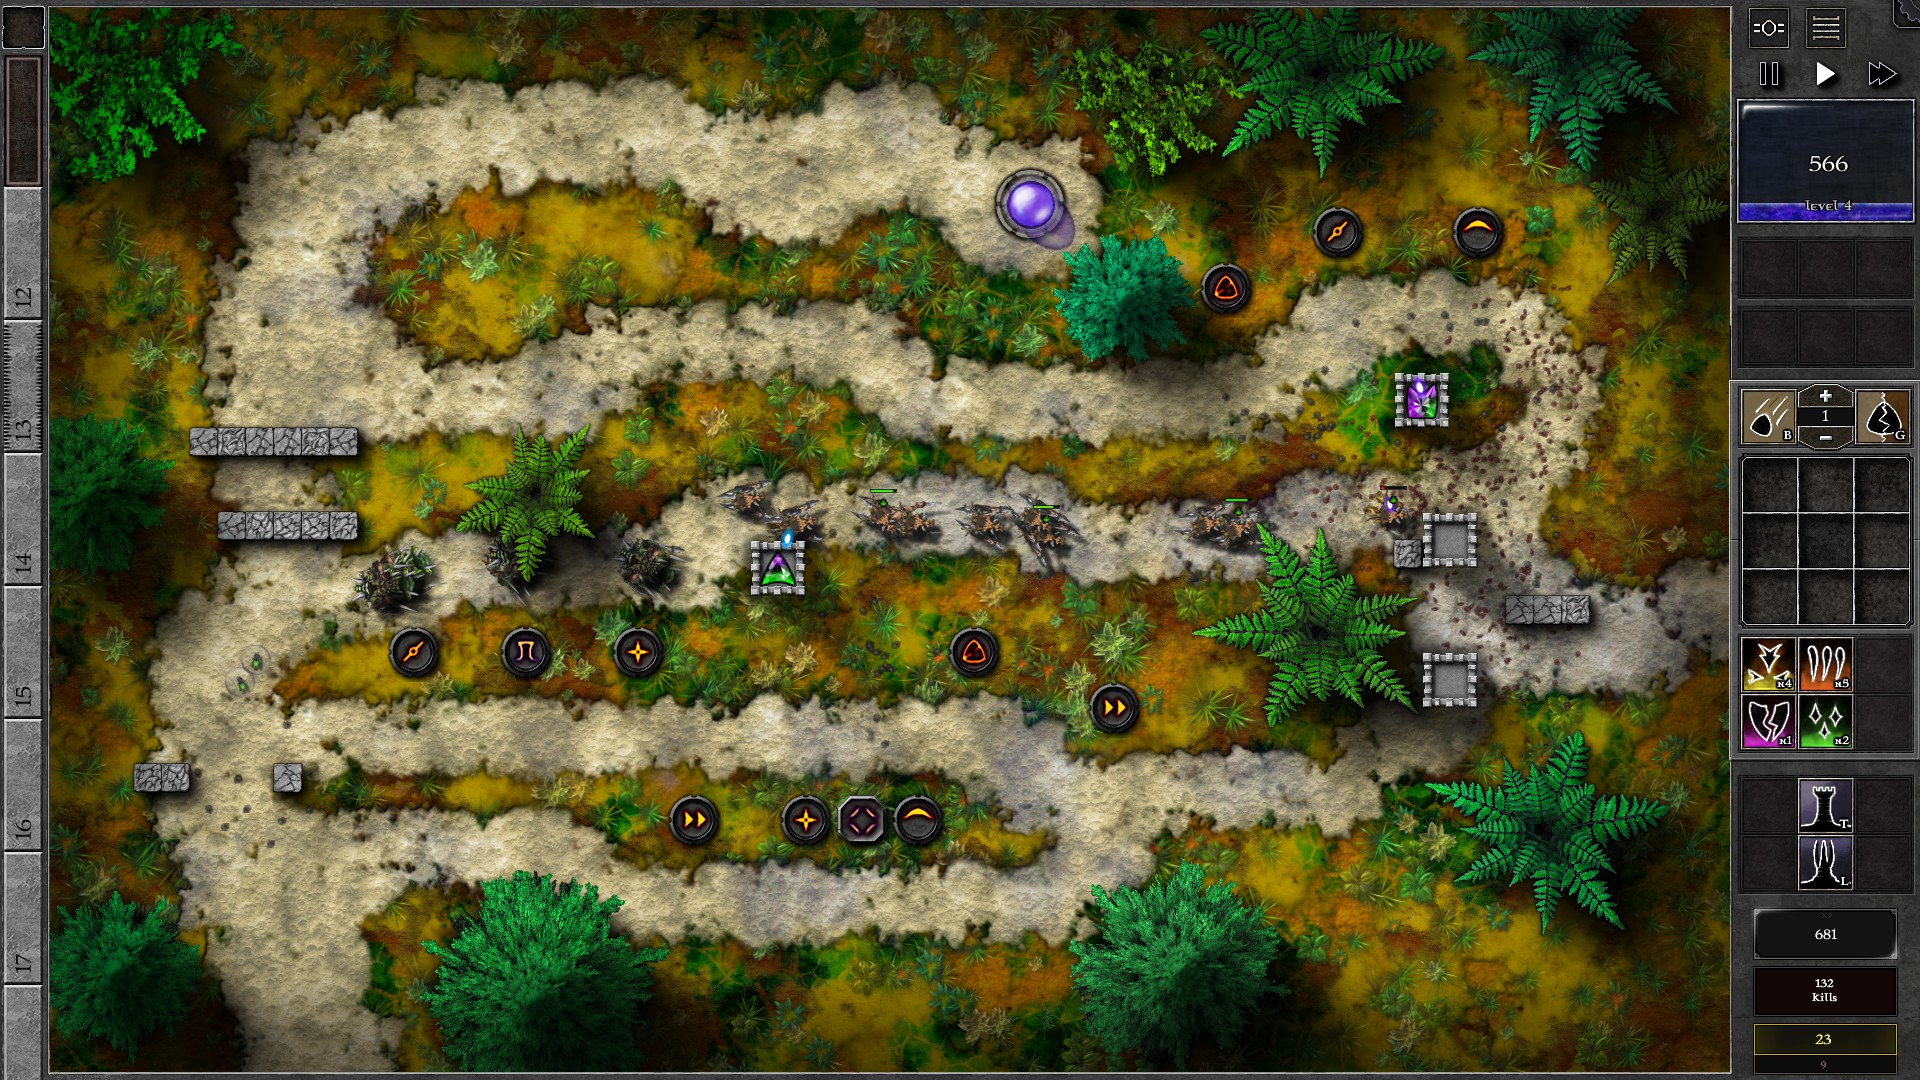
At around w10 3 Beacons should be gone: the Shield Beacon from the g2 p/g gem, and the 2 Static Beacons just above your g4 tower. Build a tower where the Static Beacons were and move the g4 gem closer to the right entrance to this new tower to take advantage of a better path coverage for your gem. At the same time, upgrade the g2 gem to g3 when you are safe from banishments and move it to where the g4 gem was and set to target “Least HP”.
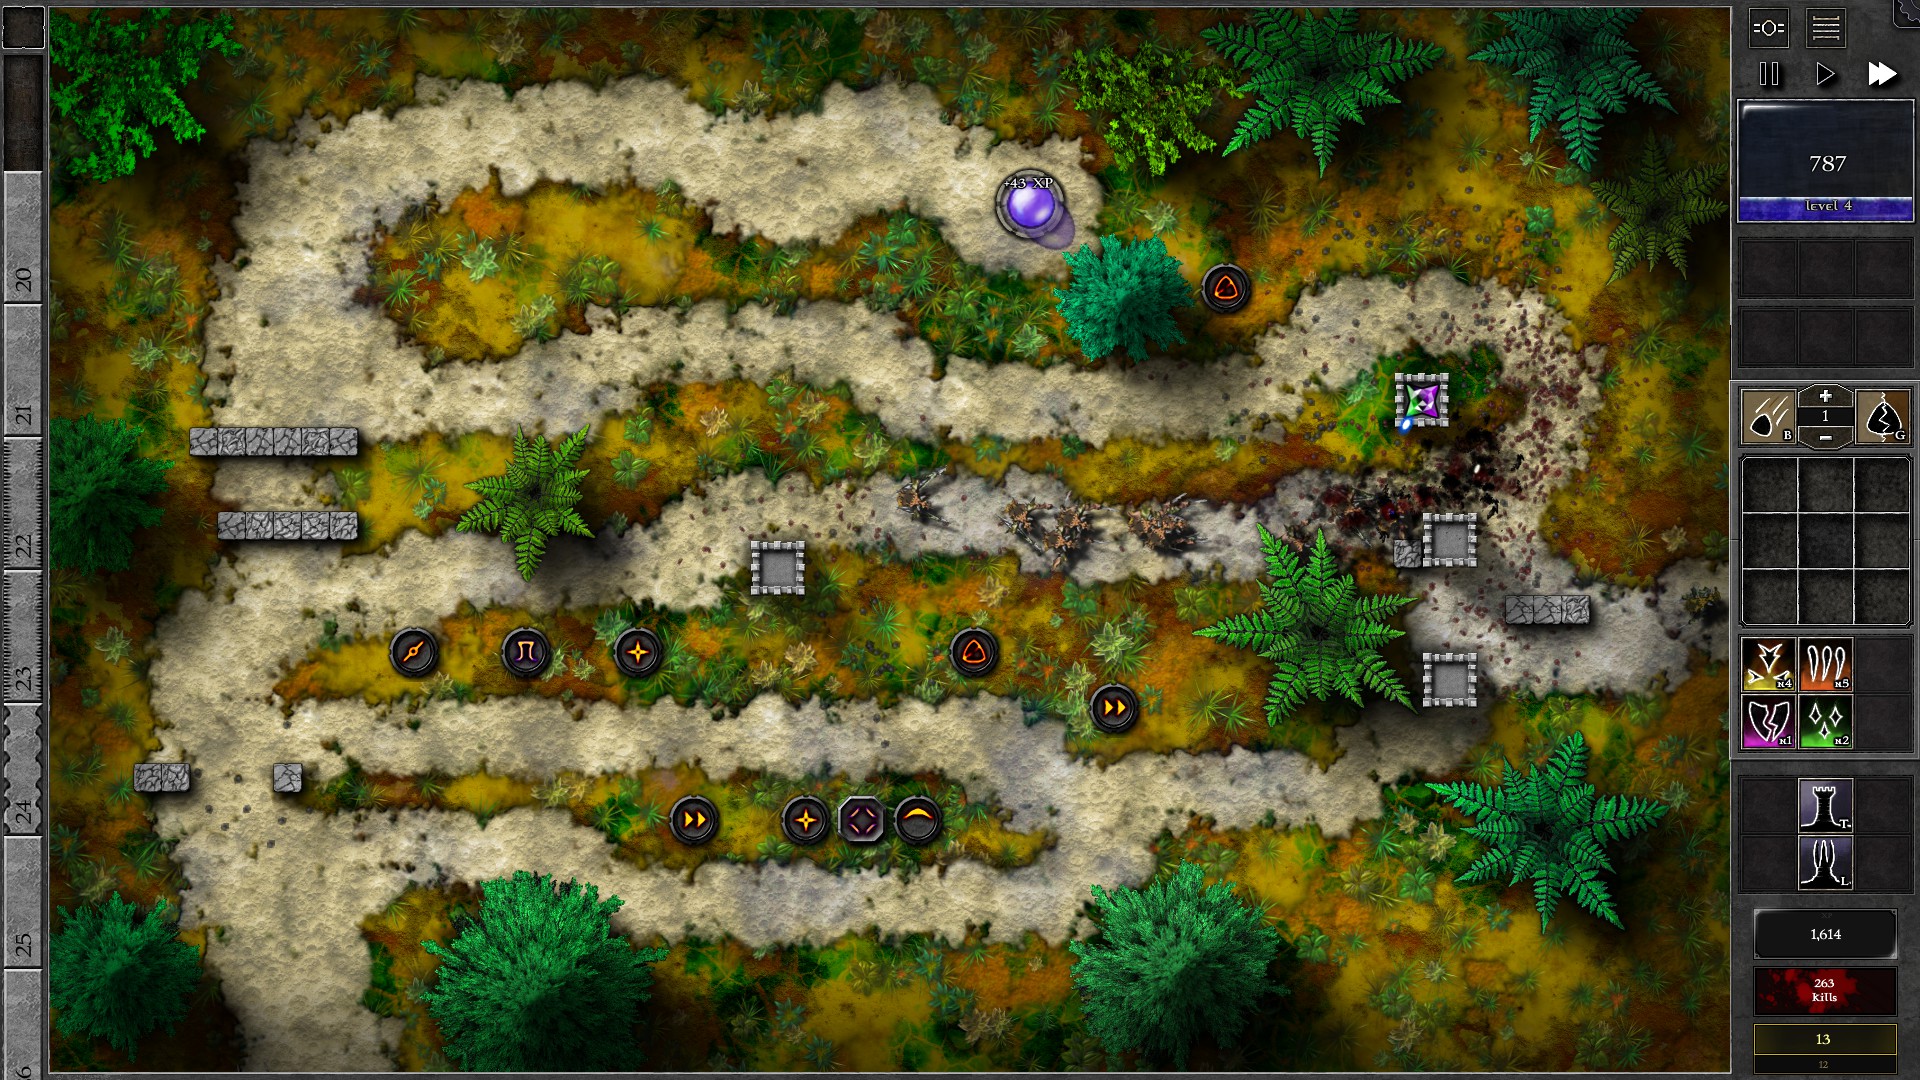
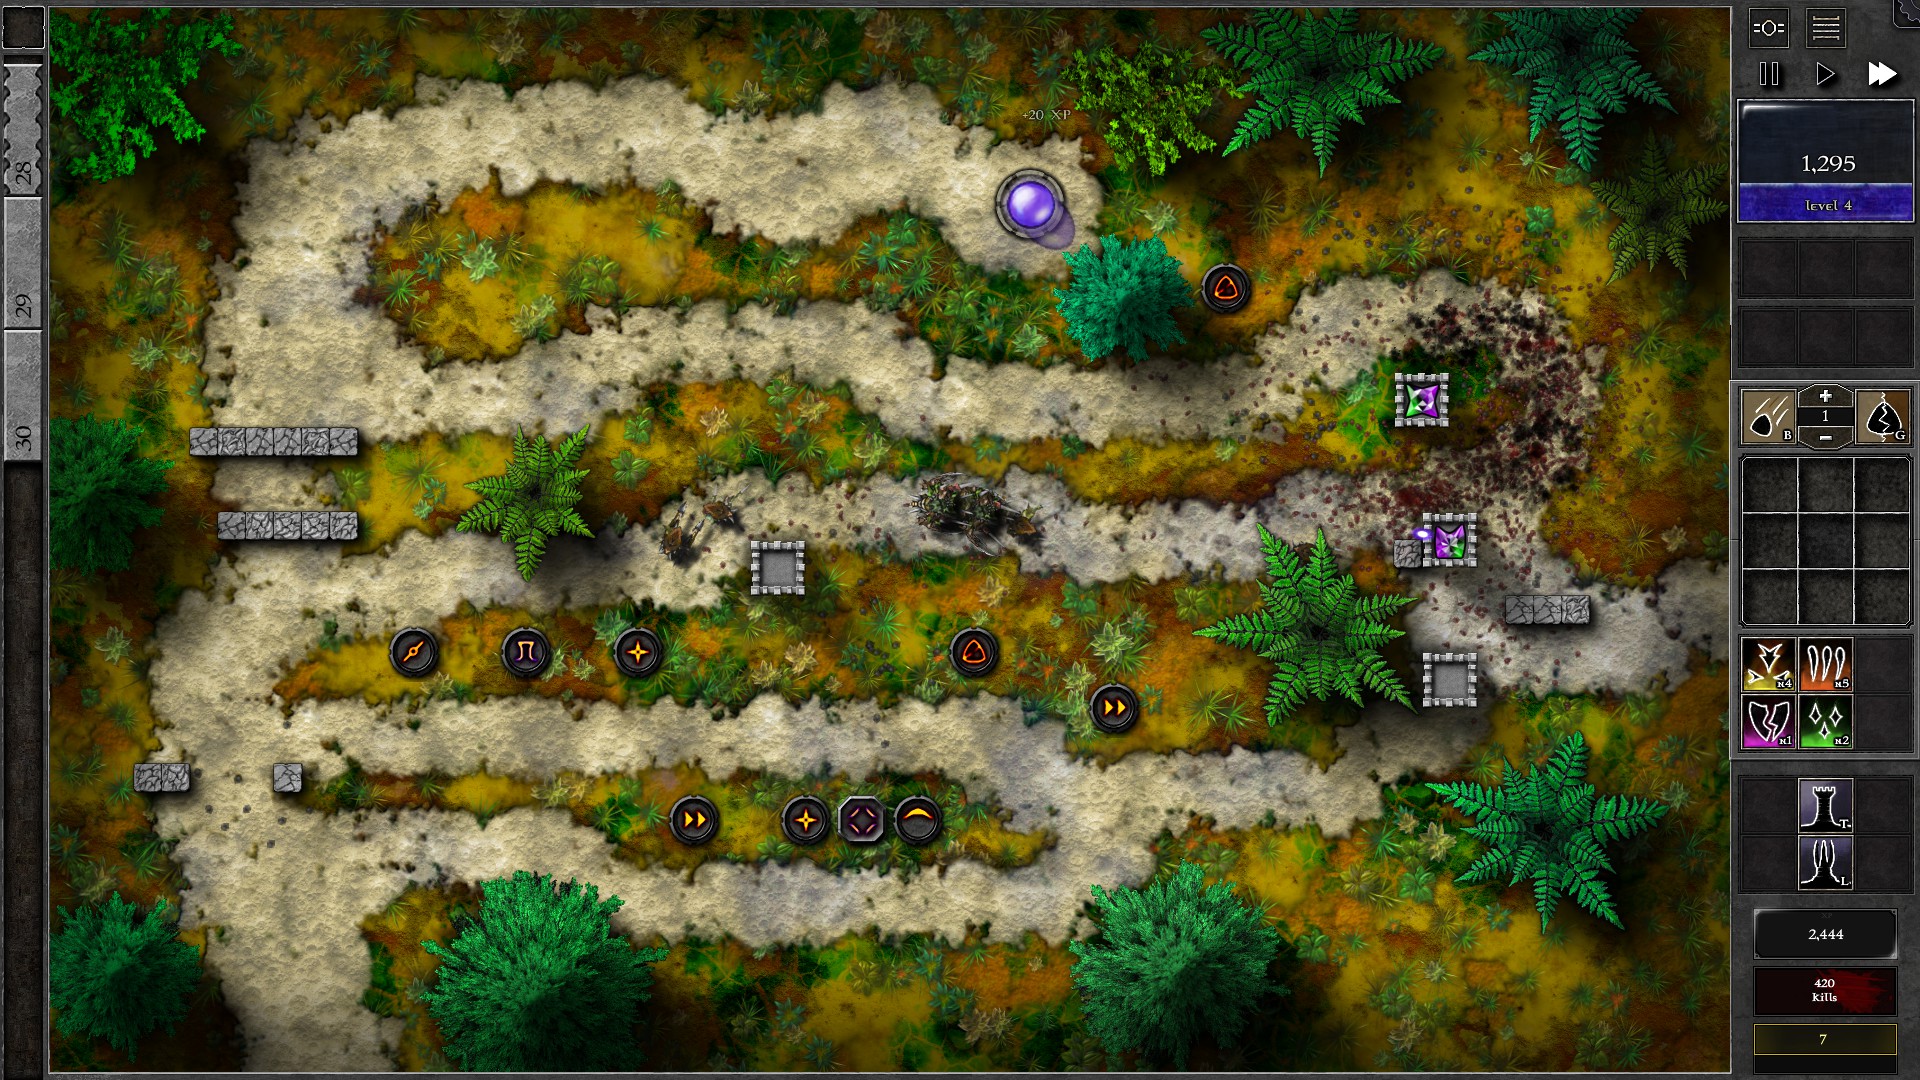
Now, whenever your g4 gem is not busy killing monsters, it should fire at the Shield Beacon above it; you’ll want to destroy this Beacon ASAP to prevent it from disrupting your defenses. At around w16 the Shield Beacon should be gone, and you should upgrade the g3 gem to g4 and optionally combine the g4 gems into a g5.
Finally, either upgrade a g4 gem to g5 or create and insert into tower another g4 3p1g gem (depends on whether you combined the g4 gems at w16) before w26 and you should have no problems dealing with the remaining monsters.
053 – Field O3

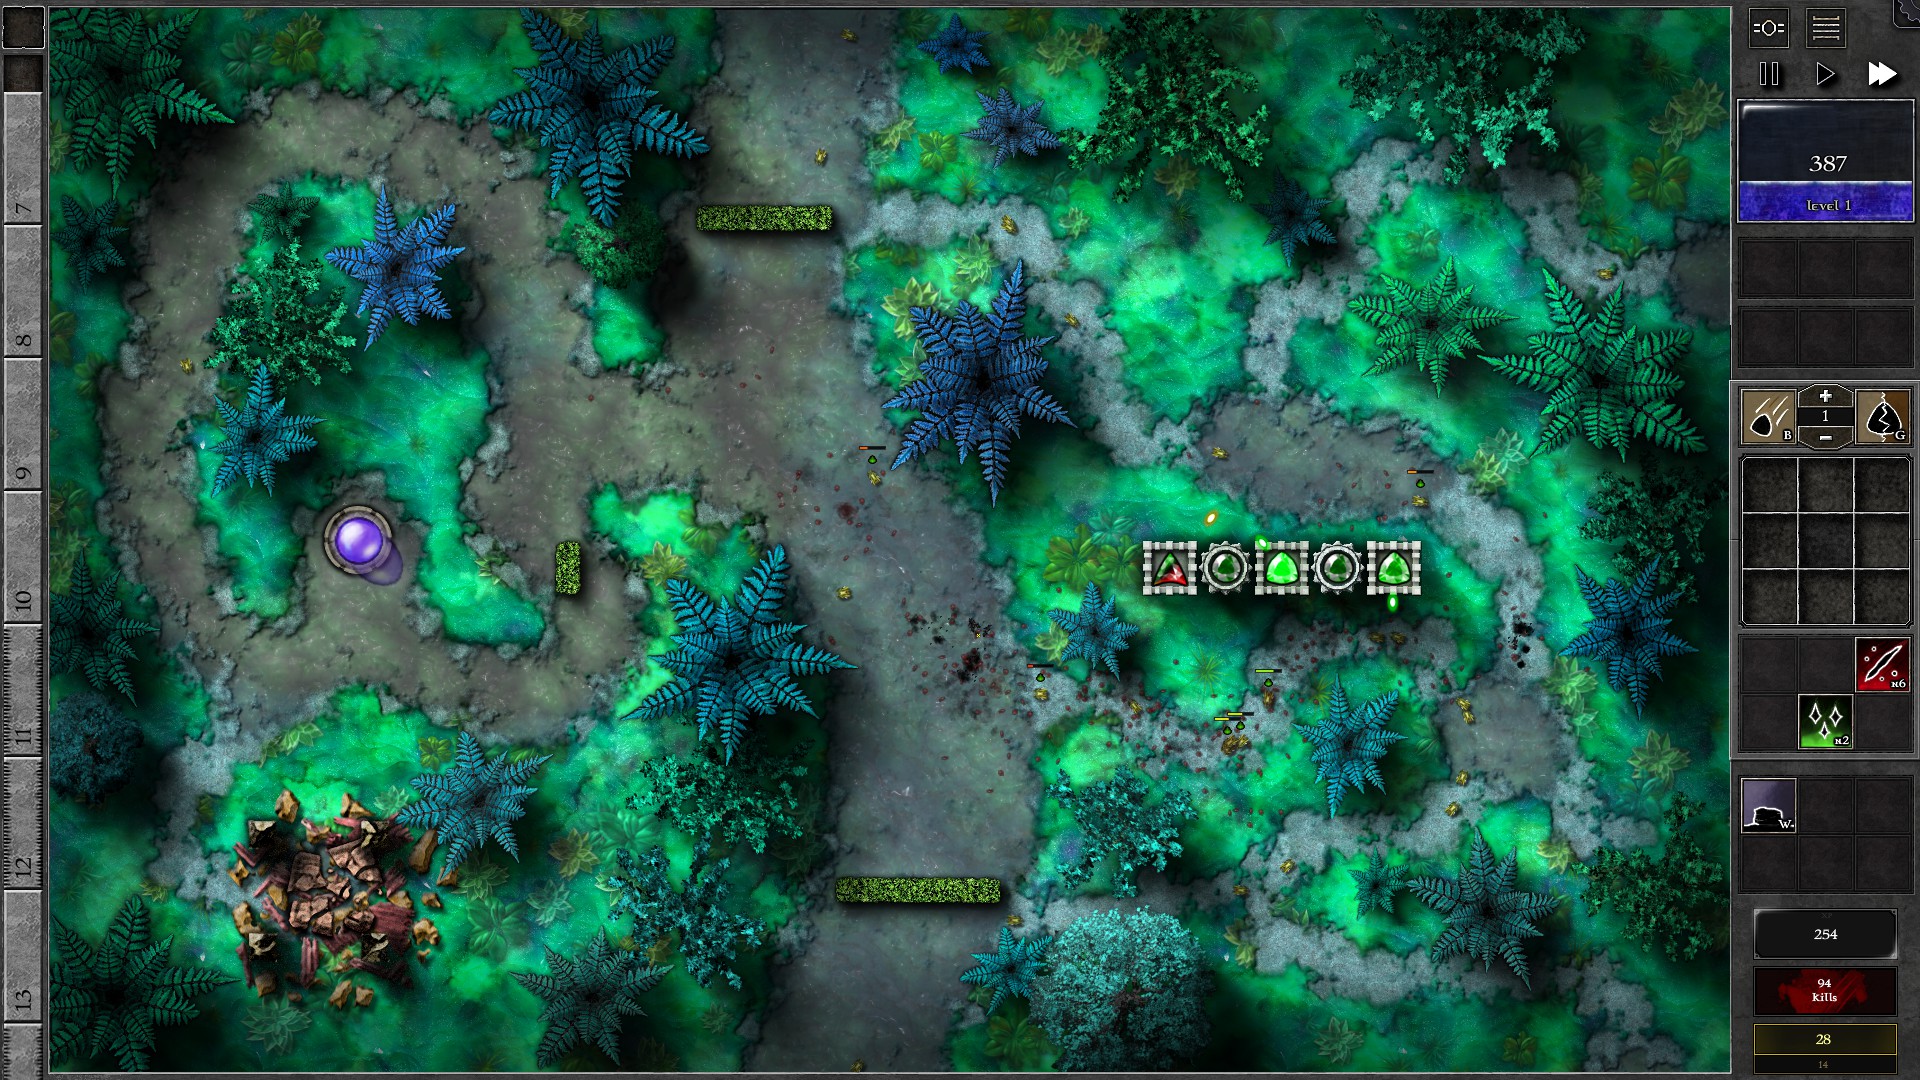
Start the field as shown with walls and 5 g1 green gems inserted into towers and amplifiers. Keep the leftmost tower gem in “Nearest to Orb” targeting and change the other 2 towers to target “Random”. At around w3-4, create a g1 red gem and combine with the leftmost tower for a g2 r/g gem, then upgrade it to g3 before w10.
NOTE: Whenever you try to spend mana to upgrade your gem, take note of monsters that have leaked through your defenses which is a rather frequent event in the earlier waves, even though some might be killed by poison before they actually reach your Orb.
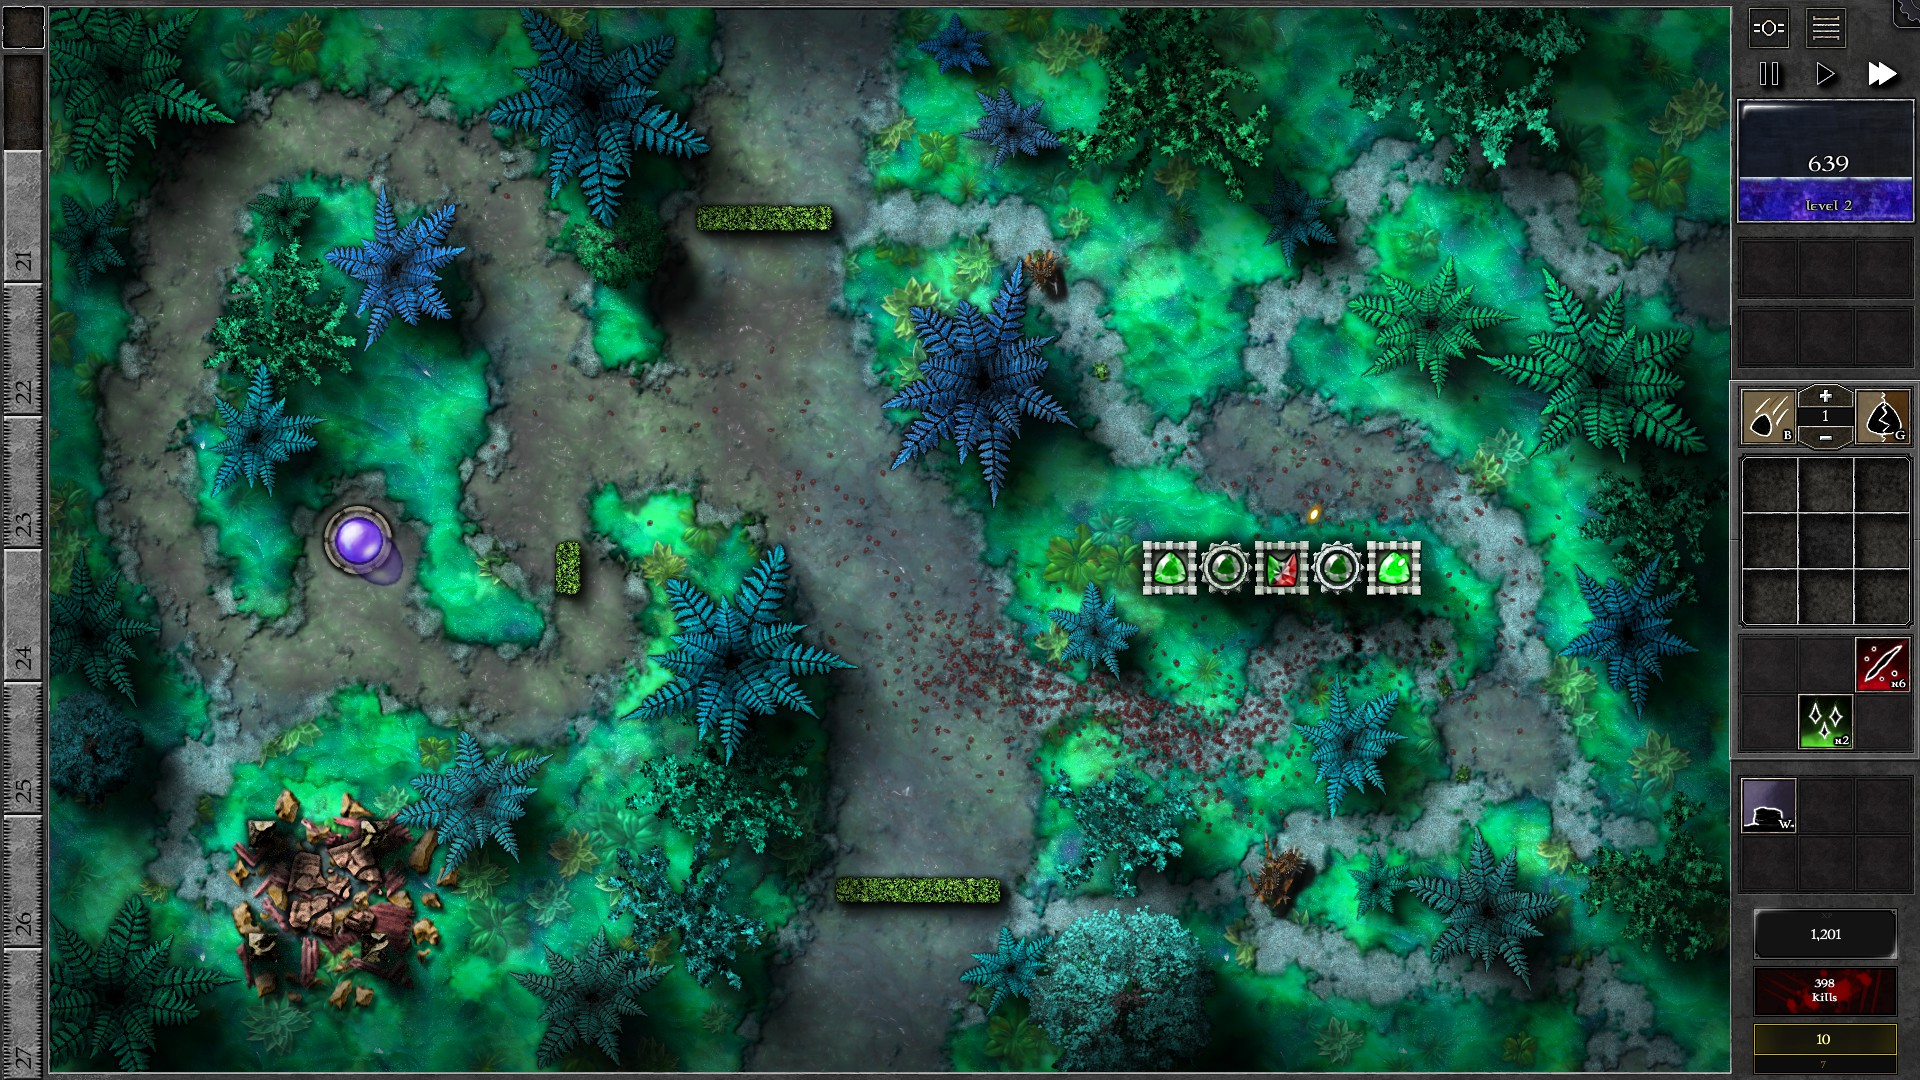
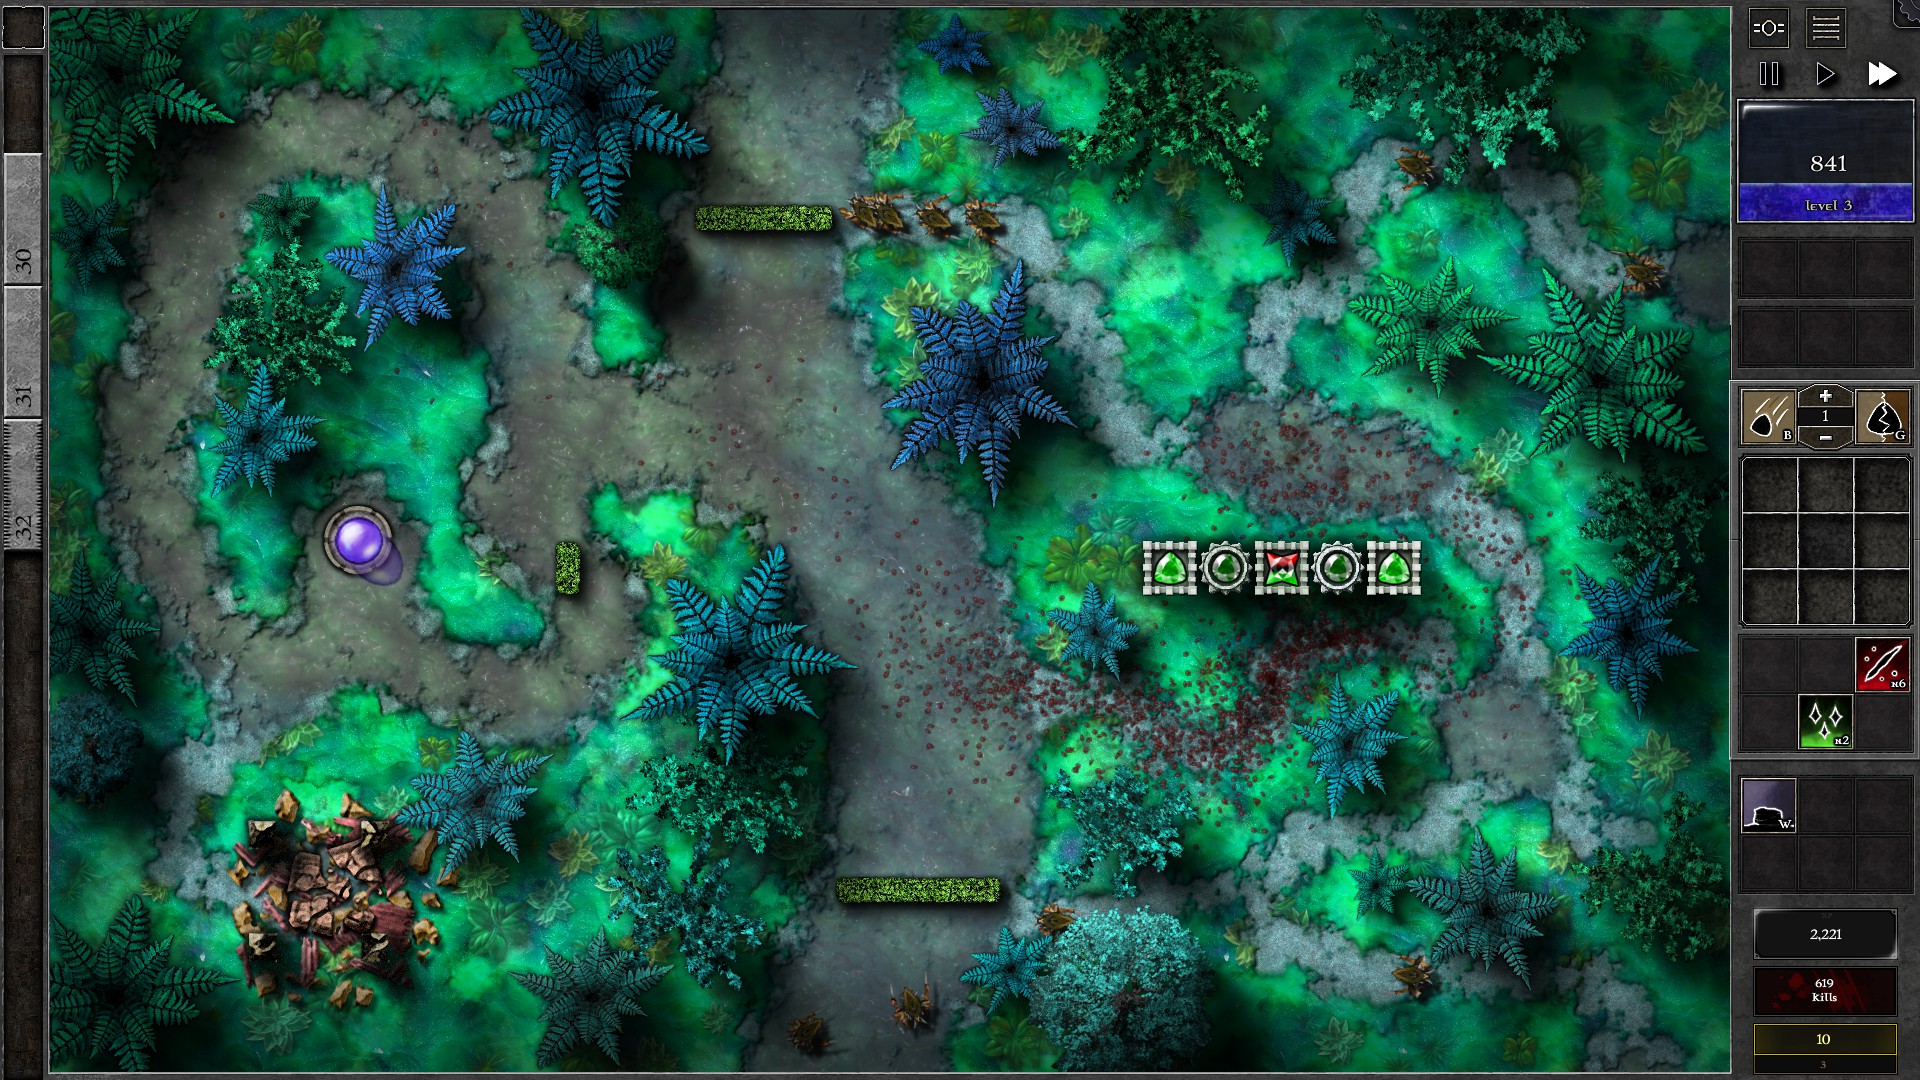
There will be more swarmling waves incoming which puts in a constant pressure to your defenses. You should have enough mana to upgrade your g3 gem to g4 at w15-16, but make sure you have a 150-300 mana buffer before you upgrade as you will leak monsters while your new g4 gem’s resocket. In addition, use this opportunity to swap the g4 gem with the g1 gem in the middle tower right after upgrading so that your g4 gem is amped by 2 gems.
Upgrade your r/g gem to g5 before w26 and it should take care of the remaining waves. Note that if you banished too much monsters due to the more frequent leaks you may not make it through the last waves without the g5 gem upgrade due to the heavy armor the late wave monsters have.
054 – Field O4
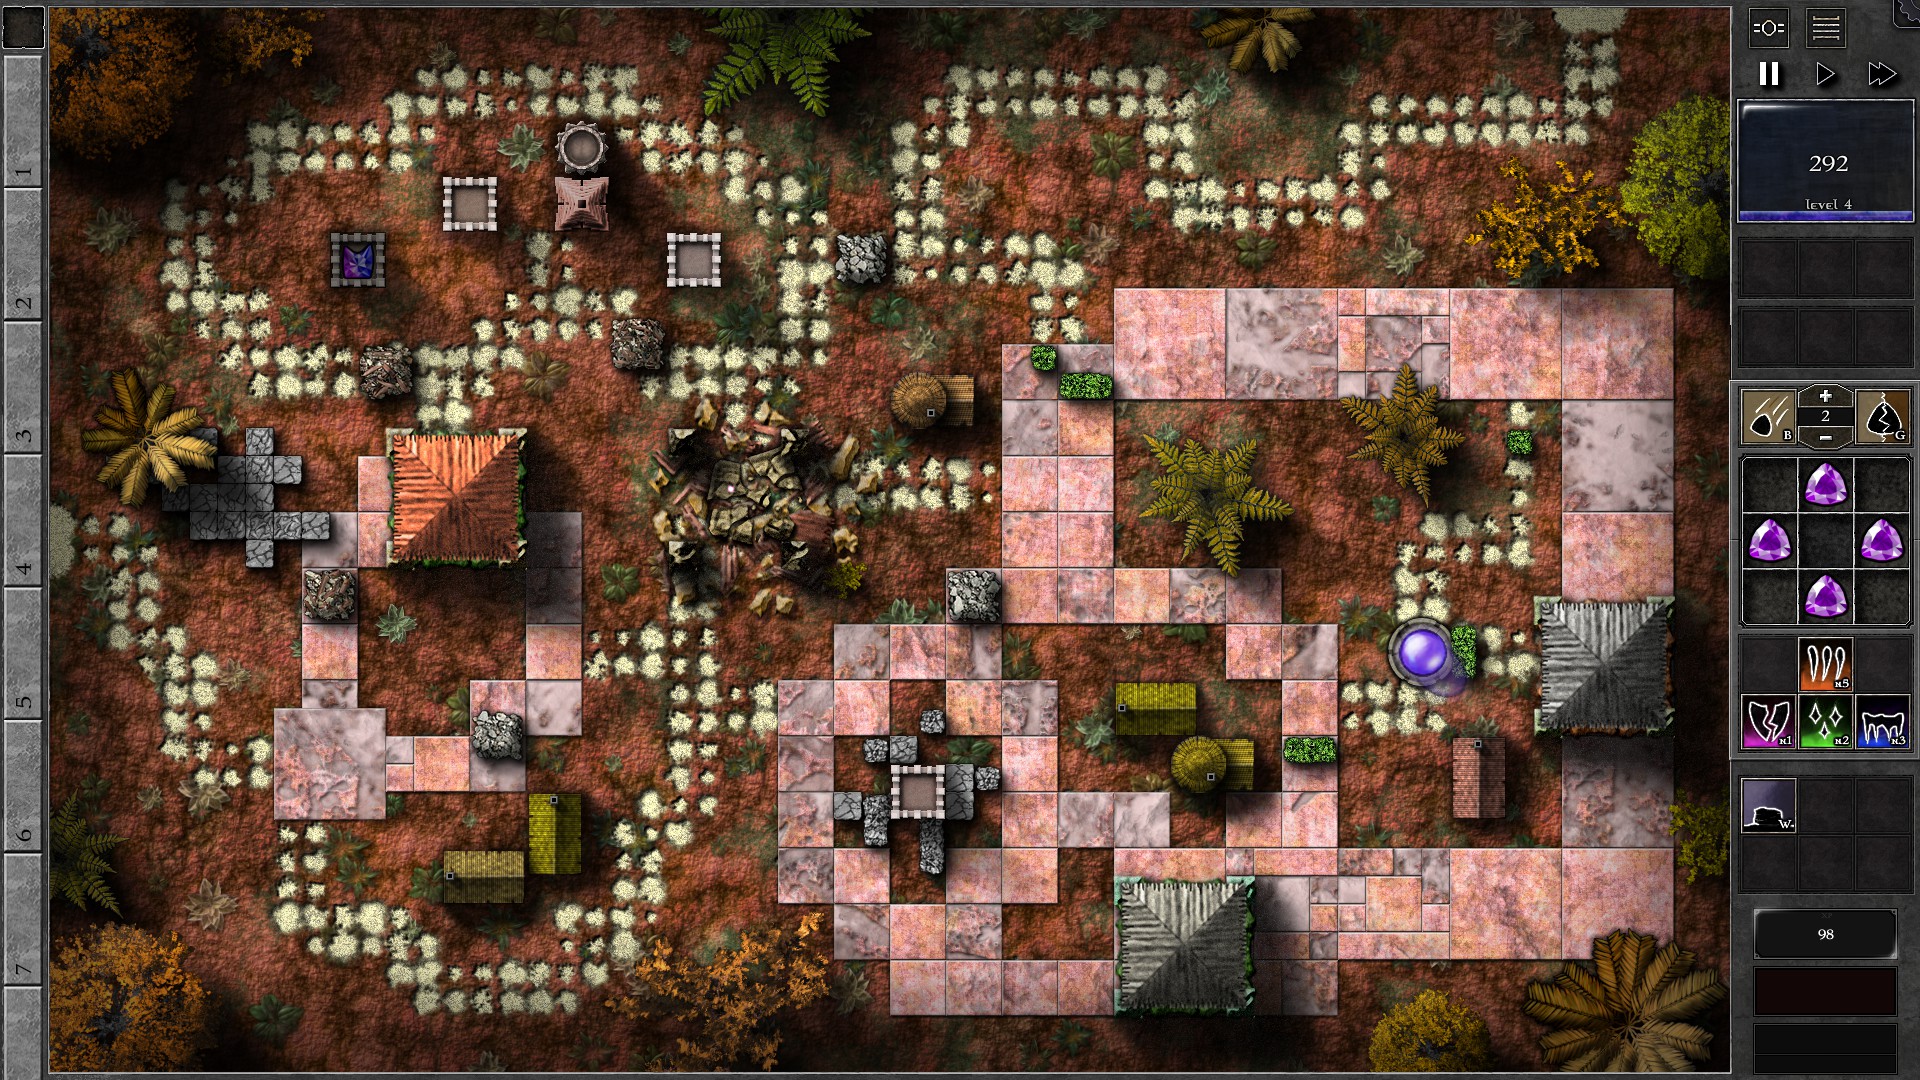
This is a tricky Trial that requires you to figure out how to start the field. Create the walls (Shrub) as shown. Now you need to destroy the 1000 HP 10 Armor Monster Nest in the middle of the field using Gem Bombs (make sure you don’t miss). Combine 2 of the g2 p gems given at start into a g3, then combine with a g3 b into a g4 p/b. Throw it into the Monster Nest and it should destroy the Nest in one go.
After destroying the Monster Nest you should have 2 g2 p and 4 g1 p gems left. Create a g3 b gem and use 2 g2 p gems to combine into a g4 p/b gem. Set the gem to target “Structures” and you are now ready to start the field.
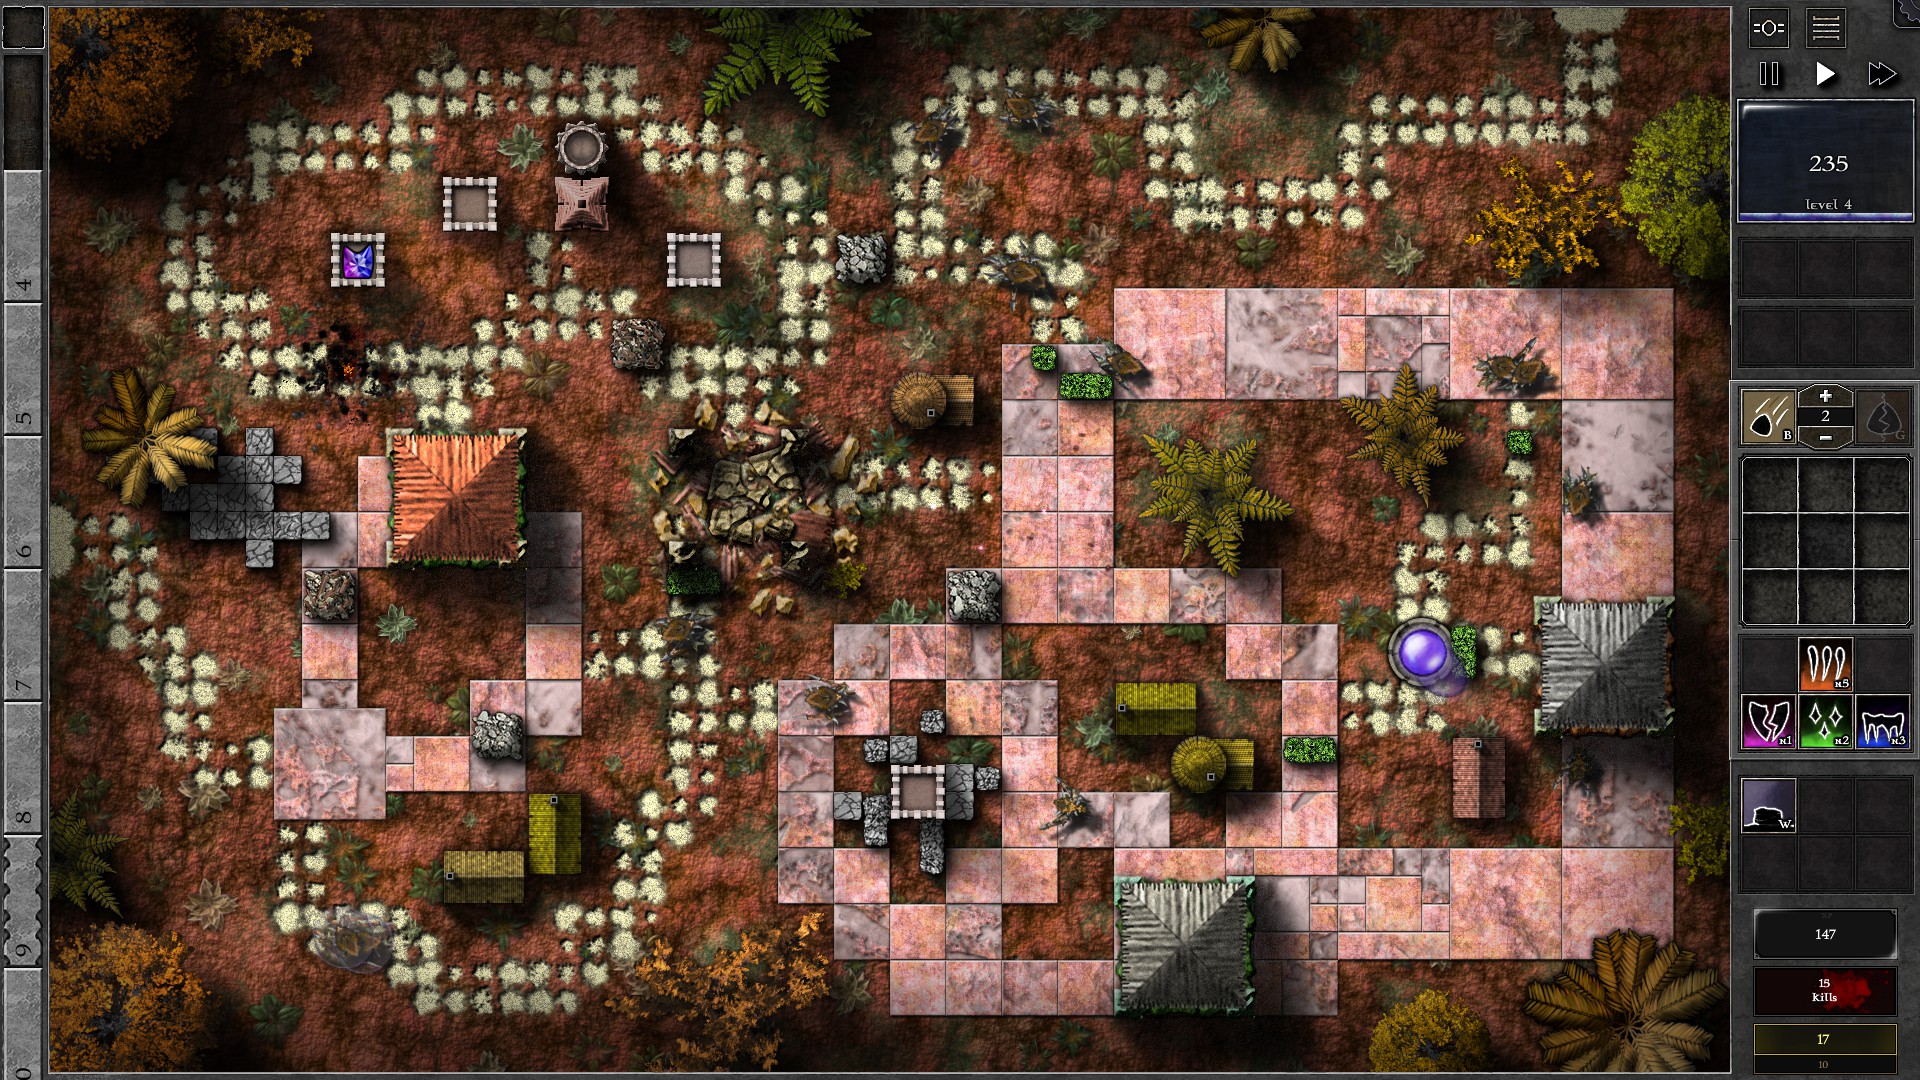
The gem wasps from bombing the nest should hold off some of the monsters in w1. As more monsters go through, throw the 4 g1 p gems as gem bombs on the incoming monsters. Make sure that you bomb one monster at a time.
The g4 gem will fire at the barricade below it. Once the g4 gem destroys the barricade, immediately block the shortcut to your Orb through the destroyed nest with walls, which forces monsters to go through your g4 p/b gem. Change the g4 gem’s priority to “Nearest to Orb”. You may have some leakage of at most 2-4 monsters which should be bearable.
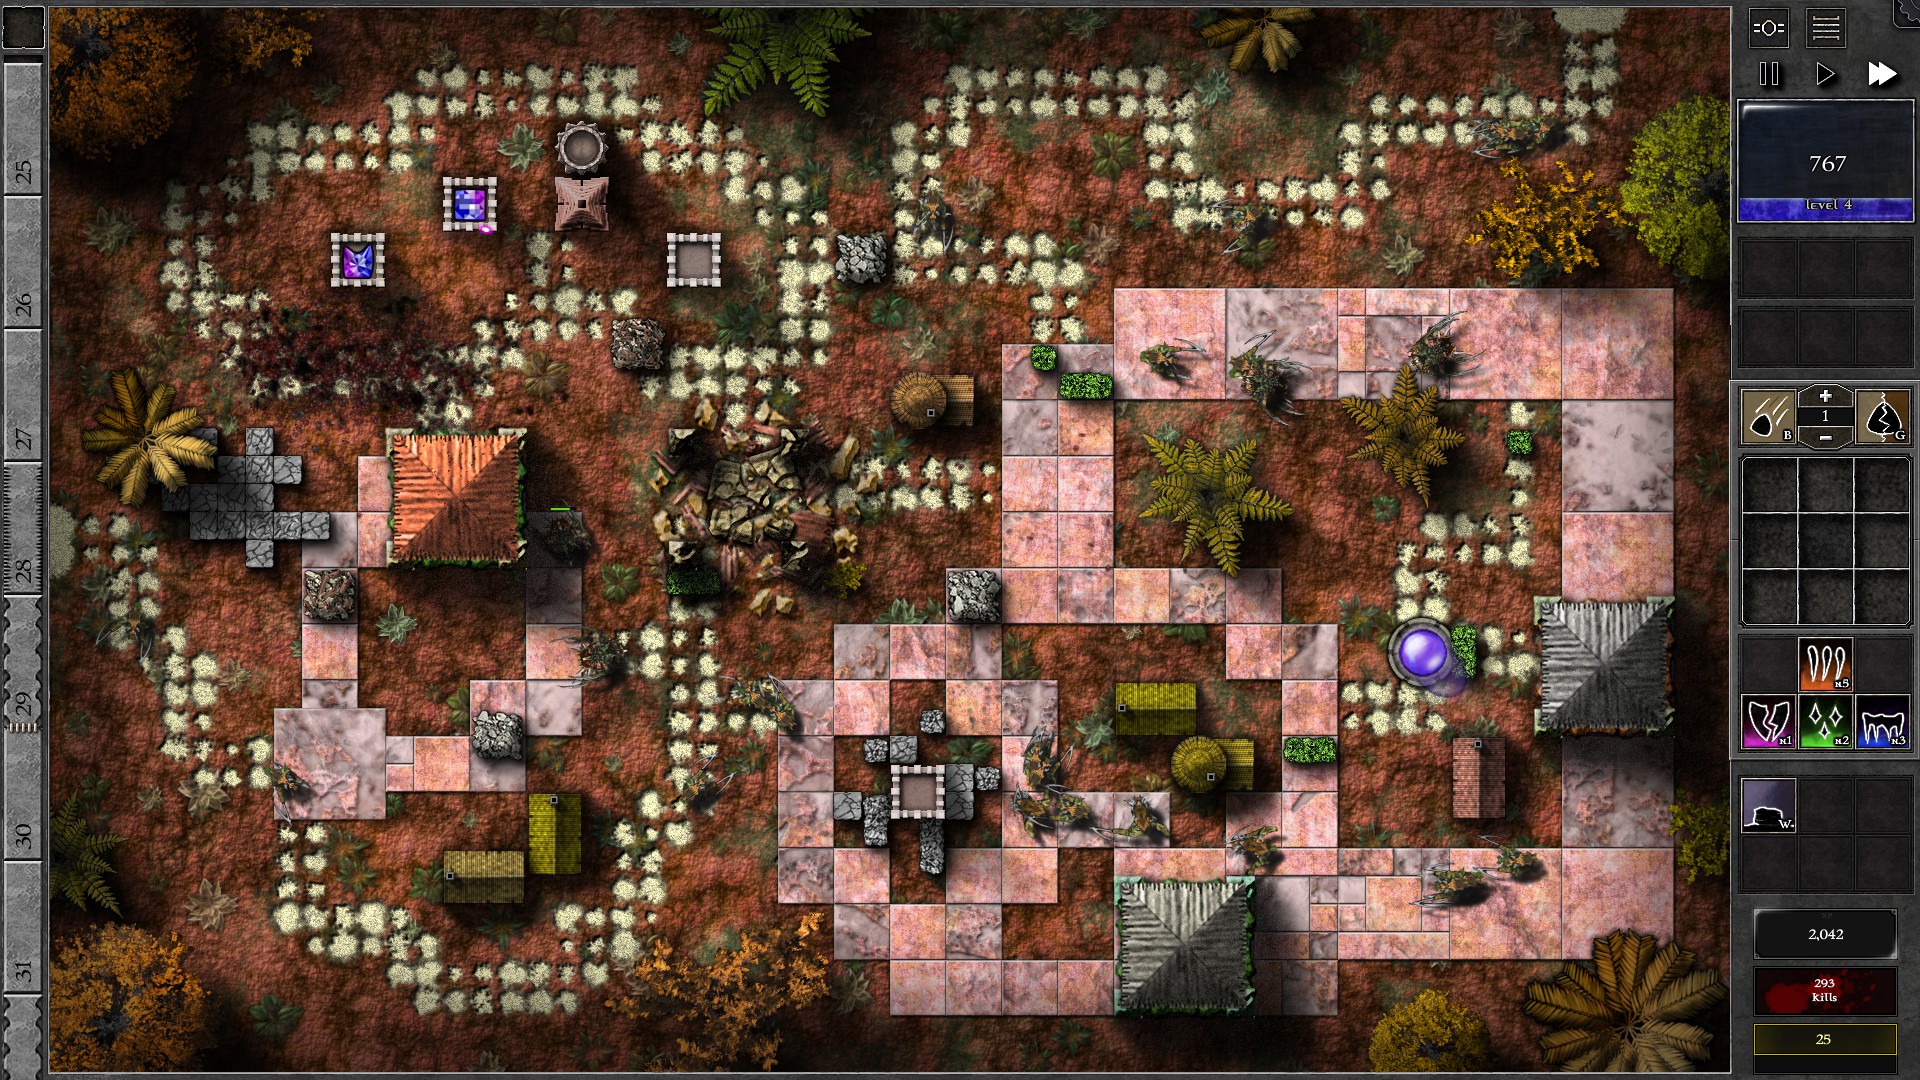
As you gain enough mana, create a g2 p/b gem and insert it into the tower at the left of the pylon. This gem should fire at the pylon and provide some extra firepower. The setup should now be able to fend off the remaining monsters (upgrade the g2 gem as you have enough mana).
055 – Field P1
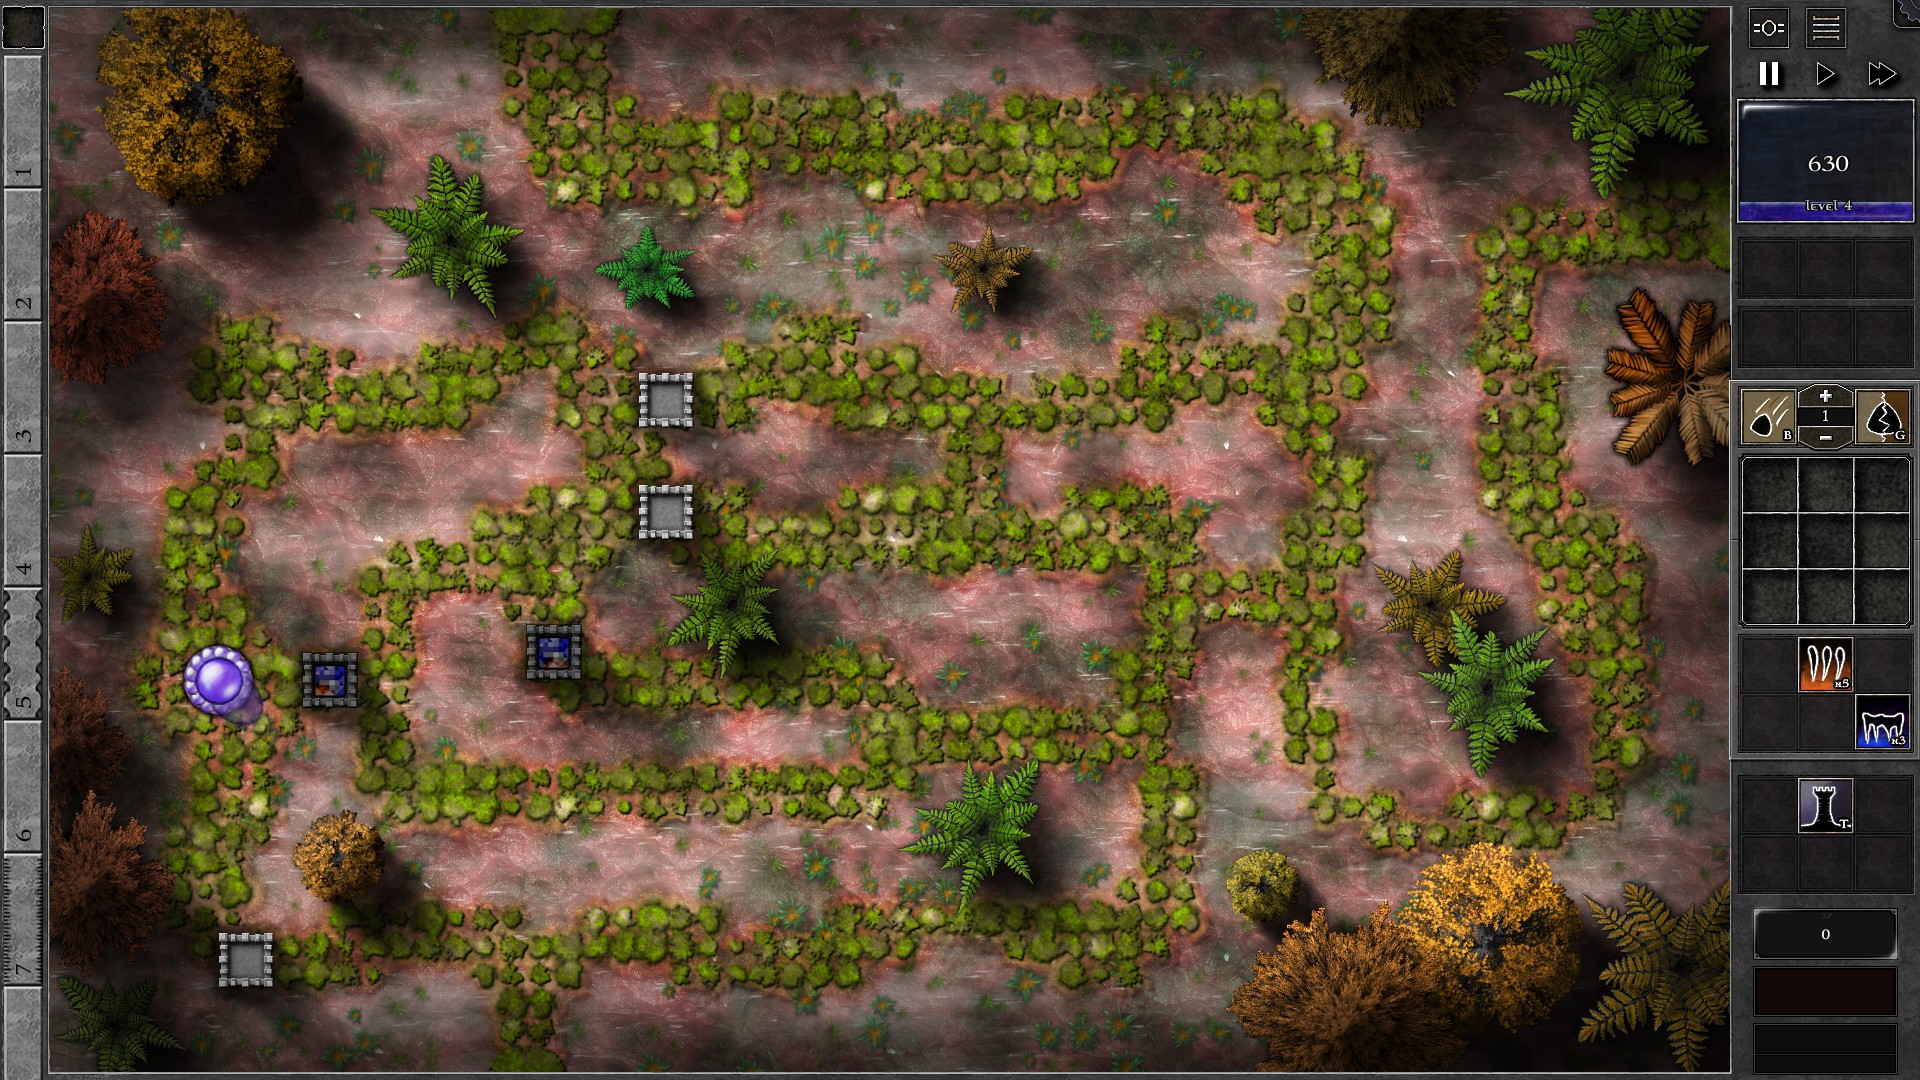
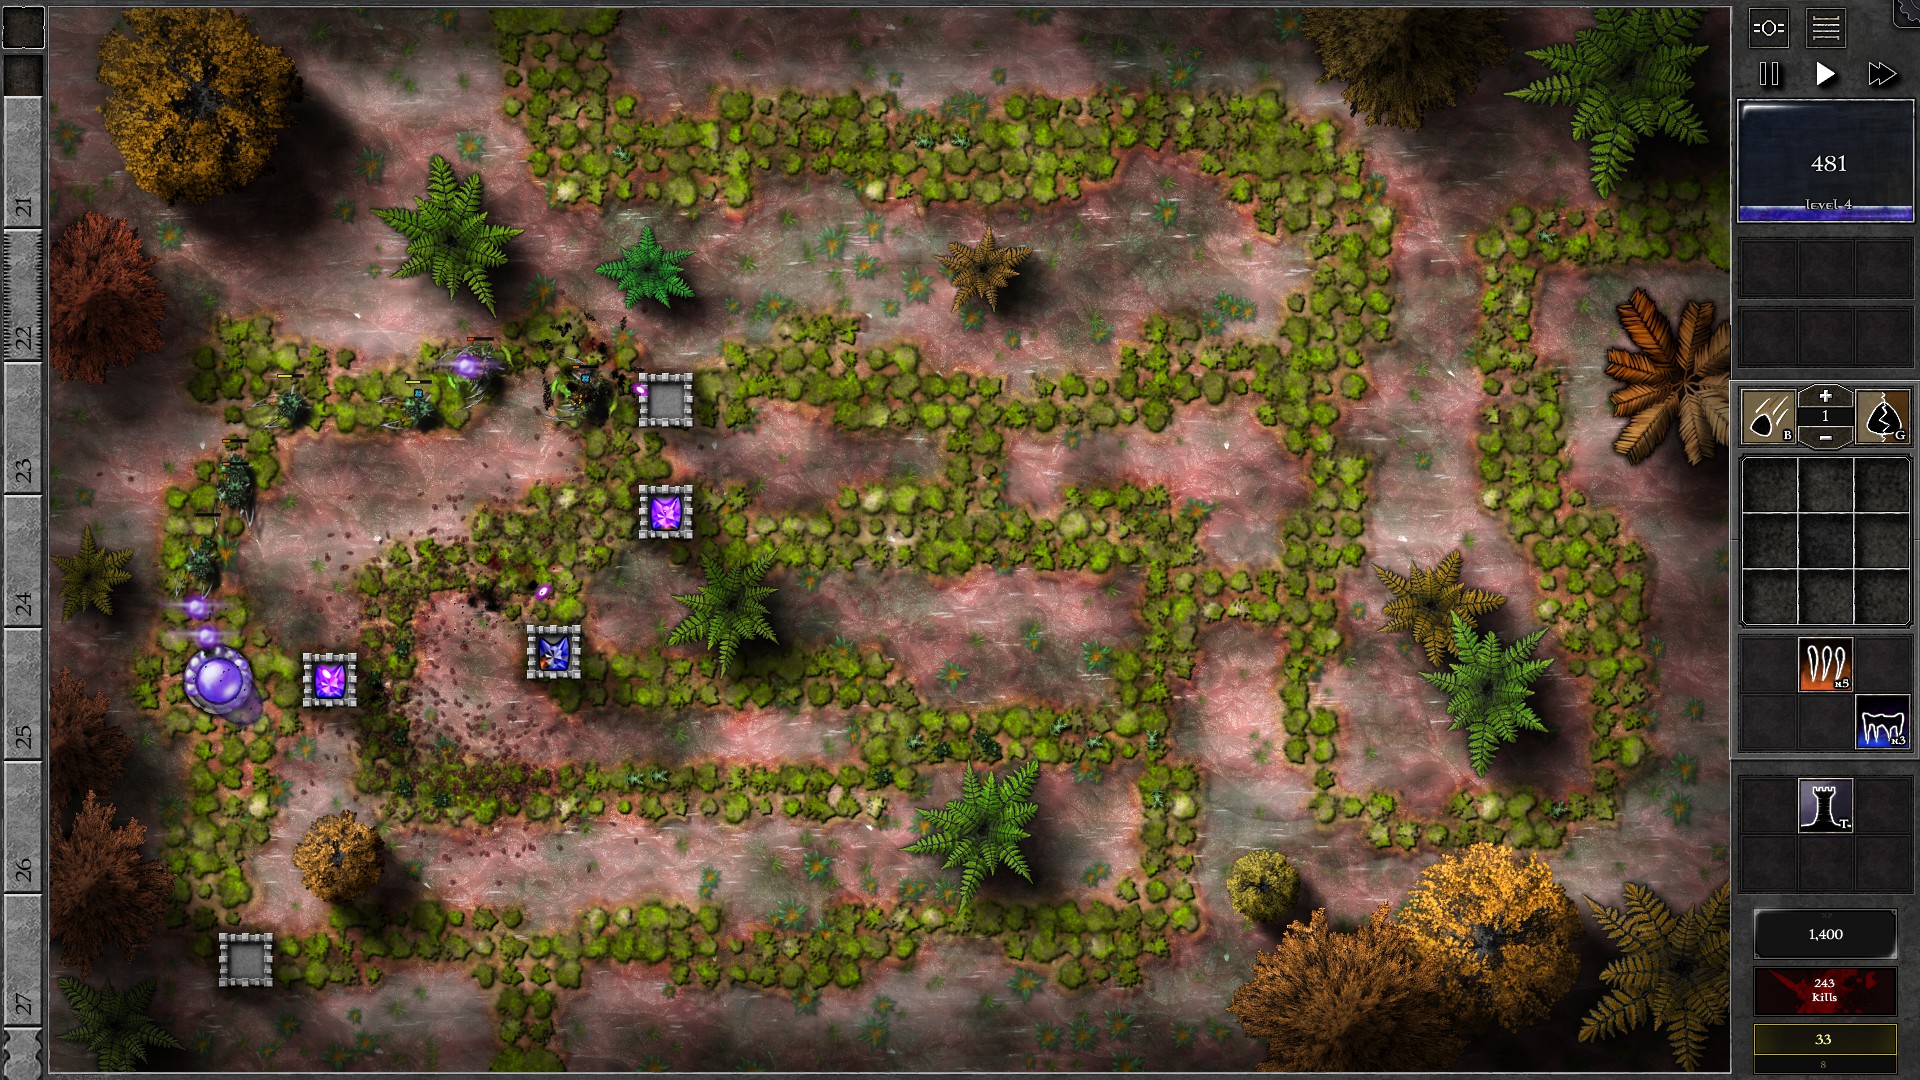
Start the Trial with the setup as shown. using 2 g3 3b1o gems as the defense. As soon as you collect enough mana, create a g3 b gem and combine into the tower gems to upgrade them to g4. You should have both gems upgraded at around w12-13.
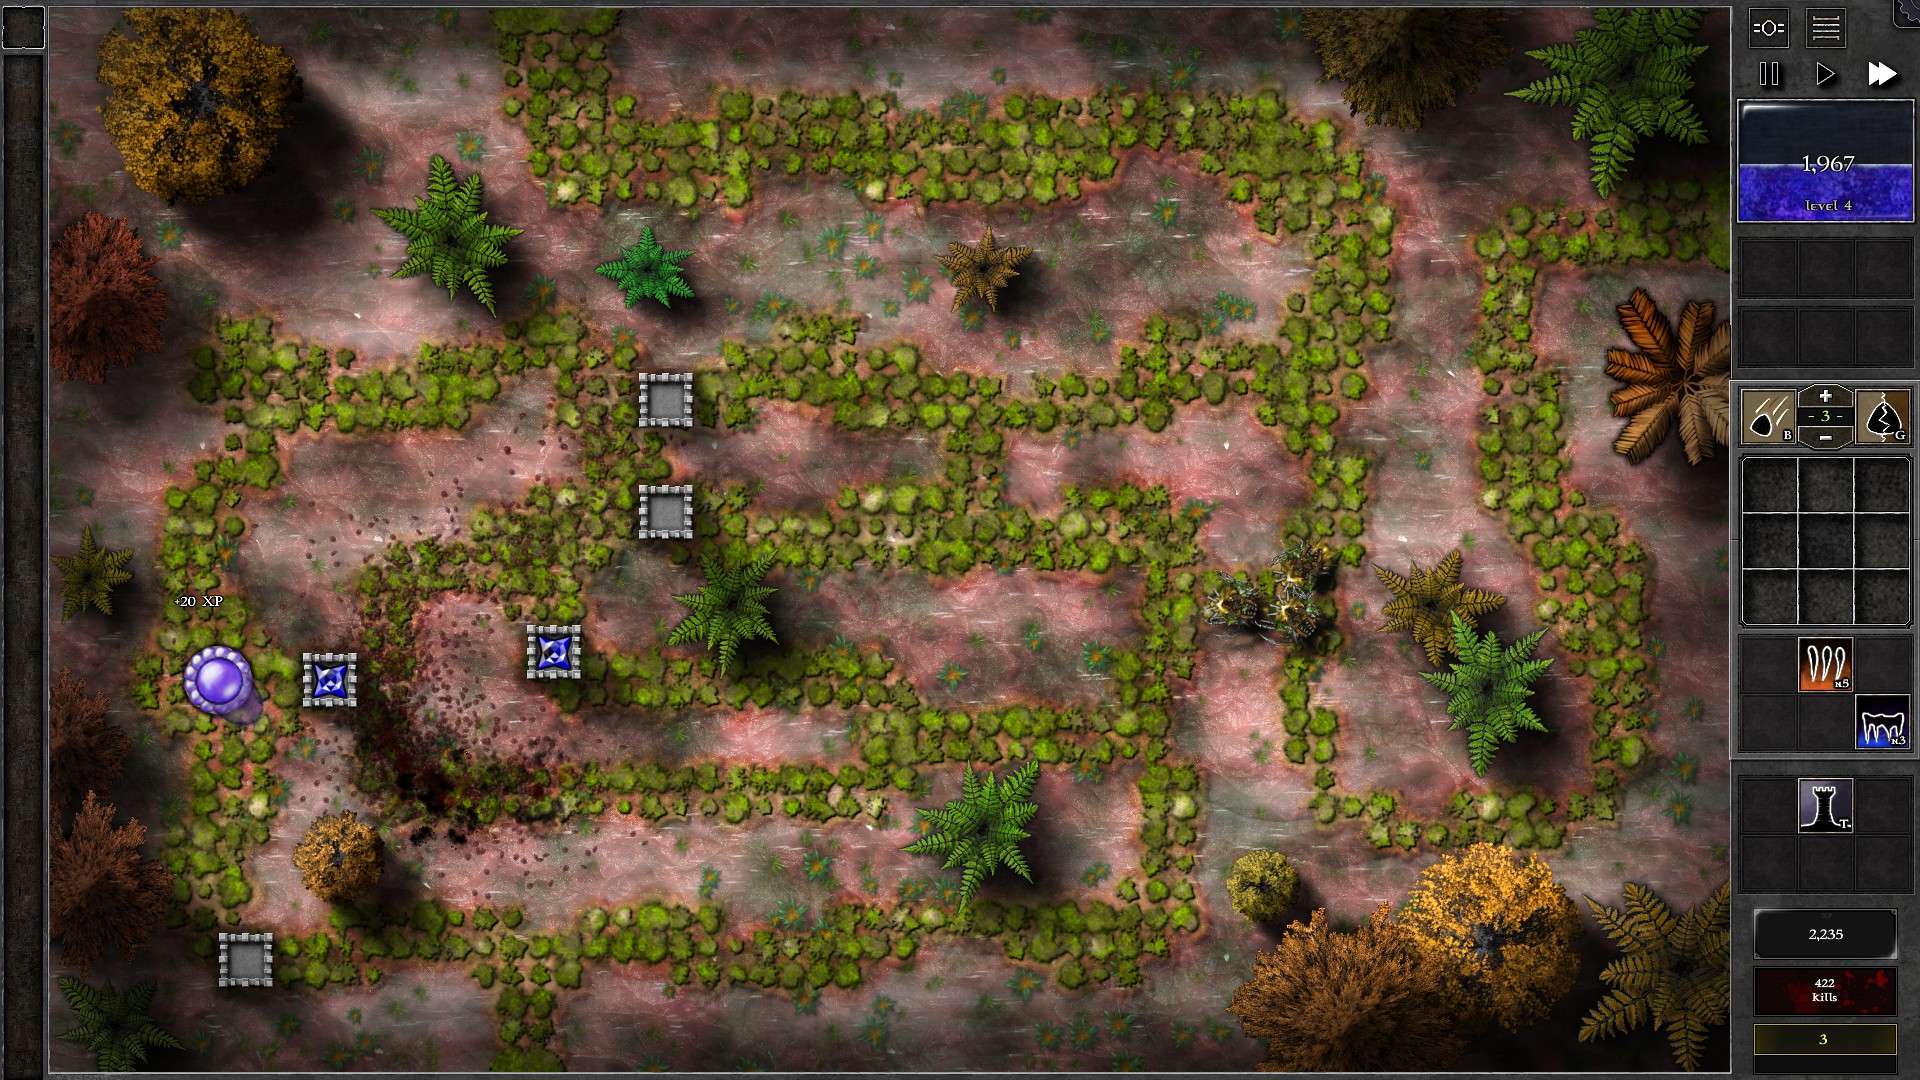
Now, you need to prepare for the monster onslaught in w19-22. Create a 3rd gem, g4 7b1o, and insert it into the tower as shown in the second screenshot. Set it to target “Carrying Orblets”. You should be able to have this gem deployed just as the onslaught comes in (close to w20). Due to the wave formation (multiple swarmling waves + some giants from w13), you will get a lot more monsters rushing through your orb and need extra shots to help control the monsters. Your 3 gems should handle the swarmling waves without losing more than 2-3 Orblets.
Once most swarmlings are killed, combine 2 of your tower gems into a g5, resuming the same gem formation as you started the Trial. You should be able to take on the remaining waves while upgrading the remaining g4 gem into a g5.
056 – Field P2
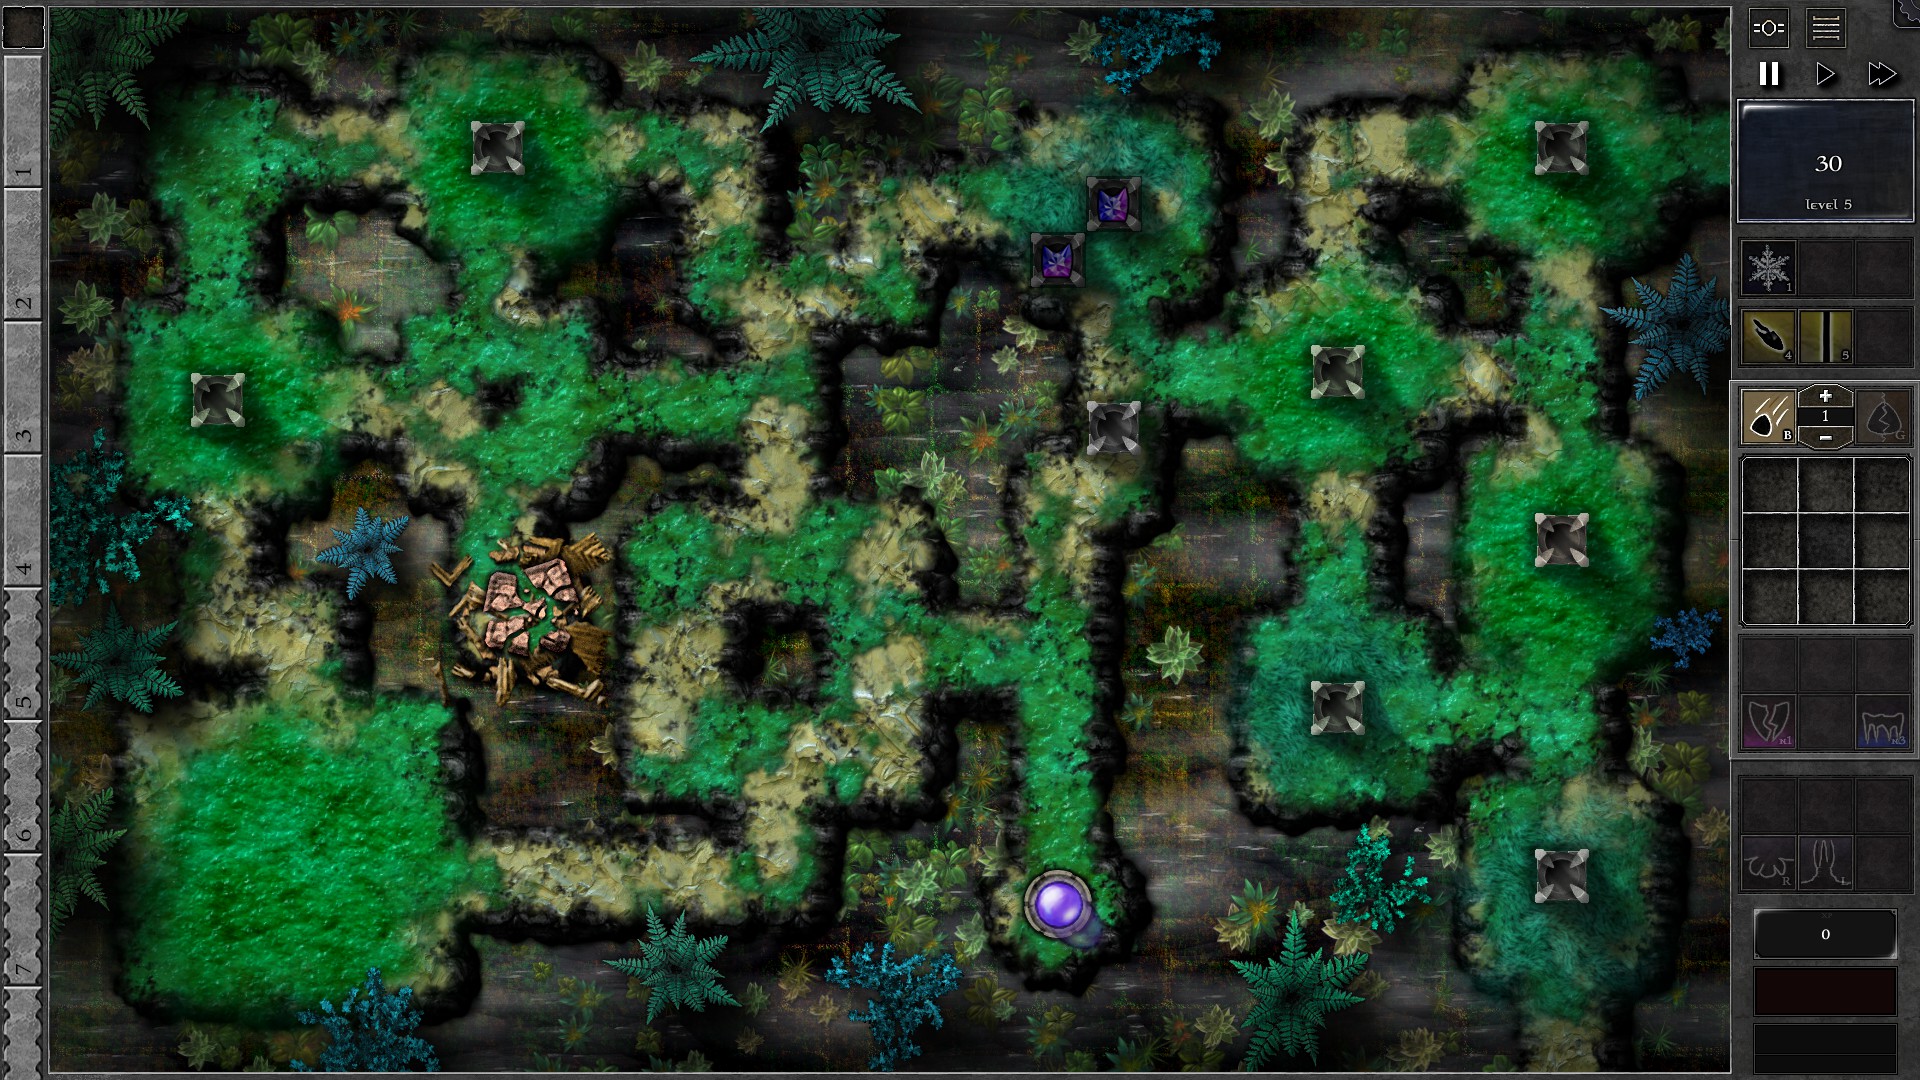
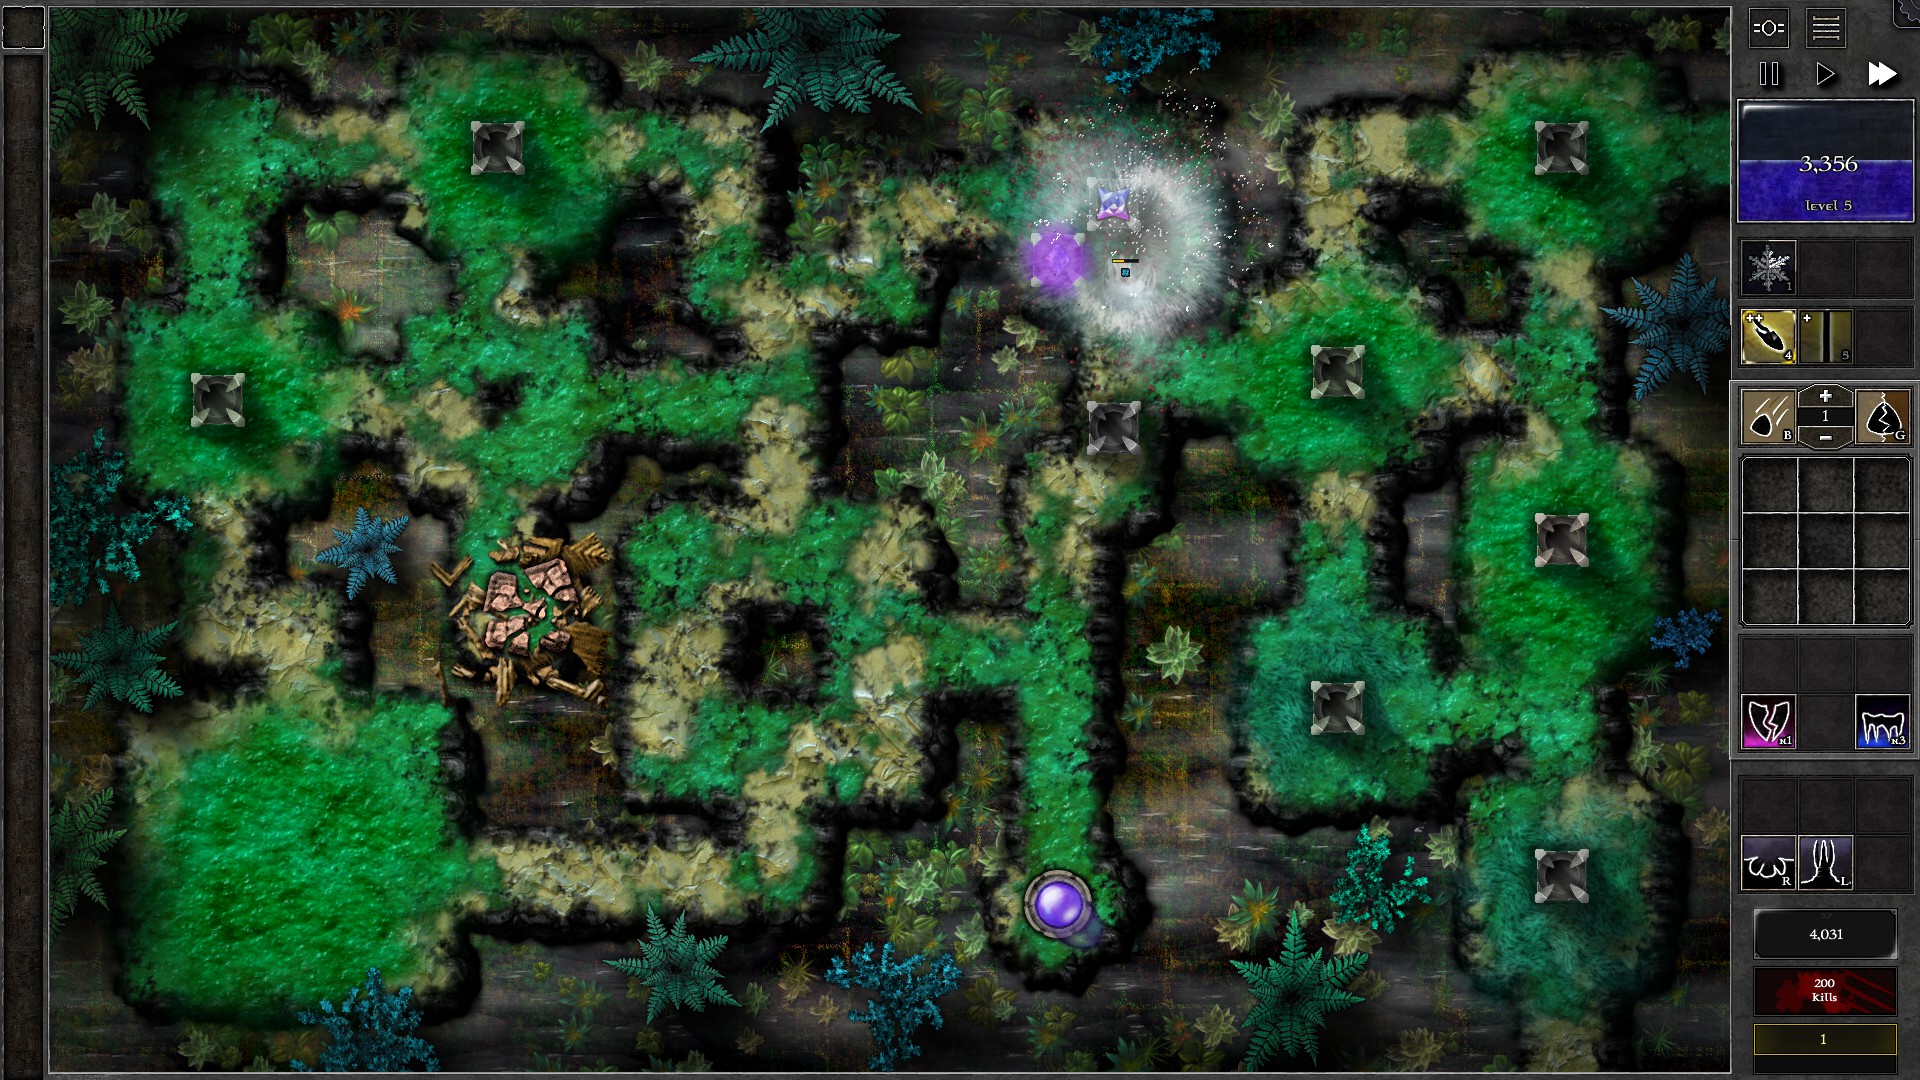
Build 2 Lanterns, one to block the shortcut to your Orb and one for your defending gems. Create 2 g4 p/b gems and insert into lanterns as shown. The first few waves should not be a problem for the lanterns. As the giant waves arrive, start using Freeze and Beam to help kill the giants before they leak through your defenses. You should gain enough mana to upgrade one of the gem to g5 by w13-14 and both to g5 by w20. At the end, upgrade one of the gems to g6 and you should finish this Trial with the help of spells.
057 – Field P3
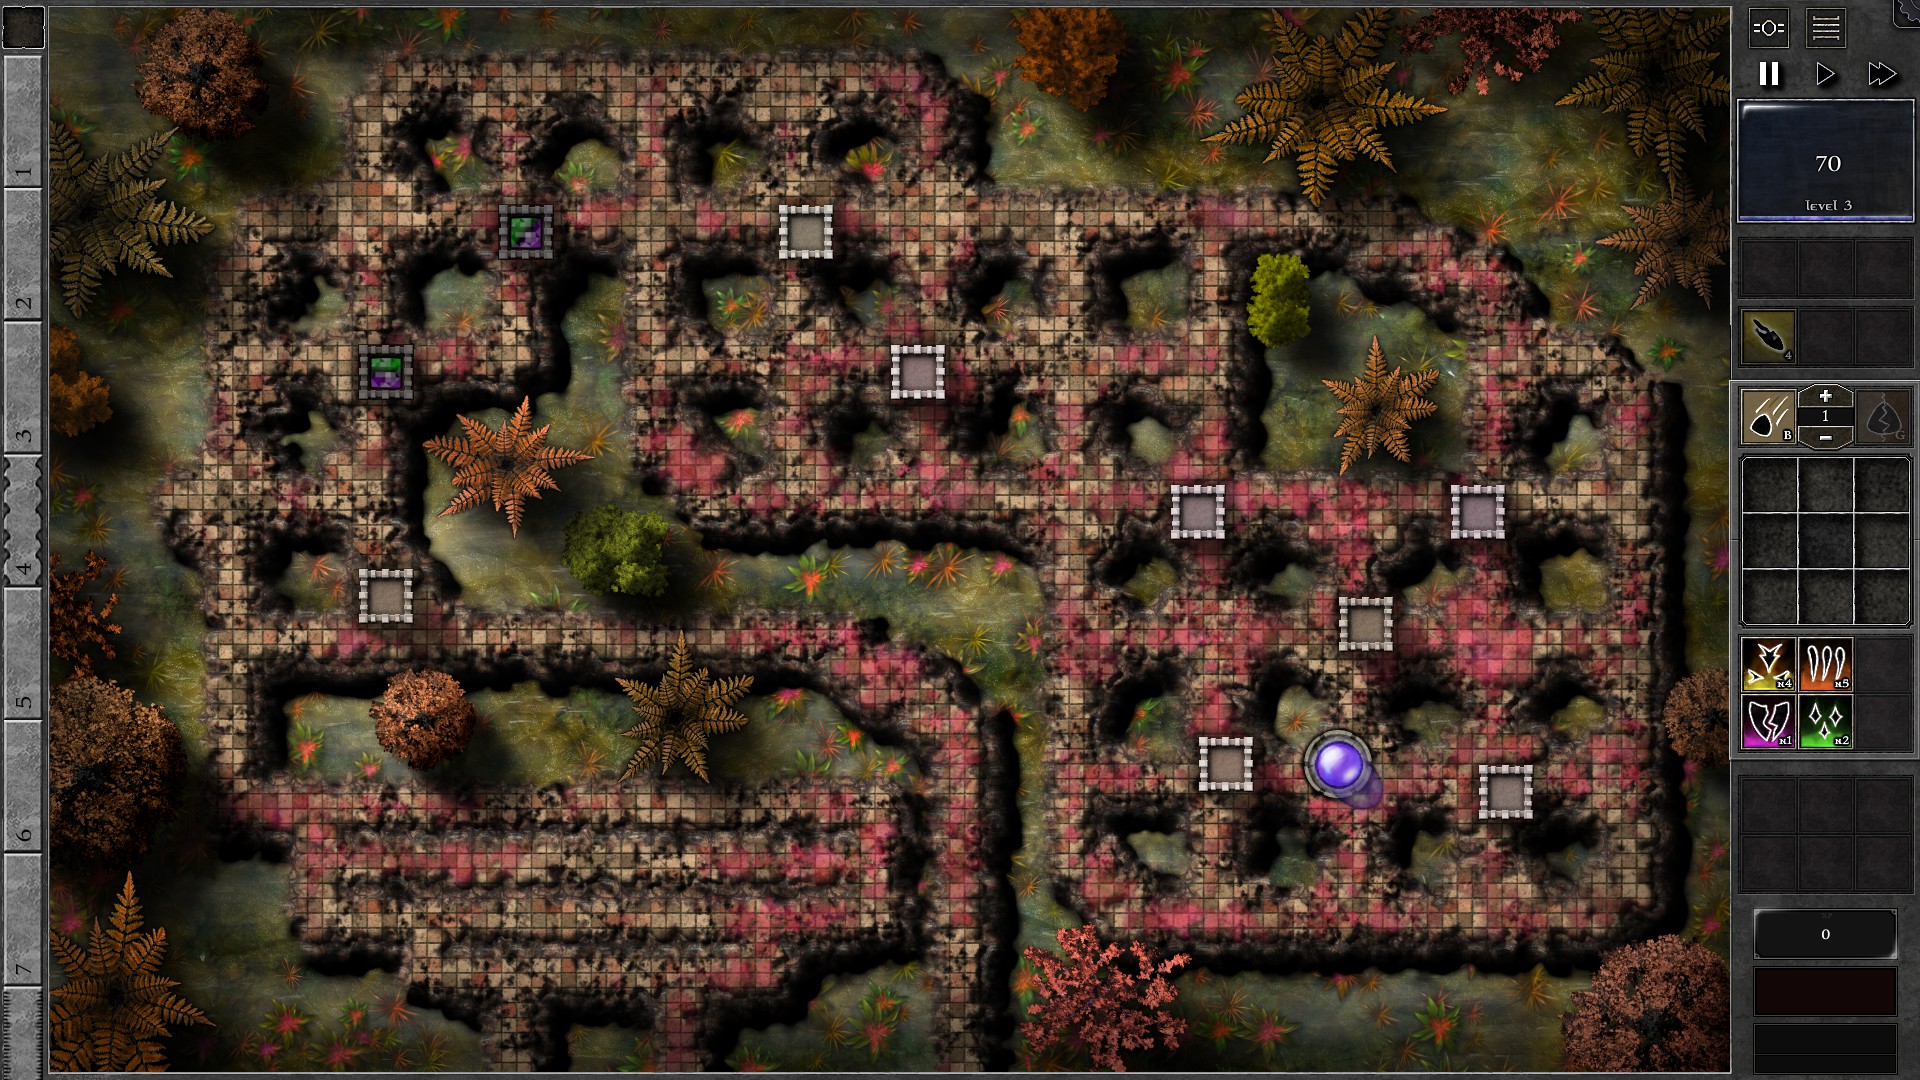
Insert 2 g3 p/g gems into the top left towers as shown. Use Bolt spells as necessary to reduce leaks, and you should upgrade one of the gems to g4 at around w8. You will soon get enough mana to upgrade the other gem to g4 at around w10-12. For w13 you can send this wave early once w12 giants arrive.
NOTE: Some Specters will enter the field soon, take note of the premonitions and save up at least one Bolt charge for fighting the Specters.
A Specter will appear in w14; take note of which gem the Specter is trying to steal, then cast Bolt into that gem as the Specter close in. Click on the Spectre to make sure the gem is firing it; the gem should kill the Specter before it can steal your gems. Be careful of other monsters going through your defenses while your gem is killing the Spectre.
You should be able to afford upgrading one of the gems to g5 at around w18. Send w21 early as w20 enters. At w22/23 another Specter spawns in, which should be targeting your g5 gem. However, as long as you have Bolt ready and focus on the Specter once it enters tower range, it should be dead before it could steal your gem. After defeating the 2nd Specter, upgrade the other g4 gem to g5.
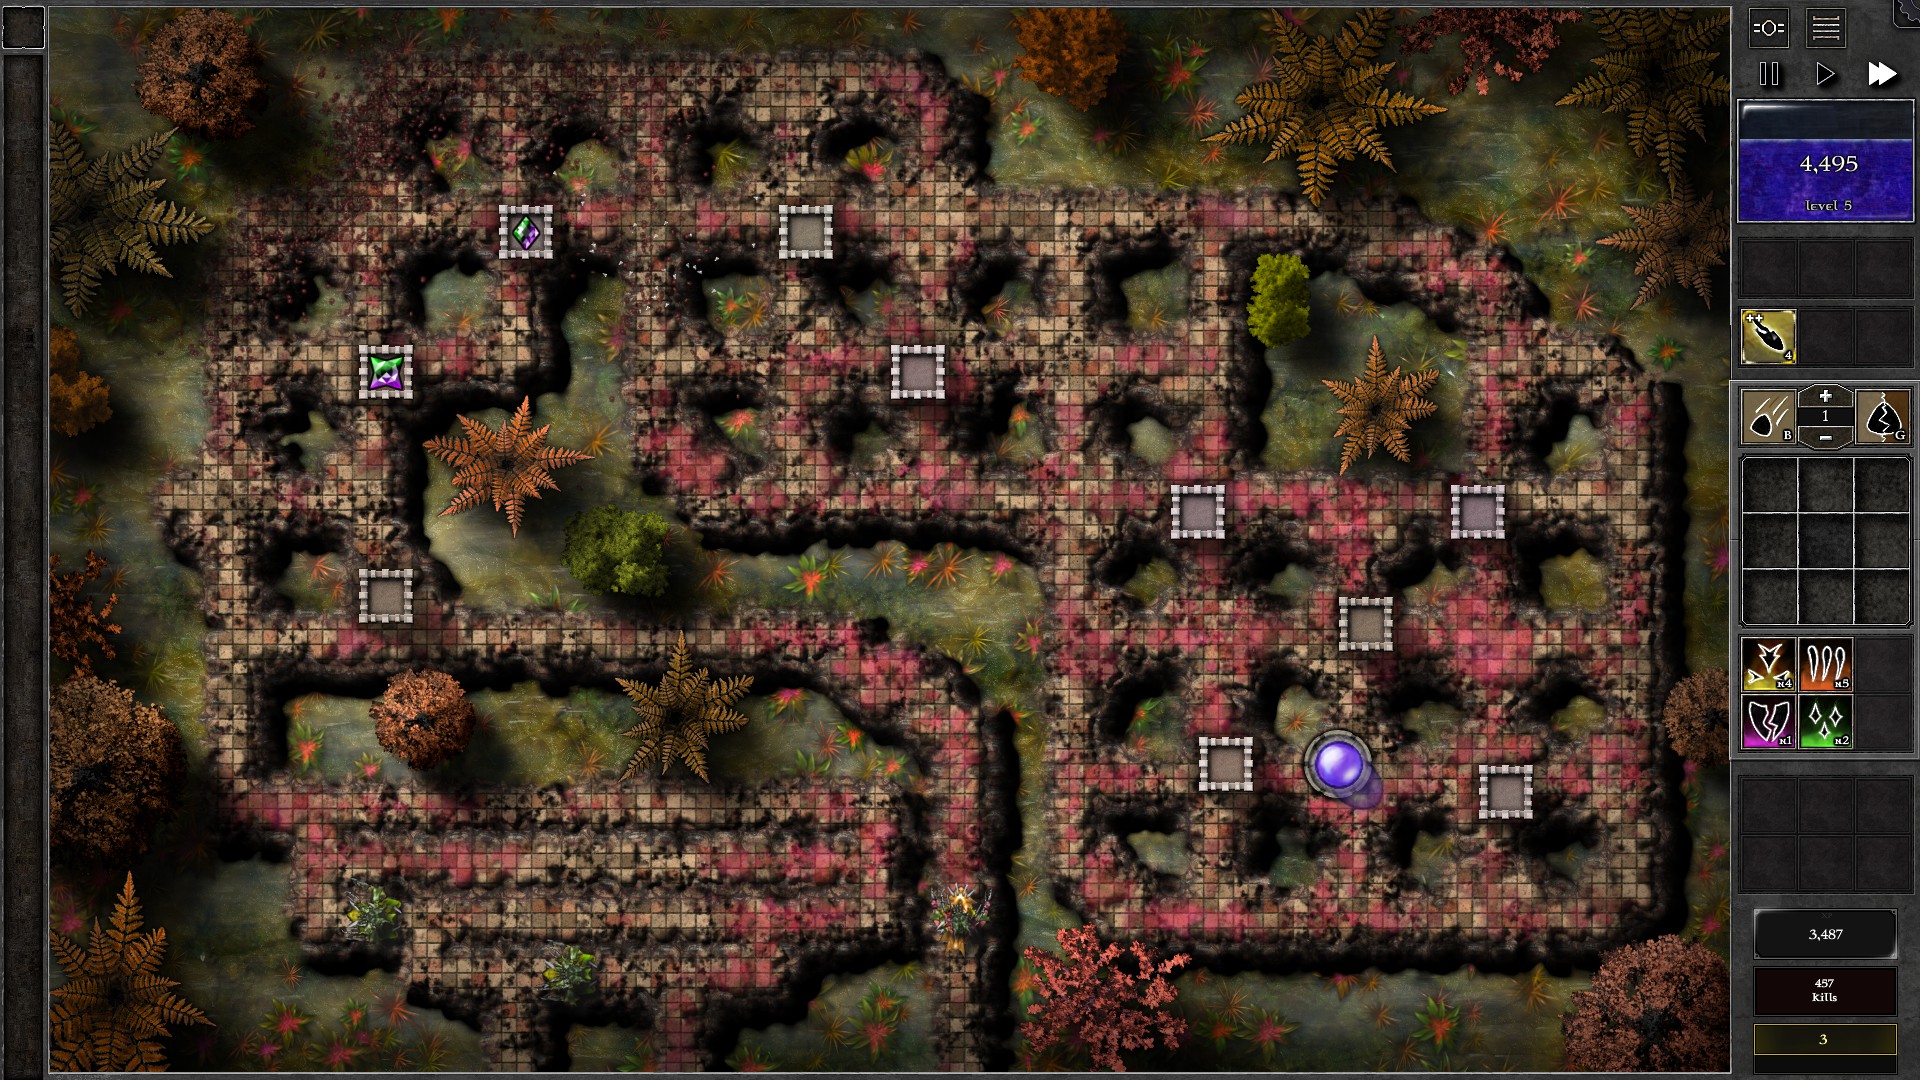
At w32 a 3rd Specter will spawn. At this point you should be able to upgrade a gem to g6 (be careful of banishments). Use Bolt of the g6 gem and it should take out the Specter. After that the g6+g5 gem should take care of the remaining monsters with mana to spare for banishments.
NOTE: For the last Specter, you might want to move the gem NOT targeted by the Specter to intercept its flight. This is mostly important if you can’t afford (or if it’s too risky) to get the g6 gem.
058 – Field P4
You will notice that you won’t be getting any mana through natural regeneration or by killing monsters, which forces you to use mana leeching gems to gather mana. Setup the field as shown with 2 gems in towers. A g4 pure orange gem which should be placed that it fires at monsters first, and a g4 7b1o gem mainly used to deal damage.
Whenever you have Beam ready, use it on the pure orange gem; the orange gem Beam will leech mana at a rapid rate whenever monsters get close to the gem. As long as you keep using Beam, you should gain enough mana to upgrade your pure orange gem to g5 at around w10-11, then the 7b1o gem to g5 before w20. The 2 g5 gems should take on the remaining monsters, but it’s a good idea to continue leeching mana with pure orange Beam as a safeguard against banishments.
059 – Field P5
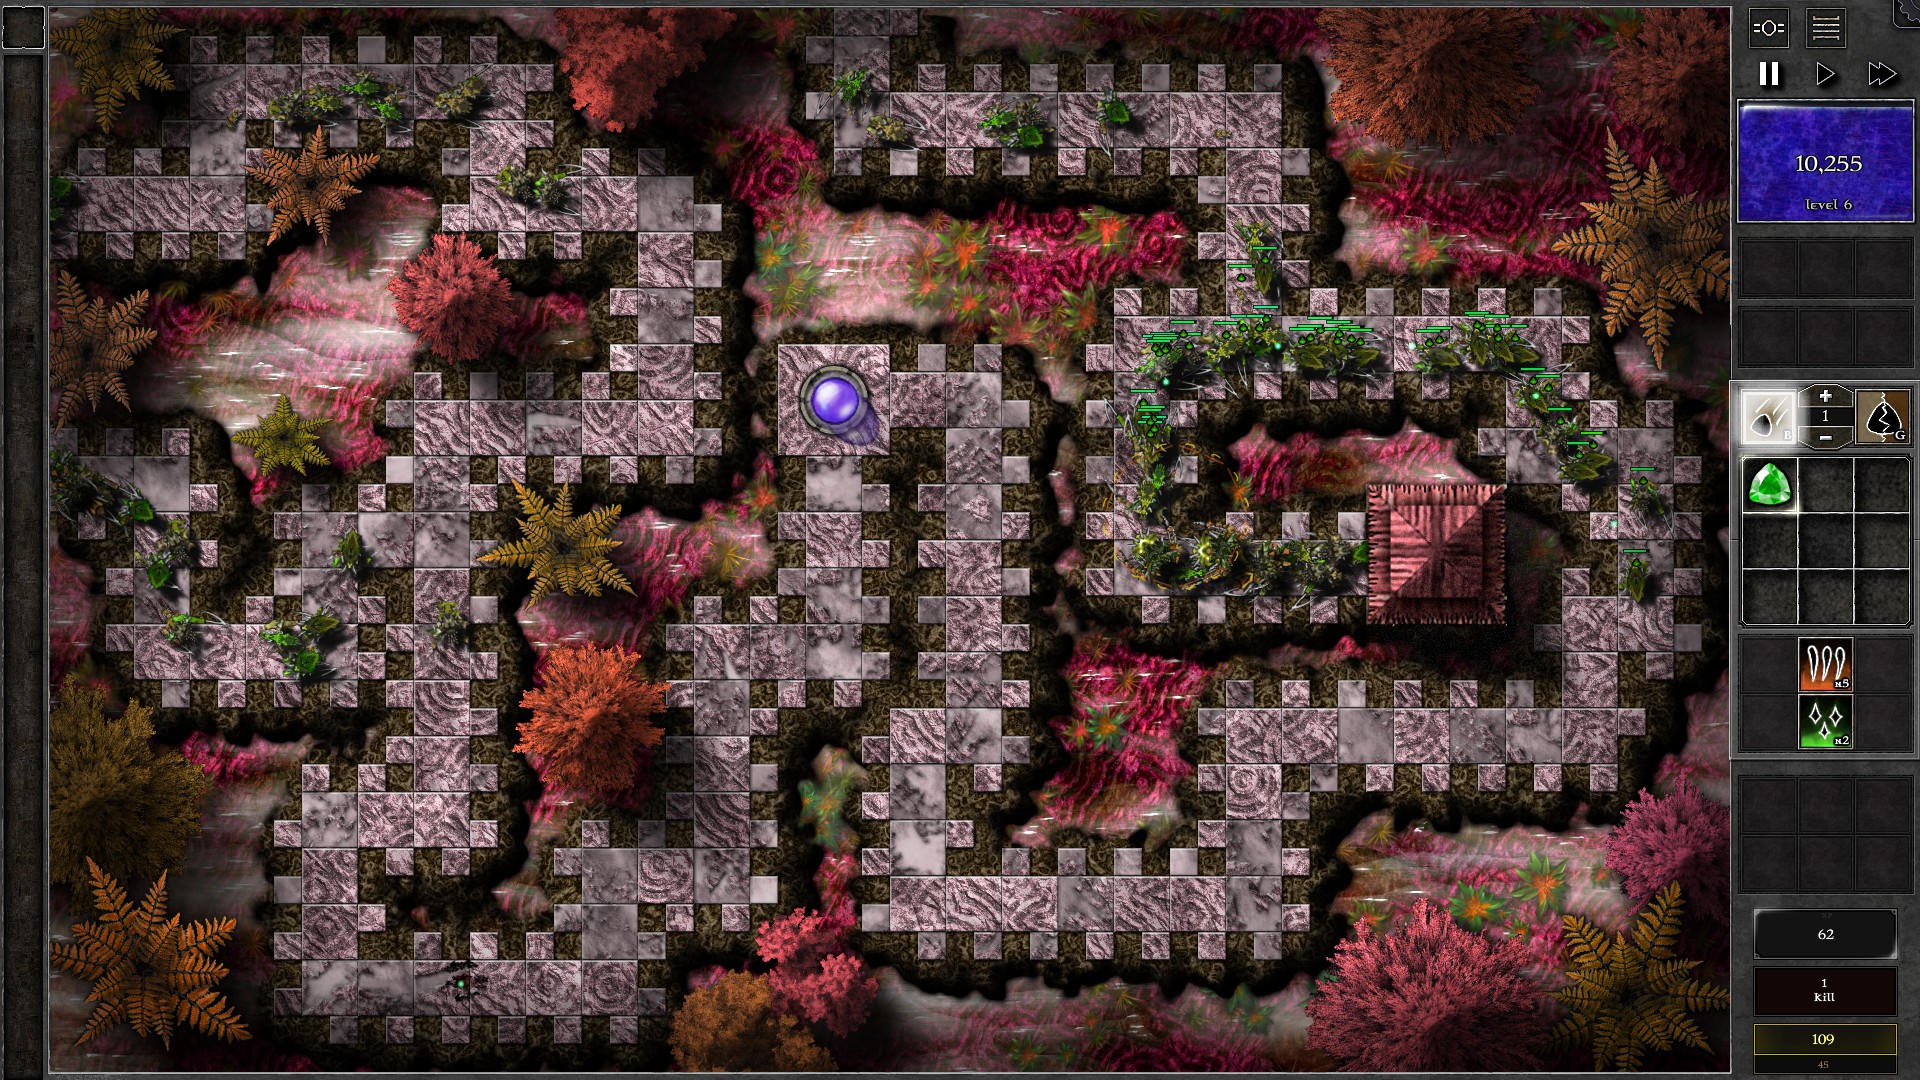
Start this Trial by calling all 12 waves early immediately (Ctrl-Click on a wave stone to send all remaining waves early). Create a g1 green gem in your inventory and enter gem bombing mode. Once most of the monsters (around 100) are on screen, you are ready to engage the monsters.
Start by freezing time and kill some of the the front runners with gem bombs. 1 gem bomb is usually enough to take down a lone reaver from the earlier waves (later ones may need 2). You shouldn’t need more than 10 bombs for this. Then bomb through the main group of monsters still walking through the path for 2 passes. Have your gem bombs cover as much monsters as you can with each bomb (this is to mainly spread poison damage instead of killing with bomb damage) and poison every enemy that you can.
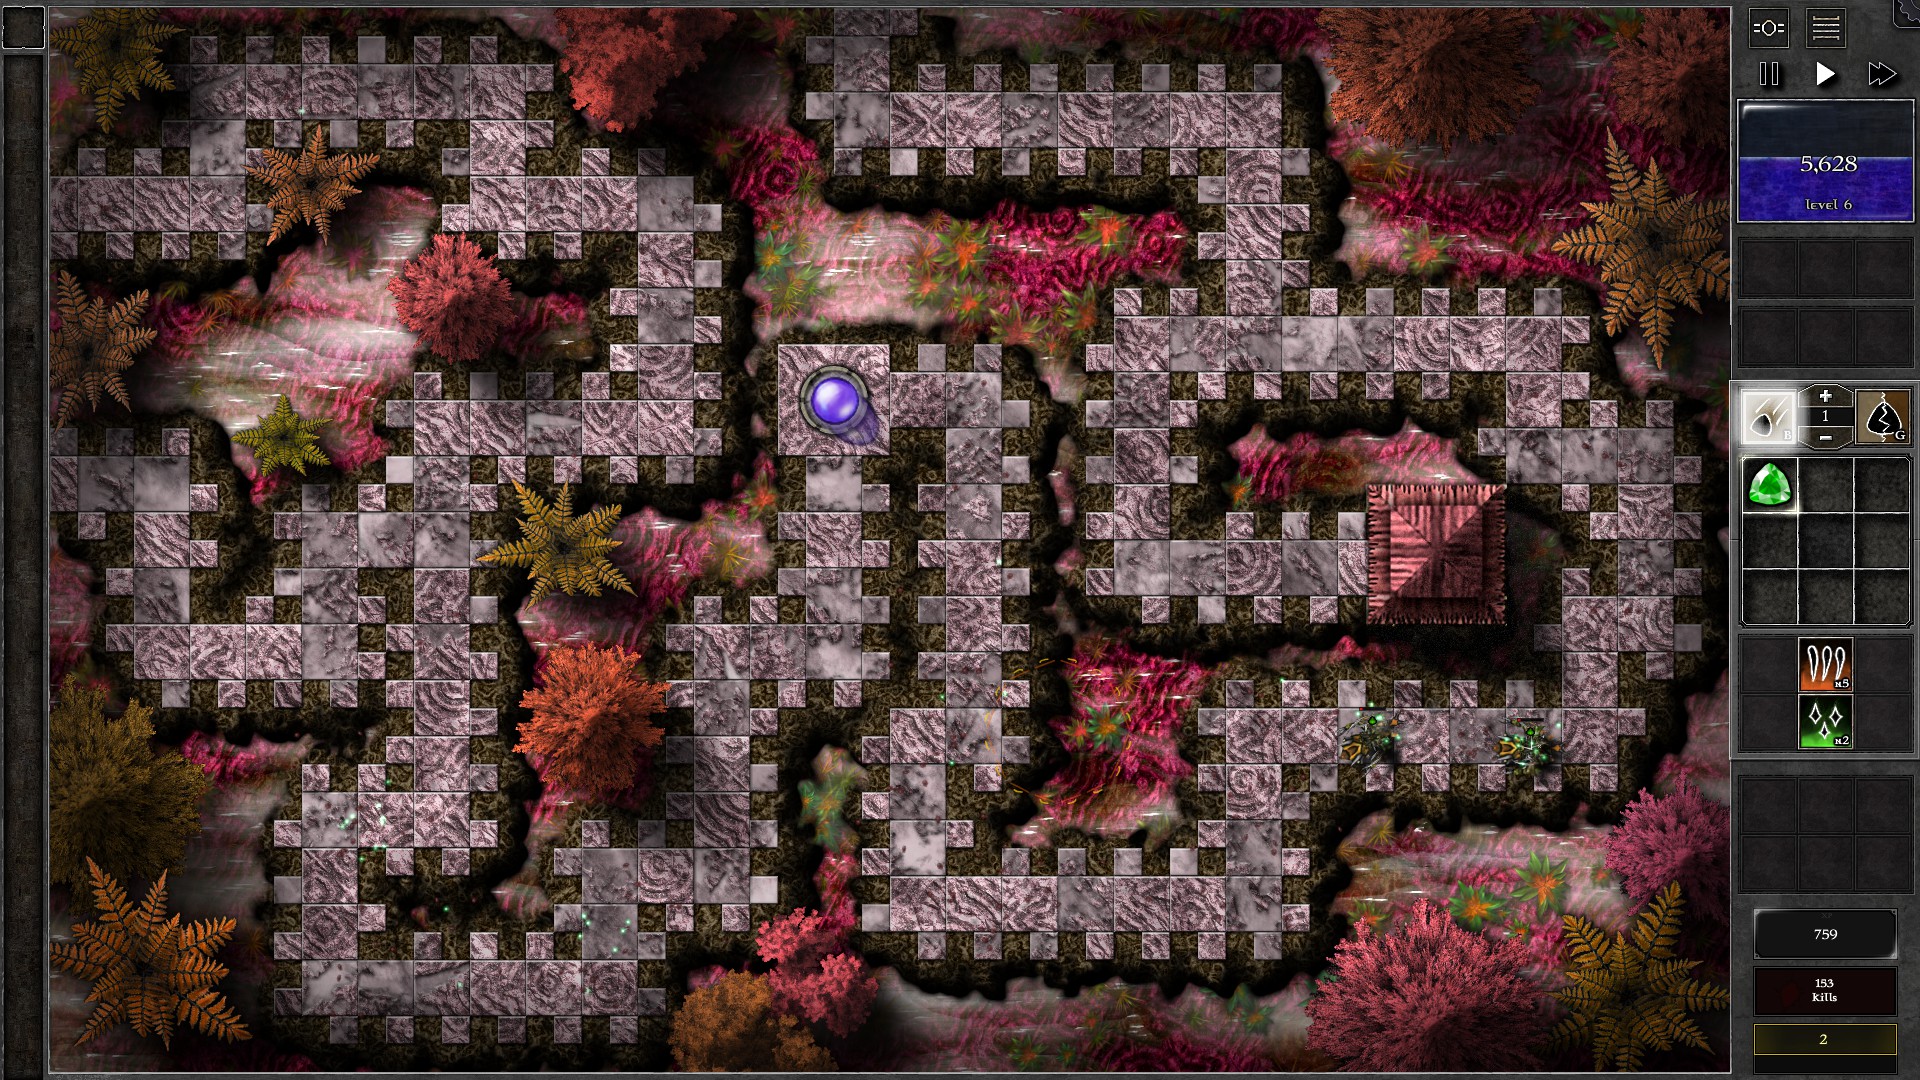
Once you have poisoned all the monsters, unfreeze time and let the gem wasps do some work, then freeze time again and repeat the whole bombing process with g1 green gems. After about 2-3 rounds of gem bombing, unfreeze time for longer; most of the monsters should start to die from poison damage. Continue using g1 green gem bombs in moderation to pick off the remaining reavers and swarmlings. This process should leave you with around 6000-7000 mana while accounting for mana gained from monster kills.
Once only the giants remain, you can focus on bombing these. Throw several g1 green gem bombs onto each giant monster individually, while giving pauses to let the poison damage and gem wasps work. As a reference, about 5-6 gem bombs should have enough total damage to kill a giant if you make sure that only one giant is in bombing range
060 – Field P6
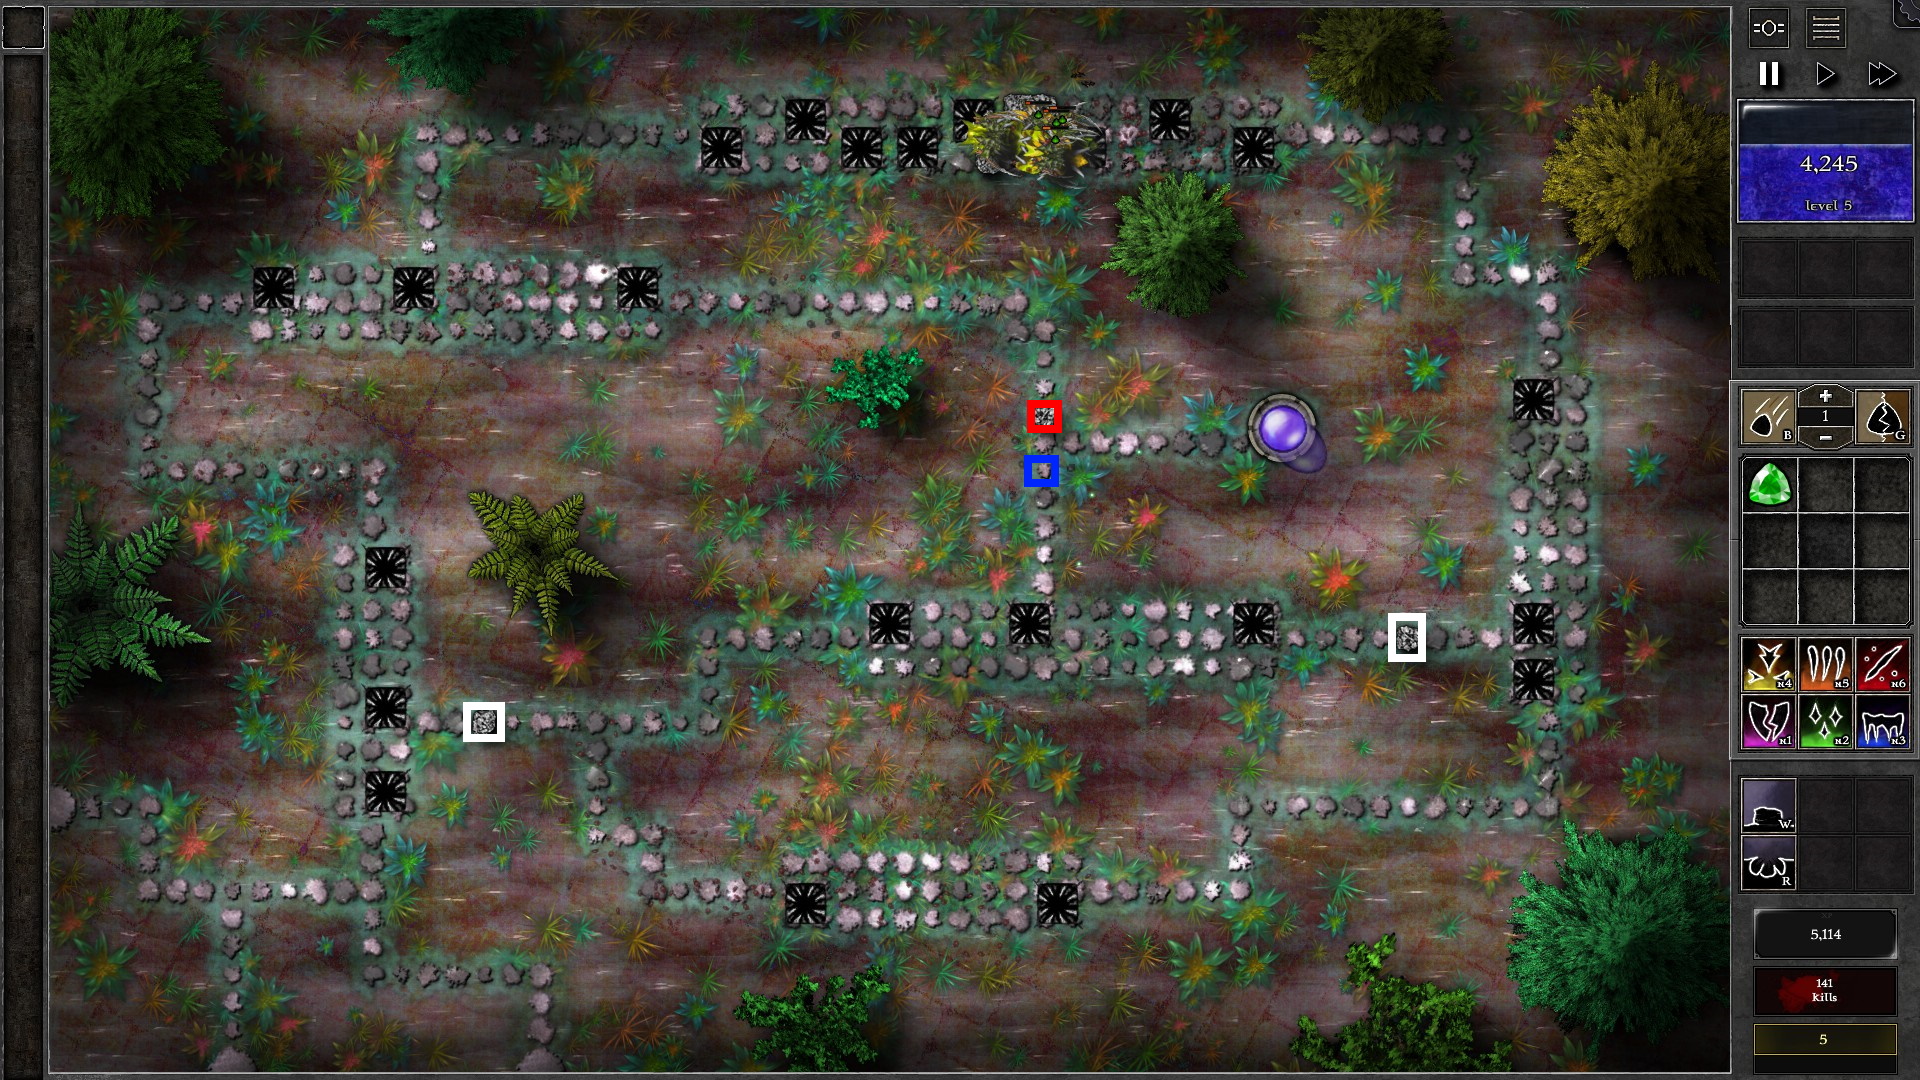
Start this field by calling all waves early. While the waves are being sent, quickly build walls in the locations marked White and Red in the screenshot. The bonus mana from calling waves should be enough for you to afford a g5 pure green gem. Set it to “Least HP” or “Least Affected by Specials” and put into a trap closest to the leading giants. Let the poison gem attack most of the giants before moving it to attack the leading giants again.
When the giants approach the location marked Blue, create a g1 gem, and use it to destroy the wall in Red. Quickly build the wall at the Blue location to force the giants to go back and attack your orb through the red location. Continue follow through the giants with the g5 gem. As they reach the red location, destroy the wall in Blue and build a wall in Red to force them to trek a long way again. Repeat until all the Giants die off to the g5 gem.
061 – Field L1
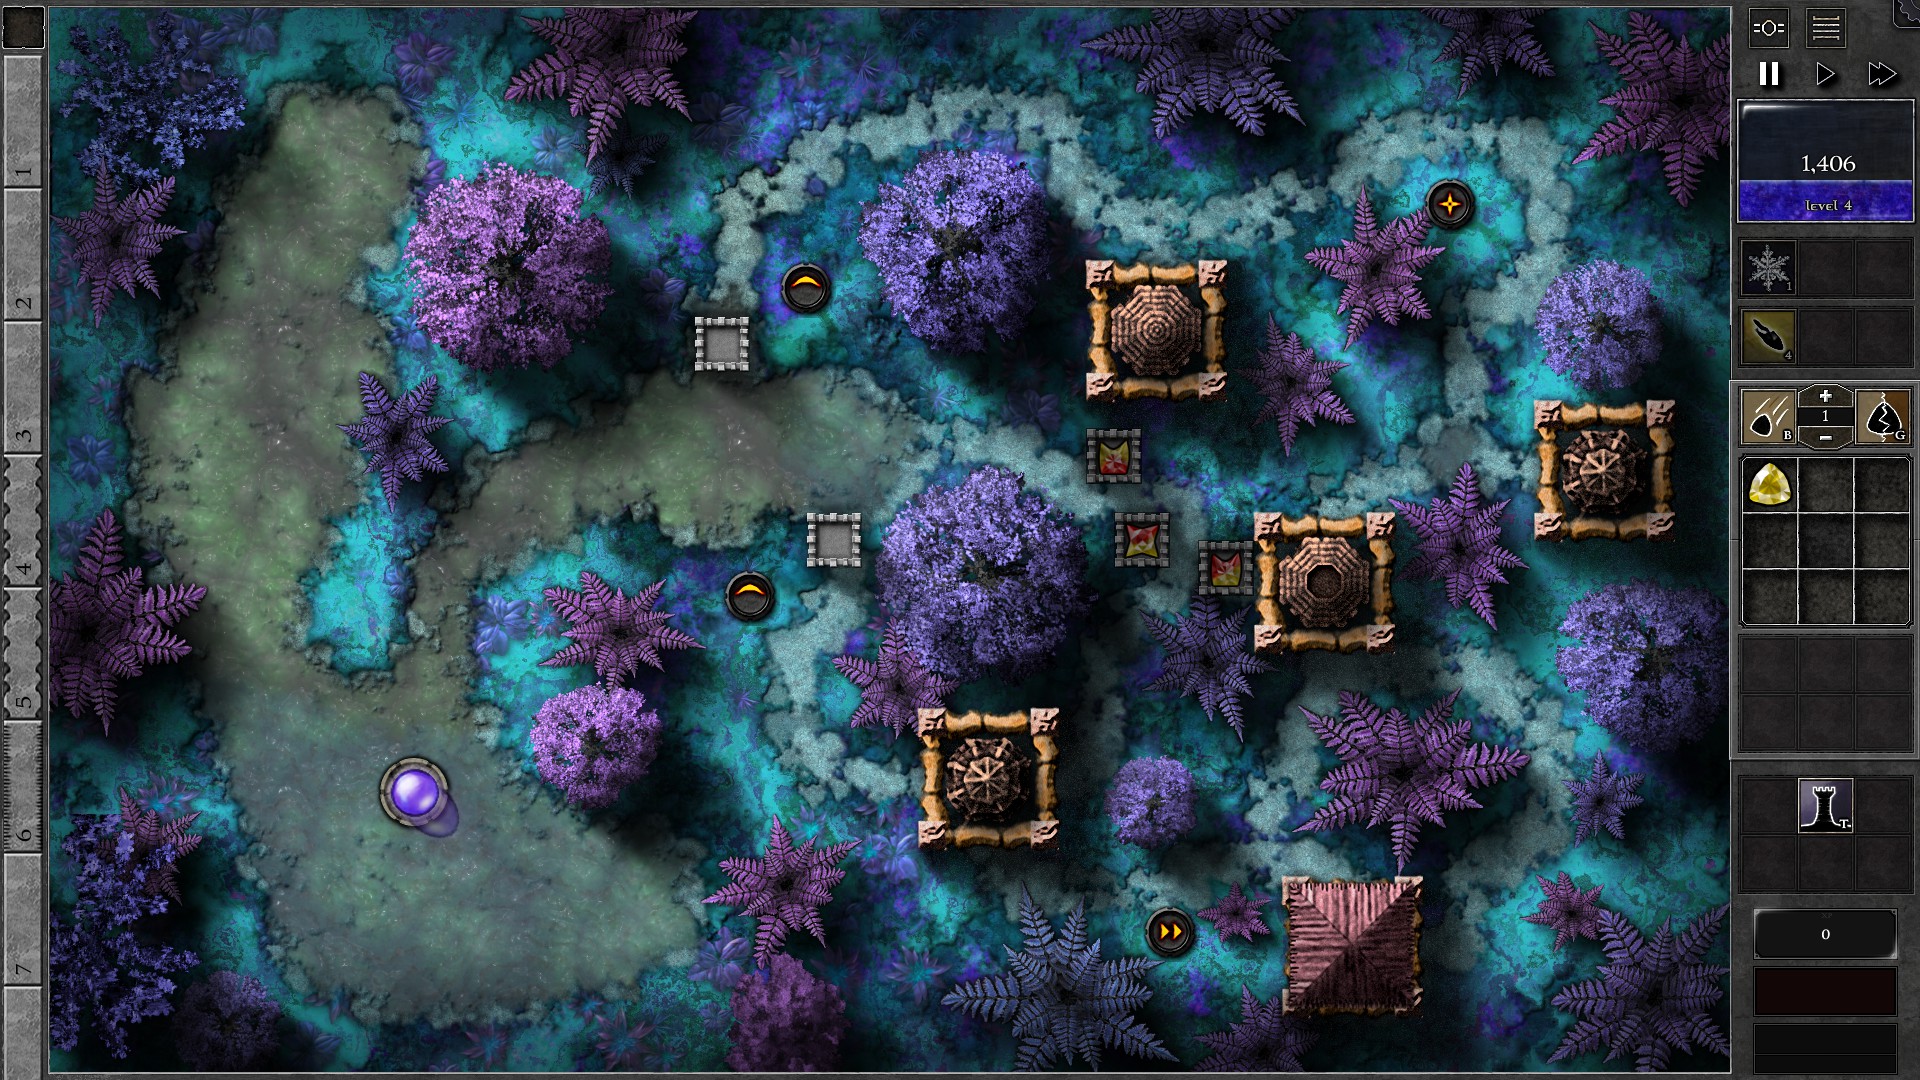
Salvage the g2 gems with Mana Value 960 and 2760 for extra mana first (this should put your mana pool to LV5), then build the towers as shown in the first screenshot. Now setup the gems as follows:
- Insert the g4 r/y gem into a tower directly.
- Combine the g3 y and g3 r/y gems and insert the resulting g4 gem into another tower.
- Combine the g2 r and g2 r/y gem into a g3. Upgrade the g3 gem into g4, then combine into the g4 y gem for a g5 which should be inserted into the centre tower.
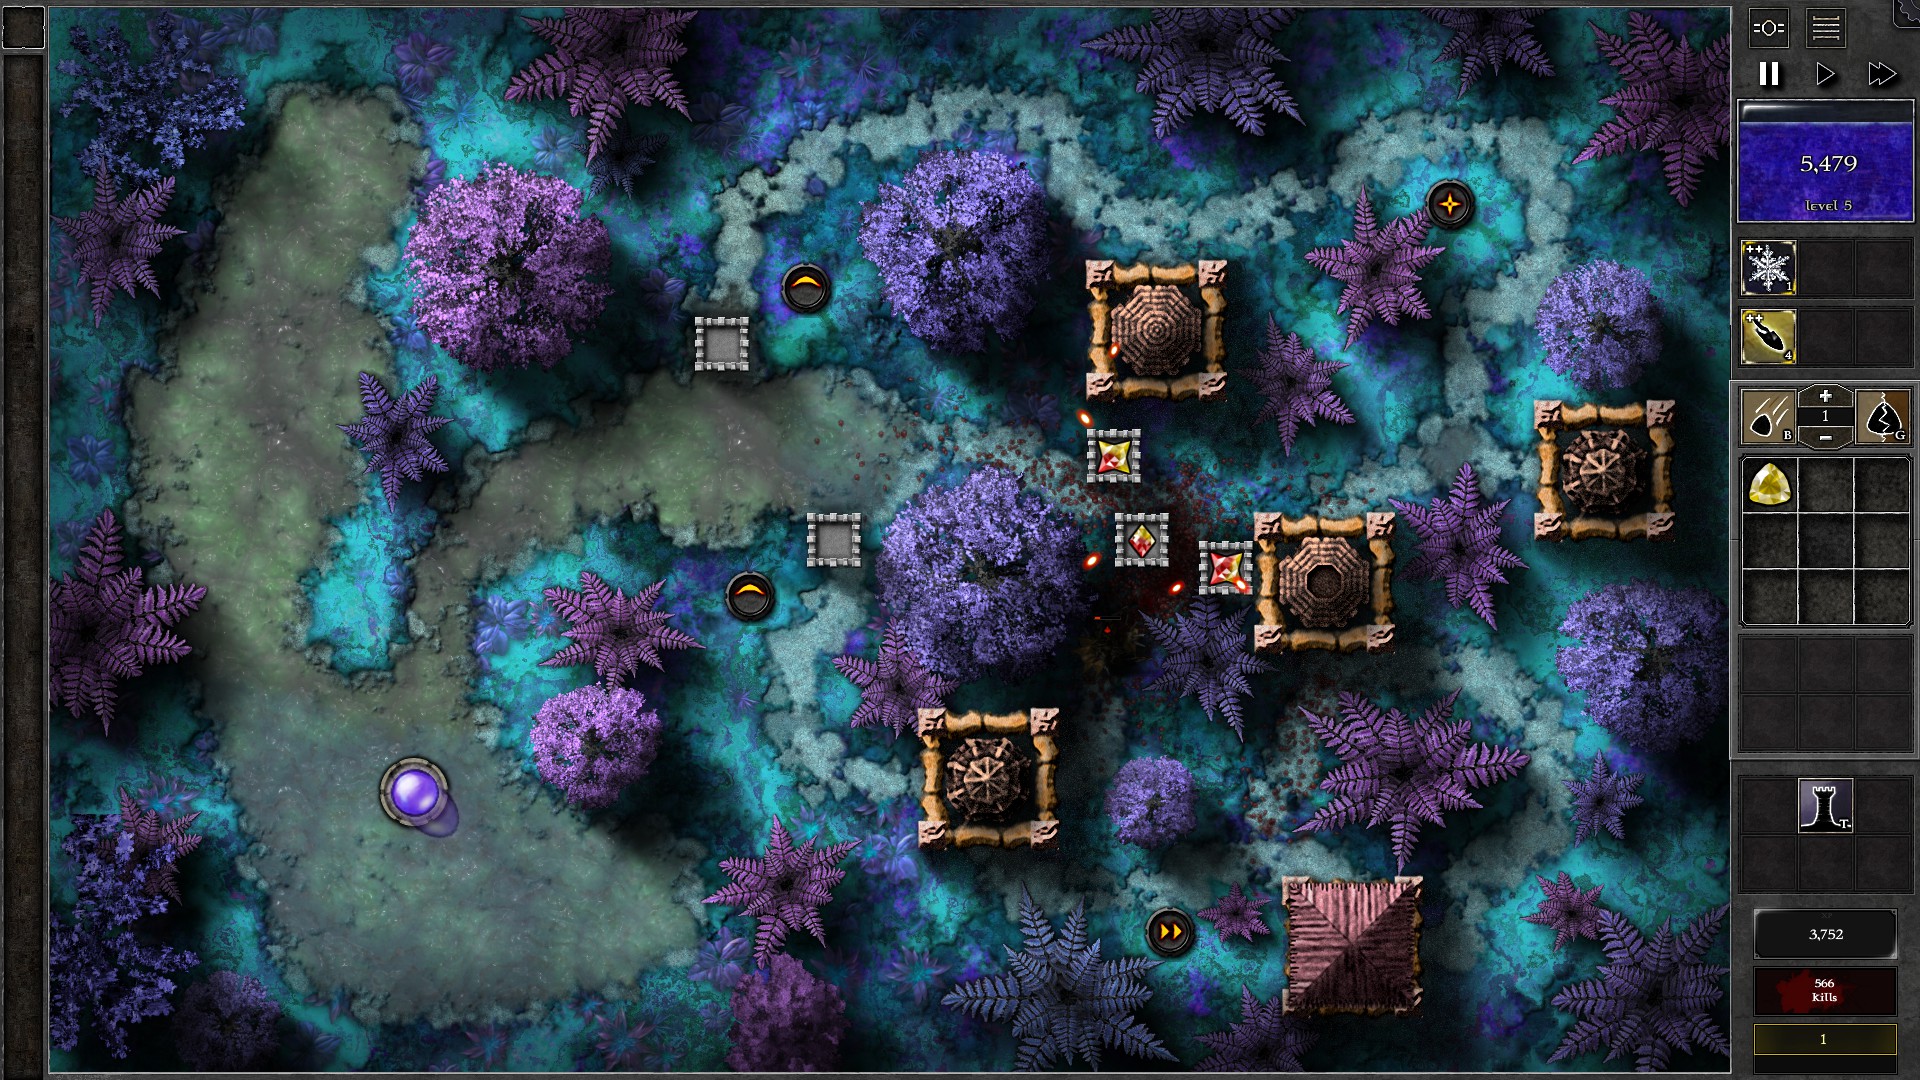
Now, start the waves and your 3 gems should mow down the monsters without much trouble. Upgrade the gems as you gather mana; you should have both g4 gems upgraded to g5 by w20. Watch out for the w10 swarmlings; save up the spells and use them to help reduce banishments from leaking monsters. As you get 3 g5 gems, you should notice a set of consecutive giant waves; use this time to hoard up your spells which will come in helpful on the fast reaver w28 and the swarmling w29.
At w33 upgrade the middle g5 gem into a g6, which should be good enough to defeat the monsters in the remaining waves together with the other 2 g5 gems and your spells.
062 – Field L2
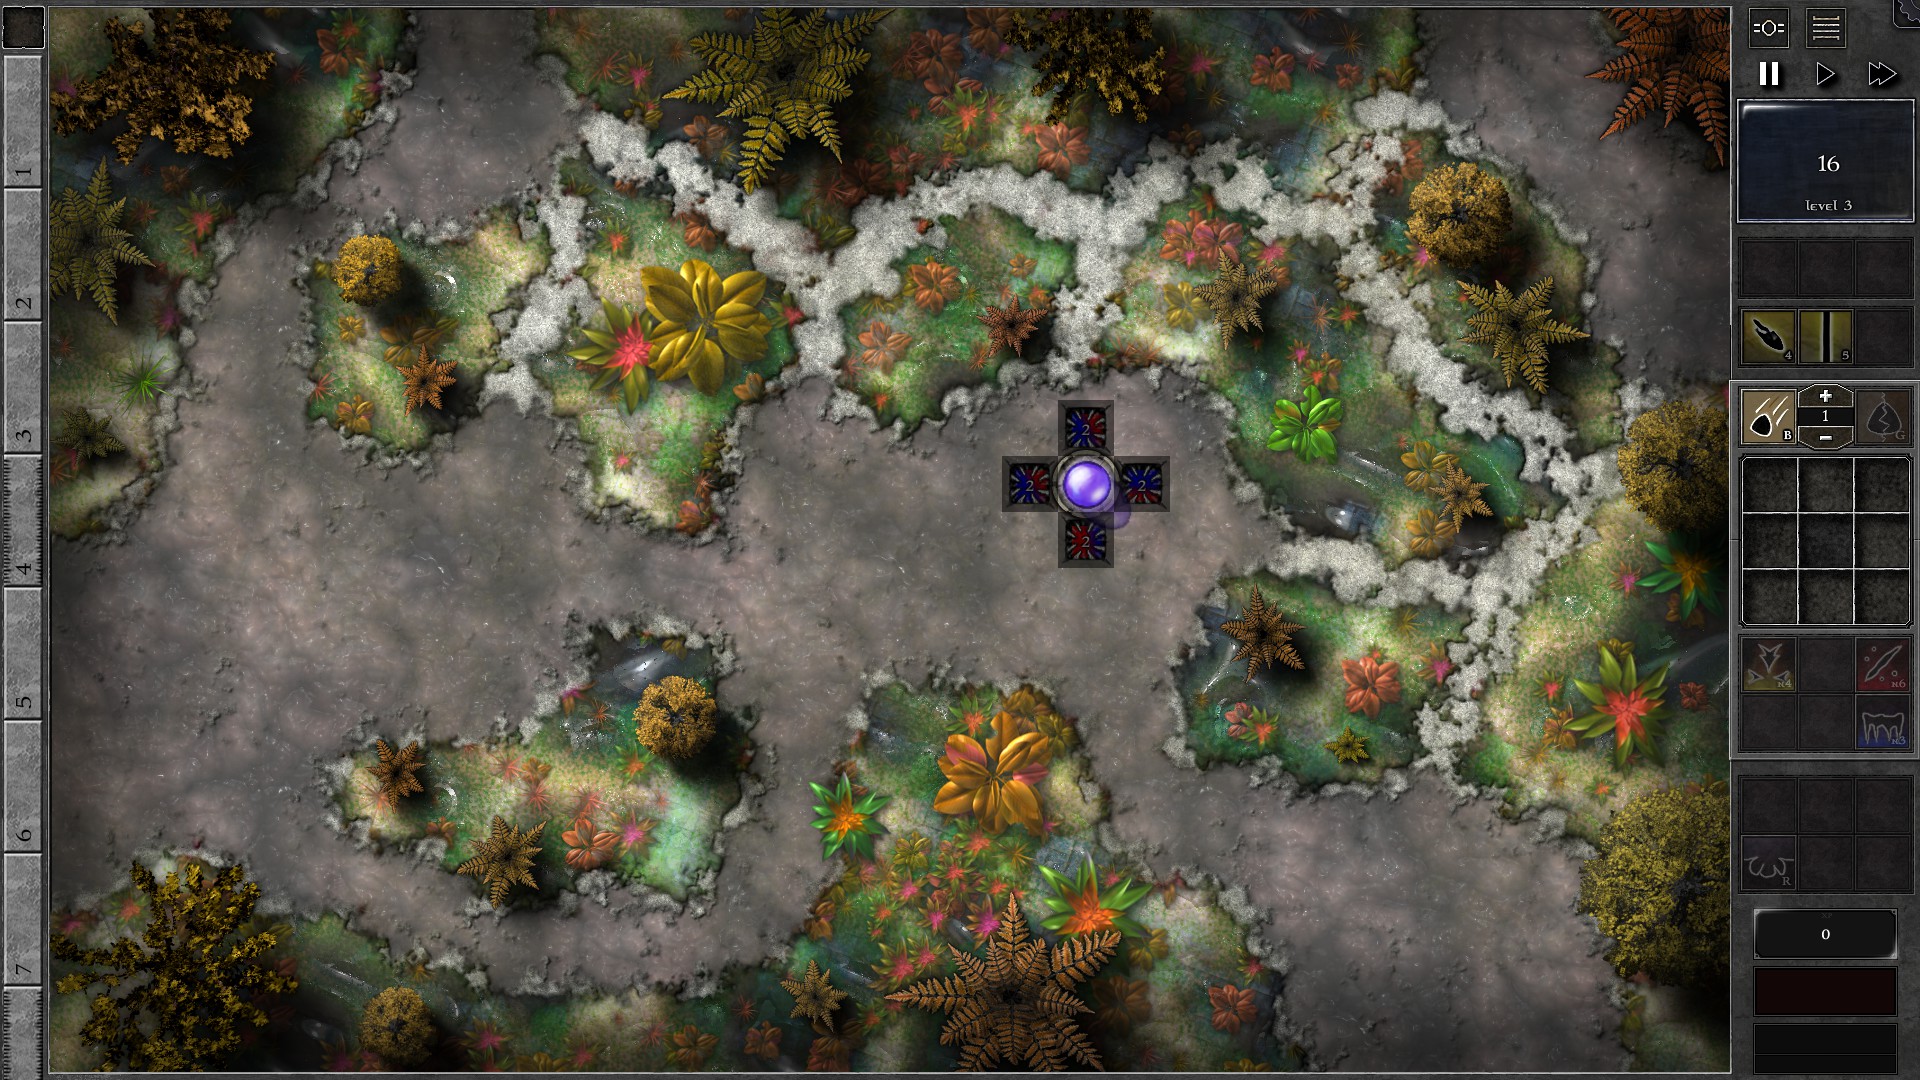
Build 4 traps around your Orb and insert g2 r/b gems into the traps. Start the waves, and as your enhancement spells charge up, apply them to the trap gems. Start with giving all 4 gems an enhancement first, then eventually replace Beam enhancements with Bolt as you get more Bolt charges. You need the extra damage from Bolt to do consistent OHKOs.
Upgrade your gems all while applying enhancements. You should be able to upgrade all gems to g3 by w20. Make smart use of the gem enhancements to insta-resocket upgraded gems and keep a mana buffer when upgrading gems as you are very susceptible to occasional banishments.
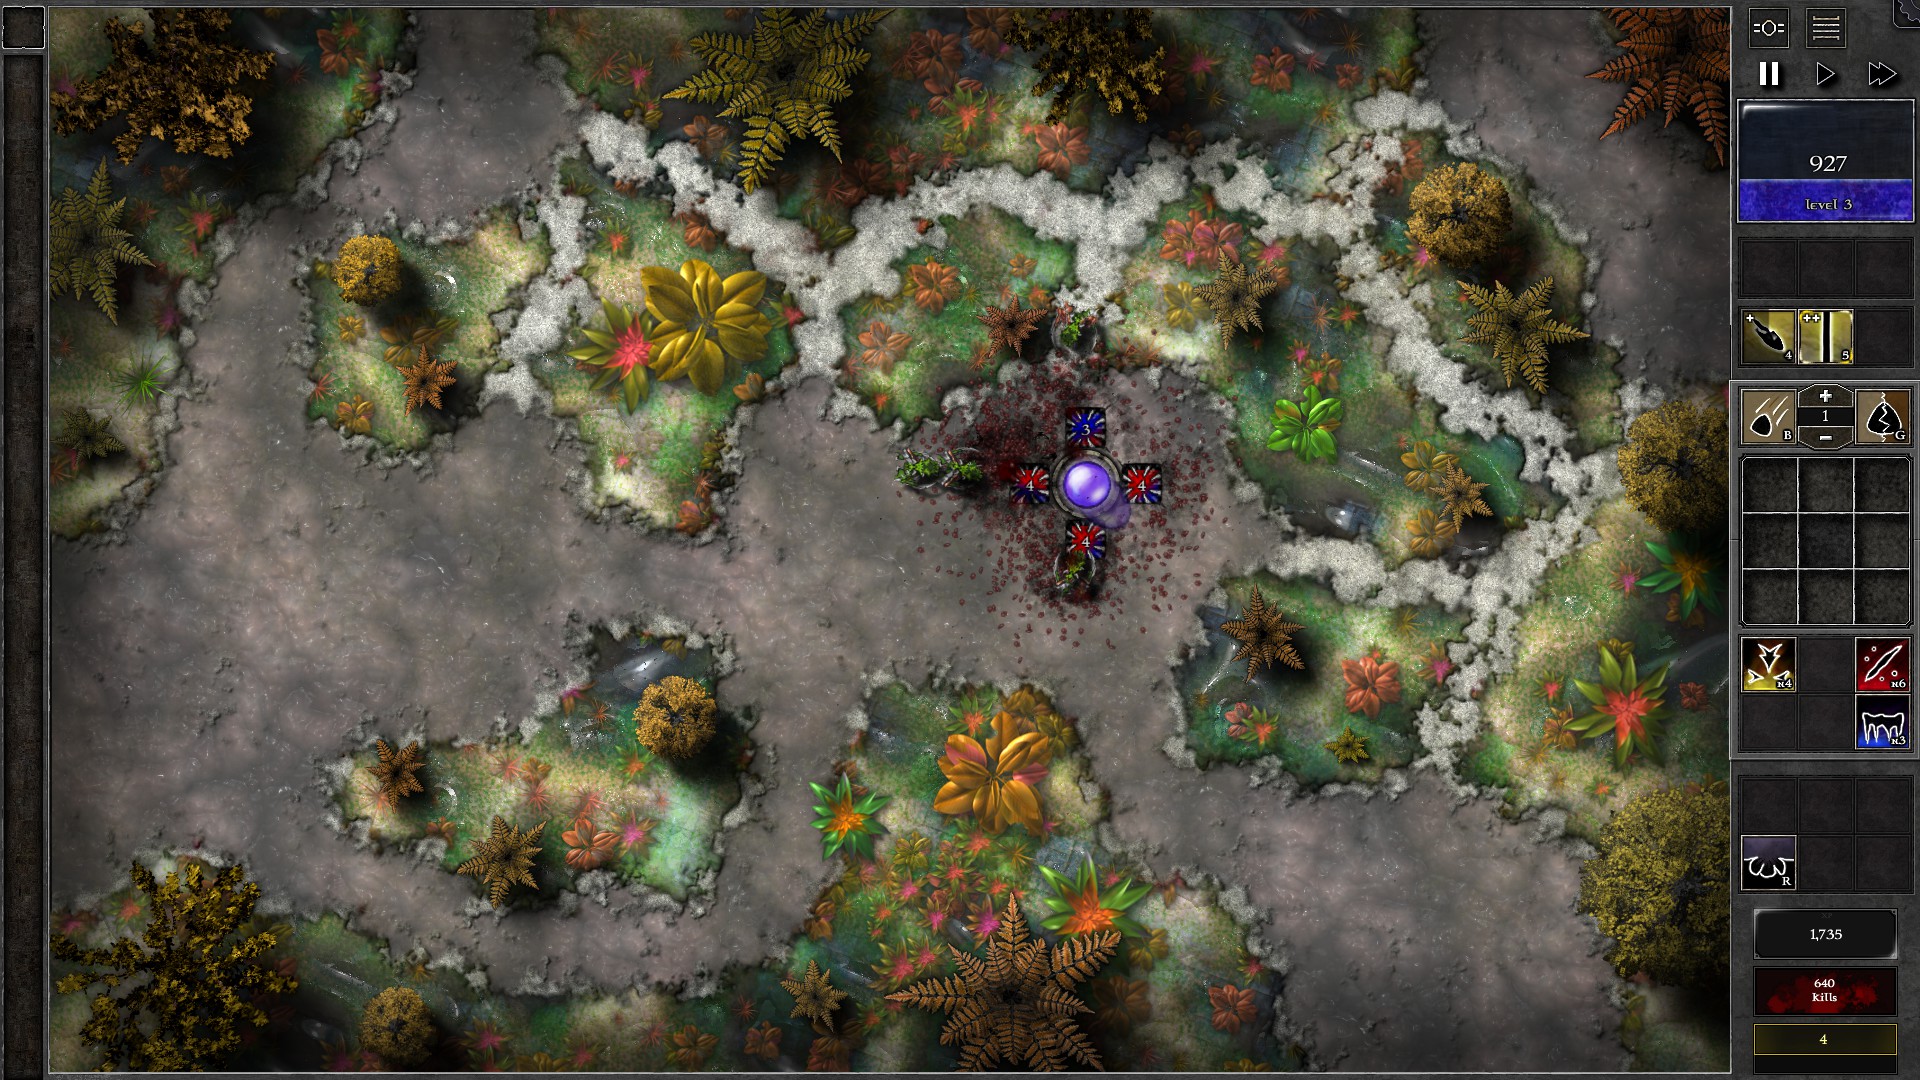
After all gems are upgraded to g3, continue killing and you should be able to upgrade some gems to g4. Focus on upgrading the gem south of and west of the Orb as these 2 are likely killing more monsters. You should have 3 g4 gems when you defeat the last monster.
063 – Field L3
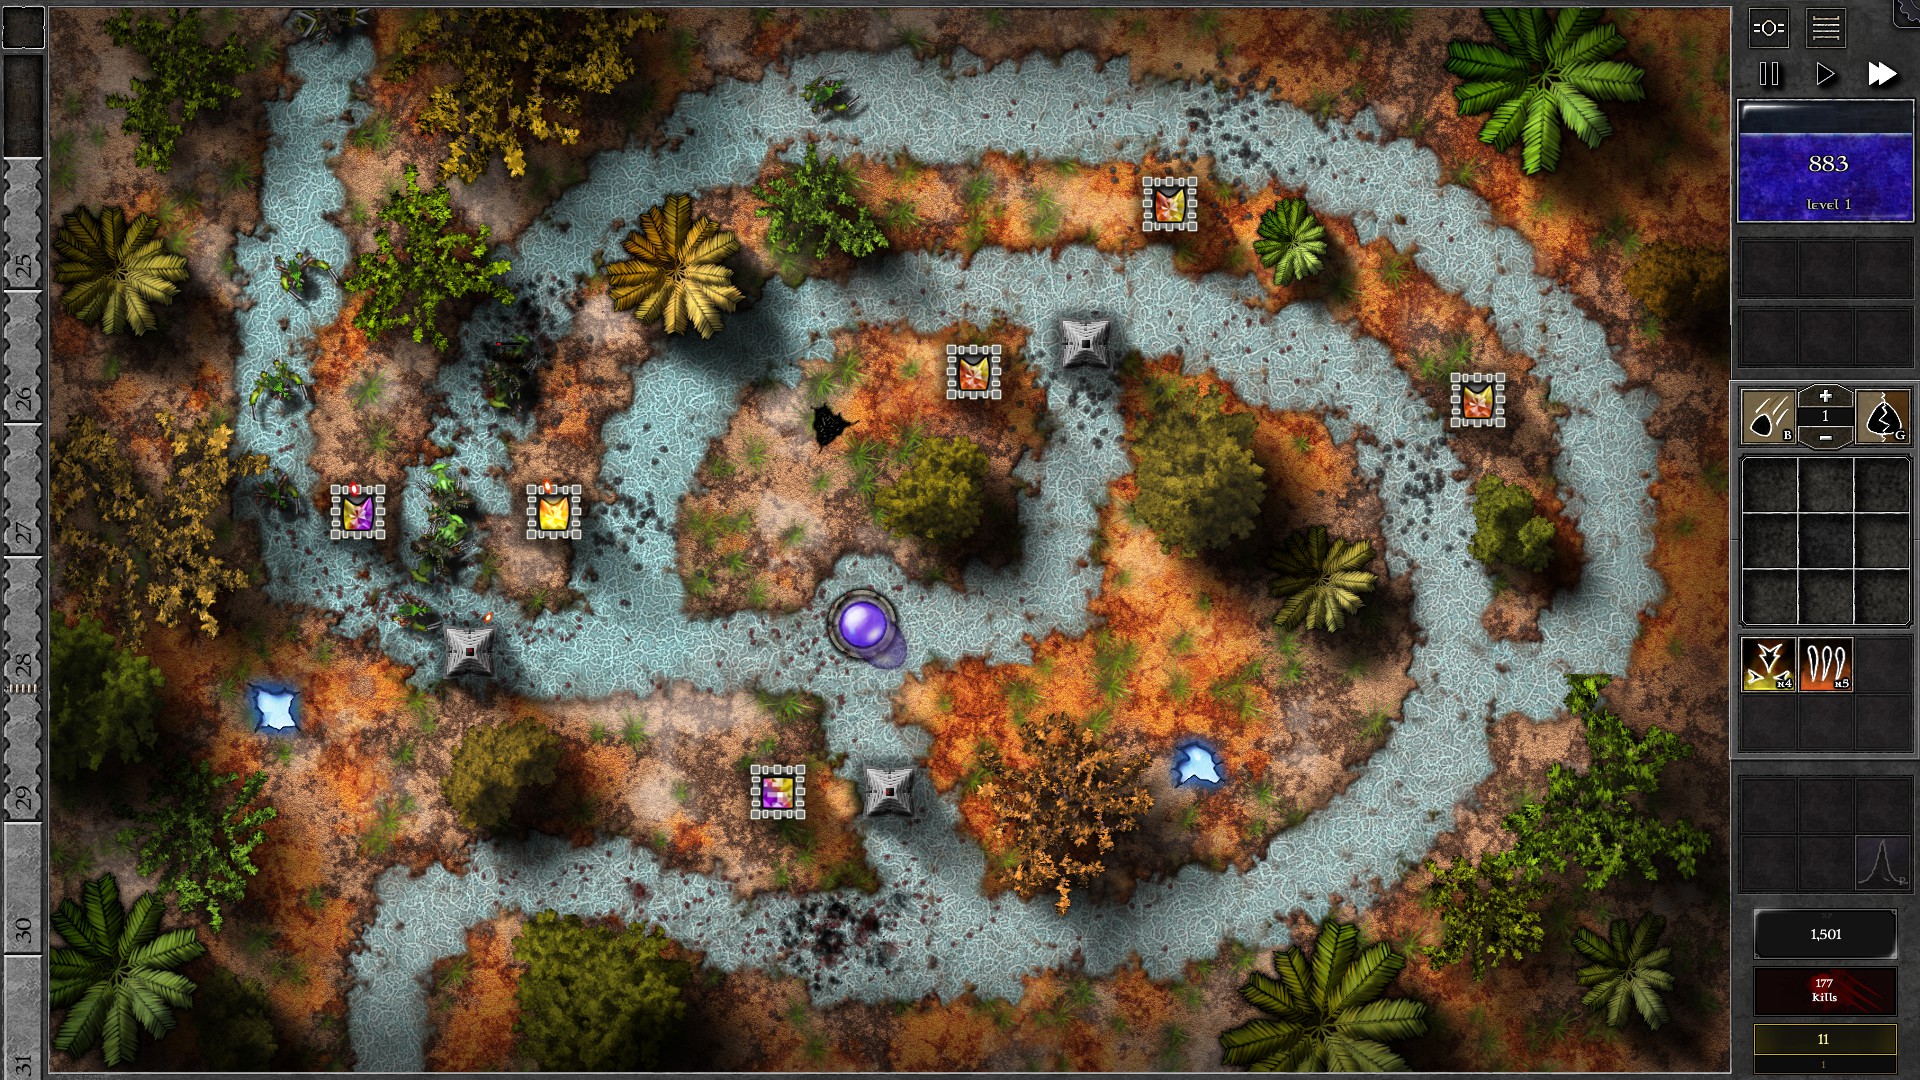
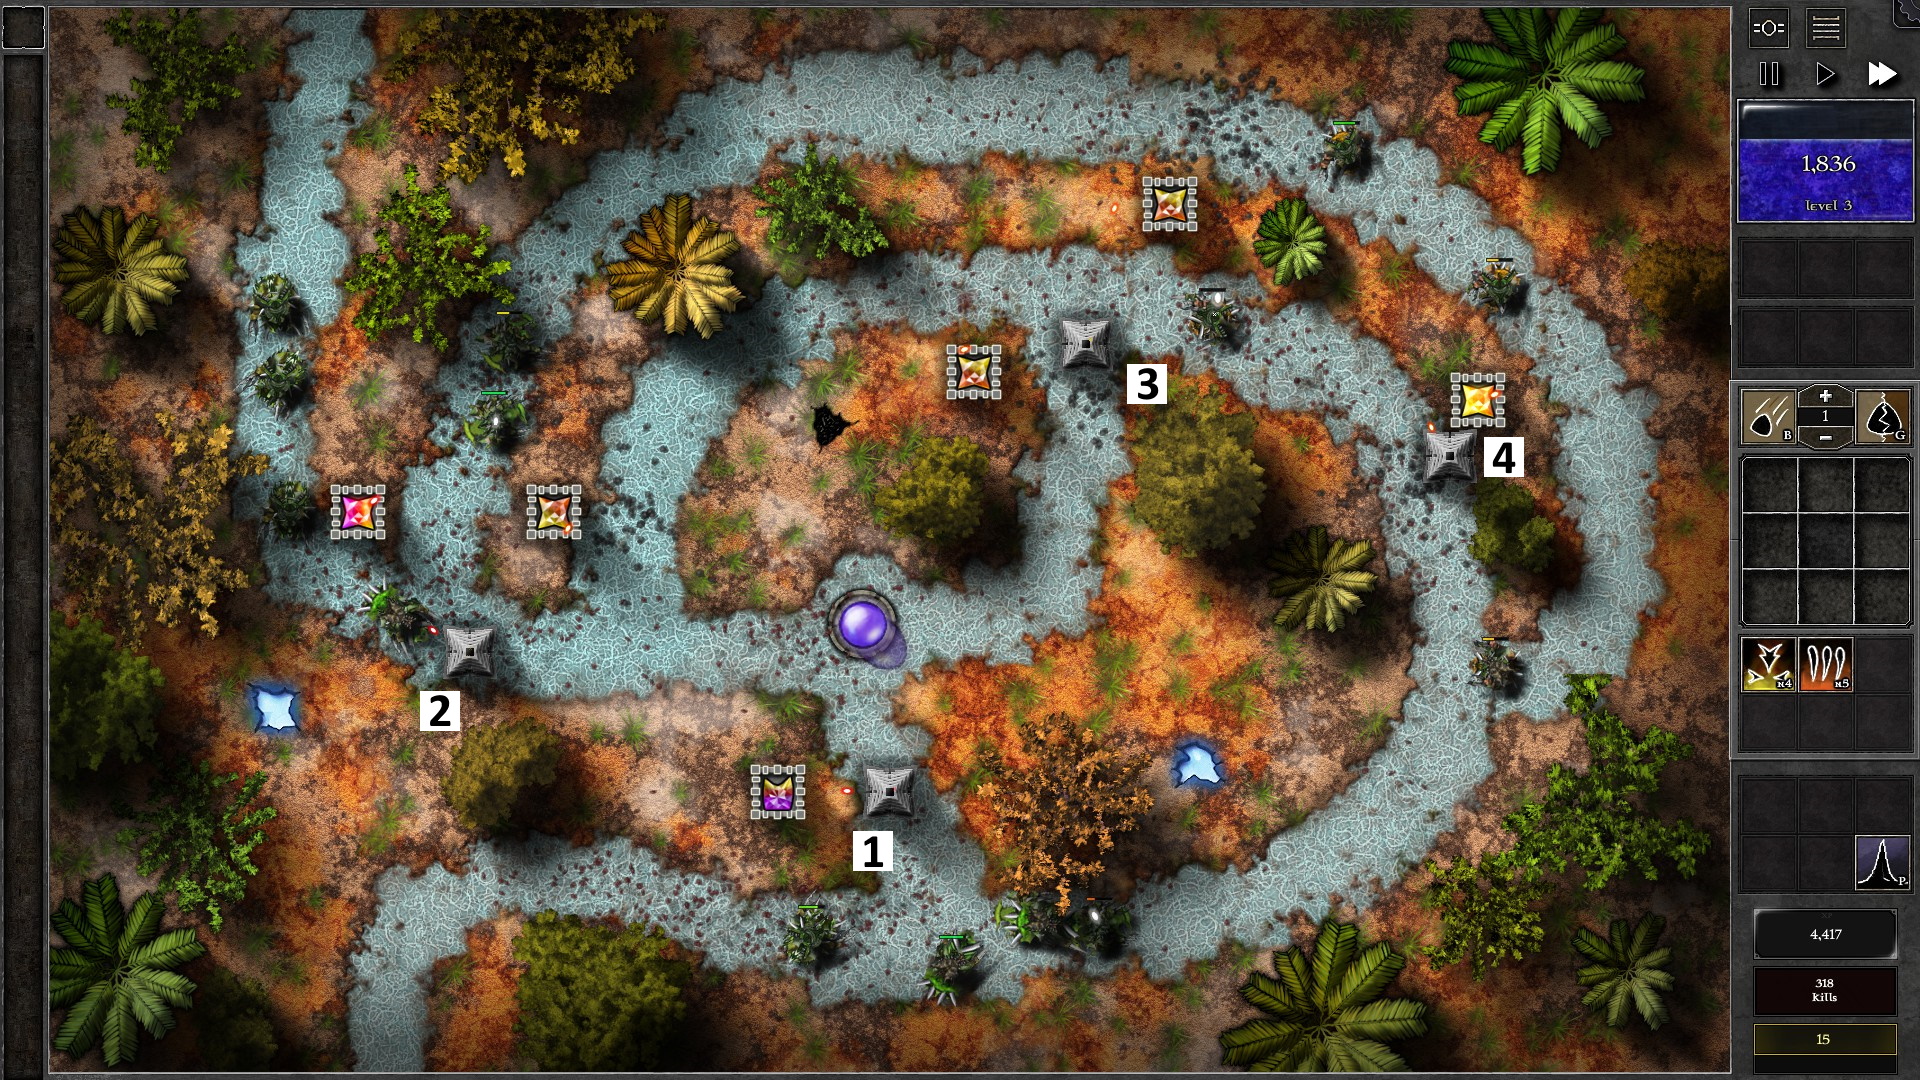
Without much options on your disposal, your only way to support the Spiritforge gems in this Trial is to construct additional build Pylons.
Start the waves without doing anything first. At around w6 several barricades would be destroyed which allows you to build the pylon marked as “No. 1” (refer to second screenshot for the numbering), blocking the direct path leading to the Orb. You will start to get low on mana but one of the Spiritforge gems will start firing at a mana shard in range which helps out with the extra. Survive the waves until around w11 when all the barricades are destroyed, which should allow you to build the pylon marked as “No. 2” blocking the other path directly leading to the Orb. Before w11 you may want to click on some monsters to force the towers/pylons to kill them before banishment (notably monsters that are low on HP).
Wait until the centre mana shard is depleted, and build the pylon marked as “No. 3” to further lengthen the monsters’ pathway. Finally collect enough mana to build the pylon marked as “No. 4” for the Spiritforge tower close to it to use. You should be able to survive all the waves as the Spiritforge tower upgrades on its own.
064 – Field L4
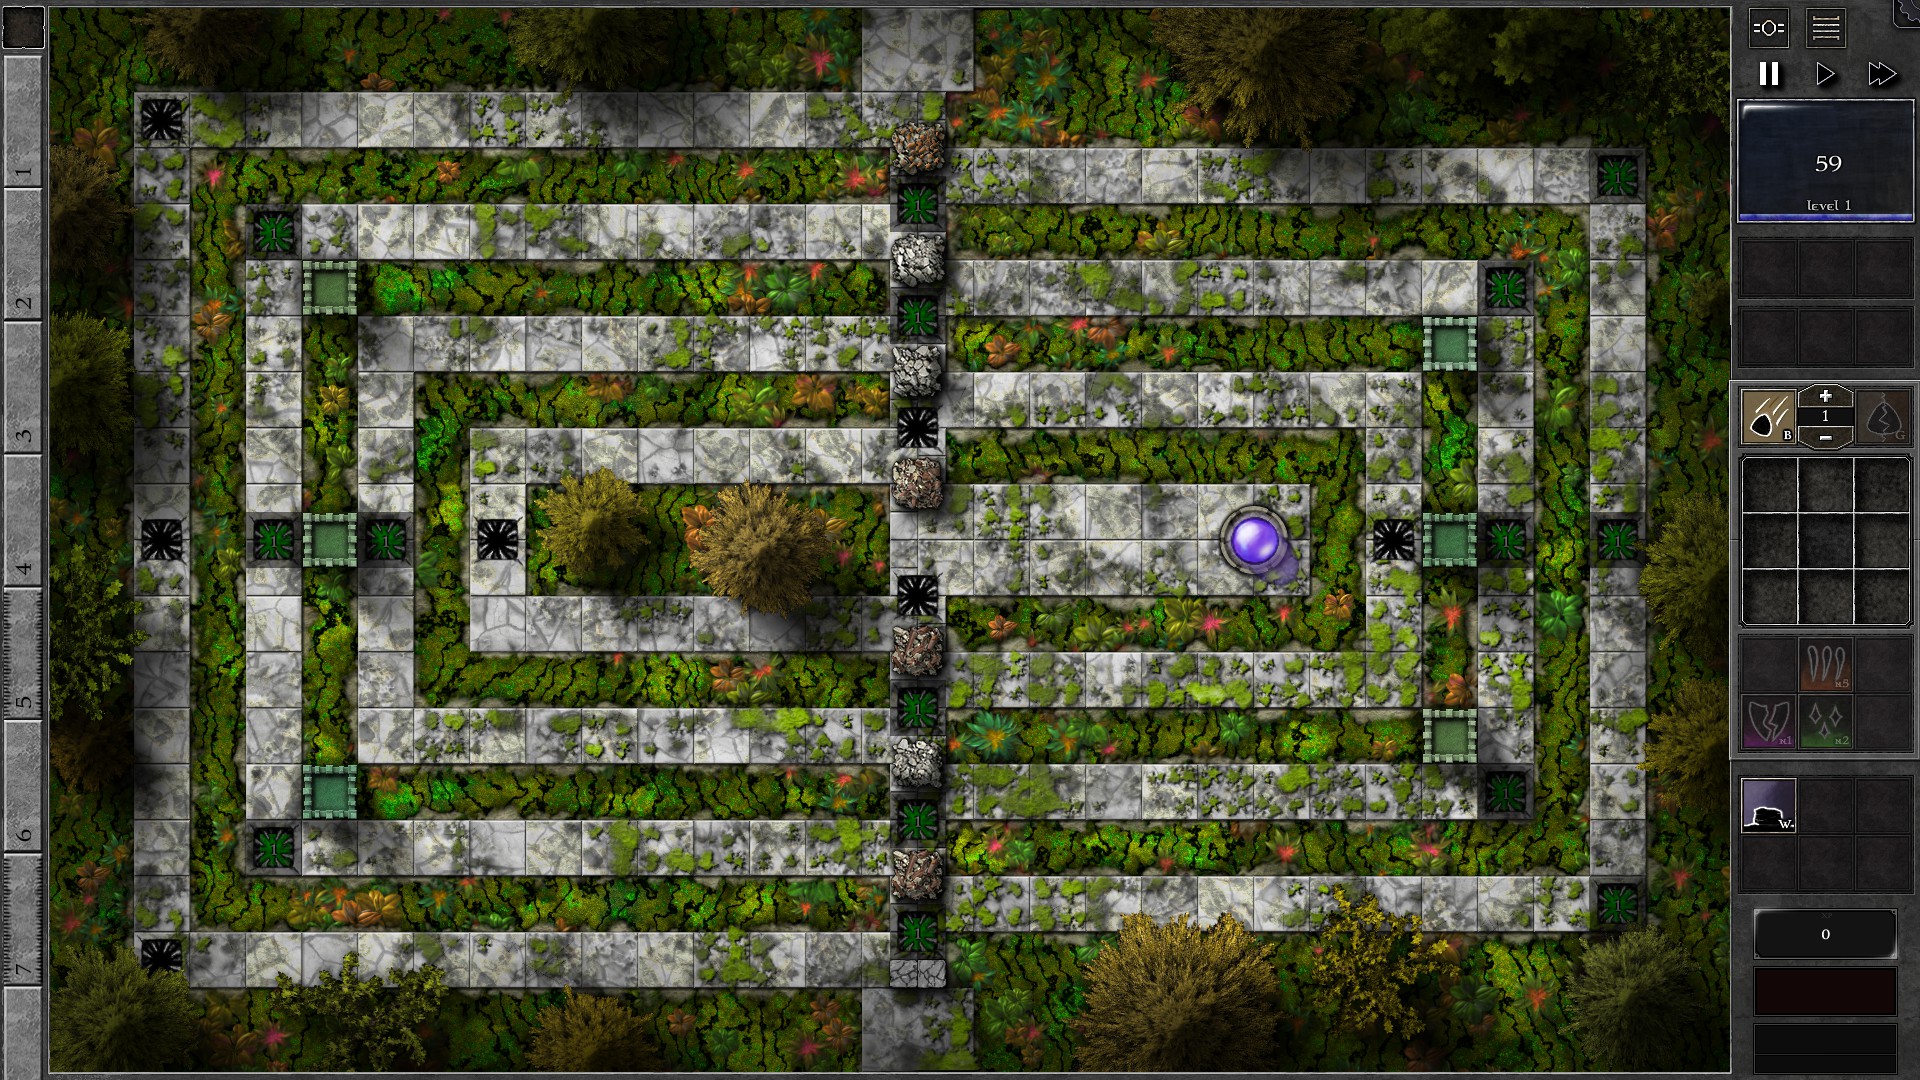
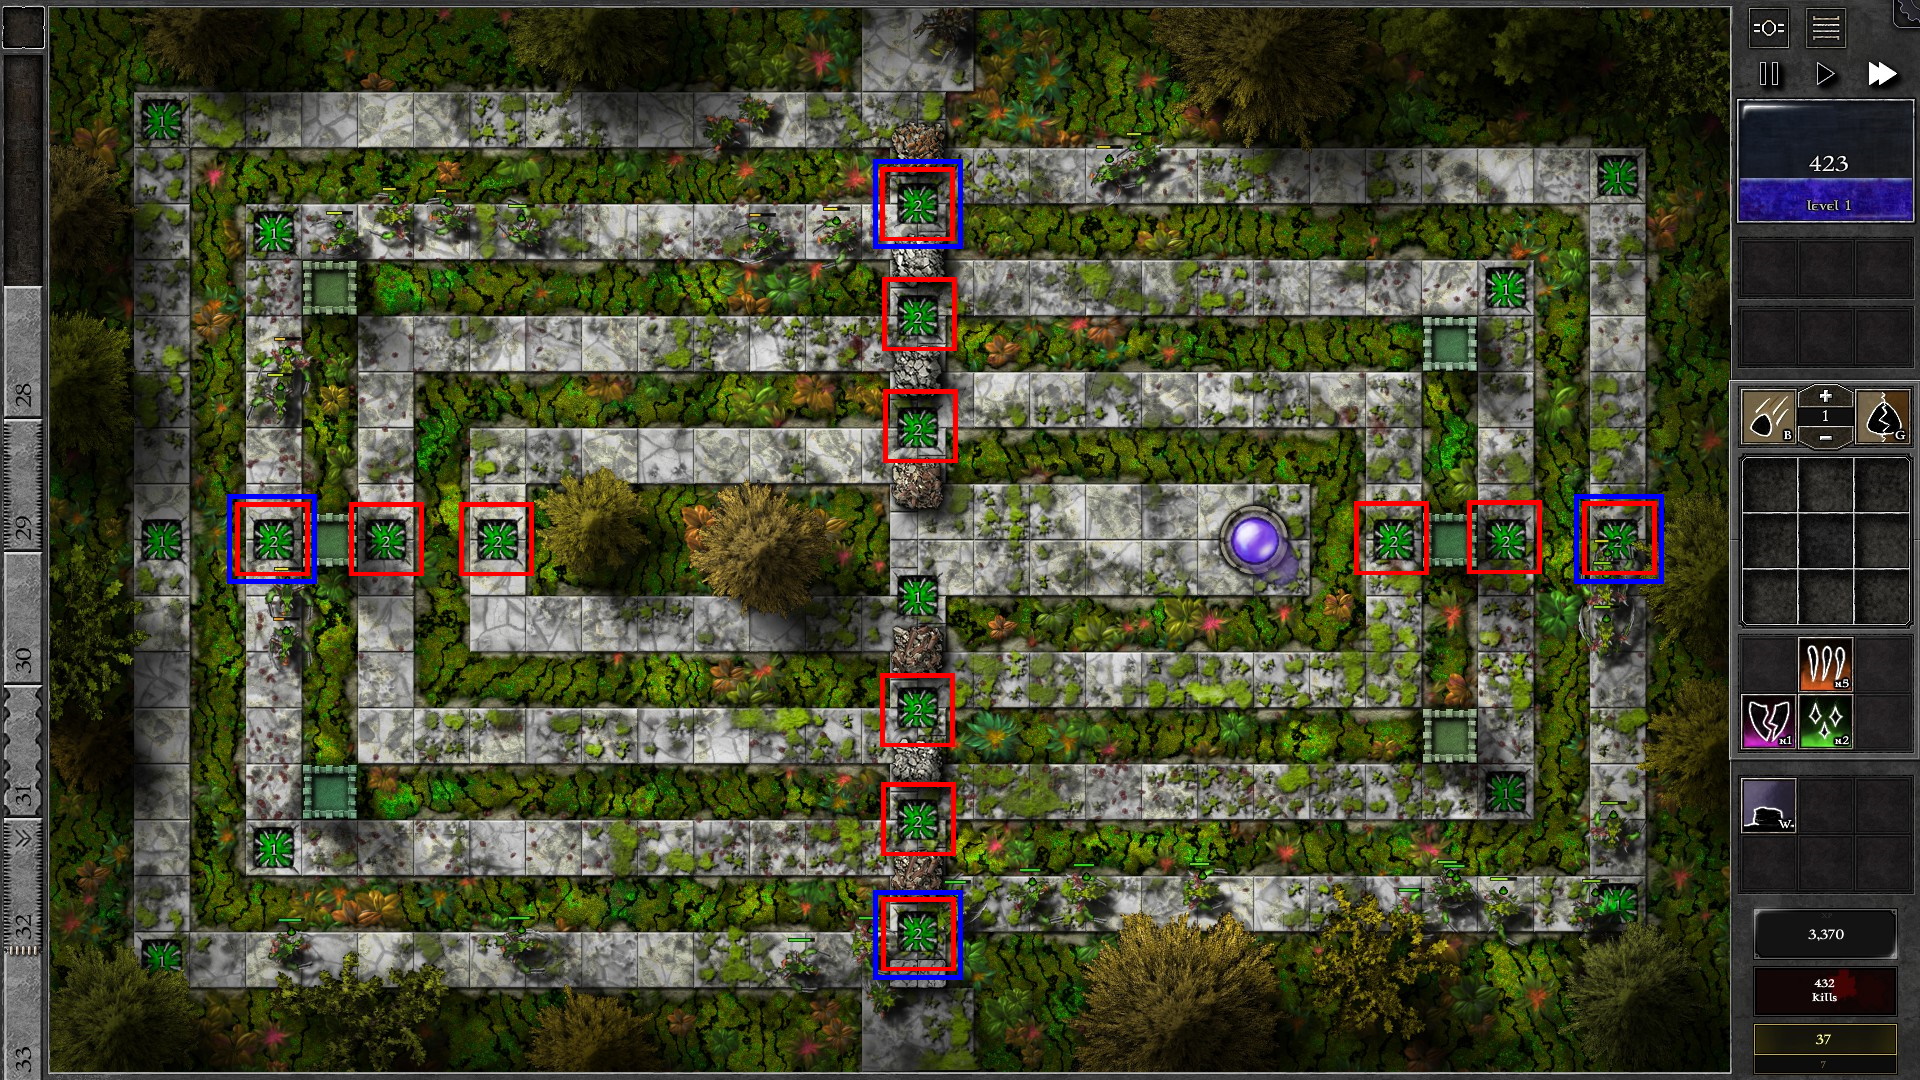
Start by setting up the wall segment below and as many g1 green gems you can afford into the traps along the path. Set all the green gems to target “Least Affected by Specials” and start the waves. Fill the remaining traps with g1 g gems which should be doable before w8.
Once the gems are setup, start upgrading the gems to take on stronger monsters. Upgrade the gems in traps marked in red to g2 as you gain enough mana, starting from the outermost gem and moving inwards. After that, the 4 g2 gems in traps marked blue in the outer path should be further upgraded to g3. You should complete all these upgrades before w36.
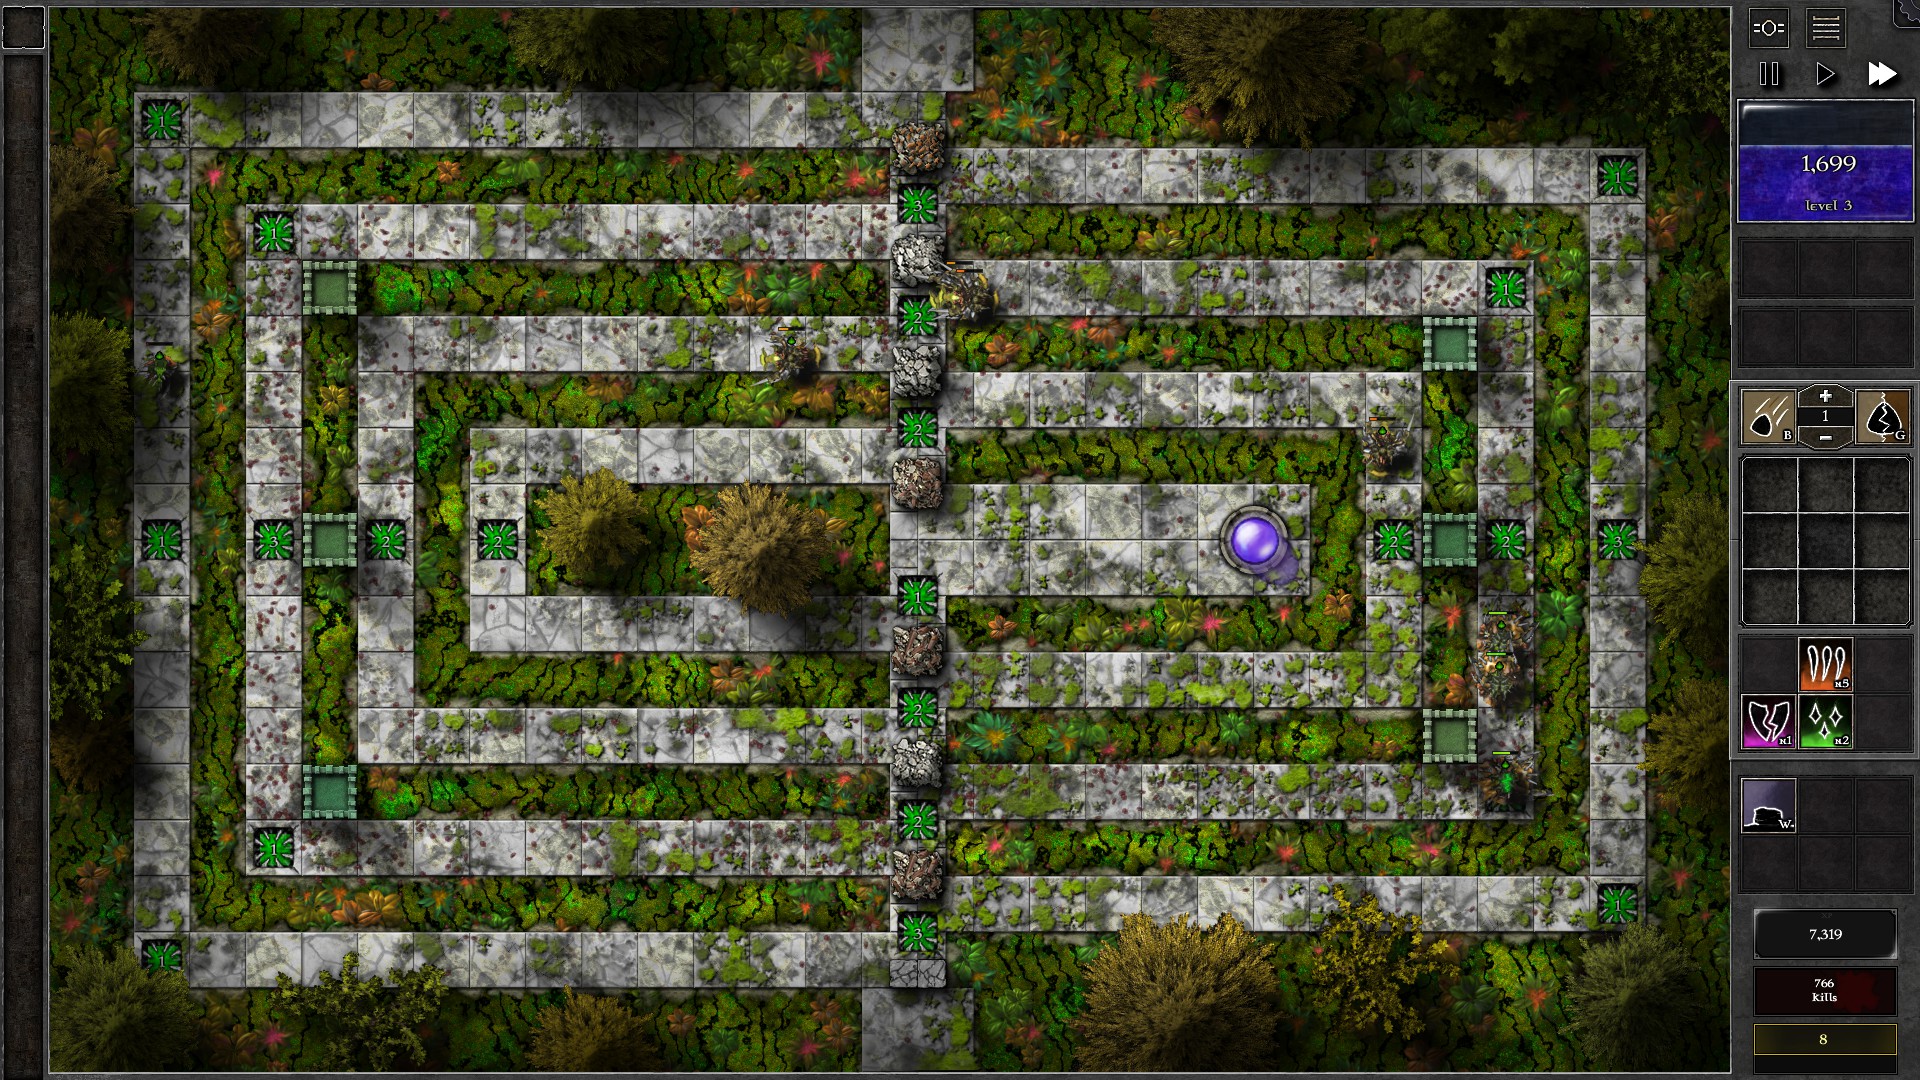
Start saving mana as a buffer against monster banishments as you will need to banish more monsters for the last few waves. Keep killing until most of the reavers and swarmlings are dead. You can now consider using some mana to combine your 4 g3 gems into a g5, so you can kill off the remaining monsters (mostly giants) more efficiently by following them with the g5 gem.
065 – Field L5
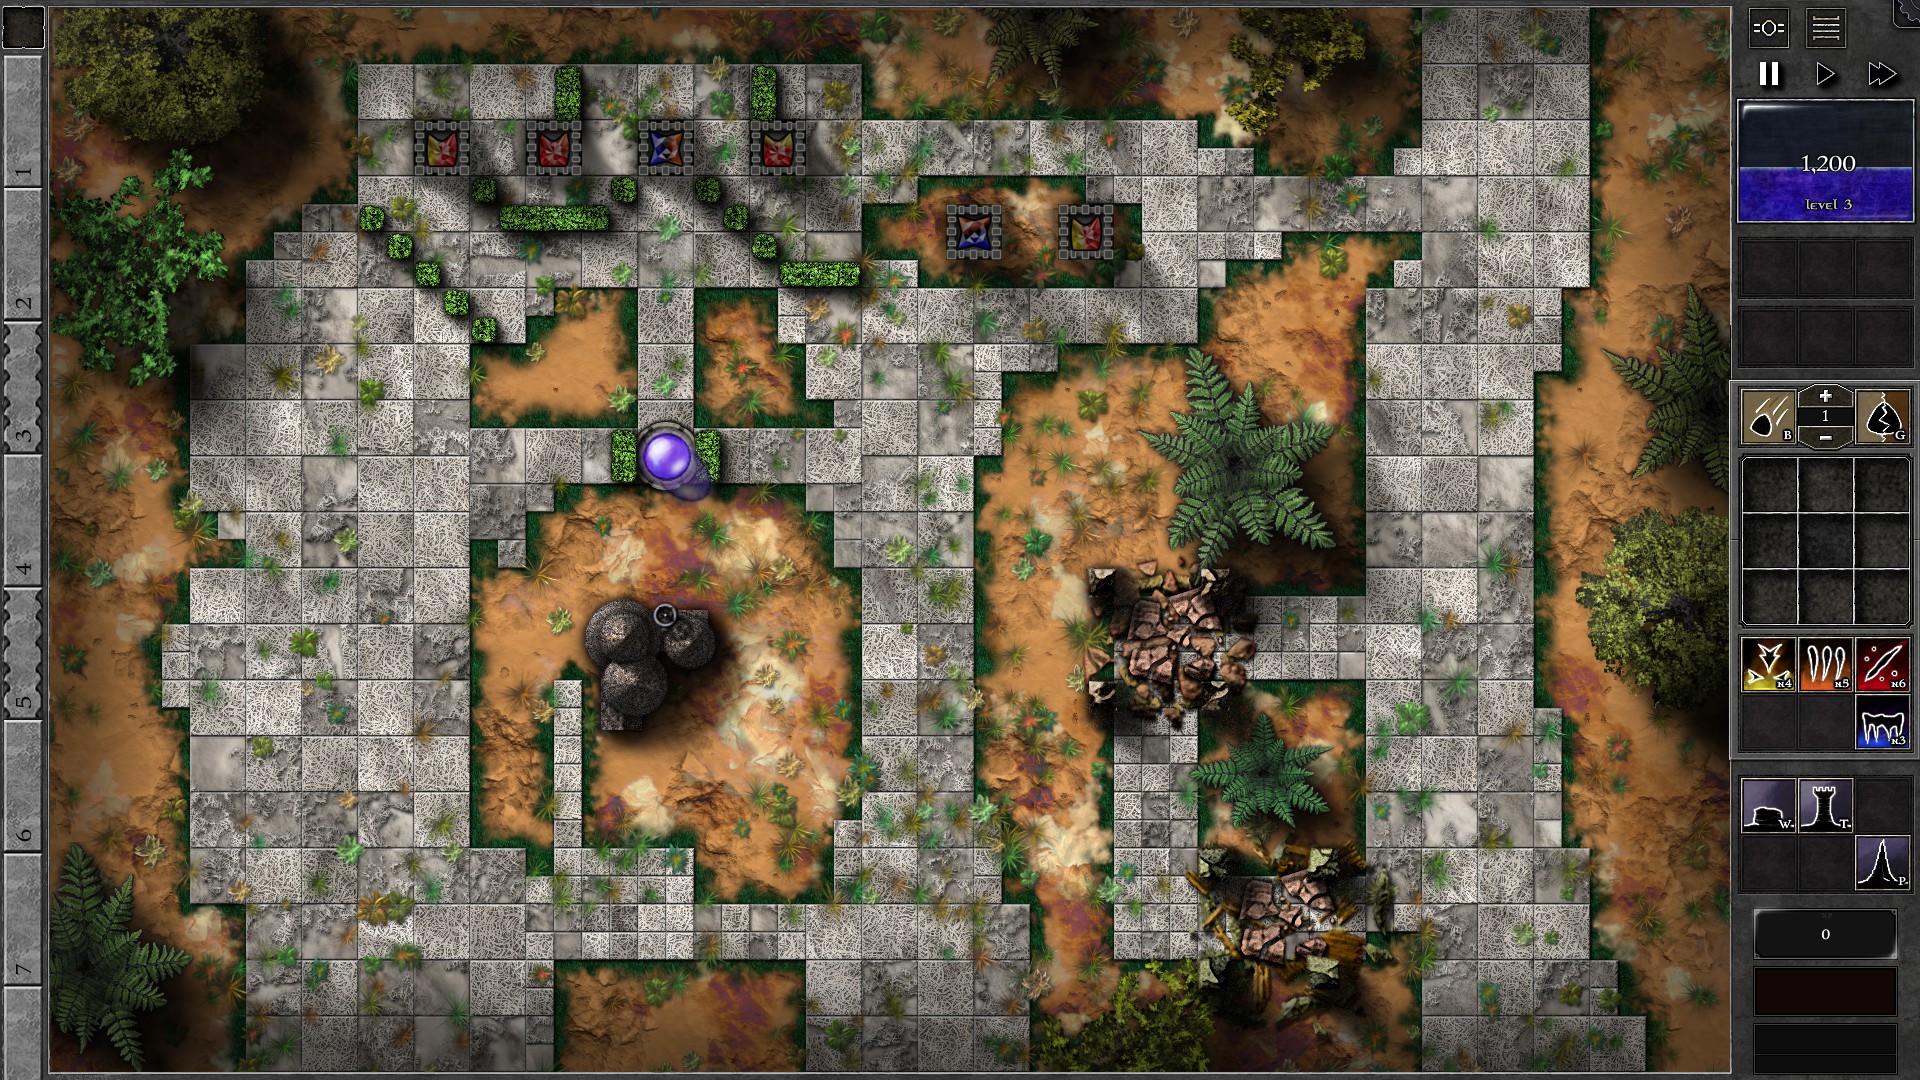
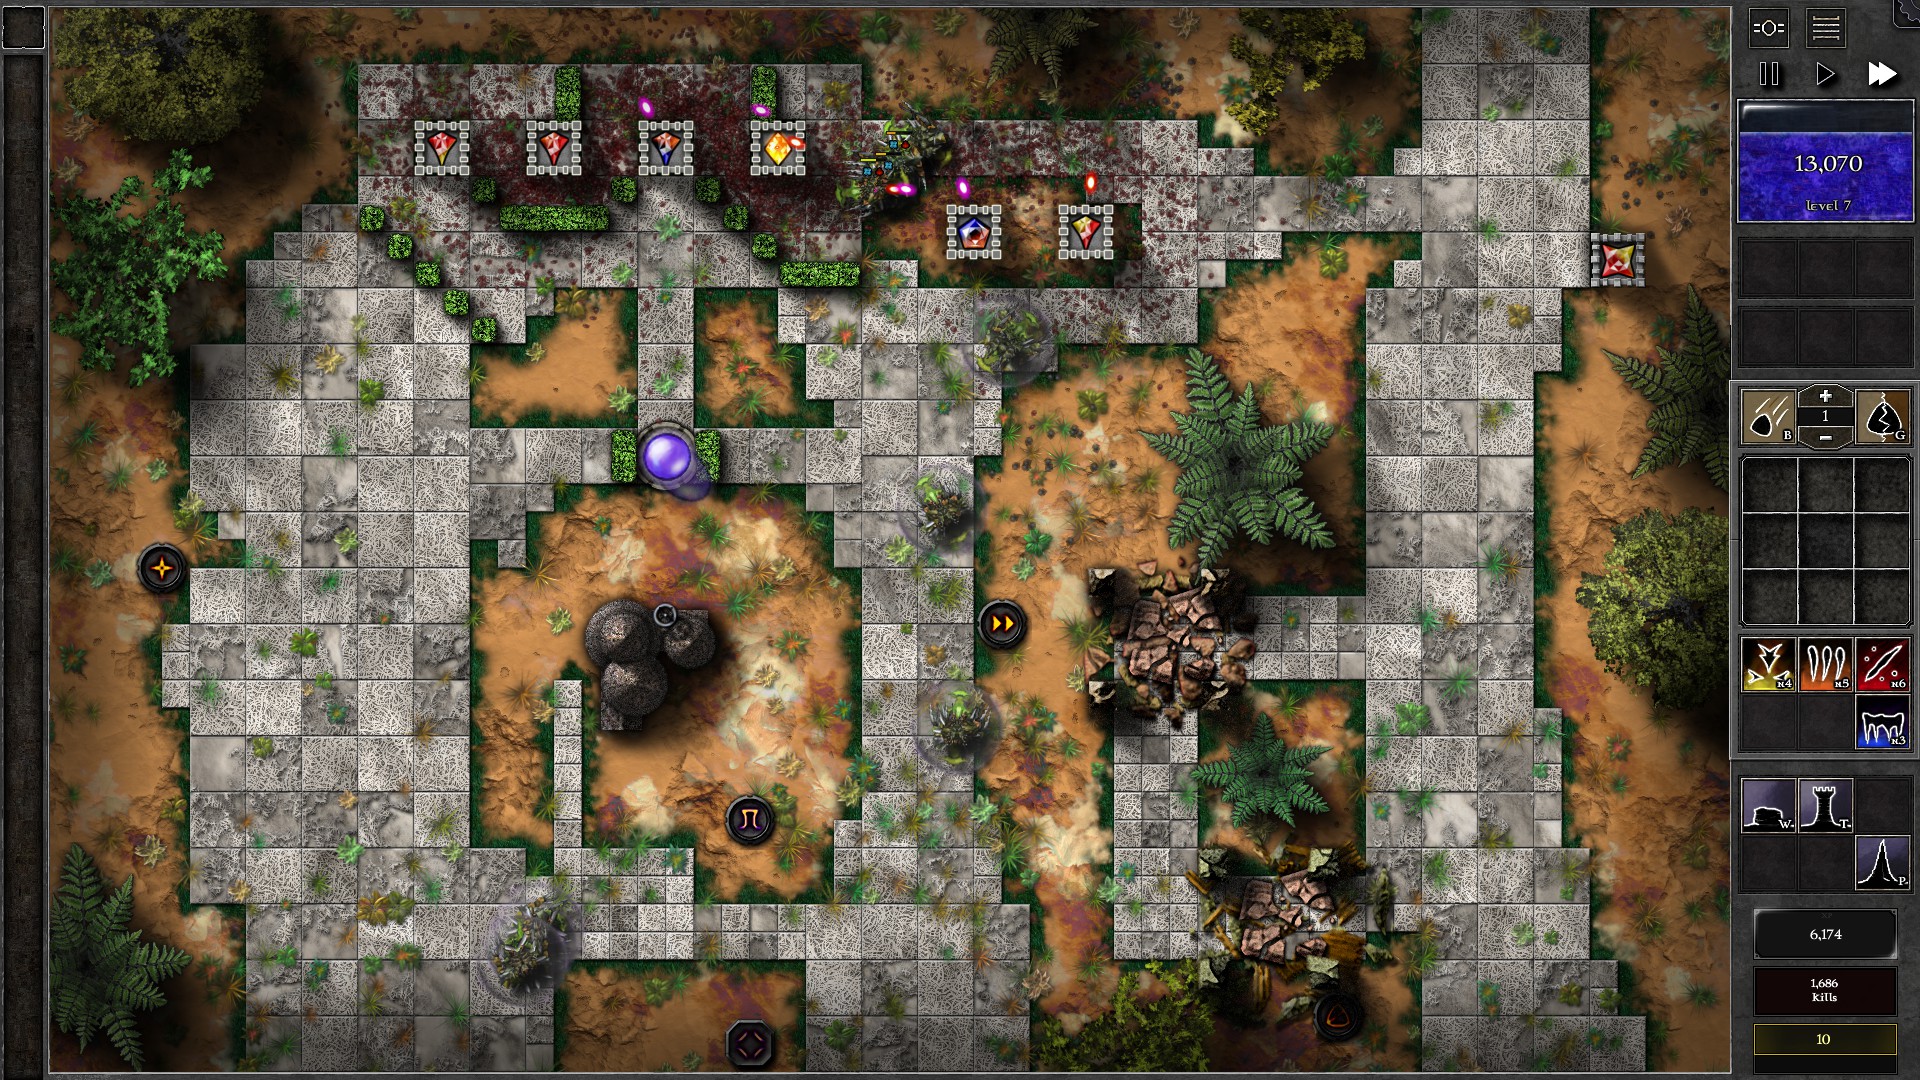
Setup the walls as shown in the first screenshot and start the field. With the self-upgrading Spiritforge gems this Trial should almost be auto-piloting itself to victory.
The only thing you need to worry about is the Beacons from Dark Masonry 1 (2 new beacons every 10th wave). As the Beacons pop up, assess whether they impose additional threat. You can safely ignore beacons that does nothing useful to monsters (e.g. lone Beacon Protectors, Healing beacons way before the kill zone, beacons with range way out of the monster’s path). For those threatening your defenses, build an r/y gem of the highest grade you can afford and setup towers to tear the Beacons down.
066 – Field K1
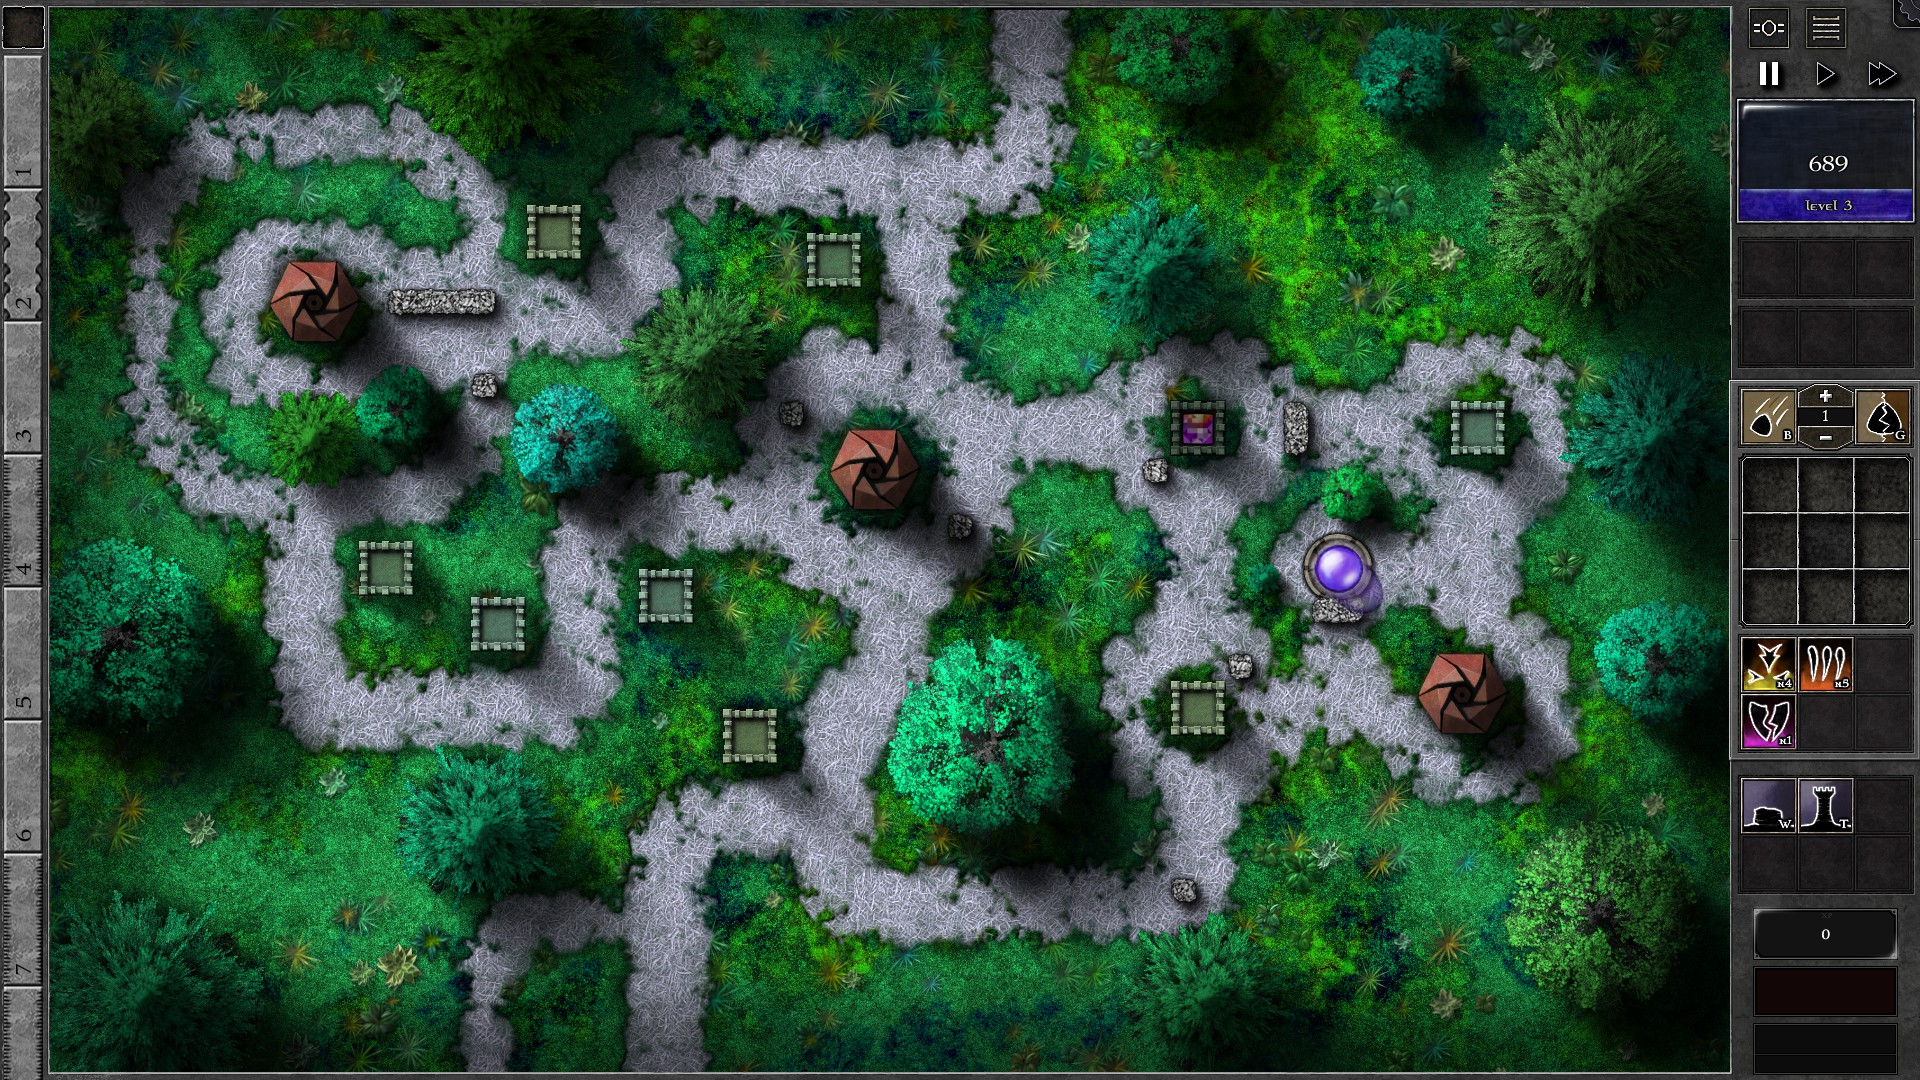
NOTE: There are inherent RNG factors regarding Watchtower targeting monsters or your buildings.
Start by building walls to lengthen monster path and insert a g3 3p1y gem into the tower as shown. Throughout the Trial, pay attention to whether your towers are being targeted by Watchtowers and move your gem before the tower gets destroyed (make sure that all monsters still pass through your gem). Targeted towers will show premonition effects on it before the Watchtower shot arrive. Shots targeting towers also move much slower than shots targeting monsters.
In addition, try sending as much early waves as you can (without overwhelming yourself) to increase the chance of Watchtowers targeting monsters.
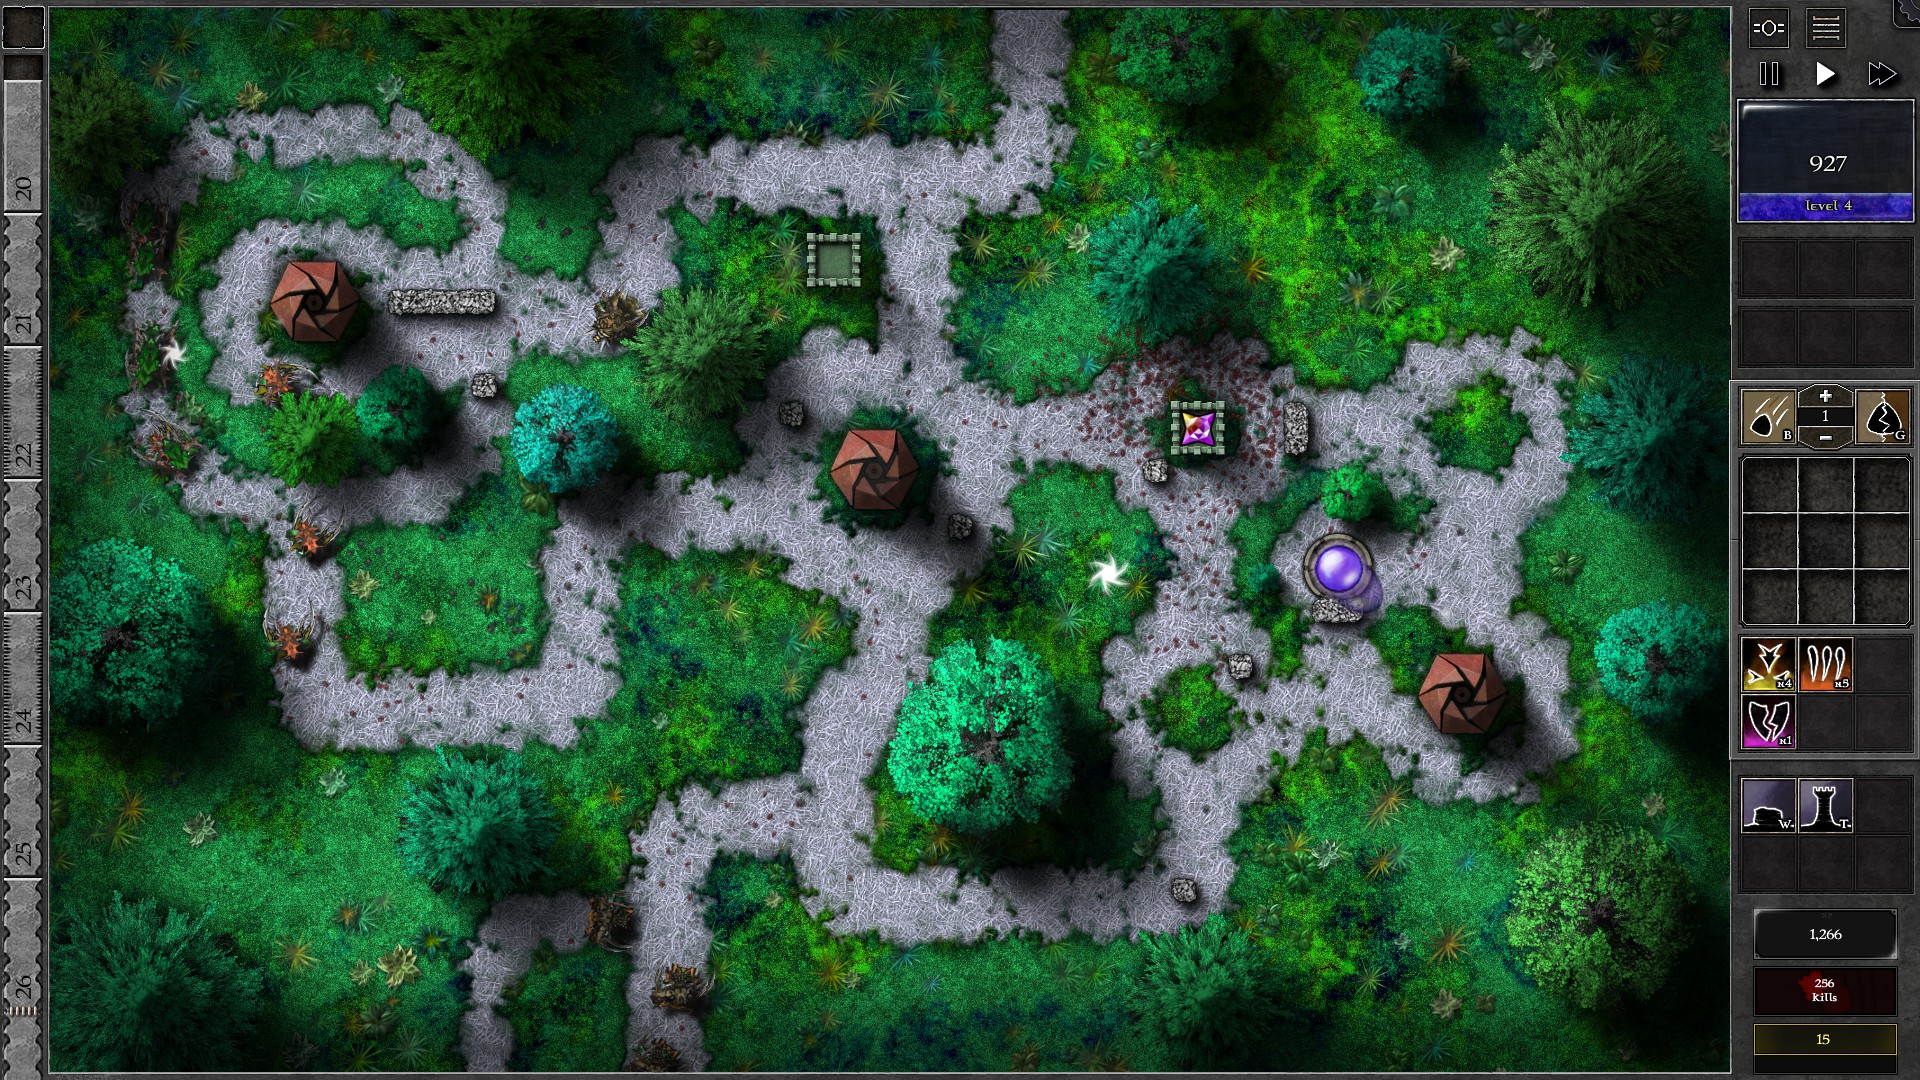
At around w7-8 you should be able to upgrade your gem to g4. For w10-12 giants, send them all early once all the monsters from w9 entered the field, then send w13 once the giants have spawned in. At around w16, you should have enough mana for a gem upgrade. However, you will also start to lose more towers and thus need to rebuild towers. Always keep enough mana buffer for rebuilding towers when upgrading, but you should still be able to upgrade the gem to g5 before w20.
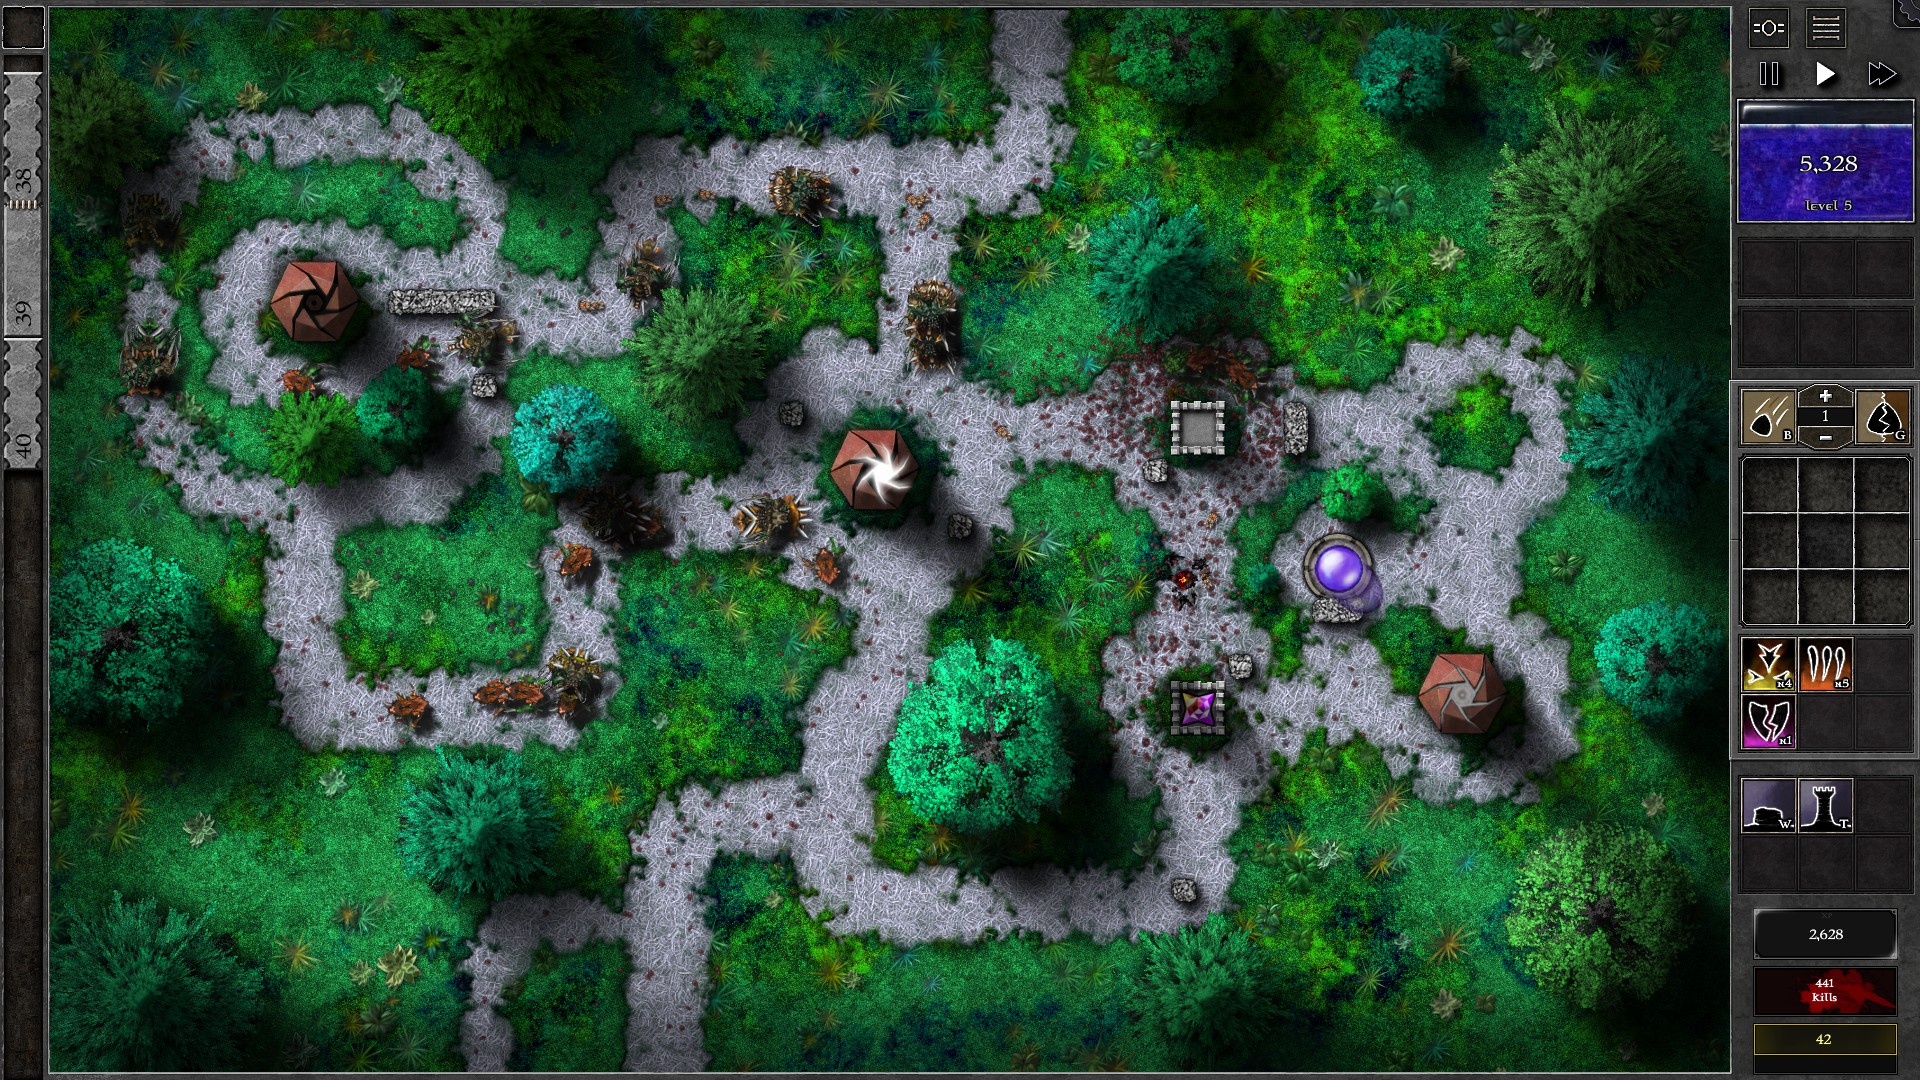
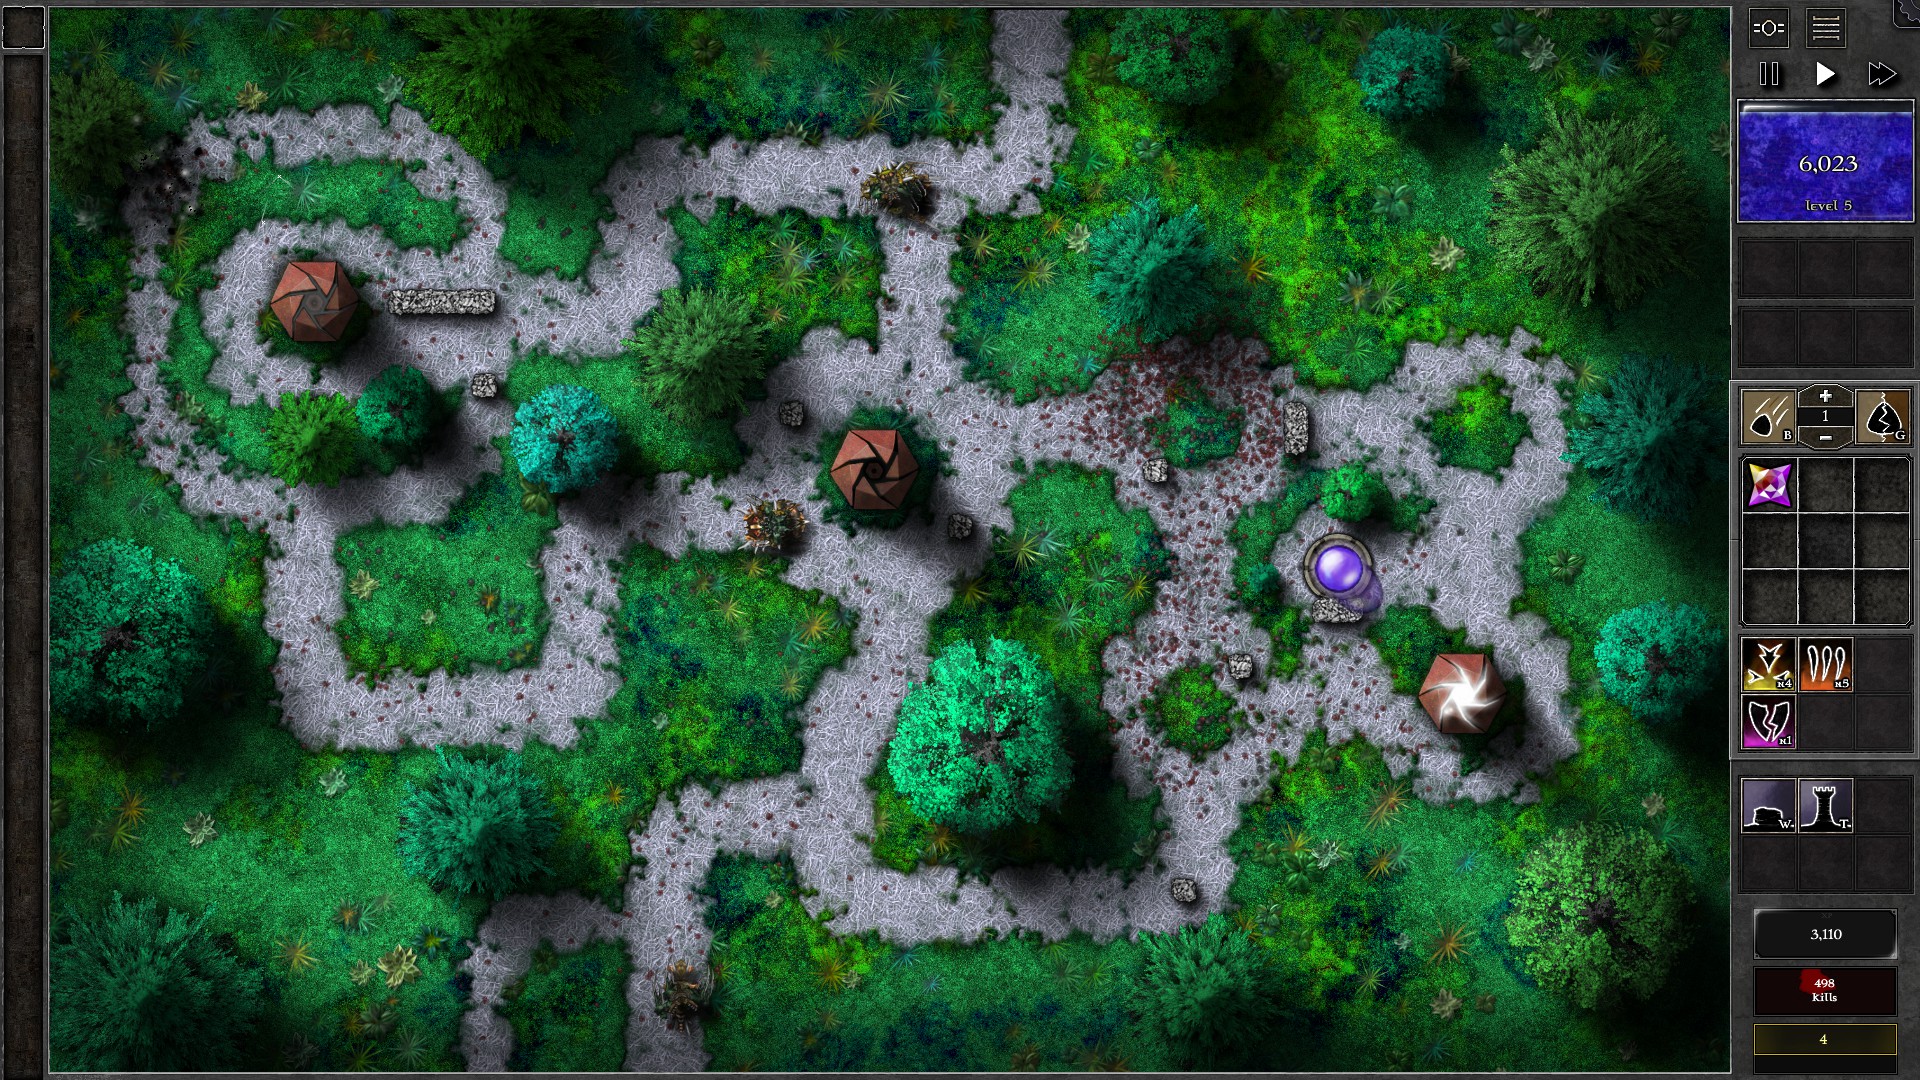
At w21-31 you will notice a lot more giant waves incoming, try sending most of them as early as you can but be careful of swarmling and reaver waves mixed in between. At this point you will likely need to rebuild towers every time your tower get targeted by Watchtowers. Utilize the early wave from early giant waves and stock up at least 1500-2000 mana to rebuild towers. Meanwhile, try to send the remaining few waves as fast as you can reasonably take on. A g5 gem should be able to take on the last few waves of reavers and swarmlings. Once no more monsters spawn and you have only about 10-20 monsters left, you can even remove your gem from the field and just let the Watchtowers do their job.
067 – Field K2
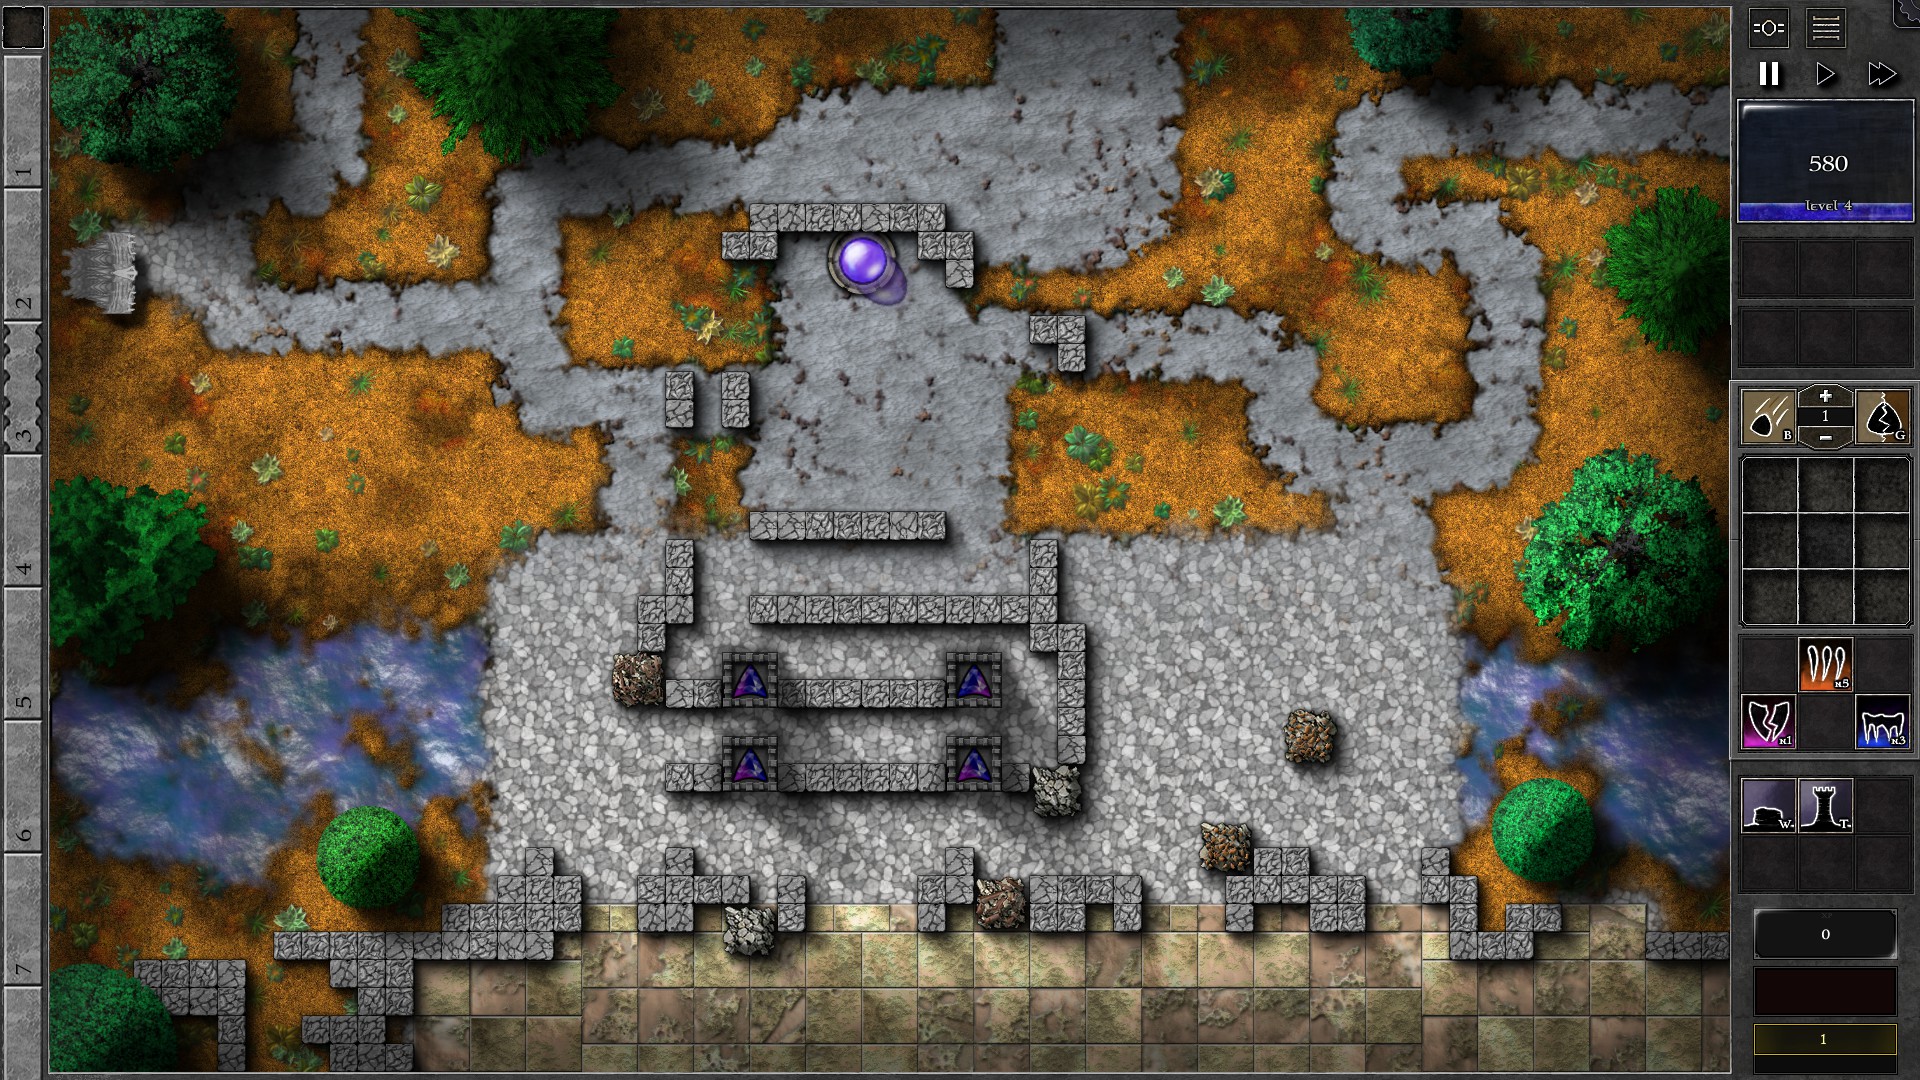

Start the field as shown with 4 g2 p/b gems. Upgrade the gems as soon as you have enough mana; you should reach 4 g3 gems at around w10. You will soon notice that Wallbreakers are coming into the field, and there is also one Wallbreaker in stasis which will start moving at w15.
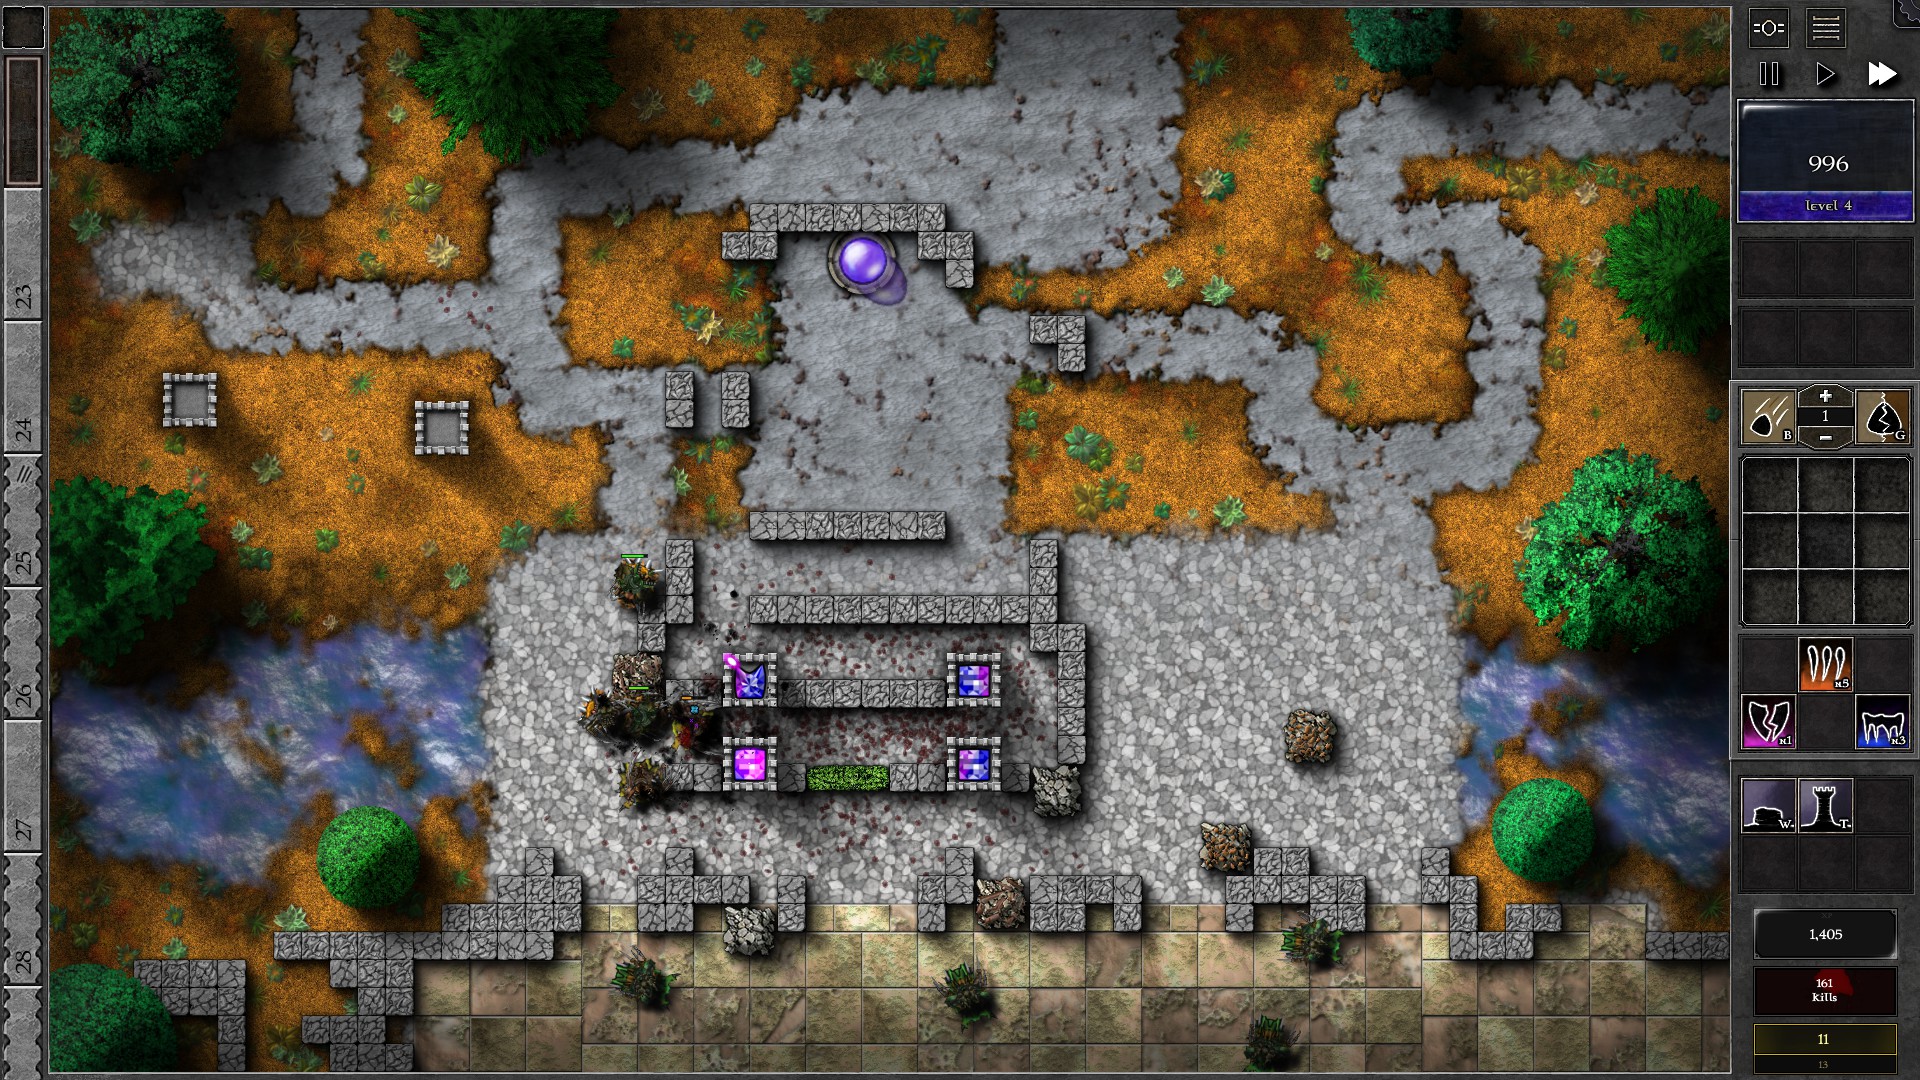
The first Wallbreaker arrives at w12; continue fighting as normal, and set up a tower close to the Wallbreaker in stasis with a g2 p/b gem to start damaging it before it moves (Set target to “Specials”). As the w12 Wallbreaker closes into your towers, click on it to focus on taking it down. It will likely destroy one set of walls which shortens the monster path slightly. This is not yet a concern though since most of the monsters on field should be slow giants. Upgrade the g2 p/b gem on the sides fighting the w15 Wallbreaker to g3, then fix the destroyed walls from w12 Wallbreakers.
Build another tower to follow the w15 Wallbreaker with your “Specials” targeting g3 gem and you should kill it before it reaches the intersection ahead. After killing the w15 Wallbreaker, combine the “Specials” targeting g3 gem into one of the other 4 gems to make your first g4 gem. You should also be able to upgrade 1-2 more gem to g4 before w27. Now, make sure the 2 towers closer to the bottom of the field are g4 (move gems if needed) to prepare for another Wallbreaker.
A 3rd Wallbreaker will arrive at w27. Kill off all the reavers in w27 first, then focus on the Wallbreaker as it closes in (very convenient that w28-31 are all giant waves). You should be able to kill the Wallbreaker and upgrade the last g3 gem into g4 before w32.
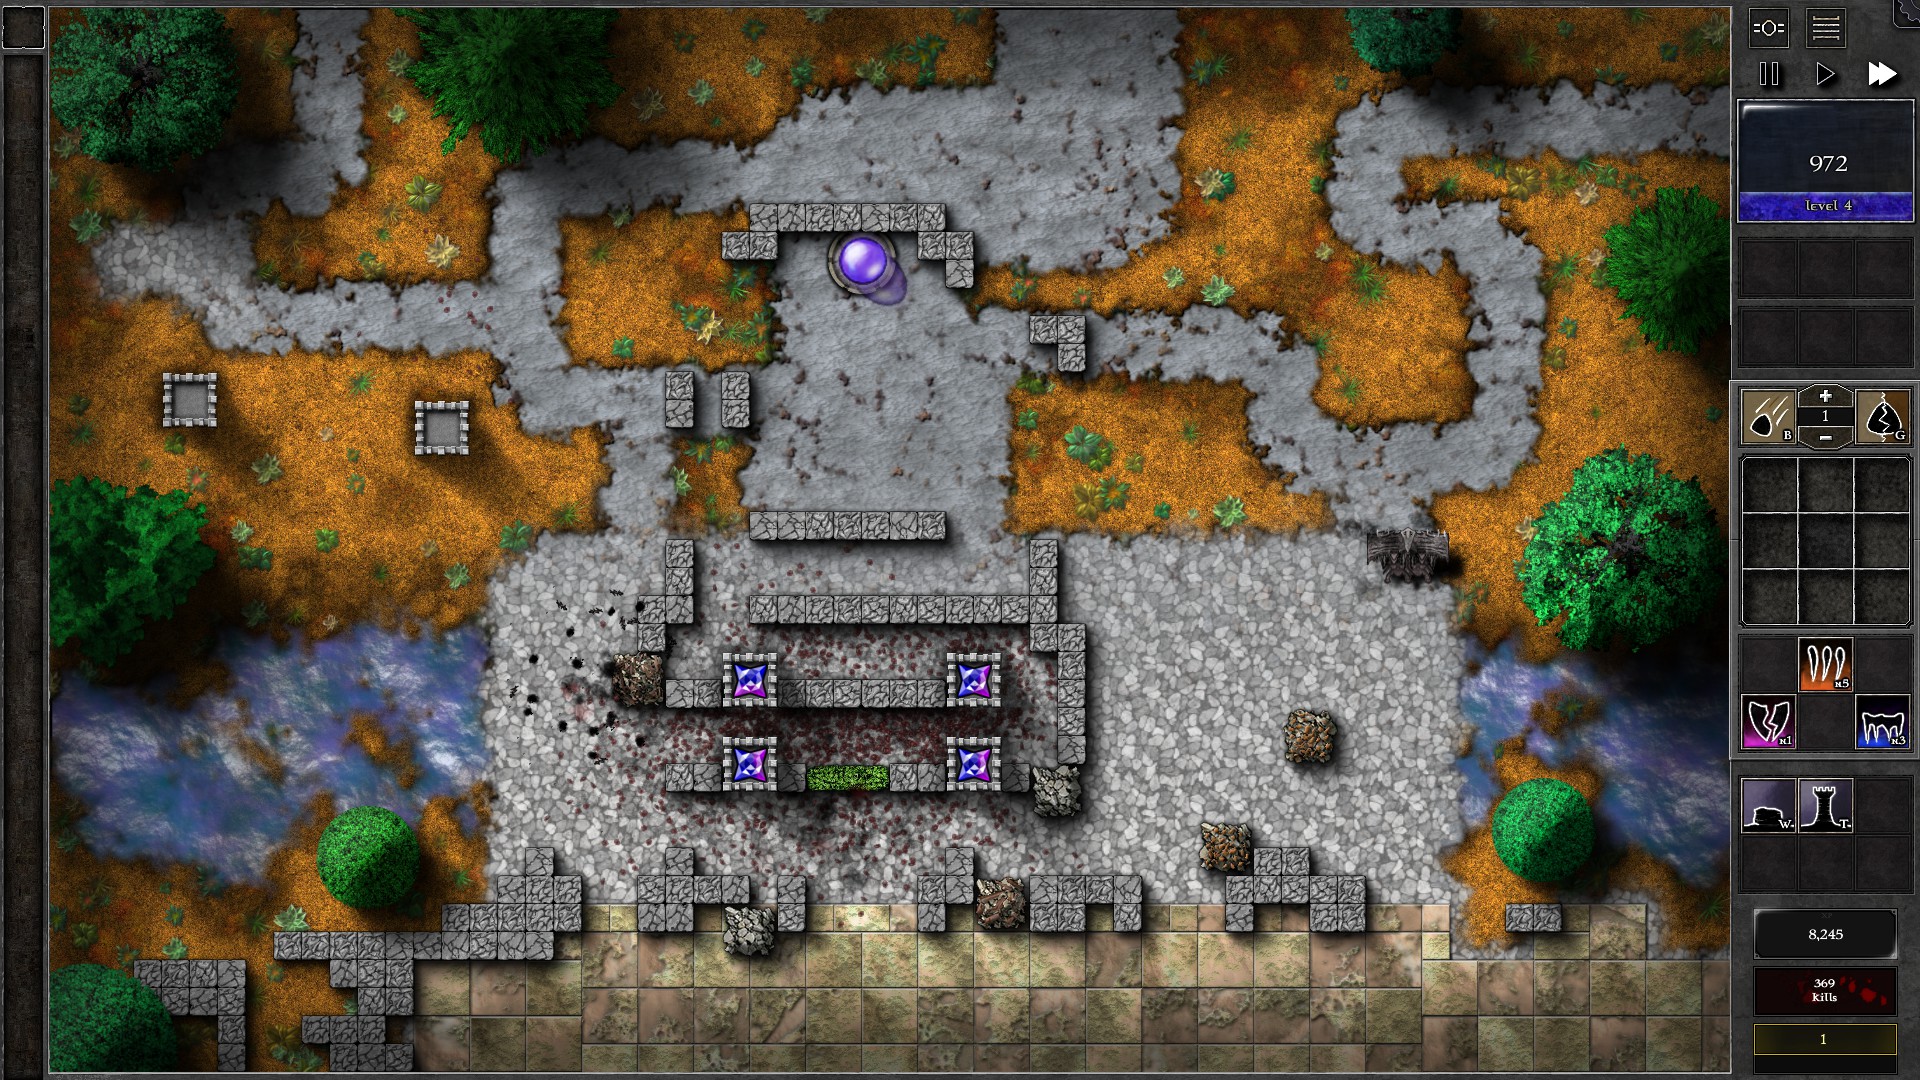
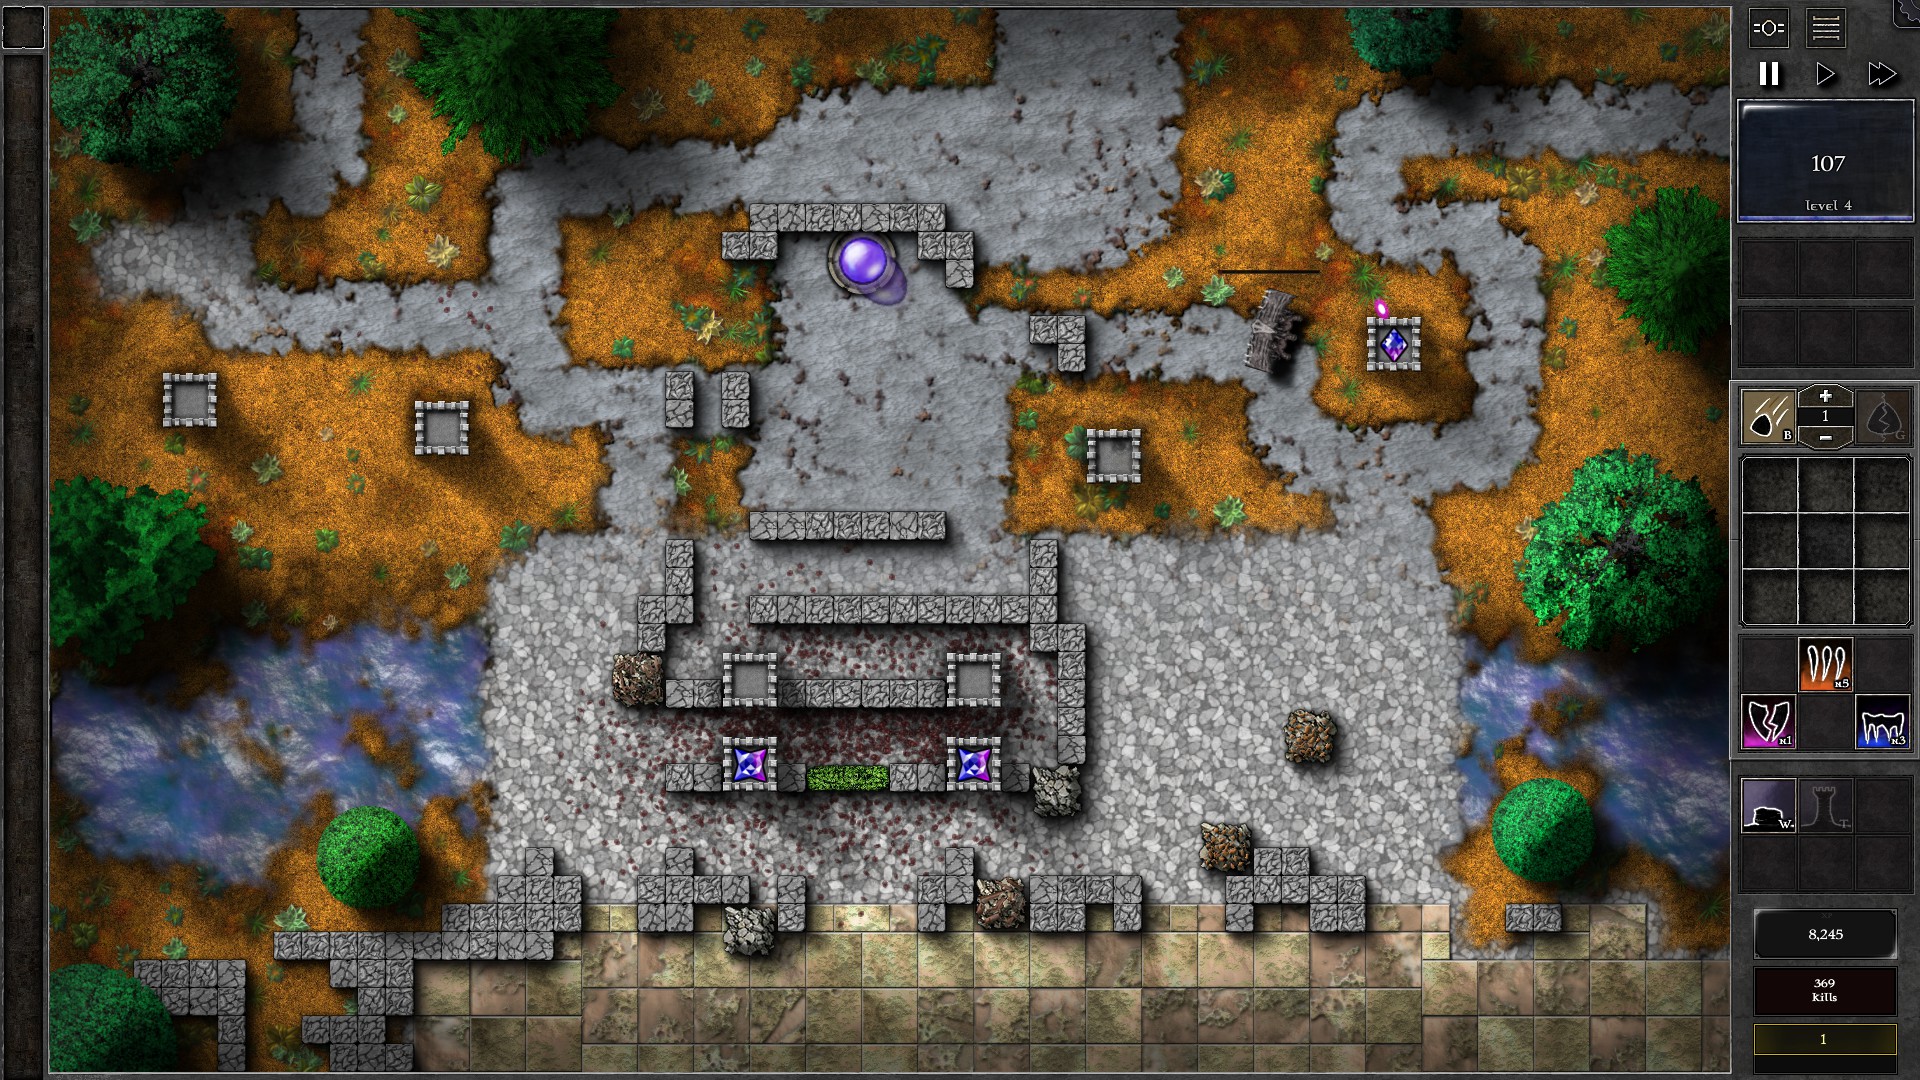
Upgrade the gems to g5 as you gather mana. The 4th and last Wallbreaker will arrive at the bottom right corner at w37. Ignore it first and focus on the remaining waves. After you defeat all the monsters except the Wallbreaker, you should have 4 g5 gems and the Wallbreaker should approach the top left path’s intersection and attempt to turn left into the path towards your Orb. Combine 2 of your g5 gems into a g6 and start following the Wallbreaker with a g6, which should kill the Wallbreaker before it reaches your Orb. Refer to the last screenshot for some safe tower positions for fighting the Wallbreaker.
068 – Field K3
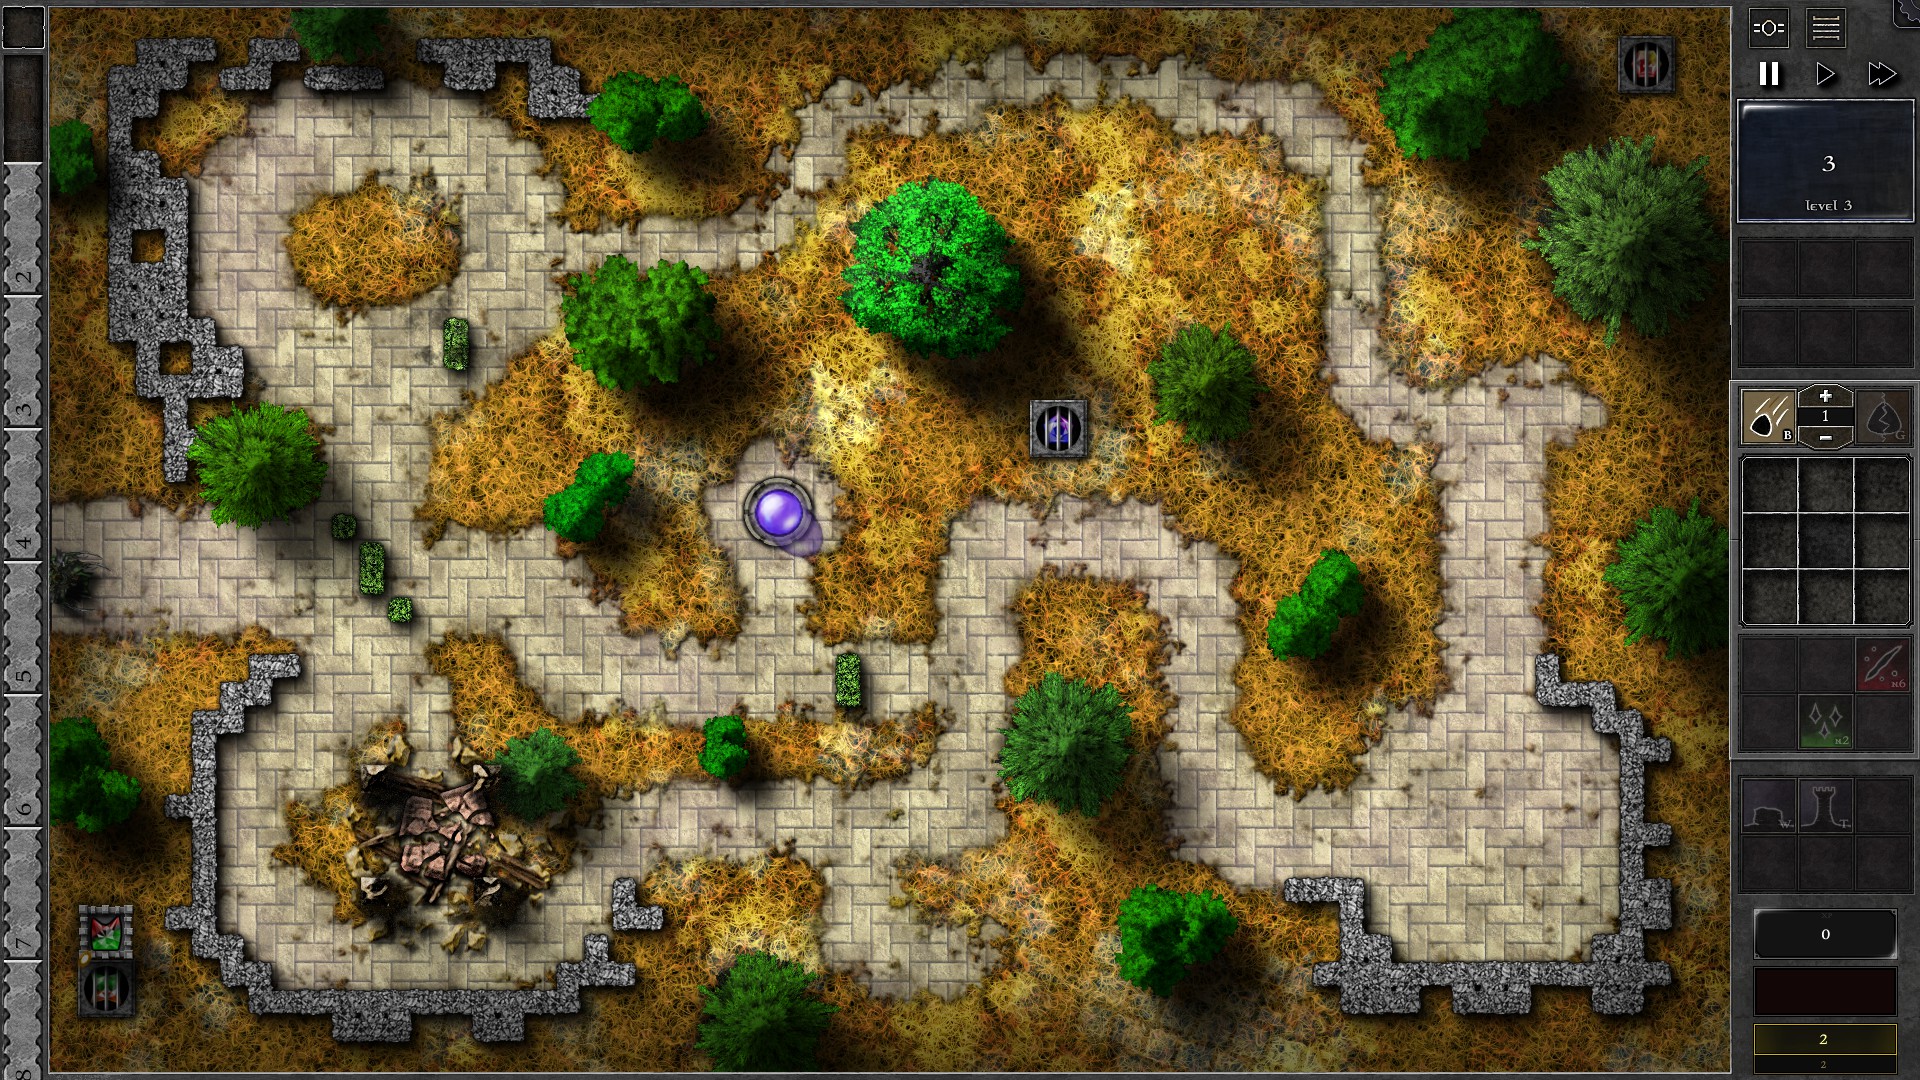
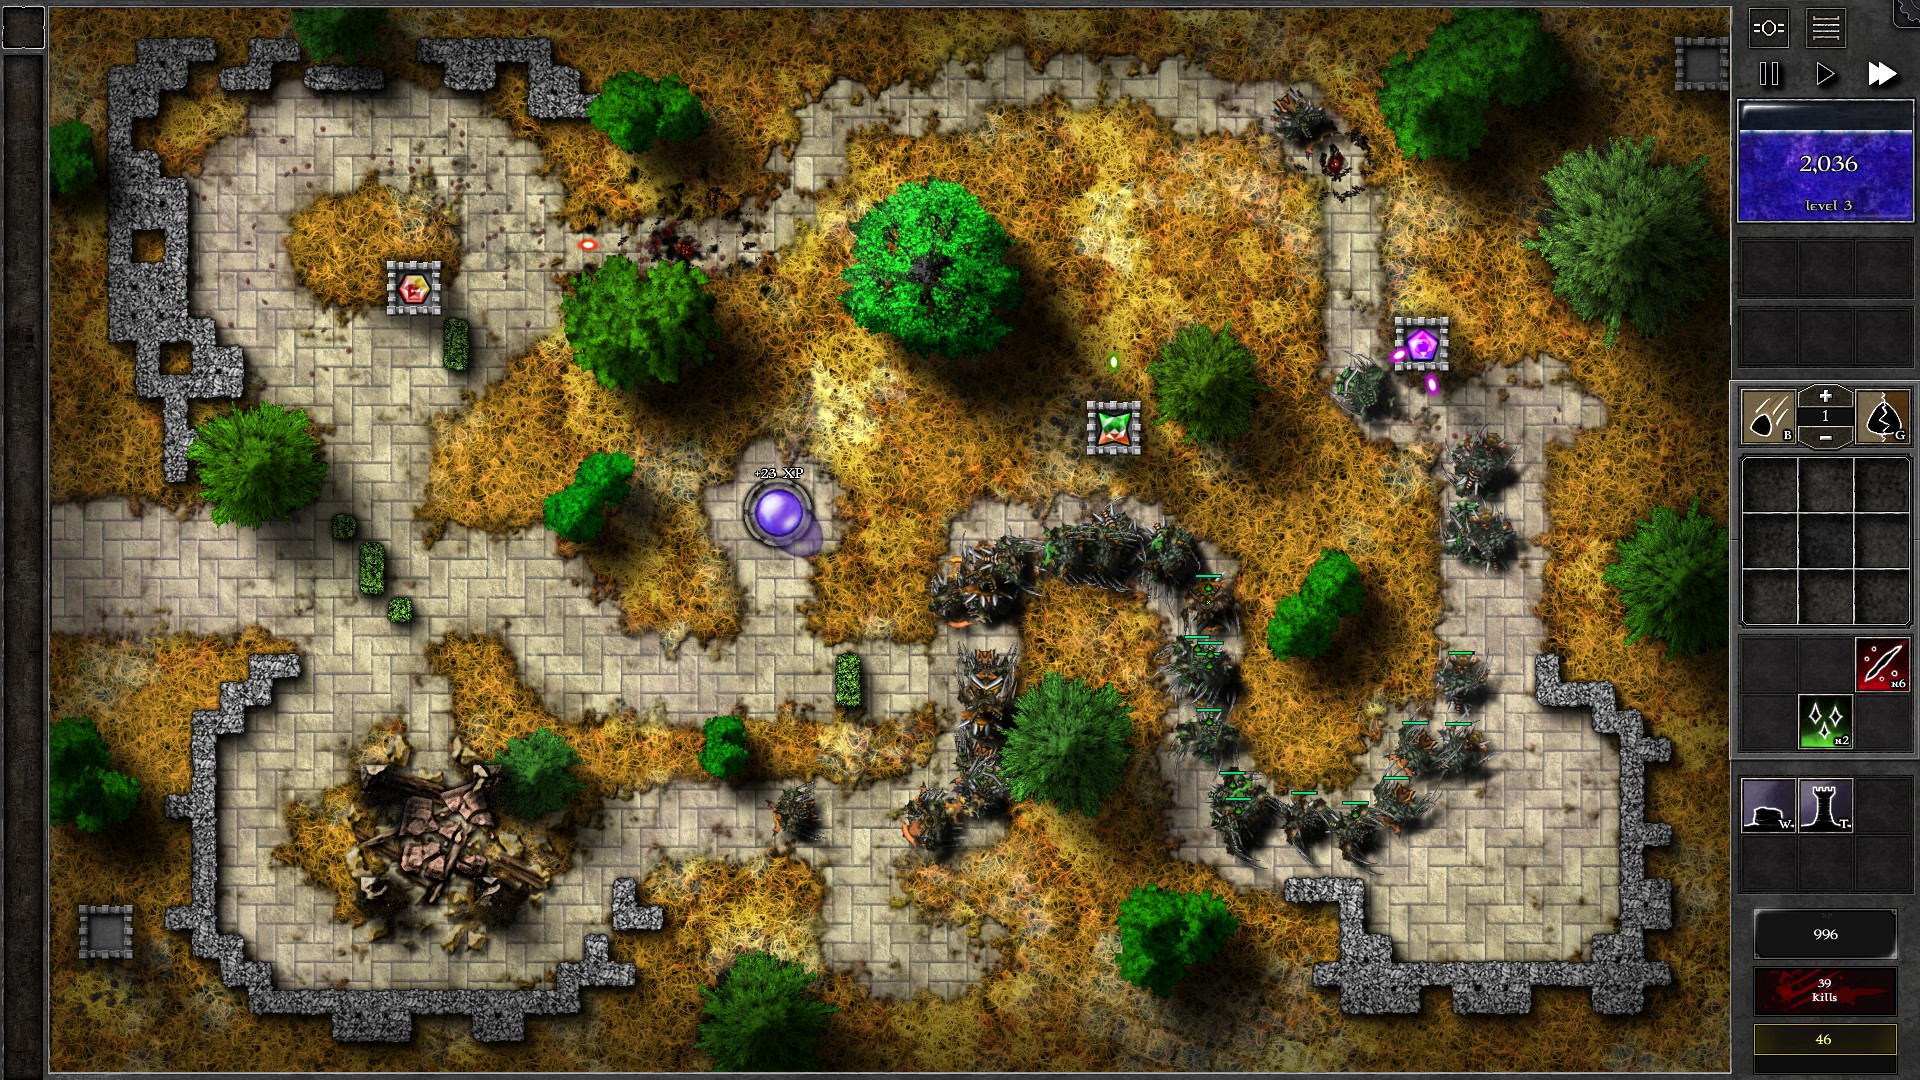
This Trial is a straight forward one. Setup the walls and a g4 r/g gem as shown (target “Structures”). Start the waves and wait until the g4 r/g gem frees the g5 g/o gem. Once you get the g5 g/o gem, salvage the g4 r/g gem for mana, and build a tower close to the second sealed gem (a g8 p/b).
Have the g5 g/o gem target “Structures” and free the g8 p/b gem. Keep the g5 g/o gem firing at monsters and setup a tower at the top right corner. Use the g8 p/b gem to free the final sealed gem (a g10 r/y gem). The faster monsters should now arrive at the top left area. Setup a tower with the g10 r/y gem at the top left area. Send all remaining waves early and have the g10 r/y gem destroys all the monsters.You may need to juggle the monsters once by demolishing the walls at the left and rebuild the walls to block the intersection from top right to bottom left, which forces the monsters to go all the way through the field again.
NOTE: While this is not the intended way, breaking all 3 Gem Seals in this Trial will grant you “We Just Wanna Be Free” achievement. This achievement’s reference is actually reflected in this field’s Endurance mode which has 3 Gem Seals each containing a g2 b.
069 – Field K4
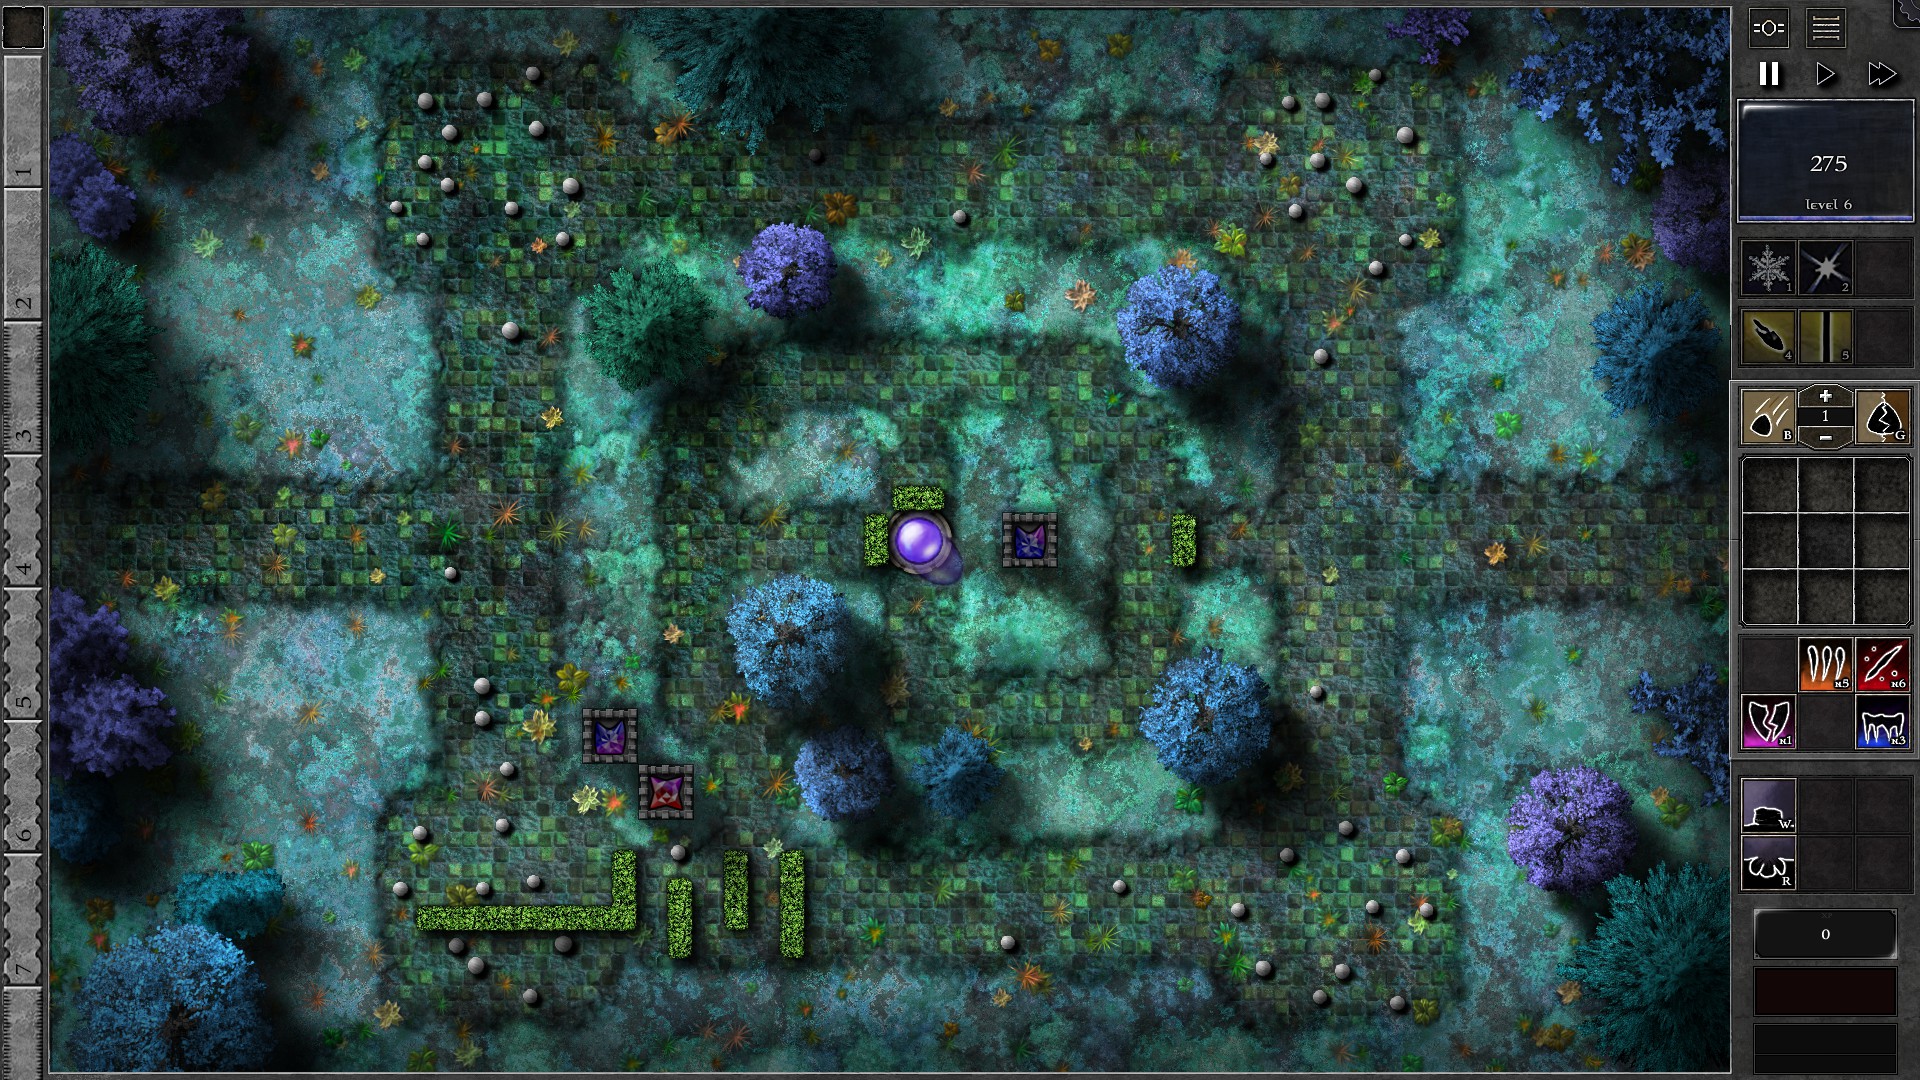
Setup the field with a g5 p/r gem and 2 g4 p/b gems as in the first screenshot. Upgrade the g4 p/b gems to g5 as you gain enough mana, which should be doable before w8. Use beam on the p/b gem closer to the orb to help clean up spawnlings if necessary (likely needed for the w3 swarmlings).
As the swarmling waves from w8-9 arrive, you will start to see monsters going through your defenses and need to be banished. Try to minimize the amount of spawnlings banished by killing these first instead of other monsters (usually “Least HP” works well but sometimes you may want to target manually. Continue upgrading your gems and lengthen the maze with additional walls to keep monsters in the range of the outer 2 gems longer. You should be able to get all 3 gems to g6 at around w20.
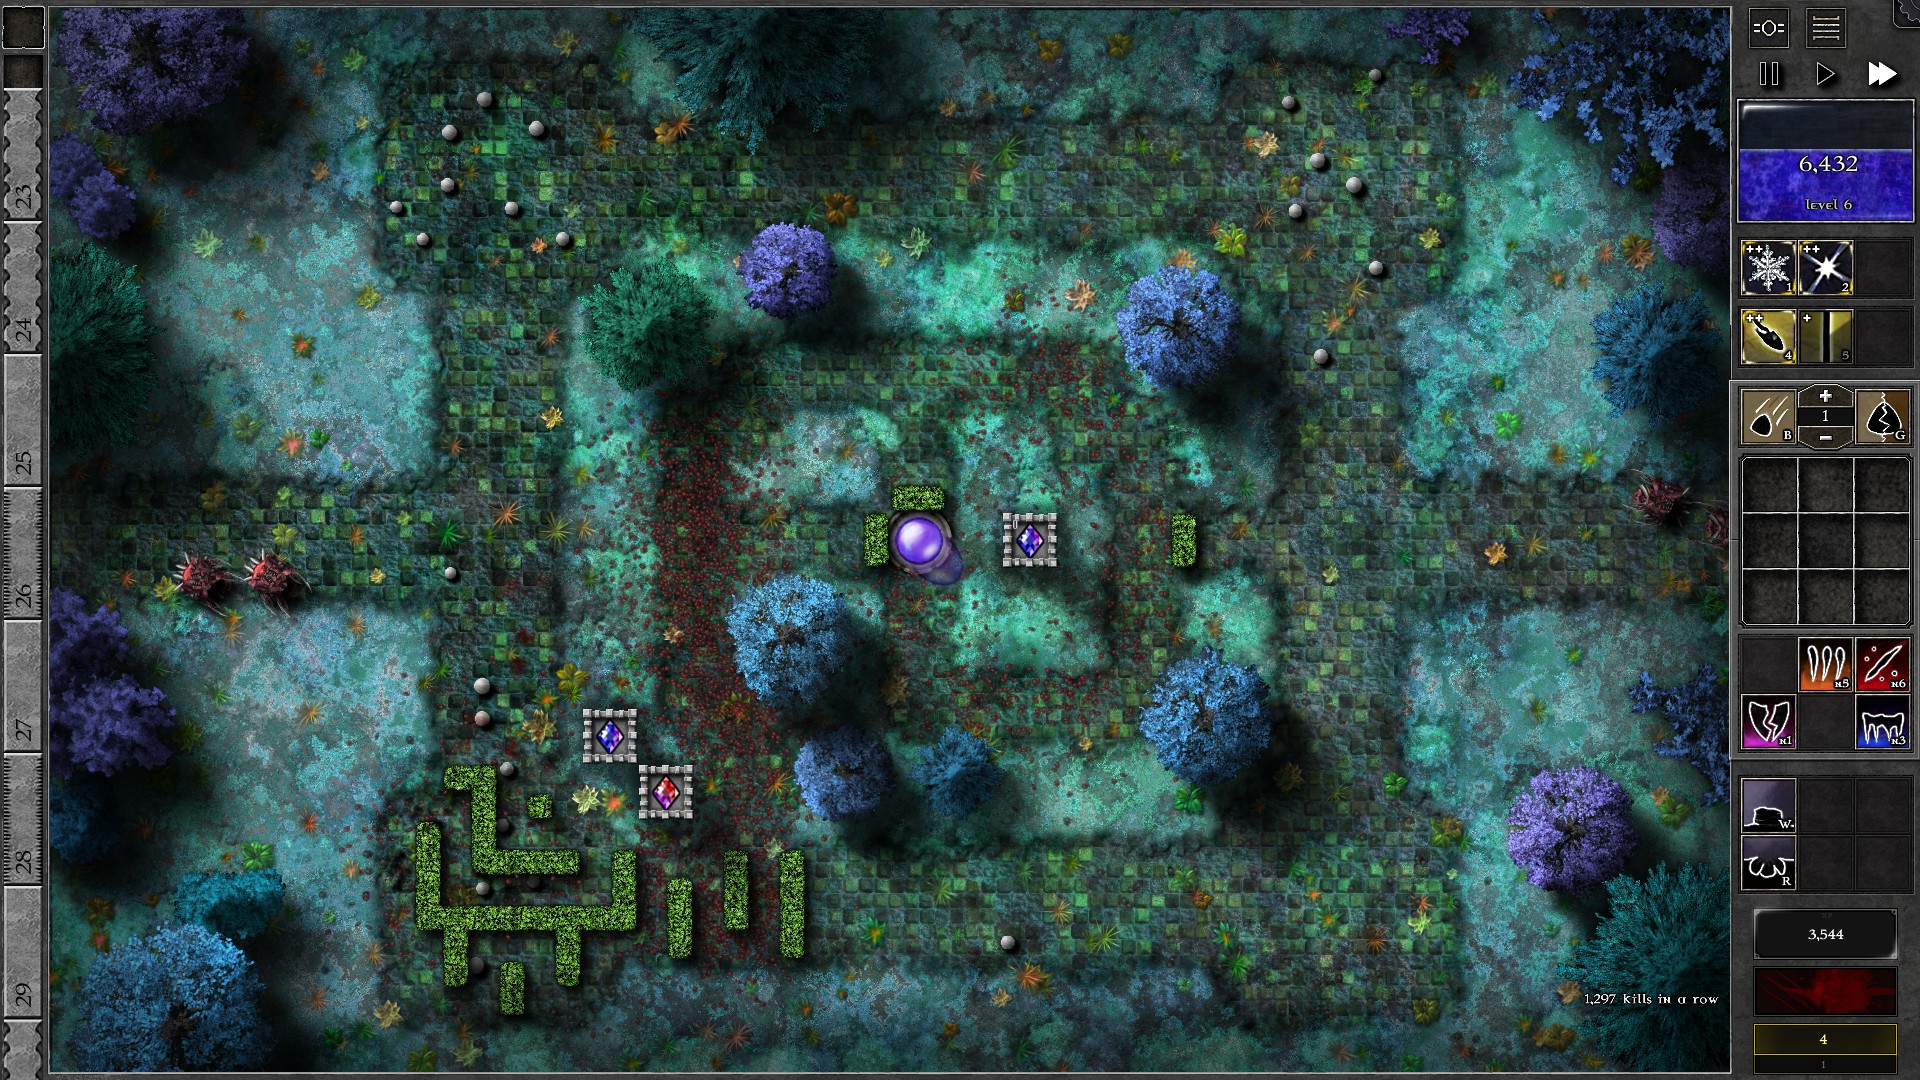
After getting 3 g6 gems, continue building walls to finish the maze at the lower left corner (a decent path for mazing without clashing with too many monster eggs is shown in the second screenshot). With the small maze you should now suffer much less leakages since you have much more time for the outer 2 gems to kill monsters. Continue upgrading the 3 gems to g7 as you gain enough mana. Upgrade the gem closest to the orb last as it’s mostly used to kill spawnlings and will usually see less combat once the maze is set up. All 3 gems should be g7 at around w35, and you’re now set for the remaining waves.
070 – Field K5
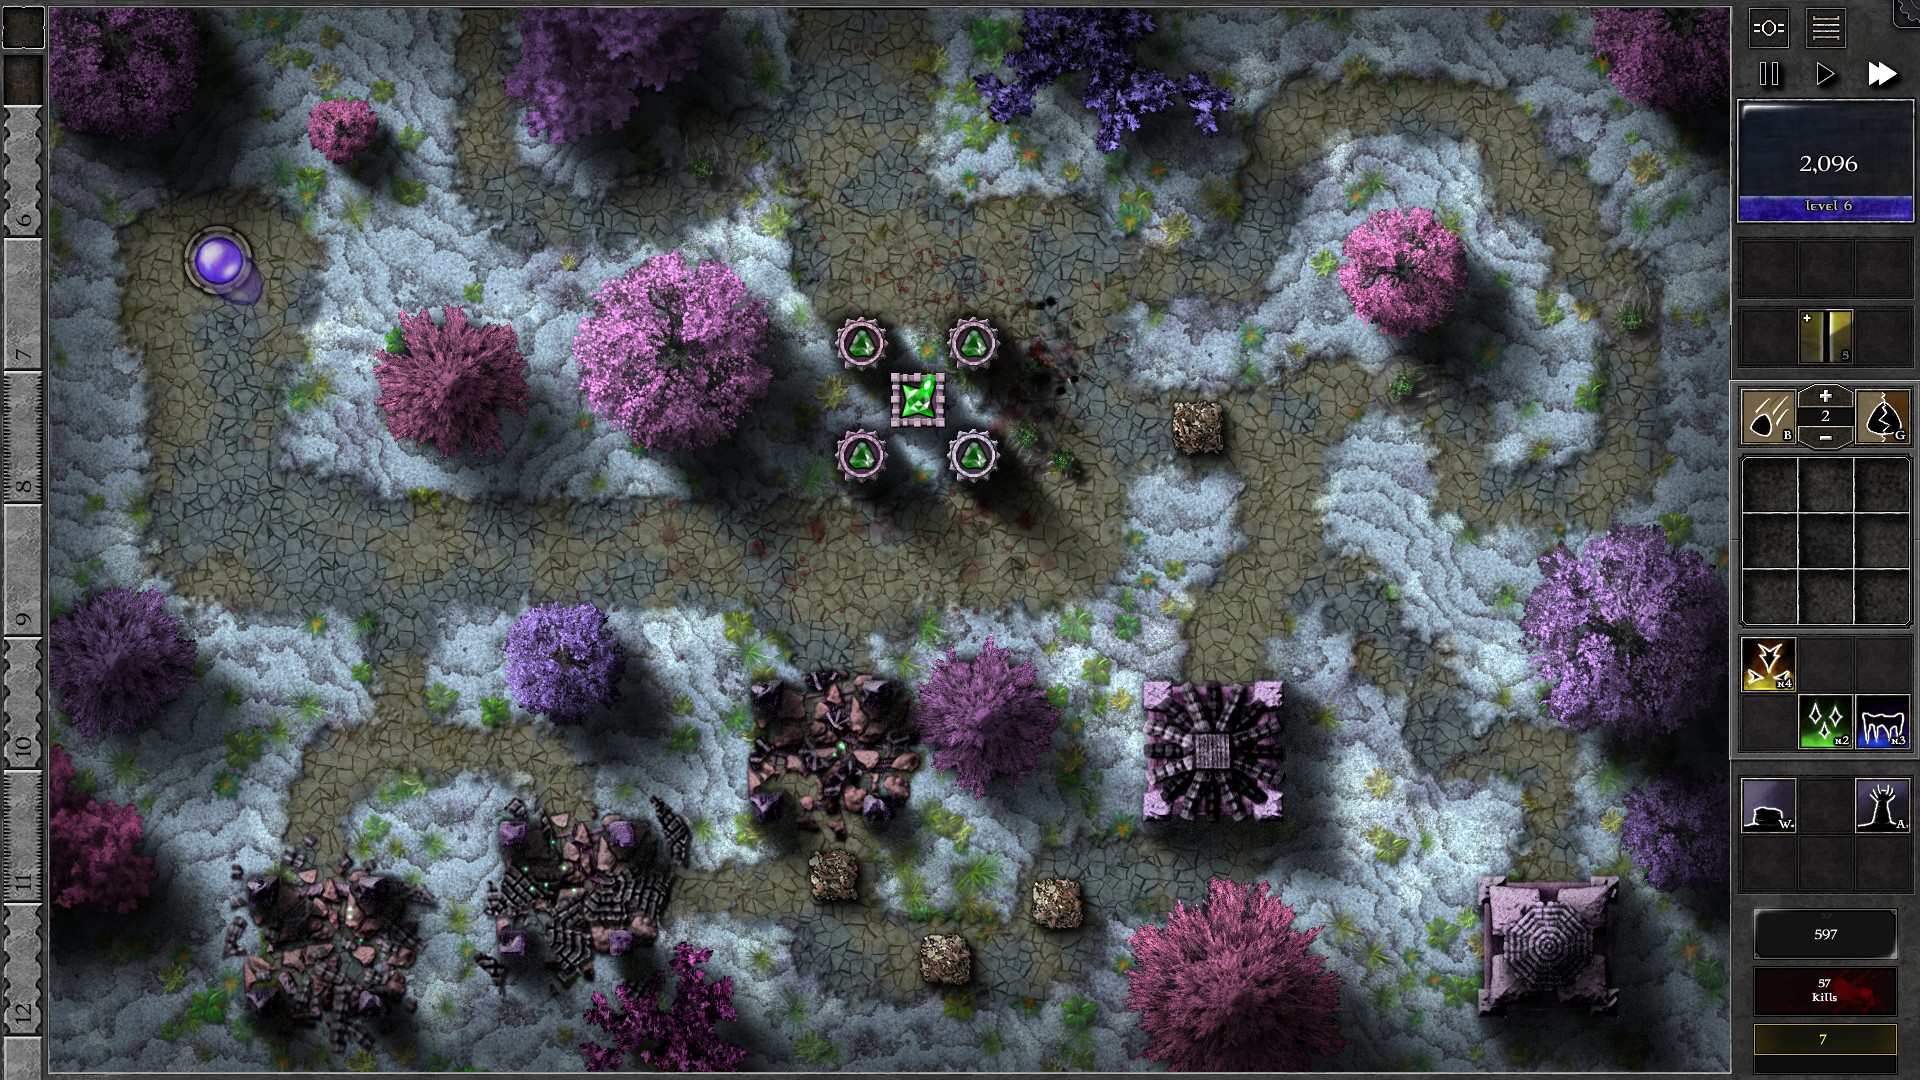
Create 2 g3 and 2 g2 gems. Use these gems as gem bombs to destroy the 3 leftmost monster nests. The g3 gems should take care of the 2 400 HP nests and the 2 g2 should take care of the 200 HP nest.
Fill the initial tower and amplifiers with gems as shown. The tower gem is a g5 15g1b and the amps are g2 g. Now you can start the waves. You will probably want to use the first beam charge immediately once charged as it’s probably difficult to deal with the shielded monsters initially.
Once the initial waves are taken care of, focus on building another 4 amplifiers to completely surround the tower with amplifiers. Fill these amplifiers with a g2 g each. Use beam as required when monsters arrive in larger amounts (especially swarmling waves) and consider temporarily switch to “Shielded/Highest Armor” or “Random” targeting to quickly de-shield the monsters.
After finishing the amplifiers, gather enough mana to upgrade the g5 tower gem once to g6 and it should be good enough to take down monsters in this Trial wihtout much trouble. Remember to use beam as required, and do pay attention to any specters coming into the field and take them down first. (note the premonition patterns; Specters have 2 black crosses as their premonition pattern.)
071 – Field G1
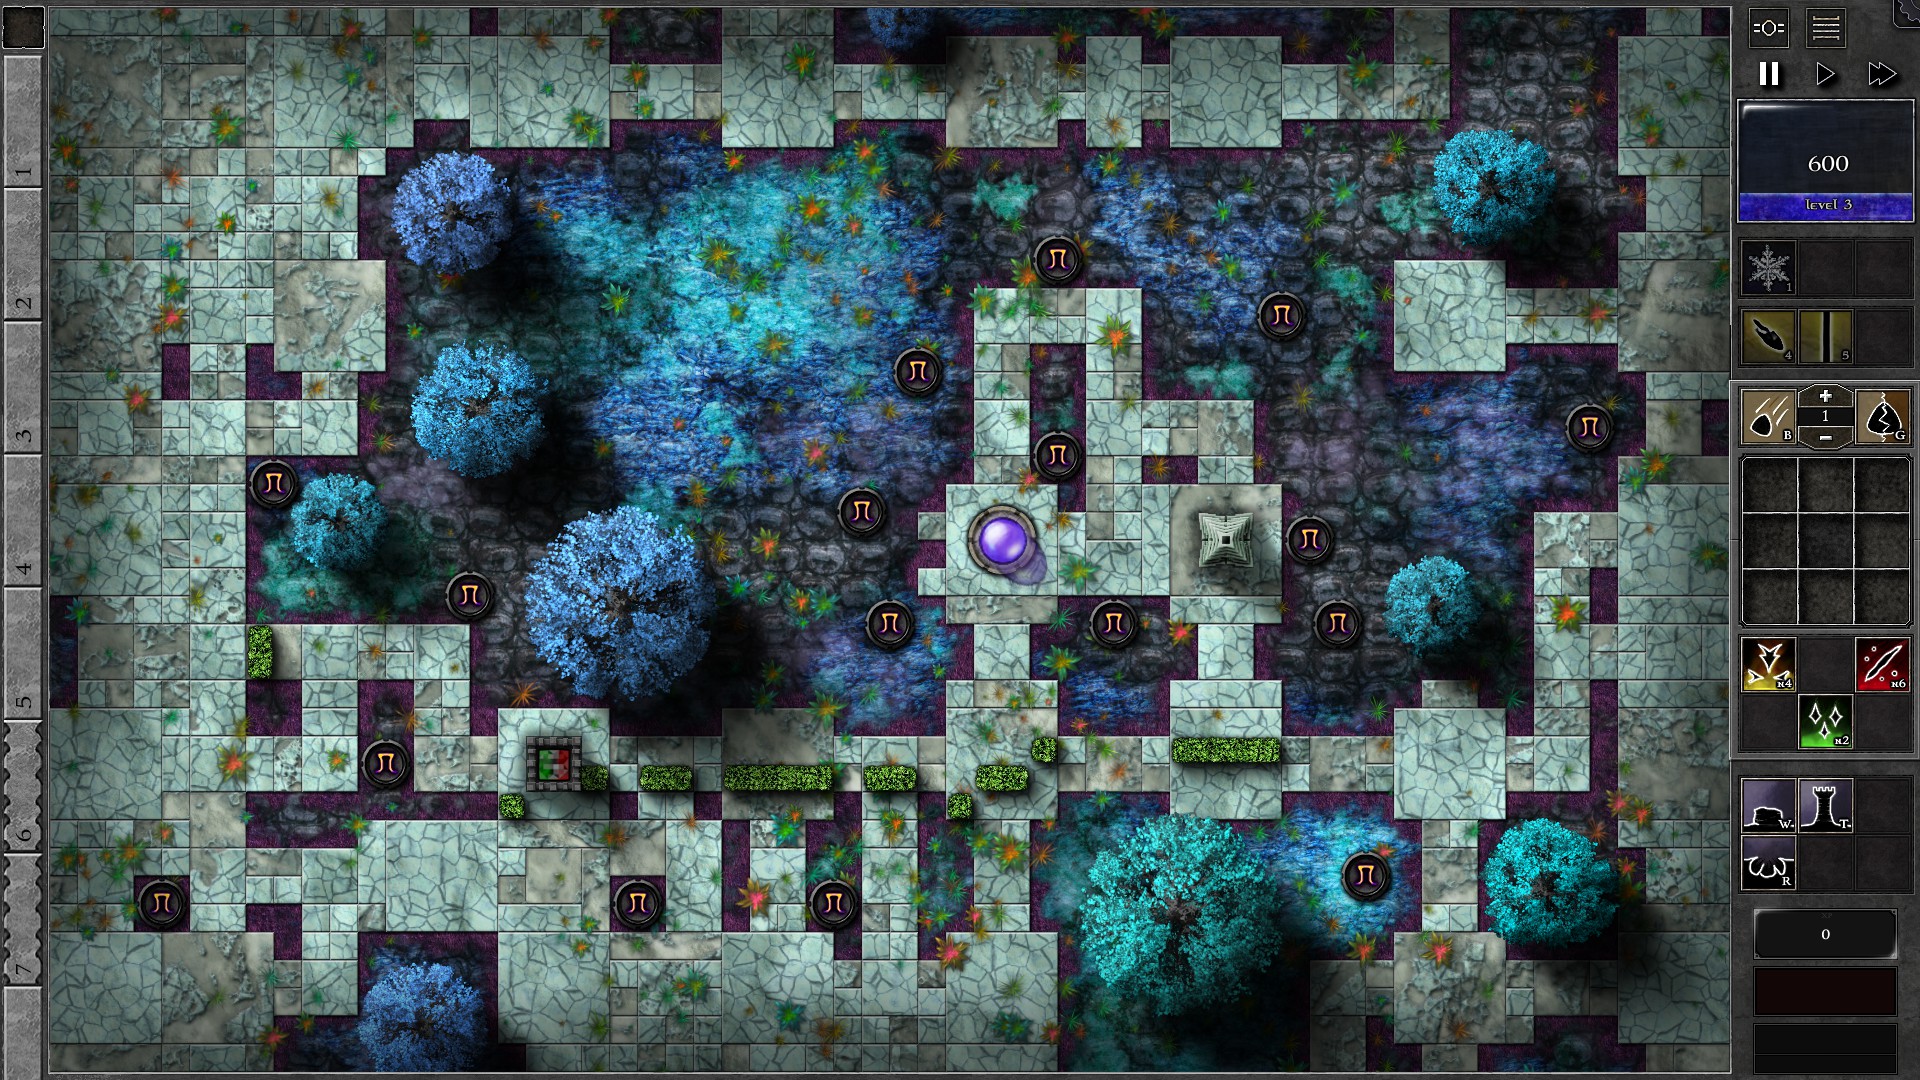
This is not a particularly difficult Trial to tackle. Start with a g3 r/g gem with tower and walls as shown. Your g3 gem will probably struggle a bit in killing monsters, but you should be able to hold on until the spells get charged. Upgrade the g3 gem whenever you have enough mana, You should be able to get your gem to g4 at around w6-8 and to a g5 before w20.
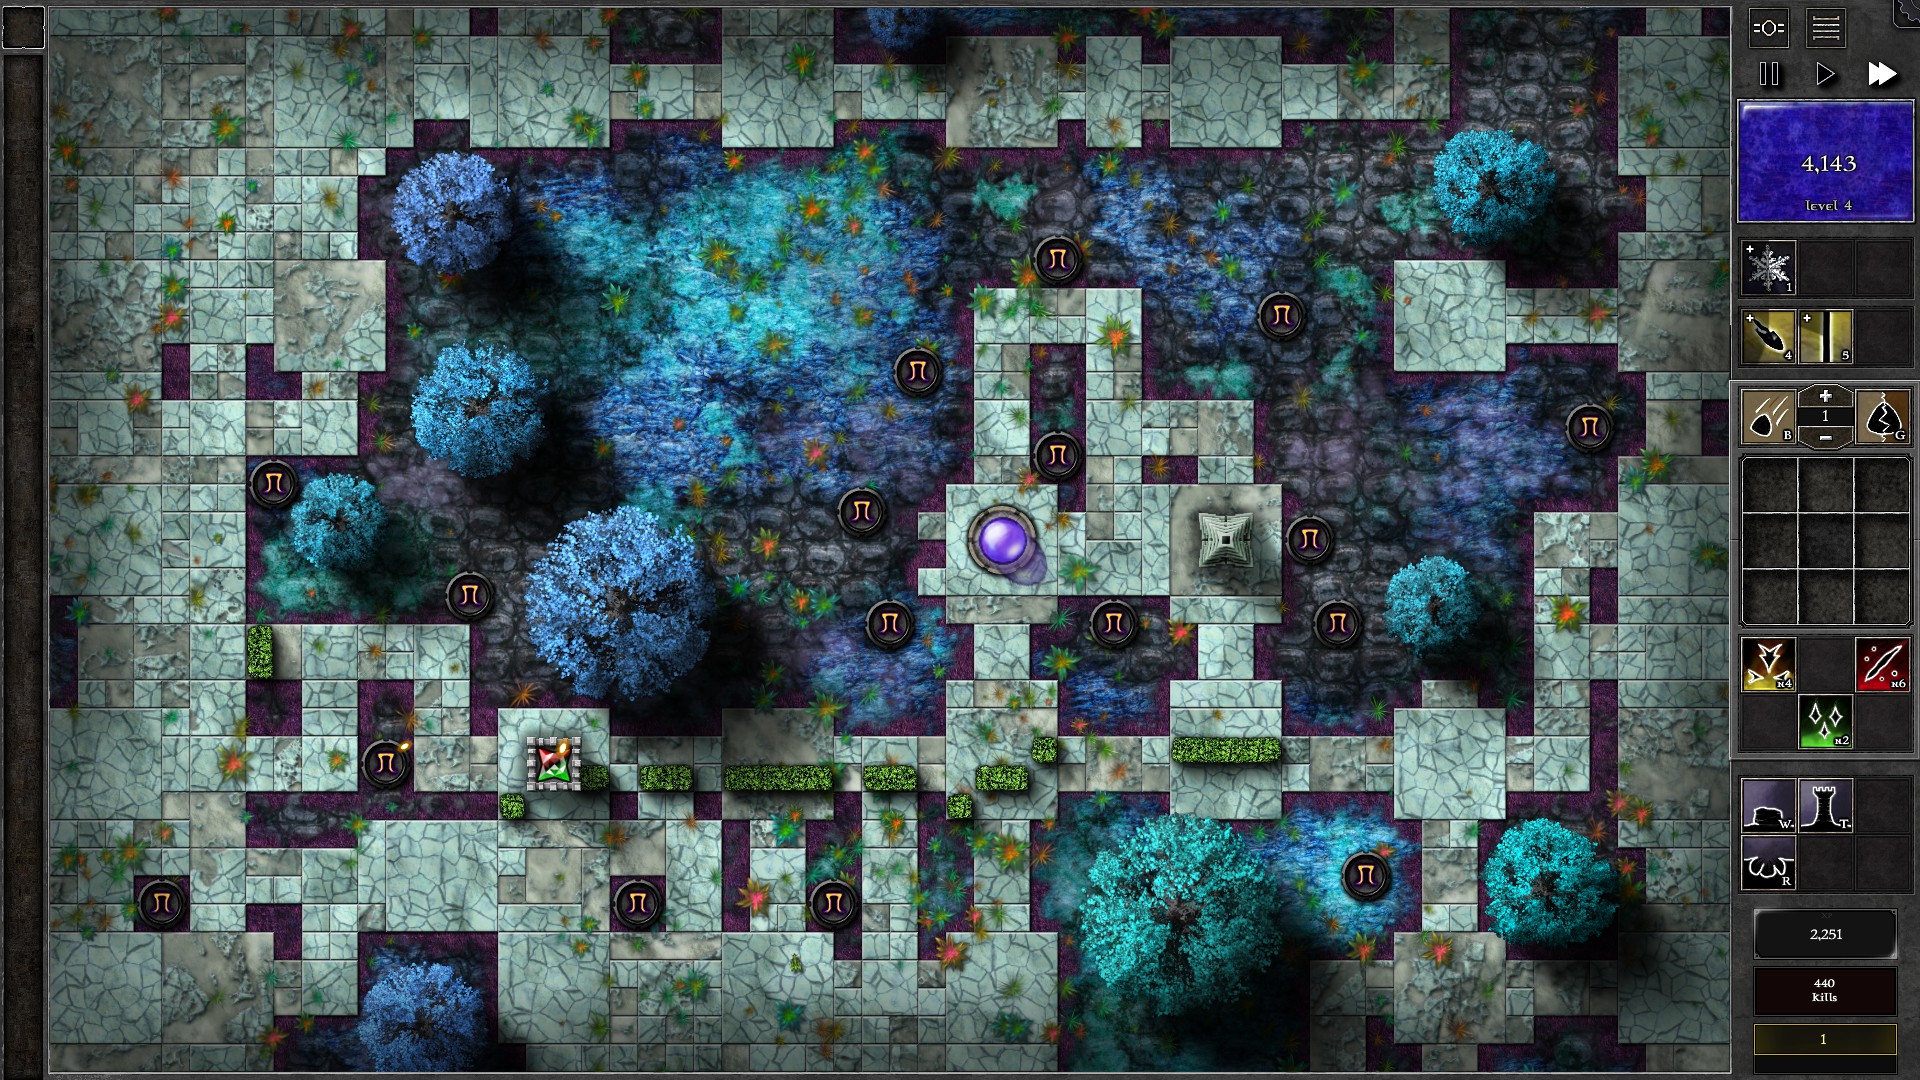
When using spells, note that your tower will be firing at a nearby Static beacon which will waste your enhanced shots. Consider holding the gem up by clicking and hold the gem just above the original tower to stop it from firing at the static beacon. You can drop it back into the tower without needing to resocket the gem as long as you did not put the gem somewhere else.
Save up Freeze and Beam as you notice waves with more monsters incoming, and you should have no problem completing this Trial once you get a g5 gem.
072 – Field G2
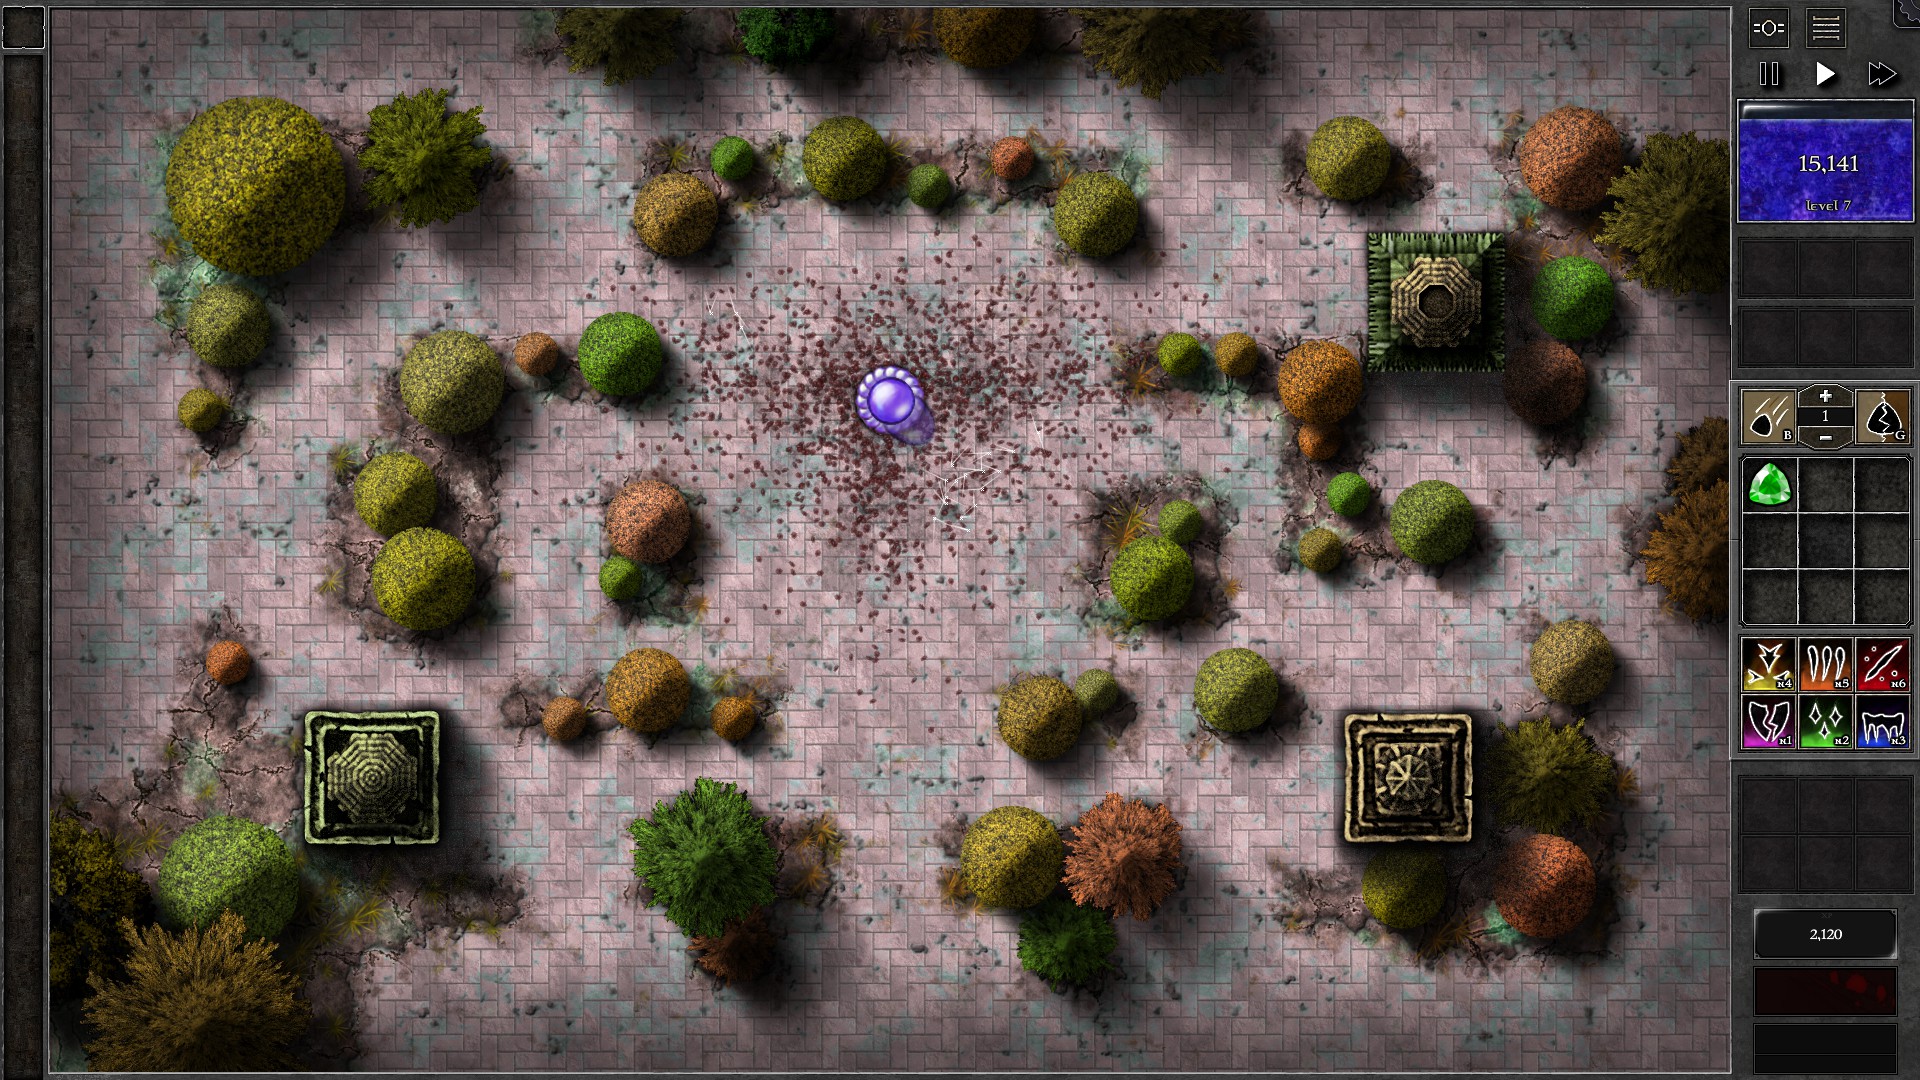
Since there are no buildings on screen and you are not allowed to build anything, you are forced to use gem bombs in this field. Green gem bombs are highly efficient in this Trial, as the poison damage from the gem wasps become very significant and helpful for killing more monsters (g1 g has 8 poison damage when the last wave reavers have 22 HP each and the last wave swarmlings have 9 HP each).
In the first few waves, you have limited mana so you need to be careful in using the gem bombs. Try to attack monsters only when they get close to the orb and bomb them efficiently. One gem bomb can usually kill 1-2 reavers and 2-3 swarmlings with its own blast radius. The green gem wasps provides extra damage with poison which kills more monsters. Be alert against monsters trying to take away your orblets; you will want to bomb these monsters before they go too far.
As the Trial goes on, you will notice that you are gaining a lot of mana due to the 75x multiplier to your natural mana regen rate. Once you survived to have like 3000-4000 mana, you can start to do some pre-emptive strikes to spawn poison gem wasps to kill monsters faster. It is possible that one can amass up to 10k mana in the late waves, which allows a huge buffer for even more liberal use of the gem bombs. Generally there is no need to use higher grade gem bombs in this entire Trial.
073 – Field G3
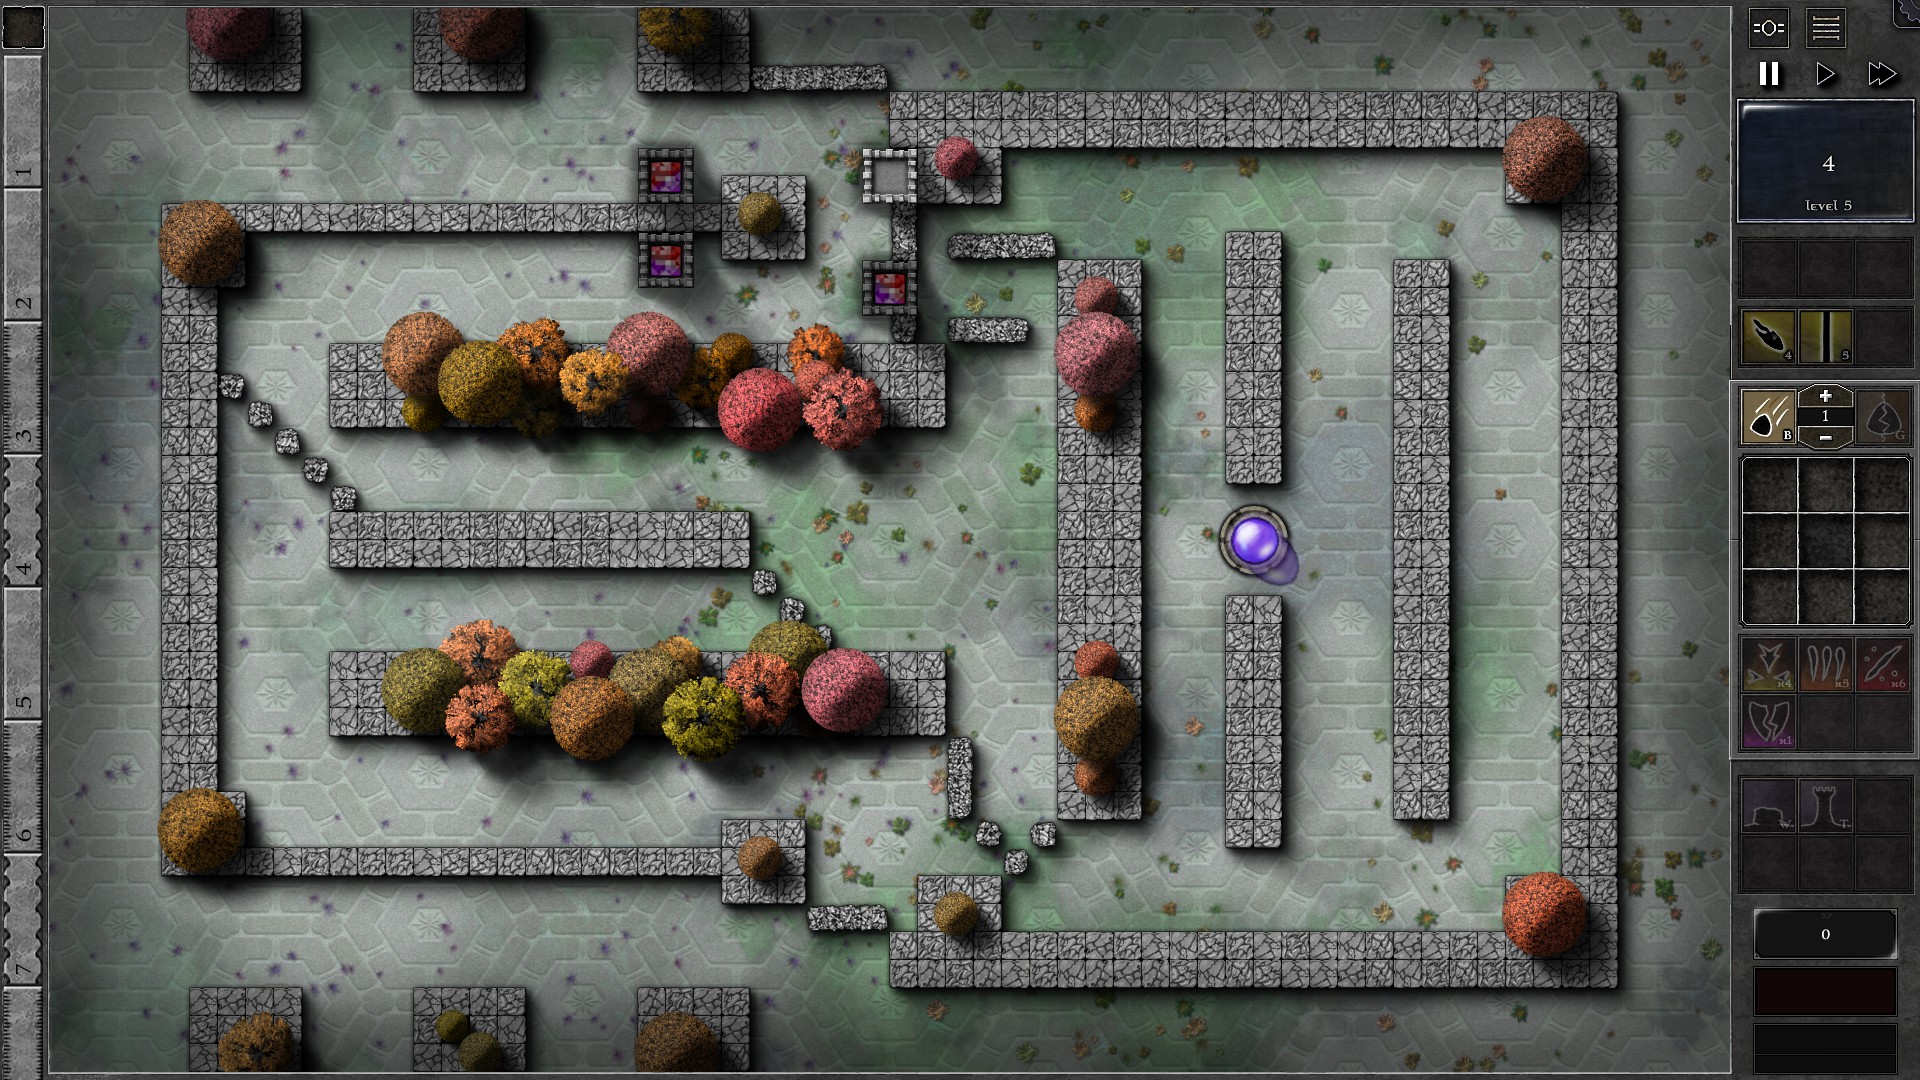
This is a tough Trial to crack, so be prepared for a wild ride. Start up the field with a monster defense zone of 4 Towers and 3 g3 p/r gems as shown. There are 9 Wallbreakers (WBs) throughout the Trial coming in all directions as follows:
- 2 from the left in w5
- 2 from the left in w16
- 1 above your Orb and 1 below your Orb in w28
- 2 from the left in w35/36 (linked)
- 1 from the right of your Orb in w40
NOTE: Be careful with upgrading gem or building stuff when you are banishing monsters. You don’t want to lose the game because of a purchase leaving you no mana to banish monsters. This is especially important for spawnling leaks as they take 80 mana EACH for 1st banishment.
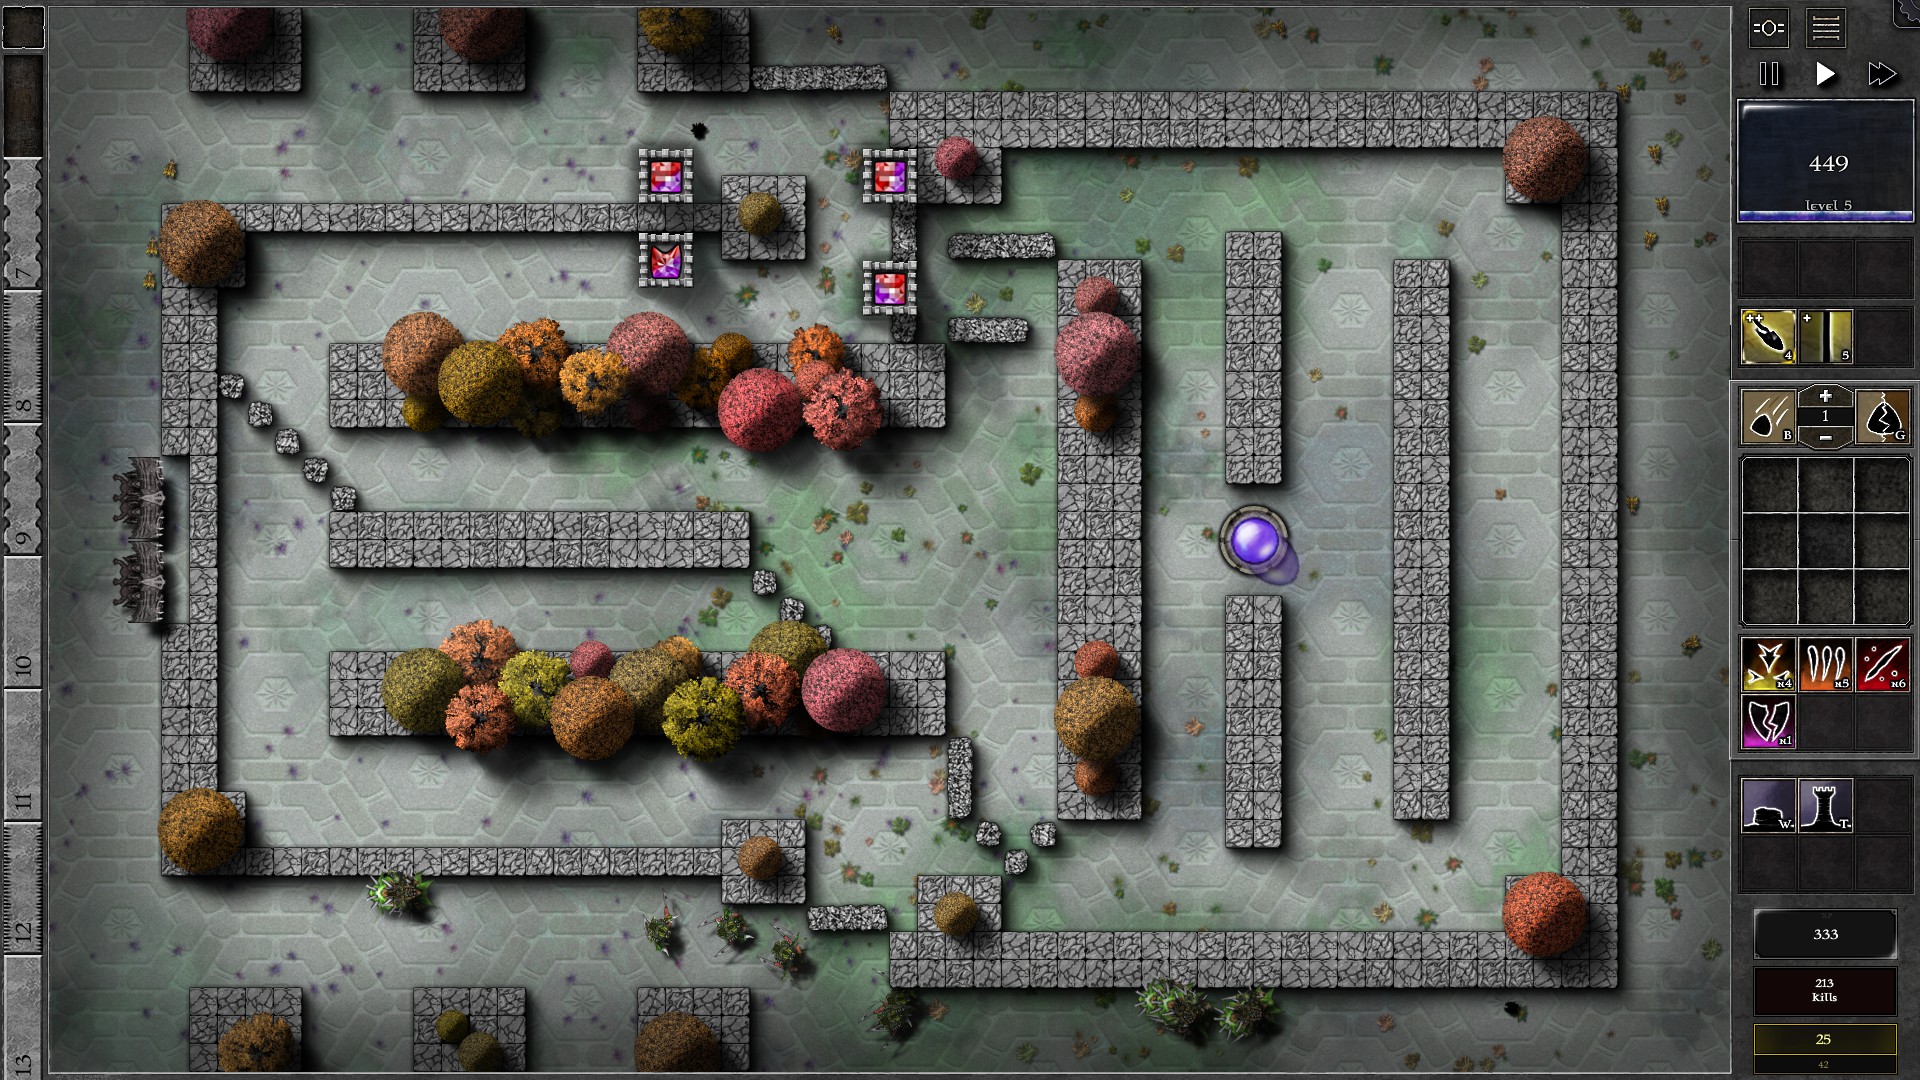
Start with adding a 4th g3 gem to your defenses when you can and place it into the remaining tower, then start upgrading the gems to g4 as you gain enough mana. You will soon reach w5 where the first WBs come in. As they break through the existing wall on the left, patch up the opening with walls before they break the diagonal walls you built. You should soon have enough mana to get 2 g4 gems at around w9. Combine them into a g5 and start fighting the WBs with the g5.
This is probably the toughest part: Your g5 gem will probably take several waves and 3 or 4 casts of each enhancement spell to take both w5 WBs down. Meanwhile your defenses gets weakened when the g5 is away. Start by building a tower behind the WBs, and use 2 Beam charges and then a Bolt charge on the upper WB. At this point the WBs should be directly below the 2 left towers in your monster defense zone. Move your g5 gem back to the bottom left tower of the zone, and cast the 2nd Bolt charge. This should have enough range for Bolt to hit the WB while normal shots cannot, allowing you to have Bolts focus on the WB while normal shots continue hitting monsters. At the mean time, fill up your vacant tower with a g3 p/r and upgrade to g4 as you gain enough mana, and fix the diagonal walls as they get destroyed.
NOTE: You may need some tries to get the correct feeling on when you should use Bolt such that the WBs are in Bolt range without being in the normal shot range. Once you can time the Bolt it greatly helps in dealing with the WBs with minimal sacrifice on monster defenses.
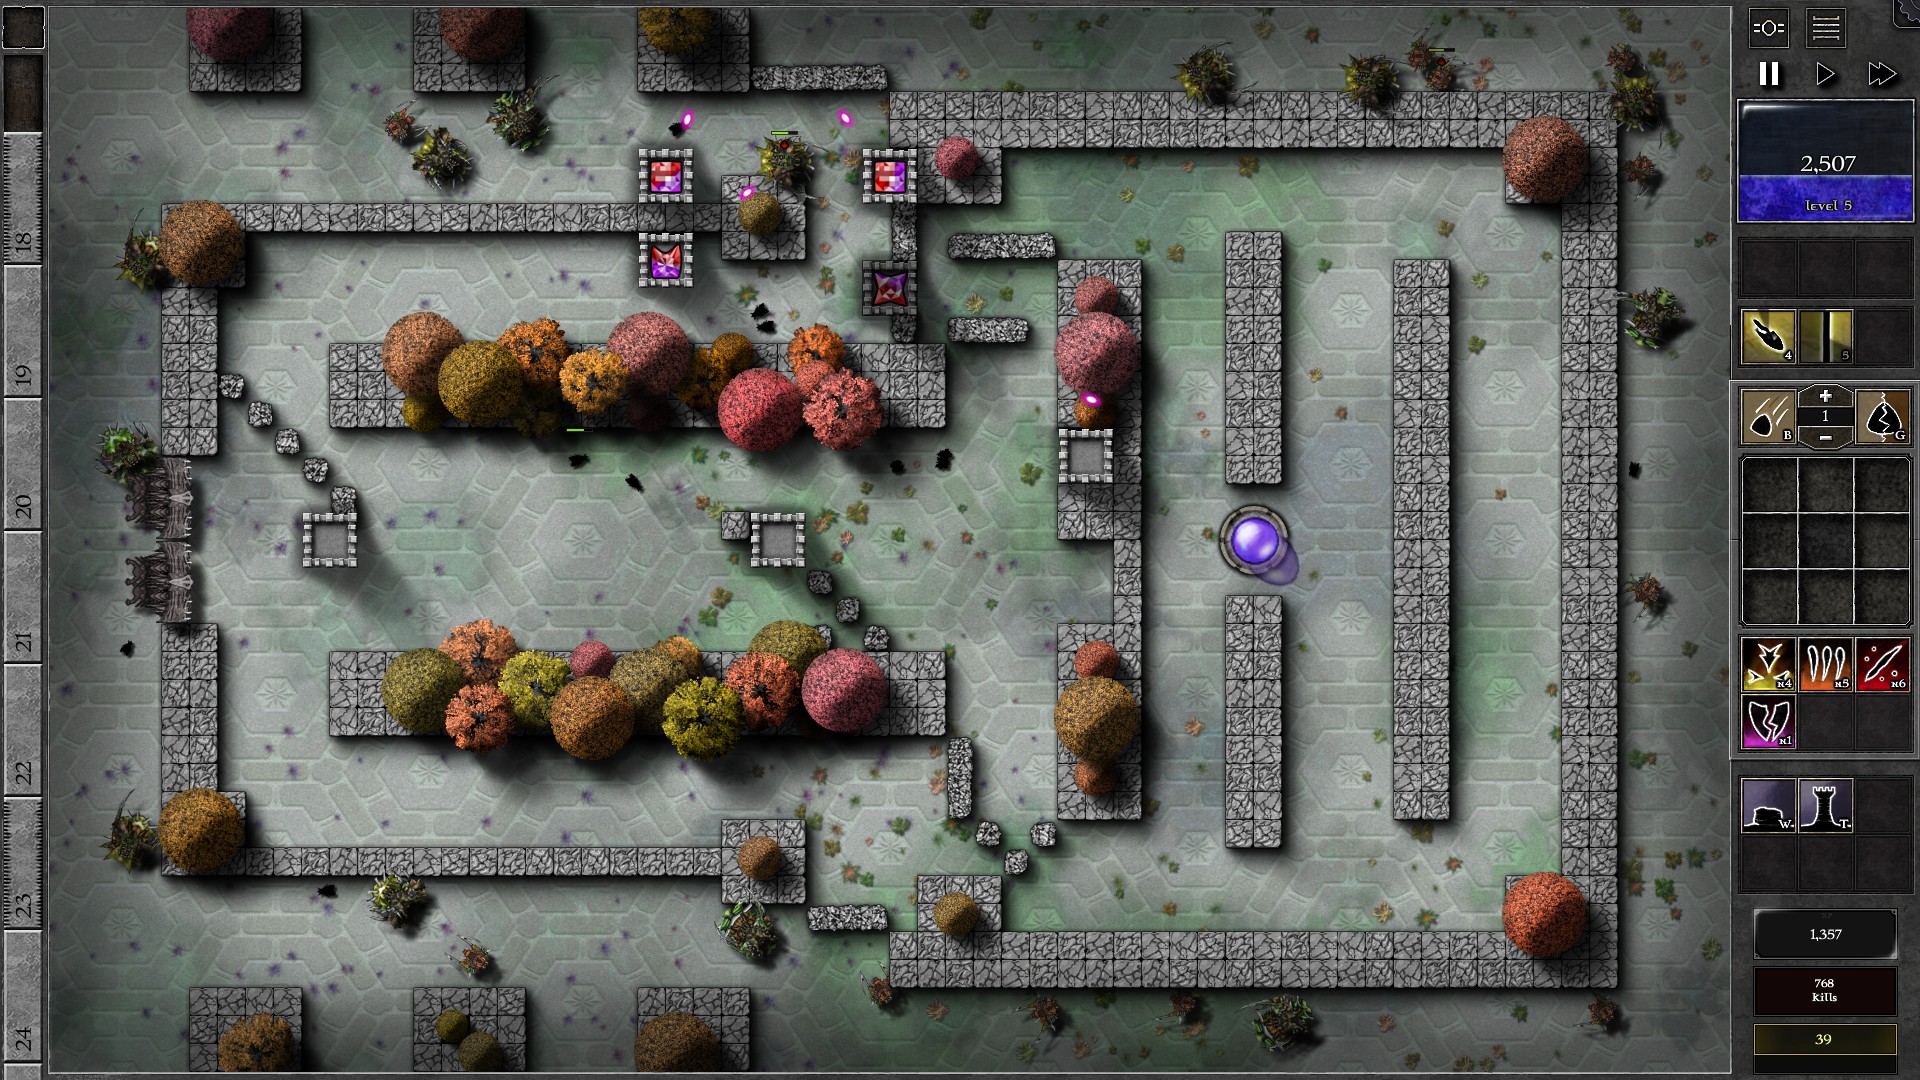
After the Bolt charge, quickly build a tower behind the WBs. A Beam charge should kill the first WB and start damaging the second one. Continue spamming enhanced shots on the remaining WB. The bottom right tower in the defense zone should allow only Bolt shots to hit the lower WB. Finally build another tower and move your g5 gem to kill the second WB. At this point you should have 2 g3 + g4 or 4 g3 gems apart from the g5 gem, and the WBs from w16 have probably spawned.
NOTE: The last tower just to the left of the orb can be a good spot for a 5th gem to catch leaks while you have gems focusing on WBs.
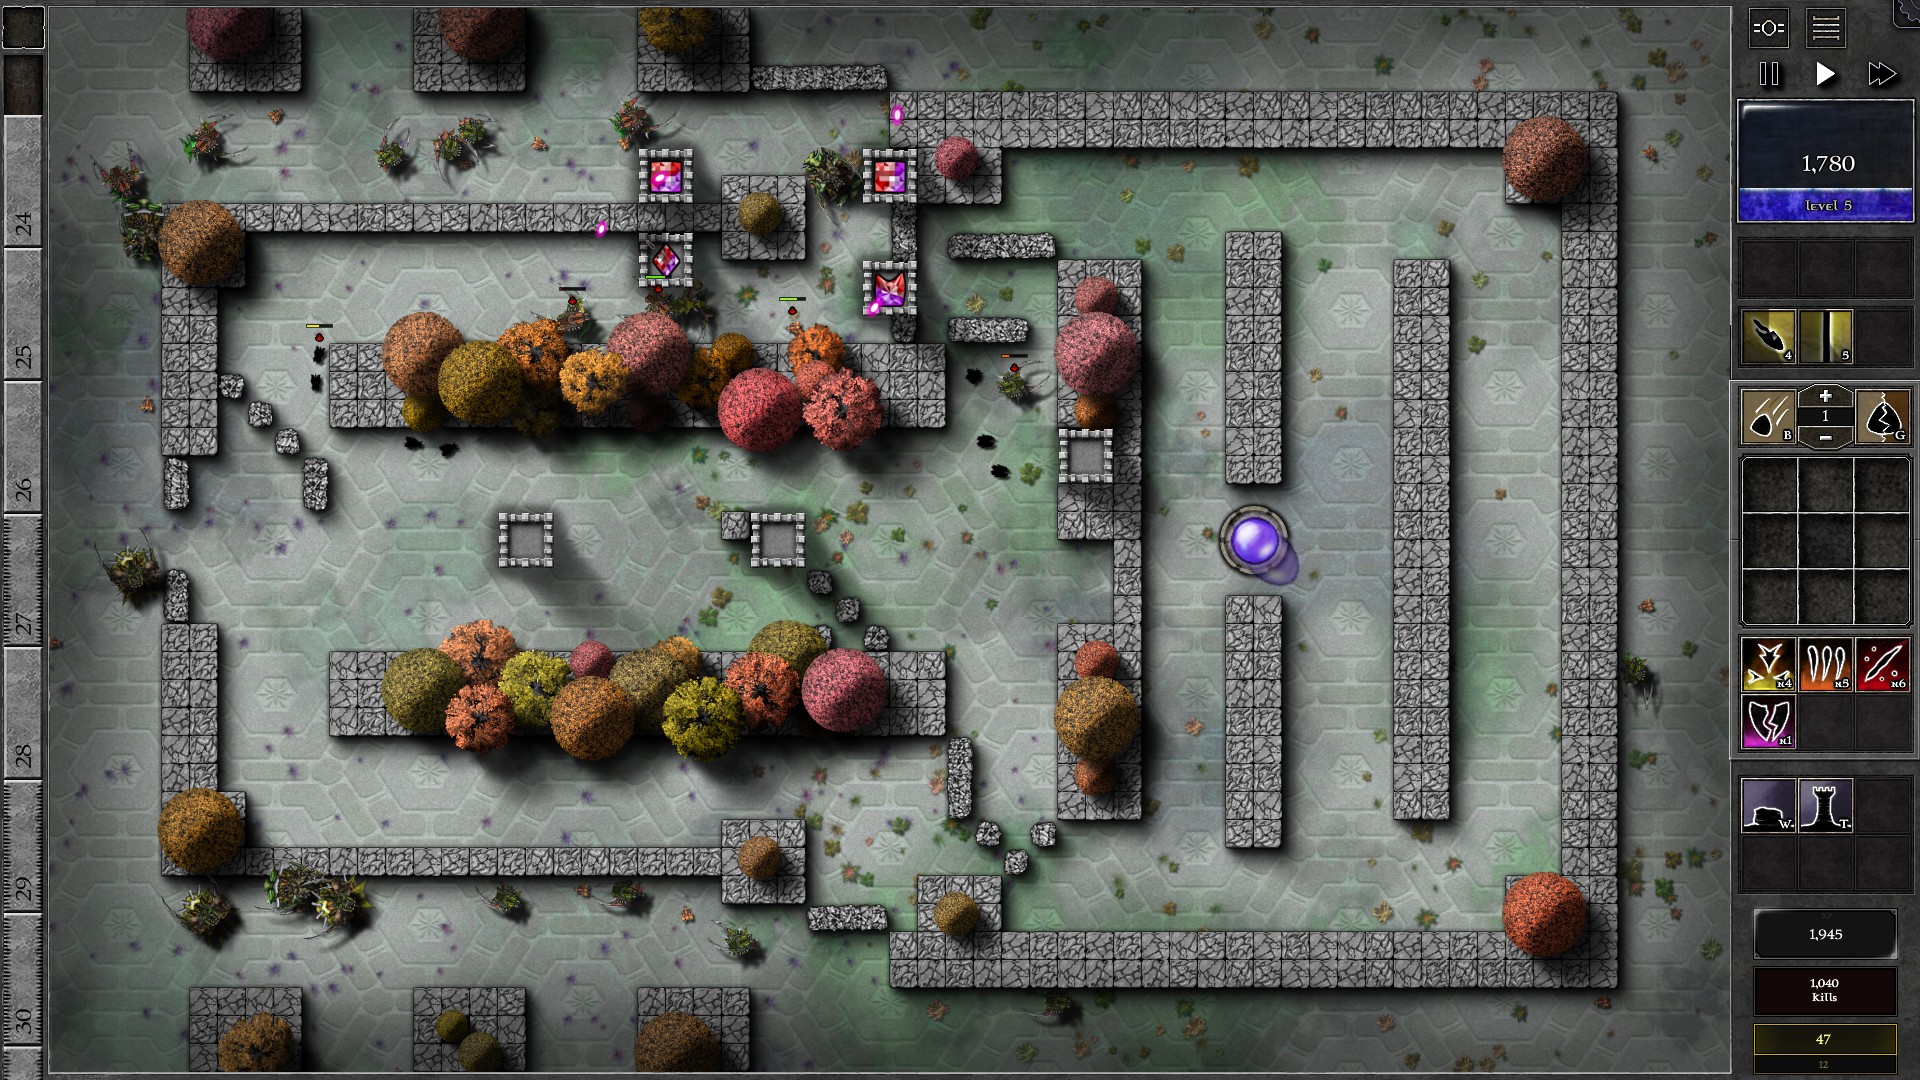
Fix the walls destroyed by the w16 WBs to stop monsters from bypassing your towers, but don’t initiate combat with the WBs until you have a g6 + 3 g3 gems which is around w19-20. Follow similar tactics as the w5 WBs, but this set should be much easier; you have a stronger gem and w16 WBs actually has the same HP and reduced armor from w5 WBs. In fact, it’s likely that your g6 gem with Beam can actually deplete the armor from the WBs allowing normal shots to actually damage them. You should be able to take down the w16 WBs before w24 while having a g6 + g4 + 2g3. Start upgrading the g3 gems to g4 and save up your spells now; you’ll really need them in w28
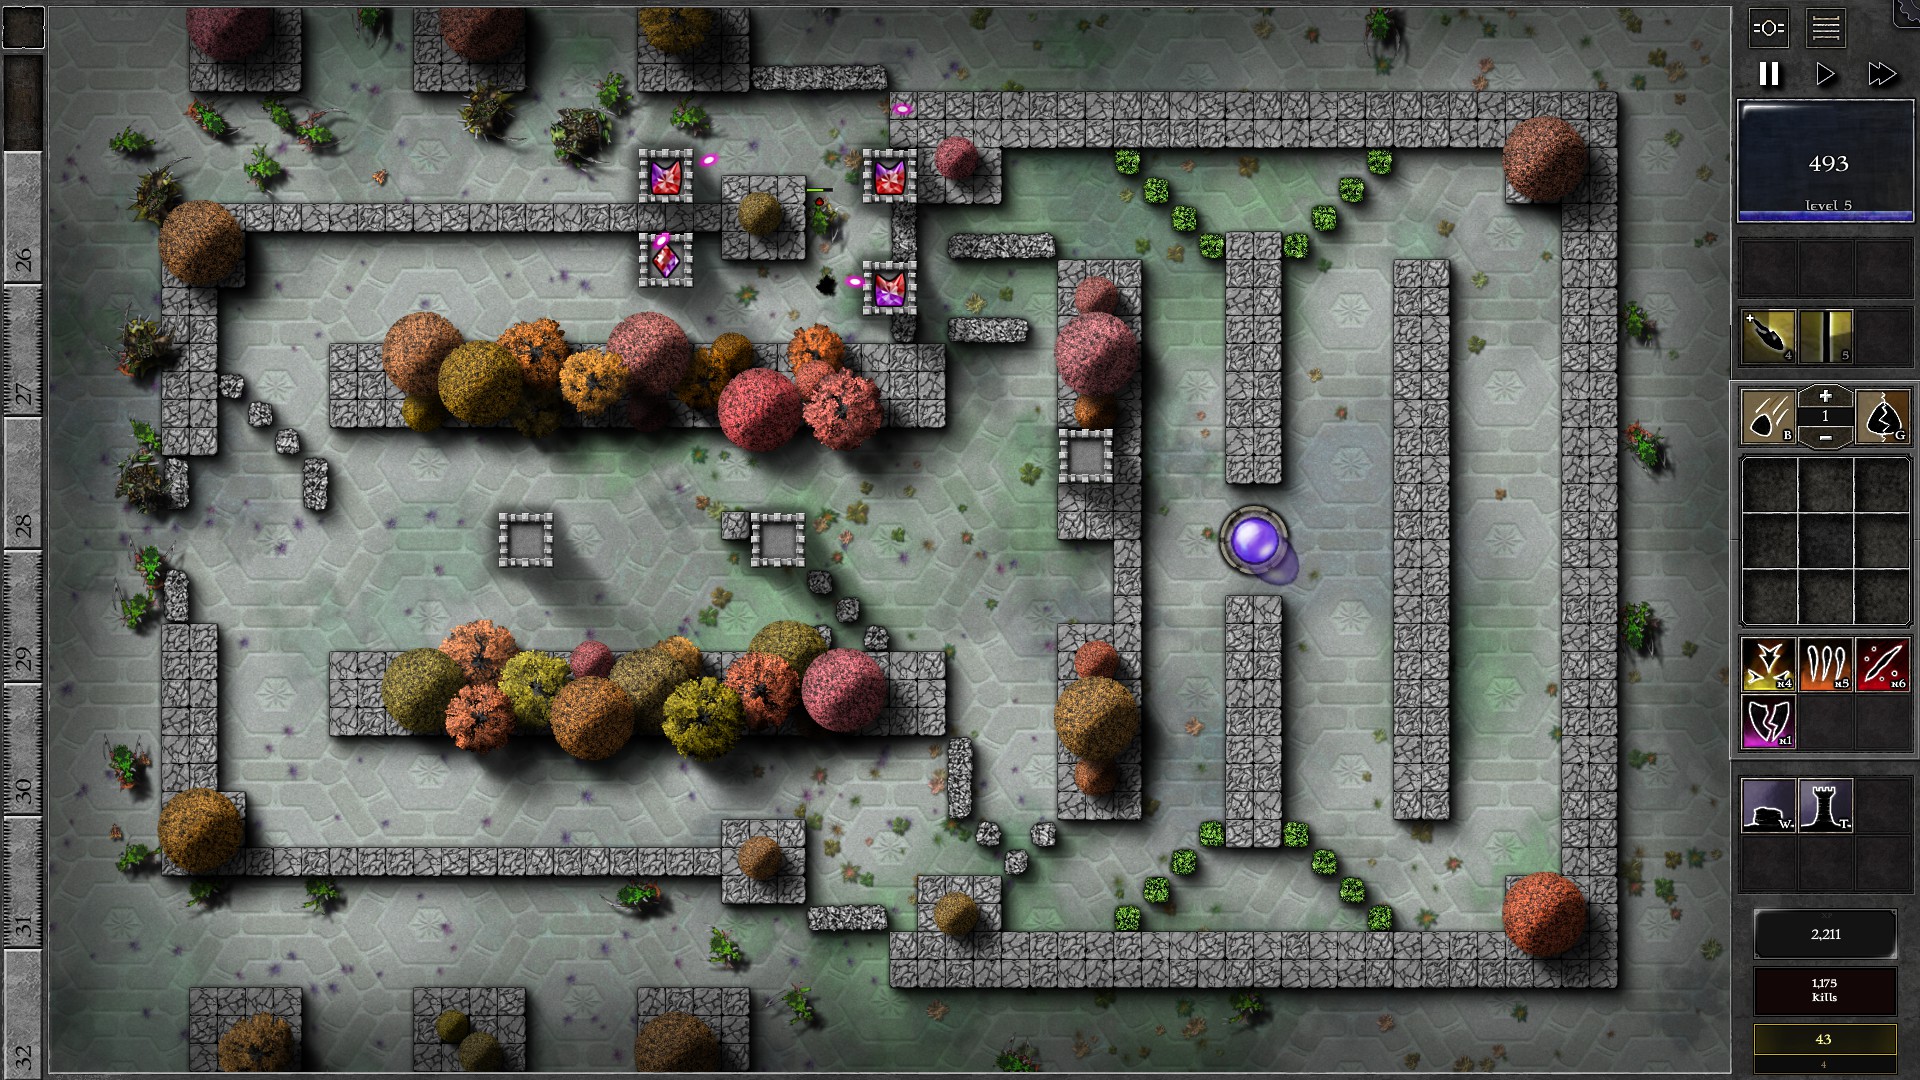
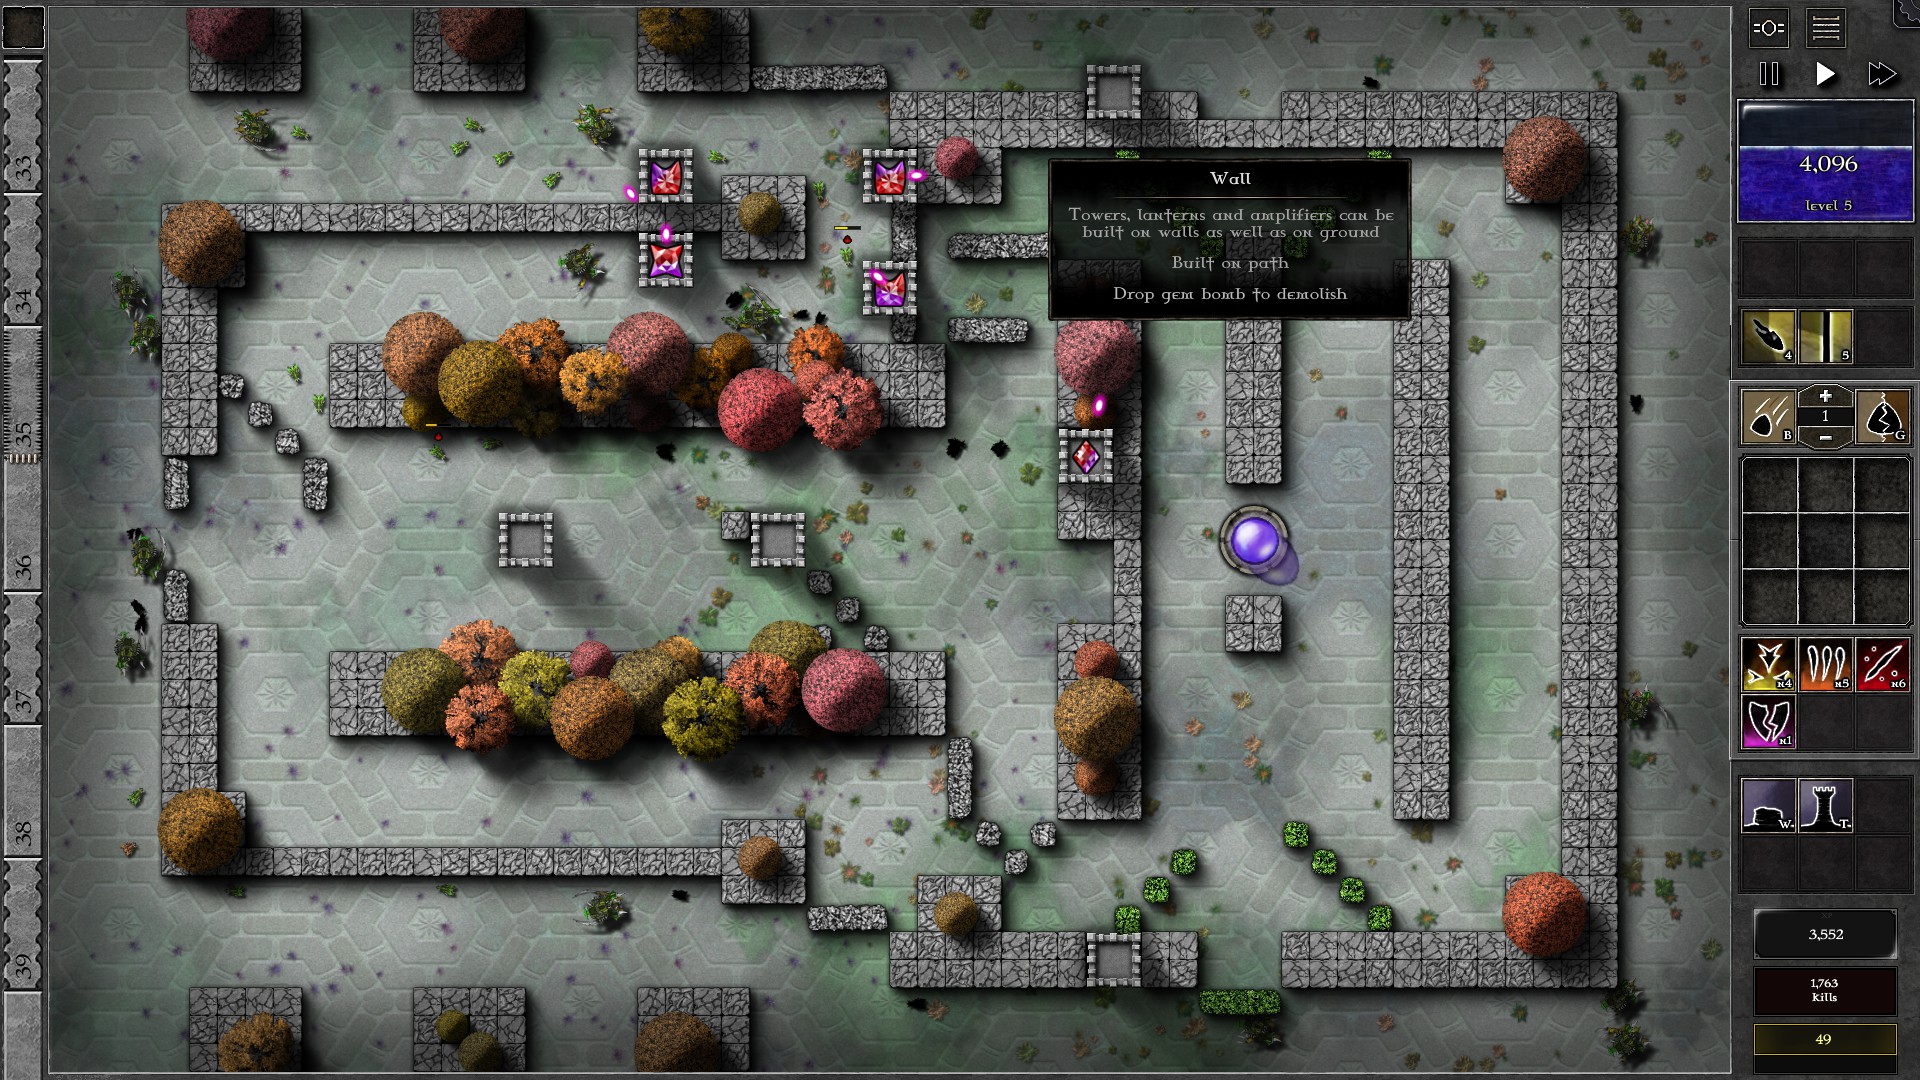
Build the walls (Shrub) as shown to prepare for w28 WBs (You can build the walls to block the 4 paths with 1 less segment but you have a bit less leeway for WBs). When the w28 WBs arrive, immediately build a tower close to the top WB (don’t build too close and get your gem destroyed though), move the g6 in and cast Beam, then Bolt all while focusing on the WB. The top WB should be killed with the 2 spell casts so move the g6 to deal with the bottom WB. Plug the destroyed walls before the diagonal wall is destroyed, and use Beam on the WB. At this point your defenses will start to see pressure from monsters, so send the g6 back to deal with monsters first. If the tower from killing w5 WBs are still in the field, this is a good spot for the gem which also allows you to Bolt the bottom WB from a distance (see g6 gem in the second screenshot). Meanwhile, you can probably gain enough mana to fill vacant towers with g4 gems and upgrade some into g5.
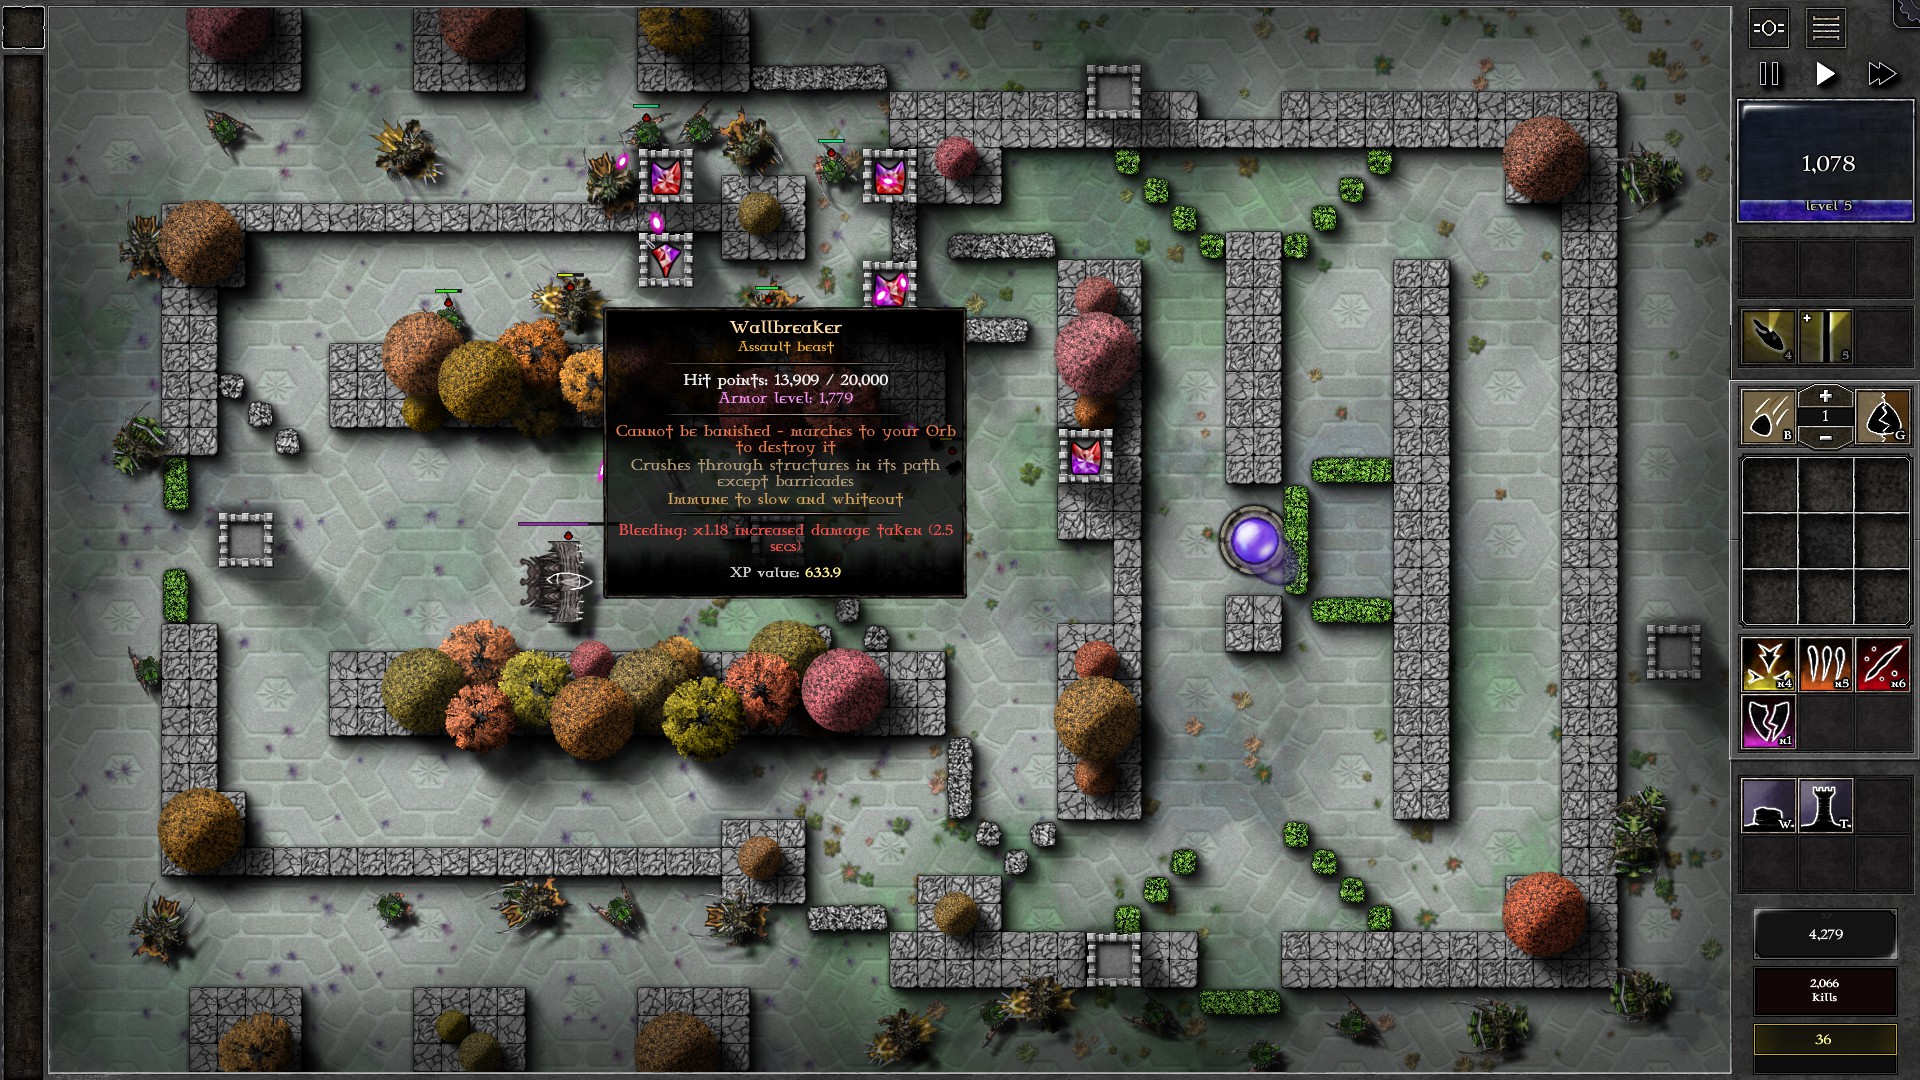
As another 2 WBs approach in w35/36, you should probably have gems to combine into a g7 while keeping some g4 gems for monster defense. Repair the destroyed walls in the same way as w5/w16 WBs. The g7 gem should have no problem killing one of the WBs with a Beam charge shredding off most armor from both WBs. Don’t immediately spend the charges though as you want at least 1 Beam and 1 Bolt for the w40 WB which comes from behind your Orb (from the right). Build the C-shaped walls (Shrub) as a safeguard from destroyed walls. When w40 WB appears, build a tower close to it and kill it ASAP with Beam then Bolt. (The C-shaped wall are not required but will help if you can’t spare the firepower to kill w40 WB immediately for some reason). After that, pick off any WBs remaining and clean up the rest of the field, which shouldn’t be too difficult with a g7 gem + some g4/g5 gems.
074 – Field G4
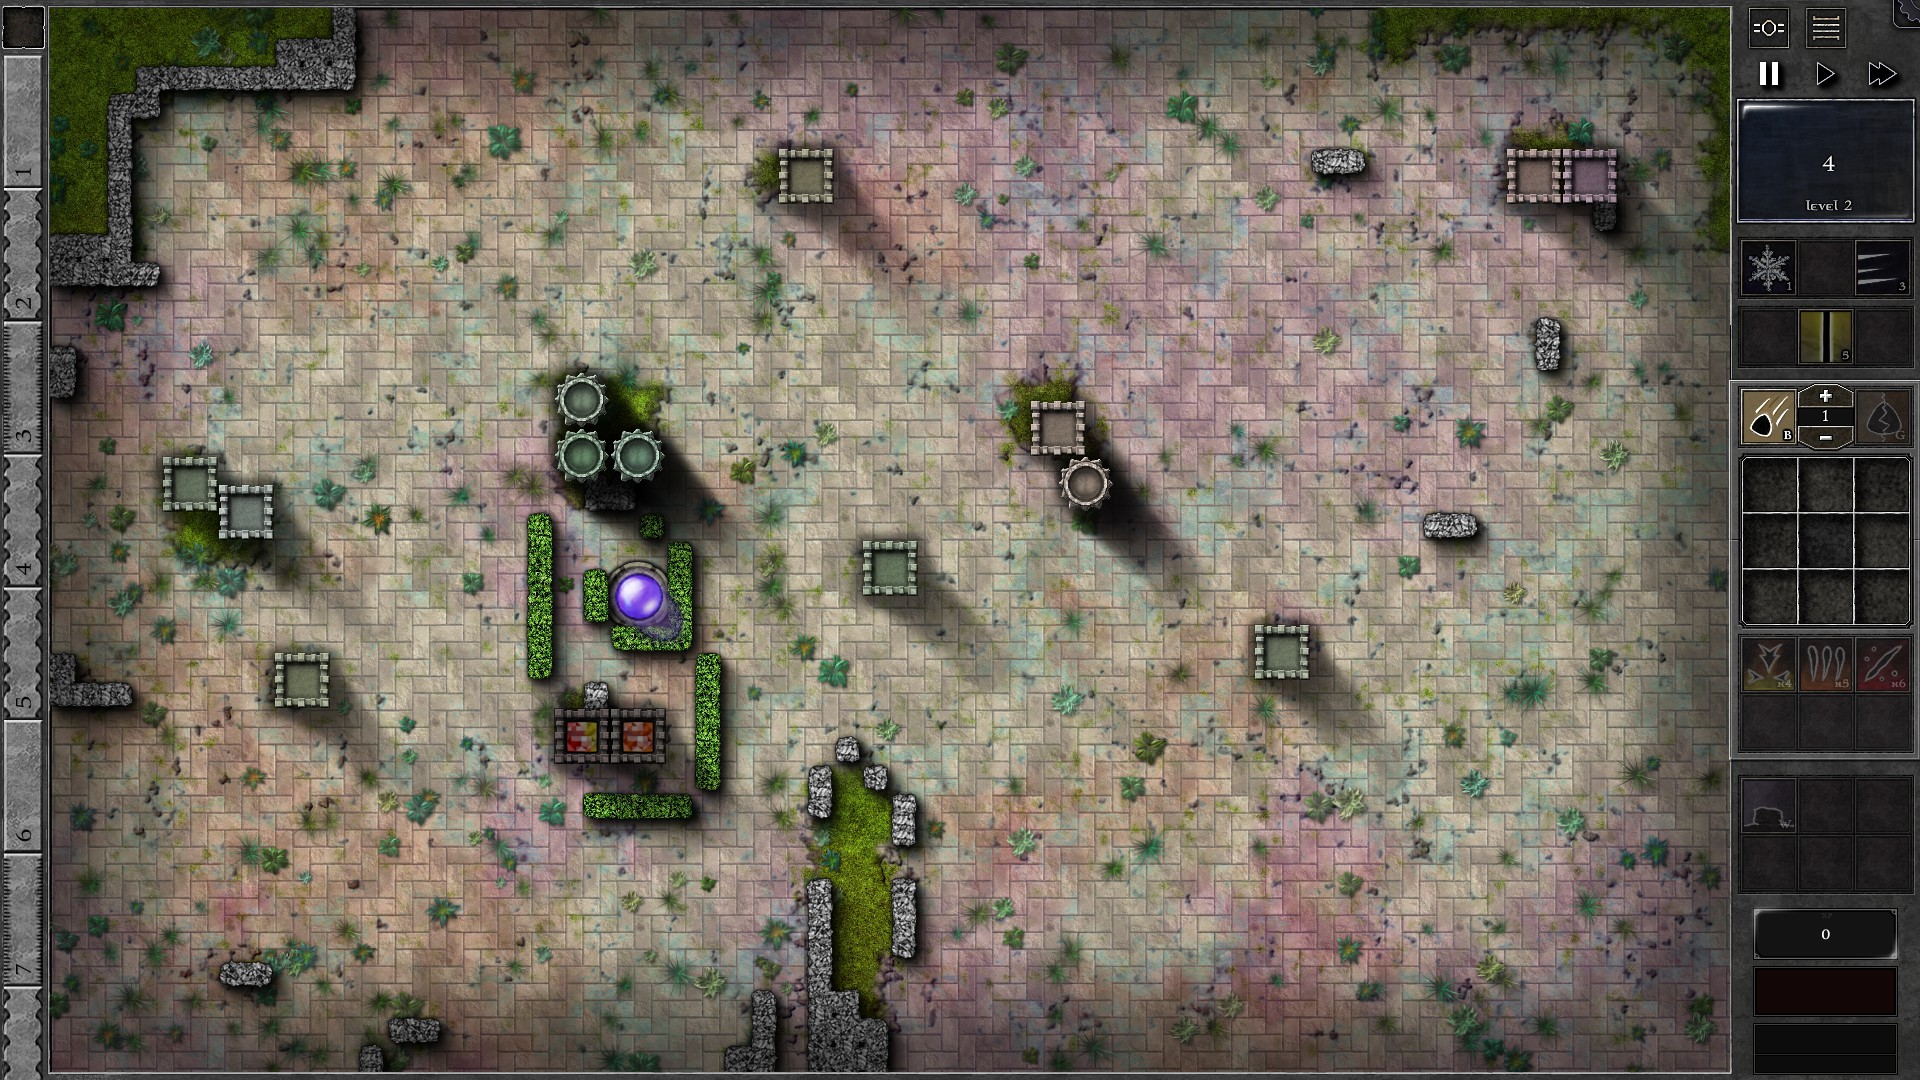
Start the field as shown with a g3 r/y gem and a g3 o (create from the given gems), together with the shrub walls as shown.
For the initial waves, focus on upgrading your gems ASAP. Whenever you have Beam available, use it on the orange gem to farm additional mana. At w3 and around w6-7 you will probably need some strike spells to reduce leaks. You should be able to upgrade both gems to g4 by w11 (For the r/y gem, upgrade it by combining it with a g3 r gem which results in a g4 3r1y gem. For further upgrades on the 3r1y gem use U-upgrade to maintain the same colour ratio). Now, start saving up your Ice Shards.
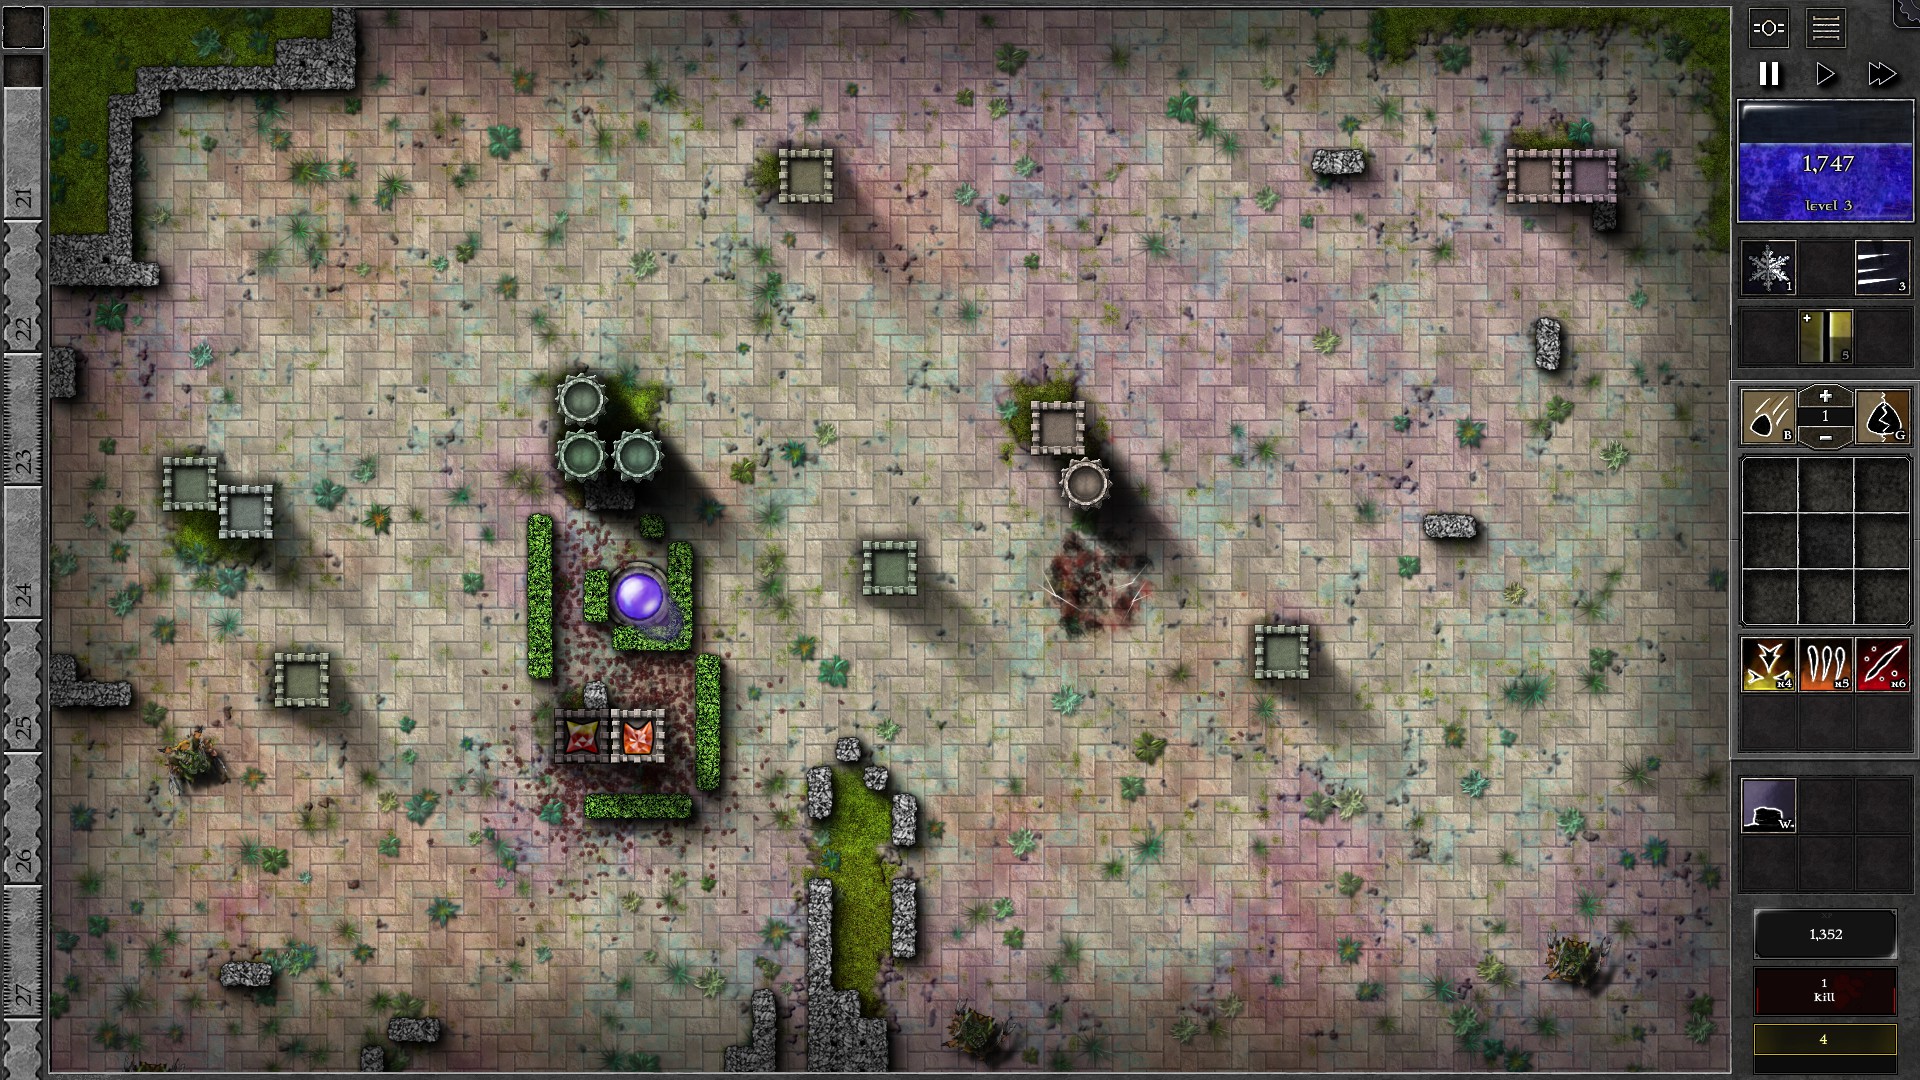
In w13 the first Wallbreaker appears from the right. Keep focusing on your defense and charge Ice Shards until you have both charges ready. Once you have 2 Ice Shards, use them on the Wallbreaker immediately. As the Wallbreaker approaches the first tower in its path (around w16), you should have enough mana to upgrade the g4 3r1y to g5. Now, move the g5 gem to the tower (this tower won’t be destroyed) and it should defeat the Wallbreaker quickly (use Freeze and Beam on the orange gem to reduce pressure from the monsters). Continue with your defense and you should be able to upgrade the orange gem to g5 at around w22.
Start saving up Ice Shards as another Wallbreaker will enter the field from the top at w27. Use both Ice Shards on the Wallbreaker and once most of the swarmlings in w27 are defeated, move the 3r1y gem to fight the Wallbreaker. You might have enough mana to upgrade the 3r1y gem during the Wallbreaker fight but do not upgrade until you defeat the Wallbreaker and return your gem to monster defense. Use Freeze and Beam to fend off the monsters using the orange gem alone while the 3r1y fights the Wallbreaker. You will probably be able to upgrade at around w32 where the Wallbreaker should be defeated and your defense is no longer under pressure. Once you have the g6 3r1y gem you should have no problems defeating the remaining monsters, so save up your Strike Spells for the last issue in this Trial. Meanwhile, upgrade the orange gem to g6 when you have enough mana.
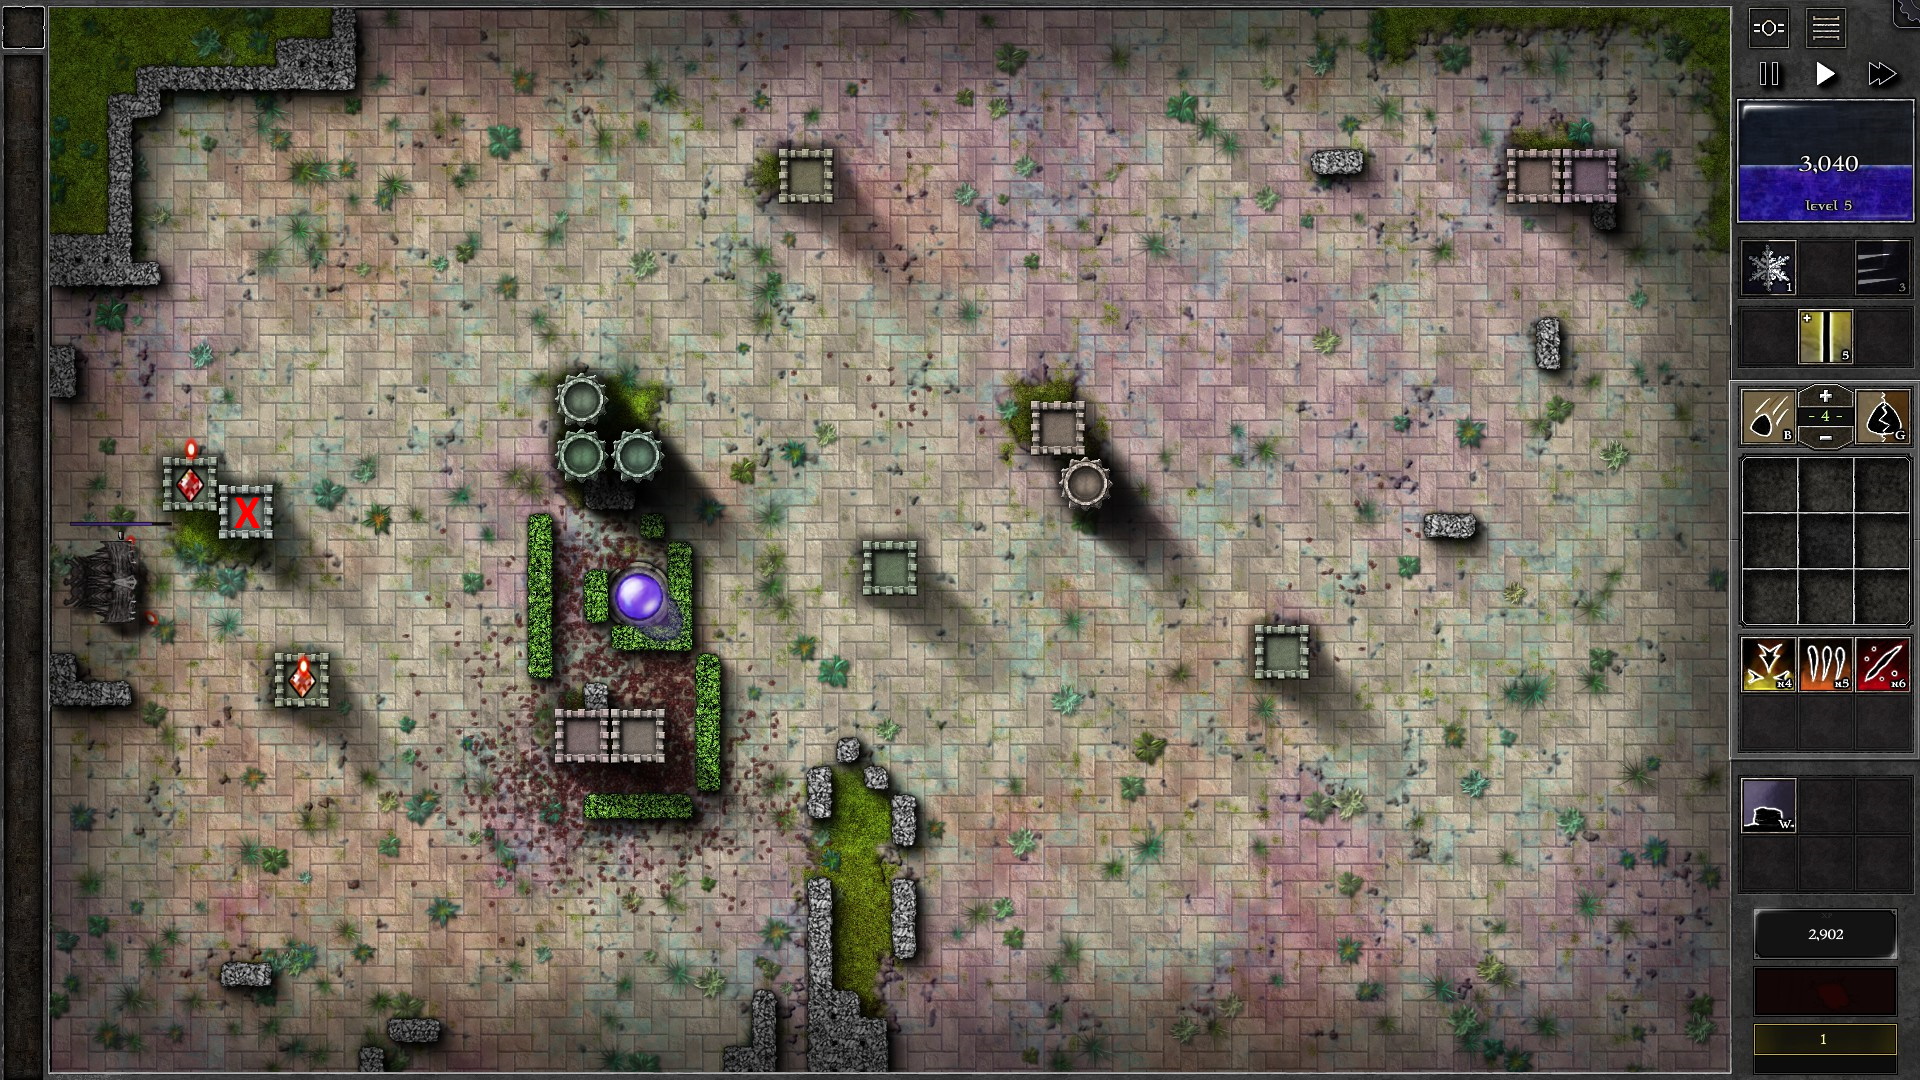
There is a 3rd Wallbreaker from the left at w38, which is also invulnerable to damage until w40 starts. When it appears, immediately cast 2 Freeze spells on it (don’t cast Ice Shards yet; it won’t get damaged from the Ice Shard’s %HP shredding effect). By the time the Wallbreaker is moving again you should be close to w40. Defeat all the monsters first, and use a 3rd Freeze spell immediately on the Wallbreaker once available. Now, move the gems to the locations as shown and spam every spell on the Wallbreaker and you should be able to defeat it before it destroys your Orb.
NOTE: DO NOT move your gems into the tower marked with an X on the last screenshot; that tower will be destroyed by the 3rd Wallbreaker,
075 – Field J1
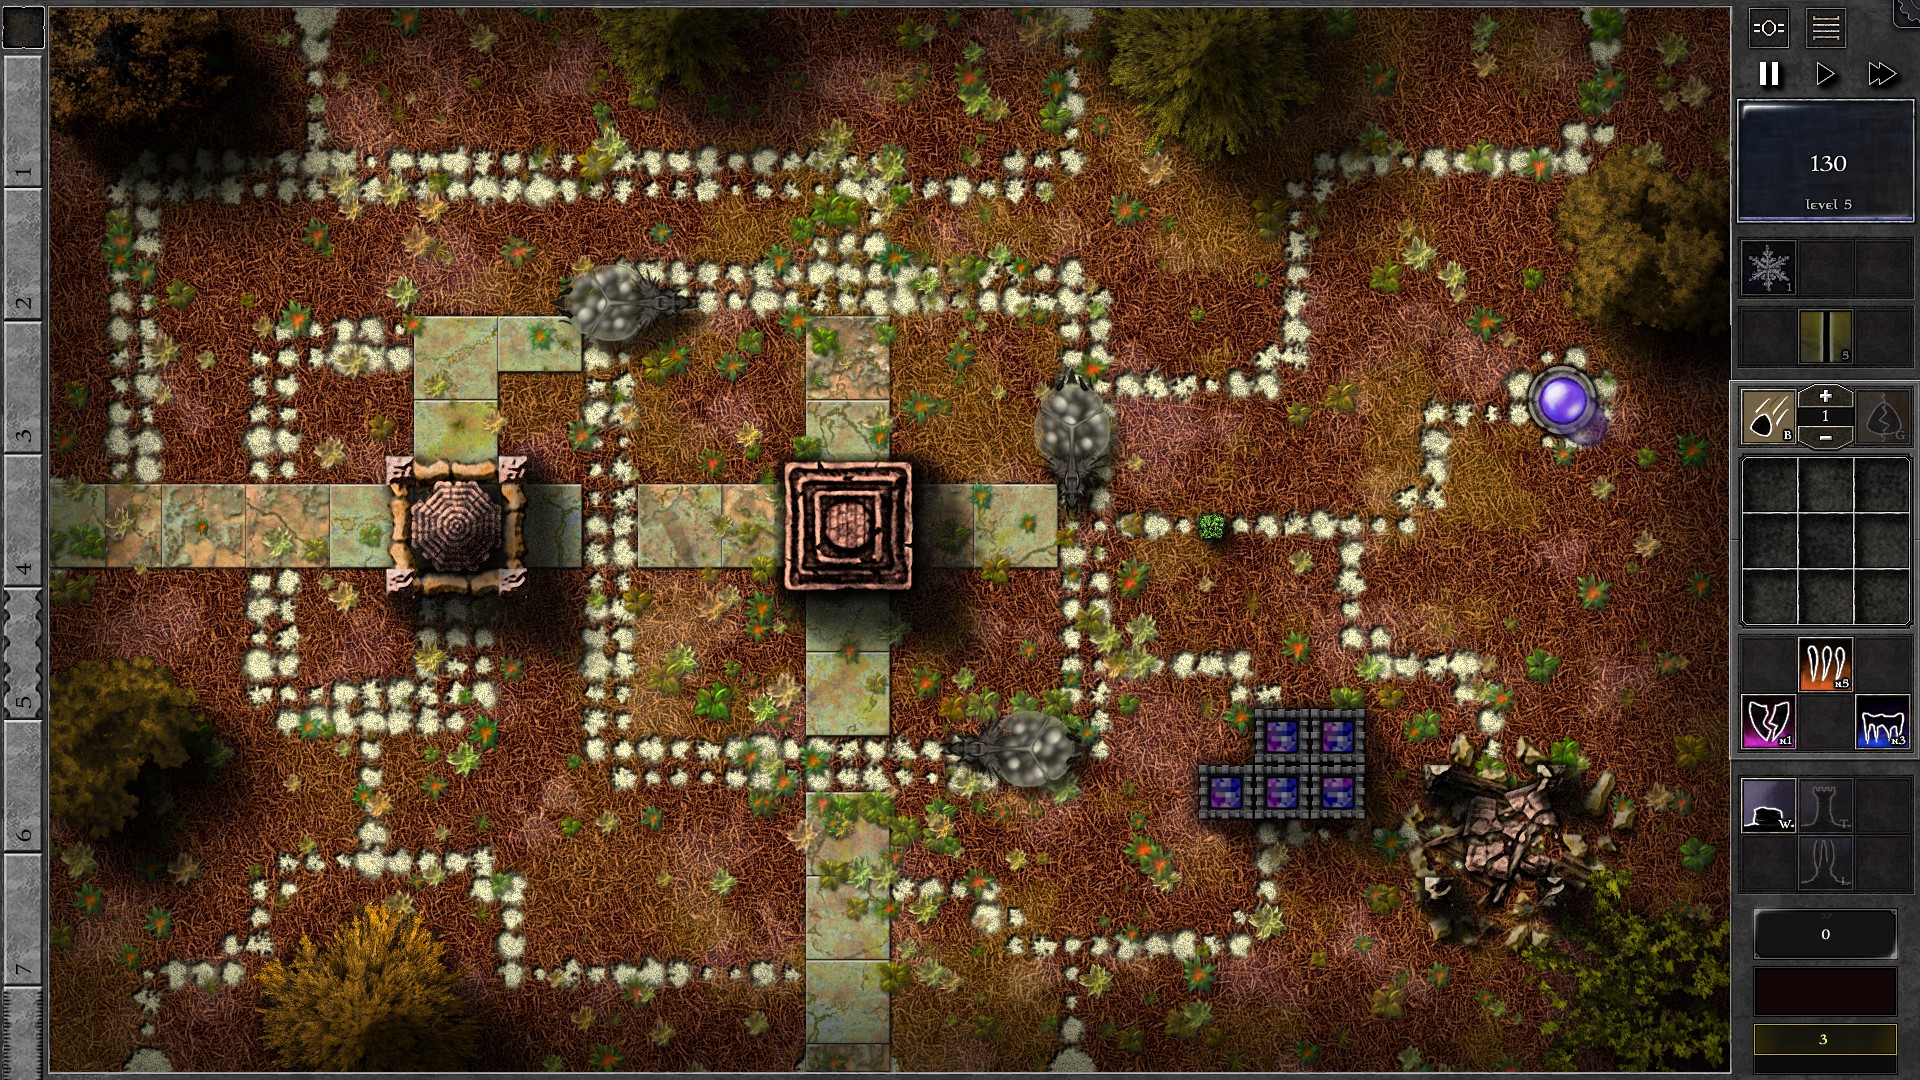
This trial is more on the tricky side, so be prepared. Start the field with walls and 5 towers each containing a g3 p/b gem as shown. Quickly collect enough mana to build a 6th tower with a g3 p/b gem (forming a 3×2 block of towers). Use Beam and Freeze to help control the monsters while you upgrade the 6 gems to g4. This should be doable at around w10.
NOTE: If you notice monsters leaking through your defenses, DO NOT allow the banishment to happen. Use gem bombs to kill the monsters instead. Some g1 bombs can take care of the weaker spawnlings early. Use multiple and/or higher grade bombs if necessary.
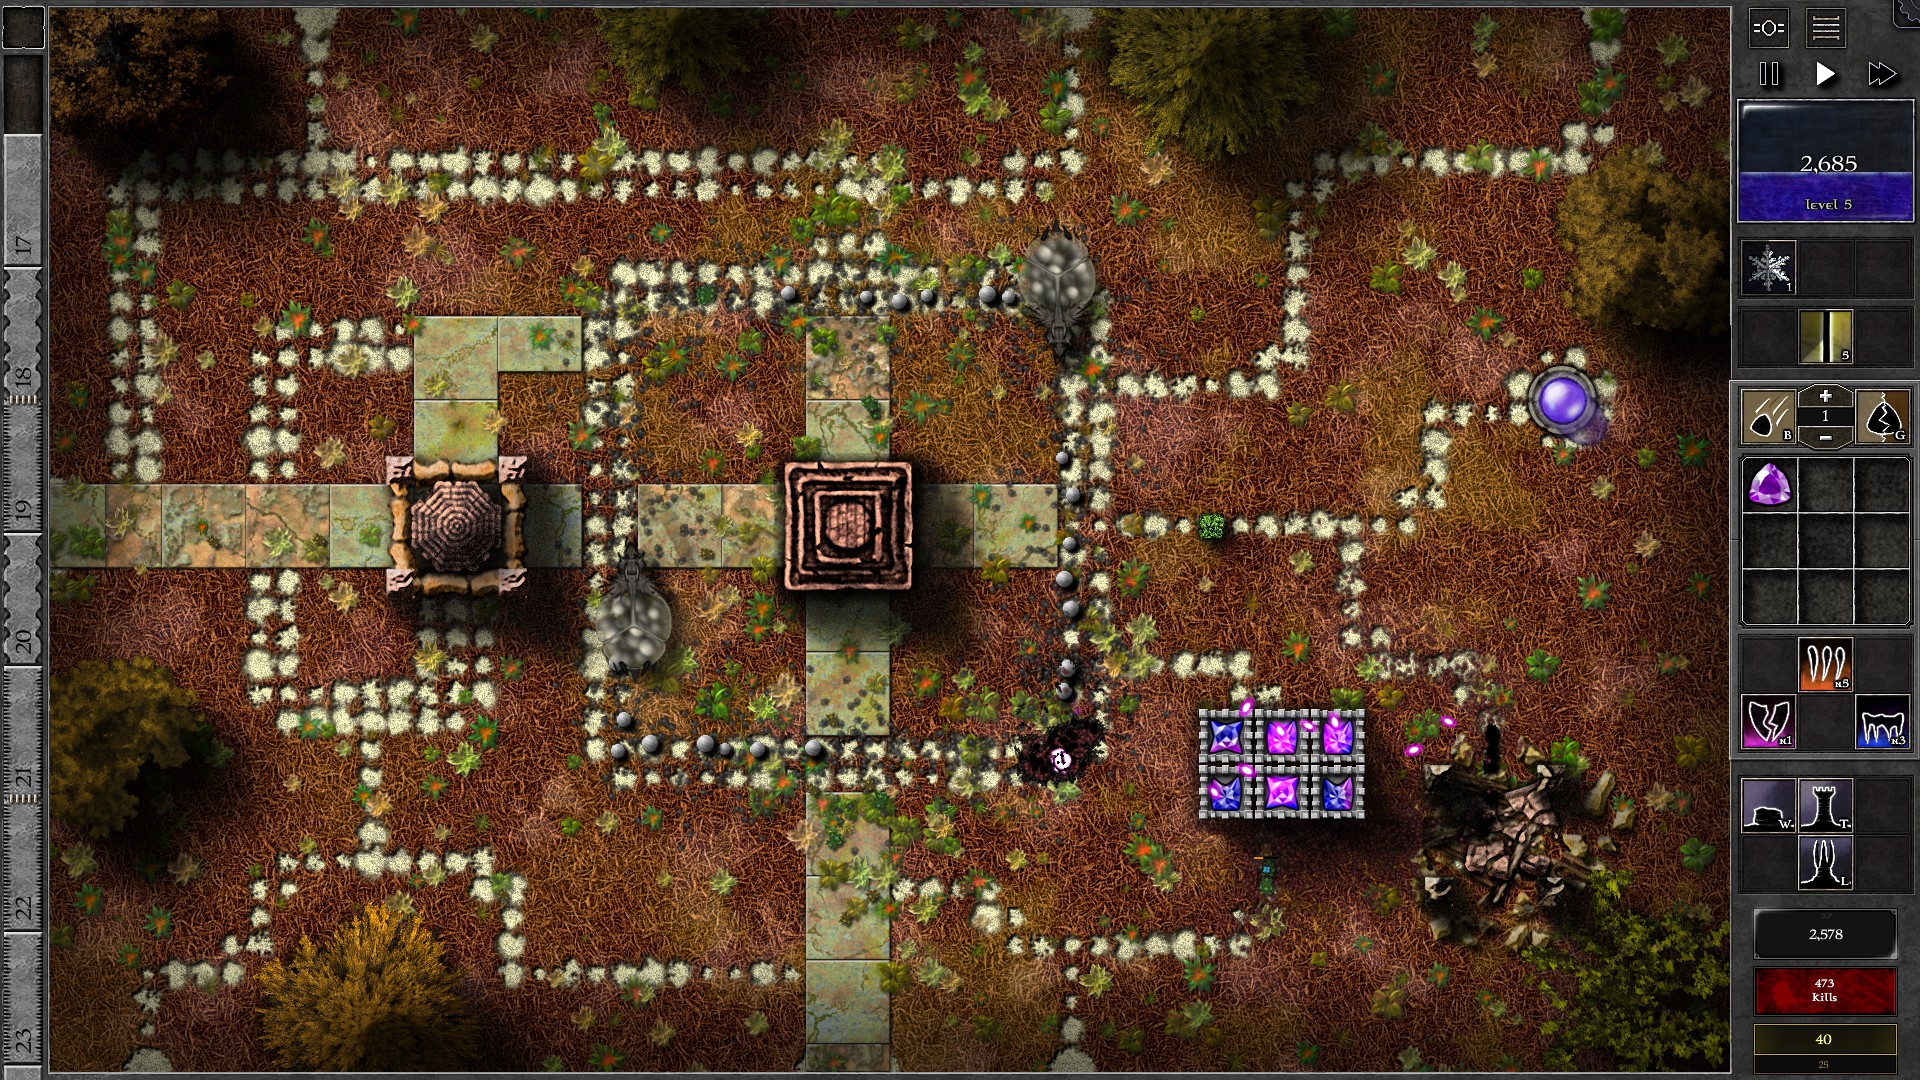
Continue with the defense and you will notice the Swarm Queen with 3000 HP starts to get close to the towers (around w15). Upgrade the top left tower’s gem to g5 and use “Specials” targeting to have it fire at the Swarm Queen. Use your Freeze and Beam to help defending the monsters while accumulating mana. Make sure you have around 2000 mana when you kill the 3000 HP Swarm Queen. (You can possibly upgrade another g4 gem to g5 while accumulating the mana).
The 3000 HP Swarm Queen should be killed at around w16 which causes it to release the swarmlings on death. Stop time immediately when the Queen is killed, and create a g1 gem for gem bombing. Keep throwing bombs onto the pile of swarmlings: A g1 gem bomb only spreads ~30 damage by itself, but hitting the tens of swarmlings amplifies total damage as each of them still takes 1 damage. About 40 g1 gem bombs should take care of the swarmlings + their spawnlings from Parasite Trait, and the mana gain from killing the swarmlings should cover the cost. Use the gem wasps to wreck further havoc to existing monsters, and don’t forget to revert the g5 gem’s targeting to “Nearest to Orb”).
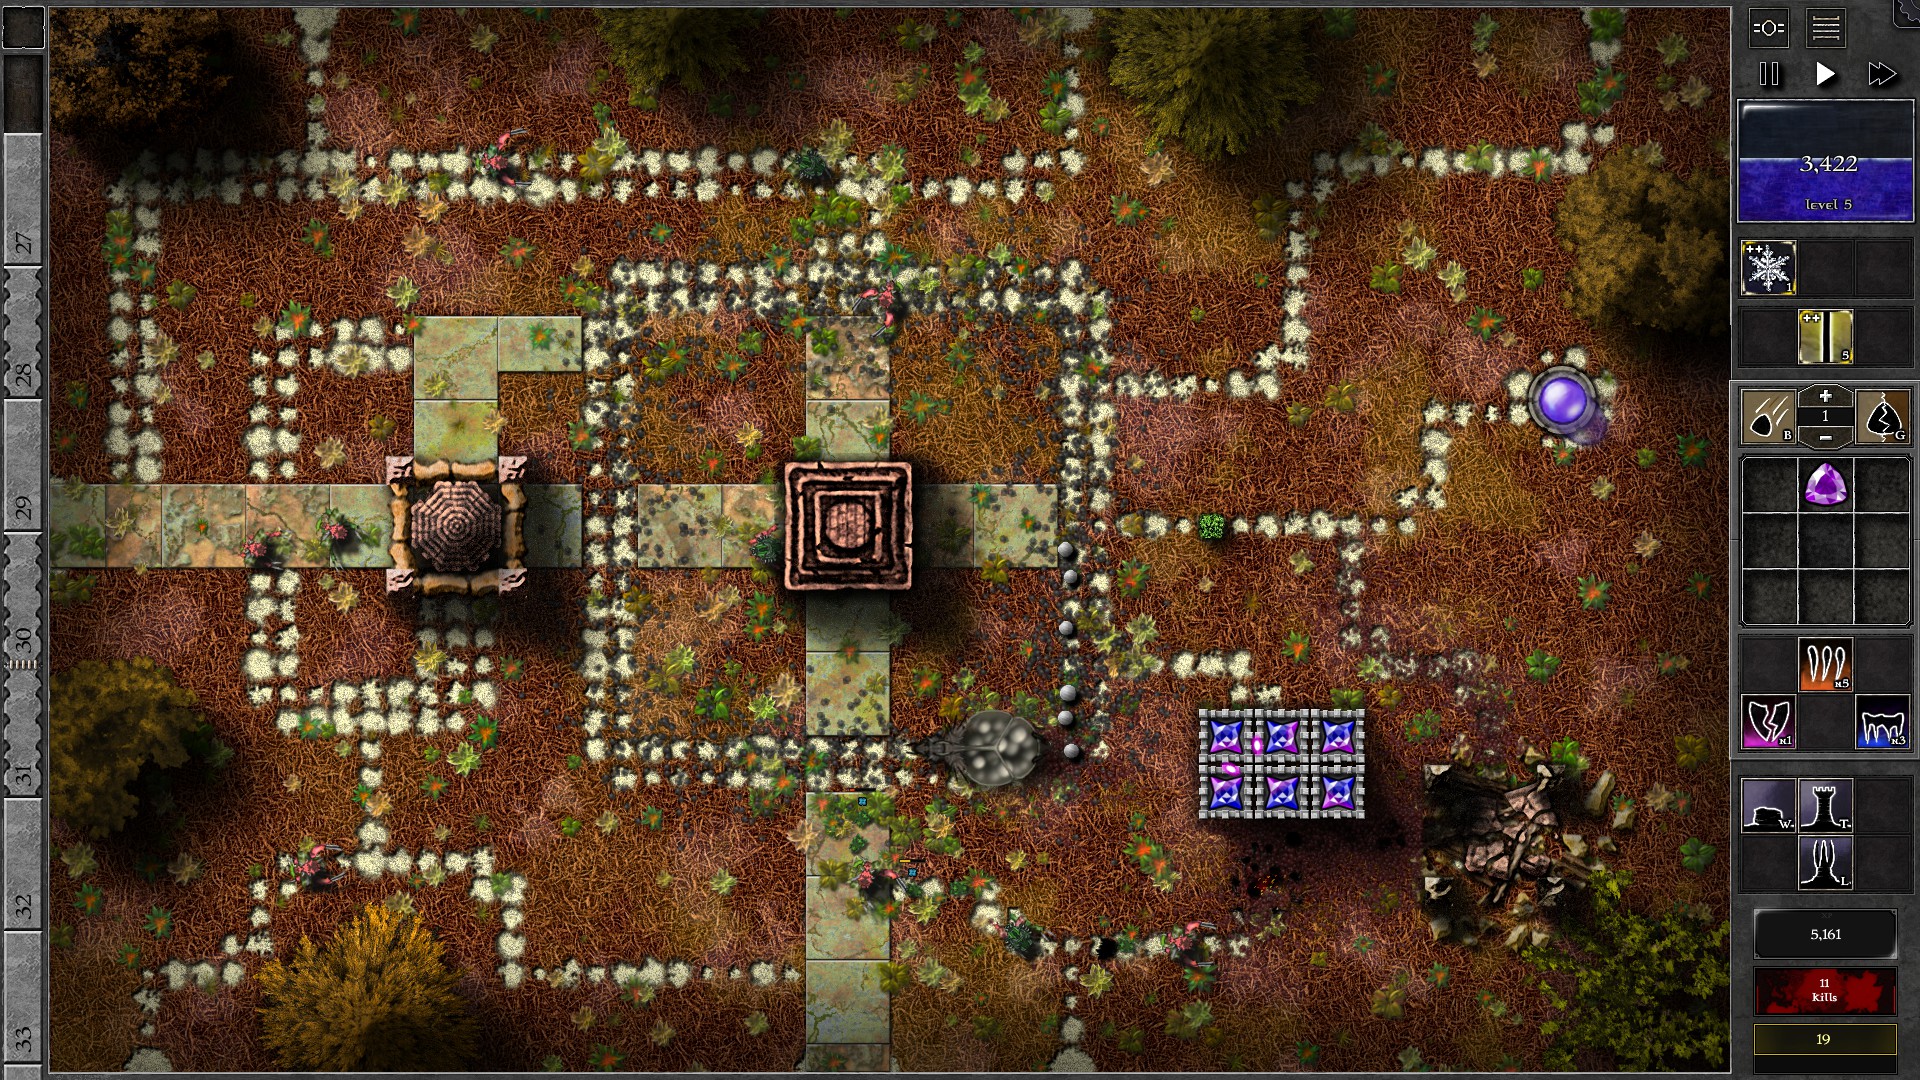
The 5000 HP Swarm Queen should now close in to your towers. Accumulate about 3500-4000 mana, then make the top left g5 gem target “Specials” again but you may need a Freeze spell to kill it before it leaves the attack range. Another horde of swarmlings should spawn which you can do the same gem-bombing tactic to kill the swarmlings. You need about 65 g1 gem bombs and you probably won’t recover the cost. This should be doable at around w20 and you should have 3 g5 and 3 g4 gems (and likely enough mana for a 4th g5).
Continue upgrading the gems until you have 6 g5 gems (around w23-25). The 8000 HP Swarm Queen should close in to the towers at around w25. Your gems may deal some damage to it but DO NOT kill the Queen at this point as you are not ready to take on the swarmlings on death. Temporarily reduce your gem range if necessary. Continue accumulating mana until you have at least 6000 mana, which is around w30-33.
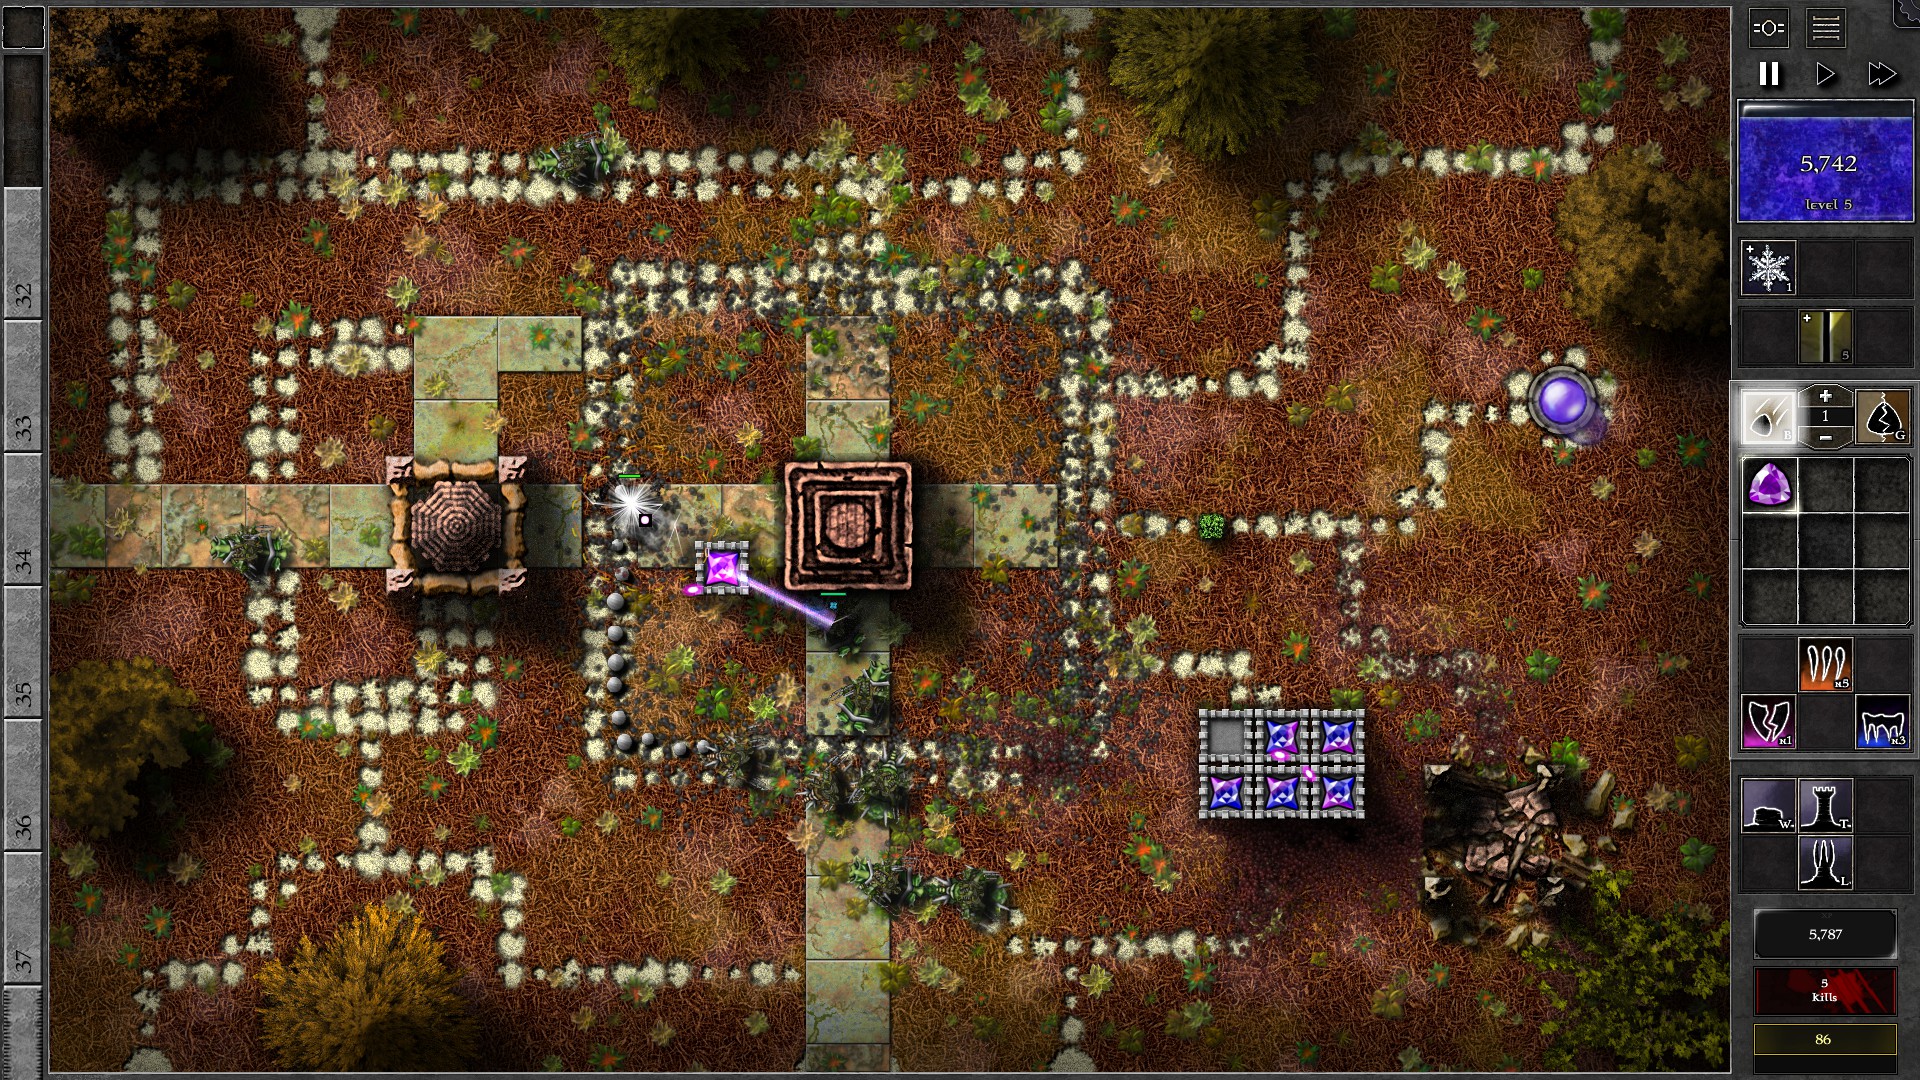
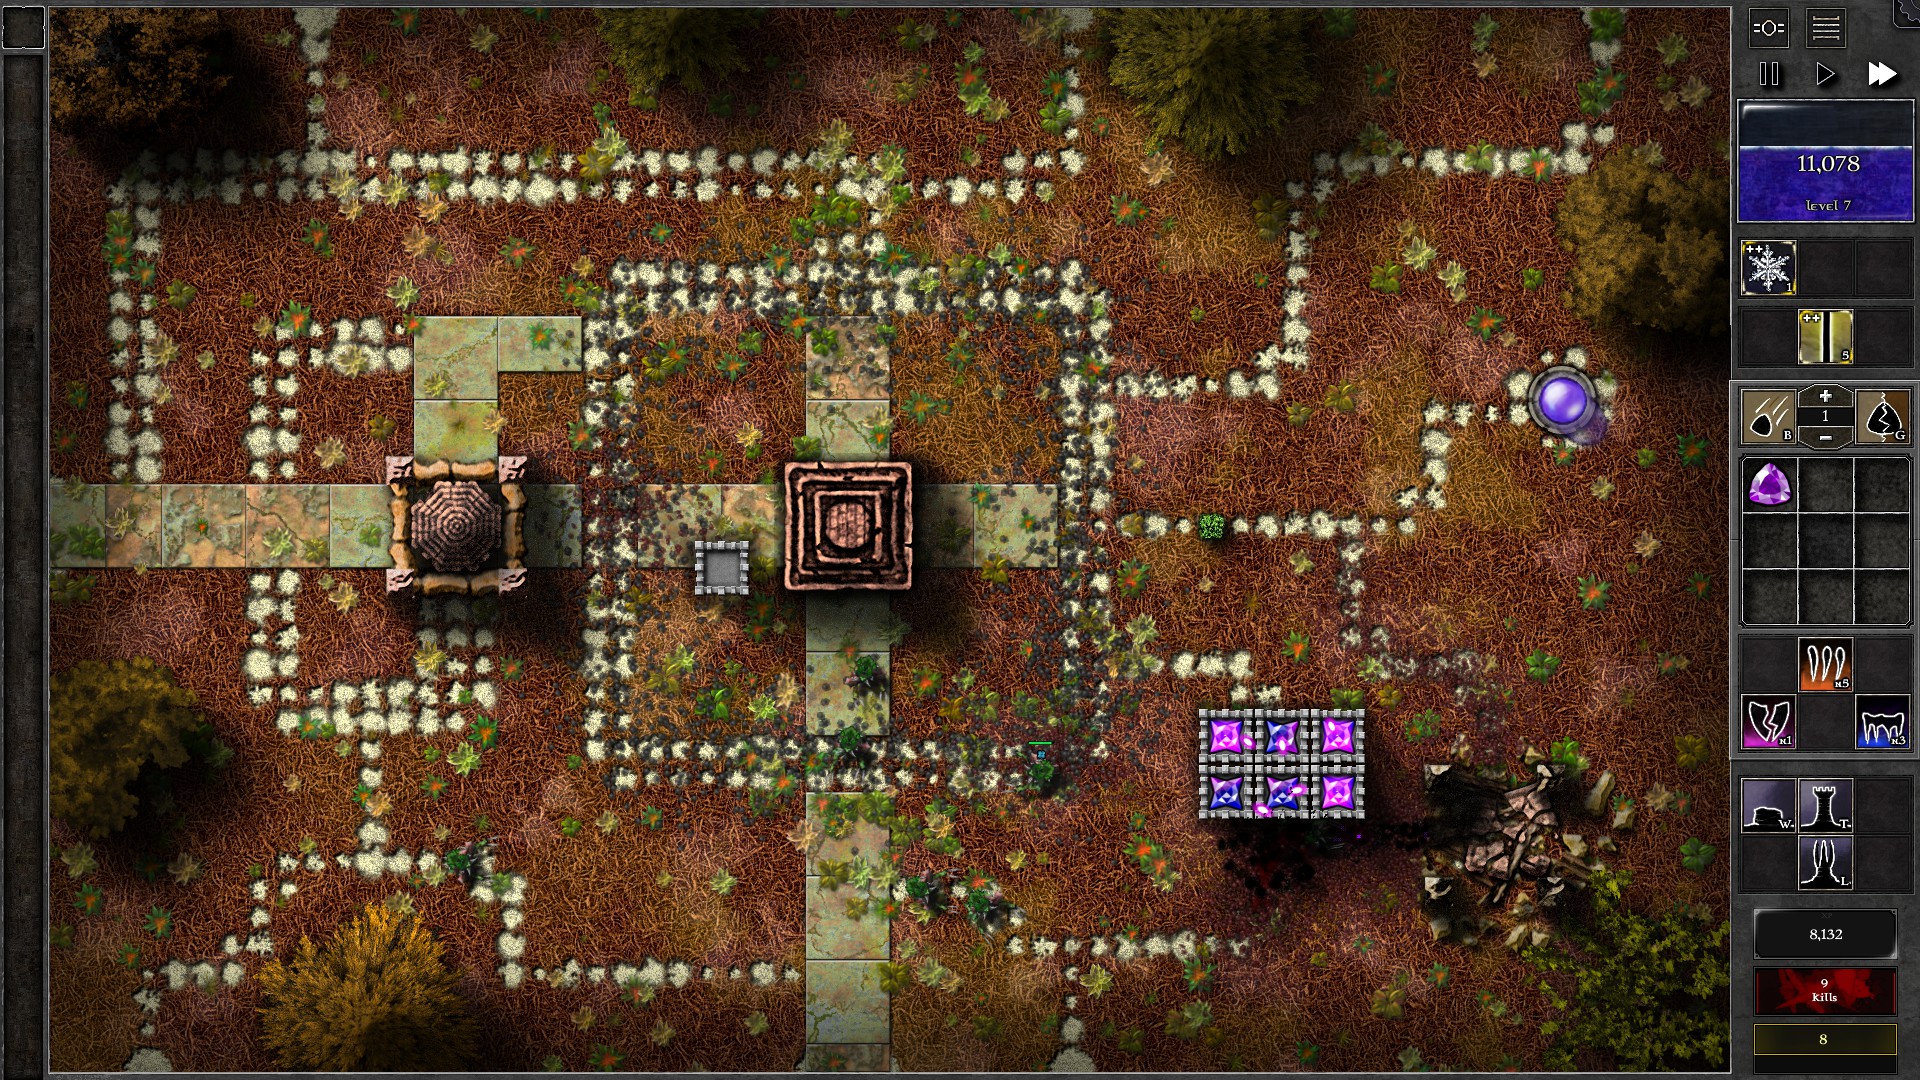
Build a tower close to the Swarm Queen and move a g5 gem there to kill the Queen. Once the Swarm Queen is dead, use gem bombs to take care of the swarmlings. This batch of swarmlings are much tougher so Freezing before bombing is recommended to take advantage of frozen corpse damage. About 100 g1 gem bombs are needed to kill this batch of swarmlings completely.
Once all 3 Swarm Queens are killed and all the monster eggs are hatched, there shouldn’t be much threat left in this Trial as long as you use the spells to help deal with the monsters and look out for leaking monsters (to kill with gem bombs). You can also upgrade some of the gems to g6 but this is probably overkill at this point.
076 – Field J2
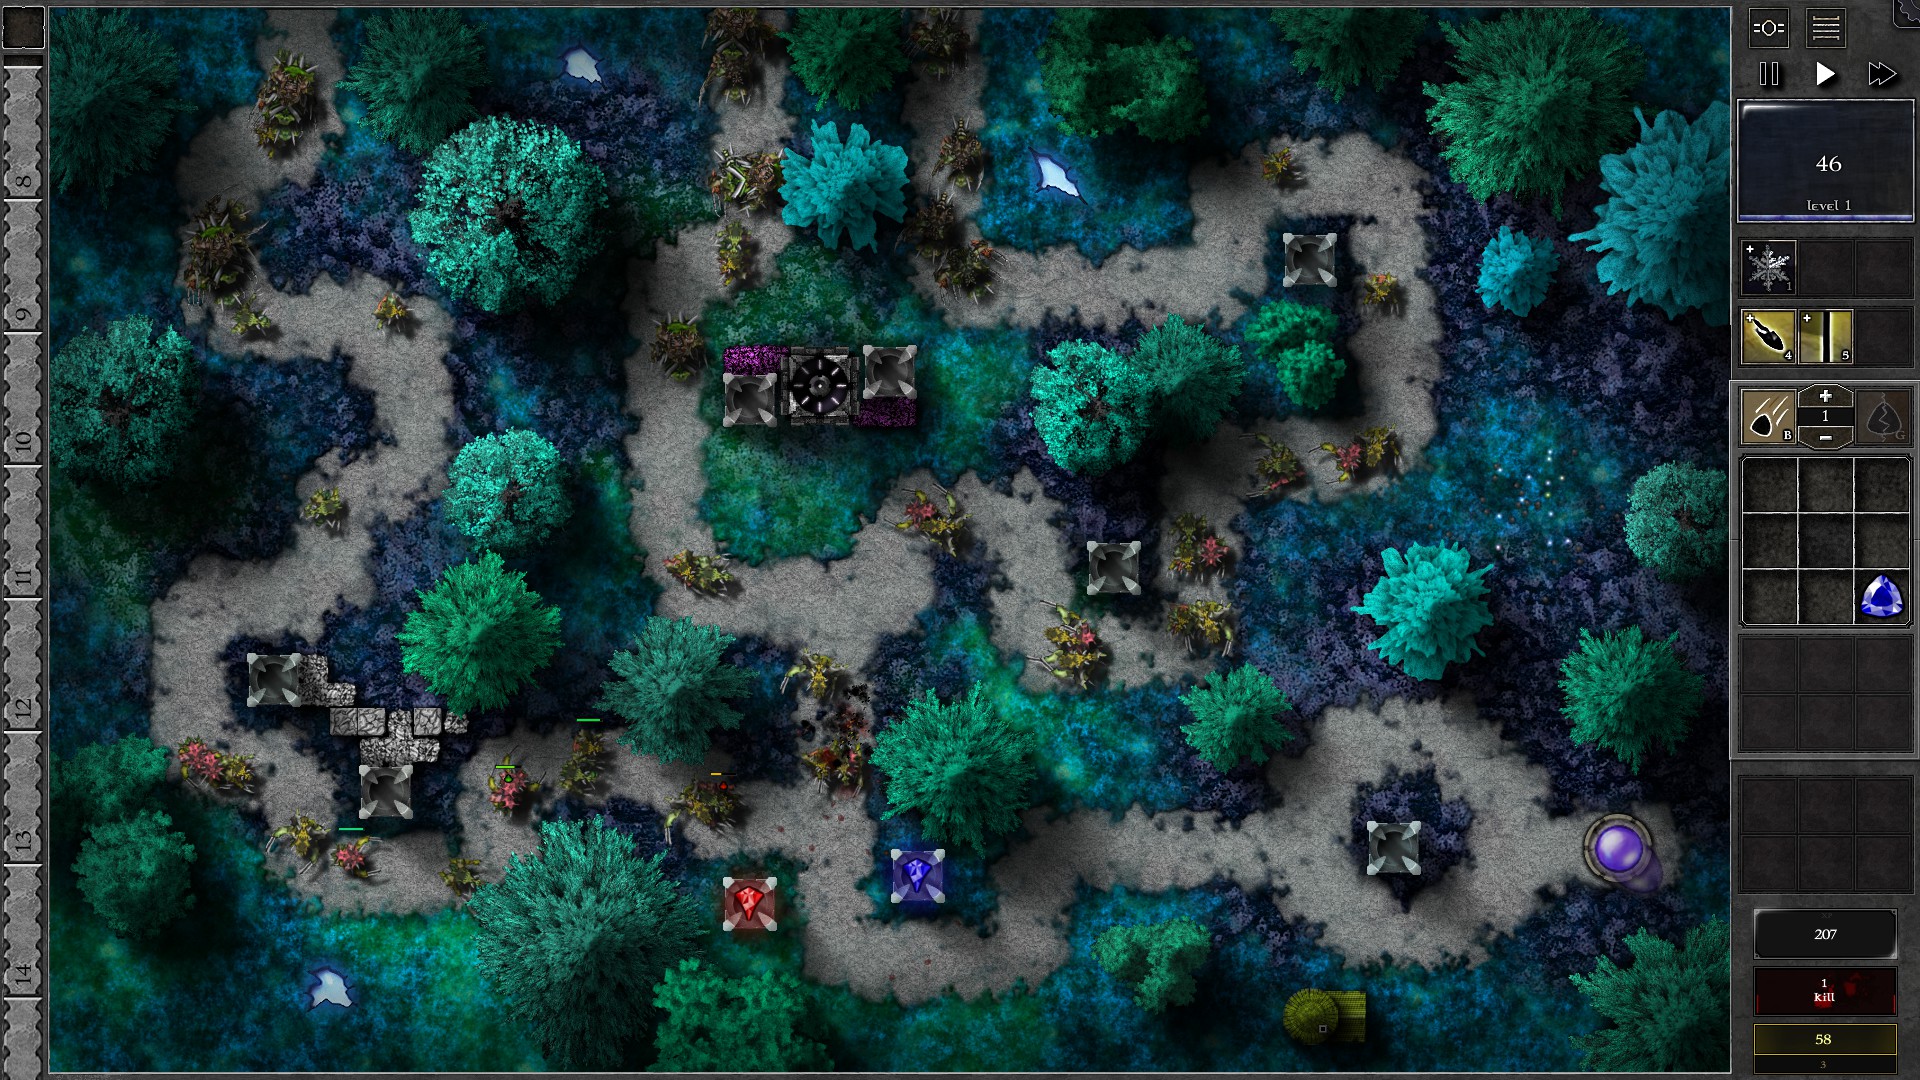
You are given 9 g1 gems at start. Use g1 y + g1 o + g1 r + g1 p to bomb one of the Gem Seals, and use g1 r + g1 y + 2 g1 g to bomb the other Gem Seal. You should now have only a g1 b left. Send the first 7 waves early and you should have enough mana to fill the inventory with g1 blue gems (Note: You would get “Splash Swim Splash” Achievement for filling the entire inventory with blue gems). Use 8 of the blue gems to bomb each of the Gem Seals 4 times. You should be able to release both g7 gems from their Gem Seals with the damage from both the gem bombs and the gem wasps.
Quickly insert the g7 gems to the bottom 2 lanterns where the paths converge. The g7 gems should take care of the monsters in the Trial. Note that you don’t have much capacity to banish monsters at all so use your Freeze and/or Beam spells to help defeat the monsters. A Shrine Strike is also helpful for the later reaver/swarmling waves (w25, w29).
Finally: Achievement “Uraj and Khalis” is specific to this Trial, and is obtained by inserting the g7 r gem and g7 b gem from the Gem Seals into the 2 Lanterns right next to the Shrine.
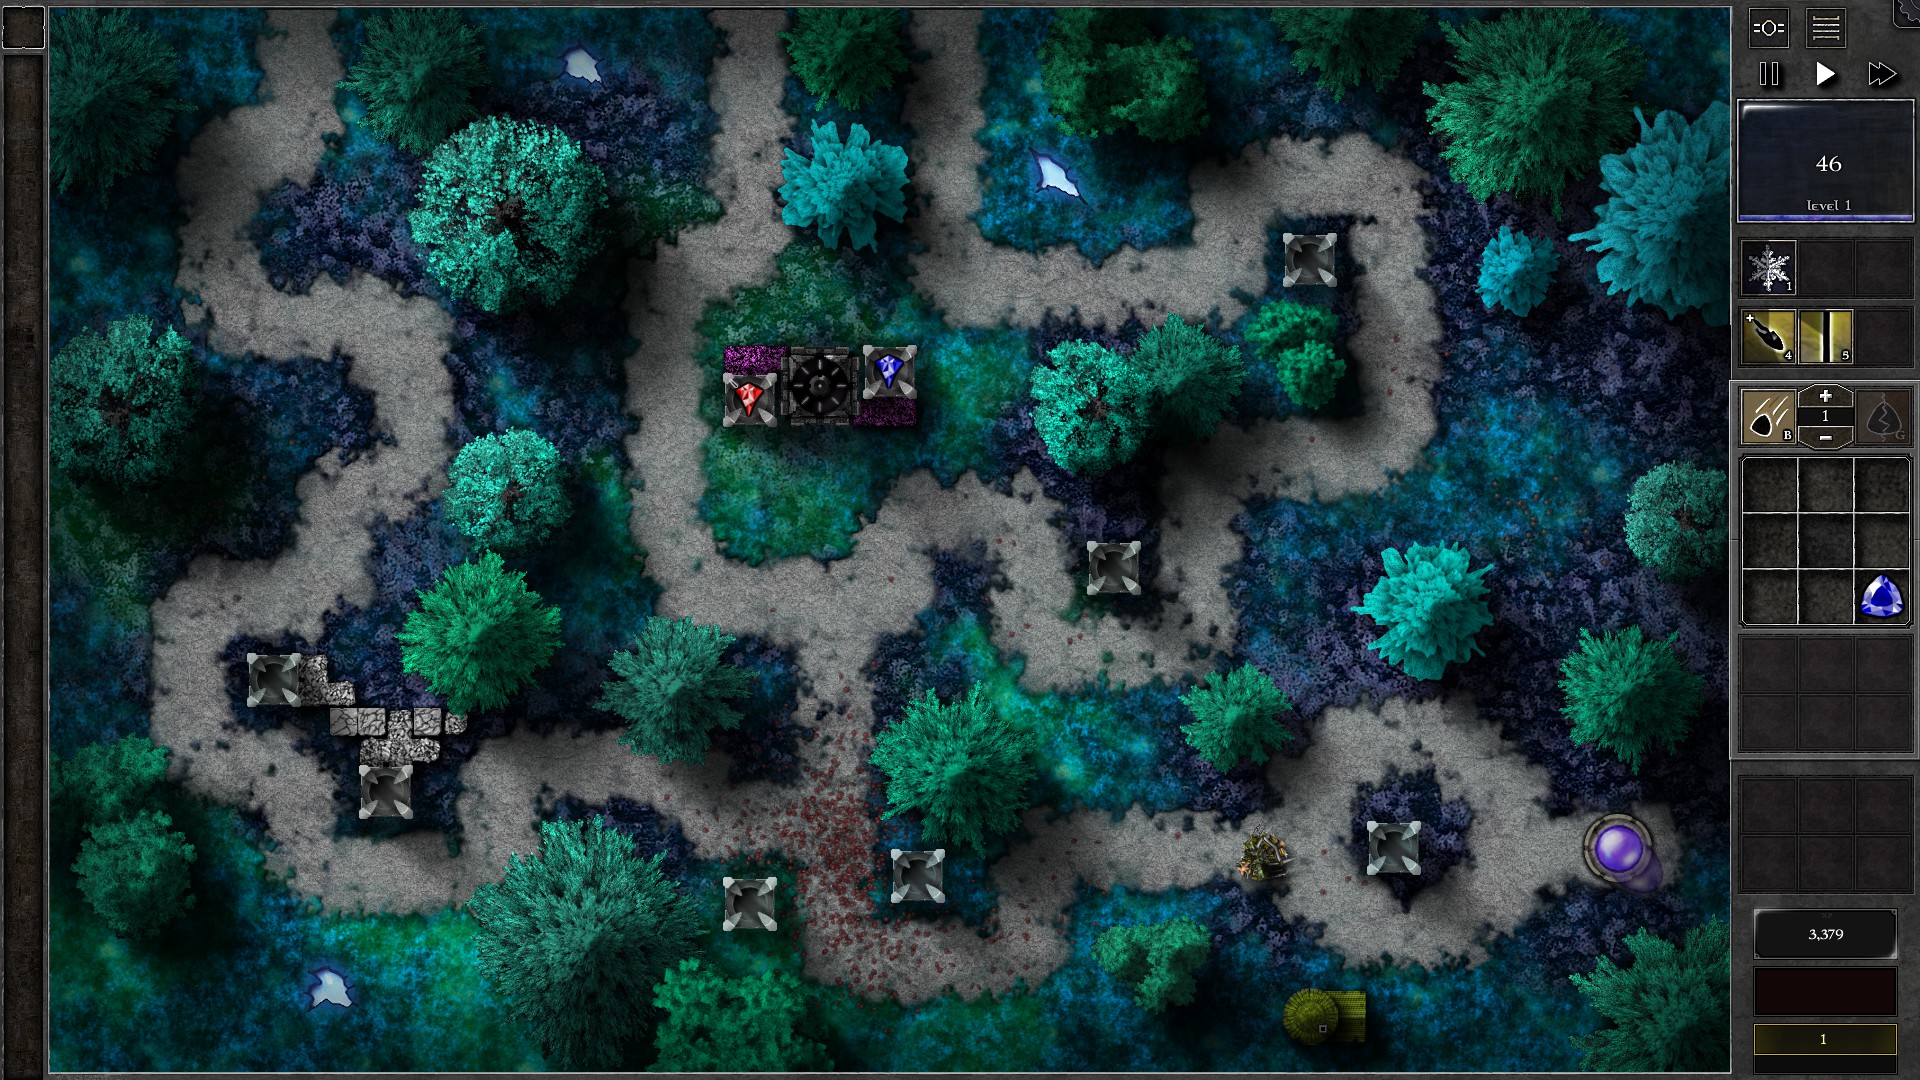
077 – Field J3
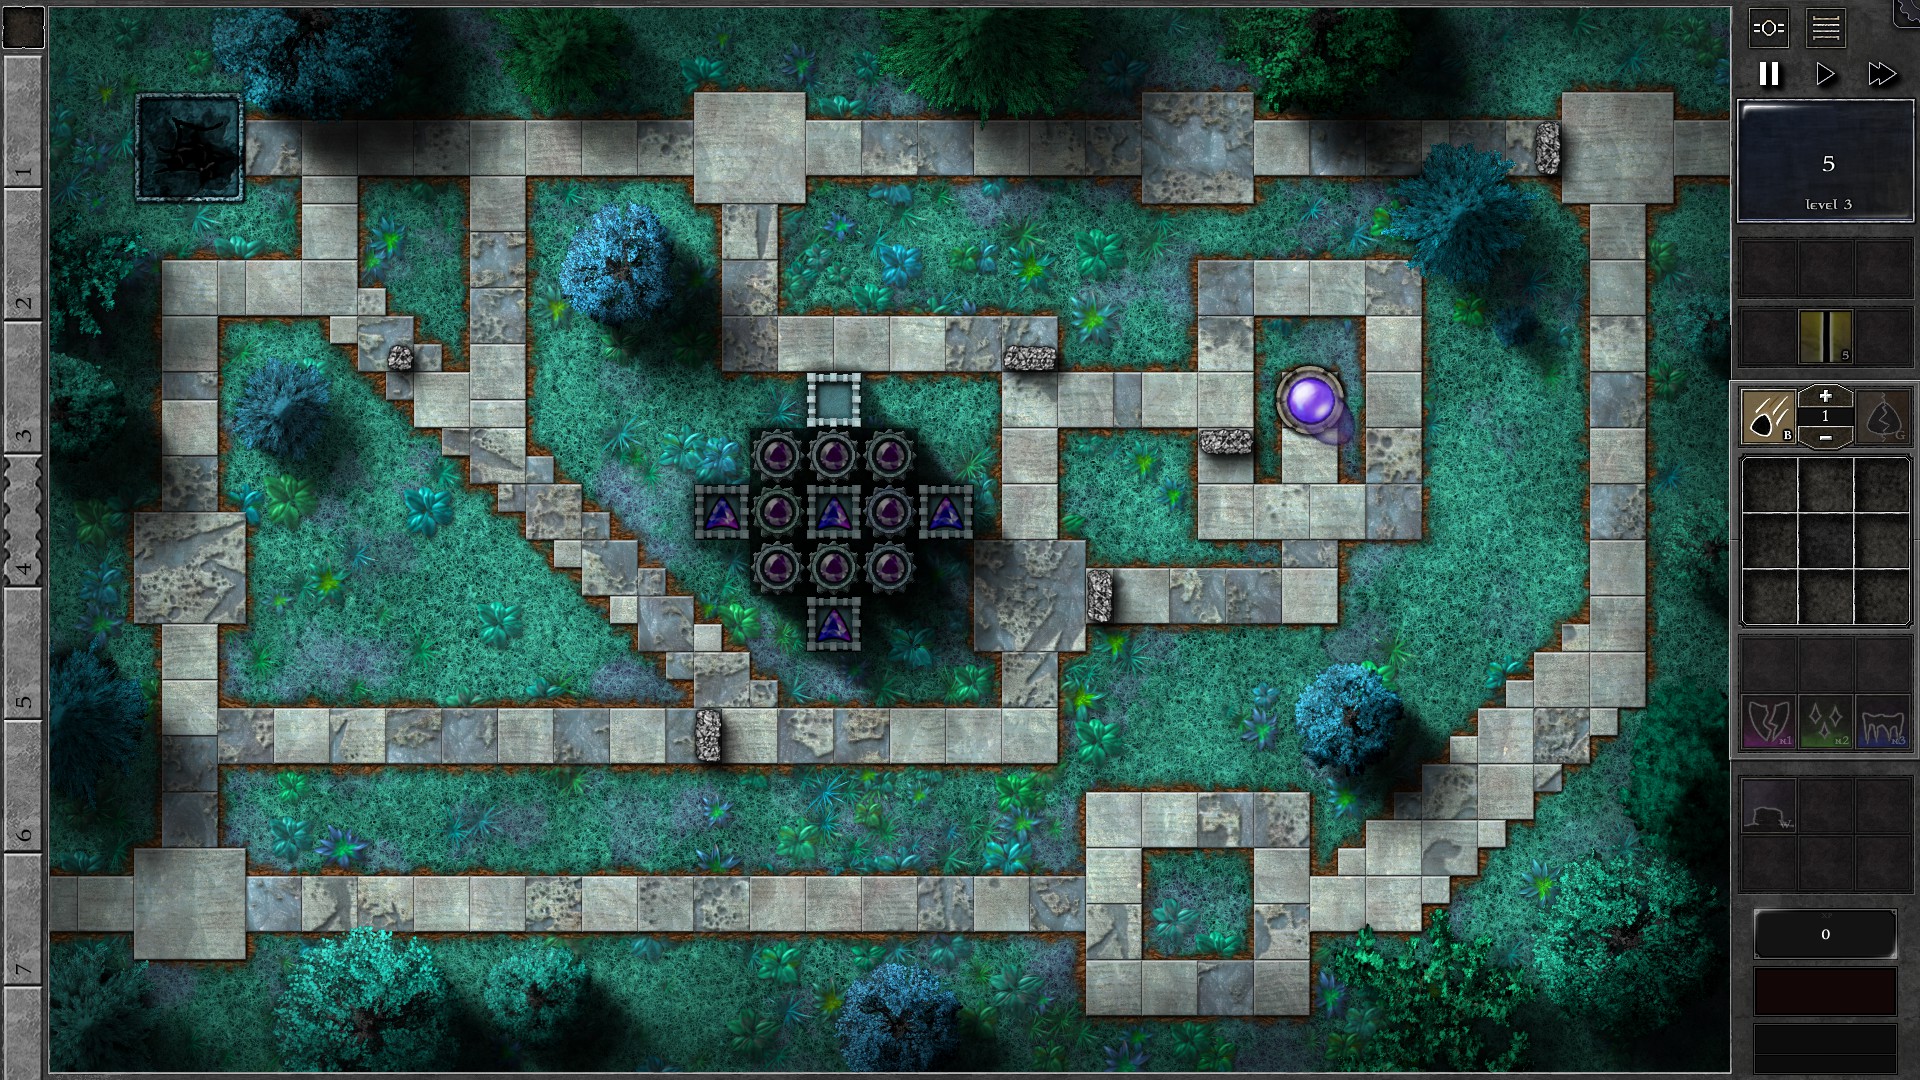
NOTE: Dark Masonry might impose additional RNG into the Trial. Be especially careful since you cannot build towers to destroy Beacons far away from the group of towers.
Start the field as shown with walls to path the monsters, 8 g1 p gems in amplifiers and 4 g2 p/b gems in towers. Upgrade your tower gems evenly as you gather mana; you should upgrade the centre gem (amped by 8 gems) first, and take advantage of Beaming larger groups of monsters with an upgraded gem (and insta-resocket with Beam) on the sides if necessary. You will likely need to Beam with a gem at the sides (closer to path) to survive the denser w5 without leaking.
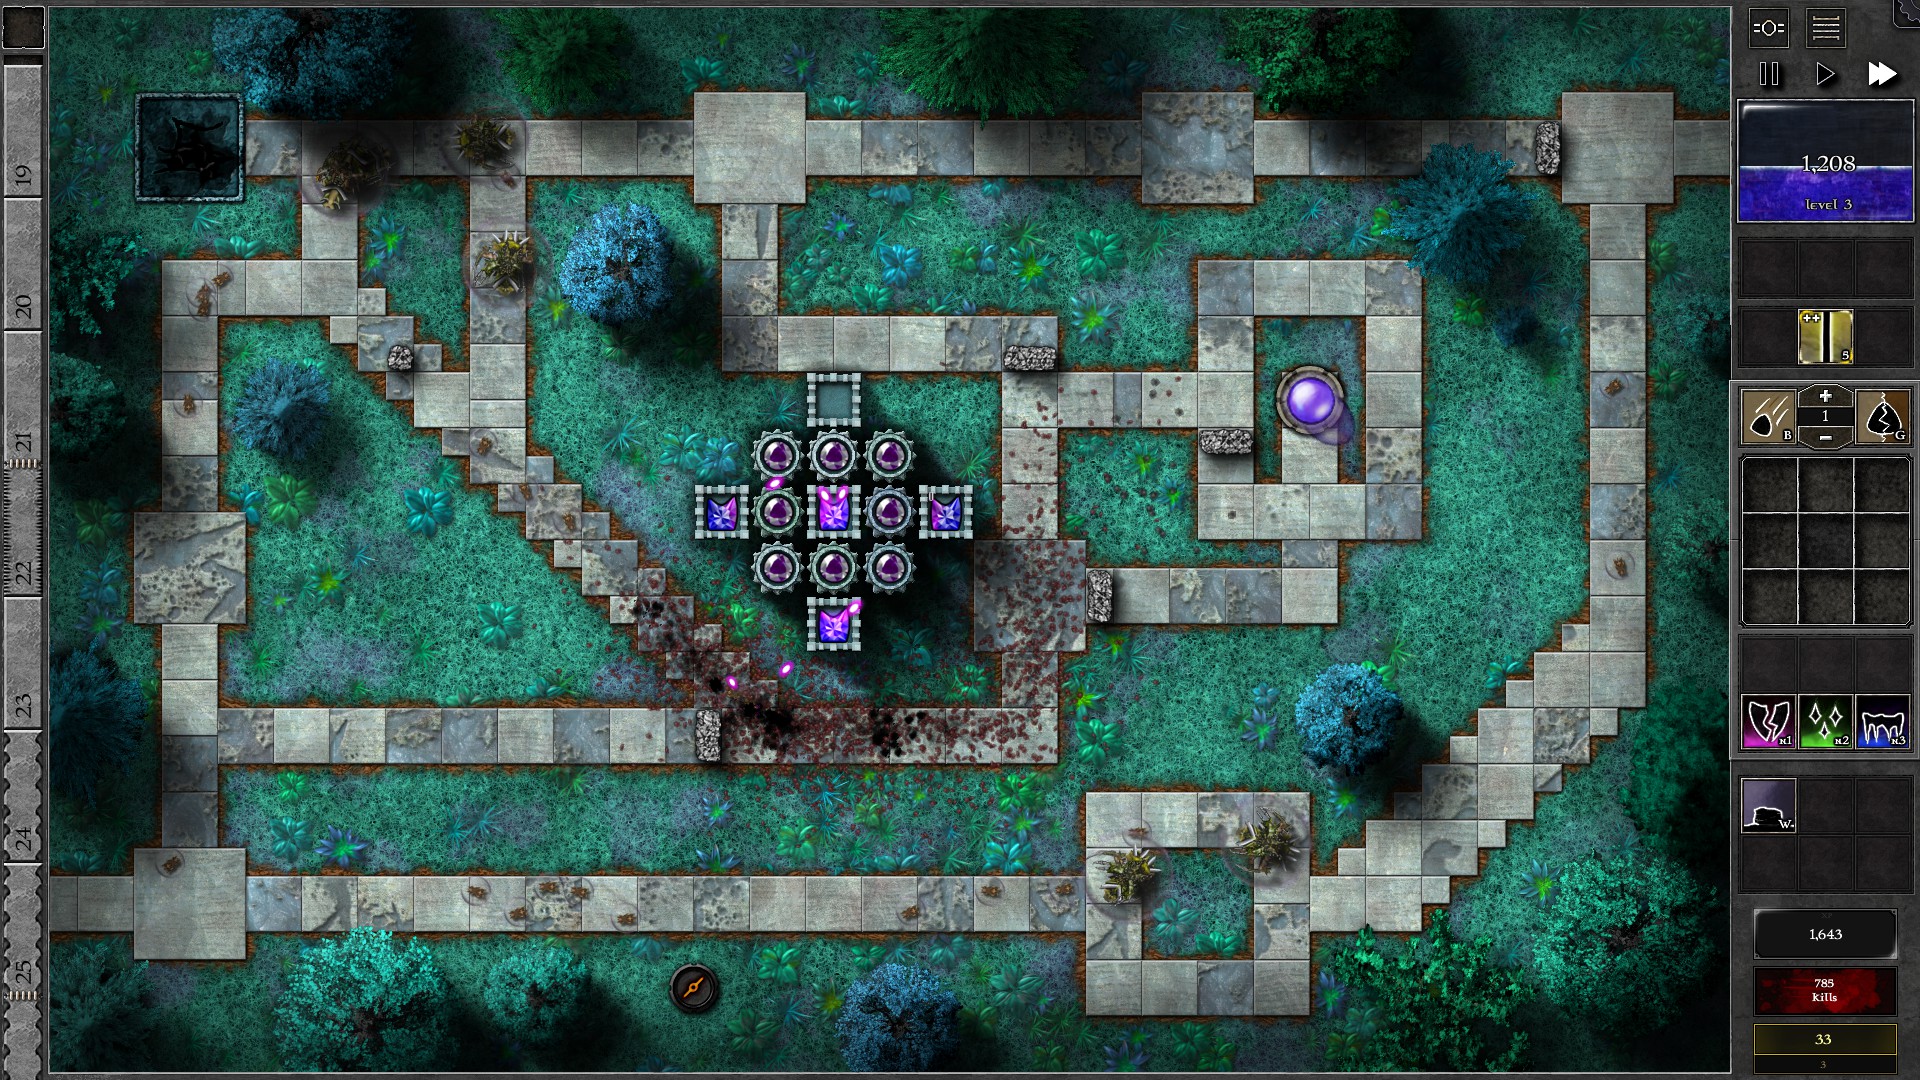
You should be able to upgrade all the tower gems to g3 before w10. Beacons will start to spawn due to Dark Masonry at w10. If you get beacons close to it you can usually use residual firepower to destroy them, but beacons far away from your towers are tough to destroy without spending a lot of mana. If you get a bad Beacon far away from your towers (e.g. Speed/Shield beacon close to monster path), try your best to live with it, but be prepared for a potential need to restart…
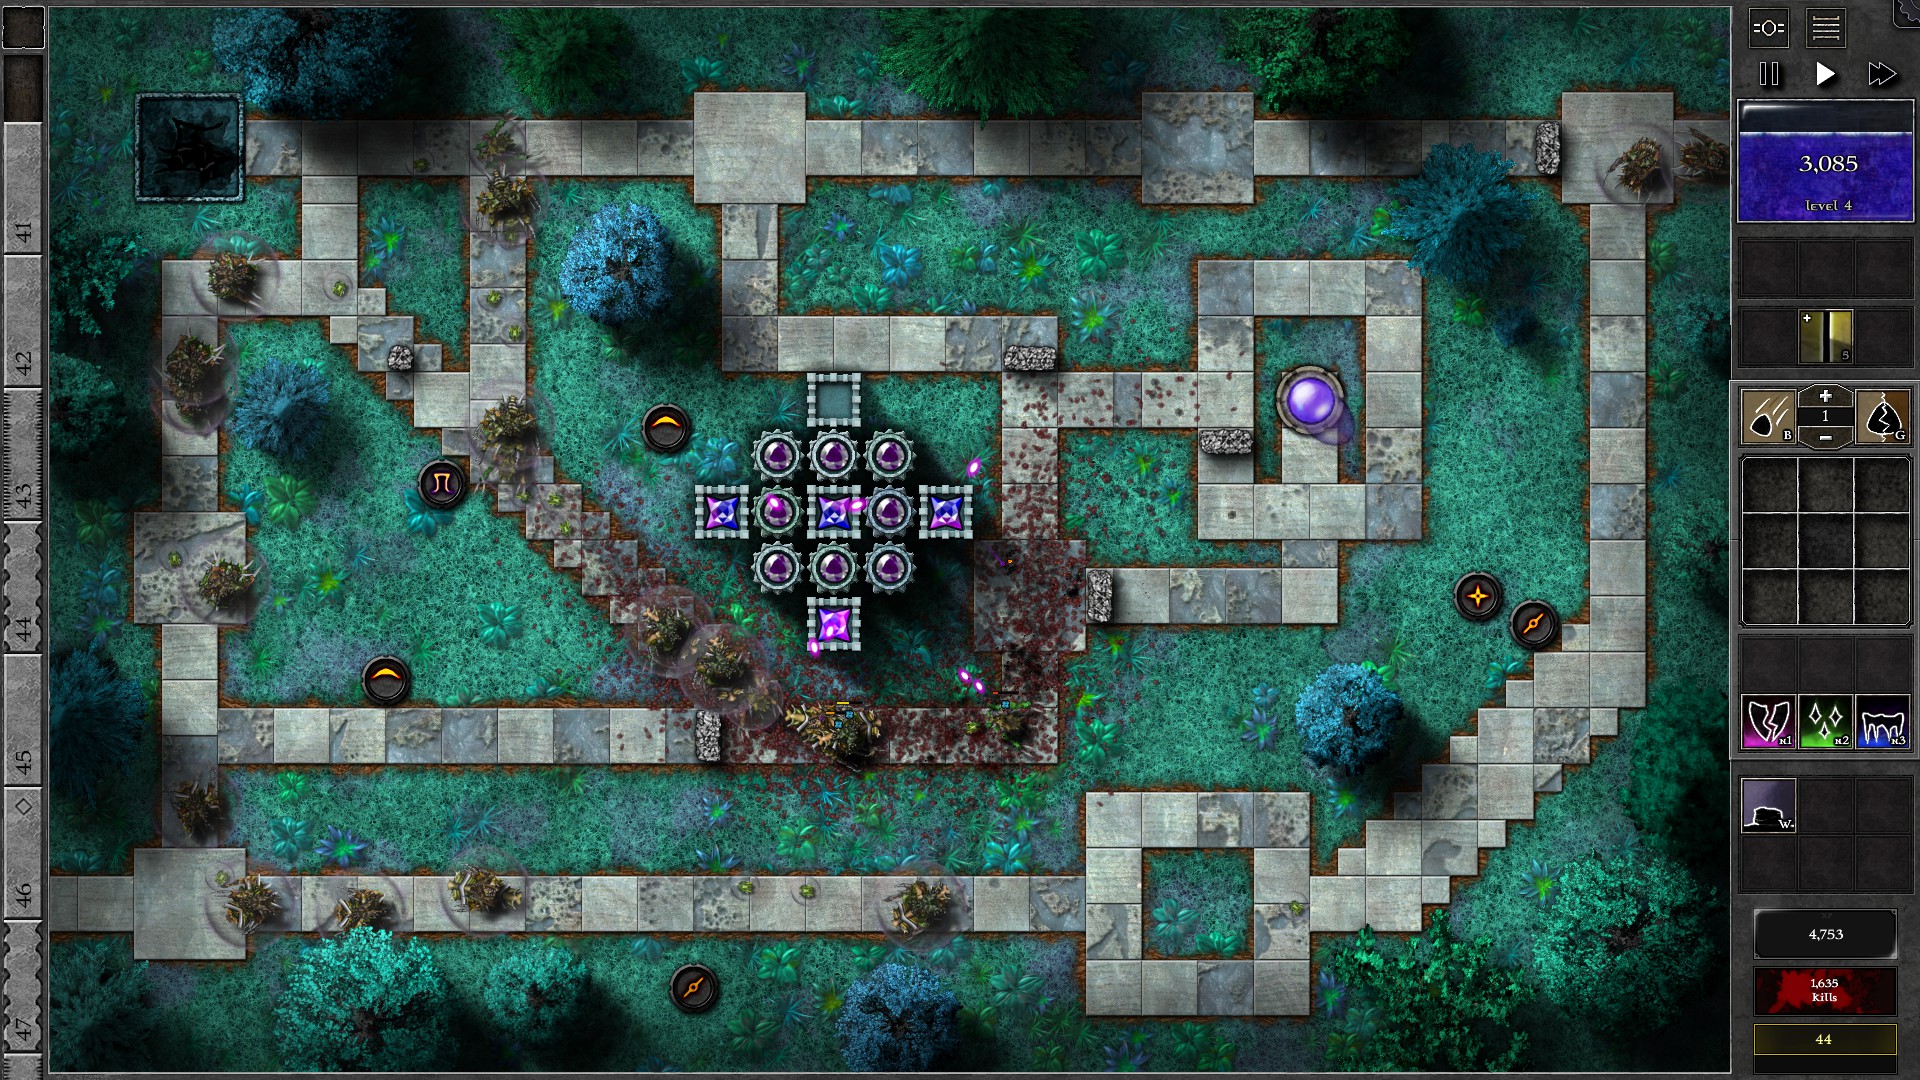
Somw swarmling waves will arrive at w12 and 14, be prepared to Beam on them while upgrading your gems. At around w18 you should have 4 g4 gems in your towers. Continue upgrading and be prepared to Beam when necessary. At w32 you will receive 5 giant waves in a row, which is a good time to stock up on Beam spells and you should also get all your tower gems to g5 at around w33-34.
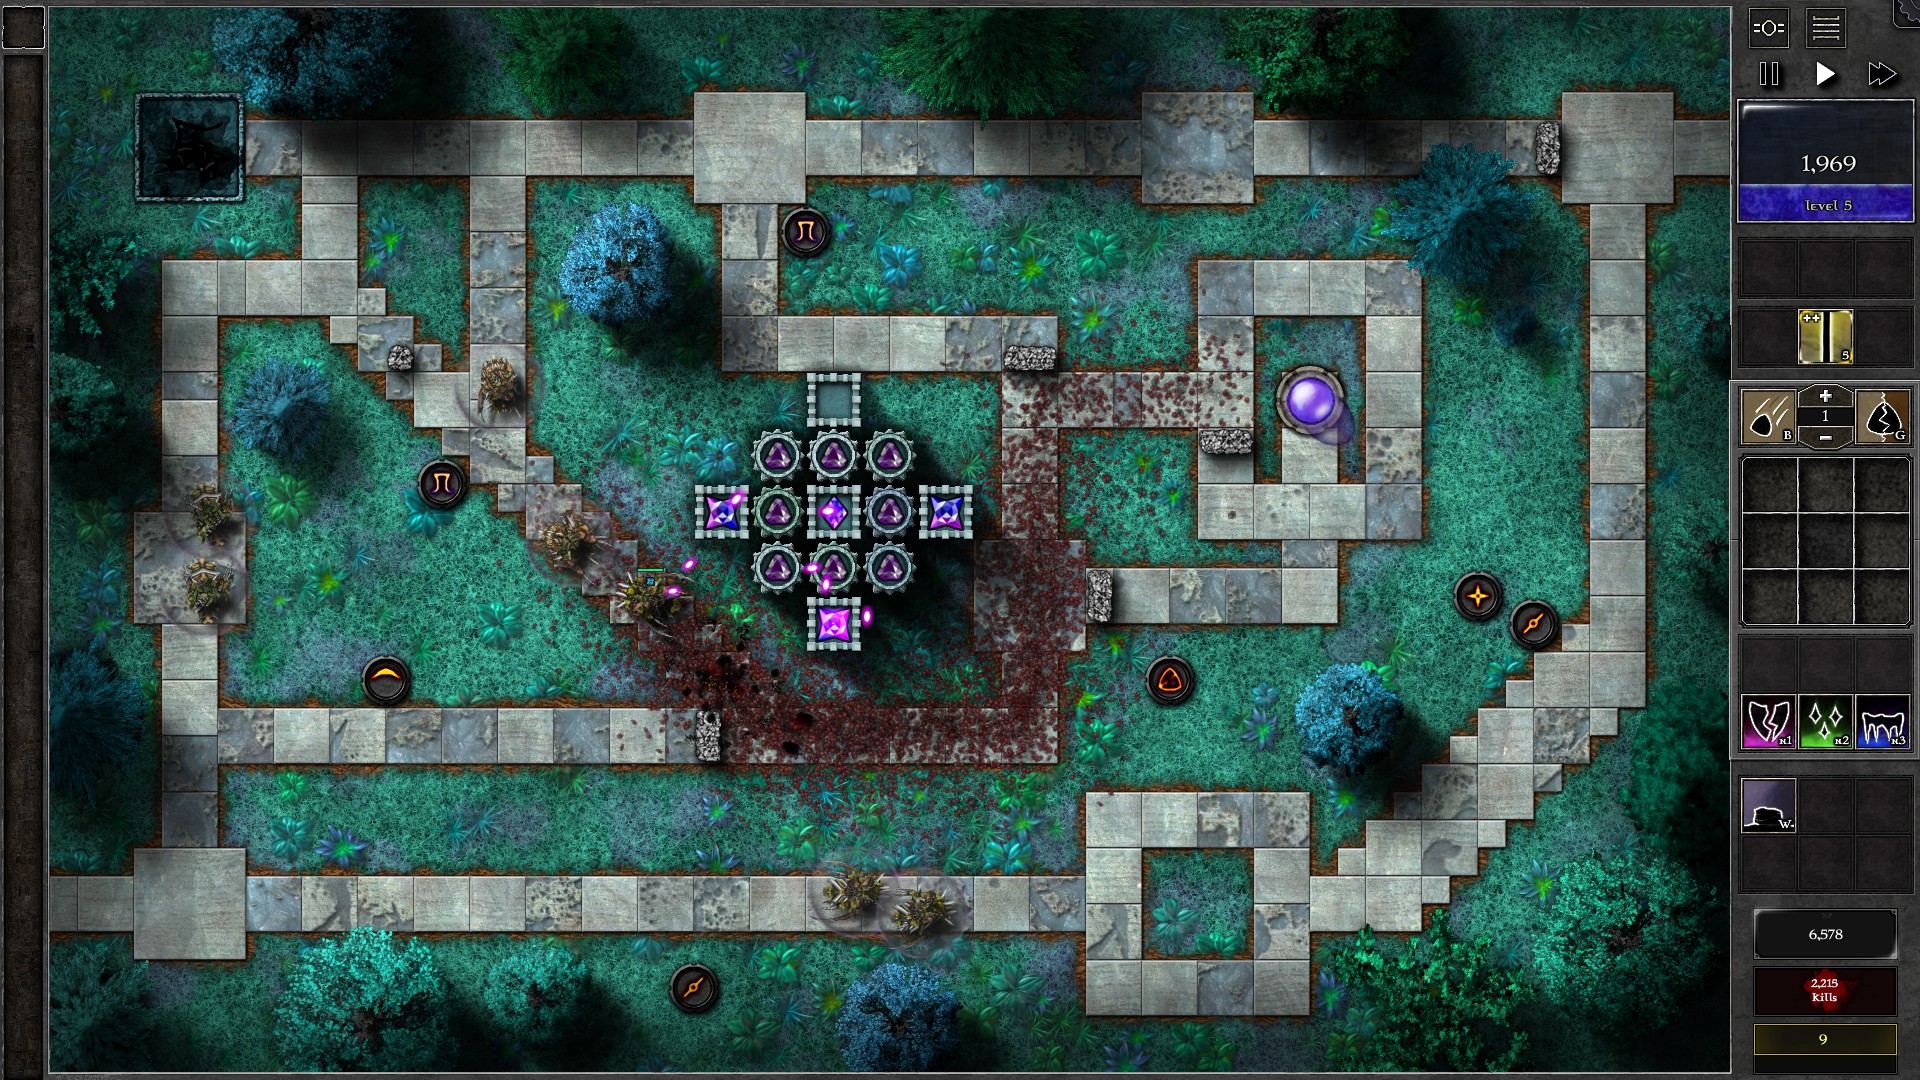
After getting 4 g5 gems, upgrade your amplifier gems to g2, which will help in dealing with the cluster of different types of monsters at around w40. At the last few waves you may start to leak more monsters. Start saving up mana for banishments and try to use “Least HP” targetting to pick off weaker monsters first. At the end you may have enough mana to upgrade a gem to g6 but this should not be necessary and should only be done if you have a good enough mana buffer against banishments.
078 – Field J4
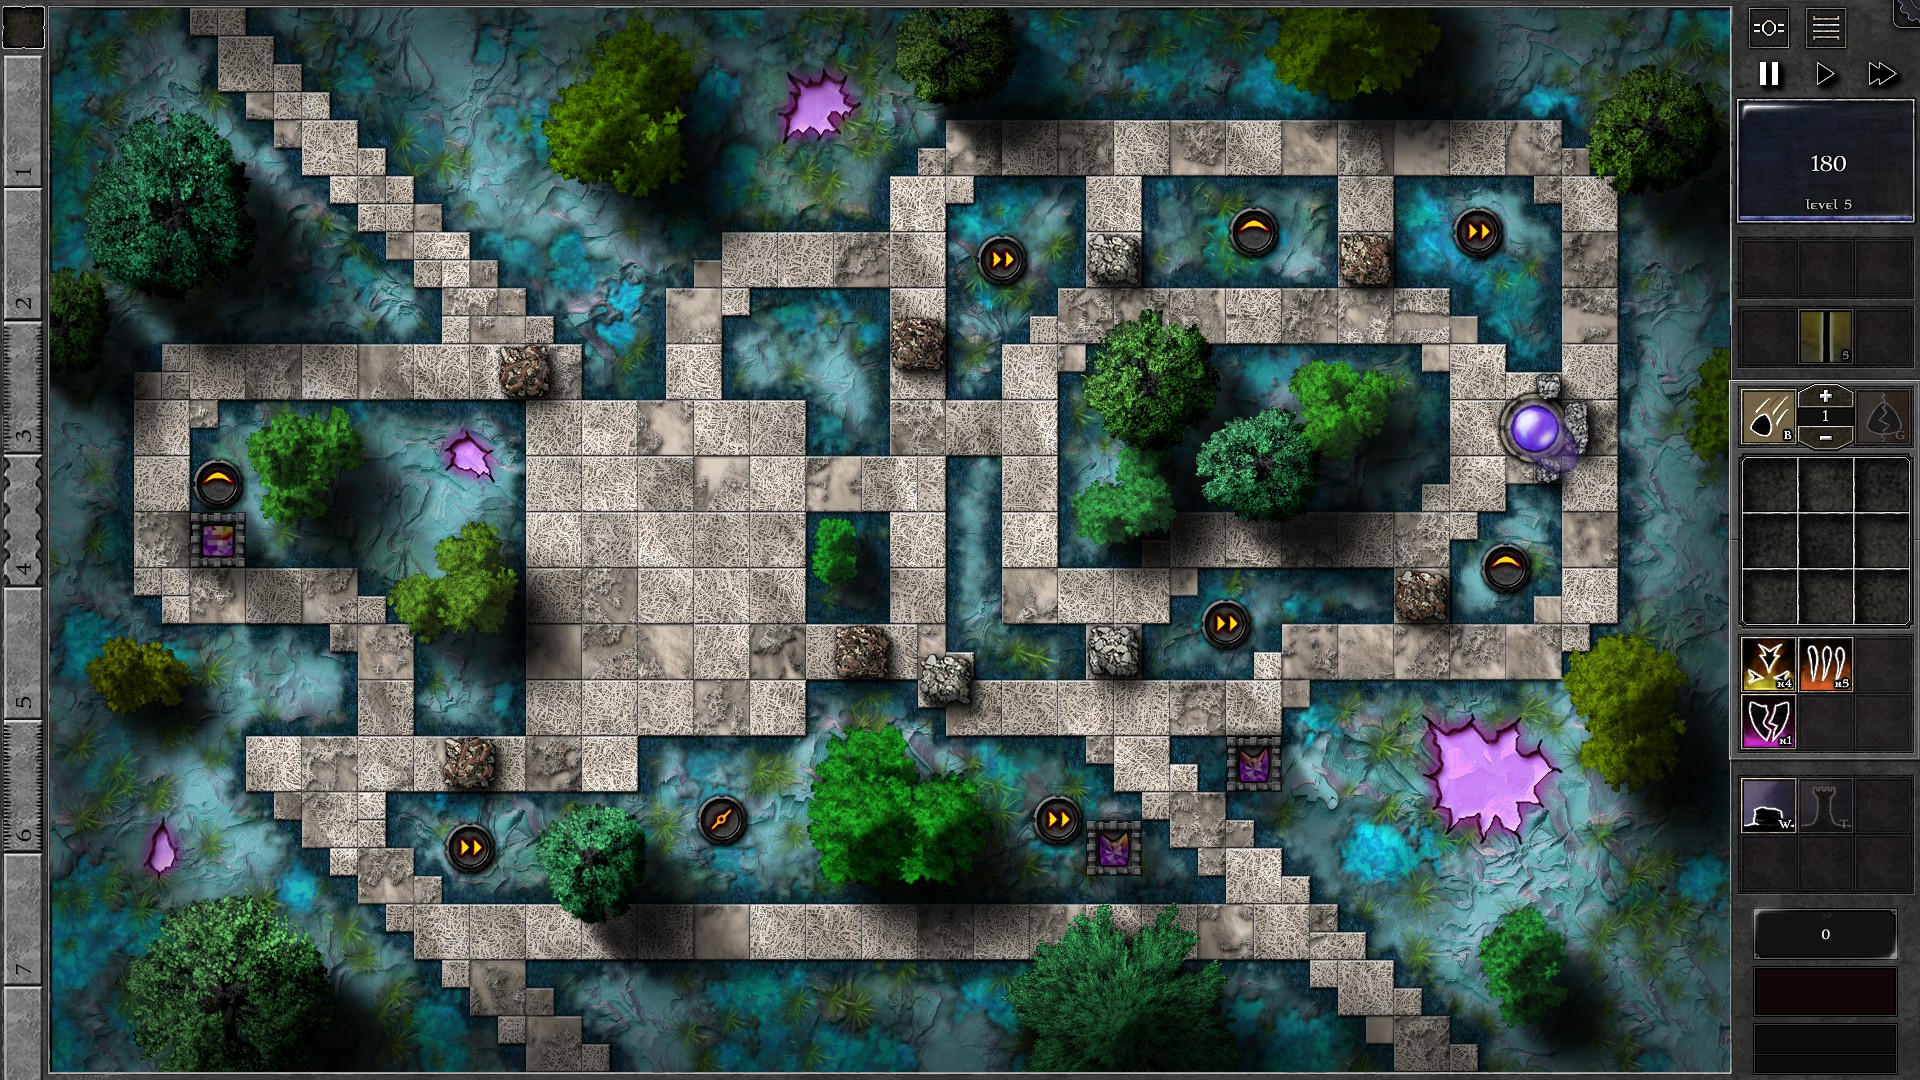
Start the field with 3 gems as shown, all 3p1y. The g4 gems will be your main defense while the g3 gem should be set to target “Structures” to take down the Shield Beacon close to it. You should have no issues defending the first 10 waves, but you might need to use Beam for w67 swarmlings and the w7-8 reavers.
At around w12 you should be able to upgrade one of your g4 gems to g5, which will help in dealing with the linked w13/14. Collect mana to upgrade your g3 gem (around w18) to speed up Beacon takedown. Once you destroy the Shield Beacon (at around w20-21), combine the beacon gem with the other g4 gem you have into a g5, and have both g5 gems focus on defending against monsters.
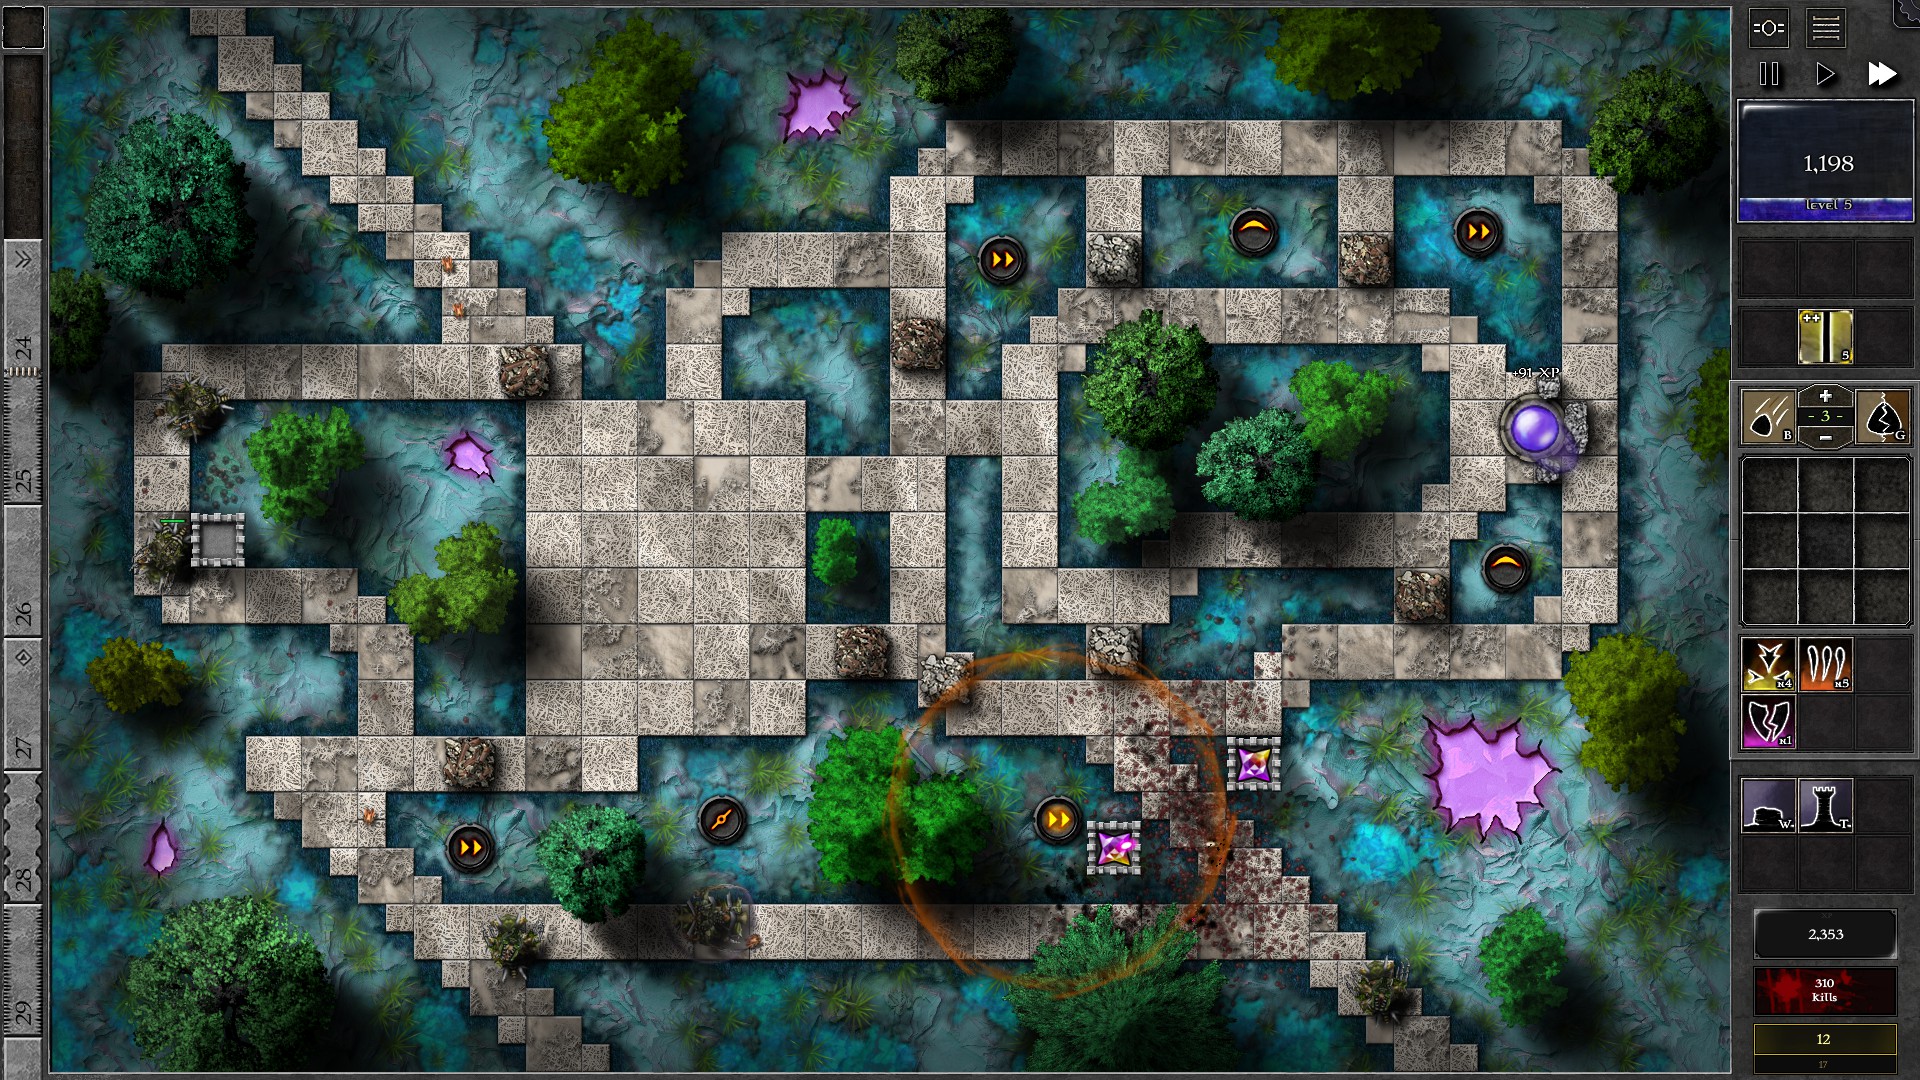
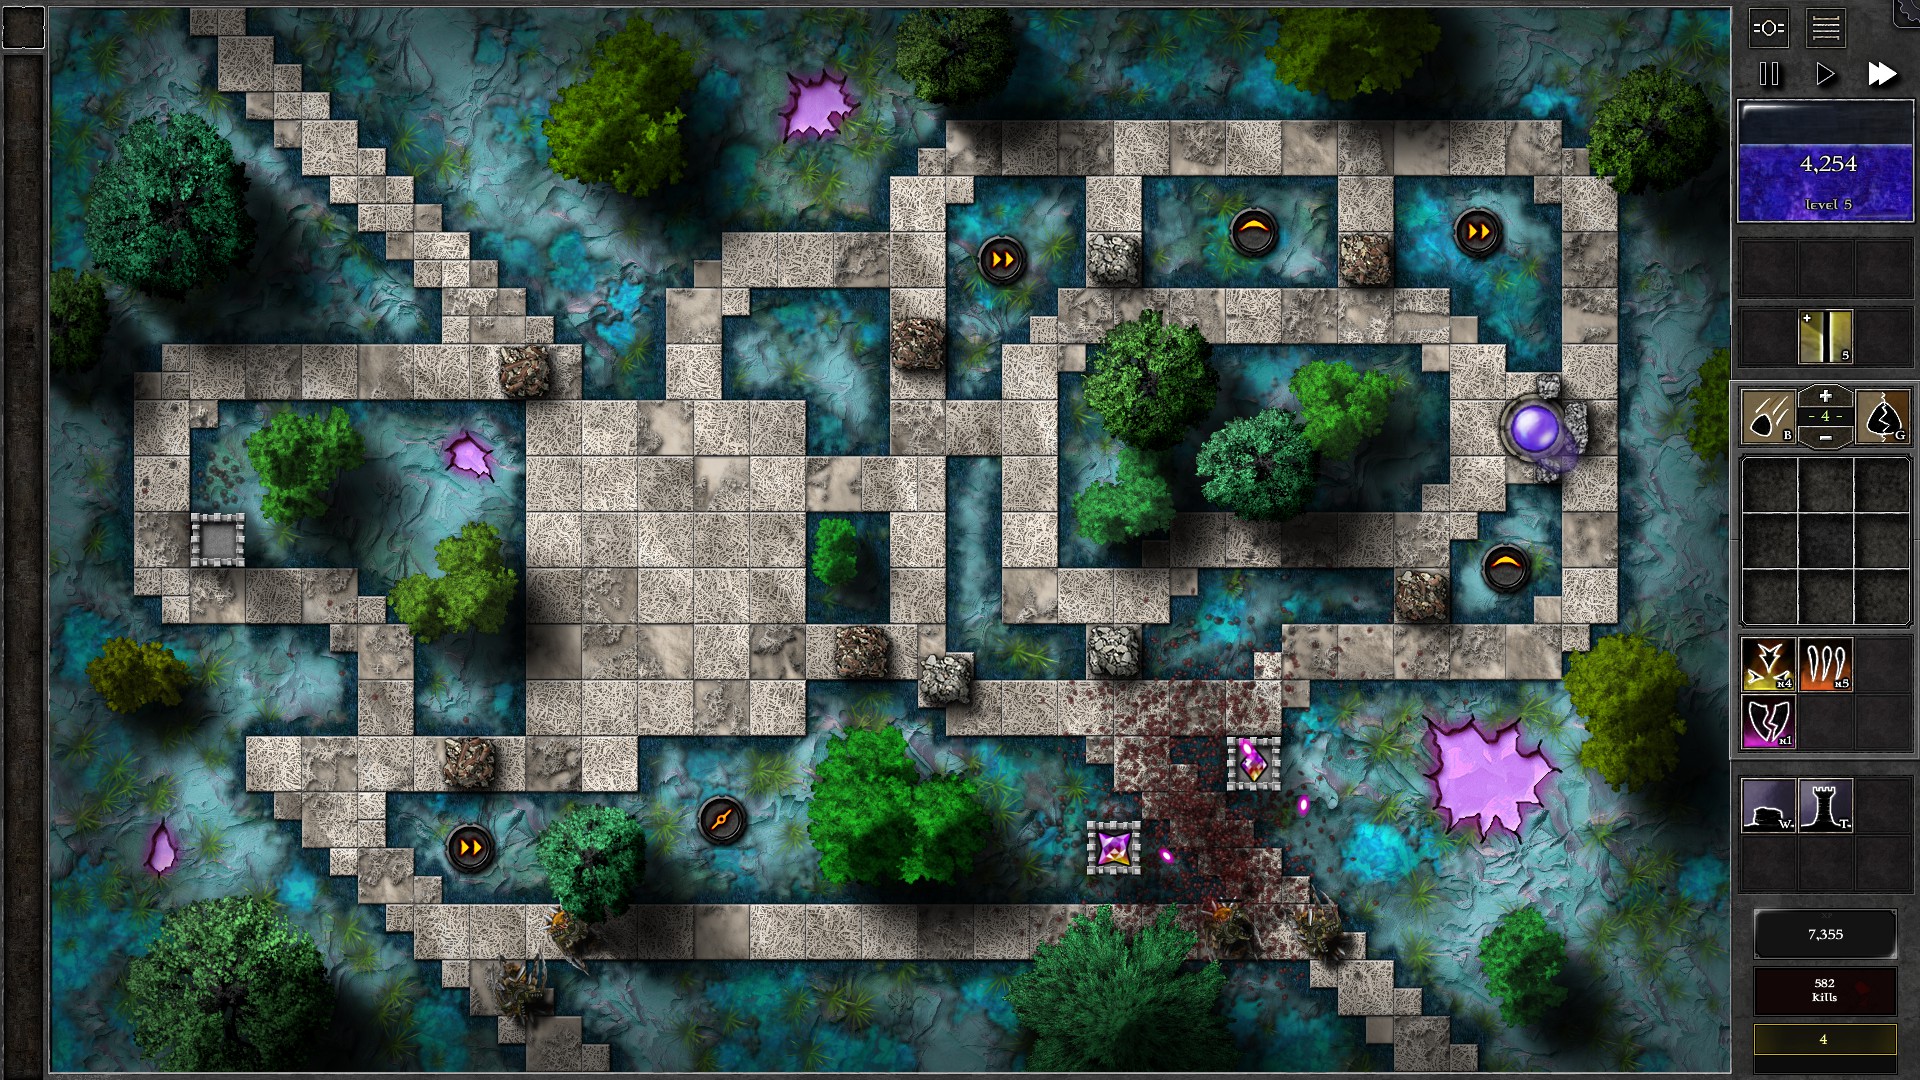
With 2 g5 gems you should have a much better time defending against the linked w24/25 which consist of swarmlings and fast reavers. At around w33-34, upgrade one of your gems to g6, which should work well for defending the remaining waves.
079 – Field M1
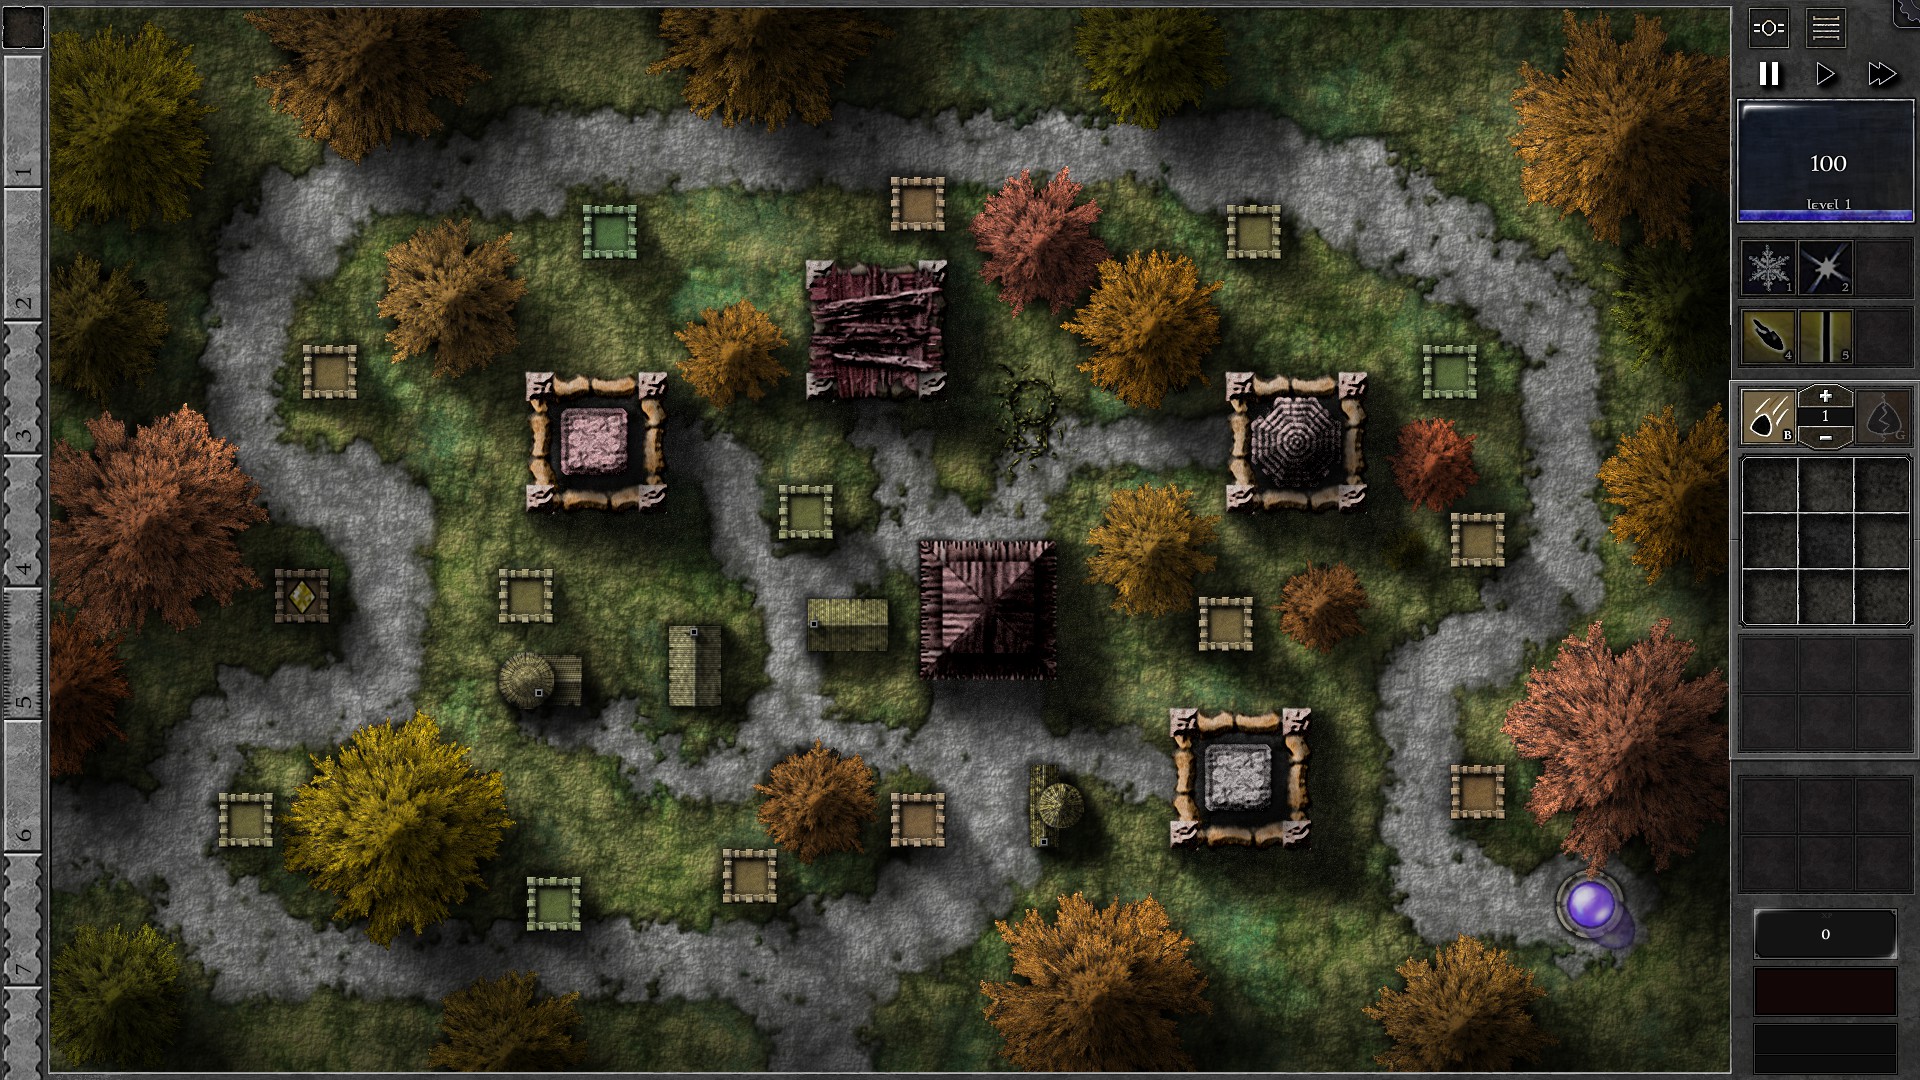
NOTE: Unfortunately the setup of this Trial makes it susceptible to bad RNG ruining your runs (The only gem available is a pure yellow gem causing RNG influence in damage, Dark Masonry spawning beacons in bad positions, monster speed).
There is pretty much only one way out of this Trial. Insert the g6 yellow as shown and start the field. I do not recommend starting any waves early in this Trial. In addtion, do not let any monsters enter your Orb under any circumstances; Corrupted Banishment will likely ruin your run after you leak a monster.
With the available spells your g6 gem should be able to take on most of the monsters. In several occasions you will see a significantly higher need to use spells, including the w5 Swarmlings, the middle waves with a much higher concentration of Reavers and Swarmlings, and the last waves with a fast Reaver wave. Try to conserve some spell uses when the pressure is lower, e.g. the consecutive Giant waves in w7-9 and w20-22.
As you kill through the monsters you will also notice that some monsters will inevitably go through your tower. At this point, you’ll need to start following the monsters with your gem, which also pushes your defense closer to the Orb. You’ll need to use your spells and targetting priorities smartly to minimize the impact and try to “push back” your gem closer to the field entrances (especially during the consecutive Giant waves). Some examples include:
- Try to target Swarmlings and Reavers first with “Least HP”, especially if you intend to clear through these with Beam or if the last wave has been spawned.
- Try your best to exploit frozen corpse damage to kill through monsters faster. (GIants in particular benefit from this the most) In addition, consider killing frozen monsters first if situation allows instead of letting your gem fire at non-frozen ones.
- Remember that you can insta-resocket gems with Enhancement spells (Bolt/Beam) which is useful when following the leaking monsters or pushing your line of defense away from your Orb. Do try to note your resocketing time and monster speed so you can avoid wasting the spells when you are actually able to wait out the resocketing time.
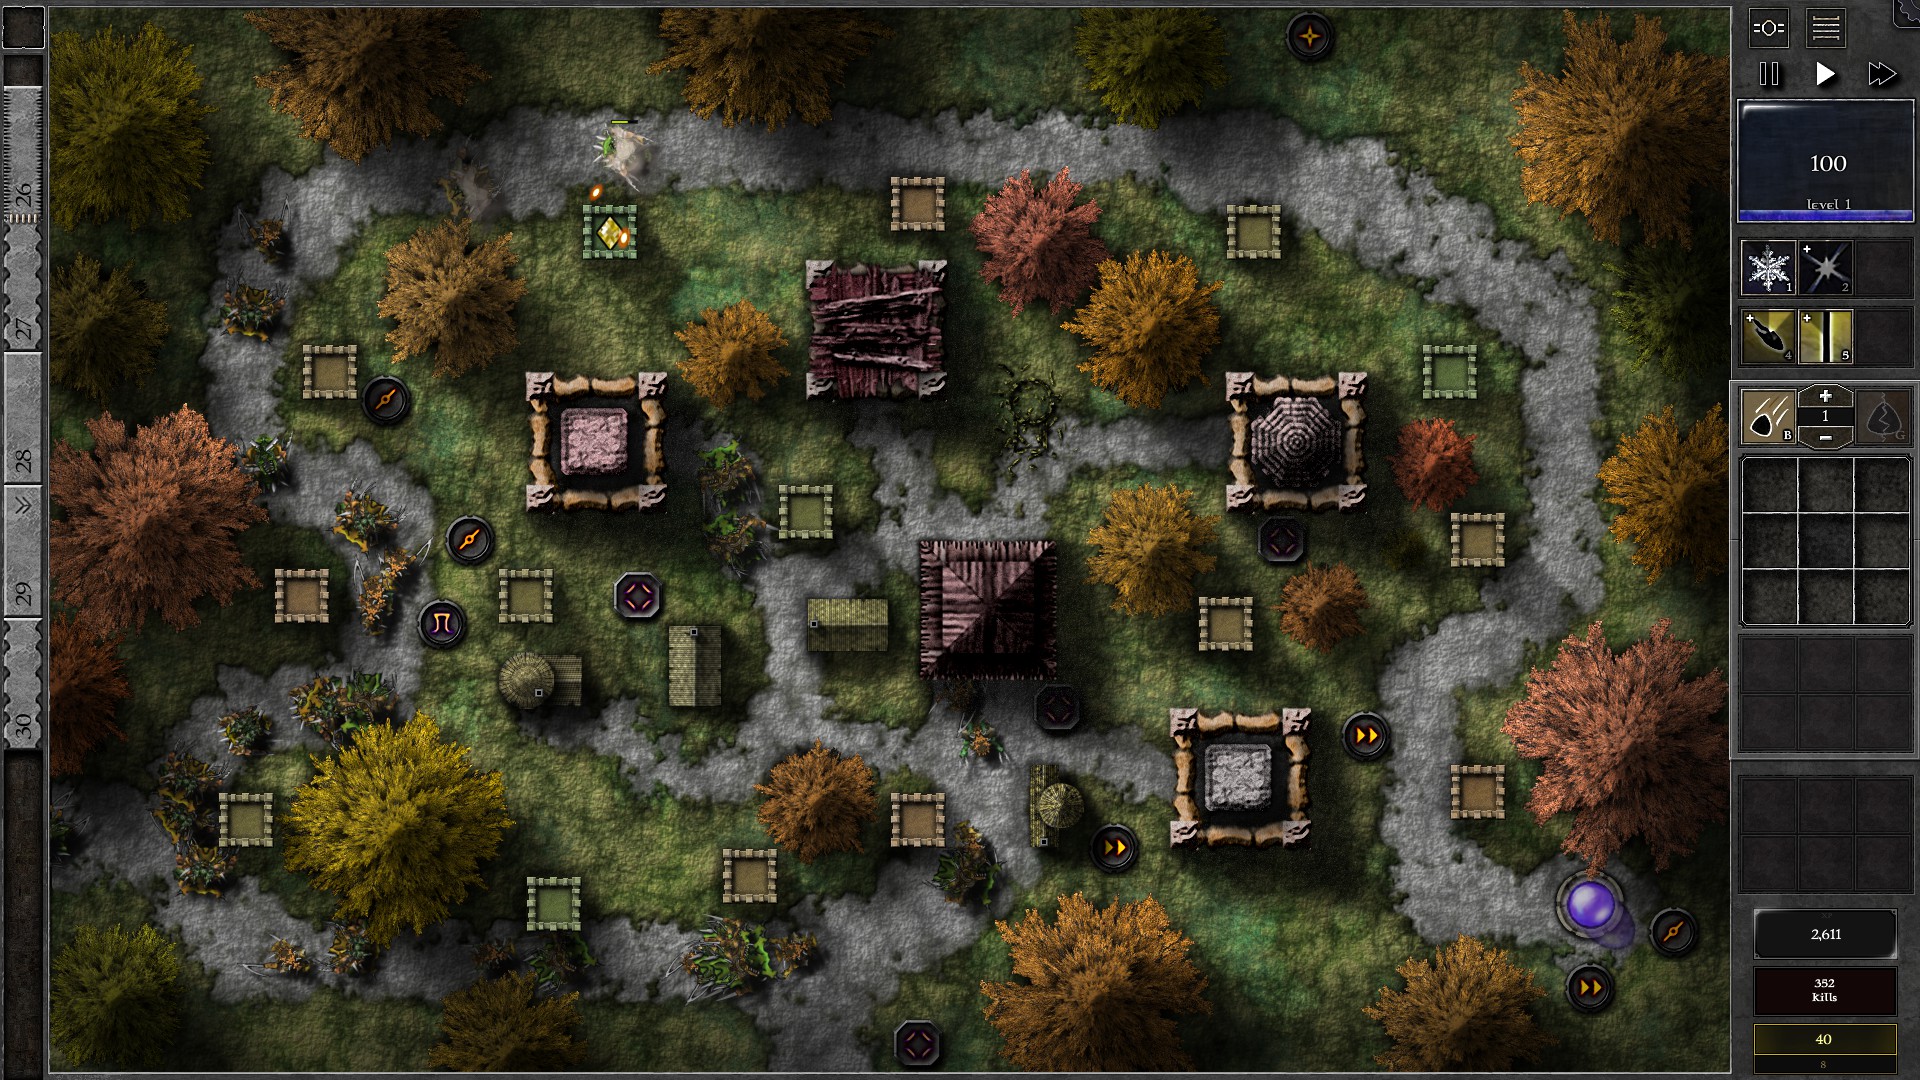
Finally about the beacons from Dark Masonry: If you get a badly spawned beacon (speed/shield beacons along the path of most monsters, discharging beacon close to tower), they can kill your run by making monsters much more difficult to kill. At the worst situation a restart may be warranted since you may not have the defensive cost to spare firepower to remove these beacons.
080 – Field M2
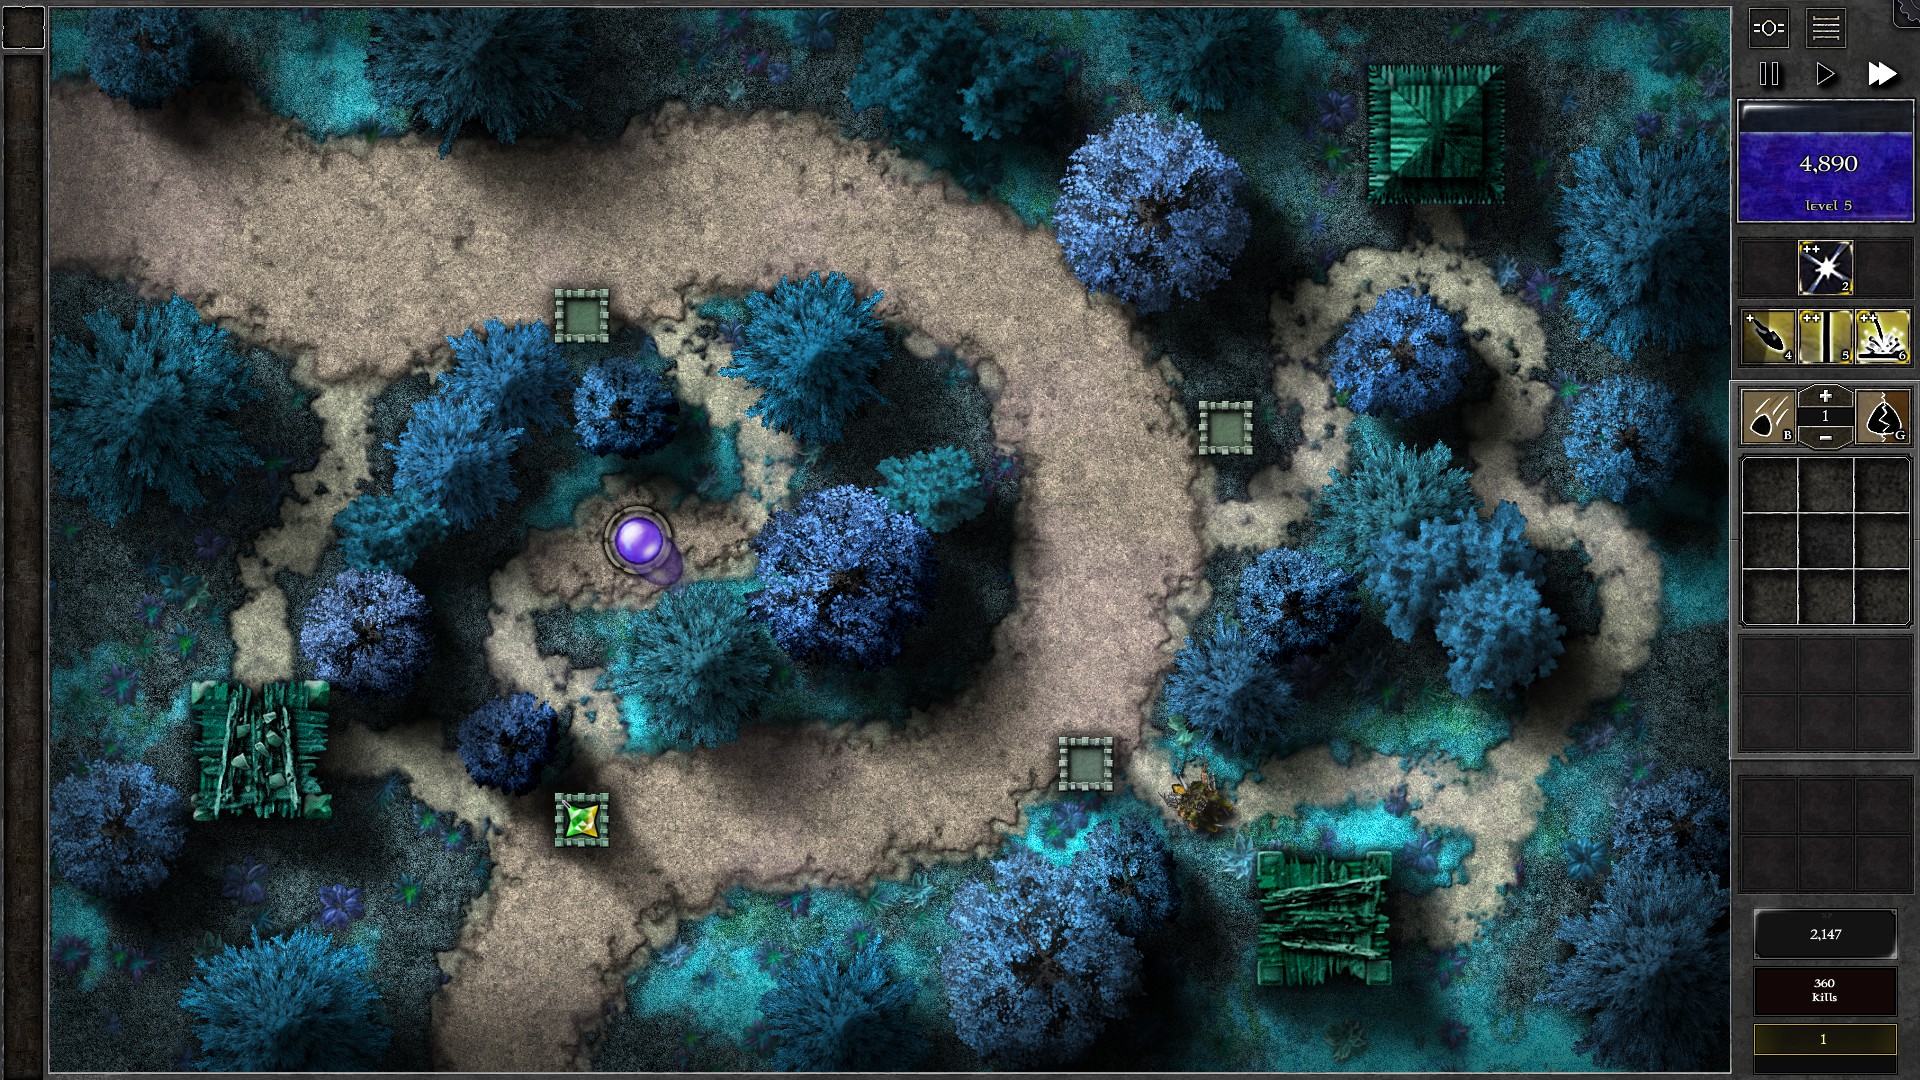
Insert the g5 gem to the bottom left tower and start the Trial. The main difficulty of this Trial is to judge when to move your gem to fight monsters at different fronts. You will probably only need the 2 towers at the left side.
Your g5 gem should have no problems dealing with the first few waves of monsters that approach from the bottom path to the Orb. However, you will notice that you can do nothing against the upper path monsters at the moment. Once you reach w3 you will gain your first batch of spells. Move your gem to the top left tower, insta-resocket with Beam (with Random as situation calls for) and make sure you take down the remaining reavers in w1 (likely only 2 reavers). Then move back to the bottom left (and insta socket, preferably with Barrage) to take on more swarmlings from w2-3. During this use Whiteout as appropriate (you probably will want 1 strike to slow down some of the monsters before moving in). As the GIants from w4-6 arrive, take advantage of the slow Giants and clean up the remaining monsters in w1-3.
For the remaining waves, you need to move the g5 gem back and forth to deal with the monsters on 2 fronts while minimizing banishments. Some general notes include:
- Prioritize swarmlings and reavers first, but still watch out for giants that get close to the Orb.
- Actively observe the flow of monsters to help you judge whether to move the gem or not.
- You can generally take 1-2 banishments from a few swarmlings or reavers before they take too many mana due to numbers or repeated banishment. Especially watch out for w10-14 where significant amounts of monsters arrive.
- When there are giants on field only, try to move your gems without insta-resocketing them to save spells on the more critical reavers and swarmlings.
- Consider using Whiteout to slow down groups of monsters close to a tower before you move your gem there. This is useful to give you a slight delay so you can clean up one side cleanly before moving to the other side, especially if you insta-resocket with Beam you can utilize Random targetting to spray poison damage on the other side.
Finally, you may be able to gain enough mana to upgrade the gem but I don’t recommend upgrading the gem because the mana is probably better spent on potential banishments.
081 – Field M3
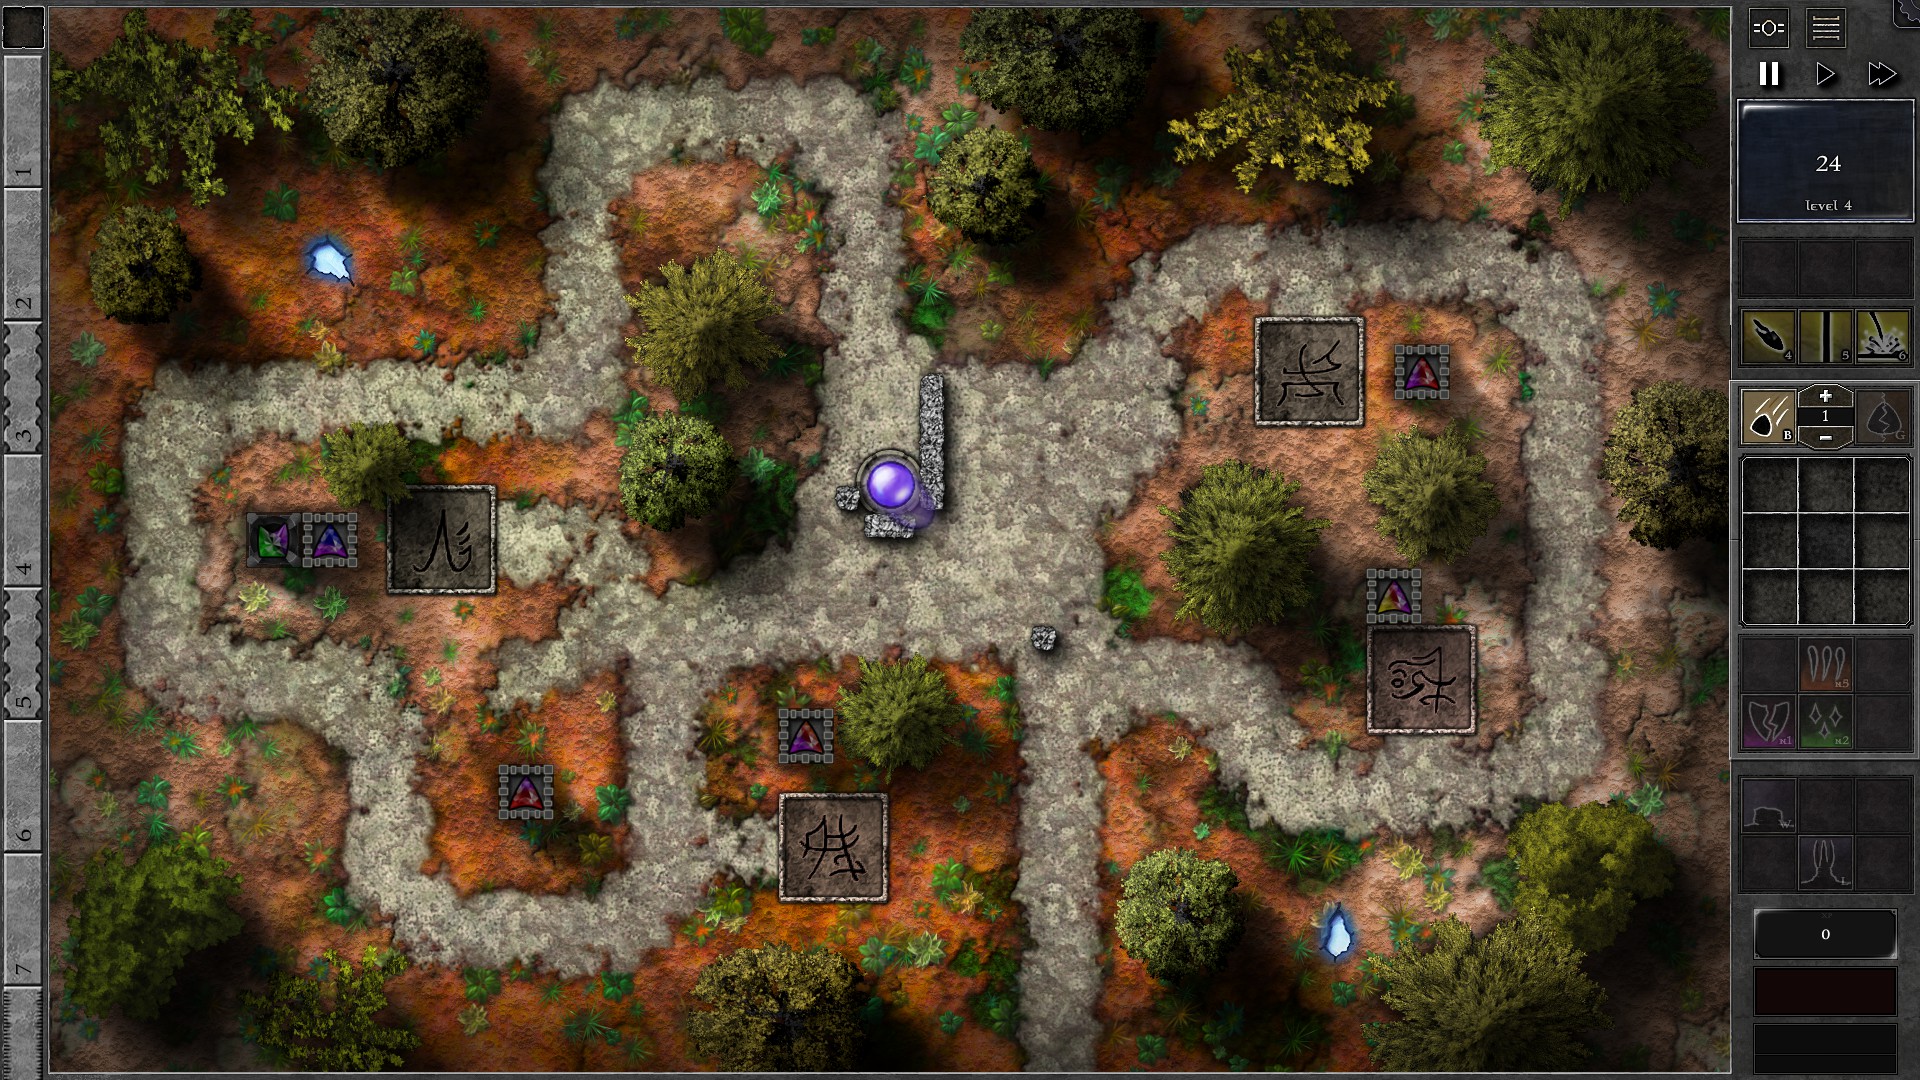
Setup the field as shown with walls and a g4 p/g gem inside the lantern. Quickly block the path from the lone wall segment with another piece of wall once you start the waves (you are 5 mana short of building that segment). The Spiritforge tower (p/r gem at the bottom left) not close to any tombs will help in weakening/killing some monsters before they reach your lantern. For w4 reavers in a tight formation, you can use Beam on the lantern to speed up your gem. At around w12-13 thje early giants should close in to your Orb which you may want to let them be banished and focus on the reavers and swarmlings.
At w15 the 1st Tomb should be broken open by a Spiritforge tower. Save some Beam spells to help thin out the horde, and upgrade your g4 gem to g5 once you are not facing imminent banishments (around w18). The helping Spiritforge p/r tower should soon be g6 (at w19) which will start to take over the monster killing duties.
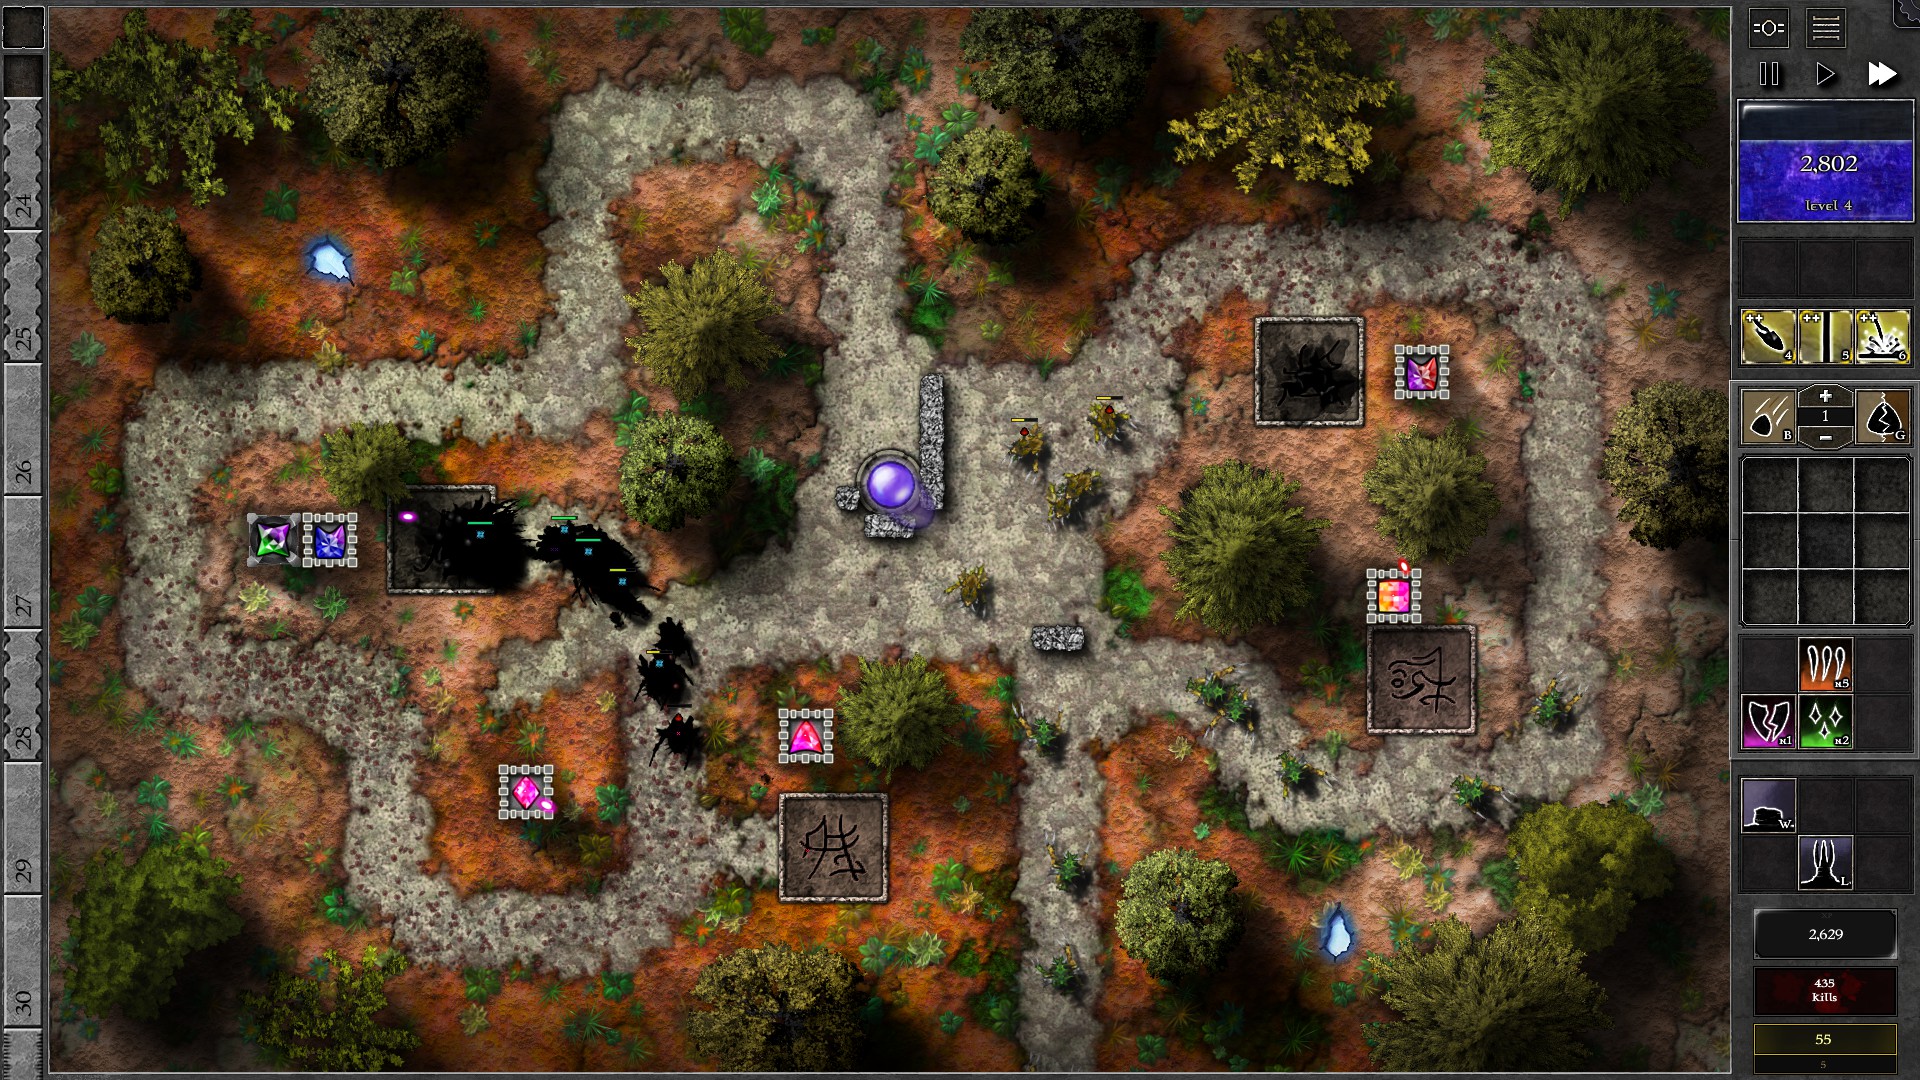
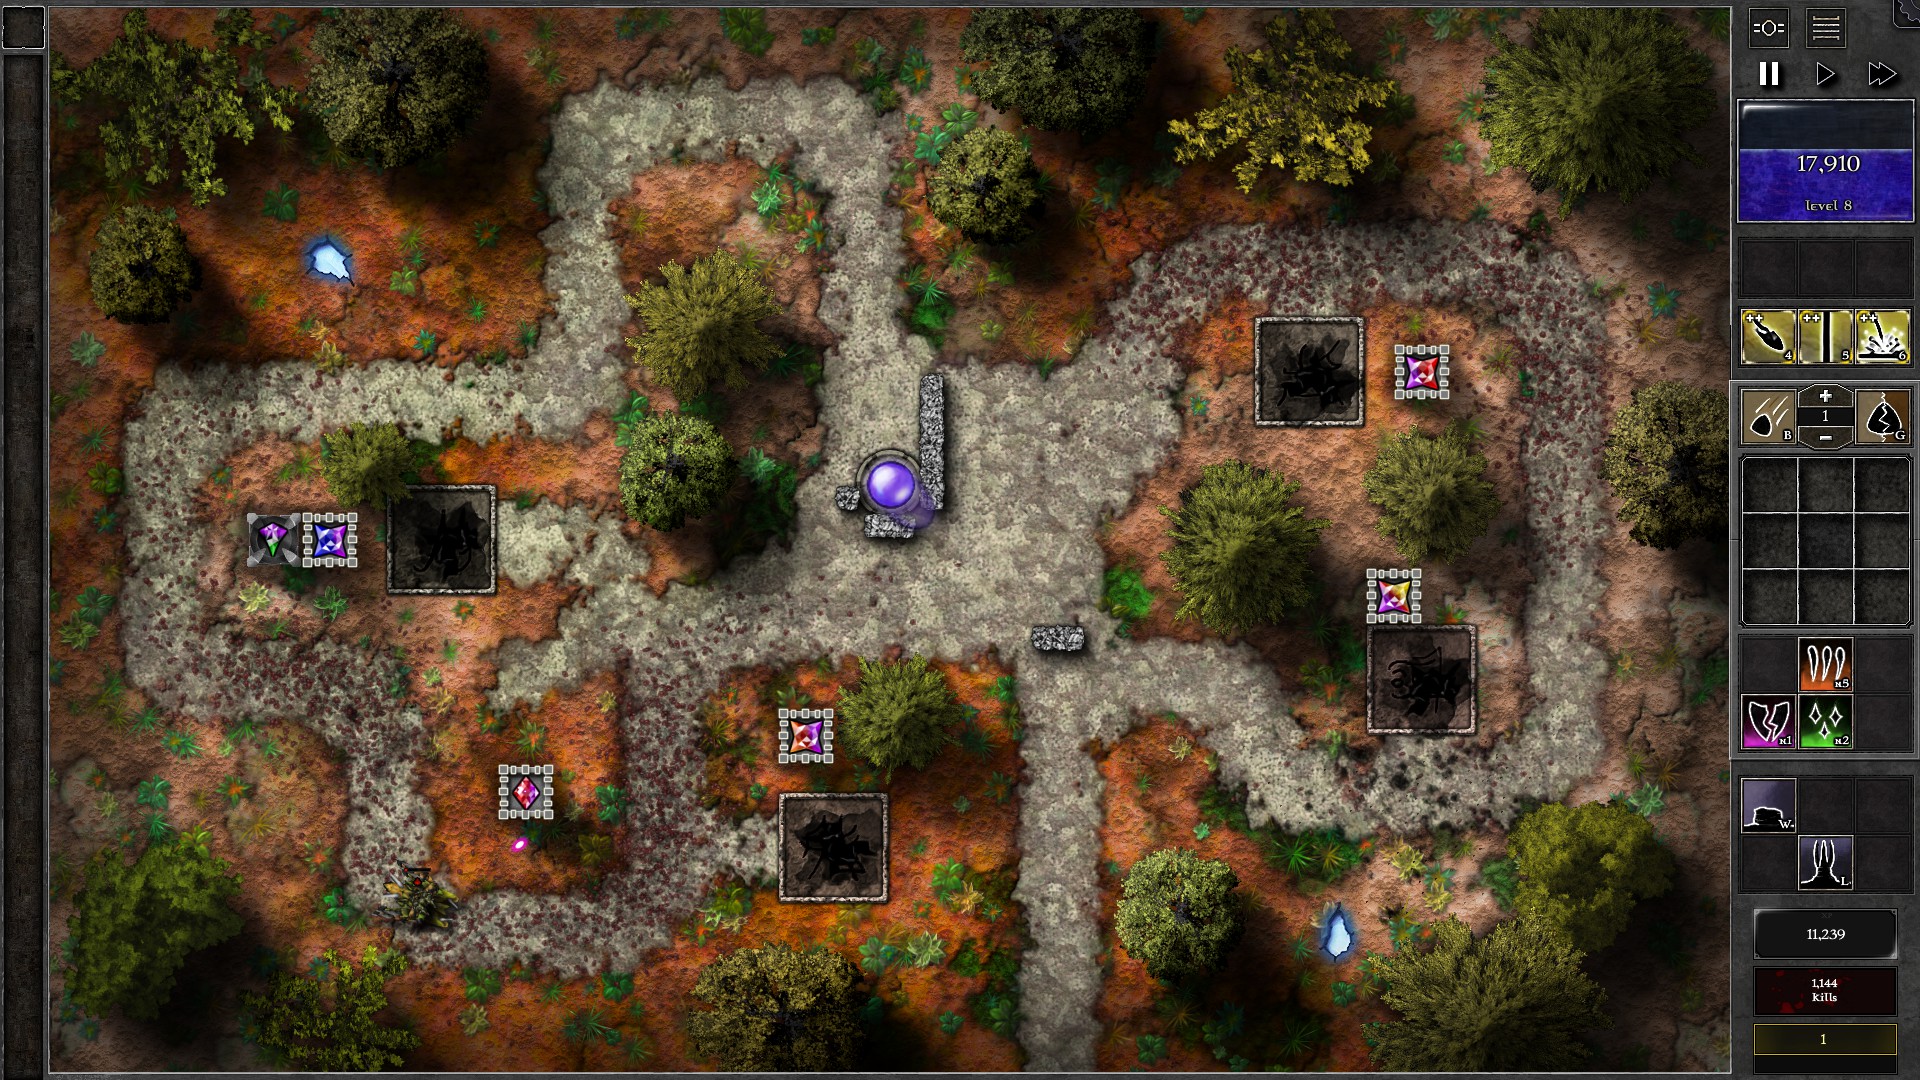
The 2nd Tomb will be opened at around w23, Use Beam on the lantern to help pick off the reavers and swarmlings that leak through the g6 Spiritforge tower. Giants are not an issue with the Spiritforge towers. In w29 the 3rd Tomb should be opened. Upgrade your lantern gem to g6 (you should have enough mana at this point) and use Beam to pick off leaking monsters.
Monsters start to get stronger that the Spiritforge g6 gem is not as effective as before; prepare to use spells on your lantern gem to help take on the monsters. The 4th Tomb will be opened at around w39, so have your spells ready to power up the lantern (you will probably still leak a few monsters through the lantern though). Soon you should have enough mana to upgrade the lantern gem to g7 (before w48). At this point there shouldn’t be much threat left with the 5 Spiritforge towers all helping out to kill monsters apart from a few occasional banishments.
082 – Field M4
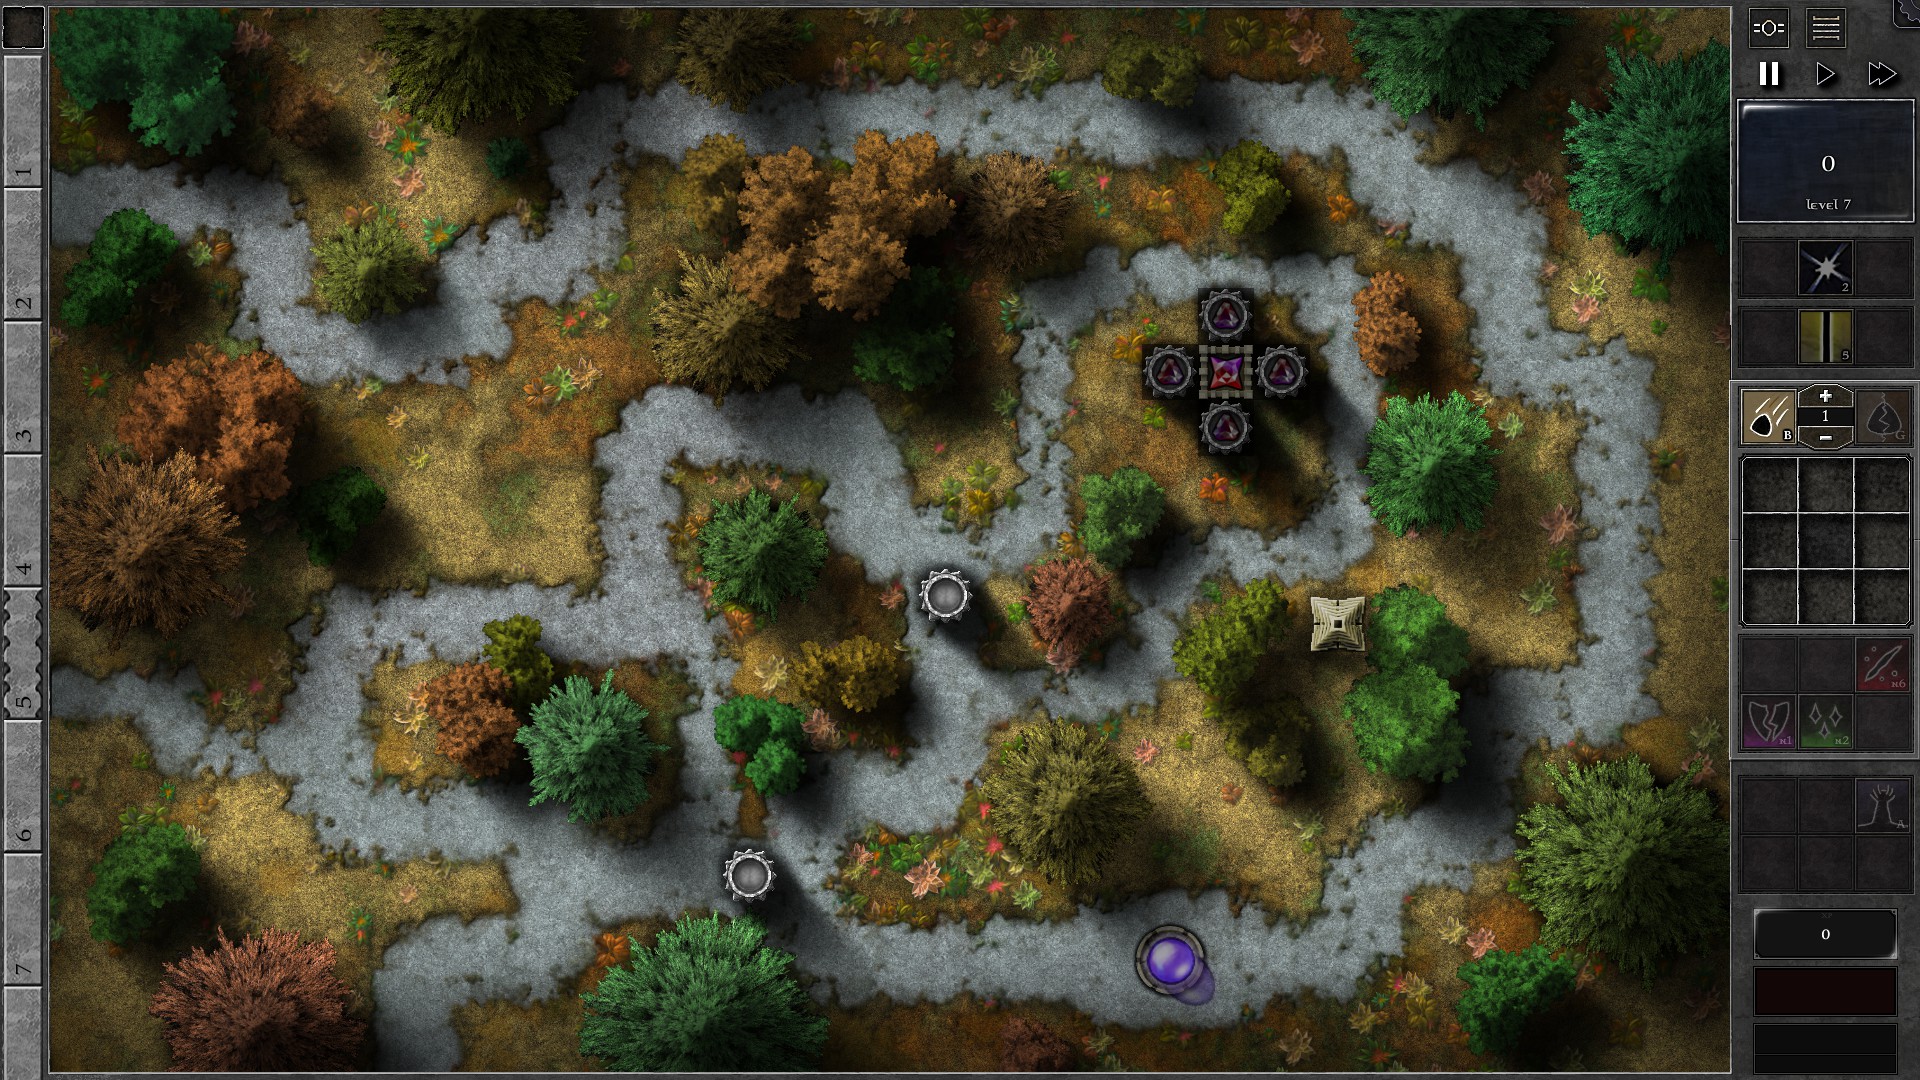
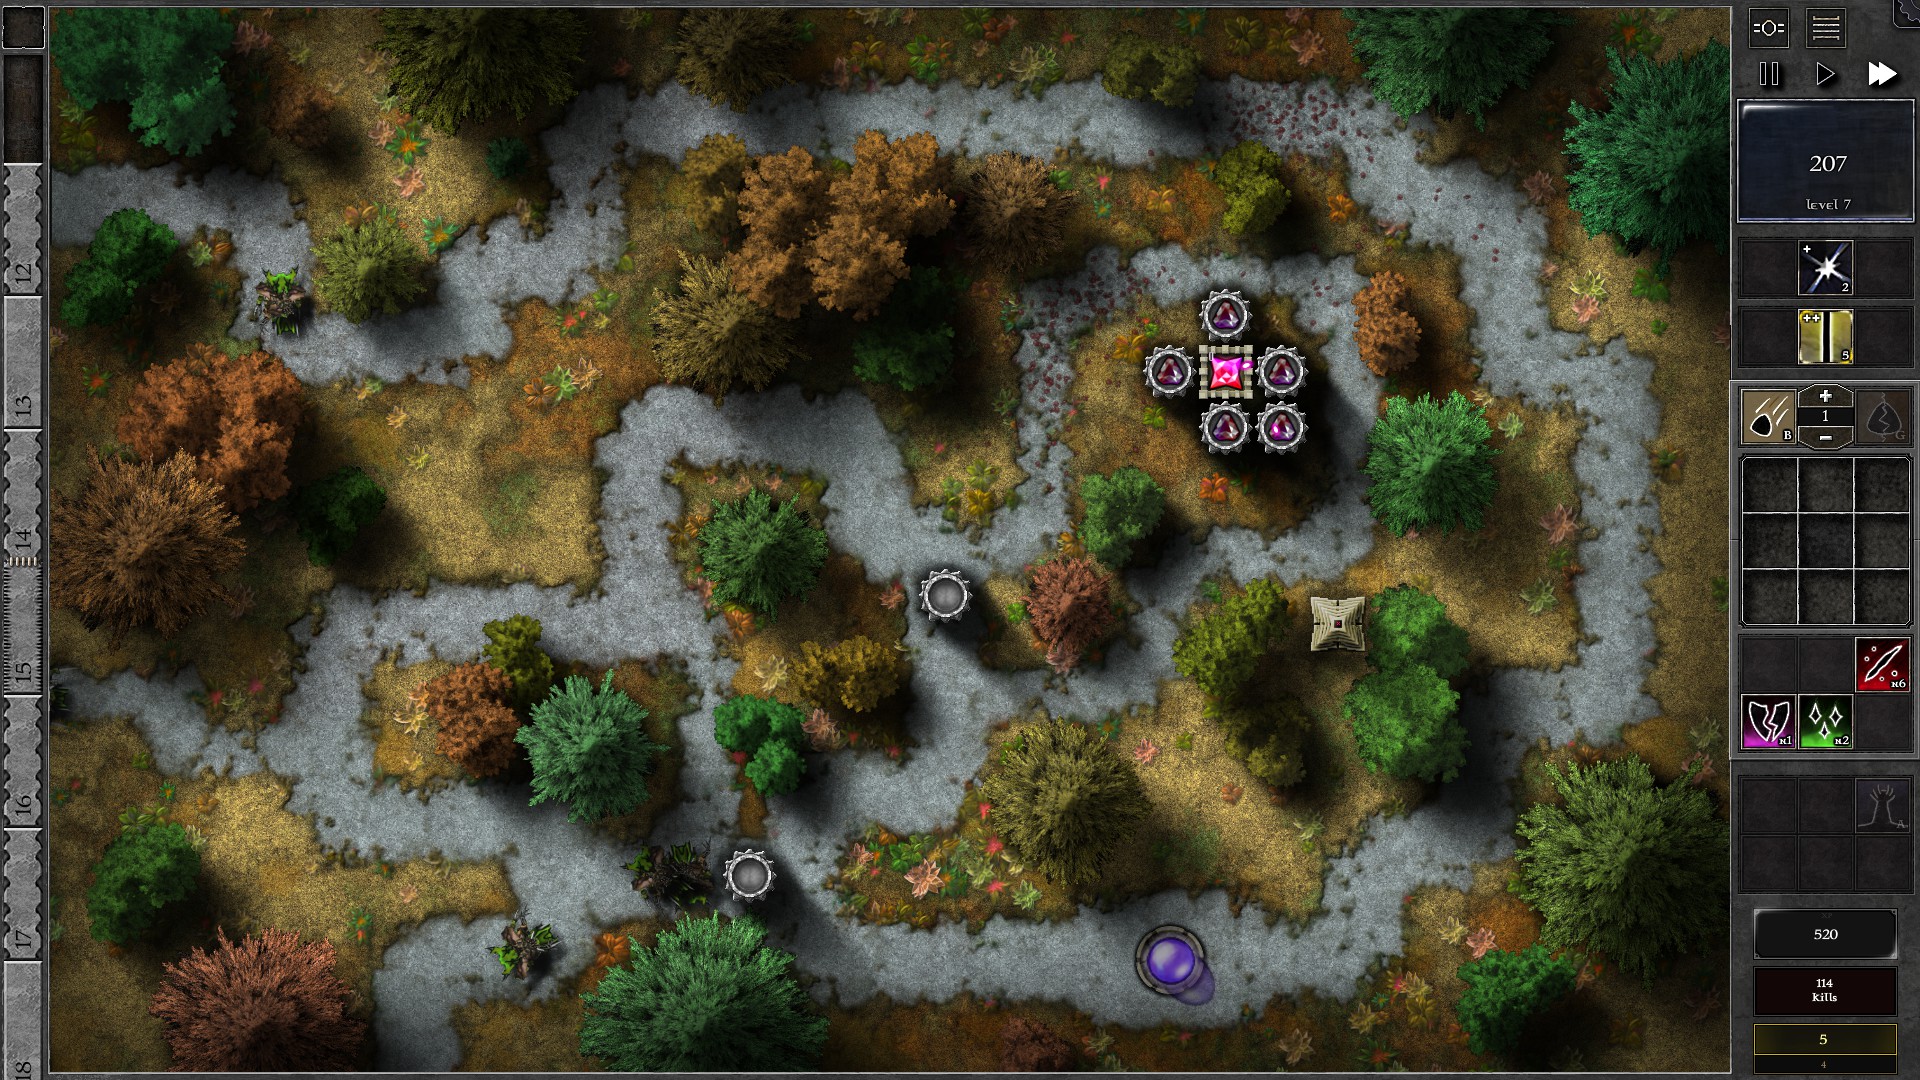
Start the field as shown with 2 amplifiers blocking the path, and another 4 surrounding the tower. Create 4 g2 p/r gems for the tower amplifiers and a g5 p/r gem for the tower. (Note: Restart if you make a mistake in setting up as this setup costs exactly 12000 mana) You should have no problems dealing with the initial waves. As you charge up spells, use them wisely if you see a larger amount of monsters:
- Whiteout is more effective on monsters moving through the outer path (slowing down monsters so they stay longer in the limited range). Take advantage of cases where you can Whiteout monsters in both paths.
- Beam is more (and only) effective in the inner path (cuts through monsters in inner path so normal shots can go to the outer path).
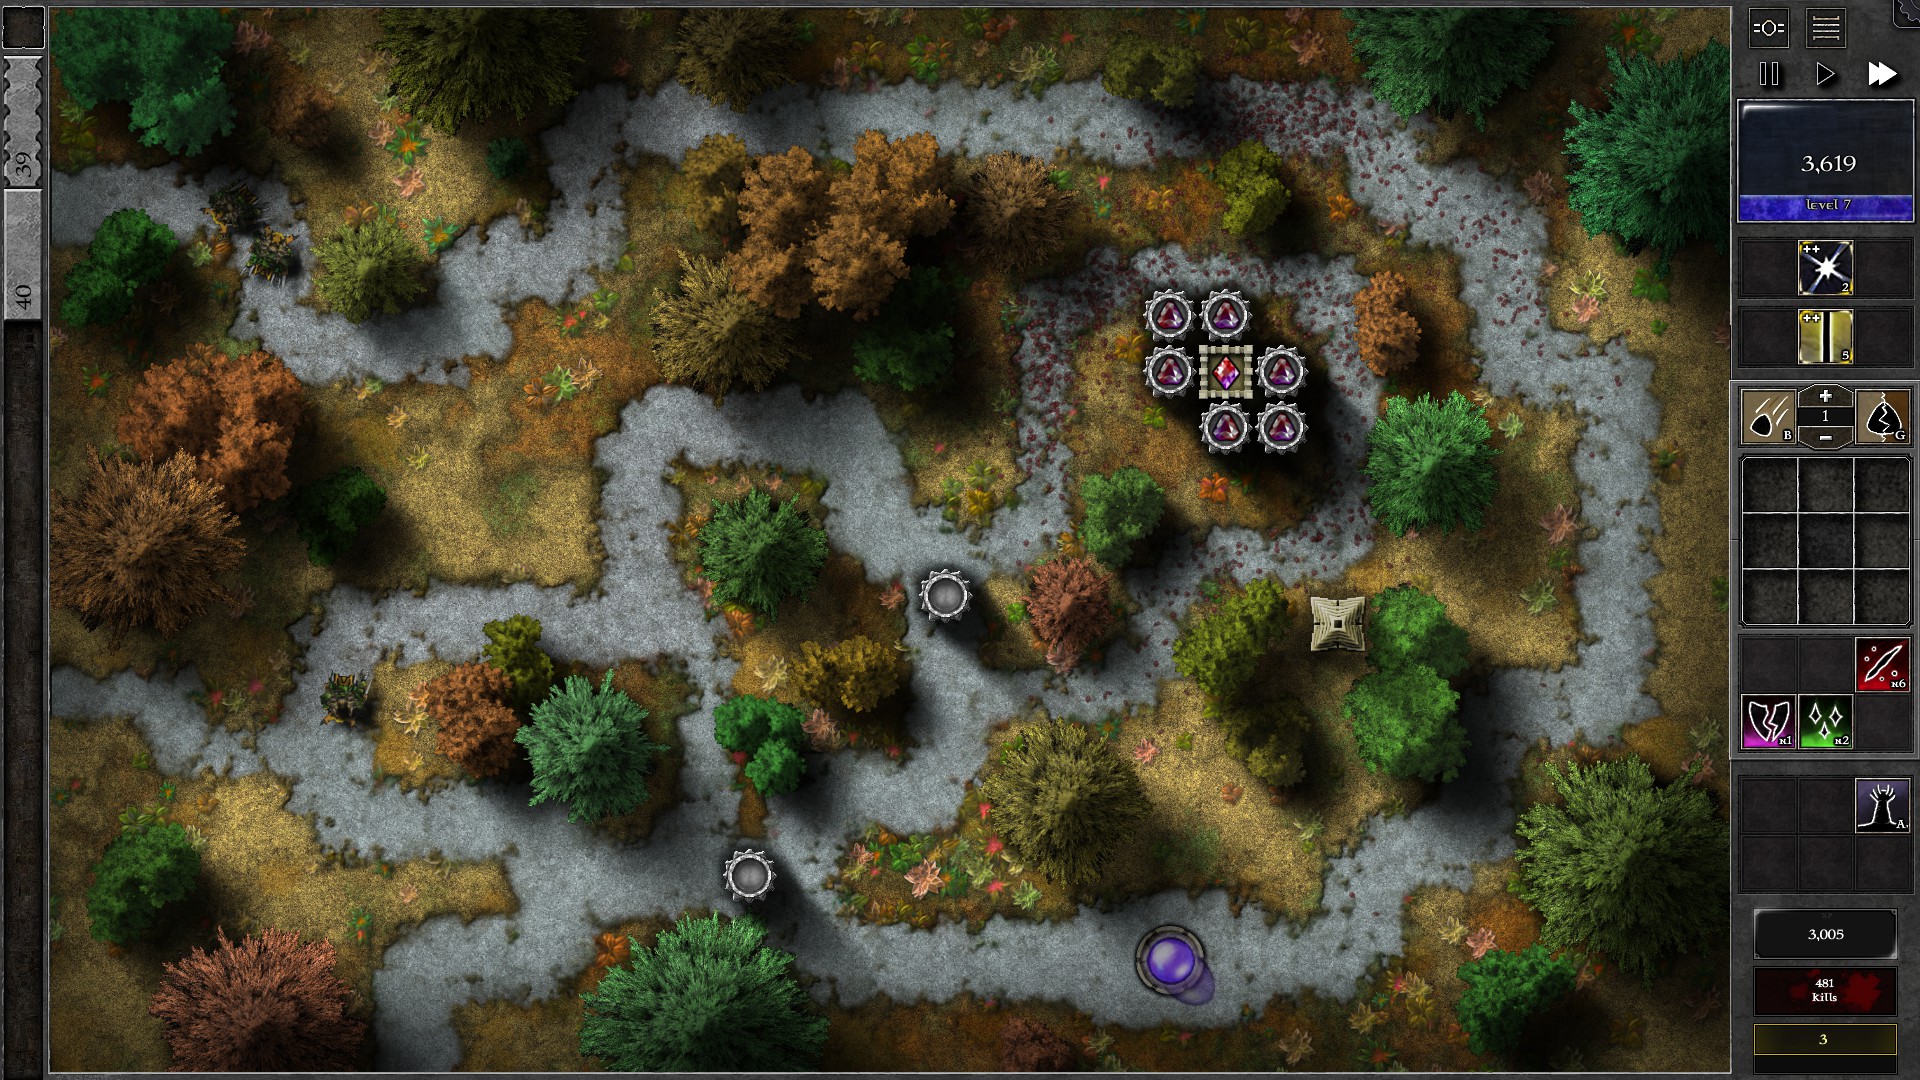
Meanwhile, try to accumulate mana to afford a 5th amplifier surrounding the tower along with its g2 p/r gem. This should be doable around w10, and extends the tower range to cover the Pylon; now the tower can charge the pylon as an extra safeguard while it has no monsters to kill. After this, gather enough mana to upgrade your g5 tower gem to g6. You should be around w26-27 at this point. Watch out when upgrading the gem though; w25-27 is also the time where leaks are likely to happen and upgrading may leave you with no mana to banish leaking monsters.
Once the tower gem is upgraded to g6, collect mana for a 6th amplifier and its g2 p/r gem for the tower. You should be able to survive the remaining waves with your spells.
083 – Field F1
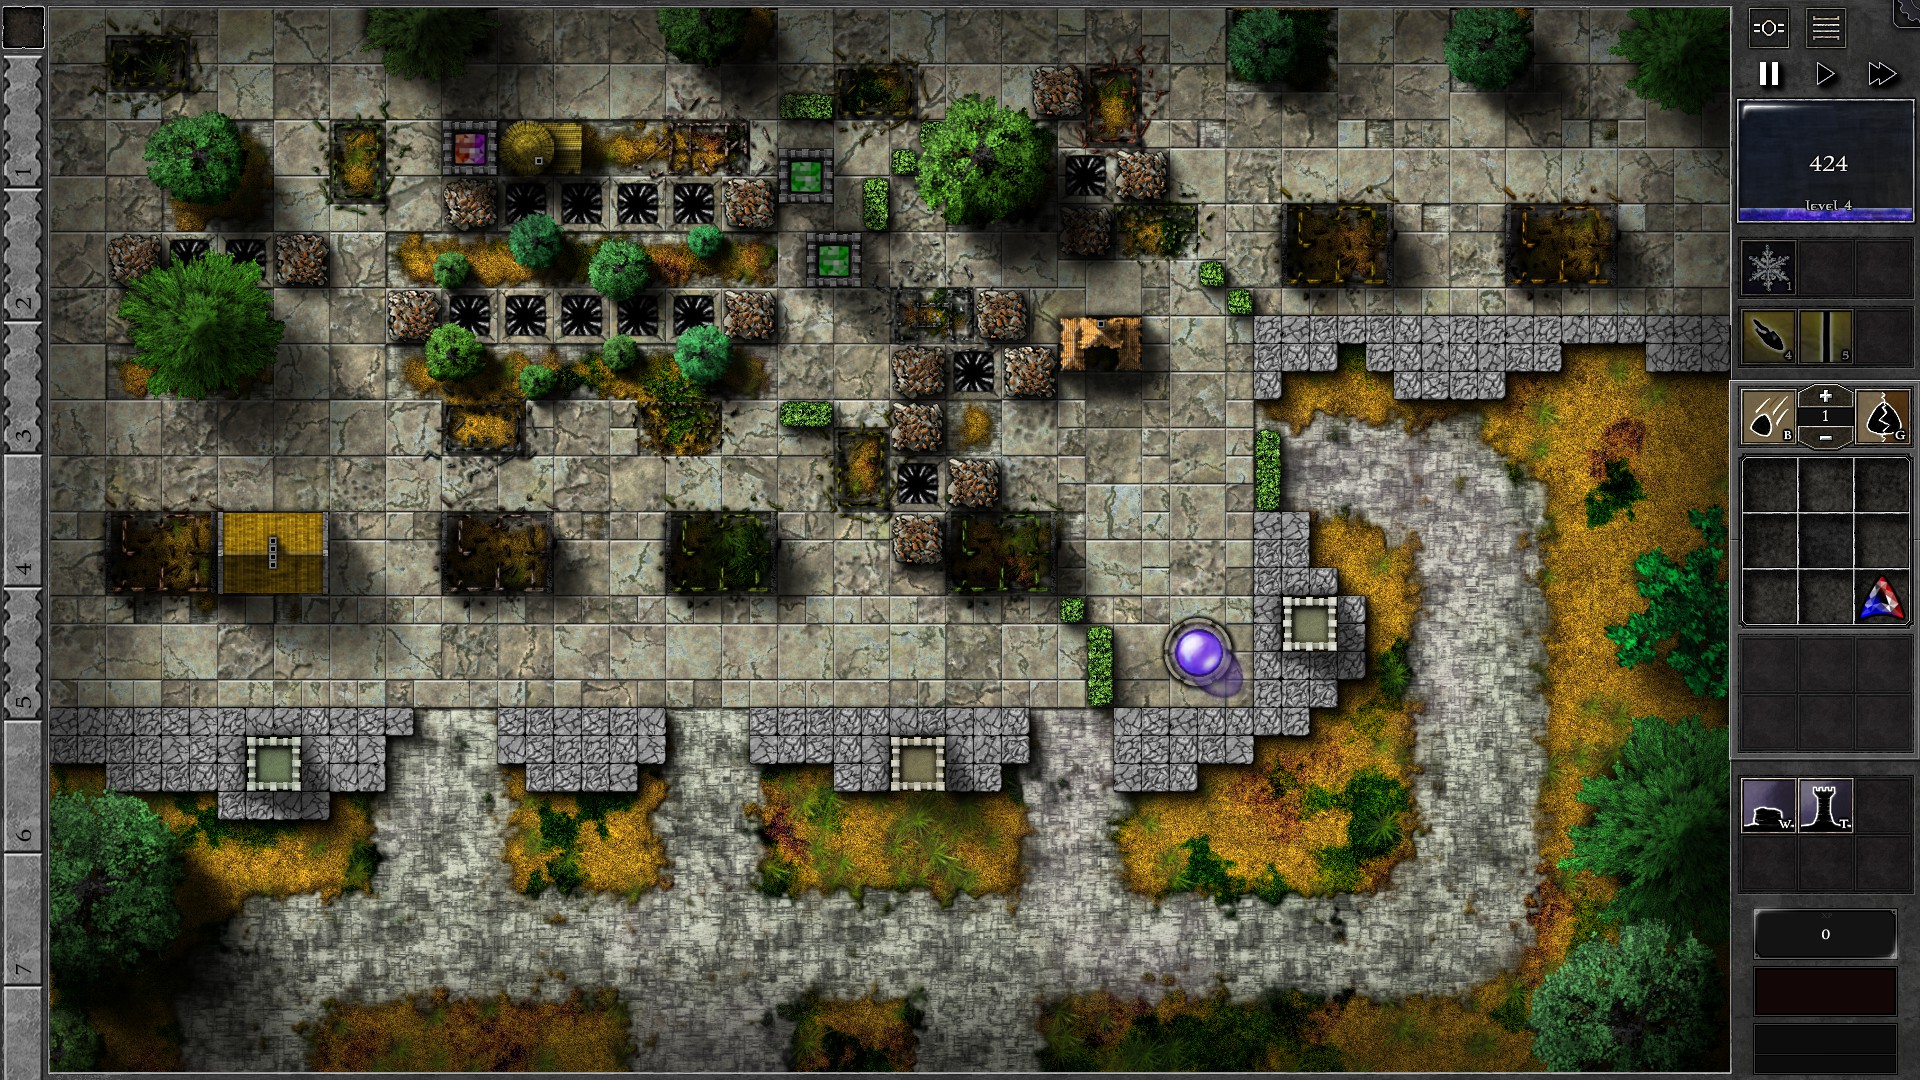
Setup the field as shown in the screenshot. You need to duplicate the g3 green gem, upgrade the g2 p/o gem to g3 and it to target Structures. The g3 p/o tower should fire at the left barricade blocking the path through 4 traps. Once the barricade is destroyed (around w5), build a tower and move the p/o gem to fire at the other barricade blocking the 4 traps. Use Bolt, Beam and Freeze to help survive the early waves.
At around w7-8 your defenses will start to get overwhelmed due to the quickly increasing monster Armor. You will want to break the 2nd barricade before w9 by focus firing on the barricade after its armor is removed. (You should have enough mana to take a few banishments at this time). Once the barricade is removed, block the entrance of the original path ASAP to force monsters go through the traps. Move your green gems to the traps to start utilizing the increased poison damage, and put the p/o gem into a trap before the green gems. You will want to cast Beam on the green gems for the increased firing speed in traps, but don’t hesitate to use Bolt to insta-socket the gems. Insert the r/b gem into the tower just before the traps and set the targeting priorities of every gem to “Random”.
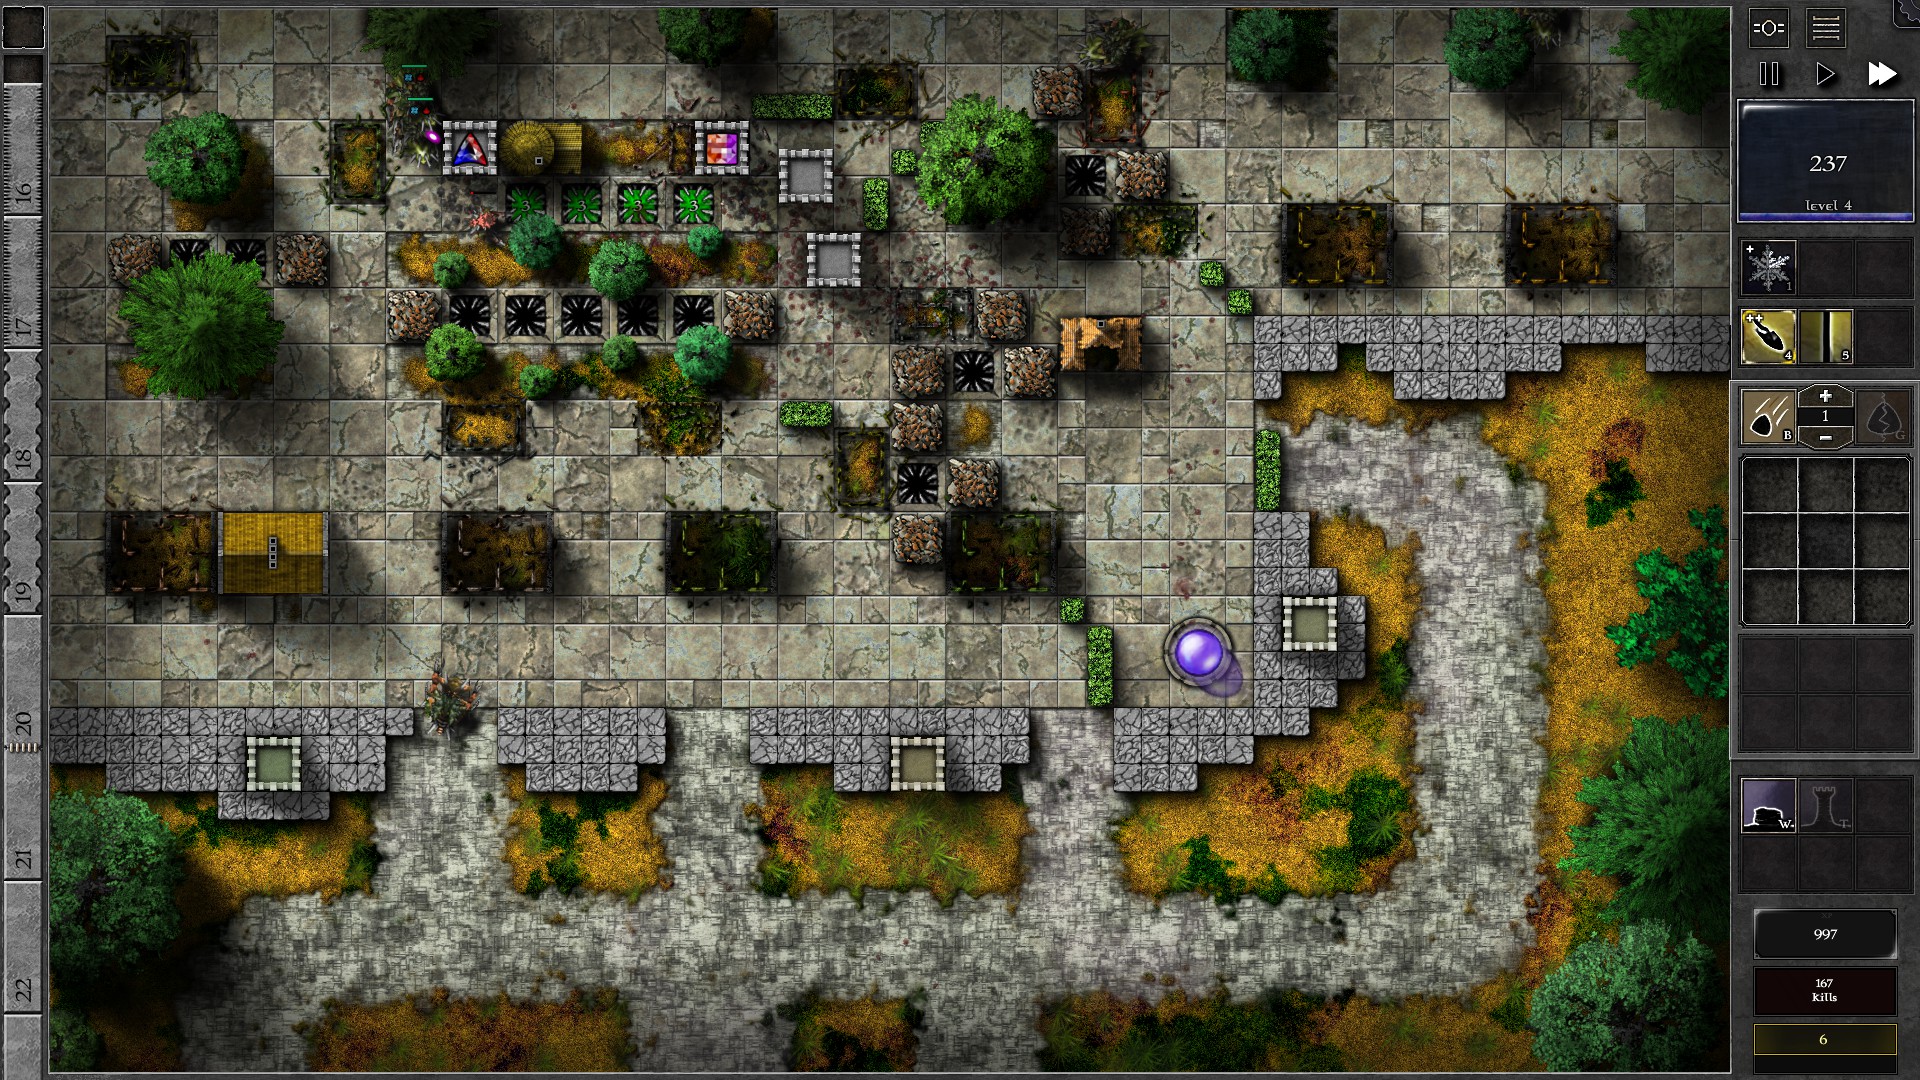
In around w10 you should have enough mana to duplicate a 3rd green gem to fill in the 4th trap. Continue applying Beam to the green gems and use Freeze if necessary. At w15 you should be able to afford a 4th g3 gem, at which you should replace the p/o gem in trap with a green gem.
Once the 4 g3 green gems are set up, start upgrading them as you gather enough mana. You should be able to get 2 g4 green gems by w25 and at least 3 g4 green gems by w30. Finally, save some Freeze spells which may become useful on the linked w28/29 and/or the fast reaver w30.
084 – Field F2
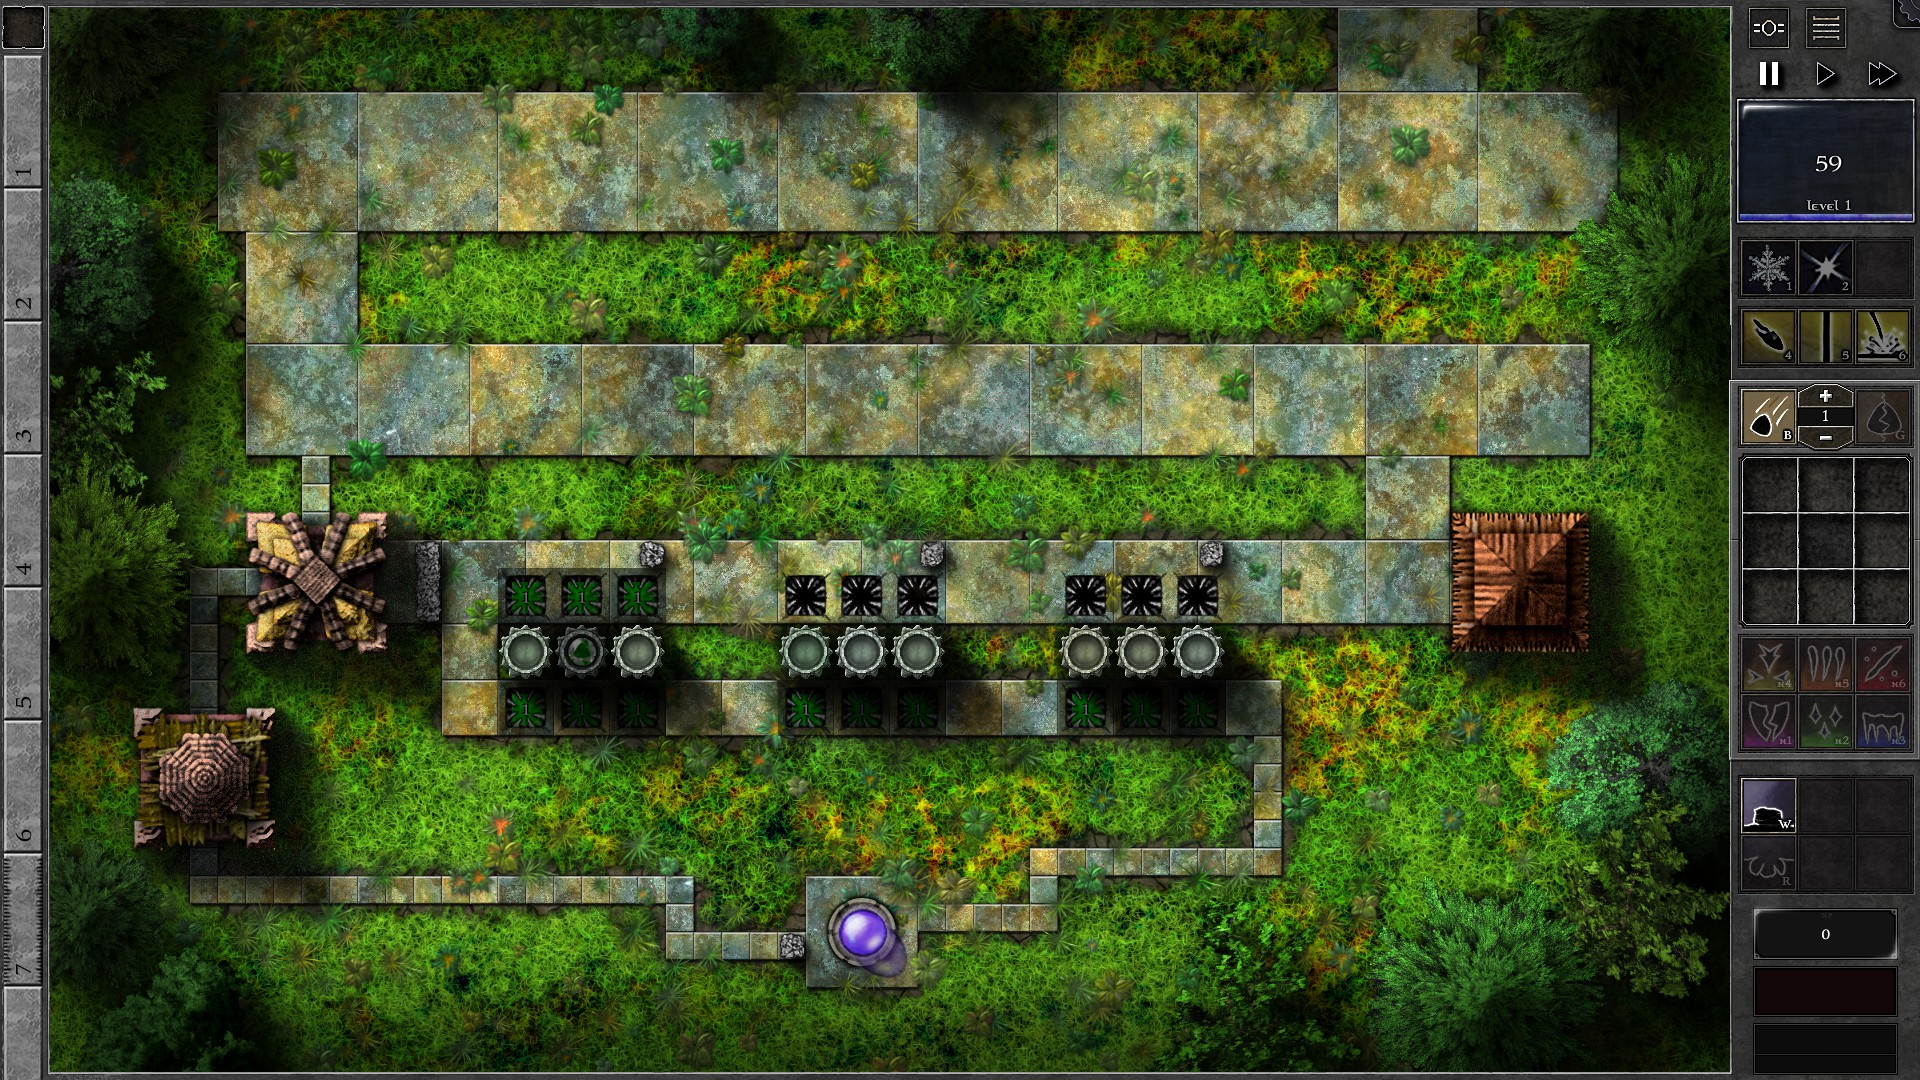
Setup the field as shown with 13 g1 green gems and the walls. All the gems should target “Least Affected by Gem Specials”. Start the field and you will soon gain a decent amount of mana from monster kills. Quickly fill up the vacant traps, then the amplifiers with g1 g gems as you gain mana. You should be able to do this before w10.
NOTE: This stage can be a bit chaotic as there is a large amount of monsters on screen throughout the Trial. Try to have some buffer against occasional banishments when you upgrade the gems. A buffer of at least 2000-3000 mana is recommended for the late waves.
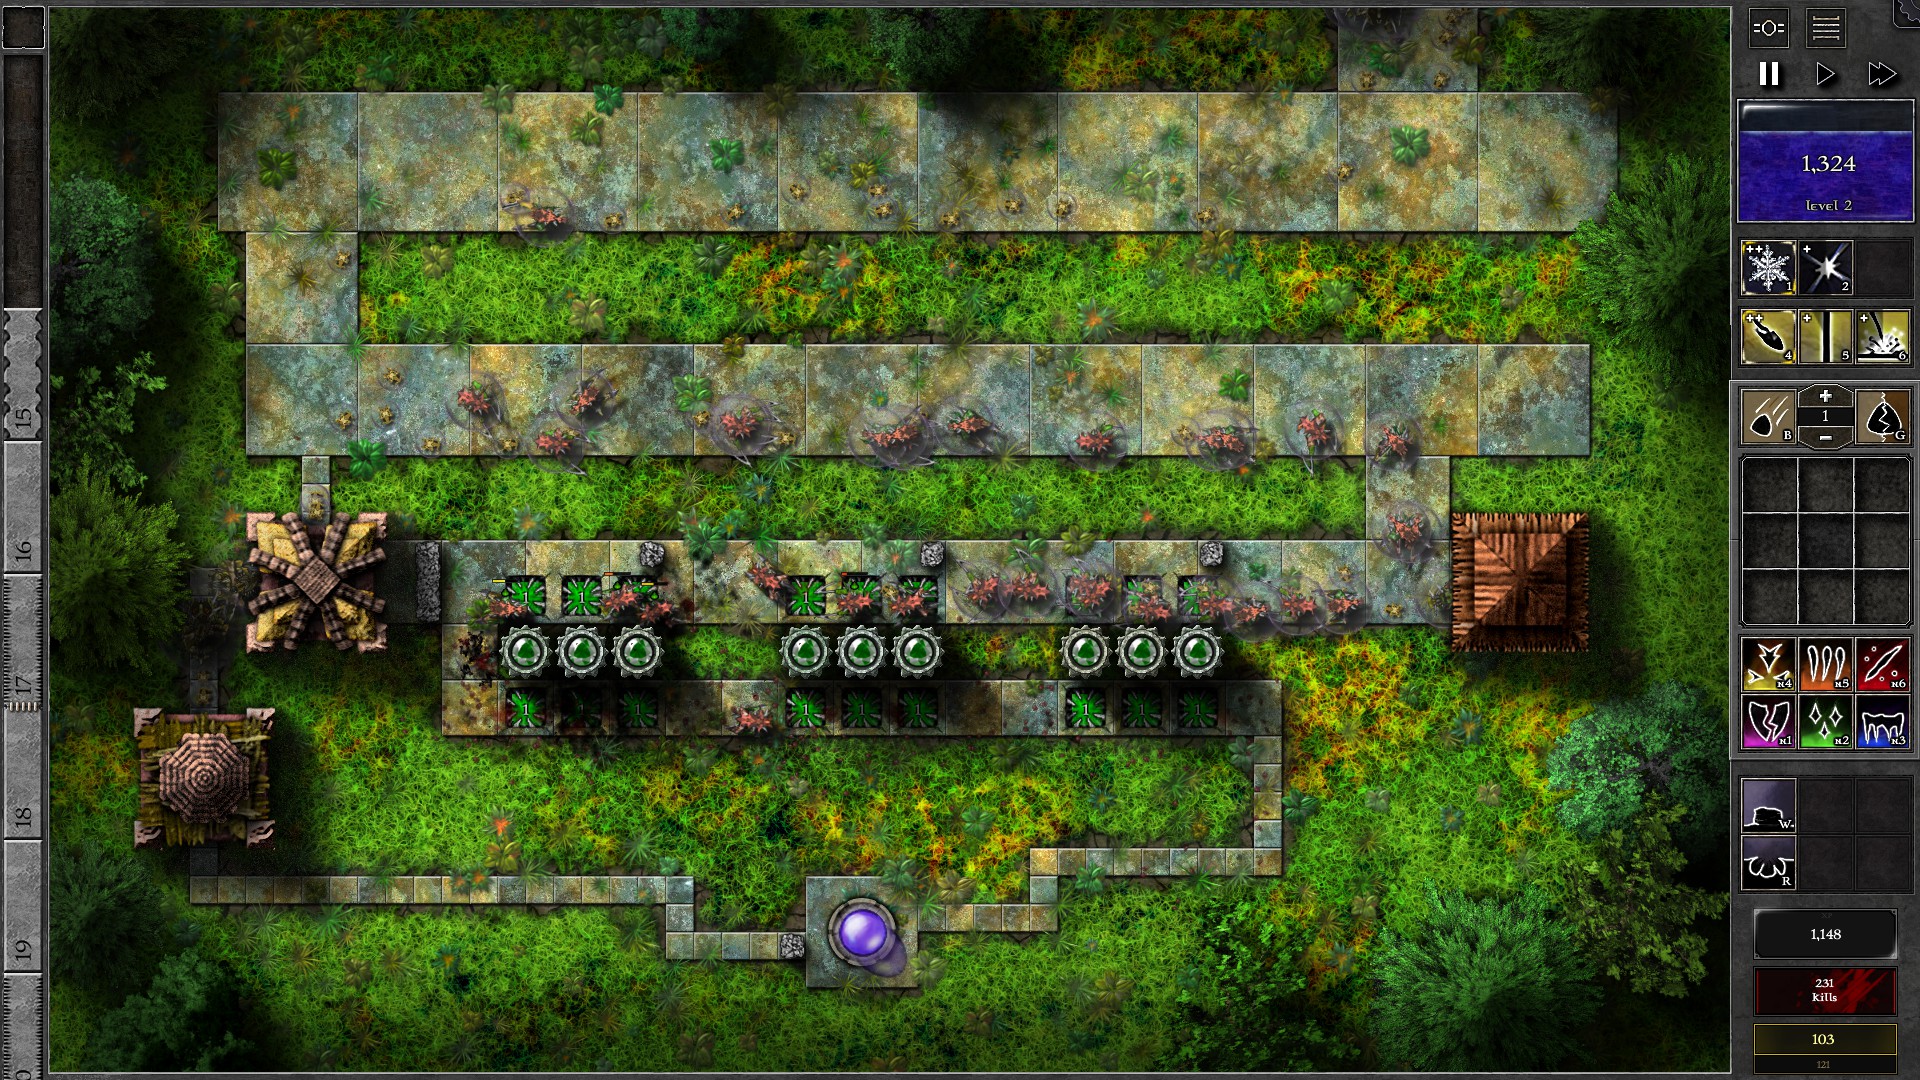
In a few wave’s time you will start to have spells ready. Apply the gem enhancement spells to the trap gems as you get them (apply in groups of 3 gems, eventually all 18 traps should have an enhancement), and use Freeze and Whiteout to help control the monster horde (this is important for the later waves). As more waves com in, you will quickly gain hundreds of mana. Upgrade the gem in the centre amplifier of each set into a g3 once you have the mana to afford the upgrades.
After the 3 centre amplifiers got upgraded, start upgrading all 18 trap gems to g2, starting from the bottom rows. You will want to use the enhancement spells on the last 3 gems in the path to reduce your defenses’ downtime. Upgrade the other 6 amplifiers into g2 gems after all 18 trap gems are upgraded. You should be close to w40 at this stage.
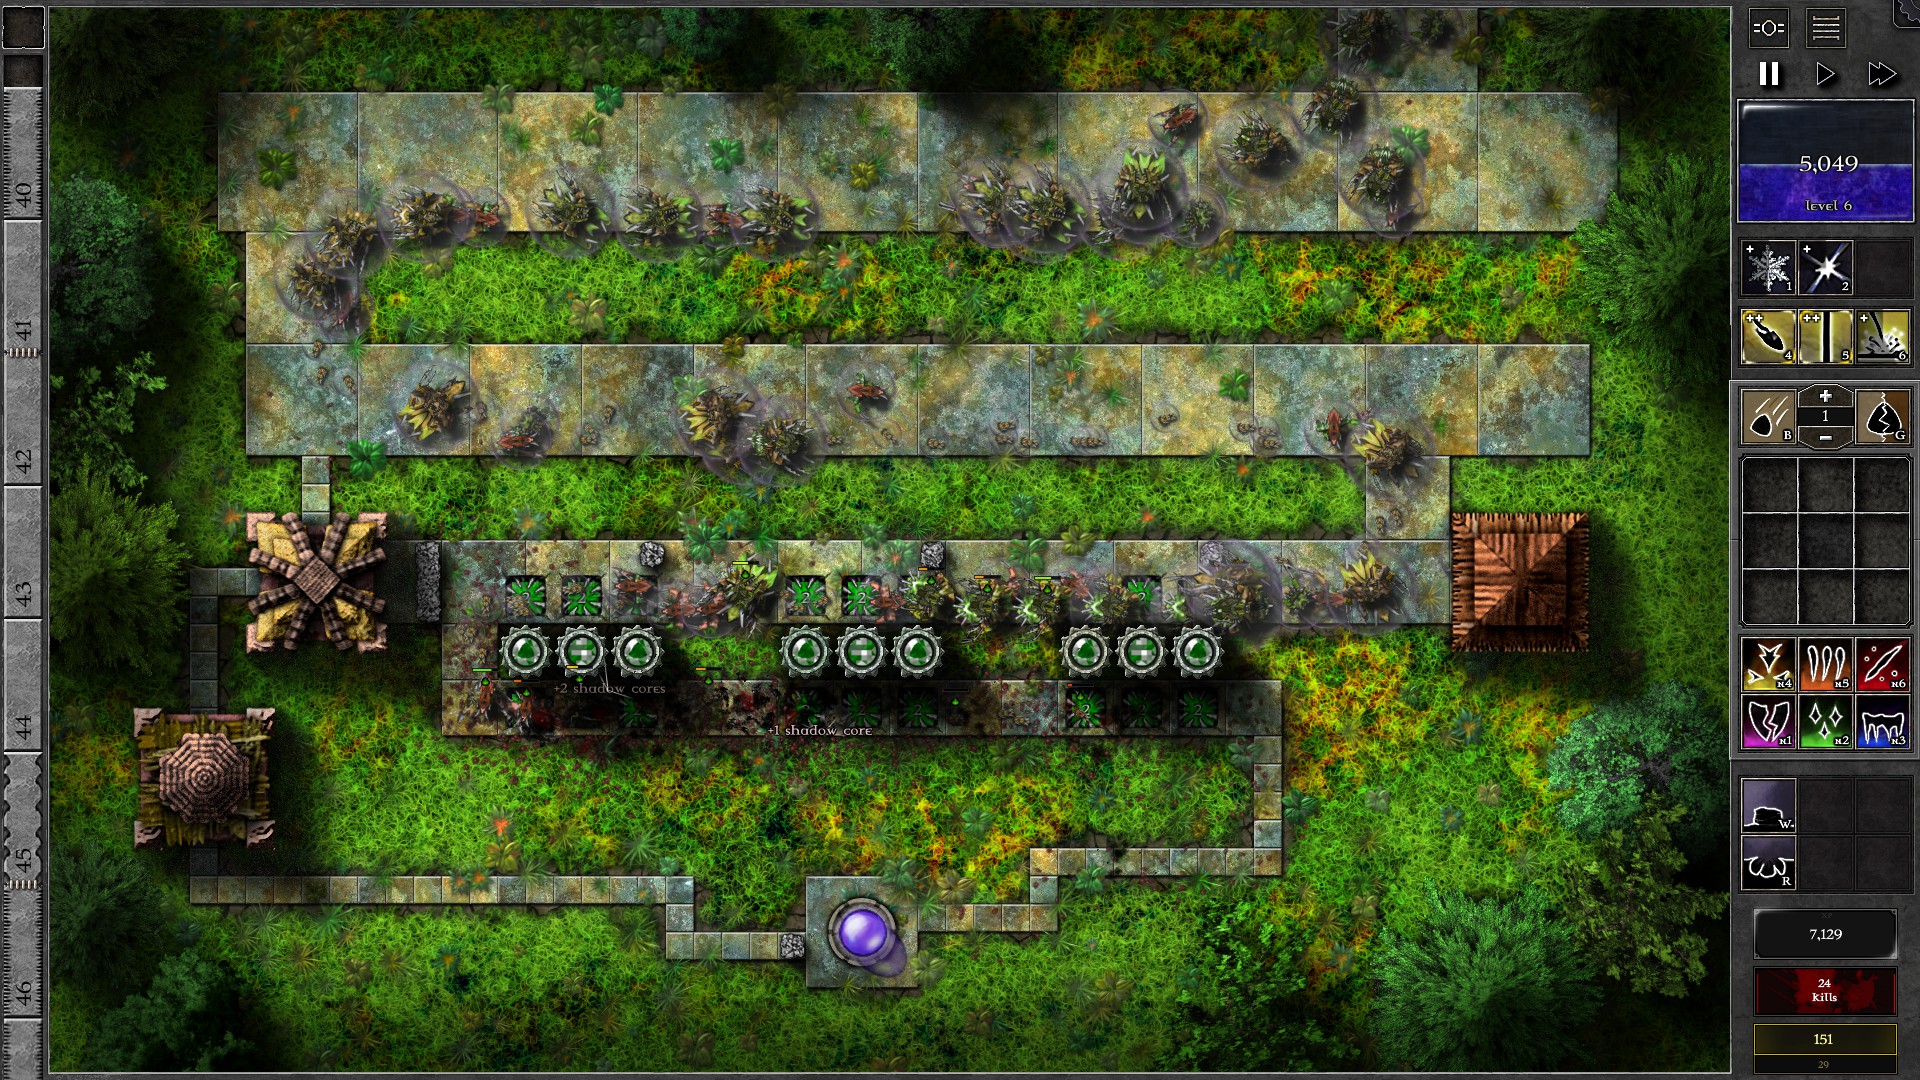
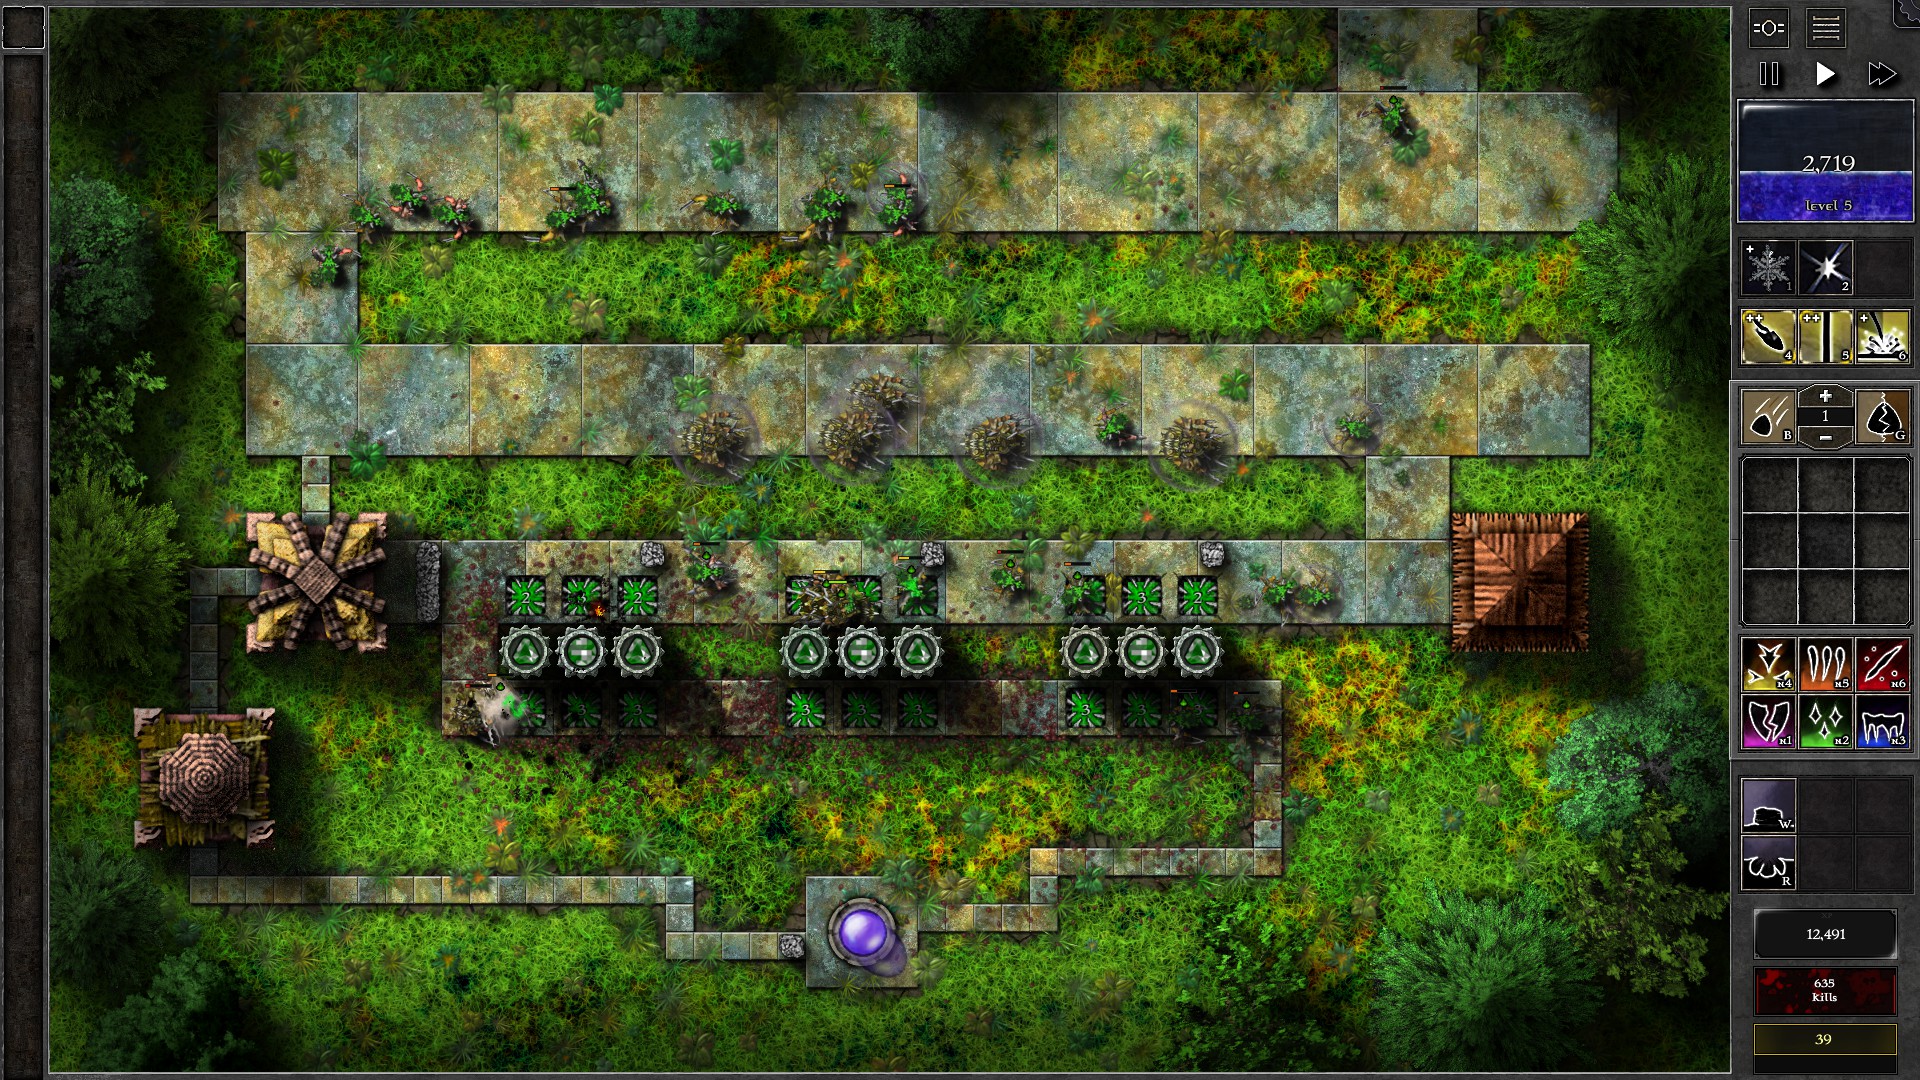
At this moment you should start to get a surplus of gem enhancement spells; start replacing Bolt enhanced gems with Beam/Barrage enhancements. Now, upgrade the centre gem in each set of traps (total 6 gems) into g3, then the remaining trap gems in the bottom row of traps. You should now be at the final waves where banishments start to get more frequent. Consider using “Least HP” on the bottom row of traps to help pick out weaker monsters first to thin out the horde and reduce banishment cost. The setup should eventually wipe out most of the non-giant monsters, at which you can start combining gems into higher grades to help defeat the giants.
085 – Field F3
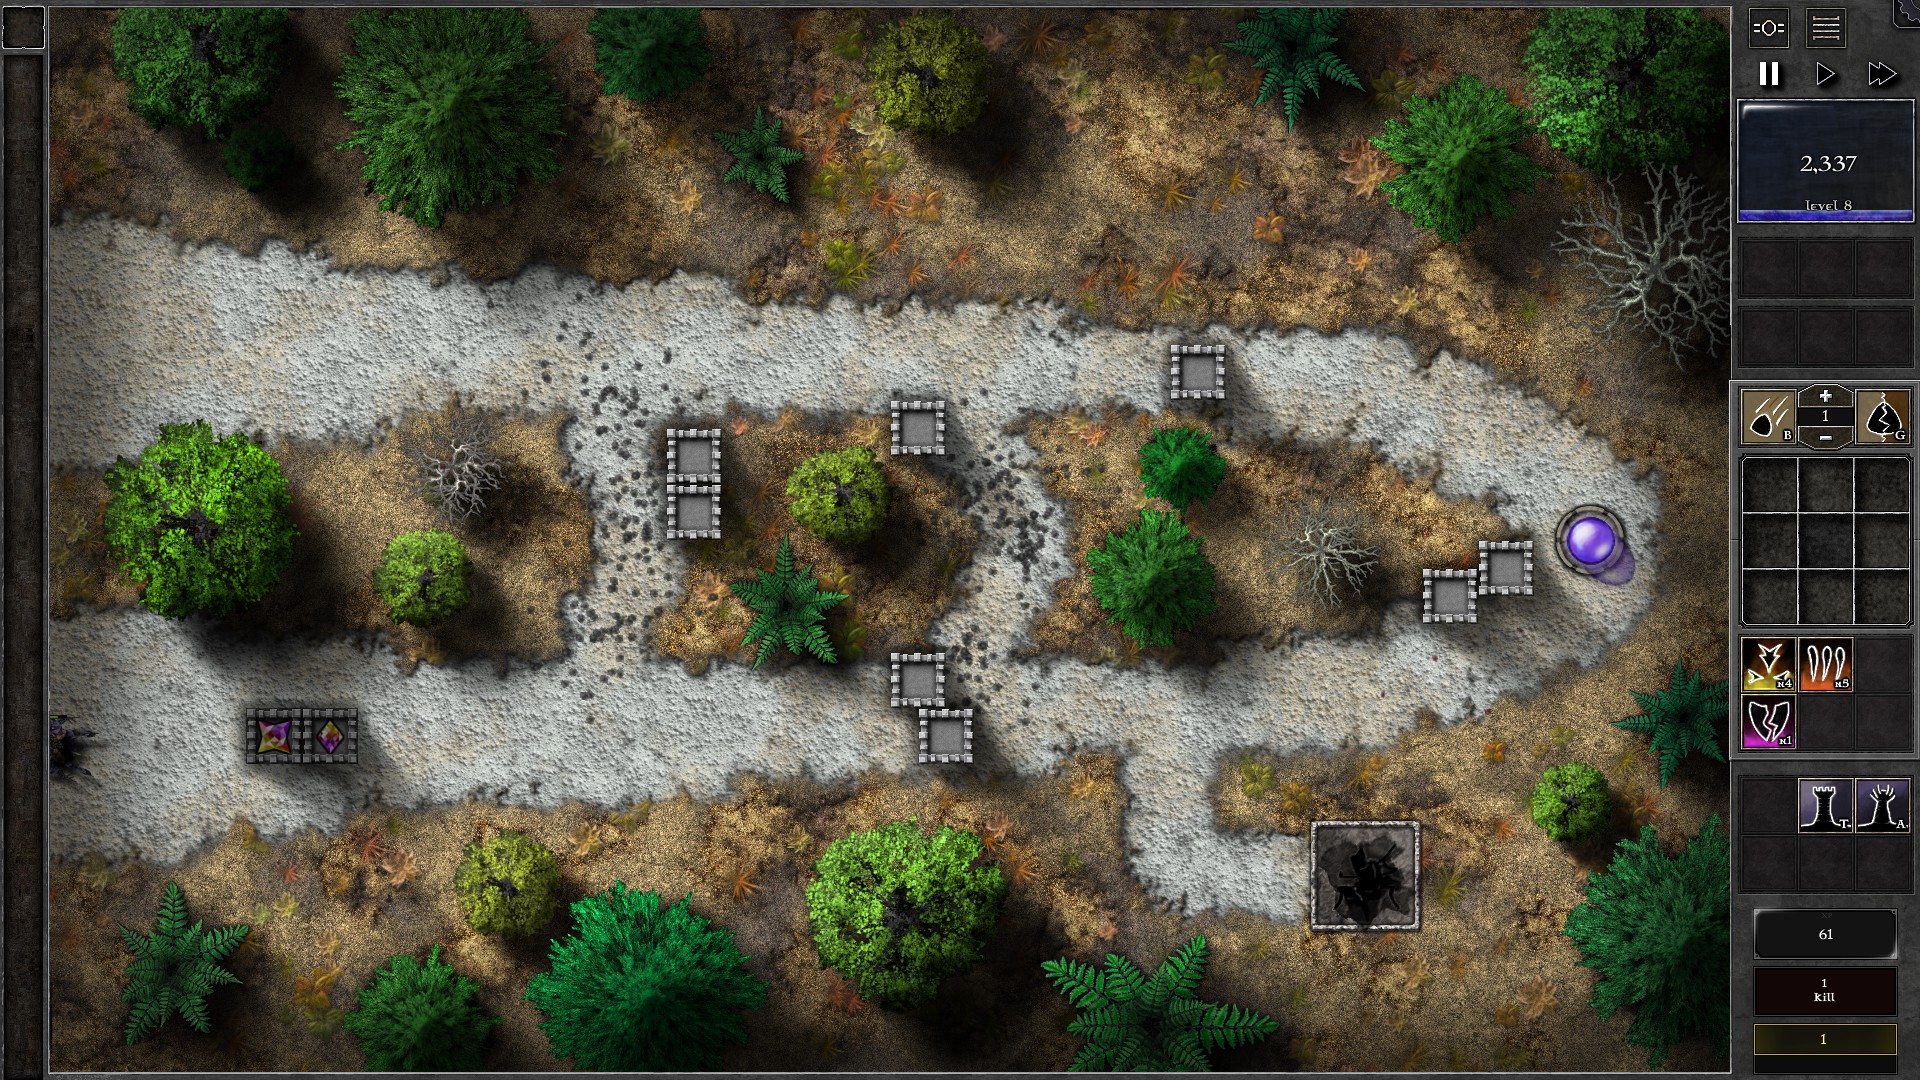
Start this Trial by creating a g6 p/y gem and a g5 p/y gem. Set these gems to target “Structures” and put them into towers to tear down the barricades. You should be able to block off the lower path with 2 towers near the intersection as shown. Now, block off the upper path at the portion closest to the orb.
You are now ready to take down the 2 giants. Change the gems to target “Least HP” and setup tower groups in at least 4 locations where both gems can fire at the giants together. Follow the giants with your gems as they travel through the path, while noting the downtime due to resocketing gems.
One of the giant should ideally fall before the 4th banishment and the second one before the 7th. If you don’t have enough mana to do a banishment (especially the 6th/7th one, likely with only one giant left), sell the g5 for extra mana if you are close to defeating the giant. A last resort is to use the towers at the lower intersection to juggle the giant and keep it around the middle part of the map.
086 – Field F4
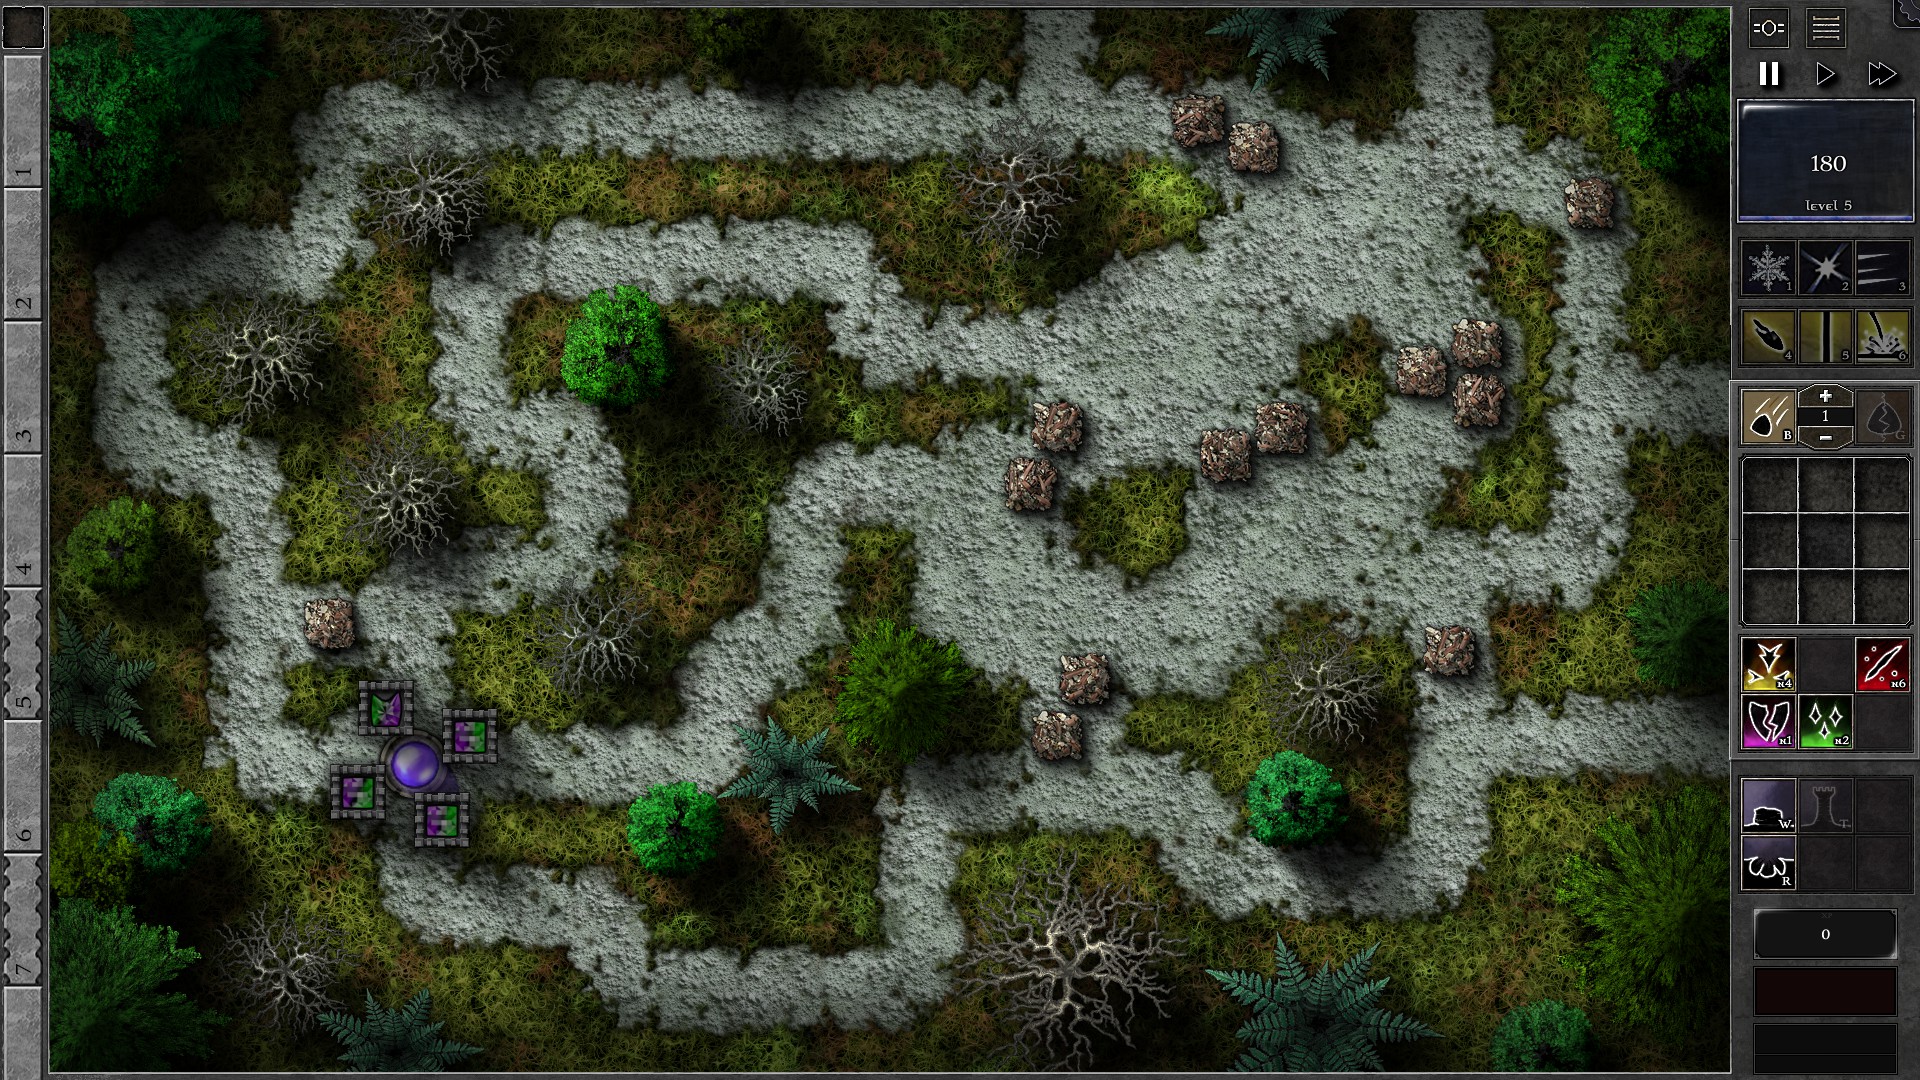
NOTE: Wizard Hunters in this field enters from random entrances. Adapt your gem upgrading timing as you may need to spend mana to rebuild towers which costs additional mana. This also introduces some extra RNG into the Trial.
Start the field with 4 towers staying close to the Orb, 3 g3 p/g gems + 1 g4 p/g gem. You have a much faster mana regen rate and monsters drop relatively high mana, which should allow you to quickly afford upgrading a gem to g4. Your gems should still be able to take out monsters with minimal leaks at this moment.
NOTE: Don’t use any spells to deal with the monsters unless absolutely necessary; you can afford to banish a few monsters and will probably want to save the spells for Wizard Hunters.
At w7 a Wizard Hunter arrives. Quickly Ice Shard it twice, Freeze it and then build a tower to move a g4 gem close to it. Focus on the Hunter with Beam and Bolt (with Whiteout) and you should take it out quickly. Beam is especially important to shred armor quickly allowing normal shots to do meaningful damage. Send the gem back to the 4 tower group and continue defending against the monsters. You should gain enough mana to upgrade the remaining g3 gems to g4 before w13 where another Wizard Hunter spawns.
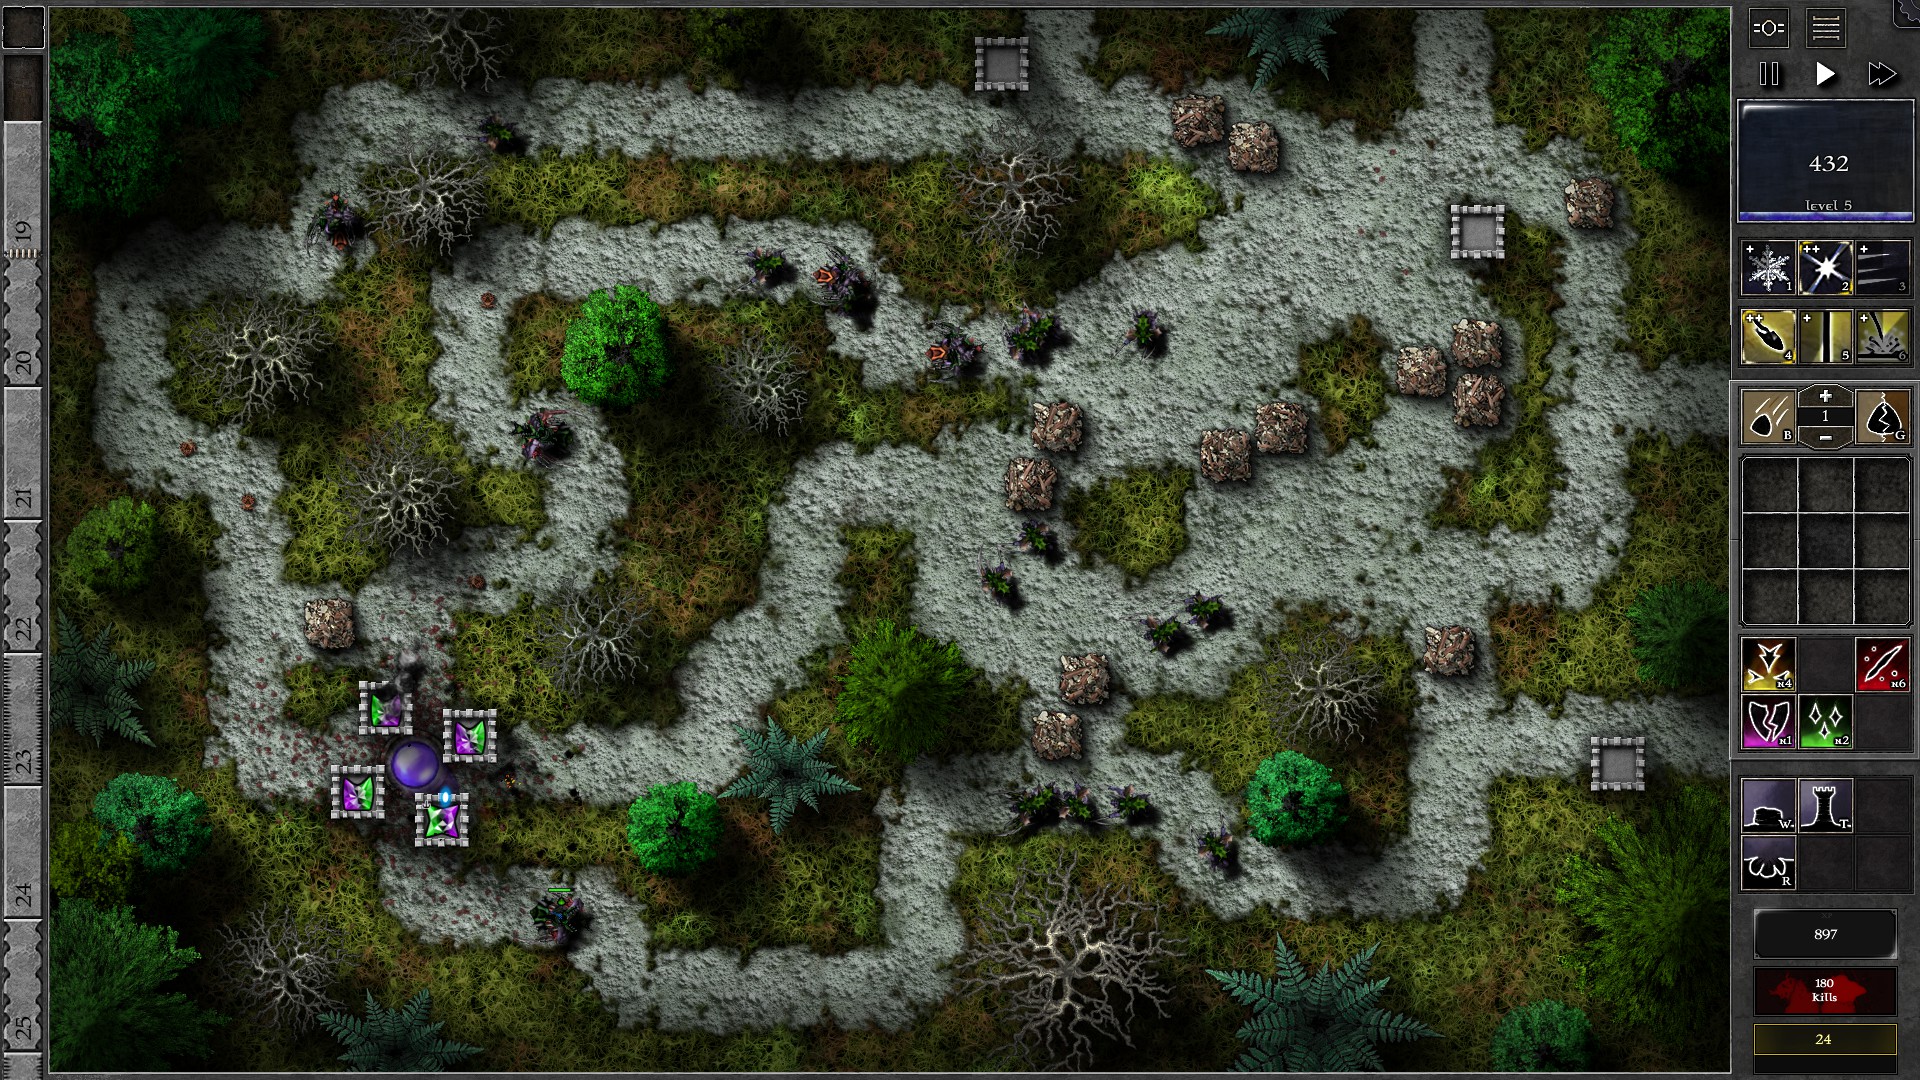
Move a g4 gem to the bottom right to take on the w13 Wizard Hunters. You should be able to take the first one before it causing any chaos, or even both if they enter from the same entrance. For the other Hunter (if in another entrance), Freeze it on the spot while you take down the first Hunter. After you defeat the first Hunter, build a tower close to the second one and use your remaining/recharged spells on it. This one will probably be able to attack once so take note of which tower gets targeted and move the gem if necessary. Try to take the 2nd Hunter out and return the gem to the 4 tower zone (rebuild if needed) to prepare for w17 swarmlings. You should also have almost enough mana to upgrade one of the g4 gems to g5. Save up charges in anticipation of the Wizard Hunters in w21.
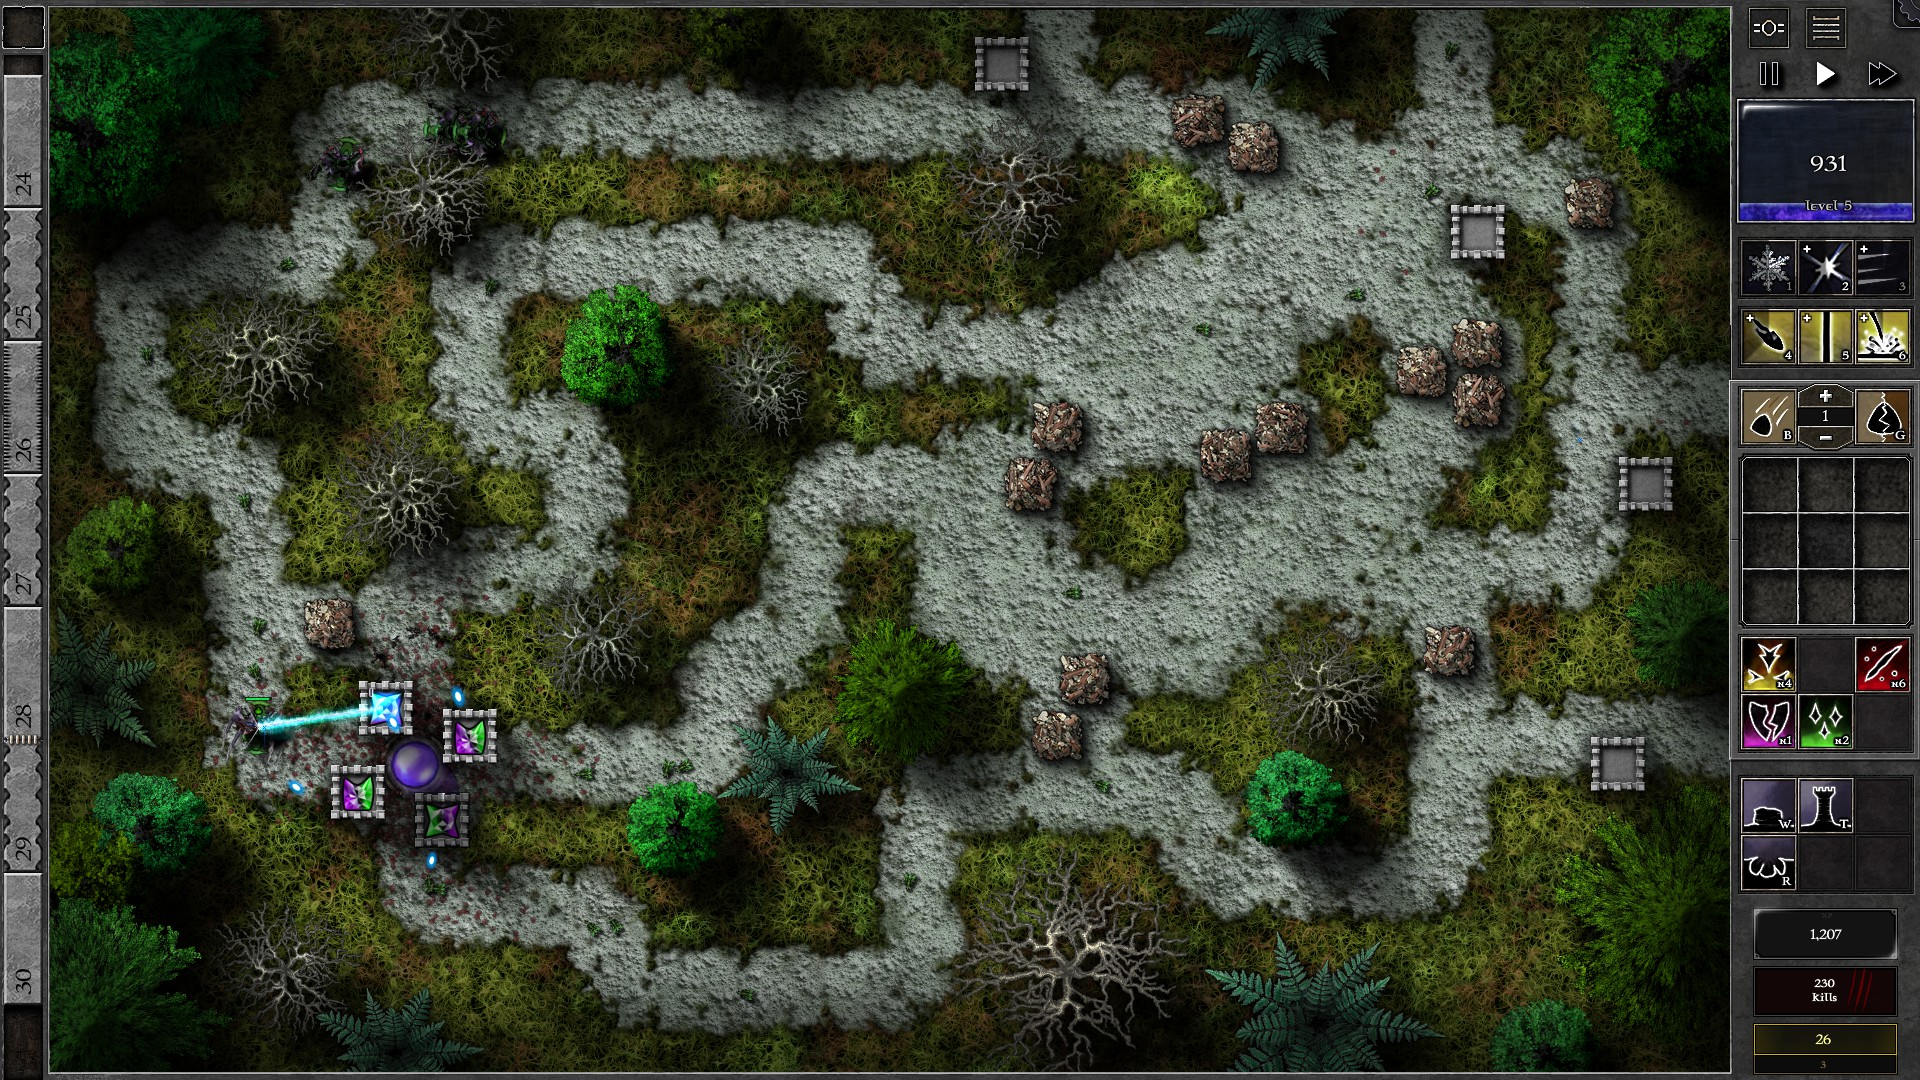
3 Wizard Hunters will spawn in w21. From now on, check where the Hunters arrive and attack the largest group first by hitting them all with your Ice Shards and one Freeze on them. Use a g5 gem and you can hopefully defeat the 3 Hunters before they cause too much damage After defeating the Hunters, you should have enough mana for a second g5 gem. Continue saving up spells for the last wave where 4 Wizard Hunters arrive.
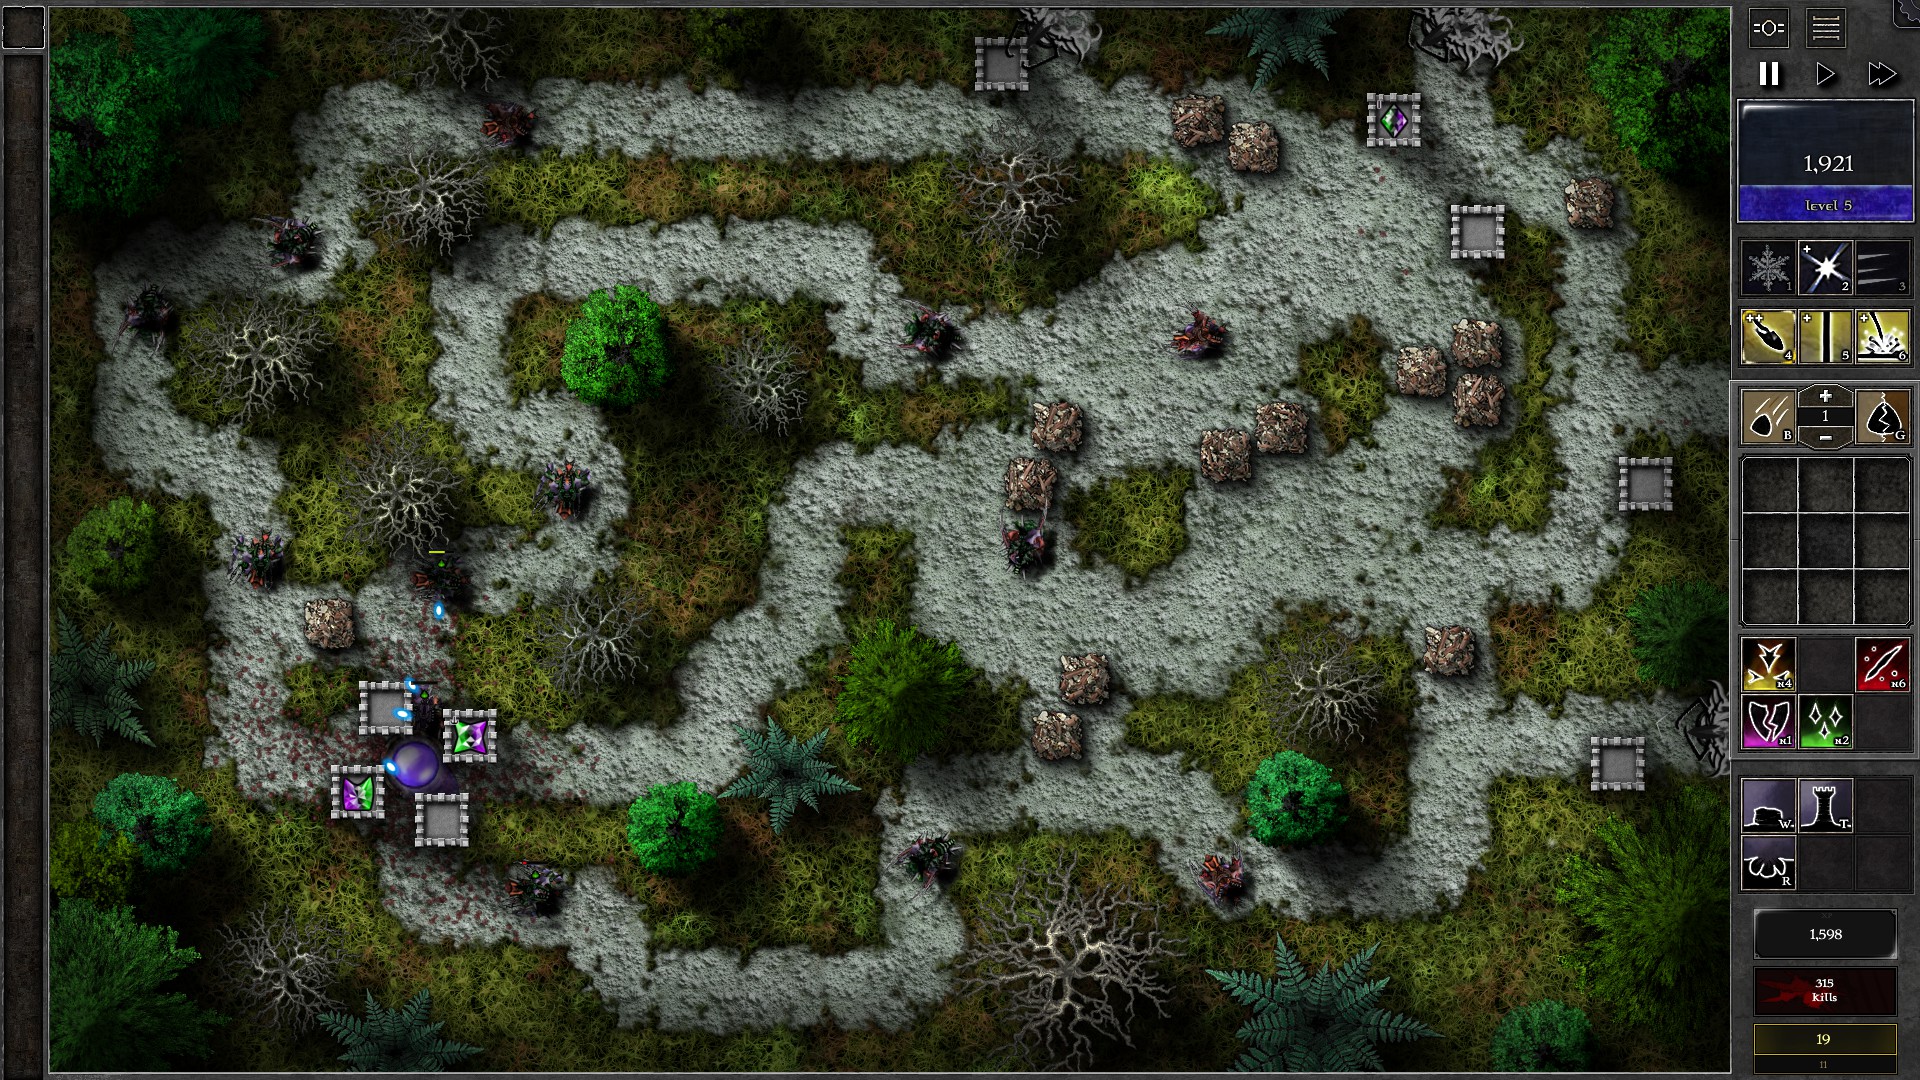
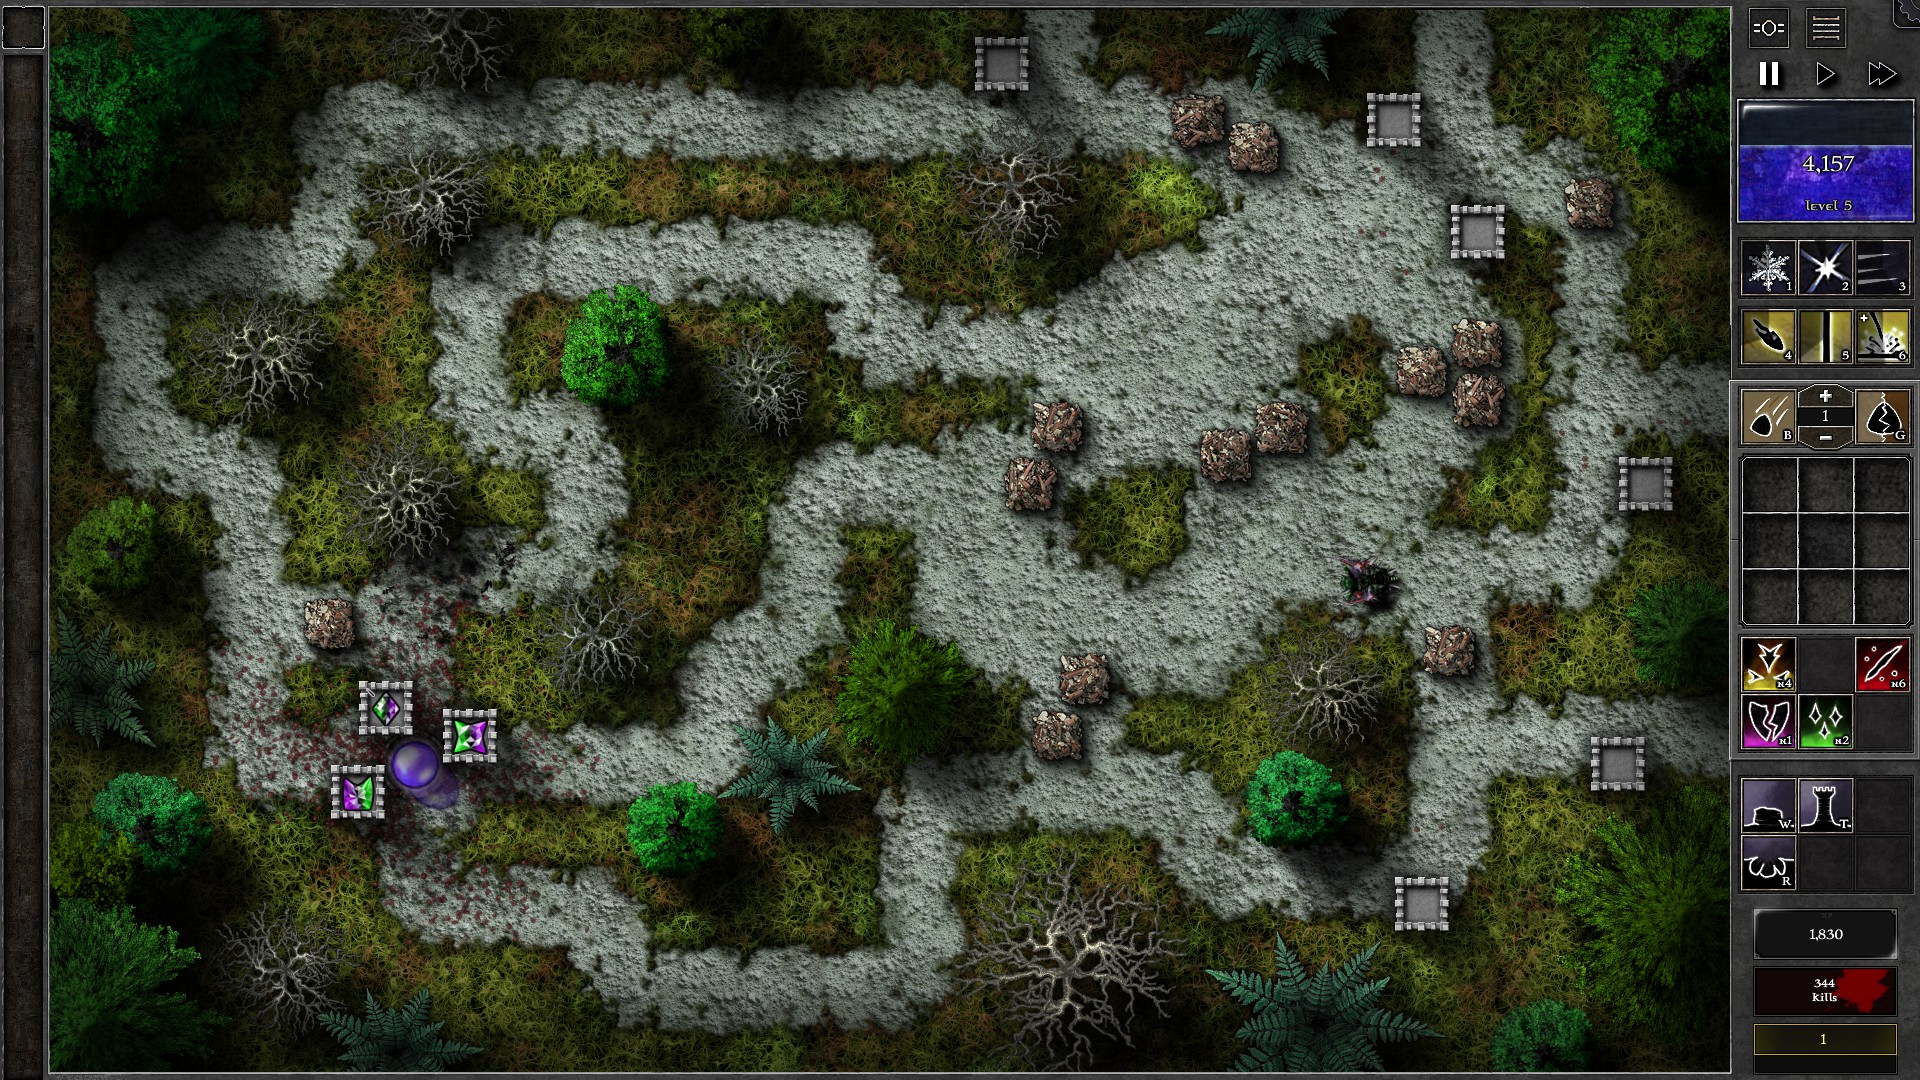
You may have have enough mana to upgrade a third gem to g5 when the last wave Wizard Hunters arrive. Combine 2 g5 gems for a g6 used to attack the Hunters, while the remaining 2 g4s (or g4 + g5) defends the Orb. As with the 3 Hunters in w21, start with taking out the largest group first (where you can use a bit more spells and probably double Ice Shard), then pick off the remaining Hunters. After the Hunters are gone, clean up the remaining monsters and you’re done.
087 – Field F5
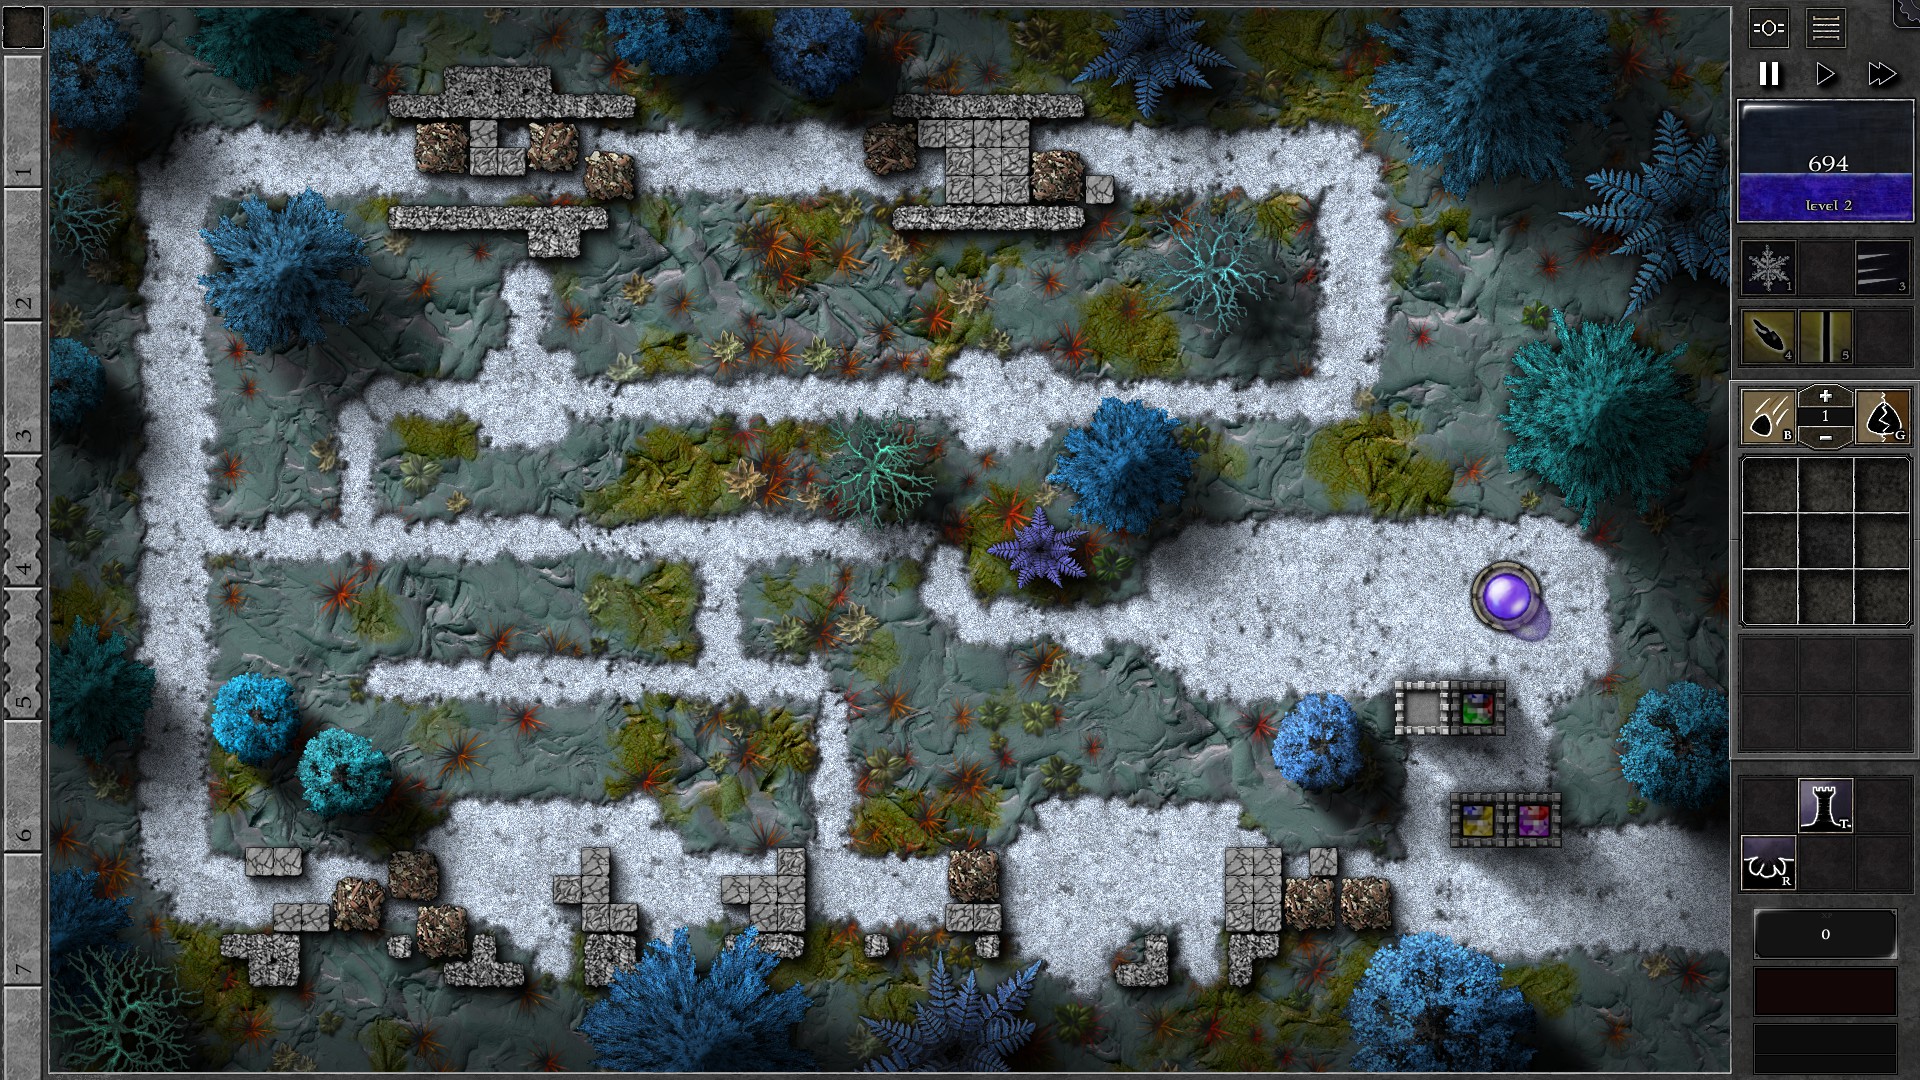
Salvage the pure blue gem for mana (this gem’s mana value is much higher than a typical g2) and setup the towers as shown. The remaining gems are used as follows:
- A g3 3y1b formed by g2 y + g2 y/b
- A g3 3p1r formed by g2 p + g2 p/r
- A g3 2gbr formed by g2 g + g2 b/r
- Salvage the remaining 2 gems (g2 o/r and g2 o/b)
The setup should have no problems dealing with the first 10 waves (you probably don’t even need any spells). Upgrade the 3p1r gem to g4 as you gain enough mana (around w4-5) and then the 3y1b gem to g4.
NOTE: You can occasionally have moments where you have no monsters on screen at all as your defenses are close to the monsters. Consider sending some early waves for extra mana and XP.
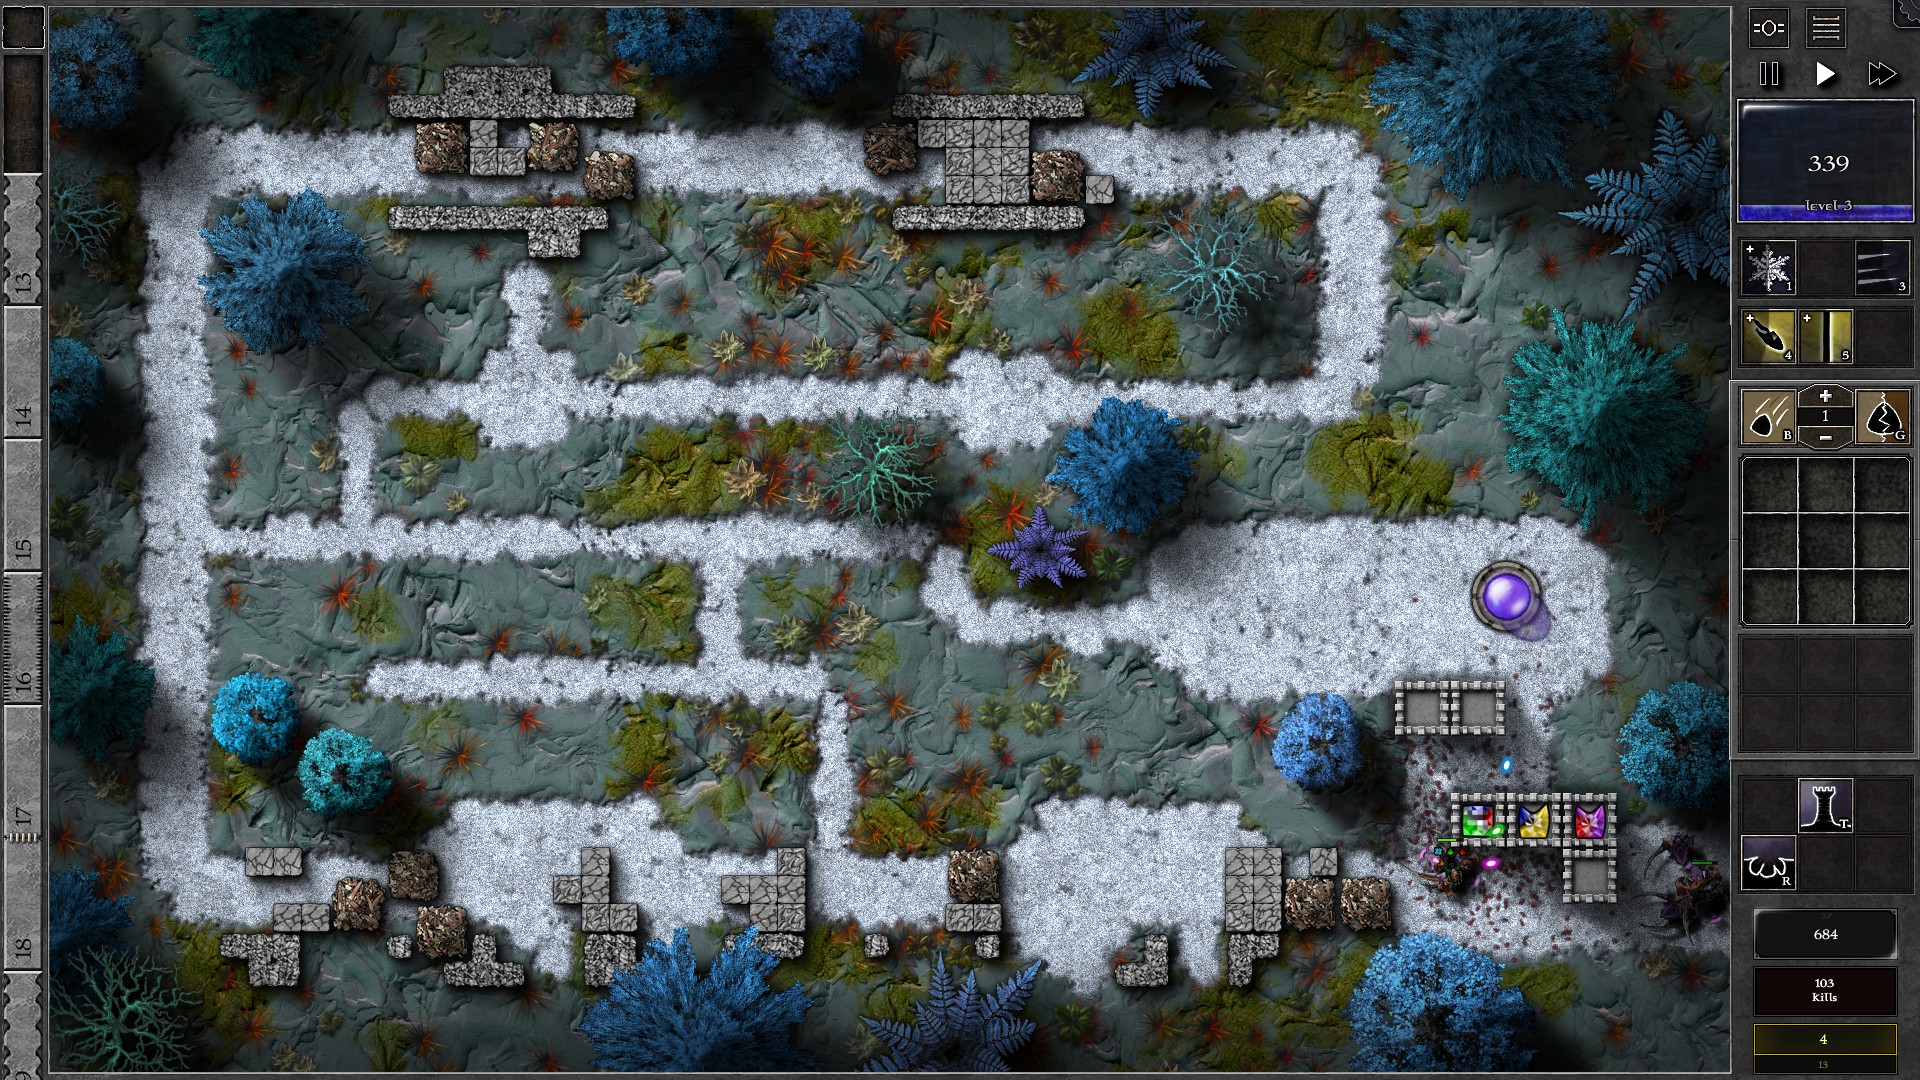
At w11 2 Wizard Hunters will arrive. Immediately cast 2 Ice Shards and 1 Freeze spell on the Hunters, and build 2 towers closer to the entrance. Use Beam on the 3p1r gem to quickly deplete armor from both Hunters (click on the Wizard Hunter, and use direction keys to cycle selection through each of them until they all have no armor) and start focusing on the Hunters with all the gems to quickly defeat them. (At this point only giants should be around so you can actually not worry for a while). After defeating the Hunters, continue your defenses and upgrade the 2gbr gem to g4 as you gain enough mana. At w17/18 linked wave you may need some Freeze spells and maybe Bolt to help minimize leaks. After w17/18 start saving up spells again as premonitions start appearing again. You should also gain enough mana to upgrade the 3p1r gem to g5 at around w20-21.
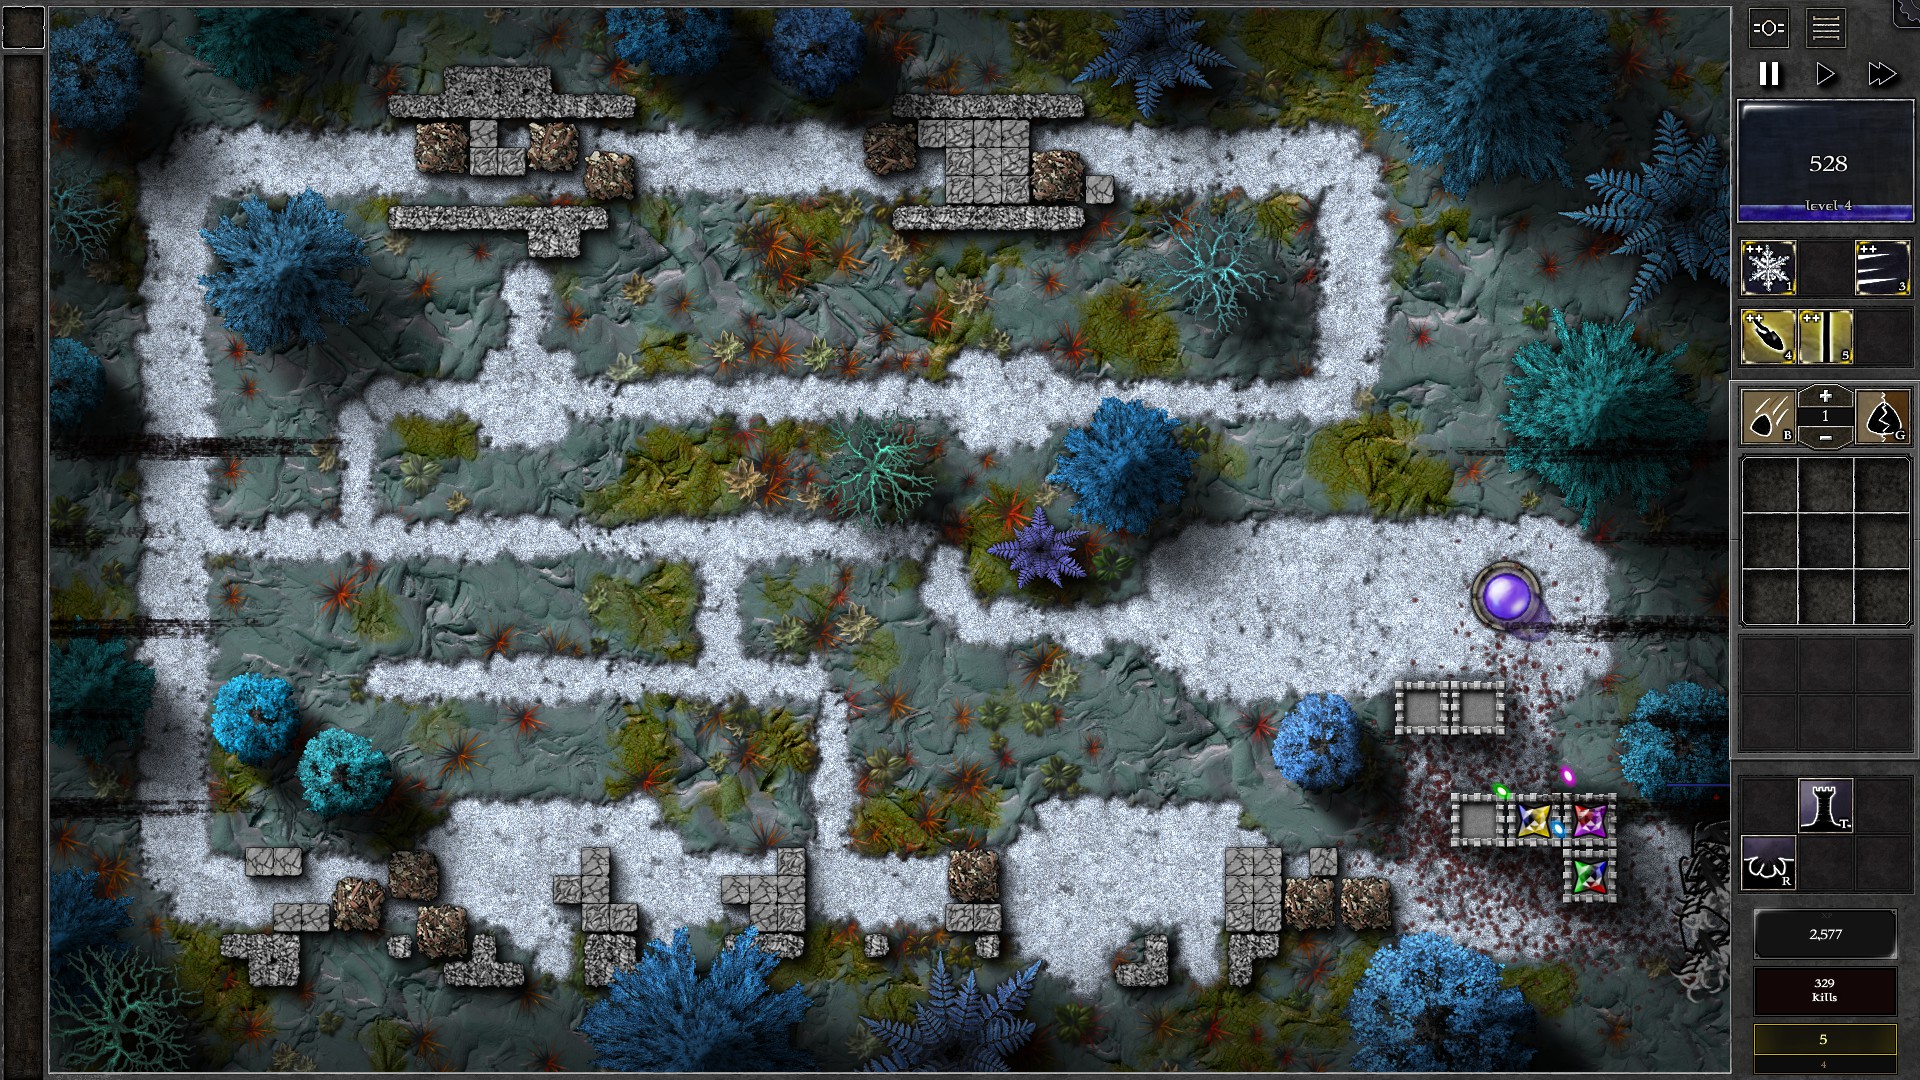
3 Wizard Hunters will arrive at w22. Take on the Wizard Hunters in the same way as the w11 Hunters (You can defer the 3p1r upgrade to when you start beaming armor off the Hunters). Upgrade the 3y1b gem to g5 (at around w26) and start saving spells again for the 3rd wave of Wizard Hunters. You may also gain enough mana to upgrade the 2grb gem to g5 before the final wave. The final wave is accompanied by 4 Wizard Hunters which is the same deal as the previous groups, with the added benefit of being able to spam all enhancement spells on other gems as well as have the strike spells also affecting the last wave giants. The 3 g5 gems should have no problems taking down the Hunters and giants.
088 – Field H1
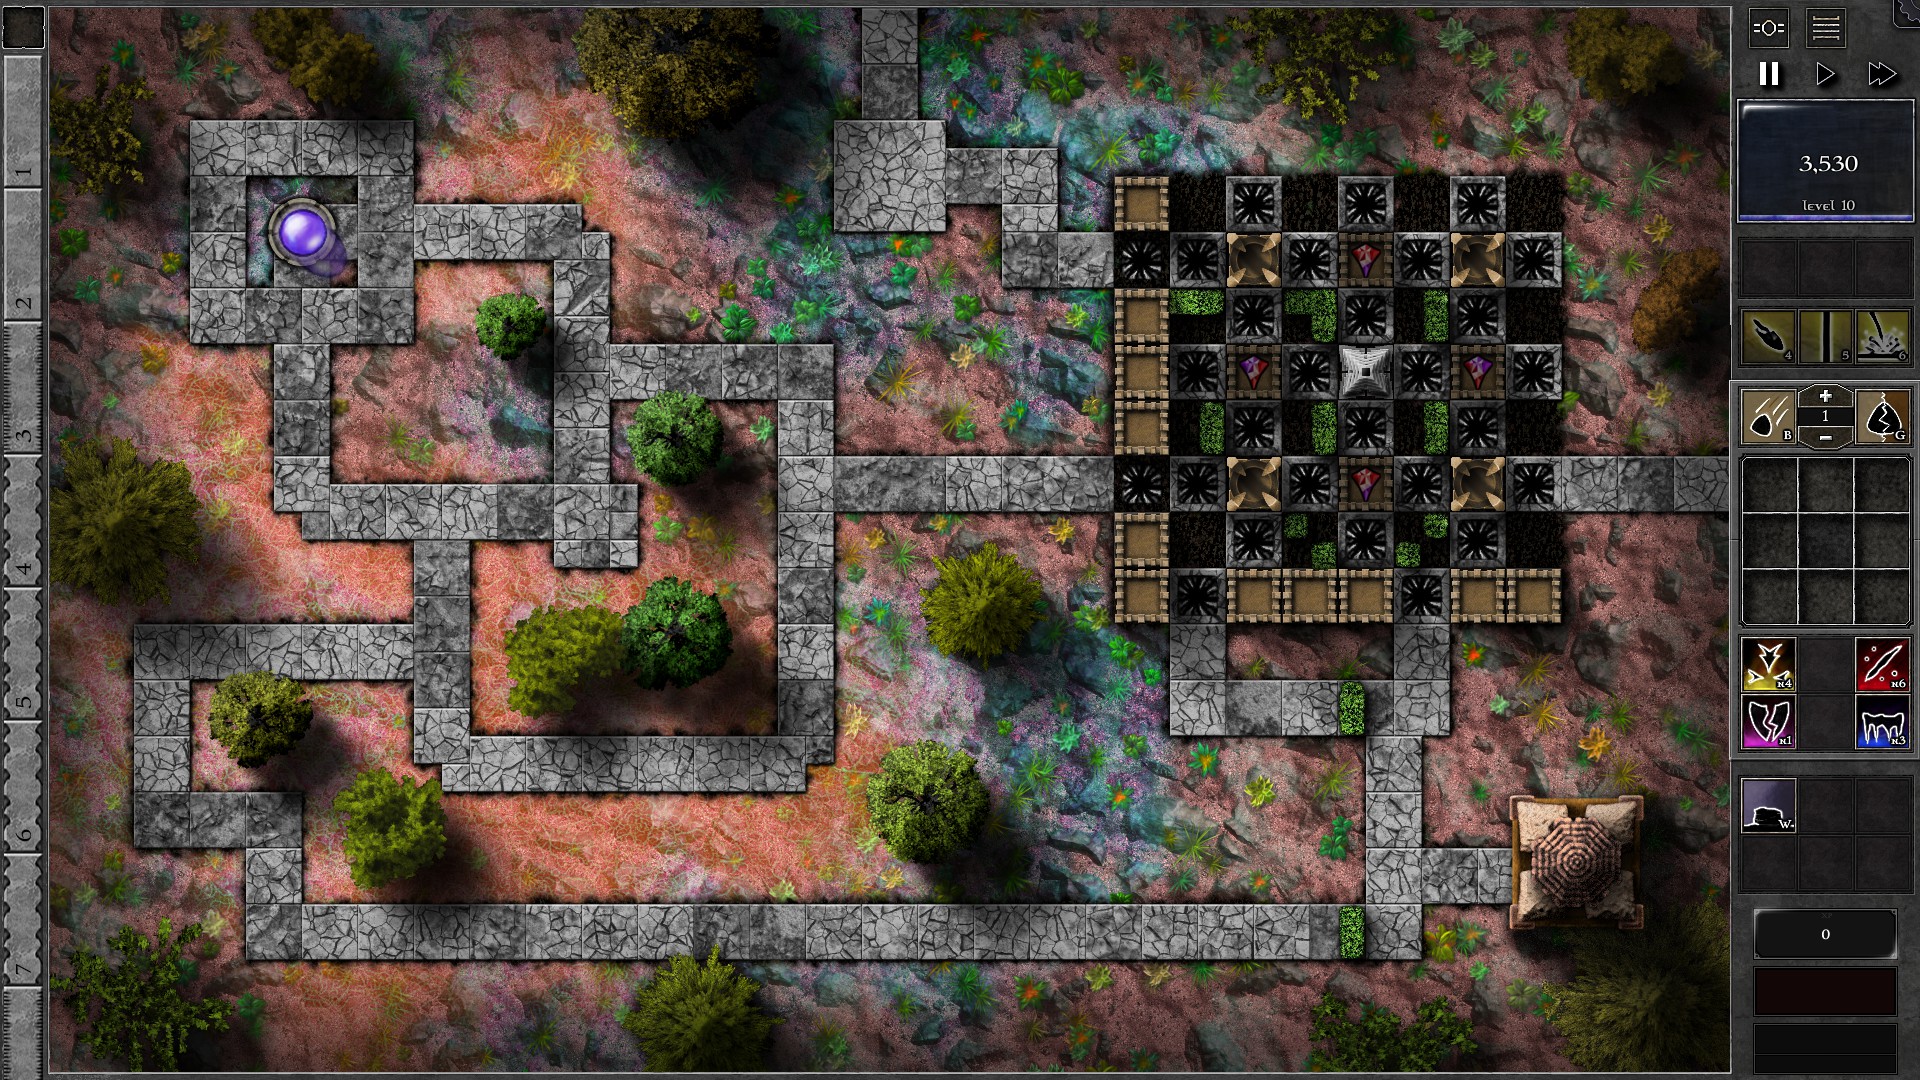
Setup the the field as shown with 4 g7 p/r gems. Your gems should have no issues killing through the first 10 waves of monsters. Once you get a Bolt charge, move one of the g7 gems close to the Monster Nest and use Bolt to destroy it; This will help you with the later waves when you need to juggle the monsters.
Your gems will start to struggle to kill monsters at around w15, where you will probably have already accumulated 15-20k of mana. As monsters leak through the “Chessboard”, start building extra walls to lengthen the monsters’ path. In addition, change your gems’ targetting priorities to “Least HP” to focus on taking down swarmlings first. Use your enhancement spells liberally to help defeat the swarmlings. You should have enough mana to banish a decent amount of leaked Giants once.
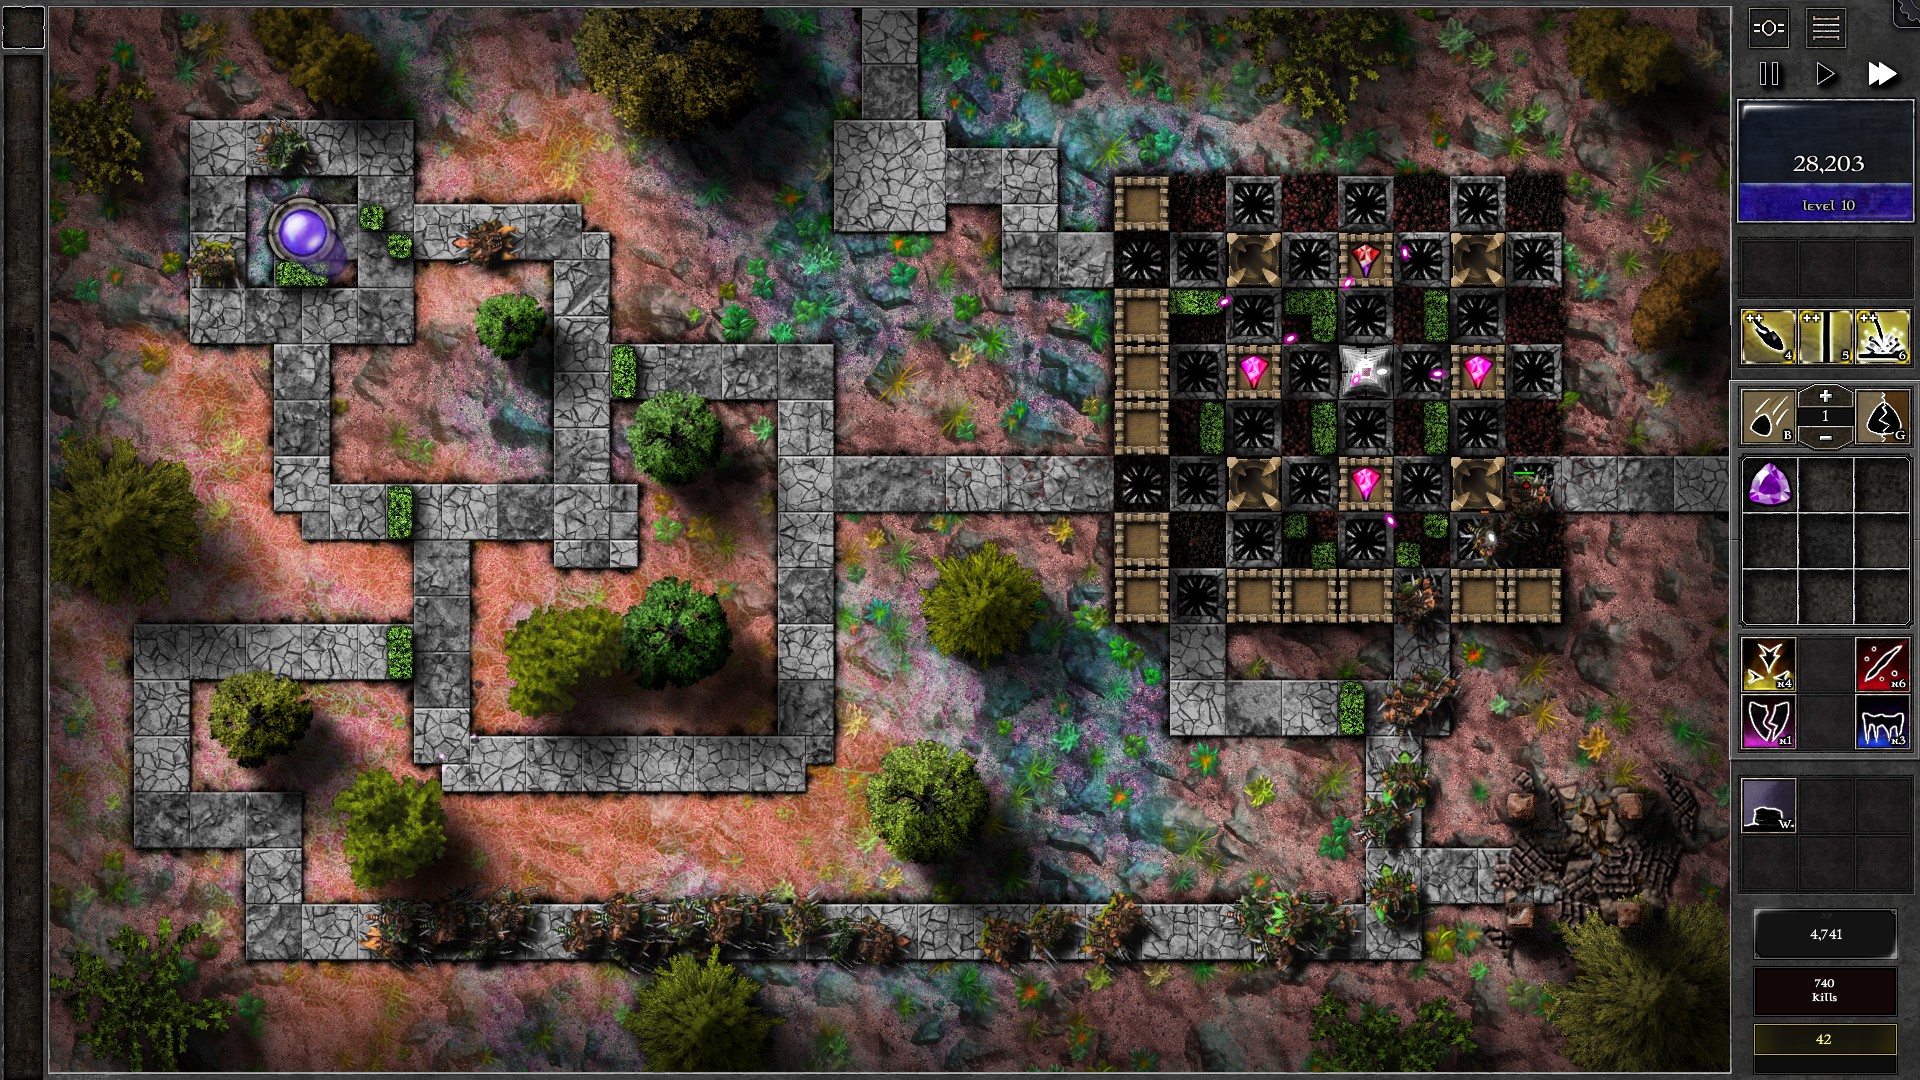
Once the swarmlings are mostly defeated, you can now focus on the giants. Use juggling technique to force the giants go back and forth through the “Chessboard”. A good point to juggle is the intersection connecting the long path at the bottom, forcing the giants to trek through the “Chessboard” and the long path at the bottom to reach your Orb. With all the demolitions for juggling, you should be able to defeat the giants with the 4 g7 gems.
089 – Field H2
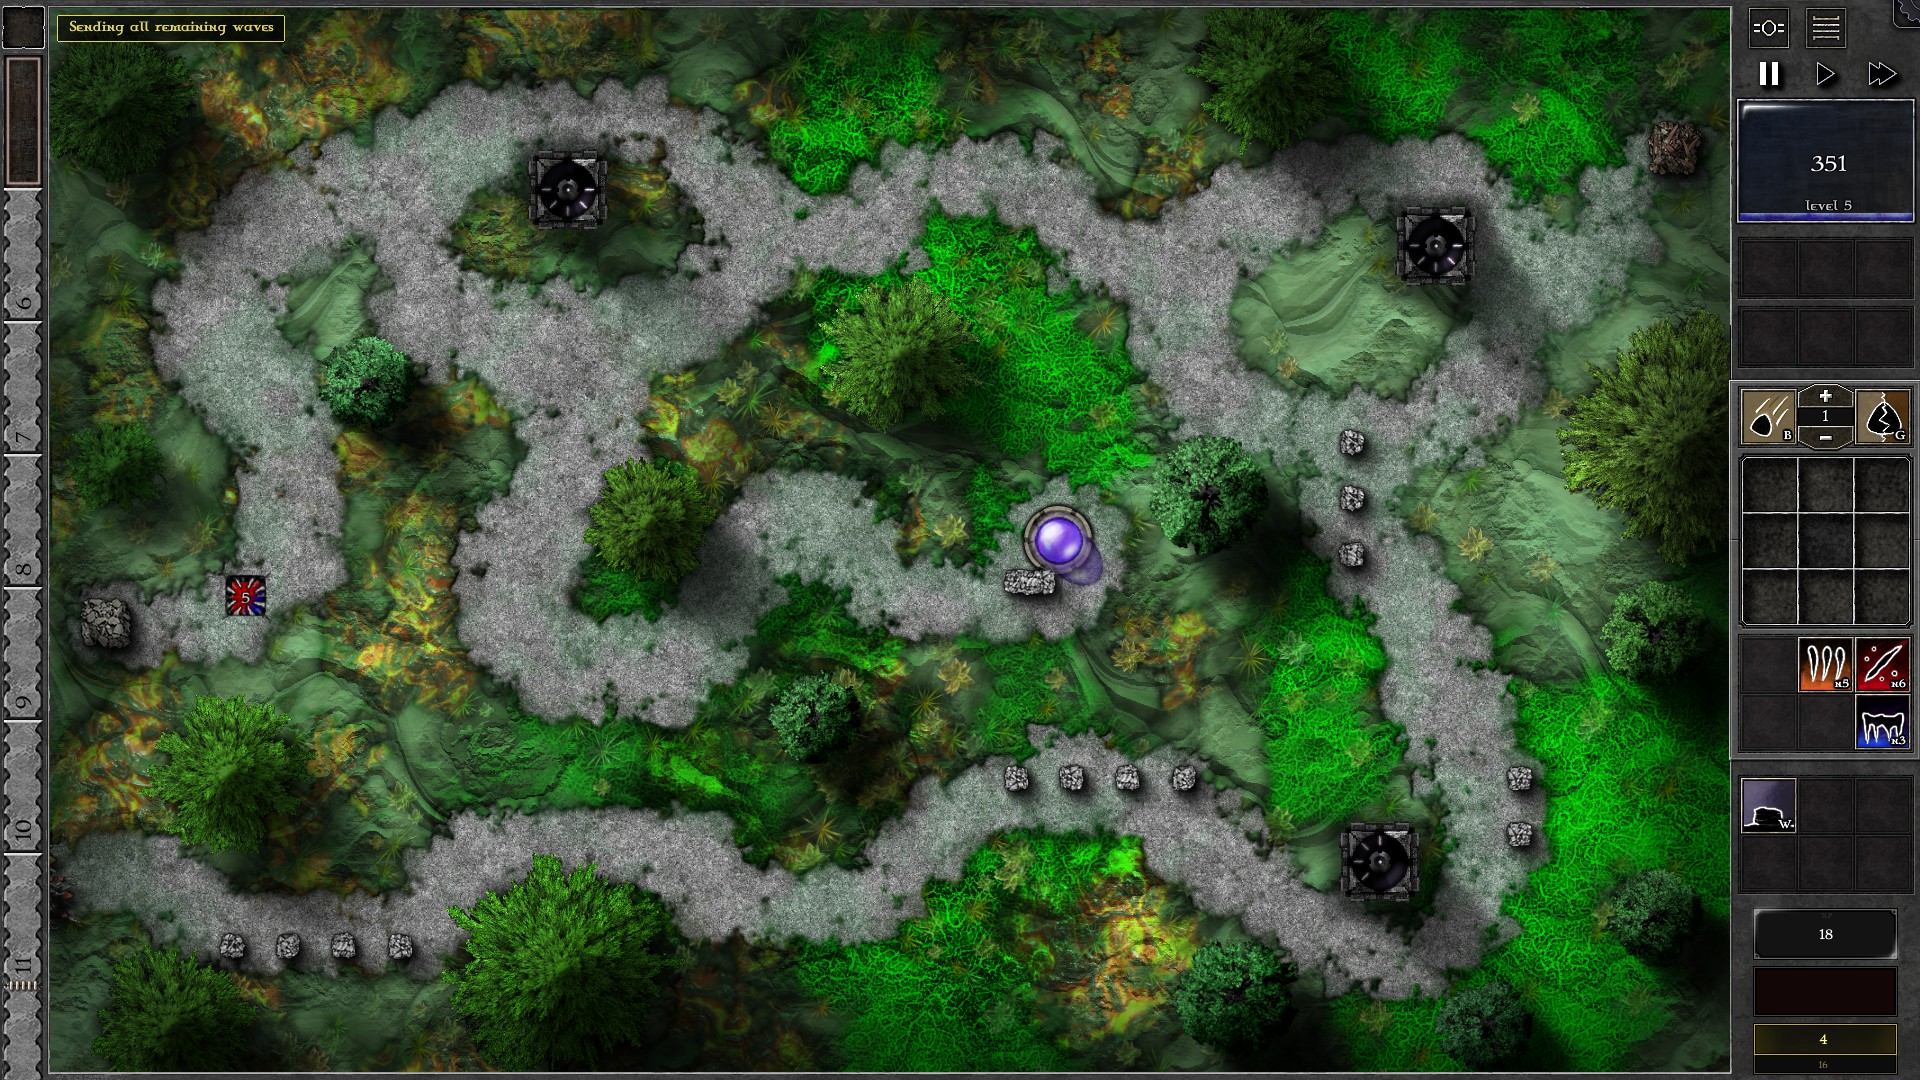
This is a rather annoying Trial as requires a lot of action and micromanagement. The random monster speed also complicates the approach. Build the walls as shown in the first screenshot first, along with a g5 r/b gem inserted into the trap. You need the gem in trap to power up the Shrines. Send all 24 waves early and you should soon have 92 giants on screen. Wait until your natural mana regeneration (with 80x multiplier) give you enough mana to upgrade the trap gem to g6.
Phase 1: The first 6 Shrine Strikes
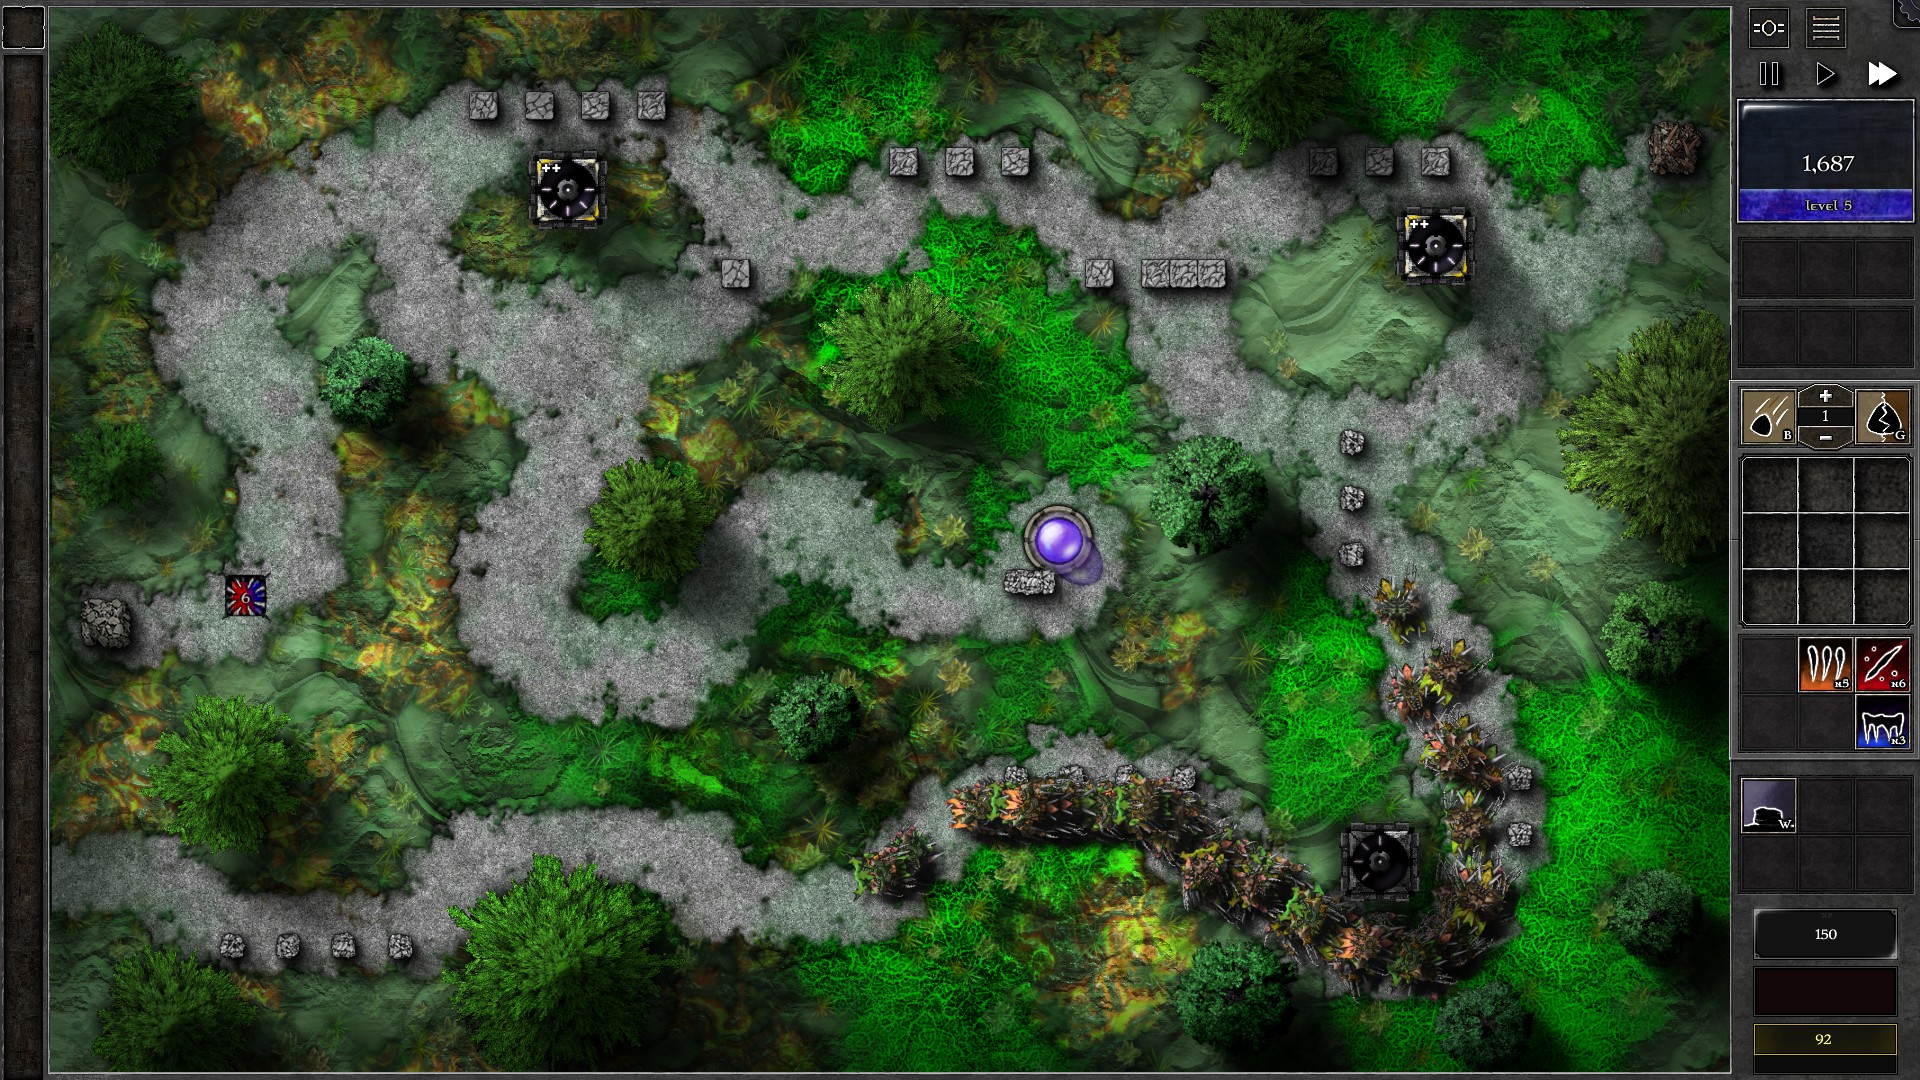
All 3 Shrines should be fully charged after you send all waves early. After you upgraded the gem to g6, activate the bottom right Shrine twice; the 2 shrine strikes should hit all 92 monsters. Build additional walls (see megalithic walls in second screenshot) and start gathering the monsters in the top right roundabout.
Use your demolitions to juggle the faster monsters to keep them inside the roundabout while slower monsters enter it (demolish the 3 square of megalithic wall and block the path with new walls to force monsters go clockwise, then demolish the new wall again and rebuild to force monsters go anticlockwise) Juggle until you have no more demolitions left (which should restore the same wall configuration as in the second screenshot), then activate the top right Shrine twice. Both activation should hit all 92 monsters. Let the monsters go down the path until they are all within range of the top left shrine, then activate it twice to hit all 92 monsters again. All monsters should have taken 6 shrine hits by now.
Phase 2: The 7th-9th Shrine Strikes
NOTE: From now on the random monster speed start to affect the exact timing for Shrine activation. Proceed with your own judgement based on the situation, but you need the 7-9th Shrine strikes hit as many monsters as you can.
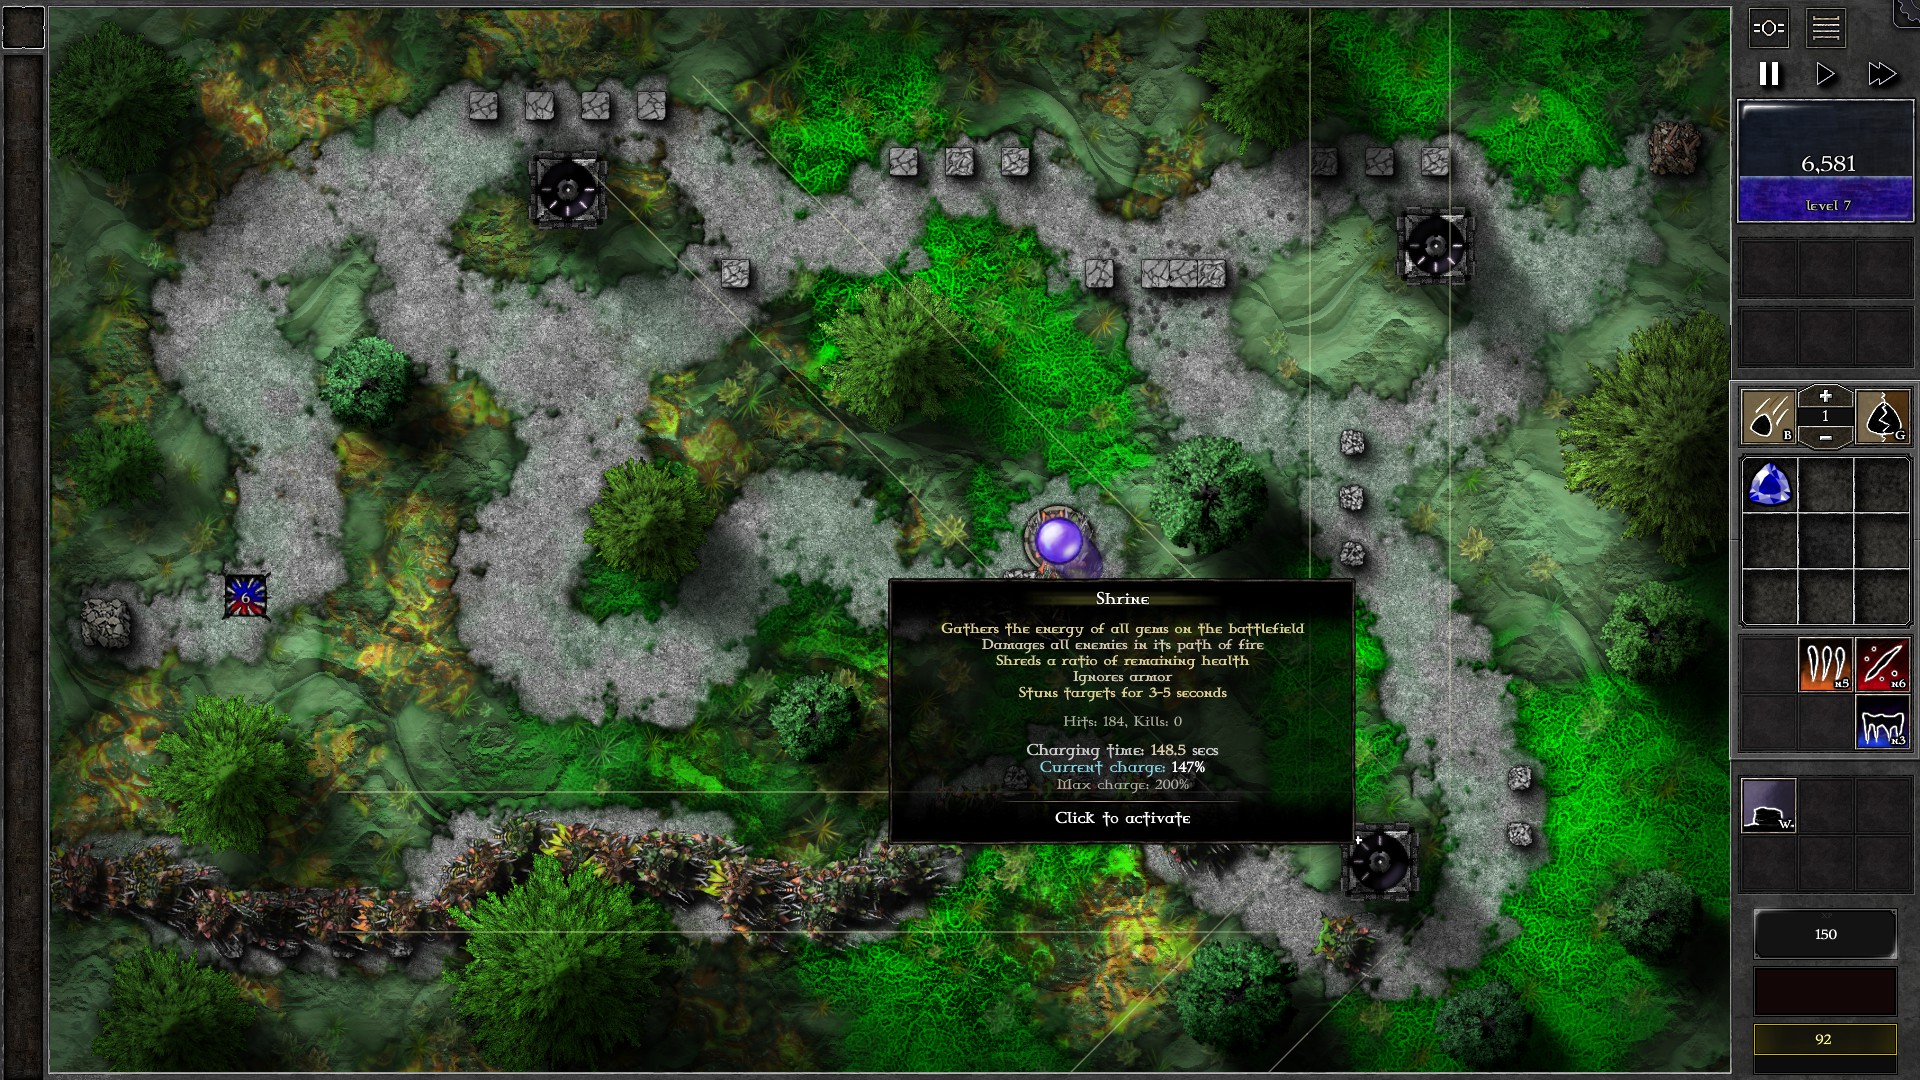
Drop 10 g1 gems into your Orb to reduce banishment costs before the monsters enter your Orb. As you banish the monsters (for the first time), the lower left shrine should be charged. Wait until the first banished monster is about to leave the range of the SW strike of the lower left Shrine, then activate it. Hopefully you should be able to hit at least 80 monsters this way (with some luck you can hit all 92). As the other 2 Shrines charge up, activate them while trying to hit as many monsters as you can (ideally you should get more than 150 total hits from both shrine strikes), but keep in mind that you should activate both Shrines before you banish any monsters a second time.
Phase 3: The 10th-12th Shrine Strike
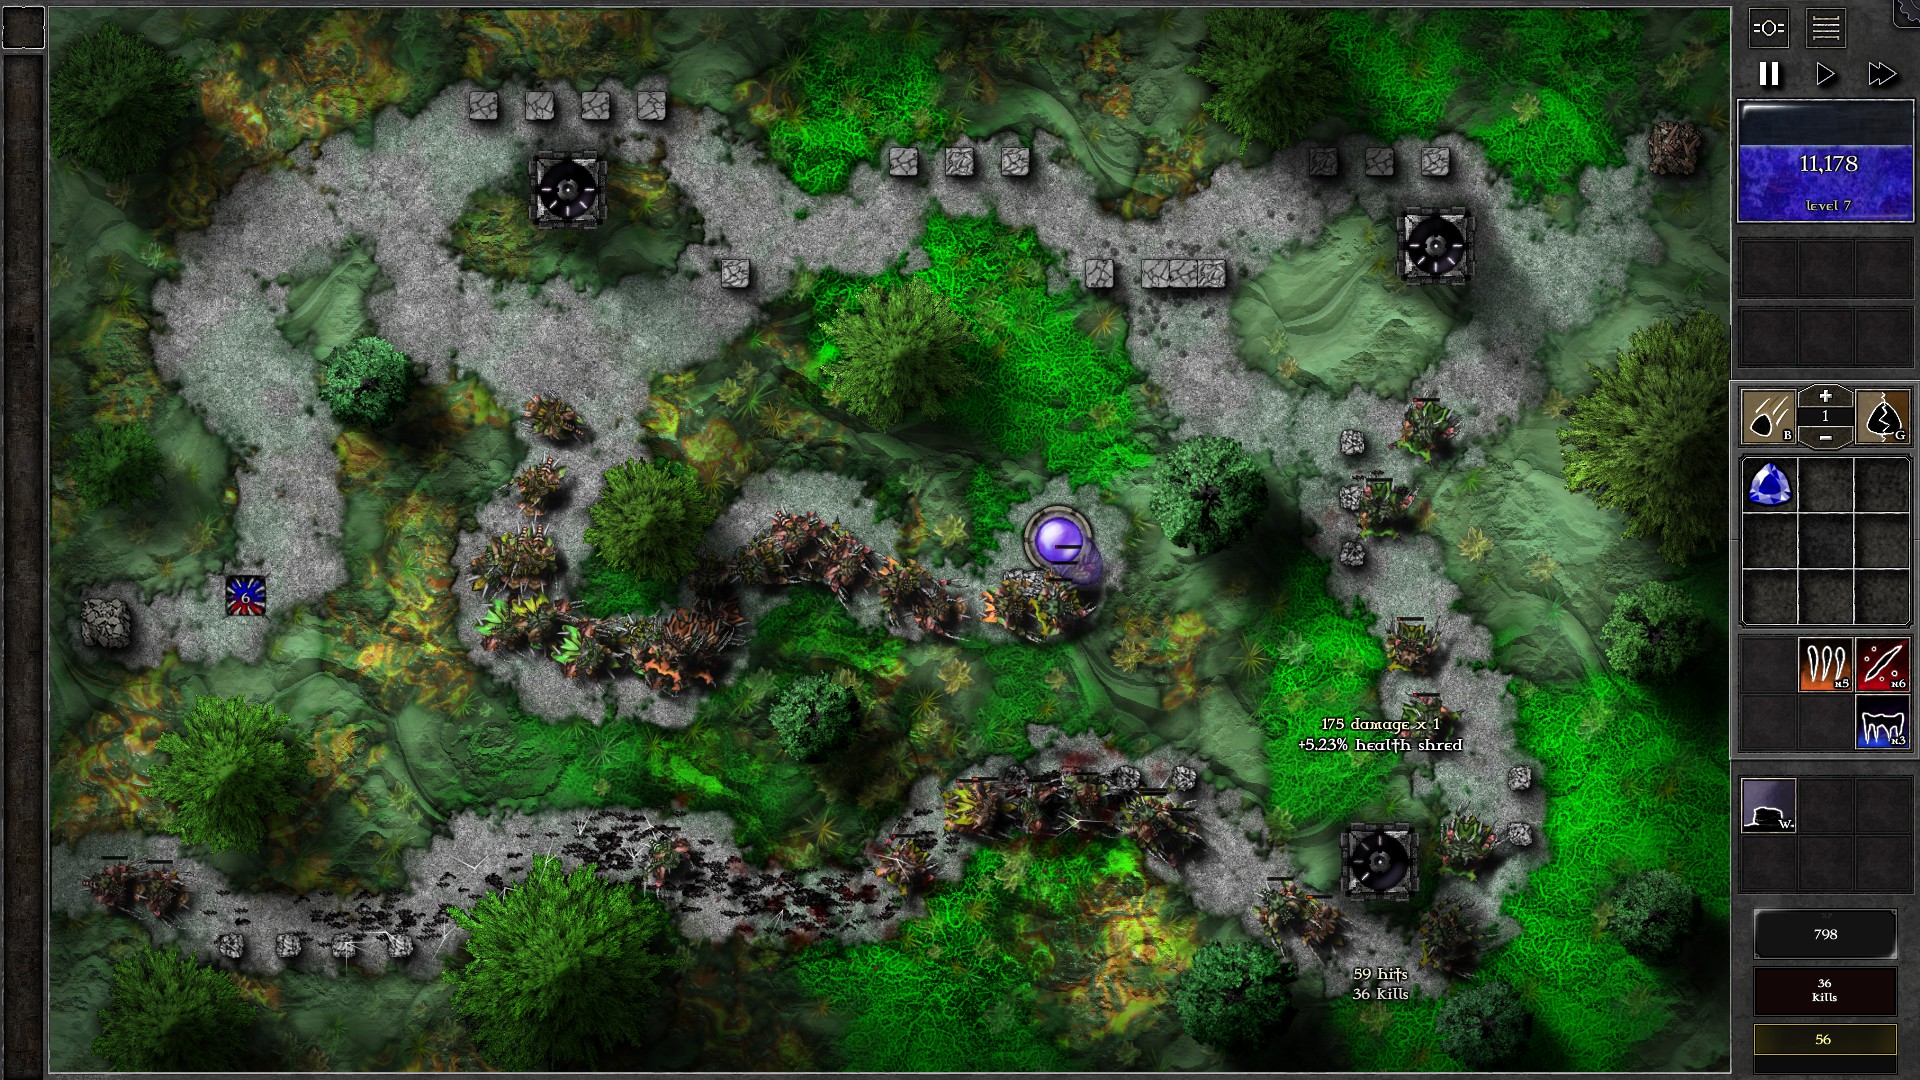
While you start to banish monsters a second time, the lower left Shrine should be charged again. However, monster speed starts to spread the monsters apart farther. Try to do your 10th strike before the first monster enters the top right roundabout and cover as many monsters as possible. The 10th shrine strike should start to kill monsters (depending on how you time the 7th-10th strike, this can kill from 10-30 monsters or even more with great timin)g. Meanwhile, your mana will start to see a sharp decrease due to 2nd banishment but you should be able to withstand this.
After the 10th strike, start looking for severely weakened monsters that are front running (monsters with <150 HP left). You can spam g1 gem bombs to kill off these monsters to prevent them from being banished again and stop them from affecting your Shrine strike timing. Each gem bomb can deal about 10 damage including gem wasp stings. Meanwhile, start looking for opportunities to use the other 2 Shrines for the 11th and 12th strike. After the 11th and 12th strike, you should have killed at least half of the 92 monsters as long as you timed the 7th-12th strike well.
Phase 4: The aftermath
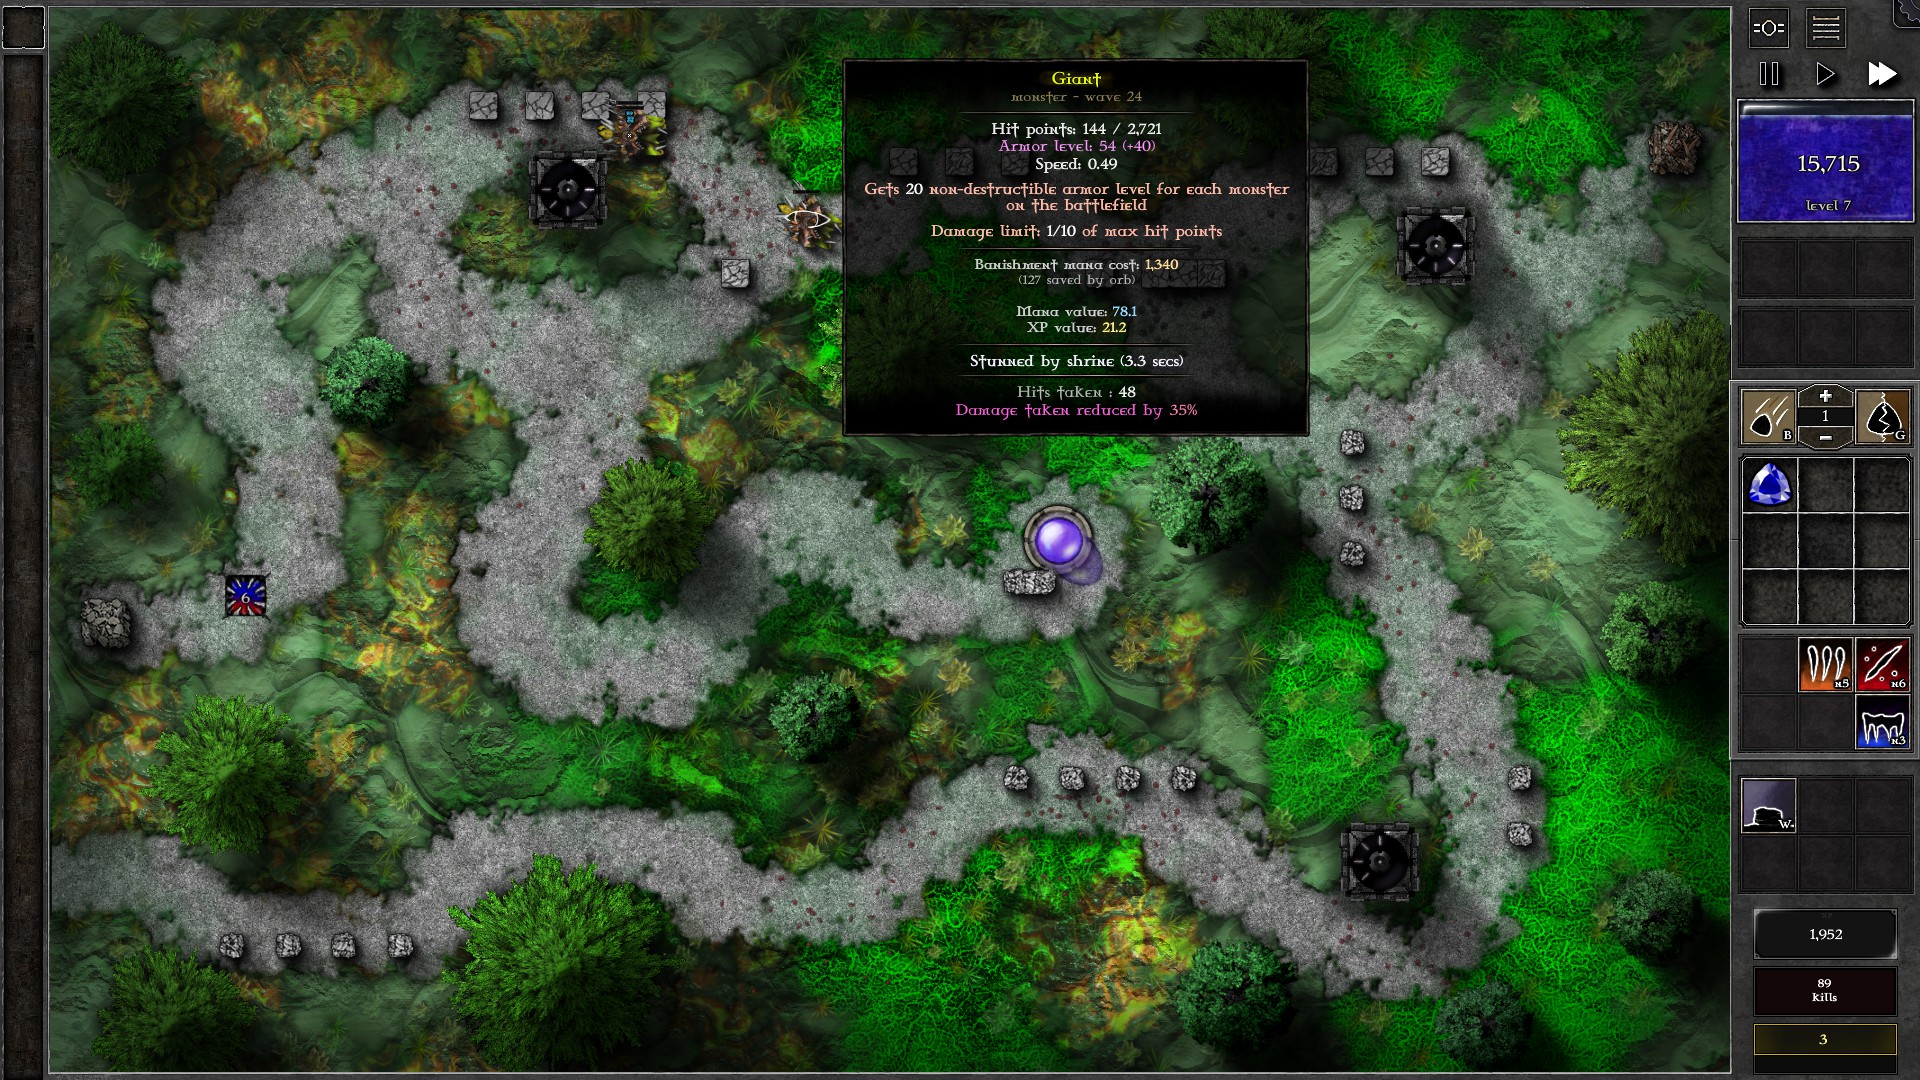
After the 12th Shrine strike, you will probably have more mana both from regeneration and the extras from killing monsters. With the monster count greatly reduced and most survivors heavily injured, you can be more aggressive on gem bombing. Continue using Shrine strikes to weaken the late wave monsters which may still have hundreds of HP left, and bombard the monsters with gem bombs. You should be able to kill the remaining monsters with gem bombs without losing too much mana on banishments at this point.
090 – Field H3
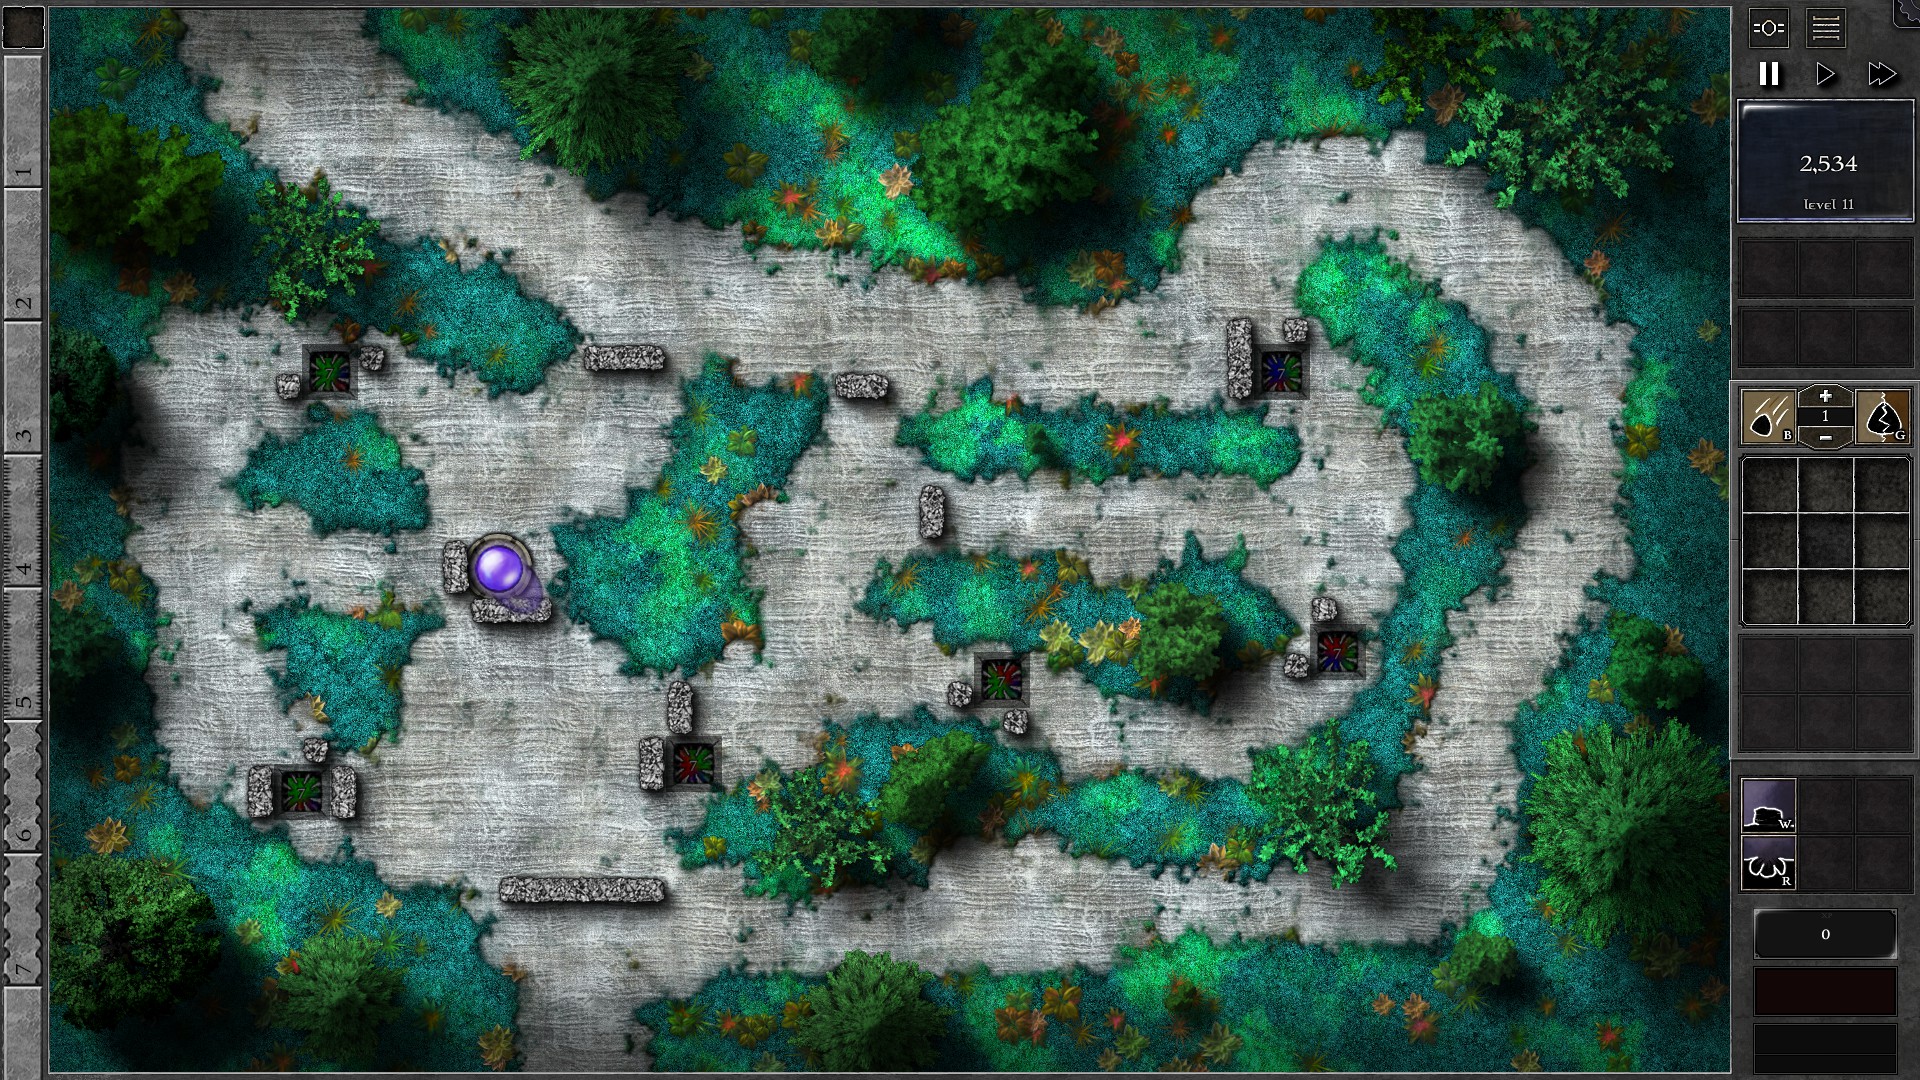
Create traps and walls to setup the field, and duplicate the g7 gem given at start to fill in the 6 traps as shown. The traps should take care of the monsters with some occasional banishments (especially giants which may require a second round of trap attacks to kill).
WIth the generous amount of mana from monster kills, you will be able to afford some gem upgrades. Upgrade the first 2 gems in the trap path to g8. You should have the 2 g8 gems by w25. At this point you will start to see more banishments. Consider setting the trap gems to target “Least HP” and let the monsters be banished while you stop upgrading more gems.
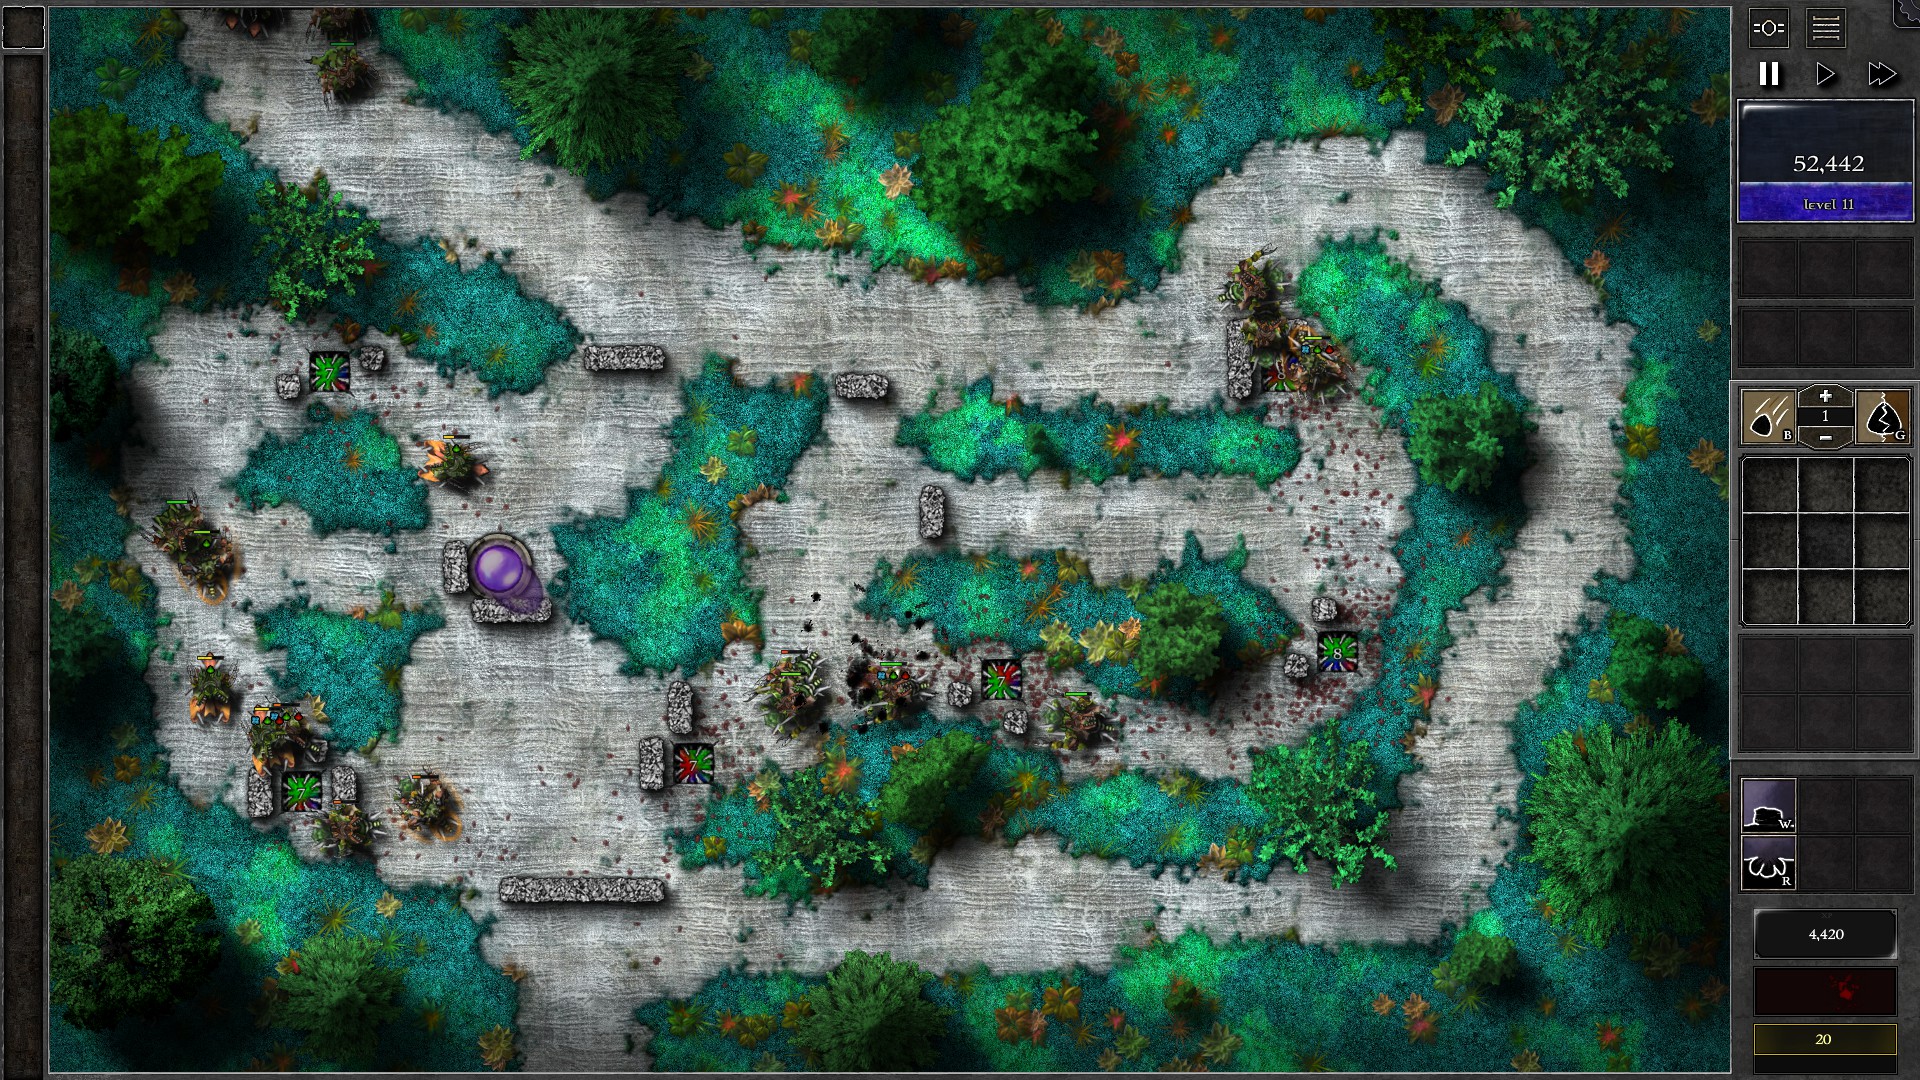
Watch out for the w32 giants that spawns beacons on death; as you have no way of destroying the Beacons (other than gem bombs which is not worth it), they can stir up the field badly and may ruin your run. You can mitigate the impact of this by using “Least HP” to pick off all reavers and swarmlings first so that the Beacons serve less monsters.
Finally, you can combine your 4 g7 + 2 g8 gems into a g10 gem to follow and kill the giants after killing all reavers and swarmlings.
091 – Field H4
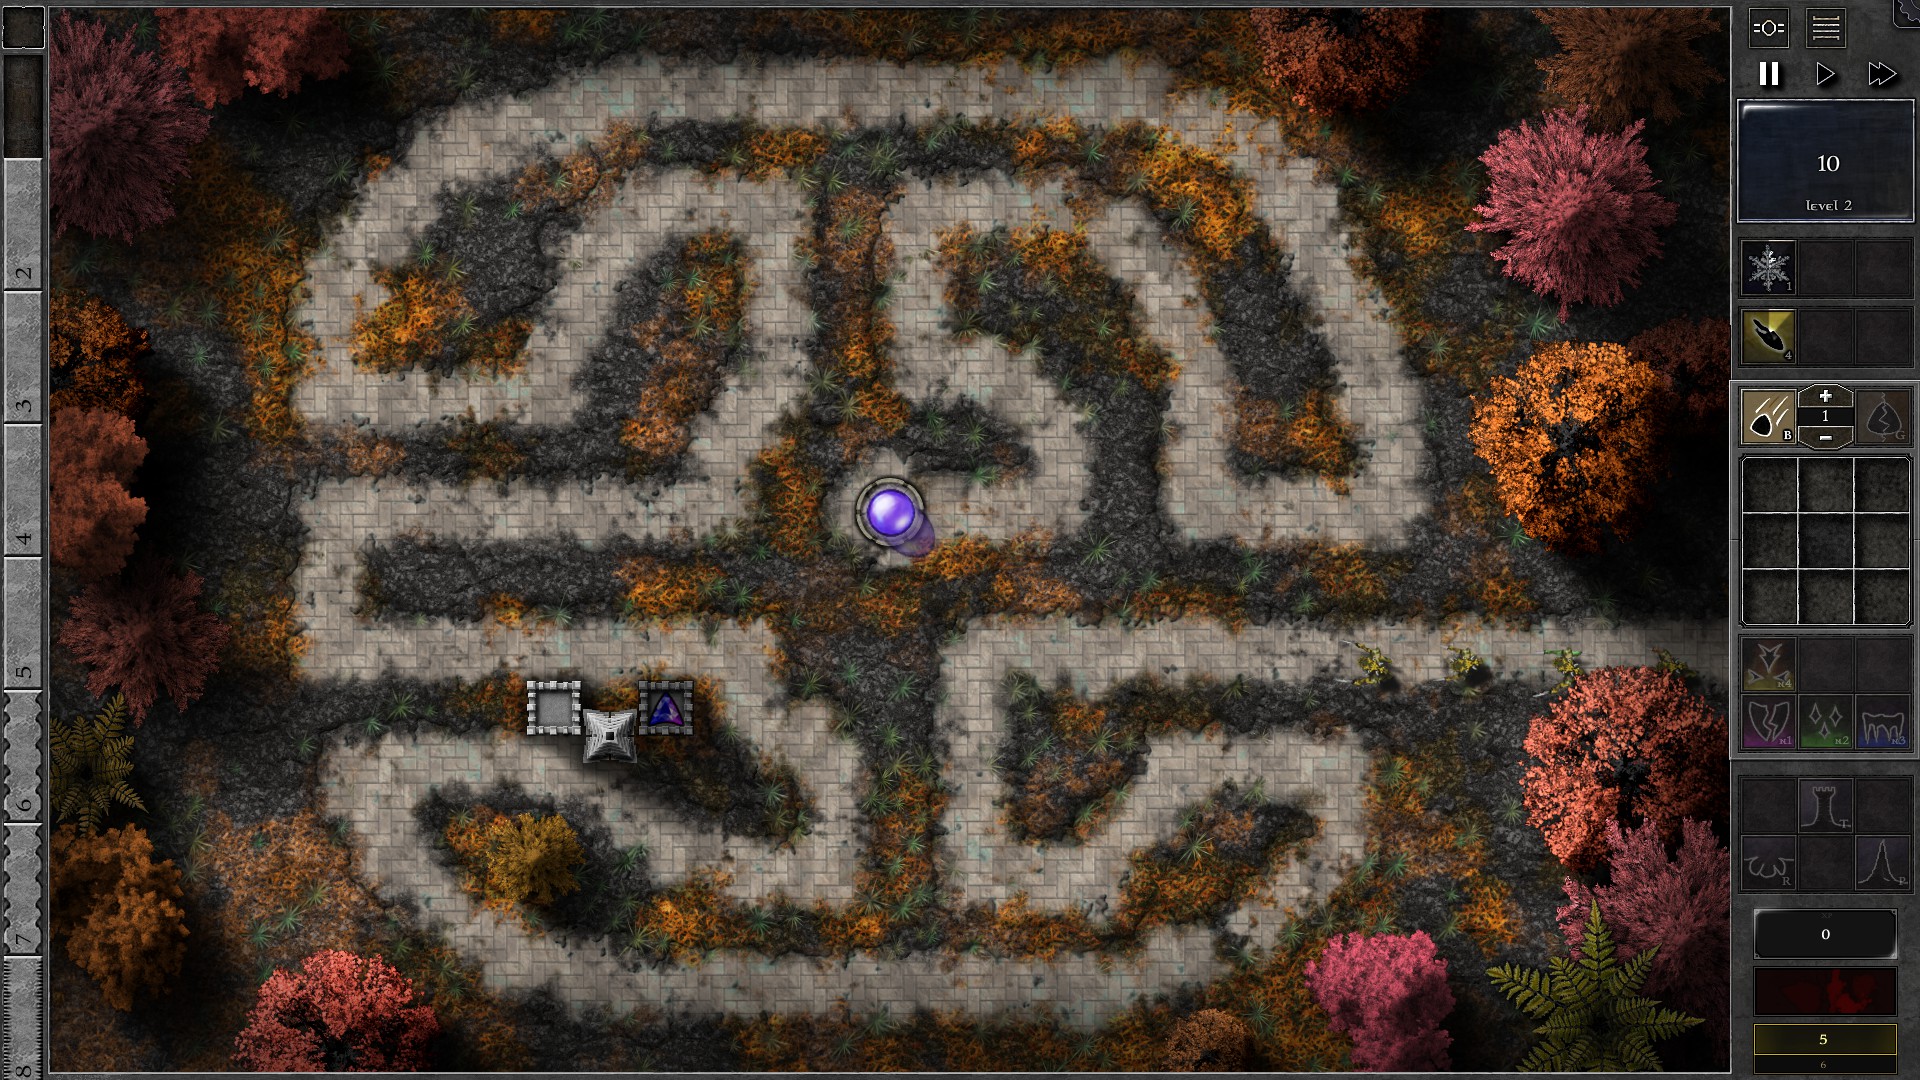
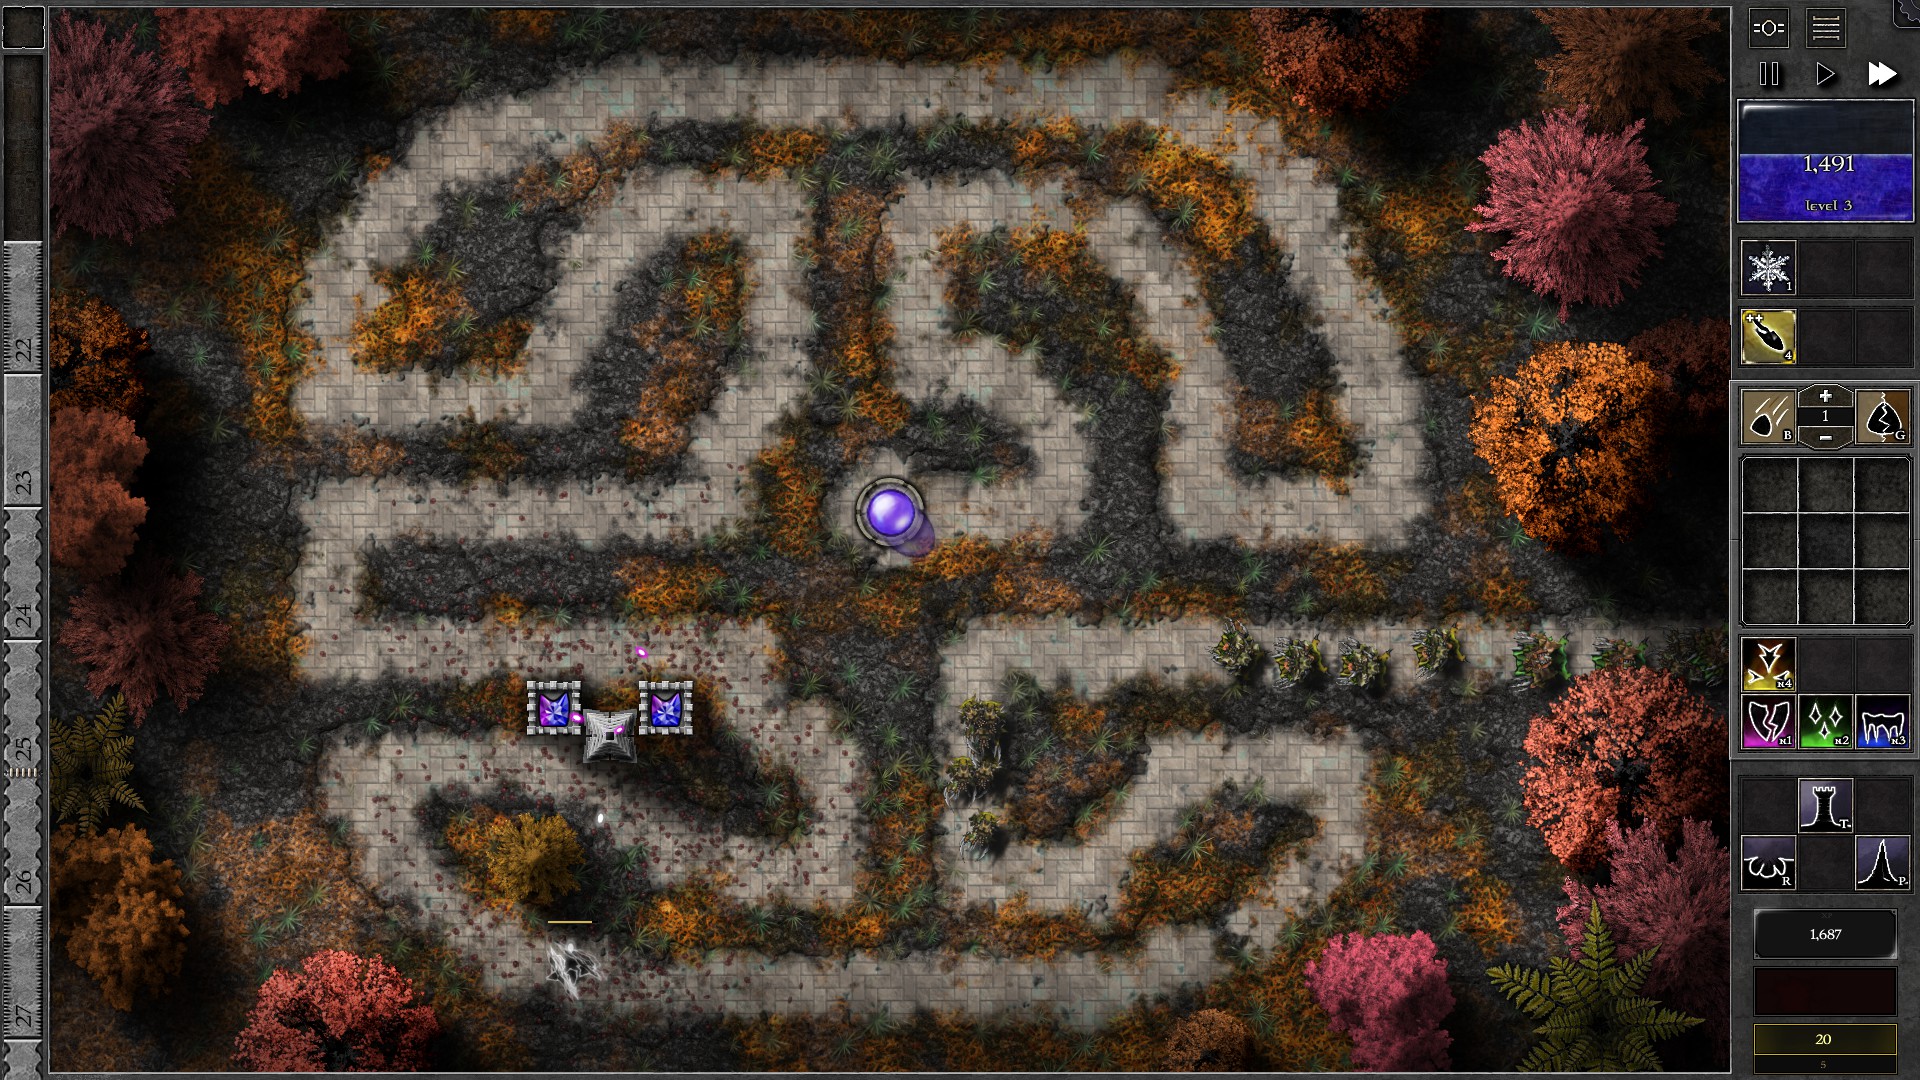
Start the field FIRST and regen 1 mana for a level 2 mana pool, THEN setup the field as shown with a pylon, 2 towers and a g2 p/b gem. Quickly create a second g2 p/b gem and insert into the other tower (doable around w4-5). After the 2 gems are set, start upgrading the gems as you gain mana from monster kills. Use the Bolt and Freeze spells as necessary.
The first Guardian will spawn at w11 which is when you should get 2 g3 gems. By the time it approaches your defense if should be around w20 with both of your gems upgraded to g4. Start firing at the Guardian using your Pylon shots. You can target “Structures” on your gems to make them focus on the Pylon (be careful of normal monster waves, especially swarmling waves). You may also need to target “Specials” on the Pylon to make it fire at the Guardian instead of other monsters, and use Freeze to stop the Guardian.
NOTE: Do NOT leave any gem with Bolt enhancements in “Structures” mode. They will fire the bolts into the Pylon which while increases damage of pylon shots, also makes them take much longer to charge.
At w24 another Guardian will spawn but you will probably be still fighting the w11 Guardian. Meanwhile you can upgrade one of your gem to g5 which will help taking down the w11 Guardian before it leaves your Pylon range. Upgrade the other gem to g5 by w32 and you will soon start to fight the w24 guardian. Apply the same tactics to kill the Guardian. During the fight you will probably gain enough mana to upgrade one gem to g6 at around w36.
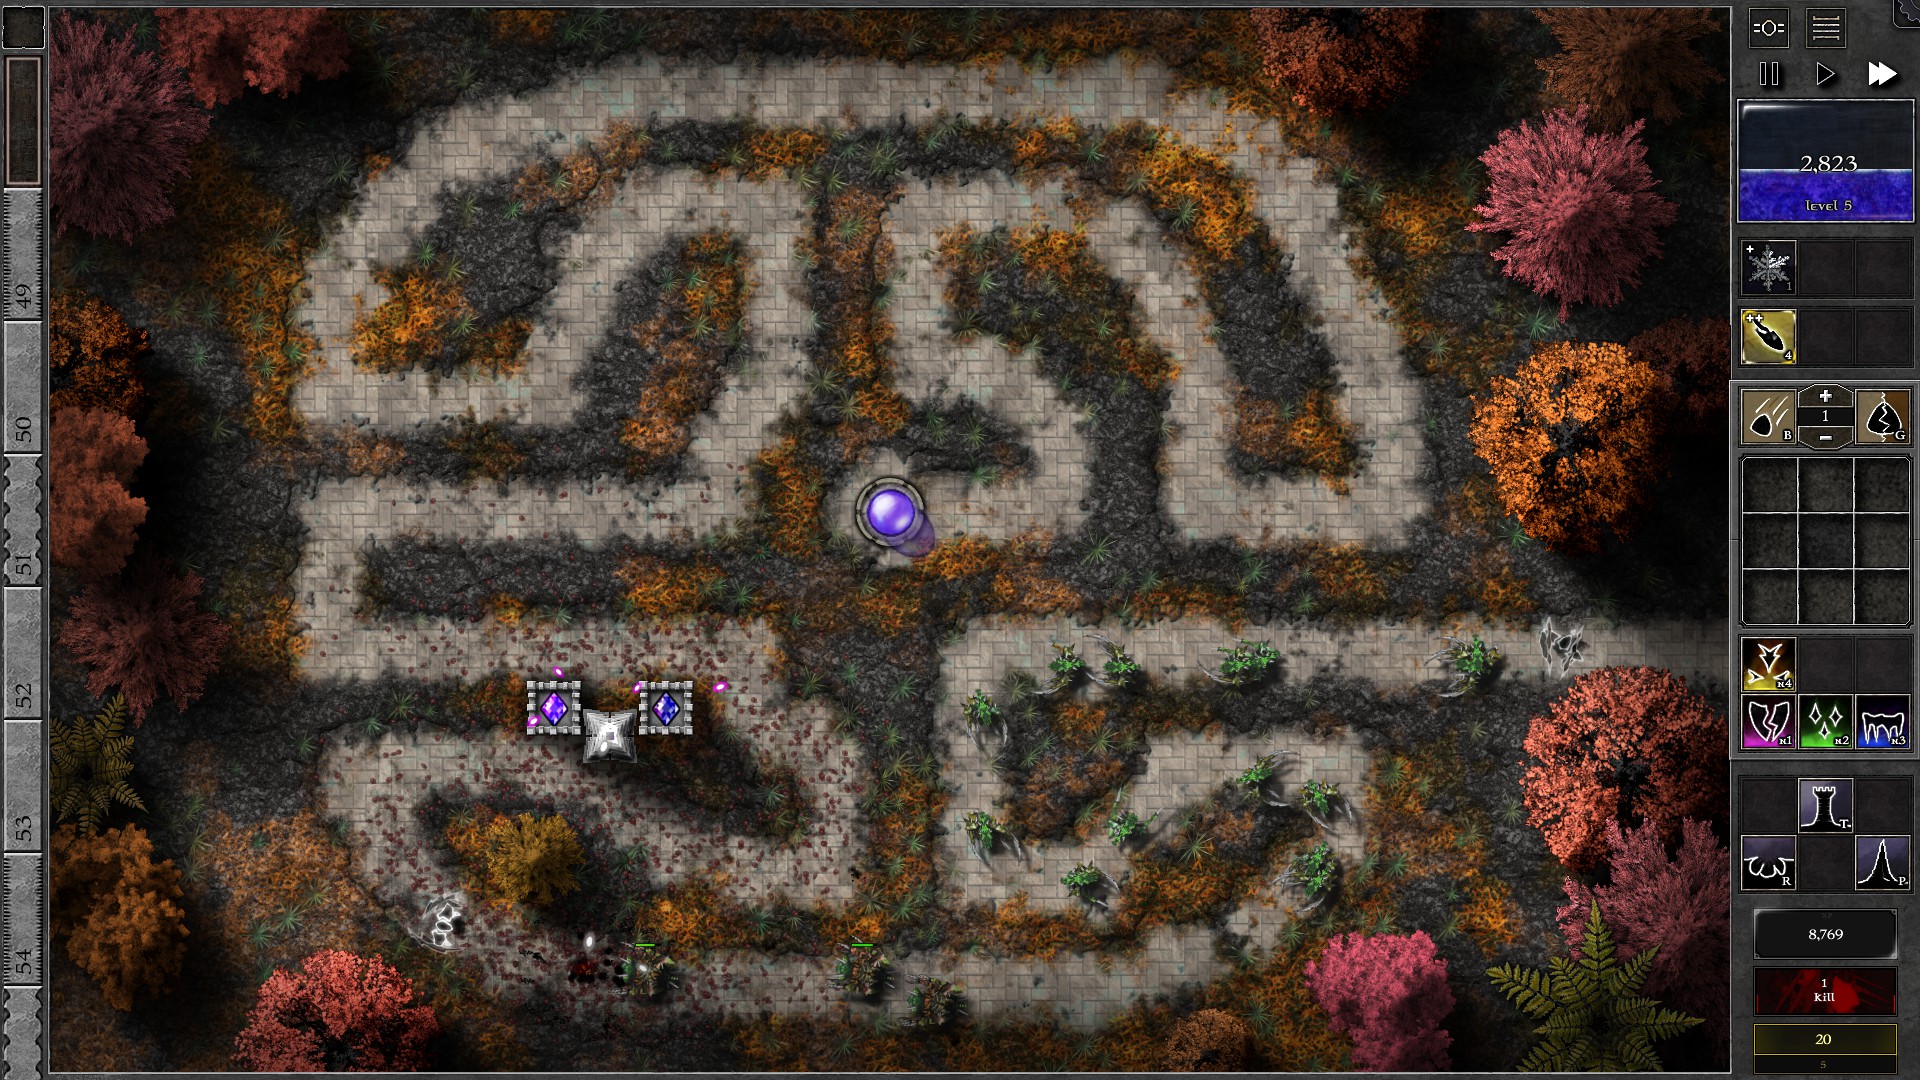
The 3rd Guardian will spawn at w38 as you kill the w24 Guardian. At this point monster armor start to get tougher so you can consider leave the towers to target “Structures” and use the Pylon as your main source of damage. You can still use other targeting priorities while using Bolt to help out, but make sure you use up the Bolts before returning to “Structures”. At around w45, you should have 2 g6 gems and at w47 a 4th Guardian will spawn.
You should be able to kill the w38 Guardian at around w52-55, and gain enough mana to upgrade a gem to g7. You will start to fight the w47 Guardian soon after the g7 gem upgrade. Watch out for the mana burner w59 (kill these 14 reavers with priority) and note that a 5th Guardian will spawn at w60. At w64 you should be able to upgrade the other gem to g7.
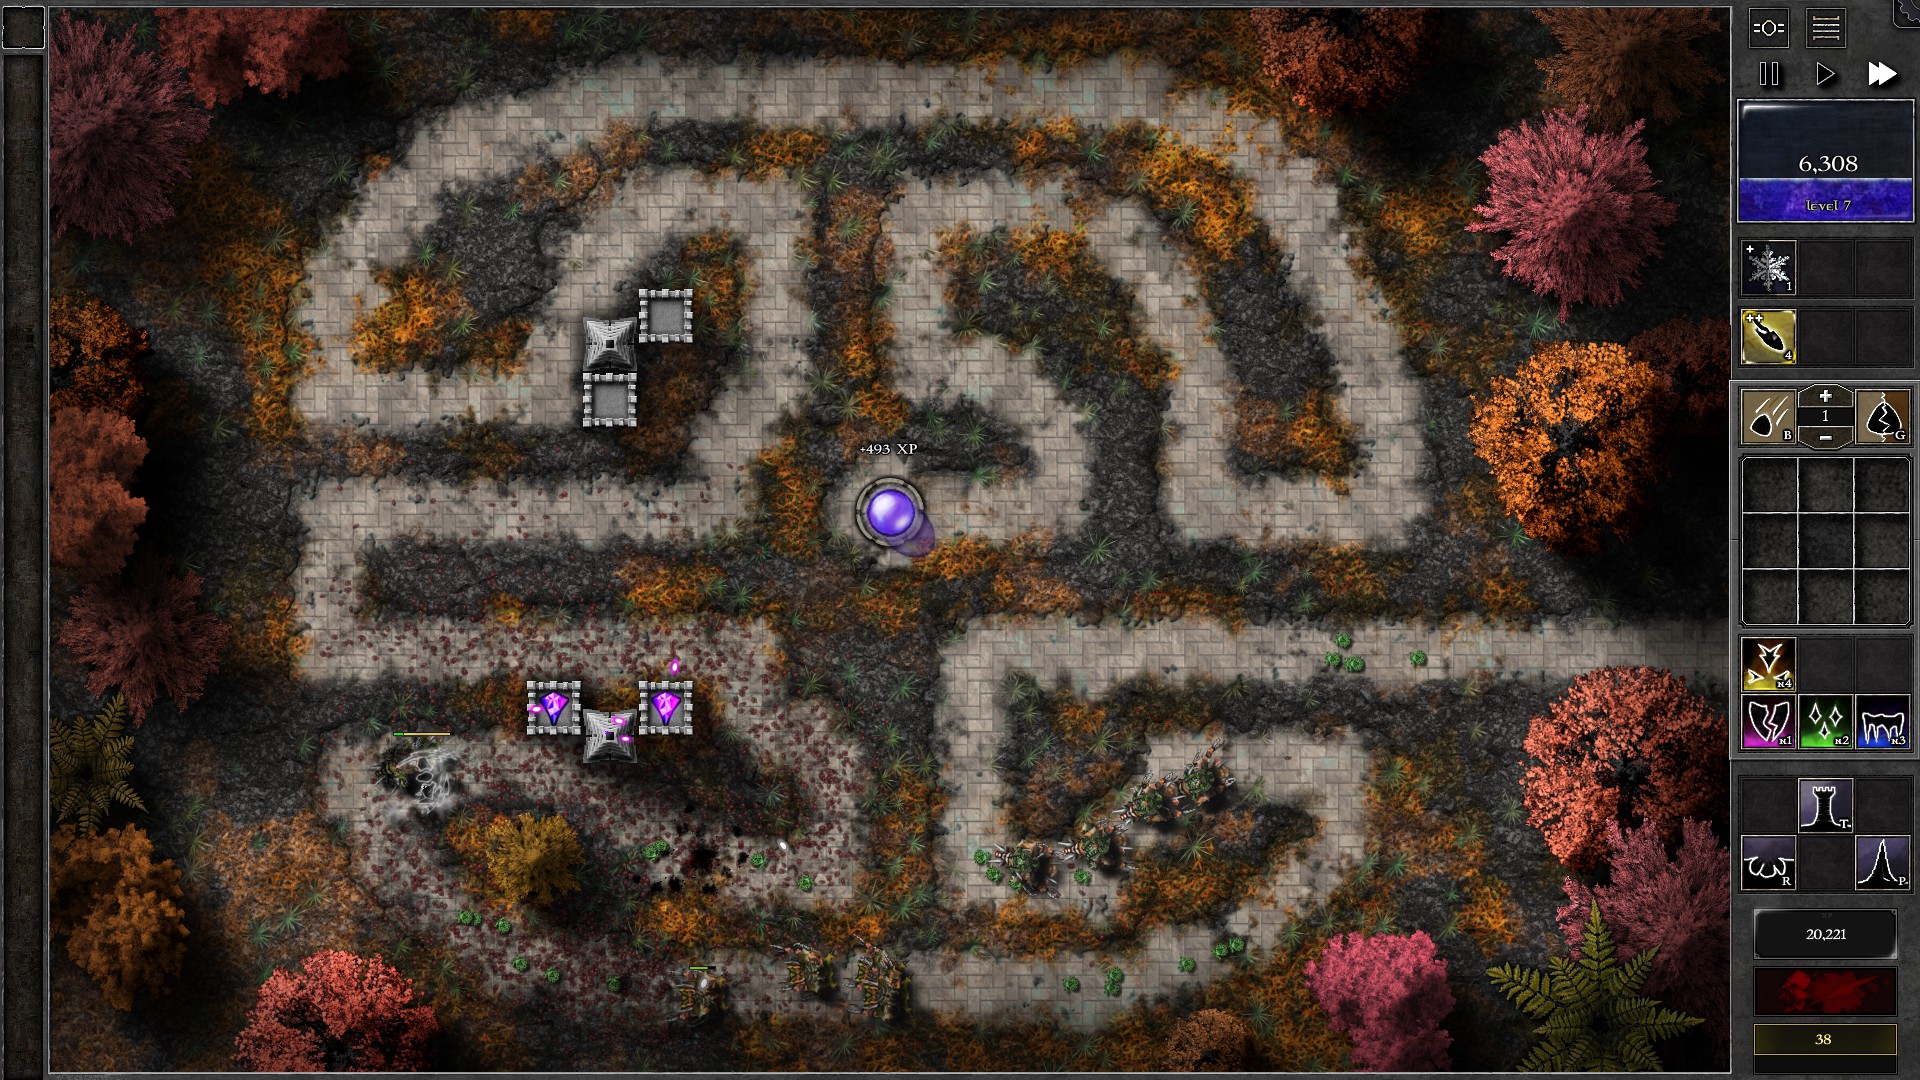
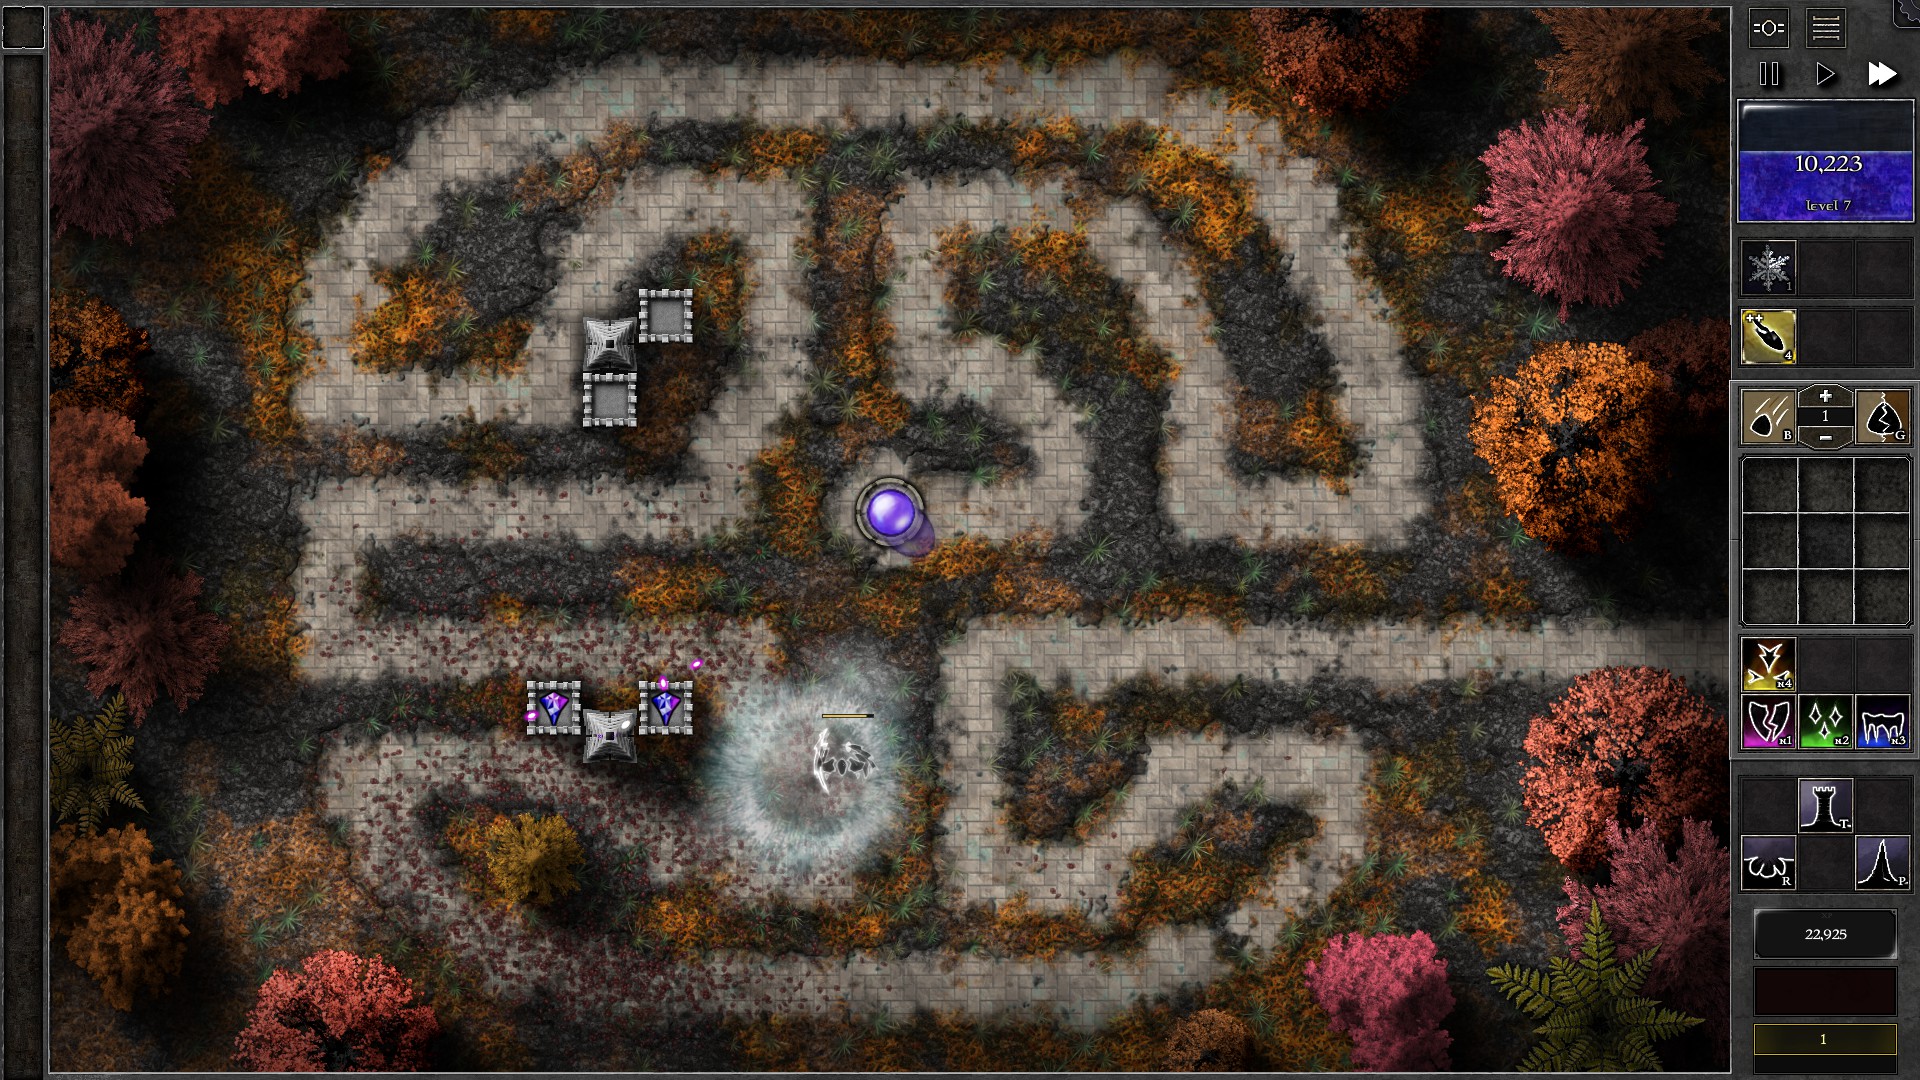
Once you have both gems at g7, start investing into extra sets of towers and pylons. The w60 Guardian has 690000 HP and you’ll need much more firepower to take down the w60 Guardian and it will probably leave your pylon range before getting killed (this extra set also serves as a safety net if you fail to kill the w47 Guardian on time). Focus on taking care of the remaining monster waves first (Freeze the Guardian as you kill through the monsters, then keep firing at the Guardian (with pylon shots) once you have killed off the monsters. By spamming your Freeze spells on the Guardian you should be able to kill it before it leaves the range of the second pylon.
092 – Field H5
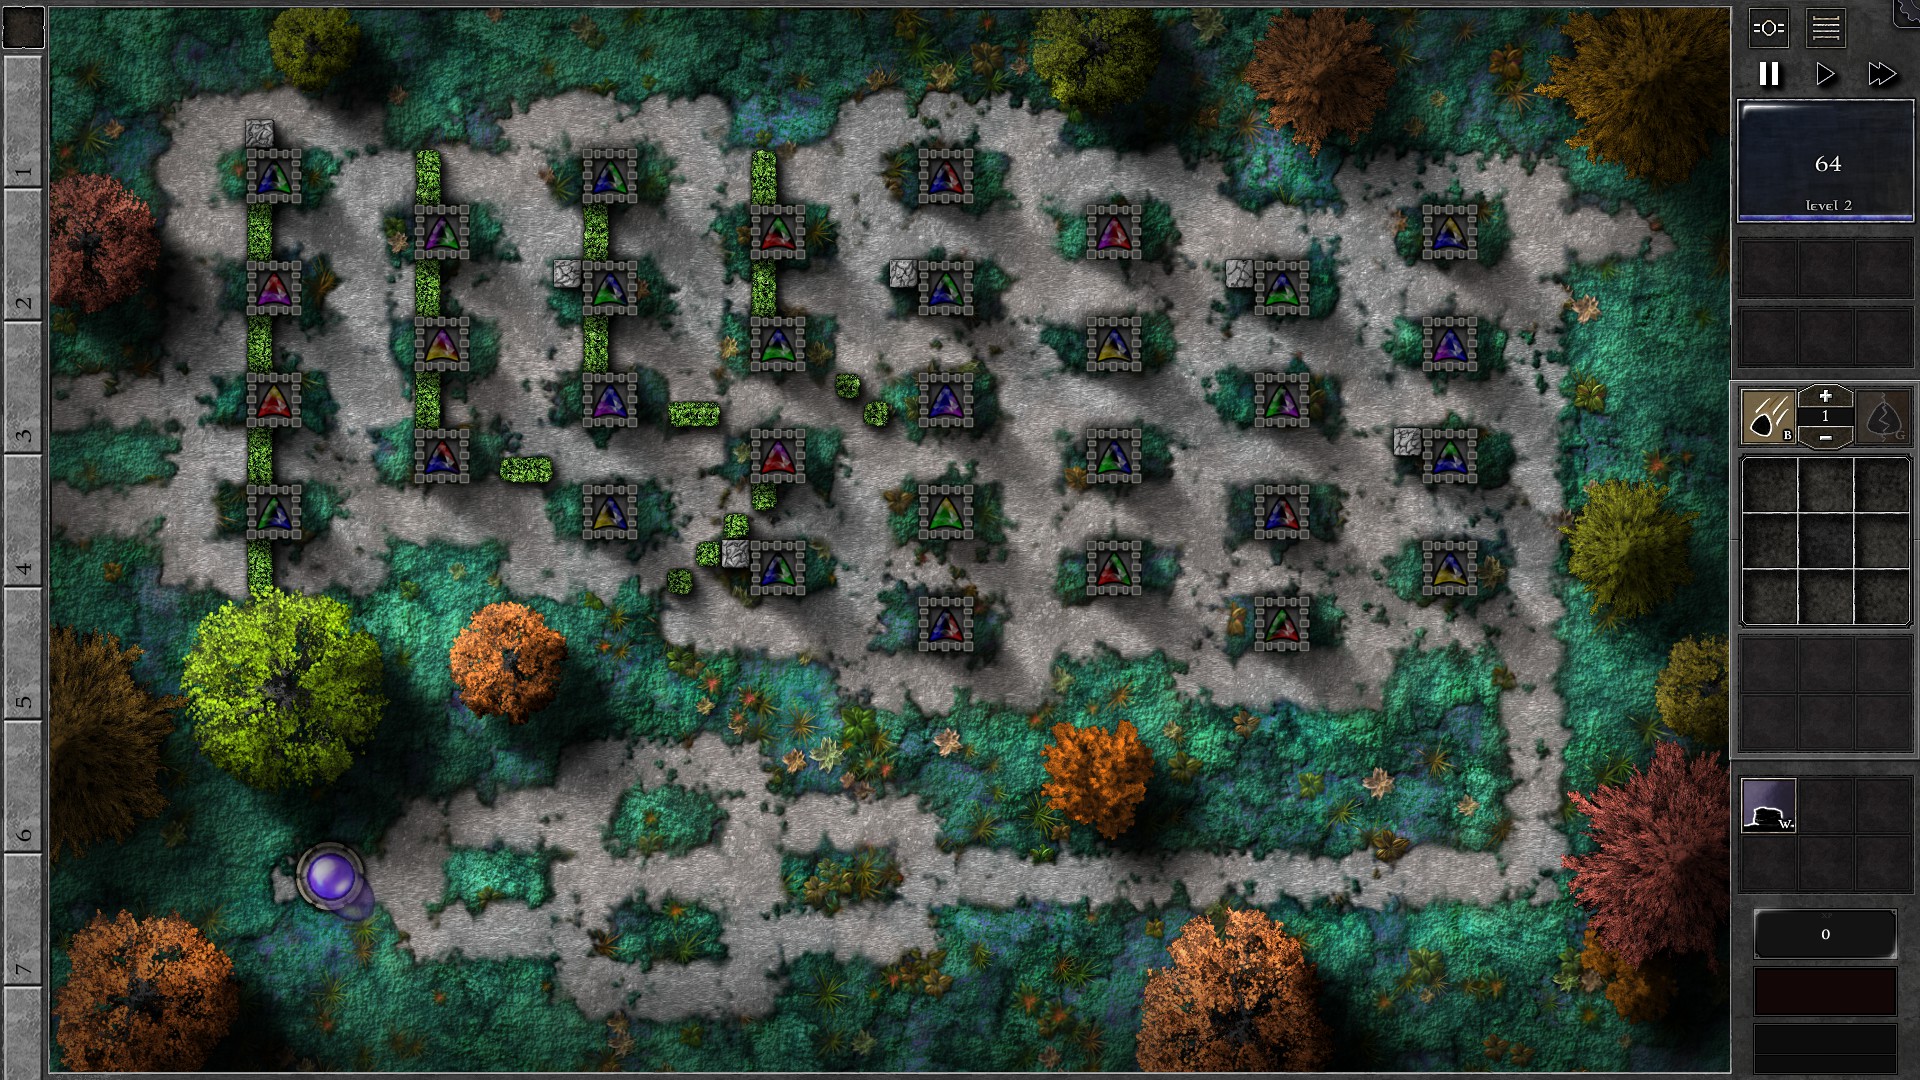
This Trial is pretty much a test on your path planning.
Start by building walls with your initial mana to guide the monsters go through the path. There are 2 types of towers that you may want to make monsters stay longer in their ranges.
The first type is the g/b towers with a megalithic wall segment next to it. These towers have slightly stronger gems with higher range compared to other gems.
The second type is any towers with a purple component which you want to use for shredding armor.
As you progress through the field, extend the path with walls using the mana you gain from killing monsters. Exercise caution on your mana amount and be extra careful on faster waves which may end up leaking through the towers and thus need to be banished. If necessary, you can click on a monster to force all the towers to fire at them (this works even on Spiritforge gems), which helps in picking out monsters with less HP to help thin out a larger group of leaking monsters. You can cycle through the selection of monsters by pressing left/right button after clicking on a monster.
At the end, you can probably extend the path all the way to the right. A sample path can be found in the below screenshot.
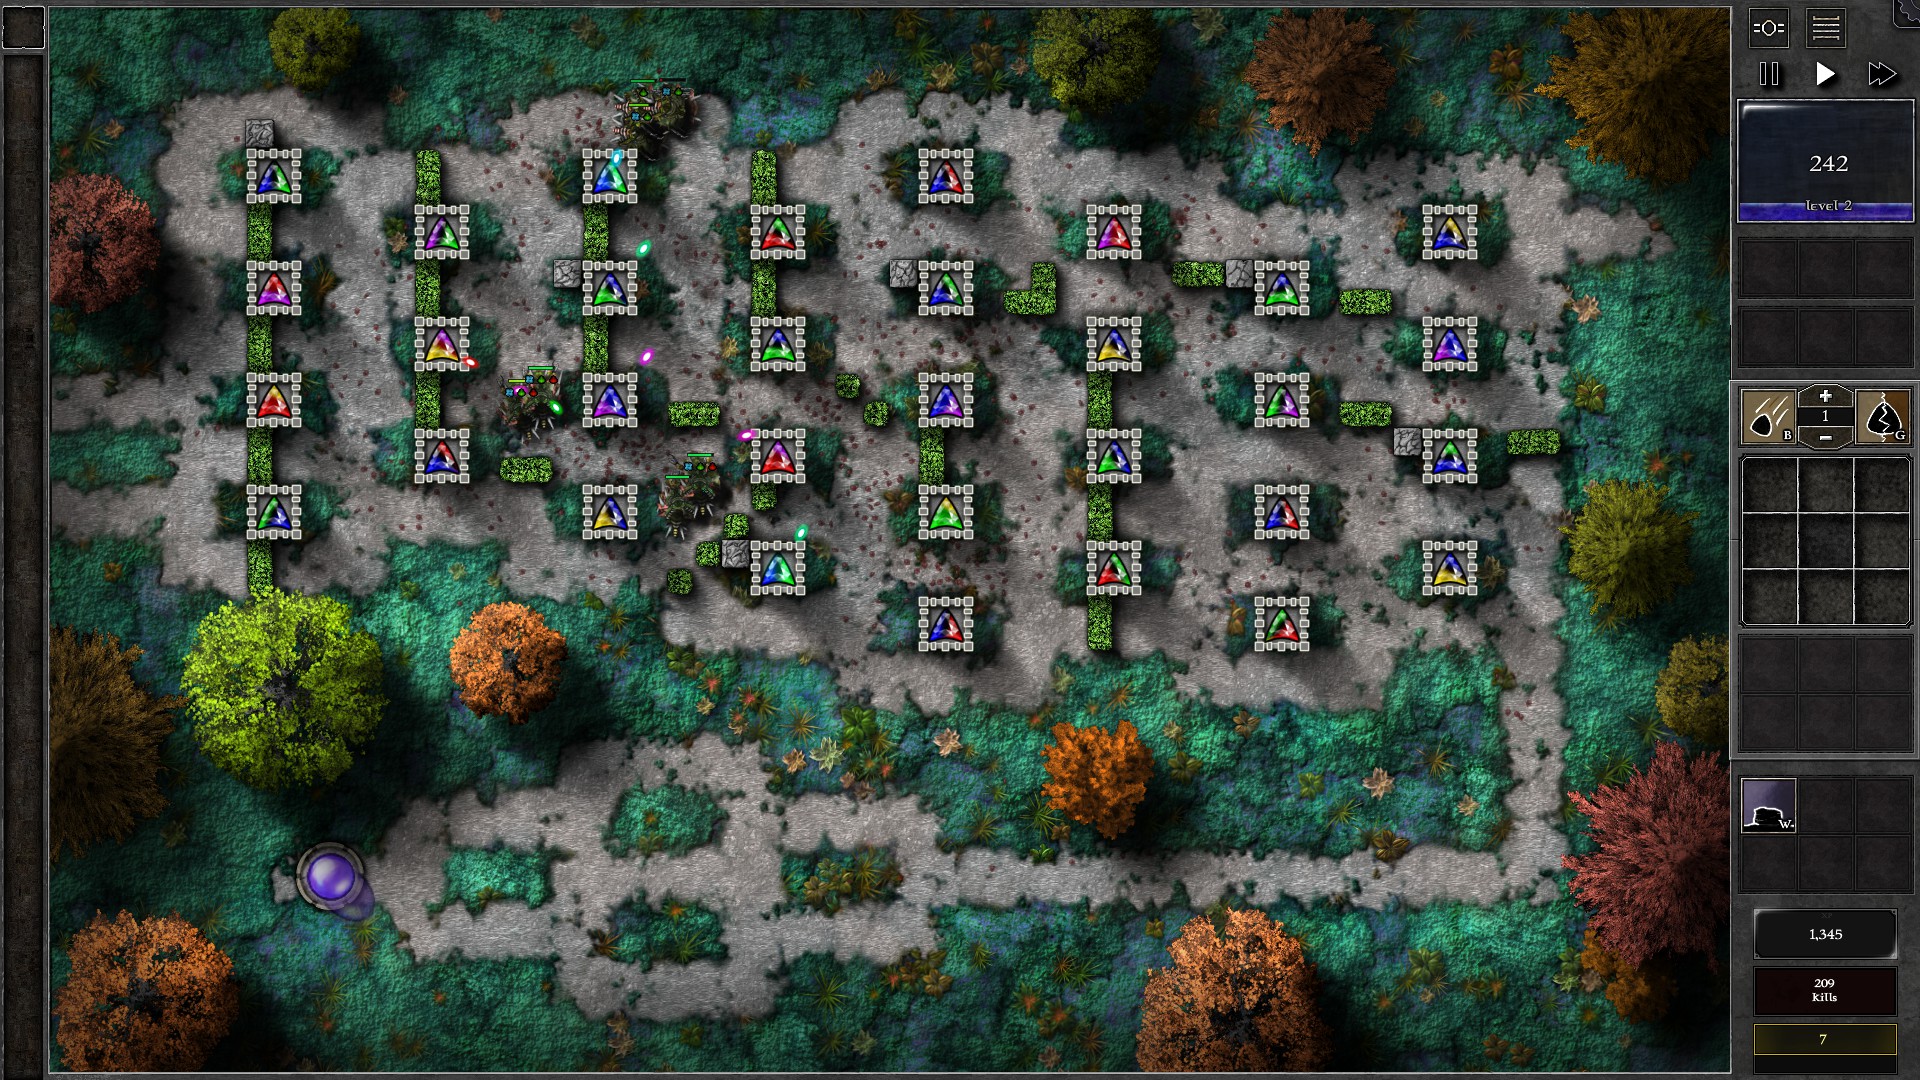
093 – Field E1
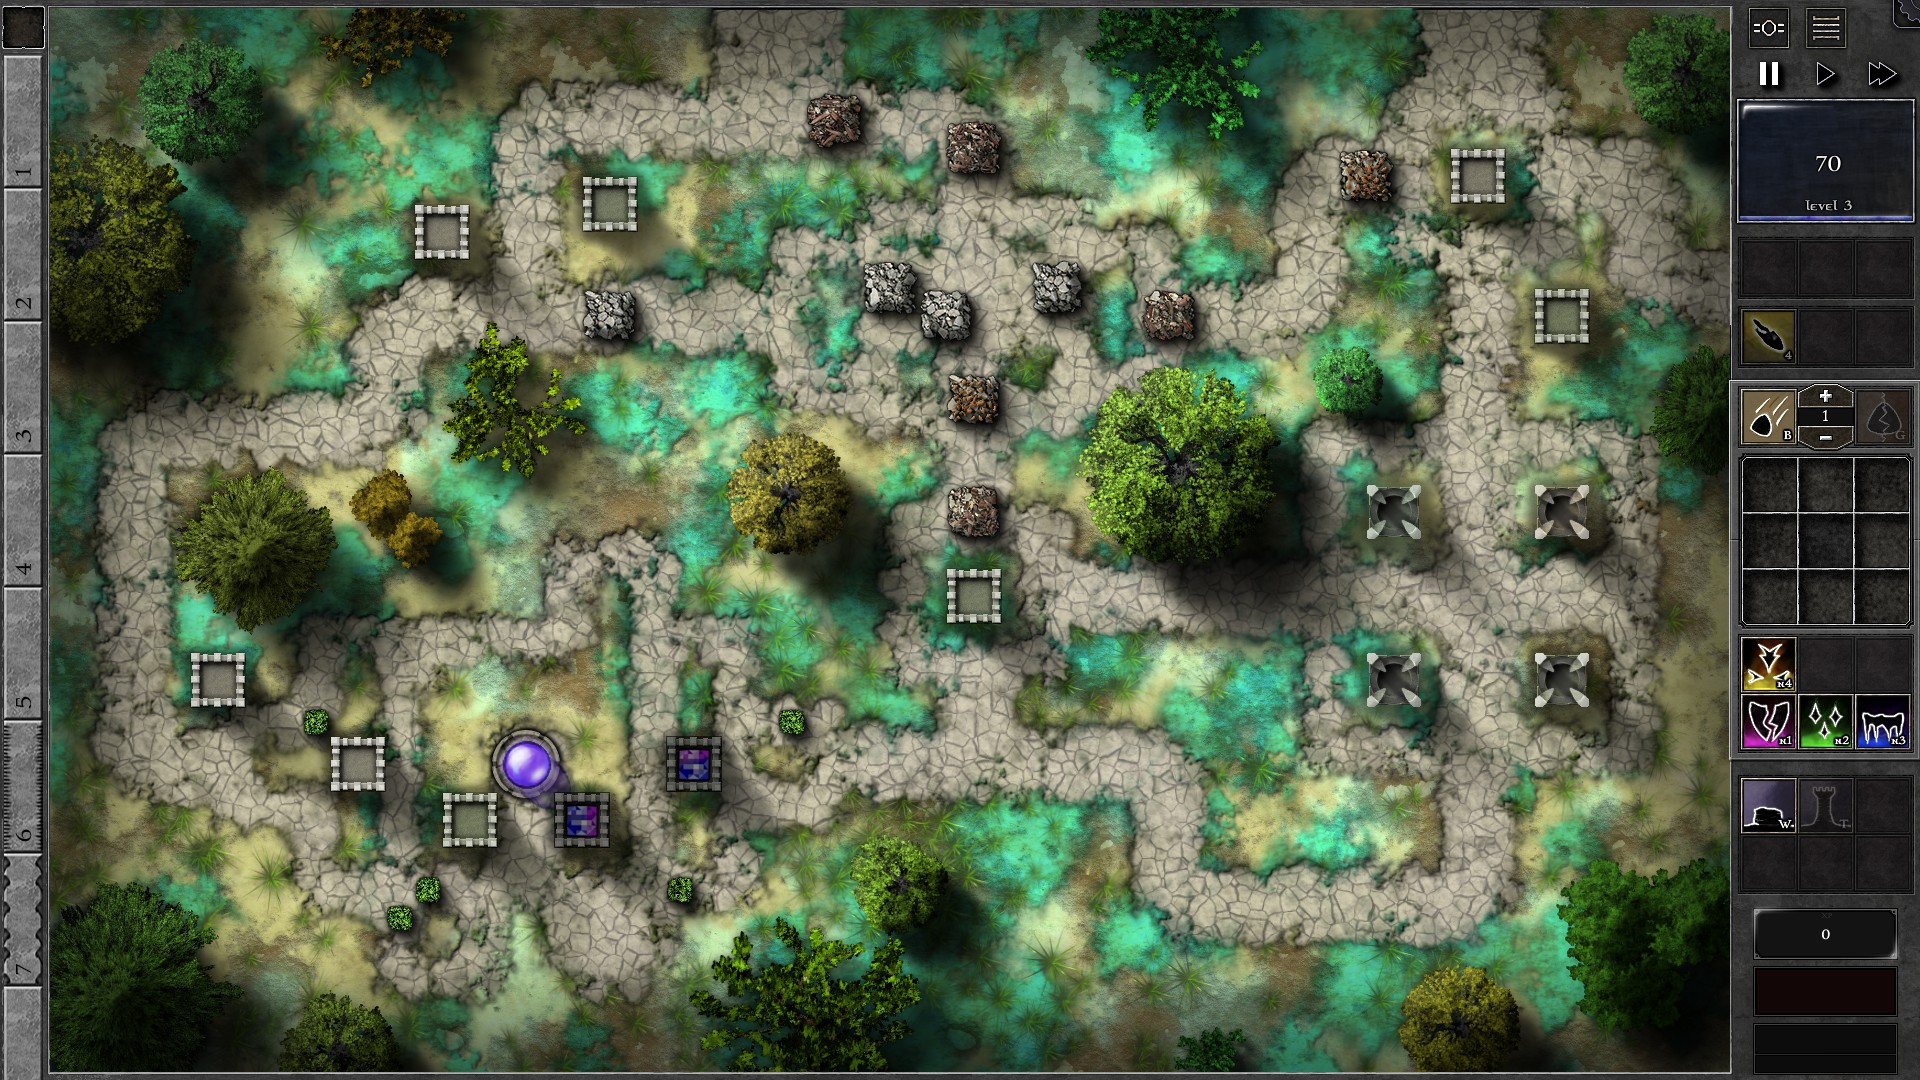
NOTE: Wizard Hunters in this field enters from random entrances. Adapt your gem upgrading timing as you may need to spend mana to rebuild towers which costs additional mana. This also introduces some extra RNG into the Trial.
Start the field as shown with 2 g3 p/b gems. You should be able to upgrade one of the gems to g4 at around w6. Bolt may be needed to reduce/prevent leakage at w5. You will soon notice premonitions for Wizard Hunters.
The first Wizard Hunter appears at w8. Take advantage of the slow giants in w7 and move the g4 gem close to the Hunter and engage it ASAP. You need at least 2 Bolt charges to kill the Hunter which will also probably destroy one of the buildings. Many buildings can be considered “hunter-fodder”s but still watch out for any key towers being targeted especially if they have gems in it. Key towers include the 2 towers used to start the field, as well as towers close to the entrance for engaging Wizard Hunters. The remaining g3 gem may also cause some leaks so be on lookout of your mana.
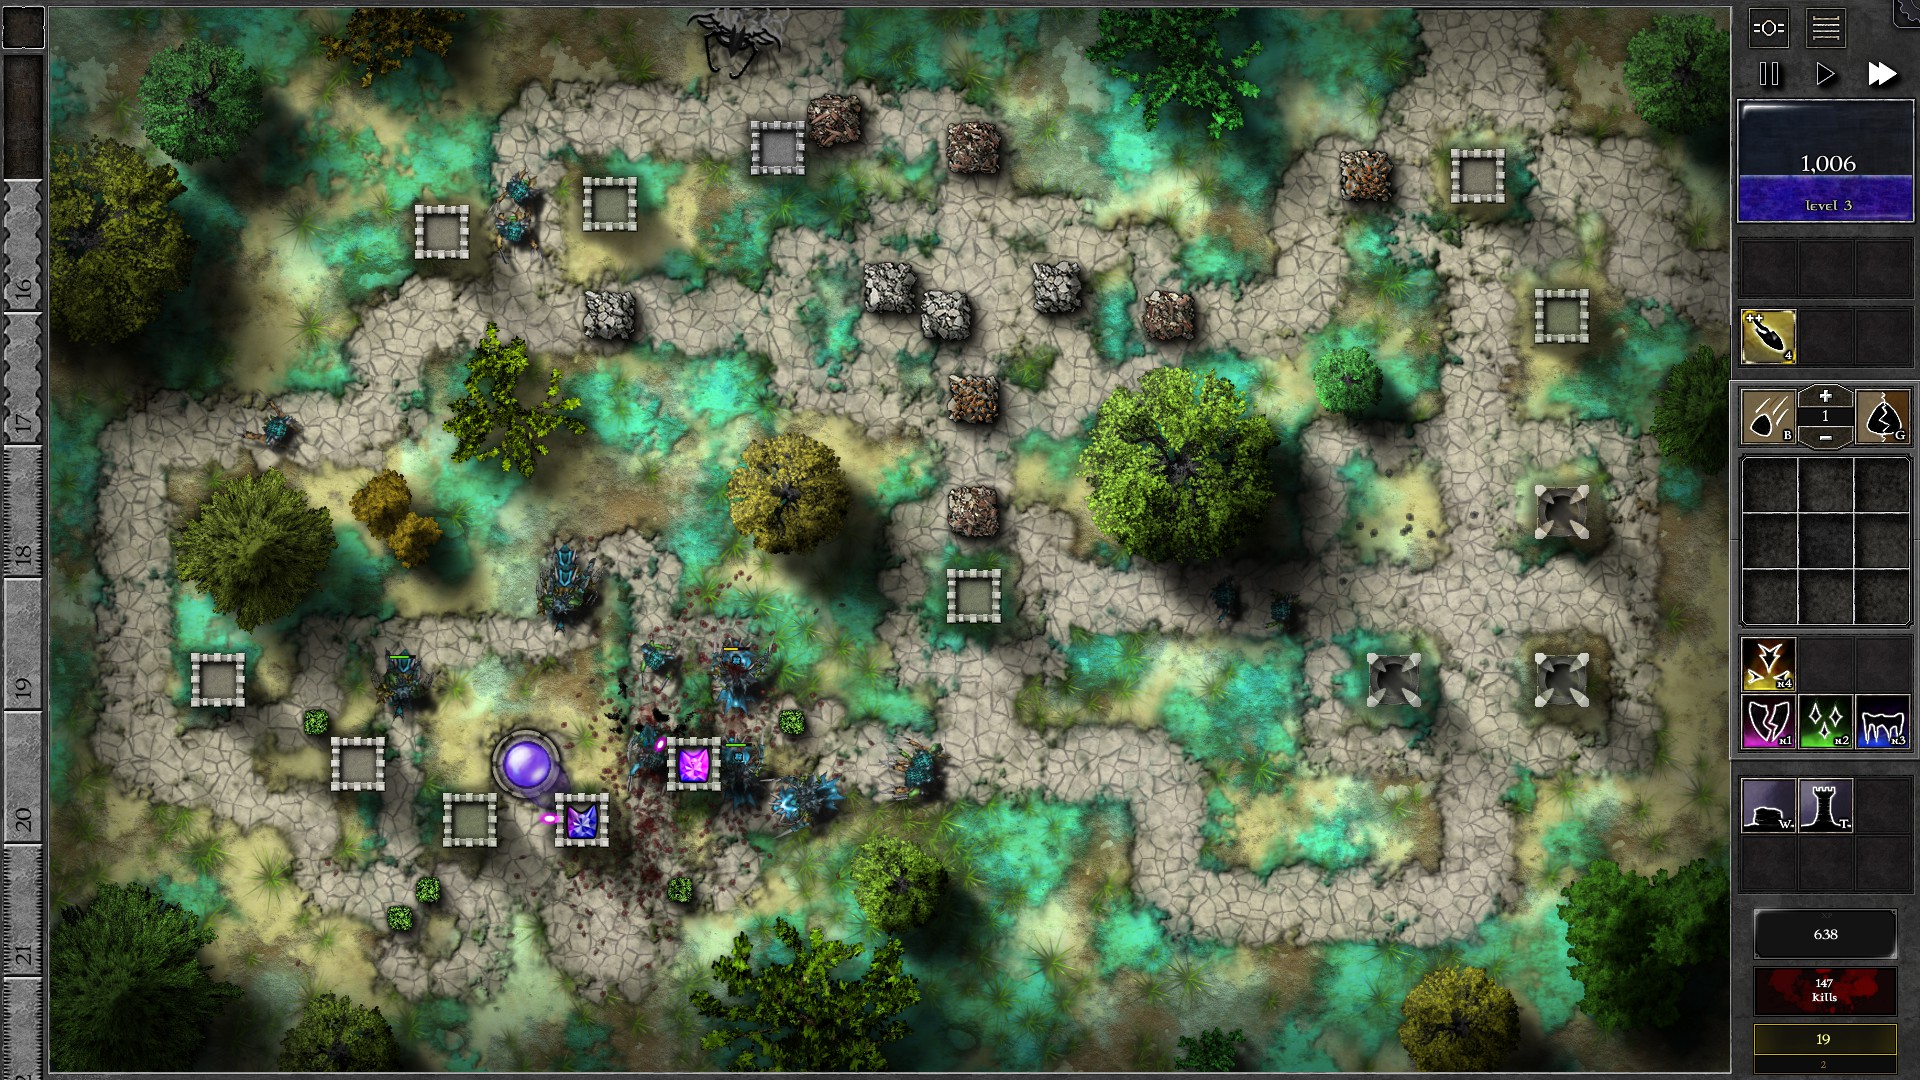
You should take down the first Wizard Hunter at around w10. Return the gem back to the defenses and save enough mana to upgrade the second gem to g4. The second Hunter will arrive at w15. Try your best to save Bolt spells and engage with a g4 gem once it enters the field. This one takes longer to defeat so you may need to follow the Hunter with your gem until it is down (at around w17-18), and also may cost you more buildings. Upgrade one of your gems to g5 after defeating the w15 Hunter.
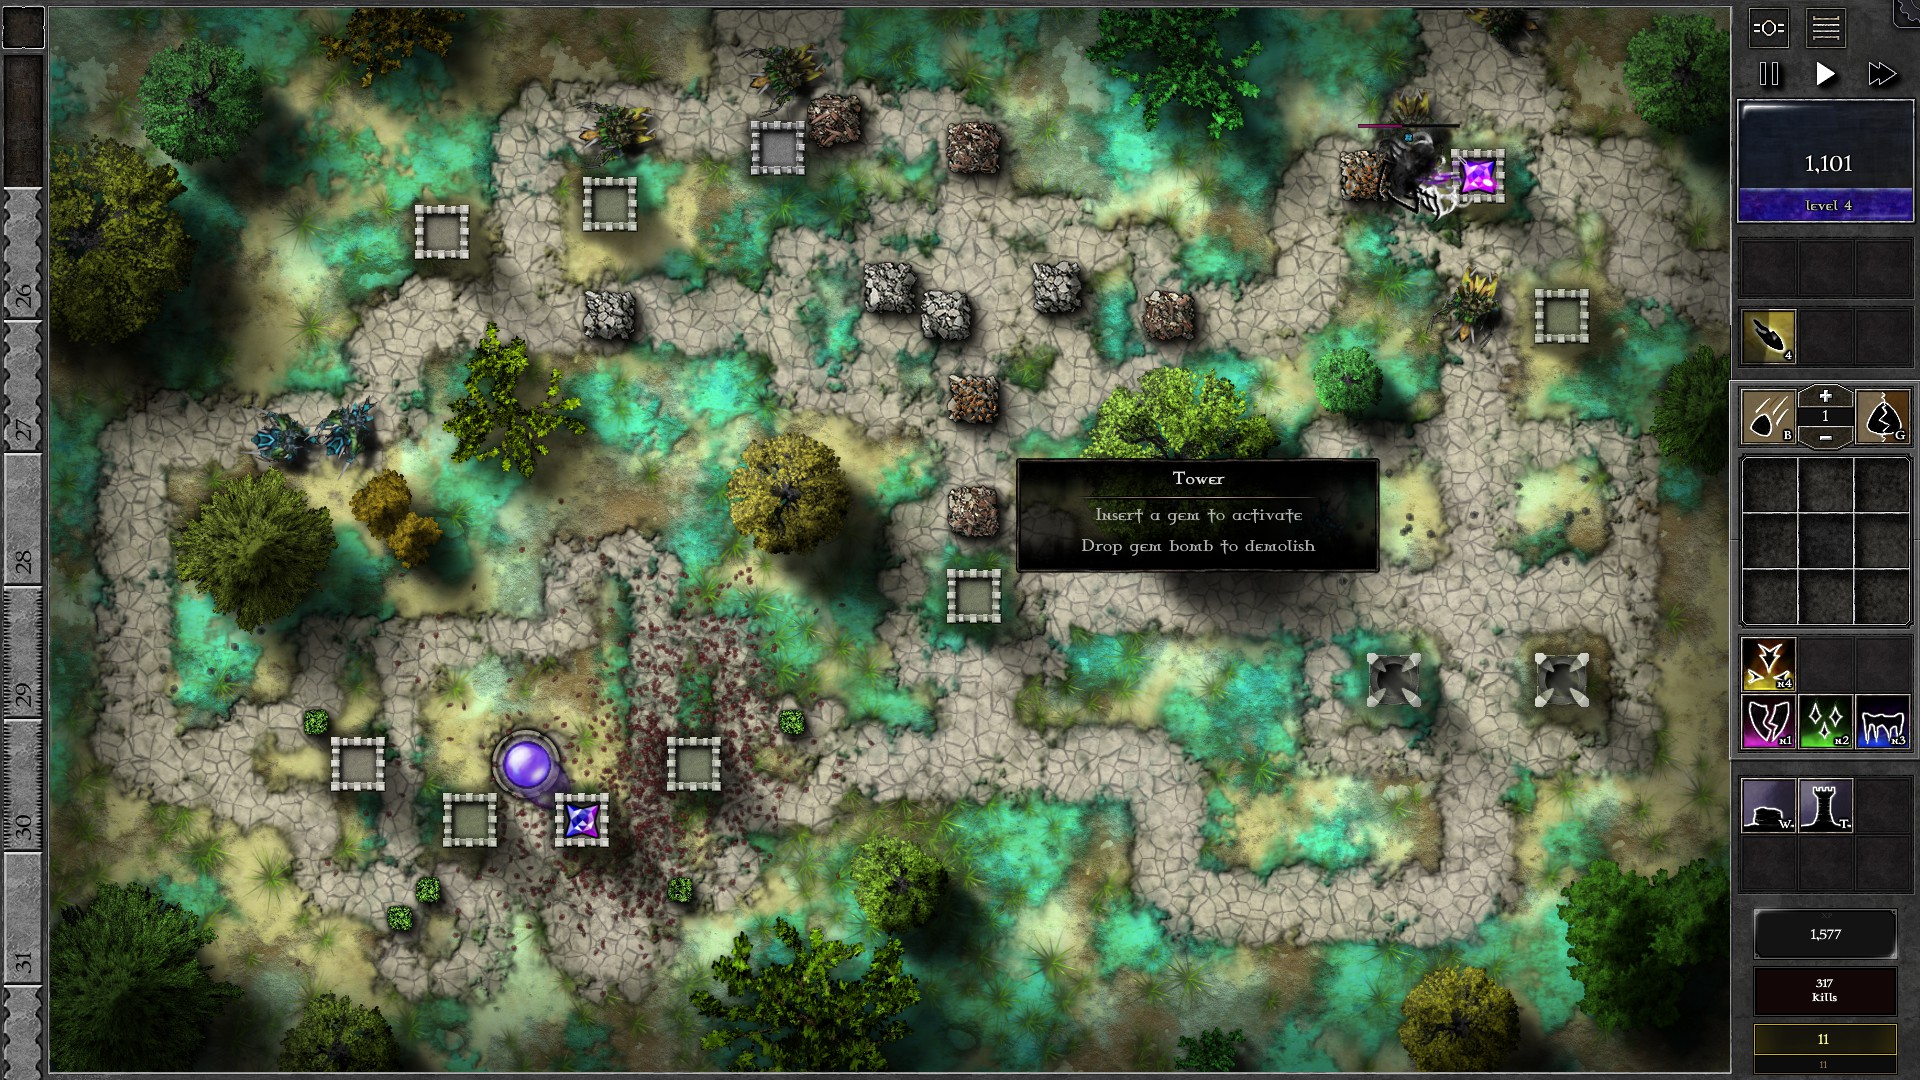
At w21-22 the combination of monsters may overload your defenses. Because of the impending Wizard Hunter, consider allowing a few banishments and save the Bolts. You also have consecutive giant waves as a rest for your monster defenses. Upgrade the other gem to g5 (around w22-23) and prepare for the next Wizard Hunter at w24. The Wizard Hunter will likely only destroy one building as you take it down with a g5 gem + 2 Bolt charges.
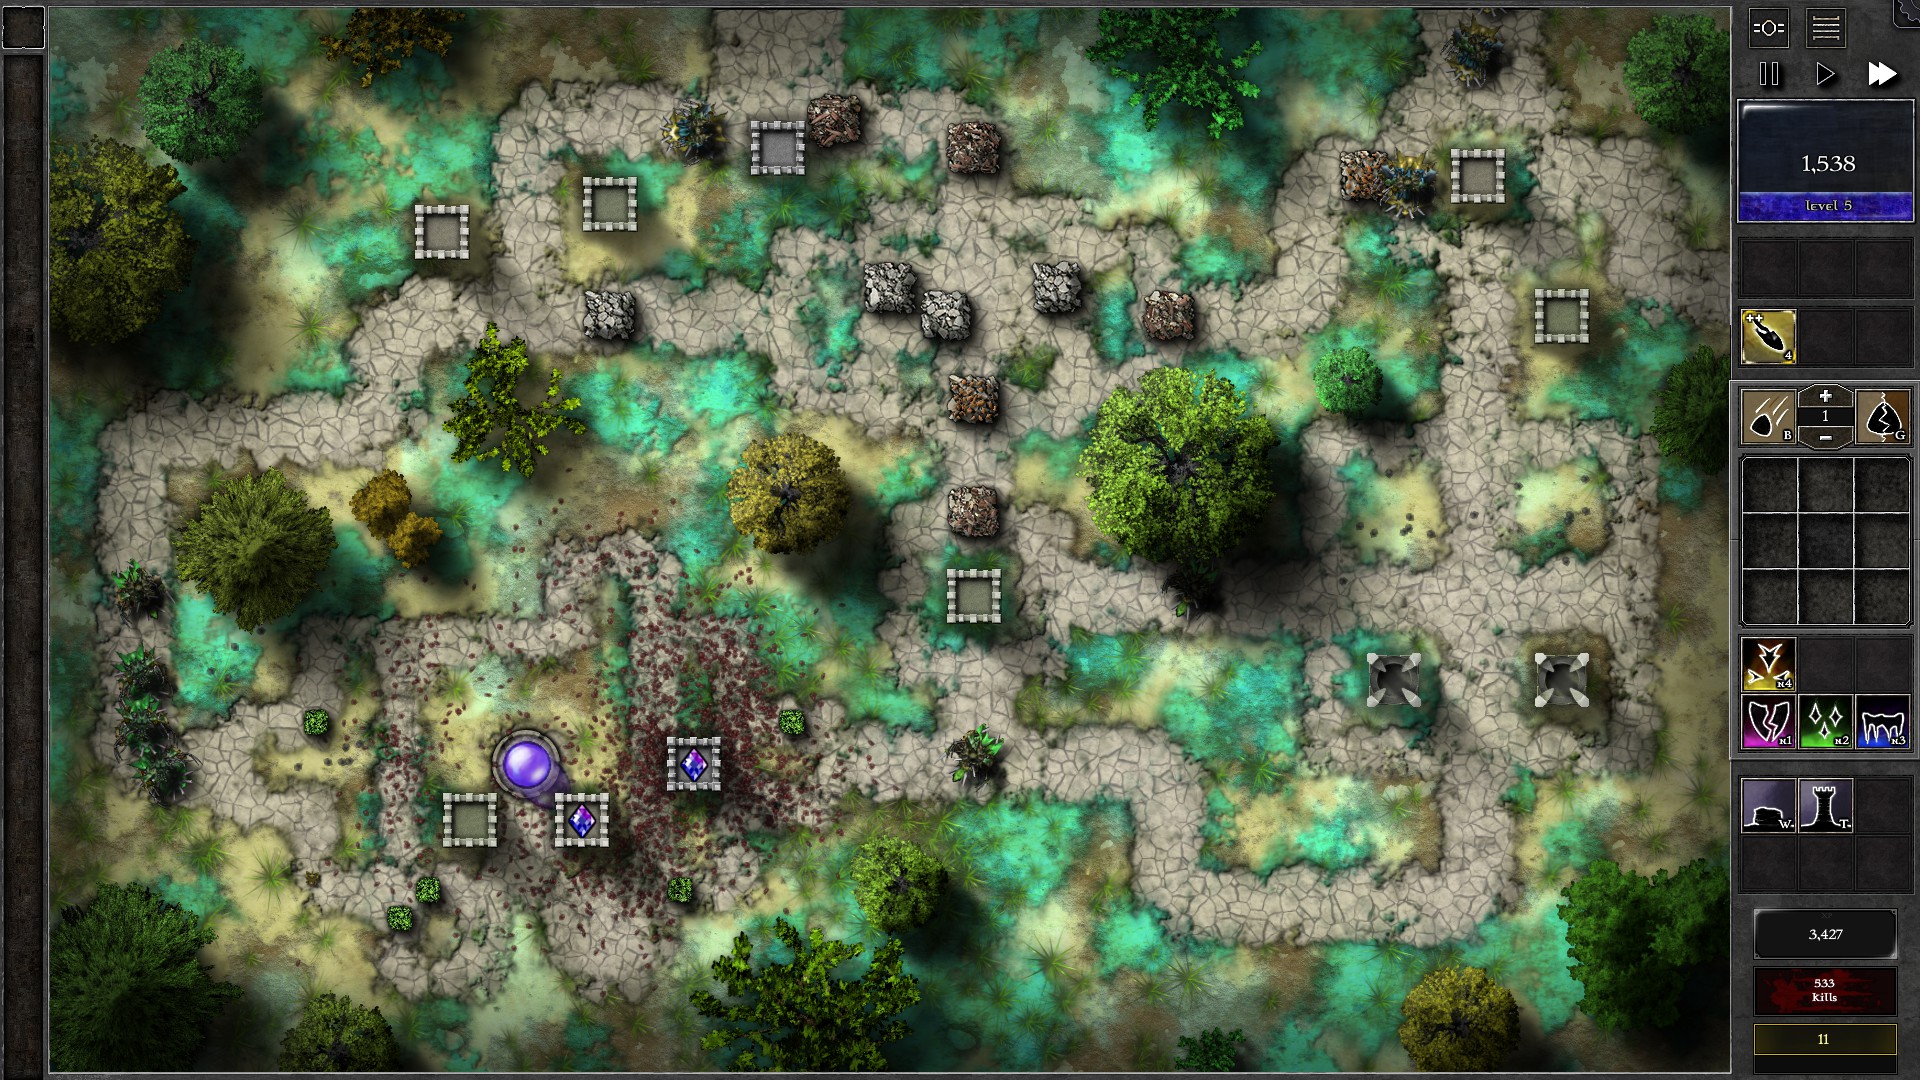
After the w24 Wizard Hunter, you should have a few more relaxing waves which allows you to save Bolt charges and upgrade one of the gems to g6 (at around w31). A 4th Wizard Hunter will soon appear at w33. Use the g6 gem + 2 Bolt charges to quickly defeat it (again taking advantage of consecutive giant waves not immediately pushing your monster defenses). After the w33 Hunter there shouldn’t be much threat left as your g6 + g5 (eventually 2 g6) gems take down the remaining monsters together.
094 – Field E2
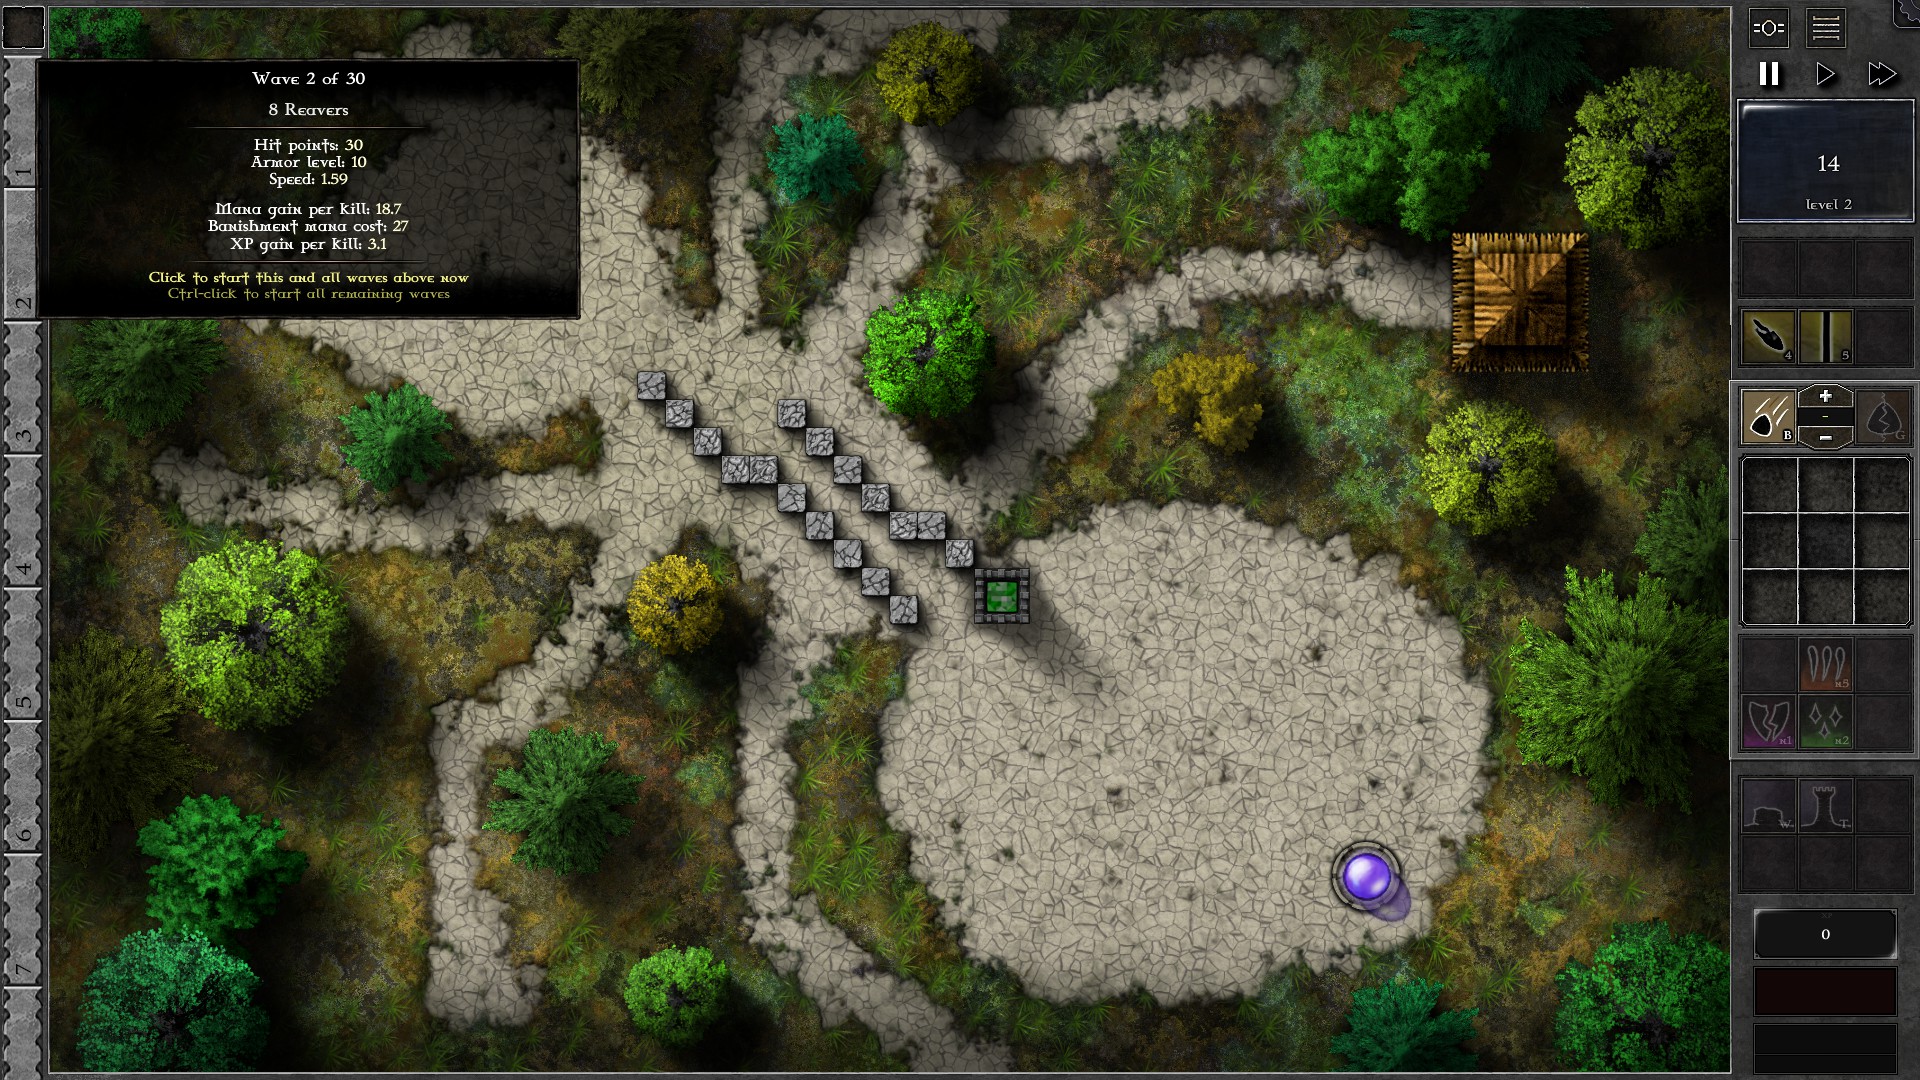
You will notice that a Spire with 70000 HP spawns in immediately at the first wave. Set up the field with a g3 pure green gem in the tower as in the first screenshot. Send the first 16 waves immediately and upgrade the g3 into a g4. Immediately resocket the gem with Bolt and use it to kill the reavers in w2 and w16 (target “Least HP”). At the mean time, you can slightly extend the walls as in the second screenshot.
Now, send in the remaining waves and upgrade your gem to g5. Start killing at least the reavers in w26 and the early wave giants to gain enough mana for a g6 gem. Use some enhancement spells to help defeat the remaining giants (Beam + Random in particular melts them quickly). Minor leaks of 1-2 giants are generally acceptable.
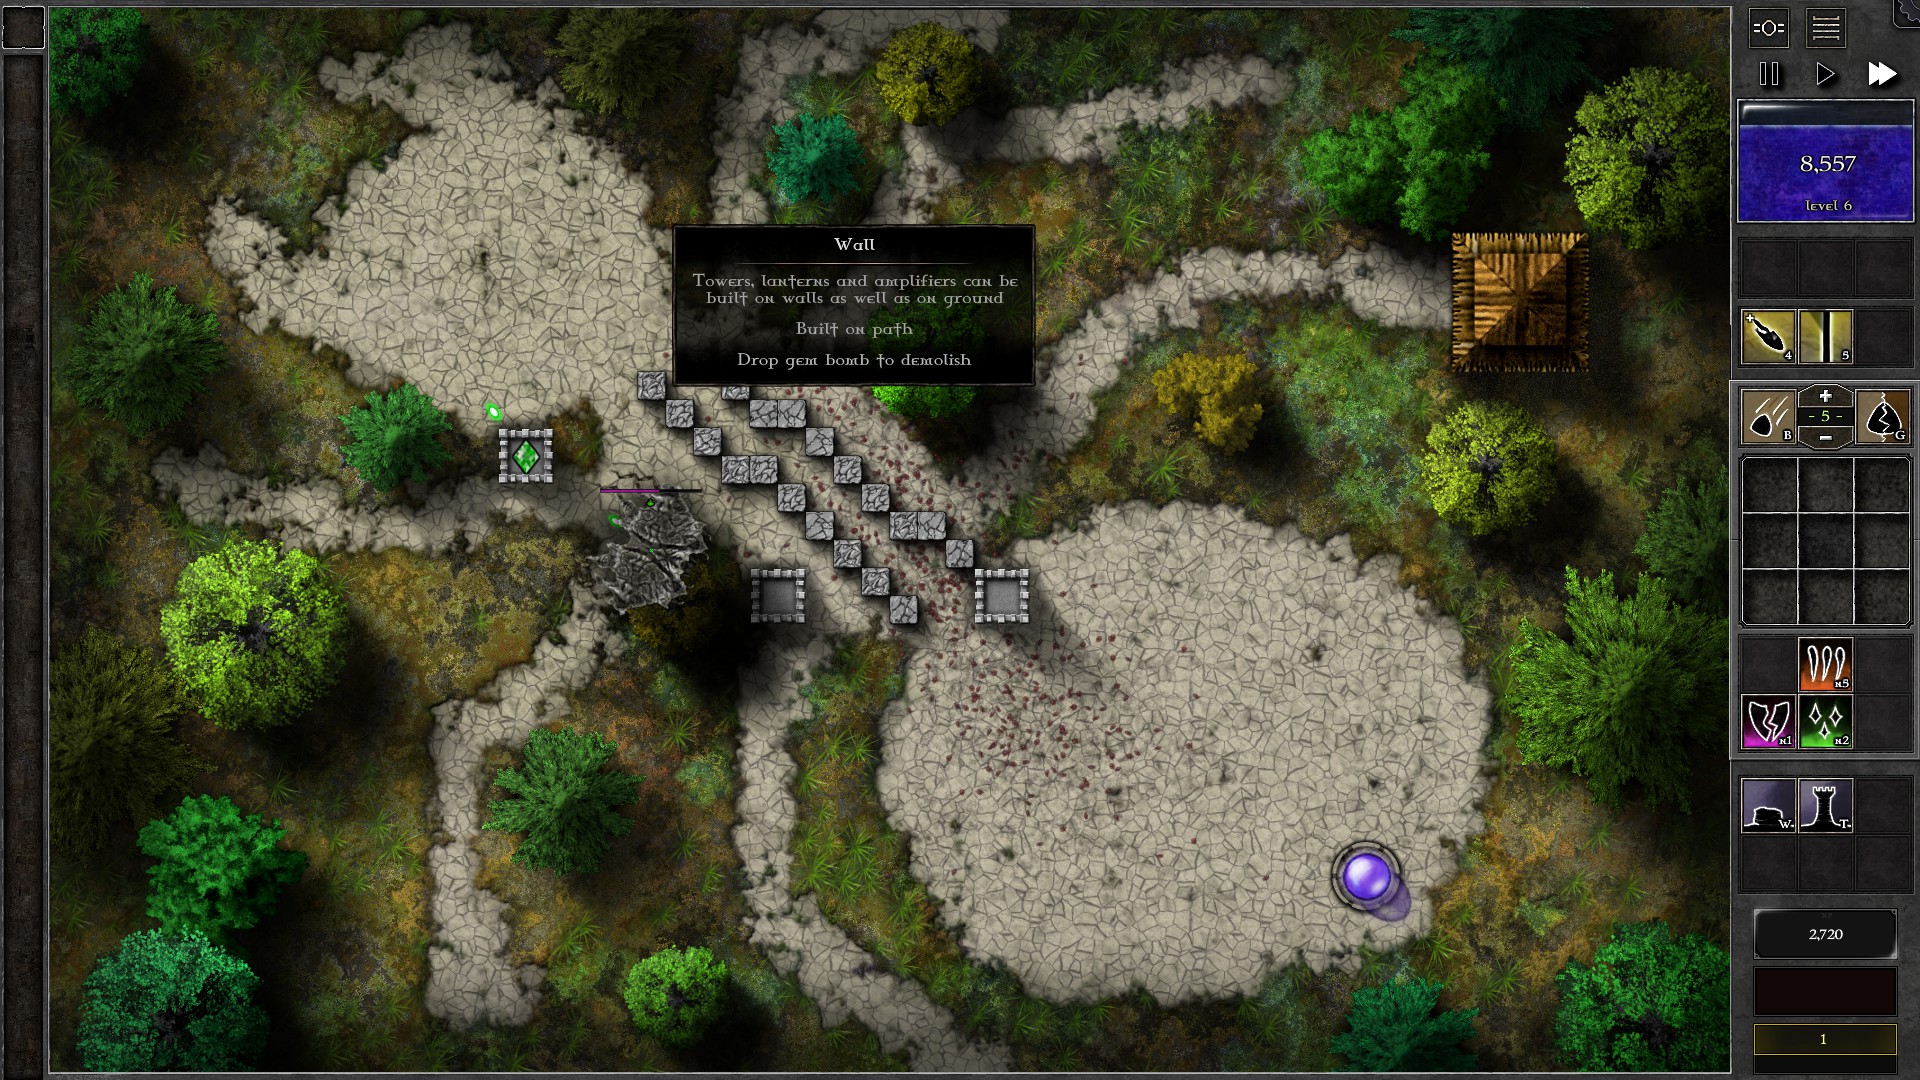
The Spire should now be around the line between the head and chest of the “Insect”. Now you can build towers to have your gem follow the Spire, while spamming all your spells on it. You should be able to defeat the Spire at the time it reaches the abdomen of the “Insect”.
095 – Field E3
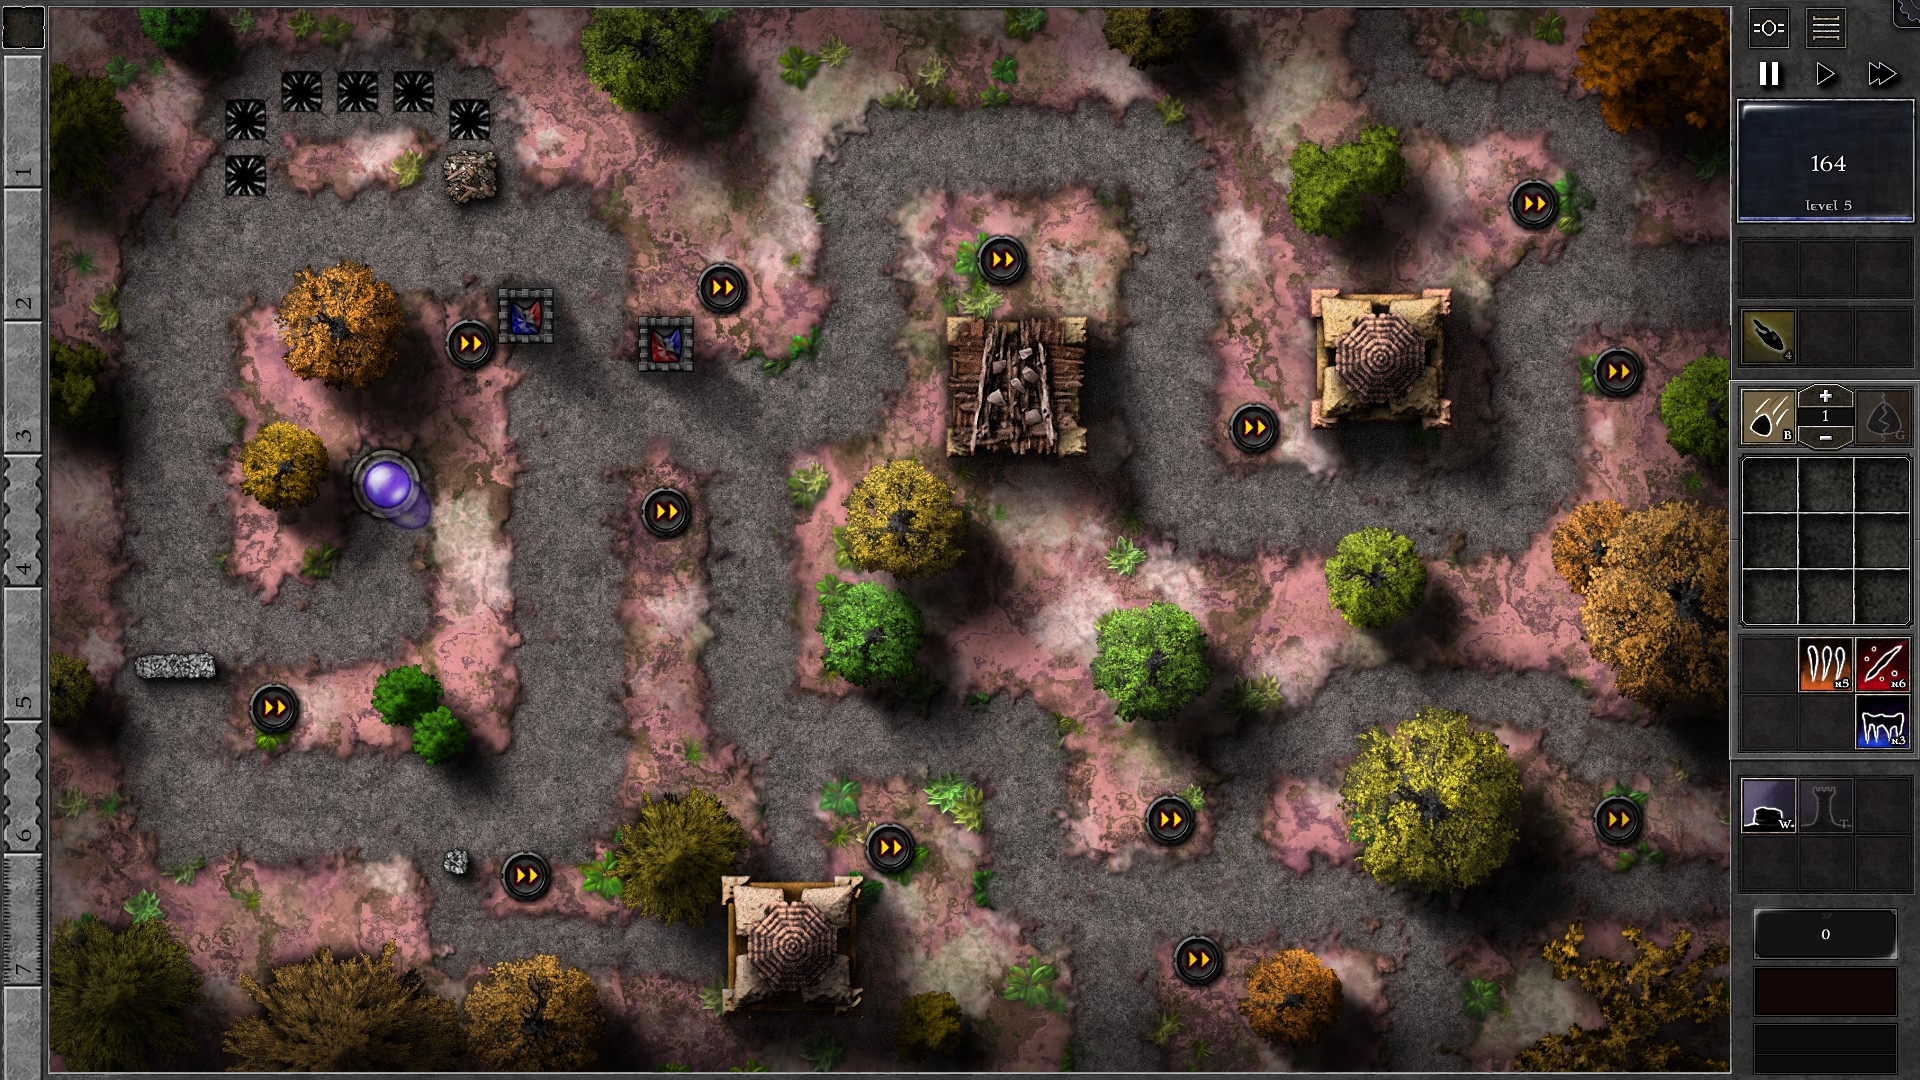
Start the field with 2 g4 r/b gems as shown. The first few waves of monsters should be not too difficult to deal with. Whenever your gem has nothing to kill, click on the Barricade blocking the path to the traps to fire at it. You should be able to destroy it before w5. Once the Barricade is gone, build walls to force monsters to go through the traps. Continue to have your gems defend from towers and hit the nearby speed beacons. Use Bolt if necessary and you should be able to get rid of the 3 speed beacons within range of your towers at around w10.
You should gain enough mana to afford a g4 gem during the beacon removal work. Duplicate a g4 gem from your defenses and put it into a trap (with Bolt enhancement). This gem should be able to help catch some of the leaks at the moment. Once the 3 beacons are destroyed, move the 2 g4 gems in towers to the traps and enhance them with Bolt. Build some walls to help control the monster’s movement inside the trap zone as shown in the second screenshot.
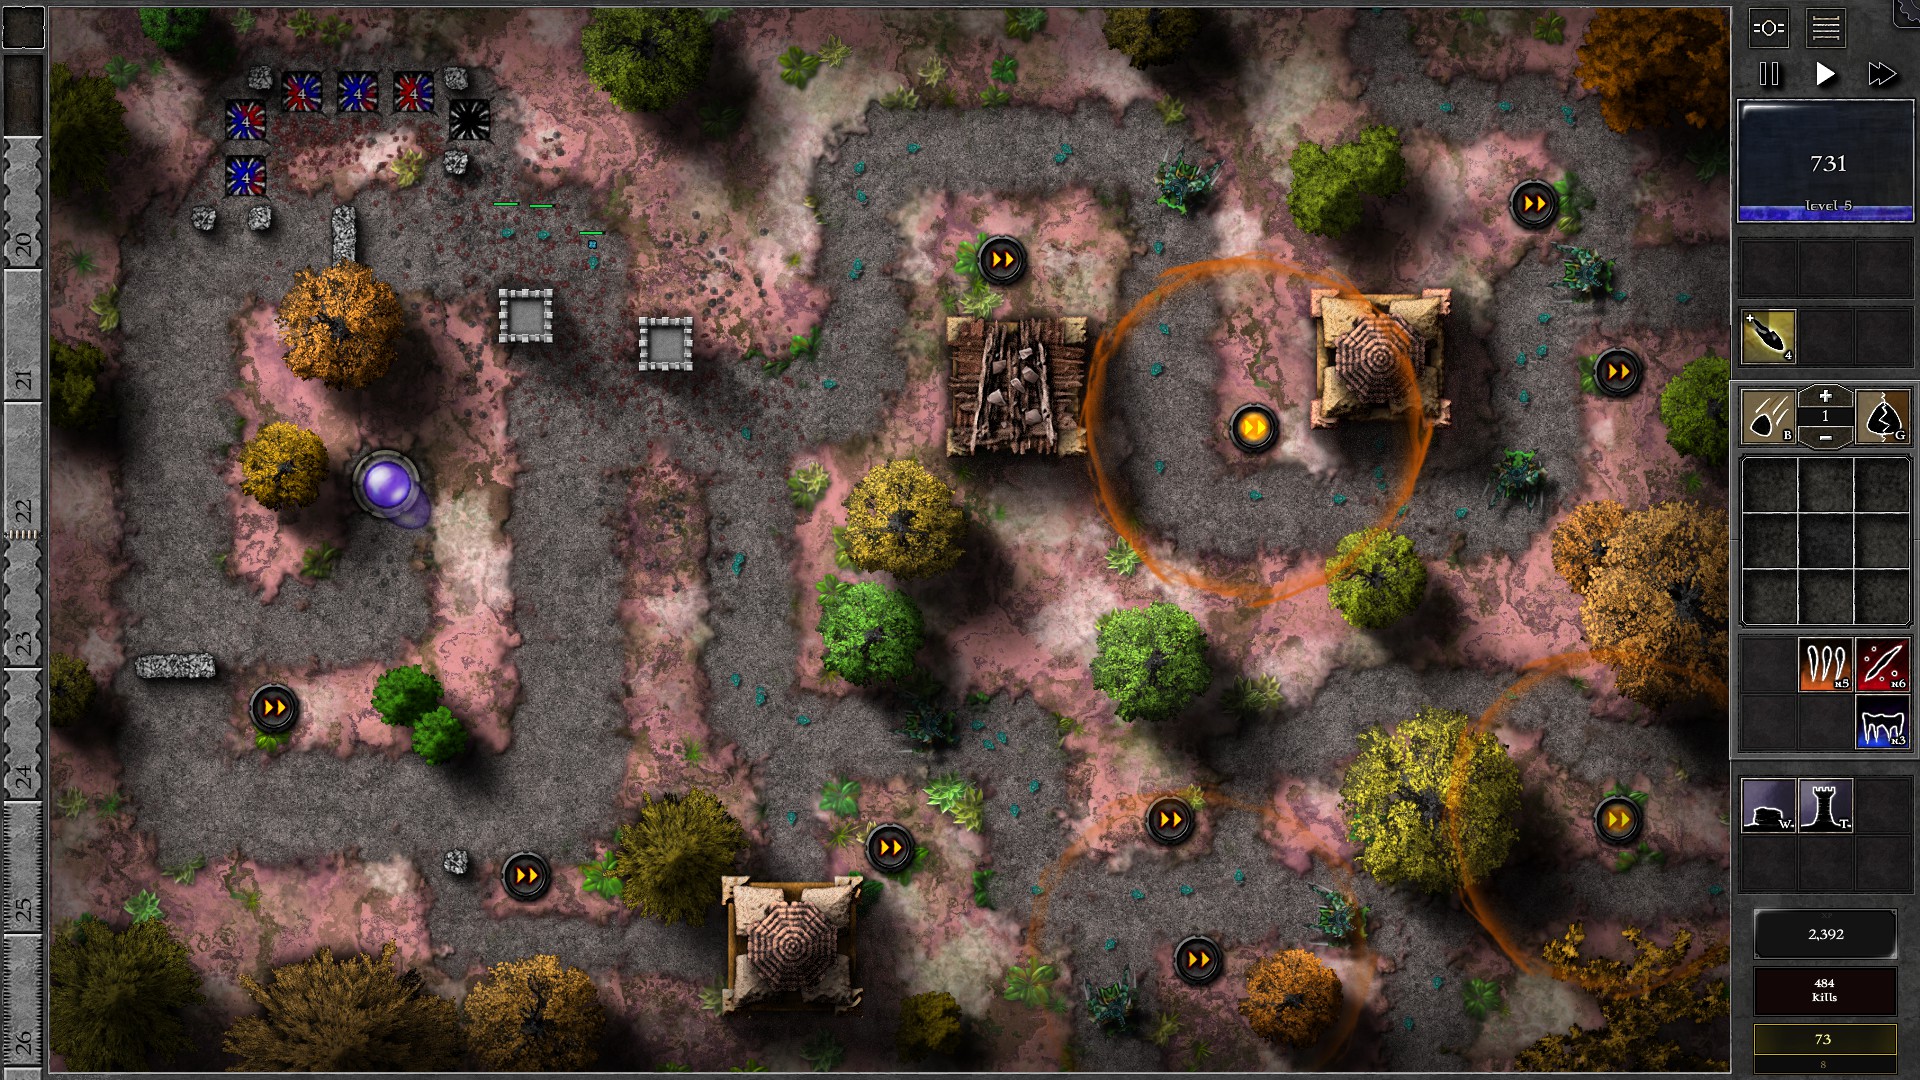
The traps should now become your tool for killing monsters; the monsters in this Trial has a very low HP growth but a high Armor growth that will soon render your tower shots useless while trap shots ignore Armor by itself. Now, whenever you have enough mana to afford a g4 gem, create new duplicates of the g4 r/b gem, insert them into the traps and enhance them with Bolt once available. You should be able to fill all 6 traps with g4 gems before w24. After that, upgrade your g4 gems to g5 one by one whenever you have enough mana (use Bolt to insta-resocket after upgrade if monsters are roaming on the traps). You should be able to complete the remaining waves without leaks while upgrading all 6 gems to g5 before the final wave.
(P.S.: It is also possible to complete this Trial without ever breaking the barricade blocking the path to the traps, although I will leave this for the players to figure out by themselves.)
096 – Field E4
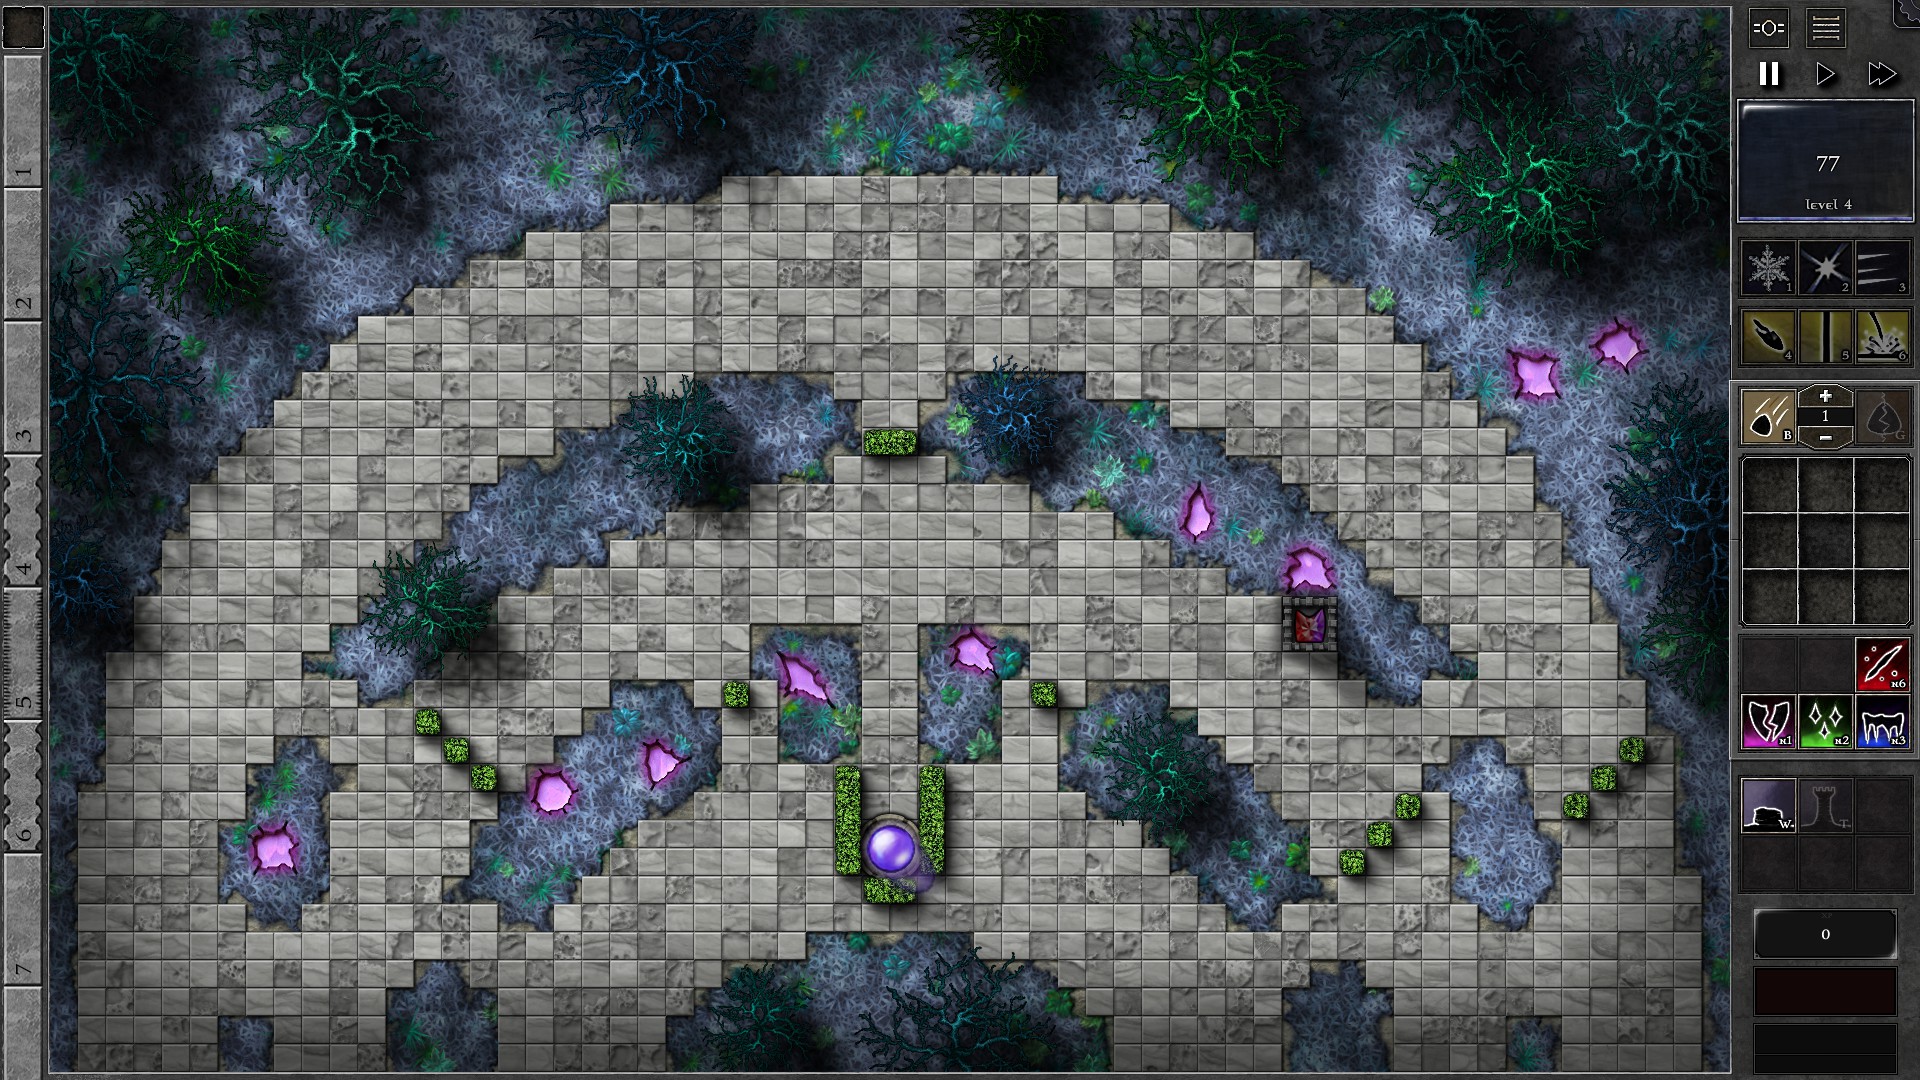
This Trial is one of the more difficult trials (even worse in the past especially when the entire I maptile is locked behind this trial). Start with the setup as shown with a g4 p/r gem. You will soon notice that you do not regenerate mana and none of the monsters give mana at all, which means shard farming is the only viable means of getting mana.
NOTE: Whenever you set up towers to fire at a shard, or upgrade gems hitting on shards, check if it’s actually hitting the intended shard. Reduce range in these gems accordingly if you are not hitting the intended shard. In addition, remember to set gems that are made to hit shards full-time to target “Structures” (which is pretty much every gem except the killing gem).
Phase 1: w1-w12
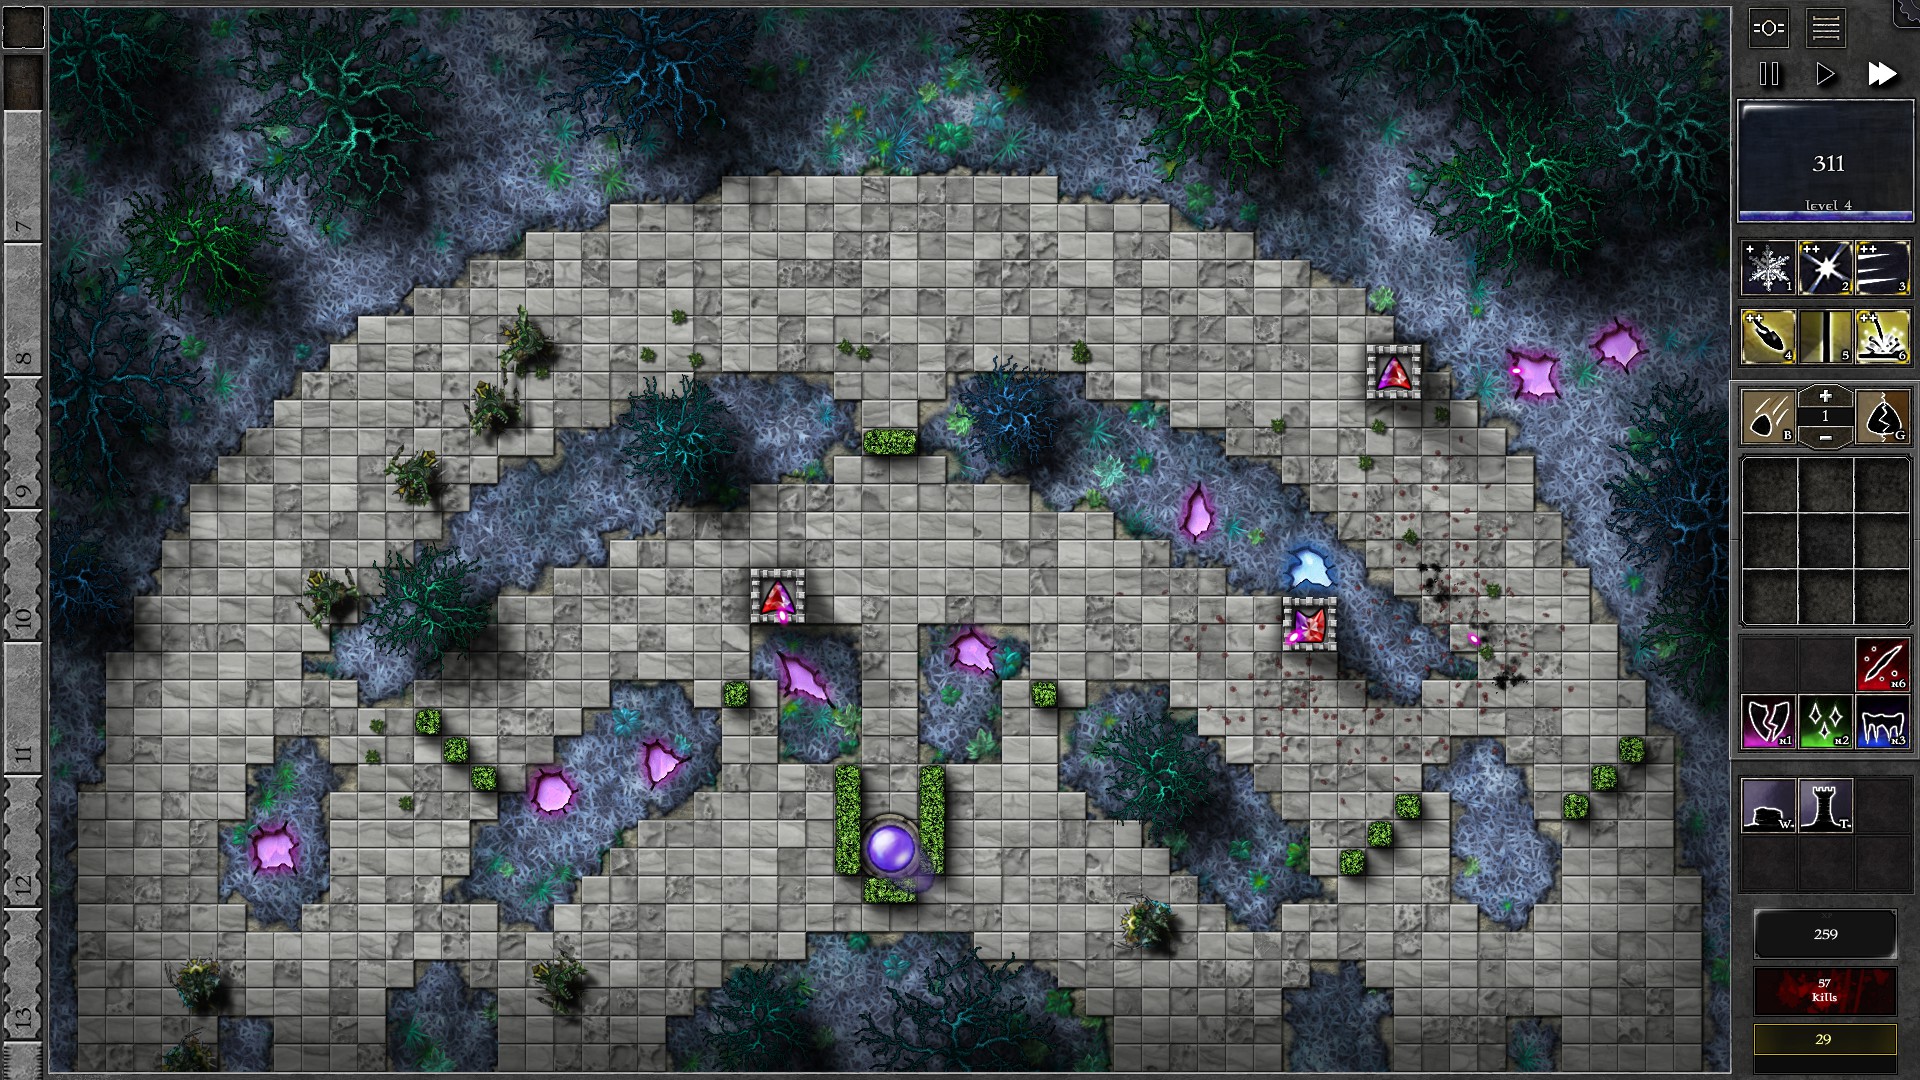
The g4 gem should open the Mana Shard with 200 shell thickness and harvest some mana before w1 monsters approach the tower. Fight through the monsters, and use Beam to hit the mana shard once available and you have fewer monsters in range. Use other spells to help defeat monsters as swiftly as possible; you need to be a bit more on the aggressive side for this Phase. You should now setup towers to start hitting other mana shards for future mana farming. Start by inserting a g2 p/r gem close to the 6000 mana – 1000 shell Shard (4th shard from the left), then another tower with g2 p/r gem targeting the 8000 mana – 4000 shell Shard (second shard from the right). Gather mana to upgrade the 2 g2 gems to g3. The 1000 shell Shard should be opened at around w10. Now collect enough mana to create at least 1 g2 p/r gem, then combine the 2 shard-hitting g3 gem and the g4 killing gem into a single g5 gem.
NOTE: The random monster speed may affect how fast you can gather mana at this point which can have significant implications on how fast you can gain strength.
Phase 2: w12-24
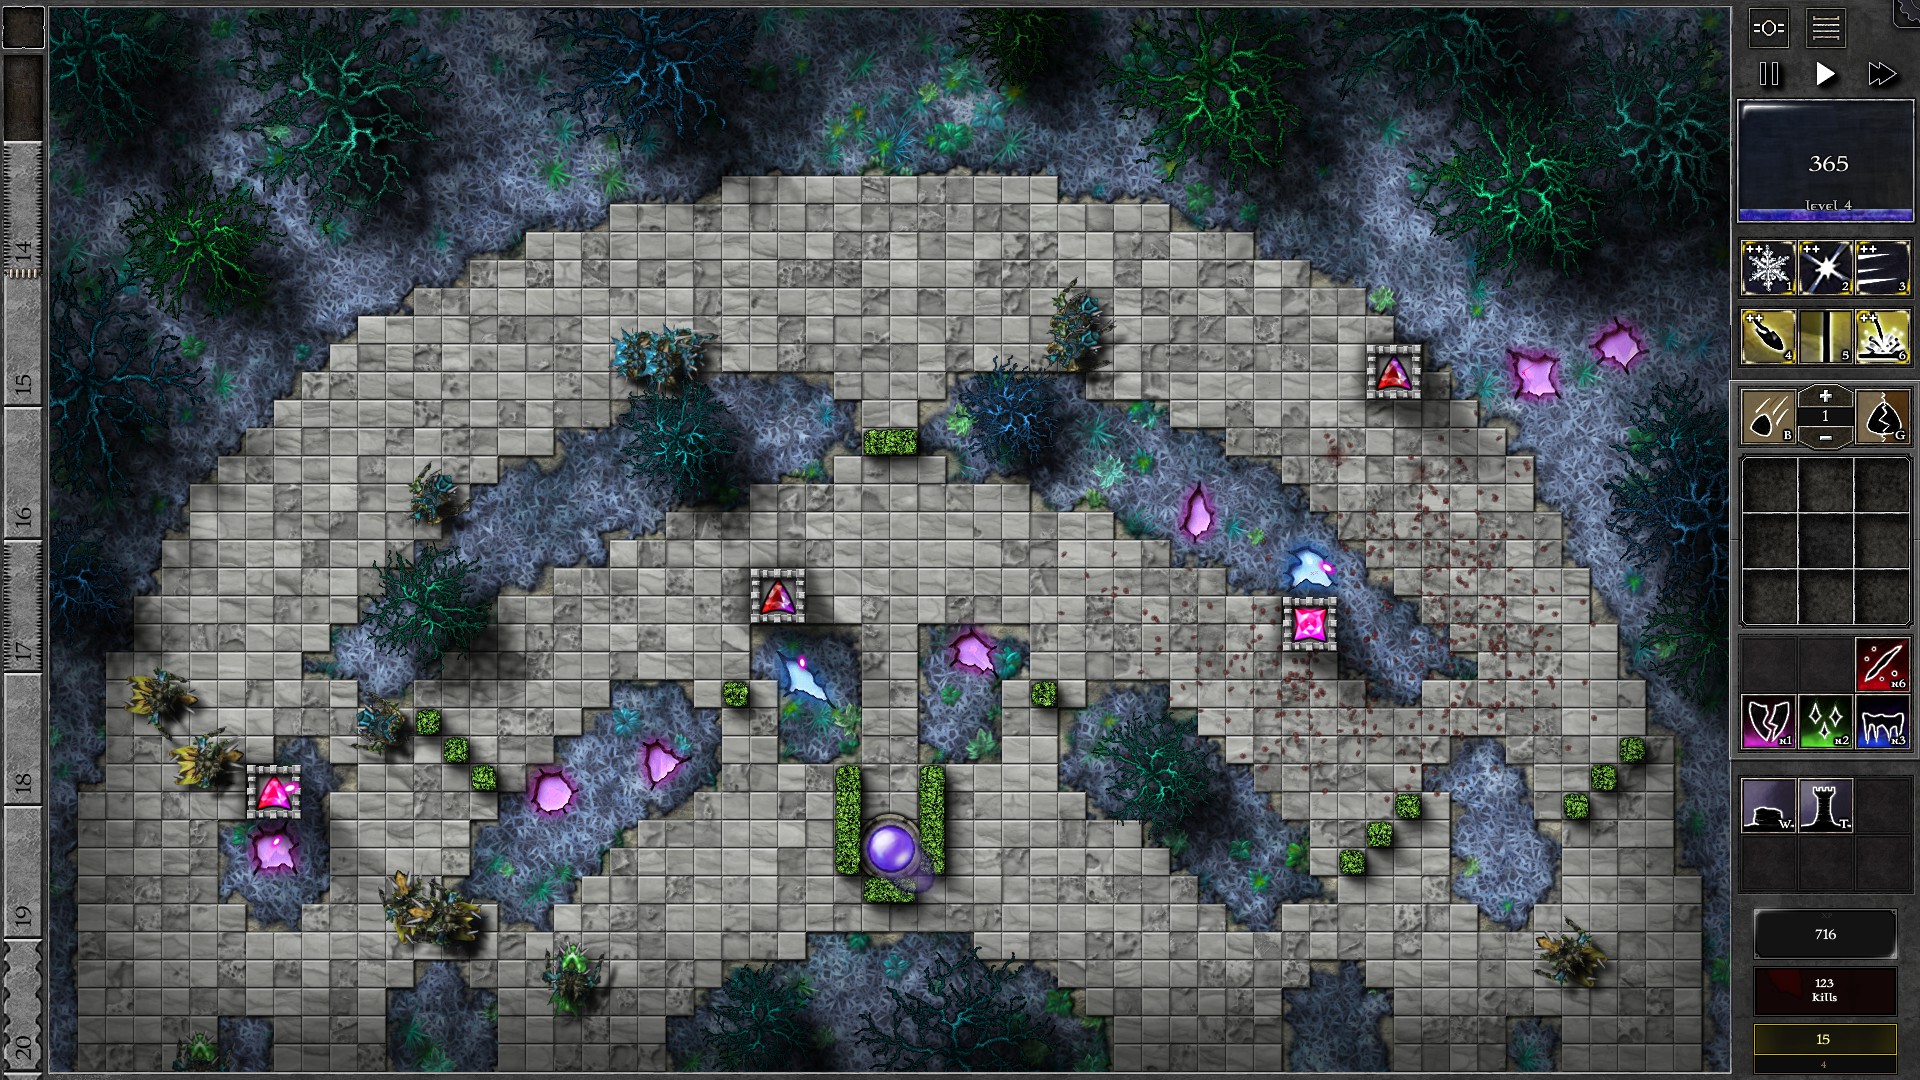
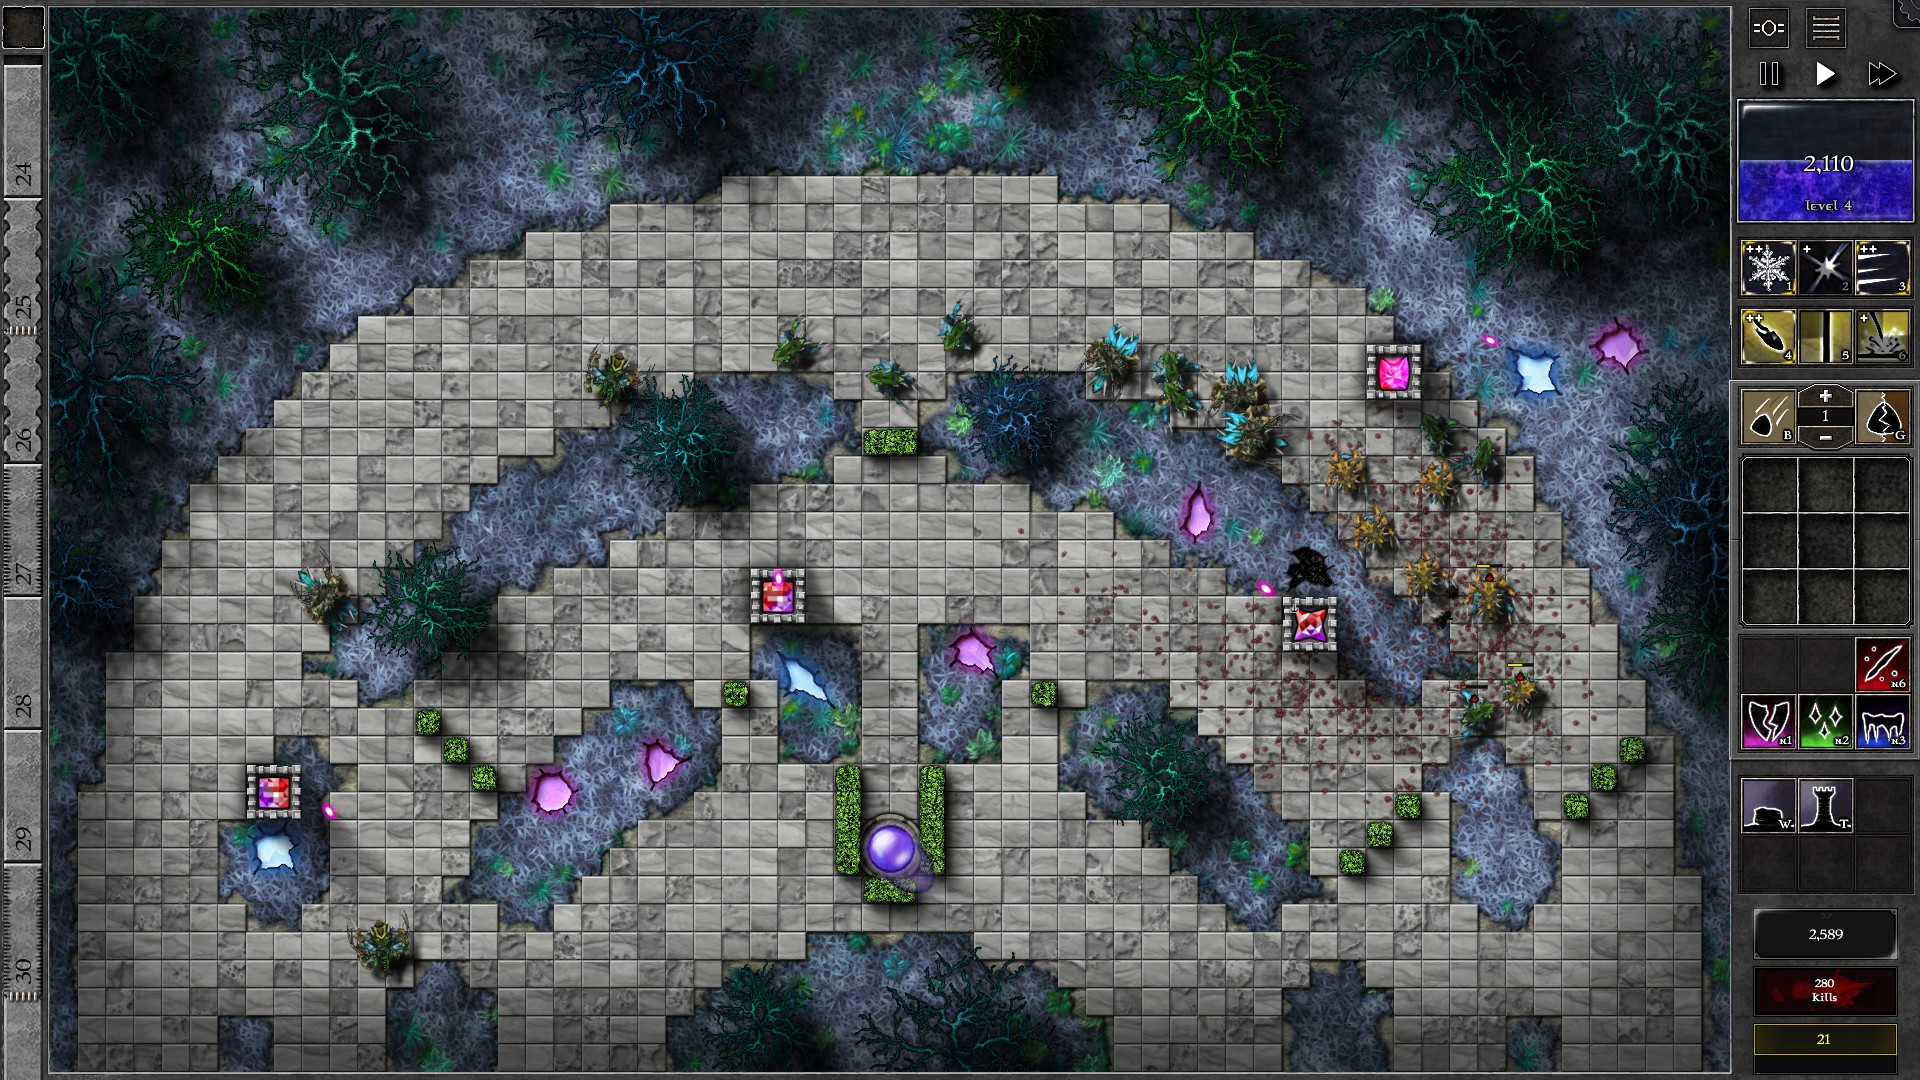
Continue farming mana to refill the towers with g2 p/r gems so you can continue hitting the mana shards. From now on, use Beam on the farming gems targeting open shards to quickly harvest mana. In addition, create another tower with a g2 p/r gem targeting the 6000 mana – 2000 shell Shard to the far left. Upgrade the 3 g2 gems to g3 starting with the gem hitting the 4000 shell Shard. After that, further upgrade the gem on 4000 shell Shard to g4. You will probably need to use more spells to fight against the larger horde of monsters in w16-18. Once you have the 2 g3 + g4 gem, collect enough mana to combine all shard-hitting gems into a g5 and combine with the killing gem into a single g6 gem. Make sure you have the mana to create g2 p/r gems for the emptied towers (Total 1800 mana). The 200 shell Shard should also be depleted at this point and both the 2000 shell and 4000 shell Shards should be just opened.
Phase 3: w24-35
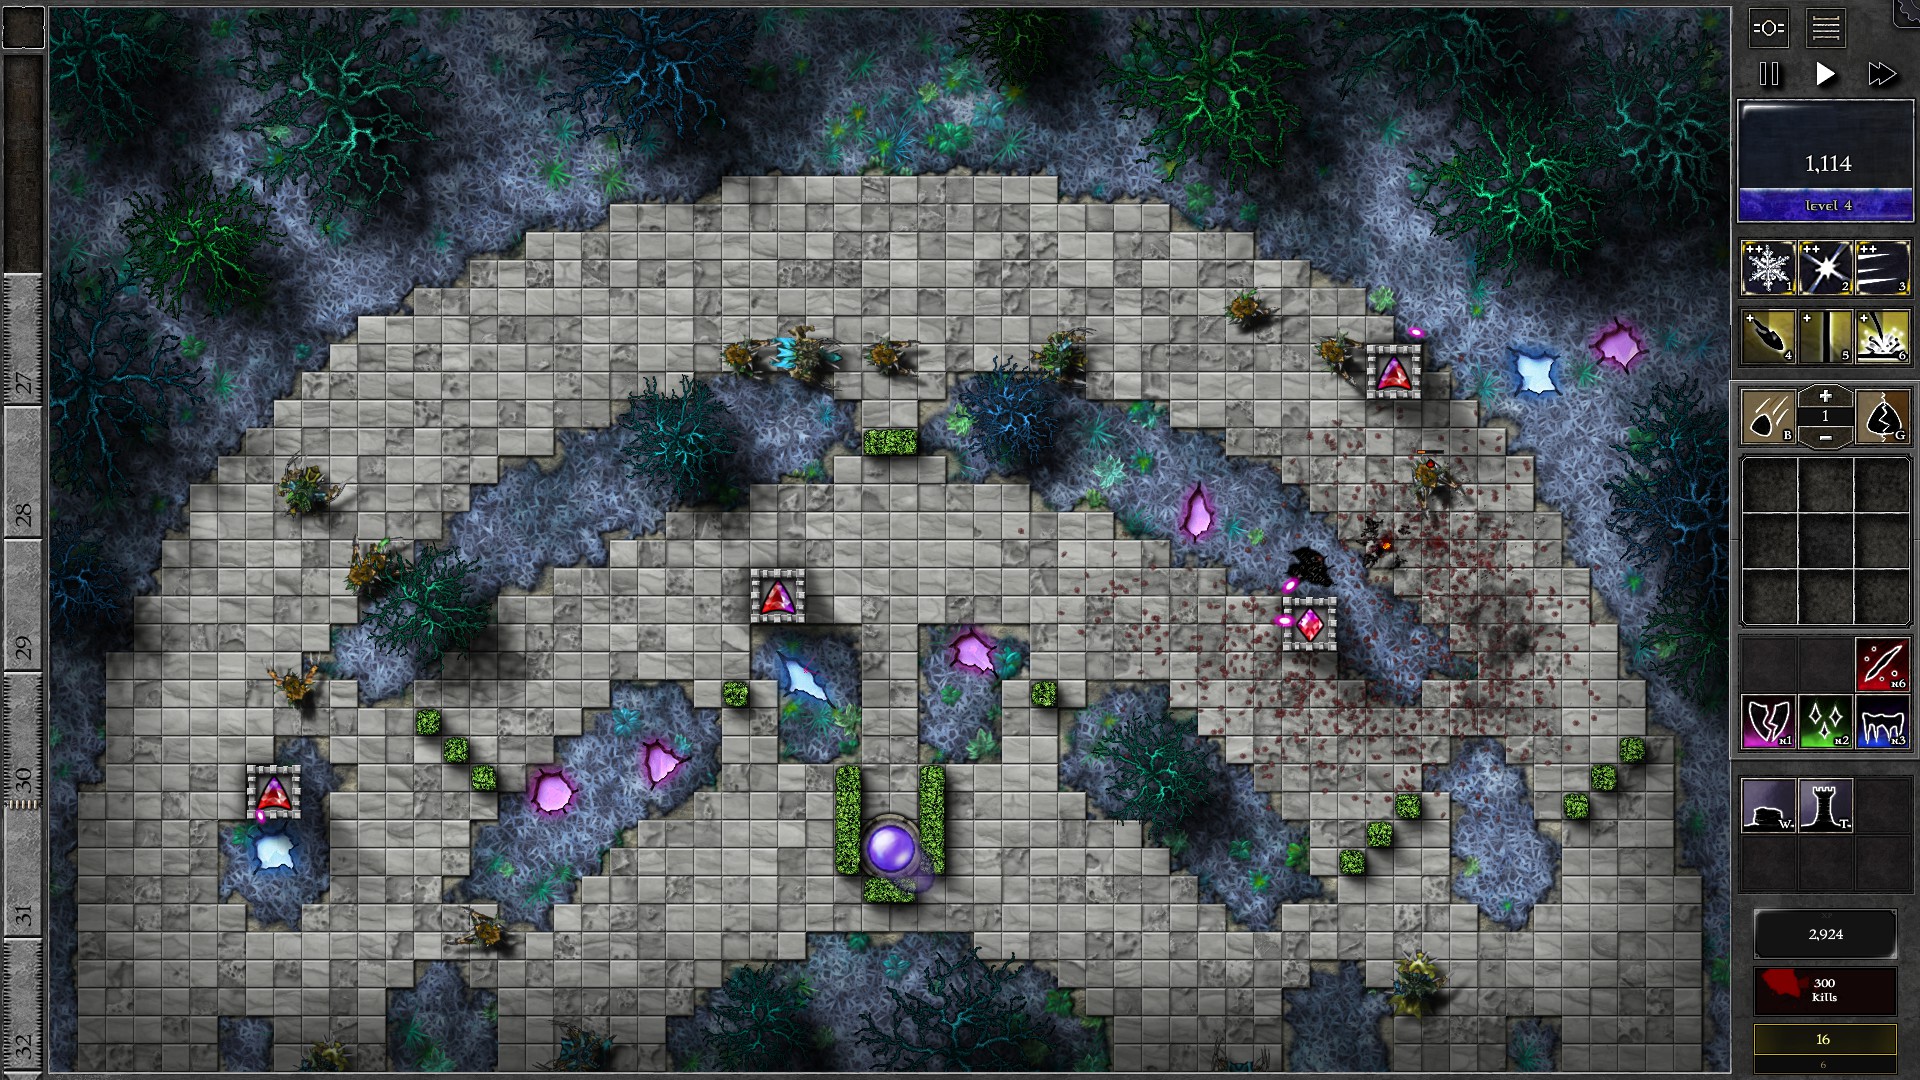
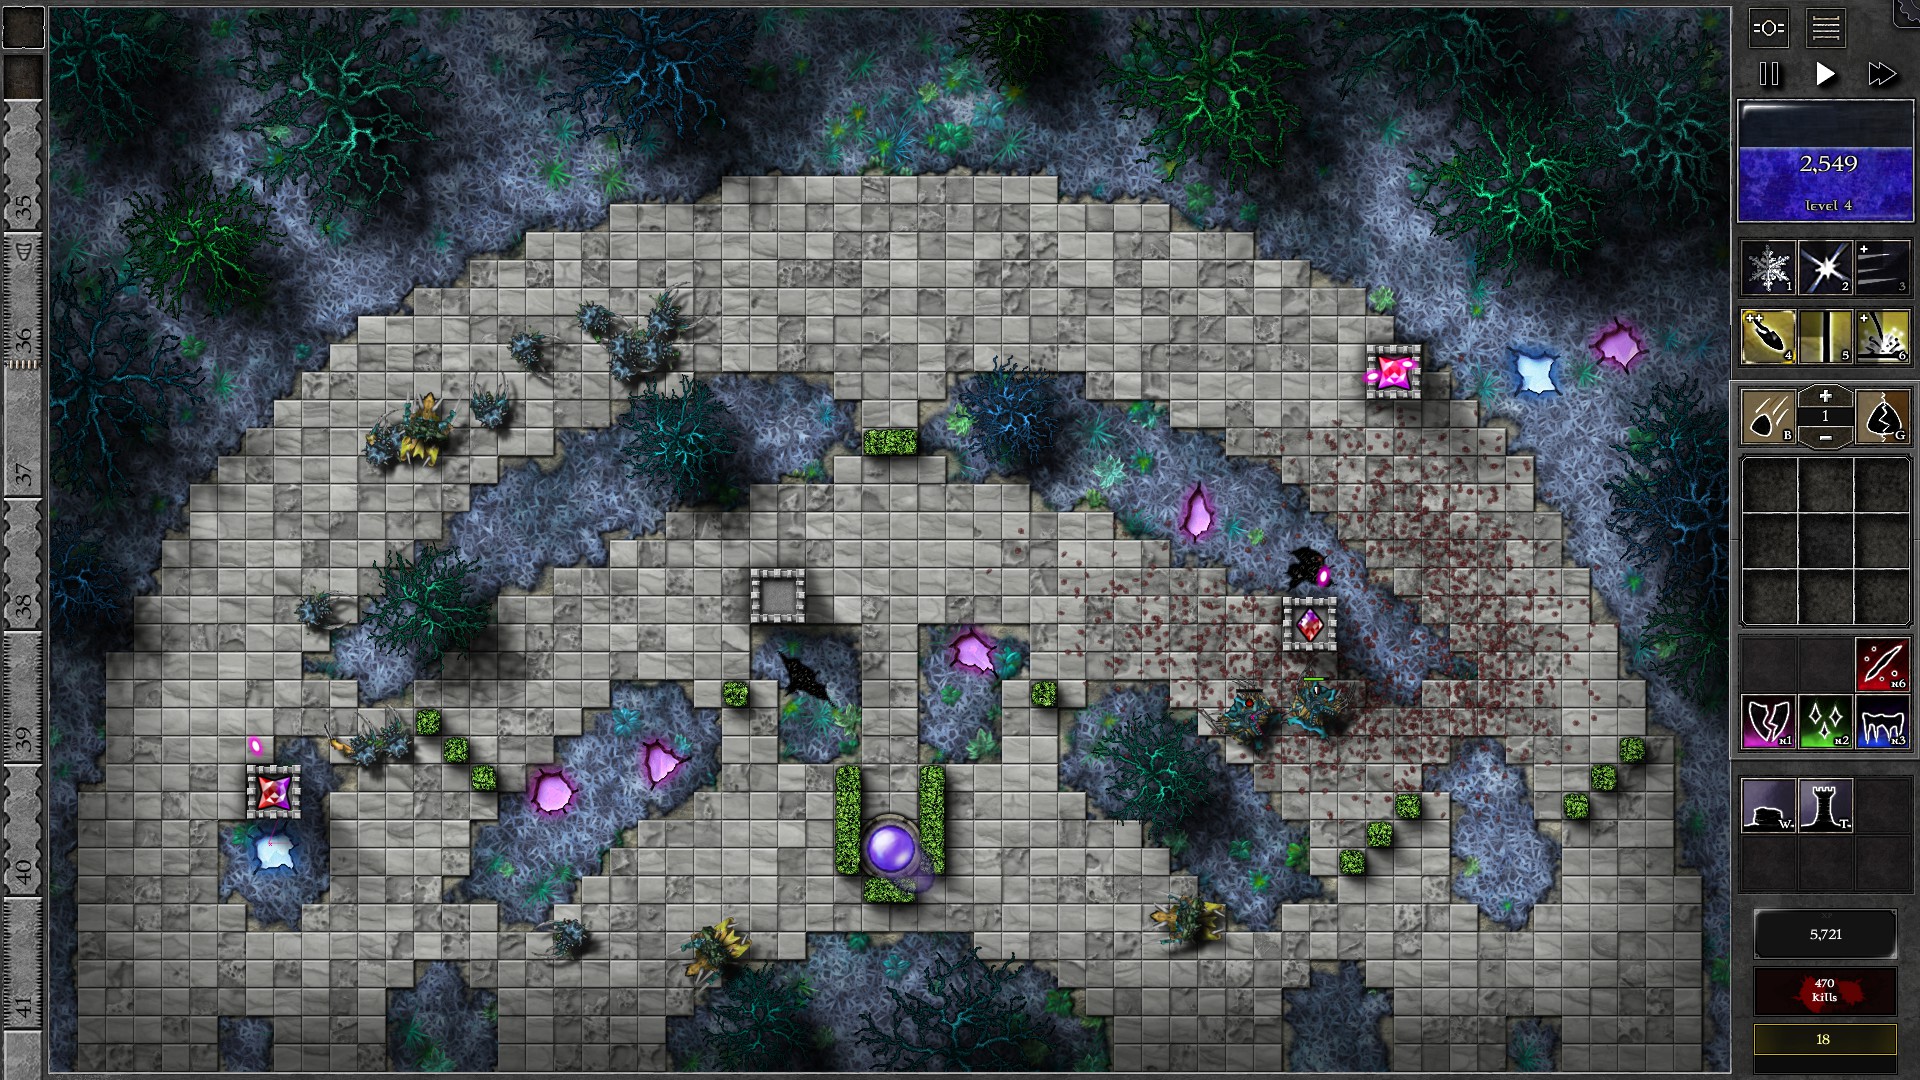
If you have survived up to this point, you are close to victory. Fill up the towers with g2 p/r gems to continue farming mana from the 3 Shards. Continue upgrading the shard-farming gems as you gain enough mana. The 1000-shell shard should be depleted soon so try to combine this gem with the other shard farming gems as you upgrade. You should eventually reach 2 g5 gems on farming duty while trying to fend off the large horde in around w31-33. After surviving the horde and have some spare mana, you can combine the farming gems and the killing gem into a g7.
Phase 4: w35-50
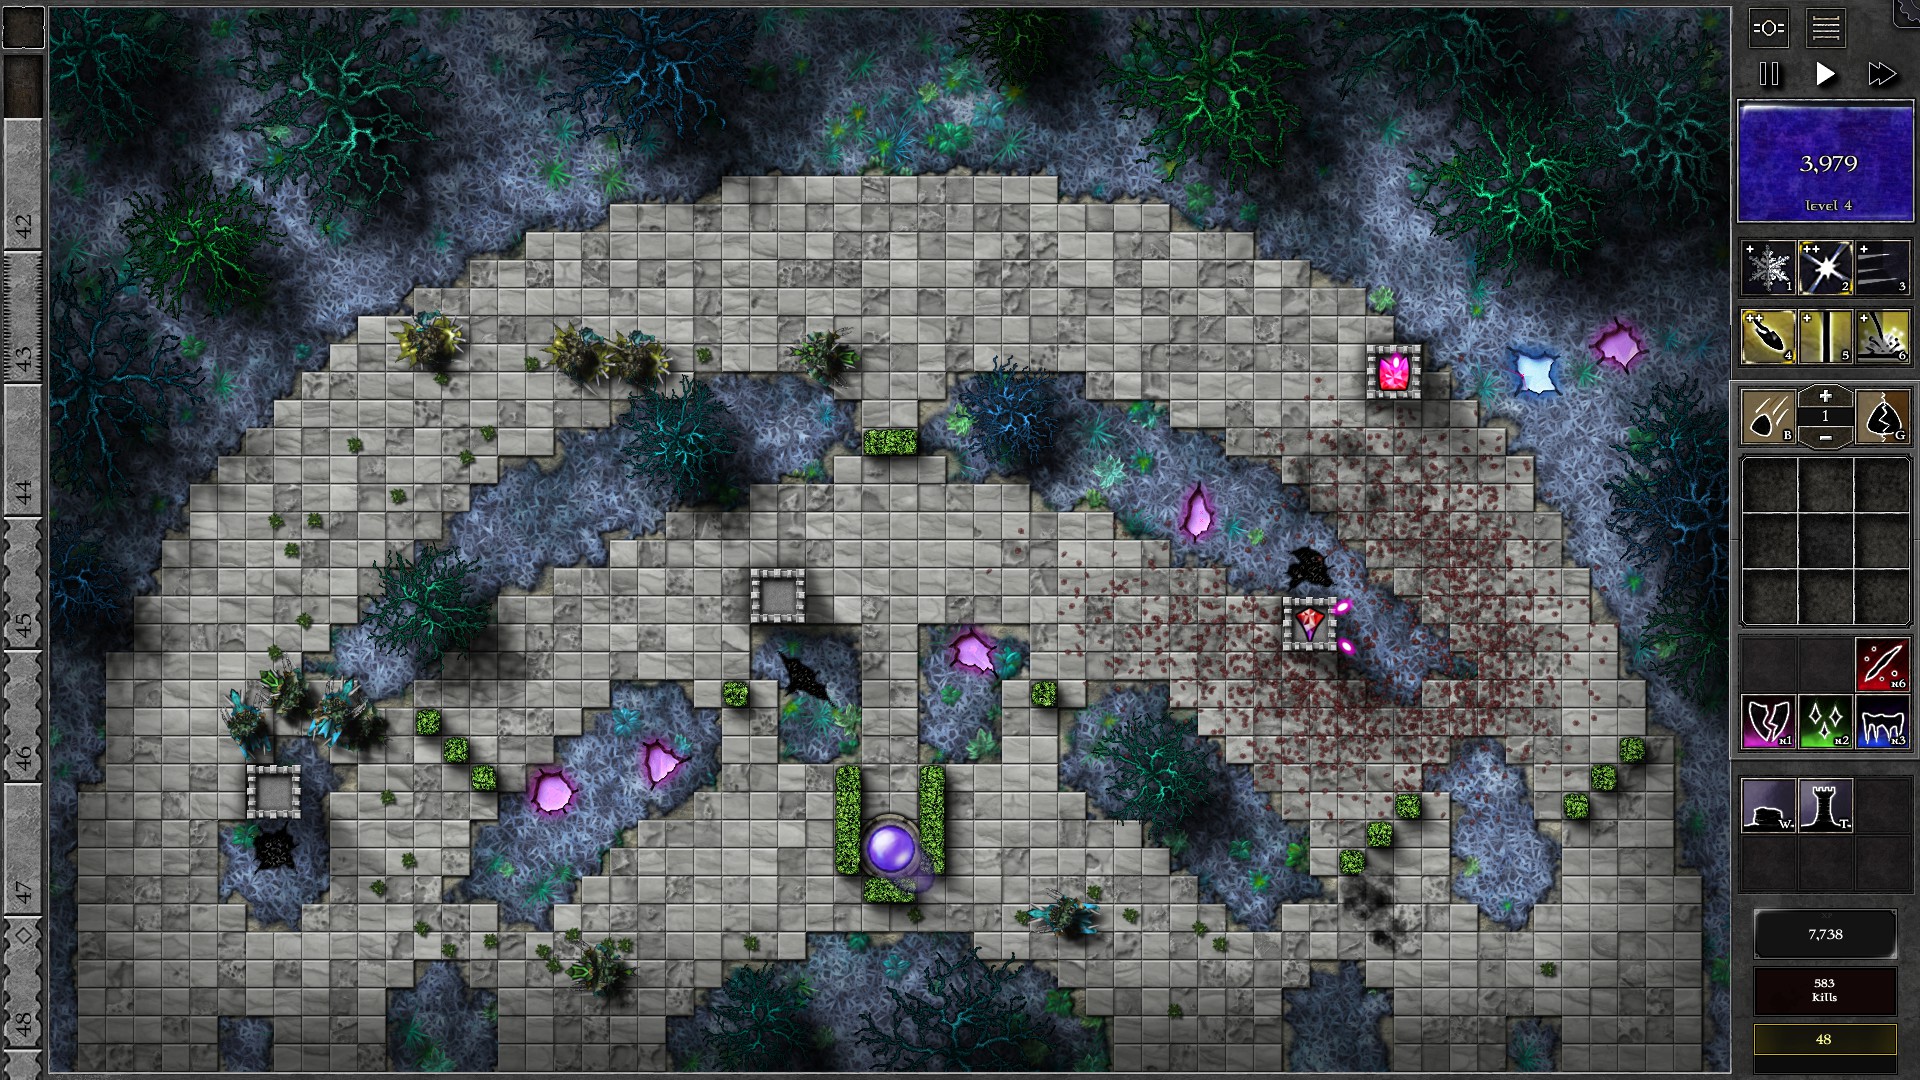
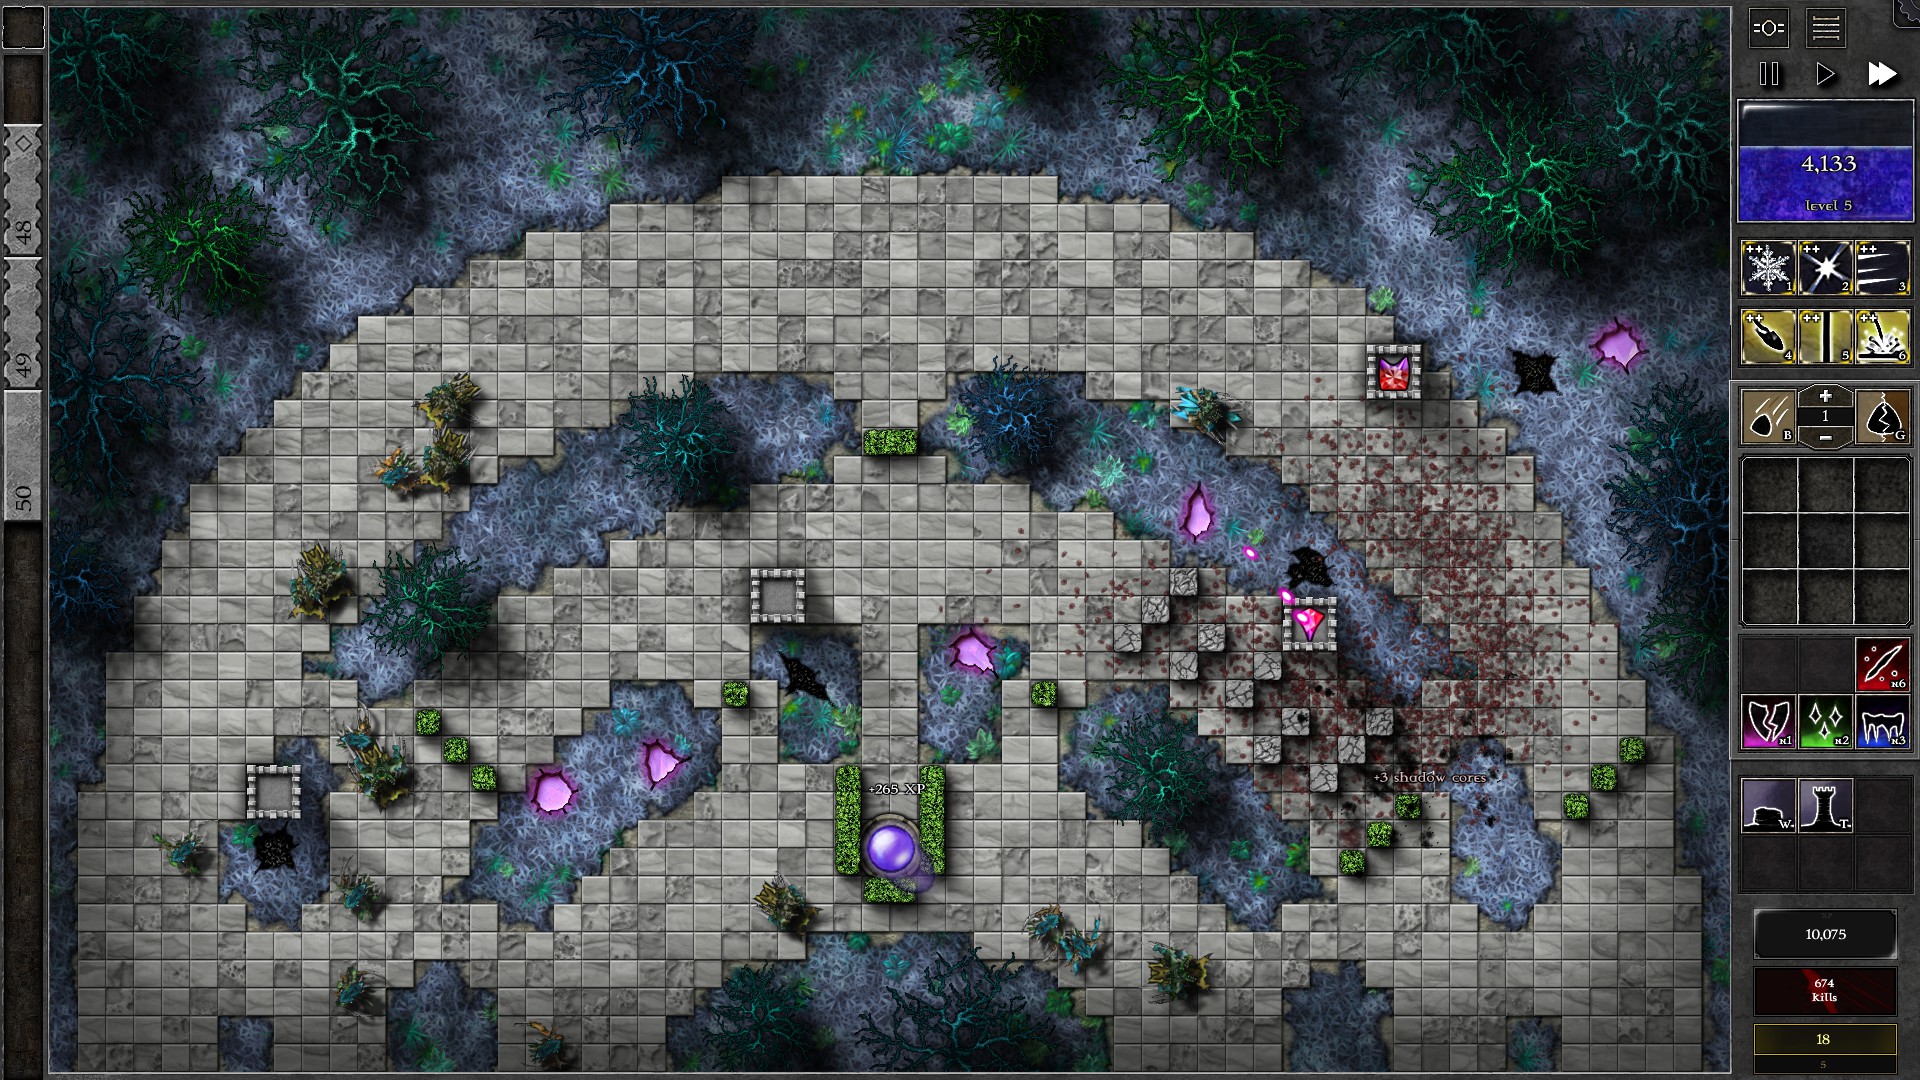
Once you have the killing gem at g7, the monsters should not be too much of a threat with the help of all 6 available spells. You can setup gems to continue farming the remaining mana from the opened shards, but don’t spend more mana than a signle g4 for this (i.e. 1 g4, or 2 g3). After depleting both the 2000 and 4000 shell Shards, you can spend some spare mana to slightly extend the monster’s path.
097 – Field E5
Before I start this field’s walkthrough, remember: Don’t sit back in this Trial. If a tomb is opened, you lose. As a reference, if you don’t send early waves at all, the first tomb will be opened at around w33-34 (Note: There are Spiritforge gems with yellow component hitting the tombs so there might be some slight randomness in how much time you have.) Sending waves early is required to beat the stage, but note that you will need to kill off monsters at the end and also get upgraded Spiritforge gems faster so you are not just sending 6-7 waves early.
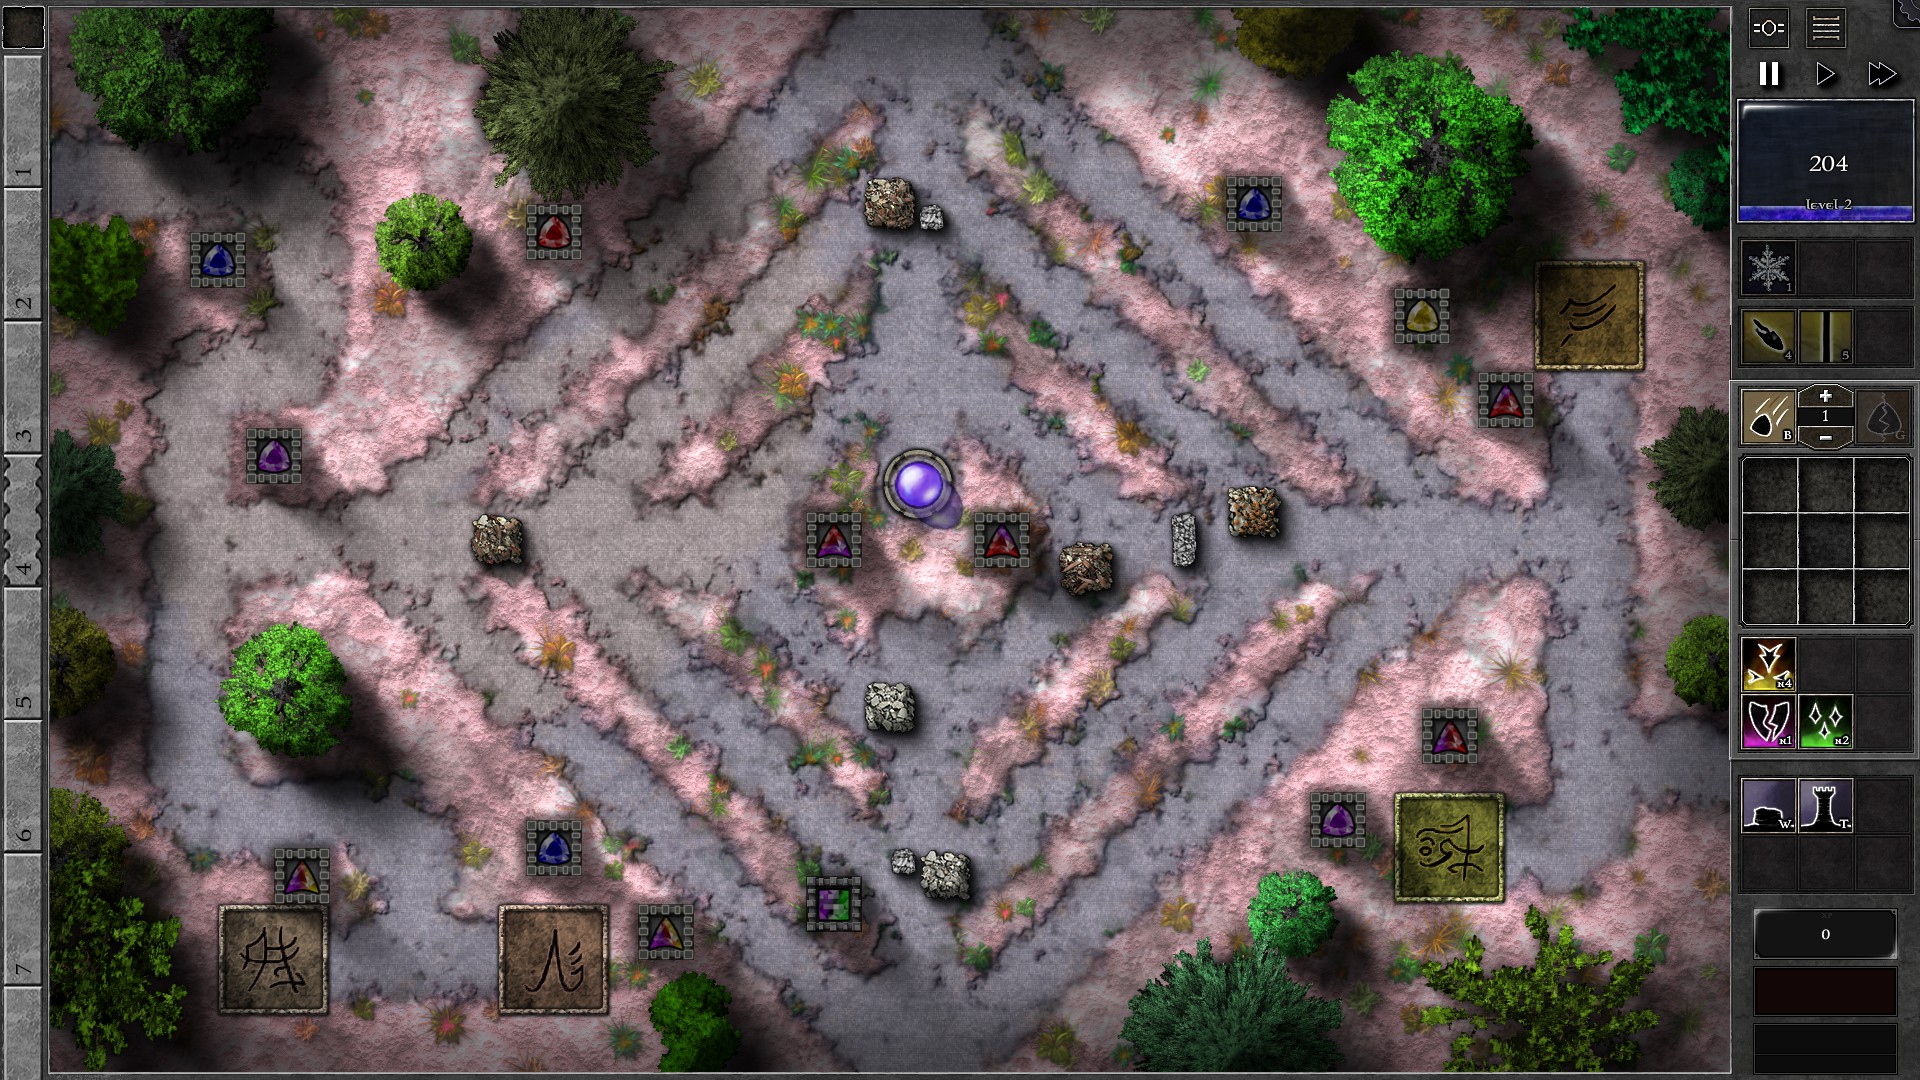
Start the field as shown with a g3 p/g gem. Once you have enough mana, build a tower diagonally to the upper right of the initial tower and insert a g2 p/g gem. For gem progression, you should upgrade your gems evenly, up to a g6 and a g5 gem at the end. If some of the barricades get destroyed (the one close to the Spiritforge tower just to the right of the orb, and the one close to your towers and has a wall segment), build extra walls to block them off. Use spells to help deal with larger volume of monsters due to early waves, in particular, Beam with random priority can spray poison damage/shread armor quickly which helps in thinning out large groups of monsters.
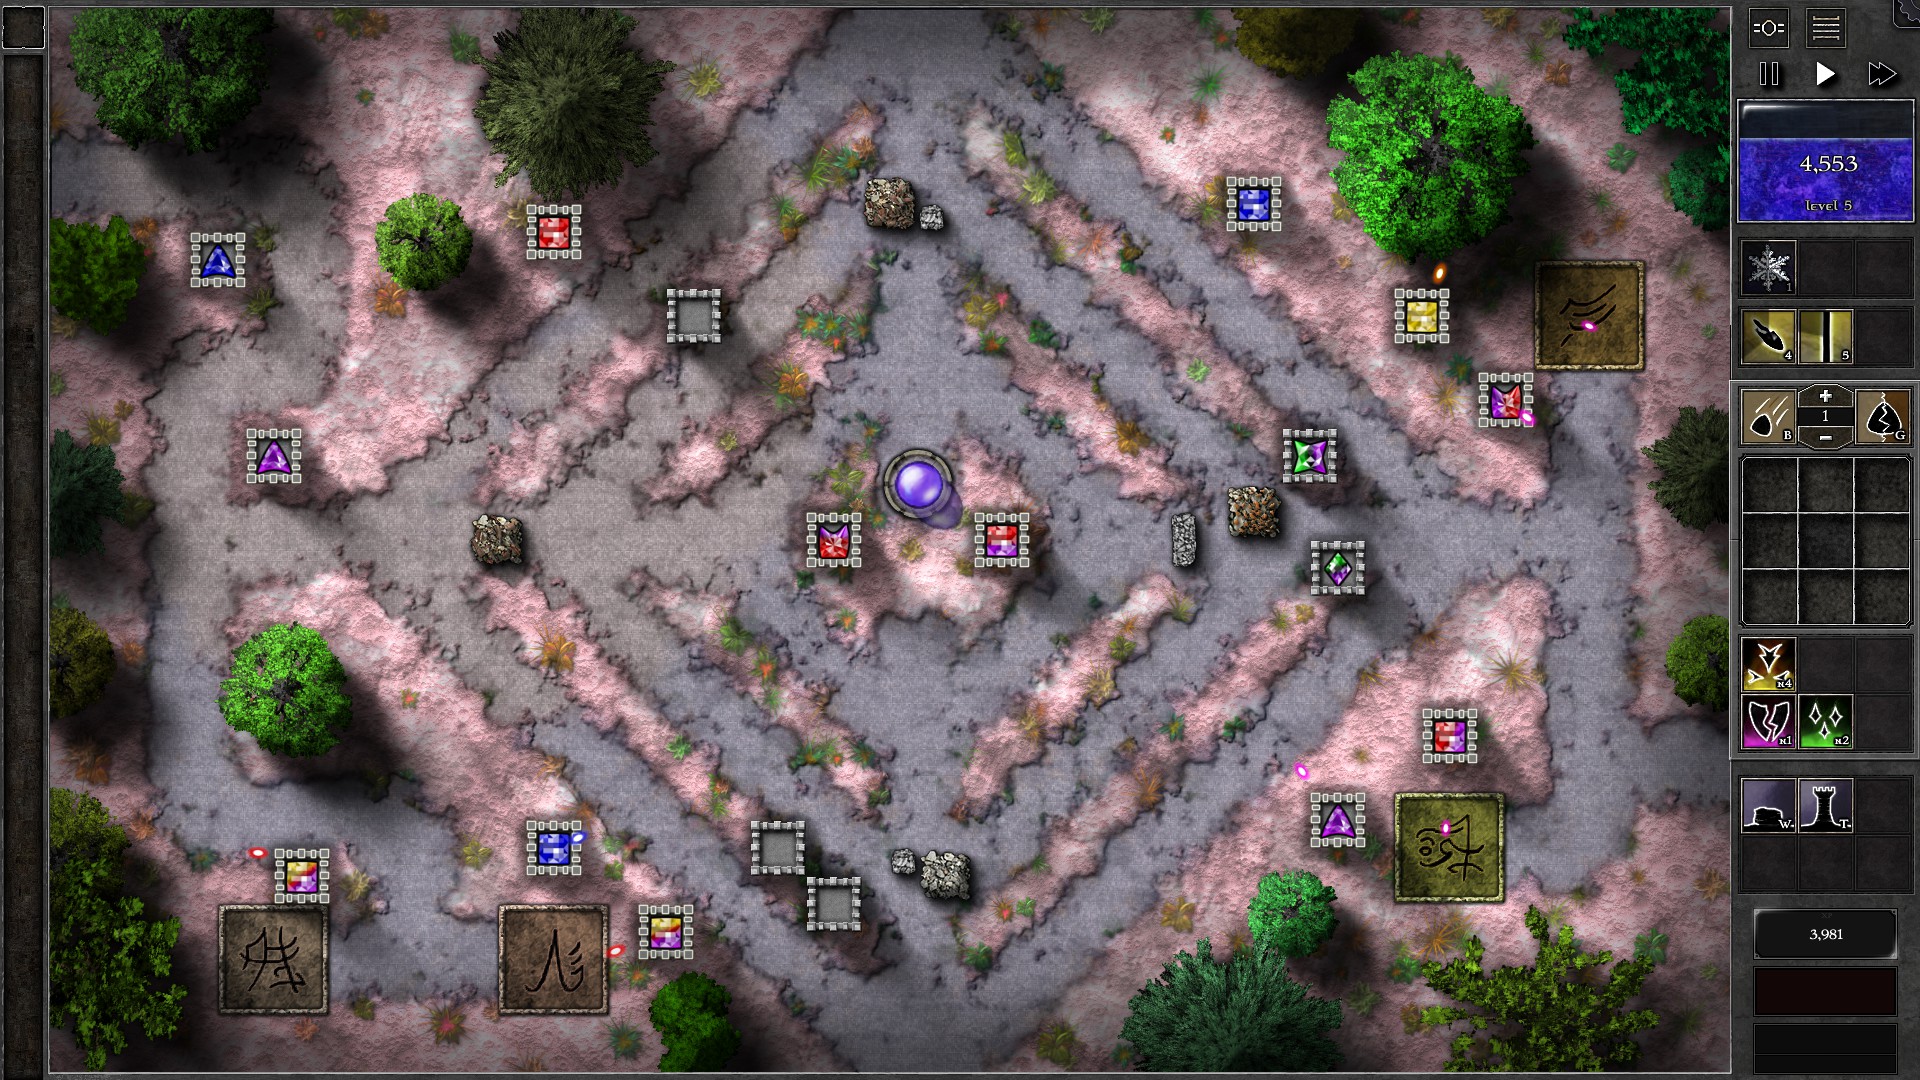
The main issue with this field is to determine when to send waves early. Try to send waves early if you notice that no more monsters are waiting to enter the field and your defenses are not under stress. At around w20 your gems start to get stronger that you can do more aggressive early eaves. Below I present a list of waves that I recommend to explicitly send early other than those through the previous advice. With this schedule I usually end up with around 2500-3000HP left on the closest to be opened tomb at the end.
- Send w5 immediately when w4 arrives.
- Send w9 immediately when w8 arrives.
- Send w11 AND w12 immediately when w10 arrives.
- Send w16 AND w17 after w15 monsters are all spawned
- Send w20 as some of the monsters in w19 are spawned.
- Send w23 as some of the monsters in w22 are spawned.
- Send w26 AND w27 when w25 arrives.
- Send w30 when w29 arrives.
- Send w32 AND w33 when w31 arrives, then send w34 once halfway through w33. You probably need to utilize spells (esp. Beam) to withstand the large horde.
- Send w35 AND w36 when halfway through w34.
- Send all remaining waves at w37. You will want to move gems across the field with extra towers to approach monsters from farther entrances so you can kill them on time.
Finally for those that are willing to invest in more control: You can force the Spiritforge gems to fire at monsters by clicking on monsters that try to pass through their attack range. This can be helpful on deferring the tombs from being opened. The tombs at the right (especially bottom-right) are more susceptible to being opened so you will want to click monsters that go past the gems firing at those tombs.
098 – Field I1
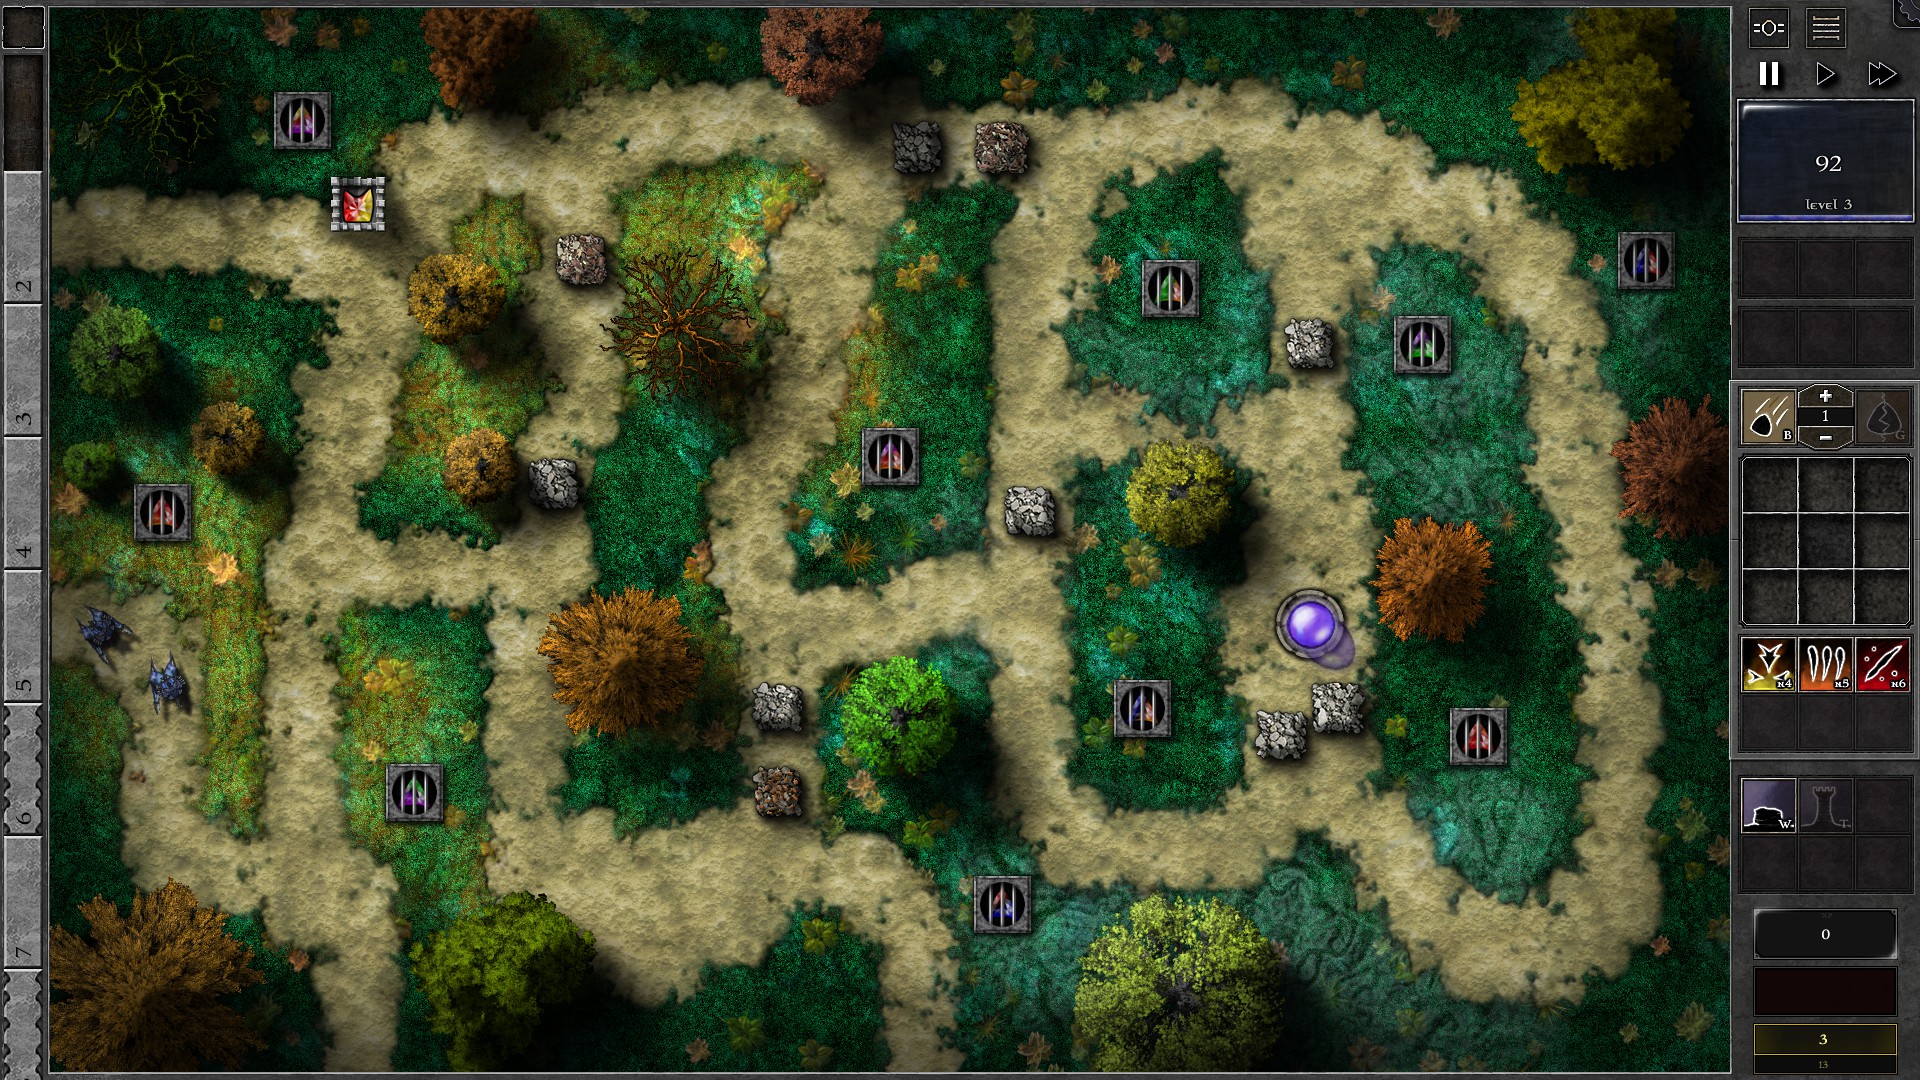
Start the field with a g4 r/y gem in the top left corner. The gem should be firing at the Sealed Gem close to it when it’s not firing at monsters, which should free the gem (y/p) at around w7.
Once the Sealed gem is freed, move your g4 r/y gem to the next sealed gem to start opening them. The freed gems can be placed in the original towers and set to “Least HP” to help thinning out some monsters. Repeat the process as you build more towers for the g4 r/y gem to free more gems. Refer to the screen shot below for a preferred order of building towers and freeing gems which should end up freeing 6 gems in total. (For the 2 freed gems close to Tower 3, sell the r/b gem and use the o/b gem)
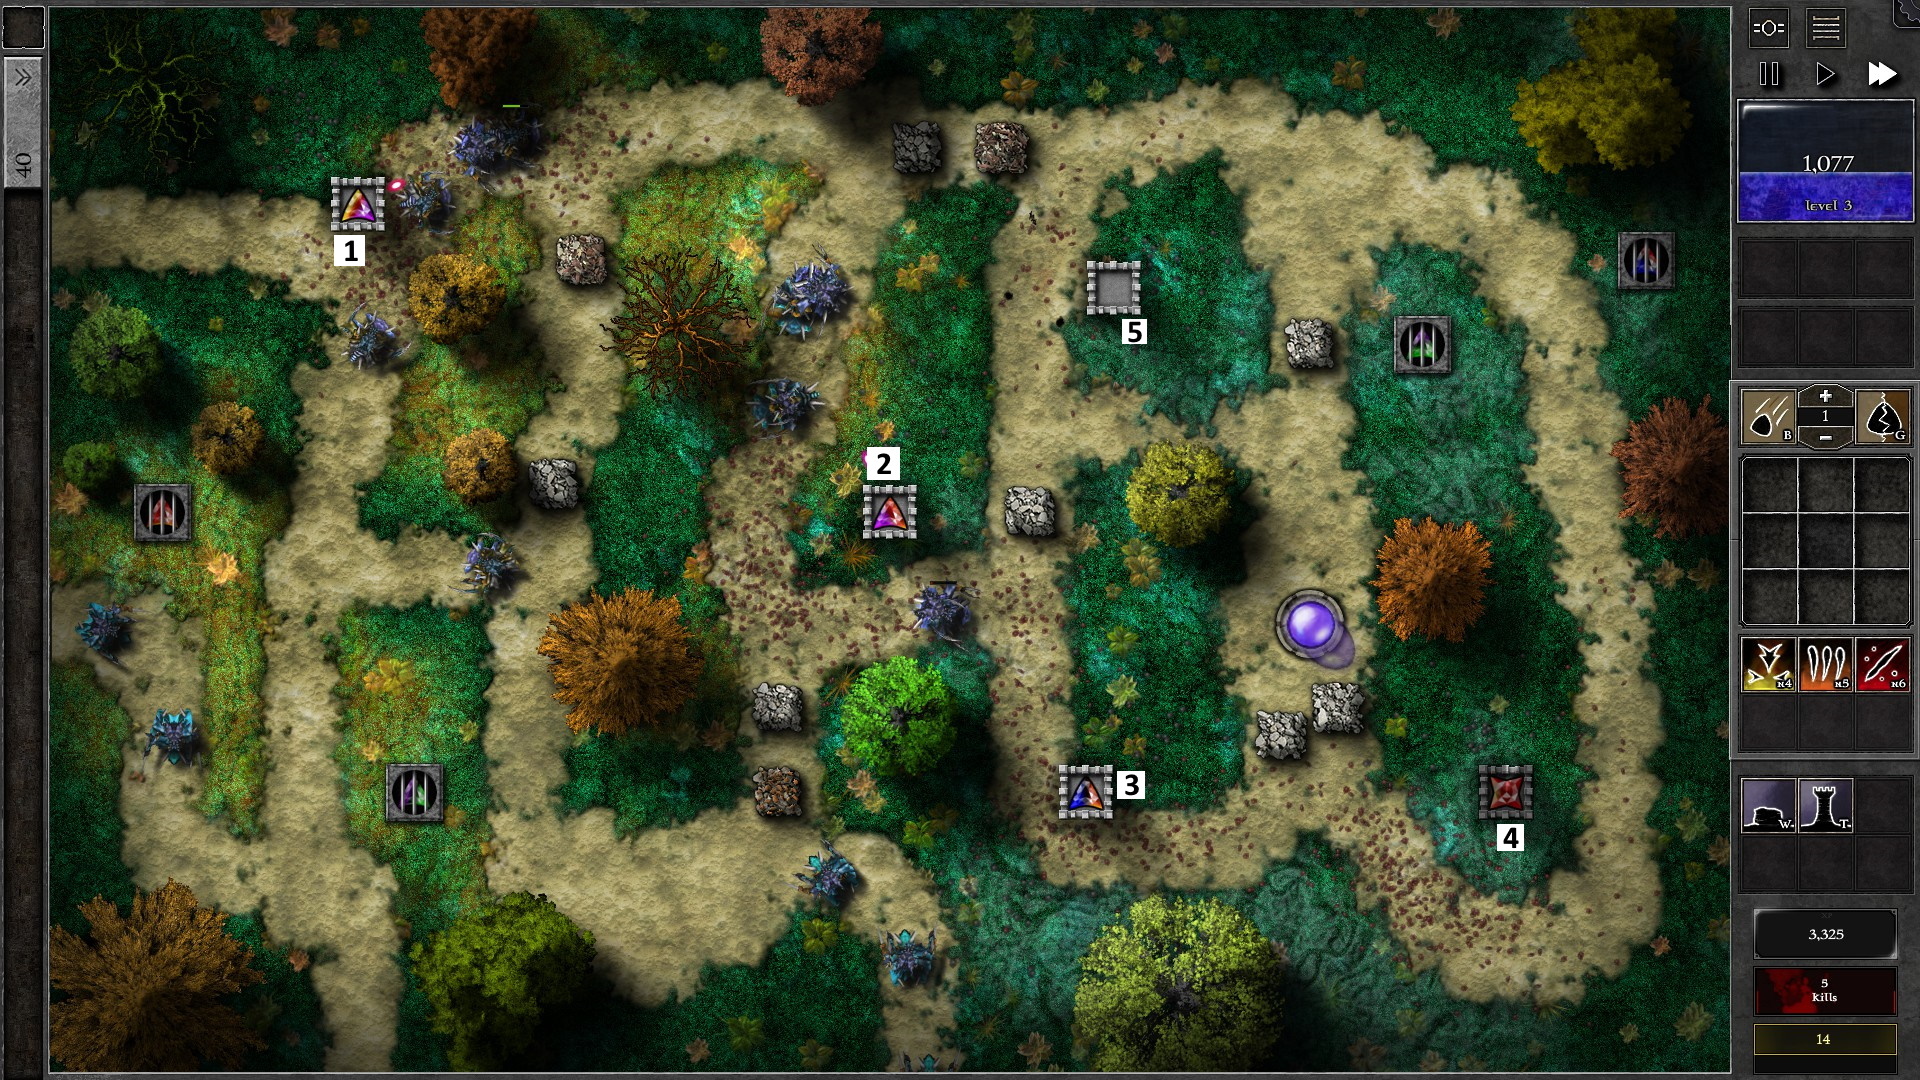
After freeing the 6th gem, sell the 5th (r/o) and 6th (g/o) gems which should give you (almost) enough mana to upgrade the g4 r/y gem to g5. The g5 gem, placed in tower 4, should be strong enough to take on the remaining monsters together with the remaining 3 freed gems. For the shielded w38, consider switching some of the freed gems to target “Shielded/Highest Armor” to help remove the shields, or move your g5 gem to tower 5 once the wave gets past tower 4. Tower 5 can also come in handy to catch the fast reavers in w40 if they bypass tower 4.
099 – Field I2
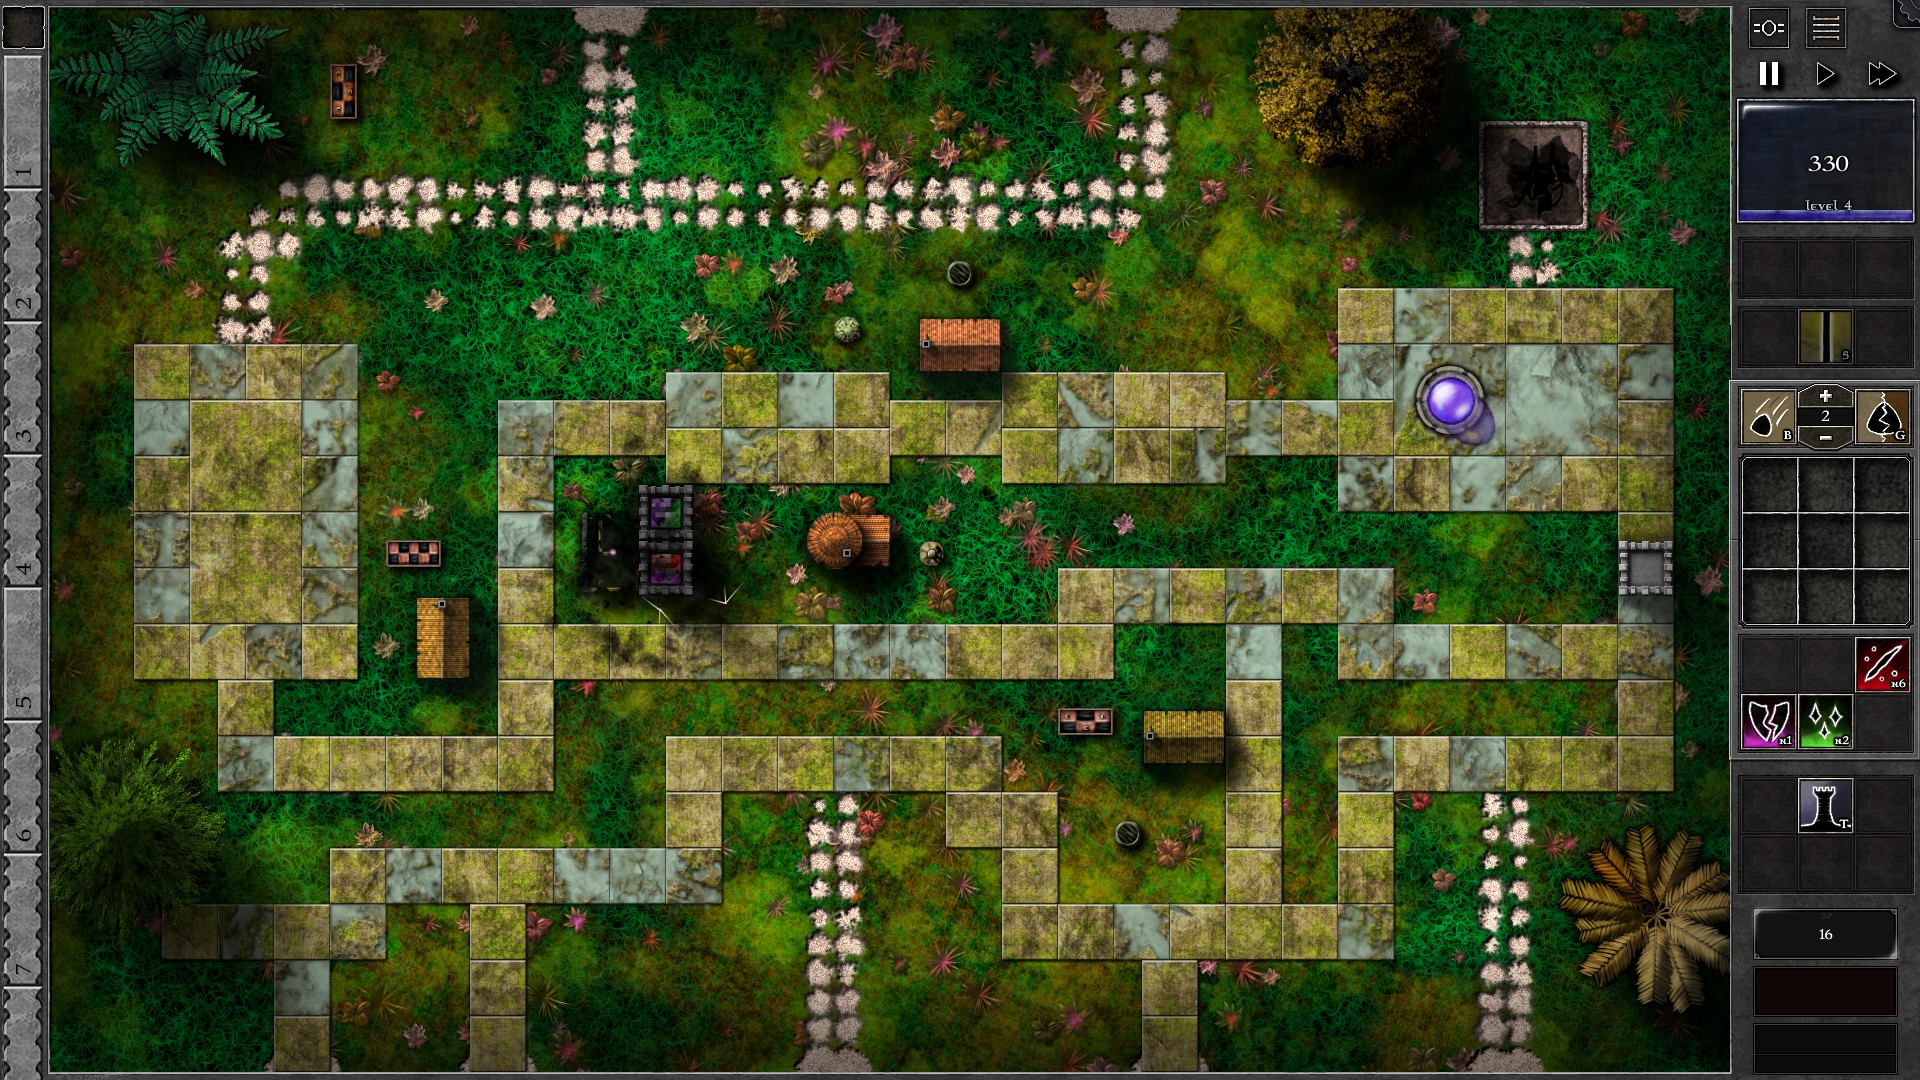
NOTE: Dark Masonry may impose additional RNG factors to this Trial. Proceed with caution.
Start the field by building the towers as shown with a g3 p/r gem and a g3 p/g gem. You need to destroy the dwelling with a g2 gem bomb to open up the area for building the towers with gems. Send w5 early when w4 starts so that the reavers arrive at the towers before the giants. When the beacons from Dark Masonry spawn, if they may threaten your defense (e.g. Shield/Speed beacons before your killzone), you can build gems and towers to destroy them and later merge these gems into your main gem.
NOTE: As you leave empty towers after destroying beacons or killing Spires later on, you can fill them with g1 p targeting “Shielded/Highest Armor” which helps in shredding some armor from the monsters.
In w13 the first Spire arrives in the field. You should have upgraded both gems to g4 at this point. Build a tower close to the Spire (or wait for the Spire to get close to your killzone if possible), then use Beam on the p/g gem to take it down quickly. You can click on the Spire or use “Specials” targeting to make sure the Beam will focus on the Spire. The w15 reavers may also pose some threat as they charge through the slow giants. Use Least HP on your towers to help pick off the reavers in w15 (and any further reaver waves as necessary).
NOTE: You can use Beam spells to help shred off armor from reavers quickly using “Sheilded/Highest Armor” targeting until the beam locks into one target.
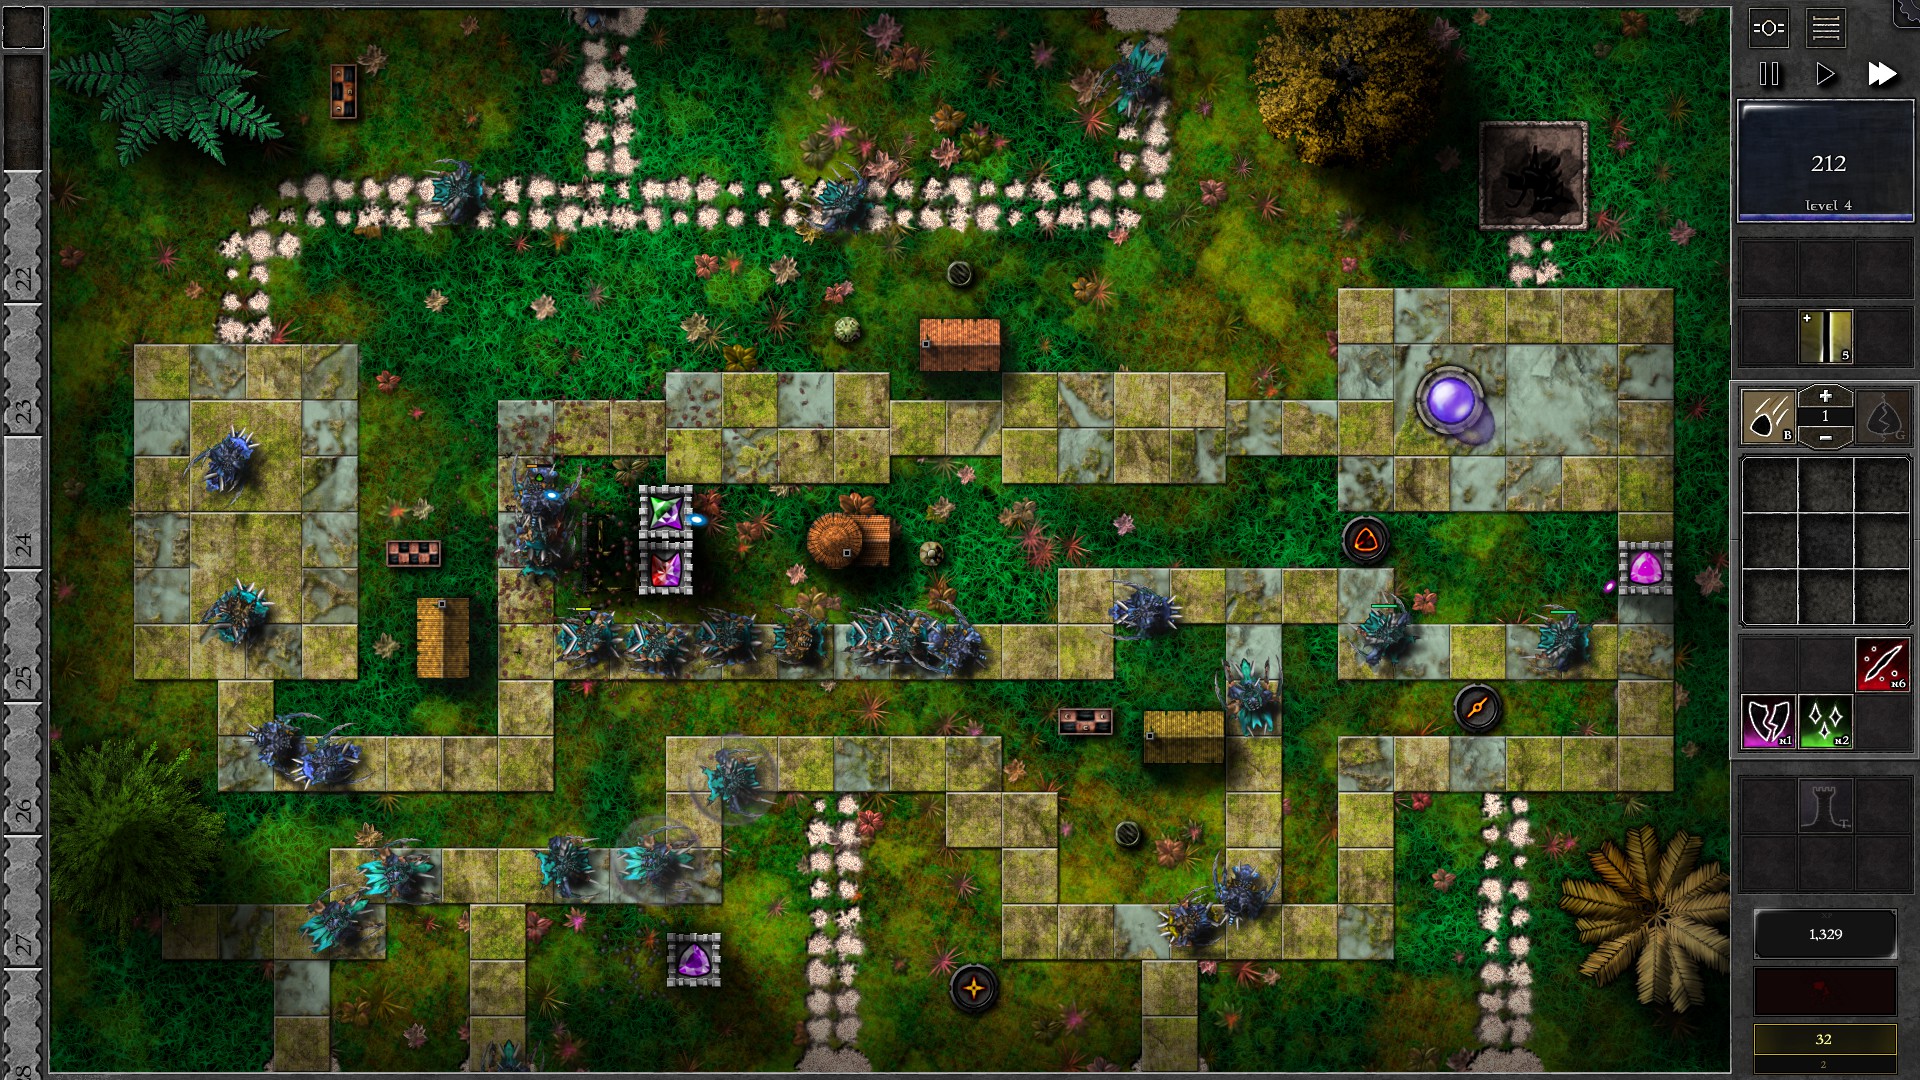
Another Spire will arrive at w21. You should have close to enough mana to upgrade a gem to g5. Upgrade the p/g gem first and use it to take down the Spire (watch out for w24 reavers). You should be able to afford upgrading the other gem to g5 at around w25 while taking down the Spire.
Continue fighting through the monsters and you will have enough mana to upgrade the p/g gem to g6 at w32-34. The 3rd Spire will also arrive as the linked w33/34 starts. Leave the Spire alive until you have defeated the reavers in w32 and 35, then kill the Spire using the p/g gem. You will also gain (close to) enough mana to upgrade the p/r gem to g6 while you work on killing the Spire.
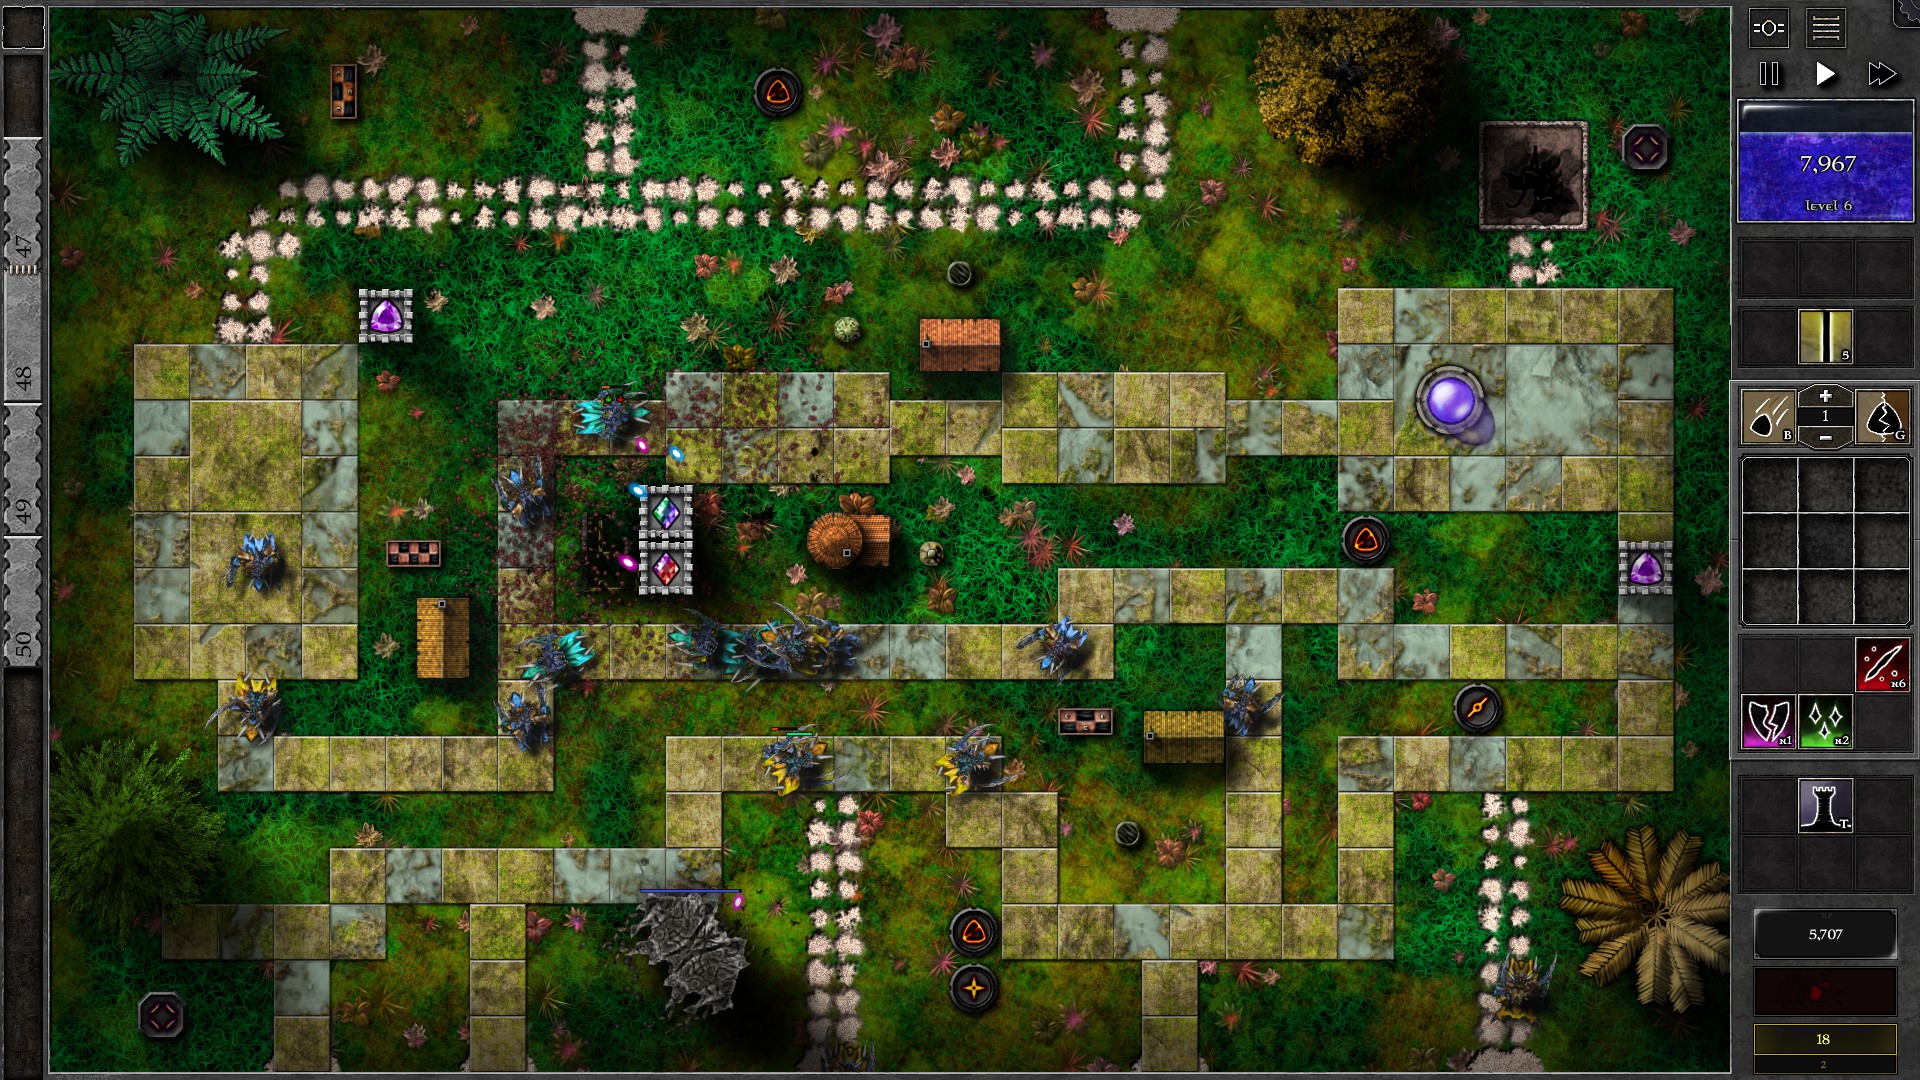
With 2 g6 gems you should be able to take on the remaining monsters with some occasional banishments. Note that a 4th Spire will arrive at w42/43, and has decent HP that will take some extra Beam spells to kill. You may also need additional beam spells to take on the reaver waves without leaking too much monsters. Finally, it’s possible to gain enough mana to upgrade a gem to g7 but it’s not required and the mana is better saved for banishments until you are sure that the situation is safe.
100 – Field I3
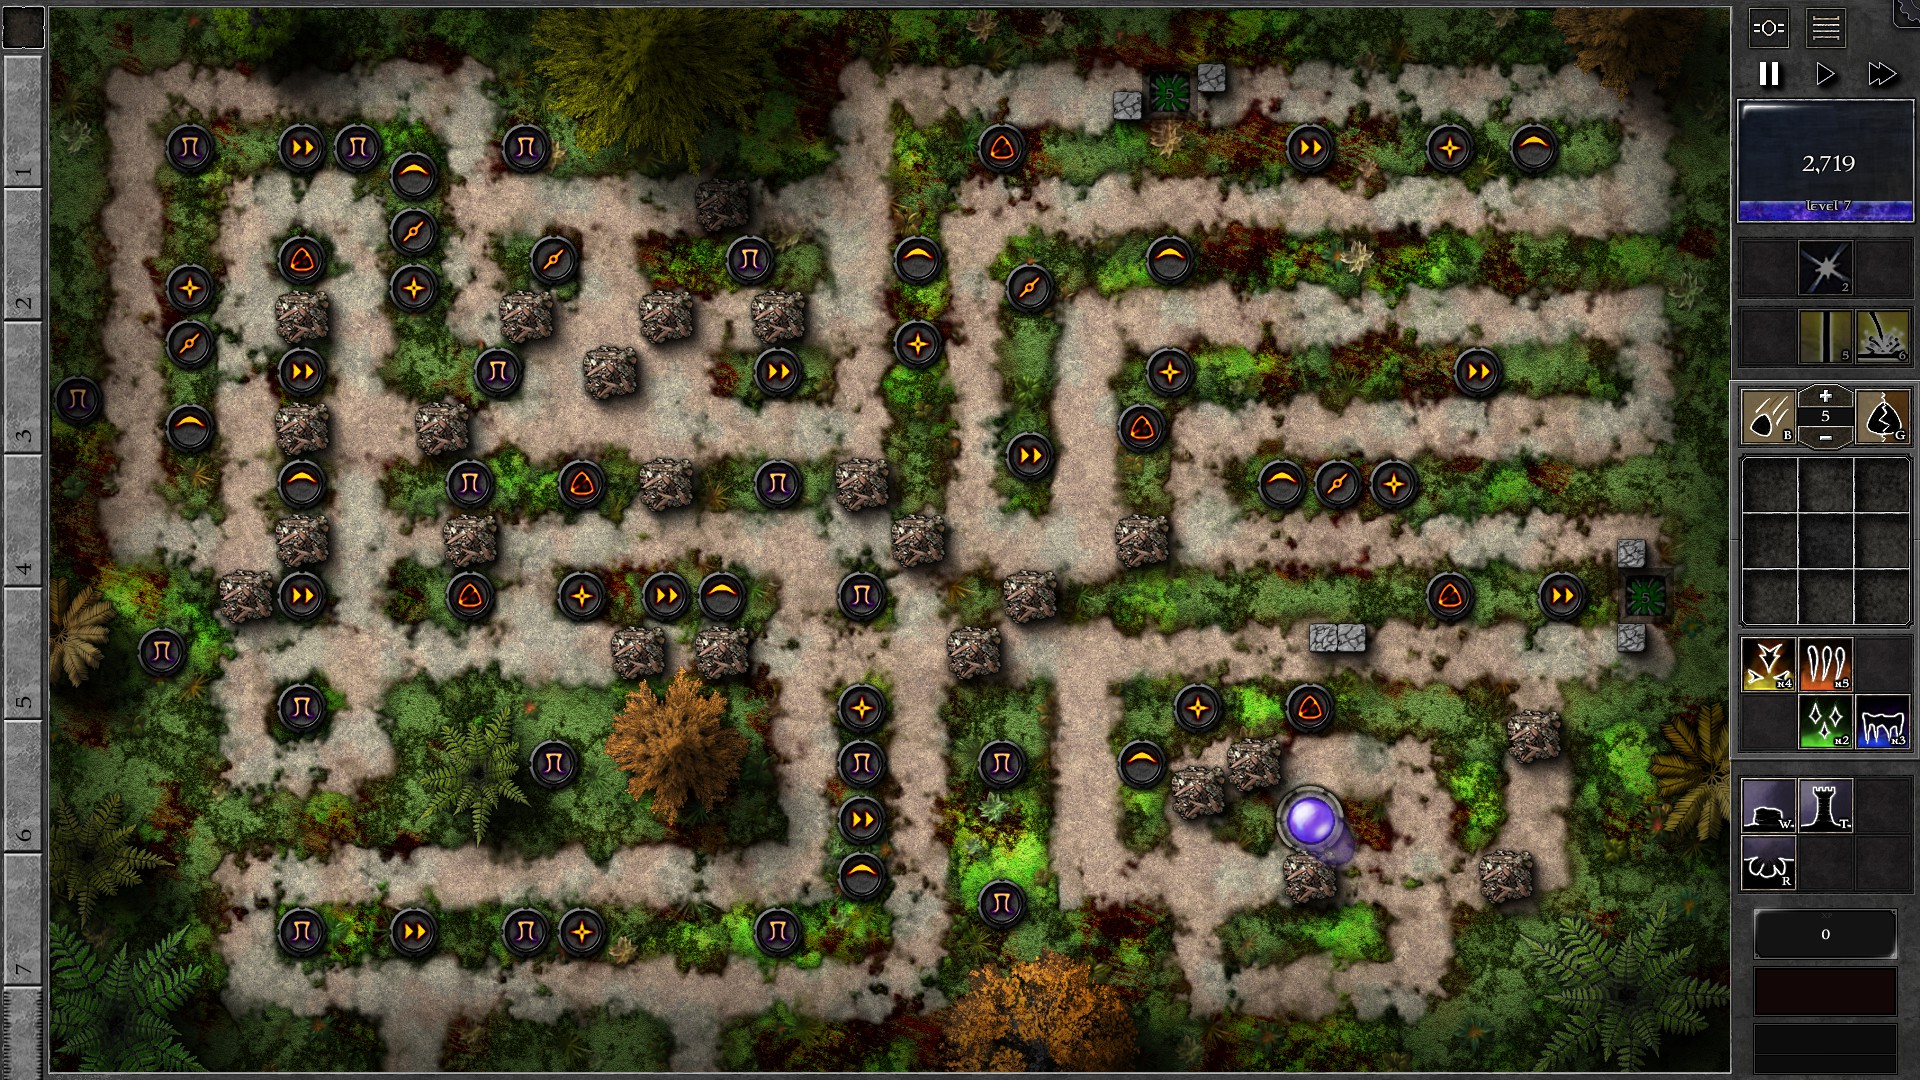
Start this field by salvaging all the gems provided at start which puts you at around 12000 mana. Create 2 g5 pure green gems an insert into traps as shown. Set the gems to “Least affected by specials”. Build wall segments to guide the monsters through the traps and block out the range of the Cleansing Beacon (right after the 2nd trap).
Start the field and as enhancement spells are charged, enhance the green gems with Barrage to increase poison damage (for the first set of spells, consider giving Beam to the first gem while waiting for more Barrage charges). At around w8 you should be able to afford a 3rd g5 green gem with its traps and walls. Build a trap right next to the first trap and insert the gem with Barrage enhancement. Create another set of g5 green gem with traps and walls when you have enough mana again (at around w16) and add the trap just above the Shield Beacon close to the Orb. So far Whiteout is not required to deal with the monsters.
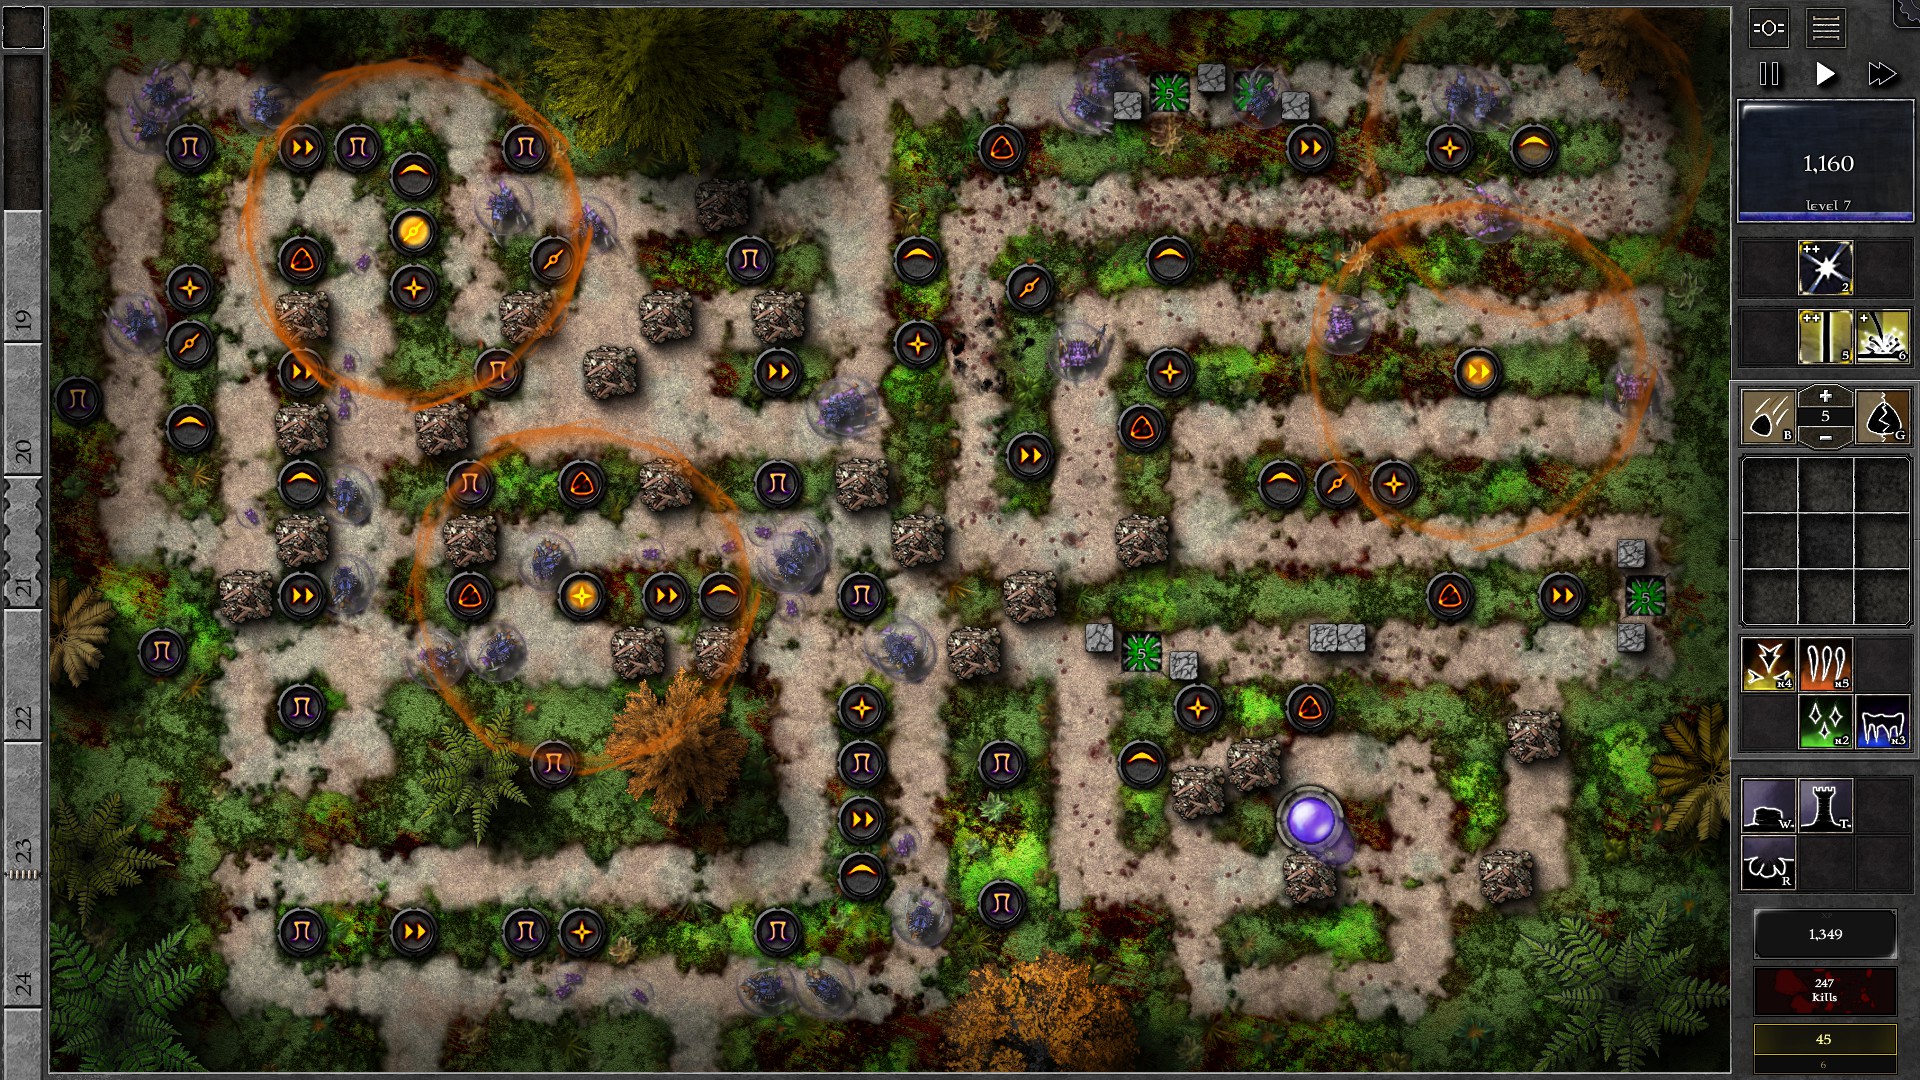
As you reach w18 your Barrage enhanced gems no longer has more poison damage than Reaver HP so start preparing to upgrade some of the poison gems as well as use Whiteout when necessary. There are also 2 Giant waves (w21 and w31) which can also pose a threat if not killed ASAP (these get healed more from healing beacons and become even deadlier than reavers/swarmlings once their speed goes up). You should gain enough mana to upgrade a g5 gem at around w24, which you should use to upgrade the rightmost poison gem (insta-resocket with Barrage).
The giants from w21 should arrive at your first poison traps at this point. Use Whiteout on them to make them take more poison damage from your traps (and also make Beacons not work on them). At around w29-30. you should have enough mana to upgrarde another g5 poison gem to g6, do this on the gem in the first trap (insta-resocket with Barrage, and take caution as you tend to leak a bit more monsters at this point so don’t blow your mana upgrading and then have no mana to banish incoming monsters).
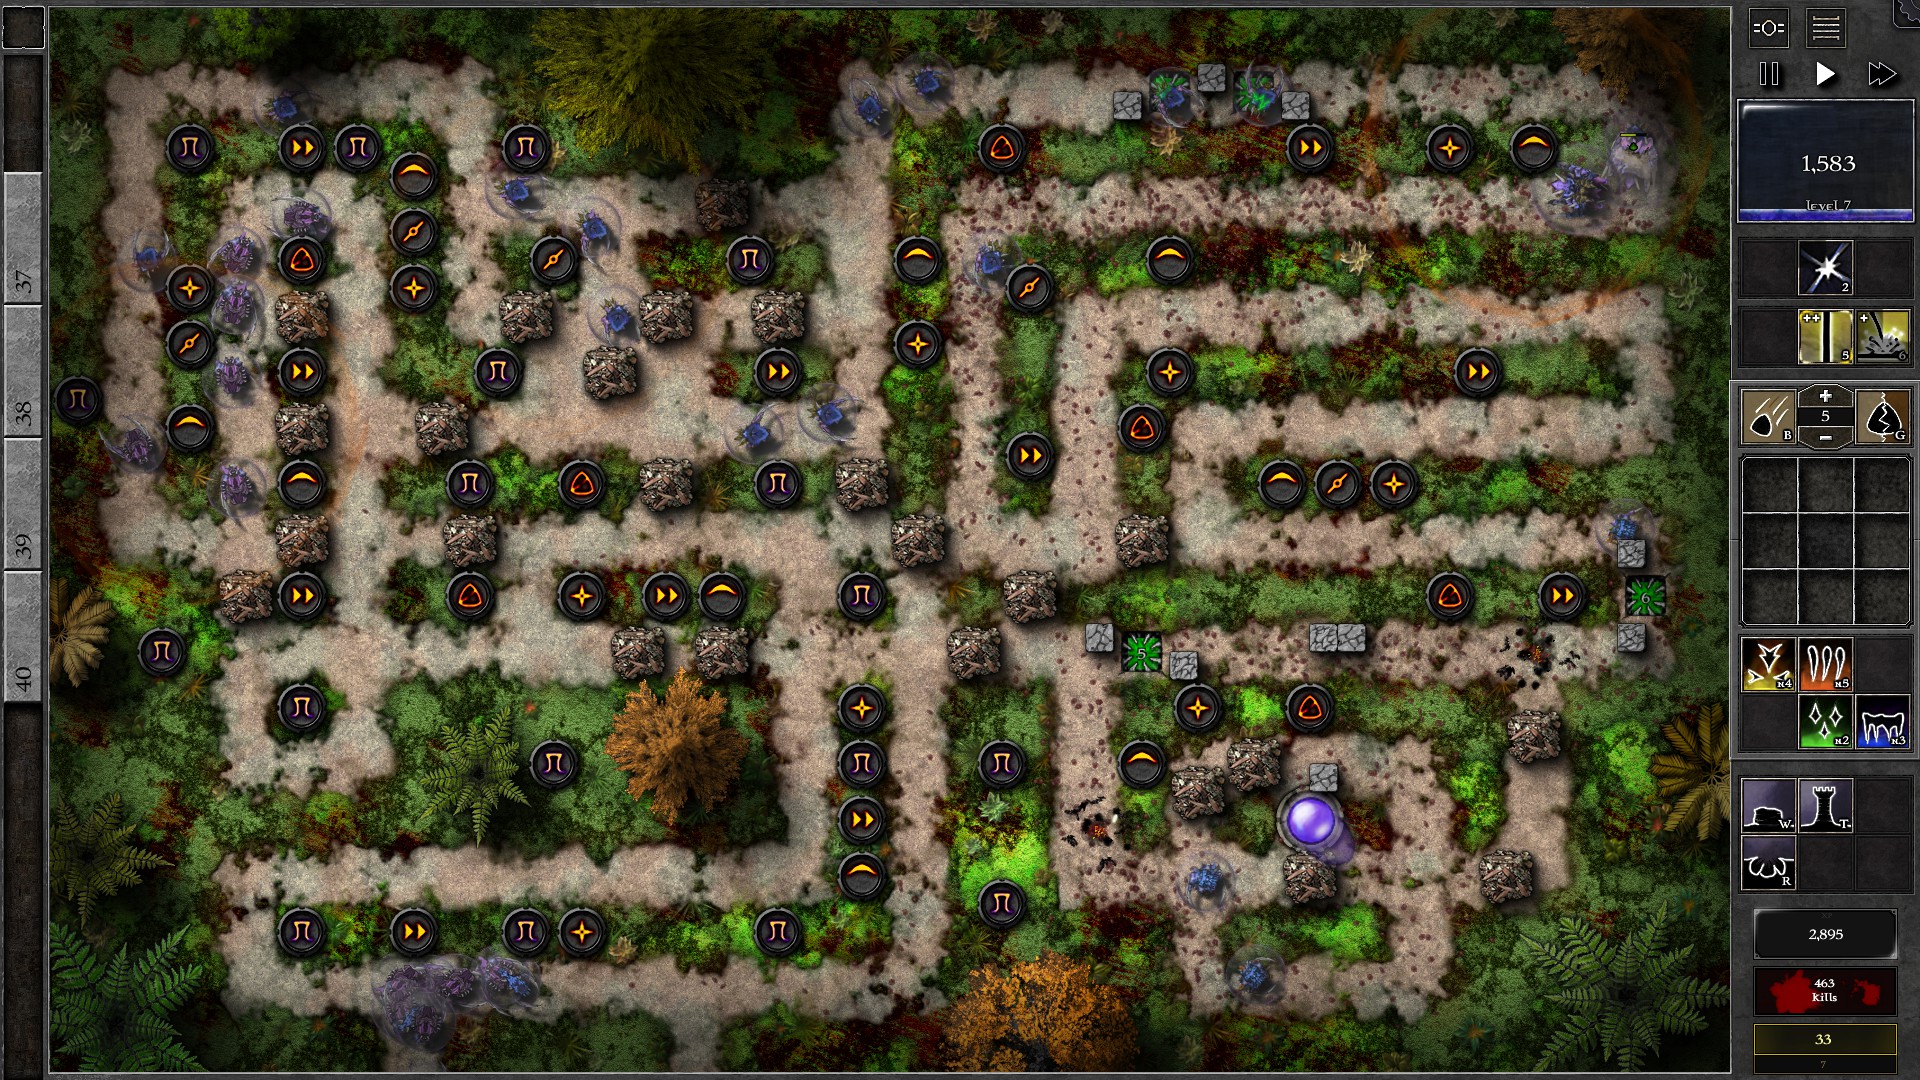
At w31 2 more giants will arrive. Keep your Whiteouts and use on these giants as they go through the poison traps. Finally upgrade a third gem to g6 as you gain enough mana (preferably the 2 gems at the top should be both g6 now). You should be able to finish the remaining waves as long as you make sure to take out the giants before it’s too late (consider combining your gems to further increase poison damage if you only have a few monsters left).
101 – Field I4
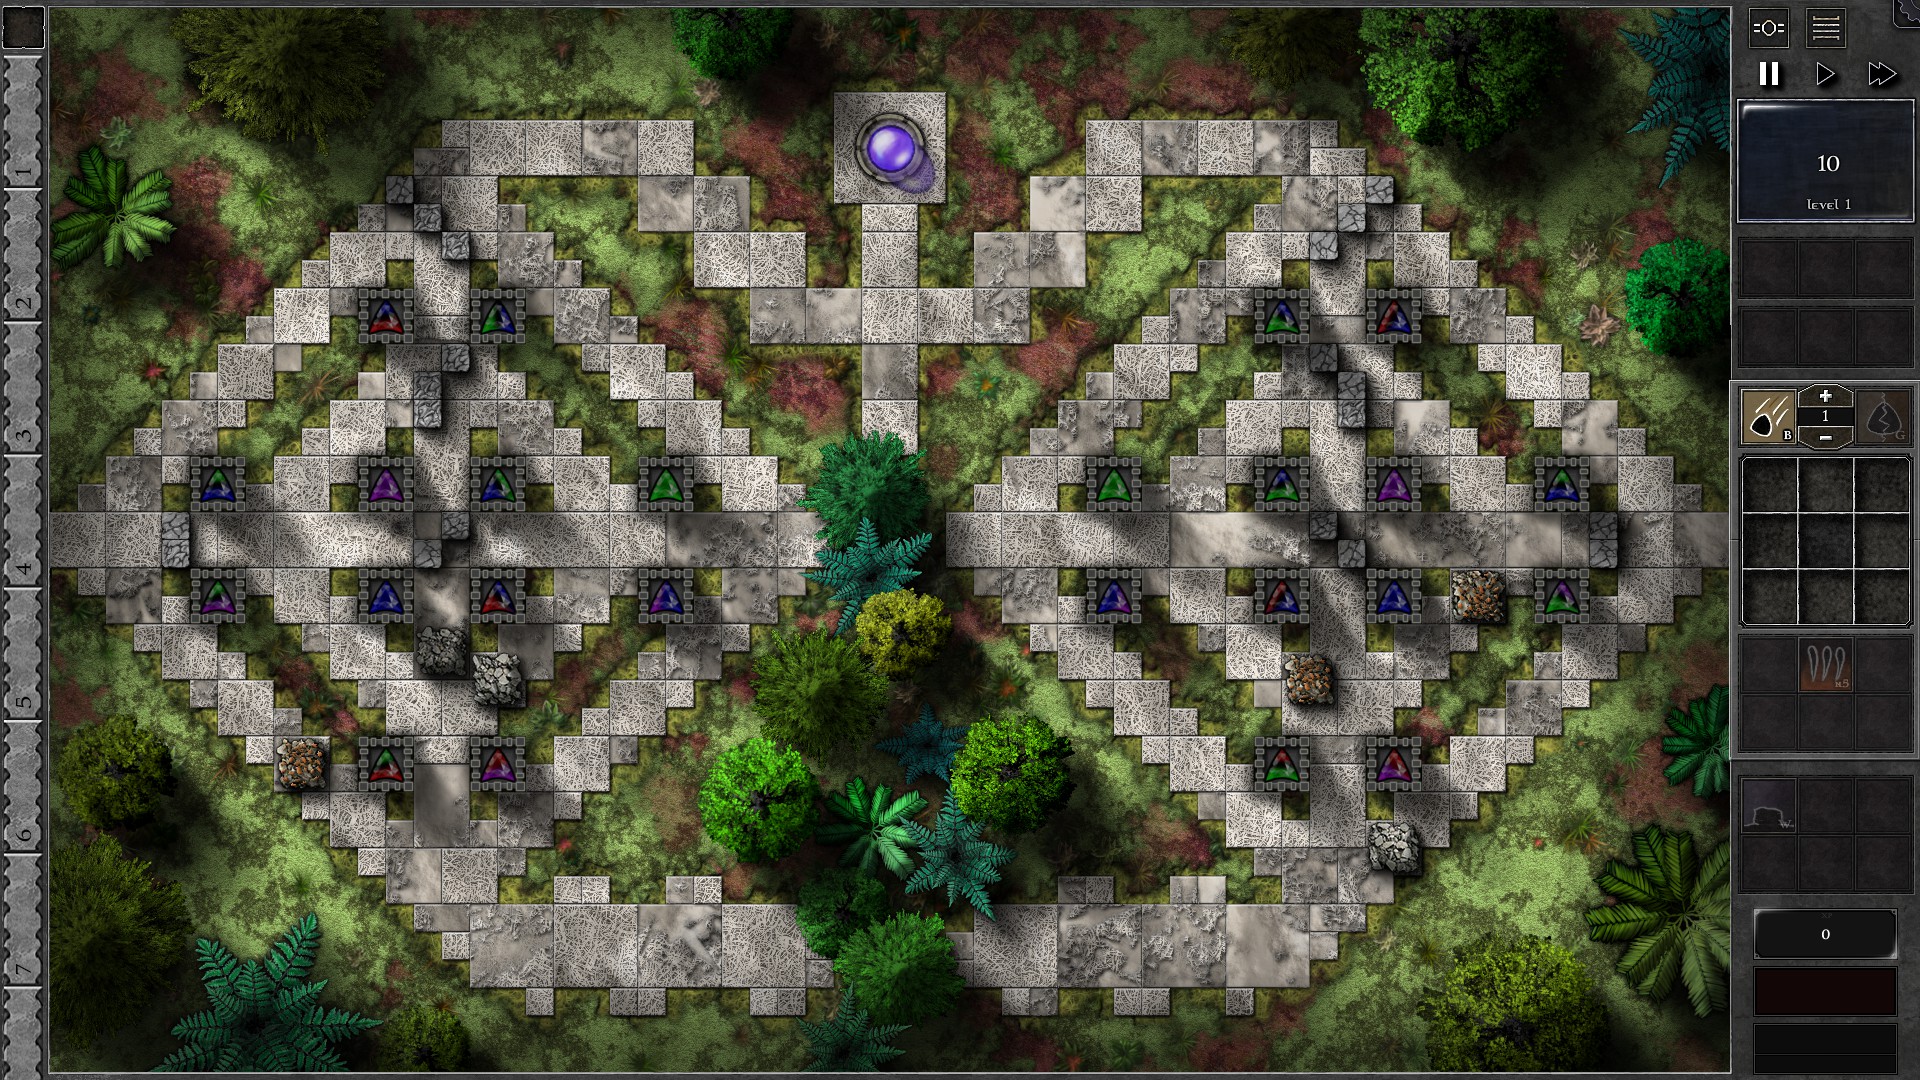
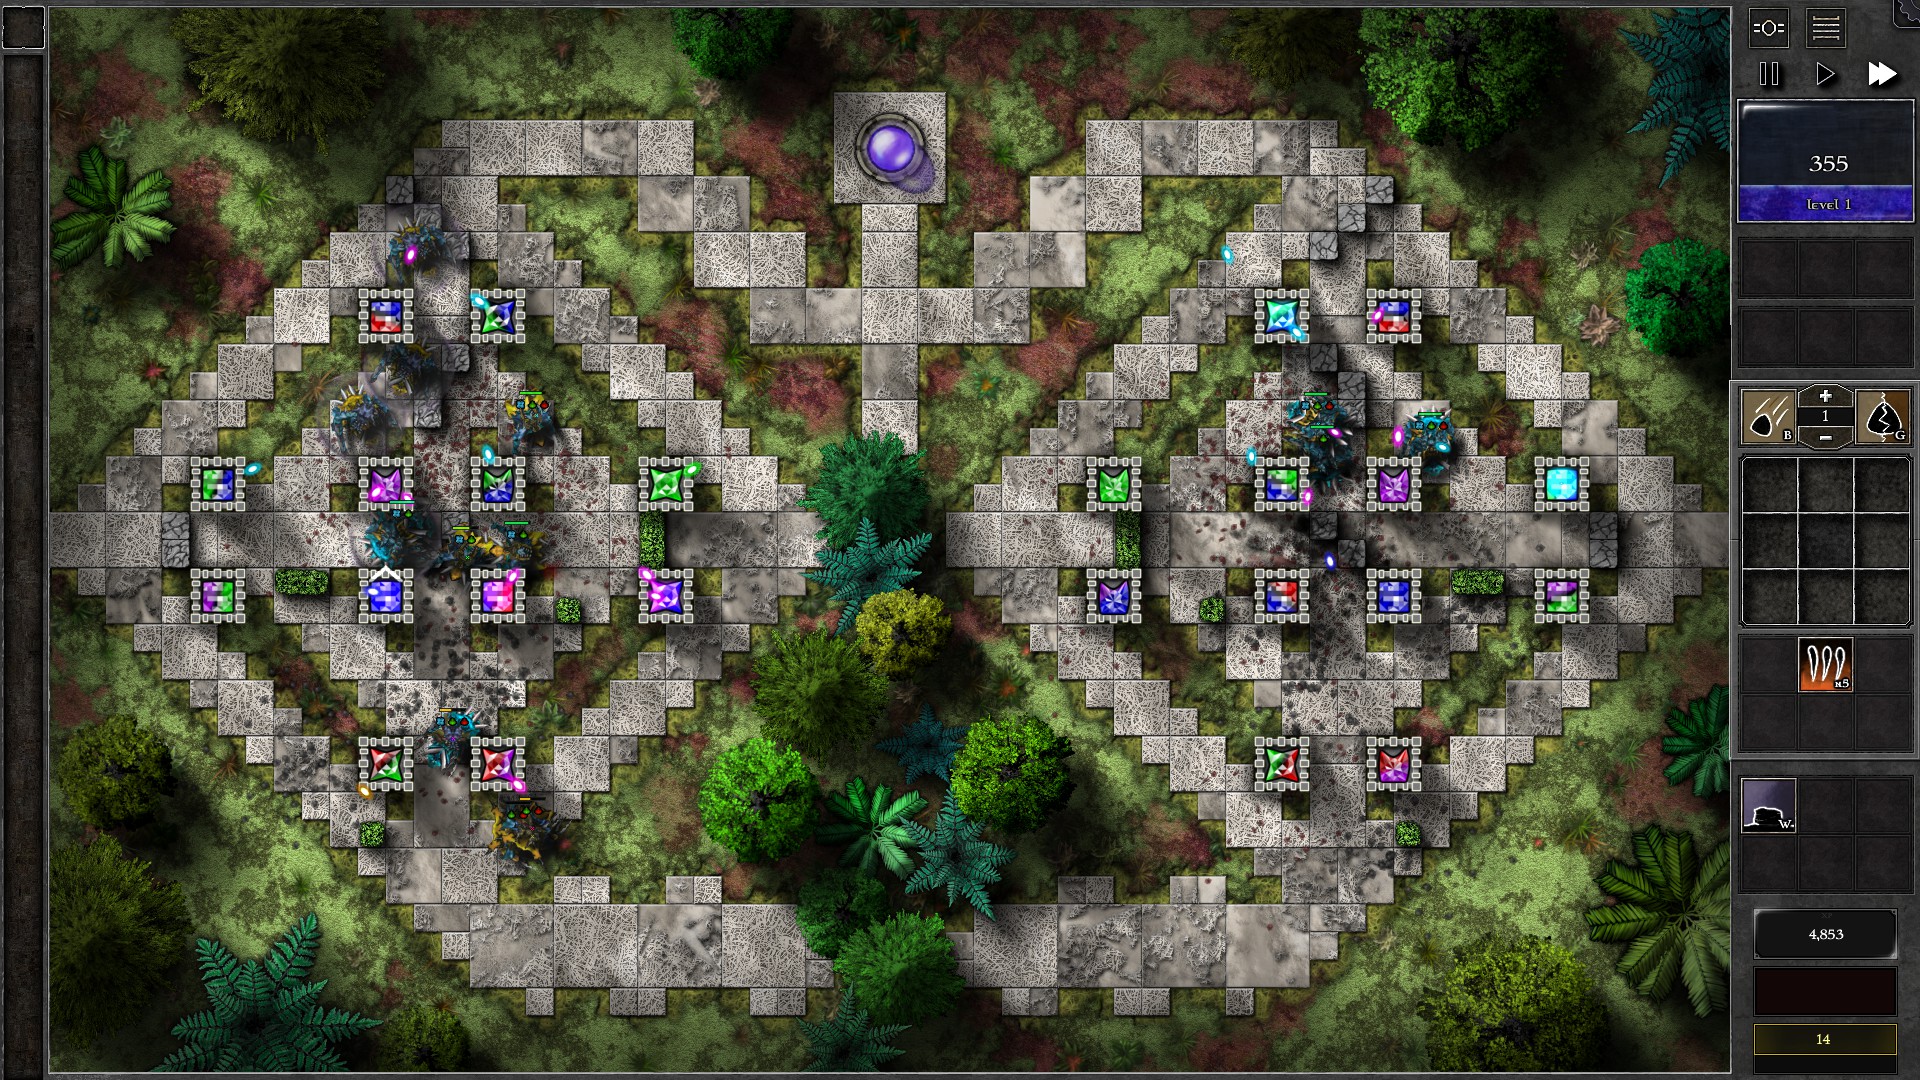
Build the walls as shown in the first screenshot (megalithic walls) and then start the waves. The Spiritforge gems should take care of the initial giants without needing much player intervention. As you gather mana, extend the maze by building additional walls (shrub walls in second screenshot). The Spiritforge gems should upgrade themselves enough to take down all the monsters in this Trial.
You should also notice that some towers are targeting the Barricades. Some paths have to be blocked after the Barricades are destroyed, especially the path being blocked by the strongest 2 Barricades (the 3800 HP and 4200 HP Barricades).
102 – Field B1
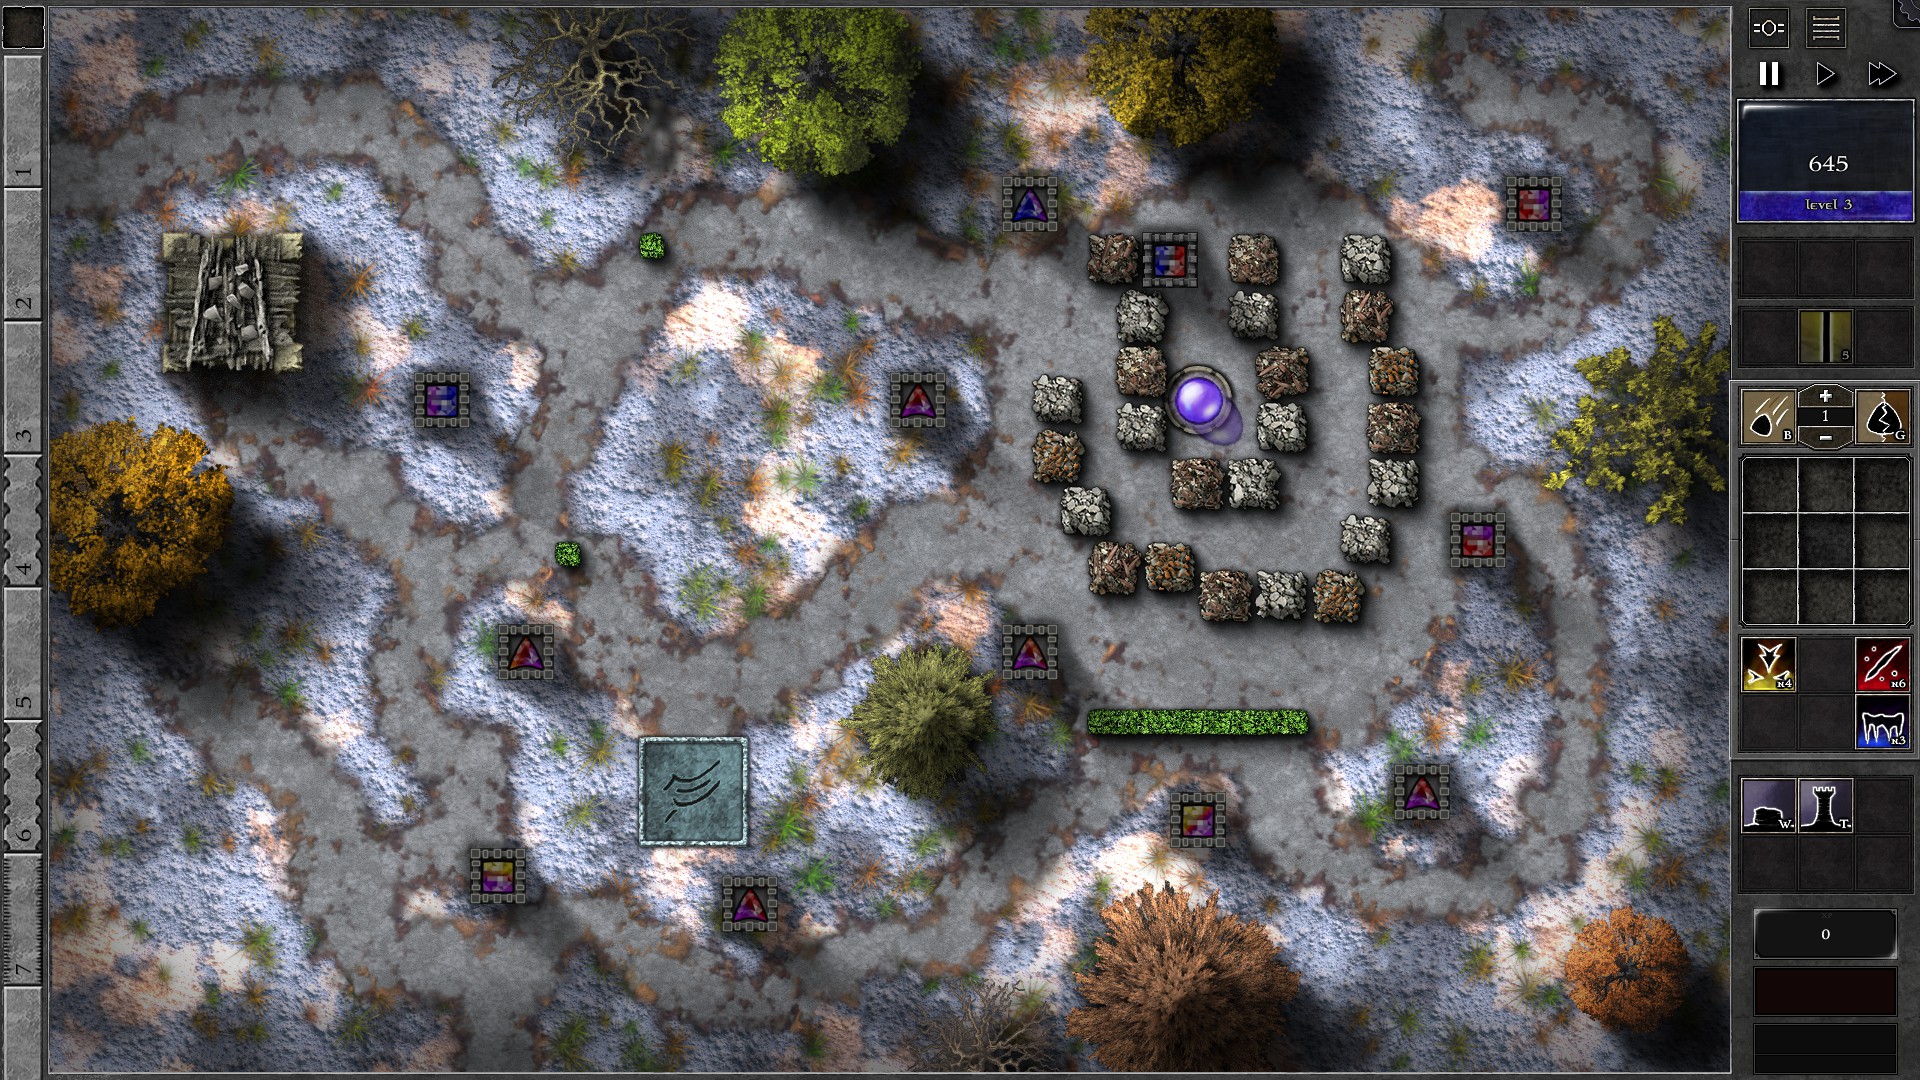
This trial requires significant micromanagement and some multi-tasking, so be prepared. Start the field with the walls set up as shown together with a g3 r/b gem in the tower close to the Orb.
You must at all costs prevent the tomb from being opened by the g2 r/p gem close to the tomb (the other Spiritforge gems don’t have the range to cover the tomb even after their scripted upgrades) as breaking the tomb open is a guaranteed loss. You need to click on the monsters passing through the g2 r/p gem (the path below this tower) throughout the entire Trial to make it fire at the selected monsters instead of the Tomb.
Throughout the waves, send the next wave early as soon as no more monsters are queuing to enter the field (note the smaller, dimmer yellow number at the bottom right corner of the screen). Do NOT send waves early while there are still monsters queuing to enter because of Vital Link trait. Sending early waves gives you extra mana to work with while also reducing damage taken by the Tomb.
Meanwhile, you also need to check on the barricades close to the Orb as they will be broken by the Spiritforge gems eventually and repair with walls as they break. Note that the Spiritforge gems will also attack additional barricades as their range extends from upgrades. This sums up to 3 things you need to process at the same time in the Trial:
- Clicking on monsters passing through the range of tomb-hitting gem
- Monitoring barricade statuses
- Sending early waves
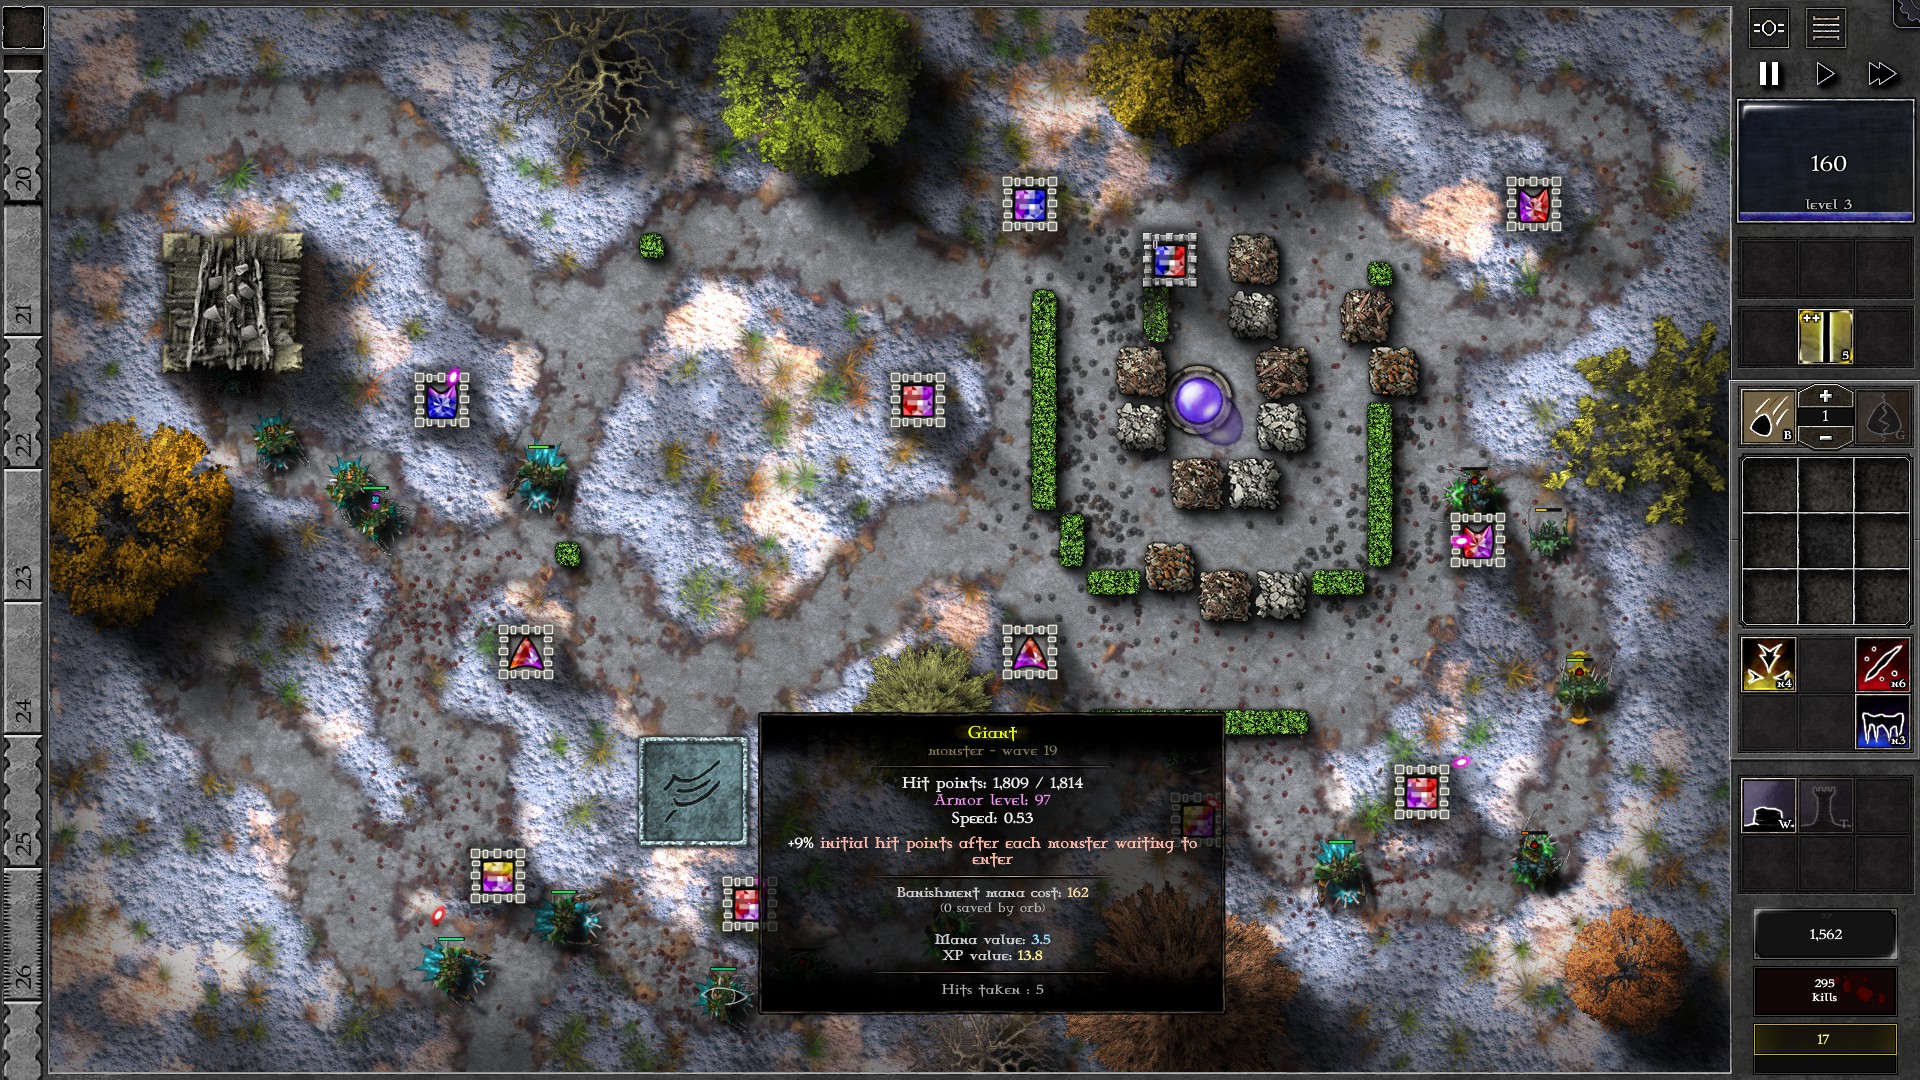
Into the specifics: In the early waves, look out for monsters approaching your Orb as most Spiritforge towers close to the Orb are too focused in taking down barricades. Use Beam on your g3 r/b gem in necessary. At around w8-9 you will start the notice barricades breaking. Fix the gaps from the right barricades immediately while the left barricades can be repaired later. You should be able to build walls to substitute the destroyed barricades by w20.
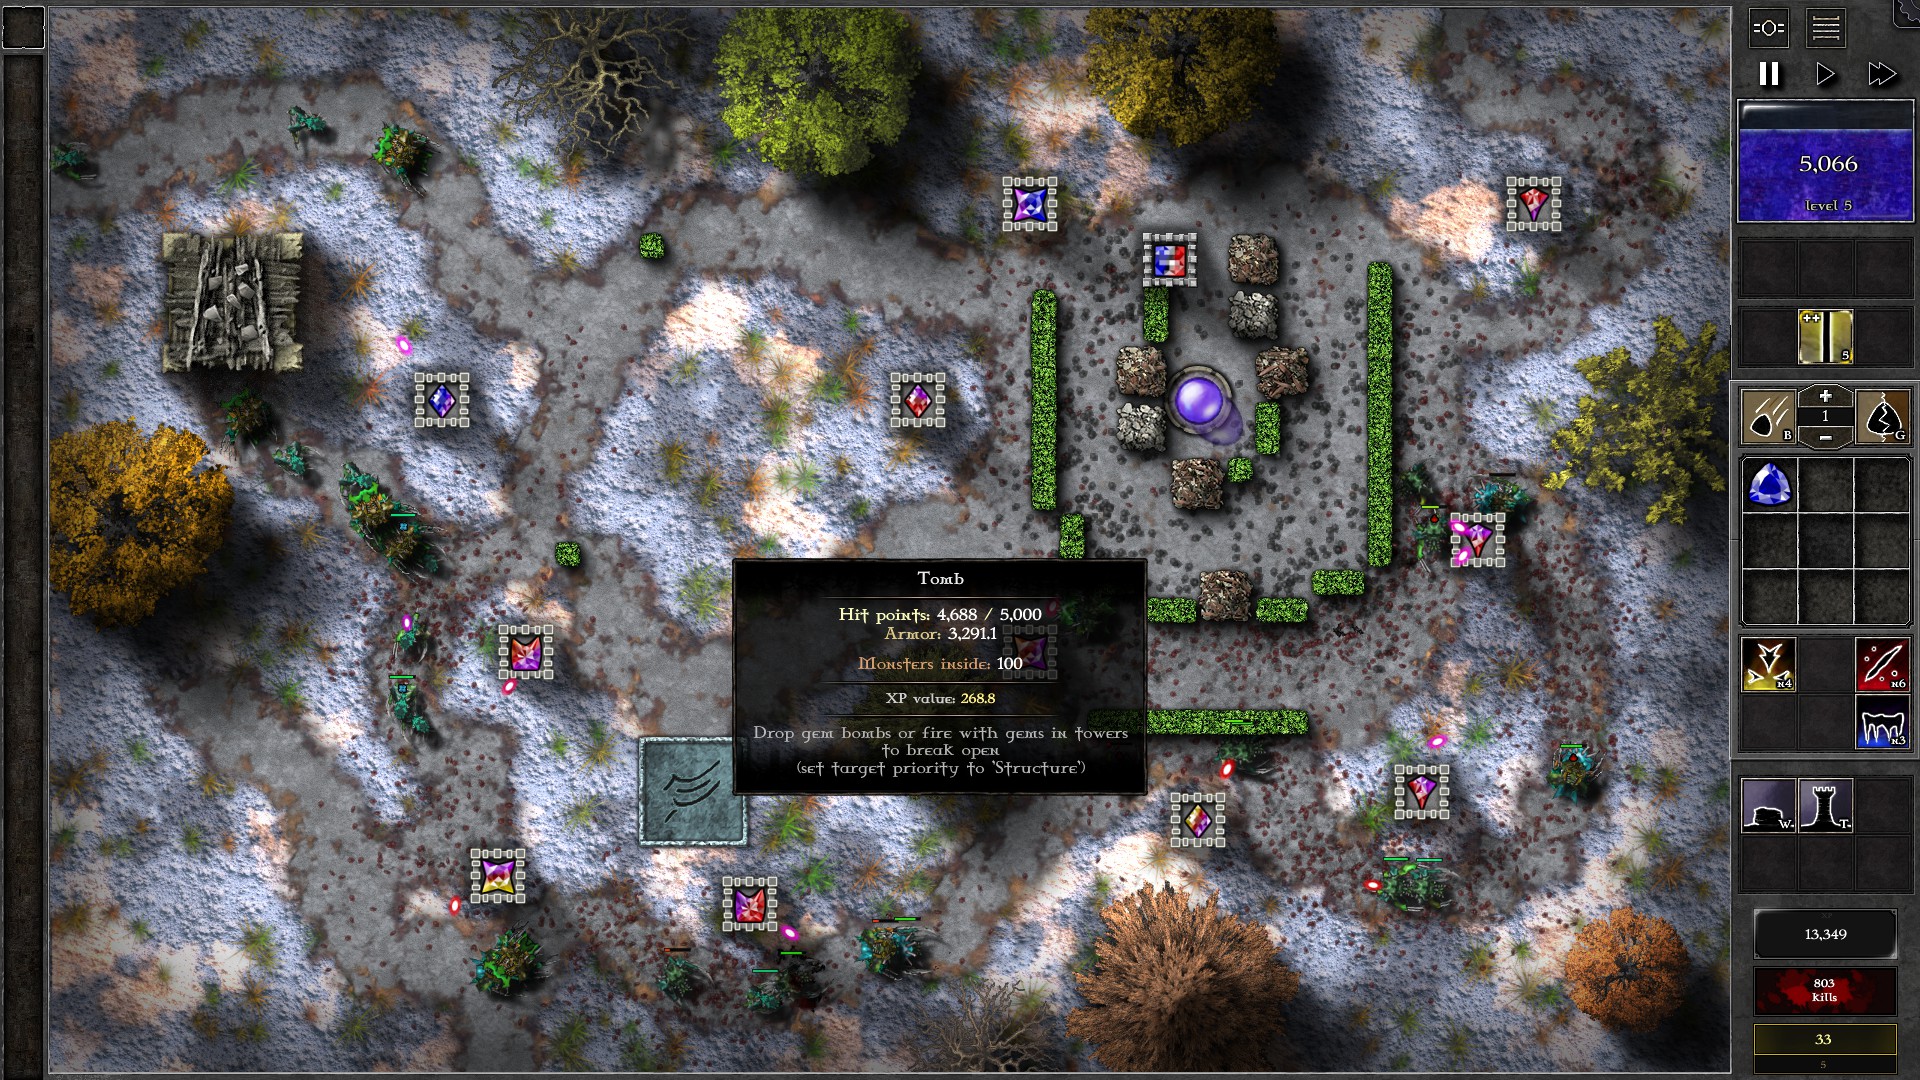
Once you get past w20, most Spiritforge gems close to the Orb should now fire at monsters instead which will hold off the remaining waves of monsters on their own as they upgrade themselves. Be on lookout of waves where Spiritforge gem upgrades will make them attack barricades instead and repair as necessay, all while sending early waves and clicking on monsters.
103 – Field B2
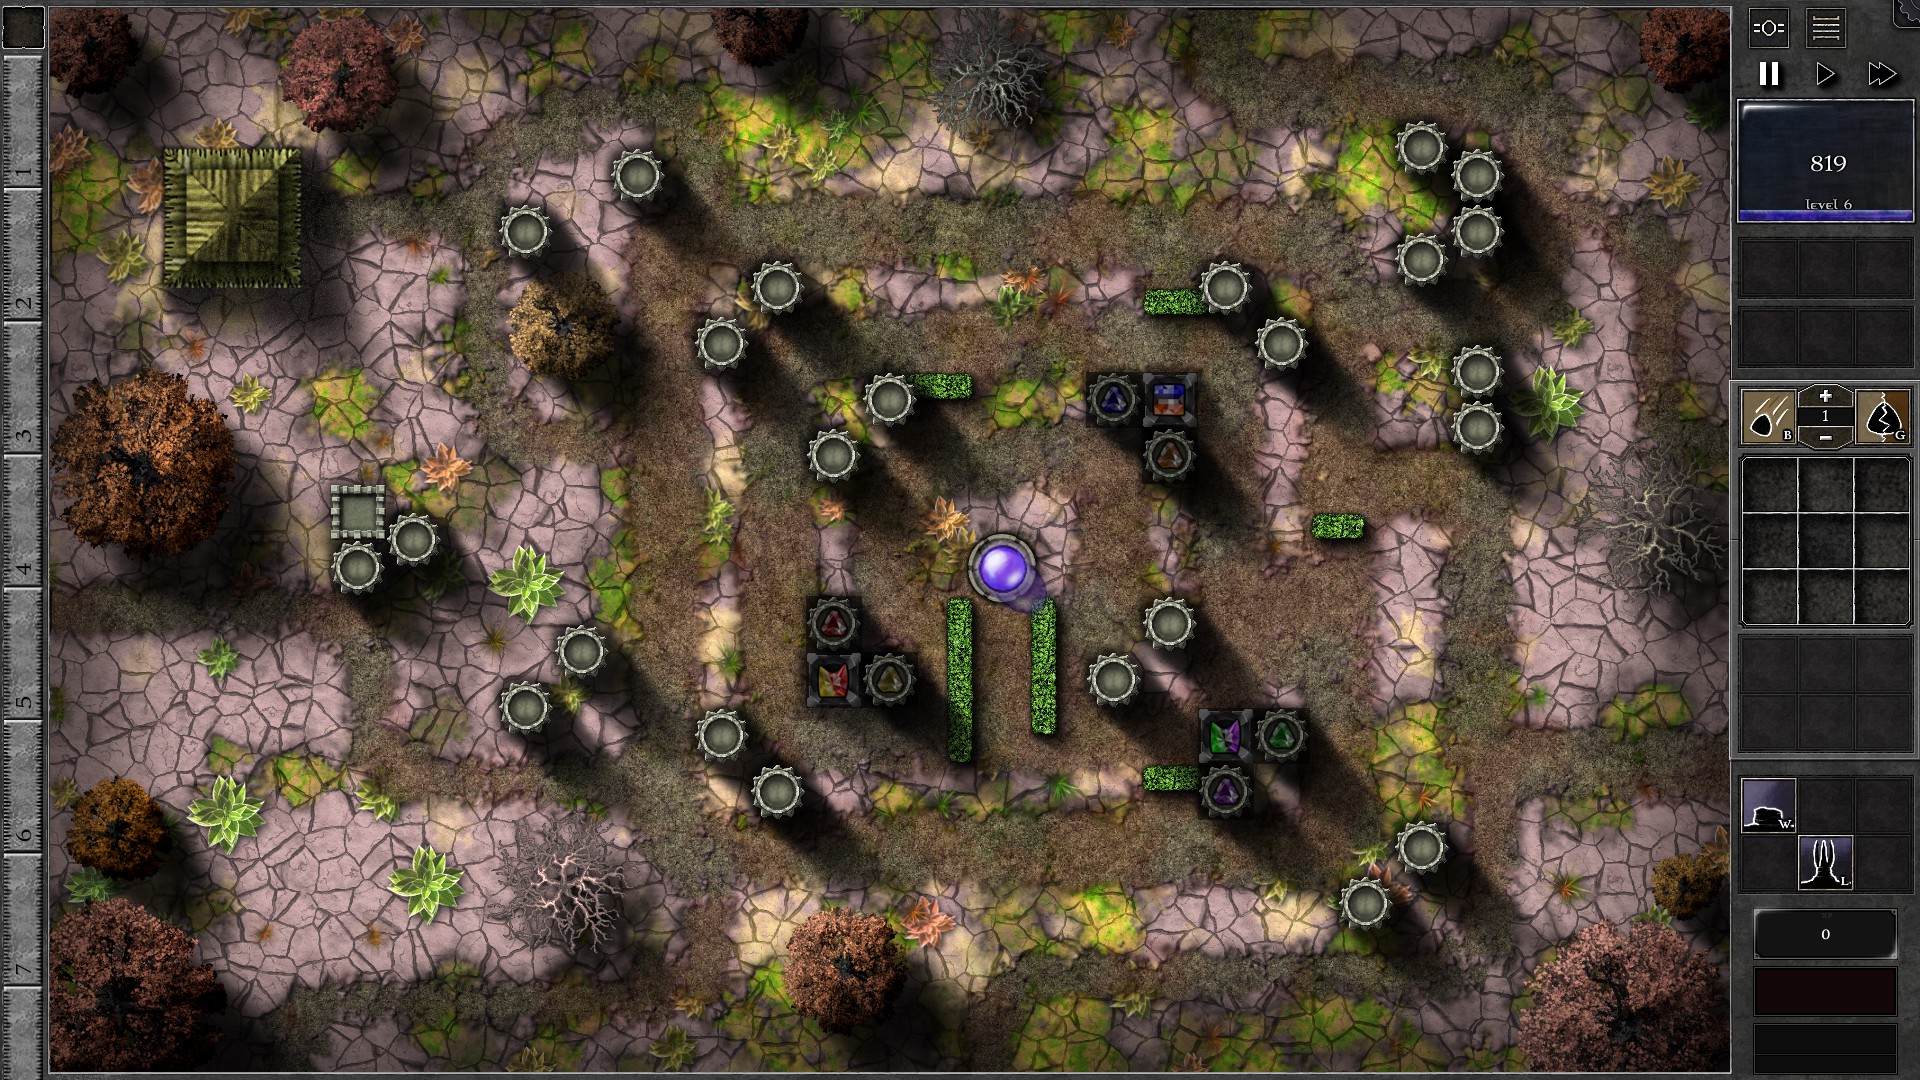
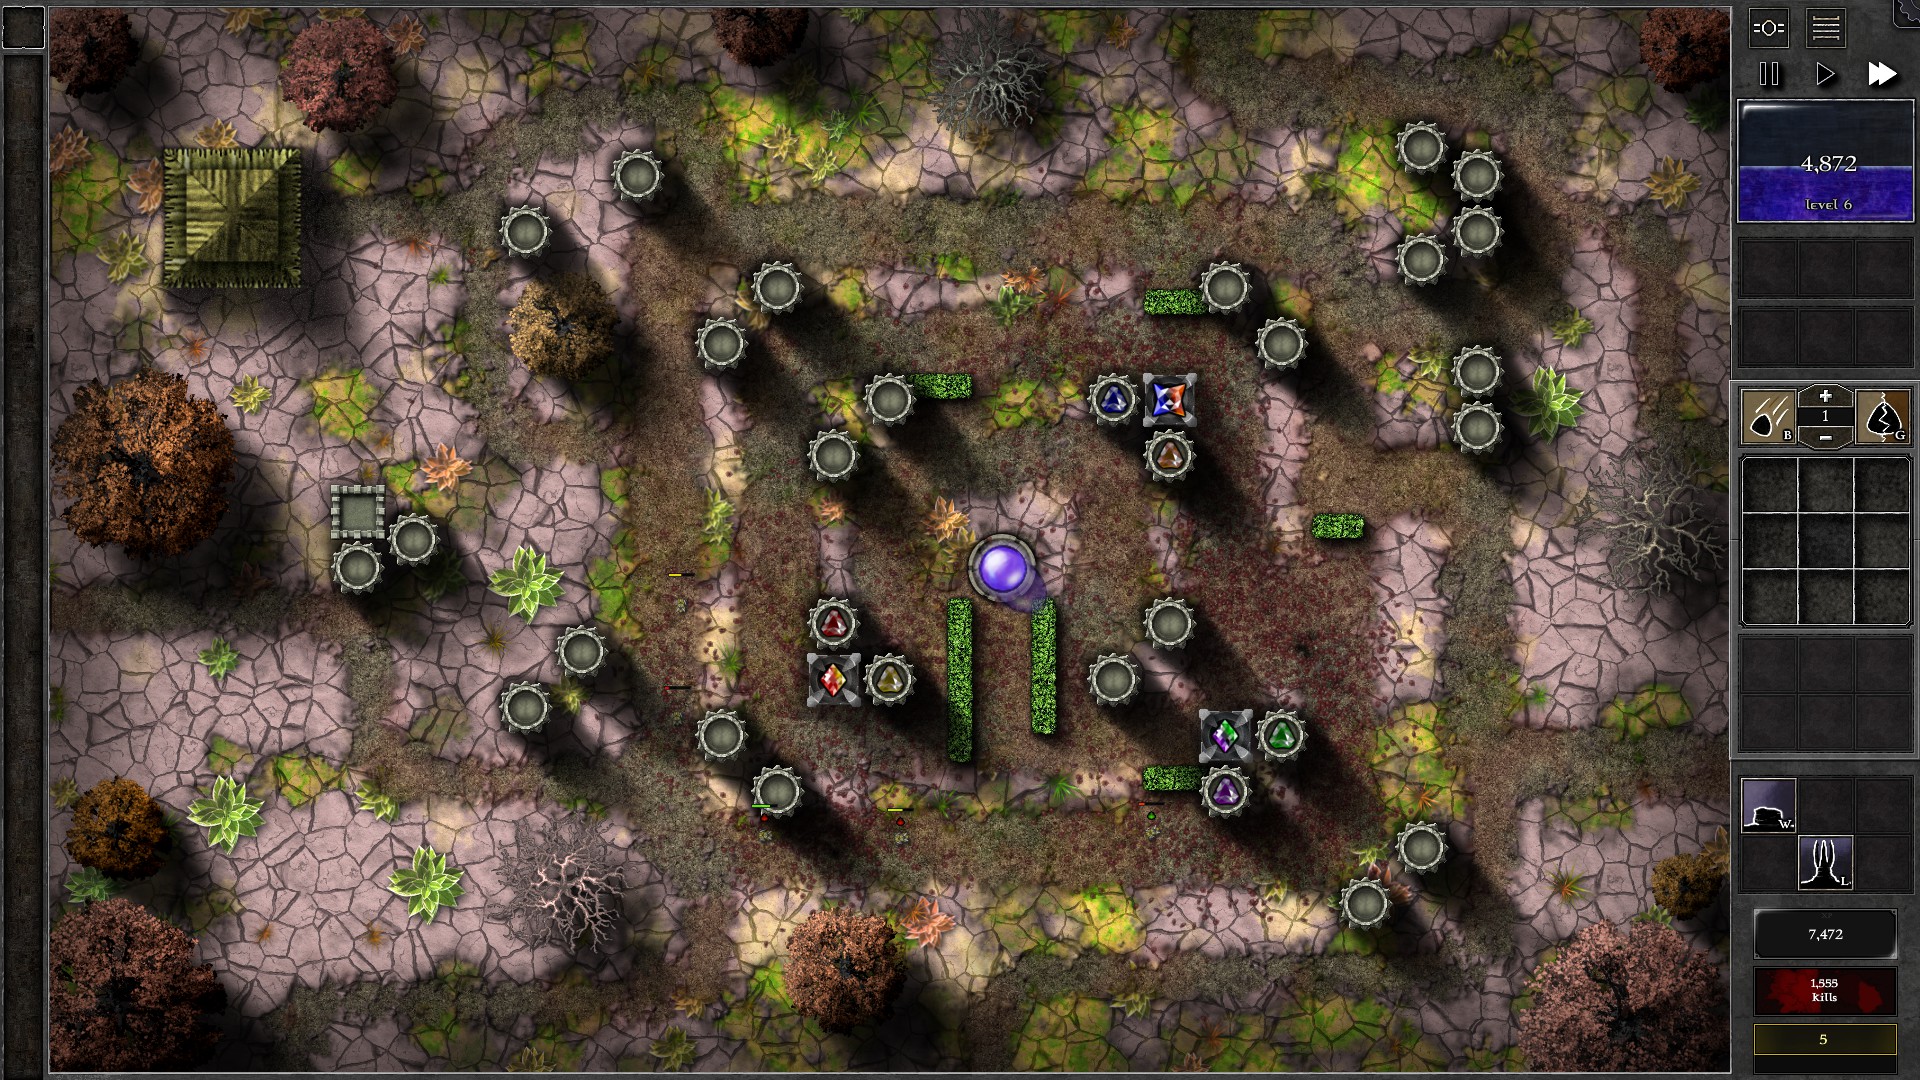
As shown in the screenshot, wall off the path and build 3 lanterns. Insert the 6 g2 gems given at start to the amplifiers, then duplicate these gems to create dual gems to be placed in lanterns, a g4 p/g, a g4 r/y and a g3 b/o (match the gems with the amp colours). The amplifier g2 gems don’t need to be upgraded throughout the Trial.
Once you start the field, gather enough mana to upgrade the g3 b/o into a g4 first. After that, start upgrading the lantern gems evenly in this order: p/g -> r/y -> b/o. As a milestone, there should be 3 g5 gems in the lanterns at around w22-23. At w31/32 linked waves you may need to banish a few of the monsters. After getting 2 g6 gems you should be close to the last few waves. Stop upgrading the gems (the b/o gem will remain g5 this way) and save up the mana for banishments. You should be able to hold off the last few waves with the amassed mana. Use “Least HP” on one of the g6 gems to help pick off weakened monsters first if necessary.
Note: While not necessary, you can spend some mana to add additional walls to the small open area just above the p/g gem to make monsters stay a bit longer in its range.
104 – Field B3
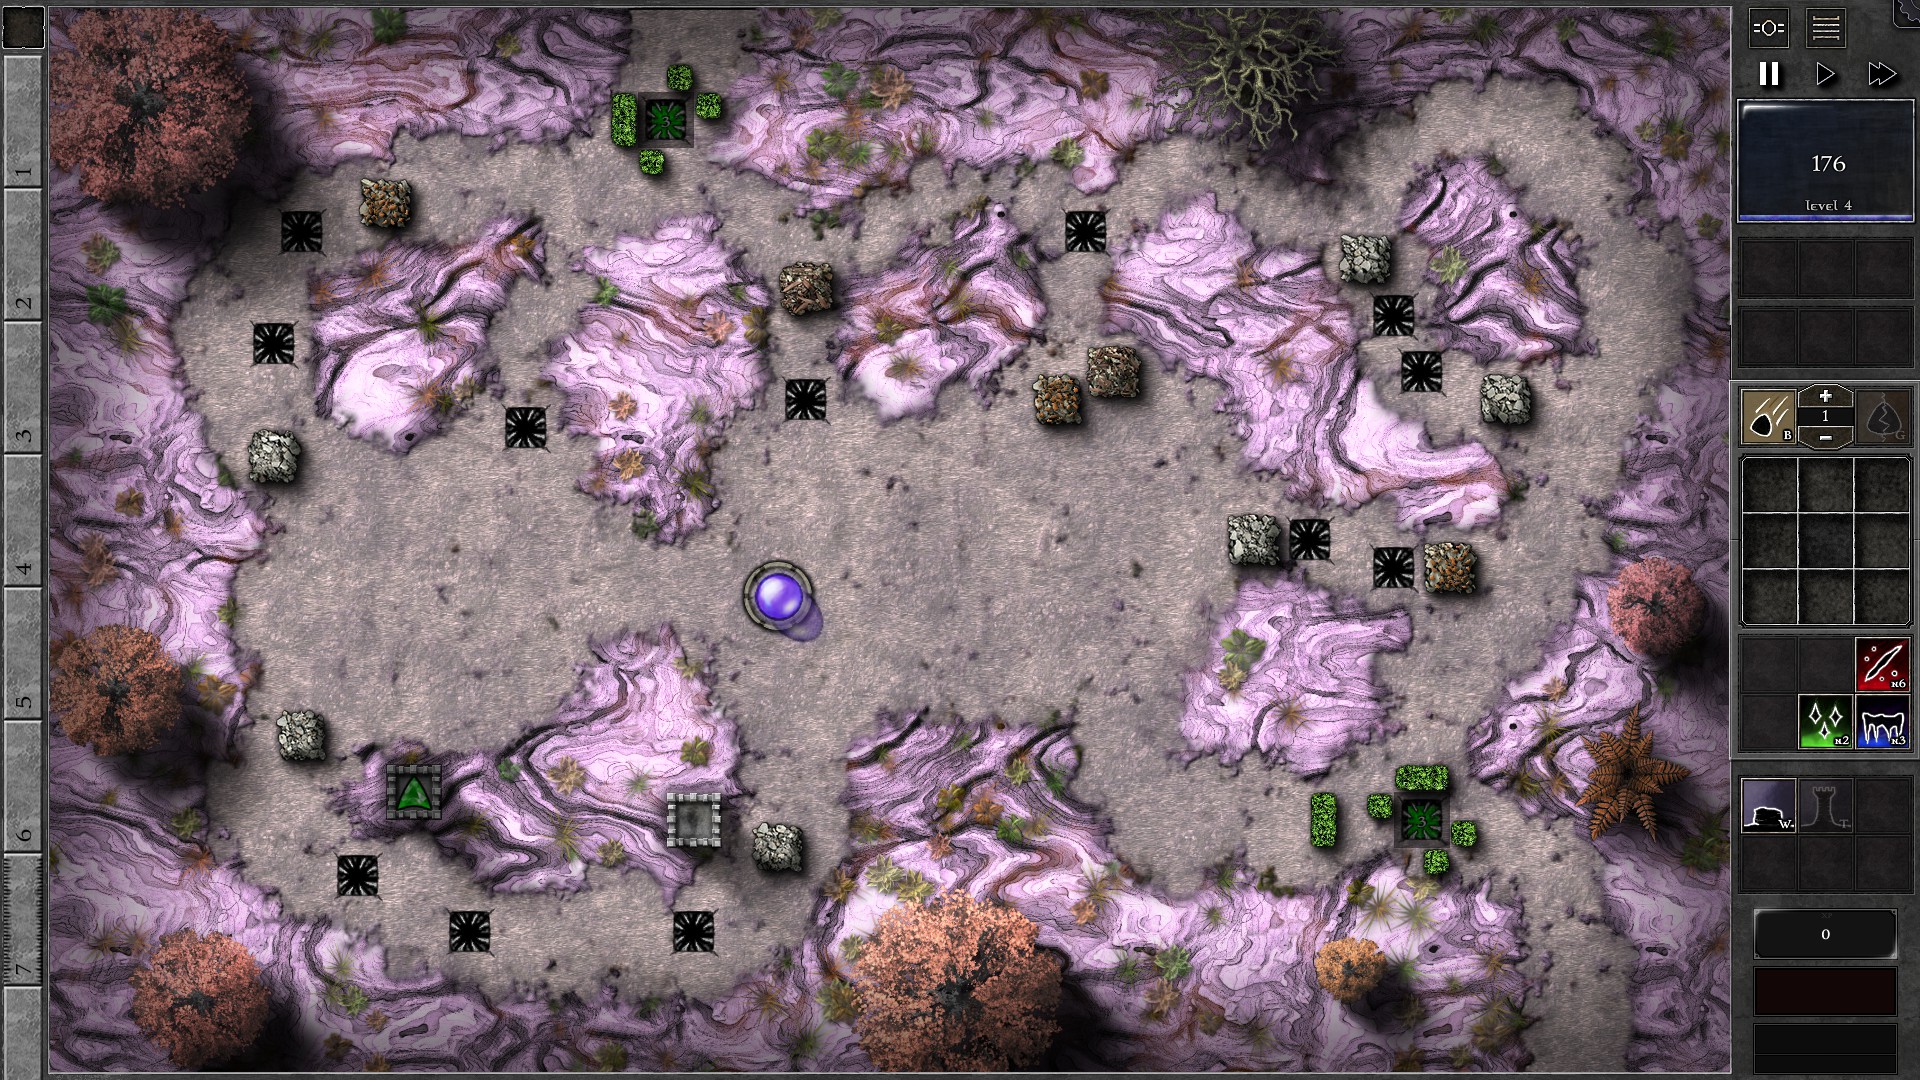
Start this field by selling the provided g2 gem for extra mana. Create 2 g3 pure green gems and place them into the traps closest to the 2 entrances. Set their targetting priority to “Least affected by Gem Specials”. Create a g2 green gem and place it into the tower at the bottom left set to structures to tear down the barricade. Build the walls to path the monsters and guide them through the poison traps. Once the first barricade is down, build another tower and move the g2 gem to take another barricade down (the empty tower in the screenshot).
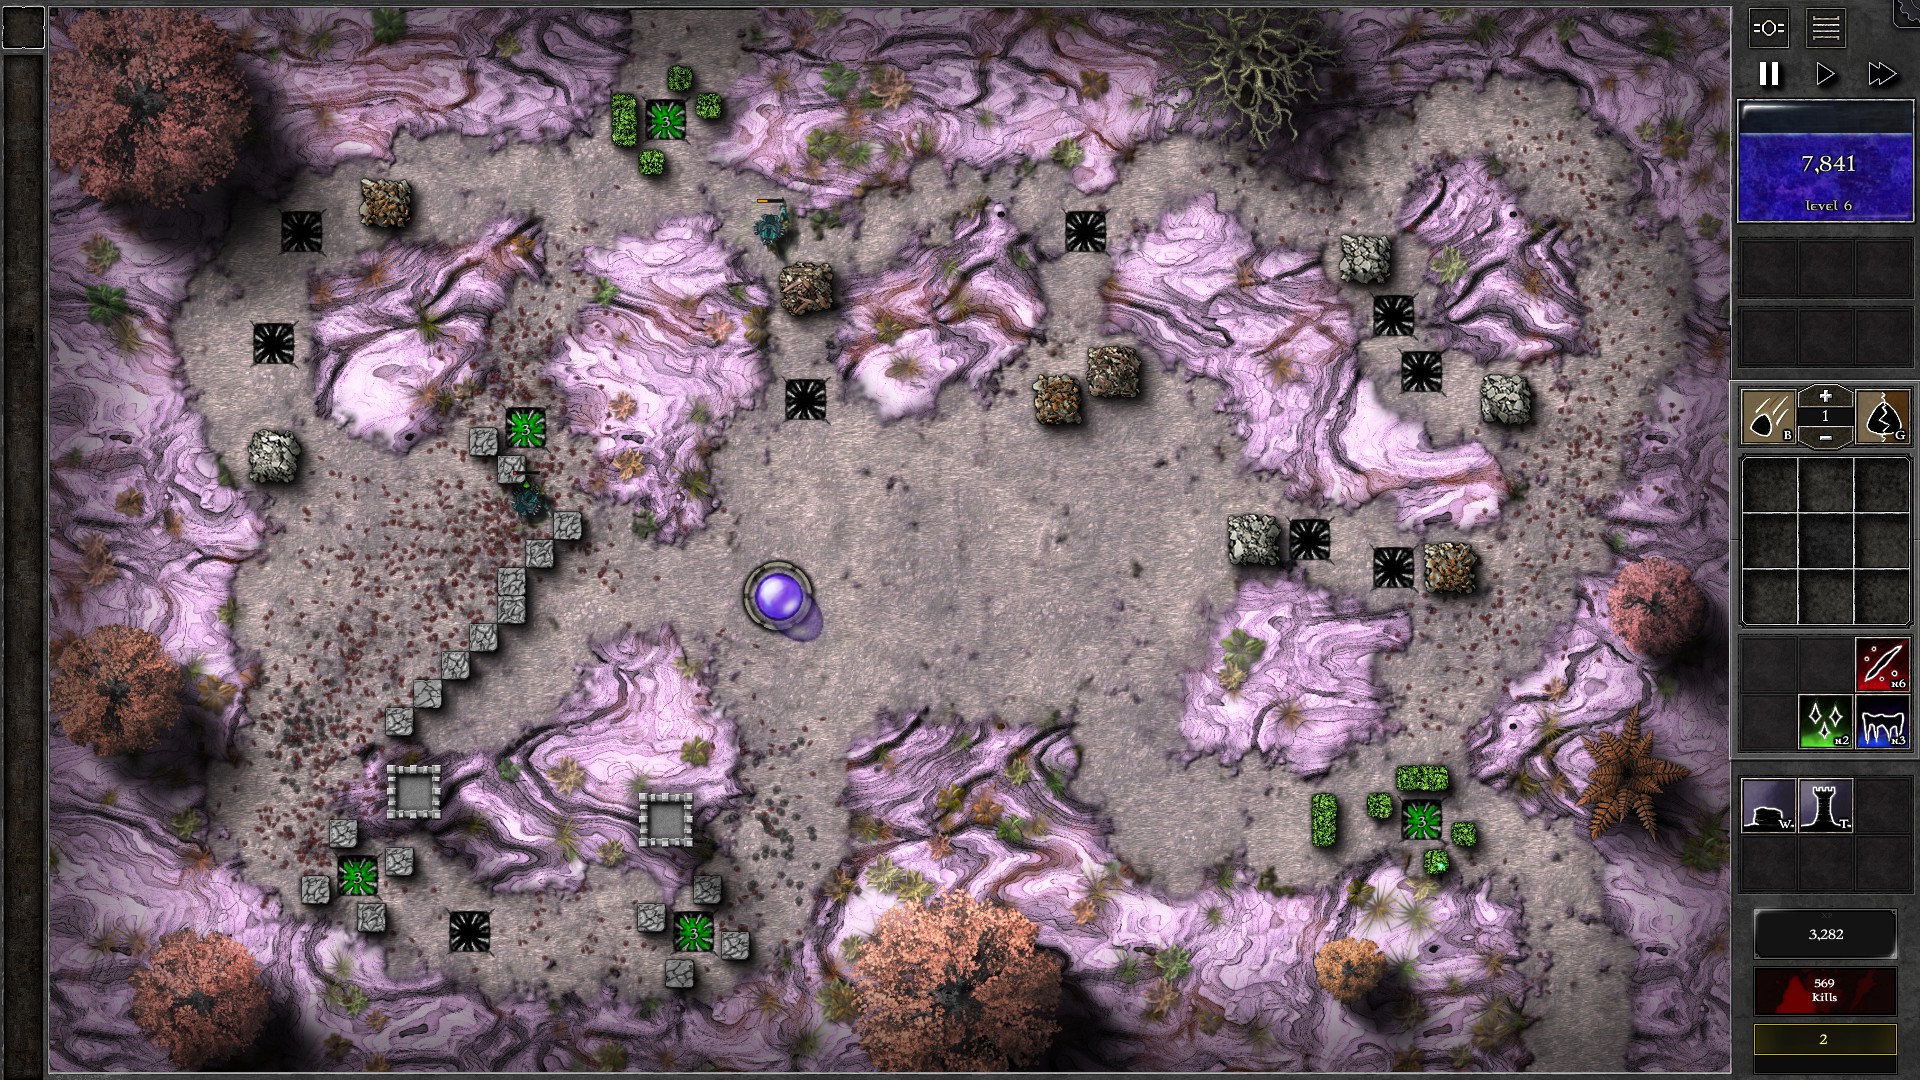
When the second barricade is destroyed, walls can now be built to extend the path as shown in the second screenshot (the megalithic walls). Put the g2 gem into a trap, and prepare 2 more g2 green gems and have them in traps. Upgrade the g2 gems to at least g3 as you gain mana from monsters and you should have enough poison damage to take down the monsters effectively. Remember to set “Least affected by Gem Specials” for the poison trap gems.
105 – Field B4
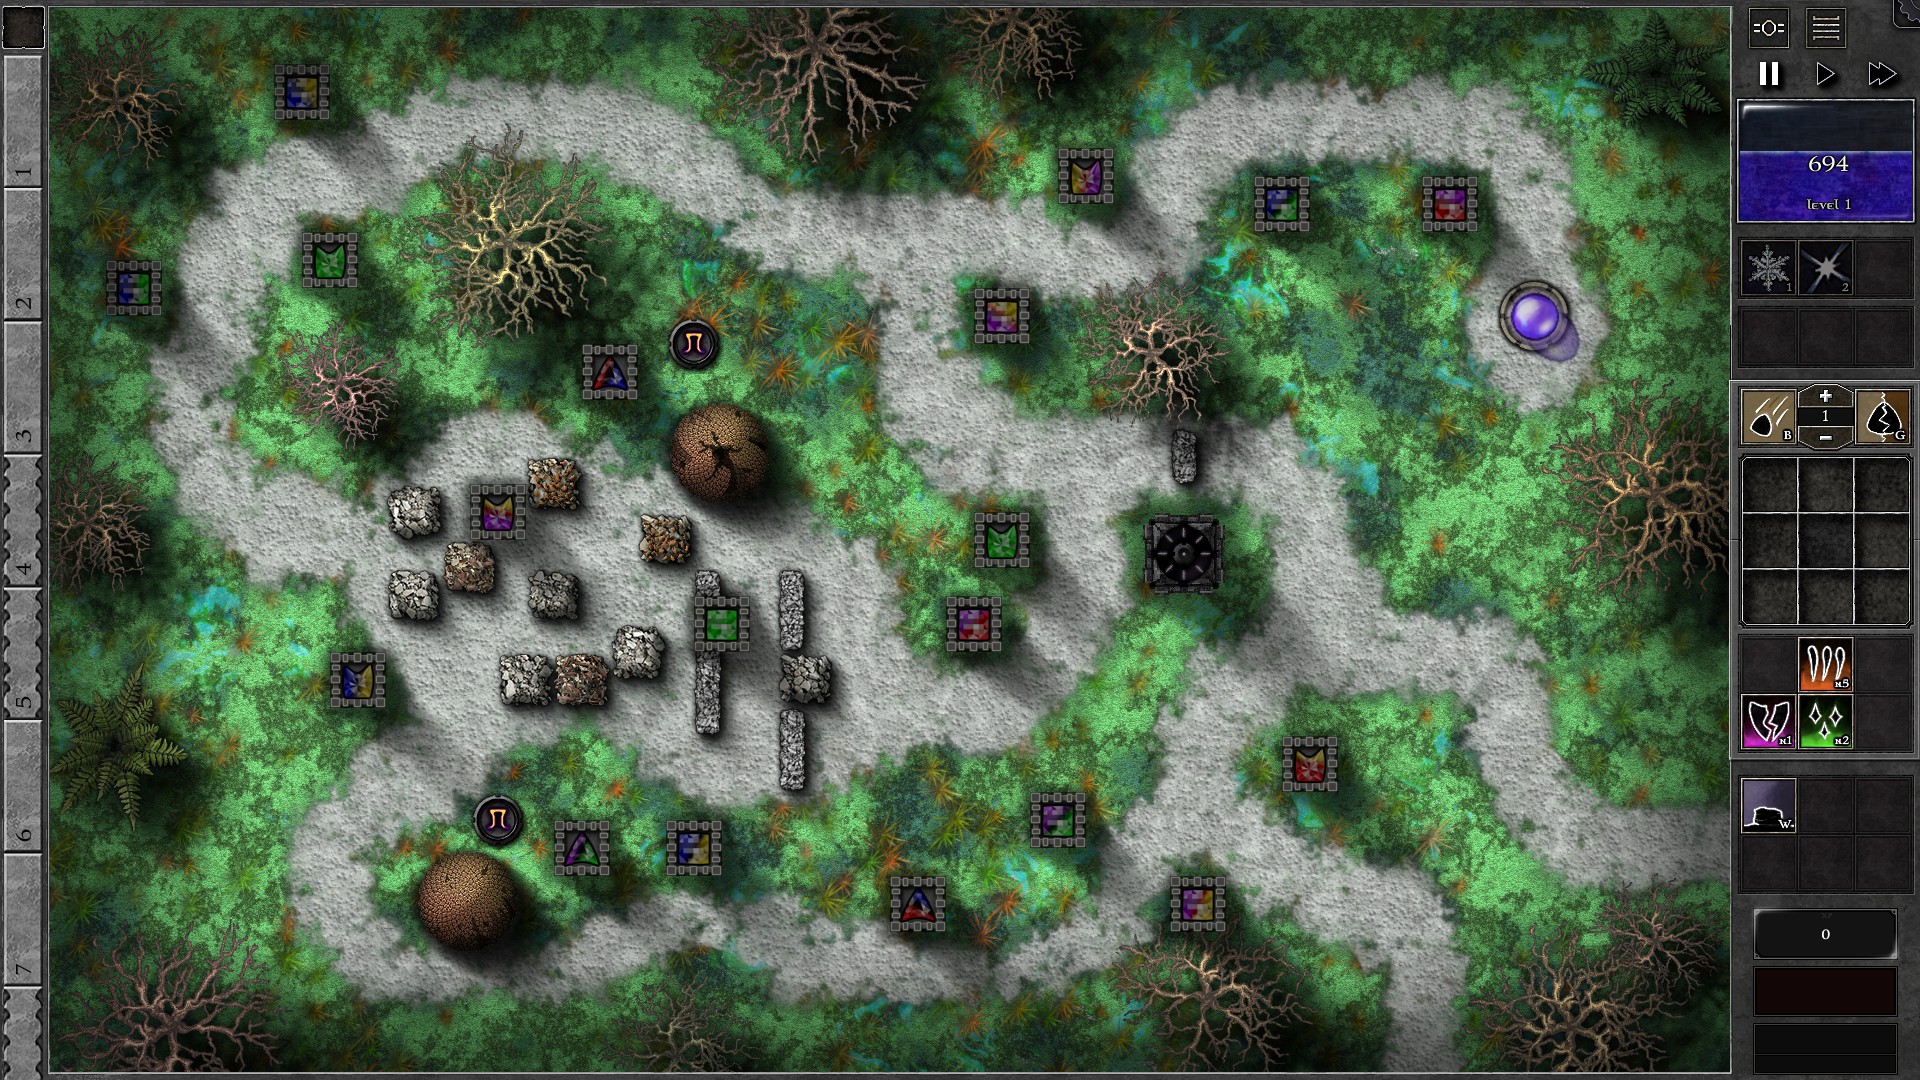
Build walls as shown in the screenshot and start the waves. This Trial is actually a race with time; the bottom left Sleeping Hive will eventually be fired on by the p/g Spiritforge gem close to it, which will release endless streams of swarmlings and will spell your defeat if you don’t stop the tower quickly. The only way to completely stop Spiritforge towers from firing at Sleeping Hives is to start the last wave.
Once you start the field, start sending waves early whenever you have no monsters waiting to enter the field. Giant waves are also usually worth sending early, but be careful with swarmling waves due to Thick Air 6 making every monster require several hits to kill.
With the increased flow of monsters from early waves, use your Freeze and Whiteout spells to help control large groups of monsters. You should mostly aim these spells in the range of either the 2 towers just to the left of the Shrine, or the 4 top-right towers along the path to your Orb. You can also use the Shrine to help stun monsters and deal some extra damage.
Keep sending early waves as much as possible without overwhelming the Spiritforge Gem’s defense. Finally, block the top left path as the path opens with broken Barricades.
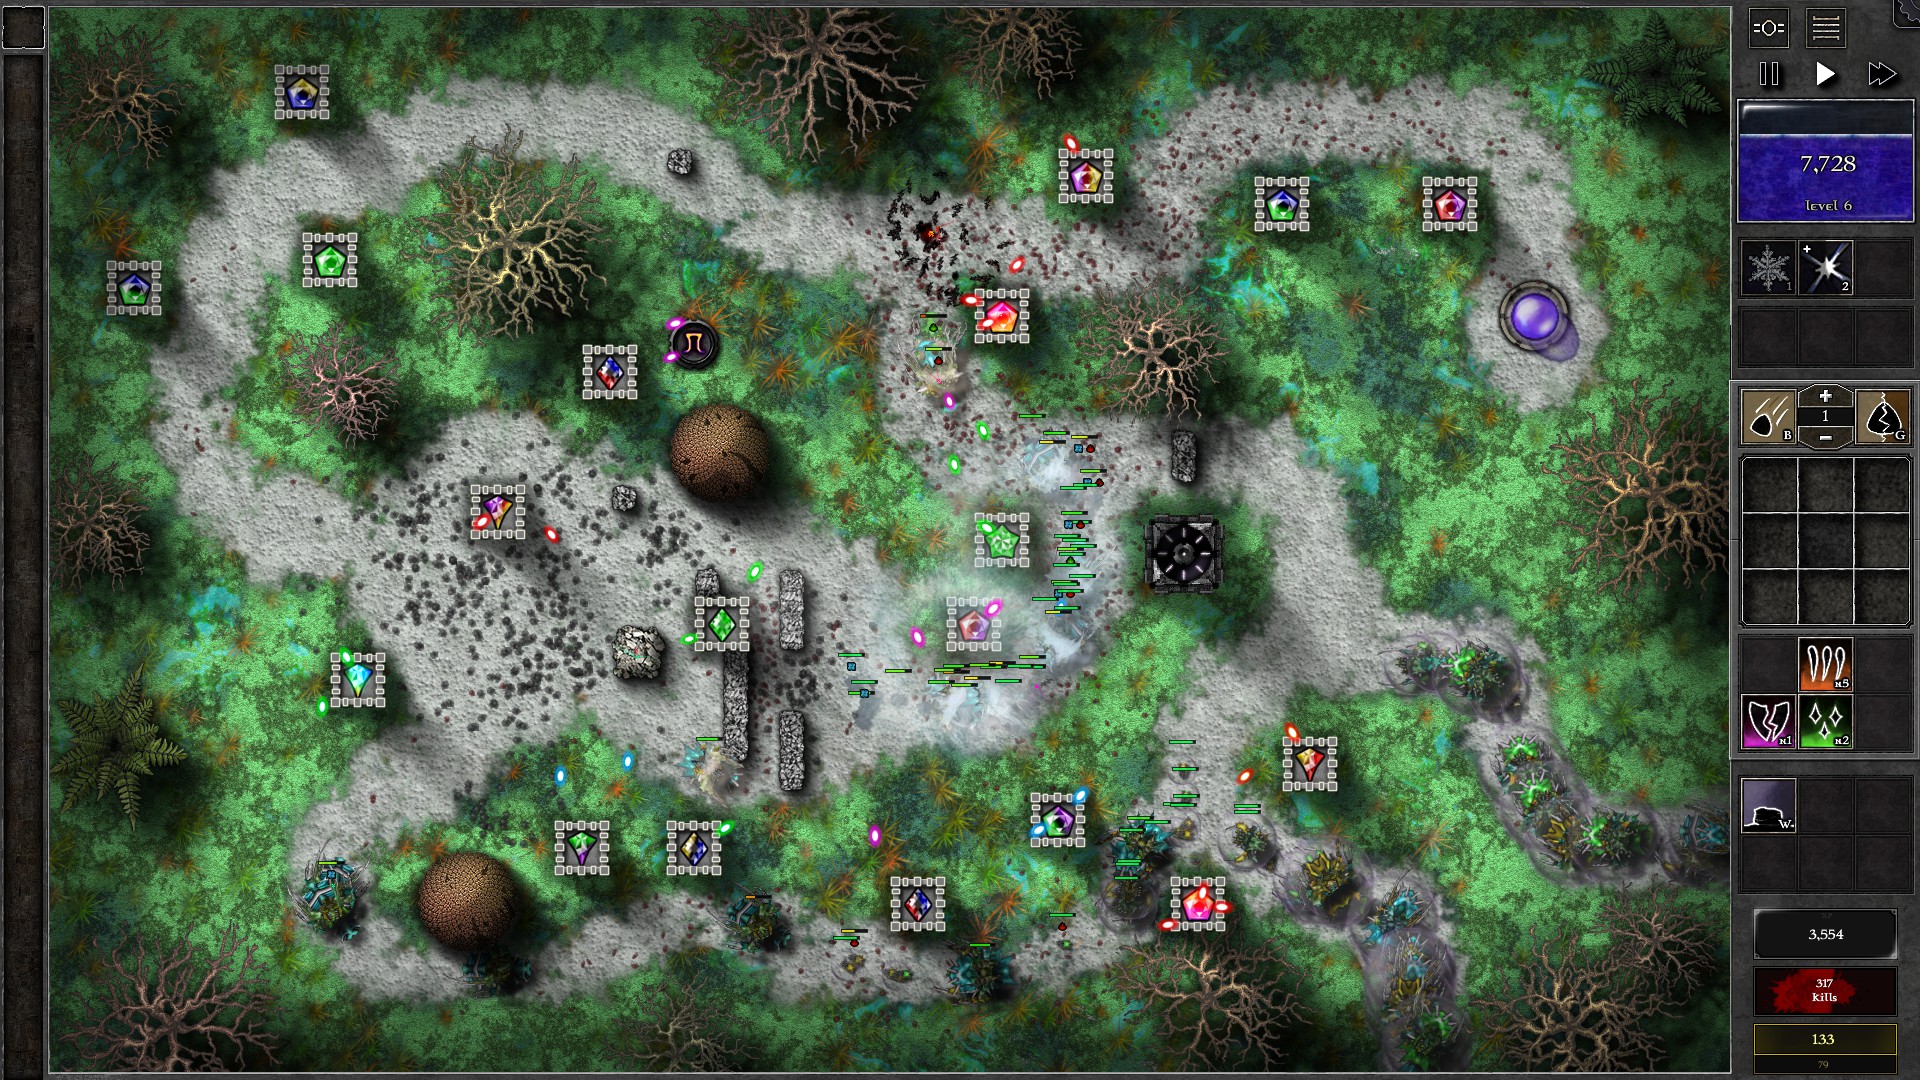
You should reach at least w35 before the inevitable event of Sleeping Hive swarmlings coming out of the Hive. Once you notice the Hive getting disturbed by Spiritforge Tower shots, send ALL remaining waves immediately to stop the gems from firing at the Hive ASAP. You will get a surge of mana from early waves (up to 8000) which will help in banishing a decent amount of monsters, as well as charging up your spells and the Shrine. Start controlling the large horde of monsters (both Hive swarmlings and the monsters in the remaining waves), starting from the reavers and swarmlings. You should be able to hold off the monsters with the further upgraded Spiritforge gems and frequent use of spells. Juggling is also a viable option at this point by opening and closing paths approaching the last intersection before the Orb..
106 – Field B5
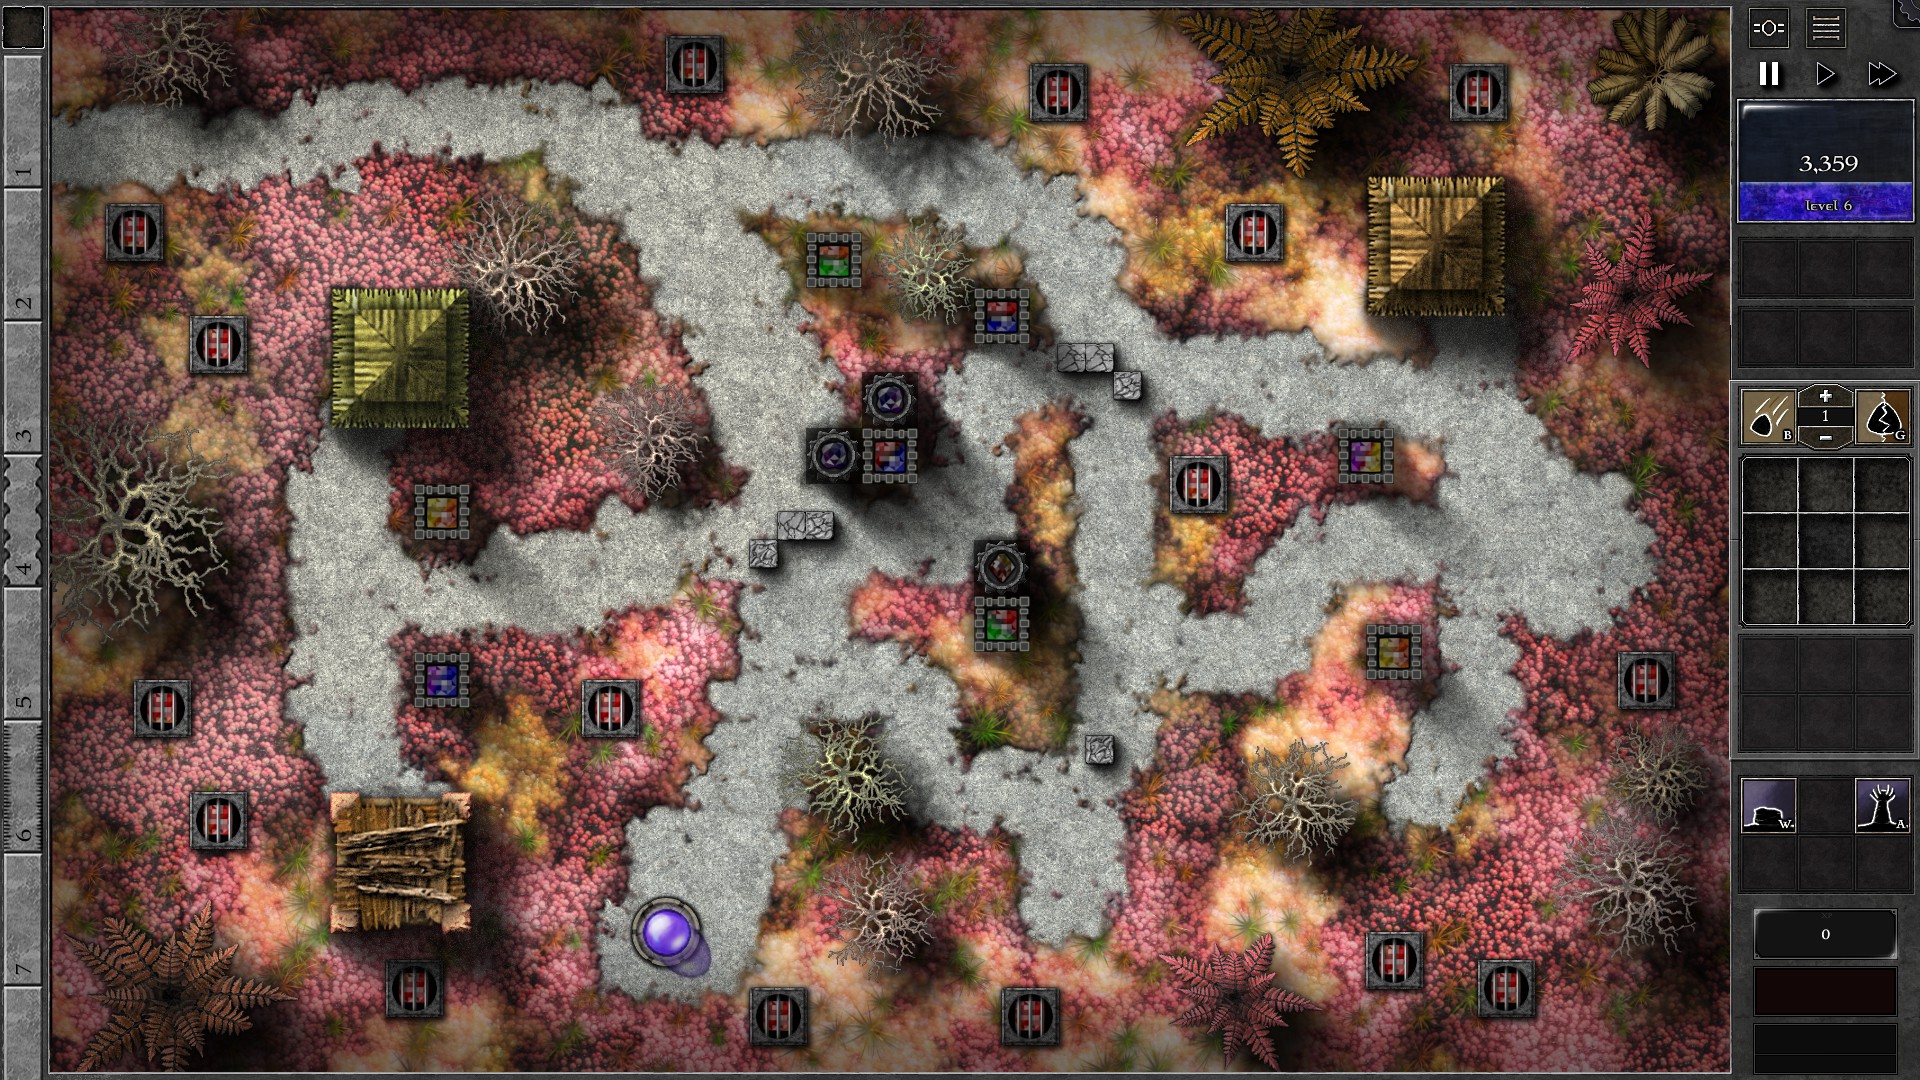
Start this field by setting up the walls and amps as shown. The g5 p/b gem is duplicated to provide a second amp to the r/b tower in the middle.
The amplified Spiritforge towers should be good enough to take down the monsters. Start by adding a second amplifier to the r/g tower at the middle, then add 2 more amps to the amped r/b tower. All amps should be filled with duplicates of the g5 p/b gem. At w17 your amped tower gems will get upgraded to g4 and at this point the amped r/b tower should have 3 gems amplifying it.
At w19 the y/p tower gem to the right should get upgraded to g4 and will start firing at the sealed gem just left of it. If you have already amplified the r/b tower with 4 gems, hold up your mana until that sealed gem is freed before you build amps for the r/g tower. (you can consider a 5th amplifier for the r/b tower but it’s not required)
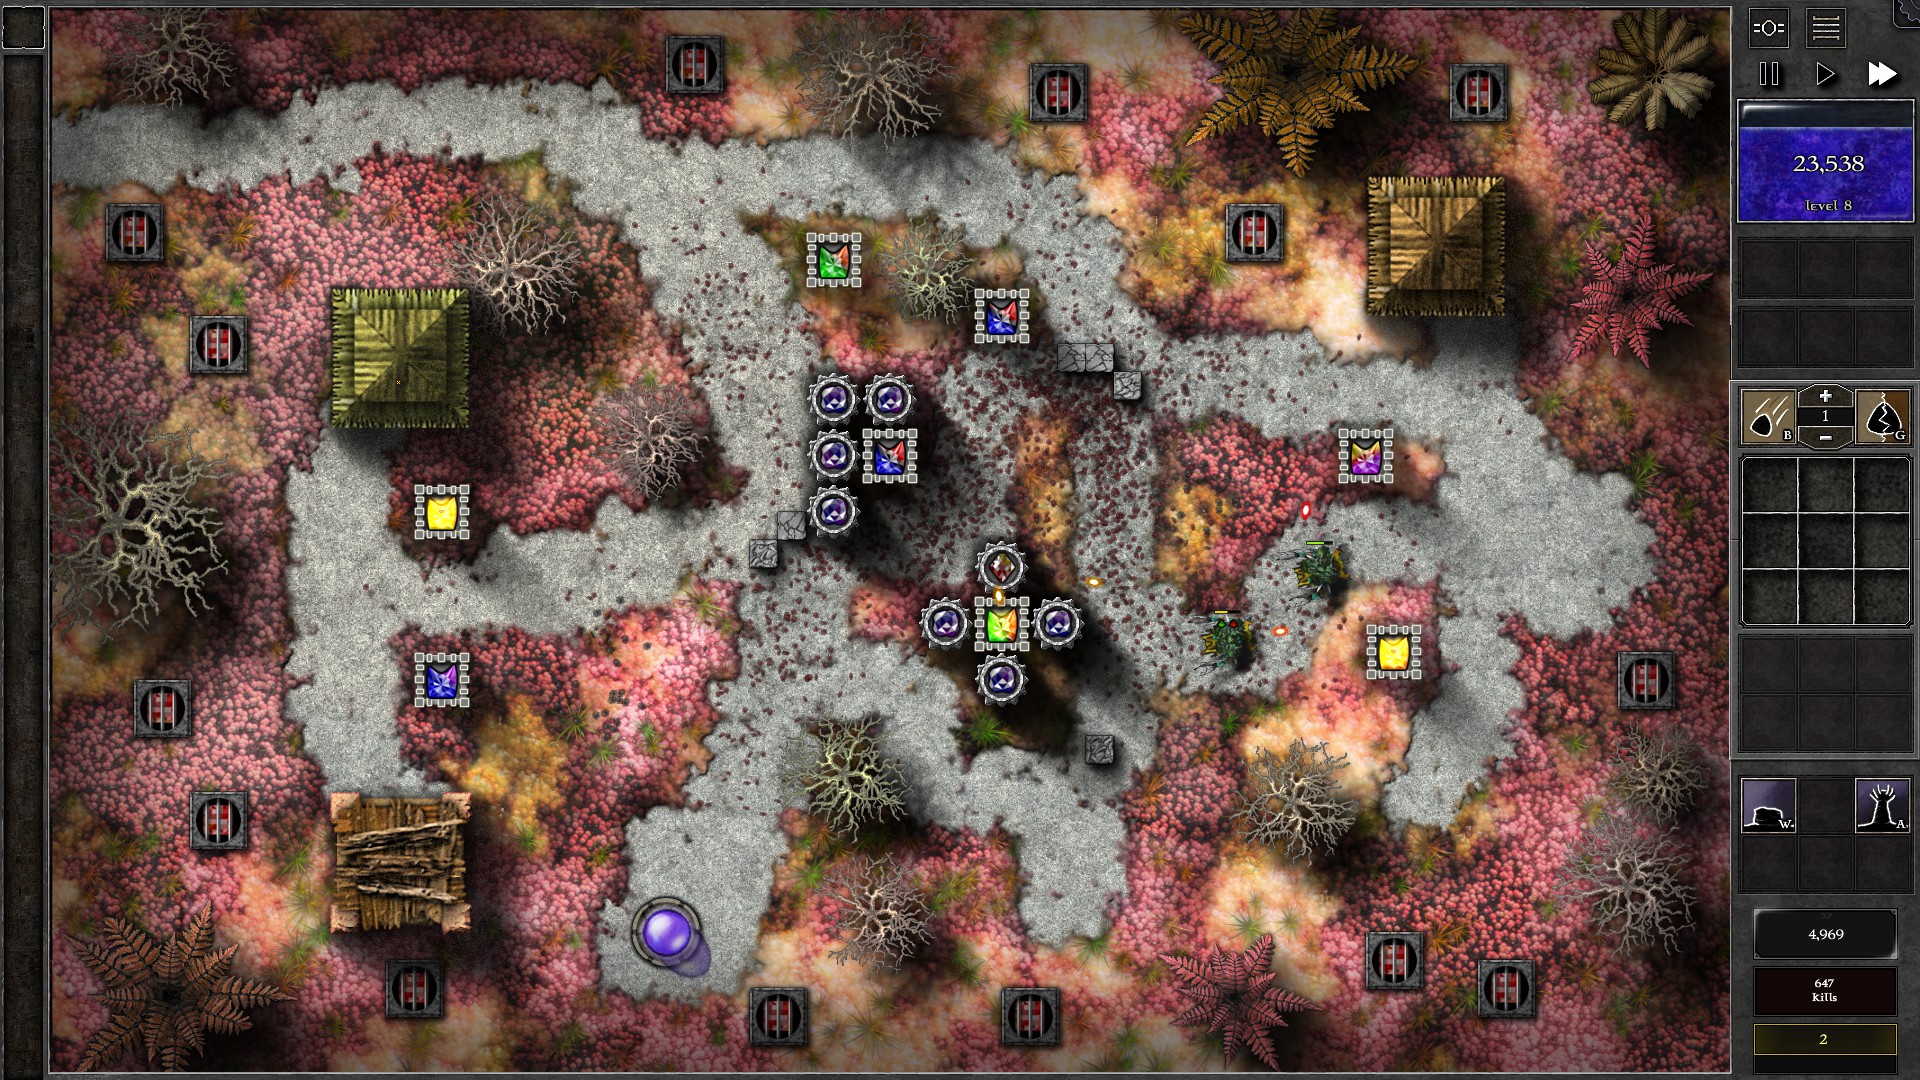
Sell any sealed gems set free for extra mana. Once the sealed gem next to the y/p tower is set free, start adding amps to the r/g tower. If you have enough mana to duplicate the g6 r/y gem, use that (instead of the g5 p/b gem) for the 3rd amp of the r/g tower. Continue with the 4th amp for the r/g tower and you should have enough firepower to take down the remaining waves with mana to spare.
107 – Field D1
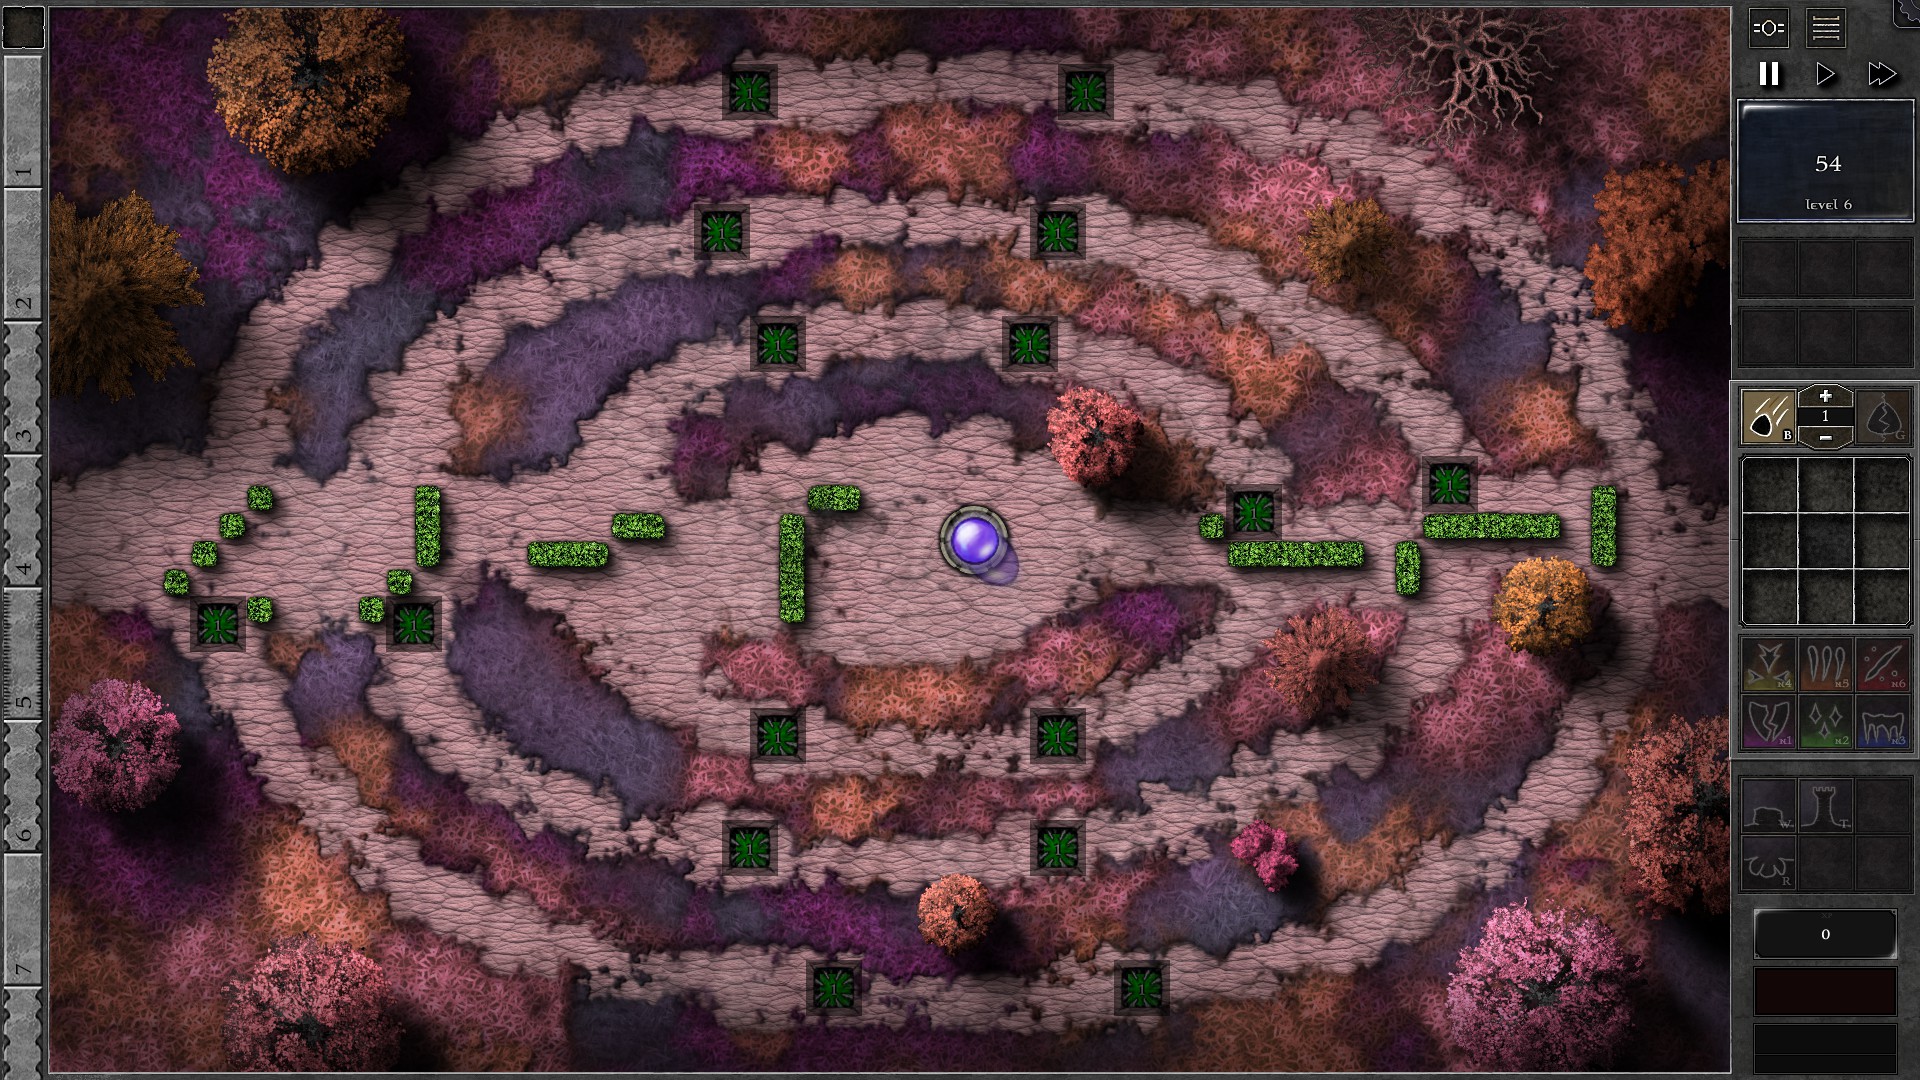
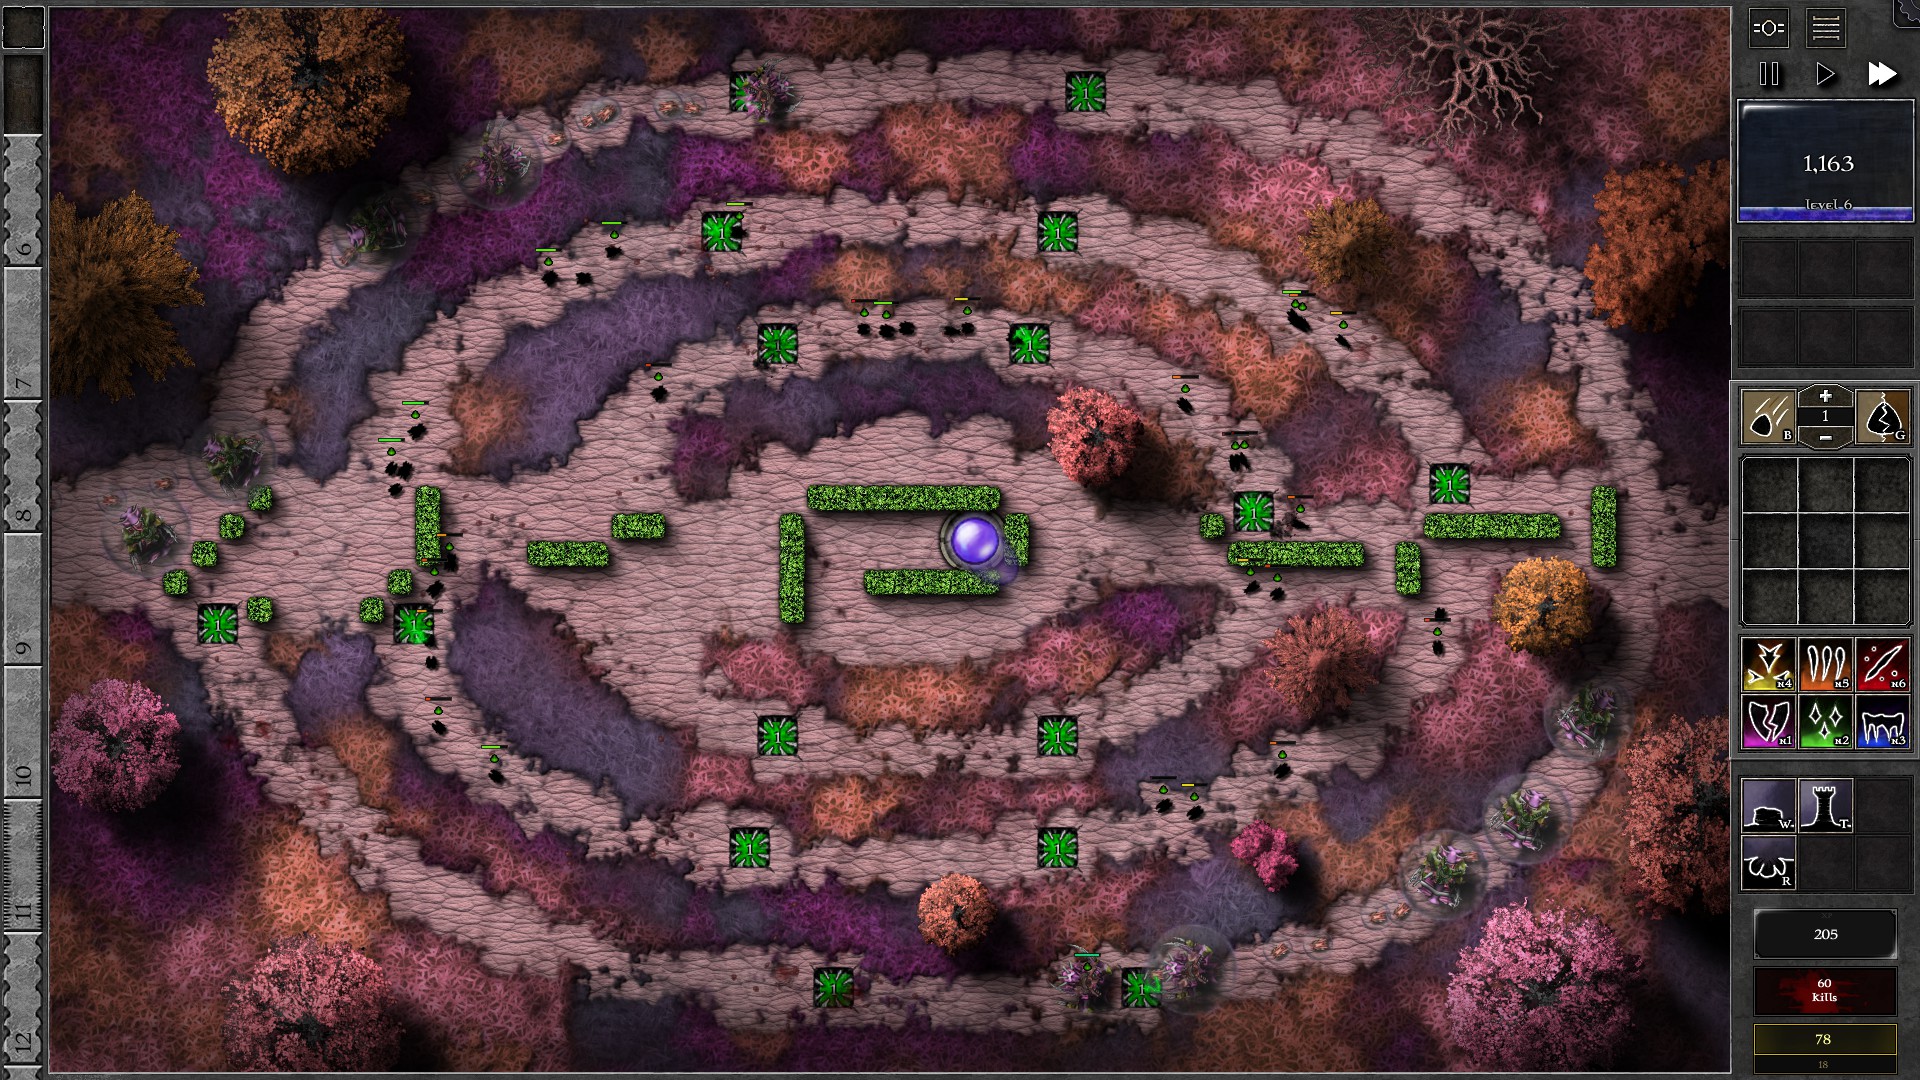
Start the field by setting up a poison trap path, with 16 g1 green gems, traps and walls as shown. After you start the field, first complete the walls in the centre of the field, then upgrade the gems evenly as you collect mana. You should have all 16 gems upgraded to g2 at around w11 and to g4 by w30. Be careful as you upgrade the gems as you will likely be banishing monsters every now and then and may get caught red-handed with no mana if you upgrade too aggressively.
Once you have all gems at g4, start focusing on the bottom 6 traps. Upgrade these 6 gems evenly as you progress through. In addition, change the targeting priority for the bottom-most 2 gem to “Least affected by Specials”. All bottom 6 gems should be upgraded to g6 by w50 and to g7 by w64.
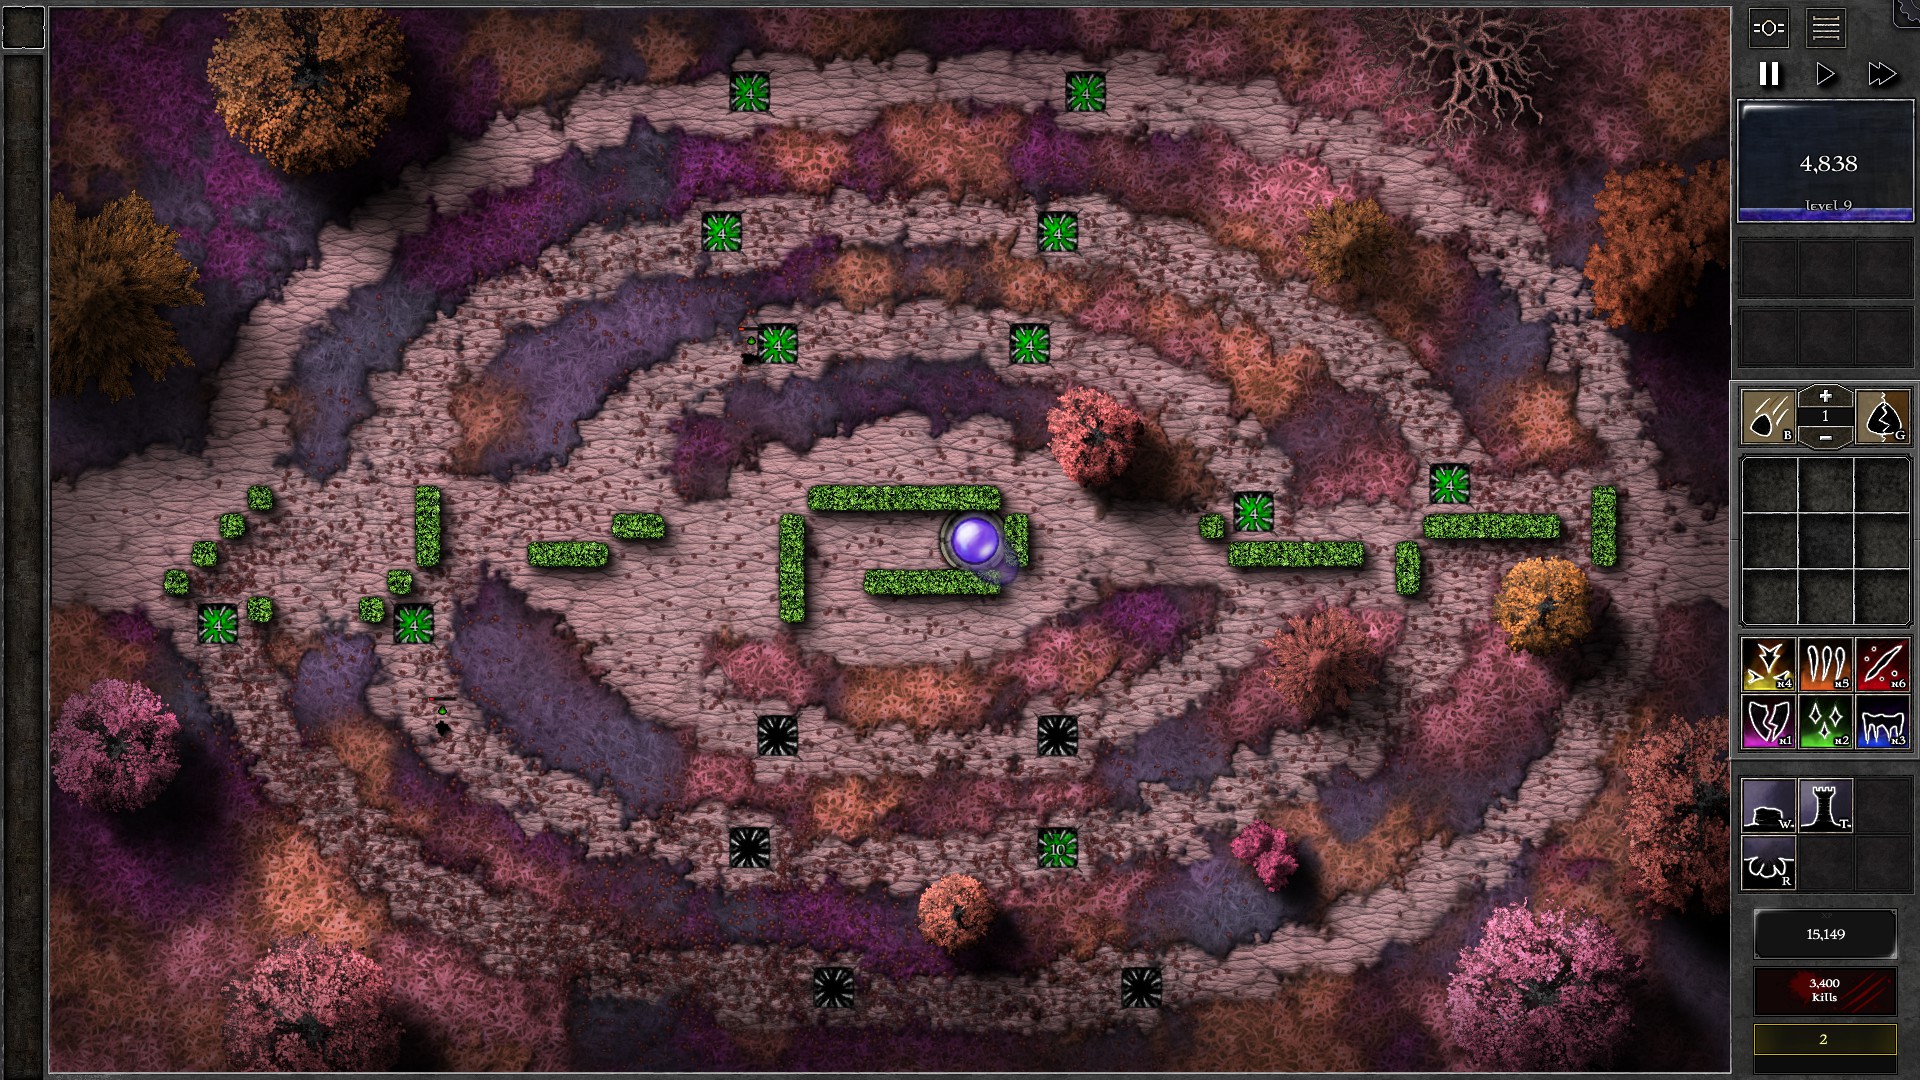
Save up your mana and prepare for the final waves. Giant spawnlings will start to pose a trouble as they may become unkillable if you banish them too much. Wait until you gather about 40000 mana which is likely after the final wave has started and most non spawling monsters are killed (Salvage some extra mana from g4 gems if needed). Now duplicate 2 g7 green gems and combine all 8 g7 gems you have into a g10 green gem. The g10 gem should take care of the remaining monsters cleanly with its huge poison damage.
Note: This trial is great for getting the “Hazardous Materials” reference achievement as you will kill over 3000 monsters with most of them being poison kills (you need 1000 poison kills for the achievement).
108 – Field D2
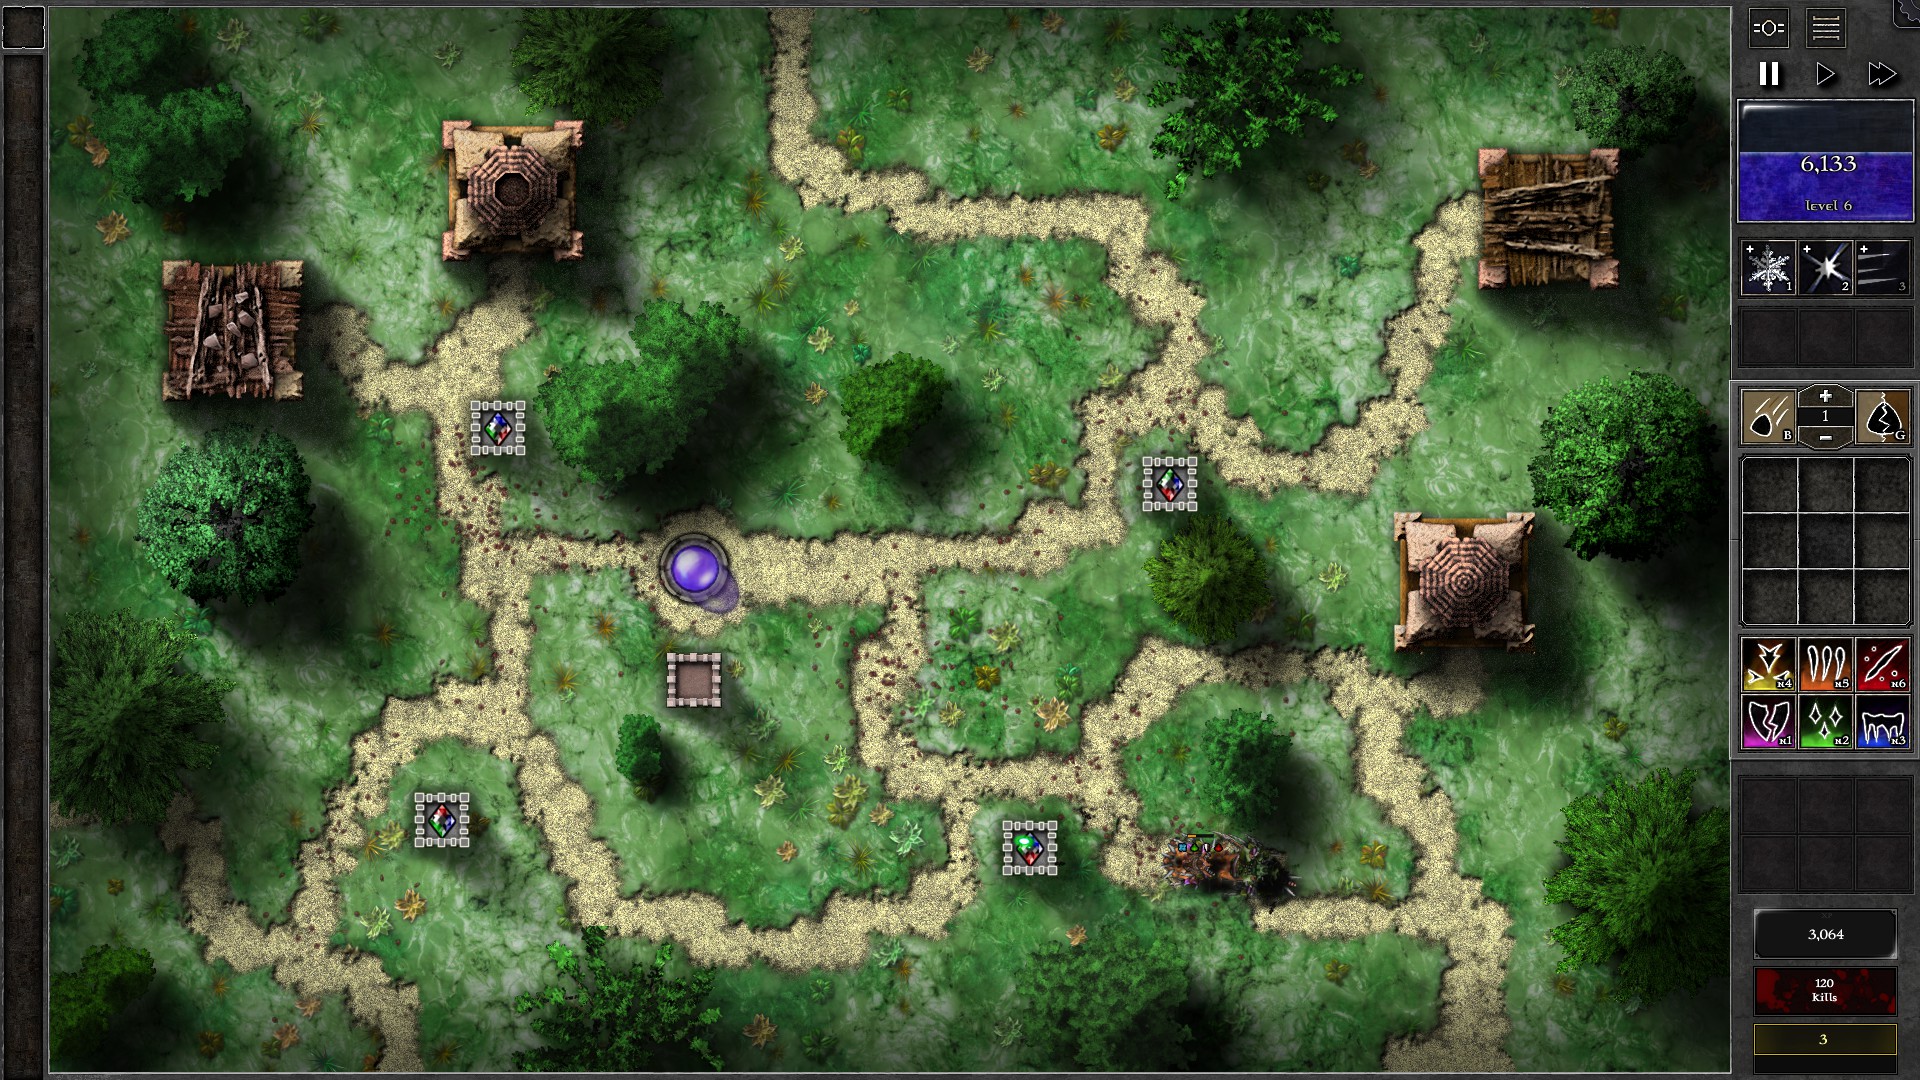
This Trial is not too complicated but may take some tries to get right.
Start the Trial by sending all waves early (Ctrl-click on the wavestones). As you gain full double charges during the waves are sending, use Whiteout and Freeze once on the top left monsters.
Once you have sent all waves the Spiritforge gems should be g6. Use your spells on the top left monsters first. You will want to use 2 sets of each spell carefully on the top left to minimize leakage from the top left due to its short path. You should also notice that the bottom right path will see many giants leak through. Use your next Whiteout on this group of monsters to slow them down and kill some more of them to reduce banishment costs. After that, start using more spells on the monsters from the bottom right path.
The mana from starting the waves early should be enough to banish some tens of giants. (If you don’t have enough mana, try to work around with how to cast the spells on the monsters more effectively in the next try) By the time monsters are taking a second run at your orb the Spiritforge gems should be able to hold their own ground with further spell support. The top right and bottom left path generally do not need attention as there are less monsters from these 2 paths.
109 – Field D3
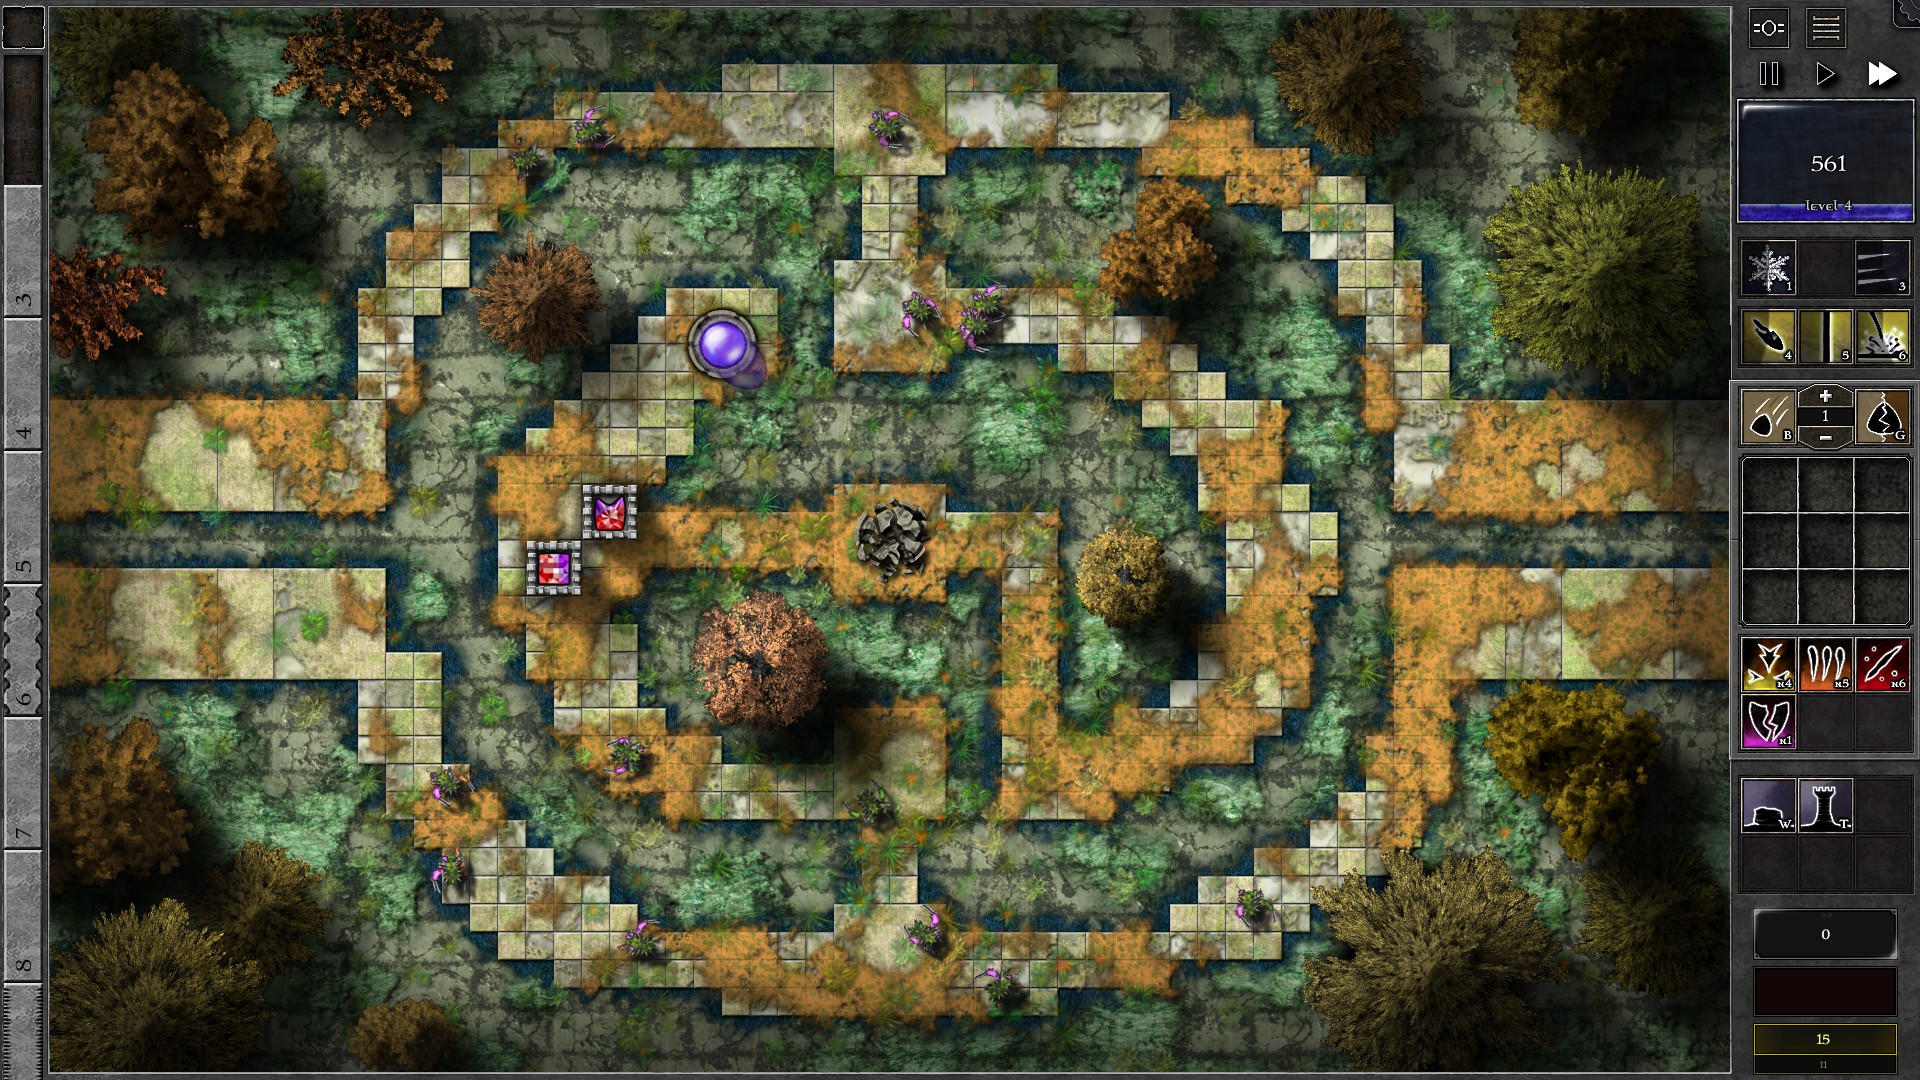
Start the field as shown with 2 p/r gems, one g3 and one g4. For the first few waves, you should be able to gain enough mana to upgrade the g3 into a g4 with no leaks.
The first Guardian will spawn in at w8. Build a tower close to the entrance where it spawn in, Cast 2 Ice Shards, Freeze once and move a gem there to use all your Beam and Bolt spells on the Guardian (Beam should be used first to burn through the armor quickly, then alternate between Bolt and Beam). You should be able to kill it or at least have it left with only a few hundred HP before your remaining gem struggles to defend against the monsters and you need to move the gem back for monster defense. Use Barrage on the gem defending against the monsters to hopefully reduce leakage.
At around w14-15 you should have enough mana to upgrade one of the gems to g5. If you haven’t killed the w8 Guardian it should be close to your defenses now, so use Freeze + Beam to pick it off. You should notice the Guardian premonitions appearing again which signals the second Guardian entering at w18. Start saving up spells, and hopefully you should have 2 of each the Beam, Bolt and Ice Shards and at least one Freeze and Barrage spell. At w18, build a tower close to the Guardian and move the g5 gem to kill the guardian ASAP with the help from spells. At the same time, use Barrage on the g4 gem to help it kill monsters approaching the orb.
Once the w18 Guardian is gone you should be able to resume monster defense and gain enough mana to upgrade the second g4 into g5. The third Guardian should spawn at w26, so save up the spells and repeat the same process as the w18 Guardian. However, you will probably fail to kill the w26 Guardian after using up all your Beam and Bolt spells with around 1000 HP left. Send the g5 gem back to defending the Orb (preferably with a Barrage charge to insta-resocket) as your lone g5 gem starts to get overwhelmed.
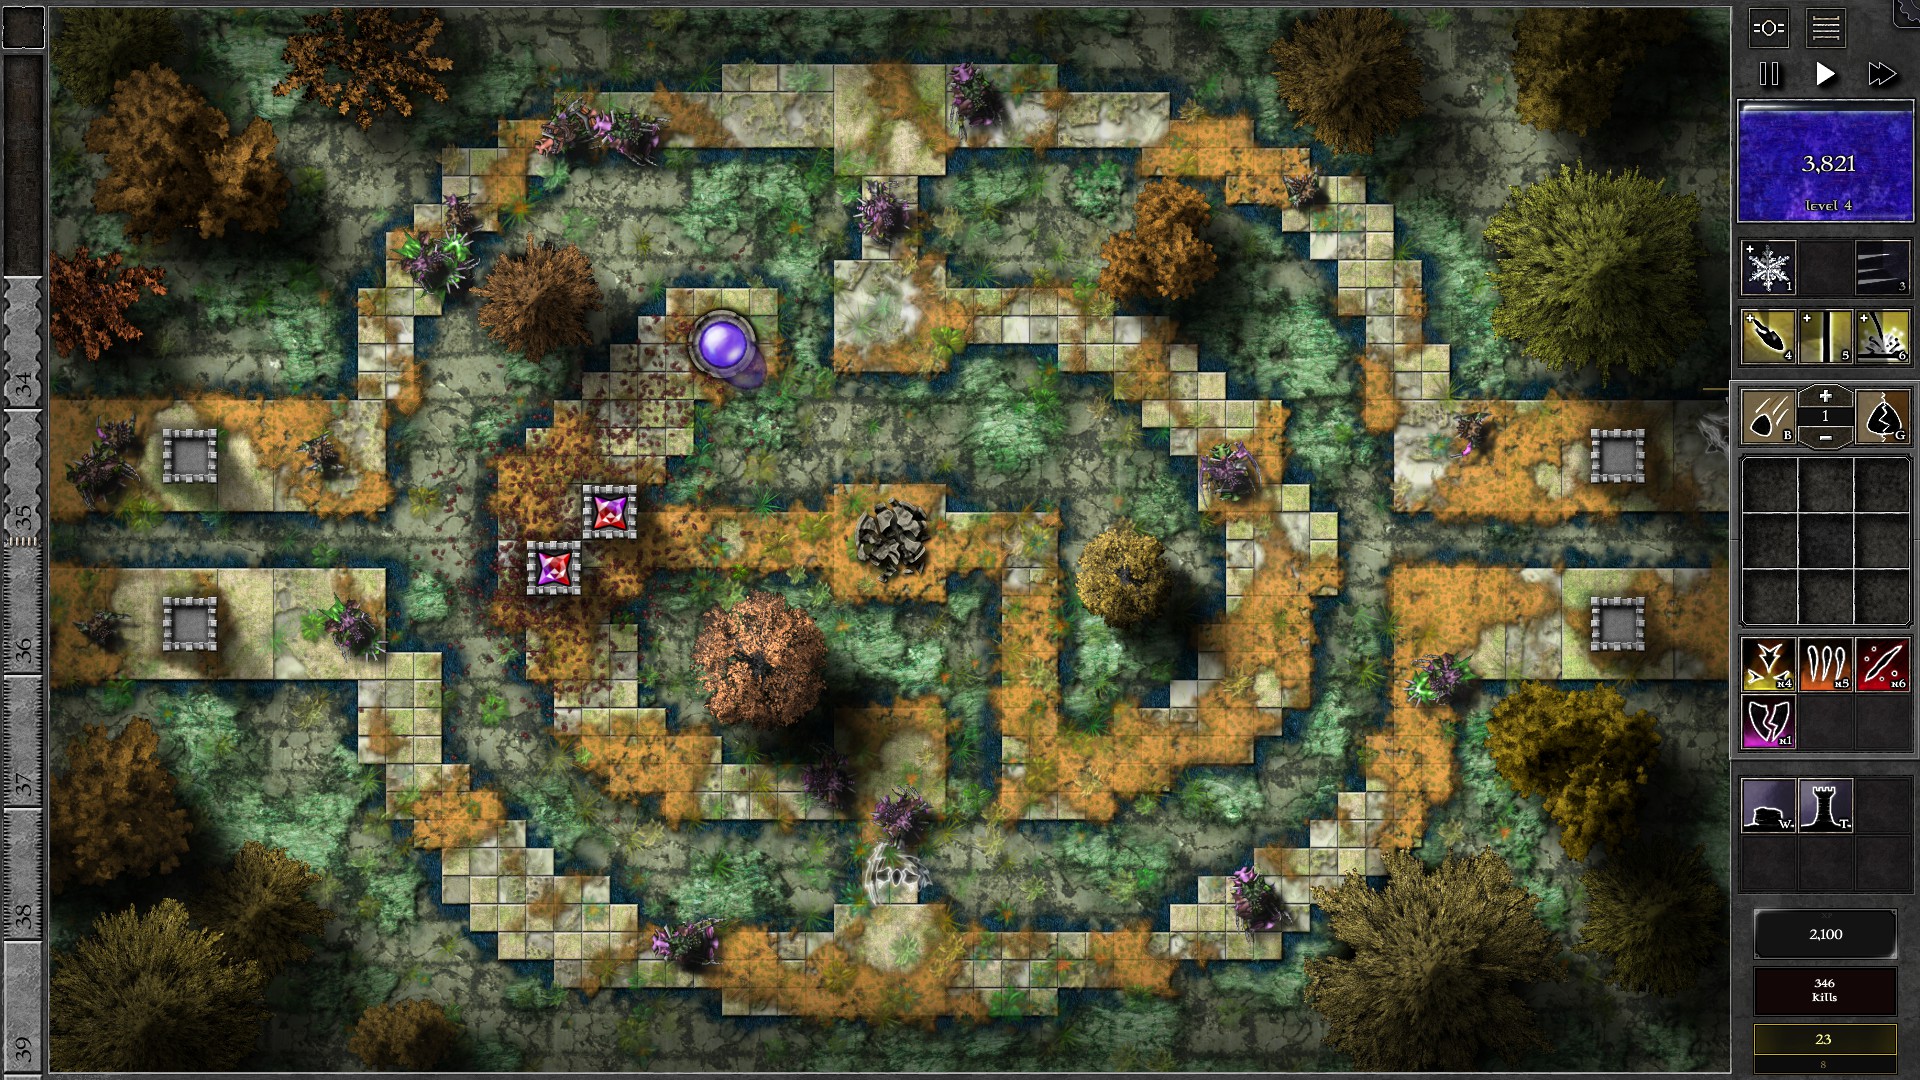
At w33 the 4th Guardian spawns in. You should now probably be free of the pressure from monsters but may not have all the spells to unleash on the new Guardian. Still, try to use your spells on the new Guardian to take off as many HP as you can, but save a Beam spell in case the w26 Guardian arrives at the gem defending against the monsters. Resume your monster defenses after that, and you should have enough mana to upgrade one of the gems to g6 at around w36. Once most monsters are defeated, use the g6 gem to take down the Guardian. After that focus on killing the remaining monsters while conserving spell use.
At the last wave, 2 Guardians will spawn. Focus on picking off any reavers and swarmlings first, then attack the Guardian spawning at the bottom (shorter) path first. WIth all the spells in focus you should be able to defeat the 2 Guardians before they destroy your Orb, after which you can pick off any Giants remaining.
110 – Field D4
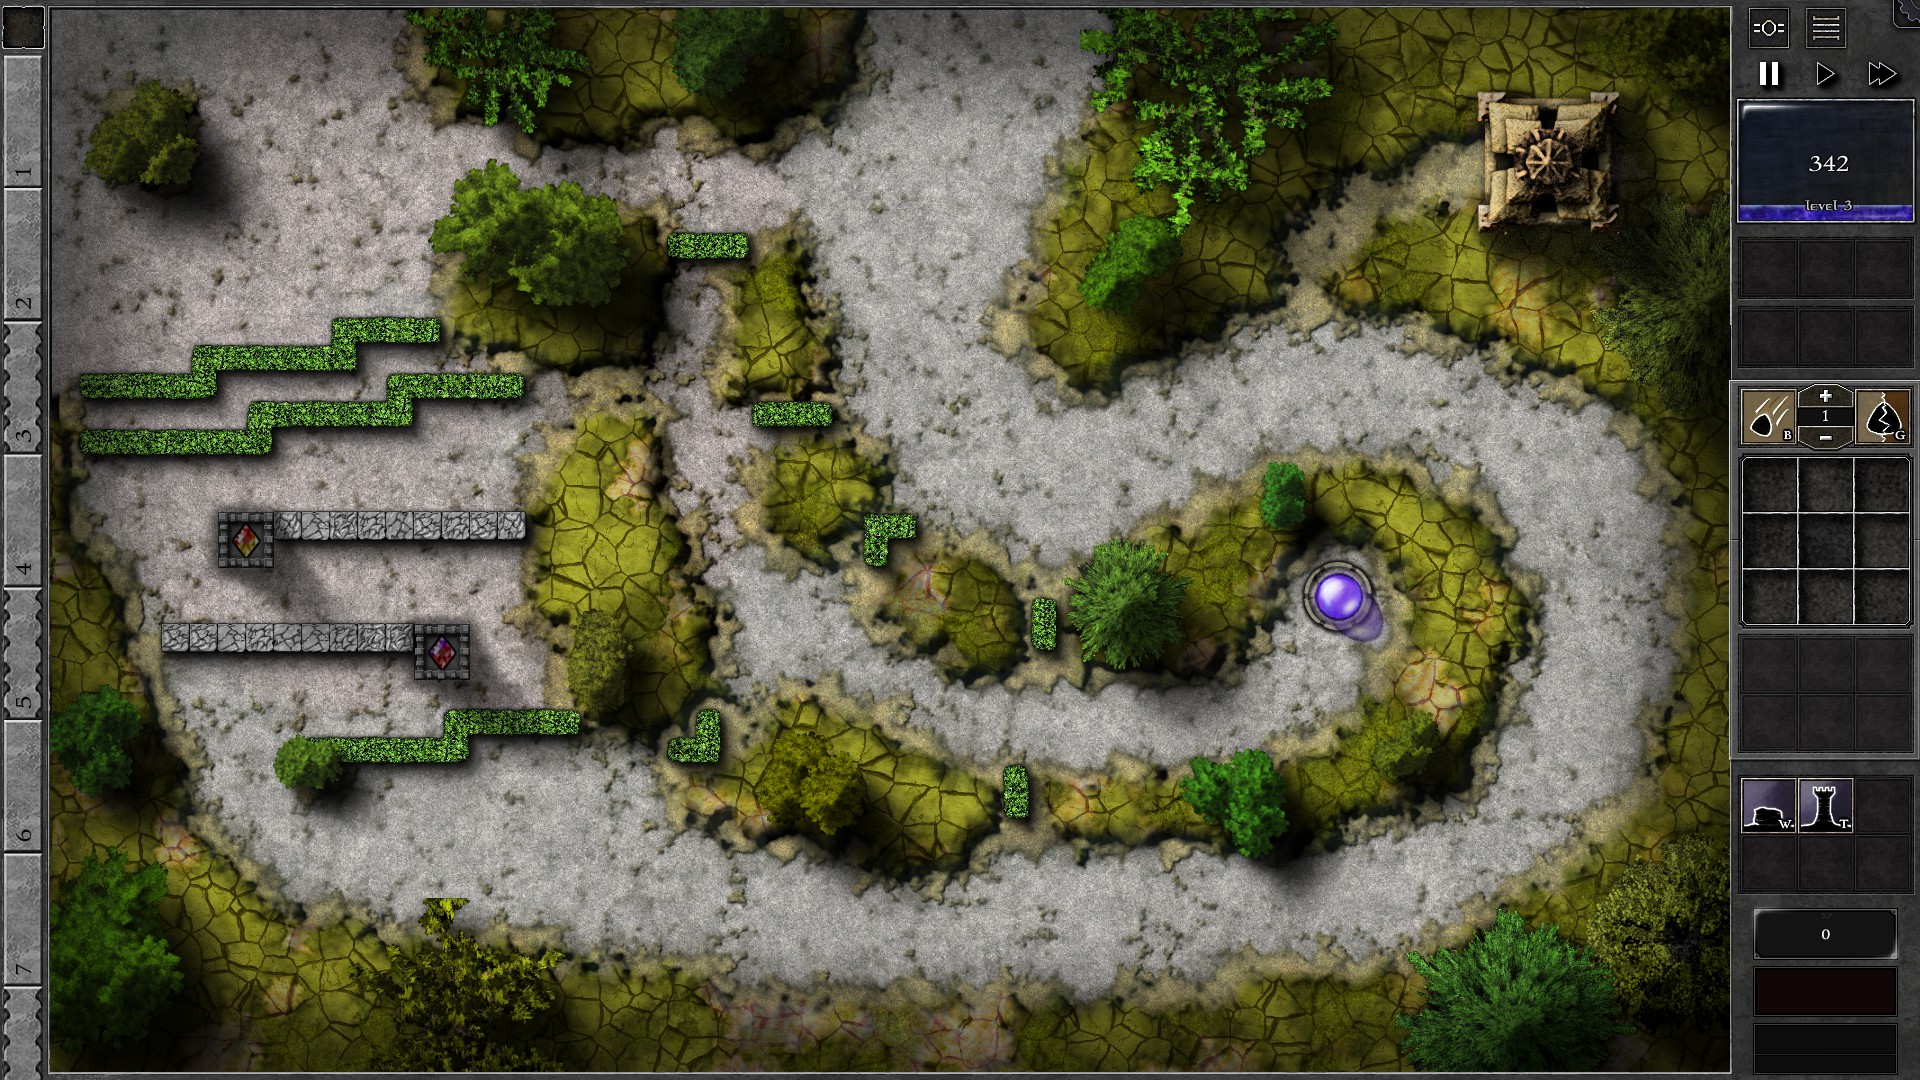
Salvage the p/y dual gem for extra mana, then start the field with 2 towers built and 2 g6 gems on them. The gems are built as follows:
1st gem: (g4 r + g4 r/p) + (g4 p + g4 r/p) = g6 r/p gem
2nd gem: (g4 y + g4 r/y) + (g4 r/y + g4 r/y) = g6 5y3r gem
The 2 g6 gems should be strong enough to take on the monsters until the last 2-3 waves. At this point, use “Least HP” targetting to start picking off the swarmlings and reavers first. You may also want to consider selling the g6 5y3r gem to get extra mana for banishment purposes. Once you sell the 5y3r gem, you can also use the mana to build additional towers that the remaining r/p gem can use to follow the monsters.
111 – Field D5
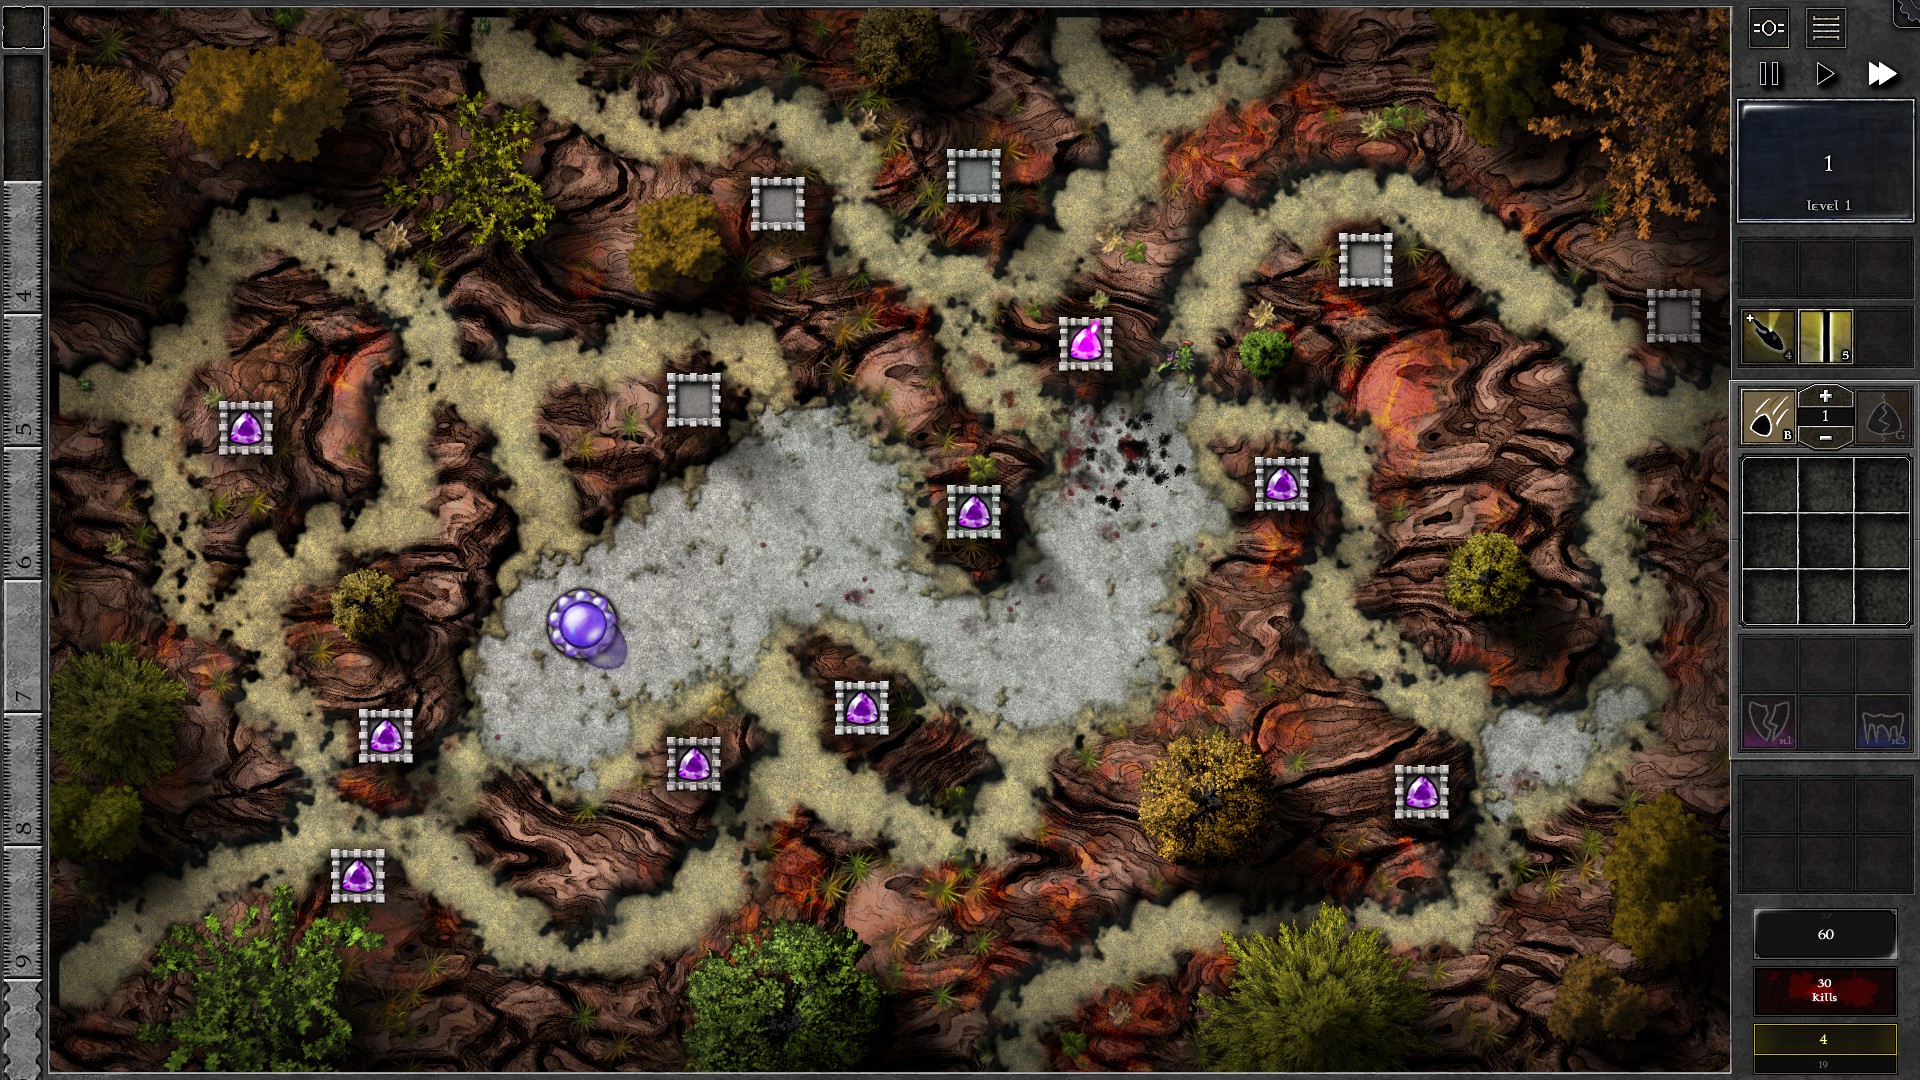
Setup the towers with 9 g1 p gems as shown, which will be all you have for completing the 40 waves of this field. You need to defend the monsters without losing too many orblets: with all 9 orblets off the Orb you probably cannot banish anything and will lose instantly. You can try sending some early waves to gain some extra mana as a small buffer if you are not under pressure.
Throughout the 40 waves, closely monitor the flow of monsters and use your enhancement spells as appropriate to guard your orblets. The left hand side of the field is especially vulnerable to leaking monsters or losing orblets. For the top left path, only one gem with limited coverage is available; use Bolt on this tower to extend its range and defeat monsters trying to go through the top left path. The bottom left path is the shortest path for monsters to attack the Orb or make their exit with orblets. Monsters from the top or the right will go through the centre of the field which is guarded by several gems and generally needs less attention.
Finally, watch out for the consecutive swarmling waves in w15-19, the tightly packed swarmlings in w21 and the tightly packed reavers in w40. These waves can generate pressure on the right side of the field and may overwhelm you by sheer numbers (they may undock every orblet you have and still have extra monsters to attack your orb which forces banishments on your mana)
112 – Field C1
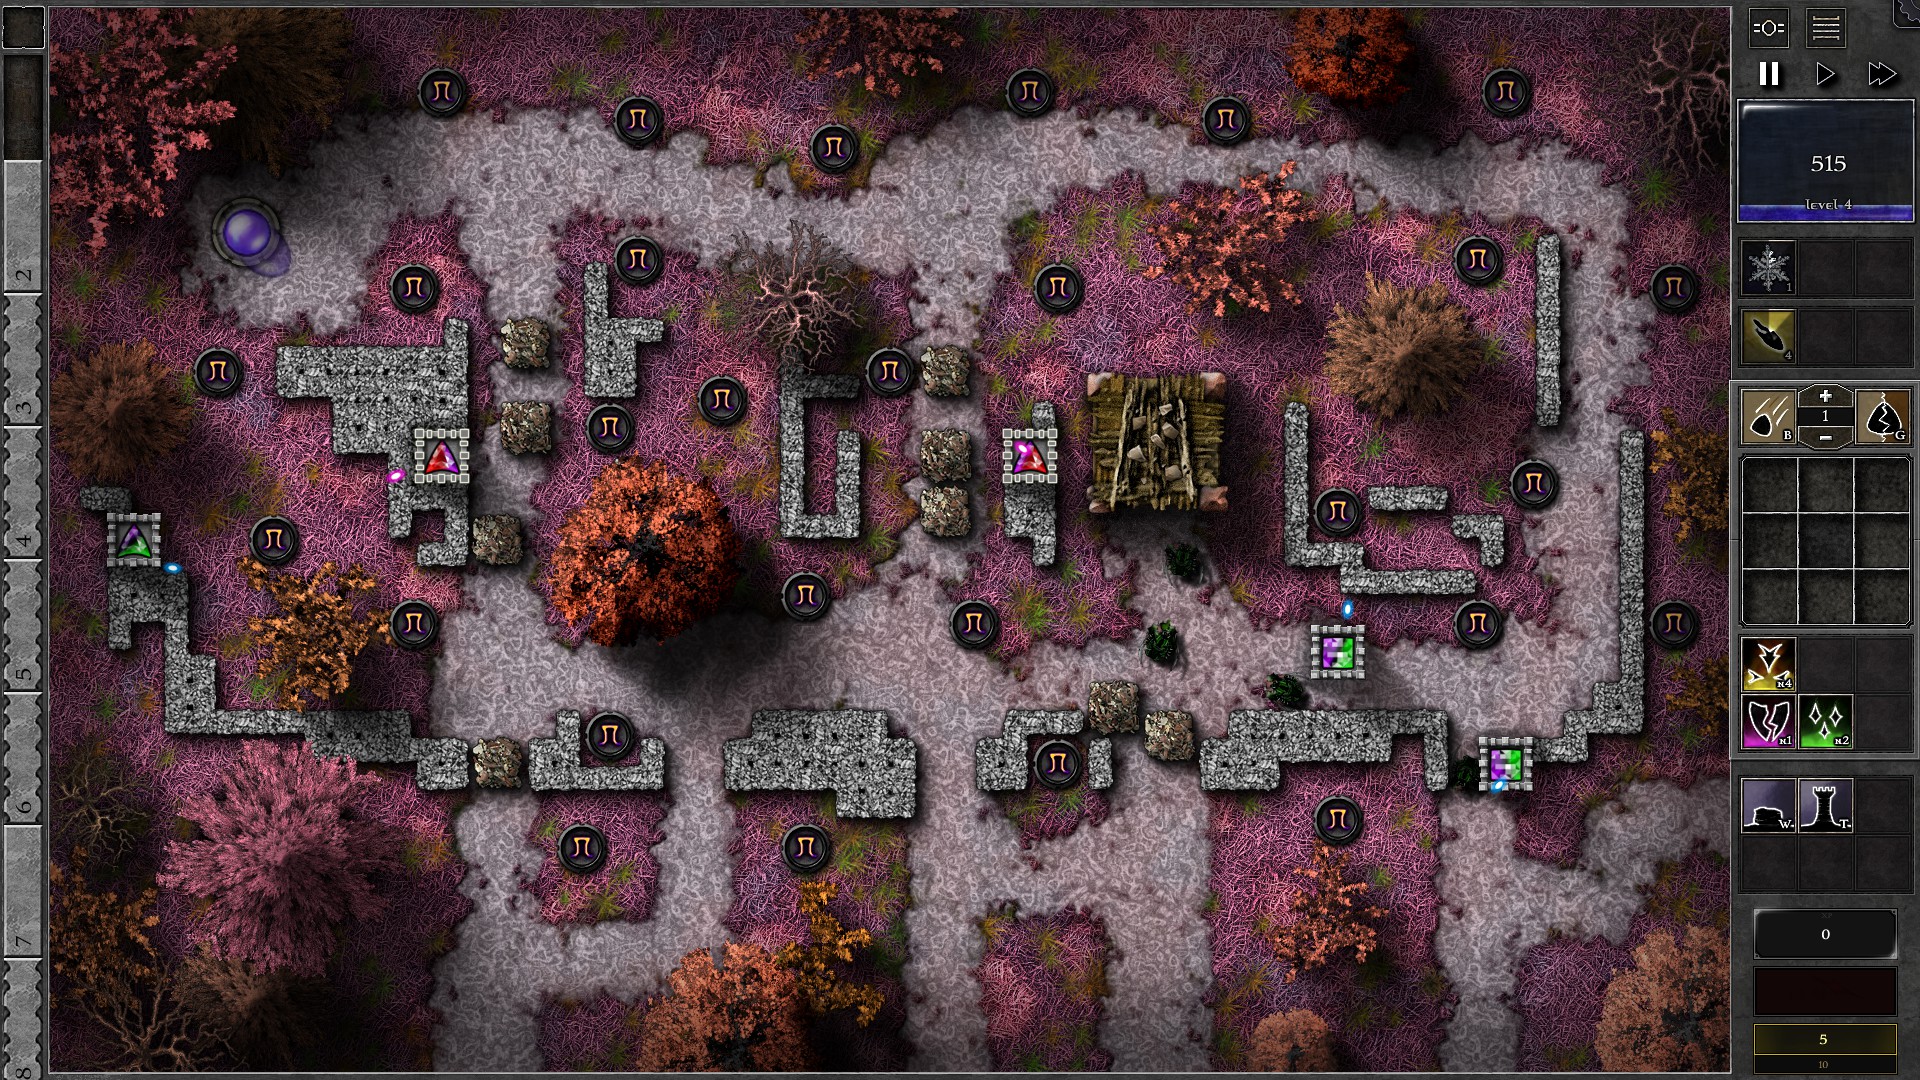
Start the field as shown in the screenshot. 2 g3 p/g gems are used in the lower right towers to deal with the monsters and the g2 p/g in the far left is set to “Structures” to take down the 2000 HP beacon.
Use spells on the g3 gems when necessary, and upgrade the g2 gem ASAP . At around w5 the 2000 HP beacon should be destroyed, in which you should build a tower close to the left spiritforge tower, and put in the structure gem to destroy the 4000 HP beacon.
Once the 4000 HP beacon is destroyed. you should have almost enough mana to make a 4th g3 gem (or upgrade one of the g3s to g4) and combine all your gems into a g5 gem. Build a tower close to the orb with good coverage on the path leading to the orb as well as the left passage blocked by barricades. This should be doable before w15. You are now ready against the inevitable destruction of the barricades which causes some monsters to take the previously blocked left passage.
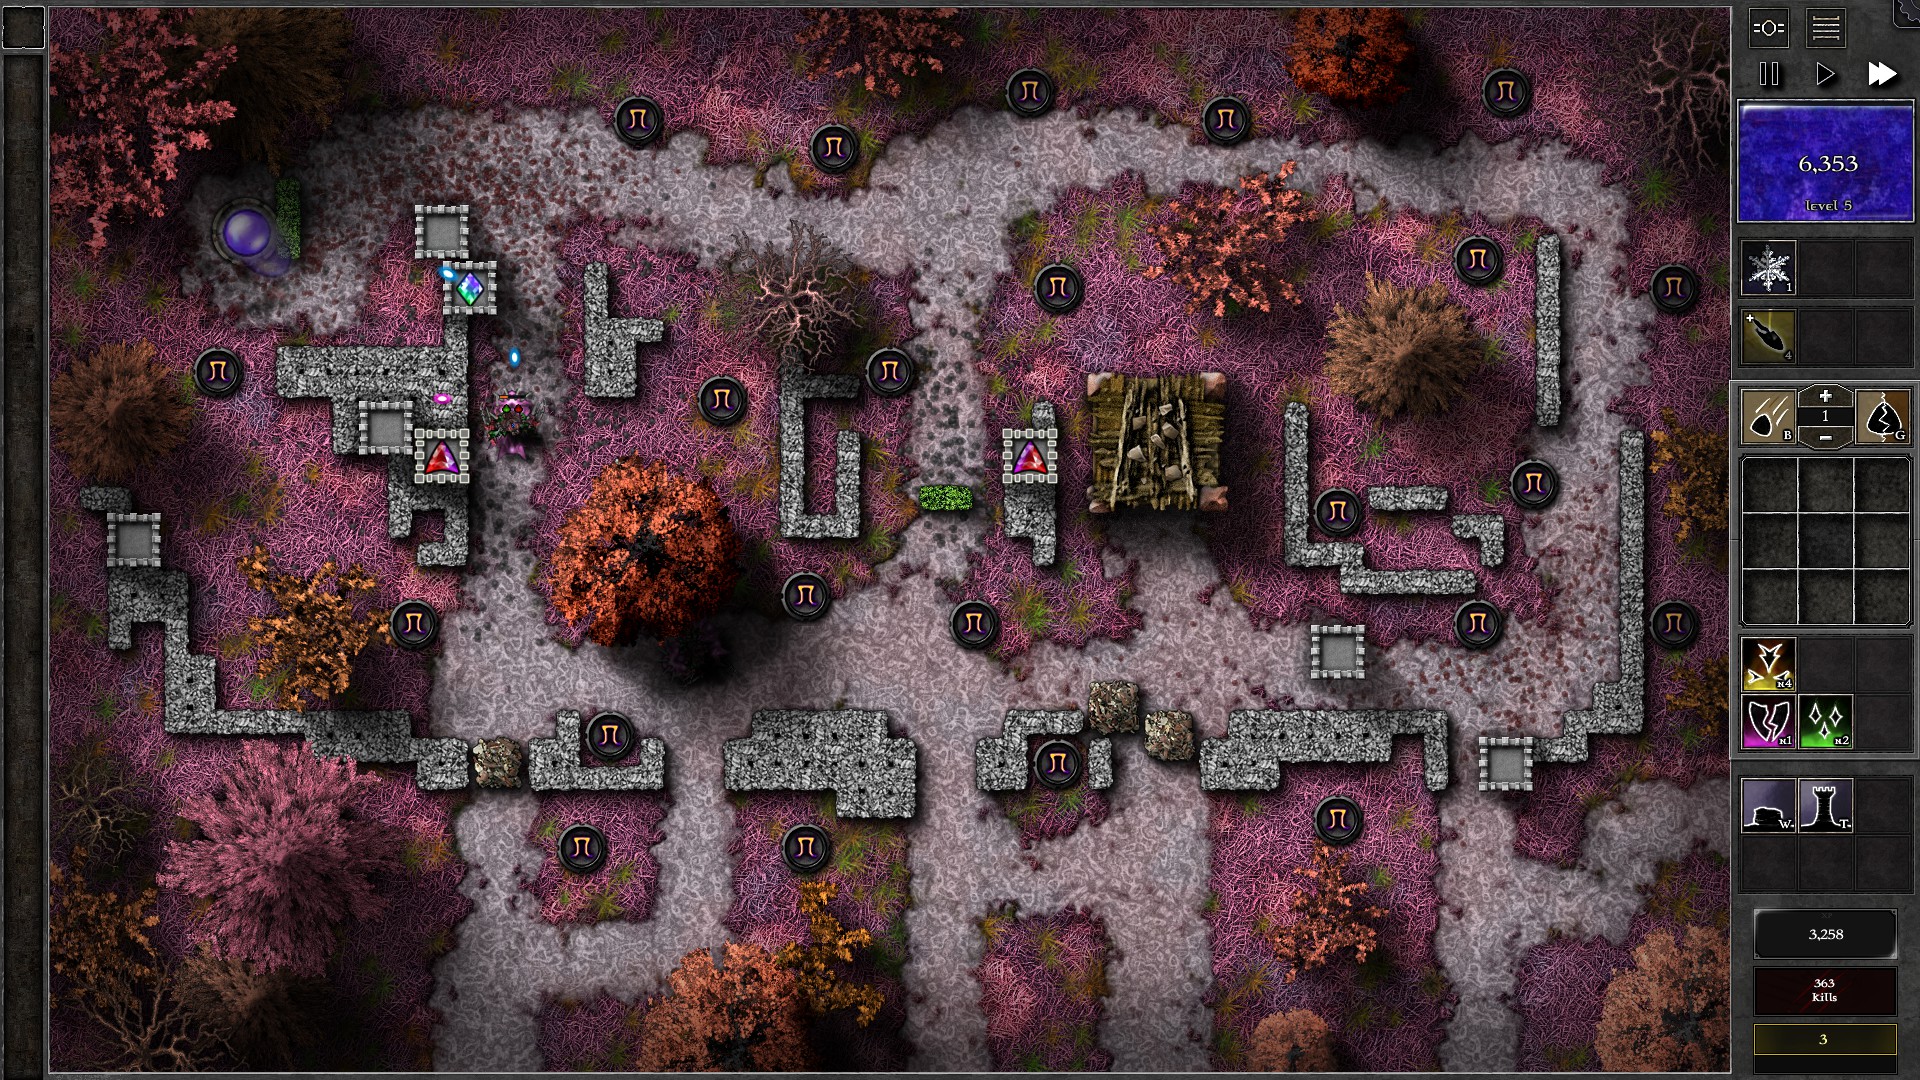
The barricades at the middle passage should be destroyed by the spiritforge tower at around w18. Block that path ASAP. At around w20 you will want to build a second tower with a g4 p/g gem close to the g5 gem to assist on killing the monsters. With some assistance from your gems (some of the giant waves can help provide downtime for your gems which allows them to help in destroying the barricades), you can open up the left passage at around w26-28, which is also when you have close to enough mana to upgrade your g4 gem and combine with the g5 gem. The resulting g6 gem should be strong enough to take on the remaining waves with some banishments which should not be too much of an issue due to the generous amount of mana from killed monsters. (You may want to clean up the non-giants first to avoid repeated banishments.)
113 – Field C2
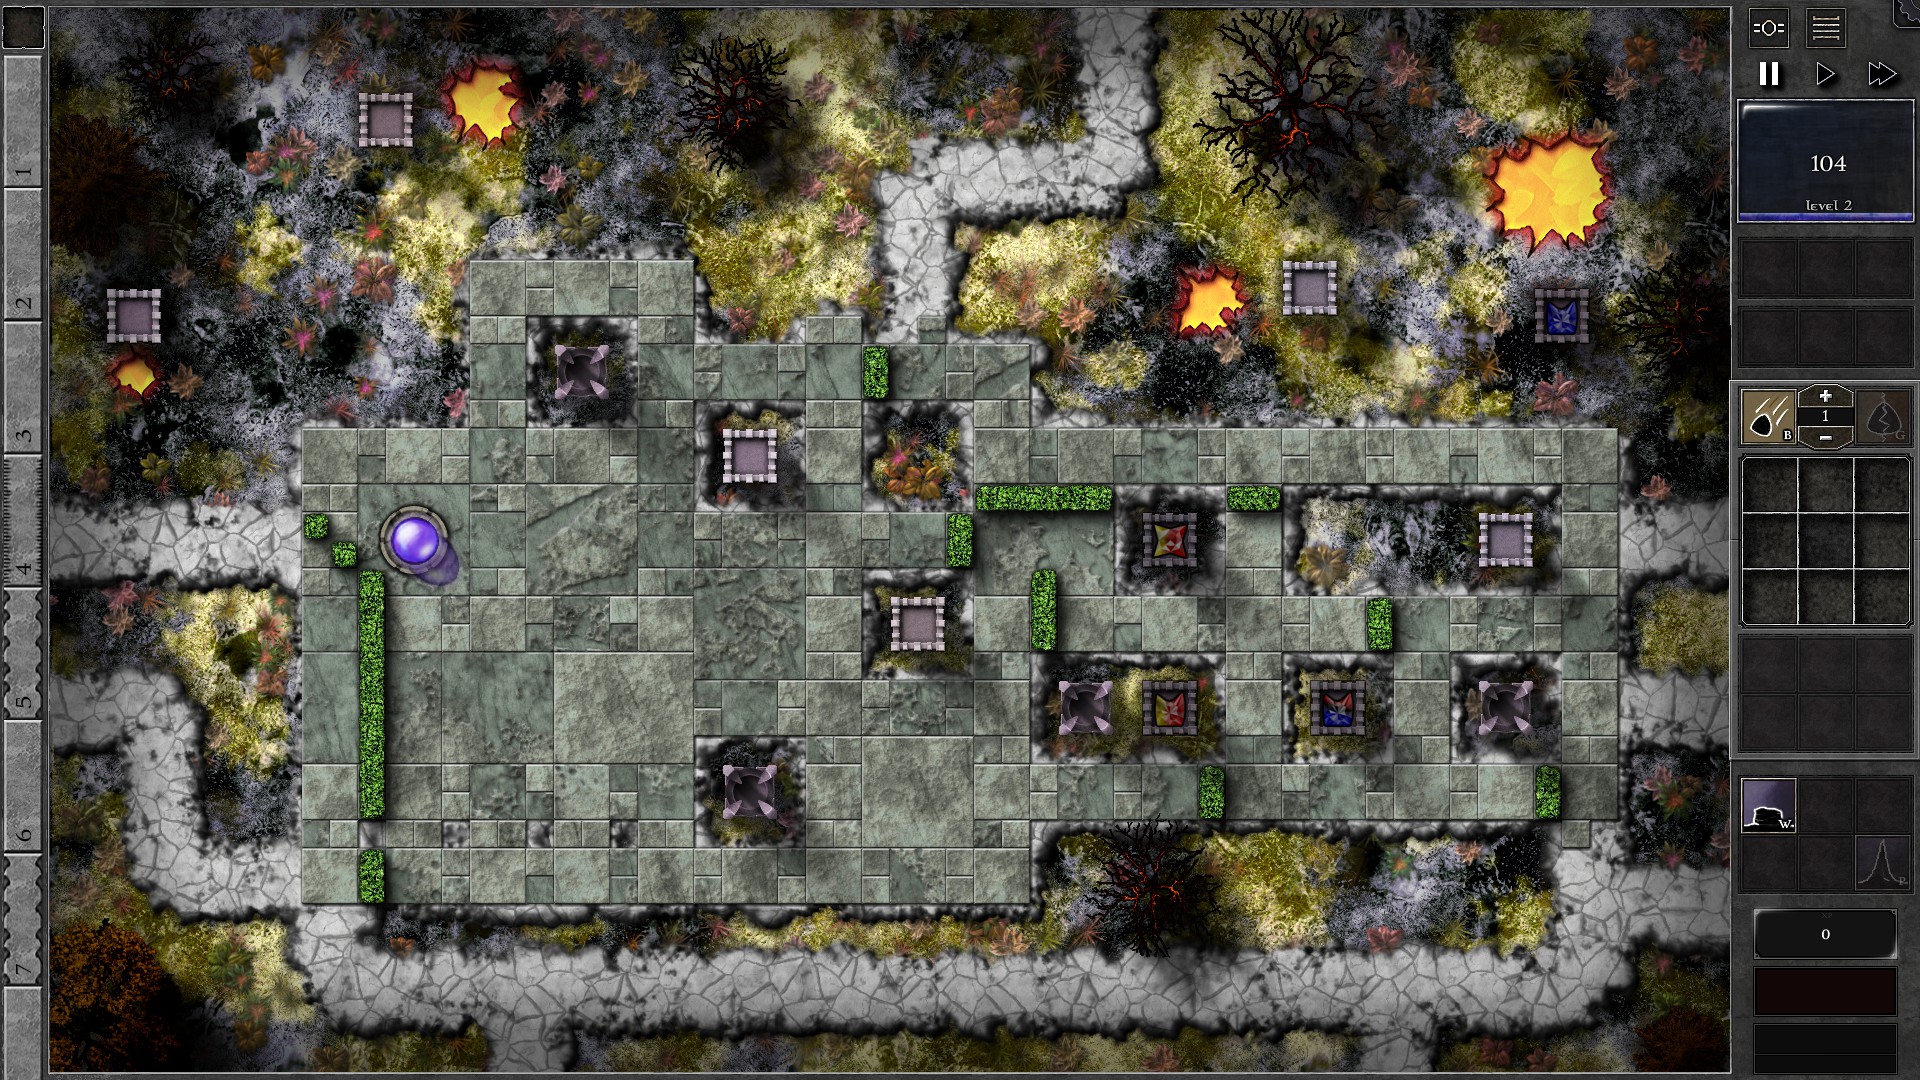
Sell the b/y gem provided at start for mana, and setup the field as shown. The g5 r/y gem is made by combining the g4 pure red and pure yellow gems. The g4 blue gem is set to “Structures” to fire at the corrupted shard.
A few waves into the field and you should have enough mana to afford a pylon. Build the pylon at the location as shown in the second screenshot, which should have a good coverage of both the path and the gem’s range. The setup should be ready to defend against the monsters.
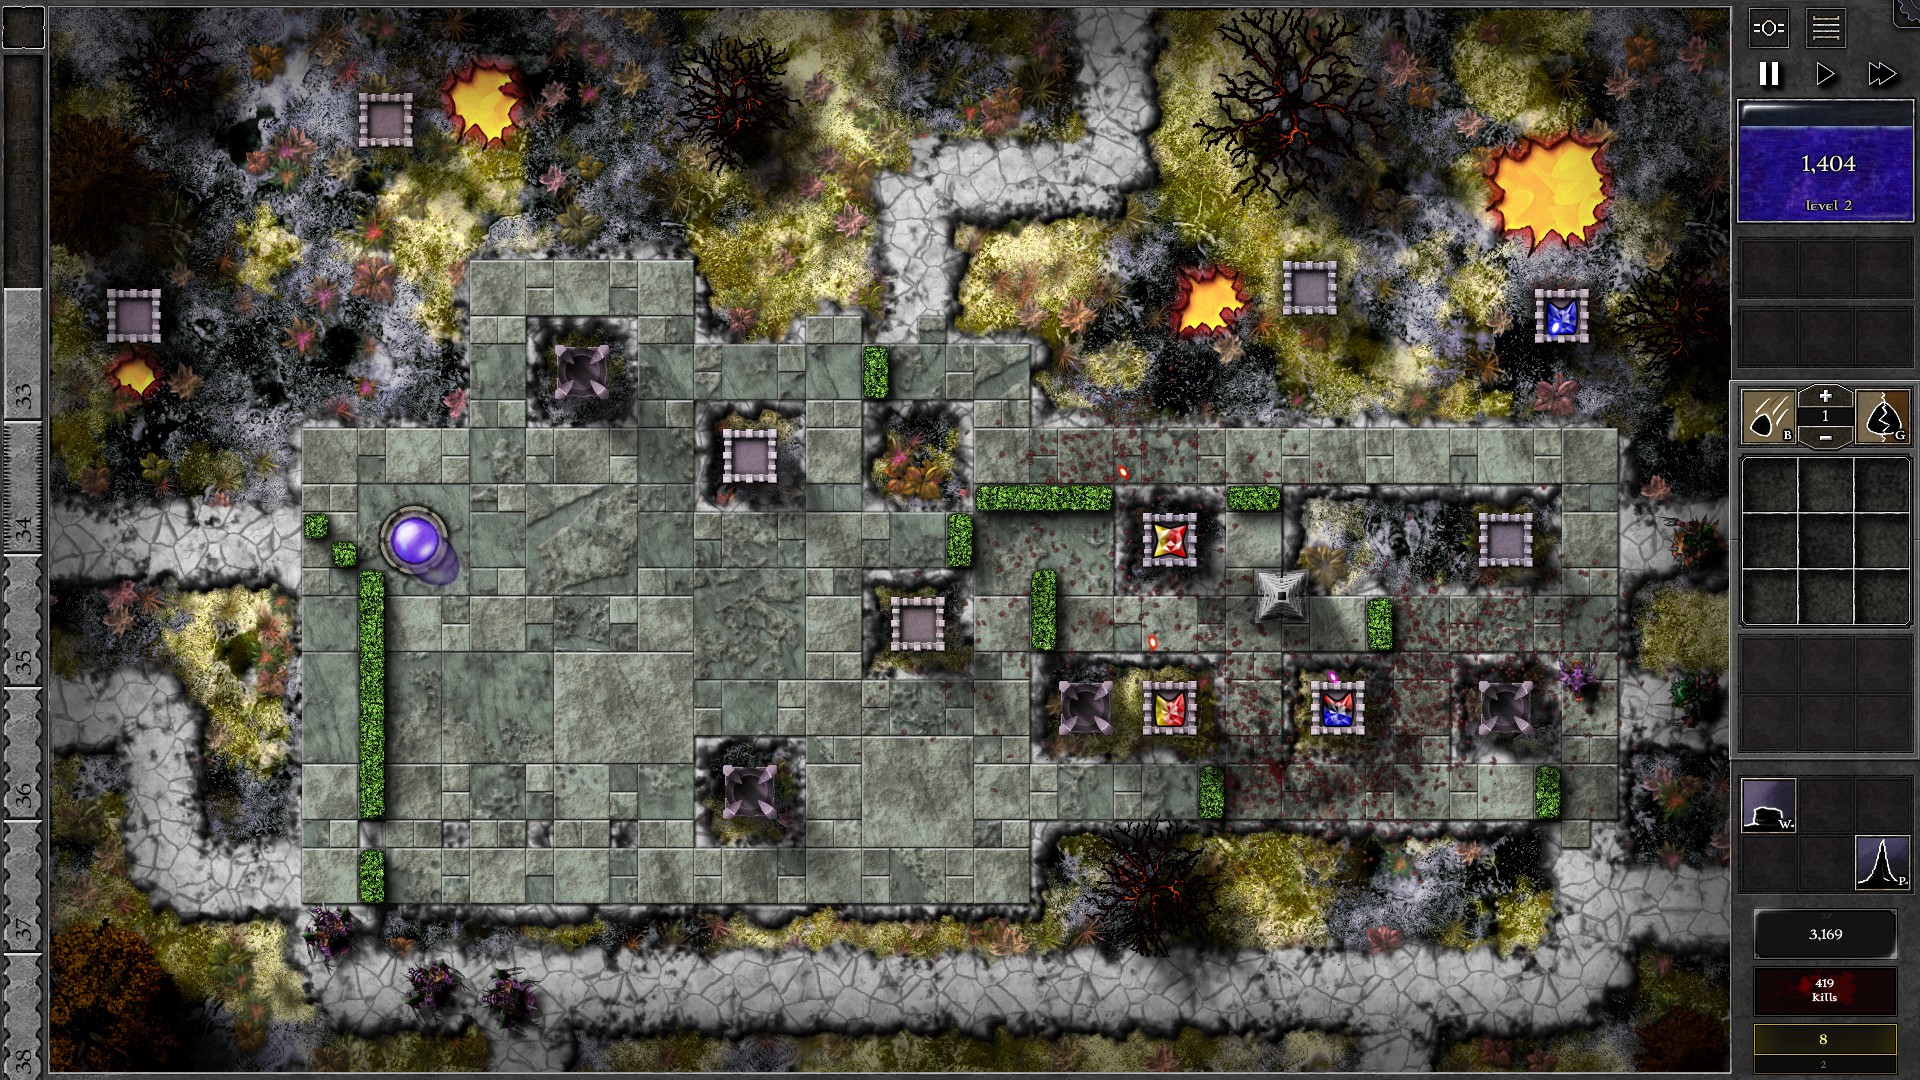
At around w26-28 your gems will start to struggle killing the monsters due to the increasing armor of the monsters. At this point, set your gems to target “Structures” so they focus on attacking the pylon and use pylon shots as your damage output. Watch out for the swarmling wave 34, which may be dangerous as the sheer amount of monsters may cause more leakages than you want. Use “Least HP” on the g5 gem to help pick off some of the swarmlings, and be alert on monsters that have been banished. You should also cash in extra mana by selling the g4 blue gem firing at the corrupted shard as an extra buffer against banishment costs. For the w40 reavers, you will want to have the pylon target “Least HP” to secure kills on them as they can cost a lot from repeated banishments.
114 – Field C3
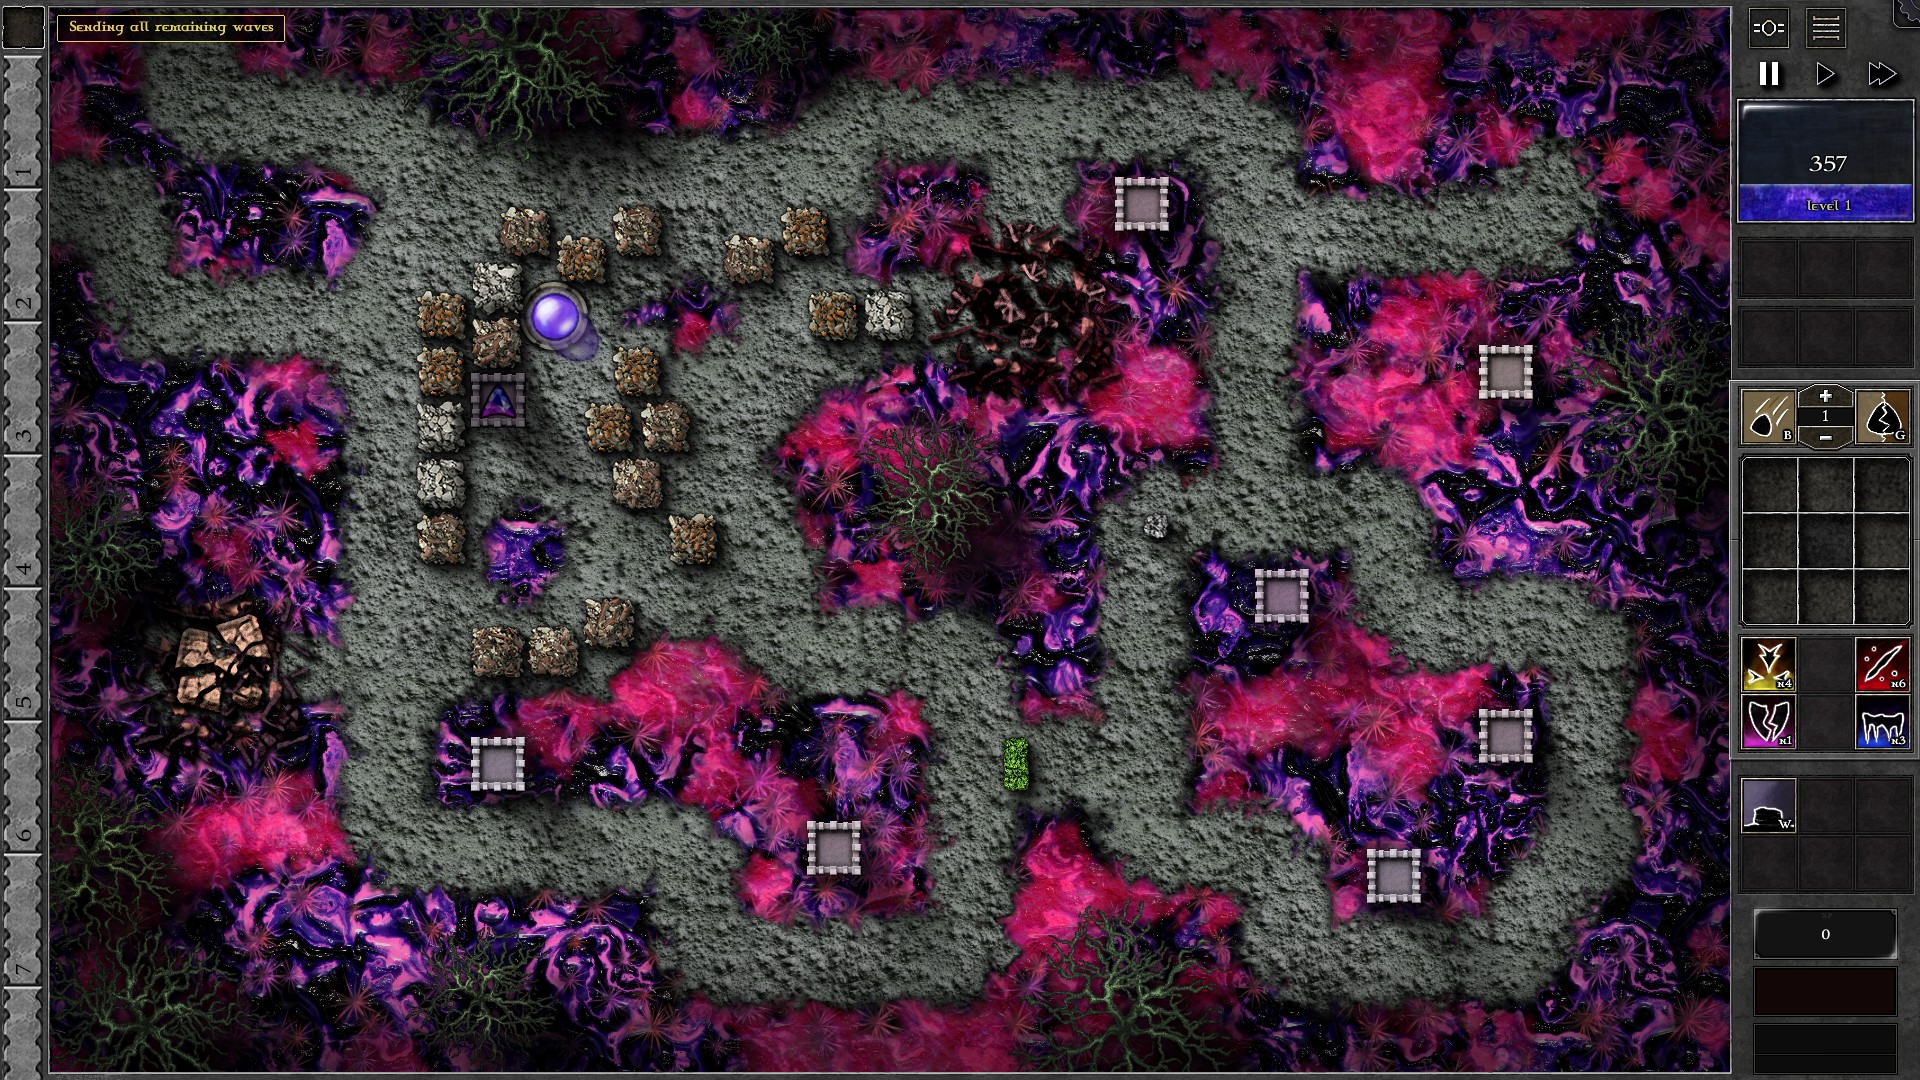
Setup the field as shown with a g2 p/b gem and 3 segments of walls. Note that the intersection where the shrub walls are built will be used as a juggling point. The shrub walls built on the right branch of the intersection will be destroyed and rebuilt on the bottom branch of the intersection to force monsters go all the way around the field and to the right branch, and the bottom walls will be destroyed and rebuilt to force monsters go all the way around the field again and so on.
After setting up, send all waves early (Ctrl-click) and you should have enough mana to upgrade the gem to a g3. As the giants move down the path, move your gem around to follow the giants to ensure that you are firing on them. When the giants close in to the intersection leading to the orb, use a g1 gem to demolish the walls on the intersection and build walls to juggle the giants.
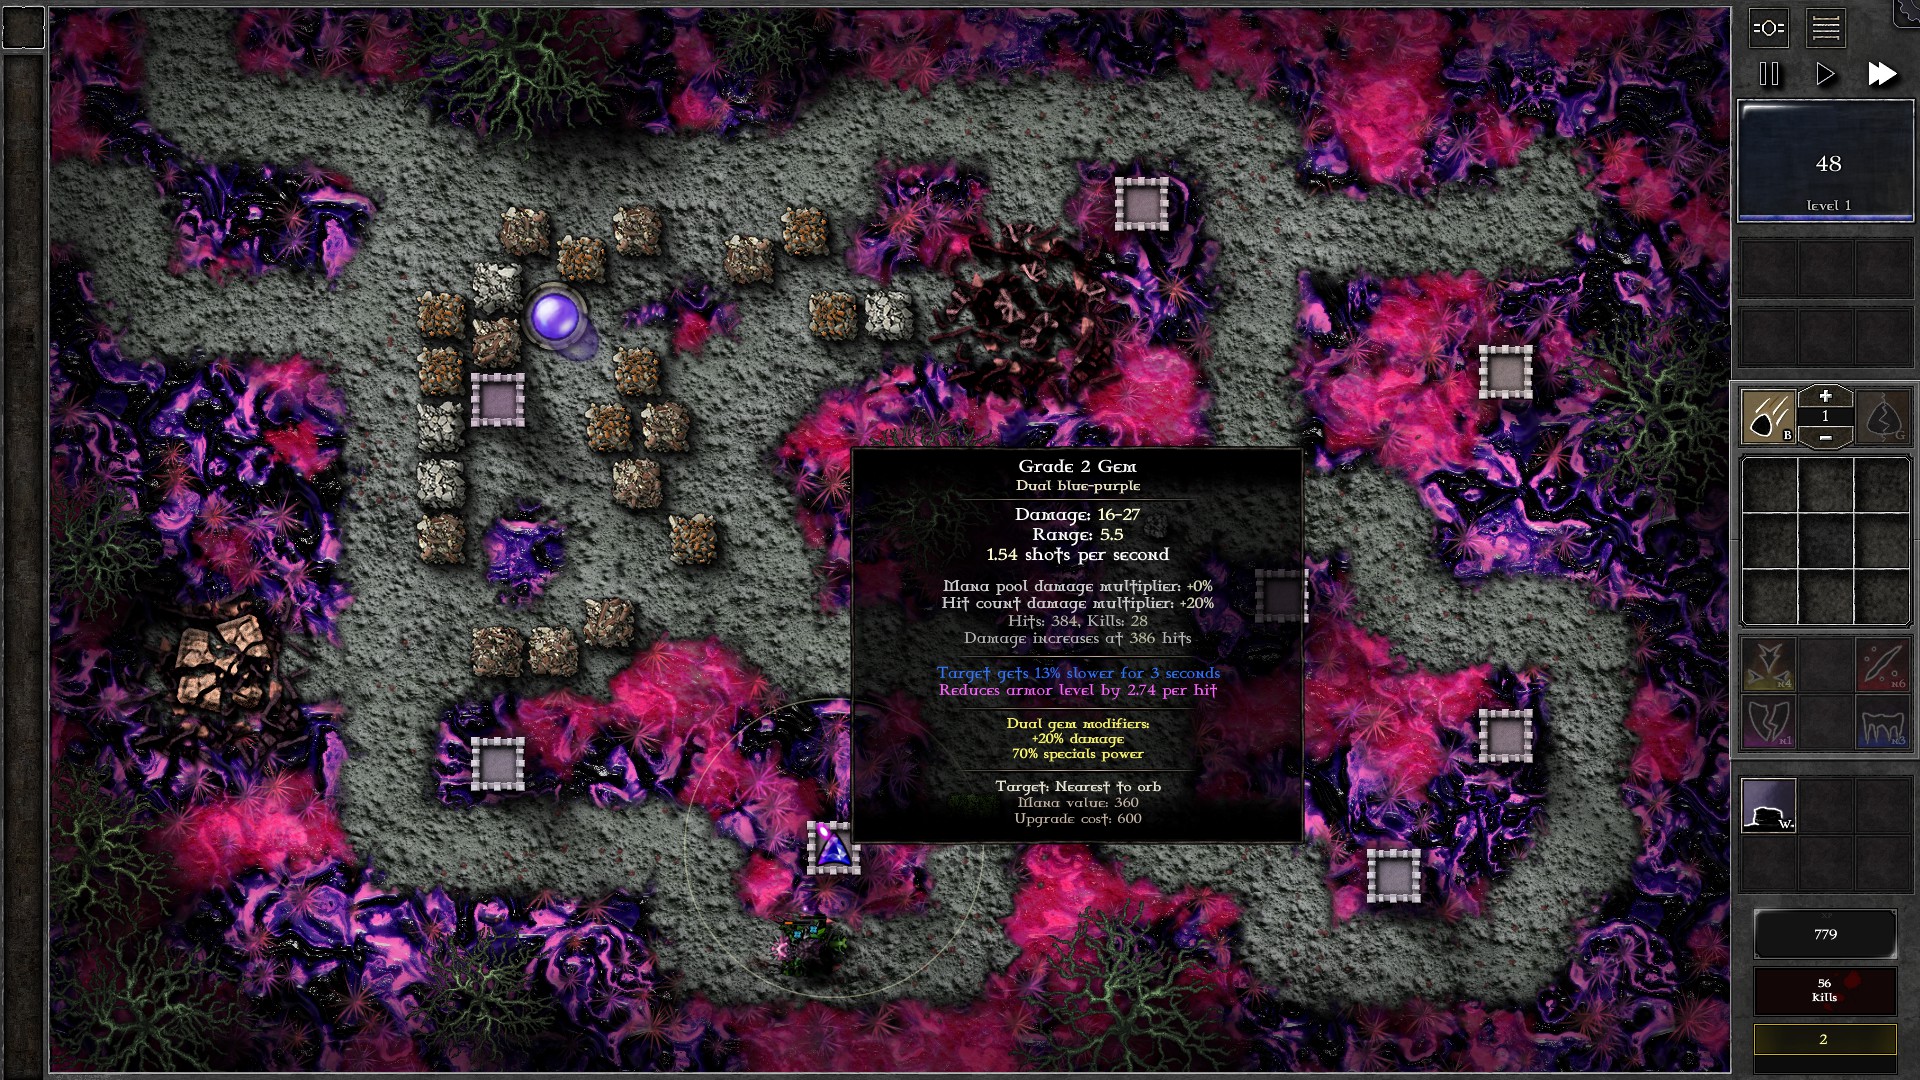
Repeat the juggling process as the giants approach the intersection while keeping them under fire and you should be able to take out the giants. You will probably need at least 4, if not all 5 demolitions to juggle the giants and defeat them all. You will also encounter a situation where you don’t have enough mana to rebuild the walls after the 3rd demolition. At this point, sell your g3 gem and rebuild a g2 p/b gem for extra mana. Finally, you can temporarily switch to target “Least HP” to help picked off the giants that were damaged as they close into the intersection and became the back of the ranks after juggling.
115 – Field C4
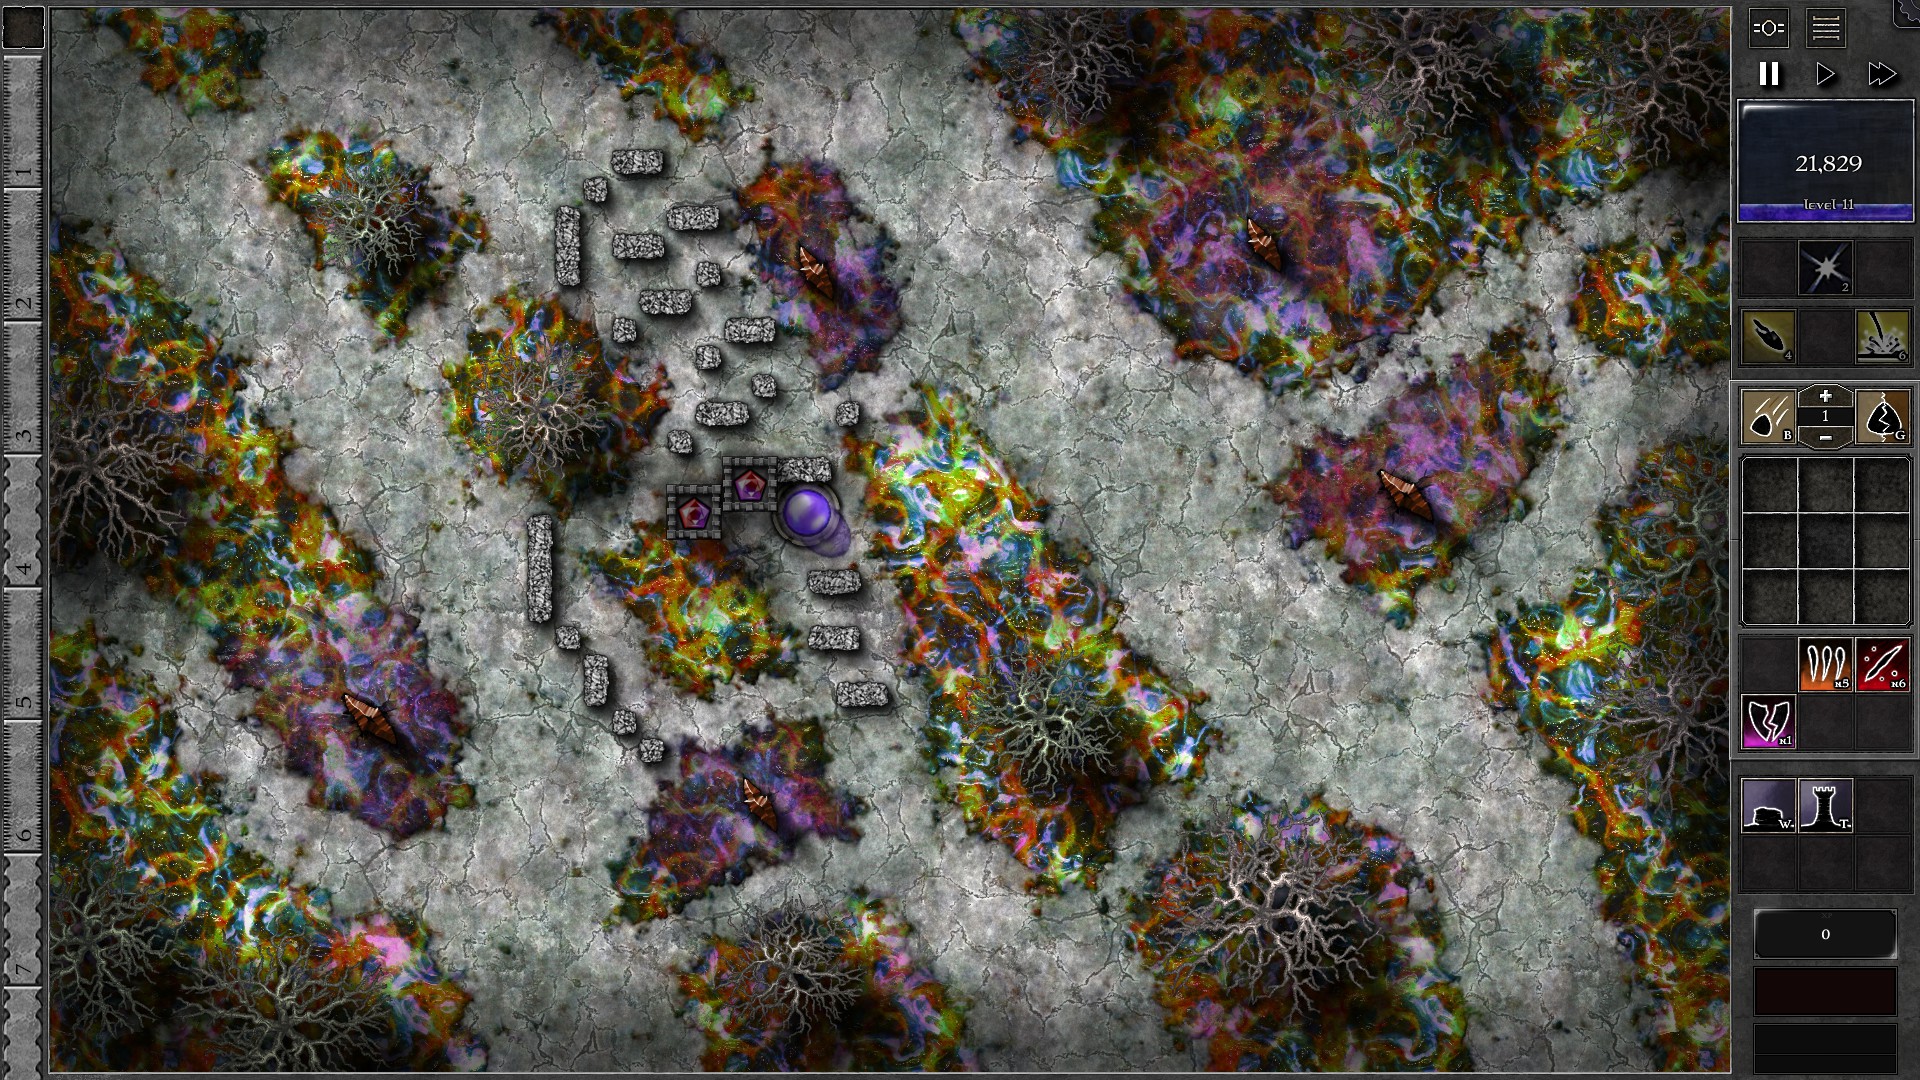
Start the field as shown in the screenshot. 2 g8 p/r gems are used for the towers, which should be strong enough to hold up the first 20 waves of monsters without much difficulty.
At around w24-25, you will start to see pressure on your defenses which is a good time to start using your spells. In around w28-29, you will probably start to have leaks. In this point, switch your gems to target “Least HP” to get rid of the swarmlings first.
In the last few waves, after getting rid of the swarmlings, start noting where banished giants respawn and try to kill those that spawn from entrances closer to the maze (and hence takes a shorter path). The giants that spawn in farther entrances are much less of a threat and can be defeated last.
116 – Field C5
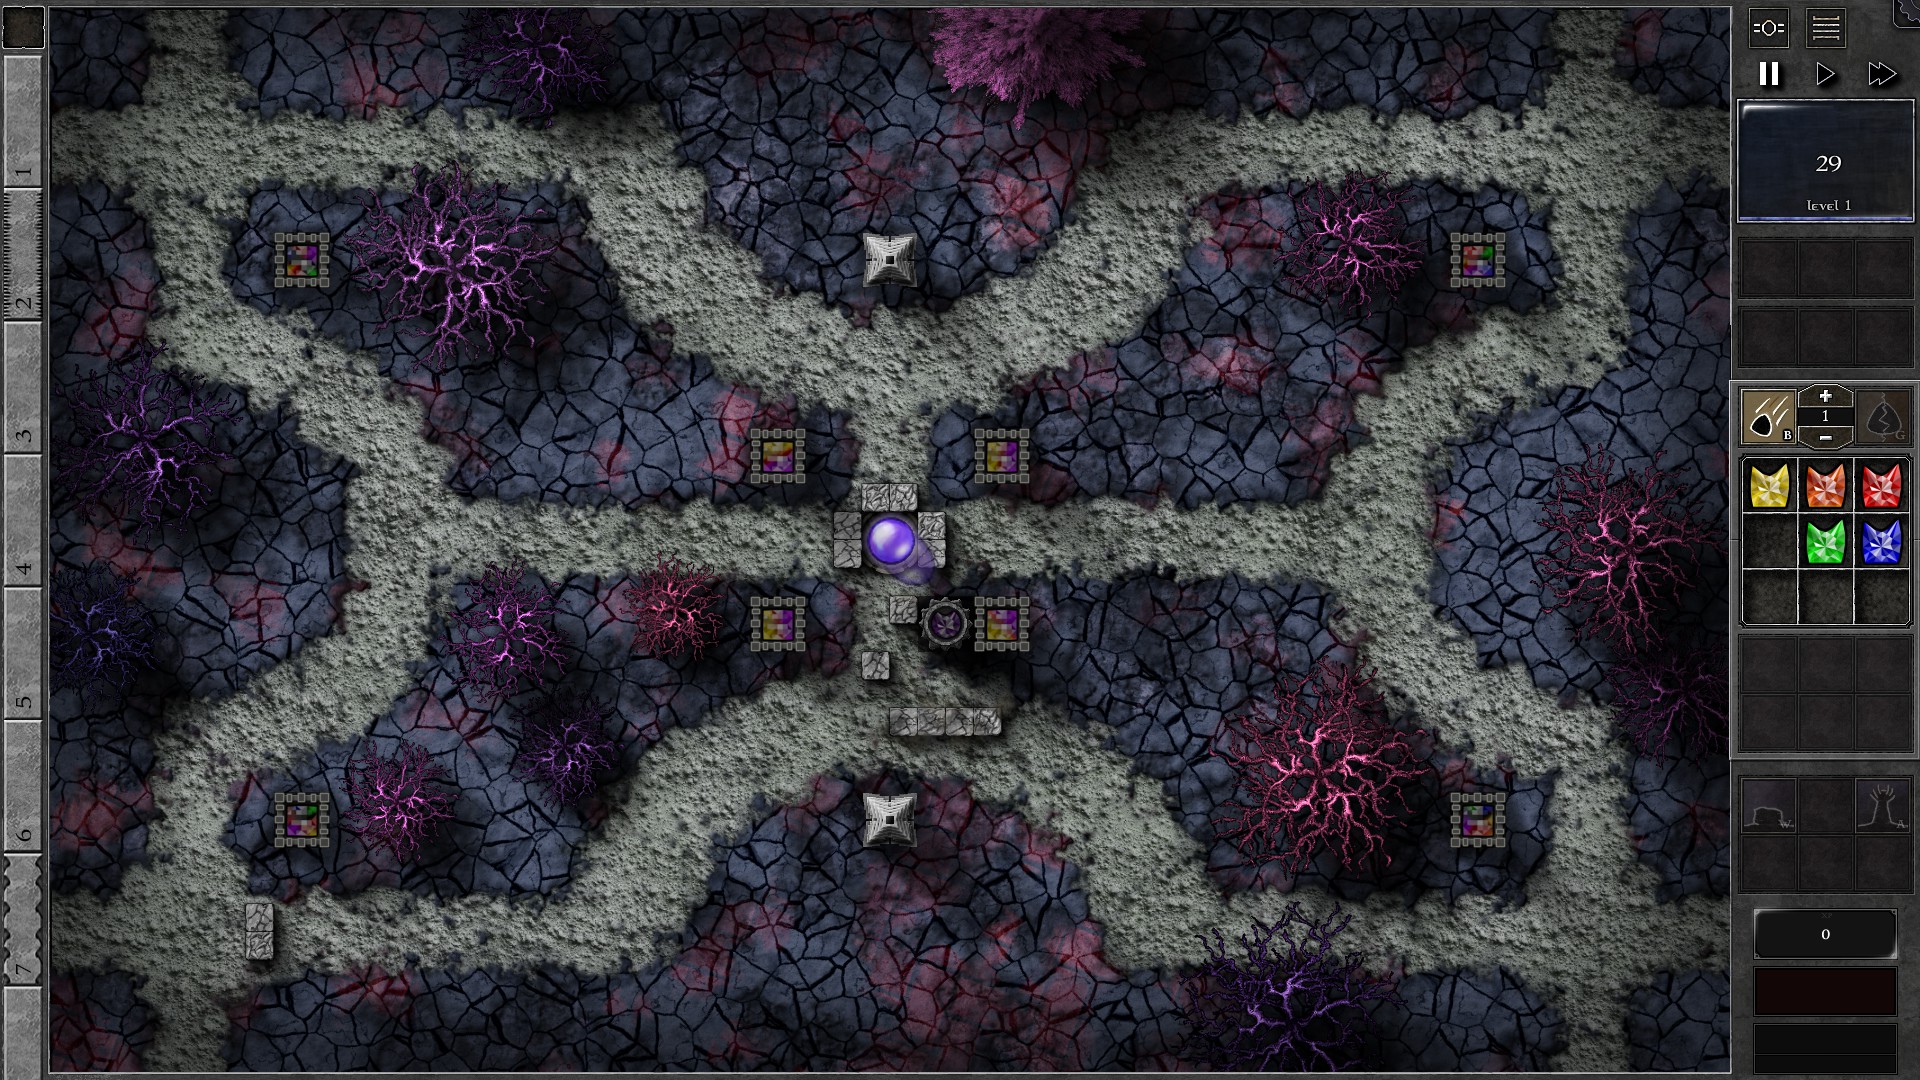
Start by setting up the field as in the screenshot, with the g4 purple gem amplifying the p/y Spiritforge tower. Start the waves and first complete the wall by adding 3 more segments to the 4 segment wall placed horizontally. Now focus on adding 2 more amps to the amped p/y tower, and put in the g4 yellow and blue gem to the 2 new amps. You should be able to do this before w15 where this Spiritforge tower’s gets upgraded to g4.
After that tower upgrade, the gem should be able to fire the the bottom pylon which helps with the expanded effective range. Now start building 3 amps for the Spiritforge tower at the lower right (and insert the remaining g4 gems into the amps one by one), as well as some walls to slightly lengthen the path around that tower. You should be able to build all 3 amps at around w30.
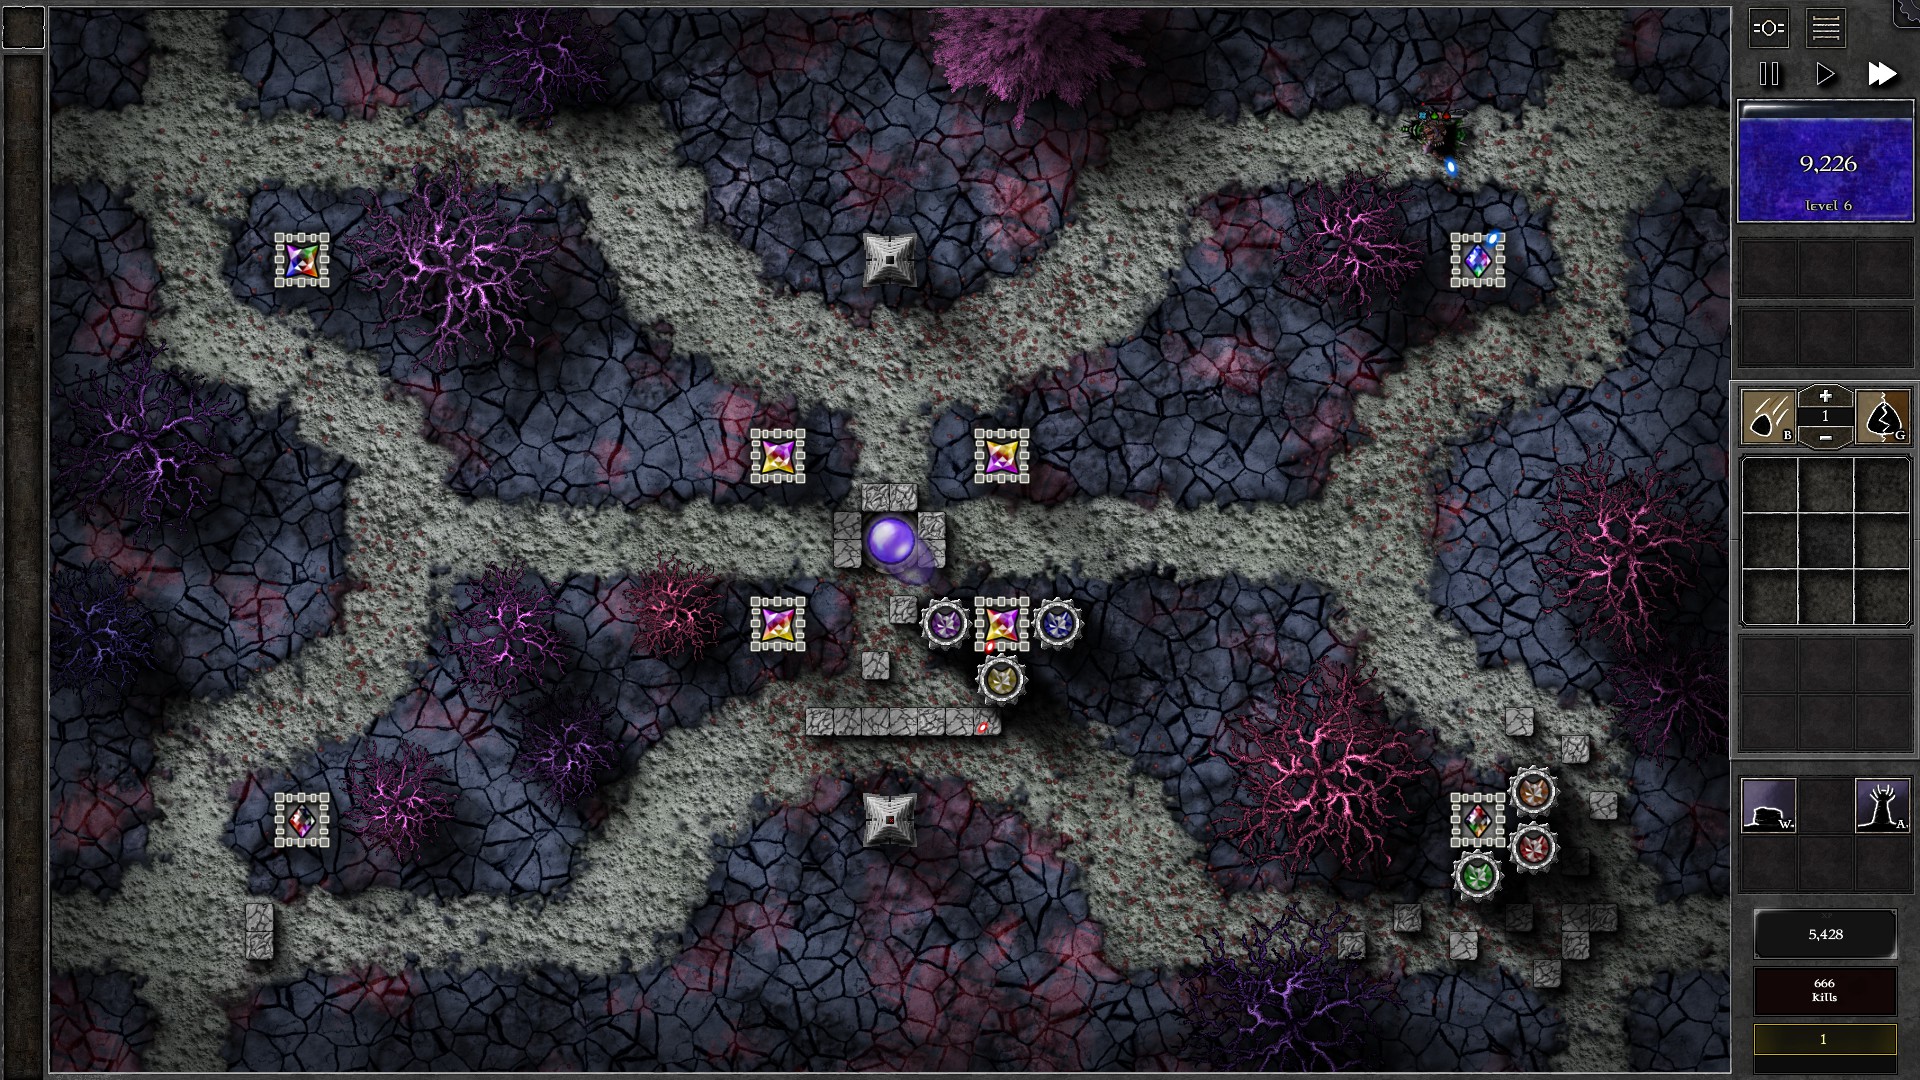
Once you completed the aforementioned buildings, you are now set for defeating all the remaining enemies (with occasional banishments). You will probably have enough mana to upgrade your amp gems but this is not required to beat the Trial.
117 – Field A1
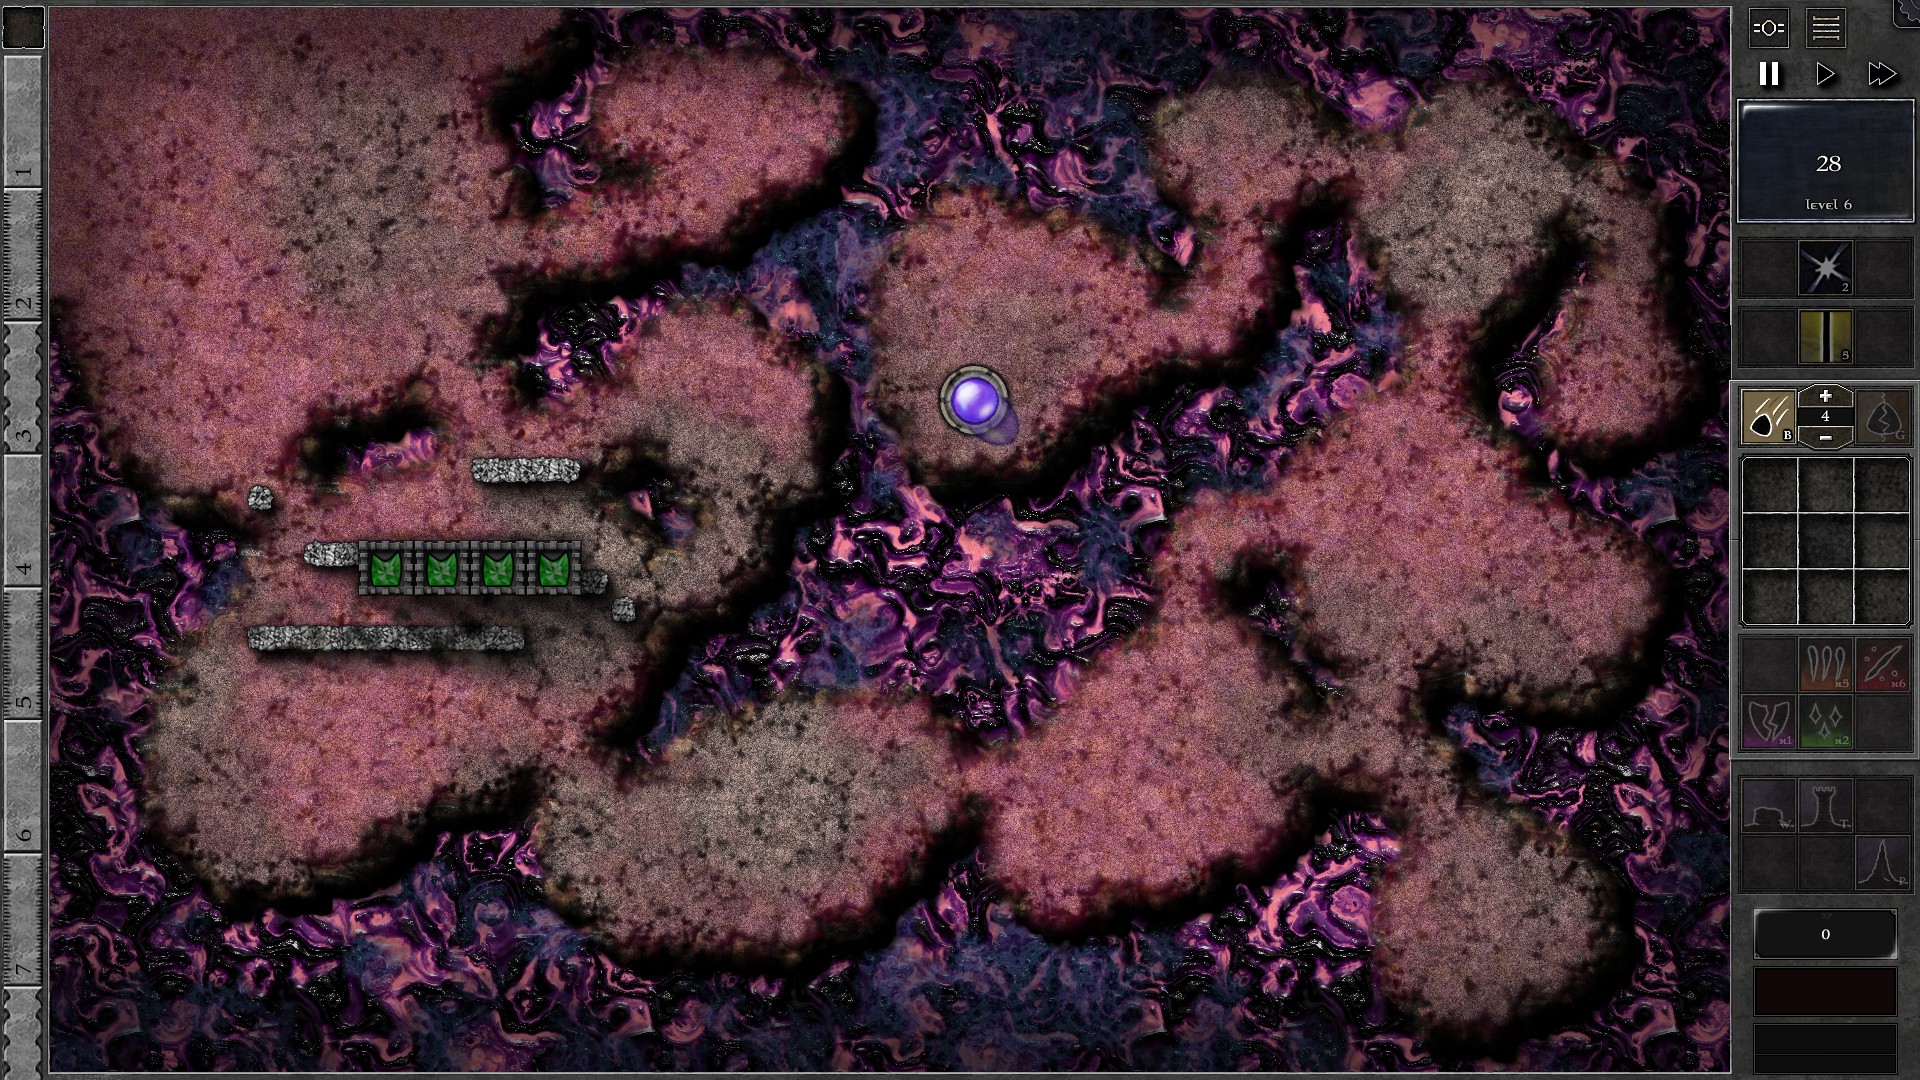
Start the field with 4 g4 pure green gems, towers for the gems, and walls to guide the monsters as shown.Set the gems’ targetting priority to “Random”; this will help the gems to spray poison damage more evenly which is the key to mitigate the Thick Air 12 trait.
Throughout the waves, use Beam and Whiteout whenever necessary. Beam can help by rapidly spraying poison damage to all monsters which helps to quickly clean up swarmlings or focus immense poison damage on a monster (you can click on a monster to target it specifically, overriding any targetting priority). Whiteout is used to slow down groups of monsters and to amplify poison damage on affected monsters.
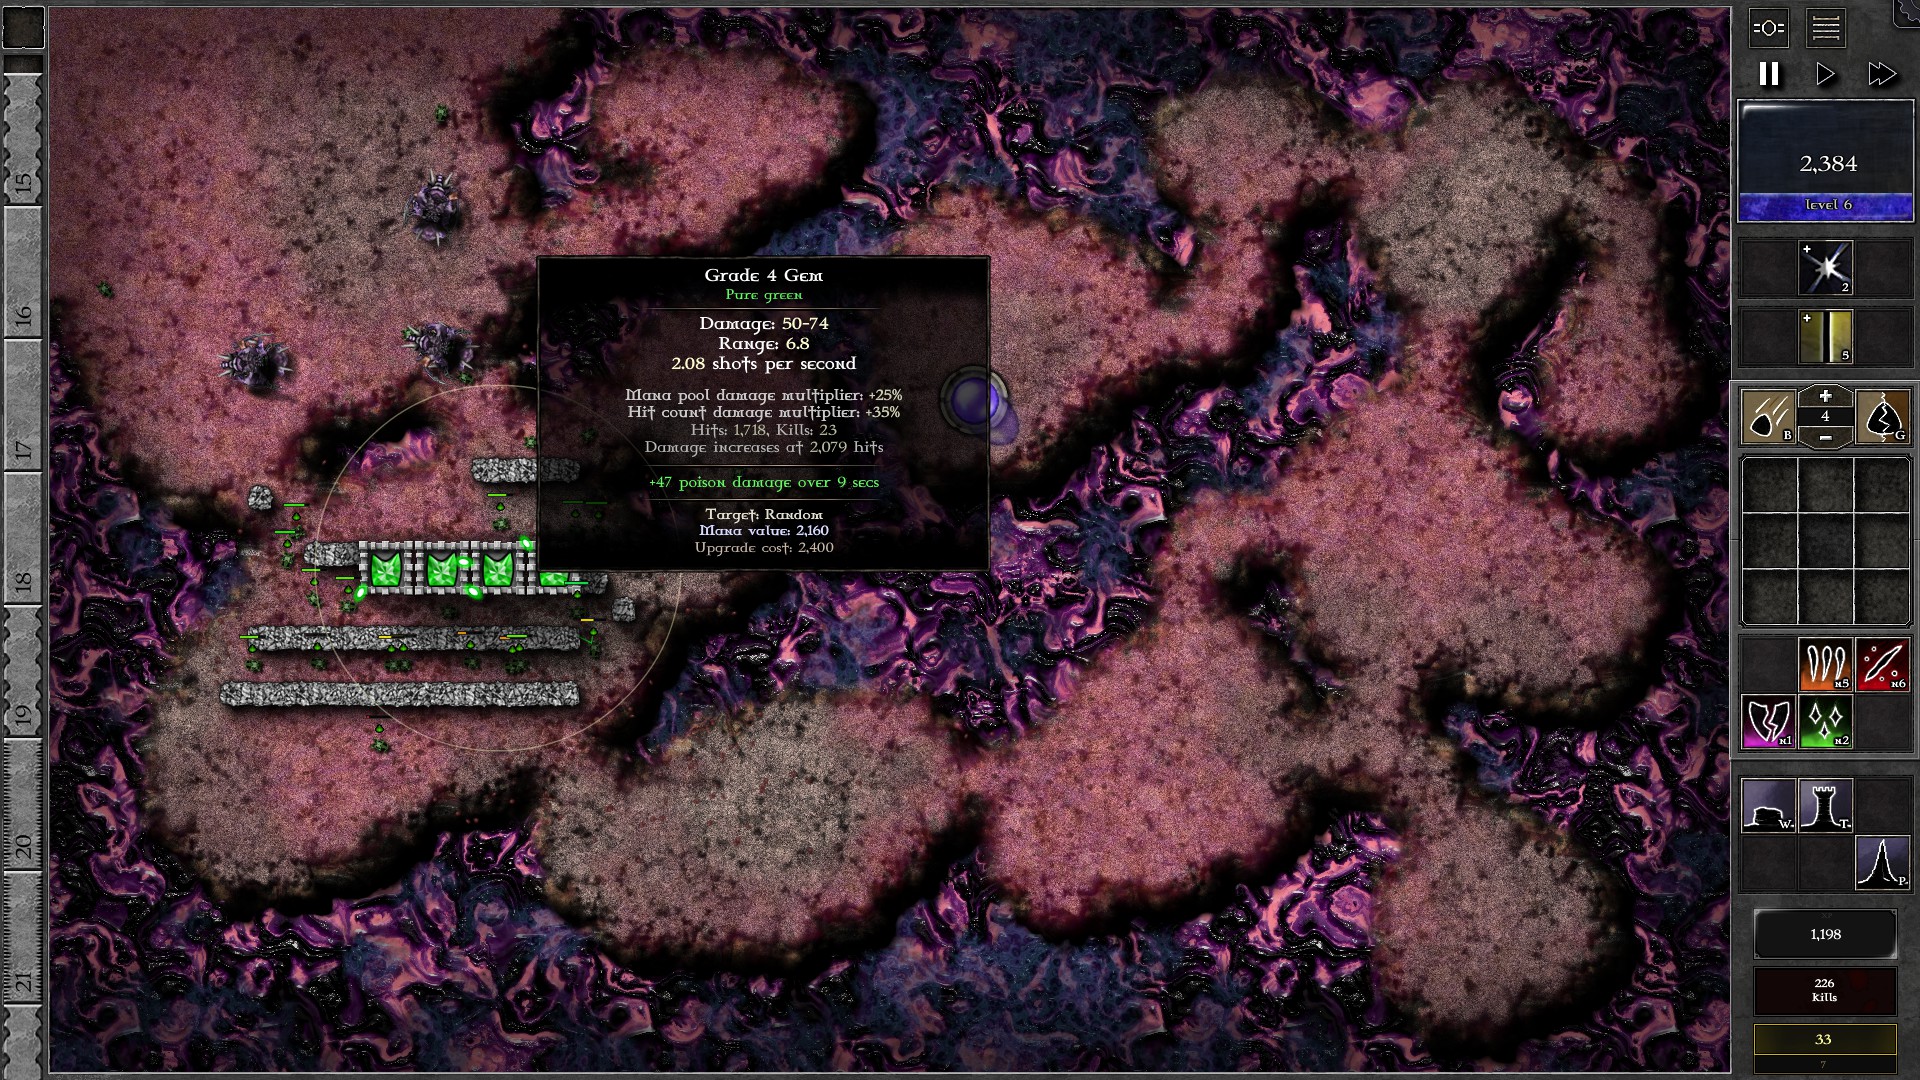
Start the waves and first focus on expanding the maze further to allow more damage be dealt before monsters leave your defenses. At around w8-10, start collecting mana to upgrade your poison gems. It is suggested to have at least 1 g5 before w15. At this stage you may have occasional leaks of 1-2 monsters but this should not significantly affect your defenses (unless you upgrade your gem while a monster enters your orb and end up with no mana to banish monsters)
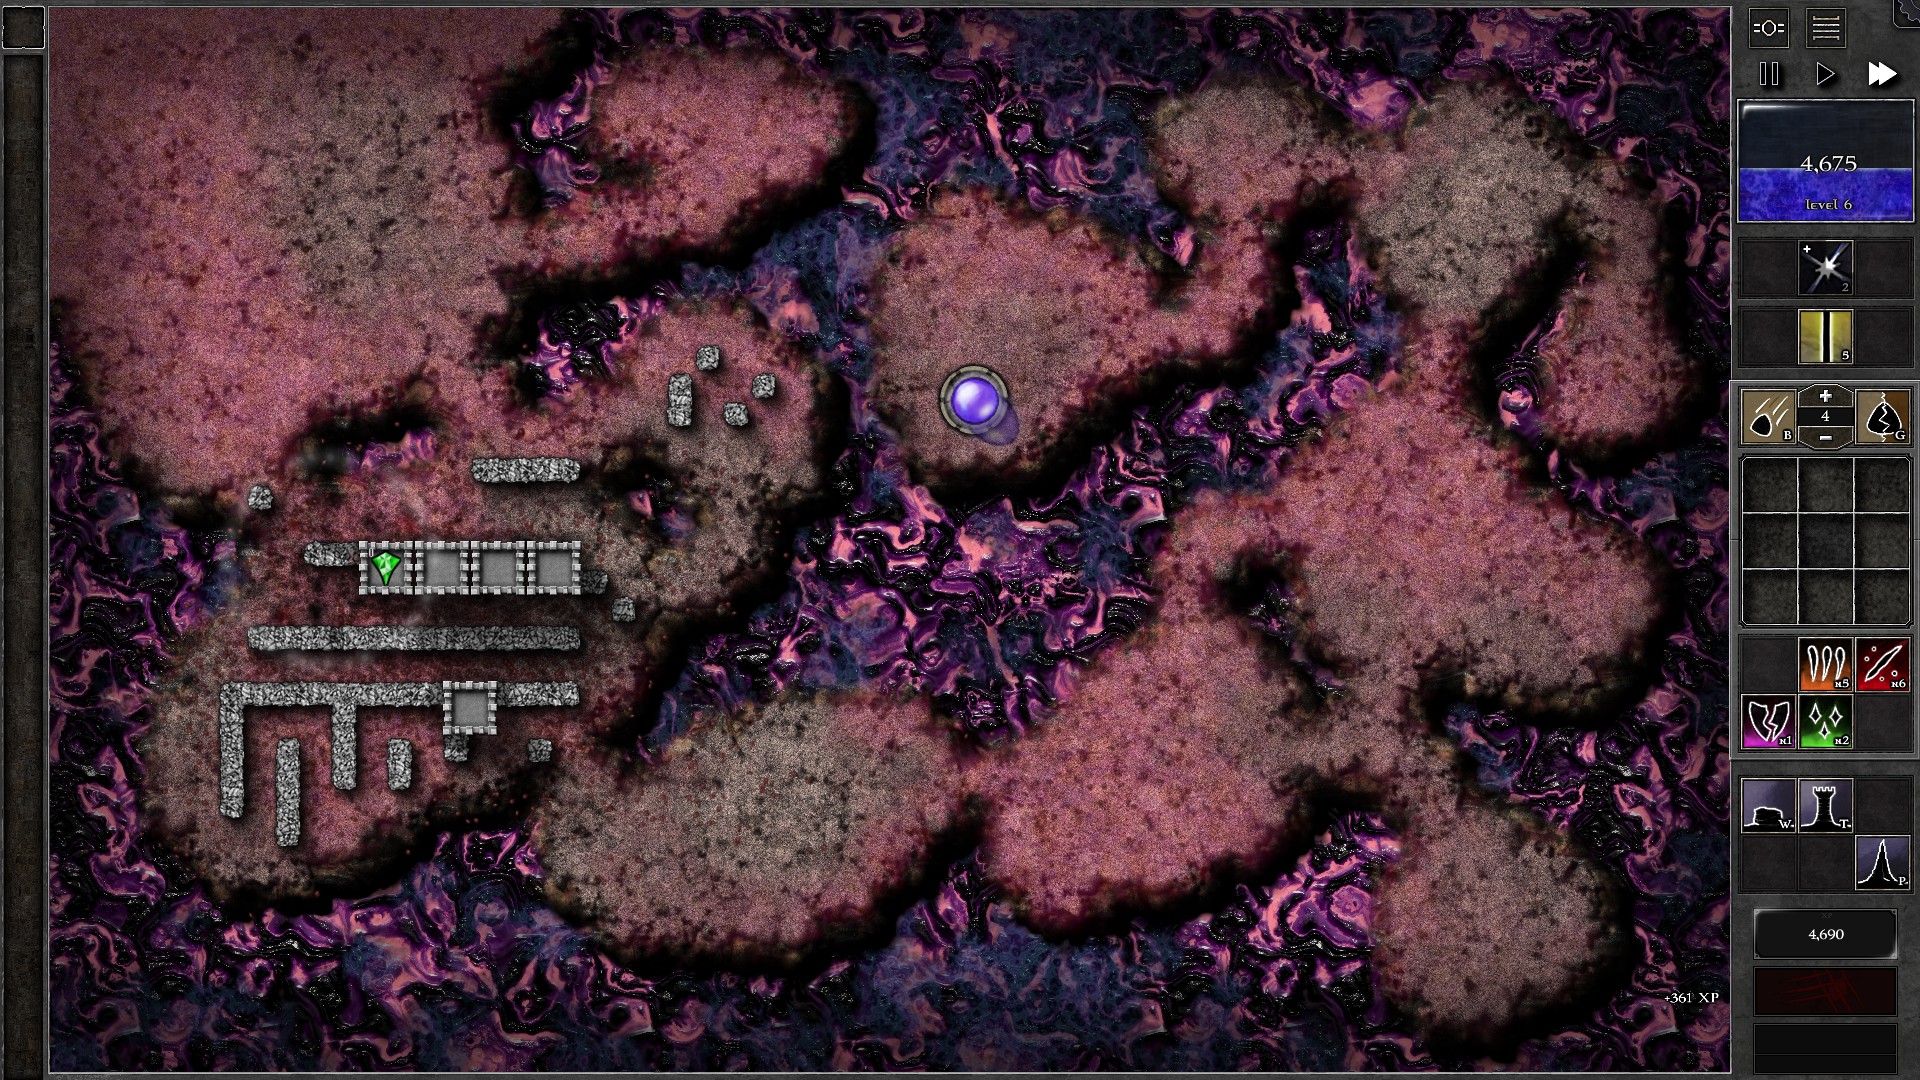
The main focus is to gather enough mana to upgrade all 4 gems to at least g5 which is enough to kill the remaining waves with only occasional leaks. Once you have 2 g5, you can also choose to continue expanding the maze to further lengthen the path or set up a secondary kill zone to move a gem to should there be bigger monster leaks in the later waves. At the end when only a few monsters (mostly giants) remain you can choose to combine the gems into a g7 to dispose of the remaining monsters.
118 – Field A2
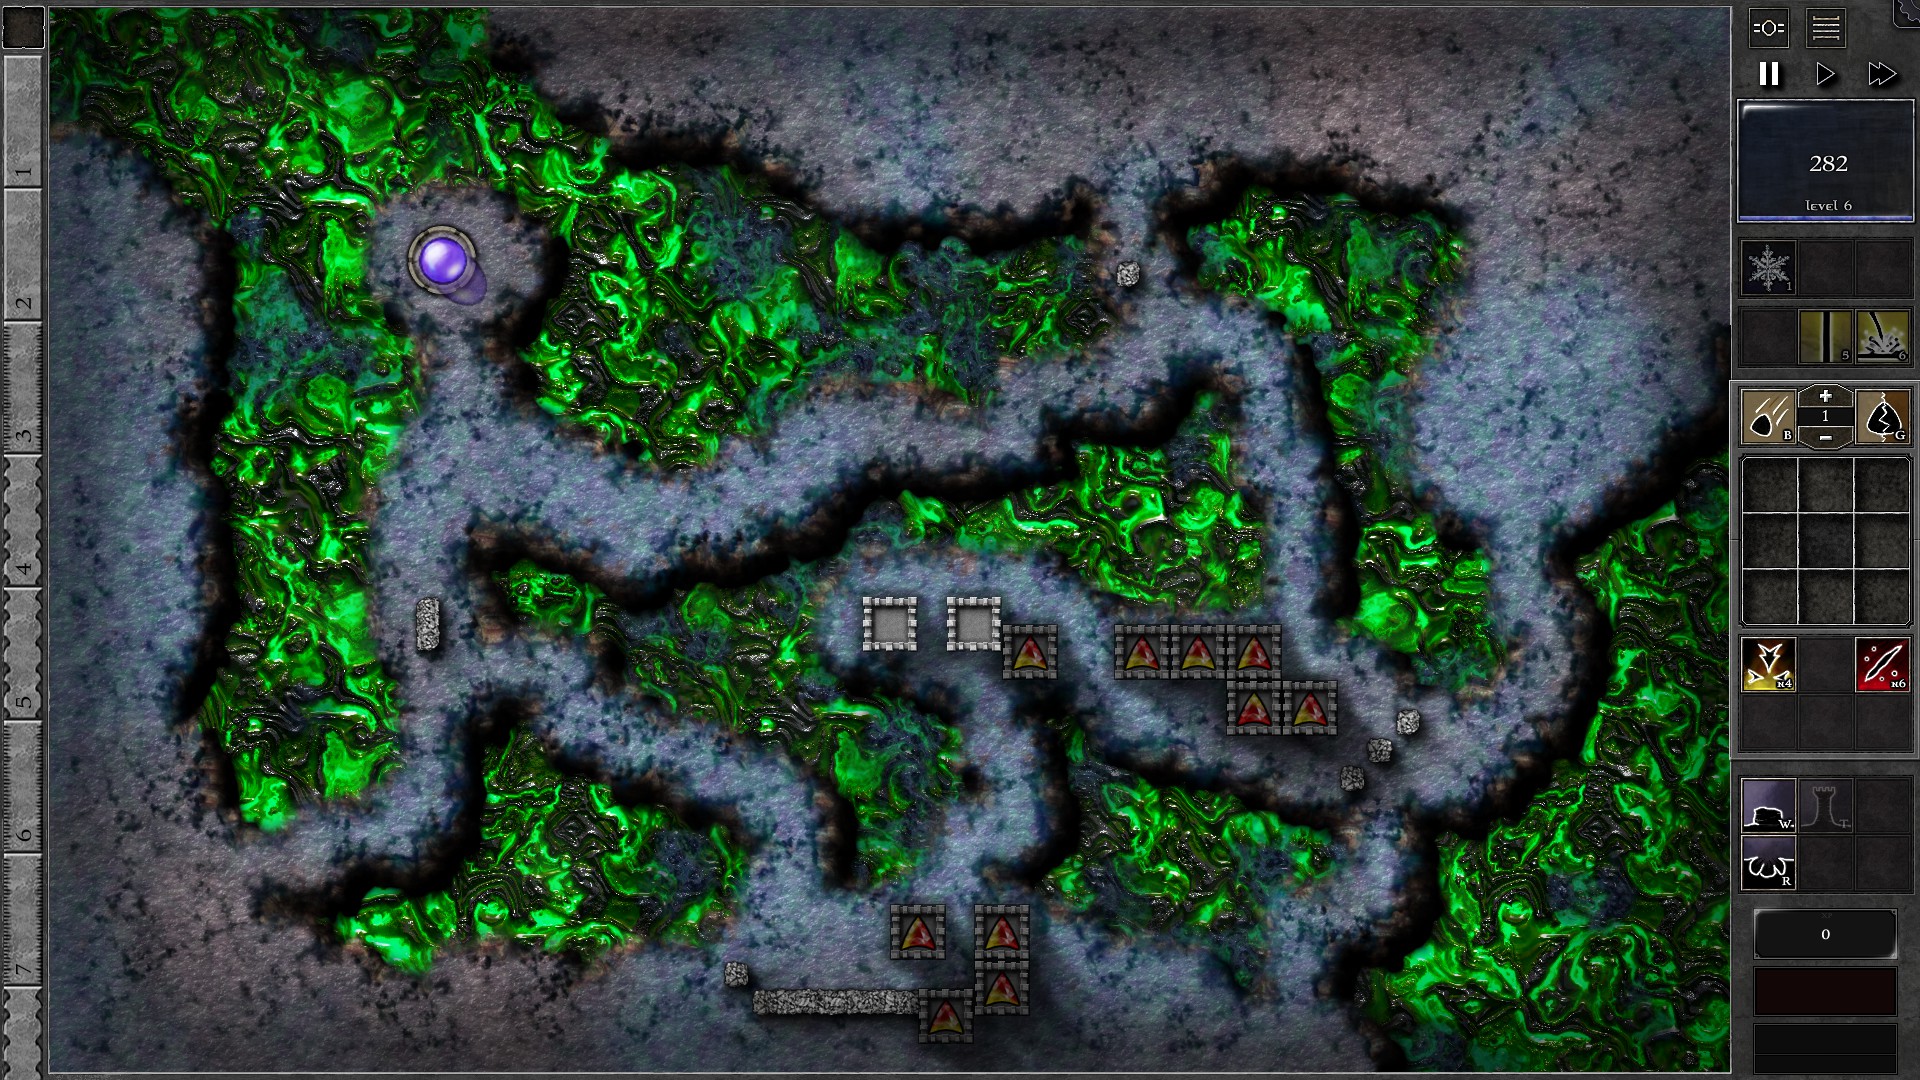
Start up with the setup as shown in the first screenshot (don’t forget the walls that force the monsters to actually go through your defenses). All 10 gems are g2 r/y with the 6 gems in the centre of the field set to “Nearest to Orb” and the 4 gems at the bottom set to “Least HP”.
Note the zoning plan in the screenshot below as this field’s walkthrough will use the zone names frequently.
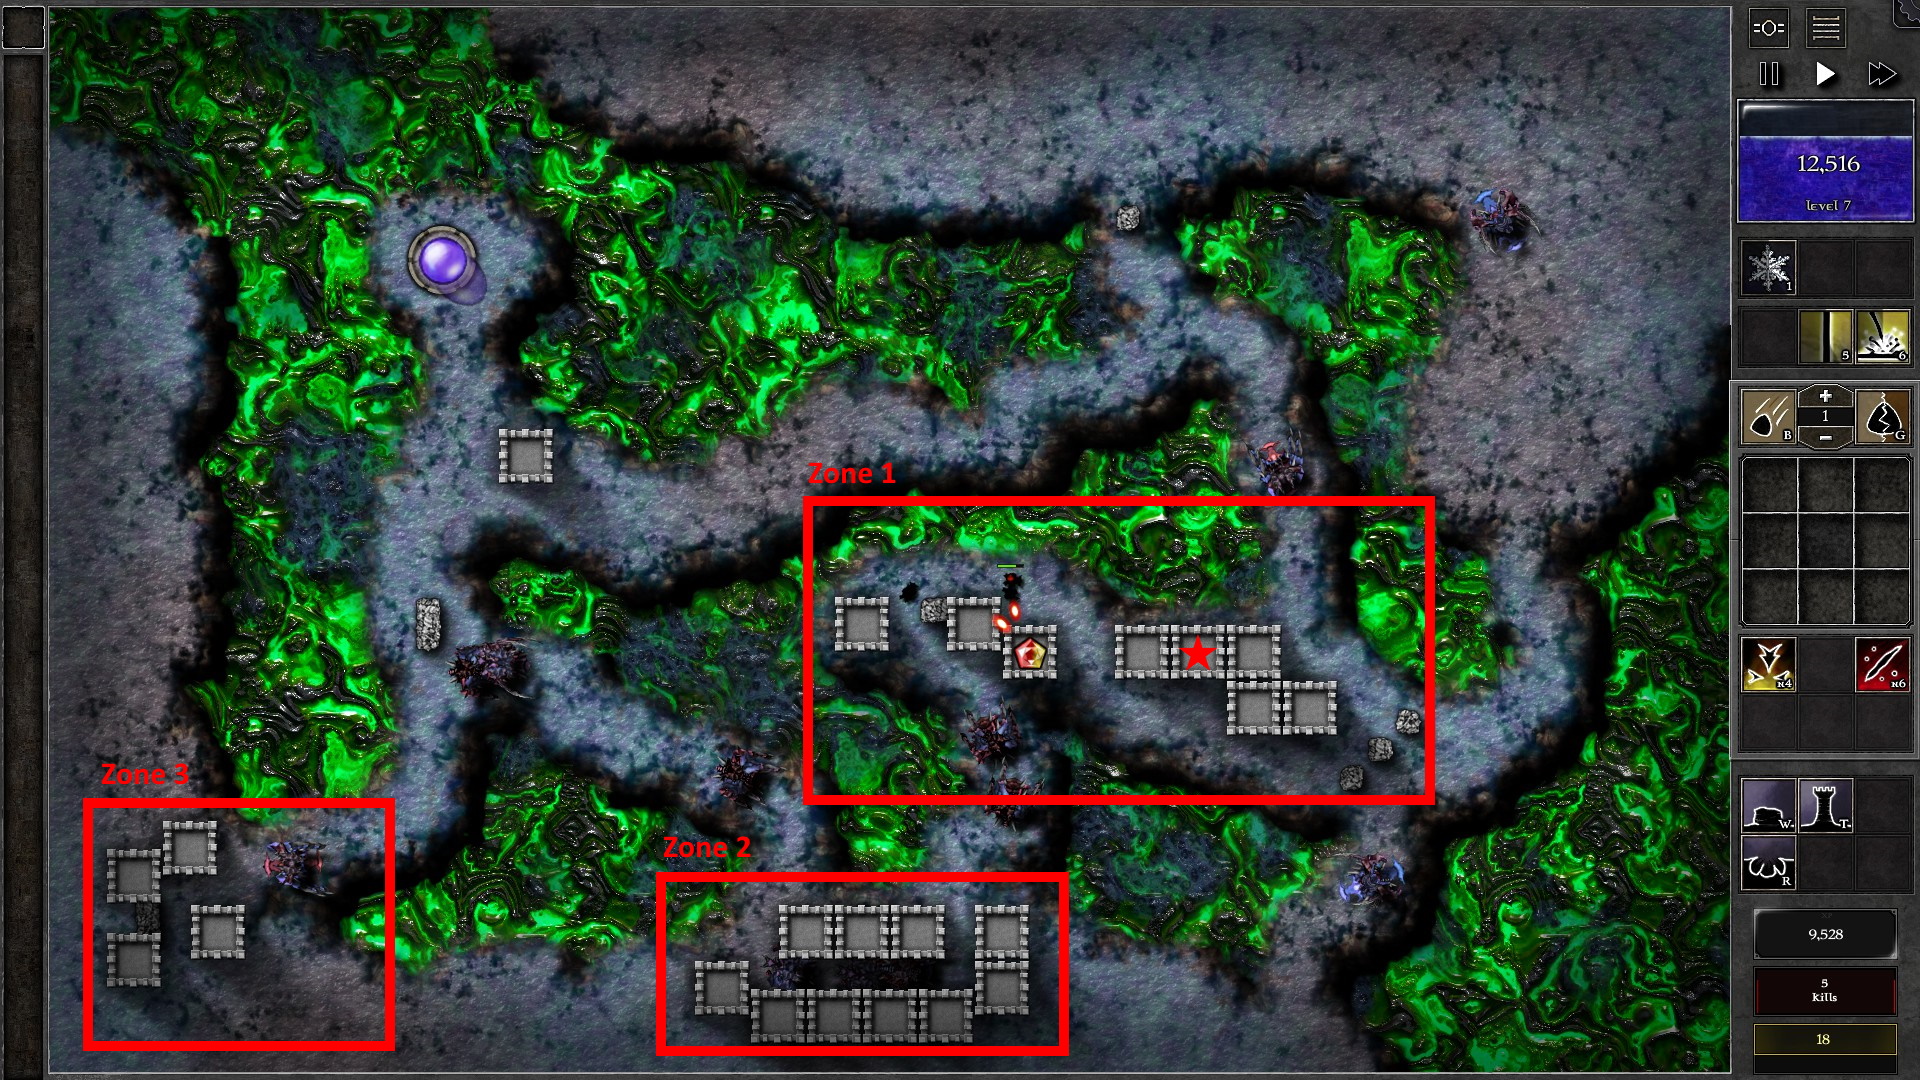
Quickly fill up the remaining 2 towers in Zone 1 with a g2 r/y, and then build the rest of the towers in Zone 2. Fill the towers in Zone 2 with g2 r/y targetting “Least HP”. Note that your defenses will be in danger at around w3 which is close to your first charges of spells; Use Freeze immediately to minimize leakage of monsters and Beam to kill monsters as much as possible (a good place to use the Beam is on the gem residing in the Tower marked with a star).
After completing Zone 2, start building the 4 Towers in Zone 3 with a g2 r/y targetting “Least HP”. You should be at around w11/12 which are linked swarmling waves. At this point your defenses should be prepared enough to take on these 2 waves.
Soon the giants from w4/5 should arrive close to Zone 1. Start upgrading one of the gems in Zone 1 (the one in the tower marked with a star) to start picking on the giants. Upgrade that gem ASAP when you have enough mana, preferably with a gem enhancement ready to insta-resocket the gem. Once the “star” gem reaches g5, start to change the targetting of the g2 gems in Zone 1 to “Least HP” (the “star” gem should be the only gem left that is still targetting “Nearest to Orb”.
Use your Freeze spells and gem enhancements (on the “star” gem) liberally but also carefully to minimize leakage (especially spawlings; every spawnling takes 80 mana for first banishment which can be a huge toll if you leak a lot of them). You should eventually upgrade the “star” gem to g7.
Once you reach g7 on the “star” gem, start upgrading the g2 gems in Zone 1 and Zone 2 to g3 as swarmling spawns start to move away from OHKO thresholds of g2 gems. Upgrade from the back of Zone 1 first, then along Zone 1 and finally the gems in Zone 2. You should be able to survive into the last waves as you upgrade the g2 gems to g3. Use Freeze spells and enhancements on the g7 to help mitigate the impacts of resocketing upgraded gems.
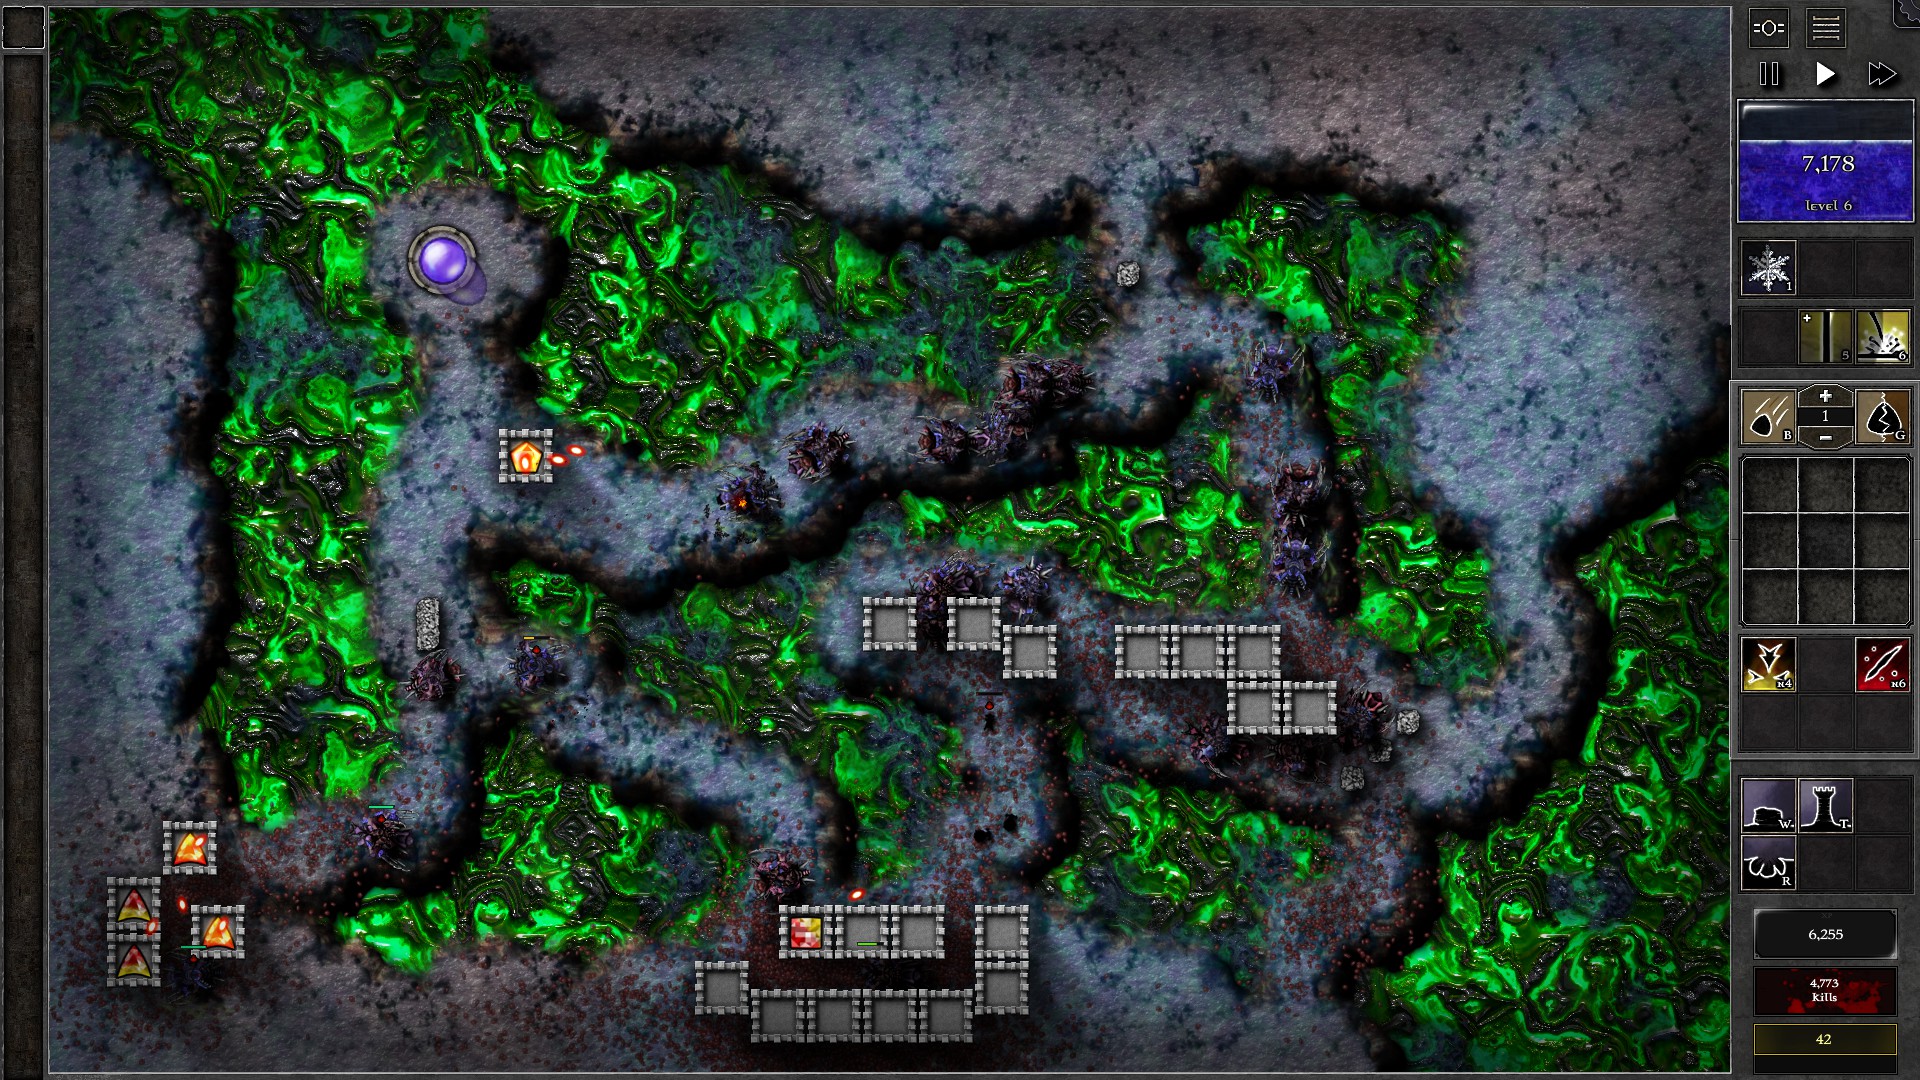
Once you notice that most of the g3 gems start to focus on giants, you have probably killed most of the swarmling waves and have several thousands of mana in stock. Now, you can combine the g3 gems into a g7 (you should have 17 g3 gems and 16 g3 gems are needed for a g7) and combine the 2 g7 gems into a g8 gem. Set the g8 gem to target “Swarmlings” and it should effectively take down the remaining monsters. You may want to build towers in additional locations to keep firing at monsters or catch up with monster leakages.
119 – Field A3
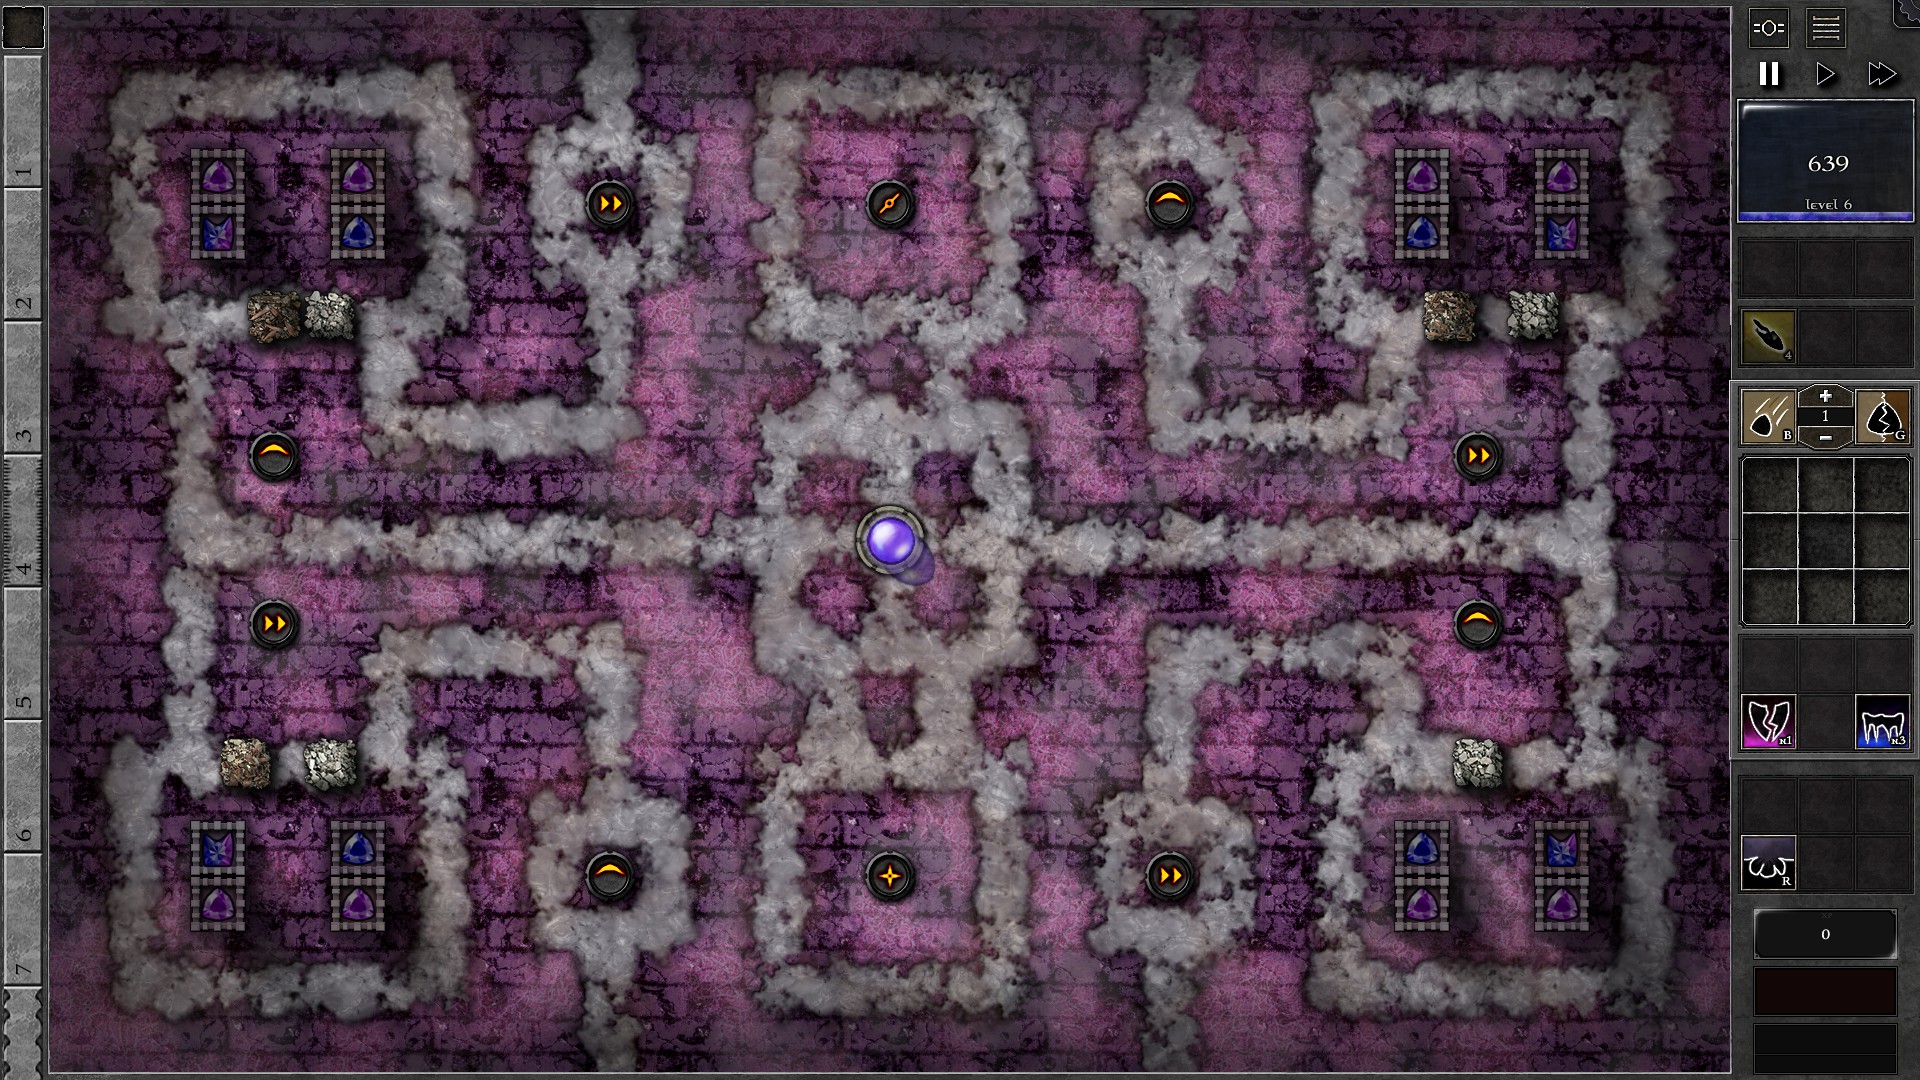
Start the field with a similar setup in all 4 fronts; 3 g1 gems set to target “Shielded/Highest Armor”, and a g4 p/b gem with “Nearest to Orb” as the last gem in each defending area. The g1 gems serves to remove shields from the practically indestructible beacons, assisting the g4 gems to actually kill monsters.
As you progress through the Trial, upgrade the third g1 gem in each defending area evenly into g2, g3 and eventually g4 dual gems while changing their targetting to “Nearest to Orb”. Keep an eye on any area with significantly more monsters than others, and use Bolt to help killing the monsters and reduce leakage. A few occasional leaks are acceptable but you should be alert and try to kill these quickly by having your gems focus on these monsters (speed beacons will eventually make monster speed through and costs a lot through repeated banishments). A g3 + g4 in each area is likely by w20 and 2 g4s in each area is likely by w25-26.
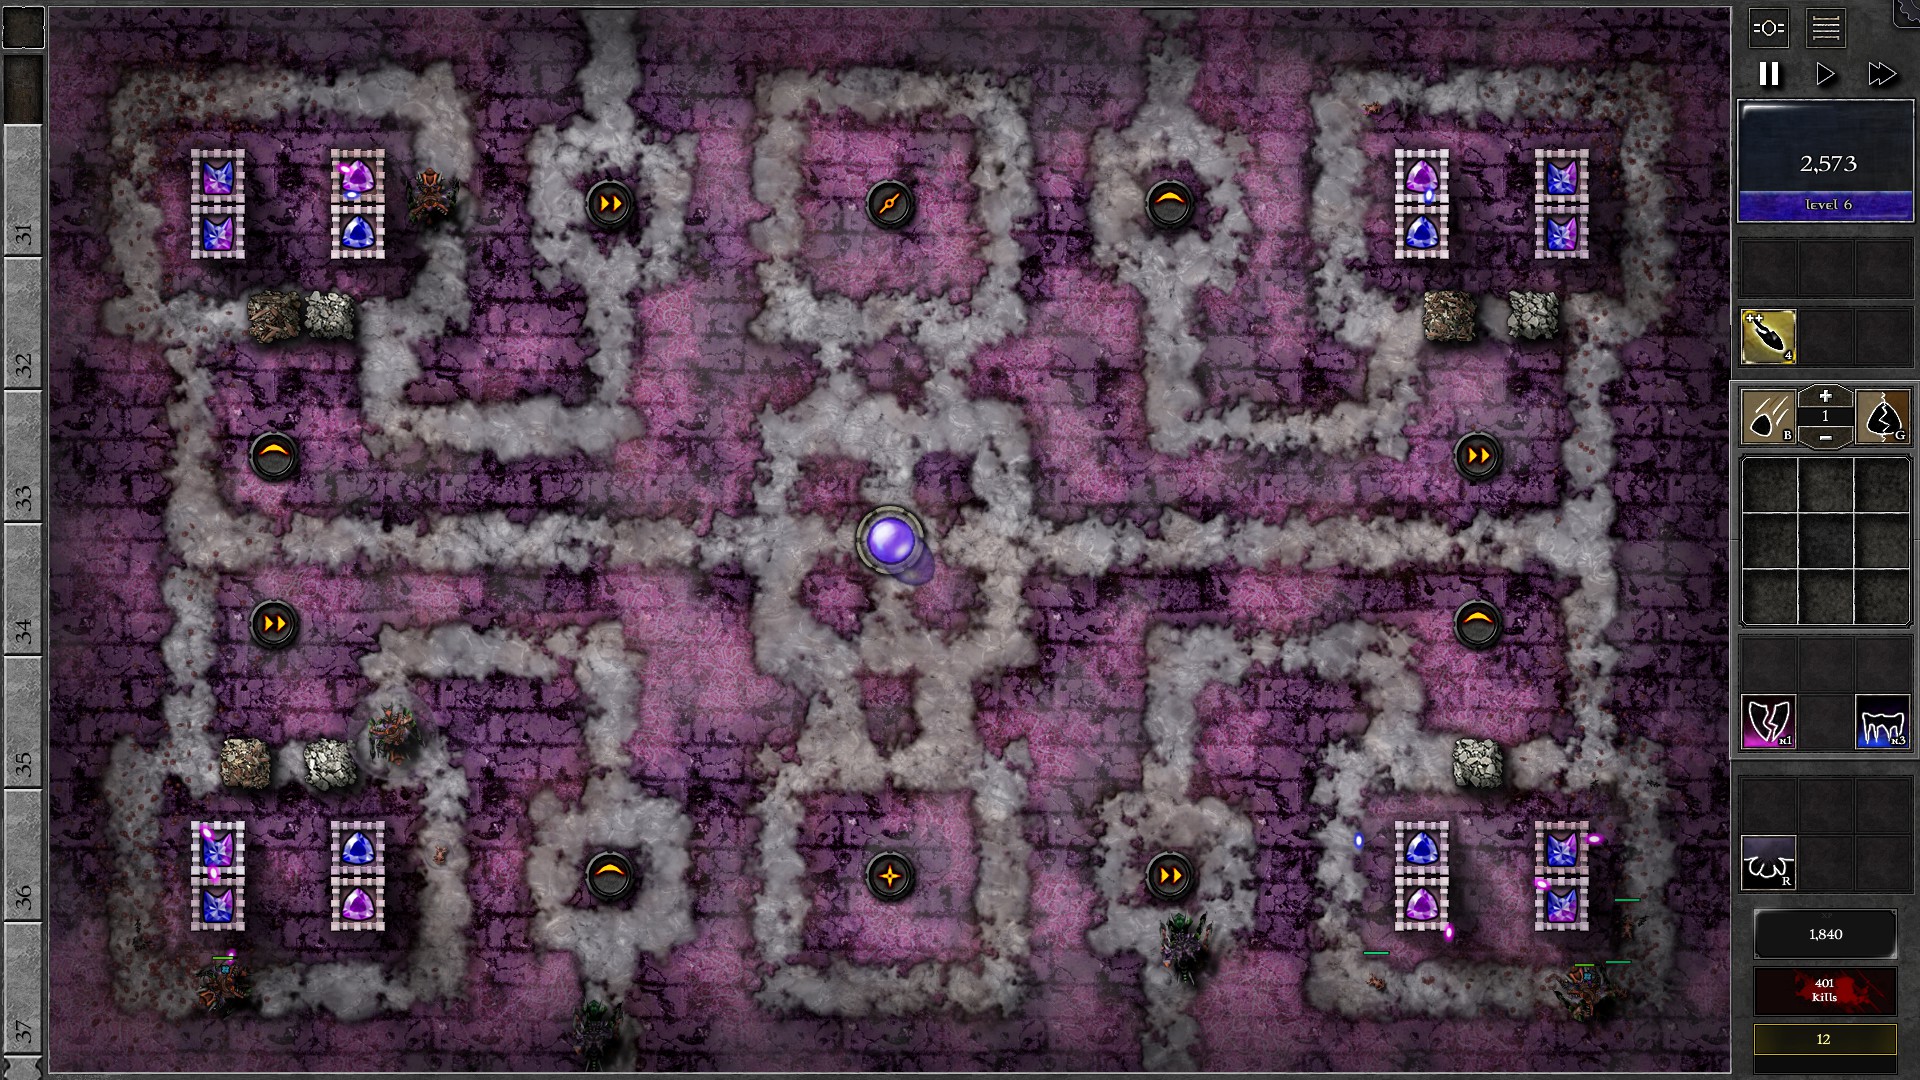
At around w30 you will probably have enough mana to upgrade for a g5 gem. Start upgrading the last g4 gem in each area into a g5 to help deal with stronger enemies in the late waves. You should have 3 g5 gems in addition to the other gems at the end, probably with enough mana for the 4th g5 gem (not necessary to upgrade and probably a good idea to save that as banishment buffers). It is recommended to move the g5 gems around to help deal with areas under attack by larger amounts of monsters especially if a g5 gem is inactive on its own area (use Bolt to insta resocket at least the g5 gem). For example, in the last giant wave (w38) the giants spawn in a rather skewed distribution so it’s beneficial to move gems around to utilize the firepower more efficiently. (You can also do this in earlier waves even before you have 8 g4 gems by moving gems or upgrading a gem earlier than others, just exercise caution to avoid leaving other areas with insufficient defense)
120 – Field A4
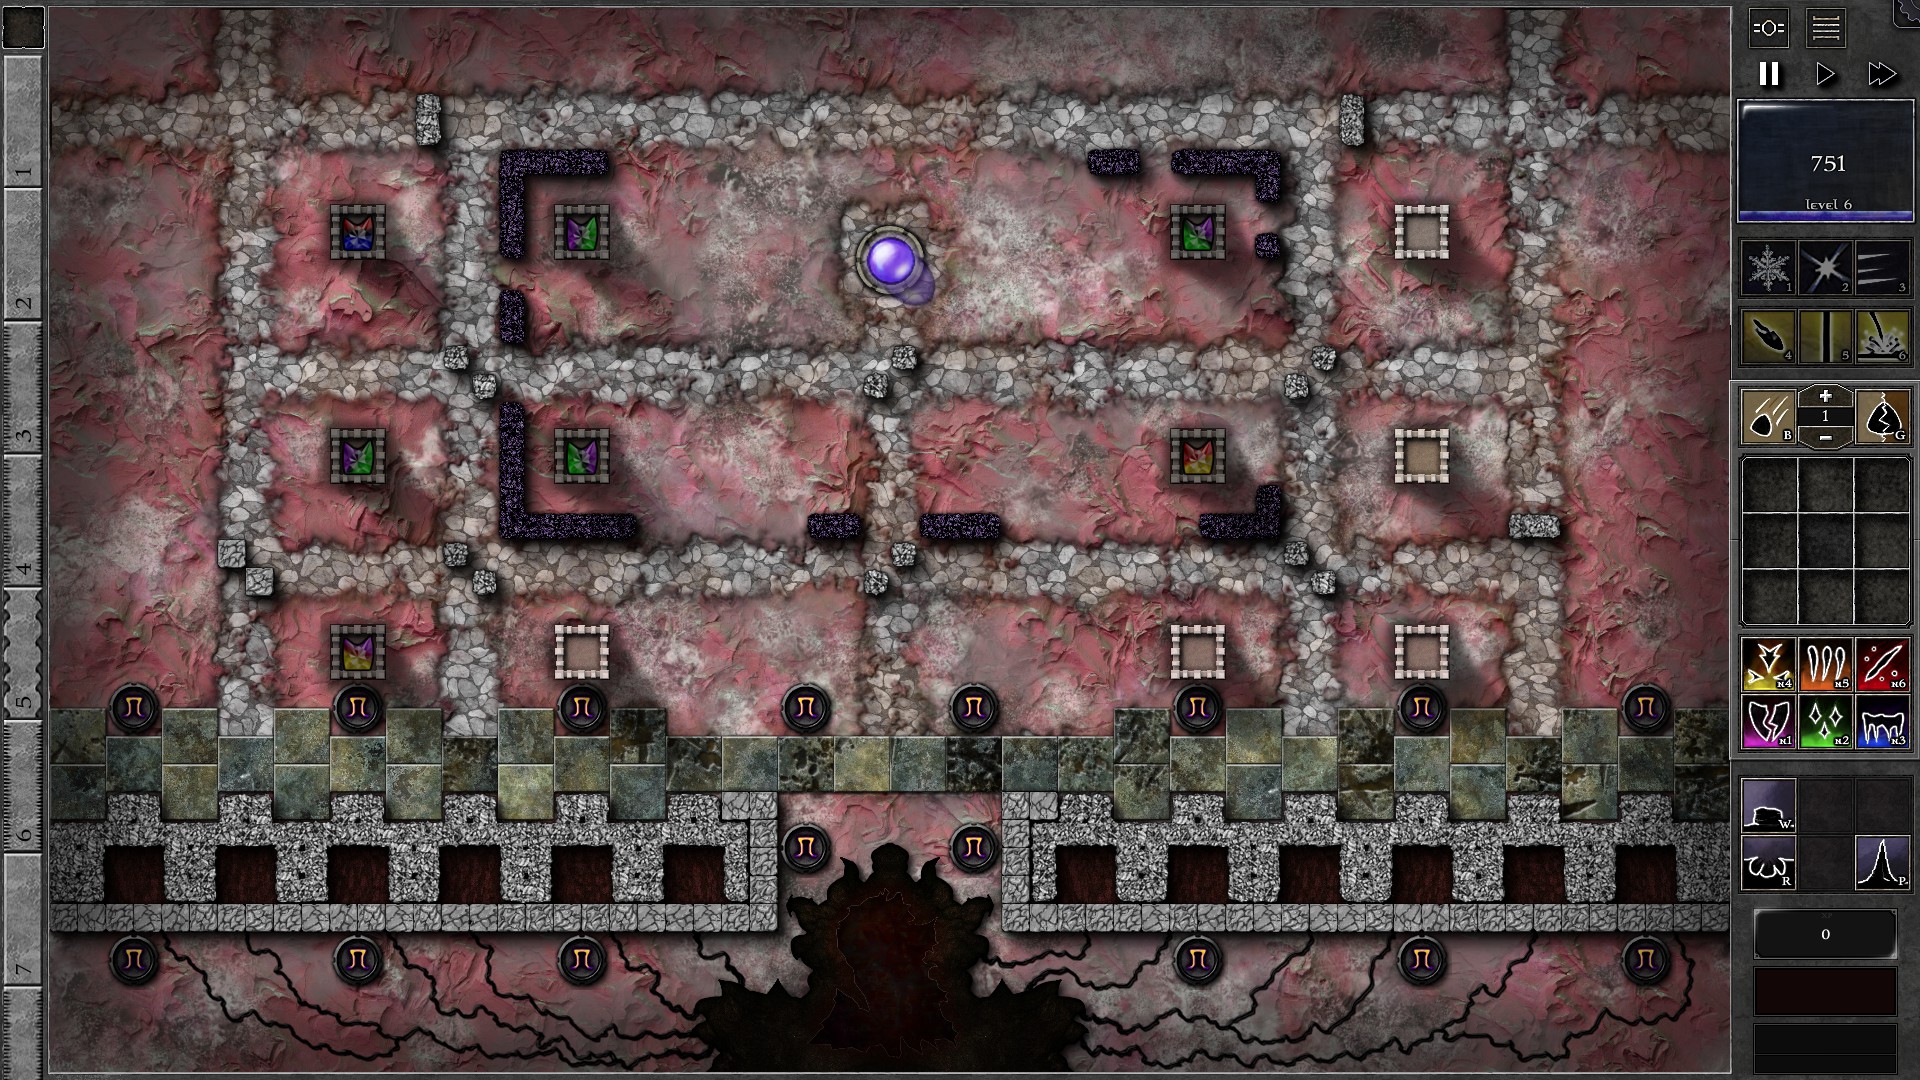
NOTE: Due to the Ritual 12 Trait, this Trial may have some occasional spikes in difficulty which may not necessarily occur in every run.
Create 4 g4 p/g gems and setup the walls and 7 gems (including the 3 free gems) as shown. Set the free gems to “Least HP”. Start the waves and focus on upgrading the 4 p/g gems evenly. The monster waves generally do not post a concern until the last few waves as long as you keep upgrading the gems. It is recommended to get all 4 p/g gems to g6 by w40, and g8 before the trial ends. At the last few waves, you may want to consider combining 2 of the g8s into a g9 and use some spells.
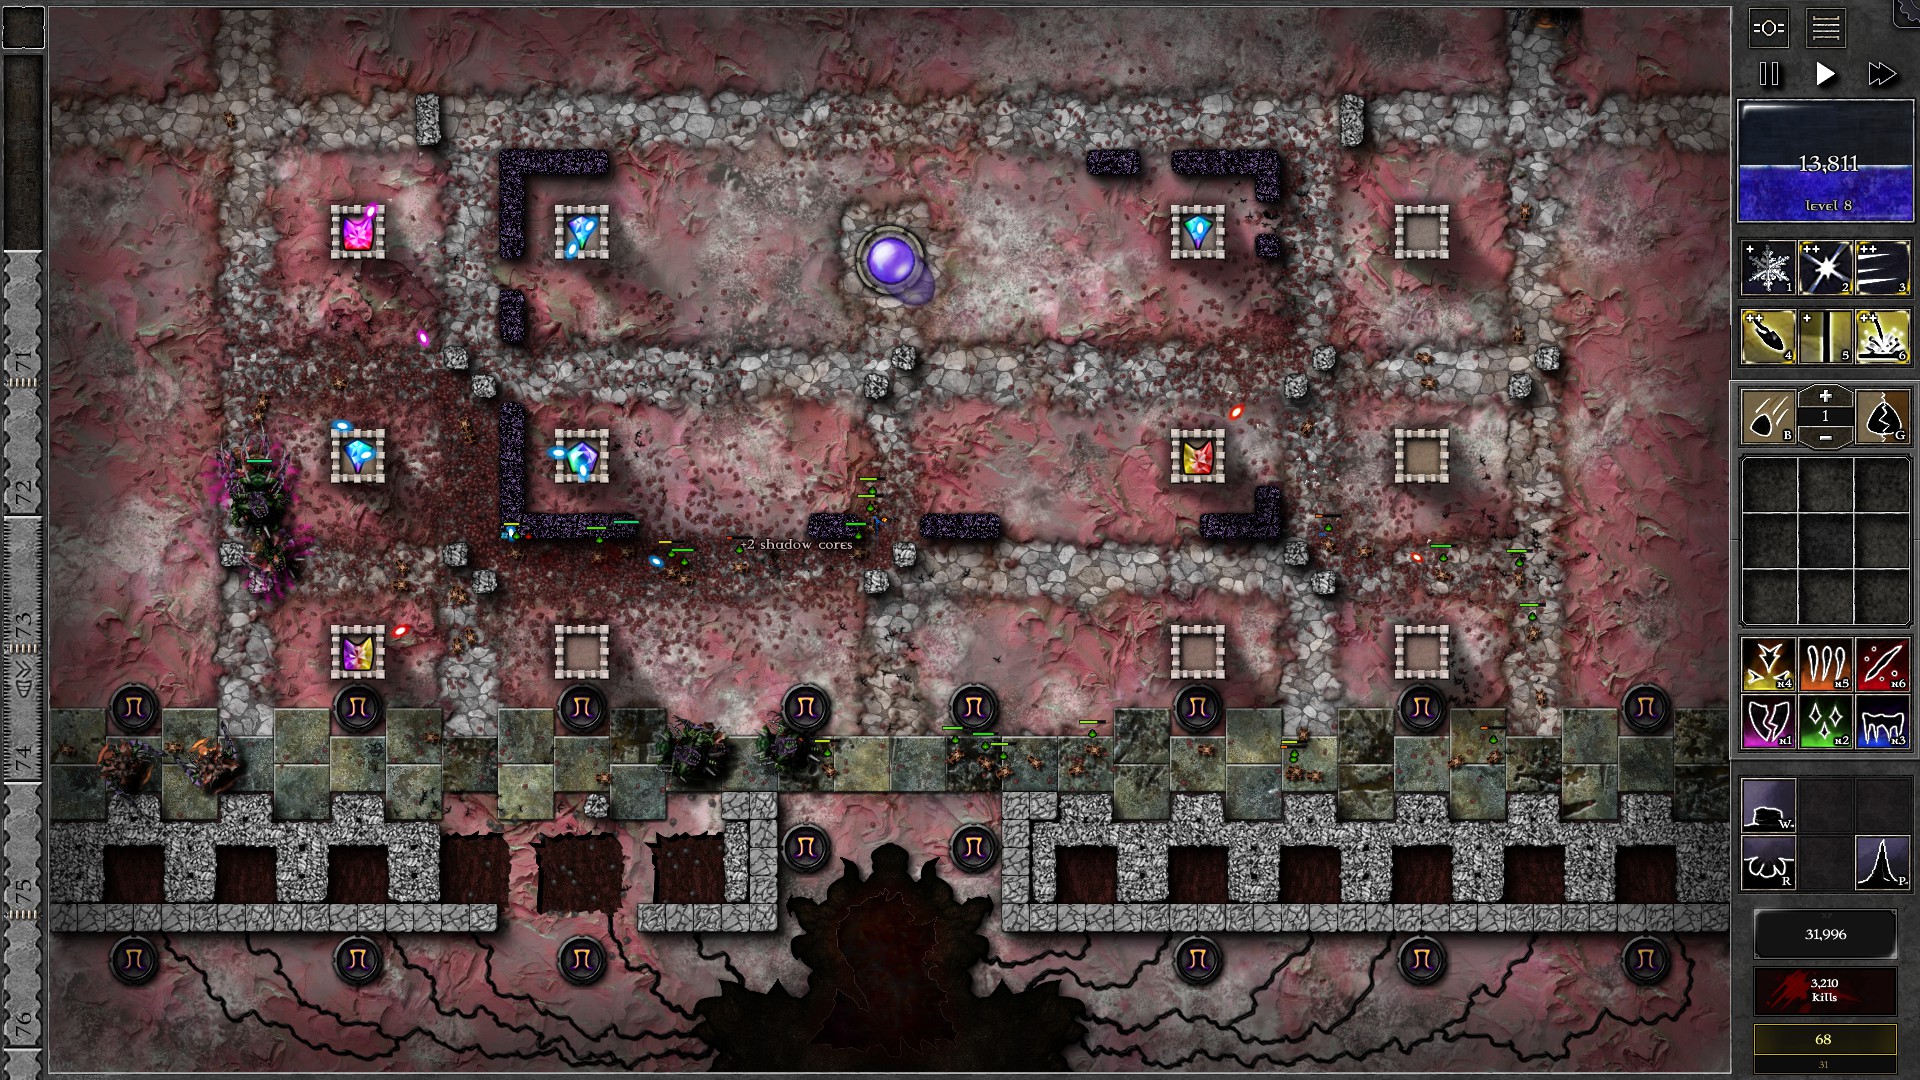
The main issue in this stage are the flying ones lured by Ritual 12. Be familiar with the Flying Ones premonitions and stock up spells to help deal with them while noting for reduced defenses if gem movements and/or target focusing is required. (Use Ice Shards on the Flying ones as you see fit, but be more cautious on the usage if multiple hostile fliers come in at the same time.)
At here I will introduce typical tactics to help dealing with the flying ones.
Apparitions: These do not post any harm but gives decent amounts of mana (especially early on). Try your best to take them down if you get some.
Premonition: 1 horizontal line at each sides of the screen
Specters: You can defeat these by moving your gems that are not the highest graded one (but still strong enough) to intercept their flight. If your main gems are all the same highest grade, exercise caution when attacking and consider using Freeze to stop them while taking them down.
Premonition: 2 crosses at the sides of the screen
Spires: Wait until they get close to a tower, Whiteout, Freeze (optional), and use a p/g gem enhanced with Beam to specifically target them (use “Specials” targetting or just click on it if no other gems are nearby. The poison damage should melt the Spires at a decent rate. Watch out for destroyed wall segments as they are killed and patch up the paths if necessary.
Premonition: 3 vertical lines at each side of the screen
Shadows: Shadow Spawnlings can cause immense pressure on you defenses so try to kill these quickly (use Beam to help killing the spawnlings if necessary). Note where they try to land when they enter the screen, and try to Freeze and Whiteout them once they land and are thus open for attack. Move your strongest gem and cast Bolt or Beam (Bolt is better with most gems, required if the shadow is too far away from the towers) to take the Shadow down ASAP. You may need 2 Gem enhancement casts to secure a kill.
Premonition: 7 vertical lines + 1 horizontal at the top of the screen
Wizard Hunters: Yes, Ritual can cause these to spawn. This is also a relatively big threat especially because you cannot rebuild towers in this Trial. Note where the Wizard Hunter spawns in and move a strong gem to the tower closest to that corner. Start firing at them with Bolt once they enter Bolt range and cast Freeze and Whiteout on them to keep them vulnerable. You will want to kill them before they attack your structures. Remember to look out for structures under attack and remove the gems in them if necessary (otherwise you will lose the gem). If you get a tower destroyed you may need to look for alternative paths.
Premonition: 5 horizontal lines at each sides of the screen, closer to the bottom
Finally, if you notice premonitions of multiple hostile Flying ones, be extra careful and refrain from using any spells to save them for the fliers. You may also need to banish some monsters so be sure to have some mana ready. When the flying ones arrive, stop time (note that Shadows can move albeit much slower even during time stop) and think carefully before acting.
121 – Field A5
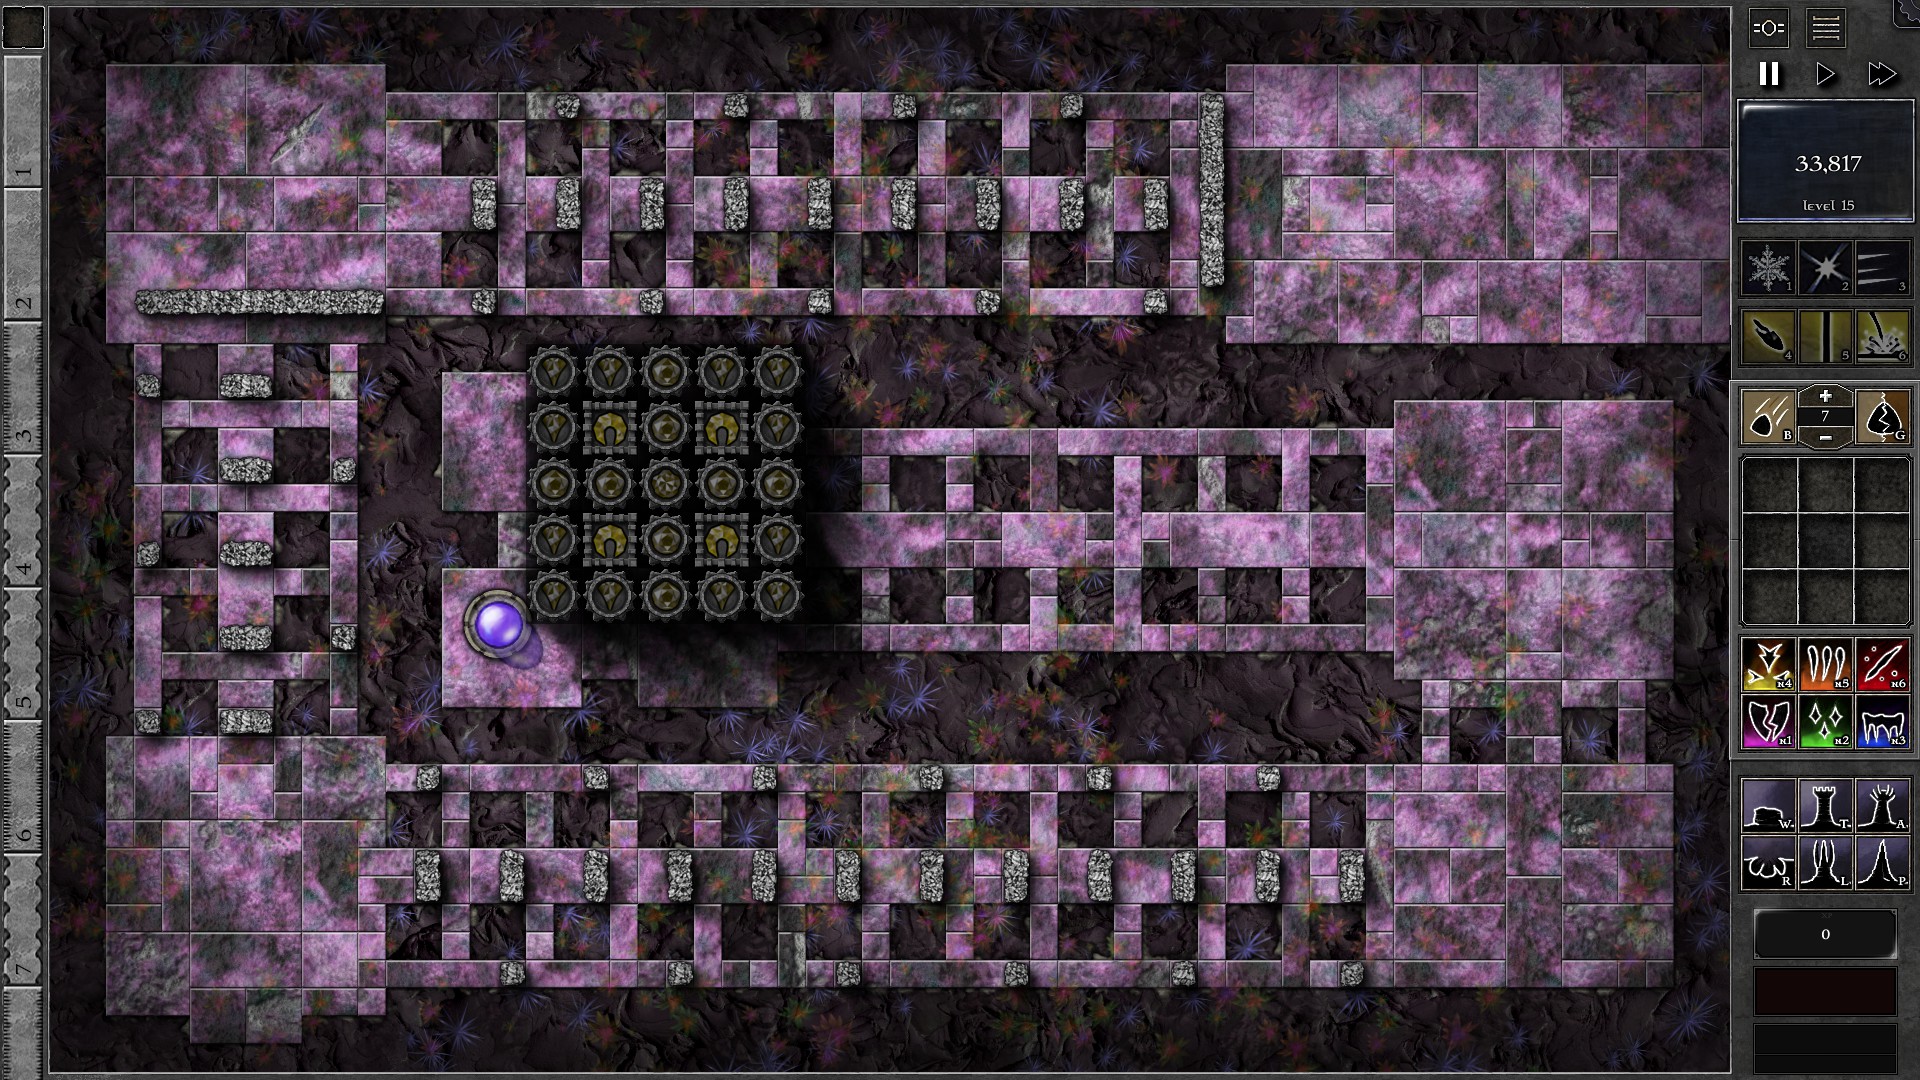
This Trial may look intimidating with its Traits, but it’s actually not very difficult. Start by salvaging all the inventory gems for mana (which gives you almost 2 million mana).
Create a setup with 4 towers and 21 amps as in the screenshot. Fill in the towers and amps with pure yellow gems. The towers are g11, the centre amp is g9, the 8 amps shared by 2 towers are g8, and the remaining 12 amps are g7.
Build a long path for the monsters and fast forward. Your setup should easily mow down every wave of enemies. However, you should still be wary of any flying ones spawning into the field (Specters, Shadows and Spires) and beacons that spawn in due to Dark Masonry. Build additional towers and move one of your g11 gems to help deal with these additional threats when necessary.
122 – Field A6
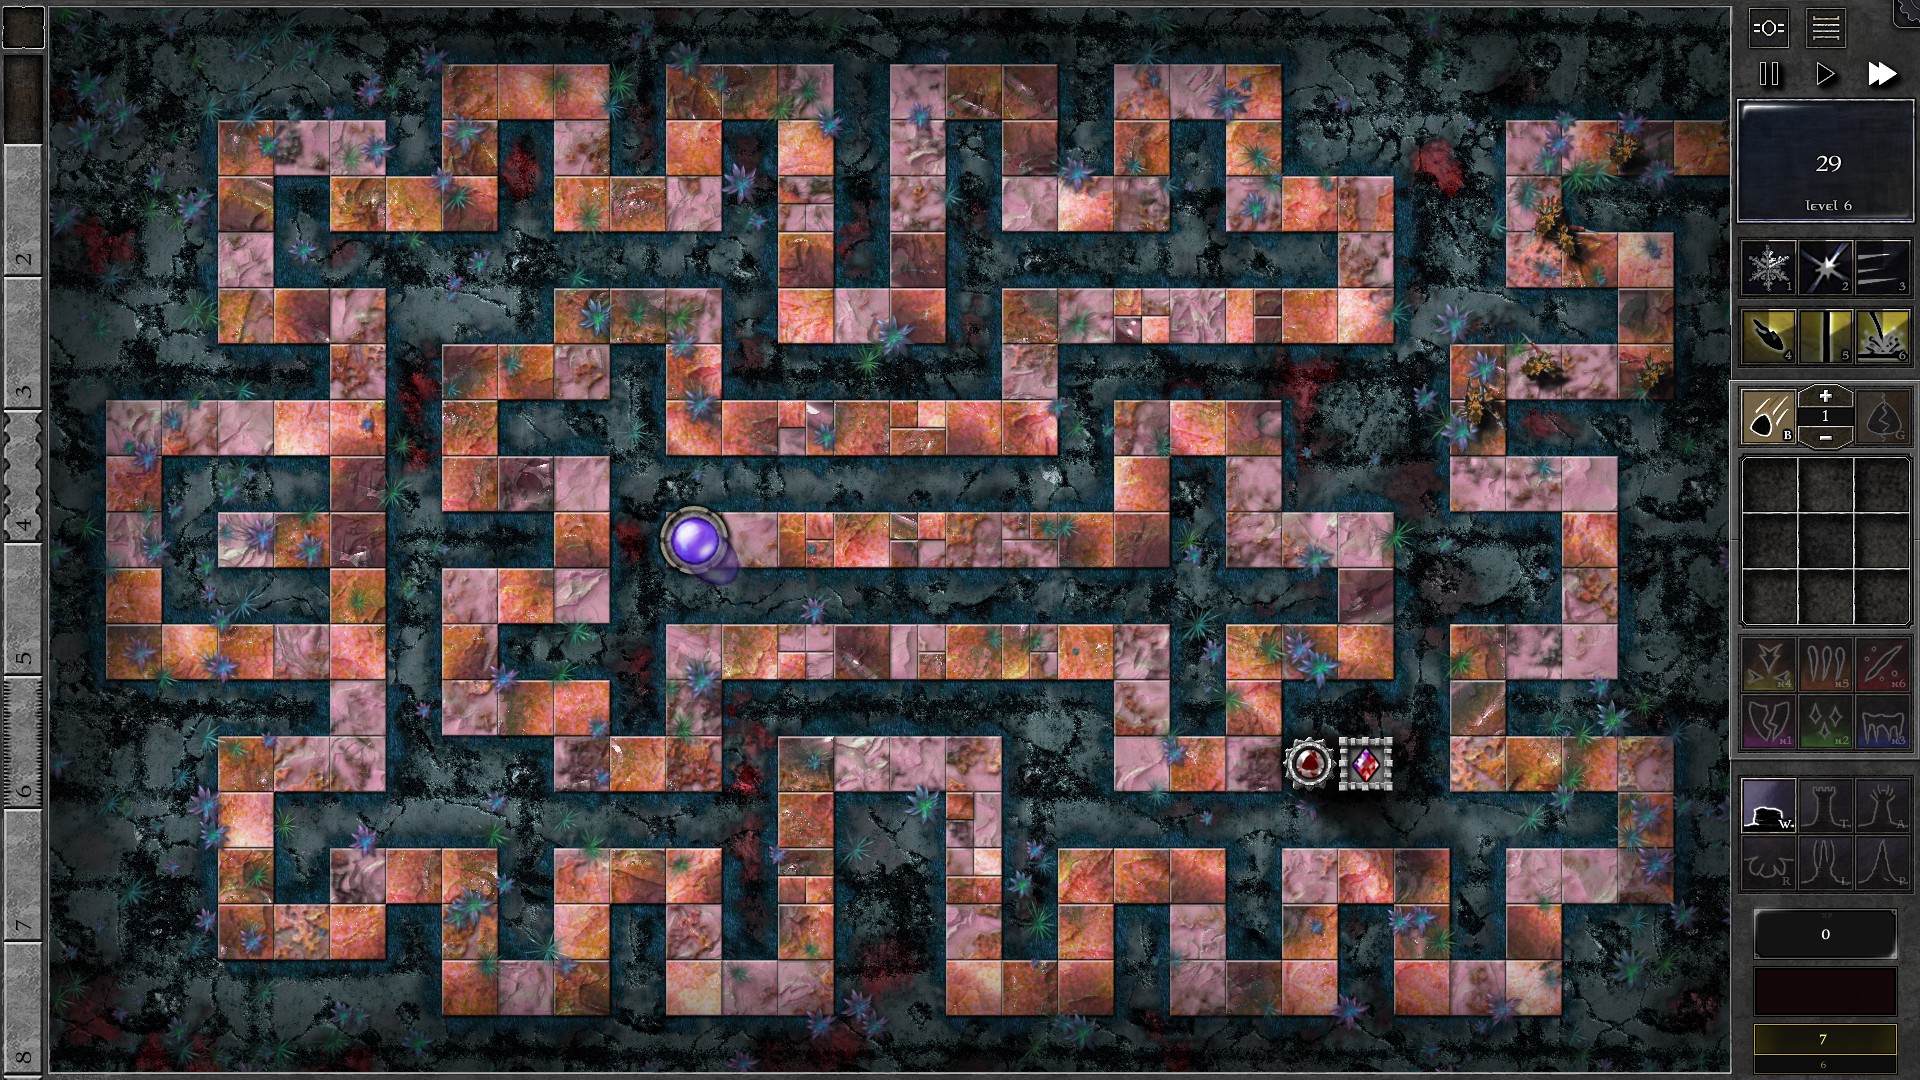
Start the field with a g6 p/r gem and a g1 amp of either red or purple gem as shown.
Collect enough mana and build a tower close to the entrance of the field, with a g1 orange gem. Throughout the Trial, whenever you have Beam and Whiteout charged, cast whiteout on the monsters close to the orange gem and use Beam on it to drain additional mana for use. Upgrade this orange gem to g4 as you continue draining mana with it. (try to micromanage or use targeting priorities to make sure that the orange beam is firing at whiteout-ed monsters.) In addition, use the other spells and enhancements whenever necessary, and send some early waves if your main gem has nothing to kill.
After the g4 o gem is online, start working on the defending gem. Upgrade the amp gem into a g2 p/r, then build 3 more amps around the tower together with their g2 p/r gems. After you have 4 amps, start collecting mana to upgrade the g6 p/r to a g7. You should probably be able to do this before w40.
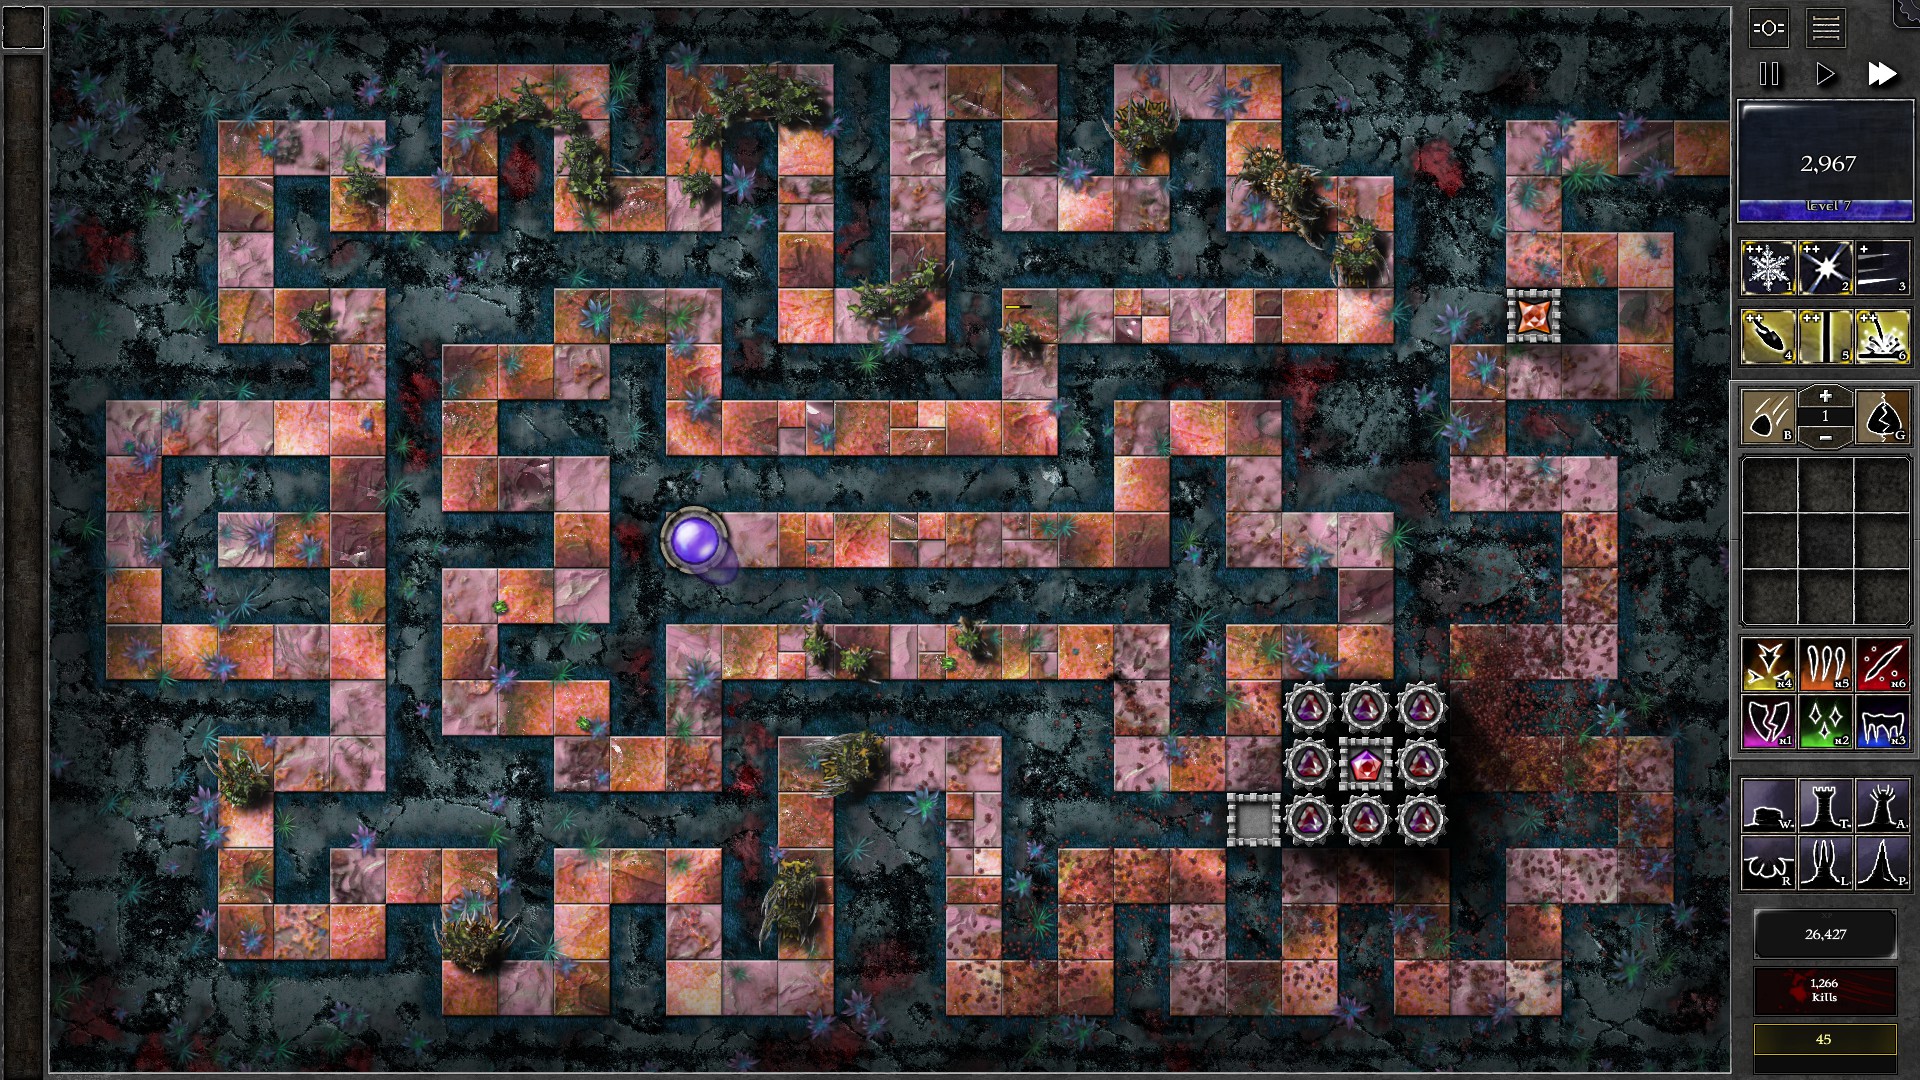
Once you have the g7 gem, resume building amps with g2 p/r around your g7 tower until you have 8 amps surrounding the tower. Build a second tower sharing 2 amps with the g7 tower. Put in a g6 p/r gem targeting “Least HP” to help with the late wave monsters until you can upgrade it and combine with the main gem to g8. You may also want to upgrade the orange gem to a g5. A g8 gem should be strong enough to take on the remaining monsters. (g7+g6 should also be good enough with smart spell/enhancement usage).
This is all about GemCraft – Frostborn Wrath – GC: FW Trials Walkthrough; I hope you enjoy reading the Guide! If you feel like we should add more information or we forget/mistake, please let us know via commenting below, and thanks! See you soon!
- All GemCraft - Frostborn Wrath Posts List


Thanks very much for this informative an detailed walktrough, it has helped me a lot.