A universal guide on how to effectively use your tank and the strengths and weaknesses of all tanks
Introduction
This is actually my first guide on steam, so the formatting may be bad. I decided to create a tank guide to help those who do not know how to use their tanks effectively or to their full potential. I was originally planning on make this guide dedicated to Colonial eyes, but after seeing a lot of captured tanks, it will be universal.
I’ll first be covering the basics and general rules to using tanks.
I will then move on to covering the different tanks in the game, outlining their strengths and weaknesses. However, I have not used every tank in the game, so some tanks may have wrong or limited information from me.
Lastly, I’ll cover how terrain can be used to your advantage and how it can prove to be a major disadvantage.
Armoured cars, half-tracks and tankettes will not be covered for now.
Rules to using Armoured Vehicles
These rules are pretty important in order to keep your tank alive, not give the enemy an advantage and not disadvantage nearby friendlies.
- DO NOT ONE MAN TANKS. Seriously. It does not matter how many damn hours you’ve logged into the game. Fulfilling the role of a spotter, a driver and a gunner simultaneously is impossible.
- You do not let your vehicle get captured by the enemy. If you get disabled, you fight to your last breath. Always have at least one person in the tank.
- I advise against bringing more than 25 tanks shells. You can always come back for more, and it allows other tank crews to have some shells.
- Use your shells wisely. Do not overload the logistics on bringing you a shell for every enemy soldier and their grandma. Use the shells mainly for defences, groups of 3 or more infantry and tanks. However if you have an abundance of tank shells (more than 800), disregard this one.
- I do not recommend using vehicles during the night. However if you have to, ALWAYS have infantry support. Make sure you coordinate with your infantry to spot potential threats, most notably field AT guns and stationary (non-AI) AT guns, as you cannot see them in the night.
- The vehicle is worth more than your life. Always try to recover the tank in the event that it is de-crewed. If the vehicle is recovered by the enemy, destroy the vehicle before it escapes.
- Support your infantry and fellow armoured vehicles. Do not try to be a one tank army. Help your infantry and they can help you. Try to coordinate pushes together.
- Always have an escape route. You may need to fall back especially if there’s 10 tanks rushing you. If there’s friendly infantry behind you, run them over. The tank is worth more than them, and they shouldn’t be behind you in the first place. Try not to back up into a tree.
Tank Crew and their Roles
As battle tanks have been removed for the time being, the engineer and machine-gunner will not be included.
Microphones are pretty important. Communicate well with your crew, and you’ll do better than those who do not communicate.
Driver
The most important role in keeping your tank alive. The person in this position should be good at listening to the spotter (reason why will be explained in that role’s section) and fairly experienced at driving.
The driver should also have good awareness and react to threats (infantry sticky grenades, RPGs, etc.) quickly. The driver should not have to wait for the commander/spotters order to avoid threats. This should be second nature to the driver.
Gunner
The least important role in keeping your tank alive, but still important. The gunner shoots things. The person in this role can be as inexperienced as possible, as long as they are good at listening.
If inexperienced, it’s up to the commander/spotter to mark targets for them (Press ‘H’ and click ‘Look here’ to mark targets).
Personally, my priority for targets are:
- Field AT guns
- Armoured cars and half-tracks that can hurt you; because they’re weak
- Tanks
- Infantry AT
- Groups of Infantry
- Foxholes and bunkers; to support your infantry
- Other defences
Commander/Spotter
The second most important role in keeping your tank alive. The person in this role should be the best in communication and awareness. They should also be the most experienced out of the whole crew since they should know how to win engagements and make a plan for the tank.
The commander should spot threats for the tank and plan out the next move. Without the spotter, you may drive into 5 enemy tanks waiting for you. Telling the driver to fall back when you spot 5 Noble Widows heading down the road is a good call.
The commander can also serve as a relatively weak, anti-infantry to help with the tank. The best gun for this role (in my opinion) is “The Pitch Gun”. If doing this, focus more on slowing the enemy rather than killing them (although a dead enemy is nice).
Crew Loadout
You’d want to bring items that will assist you in using an armoured vehicle, but here’s the loadout that my crew uses:
Commander:
- Binoculars
- Hammer
- Radio
- Gas mask with 2 filters in total
- [OPTIONAL] A gun for slot 2, such as a revolver, a pistol or my personal favourite, “The Pitch”
- [OPTIONAL] A wrench to dismantle obstacles such as mines and tank traps
- Fill the rest of your backpack with Bmats
Driver:
- Hammer
- Gas mask with 2 filters in total
- [OPTIONAL] 1 Fuel can
- Fill the rest of your backpack with Bmats
Gunner(s):
- Hammer
- Gas mask with 2 filters in total
- Fill the rest of your backpack with Bmats
Tank Subsystems
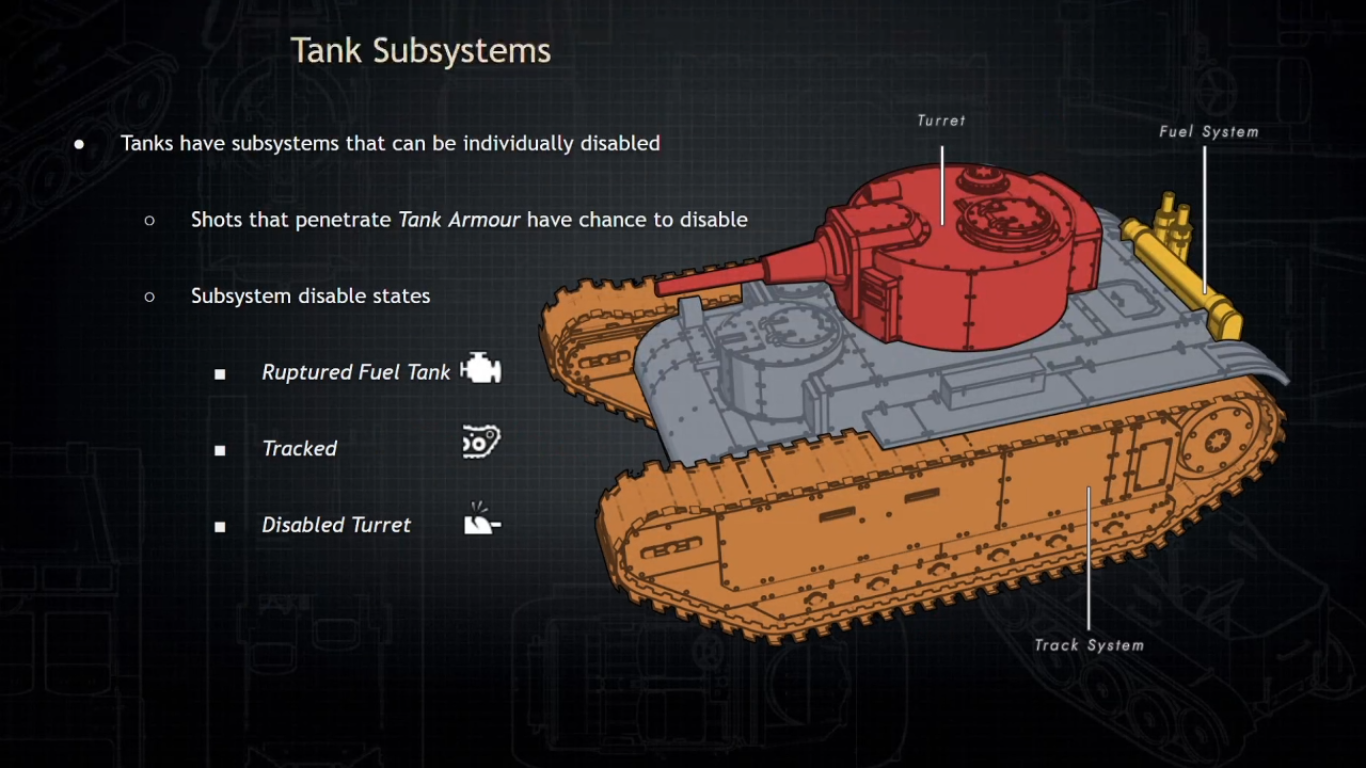
Only tanks have subsystems. These systems have a certain chance to be disabled when hit. The only way to get rid of them is to repair your tank to 100% health. There are currently only three subsystems that can be damaged:
Tracks
This is the most common target for AT to shoot at. Being “tracked” does not mean you’re immobile, but you’ll be slowed down significantly. Try to disengage and fall back behind friendly forces, a tracked tank is a great target for 68mm guns.
Turret
This one is probably the second most common. When this happens, the turret cannot shoot or turn. This one is not really that big of a problem as you can simply fall back and repair. If a tank has 2 turrets, they are disabled individually with their own hitbox.
Fuel Tank
The rarest of the three, this one is pretty bad. It will make your tank leak fuel at a very fast rate, even if you’re sitting still. You MUST fall back behind the front-line and repair, otherwise you’ll be a sitting duck. It’s rare because the subsystem is located at the rear of the tank, so if it’s common to you… maybe stop facing the rear of the tank towards the enemy.
Light/Scout Tanks
Light/Scout tanks are very mobile at the cost of having low armour and health. Scout tanks are little weaker than light tanks with lower health, armour and a worse gun, but they play roughly the same.
There are 2 scout tanks, which are both Warden tanks. These are the “King Spire” and the “King Gallant”. There are 5 light tanks (6 if you include the “Pelekys”, but that’s in the Tank Destroyer category). The Wardens have the “Devitt”, the “Devitt Ironhide” and the “Devitt-Caine”. The Colonials have the “Hatchet” and the “Kranesca”.
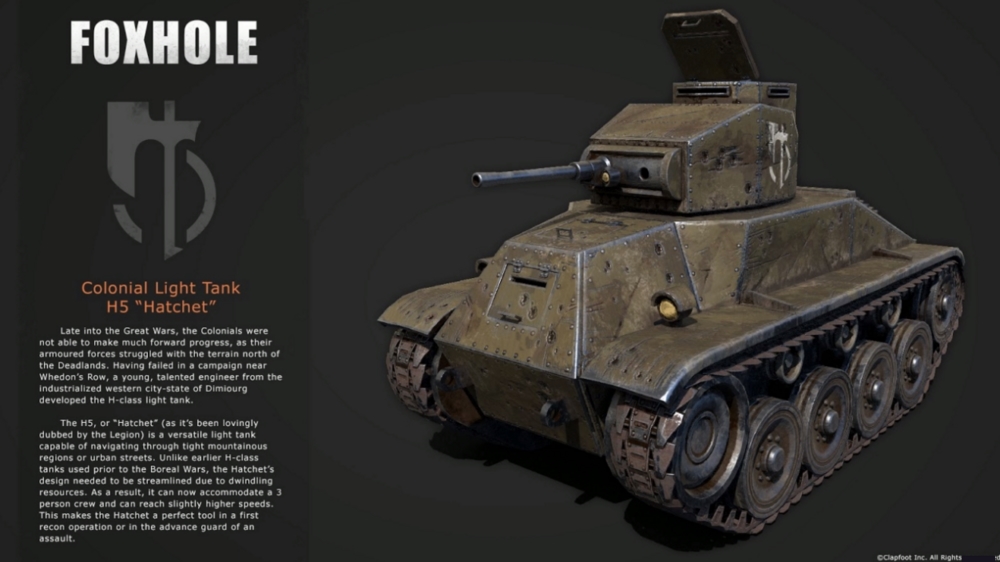
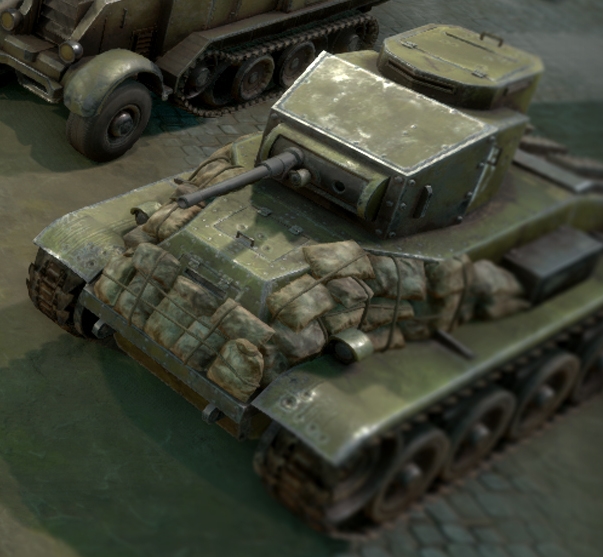
H-5 “Hatchet”
The Colonial’s standard light tank. Fast and mobile. Compared to the Warden counterpart, the “Hatchet” has slower reload speed but faster turret traverse.
Strengths:
- Better turret traverse (faster than Warden counterpart)
- Fast
- Good manoeuvrability
Weaknesses:
- 8.5s reload speed (slower than the warden counterpart)
- Armour and durability (compared to other categories)
How to use effectively:
Mobility is your biggest advantage. You can also last a long time if your fuel tank is full. Flank tanks that are superior to you, as you will not win head-on.
How to deal with:
It’s only a light tank, so the mobility is the only advantage it has. Lure the tank into a trap, such as a line of RPGs or Support guns.
H-8 “Kranesca”
My favourite tank by far. It’s slightly slower than the “Hatchet” and has worse fuel efficiency, but it comes with the addition of extra durability and an engine that can boost when you press the “shift” key. You can boost as long as you’d like, but keep in mind that it multiplies fuel consumption by six. The armour is the same, however.
Strengths:
- Highest durability for this category
- Fast
- Engine boost
- Good manoeuvrability
Weaknesses:
- Almost costs the same as an assault tank
- Slightly slower than other light tanks (without boost)
- Bad fuel efficiency
- Armour and durability (compared to other categories)
How to use effectively:
This is going to appear commonly throughout the guide, flanking. You’re a light tank. You cannot face the heavier tanks head-on. Your biggest advantage is mobility, being able to out run most tanks. Hit and run tactics are optimal.
How to deal with:
Exactly the same as the “Hatchet”, It’s only a light tank, so the mobility is the only advantage it has. Lure the tank into a trap, such as a line of RPGs or Support guns.
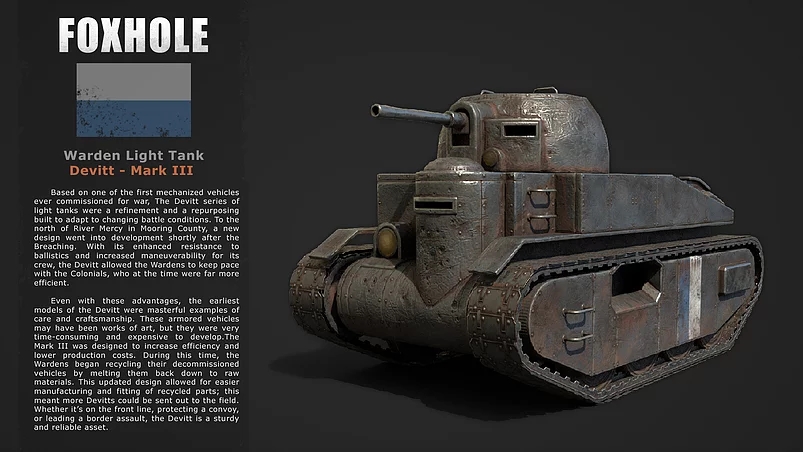
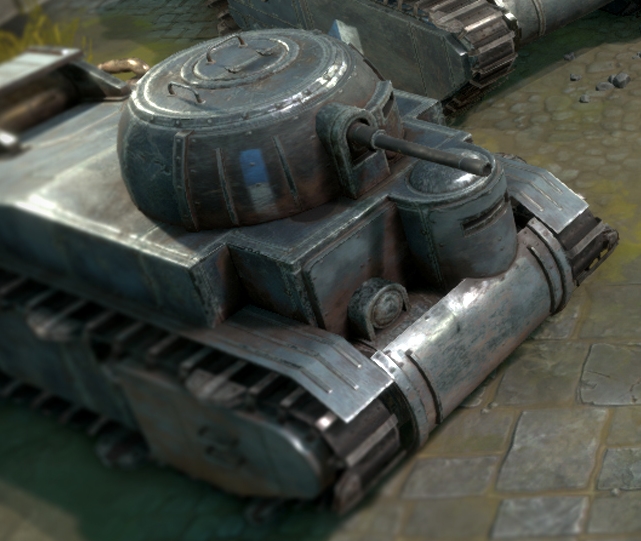
Devitt Mark-III
The Warden’s standard light tank. Just like any other light tank, it’s fast and mobile. Compared to the Colonial version, this one boasts better reload speed but slower turret traverse.
Strengths:
- Superior reload speed
- Fast
- Good manoeuvrability
Weaknesses:
- Worse fuel efficiency than the Colonial counterpart
- Slower turret traverse than the Colonial counterpart
- Armour and durability (compared to other categories)
How to use effectively:
How to deal with:
Devitt Ironhide Mark-IV
The upgrade to the standard Warden light tank. This one does not sacrifice anything, and has faster reload speed, more armour, and does not get penalties driving off road during snow or rain storms
Strengths:
- Best armour in its class
- Best severe weather tank (does not get penalised by it)
- Fastest reload speed in its class
Weaknesses:
- Armour and durability (compared to other categories)
- Tied with the “Kranesca” in fuel efficiency
How to use effectively:
You can 1v1 any other light/scout tank in terms of stats. Boasting superior armour and reload speed, face your front towards the enemy. Don’t attempt flanks since your turret traverse is slower.
How to deal with:
Only a light tank. Lure into an ambush and take it out in a volley of 30mm cannons or RPGs.
Devitt-Caine Mark-IV MMR
It’s an armoured, mobile mortar team. That’s literally what this thing is. This tank at most is an annoyance to enemy armour. Do not fight tanks.
Strengths:
- Out ranges every other tank
- Fast
- Good manoeuvrability
- Armoured mortar team
Weaknesses:
- Armour and durability (compared to other categories)
- Open top, crew is vulnerable to grenades and artillery
- Literally just a mortar
How to use effectively:
You’re mortar team in a tank. That’s all you are. Focus on destroying static defences and groups of infantry that are stationary.
How to deal with:
It’s just an armoured mortar in a light tank’s chassis. Shoot it.
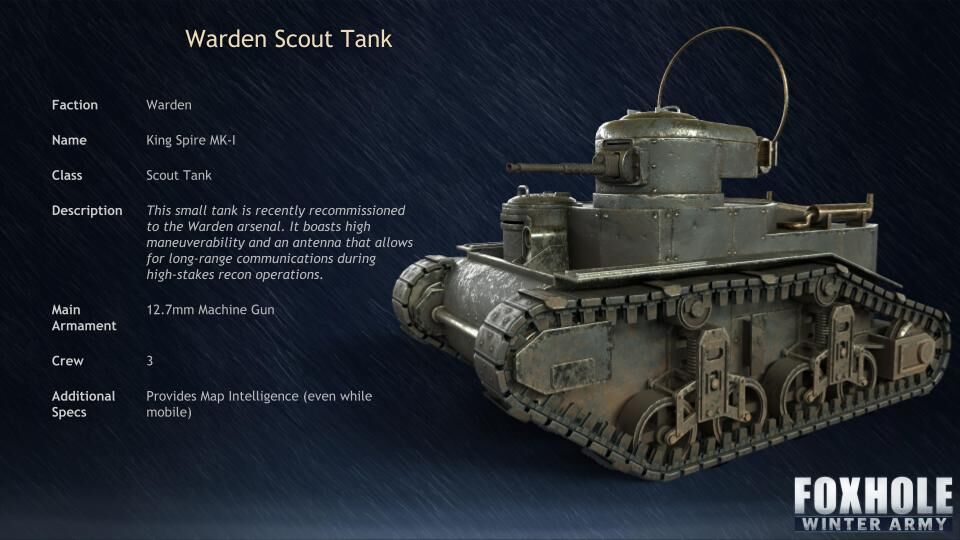
King Spire Mark-I
It’s the very definition of a scout tank. It provides intelligence for the map, and is pretty fast. Cannot engage tanks with it’s 12.7mm MG however. Pretty good for partisan work.
Strengths:
- MG will easily kill infantry
- Gathers intelligence
- Fast
- Good manoeuvrability
Weaknesses:
- Just an MG
- Weaker than light tanks
How to use effectively:
Use the MG against infantry, foxholes and watchtowers. You can also damage T1 bunkers. This tank is also great for partisan tactics, as it can gather intelligence and really ruin a logi’s day.
How to deal with:
Just an MG it will not damage tanks. Just chase it down and tell it to go away.
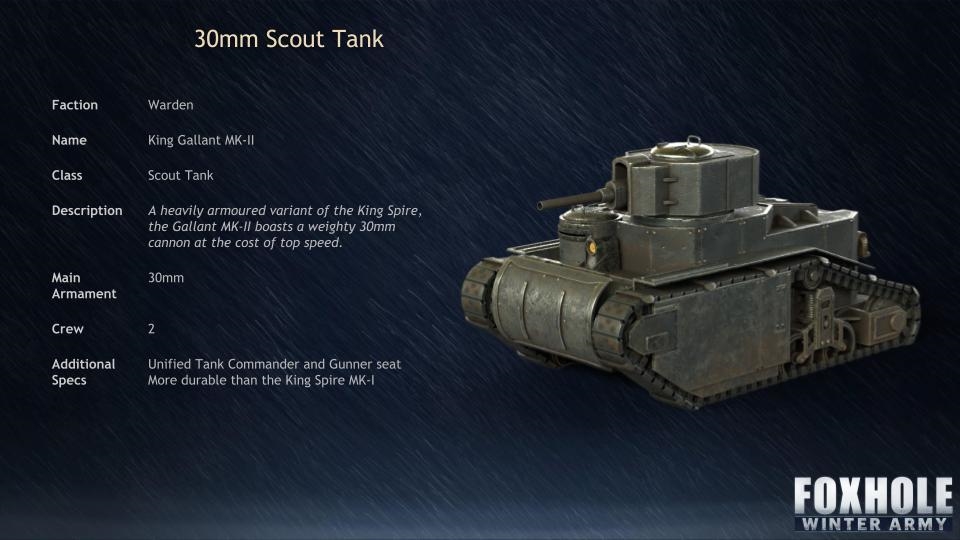
King Gallant Mark-II
I’ve experienced this thing in one of Shard-2’s wars. What the hell were we meant to do with Tankettes against this? It’s fast and mobile and will do a splendid job early game. It will easily destroy tankettes and other light vehicles. But it will not win against any other tank.
Strengths:
- 30mm is usually more plentiful than 40mm
- Fast
- Good manoeuvrability
- Superior to tankettes and armoured cars early game
Weaknesses:
- You will not win against any other tank
- Armour and durability (compared to other categories)
How to use effectively:
Use it in a similar way to light tanks. However if there’s anything bigger than a tankette, avoid it and attempt to flank. If I were you though, I’d find a new front that doesn’t have any enemy tanks.
How to deal with:
It’s pretty weak, attempt to set up an ambush and tell all AT to shoot it at once when it comes near.
Assault/Medium Tanks
The most common tank you will see late game. They are called Assault tanks officially, but are identical in purpose and stats to medium tanks. Not as fast as light tanks, not as armoured as battle tanks. They combine health, speed, manoeuvrability and armour. There are currently only 4 tanks in this category. The Wardens have the “Silverhand” and the “Silverhand Chieftain”, while the Colonials have the “Falchion” and the “Spatha”.
85K-a “Spatha”
The ‘refined’ tank for the Colonials. It has a high velocity 40mm cannon that has around a 20% increase in damage, reduces range penalty but deflects easier. It’s better than the Falchion in terms of combat.
Strengths:
- Slightly more powerful 40mm turret
- Good mobility
- Good armour
- Reasonable health
Weaknesses:
- Does not excel at anything
How to use effectively:
Flank your enemy. The 40mm deals more damage and it allows you to penetrate more often. However, keep your distance. You have mobility you can utilise, and you can escape the Warden assault tanks. The only thing that can catch up to you are Warden light tanks which you can 1v1, unless you’re weakened from damage.
How to deal with:
It’s mobile and the turret traverse is good too, so flanking is not as effective. There are no major weaknesses to exploit, just use any anti-tank tactic against it.
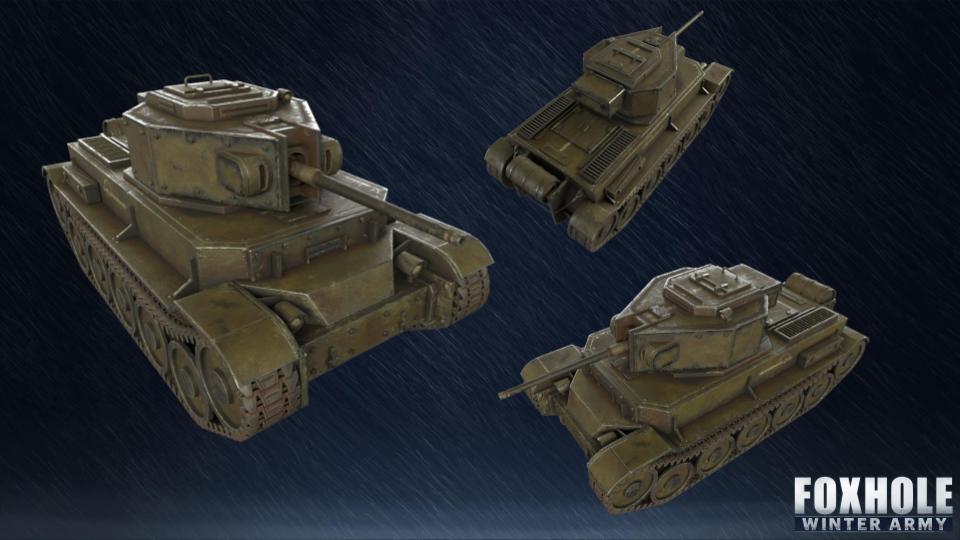
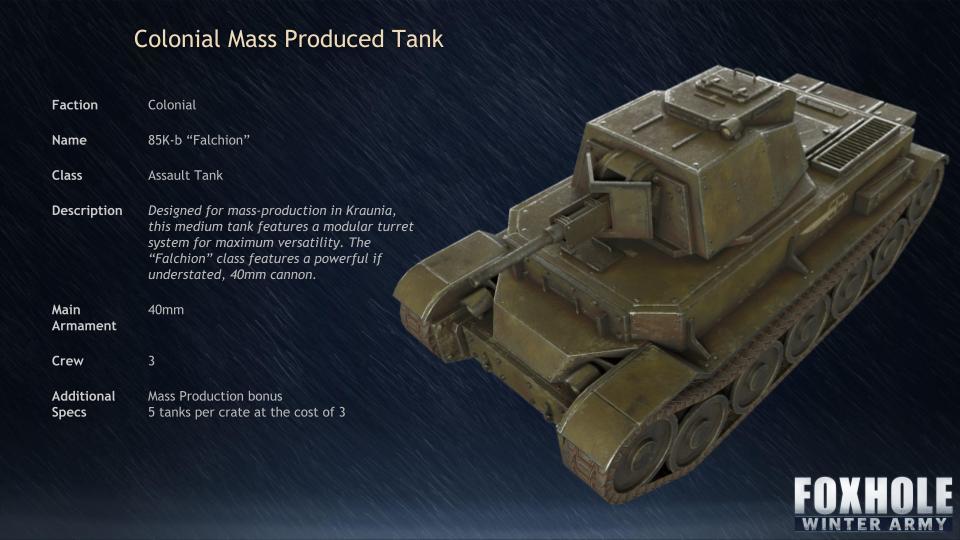
85K-b “Falchion”
This tank to the Colonials is similar to the Sherman to the Americans. This thing is meant to be mass-produced, but that doesn’t mean it’s bad. It’s a pretty average tank, nothing stellar, nothing bad. It should always be produced at a Mass Production Factory, so you get 5 tanks instead of 3.
Strengths:
- Able to be mass-produced
- Good mobility
- Good armour
- Reasonable health
Weaknesses:
- Unfortunately not mass-produced often
- Inferior to the Spatha
How to use effectively:
You’re an average tank when engaging enemy armour head-on, but possess superior manoeuvrability Don’t charge into enemy AT, and prioritise your targets well. You have mobility you can use to flank enemy vehicles, but don’t expect miracles, use hit and run tactics.
How to deal with:
Just use whatever anti-tank tactics you have, it has no major weakness to exploit.
Silverhand – Mk. IV
It has 2 guns, a hull-mounted 68mm and a 40mm turret. It also has the same speed and fuel consumption while having better armour and health. However, its turn rate is pretty abysmal and the turret traverse is slow. Still, this thing is a force to be reckoned with, and will most likely be seen very commonly late-war.
Strengths:
- 2 guns
- Somehow as fast as a Spatha despite being fat as hell
- Good armour
- A lot of health
Weaknesses:
- Turns slowly
- Fairly long, may not be able to turn in narrow areas
- 68mm is hull mounted
- 40mm turret turns slower than average
- Big target for infantry AT
How to use effectively:
Do not let the enemy flank you, you turn pretty slowly. Face the front towards the enemy at all times to make use of your superior firepower.
How to deal with:
Get on the side. You do not want to deal with both guns, and you want to maximise your chances of penetration. Do not circle it in front of its 68mm, it will shoot you in the side. The tank and 40mm turret turns slowly.
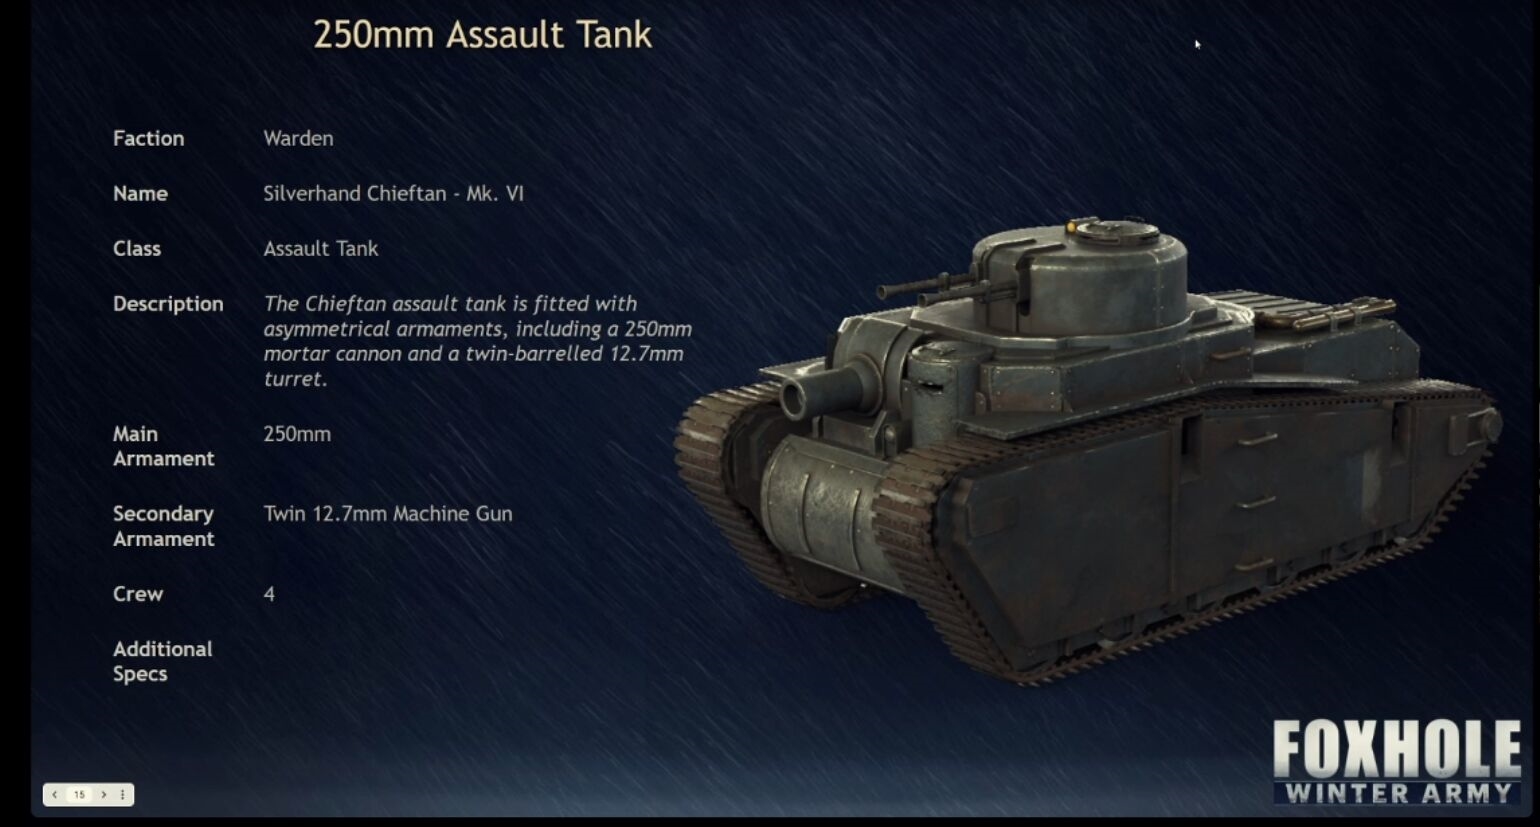
Silverhand Chieftain – Mk. VI
Exactly the same as the standard Silverhand, but the only difference is the 40mm turret is replaced with 2 12.7mm MGs, and the 68mm is replaced with a 250mm petard mortar. This makes it deadlier against infantry and structures.
Strengths:
- MG that will shred infantry and light defences
- 250mm Mortar that will destroy everything else
- Good armour
- A lot of health
Weaknesses:
- Fairly long, may not be able to turn in narrow areas
- 250mm is controlled similar to artillery/mortars
- Not good against enemy armour
- Big target for infantry AT
How to use effectively:
Use the machine gun to shred infantry and destroy foxholes and watchtowers. Use the 250mm for sturdy structures such as bunkers or buildings. Do not engage tanks, you will not be able to do that well at all.
How to deal with:
Stay out of range of its 250mm cannon, which has a range of 25m. You can also get on the side and it cannot do anything to harm you. Just be aware of supporting enemy infantry.
Tank Destroyers
Tank destroyers, their name says it all. Their primary purpose is to destroy tanks. There’s currently only 2 tank destroyers in the game, the Warden “Noble Widow” and the Colonial “Pelekys”. Do not use them against structures, 40mm shells actually do more damage to them.
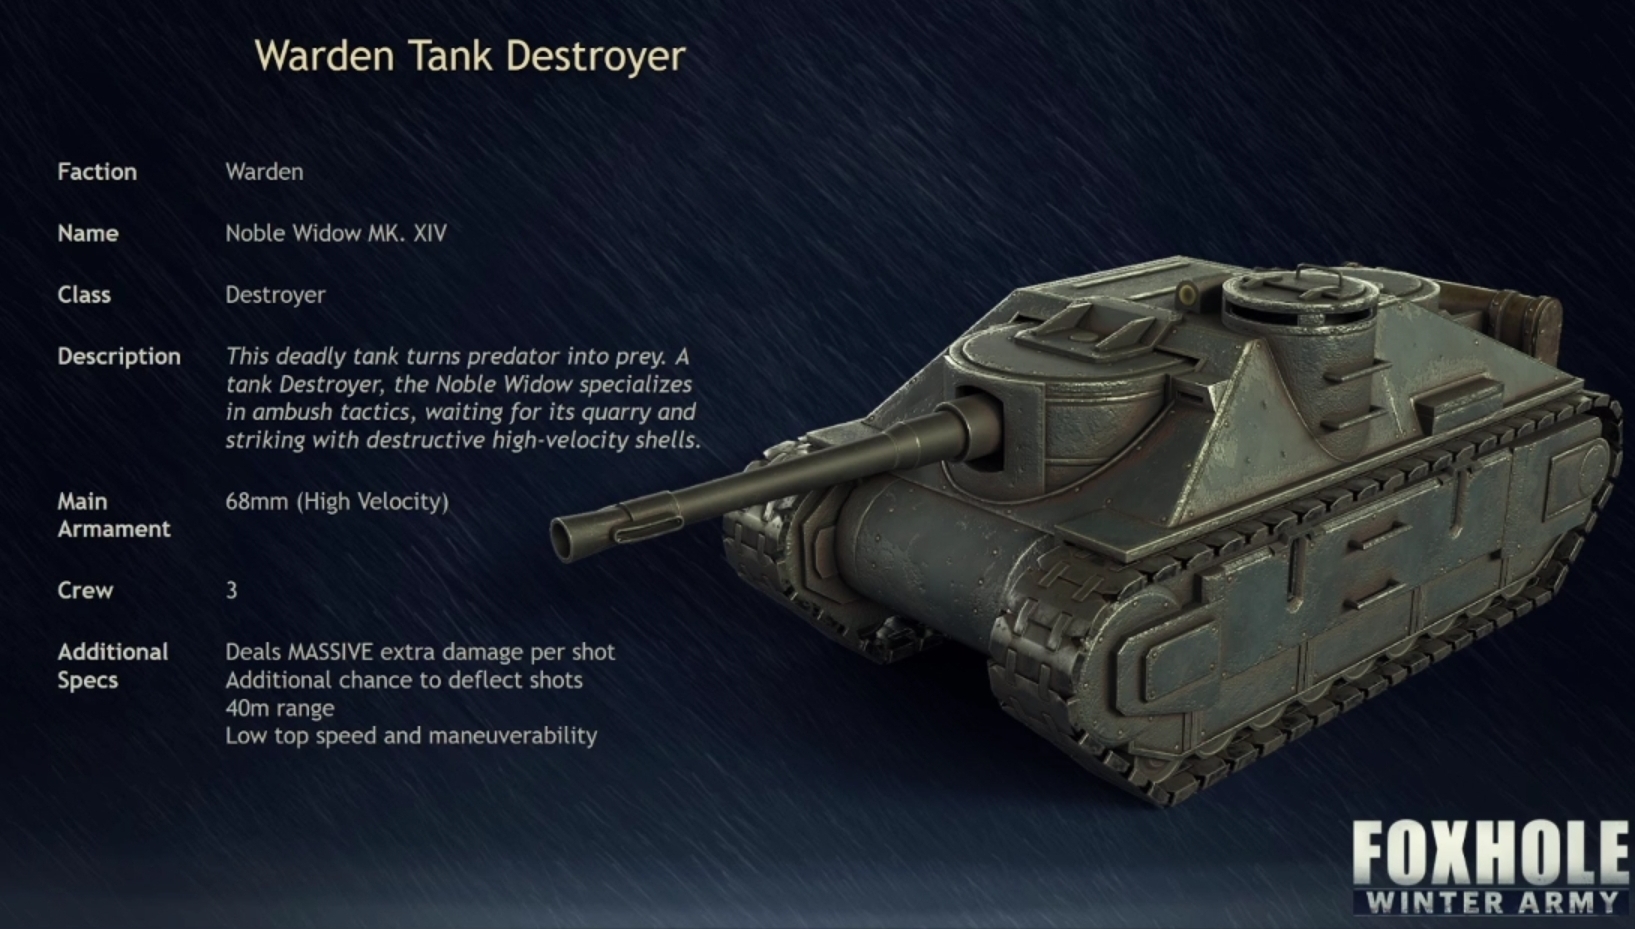
Noble Widow MK.XIV
I’ve seen this tank many times used by the Wardens. I used to think this tank was unstoppable with no flaws. However, it wasn’t until I finally got my hands on one that I realised it’s major downsides. A 300kg man in a wheel chair can turn faster and it’s slower than my grandma walking backwards.
Strengths:
- Fantastic gun to use against tanks; high penetration and higher post-pen damage (+75% increase)
- Good armour
Weaknesses:
- Very poor mobility
- No turret
- Surprisingly low health, it’s around a light tank’s health
How to use effectively:
Your main role is to destroy enemy vehicles and tanks. Do not use this against infantry or structures, let the infantry and 40mm tanks do that. Keep your distance from enemy tanks, getting flanked is a killer. Shoot the tracks of tanks as well so they cannot escape their demise. Your armour can take a beating, but do not rely on it fully as your health is pretty low.
How to deal with:
Flanking as said before. You will rarely win against this monster in a head-on fight. Get around on its sides or rear, and it’s very poor mobility will be made obvious to you. Be aware of enemy AT infantry or other tanks while flanking however.
Trust me when I say you will not win against this thing head-on. The gun will DESTROY you. Oh, if you track this tank, tell friendly infantry to gas the hell out of it. If you thought this tank was slow before, oh man, look at it now. You might be able to capture it if you pull this off.
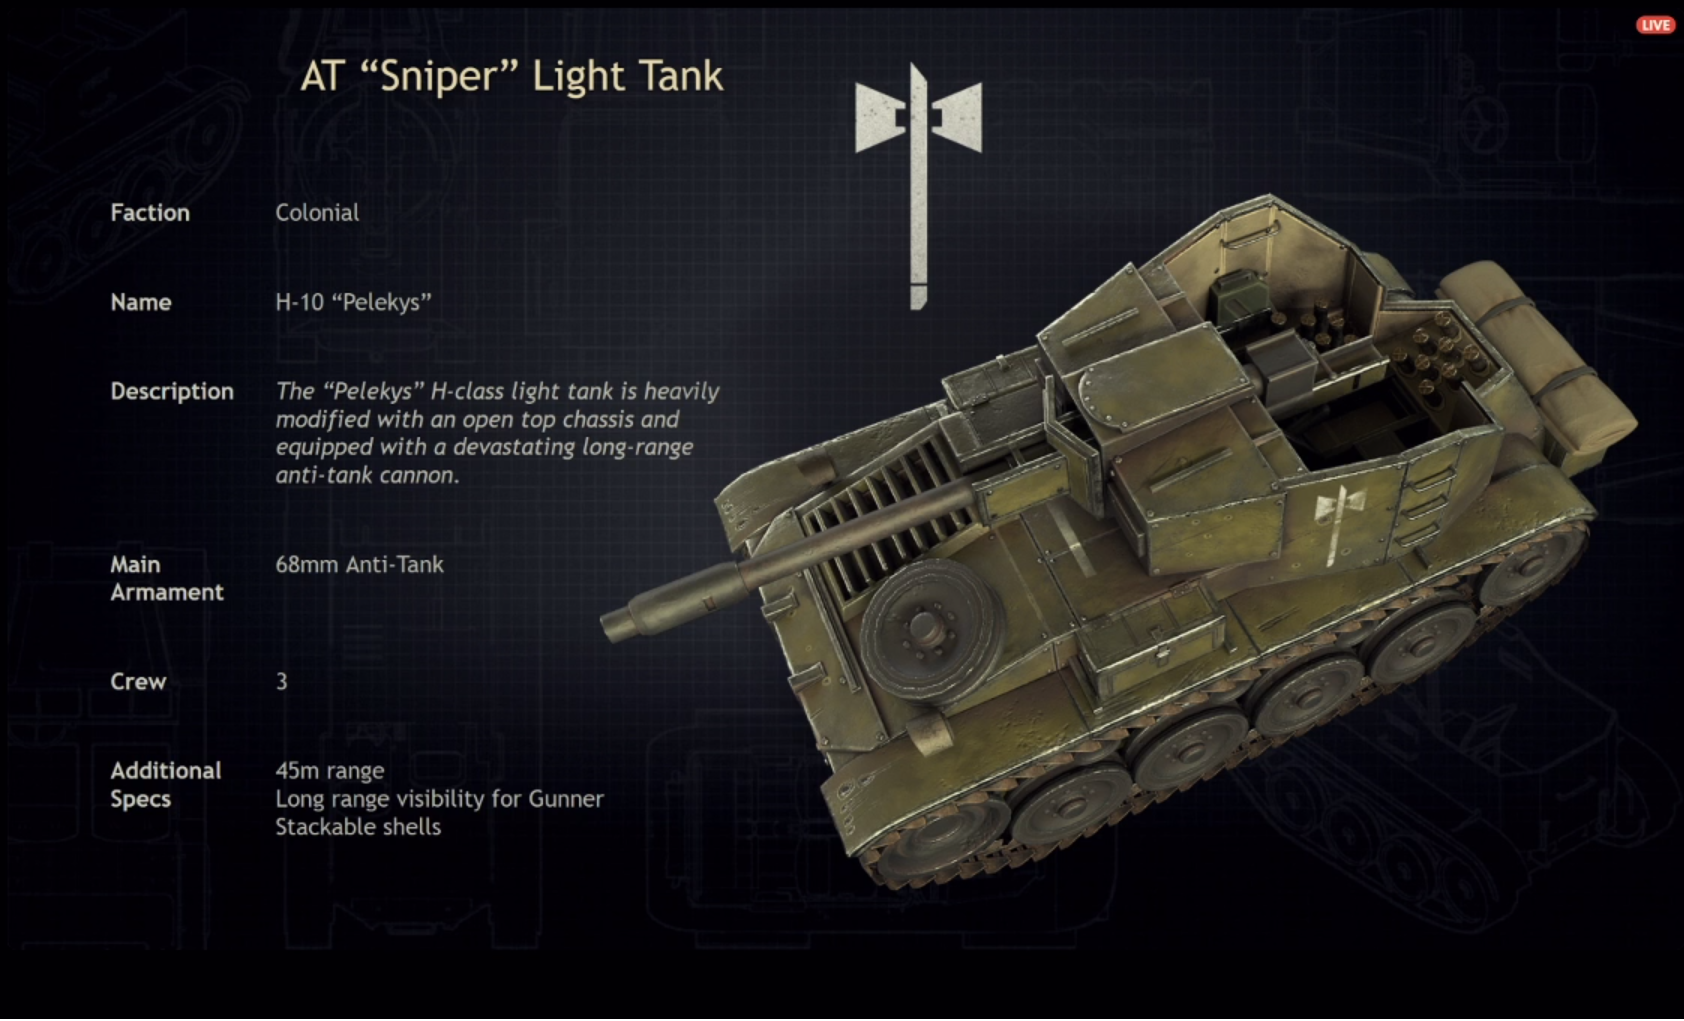
H-10 “Pelekys”
This tank is actually really good, it’s a shame the strengths of it isn’t used fully. In a complete contrast to the Warden counterpart, it’s very mobile, being as fast as a light tank in speed and manoeuvrability. However, it’s armour and durability is worse.
Strengths:
- Fantastic gun, same as the Warden one
- Very fast; same as light tanks
- Good turn-rate; also same as light tanks
- Out-ranges most tanks with 45m of range compared to the usual 40m
Weaknesses:
- No turret
- Low armour
- Low health
- Open top; a single well-thrown grenade can kill everyone
How to use effectively:
Same as the Warden one, your main role is destroying vehicles. Keep your distance from enemy tanks and make full use of your range advantage. Shoot and fall-back, rinse and repeat. This is made much easier compared to the Warden one, since you’re as fast as light tanks. Also shoot a tank’s tracks to make unable to escape your grasp. Your gun can penetrate the front of most tanks often.
You can also flank with this tank since it’s really fast for better penetration. HOWEVER, remember that you are open-top and turret-less. Make sure you are aware of your surroundings and fall back if it gets too dangerous.
This tank is actually pretty good against gun turrets due to your range. Make sure you do not engage the gun turret when they are facing you, engage from the sides. Have the gunner shoot the AT turret from the very tip of its max range, and simply back away about 5m to be safe. Repeat until its destroyed.
How to deal with:
If the crew is Michael Wittman, this tank can prove to be quite dangerous. Unlike the Warden tank, flanking the Pelekys is a bit harder since it can in most cases, out-run you, provided the commander is aware of their surroundings. If the crew is reckless and pushes up, have friendly tanks and infantry AT shoot it at once. You’ll have a high chance of destroying it.
Miscellaneous Tanks
I don’t know where to put these last two tanks, as they do not fit any of the previous categories, and they’re the only one of their type, so they will be posted here. Both belong to the Colonials the
anti-infantry “Scorpion” and the anti-structure “Ballista”.
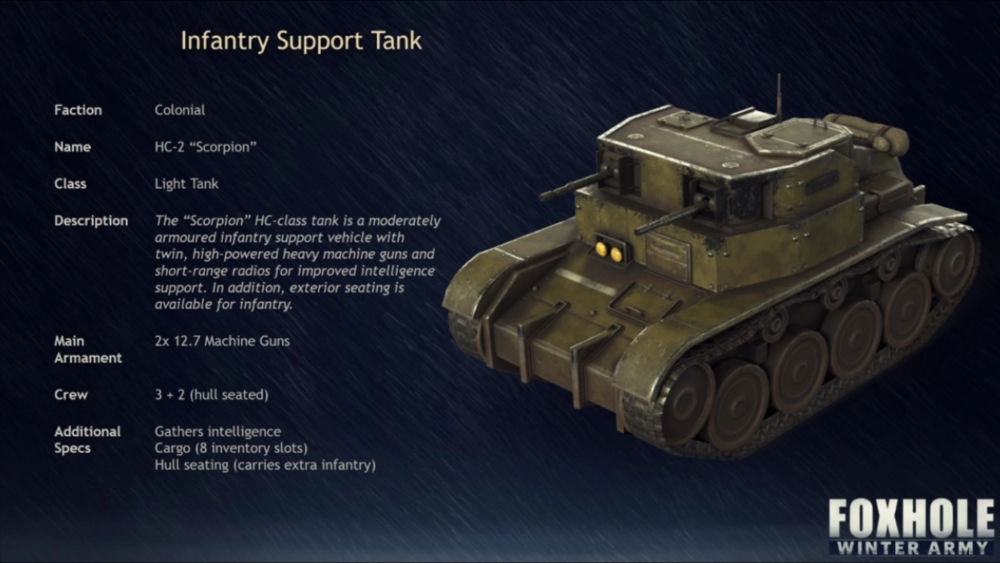
HC-2 “Scorpion”
This thing is armed with 2 12.7mm machine guns, don’t expect to kill tanks. Support your infantry by killing enemy infantry and destroying lightly armoured structures such as foxholes, watchtowers and T1 bunkers.
Strengths:
- 2 separate machine guns capable shredding infantry and foxholes
- Fairly durable
- Grants intelligence for the map in a 60m radius around it
Weaknesses:
- Machine guns will at most scratch tank armour
- Bad manoeuvrability
- Machine guns have limited traverse
- No dedicated commander seat (left machine gun is the commander and gunner)
How to use effectively:
Your main purpose is killing infantry and destroying light vehicles, such as trucks, LUVs and armoured cars. You can also provide some intelligence to the map, but you’re too slow to make that your main role. Focus on shredding enemy foxholes and infantry to support your friendly infantry.
How to deal with:
It’s armed with two machine guns, watch out, it’ll scratch your paint! Seriously though, either ignore this tank or take it out to help your infantry. Just remember the front armour is the strongest.
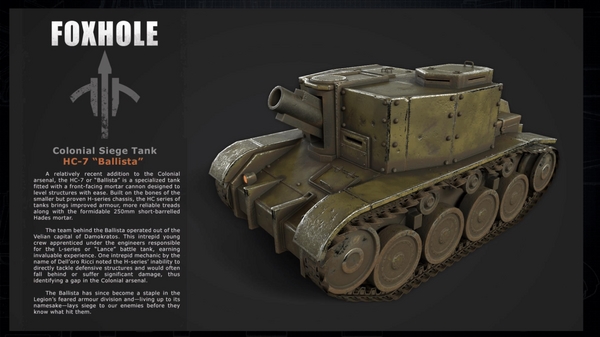
HC-7 “Ballista”
Armed with a 250mm petard mortar, this tank can be a threat to everything. It will turn infantry into giblets, reduce most structures to powder and make a massive hole in enemy tanks. This thing can take a beating, being one of the most resilient tanks in the game, trading manoeuvrability for durability.
Strengths:
- Can damage anything, dealing massive damage to structures
- Very durable
Weaknessess:
- Only 25m max range
- Turret-less
- Ammo is expensive, think of the logistics!
- Bad manoeuvrability
- Not recommended to use against tanks as the gun controls similar to mortars and artillery
How to use effectively
Despite what I said earlier, your main purpose is destroying structures. Tanks can easily kite you or dodge your shot, since the gun controls like artillery with a max range of 25m. Using against infantry is a waste. Use this tank against fortified defences such as bunkers and gun turrets (You out-range the auto-engage range of a gun turret by 3m).
How to deal with:
Every tank will out range this one. Don’t shoot the front armour. Flank the tank and shoot at it from the side. It’s pretty easy to deal with, as long as you don’t get in range of the 250mm petard mortar.
Natural Environment; How it can affect you
Overview
The enemy faction isn’t the only thing that can harm you. The terrain can prove to be a disaster to your plans, or maybe a helping hand. Here’s a list of notable terrains you need to be aware of.
Hill/Mountain
If fighting downhill, you have an advantage over the enemy, you can see further than they can.
If fighting uphill however, you are at a disadvantage. How disadvantaged you are depends on how steep the hill is. The steeper it is, the less you can see up the hill. You may not see a tank that’s 40m in front of you, which means they can target you while you cannot target them. Try to avoid fighting tanks uphill and see if there’s a way around.
Open flat land
Fast, mobile tanks will be supreme here. You can easily flank unaware enemy tanks. Just attempt your flank at least 50m away from the enemy.
Urban combat
This is where infantry AT reigns supreme. They could be hiding in any alley, any building or behind any obstacle. Only go through areas that have friendly infantry. Tanks are at a disadvantage here.
Bridge fighting
If the bridge is down, go as far up the bridge to scare off infantry and kill those that are foolish. This will help your friendly infantry push up and capture the bridge, hopefully someone will repair the bridge once friendlies push far enough. Noble Widows are also really good here to scare off other tanks.
If the bridge is up, keep an eye on the health of the bridge. Always have an escape route and fall back behind the bridge when its health is low.
Choke point (Valley, Castle Wall)
Pushing through this is a nightmare. Defending it on the other hand, is great. The defending force can be numerically inferior and defend against a larger force. The fight gets much worse if the enemy is able to position themselves somewhere above you as well. This environment is strategic, defend it well and avoid attacking this area head-on.
Notable Non-Armoured Threats
You may be a terror to infantry and defences a-like, but of course, you are not invincible. Here is a list of things to avoid and look out for and how to deal with it.
Gun Turrets (or AT turrets)
Not to be confused with AT guns, these are the AI only type. It takes 3 40mm shells to destroy this. If you have three tanks, coordinate all three tanks to fire at it simultaneously. If you’re the only tank around, shoot it once and pull-back to repair. Keep doing this until it’s dead. Some tanks also have the same range as it (Currently only the Pelekys). Engage at the very end of your max range, and fall back. Gun turrets shoot targets up to 45m away.
Field AT guns/cannons
I’ve used the Warden’s 40mm one, and it’s hilariously bad in my experience. Kept bouncing off the King Gallant’s armour. It’s the 68mm ones you want to watch out for. I’d love to say that Colonials do not have to worry about it, but the amount that I see get captured is absurd, either due to spies/alts or incompetent crew. If facing head-on, shoot next to the gunner (left side of the field gun). If behind, shoot between the driver and gunner, killing them both and damaging the gun. Be prepared to stumble upon these in the night, you can’t see them in the darkness.
ATRPGs
People using these tend to hide in trenches, craters or bushes, popping up once you get close enough. Seeing 6 guys simultaneously stand up in a trench and shoot you with an A.T.R.P.G. is terrifying. Shoot anyone with this, regardless if it’s one guy. They are a threat.
RPGs
Similar to ATRPGs, except these can damage everything in the game. Follows the same principles as ATRPGs.
Anti-tank Rifles
One AT rifle will not do much, but having four or more guys shooting you with this can prove to be dangerous. This weapon will bounce frequently. However, if your armour has been depleted, run the hell away. This thing will hit pretty hard if it penetrates. Shoot them if your armour is badly damaged. Prioritise other targets if your armour is fine.
Stationary AT guns
Not to be confused with gun turrets (or AT turrets), these are the non-AI version. They are deadlier than gun turrets and can be invisible (hidden in the night). They shoot VERY quickly (2 second reload), and have a distinct sound. Avoid at all costs, let your infantry deal with it, unless you catch it off-guard.
Sticky grenades
There are two types of people that use this, people that hide and wait for you to come close, or people that charge at you with it. People that charge at you are easy to deal with, just fall back and let infantry or machine-guns deal with it (Shooting them with your cannon is a waste of ammo).
White Flask
A weaker version of Sticky grenades, but still dangerous. These have a longer throw range and detonate on impact. Other than that, follows similar strategies of Sticky Grenade users.
Green Ash (Gas grenades)
There’s a reason why you want a gas mask. Green Ash can easily decrew those without it, leaving a nice tank for the enemy. However, even if you have a gas mask, try to drive out of the gas. Only rely on the gas mask if you are stuck.
AT Mines
Just drive on the road, since you’ll be able to see those mines. However if driving off-road, have the commander/spotter leave the tank and check for mines every now and then when it’s safe or local infantry mark them for you.
Artillery
These will not do that much damage, but it has a very high chance of tracking your tank. This leaves you vulnerable to other threats. It can also kill the commander. If you hear artillery, close the hatch. If you are getting shelled directly, leave that area.
Credits and Author Notes
Commends to those that contribute to the Official Foxhole Wiki. The link to that is here – [fandom.com]
Also commends to those who answered some questions for the Warden vehicles, as I have had little experience with those, so I didn’t know their flaws too well.
Helpful links to aid in your battles
Structure Health – [fandom.com]
Vehicle Health – [fandom.com]
Of course, I will try to update the guide when new things come back, and give feedback in the comments below if there’s something that needs to be added or updated.
This is all about Foxhole – Tank Effectiveness & Strengths + Weakness – Useful Information for New Update; I hope you enjoy reading the Guide! If you feel like we should add more information or we forget/mistake, please let us know via commenting below, and thanks! See you soon!
- All Foxhole Posts List




Leave a Reply