Intro
This guide is currently being worked on piece by piece. This is only uploaded now to provide players with the 9 new achievements regarding the monuments.
"Foundation" is a nice relaxing medieval city builder that allows one to establish a hierarchy, purchase land, establish economies, and design: manors, churches, and keeps. However, the game tends to be unforgiving and does little to show a lord what they can actually do. This guide will have quick tips for those who are just barely struggling, explain the achievements for easy completion, and also break down more thorough information in regards of building outputs, cost, and my method of tackling some more of the rigid AI aspects of the game.
I hope that with this guide more players can be successful and enjoy their kingdom so to not feel as if they wasted their money on a strategy game that they simply don’t understand. The more people who are able to reach thriving communities will hopefully result in this game becoming more popular so we can help the developers in reaching completion of this game. As of writing this guide the current version is 1.6.16.0718.
Achievements
Foundation has a total of 21 achievements, This section explains what is required to unlock most of them.
Bad weather is a random event that will result in generally an increase of 20% in fish and a 50% decrease in berries, wheat, and hops/grapes. Simply manage your resources so no villager leaves from unhappiness and you will unlock this achievement.
You unlock the church at 10 Newcomers.
Currently there is the ability to obtain overflow in your gold limit so if you can hold say 5k then go onto a military campaign you can easily store the 2k you earned giving you 7k/5k in your bank account. Ideally to amass the ability to hold 10k you will want to build a treasury. Construct a "Lord Manor" which is unlocked at 10 Newcomers and you will set every room with a function to the treasury. The most effective room for this is actually the "stone main building" which unlocks at 20 commoners and 20 Labor Splendor within the "Lord Manor: Stone Set". This building will allow 390 gold to be stored but increasing it’s height by one adds 60 more gold storage and the price to build increases every 2/3 height increases. Making a vault of 10 of these can easily push you within range. Acquiring the gold is best done through military campaigns or selling wine on the market.
Save up 500 gold and purchase land through the territory button on the top right. You will likely do this while only being able to hold 500 gold in total but don’t worry, hitting 0 gold only prevents you from making outside trade, nothing more.
This one is kinda funny, to unlock it you most build the "Sheep Farm" which is unlocked at 1 Newcomer. Once placed you must spawn the sheep for the building to function, but there is actually no limit on how many animals you can spawn. At a certain number of sheep you will be given specific prompts, they are:- 0=Spawn Sheep
- 4=(Come on… don’t abuse…)
- 10=Seriously, stop!
- 15=Think about the neighbors!
- 20=That smell…
- 25=Now, don’t go complain to the devs if the g (I assume it was suppose to say "if the game breaks")
- 30=They’ll ask you: How many sheep did you s (I assume it was suppose to say "spawn?")
- 35=If they do, DON’T ANSWER!
- 40=Because they’ll be like: Dah, that was pred (No idea what they are trying to say here)
- 45=Are you trying to see if there’s a black shee ("sheep")
- 50=Because there isn’t.
- 55=Your persistence honours us.
- 60=OMG, a black sheep. Impossible!! *Achievement unlocks*
- 65=Sorry, I could not know for sure: I’m just a ("game developer")
- 70=Well, I should get back to my normal button (I assume it was suppose to say "button mashing")
- 75=Have fun overpopulating the land with she ("sheep")
- 80+=(Come on… don’t abuse…)
Complete the Easy, Difficult, and Extremely Difficult campaigns.
To obtain a Knight, you must have at least 6 Soldiers
Minerals & Craftmanship
You will unlock each achievement by building each monument while meeting all the requirements for the monument’s perk. The requirements are not locked onto each individual monument but the perks are. In other words, a monument may require you build it entirely surrounded with forest OR completely by the riverside; but the monument will ALWAYS provide the same benefit.
The requirements needed in acquiring a monument perk can be:
- None. The monument will always function.
- Must be part of the building containing the Great Hall.
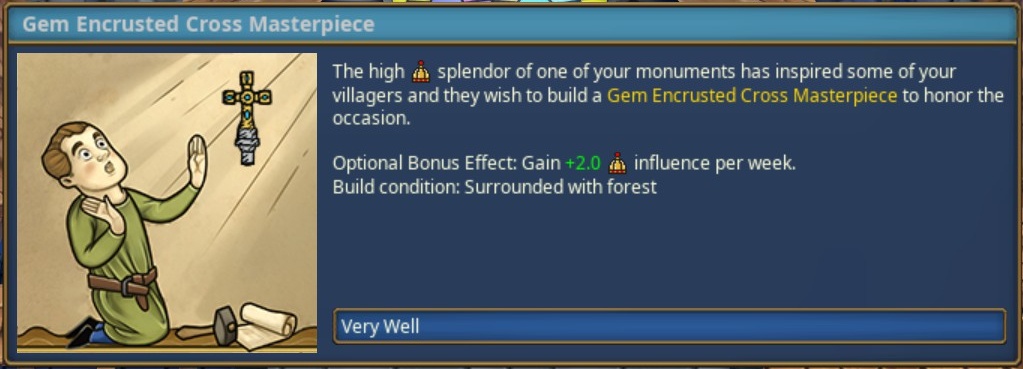
- Surrounded with forest.
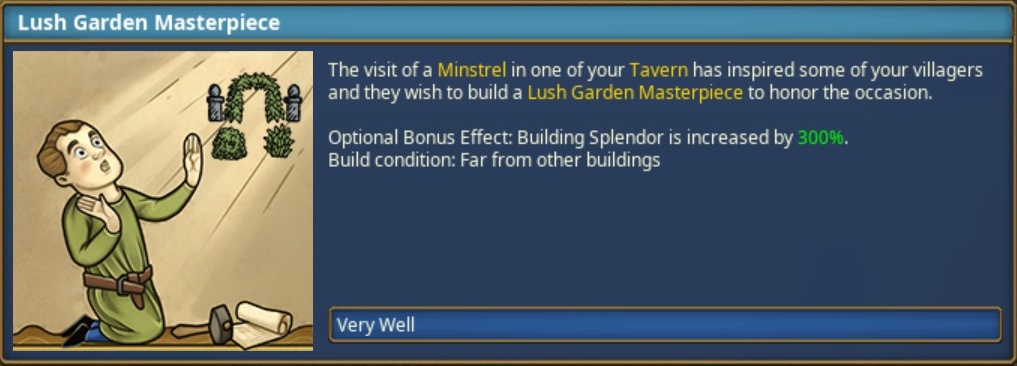
- Far from other buildings.
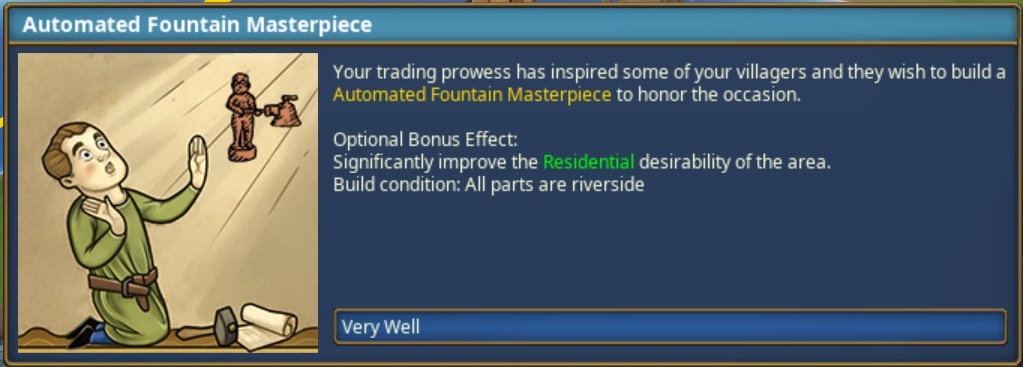
- All parts are riverside.
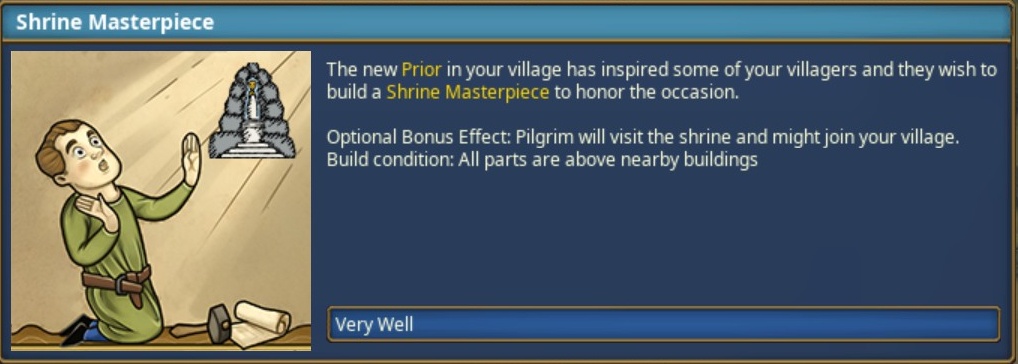
- All parts are above nearby buildings.
- Maximum number of decorative parts (Excluding Masterpiece Parts) _/5.
- Minimum number of non-decorative parts (Including Masterpiece Parts) _/15.
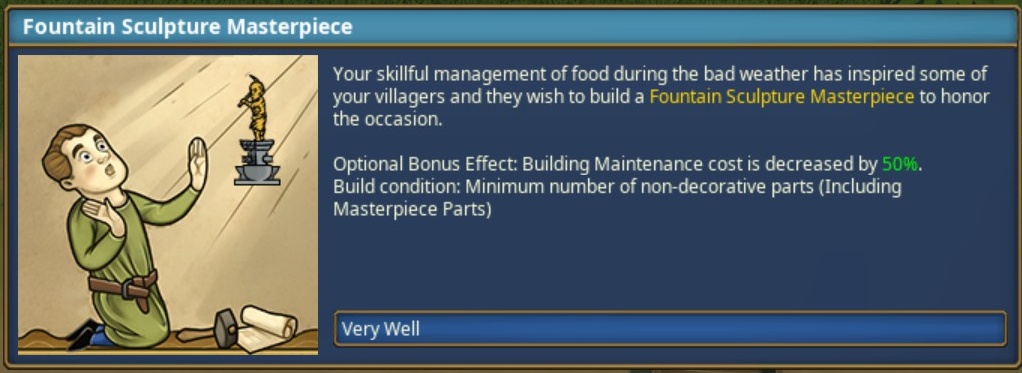
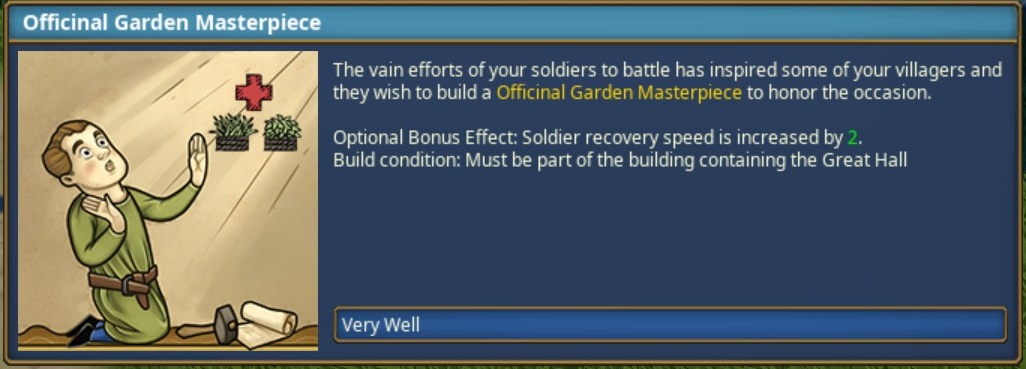
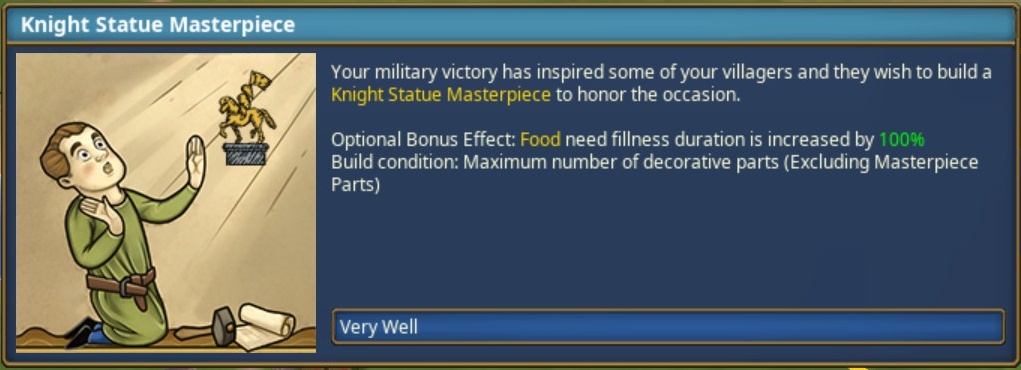
The monuments themselves are hidden from the player until they reach a specific milestone for each monument. Reaching said milestone will give the following prompt.
-
Fountain Sculpture Masterpiece: Survive the bad weather without losing a villager (possibly not letting anyone go hungry either). Regardless this is one of the easiest and the first you will likely receive.
Officinal Garden Masterpiece: Send your army onto a mission and have some return wounded. This will happen randomly and fairly quickly once you build a keep and start amassing troops.
Knight Statue Masterpiece: Fully complete a campaign. I do not believe it is limited by difficulty such as :Easy, Difficult, or Extremely Difficult. To fully complete a campaign it will be the third wave of your mission, if you succeed you should obtain the monument.
Automated Fountain Masterpiece: Simply reach a certain threshold of selling goods through trade. This achievement (like the others before it) is so easy I could not pinpoint how much this amount is or if it is accumulative or weekly. Regardless, this will be an easy monument if you simply sell resources.
Gem Encrusted Cross Masterpiece: Reach 50 splendor with any monument. This is easiest to do with the church, given all the parts optional for splendor.
Shrine Masterpiece: Obtain a Prior. A Prior is found by building the Monastery and housing enough Monks that eventually one may be promoted to the Prior. I believe the threshold is at least 10 Monks, but I may be mistaken.
Lush Garden Masterpiece: Have a Minstrel visit the tavern. This is accomplished by simply having more parts than needed, I was able to achieve this with a tavern that had no functioning room making it impossible to actually sell the alcohol. This means that the Minstrel is drawn by having things like the stables, kitchen, or other added pieces; and NOT on how many patrons you are actually getting.
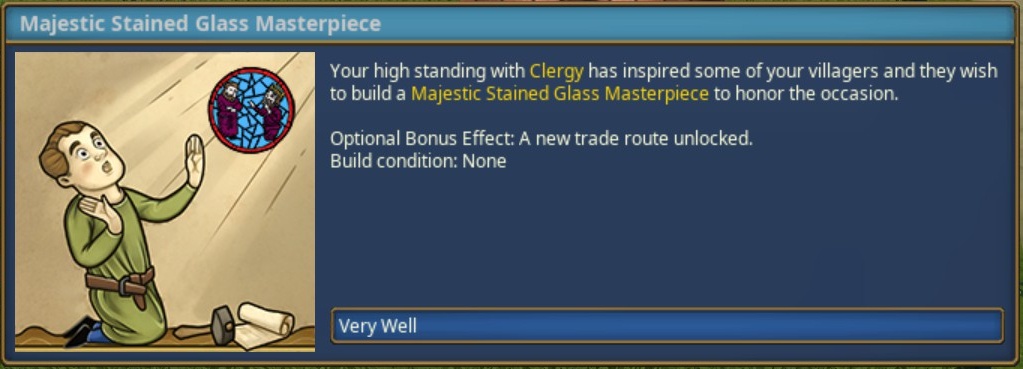
Majestic Stained Glass Masterpiece: Have 50 Influence with the Clergy. Influence is the number above your Splendor with every faction and what is used to purchase all the bonuses. If you save 50 Influence with the clergy this monument will trigger as a new part for any Church.
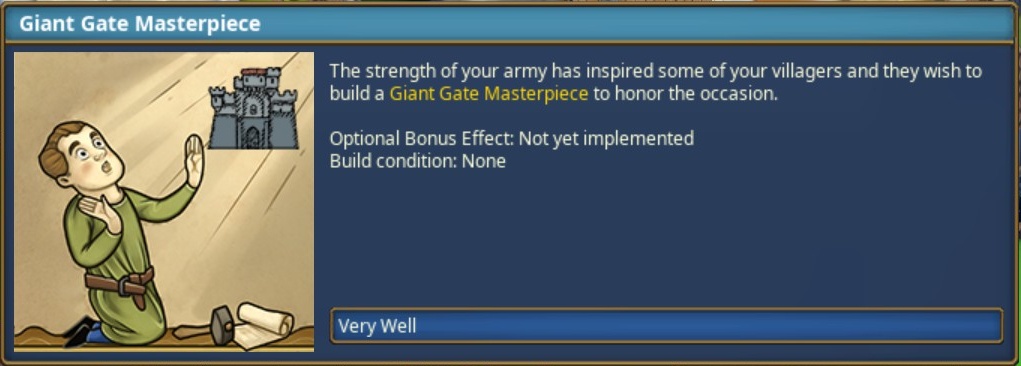
Giant Gate Masterpiece: You reach this milestone by having 6 Knights within your army. Every Knight requires at least 5 Soldiers under him meaning you must have at least a total of 36 troops within your ranks.
An Adviser named Tom Simpkins (Full Walk-through)
What Am I Missing? (Simple Tips and Features)
Ello M’Lord, So you have a village of your own but you can’t seem to slow the population flow? Are you running short on food and luxury goods? Will no one dare stay in your village? Well did you know…
Immigration
- Immigration can be stopped at any time by simply ticking the box in the ____ panel.
- Immigration has three factors to it: Happiness, Living Space, and Employment. They are as follows..
- Happiness is simply meeting all the desires of your population: providing food, religion, housing, etc.
- Living Space is about making sure that ALL your villagers are in their appropriate housing. When a villager is promoted from a Serf to a Commoner they must live in a location that is marked at least HIGH
- Employment is determined by how many members in your community do not have a job, having everyone perform one duty will keep this at max demand. Monks in the monastery count towards this number!
- You can see what factor is lowering your immigration by hovering over the ticked box to enable immigration within the ____ panel.
- Factors have ranges but do not provide numbers so you can see a difference from output with the same label. E.G. You can have High happiness and space, but Average employment resulting in Average immigration pull. You can find the people not working and provide them jobs and still maintain Average employment but increase to a High immigration pull. The takeaway from this is that even if something says its good, doesnt mean that you can’t improve upon it more.
HIGH+AVERAGE+HIGH=AVERAGE
AND
HIGH+AVERAGE+HIGH=HIGH
EXIST
- Just because something is listed as favorable does not mean you are guaranteed: Extreme victories can still fail, and High immigration pull can still yield nobody, albeit both are incredibly rare.
Food
- Nearly every resource gatherer can be stacked on top of the same resource to increase your yields. E.G. Fishermen on a fishing spot or Foragers on a berry bush.
- Fish only appear in ripples on the water, so best to be aware of where your fish actually are.
- Fish always increase during the storm. If you have access to fish on your map, it would be wise to try to focus on it.
- Food is arguably the ONLY resource worth purchasing. Never sell them, just always offer to buy just in case you start to tank during moments of bad weather.
- A stratified economy is a HAPPY ECONOMY. It is far easier to keep serfs and newcomers for manual labor and food jobs since they will be farthest from your village centers, and use commoners and citizens for jobs that can be done at your village center. This is because at rank commoner and up, you will need to provide clothing and two food resources to every individual. This becomes overwhelming VERY fast if not careful.
Housing
- Your villagers will demand HIGH housing attraction at rank Commoner and Citizen, so only be ready to promote when their household is already in an attractive area.
- Many villagers will jump from house to house to get closer to their job and meet their needs more but eventually they will stop and decide that it is better to walk 150 meters from their house to place of business and become incredibly unproductive.
- The best solution is to evict villagers when they change jobs or place of business. If you have a bakery move be sure to evict the baker so they will "reset" into the best available housing. If you have a transporter become a shepherd? You better evict him or you will be lucky for him to sheer two sheep a job shift.
- As annoying as it to stay on top of residency of villagers there will constantly be buildings left abandoned as well, especially from serf to commoner. I find it better to just destroy the building altogether and free up the space.
- If ONE villager is not in a house that meets their needs because they are a commoner or citizen in Average or Low housing, you will likely NOT receive any new villagers, you must always be mindful of this when you grow and expand.
- All housing can be drastically improved with the third building tab. Placing bushes, trees, fountains, statues, and lastly markets will yield high attractiveness in increasing order. E.G. bushes provide some low boost, while fountains are incredibly high boost
- Most jobs will lower attractiveness, that is what the red circle on placement for them represents, keep these away from your village and those without circles at your village center.
Economy
- All buildings and jobs will have a max stack of "50" with a warehouse or granary using the stack of "100". Villagers will sometimes go over this number by a few but at these limits they are told to no longer work or retrieve any more. E.G. A miller will only grab up to 50 wheat and no more. A lumber yard will not collect wood if 50 logs are residing in the camp.
- Not every job is one to one in the production chain, watch their yields carefully and try to mitigate shortages this way. Some are one to one by employees, and others are one to one by building. E.G. one shepherd supplies one weaver’s hut, but two tailors are needed to keep up with the two weavers in the one building.
- Luxury goods are almost solely fulfilled by monks at a monastery: Honey, Wine, and Herbs
- The monastery can ONLY be filled by unemployed men
- Monks without a job will count against your employment.
- If you do not have the religious influence high enough for a monastery you can send soldiers out for raided jewelry or rely exclusively on the beer at the tavern. Either way you will need to use one of your three pillars to progress into citizens.
- The only difference between commoner and citizen is one luxury good so if you can provide them it is best to just promote commoners.
- Wine is by far the best resource you can sell: It is made incredibly fast, the citizens do not use it as much as you’d think, and sells by your citizens for 100 gold and by your trader for 120.
- True to medieval nature, the best way to get rich is a good ole fashioned military campaign. Easy missions provide hundreds of gold bars while difficult and extremely difficult missions provide thousands of gold bars.
- You can’t have an economy if you can’t keep the gains. Build a "treasury" by building a lords manor and making every room a "treasury". By doing this you provide a safety net for your economy because some products take time to make and time to sell. You will see your weekly gains both skyrocket and fall from time to time. This is most common with things like clothing and beer.
- You can’t sell everything, check to see what trade routes are available and what they are willing to buy that you can get rid of. You can’t sell "herbs" for example, do not try to build gardens in the attempt to sell them.
- All products sell for different prices with the general value of nearly everything being "10 gold" but things like berries being "9" and beer at the tavern being "25". Pay attention to these numbers for you can giver the cheaper stuff to the serfs in small one food markets (because it will likely be easier), or you can try to trade it all off and sell things like fish to everyone for that sweet extra profit of "1 gold"
- You can’t buy everything either. You should be able to buy most food sources but you will rely on certain resources that may not be available for purchase (like clothes). DO NOT NEGLECT THESE PRODUCTS
I hope you enjoy the Guide we share about Foundation – Crash’s Comprehensive Guide to Your “Foundation”; if you think we forget to add or we should add more information, please let us know via commenting below! See you soon!
- All Foundation Posts List










Leave a Reply