
To be the Red Power Engie, you must: be reliable, be capable, and above all: have attitude. See if you have what it takes to harness the true powers given to you by DRG.
A Man or a Monster?
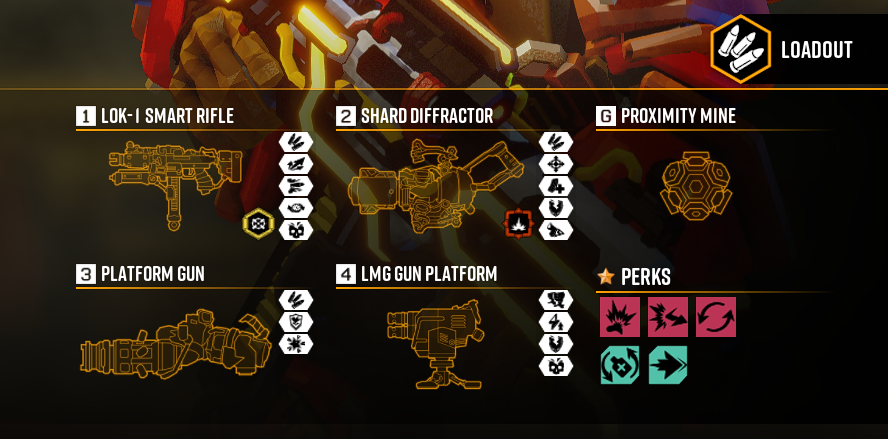
This loadout can wreak havoc on everything, whether your style is aggressive or defensive. Regardless, you can achieve a kill count that no one can compete with.
LOK-1 Smart Rifle: 23312 Seeker Rounds
This gun makes you the third turret of your turret collection.
Tier 1: Expanded Ammo Bags
The biggest weakness of any great gun is a tiny, small, disappointing ammo pool. Which is why taking Increased Caliber Rounds for a tiny damage boost is significantly worse than two extra reloads. Think about that extra ammo during a resupply.
Tier 2: Zoom Lens
Finding targets is what you’re about. I like to find my enemies easily and destroy Cave Leeches before a scout can shoot any flares.
Macro Lens gives too tight of a scanner (you are Scout-dependent) and CCD Array Add-On doesn’t scan far enough to be reliable against waves.
Tier 3: Super Blowthrough Rounds
Conserve your ammo with this. Shoot the bugs behind the bugs behind the bugs that are behind the bugs. Effective and smart. SMЯT Targeting Software™ is cool (on lower hazards), but is not needed when you should be shooting through everything. Also, Electro-Chemical Roundsis conditional extra damage. Not worth it.
Here’s the math:
Collective damage per bullet with Electro-Chemical Rounds: up to 30.24 damage.
Collective damage per bullet with Super Blowthrough Rounds: up to 84 damage.
Tier 4: Shutter Speed Sensor
Faster lock-on time means you can release your rounds faster. It also plays a very important role with Tier 5. Do not take Aperture Extension.
Tier 5: Unstable Lock Mechanism
Once you place down all 12 locks, all your rounds gain a +20% damage boost, doing a total of 25.2 damage per round, instead of 21 damage. That’s 302.4 damage per 12 round burst, potentially 907.2 damage per magazine.
Collective damage per bullet with this mixed with Super Blowthrough Rounds: up to 100.8 damage.
Potential damage per 12 round burst using this math and logic: a lot.
Electric Generator Mod is super conditional as a target needs a minimum of 3 locks to get zapped, NOT you need 3 locks and all your bullets are tesla super thunder rounds. And Fear Frequency, while effective, doesn’t give you the damage boost.
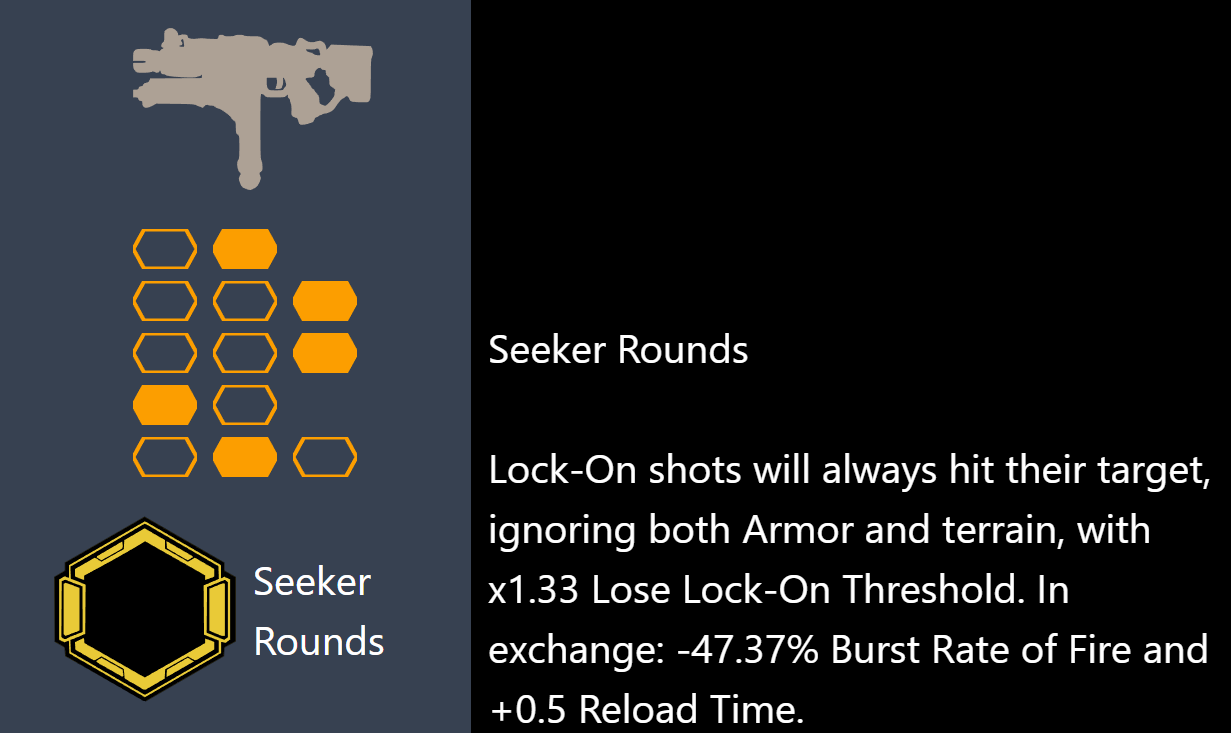
OC: Seeker Rounds
Ignoring armor, terrain, some enemies (because of Tier 3) is the beauty of this OC. When the world gives you no limits, all you can give back is collateral damage… while hiding behind a wall.
Shard Diffractor: 32123 Plastcrete Catalyst
This is DRG’s version of the Power Blaster. POWER ENGIE! FIRE!
Tier 1: Larger Battery
Ammo disappears quickly with this weapon, this option gives you more ammo per resupply. The extra damage fromImpact Splash or Increased Energy Densityis negligible.
Tier 2: Particle Spattering
This modifier gives you the bigger blast radius to fry multiple bugs at the same time. It’s also what makes the OC so effective. Soft Tissue Disruption is only useful for a handful of bugs and is not really needed.
Tier 3: Aluminum Foil DIY
We are going for the most ammo per resupply, here. I know Open Structure Battery allows you to shoot faster, but it’s not that needed. Just be ready to commit when you shoot the beam.
Tier 4: Nitrogen Vaporizer
Some people would say High-Intensity Heating is better, but armor breaking would theoretically deal more damage, plus help your friends deal more damage. Everyone wins.
More damage how? If a beam tears off a piece of armor, that’s 35 damage done to the bug for this gun. Melt off many pieces of armor, it’ll be 35 * X. Theoretically deals more damage.
Tier 5: Dazzler Module
Hydrogen Rupturing is like a special event that doesn’t happen often enough, and when it does, you might forget about using the beam entirely. Bio-Mass Converteris great, but slowing enemies is better for any reason. For me, it’s because of the OC.
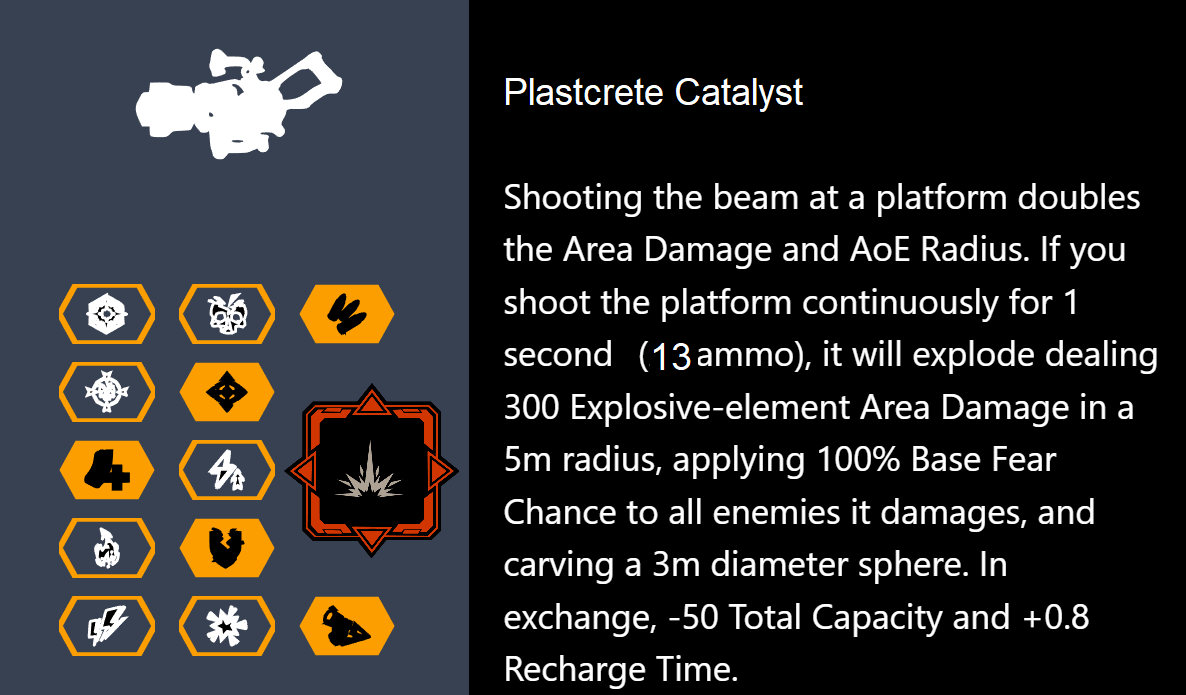
OC: Plastcrete Catalyst
Any enemy that walk into the 4.2 radius will slow down, bunch up, and be forced to take the explosive damage that happens 1 second later. This is effective against any enemy, even after resistances are applied.
LMG Gun Platform
Your turrets really dish out the DPS. Say “goodbye” to your turret ammo pool.
Tier 1: Gemini System
DPS and targeting multiple enemies. It makes ammo disappear fast, but your allies will thank you.
Tier 2: Quick Deploy
There is no sane engineer who will spend 4 seconds to deploy a turret, let alone two.
“But there’s an option for more ammo!”
Those bugs will eat you alive before you can use any of that ammo pool if it takes FOUR SECONDS to deploy a turret.
Tier 3: Penetrating Rounds
The AI is not super reliable for this one, but whenever a piece of armor breaks off, your turrets will deal 44 damage. That’s how we (sort of) save on ammo.
Tier 4: Defender System
I know the Hawkeye System gives you 360 degrees of safety, but having a specific scope of attack allows the turrets to be more effective and deal way more damage. Win-win.
Proximity Mine
Face it: this mine is better than the rest.
It explodes FOUR times, implements fear in bugs, and is RECOVERABLE if it hasn’t exploded once.
If I’m full on grenades and a resupply is called (and needed), I’ll throw two mines wherever. If they go off, that’s OK. If not, the mines are there to be picked up whenever I need them.
Platform Gun
The only things worth mentioning is to go for the extra ammo plus the bug repellent so you can make a platform “barrier” whenever you need to redirect bugs.
Tips & Strategies
- Use the LOK-1’s lock curves to aim for weak spots and hit multiple enemies.
- The LOK-1 can damage Oppressors from any angle.
- The Power Blaster’s Shard Diffractor’s beam is perfect against swarmers and generally anything.
- The Power Blaster’s Shard Diffractor is even stronger when shot at platforms.
- Plastecrete Catalyst can be used for mining albeit you will need to be desperate.
- Plastecrete Catalyst explosions are more ammo economic than holding the beam on a target.
- Plastecrete Catalyst explosions can be used multiple times on a platform so long as there is a part of a platform left to shoot.
- Proximity Mines can be recovered if they haven’t exploded.
- Accidental/Premature platforming can be weaponized through this build.
- Don’t forget to call your turrets back into your pocket if you are no longer using them. It will auto-reload them.
Wrapping up
This build has served me well. The best part of this build is that it can mold to your aggressive or defensive playing style. I hope you enjoy this one!
This is all about Deep Rock Galactic – Red Power Engine Weapon Guide; I hope you enjoy reading the Guide! If you feel like we should add more information or we forget/mistake, please let us know via commenting below, and thanks! See you soon!
- All Deep Rock Galactic Posts List



Leave a Reply