What You Will Need
- A paint program that uses layers, such as Photoshop. Adobe offers different purchase plans, including one for $10 a month.
- Google Maps Downloader ($49) or a freeware proggie, if you don’t want to pay. I’ve tried them all, and GMD is worth the money if you’re invested in creating image overlays. The option is to copy/paste the street data from Google Maps and then assemble it into a paint program
- IrfanView (Optional). This powerful freeware image manipulation software is free.
Capturing The Land
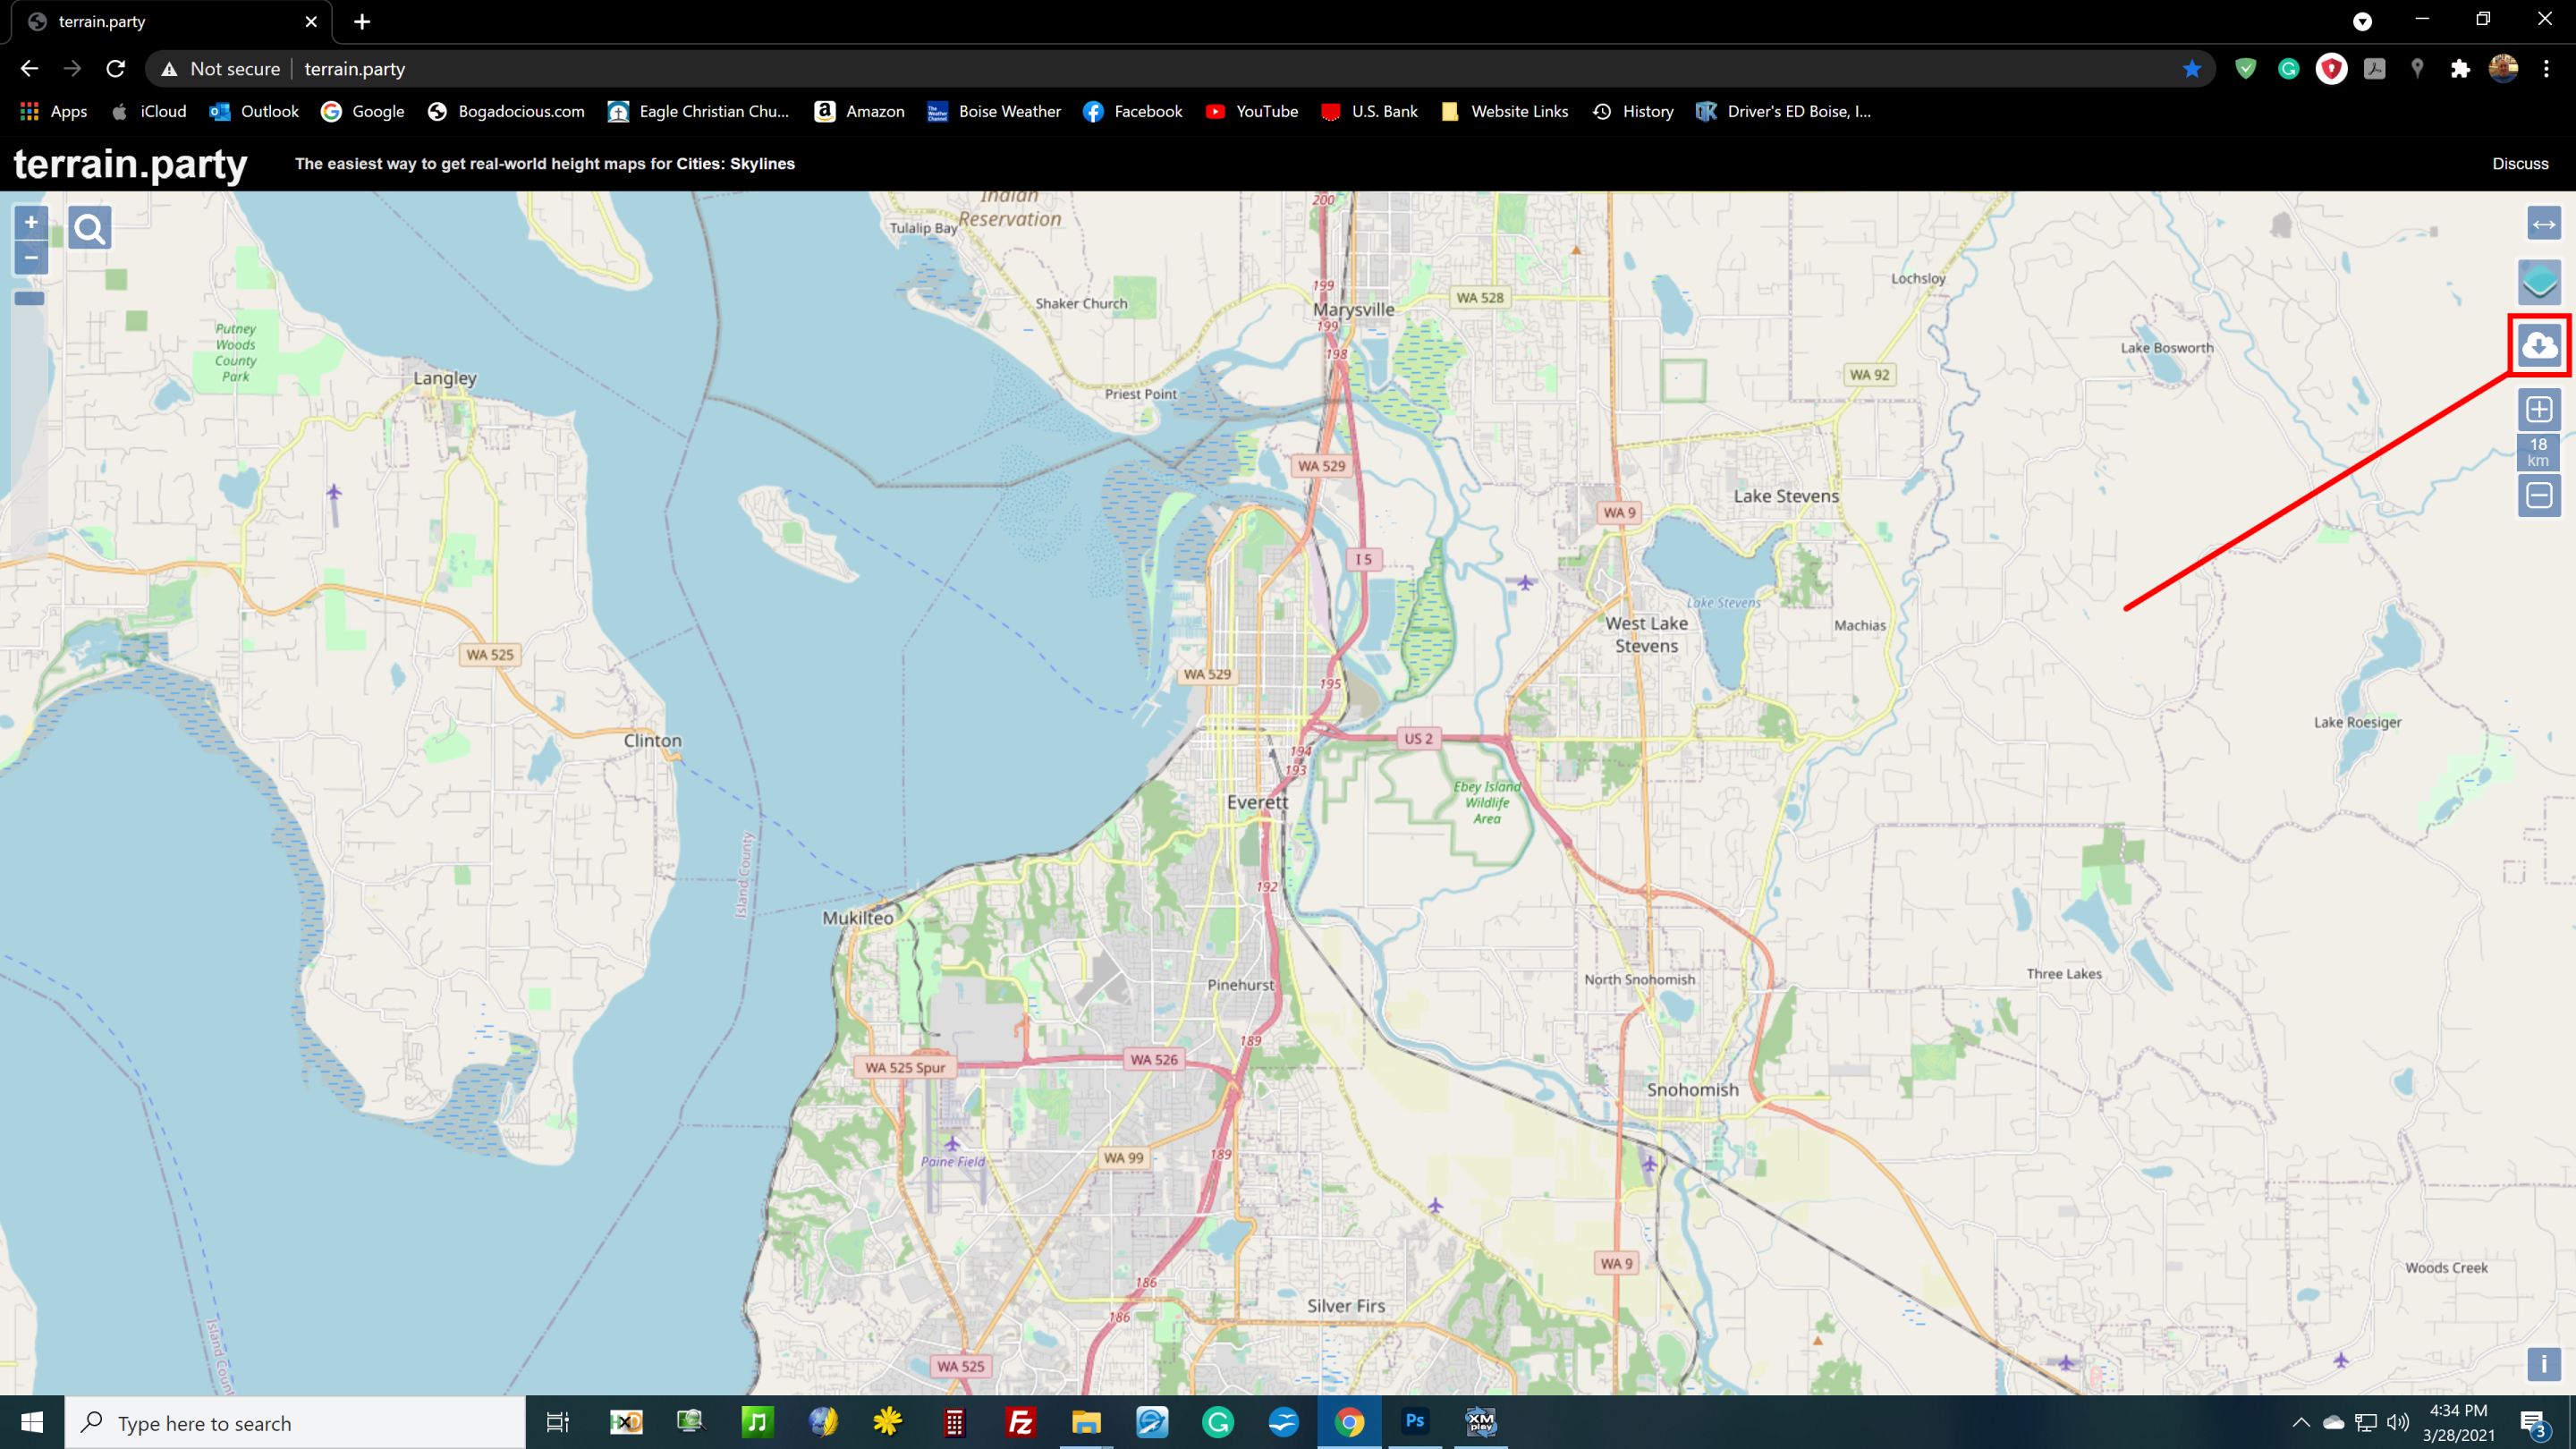
1. Once you’ve decided on a city or area to capture in Terrain.Party (TP) go there as you normally would. For the purposes of this tutorial, we’ll be using Everett, Washington, a North Seattle subdivision.
Tip
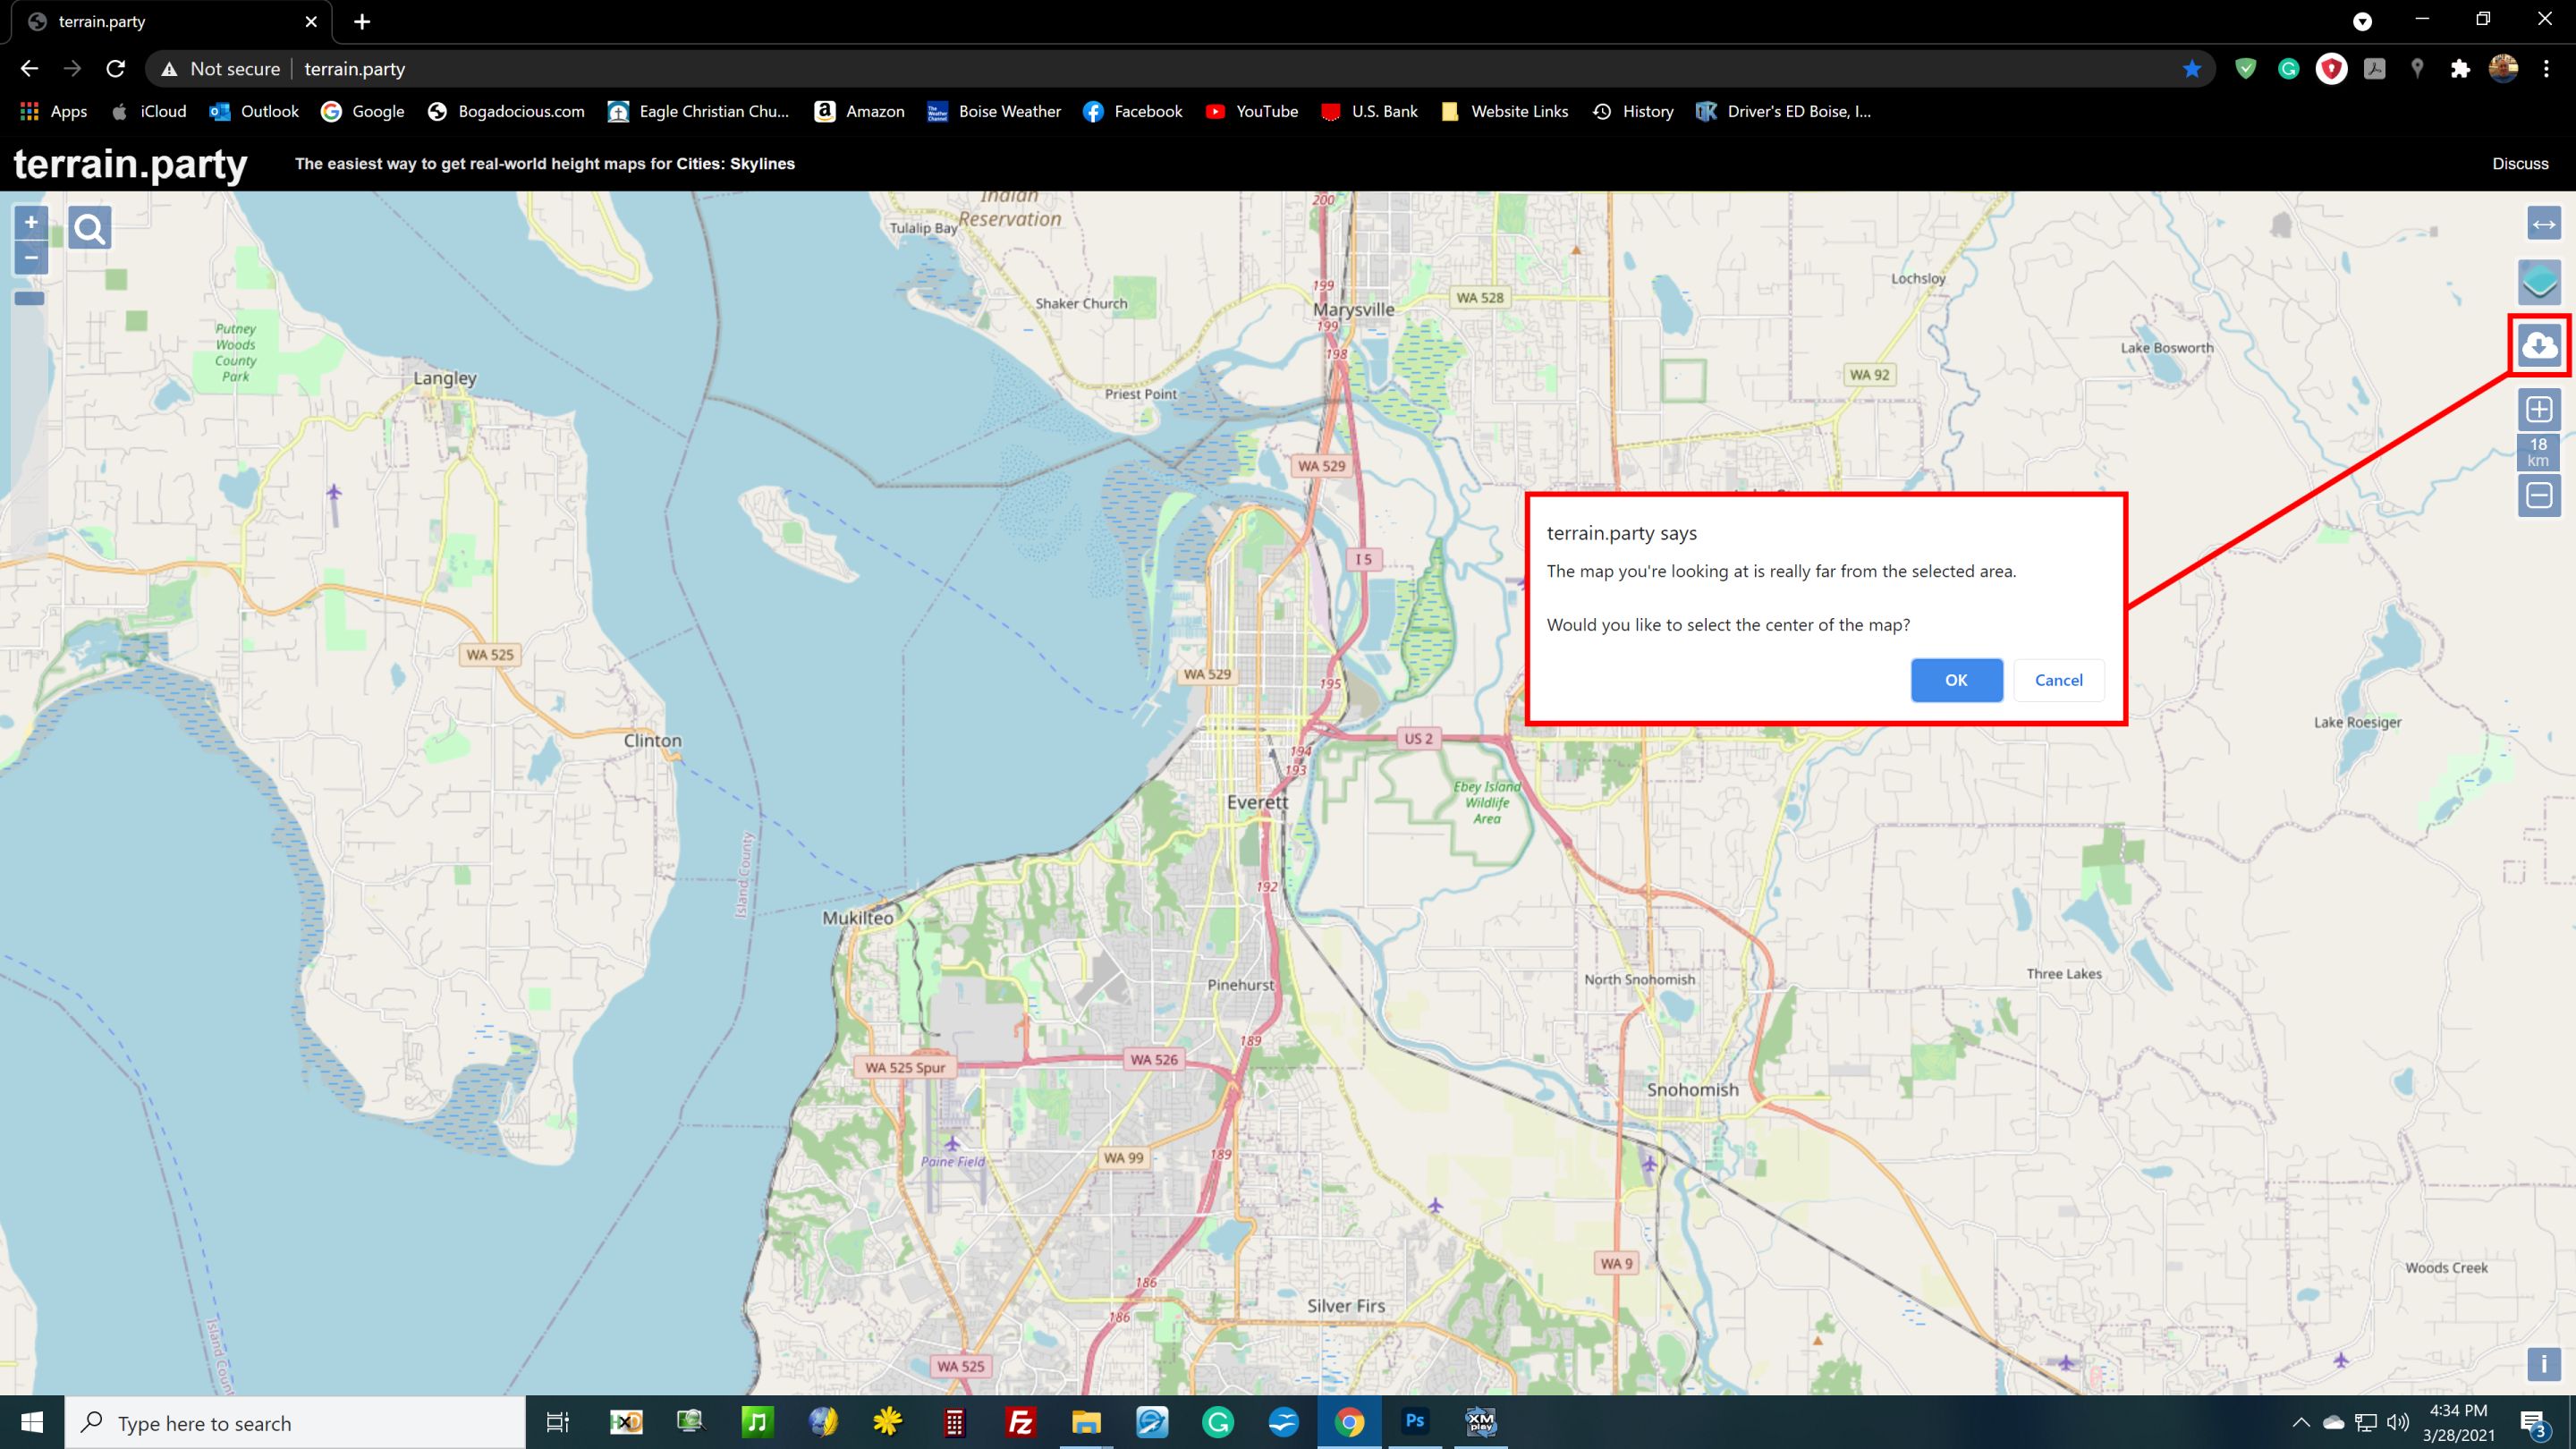
Instead of dragging the blue square in TP, simply go to your desired location on the world map and press the cloud icon.
When the name dialog comes up, type in Everett and hit ENTER. Adjust it accordingly.
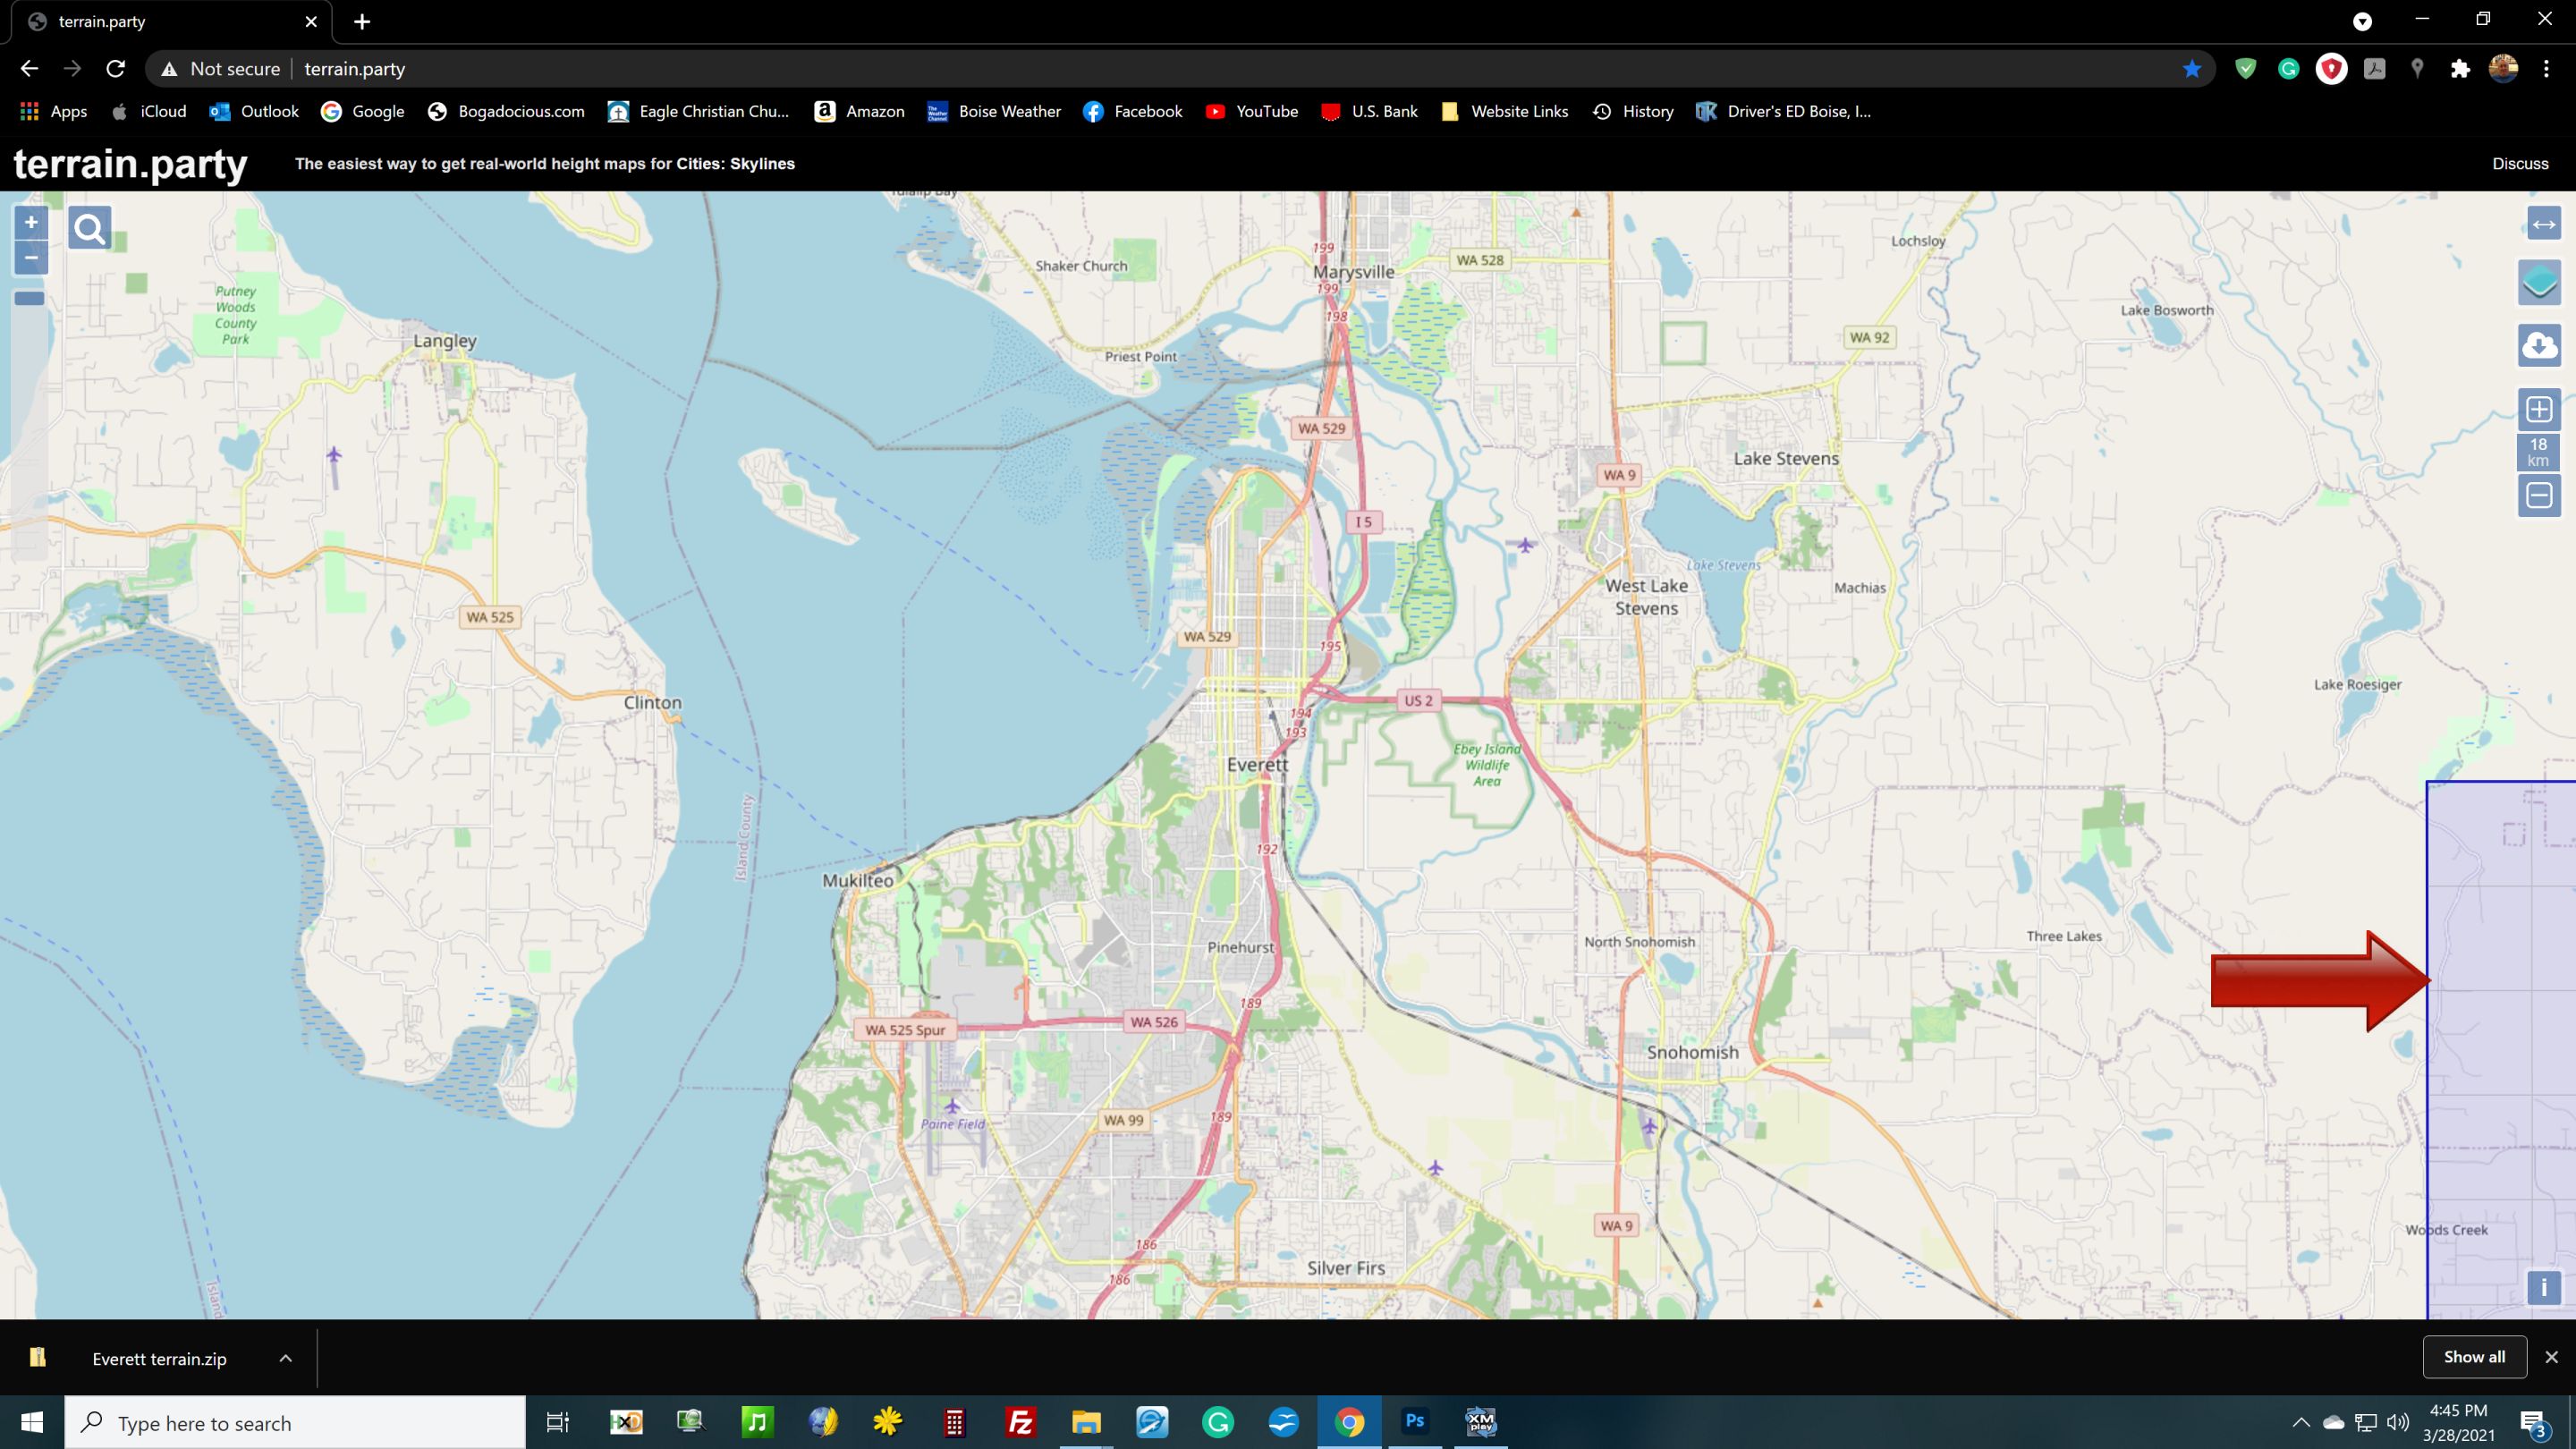
2. Press the Print Screen key on your keyboard.
3. Make sure TP is set to 18 (default).
4. Once you have the blue grid where you want it, name the TP file Everett and save it.
5. DO NOT CLOSE TERRAIN.PARTY.
6. Fire up Photoshop.
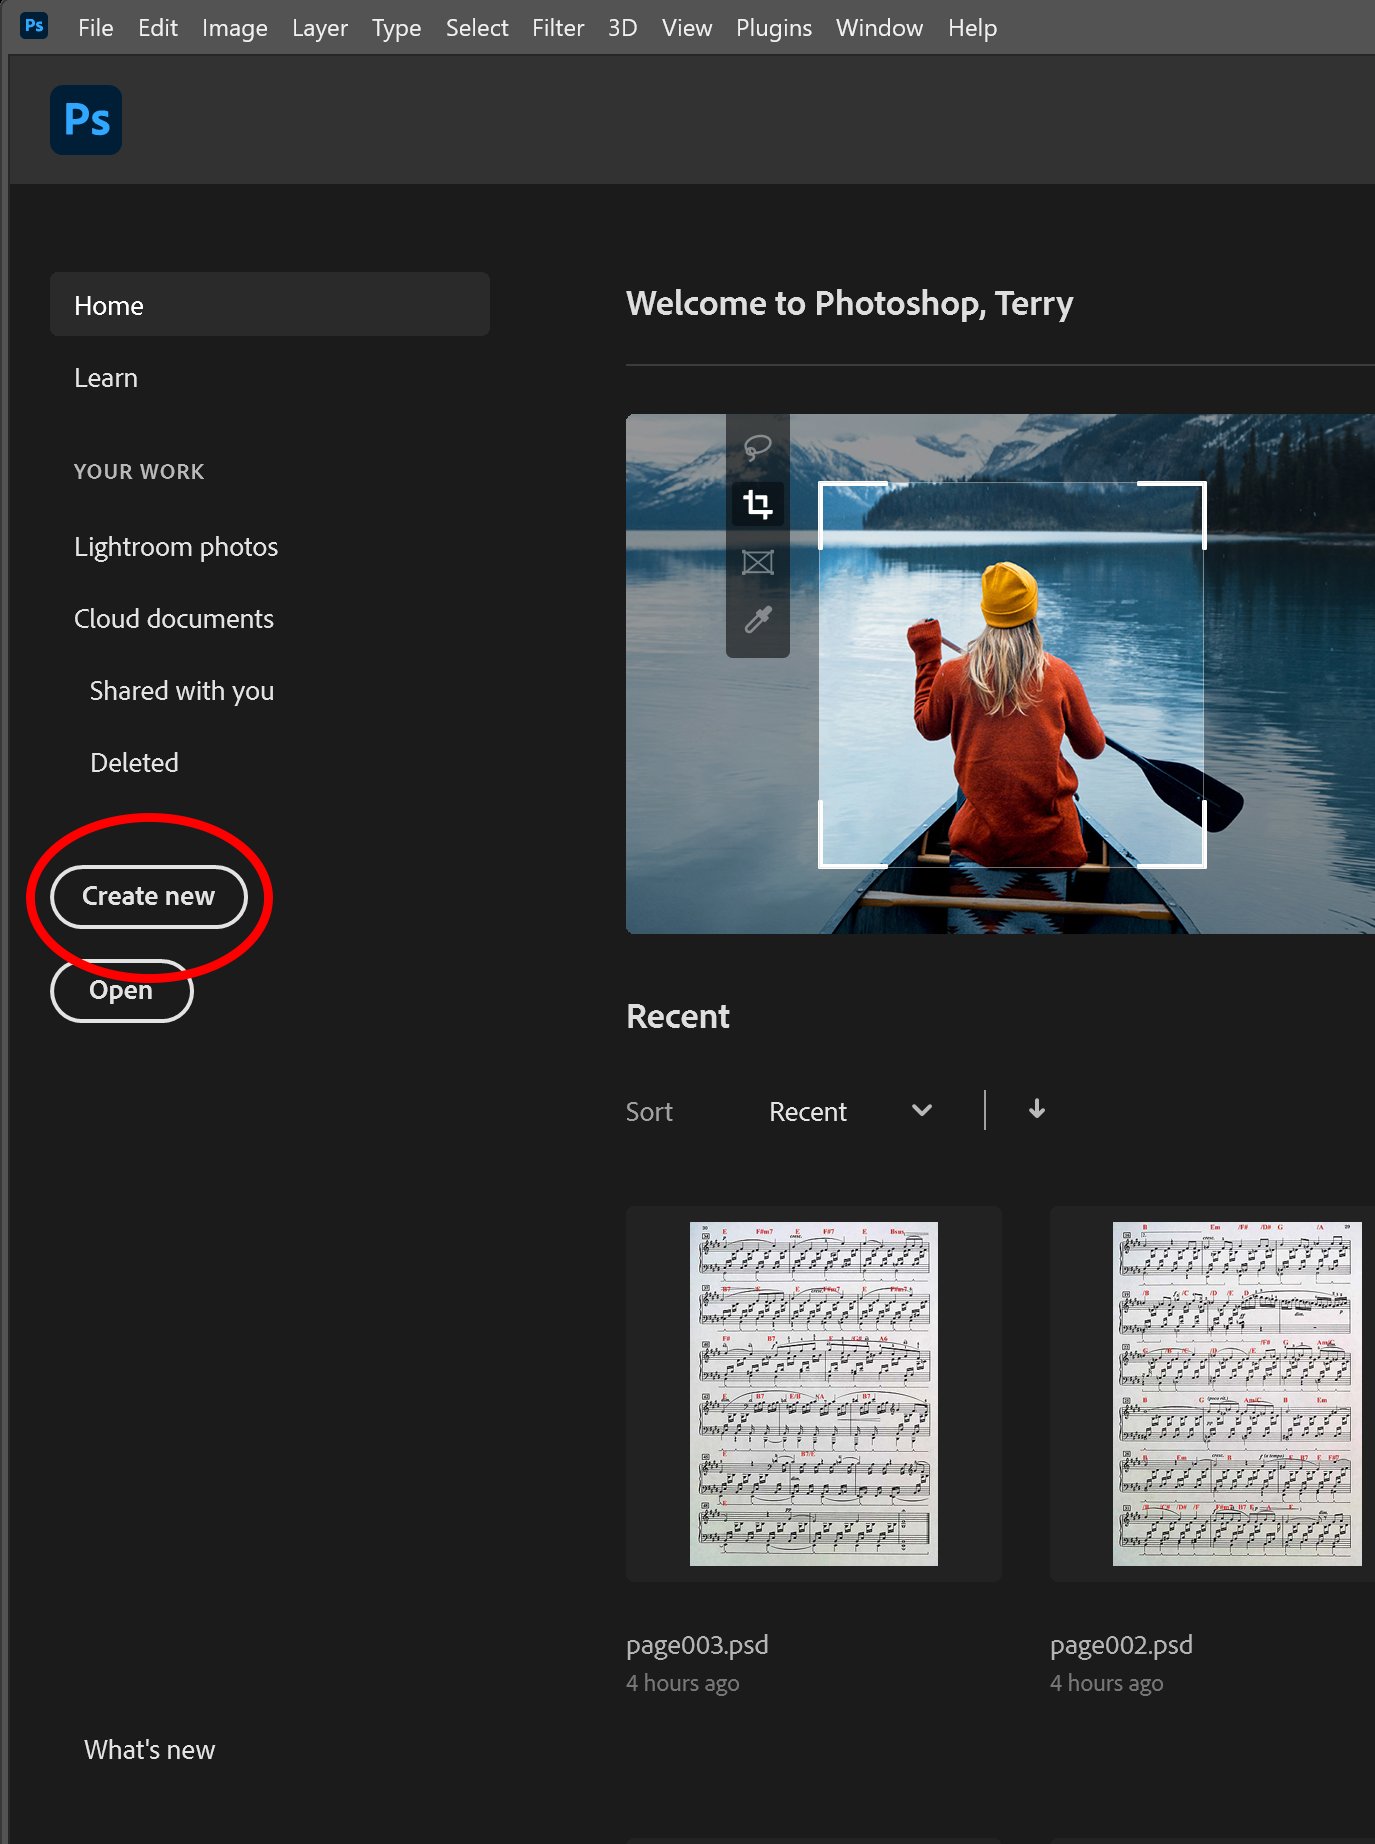
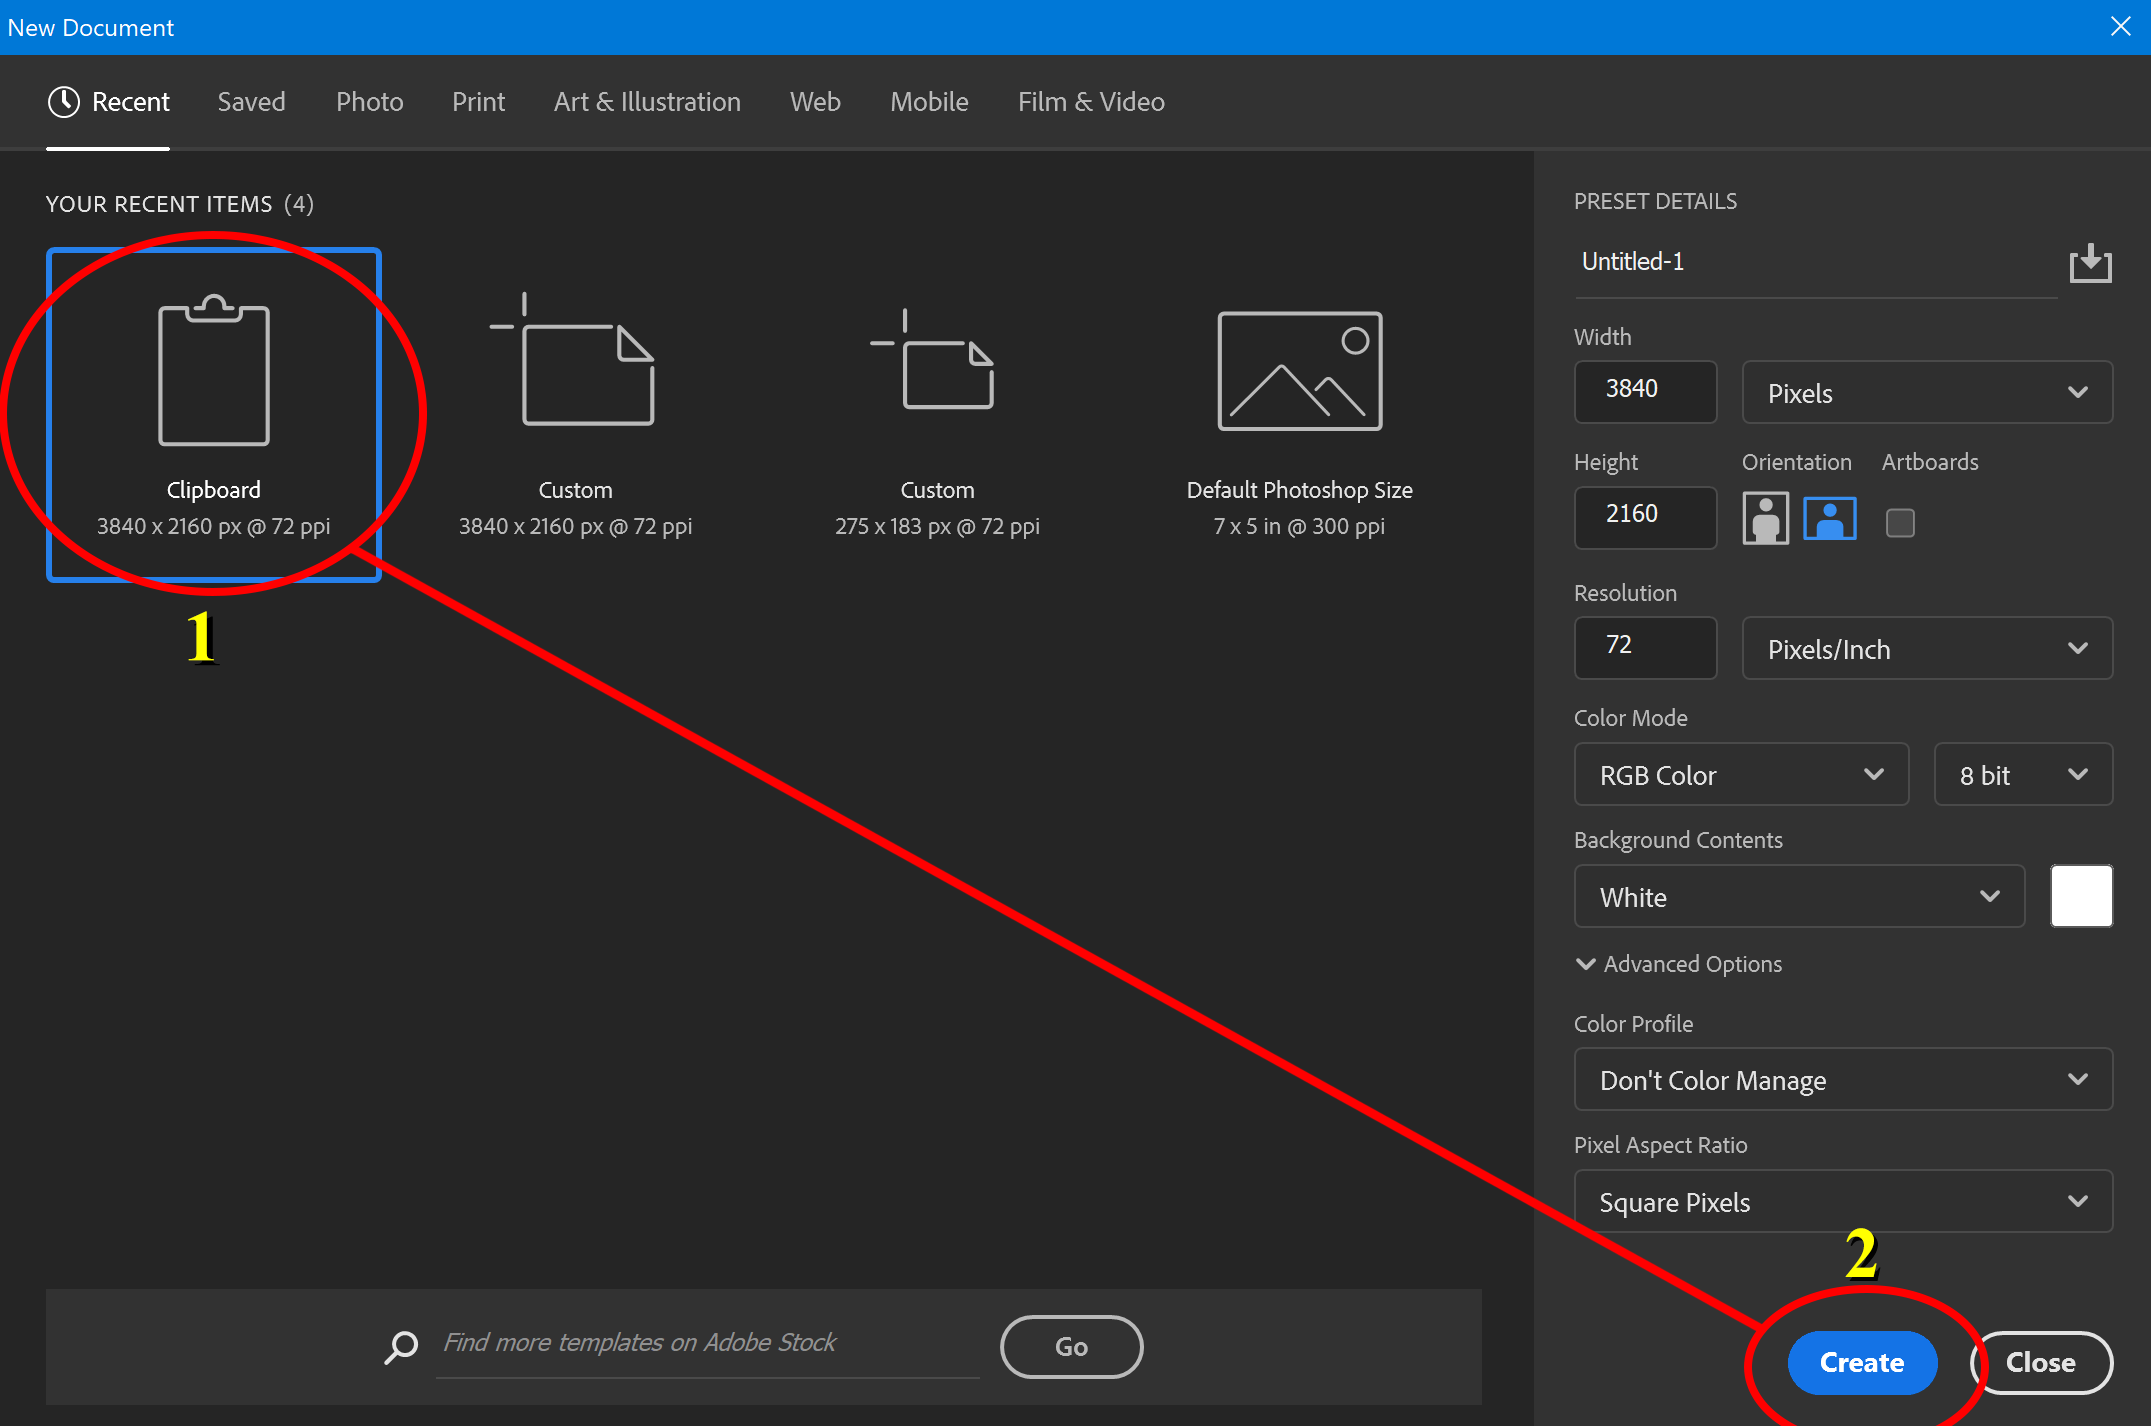
7. In PS, press Create New.
8. On the next screen, press Clipboard and then Create. Press CTRL-V to paste the screen shot. Leave this screenshot open in PS. Save it.
9. Return to Terrain.Party. DO NOT MOVE THE SCREEN.
10. Click and drag the blue grid out of the way.
Creating The Height Map
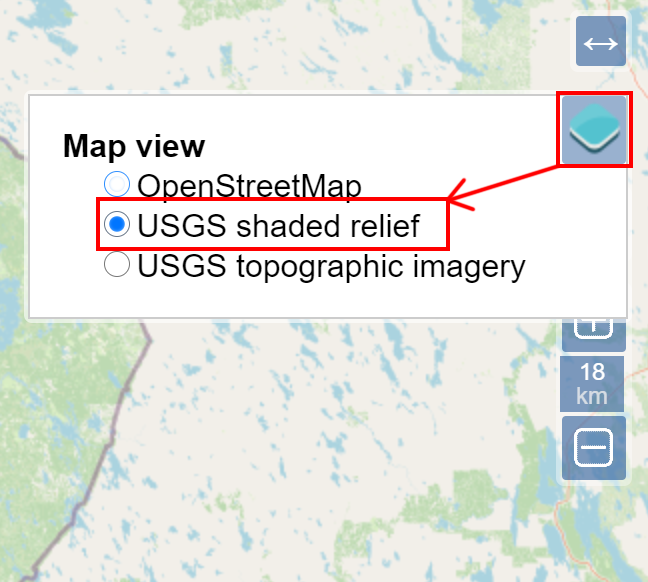
11. Click on the blue icon in the upper right corner of the screen.
12. Select USGS Shaded Relief. The map should turn into a gray-scale height map.
13. Take another screenshop of this screen.
14. Create another file in PS, following steps 2 thru 5.
15. You should now have two layers in PS. Drag the newest screenshot to the top of the layers screen.
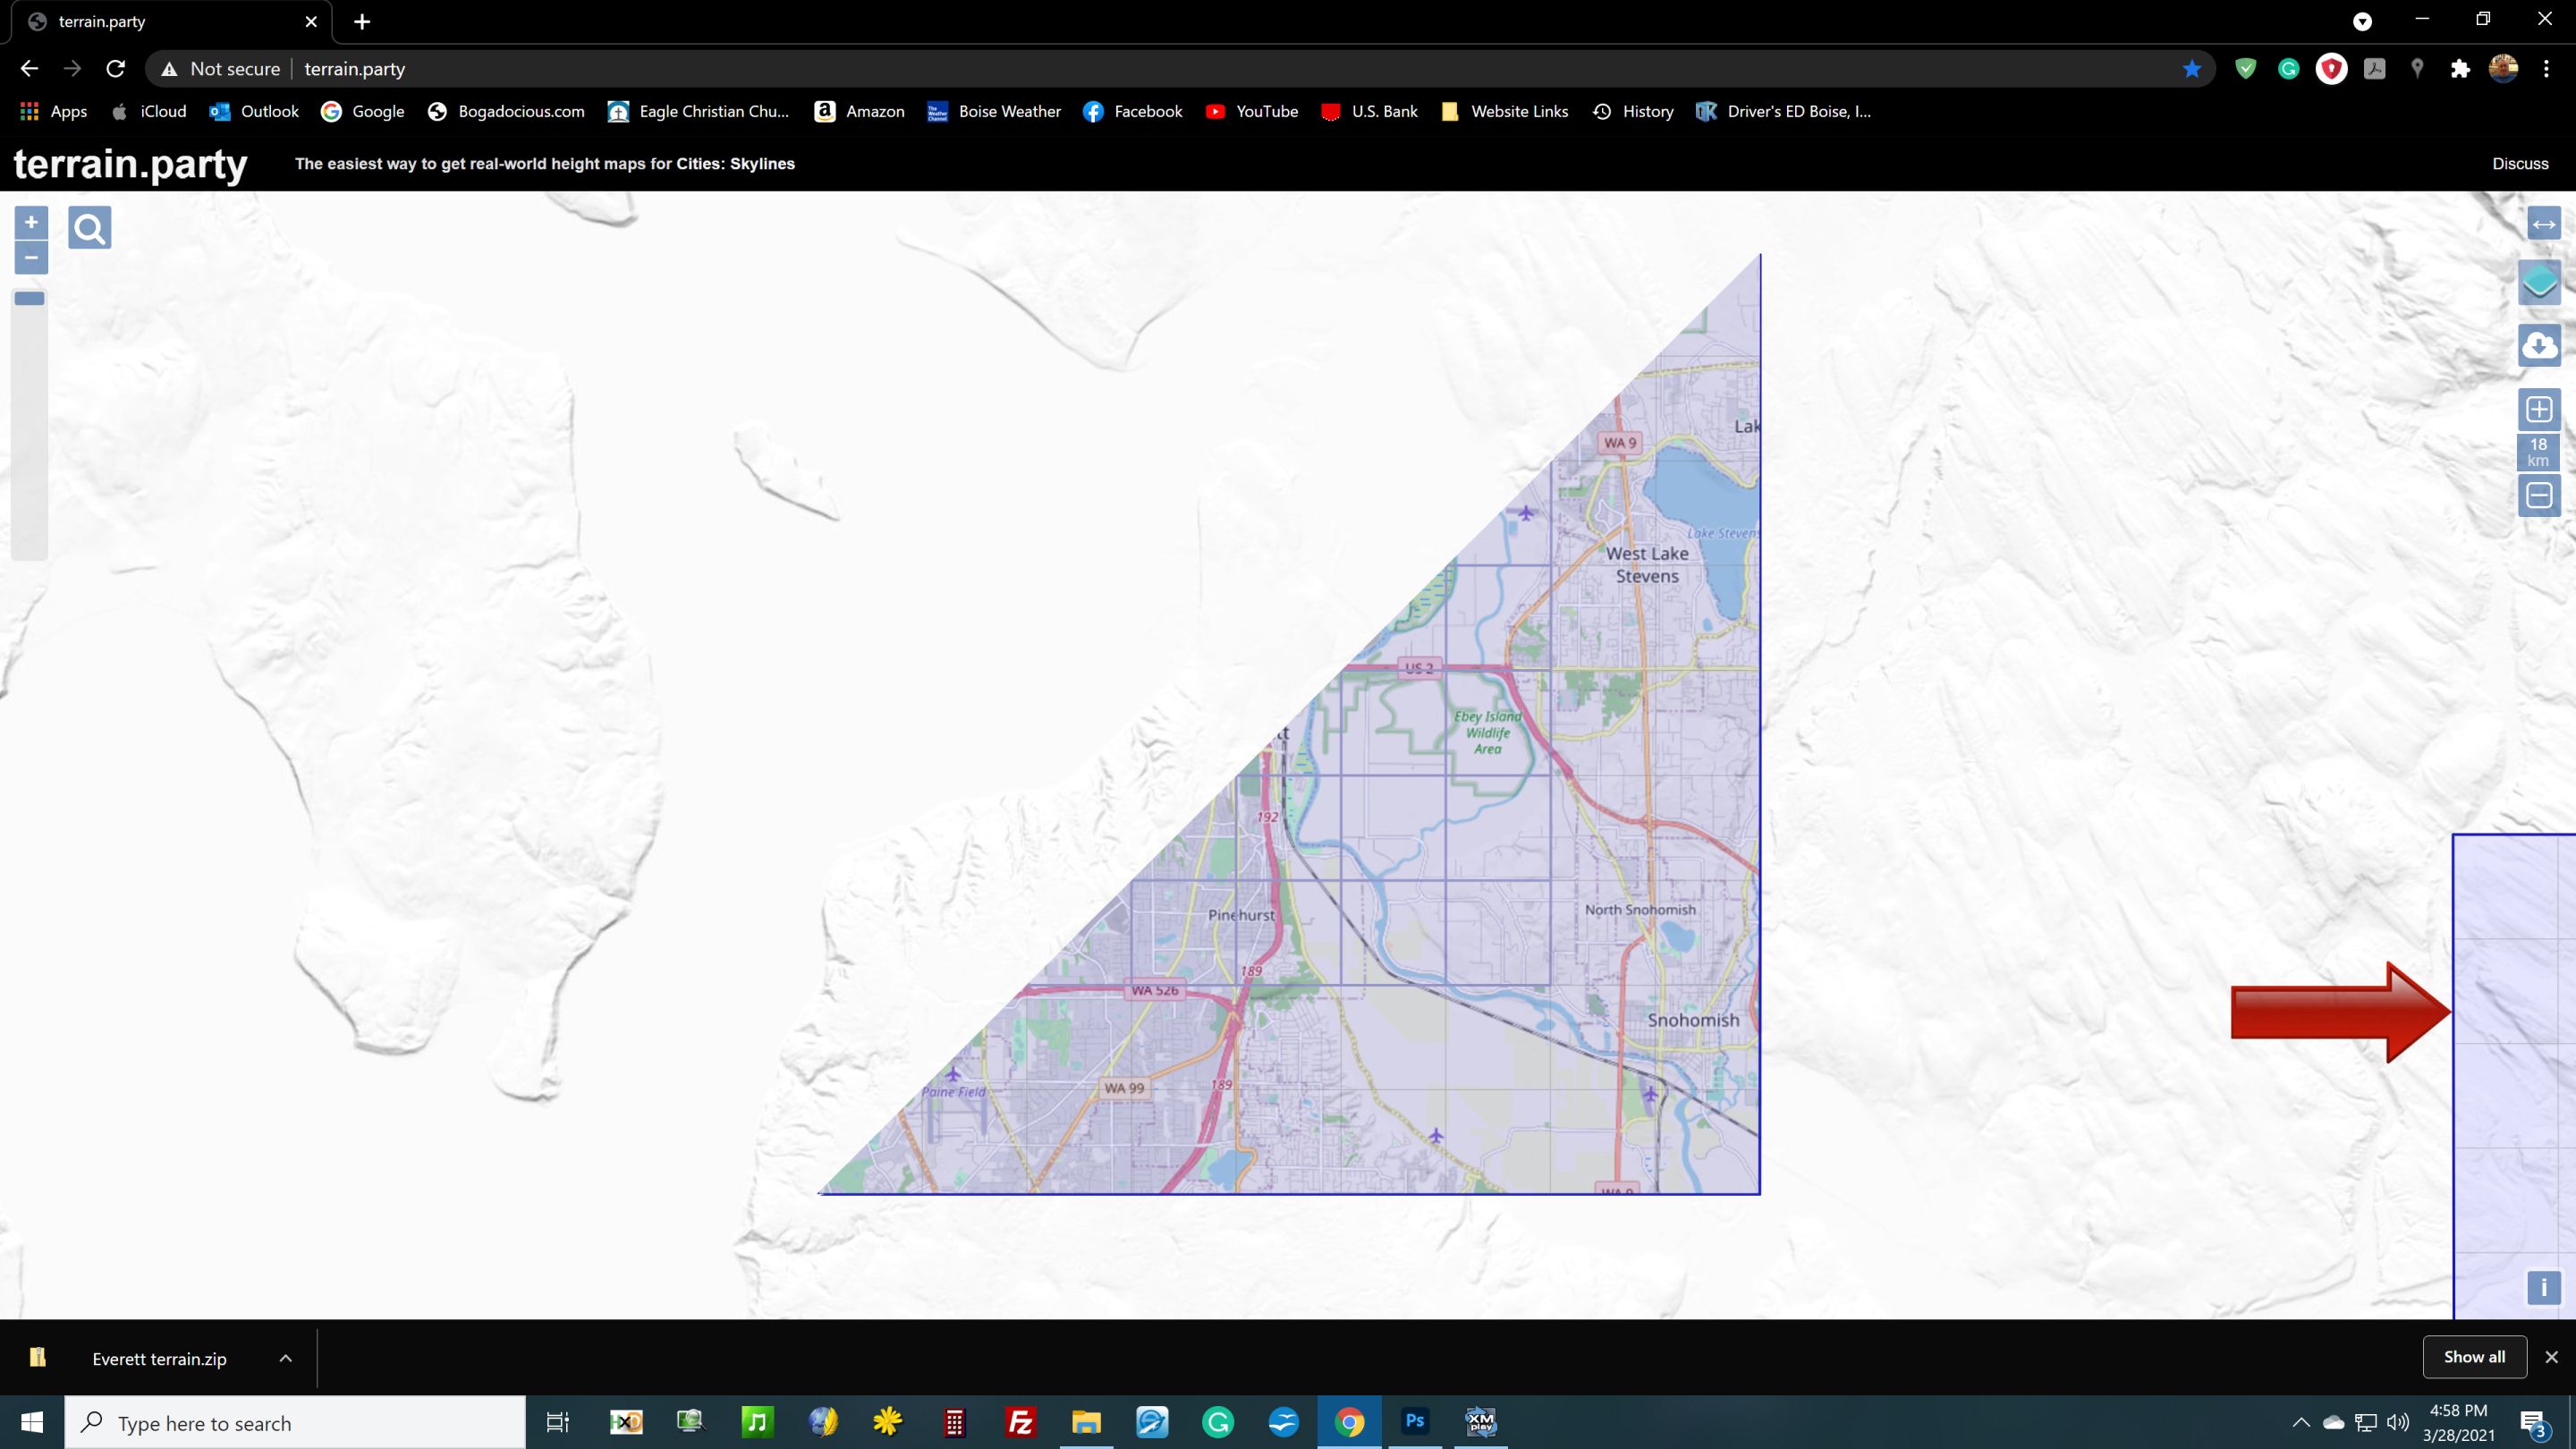
16. Engage the Clip tool. Move the handles so that only the blue grid in clipped. Hit ENTER or press the checkmark icon at the top of the screen.
The screenshot shows both layers, one without the blue grid, the other with it. Note how in the screenie, the actual blue grid is moved away from the capture area.
17. The clip operation should have affected both layers. If not, make sure both layers have the “eyeball” showing.
18. You can now delete the screenshot with the blue grid on it.
19. Save the newly clipped heightmap.
20. Convert the screenshot into a 16-bit greyscale. Image/Mode/16-bits/Grayscale.
21. You must reduce the image resolution to 1081 x 1081. Save this file to the following folder:
C:/Users/Name/AppData/Local/Colossal Order/Cities Skylines/Addons/MapEditor/Heightmaps/Everett.png
Creating The Overlay
Unless you’re doing an island or vast stretch of featureless terrain a Real World map is worthless without an overlay image. A proper overlay shows the creator where to place roads, tracks, etc.
1. Terrain.Party saved your HM coords in Everett.zip, to wherever you downloaded it.
2. Open this file.
3. You’ll see a set of four numbers, which is the coords for Everett. There are no attached heightmaps, obviously. But, hey! You already created one!
4. Fire up Google Maps Downloader.
If you cannot afford the $49 for this most excellent program, send me an email with the coords. I will generate the HM and provide a D/L link for you.
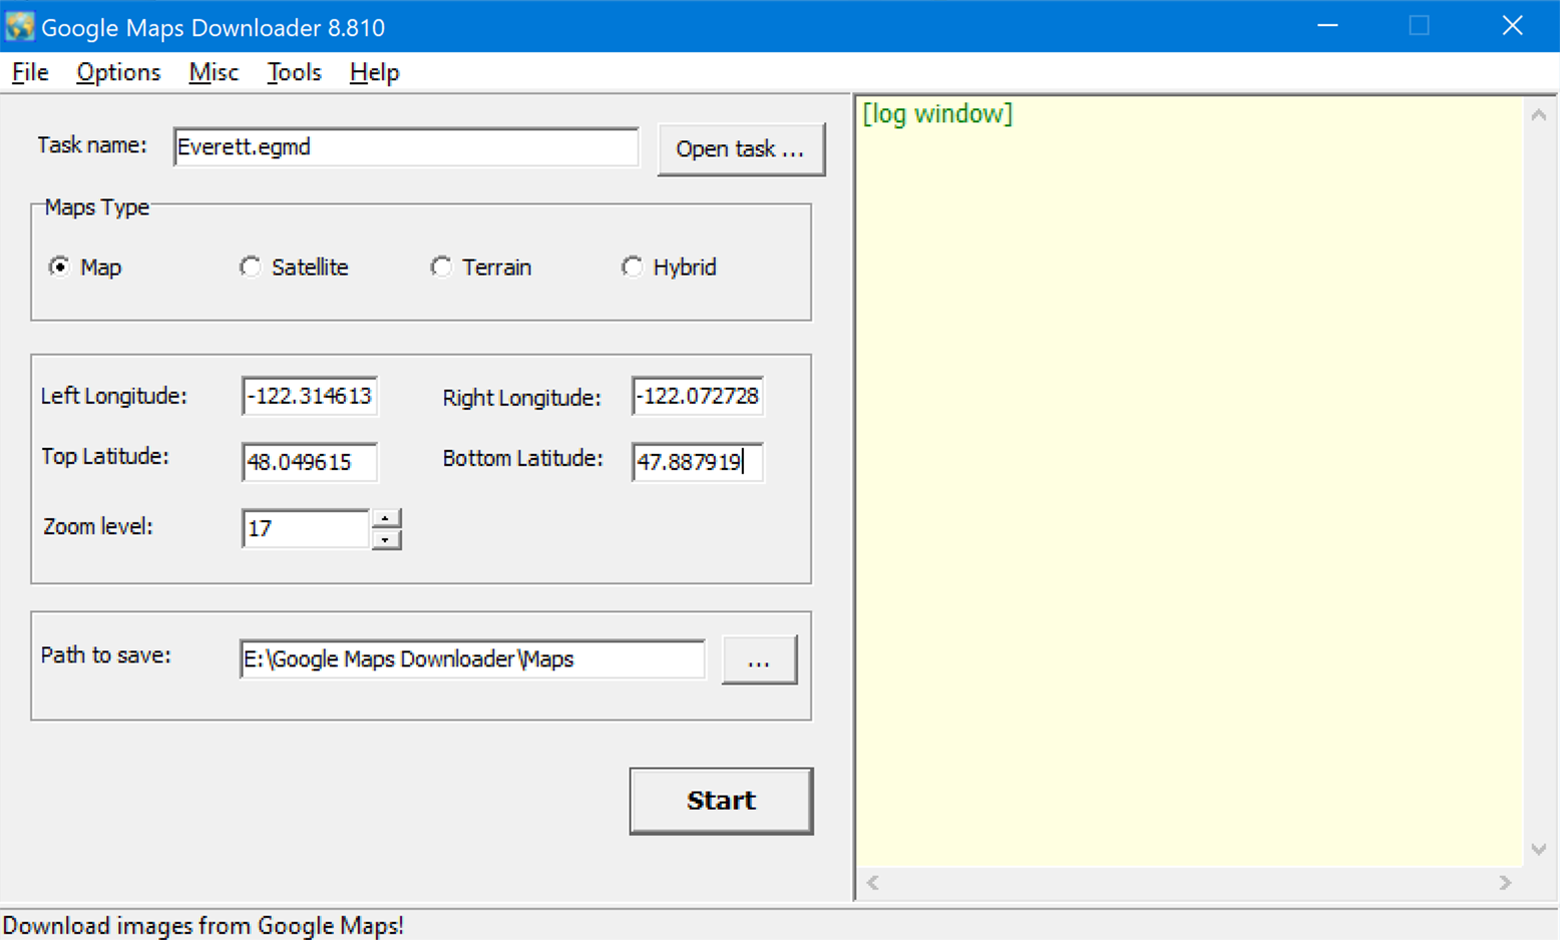
5. Enter the coordinates from the file saved by Terrain.Party. The numbers go into the Google Maps Downloader (GMD) in the following order:
A Zoom Level of 18 will create an image that most image processors can’t handle.
The 1st number goes into the RIGHT long.
The 2nd number goes into the TOP lat.
The 3rd number goes into the LEFT long.
The 4th number goes into the BOTTOM lat.
6. Press START. Depending on the computer, it should generate the tiles in several minutes.
7. Once finished, go to the Tools menu in GMD and select Combine. In Task Name, press the Open Task button and choose Everett.egmd. This will generate a complete map for your overlay.
Final Steps
GMD’s compiled map is too large for CS to read. Resize it in either PS or IrfanView to 15000 x 15000. Save the overlay in the Files folder located in /Steam/SteamApps/Common/Files. I don’t know why the devs decided to store the heightmap in a user profile and the overlay in the Steam game folder.
Until Terrain.Party comes back on-line or someone decides to replace it, we’re stuck with workarounds such as these. Enjoy.
This is all about Cities: Skylines – Terrain.Party Workaround; I hope you enjoy reading the Guide! If you feel like we should add more information or we forget/mistake, please let us know via commenting below, and thanks! See you soon!
- All Cities: Skylines Posts List


Leave a Reply