A guide for getting the PipeWire audio server working with the Open Mic feature
Introduction
The following is a guide on how to get Beat Hazard 2 (and the current demo for 3) to work with PipeWire as the Linux audio server. PipeWire is an advanced audio server that is intended to replace Pulseaudio, and many distributions have already switched over to it as the default (many others have instructions on how to switch over to it). This guide is written with PipeWire 0.3.54, but this should work with any relatively recent version of PipeWire.
How do I tell if I’m using PipeWire
Run
pactl info
from the command line. If you look in the “Server Name” field you should see something like this:
Server Name: PulseAudio (on PipeWire 0.3.54)
Overview
In order to get this to work we’re going to create a virtual sink and then link our running audio streams to it. A virtual sink is essentially a virtual output which does not actually produce output via your speakers, but can be used with other applications (such as Beat Hazard 2). This allows our running audio to go out of our main speakers/headphones and also feed it into Beat Hazard 2 but without Beat Hazard 2 hooking into our main audio output (you can try that if you want, it sounds TERRIBLE).
Requirements
- PipeWire runing as the audio server (obviously)
- At least a minimal ability to use the CLI
- Some kind of PipeWire/Jack configuration utility, like Helvum or qpwgraph (I used Helvum and my screenshots are from that). You can also probably use a similar JACK tool if you know what you are doing
Instructions
Note that these instructions do not persist across reboots. You will need to redo these every time you restart your computer or log out and back in. The virtual sink can be created automatically by editing the PipeWire config files, but since you still need to manually link the audio streams to it I wouldn’t bother.
- Run the following in a terminal in order to create the virtual sink
pw-cli create-node adapter '{ factory.name=support.null-audio-sink - [] node.name=beat-hazard-sink - [] media.class=Audio/Sink object.linger=true audio.position=[FL FR] }' - Start your audio (you can pause it immediately, you just need to start it so that the audio stream gets created
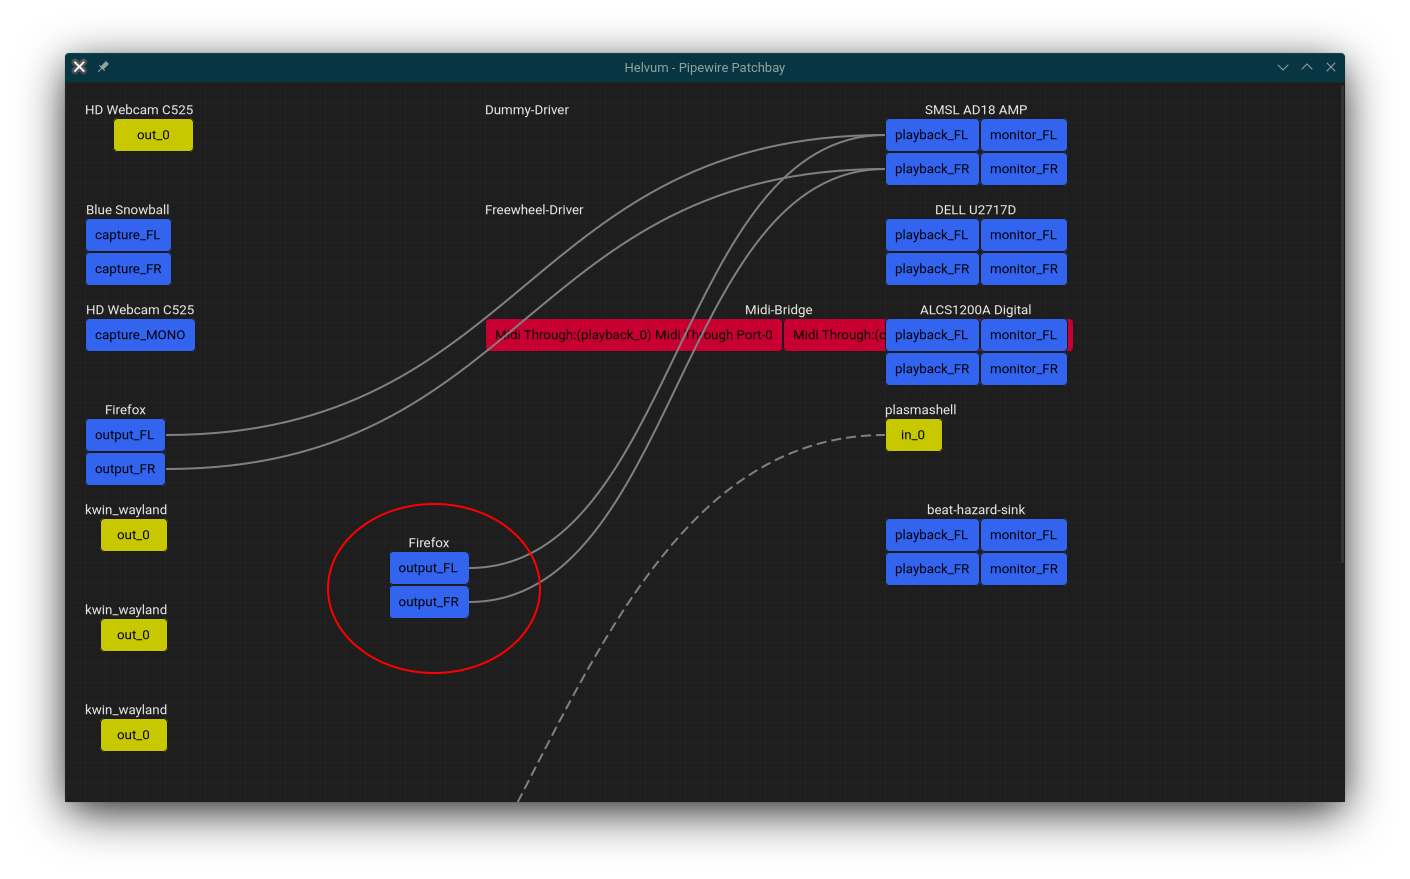
- Open your PipeWire configuration GUI and look for the created audio stream. It may not be obvious which one it is, so you may need to do some trial and error by repeating the following steps with different streams that you think might be it.
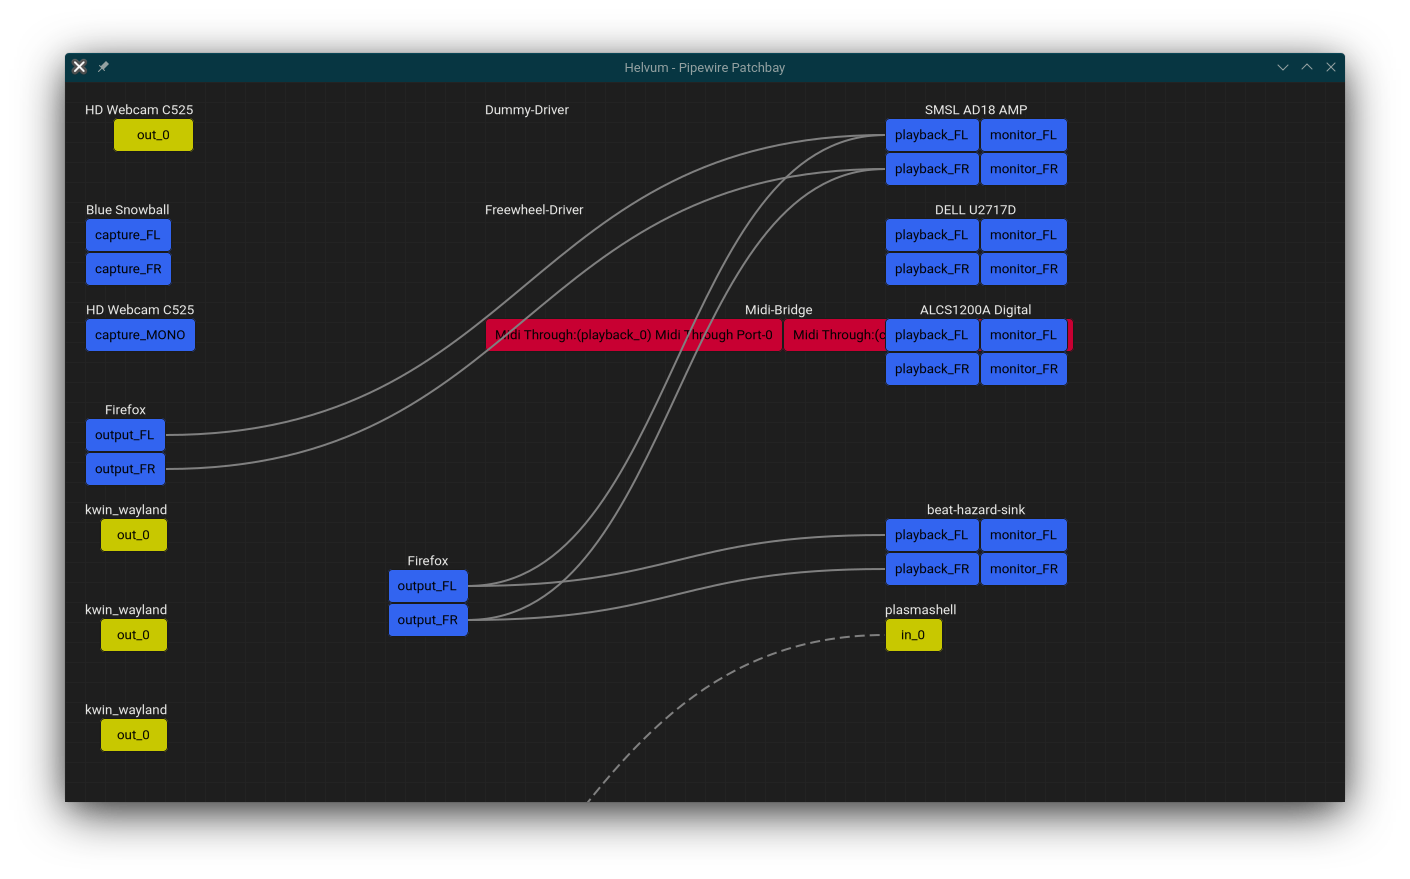
- The audio stream is usually created with the name of the application (for instance in my screenshots I started the audio in Firefox
- Helvum at least usually orders newer audio streams near the bottom of the screen. This may help you find the correct stream in the event that there are duplicates (note that you can scroll Helvum with your mouse wheel)
- You can drag your audio stream around by clicking on the label (the application name usually) and dragging it. This may help make the following steps easier.
- Once you have an idea which might be the correct audio stream create links from the output_FL square to the playback_FL square of the beat-hazard-sink graph item. Do the same with the output_FR to the playback_FR square. In order to create a link in Helvum just click and hold on the box and then drag your mouse to the other box. Let go there and you should see that they are now connected. If you make a mistake you can just repeat the process and it will delete the line instead.
- Start Beat Hazard 2
- Go to settings, and then select “Line-In Audio”
- You should see the option “Monitor of beat-hazard-sink”. Select it.
- If your audio is playing now you should see visuals in Beat Hazard 2 synced to the audio. If you do not see this you may have not connected the correct audio stream. You can open Helvum and try again until you succeed. You can keep Beat Hazard 2 and Helvum open at the same time so you can see immediately when you’ve configured the right audio stream correctly.
- Play!
Troubleshooting
There is an echo in the audio while playing
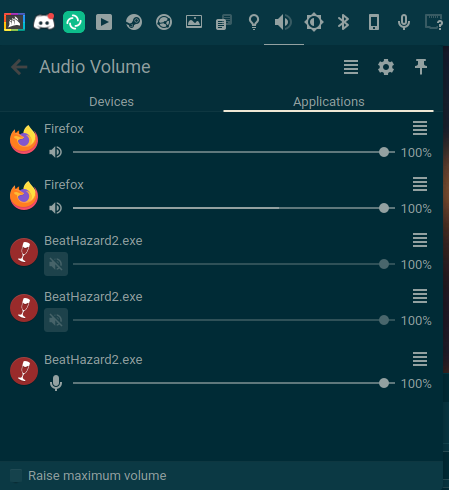
This is caused because in Line-In mode Beat Hazard creates an extra audio stream in order to output the audio source you selected in Line-In. This is required because otherwise if you were actually using a line-in you would have no audio from what you were using as an input.
In order to fix this you just need to mute that audio stream. If your desktop environment supports it you can usually just click on the sound widget and try muting audio streams until you find the right one (you’ll know it’s the right one because the audio will sound fine as soon as you mute it).
This screenshot is from Plasma, if your desktop environment does not have a similar feature you can use something like pavucontrol instead.
Hope you enjoy the Guide about Beat Hazard 2 – How to Use PipeWire Audio Server on Linux Guide, if you think we should add extra information or forget something, please let us know via comment below, and we will do our best to fix or update as soon as possible!
- All Beat Hazard 2 Posts List


Leave a Reply