In this guide I’ll be talking about in-depth design elements, the necessities and what to avoid when designing your first submarine. It also contains a separate section for using the sub editor if you don’t wish to learn the design aspect.
Design | The First Steps of Design
Designing the Interior
The interior design requires crucial thought if you wish for your submarine to stand out. This not only involves placement of objects, items and pathways but as well as lighting, colour and decoration.
But all of that will be explained in future design sections. Right now let’s get into the very basics. What you’ll need for your first submarine depends on size.
For very small submarines, I recommend having:
- Reactor Room
- Engine Room
- Electrical
- Cockpit
- Medical (Cabinet)
- 2 Ballasts
- Gunnery
In these rooms you’ll require:
- 1x Small Reactor
- Normal Engine
- 6 Junction Boxes + Fabricator (Optional)
- Navigation Terminal + Status Monitor (Optional)
- Medical Cabinet
- 2 Large Pumps
- 2-3 Periscopes + 2-3 Weapon Loaders
with these object you’ll be able to make a small basic design. In larger subs you might even be able to add a security room for weapons, a separate engineering compartment, a bigger cockpit (bridge), extra ballasts and separate fabricator rooms.
Making the Interior
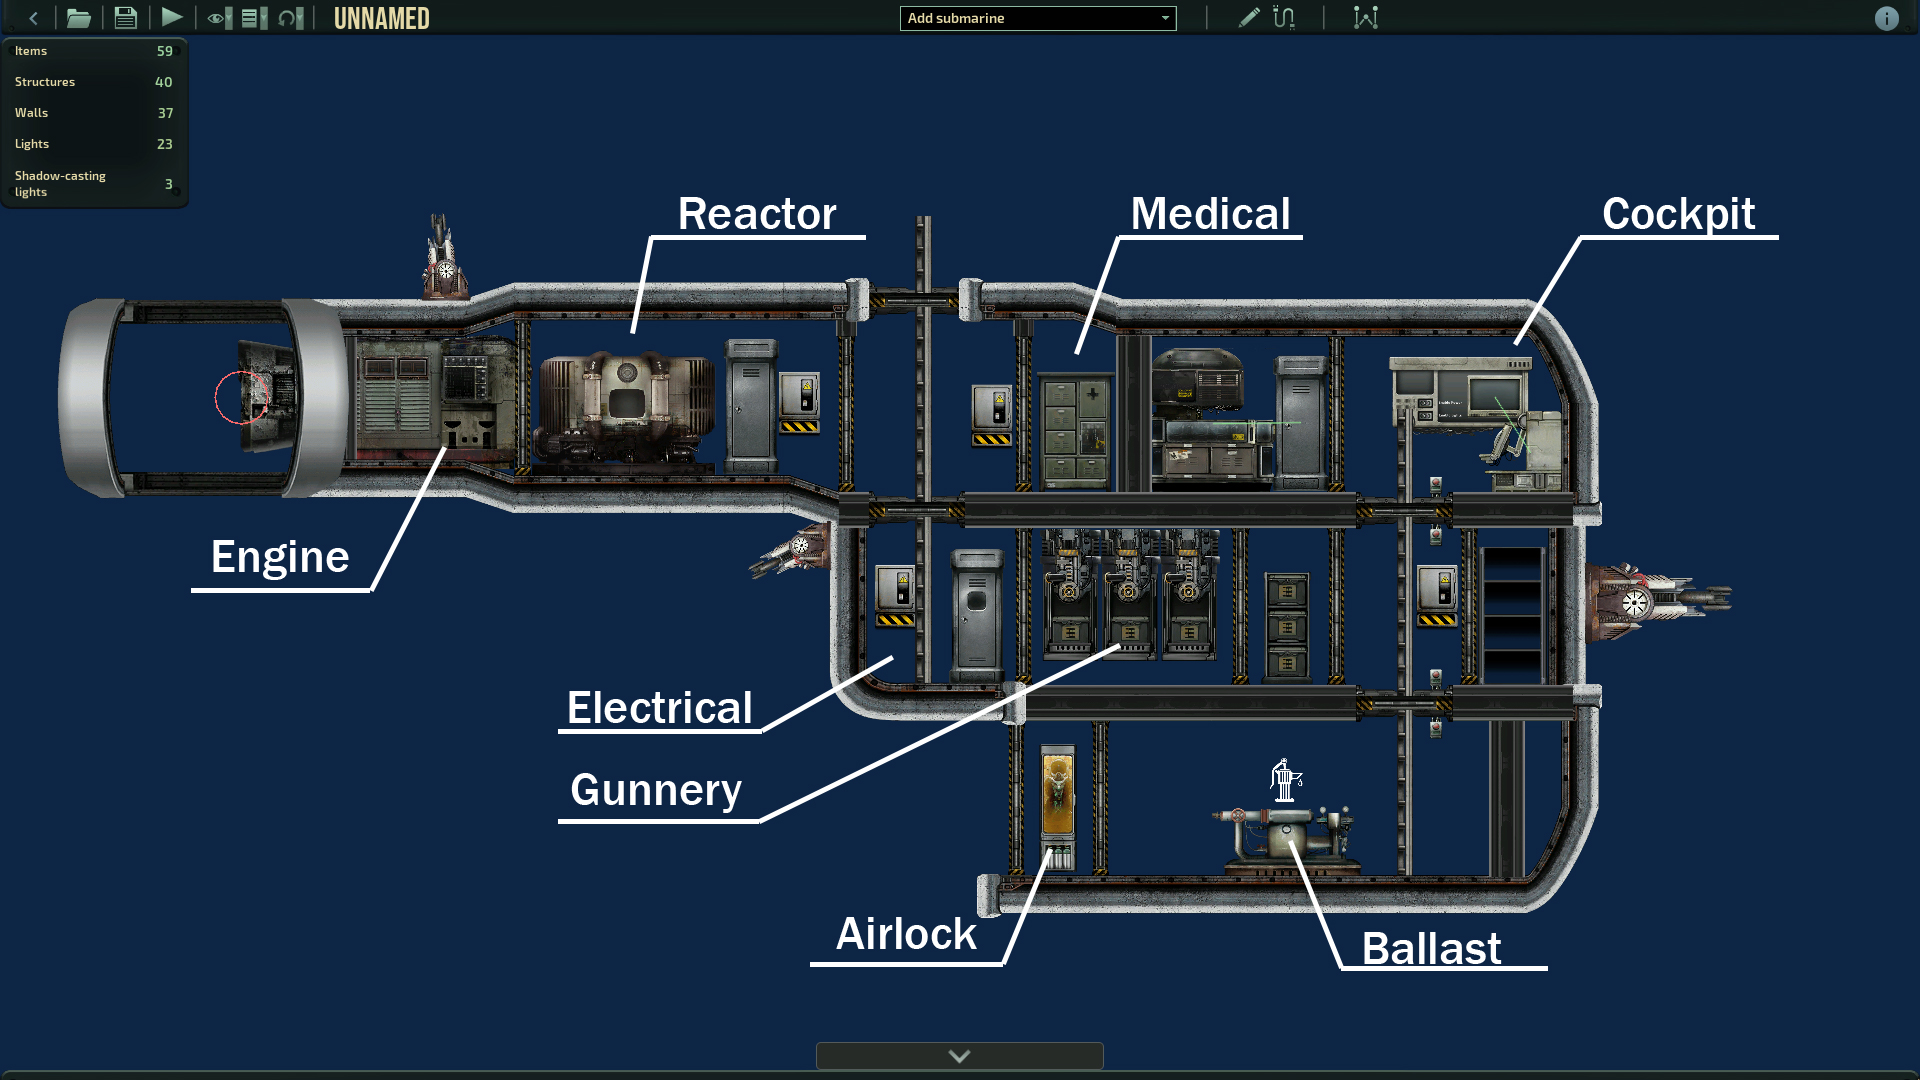
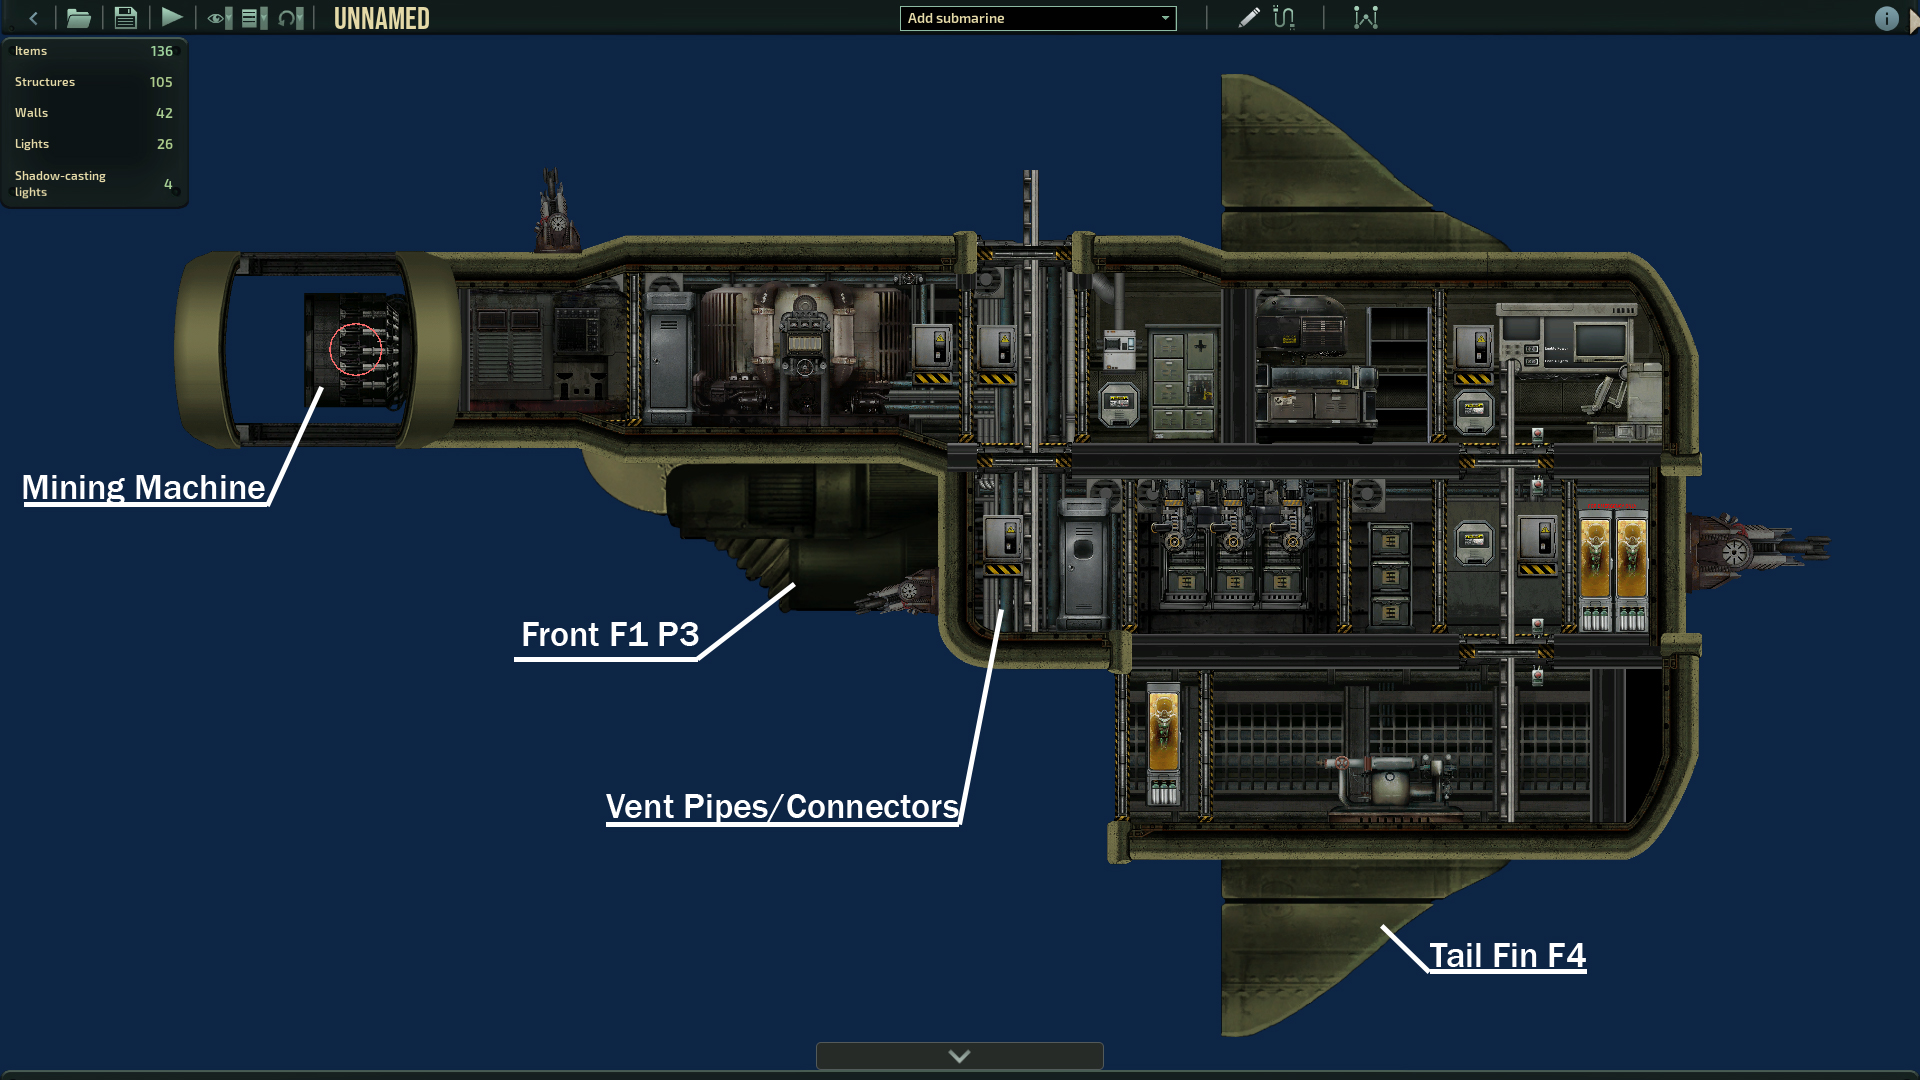
Below is an image of a sub I’ve created for this tutorial showing the main rooms you’ll need in your submarine and how simple they need to be.
Reactor
The Reactor should have a cabinet for fuel rods, wiring, some tools and damage control items (plasma cutter, welding tool). It should also contain a junction box to distribute the power around your submarine.
As for decoration, I usually have pipes running out of the top and going through the entire sub to illustrate the power distribution. You can add valves and other mechanical decorations to really sell the feeling of a cramped engineering room.
When adding the cabinet, add “reactorcab” into the tags to autofill it.
Engine
The engine is pretty simple. Some people like to have it in a separate compartment like I did while others like to include it with Electrical. Either is fine and adds different kinds of advantages and disadvantages to your submarine.
For decoration, I usually add valves, pipes and other steampunk decorations on top of the engine. Make sure to leave a space to click on the engine! You can also add decoration outside your submarine like I have to act as a small guard or guiding fin for your submarine.
Medical
Medical is a great place for creativity although for a ship as small as mine, we cannot add as much. For small submarines, it is best to add just a cabinet.
If you have a large room for medbay, I recommend adding a medical fabricator, a medical bed and some decorations of your choice. Look at real life medbays for inspiration!
Ballast
For the ballast, All you need is a single pump for each ballast you have.
I usually have a darkened backdrop and just a pump. Although you can use the legacy pumps combined with other pipes to sell the look.
Gunnery
Gunnery is one of the most important parts of the sub. I usually have them in the middle of the sub allowing access to most people on all sides of the sub. Placement is crucial. Its also best to include a way for flooding (etc. placing next to a ballast or even on the bottom of your sub if its a simple one)
For gunnery I usually focus the creativity around the railgun. Making it seem more like a cannon breach you’d see in a tank. But you can also use Outpost Wall 3 combined with Vertical Cable Holders to make it look like a belt feed for the coilguns/chainguns.
Bridge/Cockpit
I like to make the cockpit be the control center, allowing controls to monitor and enable/disable power to the sub. In the example sub I’ve added two switches to enable lights or emergency lights as well as power distribution. Sort of as an ignition switch which I’ll explain how to do in the other part of this guide.
If you would like to decorate yours in a different way, you can look at real life cockpits of planes or boats to try and decorate with.
Production | Basic Functions, Wiring and Changes
Moving your Submarine
Congratulations! If your at this stage, You’ve added the basic rooms and necessary additions to your submarine as well as done a few decorations. In this part of the tutorial we’ll be wiring the submarine to move up and down, left and right as well as learn what the nodes in the wiring mean.
Powering your Submarine
In my submarine I have 5 junction boxes. For optimisation, it is recommended to assign each one to various functions, etc. lighting, steering, pumps, secondary systems and place them around the ship for added challenge for your players. Although there is nothing wrong with giving the junction boxes their own room!
If you wish to have a manual power on/off switch in the bridge, follow this, otherwise skip to step 3
Step 1:
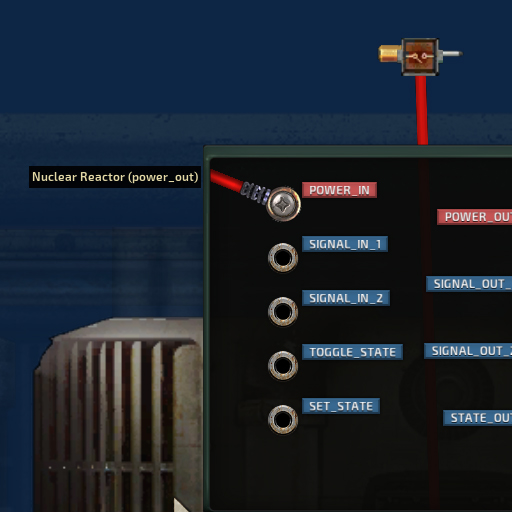
The first step is to send the power out to a relay. A relay is basically a component which takes the input of one signal and allows to transfer the signal to an additional 5 outputs. It is also used to transfer power.
Step 2:
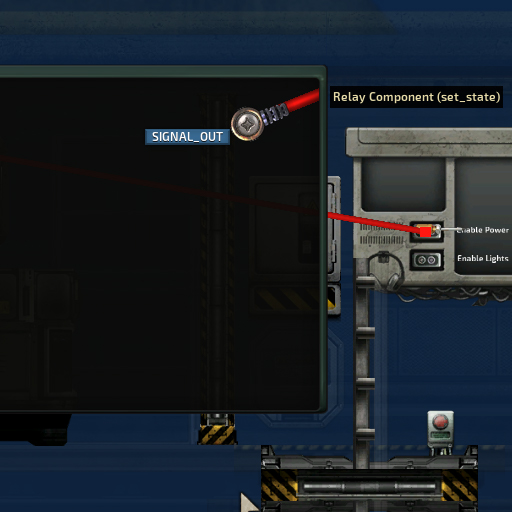
After you’ve powered the relay, Set the relay’s SET_STATE to the swtich’s SIGNAL_OUT. This will make it so when the switch is disabled, the relay will be turned off. Not allowing any power through.
Step 3:
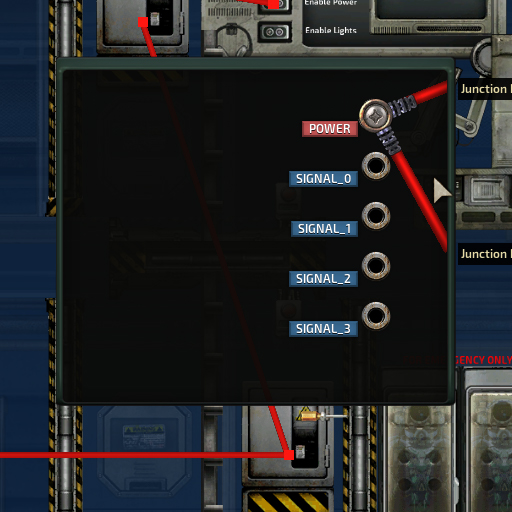
Now after you’ve set up the switch (If you’ve chosen to,) Just snake the wire from junction box to junction box. Junction boxes POWER is set to recieve and send out power so as long as they’re all connected, they won’t lose power. Connecting them all to a reactor however can be messy and inefficient.
Making your Submarine Move
Now, after your junction boxes are set up. Just wire the boxes to everything that needs electricity! Make sure you use relays for bilges, lights and other bulk items to avoid clotting up your sub with multiple junction boxes for nothing.
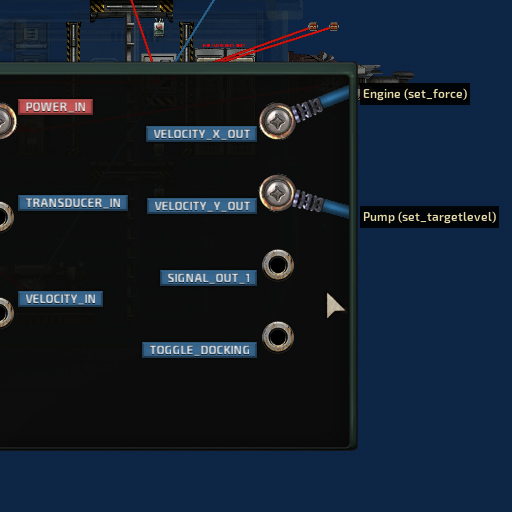
Now all you need to do is go to you Navigation Terminal and set VELOCITY_X_OUT to your engine’s SET_FORCE and all of your pumps SET_TARGETLEVEL to VELOCITY_Y_OUT. Make sure that both of the engine and the pump is turned on in the properties tab.
Production | Advanced Wiring, Docking & Airlocks
Congratulations! You’ve made your first submarine! Now lets finish and furnish it up. You’ve gotta be able to dock it on stations but how do you do that?
Easy!
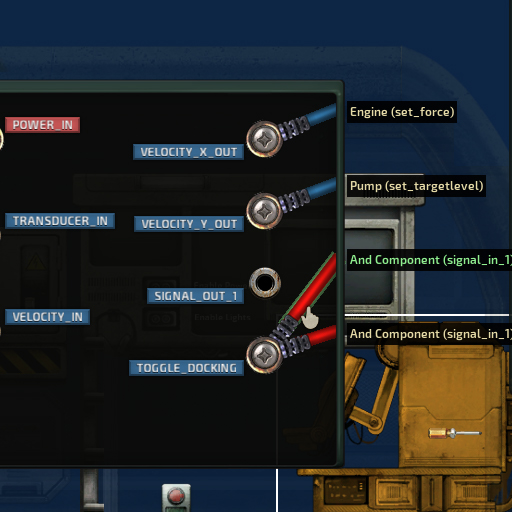
Search up “Docking” in the creation tab and you’ll be given an automatic docking port. Slap that on your sub and attach BOTH the AND gates’ SIGNAL_IN_1 (marked with labels) to the Navigation Terminal’s TOGGLE_DOCKING and you’ll now have a docking port to use!
Powering your Lights
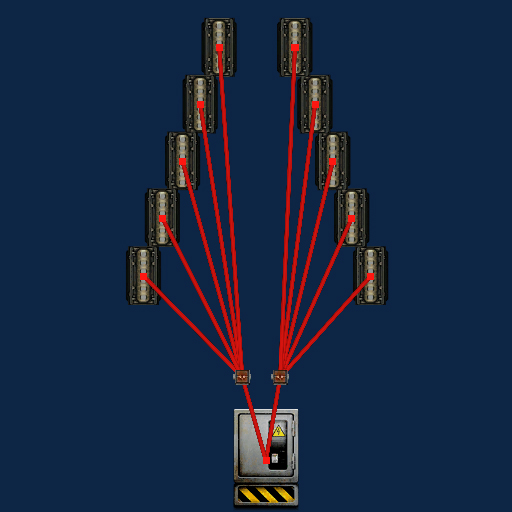
There are going to be dozens of lights into your sub. The most efficient way to do this is with Relays. As shown in the image, Two slots on the junction boxes which goes into the relays, give 10 lights power.
Lighting and Colours
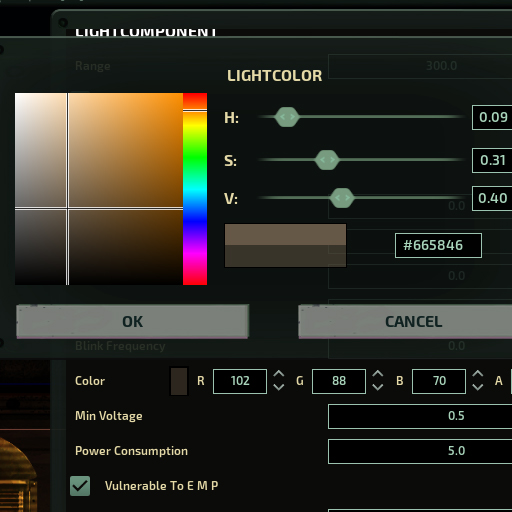
Lighting is a great way to give an eerie feel to your sub. For a Deep Diver, make the light darkened or orangish. For an attack submarine, make it blue or a white. Colour adds an aesthetic that is hard to replicate and Each colour gives a subconscious meaning. Red means danger which is why a emergency light filled submarine produces panic, Blue means safe which is why people feel secure in a blue-lit room. Darkened colour or dim lit areas make people feel claustrophobic. The list goes on. Experiment with colour and range to find a combination which you enjoy!
Hope you enjoy the Guide about Barotrauma – Design and Making Your First Sub/Sub Editor Guide, if you think we should add extra information or forget something, please let us know via comment below, and we will do our best to fix or update as soon as possible!
- All Barotrauma Posts List


Leave a Reply