
For new players only now starting to play Back 4 Blood or other team based shooters. If you’ve played L4D before or anything like it, this guide ain’t gonna help. **NOW WITH CAPYBARAS**
I’ve decided to continually update this guide whenever new information is available.
DISCLAIMER
Back 4 Blood is the spiritual successor to the Left 4 Dead series (this is how it was marketed not my opinion), comparison of gameplay aspects and naming conventions used throughout this guide will, as a result, be very common. Back 4 Blood is a team based co-operative shooter in which the goal is to make it from A to B in a strategic yet fun manner. Things can get hectic during games especially on Veteran and higher difficulties, so it is expected that many things can go wrong and that some friendships will be broken playing this game. Of course, none of this is of my doing or inherently my fault because I’m a Back 4 Blood Closed Alpha player and that means I’m intentionally and always will be biased toward this game. (/s)
This guide will not contain super detailed instructions on how to be the best B4B player in the world, nor will it serve as a concrete strategy to beat every level in the Beta as every game is a random experience due to how unpredictable the AI of the Ridden is. This guide merely serves to reduce the amount of times people will be breaking their backs over having to revive the same players over and over. Some sections will not include 100% accurate information as only a portion of game content is actually available. I am constructing this guide using the knowledge I acquired during the Closed Alpha and Open Beta testing experiences thus far.
With this in mind, welcome to Back 4 Blood and have (as much fun as is possible) reading this steam guide.
Explanation of Characters
Every character offers two types of buffs, character buffs and team buffs:
Evangelo
Evangelo is capable of automatically breaking out of grabs and snares every 60 seconds without need of assistance. This is handy if your team is in way over their heads and you get stuck with no-one to help you. As a result, his breakout speed is much higher and his stamina regenerates 25% faster than every other character. Evangelo’s team buff is that he offers 5% movement speed to all other members of the team. This buff seems useless but in a vast number of situations, even 5% can mean the difference between life and death.
Walker
Walker’s ability grants him extra accuracy upon a precision kill (a headshot basically) and an extra 10% damage over his colleagues. Walker’s team ability provides 10 extra HP to every team member which may not last long on Veteran+ difficulty but allows a few extra seconds of being pummelled to death in most situations on Survivor.
Holly
Holly is a fairly good close range fighter as she has a base +10% damage resistance from all sources and regains 10 stamina points upon killing a ridden (or zombie if you prefer your classic terminology). She provides an extra +25 stamina to the entire team which is exceedingly useful when hauling a*s around the ferry at the end of Act 1. Don’t worry about not getting her in your party because as of right now she’s the best looking female in the game so it’s pretty impossible that no-one will pick her.
Mom
Mom basically just instantly revives you once per level. You can carry an extra bandage or medic with her on the team which is pretty much a must on Nightmare difficulty.
Hoffman
Looks like someone really wanted Richard Nixon with an ammo fetish in the game. Not really worth choosing unless you run out of ammo or grenades every five seconds, but hey, it’s funny Richard Nixon.
Card System & Weapon Parts
Back 4 Blood includes a pretty neat card system wherein players create decks (that will 100% suck major a*s at the start of the game, don’t worry, you get more) and are given a random selection of cards from said created decks and must select 1 card to apply each round. There also exist “Corruption Cards” which are really just fancy names for environment modifiers or challenges like mist or stealth (completing a level without setting of any hazards). Health, Ammo and Stamina based cards stack and are infinite as long as you have them in your deck. Cards like 10%+ Health and 10%+ Stamina can stack infinitely (hypothetically, as long as there is some way to infinitely play a run).
(Team cards can be purchased from the Vendor Crates in the safehouse for 1500 coins)
On Survivor and Veteran difficulty, the allocation and selection of cards is really just down to whatever you don’t want to have to micromanage in later stages. For example, go for Health if you can’t be bothered to locate each level’s health kit or bandage drops (doesn’t mean you can still ignore them, just means less of a worry). On Nightmare difficulty, you will probably get your balls pan fried and served to you on a silver platter if you even do so much as to think about joining that high a difficulty game without having already completed at least two supply lines (Play a bunch of games on Survivor and Veteran if you want a challenge, just to build up your supply coins first).
Initially (and for the rest of the closed beta), the most you’ll ever need in a deck for Veteran is going to be Reload Drills, Antibiotic Ointment, Combat Knife, Ammo Pouch, Vitamins and Second Chance. The rest can be Health, Stamina and Ammo percentage modifiers that you just stack if you have no other cards to spare (these cards are unlockable from the first supply line).
Never even think about doing Veteran+ difficulty without Combat Knife.
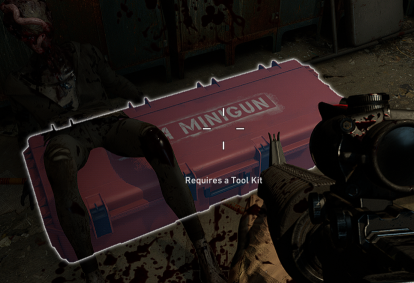
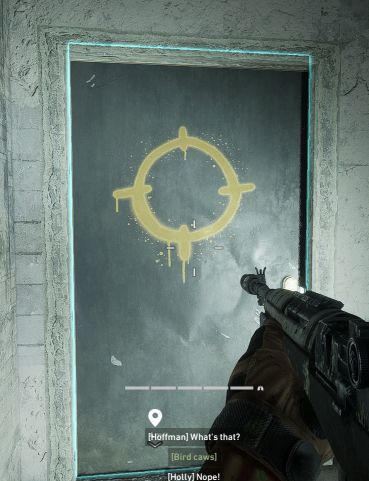
Weapon parts in Back 4 Blood are either bought at the start of a level in supply crates or found elsewhere in the levels (usually in locked rooms marked with a yellow circle on the door, use a toolkit here). Be wary of weapon drops with broken parts (red parts), replace them as soon as you can. Weapon part rarity/effectiveness goes from Green, Blue, Purple to Orange. The parts system is too complicated, adjust your parts choices based on how much damage and how accurate the guns become. Always, always make sure you have a fast mag in at least one of your weapons (hopefully your primary). Remember, Reload Drills + Fast Mag means you never have to worry about insanely long reloads that leave you vulnerable. Special weapons (the only one in the game currently is the Minigun) are found around the map in orange weapon crates marked specifically with what weapon it contains. These crates require a toolkit to open. Toolkits are also required to open Prepper Stashes marked with the yellow circle.
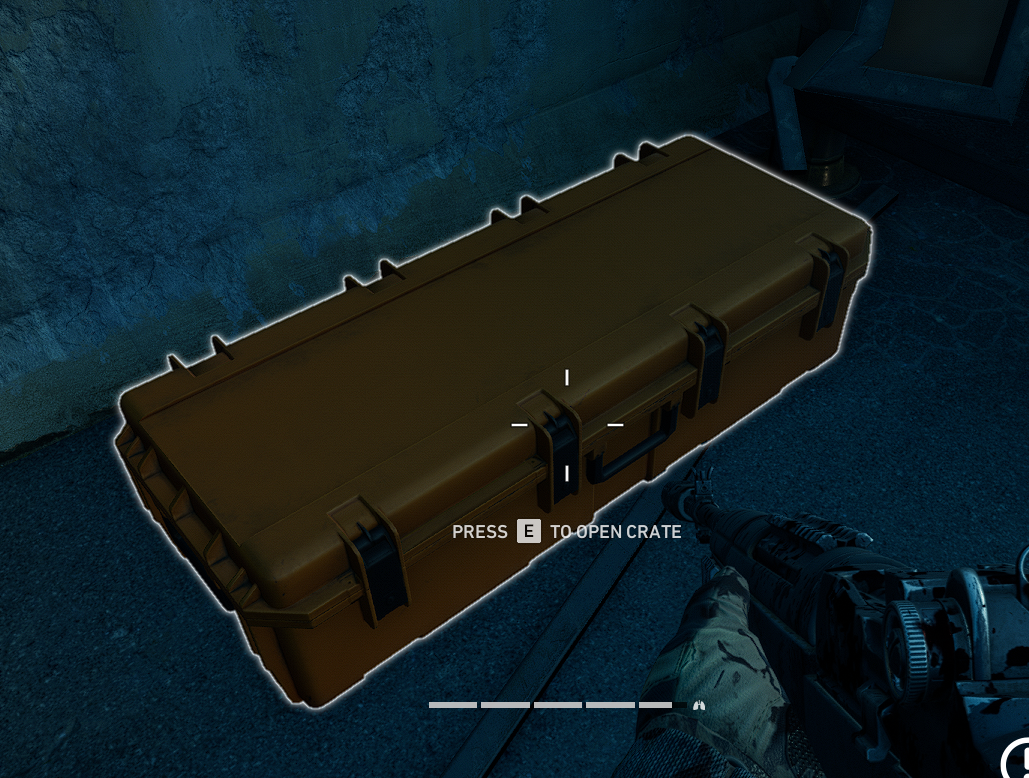
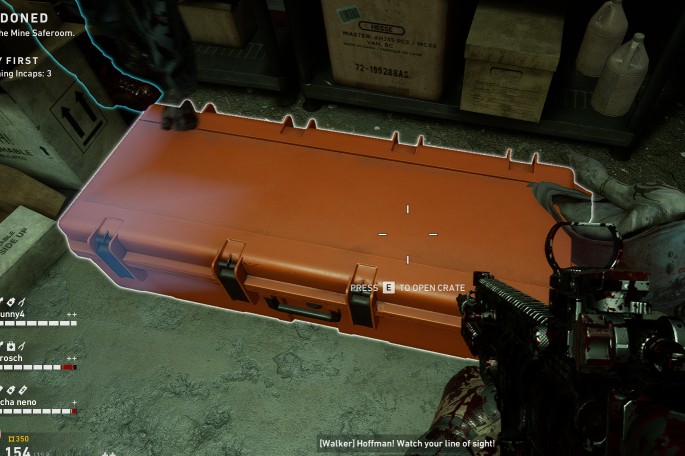
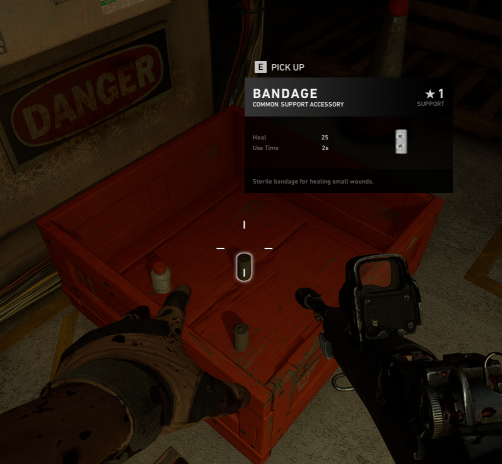
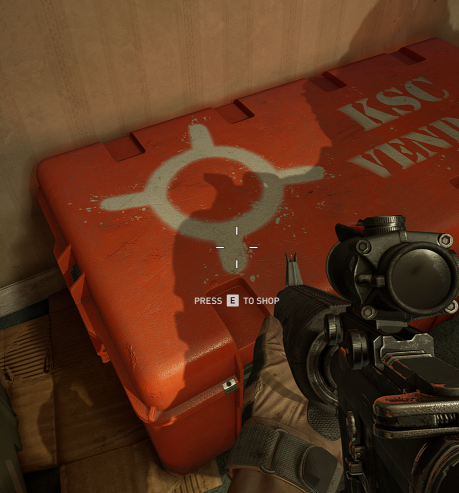
The various sizes of weapon crate can give clues as to what is contained inside:
Primary Weapon Crates
Supply Crates
(can contain either medicine or ammo of all types, two boxes each, marked “supply” with white paint)
Vendor Crate
(found at the start of every level, don’t forget to buy your weapons, ammo and items here)
Special Weapon Crates (with zombie)
(contains whatever is written on the top)
Prepper Stashes
(will usually contain multiple ammo types, various piles of coins and supply crates)
How the Health System Works
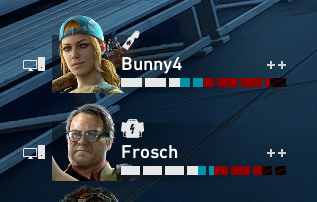
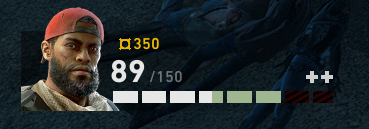
The B4B health system works a little bit different to most games functioning on four different types of health. Main health, Potential Health, Temporary Health and Trauma.
Note the four different colours of the health bar. The white bars indicate main health, this is how much health you have remaining until incapacitation. When this health drops below 30, the screen will de-saturate and your movement speed will be heavily reduced. Blue health indicates temporary health acquired from painkillers, this health only lasts for a few minutes, as the name implies, it is no permanent solution. Red health indicates potential health, how much health you could potentially heal up when using bandages or medkits. The darkest red health indicates trauma, this is health you will never be able to heal back until you reach a safehouse. Trauma is accumulated by taking too much damage at once or over a short period of time.
The pale green health indicates health you are in the process of healing back.
Medical Boxes
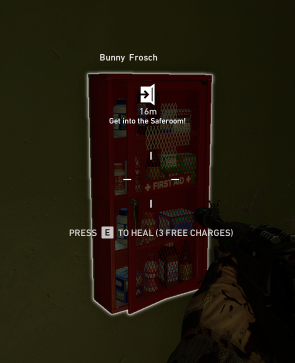
These spawn similarly to that of supply crates, usually hidden away or on the walls of prepper stashes. They can health a player to max health and recovers trauma, however there are only four charges per Medbox so don’t hog the entire Medbox to yourself, give your team some love (sharing is caring).
Healing Items
There are four main healing tools/items in the game at the moment, painkillers that provide temporary health, bandages that heal a small amount of health quickly, medkits that heal larger amounts than bandages but at the cost of taking longer to apply, and defibrillators which revive dead or incapacitated teammates. You can only hold one support item unless you have Mom’s ability active or a card that lets you hold extra support items.
Overview of Enemy Types
Back 4 Blood contains a vast variety of enemy types, however only a few serve significant threat or appear frequently enough to actually be mentioned.
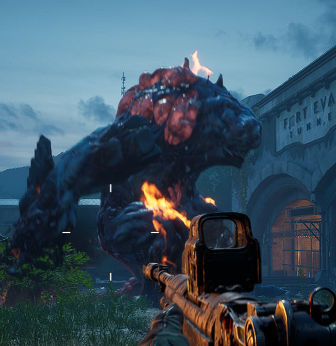
The main six enemies you will frequently encounter are basic ridden (zombies), hockers, bruisers and crushers, retches and weird creatures that jump out of you from the walls (Sleepers). You may encounter other special ridden like hags and an Ogre (the real big guy). The other enemy types spawn randomly among harder difficulties in Veteran+ but half the time are already dead before they’ve even got to do anything to you. Each type of special has a weaker and stronger counterpart, Exploders have Retches that can vomit and explode, Bruisers have Crushers that can grab and pin teammates. Hockers and Stingers are pretty much the same except Stingers shoot a fast moving gooey projectile that inflicts a small amount of damage and obscures vision for a few seconds. Hockers jump across trees and cling to walls whilst pinning teammates with goo from afar (or close range if you are unlucky).
So far, I have yet to encounter a Snitch or a Hag so my information is limited on these types, but if my memory serves correct, killing a Snitch incorrectly or being spotted by a Snitch will alert a Horde. I assume Hags behave the same as witches from L4D2.
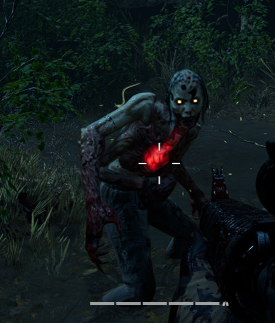
Zombies are your run-of-the-mill filler enemy, cannon fodder, sandbags, whatever you want to call them. They’re just there to be shot at and serve no real threat (unless in a horde, if not managed correctly which will be covered later).
Hockers, spit balls of goo at the player and keeps them stuck in place until freed (cleaners like Evangelo can break out of these automatically without interference). These special zombies cough pretty damn loud so they’re hard to miss. Shoot these guys in the chest and they’ll be no problem.
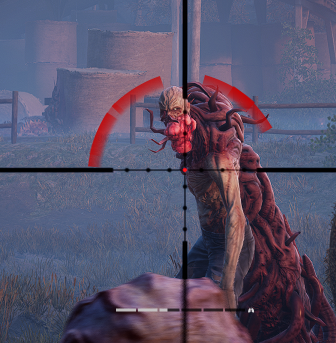
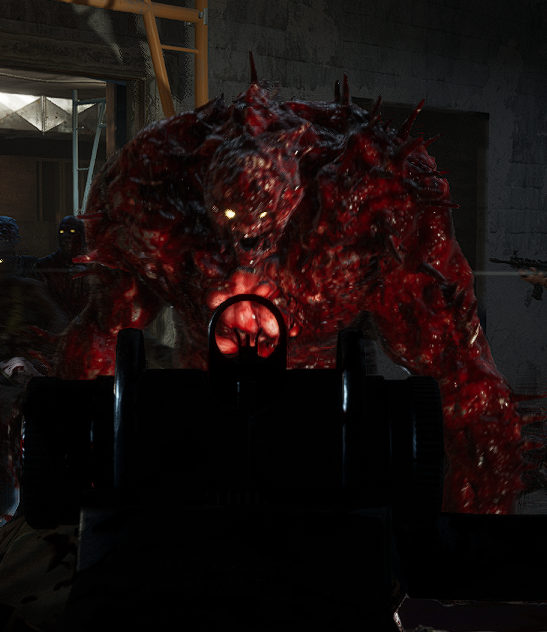
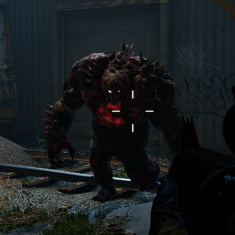
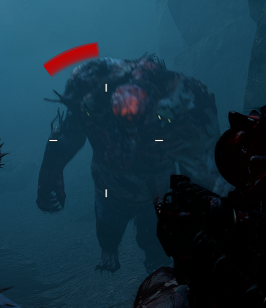
Bruisers and Crushers look pretty much the same but behave slightly differently. All players need to do is identify which type they are by the location of their weak spot, Bruisers weak spots are located at the top of their mutated arms and Crushers weak spots are located just below the chin. Dispatch them quickly and easily with a shotgun and they’ll be no problem. Just don’t get hit by their huge swings, keep good distance from them at all times (unless you’re using a shotgun, in which case let someone else pull aggro and shove your 12 gauge barrel up their a*s).
Retches and Exploders, charge and spit bile from a distance, this bile will sit on the ground for a few seconds damaging the player and a cloud of gas will remain by the corpse once they die, harming any player that walks through the clouds before they dissipate. Aim for their stomachs and they’ll explode, just make sure you’re a fair distance away when this happens or you’ll take a faceful of bile and an earful of playground insults through the voice chat.
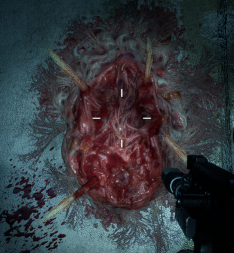
Sleepers are literally just zombies that hide in a barnacle formation on walls and flat surfaces, you can hear their loud snoring whilst they aren’t active, two or three shots from most primary weapons dispatches them with ease.
Remember the callouts: Hockers (or Stingers), Bruisers and Crushers, Retches (or Exploders) and Sleepers. I’ll come up with more callouts later on when encountering the new specials.
Crushers
Stingers and Hockers
Exploders and Retches
(Exploders are a bright red and Retches are a pale grey with some bright red patches)
Sleeper Pod
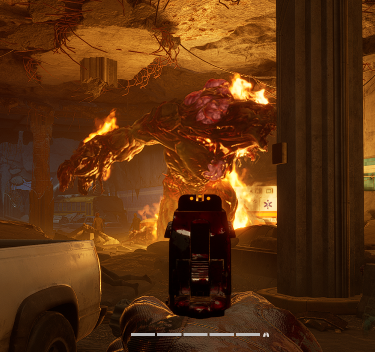
Ogre
Gameplay Tactics & How NOT to Shoot Each Other
There are three states of play in B4B as I have observed them:
Normal Activity
At this state of play, zombies are idle and don’t react to anything until shot at and will promptly run towards the source of the gunshots until killed. You can easily pick off around 10 or so zombies just by being positioned up high and taking out zombies one after the other. Just make sure to kill any zombies trying to climb to you.
Mini-Hordes
Small groups of zombies pop up at some points in some levels, just watch out and make sure you don’t get surrounded.
Hordes
Lots of zombies, lots of problems. Clench your cheeks and get ready for a fight.
How to deal with a horde or mini-horde easily
Communicate with your team and ask one person to “clear a doorway” meaning they need to stand in a doorway and attract the mini-horde towards them killing them with a melee or primary weapon. There’s no need for two guns to watch one door, so as your teammate is clearing the doorway, cover their a*s whilst they go to work. The same strategy applies for hordes except it’s time to split up and cover more ground. Find a room with a single doorway and blocked windows so you don’t have to be constantly looking over your shoulder and simply hold the doorway you came in through. Zombies should pile up on the door and all you have to do is hold down your fire button keeping your gun pointed at head level for easy headshots. This strategy works pretty well for the contents of Act 4 when alerting the hordes as a result of killing nests in houses.
If there are no houses and you find yourself with someone who finds great pleasure in unloading bullets into cars, triggering their alarms, find an elevated location like a truck or tall car. As long as zombies can’t hook at your feet it’ll work fine. Split your team up into four to watch all four sides of the truck preventing stragglers from climbing aboard and you’ll be done in no time at all.
If all else fails, just run to a building and close the door or run to the safehouse if you know where it is or might be. Additionally, when fighting special zombies, please keep your distance as it makes their movements much more telegraphed and readable. Even if it means turning your back and kicking up more dust than America in the 1930s.
How NOT to shoot each other (made simple)
Remember what I said about clearing doorways? Do that but in every situation with a large group of zombies. If you are IN FRONT of everyone else in your team and you are killing zombies upfront, that is YOUR job and YOUR job only in that moment. The other three people will need to be covering your a*s as you all move up towards your objective. This maximises safety and reduces health lost because of poor trigger discipline. This also goes both ways, if you are protecting the rear of someone in your team, don’t be running around like there’s piss dribbling down your leg 24/7. You’ll just end up soaking bullets for the zombies.
If you absolutely can’t play as a team player, then one, why are you playing a TEAM shooter and two just get an ACOG scope part and keep your sights off of the backs of other player’s craniums. Considering how much damage friendly fire does on Nightmare, it’d be best if you’d stay in Survivor difficulty if you can’t help but drop lead on a friendlies’ head.
Specific Strategies (W.I.P)
**Keep in mind, this game plays like juggling a toaster in a bathtub, literally every interaction is either a horde or watching your filler AI characters teleport around the map. These are just strategies on how to go balls deep and survive.**
Act 1 – Stage 2 & 3
During horde alerts (either from crows or car alarms or events like the tow trucks, it’s best to stay on top of the white freighter truck clearing out zombies as they attempt to climb aboard, be careful around the sides of the truck as there may be barnacles attached which can pin and easily incapacitate a team member during a horde. It’s not usually a necessity to use a pipebomb but it can be a saving grace if you find yourself overworked or in trouble.
On the second tow truck, it’s best to just run as fast as you can whilst throwing pipebombs when recovering stamina. Don’t bother trying to kill the zombies as it’s a near constant flow of hordes.
In the nest house (accessible via the yellow ladder), this is where you find your closed rooms to guard the doors but be wary as for some reason bruisers are capable of spawning in these closed spaces which can be a run-ending encounter on Veteran+ difficulty.
On the final fight of the run, before firing the Howitzer, gather all four shells needed right next to the Howitzer to save time going from the crate and back. Once the Howitzer is fired, a horde will run from the mine, throw a pipebomb to distract them whilst cleaning and loading the next shell. Rinse and repeat until the Humvee arrives. I recommend having an M249 and Desert Eagle combo by this point in the game as it’s the most powerful pairing of weapons thus far.
Act 1 – Stage 1
DO NOT TOUCH THE TURTLE TRUCK. TURTLES ARE EVIL.
A Message to Console Players & Versus Mode
Stop shooting the cars with alarms. Thanks.
If you are a versus mode player, just go play Dying Light to get some practice.
Afterword
If you found this guide somewhat helpful, make sure to share it around and let me know if there are any strategies you like to use in B4B. I’ll evaluate and be sure to add them here at a later date. I intend to keep this guide up to date as best as possible whenever I come across new information on the game.
Have fun, Cleaners!
Capybara
I hope you enjoy the Guide we share about Back 4 Blood Beta – Comprehensive Guide and Game Information – Characters – Card System & Weapon Parts; if you think we forget to add or we should add more information, please let us know via commenting below! if you want to check the original post click here! See you soon!
- All Back 4 Blood Beta Posts List


Leave a Reply