The idea of this guide was make one script file that would set up the full ark server and make this process easy for anyone (Least amount of clicks as possible). Not an traditional guide in this sense
I also wanted to share how I run my server as I find it useful and thought others might as well.
Before you Start
Welcome to EZ ark server
You will need to download this ZIP Folder:
1drv.ms – https://1drv.ms/u/s!AmqyFhj1gx0lgadwTmJAqUW5OJq0Tw?e=UI39aD
The Zip file contains:
- Ark server lancher .bat
- A list of commands you may find useful
- Steam CMD
Before you Start:
Make sure you have both ports open:
- 27015
- 7777
Note: Best to set a static IP as well so ports remain open
I will not discuss how to open ports but you will need to do this by accessing your router setting.
Step 1: Startup
Extract the folder: (Example: Extract to desktop for easy access)
Now double click on the file called (ark server launcher.bat)
for 1st time setup it will automatically start the downloading and install process then ask for some information about your server

Note: This is not case sensitive
Step 2: Installing
After Double Clicking this window will appear and start the install process
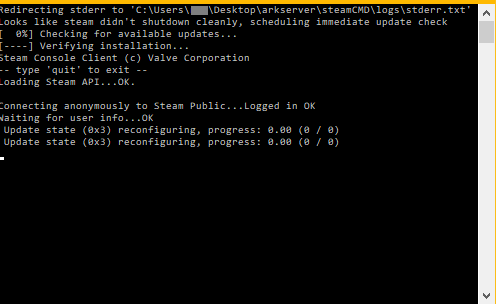
There are 3 install phases:
- Checking for update
- Downloading update
- Verifying install
Note: this will take awhile and will self close:
Step 3: Map selection
After install is complete the window will ask to select a map

Enter map number:
- Enter the number next to the map you want to play
Example: 1 (This will load the island map)
Note: some maps require DLC to play
Note: the default setting is 1
Step 4: Naming Server

Enter server name:
- Enter your server name here
Step 5: Enable battle eye

Enter Y/N :
- Y
- N
Note: Default setting is Y
After this setup is finished the window will close
Step 6: Loading Server
The next window to open is your sever
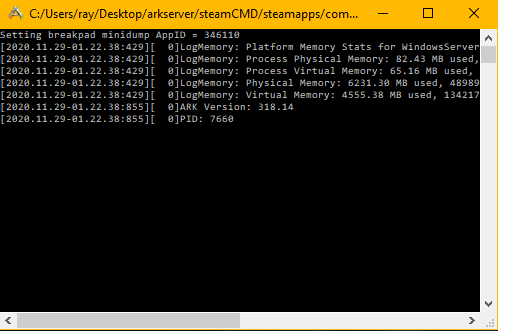
the server is loading.
Note: this may take a few mins
Once this window looks like this:
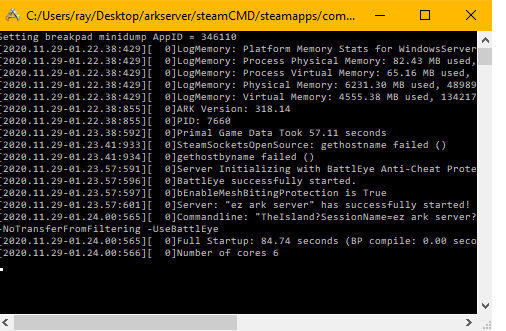
The server is up and running and can now be joined.
Note: Full startup time will vairy and number of cores is dependent on your PC
Additional information
Known problem:
Sometimes the steam download is interrupted and when this happens it causes the download to stop and close the window early. There is an easy way to fix this:
- Close all windows
- Restart the launcher
- And press Y to update server again
This will then search though the files and continue to install where the drop out happened.
Thank you:
This is just the way i start my server and i am sure there are many ways of doing this.
I hope this fixed some of the problems people are having when it comes to setting up your 1st server I know I had some issues.
Step 7: Edit settings / Server Found
After 1st time setup you can now edit the server setting without losing player data to access edit
Start ark server launcher
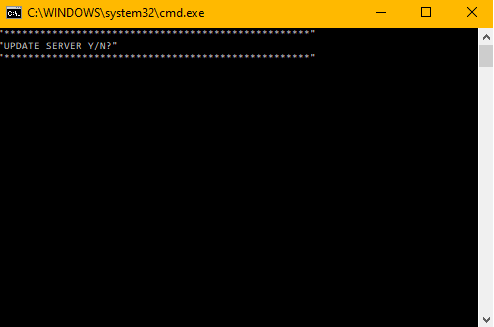
Press N to skip update
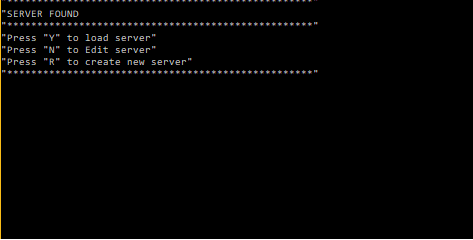
Press Y to load server
Press N to edit server
Press R to rebuild server under new folder name

Press 1 to change map
Press 2 to change name
Press 3 to change batte eye
Press 4 or enter to skip and load server
This is all about ARK: Survival Evolved – EZ Ark server; I hope you enjoy reading the Guide! If you feel like we should add more information or we forget/mistake, please let us know via commenting below, and thanks! See you soon!
- All ARK: Survival Evolved Posts List


Leave a Reply