Some helpful tips on ways to manage deck operations to allow busy admirals to get on to more pressing matters.
This is my first ever game guide. I love this game with a passion and want others to enjoy it too. The game has some decent basic tutorials, but some things you have to figure out along the way. I’m sharing some things I’ve figured out that help me perform better in the game. I’m not an expert in the game by any means; I’m still learning and still fail missions but almost always enjoy the time I spend playing and trying to be successful.
I’m hoping to add more screen captures to break up the text and would certainly do additional guides if folks find this useful. Feel free to share feedback, corrections, suggestions or requests for specific areas to cover.
Queued Operations
Simple launch queuing is possible the moment that the last squadron of planes required for the mission starts to be moved top side. You do not have to wait for the squadron to reach the ready/staged position. Use this to save some time by watching whats on the deck and listening for that last callout to “Issue a XXXX squadron on the deck” to know its time to queue the launch.
It is possible to queue a launch without the required squadrons topside if the squadrons needed for the mission you want to launch currently reside on the deck. All squadrons associated with a mission are considered resident on the deck until the last plane of the last squadron to launch lifts off. So for example to queue back to back ID targets missions using dive bombers which are at ready status you can perform the following with 4 very quick clicks.
1. Issue a dive bomber squadron
2. Launch 1st ID targets mission
3. Issue a dive bomber squadron
4. Launch 2nd ID targets mission
Before the first squadron even reaches its final deployed position you’ve put two missions on autopilot and are free to go manage things below deck, set island buttons, plan more missions, issue orders, or simply sit back and enjoy the buzz of deck activity.
This technique works best for missions using smaller numbers of squadrons but can be used for larger missions with some careful consideration. However, if you fail to queue actions to get the necessary squadrons deployed before the associated launch command reaches the active position in the queue the mission will fail to launch. Remember if you make a mistake in queuing you can right click any future deck action to cancel it. The currently active operation cannot be cancelled.
Recovery actions can be queued up to the limit of available deck operations and will be performed in the order sequenced unless disrupted by a plane crash (see Deck Availability section for more details).
Launch and recovery actions are both subject to countdown clocks during which the action must be completed. In both cases the clocks continue until the queued action reaches the active (first) position of the queue. Use care in sequencing queued actions to ensure you allow enough time for prior actions to complete before a countdown timer expires to avoid having to replan cancelled launches or lose squadrons that aren’t recovered in time. This is particularly important when performing deck operations for missions with a high total squadron count. It’s worth having a basic idea how long the various deck operations take from recovering missions of various sizes to issuing squadrons on deck or sending squadrons back to the hangar to avoid costly deck queuing errors.
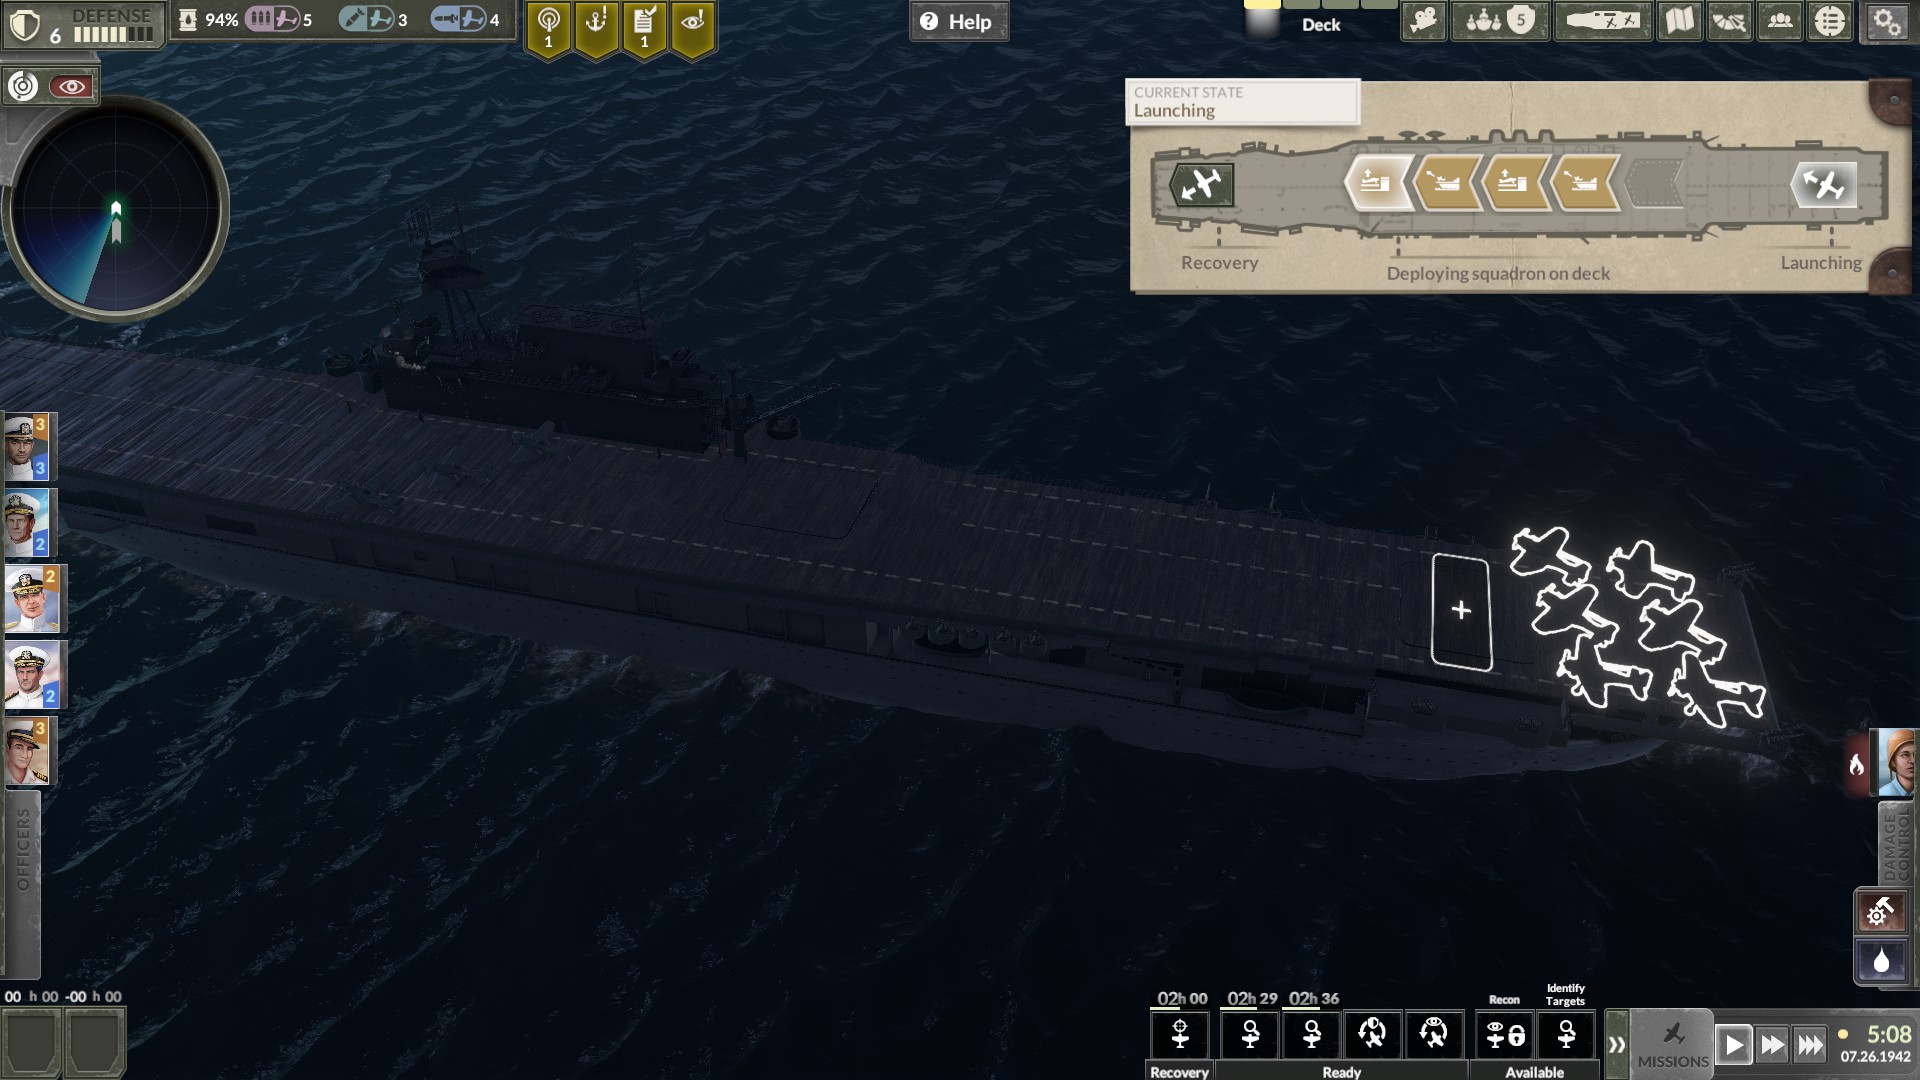
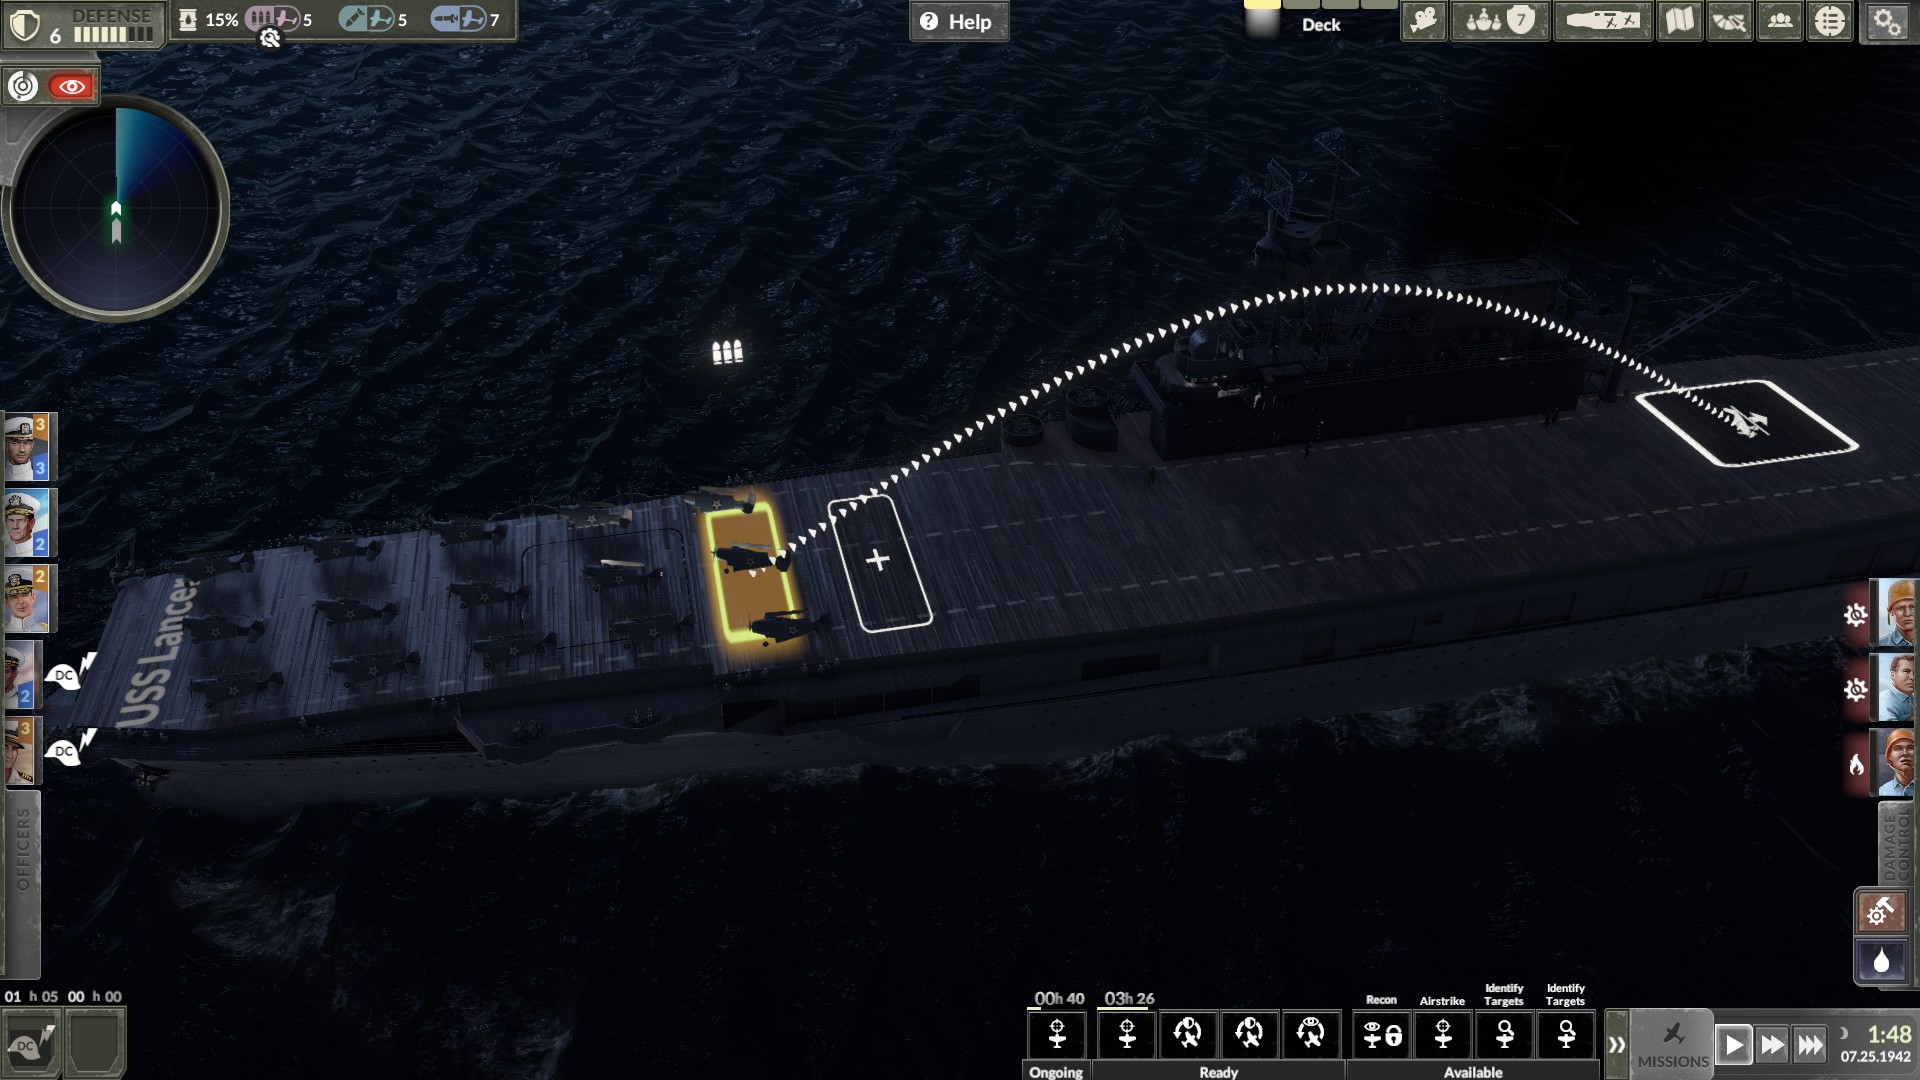
Launch and recovery actions cannot be added to the queue unless the deck is in the proper state. Issue squadron commands can be queued at any time as long as there is available deck space. Usable deck space is dependent on a number of factors including your carrier type, the number of squadrons already on deck as well as the staffing of your air operations department. Since issue squadrons commands function regardless of deck state it is possible to queue a launch/recovery action followed by a deck change state operation and then issue squadron commands that will be put in queue and be executed once the deck state change is complete. Simply look for the open deck space icon (+ symbol) on whatever deck state you are transitioning from.
The deck queue does have a limit to total of 5 operations so even the most masterfully sequenced set of actions sometimes can only be executed a portion at a time. Keep you deck hands busy though and make the queue work for you when the demands of battle require an Admiral’s hand across the ship.
Deck Availability
Be mindful of large deck operations tying up your deck. Once an action is started it will lock the deck until it completes. Launching or recovering a large airstrike can tie up a deck for ~90 minutes of in game time (I launched a 7 squad attack in 89 minutes with air dept efficiency of 202%). If you are about to start a large deck operation consider launching a proactive CAP mission or scouting mission that might be key to your fleet’s survival. Also consider whether or not your sequence of planned and required deck operations warrants a delay in planning a mission since missions have a finite time to launch before they are scrapped.
Admirals must be mindful of how much time remains to recover completed missions and make careful tactical decisions on the order in which to perform launch and recovery actions to avoid losing squadrons that aren’t recovered in time or having an ongoing operation prevent you from launching a key reactive mission (CAP, counter scouts, etc).
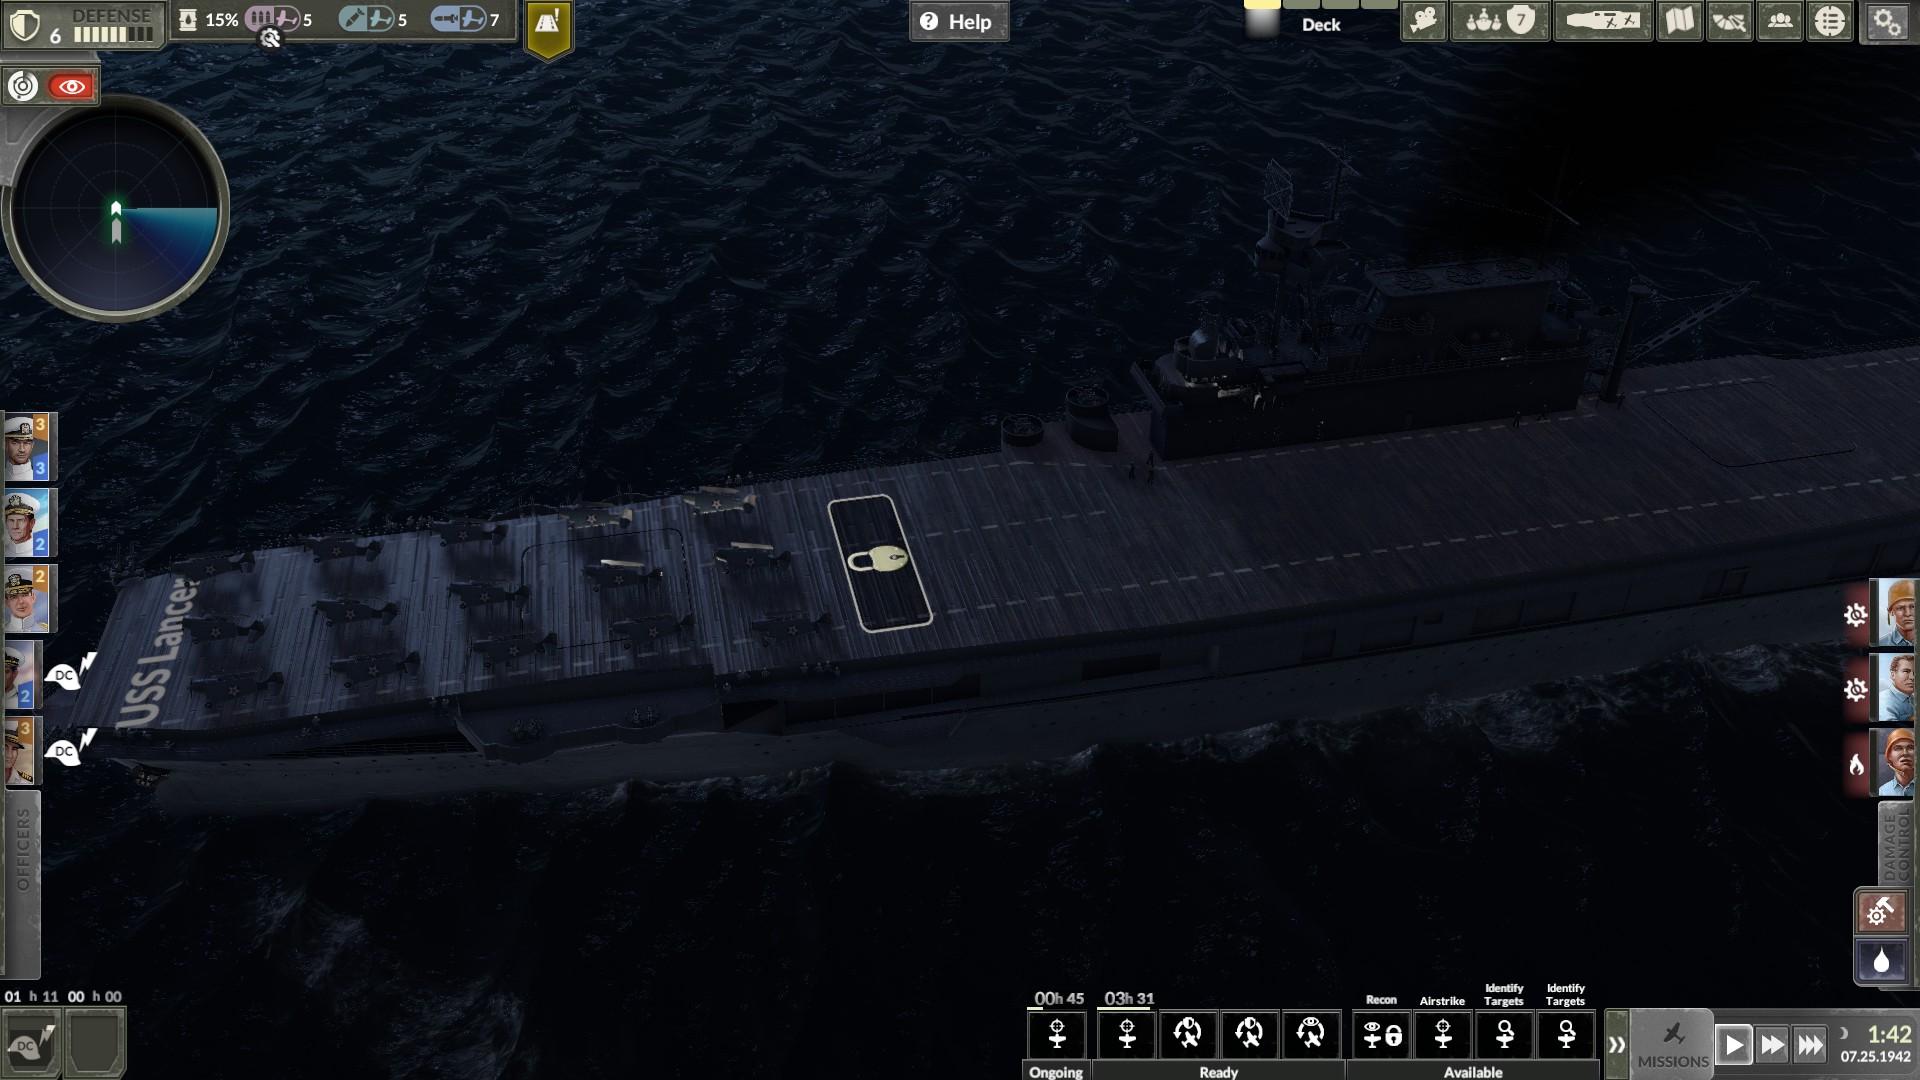
In addition to your own actions, plane crashes (sustained during aircraft recovery or kamikaze attacks) on the deck will tie up the deck until a maintenance focused DC crew goes topside and pushes the wreck overboard. Watch your notification flags at the top of your screen and/or listen for the sounds or even watch a smoking plane come hit the deck to be ready for swift actions. It is currently possible to get first indications of an imminent plane crash during recovery actions by noticing a lock symbol on the deck. If you see this symbol with no other basis for it being present you know a plane is about to crash land. Note the following image shows a lockout due to Air Department staffing being too low but the same symbol shows up just prior to a plane crash.
This is due to the fact that its always the last plane in a mission that crashes. Notification warnings and voice announcements seem to be the last in sequence of notifications with the visual of the crashing plane and sound of a deck crash occurring after the deck lock and before the formal notifications. The takeaway is it pays to have eyes on key carrier actions.
Plane crashes also have the effect of clearing any queued operations as well as preventing you from adding new or replacement queued operations until the wreck is cleared. Because of this, crashes while heavy damage control is ongoing can have a rapidly cascading effect of negative consequences. Be particularly careful if you were queuing recovery missions already on fumes to get them back on recovery as soon as the deck is unlocked.
Launch actions are locked out during night hours. Depending on what carrier class you have and which island buttons are active this can occur at either 22:00 or 24:00 hours and lasts until 05:00. In order to beat the night cutoff, you simply have to get the first plane of the mission moving on deck before the night hours begin. A strike will continue to launch during night hours if it started before the night hours begin. Queued launches added before night begins will be cancelled however. The savvy admiral will be keenly aware of the night hours and be able to get a final mission launched in the waning daylight hours to give some extra hours to actual flight and combat operations An end of day ID targets mission on a new enemy might just allow you to send a submarine escort for a night hunting mission making your next day attacks easier to manage. It should be noted that enemy flight operations also are limited to daytime hours only so you won’t have to worry about the need fort CAP or counter scout missions at night.
Aircraft recovery actions as well as rearranging/issuing squadrons to the deck are a 24/7 affair, so use the no fly time at night to your advantage to be prepared to resume a full flight operations posture at daybreak. Night time is also a great time to resupply so that your strike group can avoid a lockout due to supplies being exhausted.
One other note about deck availability is to be aware of the brief lockout that may occur if your crews are changing deck state. If there are squadrons deployed, you must wait for your deck hands to push any deployed squadrons fore or aft, taking a few minutes of in game. An empty deck has an instant change of state. Understanding this and using it to your advantage can help in those moments where every minute counts.
Effective Squadron Staging
To reach highest levels of performance you must be as efficient as possible in the never ending cycling of squadrons on and off the deck. The following tips will help you improve in keeping squadron movements as efficient as possible.
In addition to launch queuing mentioned previously, you should consider what order to issue your squadrons to the deck. Staging squadrons to support a 6-7 squadron attack can take the better part of an hour in game. I was measuring about 6 minutes per squadron with an air department operating at 202%, but your performance will vary. While issuing squadrons its quite possible your priorities will change and you may have to redo your queue. Consider deploying squadrons less likely to be used for other missions first so that if priorities change the squadrons you need are closer to the front of the squadrons on deck. For example fighters originally earmarked for an airstrike may have to be redirected to support CAP or counter scouts missions that become necessary as you are deploying your strike to the deck. Assuming you still have a healthy supply of squadrons in your hangar you can always still issue additional fighters to continue assembling your airstrike.
A similar concept applies to recovery actions however in this case you should recover the squadrons most likely to be used first since if you have to quickly change from recovery to launching operations they will be at the front of the line and easiest to launch. One other consideration for recovery operations is whether or not you even need a given squadron on the deck. You have the option to select on a squadron by squadron basis where each will be placed (deck or hangar). Simply adjust the sliders next to each squadron icon before clicking recover. Note that any squadron that suffered damage in battle can only be returned to the hangar and similarly any squadron that has a crash landing will end up in the hangar regardless on where you had designated it to go.
Do your best to avoid having the squadrons you need in the extreme aft (rearward) positions. When other squadrons not used for the current mission are in front of the squadron you need, time is wasted moving the leftmost plane of each unused squadron forward on the deck to create space for the launching squadron to pass. Then additional time is needed to return any moved planes back to the ready position before you can execute your next deck command. Careful squadron deployment and sequencing of mission launches can minimize this inefficiency.
Inevitably you will end up with squadrons that you don’t need on the deck. When returning squadrons to the hangar use the same principles discussed above for launching to try and issue commands that require as few squadrons to be moved out of the way as possible. In this case you want to try and return squadrons closest to the elevators preferentially.
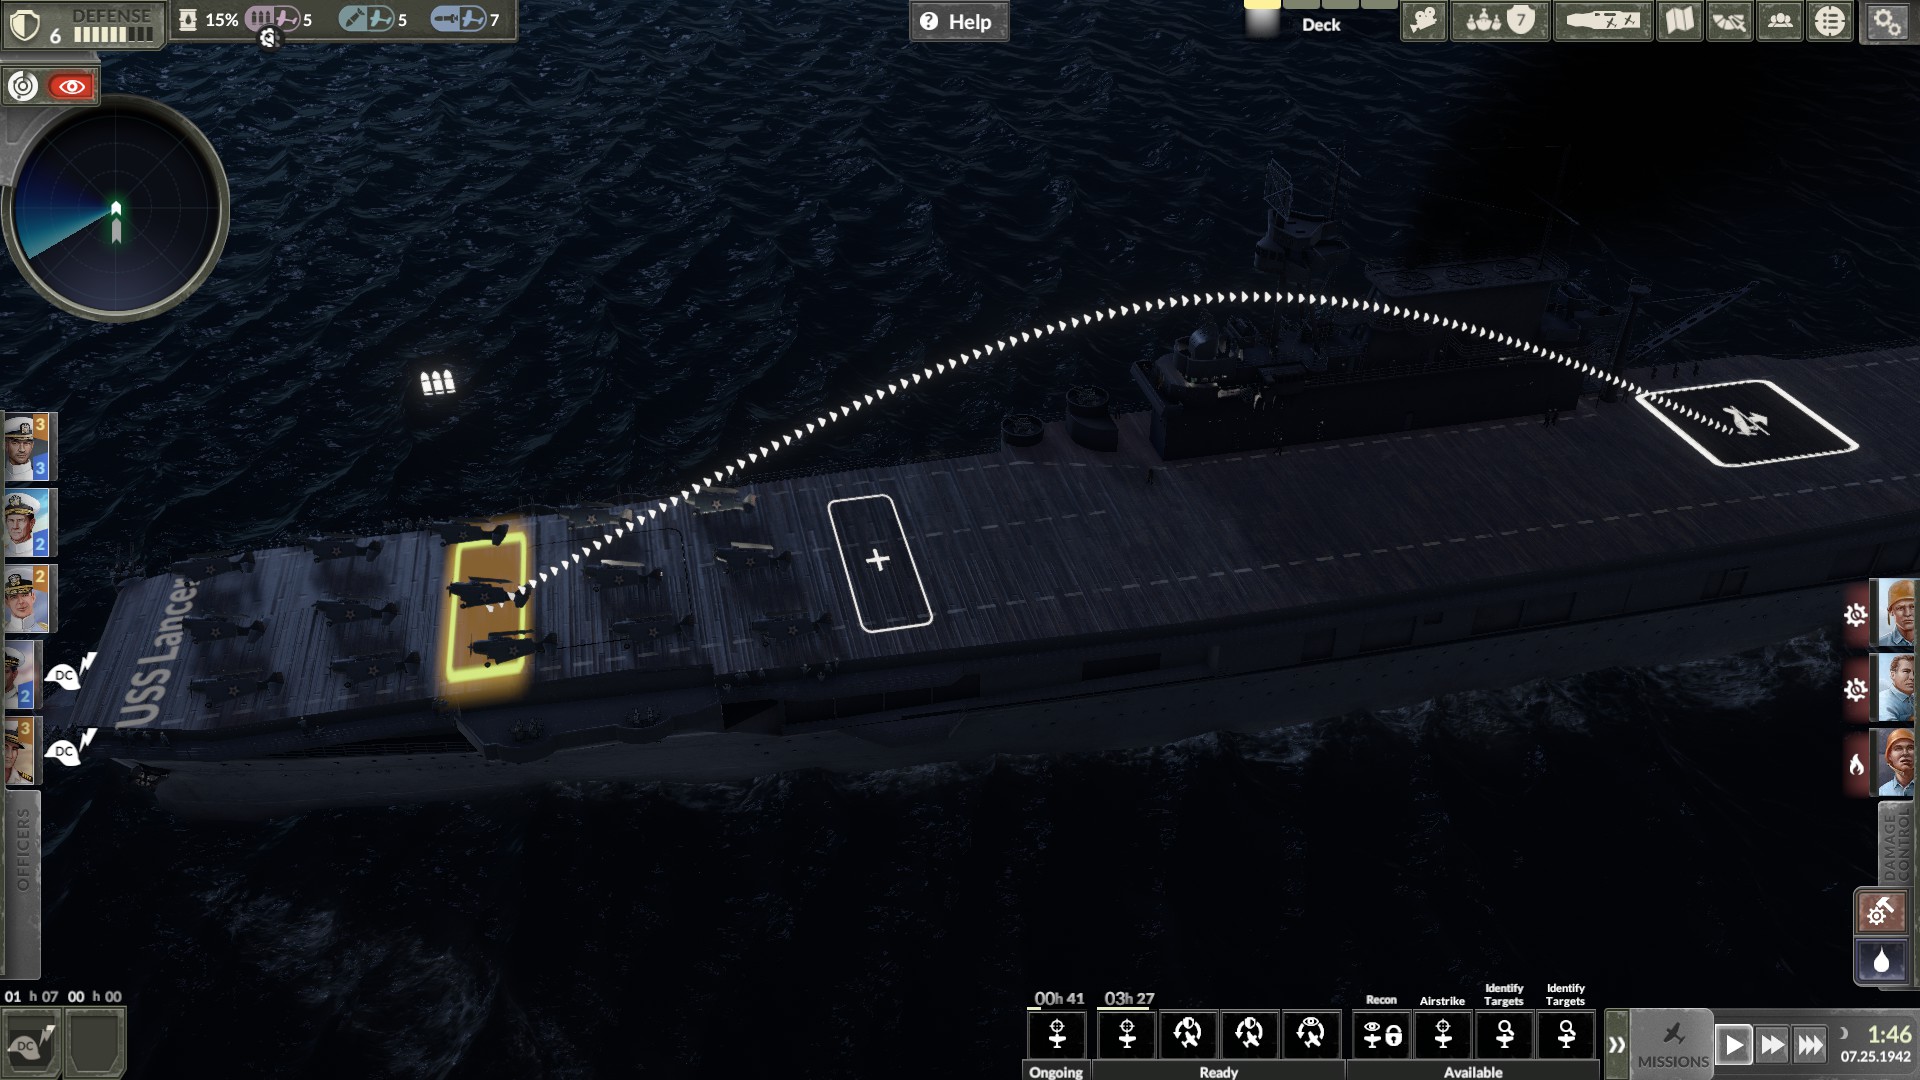
A poor choice of squadron to return to hangar since its blocked in by 2 squadrons:
A better choice of squadron to return since it’s got direct access to the elevator:
For example if you are in a recovery state having just recovered a large airstrike and are ultimately wanting to send another followup large airstrike with a slightly different makeup of planes consider if it makes more sense to return squadrons from the rear of the recovered mission, then change deck state and issue the remaining squadrons necessary for the airstrike or rather change deck state first and then return squadrons that are more towards the front of the planes on deck.
Lastly remember to anticipate your mission needs and consider keeping your deck in a ready state. Having a pair of fighter squadrons on deck is always a good idea. Torpedo and dive bombers may also be useful to have on deck if you anticipate sending ID targets or recon missions or even know you’ll be sending an airstrike soon.
Hope you enjoy the Guide about Aircraft Carrier Survival – Deck Management Guide, if you think we should add extra information or forget something, please let us know via comment below, and we will do our best to fix or update as soon as possible!
- All Aircraft Carrier Survival Posts List


Leave a Reply