Warning: I’m not holding anything back, so there are going to be quite a few spoilers. To avoid spoilers, try finding or defeating a boss by yourself, and then come here if you need help.
Starting Off:
This is just some stuff that I find really helpful in-game that I would like to point out:
1. Upgrade your Stamina
Upgrading your Stamina is the first priority of the game and is the first thing you should even consider upgrading when you get the chance in my opinion, sinceif you run out of Stamina, your health will go down, and I can not tell you how many times I’ve died to lack of Stamina, (plus, if you go on the Magic Path and craft Spell Books, you’ll need a lot of Stamina).
2. Dragonblood
Dragonblood is an easy resource for you to get your hands on earlier on since you need a minimum of a Steel Sword to defeat the Wyrms that drop it. Plus, you can make a Wyrm Pen when you complete enough of the Alchemist’s quests, and he’ll harvest the Dragonblood for you. Dragonblood heals you for one hundred health and one hundred stamina. If you have Auto-Eat on, this can save your life time and time again.
3. Manage Your Inventory
It is a pain (quite literally) to have to haul all of your stuff around, especially if you don’t have the Hunter’s backpack, since if you push your weight limits, your stamina decreases faster, depending on how far over the limit you are.Always remember to put the stuff you don’t need into some sort of storage.
4. Memorize the Element Table
This is really important, especially later in-game when you encounter more enemies with different Elements. Observe the graph below:
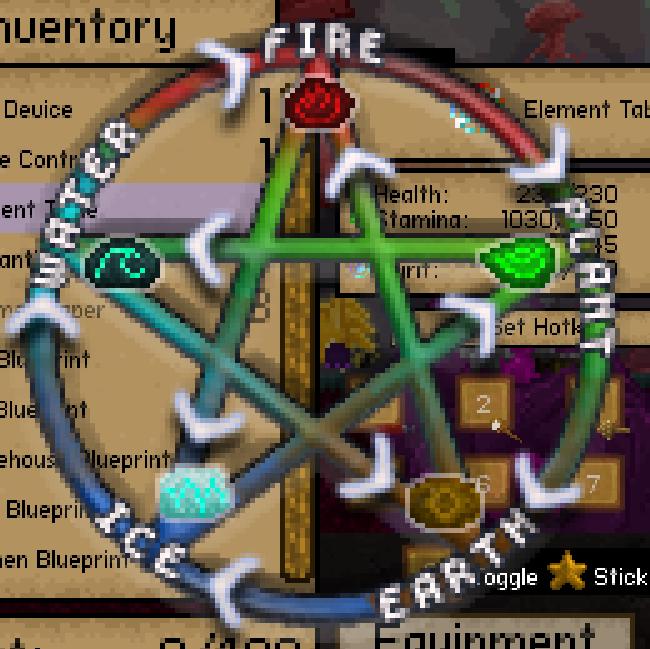
Fire beats Plant and Ice
Plant beats Earth and Water
Earth beats Ice and Fire
Ice beats Water and Plant
Water beats Fire and Earth
Keep this in mind and you’ll be able to beat any Elemental Enemy you come across.
What is the Colosseum?
The Colosseum is a place that you can go to to fight and re-fight bosses for tokens. It is randomly placed but is always at 112 depth or below. The portal to it is only visible with Spirit Goggles. It has other portals inside of it that lead to the different boss fights around the game. They will give you different equipment depending on which boss you want to fight, and if you win, you will get tokens. You can exchange these tokens for Spirit gear and weapons. The reason I bring this up is that I’ll also inform you how to beat the bosses with the Magic Path, Science Path, and the Colosseum. Alright, now with all that out of the way, let’s get into the bosses!
Dragon
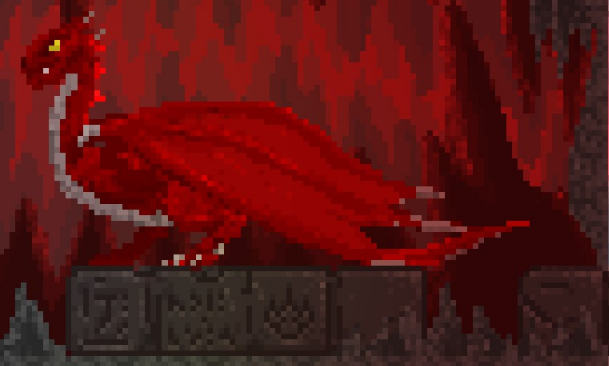
Hit Points: 30
Defence: 3
Element: Fire
Location: In the Dragon Cave on the right side of the Starting Island.
Optional? YES
How to beat her:
She is not the hardest boss to defeat, but the Dragon is a pain to deal with if you (accidentally or not) attacked or enraged her, especially if it’s early in the game. Once she gets hit, she’ll fly away where you won’t be able to reach her unless you have a ranged weapon. The dragon’s only attack is breathing a stream of fire at you and it does a lot of damage. It doesn’t have very good accuracy, so as long as you keep running, you shouldn’t get hit. Be warned though, the microstun you get when being hit will keep you in place for as long as the stream of fire is coming at you, so if you get in that scenario, that might be it for you. If you have a shield though, you shouldn’t take nearly as much damage if any. When she’s all out of breath, she will get closer to the cave so that you can hit her, and then she’ll fly off again.
WARNING: The Dragon’s fire breath can break blocks. If you’re not using a ranged weapon, hit-and-run tactics are advised.
Science Path
Using early weapons on the Science Path can help, since they can easily do damage from afar, like with the revolver. You should be able to do some decent damage by spamming a revolver and by using a familiar. Try also hitting her from behind to do even more damage. If you wish to do melee, a familiar is even more essential, and feel free to do hit-and-runs.
Magic Path
You won’t have any weapons from the Magic Path unless you enrage the Dragon later. If you do and have some magic weapons, (Fire Arrows, Water Swords, etc.) I suggest you use Water Arrows or an Earth Mallet, because all Dragons are of the Fire Element, which means they do extra damage to creatures of the Plant and Ice Elements, but are weak against the Water and Earth Elements, (observe the Element Graph above).
How I Did It:
I got cheeky with the Fighter Escort and one-tapped the Dragon with the Plasma Cannon.
Colosseum
You will have:
Steel Sword
Steel Armour
Kite Shield
Steel Pick
5 Meat
1. Blue Berries
5 Attack Potions (Hotkeyed to 2)
You’ll spawn on the mountain outside to cave. Dig to the right until you break into the Cave. The Dragon will not be aggravated. Get behind the Dragon and, when you’re ready, drink an Attack Potion immediately and hit the Dragon as many times as you can before she gets out of range and flies away. The shield can’t take very much damage without breaking, but it’ll do if you get yourself inside a pickle. If you choose to leave the Cave and then come back in, she’ll be standing on the Cave’s base breathing more fire at you.
Notes:
– If you do enough quests with the Alchemist, you can summon him to talk to the Dragon and she’ll give you a quest to give her five baby dragons, (Get them by catching and feeding Wyrms in the Wyrm Pen).
– If you successfully kill the Dragon, even after talking to her, you can summon the Alchemist and he’ll activate the Cave for you, so that way you can raise your own Dragons.
Golemech
Deactivated Golemech
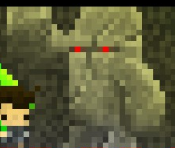
Activated Golemech
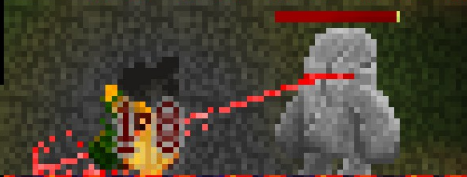
Golemech’s laser eyes
Hit Points: 60
Defence: 5
Location: Underneath the Starting Island, buried deep underground is the entrance to the Factory, though you’ll need an Earth Gem to get in.
Optional? YES
Element: Fire/Earth
How To Beat It:
When you enter the Factory, you’ll need another Earth Gem to activate the Golemech. Once active, the Golemech will begin smashing you for some damage and your average Golems will start spawning.
Science Path
There isn’t much you can really do on the Science Path, since it doesn’t have nearly as many Elemental Weapons as the Magic Path. The only thing I really can suggest is grab yourself some Health and Stamina restoring foods and a powerful melee or ranged weapon, as both would work, and try to land as many crits as possible.
Magic Path
The Golemech is one of the only bosses that have two Elements, Earth and Fire, so use that to your advantage. If you have found them already, you can use Water Arrows or a Plant Sword, since they’ll do more damage. Bringing a familiar of one of those Elements is a good idea too, since it can damage the lower tier Golems while you focus on the boss.
Colosseum
You will have:
Plant Sword
Kite Shield
Steel Pick
Steel Armour
Plant Bag
1. Blue Berries
5 Hamburgers
Bow
1. Water Arrows
5 Attack Potions (Hotkeyed to 2)
As I mentioned in the Magic Section, using the Elemental Weapons is a good idea. Drink an Attack Potion just before you activate the Golemech so you have the longest duration, and keep spamming the Plant Sword and the Kite Shield. You can also pick it off from a distance by using the Water Arrows, but be careful, since you only have ten.
Notes:
– You’re technically underground, so you and the Golems can also move vertically, but the Golemech can not. You can dodge the Golemechs attacks by just chilling above him.
Pirates
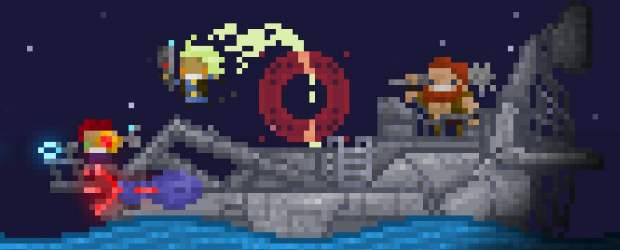
Ship One

Ship Two
Hit Points: 60 and 80
Defence: 4 and 4
Location: Right side of the Divider Island, if you don’t have something that can reach over the mountain, use a boat to go through the whirlpool in between the Starting Island and Sunset Haven.
Optional? YES
How To Beat Them:
The Pirates aren’t much of a threat, seeing how they stay in a very peculiar area, but when you defeat them, you can get some really valuable stuff. This is why I like to get them out of the way quickly.
Science Path
The best way to get rid of The Pirates is to use their own weapon against them. Build a patrol boat and some weapons and craft as many bullets as you can. Go through the whirlpool and start blasting them. Be warned though, the Patrol boat requires fuel, and is repaired by using steel, which is not fun to find or craft.
Magic Path
You can build a Patrol Boat too if you wish, but I recommend using a Dragon or Elder Dragon or any other flying vehicle that can aim downwards toward The Pirates. They can’t shoot up so you’re safe, but they definitely aren’t.
How I Did It:
I actually found The Pirates by accident when I was flying around on an Elder Dragon and decided to rain down brimstone on them.
Colosseum:
You will have:
Cyborg Eye
Cyborg Machine Gun
20. Bullets
2 Batteries
Patrol Boat
If you time your departure from the island just right, you can easily tank the fight and win.
Notes:
– I like to get rid of The Pirates as soon as possible because they drop a key to a lab also on the right side of the Divider Island. When unlocked, you will need power to get it going, so place down a generator or the Blueprint for a Power Plant. That lab can let you craft powerful weapons and technology early on.
Mirrows
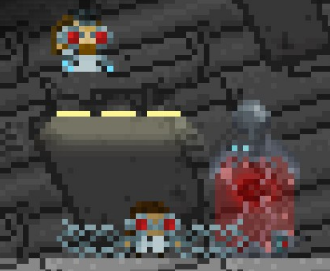
Hit Points: 30 and 30
Defence: 4 and 4
Location: Sunset Haven. Beyond the small mountain to the left and are inside the porthole on the crashed ship.
Optional? Sort of…
How to beat them:
The Mirrows love to gang up on you, so as soon as you get rid of one, the fight becomes immediately easier.
Science Path
The factory you have access to around the time you meet the Mirrows has all the stuff you need. A popular tactic is to use the Shadow Cape, (bring a piece of Shadow Fur, (dropped by Shadow Panthers which spawn at night on the Starting Island) to the Alchemist for the recipe) to hide from them and place landmines, (crafted at the Factory) for them to trigger.
Magic Path
It’s unlikely you’ll have to fight the Mirrows on the Magic Path since I’m pretty sure beating them cements you into the Science Path.
How I Did It:
I brought eleven Dragonblood with me, a chainsaw, ten batteries, and I tanked the fight. Took a bit, since I didn’t upgrade my damage and didn’t bring a Damage Potion, but in my opinion, this is the easiest strategy.
Colosseum:
You will have:
Revolver
Enchanted Shield
Drill
Great Armour
Head Lamp
Shadow Cape
3 Land Mines
6 Burgers
2. Bullets
2 Batteries
1. Berries
Chainsaw
You can use the same tactics as you use outside the Colosseum because of the wide range of items inside your inventory.
Notes:
– One Mirrow is melee, the tentacle Mirrow, and one is both ranged and melee, the electricity Mirrow.
– Since you are technically underground, you and the Mirrows can climb the walls. Use this to your advantage. However, since you’re underground, you can’t spawn in a Dragon to do the fight for you.
– When you encounter the Mirrows, you will be given the choice to Fight or to Run Away. Hitting the “Fight” option starts the boss fight. If you choose to “Run Away”, this gives you a chance to gather some equipment to fight them. Running Away also allows you to talk to the engineer, and she tells you to look around the different parts of the ship. When you find and read some of the logs, the engineer gives you a quest. You can skip the fight with the Mirrows this way.
-Once you beat the Mirrows, the bombardment starts, or you complete the Mechanic’s mission, the Mirrows will be your allies.
The Wyrm Queen
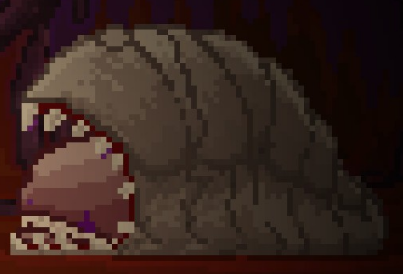
Mouth Open
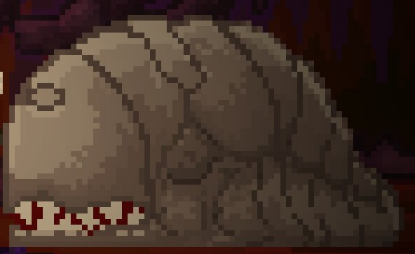
Mouth Closed
Hit Points: 15
Defence: 9, 2 when mouth is open (you can only hit her mouth)
Optional? NO
How To Beat Her:
The Wyrm Queen is a really odd boss. She’s nearly invincible (Burn being the only thing that seems to pierce her armour) and doesn’t attack directly. The only way to defeat her is to hit her when her mouth is open, (she opens her mouth to spawn another Wyrm).
Science Path
Hit her with the strongest weapon you’ve got! A chainsaw or (if you have unlocked The Pirate’s Lab) a Laser Sword are recommended. If you have good timing, you could also use the landmines to pack a punch and inflict Burn.
Magic Path
Use Fire weapons like the Fire Sword if you have them unlocked. If not, use the most powerful weapon you have as well. The only thing to really keep in mind when fighting The Wyrm Queen is timing and power. You can also bring something that can make you invisible, like the Shadow Cape.
How I Did It:
I wore a Cyborg Eye to light up the area and brought the Shadow Cape to hide from the Wyrms. I then hit her with the strongest weapon I had, (which was a revolver at the time, sad, I know) and she was gone within a minute.
Colosseum
You will have:
Steel Sword
Lantern
Steel Pick
Steel Armour
Backpack
2. Arrows
Bow
5 Attack Potions (hotkeyed to 2)
Try to avoid the small Wyrms unless you’re down to half health, because you can grind them for Dragonblood. Make sure you can always hit the mouth of The Wyrm Queen, otherwise she can sneak another Wyrm in under your nose. Drink the Attack Potion as soon as she opens her mouth to have the best duration.
Notes:
-There is a limit to the amount of Wyrms there can be in the Hive at once. If The Queen stops releasing other Wyrms, you may have to get rid of some.
– Once you defeat The Wyrm Queen, you gain access to something called “The Wyrm Maze”, (the entrance is in one of the top corners of the Hive). The layout of it is different on every save file, but if you master it, the maze can be a quick way to reach different islands, and it’s faster than boating by a long shot.
– Two of the exits to The Wyrm Maze lead to a different Hive. The Queen in the main hive doesn’t respawn, but the ones in these two Hives do. If you can navigate through The Wyrm Maze well enough, you can use these Hives as an unlimited supply of Dragonblood and Spirit Gems.
The Old One

Hit Points: 45
Defence: 25, 3 when she opens her shell to recharge.
Location: Magic Island in an underground Bedrock Chamber, (Use Spirit Goggles to see a tower of Spirit Blocks that locate the entrance).
Optional? NO
How to Beat Her:
REMEMBER: The Alchemist will be there with you, shielding you from oncoming attacks and casting a healing field around him.
The Old One has two attacks, and the second is devastating. She’ll launch a volley of four homing Magic Balls at you, (eight when she gets down to half health), and when she’s done, she’ll summon another volley, but her shell will open up so she can recharge. You can leave the cave, but the Magic Balls can move through tiles. That is when she can be hit. The Old One doesn’t start her second attack until she is down to half health. Instead of opening her shell, she’ll charge up a laser beam once she finishes shooting the magic balls at you and will blast it through the centre of the cavern. To dodge it, go to the very top or the very bottom of the cave. Then she’ll open her shell and float across to the other side of the room.
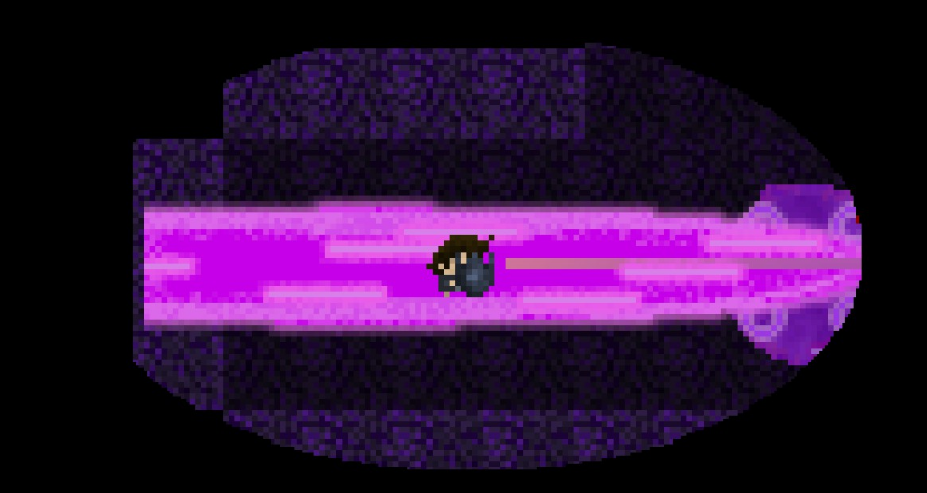
(Me getting one-tapped in the Colosseum by the Beam).
Science Path
The Science Path has lots of long-ranged weaponry and a powerful melee weapon; the chainsaw. Use these to your advantage. If you wish to use ranged tactics, try to make every shot count, so don’t fire until The Old One is done shooting the Balls at you. If you wish to use powerful melee, then remember, you’ll need to move and hit her quick, before she closes her shell again.
Magic Path
You can go over to Sunset Haven and grab a Revolver if you wish, but if you unlocked the recipe for the Fire Arrows or a Fire Sword, (found written on pillars you can only see with Spirit Goggles), that’s even better. They inflict Burn which deals DoT damage, (damage over time), which overall, deals more total damage to The Old One.
How I Did It:
Despite the fact that I was on the Magic Path, I didn’t find the recipes for the Fire Arrows, so I used a Revolver and brought fifty bullets and ten Dragonblood with me. It was lengthy but it worked.
Colosseum
REMEMBER: The Alchemist will not be with you in the Colosseum, so you’re on your own. He will still be yelling some dialogue though and the healing field will still be there.
You will have:
Fire Sword
Enchanted Shield
Steel Pick
Steel Armour
1. Blue Berries
5 Steak
1. Fire Arrows (Hotkeyed to 1)
Bow
5 Attack Potions (Hotkeyed to 2)
Chug an Attack Potion when The Old One opens her shell, so that way you won’t lose any time on its duration. You can do melee with the Fire Sword or range with the Fire Arrows. It is a good idea to take a hit from a Ball every so often and then go back to the healing field because your shield can’t take all of them and the beam. Also, in the Colosseum, your health will be set to a very particular number, so you will be one-tapped by the beam if you get hit.
Notes:
– You can only fight The Old One when you get the quest “Magic Energy”. Until then, she’ll just be in her cave, floating in the left corner. If you interact with her, she’ll be speaking a language you can not understand.
– When you are about to fight The Old One, you will be given two options: “Attack Together” or “Let the Alchemist Fight”. Pressing the “Attack Together” option starts the regular boss fight. “Let the Alchemist Fight” option will boot you out of the cave and let you watch the fight between the Alchemist and The Old One, both of which will die. (I like to keep the Alchemist alive because he gives you free stuff later).
– Defeating The Old One triggers the Bombardment. However, the fleet of the Bombardment doesn’t arrive until you complete the quest to defeat the Cultivator, given to you by the Elder Dragon.
The Cultivator

Hit Points: 200
Defence: 5
Location: Cultivator Island (duh) (Right of the Magic Island. Stop when you see a giant walking death tree).
Element: Plant
Optional? NO
How to Beat It:
Digging a trench underneath the island is not going to help you, since the seeds can go through blocks. Getting behind and staying behind The Cultivator is a must, that way its seeds can’t touch you. The Cultivator hates critical hits, so use that against it. Be careful though, since its ground attack packs a punch and can emit a poisonous gas that does DoT damage.
Science Path
Try to get as many crits on big boi as possible. Critical-hit-and-runs with melee weapons are also advised, since you can do loads of damage without The Cultivator touching you. If you have the Jet Pack or Dragon Armour, you can fly out of reach of The Cultivator and hit it with a volley of bullets. If you have it, you can also use the Fighter Escort to do a whopping amount of damage.
Magic Path
Same advice here: Get as many crits as possible, if you’re using melee, Crit-hit-and-runs are great, and if you have something that can fly, (Dragon Armour, Jet Pack, etc.) you can easily pick it off. If you have it, you can also use Fire and Ice weapons against The Cultivator, since it’s part of the Plant Element. Fire Arrows will deal DoT as I said before, but Ice Arrows are easier to get, plus they’ll slow down your enemy.
How I Did It:
I did Crit-hit-and-runs with the Revolver and, when I got it, got my Elder Dragon to decimate it, (Its defence was to high too just use a regular Dragon).
Colosseum
You will have:
Fire Sword
Kite Shield
Wyrm Drill
Dragon Armour
1. Blue Berries
Baby Cannon
Use the Dragon Armour to fly out of range of the Cultivator and start hammering it with the Baby Cannon, since it inflicts burn damage. Two out of the three attacks that The Cultivator does only affect the ground, so as long as you’re at eye-level with it, you should be fine. If you wish to take a more direct approach, hit The Cultivator from behind with the Fire Sword and when he’s about to attack, raise your shield or use the Dragon Armour to fly to safety.
Notes:
– There is a reason people call The Cultivator the easiest boss in the game: it doesn’t have very good range. Use that to your advantage.
– Once you complete the quest to defeat The Cultivator, (given to you by the Elder Dragon) and then talk to your contact, the Bombardment will start as soon as you enter the Starting Island or Sun Haven. You can delay the Bombardment as long as you don’t enter either of those islands.
The Storm
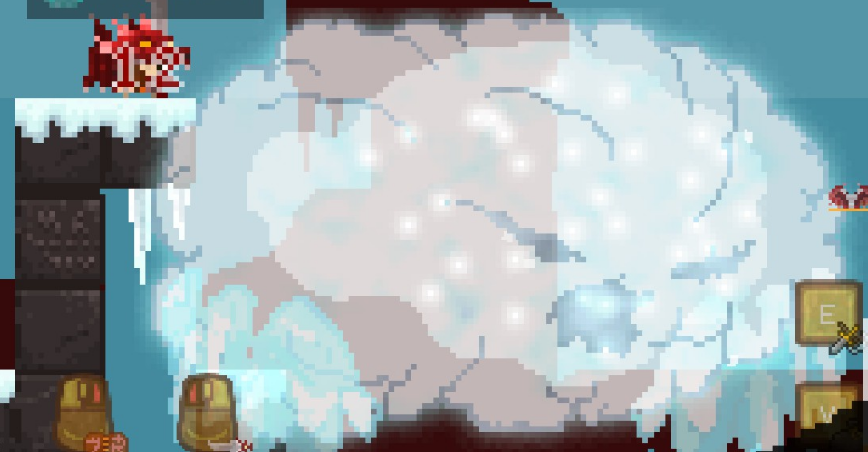
Hit Points: 60
Defence: 5 but immune to weapons that don’t have the Fire Element, 50 in tornado form.
Location: Cultivator Island, guarding the Dragon Factory floating above it.
Element: Ice
How to Beat It:
This guy is a rather complicated boss. He is immune to everything except weapons with the Fire Element, and is invincible to everything when it goes into Tornado Form. Try digging a one-block trench underneath the factory, since none of its attacks can get to you there.
Science Path
The Science Path is not great when going up against this boss, since the only Fire-based weapon in your arsenal are the landmines, which can be rather difficult to use when fighting something that flies. I haven’t tested this out yet, but you might be able to place the landmines on the ruins so that when The Storm floats past, it activates them. Otherwise, you might have to enchant some equipment in The Forge.
Magic Path
You can do two things: Climb to the top of the ruins and hit The Storm with the Fire Weapons that you’ve found without getting hit with its tornado, or you can enhance an Elder Dragon at the Vine Corpse, (dropped when The Cultivator is defeated) with a Horn, (given to you by the Elder Dragon when you beat The Cultivator, Minotaurs also drop them).
How I Did It:
I enhanced my Elder Dragon and that quickly rid the factory of The Storm.
Colosseum
You will have:
Dragon Sword
Book of Flame
Wyrm Drill
Dragon Armour
5 Blue Berries
1 Hamburger
Use the Wyrm Drill to create a trench underneath the factory as a safety net. Then climb to the top of the ruins. You’re already hundreds of blocks in the air so the flying mechanic on the Dragon Armour won’t work. Up there, The Storm’s Tornado Form won’t be able to get to you, however, The Storm’s breath attack will. From up there, you can attract the attention of The Storm with the Book of Flame, since it fires in front and behind you. This can help you get some serious crits. If it gets close enough, you can also hit The Storm with the Dragon Sword. Both weapons inflict Burn, but the Book of Flame uses much more Stamina. Remember, You only have one burger, so be careful and don’t fall off!
The Bombardment (Wave One)
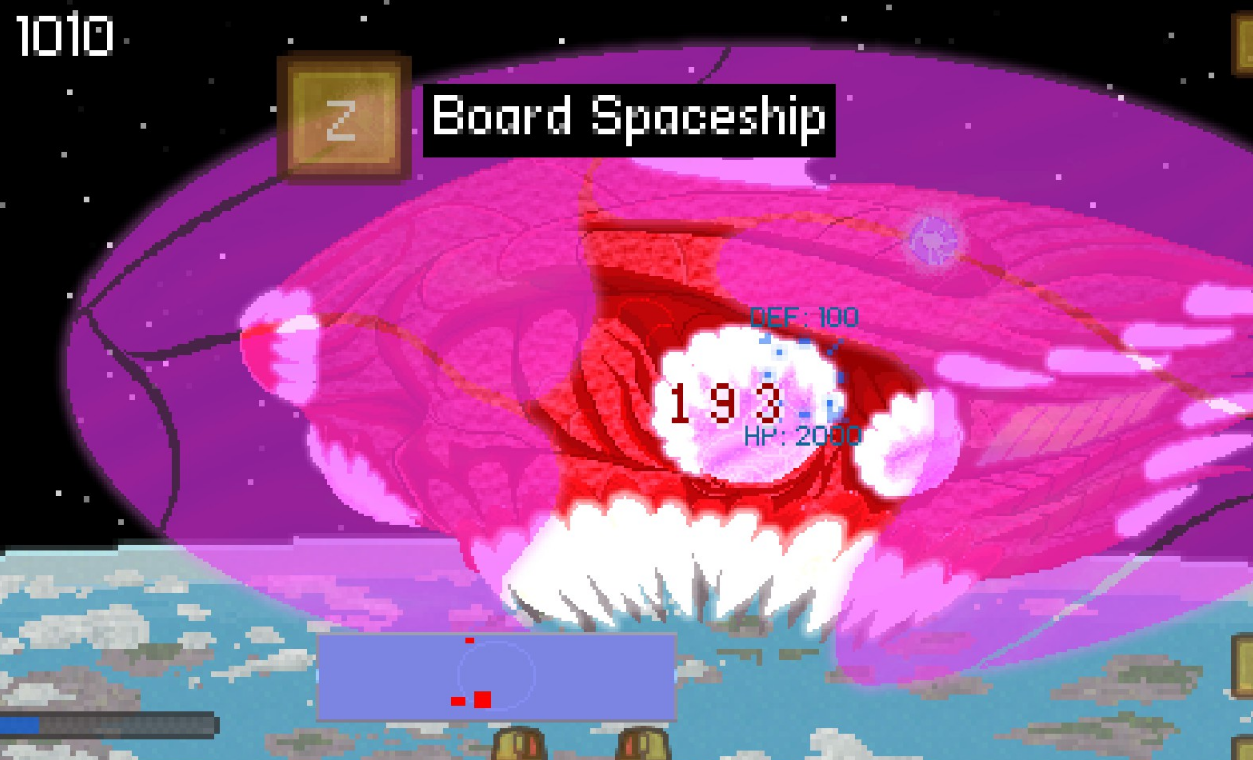
Shield Up
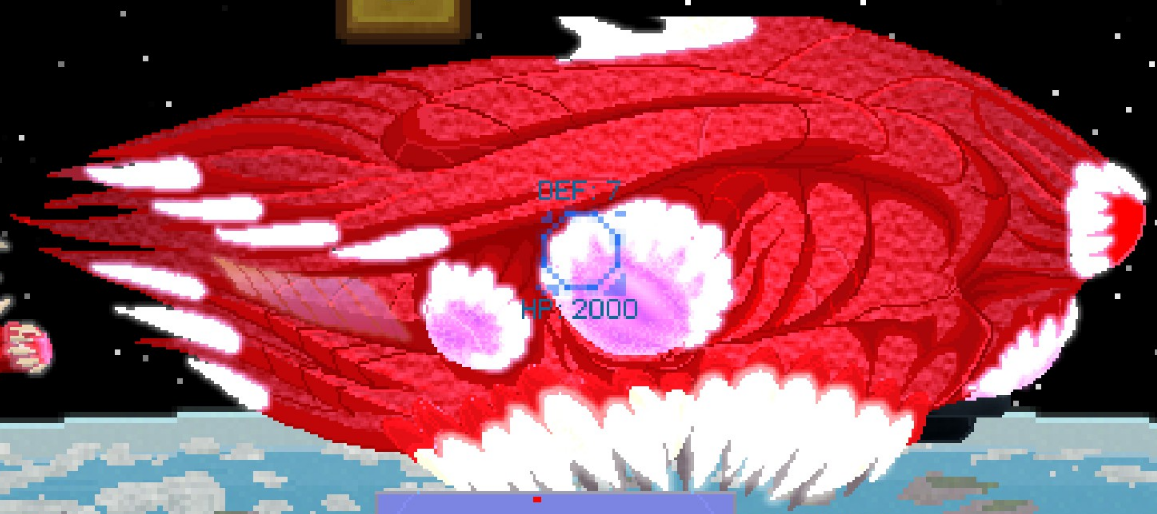
Shield Down
Hit Points: Bomber: 2000 Alien Fighter: 1000
Defence: Bomber: 7 Alien Fighter: 7 BOTH ARE INVINCIBLE WHEN SHIELDING
Location: Bomber: In orbit during the Bombardment/Above the enemy HQ
Alien Fighter: Patrolling the orbits of random planets/in orbit during the Bombardment/ above Enemy HQ
How to Beat It:
The Bombardment can be really intimidating, especially to a new player. My suggestion is to take out the smaller Fighters first, then focus on the Bomber, but if you want to protect your structures, go for the Bomber first. You have two choices of ship: the Fighter Escort if you repaired it earlier, or the Dragon Ship, if you wished to continue with the Elder Dragon’s quests.The Fighter Escort doesn’t have as much health as the Dragon Ship and its shield has a cooldown depending on how many Power Cores you have, but can be repaired easily with Titanium and it’s cheap(er) than the Dragon Ship in the long run. The Dragon Ship has a 360 degree shield which doesn’t need a cooldown, however, it runs on annoying-to-get resources like steak, Focus Gems, and Blood Gems.
Science Path
If you chose the Fighter Escort, then, what I have learned, is that the Escort doesn’t have a lot of health or speed, so what I recommend is to board the small Fighters, eliminate the crew member inside, (they work the same way as the Old One, they do a series of attacks and open their shell to recharge) loot the Cargo Bay, (you can’t access the Cargo Bay without defeating the crew first) (steak is the only thing of value because of its healing properties) and dart. This will leave the Fighter Ship stranded and won’t move or shoot, and instead of being a red rectangle on your radar, it will be yellow. Once you’re done with the Fighters, you’ll have much fewer things shooting at you, allowing you to easily shoot the Bomber down. I prefer to use the Plasma Cannon in this case because of its damage output. You can tank the fight if you want, but remember, the shield does have a cooldown depending on how many Power Cores you have. I’ll explain more about the Dragon Ship in the Magic Path section.
Magic Path
It’s unlikely you’ll have the Fighter Escort on the Magic Path in time for the first Bombardment, so your choice of ship will be the Dragon Ship. I suggest you stockpile a bunch of Focus and Blood Gems because that is basically what the Ship runs on. You’ll have a Mini-Synthesizer on board the Ship once you get it, so set it to make as much steak as possible using the Focus Gems. Once you feel you’re ready, jet out to space. The Dragon Ship isn’t as squishy as the Fighter Escort, so you should be able to tank the fight. If you’re getting low on health and resources, you can land and grab some more minerals. I recommend using the Heavy Fire, because it does a lot more damage and, if you have plenty of steak, shouldn’t take a bite out of your rations. You can board the Fighters and leave them stranded as well, but it isn’t as necessary. Also, because of the 360 degree shield, you can actually block the bombs the Bomber throws down towards the planet and will blow up and damage the Bomber, leaving you unharmed as well as protecting your builds.
How I Did It:
I used the Dragon Ship, stocked up on the resources it needed, and tanked the fight. To protect the advancements I made on Sunset Haven and the Starting Island, I made sure I didn’t trigger the Bombardment by not entering the Starting Island or Sunset Haven when I beat The Cultivator. I got rid of the Bomber first and blocked the bombs it dropped, and then focused on the smaller ships. Doing that, all of my builds were still standing by the end of it.
Colosseum
You will have:
Space Armour
Space Helm
Anti-Grav Pack
Rocket Launcher
2. Missiles
Energy Shield
1. Batteries
Laser Drill
Laser Gun (in inventory)
4 Hamburgers
You will be in the Fighter Escort.
Use the same strategy I noted in the Science Path: immobilize the Alien Fighters and then focus on the Bomber. You can’t land on the planet to stock up on resources, so be careful. I don’t recommend boarding the Bomber because there are three Alien crew members and they can overwhelm you.
Notes
– You can delay the Bombardment even if you completed the quest to defeat The Cultivator by not entering the Starting Island or Sunset Haven.
– Enemy ships have a shield similar to the Dragon Ship’s. They have an infinite amount of armour while it’s up.
The Bombardment (Wave Two)
Hit Points: Cruiser: 5000 Bomber: 2000 Alien Fighter: 1000
Defence: Cruiser: 7 Bomber: 7 Alien Fighter: 7 ALL ARE INVINCIBLE WHEN SHIELDING
Location: Bomber/Cruiser: In orbit during the Bombardment/Above the enemy HQ
Alien Fighter: Patrolling the orbits of random planets/in orbit during the Bombardment/ above Enemy HQ
How to Beat It:
The second Bombardment shouldn’t be as much of a problem since you know what to expect, however, the Cruisers should simply be nicknamed as “Bruisers”, and for good reasoning too.
Science Path
The second Bombardment isn’t technically a Bombardment since you’ll be attacking the Enemy HQ. This does mean that if you can’t kill the Cruiser fast enough, more of the smaller vessels will arrive. The good thing about that though, is that you can grind the small ships for an endless supply of Exotic Matter. Same strategy as last time, but if you decide to board the Cruiser, be careful.There will be three Alien crew membersanda Dragomech waiting for you.
Magic Path
Same Strategy as last time. You can tank the fight, but you’ll need a lot more steak and Blood Gems. You can board the smaller vessels and loot the cargo for the stuff you’ll need to keep your ship running. This way you won’t have to land.
How I Did It:
I tanked the fight with my Dragon Ship. I was not prepared since I just came back from Mars and had to eventually stop and land to get more supplies.
Colosseum
The Second Bombardment is not in the Colosseum.
Notes:
– You will be coming back from Mars because in order to trigger it, you need to complete the quest “To The Leader” from the Exiled, who is on Mars. Be ready.
– The Cruisers are more of a pain than anything else. It’s a good idea to have the strongest weapon you can get your hands on before going against them.
The Nursery Crab
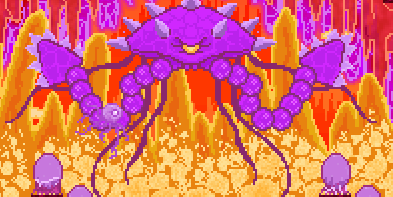
Hit Points: 80
Defence: 7
Location: The Enemy HQ, in the only body of water there. The spike on top of its head will be shot out of the water for easy location.
Optional? YES
How To Beat It:
The Crab itself isn’t much of the problem if you’re careful of its attacks, (getting underneath it in between the two big tentacles is probably your safest spot), however, the baby Aliens that hatch from the eggs are a pain, so it’s a good idea to get rid of them and the Cocoons they hatch from first. You can keep the Crab and Cocoons untouched if you want to grind the Hatchlings for Alien Hearts, but it’s easier to just remove them entirely.
Science Path
Like in the Colosseum, using the Automated Suit, (crafted in a lab on Earth, you need a Keycard to gain access) is your best bet. It can block everything and deal a considerable amount of damage. If you don’t have access to the Automated Suit yet, use the strongest weapon that you can use underwater that you can find.
Magic Path
You can go at this in different ways, one is to go straight in there and tank the fight, (might be a good idea to bring along the Book of Shielding), or you can use ranged weapons that pass through the blocks, so you’ll be safe while they take a beating. Using a Spirit Bow is a good example of this, or you can use one of the Tier Three Spell Books, (crafted at the Enemy HQ Library, Book of the Tornado recommended) to eliminate them easily.
How I Did It:
I used one of the Tier Three Spell Books to get rid of The Crab from the outside.
Colosseum
You will have:
Automated Suit
2. Batteries
1. Cheeseburgers
Get rid of the Hatchlings and Cocoons first, and then deal as much damage to The Crab as possible.
Notes:
– The Nursery Crab doesn’t move, so use that to your advantage.
– When you complete the Hybrid Path, The Nursery Crab will become a friendly NPC that can’t be harmed.
The Final Boss (Stage One)
Hit Points: 400
Defence: 10
Location: Bottom of the Alien HQ (use something with Mine 9)
Optional? ONLY ON THE HYBRID PATH
How To Beat It:
The Final Boss is extremely intimidating, especially since it’s the only boss that has two stages, (besides The Old One). You’re going to need a lot of Health and Stamina restoring foods and some method of Shielding. However, the bigger they are, which is really big, the more options you have on beating them. Stay away from the Beams The Boss will throw at you and shield yourself from the homing Magic Balls.
WARNING: MOST HEALTH-RESTORING FOODS DON’T WORK IN THIS CASE BECAUSE THE ORBS THAT THE BOSS LAUNCHES DO SO MUCH DAMAGE THEY CAN OUT-HEAL YOUR FOODS. THE ONLY HEALTH-RESTORING FOOD THAT IS NOT OUTMATCHED IS SUSHI.
REMEMBER, YOU CAN LEAVE THE FIGHT AND COME BACK WITH MORE SUPPLIES SINCE THE BOSS DOESN’T REGENERATE.
Science Path
I know of two ways to take down The Final Boss on the Science Path. The first is to tank the fight in the Exo-Mech. Bring as much Titanium as you can to heal up and just continuously hammer The Boss. If you don’t have the Exo-Mech, (I didn’t), the next best thing to do is to bring the most powerful ranged and melee weapons you can find, (I suggest using the Lab to the right of the Divider Island for some good stuff) and bring the Energy Shield with loads of Batteries. If you don’t want to craft every single thing individually and want the shield to be 360 degrees, try using the Automated Suit. You should also, (if you completed enough quests on Earth), bring along the Mobile Research Lab, since it’s the only Space Ship that can get underground, so that way you can recharge.
Magic Path
There isn’t really much to say when it comes to the Magic Path except to bring your best Spell Books, (Tier Three recommended). No Spell Book reigns supreme over all of them, but I suggest four: The Book of Meteor, since it inflicts Burn; The Book of Tornado, because it does a lot of damage and tracks enemies; The Book of Growth, since it has life steal, good range, and shoots out seeds similar to The Cultivator; and The Book of Shielding, which, let’s be honest, is the one thing that will keep you alive.
How I Did It:
To save on resources, I came with only three Spell Books: The Book of Tornado, The Book of Flood, and The Book of Shielding, a Spirit Fox Helm, which shoots a fireball every second and does fire damage, a Cyborg Pack, a Cyborg Chest, because of its regenerative properties, some Stamina-restoring foods, and some Batteries. It was an easy win by just letting my helmet shoot fire while I spam The Book of Tornado.
Colosseum
I’ll cover the Colosseum in the next section.
Notes:
– Once you get the first few hits in, a cutscene starts along with some dialog. Once done, the fight goes on.
– You can stay away from The Boss’ tentacles and destroy them, but they regrow over time.
– You need to hit the very centre of The Boss to lower its HP, which is why I prefer long-ranged weaponry.
– Once he’s down to zero HP, another cutscene will start and The Boss will move onto the next stage.
The Final Boss (Stage Two)
Hit Points: 1500
Defence:10
Location: Bottom of the Enemy HQ, (use something with Mine 9)
Optional? ONLY ON THE HYBRID PATH
Element: Changes every 150 hp it loses
How To Beat It:
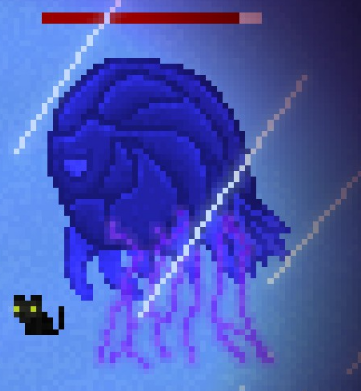
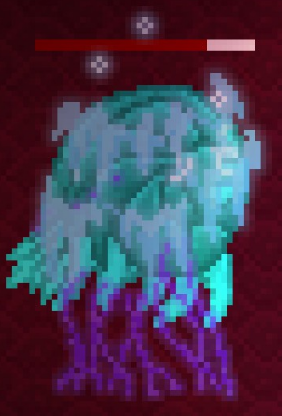
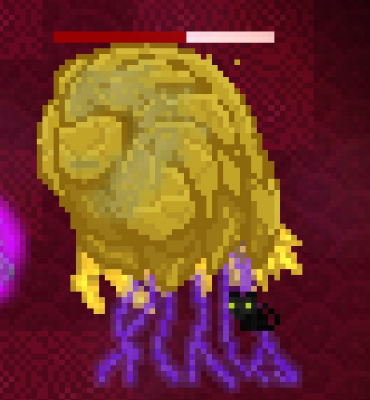
The Final Boss’s second Phase isn’t as difficult as some might think, however, it’s rather unforgettable and unforgivable. It can one-shot you if you don’t have the appropriate equipment, and to make things even more challenging, it will change elements every 150 hp it loses. Once he’s released from the centre of the first stage, it’ll take a second, and then The Boss’ appearance changes to reflect the Fire Element:
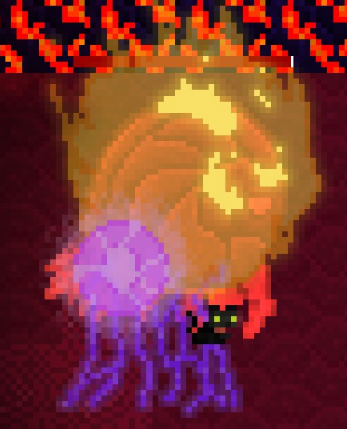
Then the Water Element:
Followed by Ice:
Along with Earth:
And lastly, Plant:
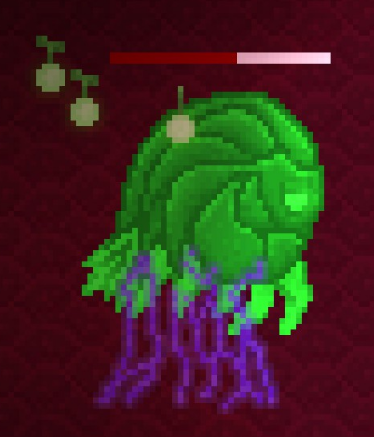
The Boss’ attacks also change with the elements, as they resemble the Tier Three Spell Books, like for the Fire Element, his attack will be The Book Of The Meteor. The main attack, however, will continue to be the deadly Homing Magic Balls.
WARNING: MOST HEALTH-RESTORING FOODS DON’T WORK IN THIS CASE BECAUSE THE ORBS THAT THE BOSS LAUNCHES DO SO MUCH DAMAGE THEY CAN OUT-HEAL YOUR FOODS. THE ONLY HEALTH-RESTORING FOOD THAT IS NOT OUTMATCHED IS SUSHI.
REMEMBER, YOU CAN LEAVE THE FIGHT AND COME BACK WITH MORE SUPPLIES SINCE THE BOSS DOESN’T REGENERATE.
You can’t really dodge the Magic Balls, to the best thing to do is to run away from them until they despawn, or pull out a shield like The Book Of Shielding, the Energy Shield, or the Automated Suit and bring lots of batteries or Stamina-Restoring foods. To dodge the Meteors, just run, since it doesn’t have good accuracy, or if you’re in the Colosseum, run up to the top of the map when the attack is about to go down, so that way the Meteors get blocked by the roof of the arena. To dodge the Flood, run away from The Boss. To dodge the Tornado, run away from it or block it. To dodge the Spikes, get far underneath The Boss, since it only affects the level The Boss is at. To Dodge the Growth, run away from the boss and try not to get hit by the seeds.
Once The Boss gets down to half health, he’ll go back to the Fire Element and start the procedure all over again, however this time, it’ll spawn enemies of that element, like for Fire, you have Cockatrices, (fire chickens), for Water, you’ll have Snaptopi (or whatever the plural is for Snaptopus) (red octopus), for Ice, you’ll have Icers, (small, walking icicles, will freeze you if they hit you), for Earth, you’ll have Golems, (your average Golem that you’ve seen throughout the entire game), and for Plant, you’ll have Crawlers, (the tiny, walking plants you see on the Cultivator Island).Quick disclosure, these enemies are going to be “charged”, which means they’re going to do a heck of a lot more damage than normal.
When The Boss is finally dealt with, a cutscene will take place, and you will have officially won the battle.
Science Path
Like I said in the previous section, try to get your hands on an Exo-Suit and loads of Titanium, or the most powerful weapon available. Don’t forget to use the Mobile Research Lab as backup too.
Magic Path
Simply put, bring as many different Spell Books as possible, (Tier Three suggested), and bring loads of Stamina-Restoring foods, and, if you have the resources and the recipe, sushi. You can also bring along the Spirit Fish familiar, (caught in the Spirit Realm), since its Element is Water.
How I Did It:
I was rather short on almost everything when I went to fight the final stage of The Boss, so in order to conserve resources, I crafted an Evo Magic House and planted it at the bottom of the cave. The Boss’ area doesn’t count as a pre-generated structure, so I can edit it to my will. The Evo Magic House restores both your Stamina and your Health, so if I’d taken a hit, I could sleep in the house and get back in the fight. Even better, if I do end up dying, the House saves your game. I then spammed The Book of the Tornado, and that was about it.
Colosseum
You will have:
Witch Hat
Spirit Robes
Plant Bag
Black Cat Familiar
Magic Staff
Book of The Meteor
Book of The Flood
Book of The Tornado
Book of The Spikes
Book of The Growth
5 Cheeseburgers
1. Cakes
2. Focus Gems
Constantly Bind and Rebind the different Books to the Magic Staff as The Boss’ Element keeps changing and shield as much as possible. Once it’s down to half health, the charged enemies will begin to spawn. Get rid of them first since all they’ll do is just annoy you, and be careful of the Homing Magic Balls!
Notes:
– The charged enemies The Final Boss spawns can be caught like any other enemy of its kind, however they will no longer be charged when it’s done.
– The Elder Dragons can go through tiles that you’ve mined out, unlike the ones that you evolve. This means that if you have a hole big enough, a Dragon can just pop in while you’re doing the boss fight and wreck you. I’m speaking from experience.
Kraken
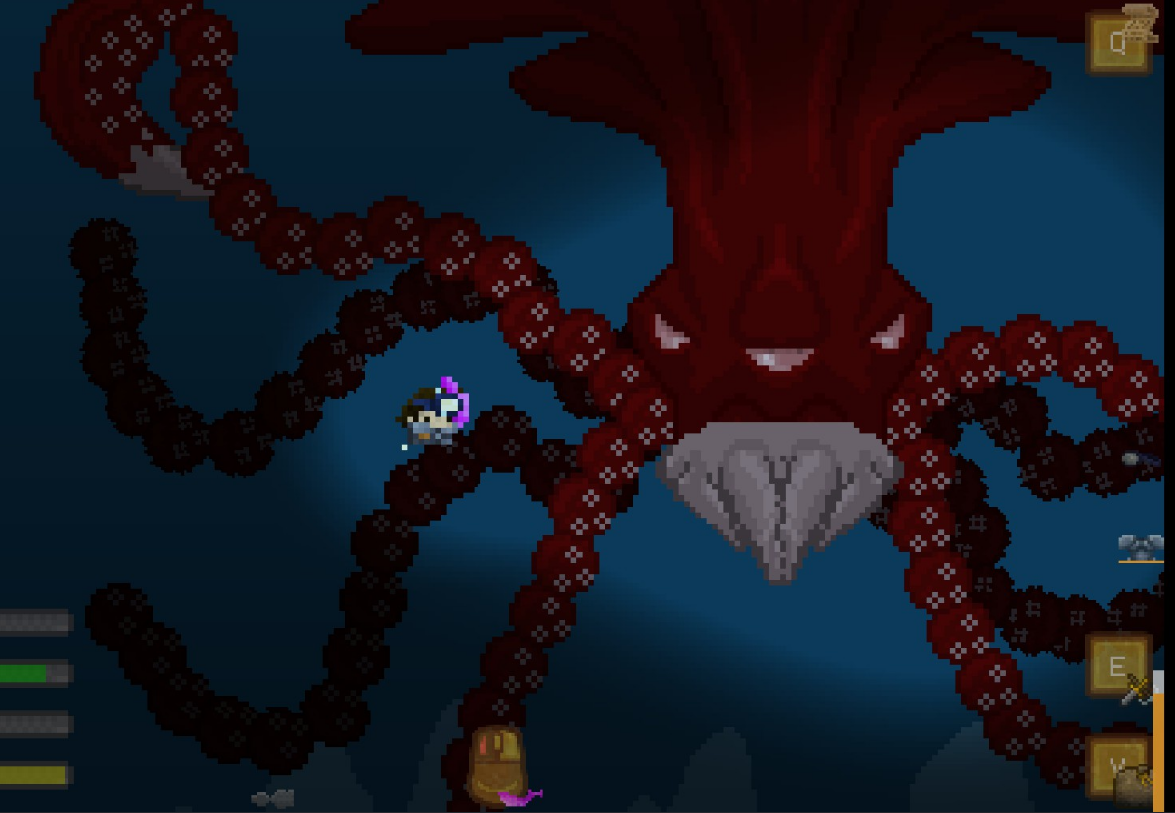
Hit Points: 50
Defence: 5
Locations: In the ocean in between Sunset Haven and The Heights (island to the left of it), Kraken Cave on the Divider Island, Just to the right of the Elder Dragon Island.
Optional? YES
How to Beat It:
The Kraken is something that you will find as you begin to explore the different oceans of Aground. It can really scare you if you have no idea what’s coming, (I jumped out of my skin for the first time when the boss music started to play), but all in all, it’s a really simple boss. In fact, it’s more of a nuisance than anything else because you can’t use most weapons underwater and the only place that you can hit to decrease its total hp is the head.
DISCLOSURE: You can hit and destroy the tentacles if you wish, but they will regrow rapidly, so it might not be a good idea. If you want, you can continuously farm the tentacles but keep the head alive for an endless supply of exp.
Science Path
You will have almost no weapons that will work underwater on either path, so I recommend using the submarine. Despite torpedoes being annoying to craft, they do a lot of damage to low-armoured enemies, (you can also find them in chests at the bottom of the sea), just don’t forget to craft the launcher first.
Magic Path
Same story: with few weapons that work underwater, your best chance against the Kraken in the early game is with the sub. However, once you figure out how to craft spell books, (which work underwater), using either the Book of Book of Frost/Tornado or the Book of Vines/Growth, the Kraken should be easy to deal with.
How I Did It:
I killed the Kraken simply with like ten torpedoes funny enough. If you aim for the Kraken’s eye-level, it does a lot more damage. Getting to the right level is easy to do if you duck underneath some of the tentacles and line yourself up in the gap.
Colosseum
You’ll have:
Coral Sword
Drill
Great Armour
Headlamp
2 Batteries
1. Blue Berries
1. Torpedoes
Submarine
There are two tactics you can do: bombard the Kraken with the torpedoes down at eye-level, or slice and dice the Kraken with the Coral Sword (the Sword can be used underwater and deals a lot of damage, but uses up a lot of Stamina and it’s a lot more dangerous. Although, if your sub gets destroyed, this is a good backup plan).
Notes:
– The tentacles themselves don’t do too much damage to you or your sub and are overall more of a nuisance than anything, but the mouth, (the thing on the Kraken that looks like a beard) does a lot of damage and will one-tap you in the Colosseum.
– All of the Krakens (except for the one in the Kraken Cave) respawn, so you can grind them for an endless supply of ink and Water Gems.
Megolemech
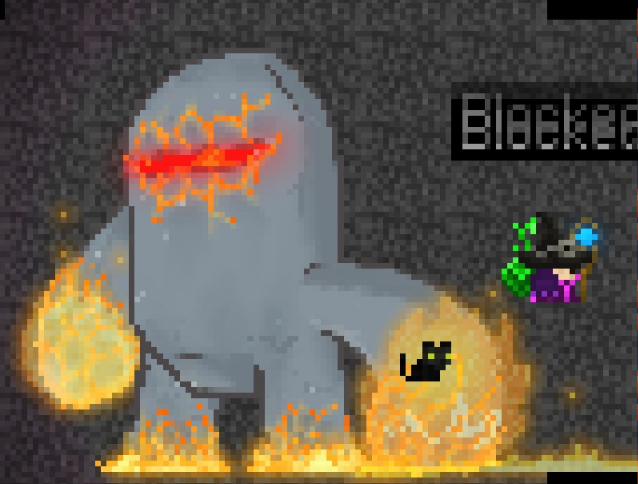
Golemech’s BIG brother
Hit Points: 1 000
Defence: 15
Location: Megolemech Factory on the Divider Island (through the underground Bedrock Maze, you’ll need something with Mine 9 and a Golem Key to get to it).
Element: Fire/Earth
Optional? YES
How to Beat It:
In my opinion, the Megolemech is the hardest boss in the game, as its attacks deal crazy amounts of damage and most familiars are nearly redundant against it, due to its high defence. Even with really good armour, it only takes one to two hits from its fists to kill you, three at most. Thankfully, it only has three attacks: Fist Smash, (300 damage) Fire Breath, (300 damage), and Homing Laser Eyes, (150 damage).
Science Path:
There isn’t as much you can do on the Science Path, but you can use the Exo-Mech, bring an abundance of Chromium and Exotic Matter, and tank the fight, or if you don’t have the Exo-Mech, the Energy Shield and a ton of batteries is a must, as well as the most powerful weapon you can get your hands on. I don’t recommend melee unless you’re prepared because of the shockwaves of the Megolemech’s fist hitting the ground.
Magic Path:
Using the Spell Books are your best bet, (especially the book of Shielding), since they can deal Elemental Damage. I suggest using the Book of Flood due to its range and it’ll do more damage. Plant will also beat Earth and the Book of Growth will also give a Life-steal effect, which heals you as you do damage. The Book of Shielding will also be your lifeline, so don’t forget to stock up on a lot of Stamina-Restoring foods.
How I Did It:
I straight up cheesed the fight. Like most of the enemies in the game, the Megolemech can’t regenerate, so I placed down an Evo Magic House outside of the arena, (you can’t place it in it because it qualifies as a structure). If I got hit or was running out of Stamina, I’d run back to the House, sleep in it which restores all of my stats, and went back in to drench the Megolemech with more tsunamis. What was also nice was that the house saved my game every time I went in it, so even if I did die, I could easily pick up where I left off. This made the fight easier, but it was very time-consuming.
Colosseum
You’ll have:
Magic Staff (pre-equipped to the Book of Flood)
Book of Shielding (Hotkeyed to M2)
Amethyst Queen Drill
Spirit Robes
Witch Hat
Plant Bag
Black Cat
Book of Meteor
Book of Flood
Book of Growth
Book of Spikes
Book of Tornado
5 Cheeseburgers
1. Cakes
2. Focus Gems
I don’t really have as much advice for this fight, so just keep your shield up and spam the Book of Flood. There isn’t much point going behind the Megolemech to land a crit since it’ll surely kill you. The Elemental Damage should be enough. Here’s a tip: Technically you’re underground which means you can move in two dimensions, but the Megolemech can’t.
Notes:
– There is a pattern to the Megolemech’s Fist Smash. If you can identify it, you can keep your shield up while it’s pounding you, and then return the favour when it takes a break.
Death

Hit Points: 100
Defence: 0 (can only be damaged by Spirit Weapons)
Location: Bottom of Death’s Dungeon (door is at the bottom of the Magic Island and can only be seen with Spirit Gear) (To get to Death, you’ll need something with Mine 9)
Optional? YES
How To Beat Him:
Death is a very interesting boss since he is the only one that can’t be harmed by anything except Spirit Weapons, making him only beatable on the Magic and Hybrid Path. He’s also known to disregard any armour since he does Spirit Damage.
Magic Path:
Most of the Spirit items you first get are straight up pathetic. However, what you get from Death is well worth it. Your best bet is to bring a bunch of healing food and just go to town by spamming your Spirit Weapon. If you happen to have the Spirit Bow and some Spirit Arrows, then you can just shoot the arrows at Death from the floor above since they can go through blocks.
How I Did It:
I didn’t really do it much differently. I brought my Spirit Scythe and Spirit Fox Helm, (they were my only Spirit Weapons at the time) and spammed the attack button. My helmet also helped quite a bit since it shoots a fireball that can harm Spirits once every second.
Colosseum
Death does not appear in the Colosseum.
Notes:
– You can grind Death for exp and Spirit since he respawns every time you enter and reenter his dungeon.
– If you get Death down to low health and catch him with an Evo Spirit Gem, you’ll be rewarded with Death’s Scythe, which is one of the most powerful weapons in the game.
Chimera
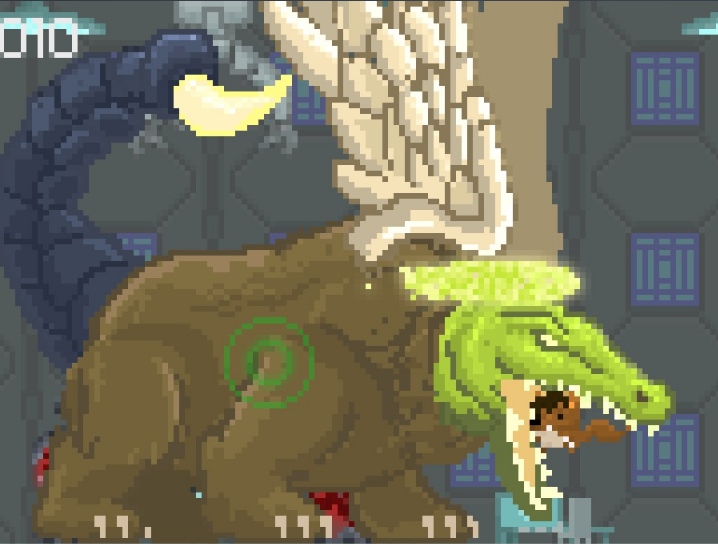
Hit Points: 200
Defence: 8
Location: Unnature Sanctuary when you complete enough of Ranger’s missions.
Optional? YES
How to beat it:
The Chimera is probably one of the easiest bosses to beat in the game since it’s affected by the same microstun as the player when hit. However, there is one thing that makes this a really interesting boss fight: Your skill points have been reset, you can’t use your gear, and you look like a squirrel.
This may be a little inconvenient since it removes some permanently-equipped items, (like cybernetic enhancements) and it doesn’t matter what Path you’re on anymore, but it is a lot of fun.
Bring a bunch of Meat Tree Seeds (since they are the native food source that replenish both your Stamina and Health) to the boss fight, (unless you brought a better food source from home). If you have enough and have a good trigger finger, you should be able to tank the fight. Spamming your claws in the Chimera’s face will stun him for a bit and will let you deal decent damage before it bites you. Going for a critical hit from behind is not a great idea because it doesn’t stun the Chimera nearly as much, so technically, you’ll be doing less damage per second.
Going head-on into the fight is probably the easiest and quickest way to deal with the Chimera, but if you want, you can wait until the timer at the top of your screen runs out. When the time expires, the Chimera will turn into a rat and you will win.
How I Did It:
I don’t think this was meant to happen but the very first time I did this, while I was doing all the quests to prepare me for the boss fight, I levelled up while mining, which gave me back all my skill points and I put them into their rightful places. Once done, the Chimera fight was ridiculously easy.
Colosseum
You’ll have:
Claws
Healing Werewolf Body
Cunning Werewolf Head
8 Red Berries
6 Cheeseburgers
1. Cakes
Wolf down (see what I did there?) one of the red berries to give you an attack boost and continuously hammer the Chimera. For me, a lot of it came down to RNG, such as if it fires its tail laser too much, I wouldn’t win, so it might take you a couple of tries.
WARNING: In the Colosseum, the countdown clock from the actual Chimera fight does not exist, so you have to beat it legitimately.
Notes:
– Once the Chimera is defeated, you can become human again and get all of your skill points back. You can also change back into a werewolf at any time.
Dice

NPC Dice
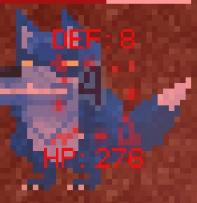
Boss Dice
Hit Points: 500
Defence: 8
Location: Unnature Sanctuary, in the Underground Maze, (should be a little to the right of the Ranger’s hideout and straight down to the bottom of the map) (You’ll need something with Mine 9)
Optional? YES
How to Beat Him:
Once you find the entrance to his maze, try to make your way through it while avoiding or eliminating the basic enemies in there. There will be a huge clearing where Dice is and, once you talk to him, will turn into a giant werewolf and the boss fight will commence.
If you stuff yourself in one of the one-block crevices of the maze, he shouldn’t be able to get you with his melee attacks, since he’s two blocks tall. However, he has a long-ranged howl ability that deals a lot of damage. if you find a nearby spot in the maze that is one block tall and four blocks deep, even that howl won’t be able to touch you. However, due to this, ranged weapons are advised.
Science Path:
Any powerful ranged weapon will do, so stock up on batteries and see what you can come up with. Using the Laser Gun or any headpiece that can fire indefinitely, (like the Cyborg Visor) should be able to clean up Dice in a pinch, as long as you have enough batteries.
Magic Path:
Same story here: take whatever ranged weapon you got and pound him. Spell Books will do really well because of there long-range and added buffs and debuffs. Even though Dice isn’t part of any Element, Burn Damage is quite significant. Although I might stay away from the Book of the Meteor since blocks above you or the enemies you’re trying to hit will prevent them from hitting.
How I Did It:
I was rather incompetent the first time I went off against Dice and I didn’t bring a ranged weapon (other than my Spirit Fox Helm, which I always had on). So when I found him and he turned into a giant werewolf, I hid in a piece of the maze with my Book of Shielding up to block his howl and my helmet was doing Burn damage against him. That was definitely not my greatest fight ever, but I didn’t die.
Colosseum
Dice isn’t in the Colosseum. Actually, he’s not found anywhere else. Once you beat him, he doesn’t respawn by reentering the maze or through any legitimate means, (you might still be able to spawn him in with cheats though). There is only one Dice per save file, and once he’s gone, he’s gone.
Notes:
– Dice drops the Ferocious Werewolf Head DNA, and once you pick it up, you can go to Splicer and equip it as a werewolf at any time.
– In one of the top corners of the maze, you’ll find a chest with the Stealth Werewolf Body DNA, when you put it in your inventory, you can go to Splicer and equip it as a werewolf at any time.
The Dishonoured One

Hit Points: 150
Defence: 4
Location: The Depths once all of the Monoliths are activated
Optional? YES
How to Beat Him:
The Dishonoured One is kind of a combination between The Old One and the Water Stage of the Final Boss. He’ll have his shield up, making him invulnerable, and launch a volley of Homing Magic Orbs at you. When all of them are launched, he will teleport next to you and uses an attack identical to the Book of the Flood. Only then will he lower his shield and make him vulnerable to attack. When he gets down to half health, The Dishonoured One will launch twice the amount of orbs, but (thankfully) will not shoot a laser beam like The Old One.
WARNING: It’s a bad idea to fight The Dishonoured One with a vehicle that has an interior, (e.g. Dragon Ship), since he’ll teleport inside, giving you less space to maneuver.
Science Path:
If you have quick movement speed or at least are able to read the signs of when The Dishonoured One is about to use his Flood attack, melee and ranged will both work. The Laser Sword and the Laser Gun are easy to obtain and do decent damage, so they should be at the very least. Shields will also come in handy since the Orbs will home in on you. The Energy Shield will be great with that, but because it only blocks damage from the front, the Flood attack will still deal damage. The Automated Suit can fix that.
Magic Path:
Despite having a flood attack, The Dishonoured One is not part of any Element, so take your favourite Spell Book (as well as the Book of Shielding) and his health will rapidly deplete. Burn Damage is also something that can come in handy, so the Book of the Meteor is definitely one to consider.
How I Did It:
I had a magic Staff that was bounded to the Book of the Tornado and I spammed it. Apparently the Tornado was freezing him in place, which made me able to get more hits in.
Colosseum
You’ll have:
Exotic Sword
Hoarder Shield
Laser Drill
Space Armour
Space Helm
Jetpack
4 Batteries
2 Cheeseburgers
1. Cake
1. Missiles
Rocket Launcher
The Shield has infinite durability, so use that to your advantage. Block all of the orbs, run away from the Flood, and then hit The Dishonoured One when he’s vulnerable. You might take a hit when you’re about to strike, but the burgers and self-regeneration will take care of that.
Notes:
– The boss drop is not exactly worth the fight if you’re on the Science Path since it is meant to be used with another Spell Book. You can have Spell Books on the Science Path, but it’s not mandatory.
Conclusion
I hope you enjoyed the guide and learned a bit in the meantime. If you need any more tips or have some that you think should go in here, let me know in the comments.
I hope you enjoy the Guide we share about Aground – All Bosses Locations + Boss Kill Guide & Tips; if you think we forget to add or we should add more information, please let us know via commenting below! See you soon!
- All Aground Posts List


Leave a Reply